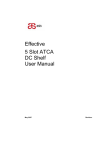
1
™ Perform 14 Slot ATCA DC Shelf User Manual August 2007 Revision 1 Table of Contents Table of Contents TABLE OF CONTENTS ................................................................................. II TABLE OF FIGURES ..................................................................................... V LEGAL NOTICE AND WARRANTY ................................................................VI CONTACT INFORMATION ......................................................................... VII SAFETY INSTRUCTIONS ..........................................................................VIII REVISION HISTORY.................................................................................... X ABOUT THIS DOCUMENT............................................................................XI 1 INTRODUCTION .............................................................................. 13 1.1 OVERVIEW OF ASIS SHELF PRODUCTS ........................................................ 13 1.2 PERFORM™ ATCA SHELF ........................................................................ 13 2 UNDERSTANDING THE SHELF COMPONENTS................................... 14 2.1 PLATFORM COMPONENTS ......................................................................... 14 2.1.1 Shelf and Boards...........................................................................14 Removable ................................................................................................................. 17 FRUs ......................................................................................................................... 17 2.1.2 Card Cage ....................................................................................17 2.1.3 Backplane ....................................................................................17 Features .................................................................................................................... 17 Update-Channel Connections......................................................................................... 18 Synchronization Clock Interface..................................................................................... 19 2.1.4 Front card Slot Identification ..........................................................20 2.1.5 Shelf manager board .....................................................................21 2.1.6 Power-Entry Modules (PEMs) ..........................................................21 Redundancy ............................................................................................................... 22 Grounding Requirements and Power Input ...................................................................... 23 2.1.7 Fan Trays ..................................................................................24 2.1.8 Air Filter Tray ...............................................................................24 2.1.9 Blank Panels with/without air baffles ...............................................25 2.1.10 Shelf ID Board ..............................................................................25 2.1.11 Cable Management........................................................................26 2.2 SHELF COOLING ................................................................................... 27 2.2.1 Overview .....................................................................................27 Perform™ Five-Slot DC ii Revision 1.0.0 Table of Co 2.2.2 Fan Tray Design ........................................................................... 27 2.2.3 Performance ................................................................................ 27 2.2.4 Fan Speed ................................................................................... 28 3 INSTALLING THE SHELF .................................................................. 29 3.1 TOOLS REQUIRED ..................................................................................29 3.2 SITE PLANNING ....................................................................................29 3.3 CHECKING PACKAGE CONTENTS .................................................................30 3.4 INSTALLATION STEPS..............................................................................30 3.5 RACK MOUNTING ..................................................................................30 3.5.1 Shelf Grounding ........................................................................... 31 3.5.2 Installer Grounding ....................................................................... 31 3.6 PEM INSTALLATION ...............................................................................33 3.7 SHELF POWER-UP .................................................................................33 3.8 SHELF FRONT & REAR BLADES INSERTION ......................................................34 3.9 SHELF MANAGEMENT INSERTION/EXTRACTION..................................................34 3.9.1 Shelf Management Card insertion ................................................... 34 3.9.2 Shelf Management Card extraction ................................................. 34 4 MAINTENANCE AND TROUBLESHOOTING ........................................ 35 4.1 PERFORMING PERIODIC MAINTENANCE ..........................................................35 4.1.1 Fan Tray Visual Inspection ............................................................. 35 4.1.2 Air Filter Cleaning And Replacement................................................ 35 4.2 HANDLING ELECTROMAGNETIC INTERFERENCE .................................................36 4.3 EXTRACTING MODULES ...........................................................................36 4.3.1 Front cards Extraction ................................................................... 36 4.3.2 Power Entry Module Extraction ....................................................... 37 4.3.3 Fan Tray Replacement................................................................... 37 4.3.4 Shelf ID modules Replacement ....................................................... 38 4.3.5 Third-Party-Module Replacement .......... Error! Bookmark not defined. 4.4 HANDLING ALARMS ................................................................................39 4.4.1 Visual Alarms ............................................................................... 40 4.5 HOT-SWAPPING FRUS ............................................................................41 4.6 RESETTING THE SYSTEM ..........................................................................42 4.7 TROUBLESHOOTING................................................................................43 5 SYSTEM SPECIFICATIONS ............................................................... 44 Perform™ Five-Slot DC iii Revision 1.0.0 Table of Contents 5.1 CERTIFICATION .................................................................................... 44 5.2 TECHNICAL DATA .................................................................................. 44 5.3 ACRONYMS USED IN THIS MANUAL.............................................................. 47 Perform™ Five-Slot DC iv Revision 1.0.0 Table of F Table of Figures FIGURE 1 – SHELF BLOCK DIAGRAM .......................................................................... FIGURE 2 – SHELF FRONT VIEW............................................................................... FIGURE 3 – SHELF REAR VIEW ................................................................................ FIGURE 4 – SYNCHRONIZATION CLOCK AND UPDATE CHANNEL PIN ASSIGNMENTS....................... FIGURE 5 - BACKPLANE LAYOUT ............................................................................... FIGURE 6 – SLOT ALLOCATIONS .............................................................................. FIGURE 7 - SHELF ADDRESSING ............................................................................... FIGURE 8 – POWER ENTRY MODULE .......................................................................... FIGURE 9 – PEM DISTRIBUTION OF POWER ON SHELF ..................................................... FIGURE 10 – FAN TRAY ........................................................................................ FIGURE 11 – AIR FILTER TRAY ................................................................................. FIGURE 12 - BLANK BOARD PANEL AND BLANK RTM PANEL .............................................. FIGURE 13 - SHELF ID BOARD WITH TWO E²PROMS (REAR COVER REMOVED) ........................ FIGURE 14 - REAR AND FRONT CABLE MANAGEMENT HOLDERS. ........................................... FIGURE 15 - FAN TRAY ......................................................................................... FIGURE 16 - REAR GROUNDING SCREWS ..................................................................... FIGURE 17 - FRONT ESD SOCKET ............................................................................ FIGURE 18 - REAR ESD SOCKET ............................................................................... FIGURE 19 – PERFORM 14 SLOT ATCA PEM ............................................................... FIGURE 20 – EXTRACTING A FAN TRAY ....................................................................... Perform™ Five-Slot DC v Revision 1.0.0 Legal Notice and Warranty Legal Notice and Warranty Information in this document is provided in connection with Asis products. no license, express or implied, by estoppel or otherwise, to any intellectual property rights is granted by this document. except as provided in Asis terms and conditions of sale for such products, Asis assumes no liability whatsoever, and Asis disclaims any expressed or implied warranty, relating to sale and/or use of asis products including liability or warrantie relating to fitness for a particular purpose, merchant ability, or infringement of any patent, copyright or other intellectual property right. Asis warranty will be for the quality of the Asis PERFORM 14-Slot ATCA Shelf for a period o one year after the shipment of the product. Asis may make changes to specifications and product descriptions at any time, without notice. ASIS © Ltd. 2007 Perform™ Five-Slot DC vi Revision 1.0.0 Contact Inform Contact Information in order to retrieve further information about any of Asis products either described in t document and/or related systems and/or components, please contact an ASIS representative at: Israel Headquarters 3 Galgalei Haplada St. Kfar Saba, ISRAEL 44422 Telephone: +972-73-233-6633 Fax: +972-73-233-6634 E-mail: [email protected] North America Office 11067 Caminito Arcada San Diego, CA, 92131 USA Telephone: E-mail: 858 776-1421 [email protected] Visit ASIS web site at http://www.asis-pro.com . Perform™ Five-Slot DC vii Revision 1.0.0 Safety Instructions Safety Instructions This symbol indicates potential safety hazards regarding product operation or maintenance to operator or service personnel. General Safety Practices Before handling the board, read the instructions and safety guidelines on the following pages to prevent damage to the product and to ensure your own personal safety. • Always use caution when handling/operating the board. Only qualified, experienced, authorized electronics service personnel should access the interior of the equipment. The power supplies produce high voltages and energy hazards, which can cause bodily harm. • Use extreme caution when installing or removing components. Refer to the installation instructions in this document for precautions and procedures. If you have any questions, please contact ASIS Technical Support. • Always follow the procedural instructions for component removal and replacement in sequence. Power High voltages are present inside the chassis when the unit's power is plugged into an electrical outlet. Turn off system power, turn off the power supply, and then disconnect the power cord from its source before removing the chassis cover. Turning off the system power switch does not remove power to components. Make sure the work environment is grounded, and use a grounding wrist strap when handling the product. ESD Safety Practices Many components described in this document can be damaged by electrostatic discharge (ESD). Follow the precautions described here and before specific procedures in the document to protect static-sensitive components from ESD-related damage. Static electricity can harm system boards. Perform service at an ESD workstation and follo proper ESD procedure to reduce the risk of damage to components. ASIS strongly encourages you to follow proper ESD procedure, which can include wrist straps and smock when servicing equipment. Take the following steps to prevent damage from electrostatic discharge (ESD): • When unpacking a static-sensitive component from its shipping carton, do not remove the component’s antistatic packing material until you are ready to install the component in the system. Just before unwrapping the antistatic packaging, be sure you are at an ESD workstation or grounded. This will discharge any static electricity that may have built up in your body. Perform™ Five-Slot DC viii Revision 1.0.0 Safety Instru • When transporting a sensitive component, first place it in an antistatic container or packaging. • Handle all sensitive components at an ESD workstation. If possible, use antistatic floor pads and workbench pads. • Handle components and boards with care. Don’t touch the components or contacts on a board. Hold a board by its edges or by its metal mounting bracket. • Do not handle or store system boards near strong electrostatic, electromagnetic, magnetic, or radioactive fields. Perform™ Five-Slot DC ix Revision 1.0.0 Revision History Revision History Number Date Comments Author 1.0.0 August 2007 Initial release Yossi Kuzi Perform™ Five-Slot DC x Revision 1.0.0 About this Doc About this Document This document provides technical information for the Perform 14-Slot ATCA Shelf . It is intended for technical staff tasked with installing, setting up and configuring the system, and providing troubleshooting assistance and servicing. Related Documents For information on the 14 slot Shelf Manager, see the ASIS 14 slot Shelf Manager boar user manual. Instructions relating to software installation and documentation for application software development for this platform are available in the Shelf Manager External Interface Reference Manual. For Asis product information and additional resources, please visit the Asis website at www.asis-pro.com. Downloads (manuals, release notes, software, etc.) are available via the Technical Sup Library product links at www.asis-pro.com (for registered customers). Information about PICMG (PCI Industrial Computer Manufacturers Group) and the ATCA standard may be accessed on the PICMG Web site at www.picmg.com. Chapters and Their Contents 1 Introduction General overview of the product family and Pg. 13 the shelf. 2 Understanding the Describes the shelf and its components, Shelf Components including the boards installed in the shelf: Pg. 14 Backplane, Power Entry Module, Shelf ID Boards. Describes the cooling capabilities of the shelf. 3 Installing the Shelf Procedures and precautions involved in Pg. 29 product installation 4 Maintenance And Periodic maintenance, troubleshooting and Troubleshooting diagnostic procedures, as well as module Pg. 35 replacement instructions 5 System Specifications Detailed quantitative information about the Pg. 44 system's dimensions and operational parameters, operation limitations, certification and standard compliance Perform™ Five-Slot DC xi Revision 1.0.0 About this Document Style Conventions Verdana Regular text. Arial Bold Commands, keys and other parts of the user interface. Arial Italics Monospace Names of classes, methods, arguments, exceptions, properties, etc. Also used for special terms, the first time they appear. Text displayed on the LCD or on a computer attached to the product. Notes, which offer an additional explanation or a hint on how to overcome a common problem. Warnings, which indicate potential safety hazards regarding product operation or maintenance to operator or service personnel. Perform™ Five-Slot DC xii Revision 1.0.0 Intr Overview of ASIS Shel 1 Introduction This chapter includes a summary of the Asis shelf product line and a brief overview of t Perform 14-Slot ATCA Shelf. For acronyms used in this document see Section 5.3. 1.1 Overview of ASIS Shelf Products As for ATCA Shelf , ASIS offers two product families : 1.2 • Effective - for cost-sensitive, yet demanding applications and • Perform - for top-of-the line solutions, for environments in which high levels of performance, availability and reliability are mandatory. Perform™ ATCA Shelf The Perform™ Series 14-Slot ATCA Shelf offers the reliability and availability of the Telco-grade standards in a package, where maximum possible performance (backplane interconnect bandwidth, power levels and thermal capabilities) is provided in the shelf. Every aspect of the Perform Series 14 slot ATCA has been developed to surpass the cur solutions found in the market. The Perform Series 14 slot ATCA has been developed ba on the accumulated knowledge and experience in the implementation of the ATCA stan since its inception in 2001, while incorporating the latest technologies available. The 14 shelf uniquely offers greater computing density in its ability to fit three 14-slot shelves mounted on a standard 42U rack, while maintaining cooling performance of 300W per s It incorporates the latest technologies available to reduce its price while maintaining performance and reliability. The system offers optional redundancy for power input and management functions. All shelf assemblies are designed using Field-Replaceable Units (FRUs), thus enabling easy and fast field maintenance with minimum or no downtime, availability of 99.999%. In addition, an ASIS cable-holder frame can be fitted to both side-mounting flanges of the shelf. The Perform 14-Slot ATCA Shelf is designed to comply with FCC, and CE certification, a with UL, NEBS Level-3 and ETSI. It is fully complies to AdvancedTCA™, PICMG 3.0 R2.0, and IPMI v 1.5. Perform™ Five-Slot DC 13 Revision 1.0.0 Understanding the Shelf Components Platform Components 2 Understanding the Shelf Components This chapter summarizes the functional features of the Perform 14-Slot ATCA Shelf, and describes in further detail each of the components as well as the shelf system cooling mechanism. The system was designed to withstand extreme conditions (to meet rigid Telco requirements) It is designed to incorporate Field-Replaceable Units (FRUs), and is fully field-serviceable. 2.1 Platform Components A typical platform consists of the following key components: 2.1.1 • 19-inch rack mount shelf — Base hardware element of the platform, which holds all the components together. • Card cage — Portion of the shelf that holds the blades that are plugged into the backplane. Mechanically compliant with all aspects of PICMG 3.0 . • Backplane — Supports one to 14 third-party ATCA-compliant front boards, and the complementary rear transition module (RTM). The backplane provides a Fabric Interface, and direct mating to the PEMs and to the redundant Shelf Manager board. • 2 DC Power-Entry Modules (PEMs) — 2 redundant and hot-swappable -48 VDC PEMs: Supply system power to the shelf and its components. • Fan tray - Hot-swappable, provides front-to-back cooling, and provids N+1 fan trays redundancy cooling to components on the front and rear of the shelf. • Air filter tray — Keeps the airflow free of dust and particles. • Blank Panels – for non occupied slots and For air flow management. • Shelf ID Board – filed replaceable shelf identification information cards • Shelf inlet temperature sensor • Front lower cable management • Front upper cable management • Rear cable management Shelf and Boards Figure 1 shows the block diagram of the shelf and figures 2 and 3 show front and rear views of the shelf with key components highlighted. Perform™ Five-Slot DC 14 Revision 1.0.0 Understanding the Shelf Com Platform Co Figure 1 – IPMB interconnection Diagram Perform™ Five-Slot DC 15 Revision 1.0.0 Understanding the Shelf Components Platform Components Front fan trays status display RTM filler panel Front upper cable management holder ESD Grounding Connection Backplane Shelf manager boards Air filter tray Adjustable front lower cable management Front Air inlet Figure 2 – Shelf Front View Fan status led Rear air Outlet Fan Trays (x4) ESD Grounding Connection Backplane Shelf ID SEEPROM 1 Shelf ID SEEPROM 2 Rear cable management Shelf grounding PEM (B) PEM (A) Figure 3 – Shelf Rear View Perform™ Five-Slot DC 16 Revision 1.0.0 Understanding the Shelf Com Platform Co Removable FRUs 2.1.2 • PEMs – two Power-Entry modules . • Shelf Management – two Shelf Manager board (see the ASIS 14 slot S Manager board User Manual). • Shelf ID: identical modules E²PROMs, etch host contain data about the shelf – such as serial number and manufacturer – and about the board’ setup – such as shelf thermal budget and slot population. Card Cage The shelf’s card cage is composed of: • the backplane • Top and bottom guide rails to hold the front & rear cards that plug into backplane. The card cage supports 14 8U front boards, and 14 8U RTMs. The guide rails in the card cage incorporate electrostatic discharge (ESD) clips, as define by PICMG 3.0 R2.0 AdvancedTCA™ standard. 2.1.3 Backplane Features The ATCA PICMG 3.0-compliant backplane provides interconnectivity between the FRU's shelf's front blades . It conforms to the PICMG 3.0 R2.0 AdvancedTCA™ Base & fabric Specification. Backplane features include: • 14 slots • Two hub slots • Fabric interface with dual-star interconnect. • The Fabric Interface grid consists of eight differential pairs per channel; The Base • Interface grid consists of four differential pairs per channel. • Dual-star Ethernet signalling environment on the Base interface • Bussed IPMI (radial IPMI available upon request) • Hub slots are slots 7&8 • update channel between slots 1&3 , 2&4 , 5&9 , 6&10 , 7&8 , 11&13 , 12&14 . • Connection capacity for up to 14 third-party ATCA-compliant front boar as well as to the redundant Shelf Manager board and Power Entry Modules. • Full compliance with AdvancedTCA™ electrical and mechanical specifications Perform™ Five-Slot DC 17 Revision 1.0.0 Understanding the Shelf Components Platform Components • Interconnect for system power for 14 slots. There are no active components on the backplane, and no removable or serviceable parts on the backplane board. The backplane has two functionally-distinct parts: bottom and center-top: • Bottom backplane (consists of Zone 1 connectors) – dual-power connections, power connections from the two PEMs are independently supplied to each card plugged into the backplane. The PEMs also include circuit breaker that protect the backplane power connections from an electrical short , the PEMs are manageable thru the IPMB bus by the Shelf Manager boards. • Center-top backplane (consists of Zone 2 connectors) – connectivity for the Base, Fabric, and update-channel interface. Update-Channel Connections The update channels are backplane connections between pairs of front cards that operate on redundant basis . Application software can use the update channel for redundancy interlock, o to provide a direct connection that bypasses the (indirect) fabric interface. If you configure a pair of front cards to use the update channel for redundancy support, you must insert the two modules into slots linked by an update channel. Figure 7 shows the update channel connections. Each update channel consists of 10 differential-pair connections. If an update channel connec two modules that are not identical, the Shelf Manager disables the update channel between them. Base interface The Base interface comprised of a single raw of signal pins for a total of four signal pairs per Base interface. In total the Base interface contains up to 14 Base channels for a total of 56 possible signal pairs per board/slot. A Base channel can be used to support a 10/100/1000BASE-T Port comprised of four signal pairs. Perform™ Five-Slot DC 18 Revision 1.0.0 Understanding the Shelf Com Platform Co Figure 4– Base interface channel Fabric interface The Fabric Interface allocates signal pairs differently than the Base Interface. A Fabric Channel is comprised of two rows of signal pairs for a total of eight signal pairs per Channel. Thus, each connector supports up to five Channels available for Board to Board connectivity. A Channel may also be viewed as being comprised of four 2-pair Ports. Synchronization Clock Interface The backplane supports a set of synchronization clock buses that can exchange synchronization timing information. This synchronization can be used for system-wide a intersystem synchronization purposes, which are important in some applications, such a involving synchronous time division multiplex (TDM). Row # Interface Px20 Connector Pairs ab 1 Clks 2 3 cd ef gh CLK1A+ CLK1A- CLK1B+ CLK1B- CLK2A+ CLK2A- CLK2B+ C Update Tx4(UP) Tx4(UP Rx4(UP) Rx4(UP CLK3A+ CLK3A- CLK3B+ C channel & + )- + )- Clks 4 Perform™ Five-Slot DC Tx2(UP) Tx2(UP Rx2(UP) Rx2(UP Tx3(UP) Tx3(UP Rx3(UP) R + )- + )- + )- + ) Tx0(UP) Tx0(UP Rx0(UP) Rx0(UP Tx1(UP) Tx1(UP Rx1(UP) R + )- + )- + )- + ) 19 Revision 1.0.0 Understanding the Shelf Components Platform Components Figure 5 – Synchronization clock and update channel pin assignments Figure 6 - Backplane Layout 2.1.4 Front card Slot Identification The shelf is compliant with PICMG 3.0 R2.0, and accepts front & rear cards compliant with thi standard. Figure 7 illustrates the locations of the module slot allocations when viewed from the front. The physical and the logical slot allocations are not the same for this shelf: the Physical slots are numbered 1 to 14 from left to right. Perform™ Five-Slot DC 20 Revision 1.0.0 Understanding the Shelf Com Platform Co Figure 7 – Slot Allocations The following table shows the hardware addresses in relation to the slot numbers and s addresses. Slots are shown in the same order as they appear in the shelf: slot 2 on the slot 1. Logical Slot Number Hardware Address (8 bit format) Hardware Address (7 bit format) 1 82h 41h 2 84h 42h 3 86h 43h 4 88h 44h 5 8ah 45h 6 8ch 46h 7 8eh 47h 8 90h 48h 9 92h 49h 10 94h 4ah 11 96h 4bh 12 98h 4ch 13 9ah 4dh 14 9ch 4eh Figure 8 - Shelf Addressing Perform™ Five-Slot DC 21 Revision 1.0.0 Understanding the Shelf Components Platform Components 2.1.5 Shelf Manager board The shelf manager controls and manage the chassis. It controls the fans speed, monitor temperatures across the chassis, manage the hot swap insertion and extraction of modules and blades and performs multiple other tasks and functionalities. For more information, pleas refer to Asis Shelf Management Board user manual. 2.1.6 Power-Entry Modules (PEMs) The Power-Entry Modules (PEMs) provide power filtering and over-current protection to the Perform 14-Slot ATCA Shelf. Each PEM is located on a tray that slides directly into the backplane. Each PEM (see Figure 9) provides a -48 VDC/-60 VDC input filter, and is capable of supplying 100% of shelf power. The dual redundant EMC filtered power feeds provide common-mode and differential-mode filtering for conducted emissions. Figure 9 – Power Entry Module Redundancy In typical installations the –48 VDC feeds are independent of each other so that if one feed fails to supply adequate power, the other feed continues to supply power through a single PEM. See Figure 10. The first feed (-48V A) is sourced from PEM-A (left side). The second feed (-48V B) is sourced from PEM-B (right side of the shelf). Both feeds are individually routed to each of the FRUs. The FRUs isolate the two sources to allow full redundancy. If one PEM malfunctions, the other PEM can provide all the power needed for the platform. Th PEMs are hot-swappable FRUs, so a malfunctioning PEM can be replaced without disrupting th platform normal operation. For extraction & insertion instructions see section 4.3.2 Power Entry Module Extraction Perform™ Five-Slot DC 22 Revision 1.0.0 Understanding the Shelf Com Platform Co caution – when replacing a Pem make sure that the power source is disconnected And insolated. SLOT 14 SLOT 3 SLOT 2 SLOT 1 Shelf Manager 1 Shelf Manager 2 FAN TRAY 1 FAN TRAY 2 FAN TRAY 3 FAN TRAY 4 PEM A PEM B Figure 10 – PEM Distribution of Power on Shelf The -48V power feeds provide power to the backplane connector for all the front cards FRU's. Grounding Requirements and Power Input When connecting ground and power cables to the shelf, follow instructions in beginning of this document. see safety instructions at page xxiii. A readily-accessible disconnect device must be incorporated into the building’s wiring b the shelf’s PEM input terminals and the power source. The installed breaker is determin the voltage of the nominal input. The supply circuit should be capable of delivering the equipment nameplate ratings of -48V@100A or -60V@100A. The frame-ground cable must be a high-quality return and safety cable, no smaller tha AWG stranded for -48V. Perform™ Five-Slot DC 23 Revision 1.0.0 Understanding the Shelf Components Platform Components The PEMs are hot-swappable, which means a PEM can be inserted or removed from the backplane while the system is operating. The remaining installed PEM continues to power the shelf. Comment [MSOffice1 he shelf contains four fan trays Fan Trays 2.1.7 Each fan tray is a closed module containing three 92x92x38 & two 80x80x38 fans that supply air volume and velocity for cooling all front and rear cards including system fru's (see Figure 11). The cooling power of the four fan trays can dissipate the heat generated by up to fourtee front boards and complementary RTMs. 300W for front board and 20W for RTM, per slot is supported. The fan tray is designed with N + 1 redundancy to meet the cooling requirements of a highdensity/high-performance computing environment. In case of single fan failure, the remaining fans provide the required cooling to dissipate the heat generated by the occupied slots. Comment [MSOffice2 נושא צריך להבדק It is recommended to replace a malfunctioning fan tray as soon as possible. The fan tray is factory-mounted in the Perform 14-Slot ATCA Shelf. It is easily replaceable, an can be replaced while the shelf is operating. The fan tray has a Power fault LED witch indicate fans are functioning properly . If one of the voltages ( -48V_A , -48V_B or 12V or 3.3V ) fails , LED will light red. For more on shelf cooling, see Section 2.2. Locking captive screw Fan tray handle Power fault LED Figure 11 – Fan Tray 2.1.8 Air Filter Tray A NEBS-GR63-compatible air filter installed on the ASIS Perform 14 slot ATCA Shelf . The filter is field-serviceable, and can be extracted for periodic field maintenance or Perform™ Five-Slot DC 24 Revision 1.0.0 Understanding the Shelf Com Platform Co replacement. The filter is easily accessible from front right side of the card cage. A shelf-based micro switch detects the installed filter and reports its presence to the Shelf Manager. For instructions on air-filter maintenance, see Section4.1.2. Figure 12 – Air filter tray 2.1.9 Blank Panels with/without air baffles Compliance with ATCA's temperature specifications requires a steady air flow in the she insure a steady air flow, either the ASIS Perform 14 slot ATCA Shelf must be fully pop or a blank panel, available from ASIS , must be equipped to fill every empty slot. The "blank panel" is designed to emulate the air flow restriction in a standard card, thu ensuring the required conditions for proper cooling. two types of airflow-management panels are available for the empty slots on the shelf. include panels specifically designed for: • blank front module panels, with/without air baffle; • blank RTM panels, with/without air baffle; Figure 13 - Blank Board Panel and Blank RTM Panel 2.1.10 Shelf ID Board There are two hot swappable shelf ID modules, etch module containing E²PROM chip an housed in the rear of the Perform 14 slot ATCA Shelf . Perform™ Five-Slot DC 25 Revision 1.0.0 Understanding the Shelf Components Platform Components The E²PROMs store product and manufacturer information such as shelf serial number, part number, backplane routing assignment, and shelf heat budget. When the Shelf Manager board boots up, it compares the information stored in the two E²PROMs: • If E²PROM data coincides, it is loaded and saved in the Shelf Manager board, and the shelf initializes. • In case of a mismatch, the data on the E²PROMs is compared with the last saved configuration in the Shelf Manager board: • If the saved configuration matches one of the E²PROMs it is assumed to be the right one and it is stored in both E²PROMs. • If the three configurations are all different, the Shelf Manager board will not boot up. Figure 14 - Shelf ID Board with two E²PROMs (rear cover removed) 2.1.11 Cable Management A cable holder frame can be fitted to both Top-Bottom mounting flanges of the shelf. Figure 15 - Rear and front cable management holders. Cables attached to the cable management holder must be allowed to move freely; Insure that a service loop of minimal required length is maintained. Perform™ Five-Slot DC 26 Revision 1.0.0 Understanding the Shelf Com She 2.2 Shelf Cooling 2.2.1 Overview ASIS Perform 14 slot ATCA Shelf complies with all the cooling requirements specified PICMG V3.x specifications. The cooling system consists of four high-performance fan trays. The air comes in from front bottom to upper rear of the shelf. The fault-tolerant design is optimized for airflow to 300W per front card. 2.2.2 Fan Tray Design ASIS Perform 14 slot ATCA Shelf ventilation is achieved by three horizontal 92x92x38 Vertical 80x80x38 fans, installed in the fan tray. The fans provide for n+1 redundancy. Two Vertical fans three horizontal fans Figure 16 - Fan Tray The fan tray connects directly to the fan card BP, where it plugs into power and control connectors. The fan tray unit is fully serviceable, and can be easily replaced without too The shelf manager fully controls the fans speed based on temperature it senses across shelf. Comment [y3]: not operetional Cooling ability is maintained even in the case of a single fan failure. In this case, the gr LED of the fan tray turns red, so that it is easier to identify the tray that needs to be re 2.2.3 Performance The four fan trays supply air volume and velocity for cooling the high-density/highperformance computing environment. The cooling power of the fans can dissipate the h generated by up to 14 front boards and complementary RTMs. 300W per front board an for RTM per slot is supported. Refrain from clogging air input and exhaust during chassis operation. Perform™ Five-Slot DC 27 Revision 1.0.0 Understanding the Shelf Components Shelf Cooling 2.2.4 Fan Speed When a fan tray is inserted into the shelf, the fans start at full speed and then decrease by steps of 7%. Under normal operating conditions, the fans run at 21% of full speed. The lower speed reduces the acoustic noise and increases the longevity of the fans. The circuitry on the fan trays uses a pulse-width modulation to control the speed of the fans. The speed of each individual fan is monitored. If the speed of any of the fans drops below the desired fan speed, the other fans will speed up to compensate. The Shelf Manager logs such events in its system event log (SEL) as a fault condition. If this occurs, replace the fan tray as soon as possible to restore fault tolerance and redundancy. Perform™ Five-Slot DC 28 Revision 1.0.0 Installing Tools 3 Installing the Shelf This chapter provides you with instructions on how to install and prepare the Perform 14-Slot ATCA Shelf for use. You will be performing some or all of the following setup tasks: • Site Planning • Checking Package Contents • Rack Mounting • PEM Installation • Shelf Power-Up • Shelf front & rear blades Insertion Before installing the Perform 14-Slot ATCA Shelf, you should aware of what cables will be needed for equipment and powe and whether they will be connected in the front or rear of th shelf. 3.1 Tools Required To install the shelf in a standard 19" rack, the following tools are required: • Standard Philips screwdriver set • Wrench • ESD grounding bracelet. All the modules in the Perform 14-Slot ATCA Shelf are field-replaceable units (FRUs) re no special tools for mounting other than those mentioned above. 3.2 Site Planning Only qualified personnel should be involved with this installation procedure. The Perform 14-Slot ATCA Shelf should be installed in a standard 19" rack. All sides of shelf should be easily accessible. The prerequisites for setting up the Perform 14-Slot ATCA Shelf for use in your facility involves: • If a rack is used, it should be properly grounded. • A readily accessible disconnect device must be incorporated into the building’s wiring between the shelf’s PEM input terminals and the powe source. Perform™ Five-Slot DC 29 Revision 1.0.0 Installing the Shelf Checking Package Contents 3.3 • The disconnect device rating required is determined by the nominal input voltage. • To ensure sufficient airflow for the individual blades in the shelf, allow at least two inches of clearance at the air inlets and outlets. Checking Package Contents The following items are included in the Perform 14-Slot ATCA Shelf package. Check that all items in the package are intact. Use of equipment damaged during delivery could prevent proper functioning of the Shelf and/or cause permanent damage to it. Check all pins, screws and other components before using any of the package contents. 3.4 • Shelf chassis with backplane • Fan trays • Air filter tray • Power-entry modules (one or two , dependent on what was ordered) • Up to 3 Cable-management holders (dependent on what was ordered) Installation Steps The following overall procedure is described more in detail in the sections below. 1. Mount the chassis in the rack with eight screws. 2. Connect the chassis to the site ground with a ground cable. 3. Install the Cable-management tray holders. 4. Insert a Shelf Manager board into the top slot. 5. Insert the PEMs. 6. Connect the PEMs to -48VDC supply. 7. Power up the chassis with the PEMs circuit breakers on. 8. Insert front & rear cards 3.5 Rack Mounting You will need eight M6x10 (or longer) screws to mount the chassis on the rack. Before you begin: • Confirm the rack is stable so that the weight of the shelf does not cause it to tip Over. • Be sure that the job is preformed be two persons at least. Perform™ Five-Slot DC 30 Revision 1.0.0 Installing Rack To mount the shelf on the rack: • Insert the Perform 14-Slot ATCA Shelf chassis in the 19" rack, securing by fastening the eight mounting screws. The shelf should be level, and not positioned at an angle in the rack, and the doors should be able to close. 3.5.1 Shelf Grounding Connect rear grounding screws on the rear left side to insure that the shelf is properly grounded. Figure 17 - Rear grounding screws 3.5.2 Installer Grounding Any person involved in handling the shelf or card installation or replacement required to wear an ESD grounding device. Two grounding sockets can be found on the shelf: • an ESD grounding socket in the front of the shelf • an ESD grounding socket in the rear of the shelf Perform™ Five-Slot DC 31 Revision 1.0.0 Installing the Shelf Rack Mounting Figure 18 - Front ESD Socket Figure 19 - Rear ESD Socket Perform™ Five-Slot DC 32 Revision 1.0.0 Installing PEM I 3.6 PEM Installation While the power cables are being connected to the PEM, the power source an PEM's circuit breakers must be off. Figure 20 – Perform 14 slot ATCA PEM 1. With the module fastening clip open, slid the module into the slot until it plugs in backplane connector. Lock the clip in place when the module is plugged in, and f two tumble screws on the front side of the panel. 2. Remove the protection cover by releasing the two tumble screws on the front sid panel. 3. Connect the power cable ends to the positive and negative poles (the hexagonal on the PEM front side): the positive wire should be connected to the right poles, negative to the left poles. Recommended cable specifications (6mm ring cable terminals): • Positive wire: 48V –10AWG red wire 300/600V insulation - WEICO 10AWG 3 2 • Negative wire: 48V –10AWG black wire 300/600V insulation - WEICO 10AW 3210-0 4. Make sure the power wires are firmly fastened to their poles. 5. Replace the protection cover. 3.7 Shelf Power-Up To power up the shelf: 1. Connect one PEM to a -48VDC source. 2. Set the circuit breaker to the on position. In case of current overload, the circuit will trip. 3. If applicable, connect the second PEM to a power source, and follow the previous steps for the second PEM. Perform™ Five-Slot DC 33 Revision 1.0.0 Installing the Shelf Shelf front & rear blades Insertion 4. At power up, the fans speed will set to maximum and all LED on the shelf manager will illuminate. After few seconds (up to one minute) fans speed should slow down gradually until it reaches the optimum working speed. All LEDs on the shelf manager should be off except for the ACT and PWR LEDs that should be illuminate in green. 3.8 Shelf front & rear blades Insertion Third-party cards must be ATCA-compliant. Third-party cards should be inserted only after the installation, power-up and testing procedures of the Perform 14-Slot ATCA Shelf have been completed. Insert Third-party cards according to the manufacturer's instructions, making sure they are properly-positioned in their slots and are secured to their respective connectors. When a Third-party card is inserted and powered up, the blue LED should switch on and light steady for 10-30 seconds (depending on the card type). After that time, the blue LED should blink for about 10 seconds, and then go off. Each third-party card much be hot swappable. In order to initiate the hot swap process, the card extractor should be opened partially. Each third-party card must provide a hot-swap LED This LED can be in one of the following states: Indicator State Off Indication The card is not ready for removal or disconnection from the shelf Blue The card is ready for removal or disconnection from the shelf Blinking slowly The card is activating itself Blinking quickly Brief deactivation has been requested 3.9 Shelf management insertion/extraction 3.9.1 Shelf Management Card insertion Simply insert the shelf manager card into it's allocated space. Close the two tumble screws tightly. All Shelf managers LEDs should illuminate for a period of few seconds. After few second, all LEDs should turn off except for the ACT and PWR LEDs which should illuminate in green. 3.9.2 Shelf Management Card extraction Carefully open the two tumble screw and Slightly extract the hot swap handle so the blue led will lit (see the above table) , after it is lit permanently, fully extract the handle and remove the shelf manager. Perform™ Five-Slot DC 34 Revision 1.0.0 Maintenance And Trouble Performing Periodic Ma 4 Maintenance And Troubleshooting This chapter includes instructions regarding: • Performing Periodic Maintenance • Handling Electromagnetic Interference • Extracting Modules • To insert a shelf manager car 1. Slide the card into it's slot 2. All led's should lit for few seconds. 3. The blue led should blink for a while and then it's should turn off. • Handling Alarms • LED Functions: Application-Defined LEDs LED A Status Meaning Green/ red/ As defined by application bi-color B Green As defined by application C Amber As defined by application • Hot-Swapping FRUs • Resetting The System • Troubleshooting. As required by the ATCA standard, the Perform 14-Slot ATCA Shelf applies a fully hotswappable approach. Assuming redundancy has been provided for (i.e., two shelf mana units, and two PEMs), all of the shelf assemblies can be field-replaced with no interrupt service. Visual alarms provide clear indication of trouble, for easy problem location. Malfunctions can be responded to quickly and easily, as no field repair is necessary. Fai modules can be easily extracted and replaced with no tools or with a minimal set of too 4.1 Performing Periodic Maintenance This section provides procedural instructions on servicing or replacing shelf components Maintenance of the Perform 14-Slot ATCA Shelf involves the following tasks: • Fan Tray Visual Inspection • Air Filter Cleaning And Replacement. Perform™ Five-Slot DC 35 Revision 1.0.0 Maintenance And Troubleshooting Handling Electromagnetic Interference • 4.1.1 Verify all LED's on front and back of the chassis are green, representing status OK. Fan Tray Visual Inspection The fan trays should be checked periodically for any visible damage that could prevent or disrupt normal fan operation. Fan trays Status indicators on the front & rear should be green to indicate there is no malfunction. See Section 0 for instructions on replacing a fan tray. 4.1.2 Air Filter Cleaning And Replacement The air filter should be checked regularly. If environmental conditions are good, it may be enough to extract the filter and vacuum clean it. Otherwise it might be necessary to replace it The air filter can be ordered separately (i.e., without the metal tray). Air filter cleaning must be performed in a different location from where the shelf is placed. The air filter can be extracted without interrupting power. Release the two tumble screws on the front side of the grill unit (fig. 1) and extract the unit by pulling the two tumble screws (fig. 2). Release the air filter screw, as shown in figure 3 and pull it out (fig. 4). 1 Comment [MSOffice4 We should add air filter insertion process 2 4 3 4.2 Handling Electromagnetic Interference The shelf emits electromagnetic waves that may interfere with nearby equipment. Conversely, nearby electronic equipment may emit electromagnetic waves that interfere with the shelf. The EMC, EMI, and RFI specifications of the shelf and all nearby equipment should be considered when choosing the placement of the platform and surrounding equipment. In the shelf and most other equipment, the use of fillers panels in unoccupied slots is necessary to keep the product’s emissions within their specified limits. • Install front and rear fillers panels into any empty slots. • Do not use blank faceplates in place of fillers. Perform™ Five-Slot DC 36 Revision 1.0.0 Maintenance And Trouble Extracting • Keep slots populated with active modules directly next to each other an fillers directly adjacent to the outermost active modules. • If the shelf experiences unexpected and intermittent data errors, carefu consider the possibility of electromagnetic interference from nearby equipment as a possible source of the problem. If your system configuration does not populate all front slots with active blades, you mu those empty slots with additional blades or slot flow blocker blades to maintain system and electromagnetic shielding integrity. fillers panels can be ordered separately. 4.3 Extracting Modules 4.3.1 Front cards Extraction To extract a front third party card: 1. Pull the module's insertion lever slightly. The de-activation sequence begins. 2. After the module's blue led lights steady, pull out the front card extractor lever. 3. Pull out the front card. 4.3.2 Power Entry Module replacment If PEM redundancy is implemented, one of the PEMs can be extracted without stopping To extract a PEM: 1. Turn off the circuit Breaker. 2. Turn off external power to the PEM. 3. Remove the protection cover. 4. Disconnect the power cables. 5. Fully pull out the module's insertion lever. 6. Pull out the module. To insert a PEM: 1. Turn off the circuit Breaker. 7. Push in the module. 8. Fully push in the module's insertion lever. 9. connect the power cables. 10. remount the protection cover. 11. Turn on power to the PEM by Turning on the circuit Breaker. Perform™ Five-Slot DC 37 Revision 1.0.0 Maintenance And Troubleshooting Extracting Modules 4.3.3 Fan Tray Replacement The shelf should be used only with a fully-operational fan tray. A malfunctioning fan tray should be replaced immediately, in order to prevent thermal damage to the installed application cards. Use care when handling the fan trays, and do not handle them from the connectors Improper handling of the fan trays could cause damage to the connector pins. Do not handle a fan tray while the fans are operating. To replace the fan tray: 1. Without interrupting power, release the tumble screw on the top Back side of the fan tray , and pull slightly out. 2. wait for the full stop of the fans (could take a few seconds). 3. Extract the tray by pulling the handle, as shown below: Figure 21 – Extracting a Fan Tray 4. Insert the replaceable fan tray unit. 5. Lock the fan tray by using the tumble screw. 6. the status led should be lit red and after a few seconds should turn green. Perform™ Five-Slot DC 38 Revision 1.0.0 Maintenance And Trouble Extracting 4.3.4 Shelf ID modules Replacement Shelf ID modules are generally installed and handled only in the factory. Follow the pro below in the rare case that it becomes necessary to field replace the Shelf ID modules. To replace a Shelf ID modules : 1. Without disconnecting the power, Release the two tumble screws and pull the module out. (as shown in the picture above). 2. Replace the unit with a new Shelf ID module. 4.3.5 Shelf manager card replacment To extract a shelf manager card: 1. Pull the card insertion lever slightly. The de-activation sequence begins. The Card blue led blinks. 2. After the card blue led lights steady, pull out the front card extractor lever. 3. Pull out the front card. To insert a shelf manager card: 1. Slide the card into it's slot 2. All led's should lit for few seconds. 3. The blue led should blink for a while and then it's should turn off. Perform™ Five-Slot DC 39 Revision 1.0.0 Maintenance And Troubleshooting Handling Alarms 4.4 Handling Alarms Both visual indicators and software alarms are provided. 4.4.1 Visual Alarms Nine LEDs at the front of the Shelf Management card provide visual alarms. LED Functions: General LEDs LED ACT PWR HS (hot swap) Status Meaning Green Shelf manager is active Red Shelf manager failure Blink Shelf manager is inactive Green Local voltage supply on Shelf manager is good Off Local voltage failure Steady Shelf manager is powering up or Blue ready for extraction Blinking blue Off Shelf manager hot swap process Shelf manager is operating LED Functions: Telco Alarm LEDs LED Status Meaning CRT Off Normal operation (Critical) Red System alarm event MJR Off Normal operation (Major) Red System alarm event MNR Off Normal operation (Minor) Red System alarm event Upon completion of boot-up, LEDs will display as follows: Perform™ Five-Slot DC 40 Revision 1.0.0 Maintenance And Trouble Hot-Swapp General LEDs ACT return to normal state PWR Remains ON Lights steady blue for a few Telco Alarm LEDs Application Defined LED OFF OFF seconds, then begins HS blinking, then goes off after a few blinks Software Alarms The ASIS Perform 14-Slot ATCA Shelf supports software alarms according to PICMG Specifications 3.0. Please refer to these specifications for a detailed description. LED Functions: Application-Defined LEDs LED A Status Meaning Green/ red/ As defined by application bi-color 4.5 B Green As defined by application C Amber As defined by application Hot-Swapping FRUs All the active components in the platform are mounted on (or housed in) field-replacea units (FRUs) that you can easily remove and replace. The subrack, backplane, and othe FRUs do not contain active components. All FRUs are hot-swappable: you can remove and insert a FRU without shutting down a other shelf component. Hot swapping facilitates planned maintenance activities and FRU replacement. The platform includes front-panel LEDs and a Telco alarm, which can be configured to a when a hardware or software failure occurs. If an external alarm system is connected t platform, it will also be activated for the alarm condition. The alarms alert an operator o technician to replace a failed FRU or perform some other maintenance operation. The following procedures are to be used when modules are hot-swapped. To remove a module: 1. Partially open the module’s right ejector latch to activate the module’s hot-swap The module’s IPMC sends to the Shelf Manager a request to deactivate, and the hot swap LED blinks at a fast rate. 2. The Shelf Manager determines whether the module can be extracted. If it can, th Manager grants permission to the IPMC. Perform™ Five-Slot DC 41 Revision 1.0.0 Maintenance And Troubleshooting Resetting The System 3. The IPMC disables the interfaces that are controlled by electronic keying, and shuts down the module’s operations. It then notifies the Shelf Manager the deactivation is complete. The blue LED remains lit. 4. Extract the module. 5. The Shelf Manager reclaims the module’s power budget. Also, as part of electronic keying, the Shelf Manager disables—on other modules—the interfaces that are only shared with the deactivated module. 4.6 Resetting The System One or both of the following reset options should be used if the shelf management card is not responding. (The second step should be performed only if the first one has not solved the problem.) 1. Press the Reset button on the Shelf Manager card front panel. 2. Extract the Shelf Manager card from the chassis ( in case of one Shelf Manager card installed), and re-insert it. Perform™ Five-Slot DC 42 Revision 1.0.0 Maintenance And Trouble Troub 4.7 Troubleshooting The following table summarizes potential problems and recommended solutions. Problem Probable cause Solution shelf manager does not boot up shelf manager is not in fully Check that the shelf manager properly: inserted in the cage. One or more of the LEDs fails to shelf manager malfunction. light during boot-up. board is properly inserted in th cage; Verify that the ejector cl is closed. The LEDs fail to return to their Replace the shelf manager. status as described in Section 4.4.1, above. The blue LED does not blink. Fans fail to operate at power up fan trays is not in fully inserted in the cage. Replace fan trays. Replace the shelf manager. shelf manager is not in fully inserted in the cage. shelf manager malfunction. Fan tray cards malfunction. Fan speed does not decrease Shelf Manager board after boot-up is completed malfunction. Fan tray LED is lit red One or more of the fans are Pull the fan tray slightly out for not working. few seconds until all fans stop Logic malfunction. Replace the shelf manager. spinning, and re-insert it. Replace fan tray. Replace shelf manager followin this sequence: Insert a second shelf manager the redundant slot; Issue a switchover command to switch shelf control from the current shelf manager to the redundant one. Circuit Breaker trips off Chassis power trouble. Remove all third-party and she manager to isolate the malfunction. Replace Power Entry Module. Boot sequence does not One of the Backplane's Replace E²PROMs. if you have complete, and the blue LED connectors is damaged. not yet done so; One of the cage units, or the Replace chassis. continues to blink after the Shelf Management card has been replaced and all relevant monitor commands have been performed Perform™ Five-Slot DC ATCA board, does not fit properly in the cage. 43 Revision 1.0.0 System Specifications Certification 5 System Specifications This chapter documents the product’s standards certification, and physical and other technica specification parameters. 5.1 Certification The Perform 14-Slot ATCA Shelf is designed to support NEBS level-3, CE, FCC and UL. It complies with the following: 5.2 • Advanced TCA, PICMG 3.x • IPMI v 1.5. Technical Data The following table presents technical specifications for each of the product elements. Description/ Category Property Value Physical 14 slot 8Ux280mm, front blades; Number of slots 14 slot 80mm, RTMs 21'' (12U)''H x 448mm (17.637'')W (19'' rack mount) x385.57mm (15.18'')Depth Dimensions not including handles & cable holders EMI EMI gasketing and hardware spacing to support FCC part B 19Kg (chassis & Backplane, Air filter, Cable Management Weight – Empty shelf only) Weight – Assembled shelf 35Kg (Including PEMs, Fans, 2 x shelf managers) Compliance PICMG 3.0 Temperature Humidity: - 5% to 95%, non-condensed R.2.0 Storage Temperature: -40° to +70° Celsius Operating Temperature: -5° to +55° Celsius Other Front and rear ESD jack Front rack flanges Front and rear cable management tray Accessibility Shelf Manager, Front boards, Air Filter Tray, top & bottom Front Perform™ Five-Slot DC cable management. 44 Revision 1.0.0 System Spec Tech Description/ Category Property Rear Value Fan trays, PEMs, RTMs, shelf ID, cable management. Backplane Up to 14 third-party ATCA-compliant front boards, dual star, dual redundant Shelf Management boards, Bus architecture bussed IPMB (radial by request). Base channel interconnect between two ATCA slots, with support for 10/100/1000 BASE-T Ethernet; Base interface base channel 1 is allocated to Shelf Management board Dual star or full mesh fabric connectivity optimized for performance at 10Gbps Fabric interface Replicated fabric channel upon request. Hub slots 2 logical slots 7 & 8; Update channels Physical slot 1-3, 2-4, 5-9, 6-10, 7-8, 11-13, 12-14 Dual redundant, full IPMB support with Asis shelf IPMB support management DC input (Nominal) carry over 100Amp Power -48 VDC/-60 VDC; one feed per PEM (A or B), designed Dual redundant PEM modules, each capable of supplying Redundancy 100% of shelf power Dual redundant EMC filtered power feeds; PEMs provide common-mode and differential-mode filteri for conducted emissions, reducing differential-to- commo EMC filtering mode conversion. Number of fans and RTM slots. Redundancy N+1 (i.e., any one fan can fail with no service degradatio Fan speed Variable speed under shelf management control Cooling Four hot pluggable fan trays, 5 axial fans per tray, for fro 300 Watt per front board, Cooling capacity 20W per RTM slot - temp. Front washable field replaceable NEBS GR63 compatible Air Filter filter Alarm I/O Electrical/Mechanical Dual redundant Alarm I/O Modules accessible from front Placement chassis Perform™ Five-Slot DC 45 Revision 1.0.0 System Specifications Technical Data Description/ Category Property Value 15-pin MicroDA-15P connector. Supports 4 outputs (Major, Minor, Critical, Power) and 2 Alarm I/O interfaces inputs (Major & Minor Reset) Safety Designed to meet UL, TUV requirements CE & FCC Designed to meet CE & FCC part 15 requirements Environment Designed to be compatible with NEBS level-3 and ETSI Regulatory Other Configuration board with on-board E²PROM stores shelf serial number, part number, backplane routing assignments, Shelf identity Perform™ Five-Slot DC shelf heat budget and other data. 46 Revision 1.0.0 System Spec Acronyms Used in th 5.3 Acronyms Used in this Manual Acronym Meaning ATCA Advanced Telecom Computing Architecture FRU Field-Replaceable Unit HS Hot swap PEM Power Entry Module IPMB Intelligent Platform-Management Bus IPMI Intelligent Platform-Management Interface RTM Rear Transmission Module NEBS Network Equipment-Building Systems ShMC Shelf Manager board ETSI European Telecommunications Standards Institute ANSI Perform™ Five-Slot DC 47 Revision 1.0.0