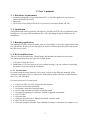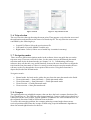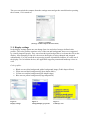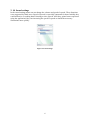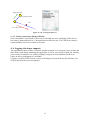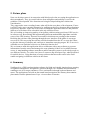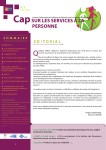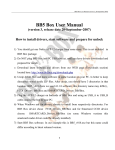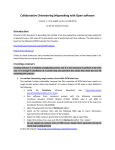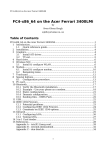
1
NaviSpeech - Documentation
Team: SpeechLab
Team members: Akos Viktoriusz, Balint Toth
Date: 18th April, 2008.
1. Short description
NaviSpeech is a GPS based navigation software for blind and visually impaired people.
Blind people have special needs. They perform usually the same trips alone, so they have to
memorise them well. It is a long and difficulty procedure, takes at least a few days in the most
of cases, especially by the group of blind people who lost their sight in the near past.
Consequently a navigation software could be very useful for them to get feedback from the
actual position. It would make easier performing journeys without fully memorising the
itinerary.
Furthermore nowadays using of public transport vehicles means a large problem for blind
people as well because of the lack of satisfying informations. So they would take very gladly
a mobile navigation software that gives informations about a public transport system in the
cities.
The current software was tested by blind people and they guessed it could become a fellow
that will guide them if they would like to get to a place that absolute unknown for them.
The application using a Symbian version of a Text-To-Speech (TTS) software called Profivox
developed at the Budapest University of Technology and Economics, Department of
Telecommunications and Media Informatics. The texts are read by the TTS engine, they
aren’t recorded in advance, instead assembled in real time using a special voice database. It
knows the construction of more languages, but NaviSpeech supports only Hungarian language
at the moment. Profivox is available only on Symbian 2nd edition, the 3rd version of the
software is under development at the department.
The application announces every information and instruction in voice and shows them on the
display as well. After the application is started it tries to connect to the GPS receiver unit.
After the connection is successfully established the user can select the trip and start on the
way. During the working the application compares received GPS data with coordinates of the
actual placemark and indicates, if the user gets at it or gives warning, if the user leaves the
right way.
Figure 1: NaviSpeech splash screen
(message: Welcome to the navigation software. Press „0” to help)
1
2. User’s manual
2. 1. Hardware requirements
•
•
•
Symbian smartphone: at least 2nd edition FP 1 or 3rd (The application was tested on
Nokia 6680 and Nokia N95)
Bluetooth
GPS receiver unit (Nokia GPS device is preferred, tested with Nokia LD-1W)
2. 2. Installation
On Symbian 2nd edition upload the NaviSpeech_2nd.SIS and TTS.SIS, on Symbian 3rd the
NaviSpeech_3rd_signed.SIS installation files. After uploading simply install them to the
smartphone.
2. 3. Running application
The application can be started from the menu (on 2nd edition) or from the Applications folder
(on 3rd edition). Before you start NaviSpeech, switch on Bluetooth on the phone and turn on
the GPS receiver unit.
2. 4. Keyboard functions
There are two keyboard modes: Normal mode and Manual placemark selection mode
The function buttons have the same role in both modes:
•
•
Left button: Entry the menu
Right button: Exit: here appears an exit confirm message, you can confirm exit pressing
the right or cancel pressing the left button.
2. 4. 1. Normal mode
In normal mode the main functions can be used: connect to the GPS unit manually (if the
automatic connection failed) or obtain basic informations (if the GPS unit is connected and
there is a valid GPS data).
Keyboard functions in Normal mode:
•
•
•
•
•
•
•
•
•
•
1: Connect to GPS, if it isn’t connected at the moment
4: Get name of the actual placemak
5: Get distance from the actual placemark
6: Get the right direction toward the actual placemark
7: Get actual geographical coordinates: latitude, longitude and altitude
8: Get UTC time
9: Get actual date
*: Change keyboard mode to Manual placemark selection mode
0: Help: Get the key functions
#: Get actual compass direction if the embedded compass is turned on (See chapter 2. 8.)
2
2. 4. 2. Manual placemark selection mode
In the manual placemark selection mode one can edit the currently trip as well. Edit functions
are reserved for future use, if once the application will have a map database to know about
topological informations. These fuctions can provide only guidance informations at the
moment.
Keyboard functions in Manual placemark selection mode:
•
•
•
•
•
•
•
•
•
•
•
•
1: Set the previous placemark as actual
2: Set the closest placemark as atual
3: Set the next placemark as actual
4: Get name of the actual placemak
5: Get distance from the actual placemark
6: Get the right direction toward the actual placemark
7: Get actual geographical coordinates: latitude, longitude and altitude
8: Get UTC time
9: Get actual date
*: Change keyboard mode to Normal mode
0: Help: Get the key functions
#: Get actual compass direction if the embedded compass is turned on (See chapter 2. 8.)
2. 5. Menu functions
The functions are available from the menubar as well. The menus are voice enabled, so the
name of the actual menu point is always read, enabling to use it for blind people,
consequently they don’t have to memorise the keyboard functions. Furthermore the menu
contains more functions and options than keyboard buttons.
Menu functions:
• Select trip (Útvonal kiválasztása; see chapter 2.6.)
• Trip informations (Útvonal infók):
• Actual placemark information (Aktuális pont információ)
• Get distance from the actual placemark (Távolság az aktuális ponttól)
• Check user’s direction toward the acutal placemark (Haladási irány ellenırzése)
• Other informations (Egyéb infók):
• Actual compass direction (Menetirány)
• Actual UTC time (Pontos idı)
• Actual date (Mai dátum)
• Actual geographical coordinates (Földrajzi koordináták)
• Settings (Beállítások):
• Connect to GPS (Csatlakozás a GPS-hez)
• Select navigation mode (Navigációs mód kiválasztása; see chapter 2. 7.)
• Turn compass on/off (Iránytő; see chapter 2. 8.)
• Turn menu reading on/off (Menüfelolvasás)
• Sound settings (Hangbeállítások; see chapter 2. 9.)
• Display settings (Kjelzı beállítások; see chapter 2. 10.)
• Help (Segítség)
• Exit (Kilépés)
3
Figure 2: Menu
Figure 3: Trip selection screen
2. 6. Trip selection
The user can select the trip choosing the menu point. Then appears a trip selection screen and
the application reads and shows the name of selected trip file. The trip selection screen one
can handle by the following keys:
•
•
•
Joystick Up/Down: Select the previous/next file
Left button or Joystick Middle: Load the trip
Right button: Cancel (if there was a loaded trip it remains in memory)
2. 7. Navigation modes
There are more different navigation modes in the software, these can guide the user on the
trip more ways. These are reserved for later, for the same reason as the Manual placemark
selection mode by the keyboard modes (see chapter 2. 4. 2.). Collaborating with a map
software, these can become very useful functions, beacuse the user doesn’t have to begin the
trip from the first placemark or if there is a nearly section between two placemarks, the user
can entry to the way through the closest point of this section. Using these functions is
deprecated, besides the Normal mode.
Navigation modes:
•
•
•
•
•
Normal mode: the basic mode, guides the user from the start placemark to the finish
Closest placemark -> Start placemark -> Finish placemark mode
Closest placemark -> Start placemark -> Finish placemark mode
Closest section -> Finish placemark mode
Closest section -> Start placemark mode
2. 8. Compass
The application has an embedded compass, that can show the basic compass directions, like
East, North-East, etc. The GPS has some (approximately 4-5 meters) imprecision, therefore it
cannot provide the exact positon, instead sprinkles coordinates in a circle around the user. So
the sequental directions could be different from each other.
To resolve this emerging problem, the compass gathering counted angles between two
received positions and creates the average of them using a special mathematic algorithm to
show the smooth right direction for the user.
4
The user can switch the compass from the settings menu and get the actual direction pressing
the # button, if it’s turned on.
Figure 4: Compass
(message: Actual compass direction: East)
2. 9. Display settings
In the display settings menu one can change font size and select from pre-defined color
profiles. The color profiles contain a color of the text and background, these were suggested
by visually impaired people. They can select their preferred profile to see better the text on the
display. After changing a font size, the text on the display is being changed and wrapped
automatically. You can scroll the text pressing joystick up and down buttons, if it runs out of
the display. On 3rd edition devices, the application supports portrait and landscape views as
well.
Color profiles:
•
•
•
•
Black text on white background with a background image (Fehér alapon fekete)
White text on black background (Fekete alapon fehér)
Yellow text on blue background (Kék alapon sárga)
Blue text on yellow background (Sárga alapon kék)
Figure 5:
Display settings
Figure 6:
Changed display properties
5
Figure 7:
Landscape view
2. 10. Sound settings
In the sound settings menu one can change the volume and speed of speech. These functions
were suggested by blind users. Speed of speech is especially important for them. Initially they
could memorise everything better listening to slow speech. After they gained some experience
using the application, they can increasing the speed of speech to obtain the necessary
iformations more quickly.
Figure 8: Sound settings
6
3. Route planning
The application interprets the itinerary as a polyline; its vertices are the placemarks, those are
given with identifier number, description and geographical coordinates, like latitudes and
longitudes. The user can make the trip file that contains the itinerary using a simple text editor
or plan it via Internet.
Ready trip files must be placed to:
•
•
„C:\Nokia\Others\NaviSpeech\TripFiles” folder on Symbian 2nd
„C:\Data\Others\NaviSpeech\TripFiles” folder on Symbian 3rd
By selecting trip the application browsing this folder.
3. 1. Route planning via text editor
The itinerary that is processed by the application can be created using a simple text editor. It
has a specified file format with „.trp” extension. In the first line must be a short description
about the itinerary, it begins with a # character. The following lines contain the properties of
placemarks in different fields those are separated by a tabulator character. Each line ends as
well with tabulator.
Placemark fields:
•
•
•
•
•
•
•
Identifier number
Placemark name
Longitude (in degrees)
Latitude (in degrees)
Cell information
Image URL
Description URL
The first four fields are mandatory. The cell information field is optional. If there isn’t a valid
GPS data, the application can set the actual placemark obtaining the current network
information and comparing wtih in the field stored ones. This location service is avalaible
only on Symbian 2nd using the keyboard in Manually placemark selection mode. The URL
fields are reserved for future use.
Example for trip file format, that contains a walk around an Informatic Building of the
University:
#Walking around the Inofmatics Building
01
Informatics Building, North-West
02
Informatics Building, North-East
03
Informatics Building, South-East
04
Informatics Building, South-West
of the University
corner
19.05922
corner
19.06057
corner
19.06282
corner
19.05977
7
47.47285
47.47319
47.47284
47.47212
00/0000
00/0000
00/0000
00/0000
3. 2. Route planning via Internet
There is available a way to plan the route using an Internet software. One can easily do it by
the following steps:
•
•
Get the T-Online map and route planning page: http://terkep.t-online.hu
One can move and zoom the appearing map now. Find the place of the start placemark
filling the „City” (Település) and „Street, number” (Utca, házszám) fields on the left side
panel and press the „Search” (Keresés) button.
Figure 9: Search form
•
If the result is appearing, select the flag icon over the map and click to the right place on
the map to create a placemark. It will appear in the chart on the left side.
Figure 11: Create placemark
•
•
Figure 10: Flag icon
Figure 12: Placemark on the chart
Locate other placemarks in the same way. It supports only 5 placemark per route.
Press the „Route planning” (Útvonaltervezés) button left from the map.
Figure 13: Route planning button
Figure 14: Download link
8
•
•
•
•
After it there will appear a link with a caption „Download planned route in GPS
TrackMaker format” (Útvonal letöltése GPS TrakMaker formátumban) under the map.
Activate it and save the „.gtm” file to your computer.
Download GPS TrackMaker software from: http://gpstm.com and install it to your
computer.
Open the downloaded trip file with GPS TrackMaker.
Rename the placemarks clicking by right button on them.
Figure 15:
Placemark in GPS TrackMaker
•
•
Figure 16:
Rename placemark in GPS TrackMaker
Rename the file and save it.
Copy the file to trip file folder on your phone (see above).
Route planning via Internet from smartphone is under development. The final goal is that
once the user has only to give the address of the start and finish placemarks, afterwards the
application connects to a route planning software and loads the planned itinerary.
9
4. Working issues
4. 1. At the beginning
Running the application it loads the Text-To-Speech engine. Then tries to establish
connection with the GPS unit via Bluetooth. Indicates if anything failed. After them one can
obtain GPS informations and use the embedded compass if the GPS receiver provides a valid
GPS data.
The application stores the Bluetooth address of the first attached GPS unit. If one want to
change to another device, must delete the „C:\Nokia\Others\NaviSpeech\btaddr.bin” (on
Symbian 2nd) or the „C:\Data\Others\NaviSpeech\btaddr.bin” (on Symbian 3rd) file or
reinstall the application.
4. 2. Select trip
If one need navigating on a trip, one has to select it using the trip selection screen (see chapter
2. 6.). After one can obtain informations about the trip.
4. 3. Begin navigation
To begin the navigation one have to go to the start placemark. The application indicates it.
After one can check the right direction toward the actual placemark.
4. 4. Automatic messages and instructions
The application notifies the user in following cases:
4. 4. 1. Getting at the actual placemark
If the user enters to the close range of the actual placemark, the application notifies the user
about this event and shows the right direction toward the next placemark.
Placemark range
User
Figure 17 - 18: Getting at the actual placemark
4. 4. 2. Leaving the itinerary
If the user leaving the right way (the user’s direction differs much from the right direction),
the application warns and guides the user to previous placemark. It works only in Normal
keyboard mode. This function wasn’t finished yet and may not work properly. For example it
may warn too late or not at all. Our team is working on improving it. To switch it off change
to Manual placemark selection keyboard mode.
10
Right direction
Actual placemark
User
User’s direction
Figure 19 - 20: Leaving the itinerary
4. 4. 3. Losing connection with the GPS unit
If the connection is lost with the GPS receiver unit (that can cause switching off the device,
low battery, Bluetooth fault, etc.), the application notifies the user. The GPS device must be
restarted and the user has to connect to it again.
4. 4. Logging (developer support)
The application is able to make a real-time log that contains every relevant events, actions and
data, what occurs during launching the application. It can be very useful to check the working,
parse results, for statistics, etc. and by looking for bugs as well on Symbian 2nd devices
where on-device-debugging isn’t available.
Logging is switched off in current version of NaviSpeech, because the log file allocates a lot
of space and must be removed regularly.
11
5. Future plans
Now our developer team is in connection with blind people who are testing the application on
their smartphones. They give useful advices from navigation and usability to resolve the
guideline of development. New functions are being developed taking their claims into
consideration.
They suggested a route recording feature what will be the next phase of development. If once
it will be ready, users can make itineraries by walking on their way along on and performing a
keypress by the turns. In the end of the route recording the application will save the planned
itinerary to a file that will be selectable in the trip selection screen.
We are working on improving quality of navigation with increasing precision of GPS service
in software way. Researching and implementing different mathemathic algorithms can hide
errors of the GPS locating. Theoretical researchs in this theme are pending at the moment.
Realising the real time route planning through the user interface of the phone is our target
now as well. This way using the sofware could be detached from the PC so users don’t have
to plan the itinerary in advance and could get to immediate emerging targets. Wi-Fi service is
available now on Symbian 3rd devices to make this function free.
We are intent to make this application able to collaborate with a map software to get more
informations from the streets and manage the route planning if there isn’t available Internet
access. A map handling software must know public transport system as well to help people to
use different vehicles. To realise it we have to contact a map developer firm, what specialised
for mobile devices. Using functions of a map software that knows the traffic rules could
enable navigating in different vehicles in the future.
6. Summary
NaviSpeech is a GPS based navigation software for blind and visually impaired users running
on Symbian smartphones. Navigation is possible through voice feedback and informations
enabling to use it for target consumers. Users can handle it through keyboard buttons and
menu. The application was built on placemark based navigation, the itinerary that contains
placemarks could be planned more ways: via text editor or Internet.
12