1
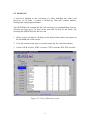
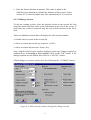
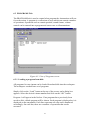
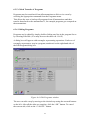
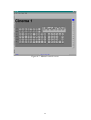
3. INSTALLING CA-Link
3.1 Installing the Software
The installation of the CA-Link software is very simple.
Insert Disk 1 of CA-Link into the disk drive and from the FILE menu from
Program Manager, Select RUN to run “SETUP.EXE”. Follow the instructions
from that point on.
If the installation was successful, a CA-Link program group would have been
created with a CA-Link program icon.
The next step is to disable any other COM2/COM4 port. The RS485 card is
configured as COM4 and uses IRQ 3 exclusively. This means that COM2 or
another COM4 port (which also uses the same interrupt) MUST BE
DISABLED.
If the PC’s serial I/O is integrated on the motherboard, COM2/COM4 can be
disabled via the CMOS setup program. This setup program is normally
accessed by hitting the <DEL> key after the PC is reset.
NOTE: COM2 (or existing COM4) MUST BE DISABLED FOR CORRECT
OPERATION OF CA-Link.
If the PC’s serial I/O is in the form of a plug in card, COM2 can be disabled by
configuring it via special software or by changing the jumpers on the card.
For further information, consult the documentation for the PC.
3.2 Displaying a title at the top of the status screen.
Once CA-Link is installed, the title shown on the status screen (default is
“Cinema Status”) can be changed by editing the configuration file. The name of
the file is ca100.cfg and is located in the installation directory. (default:
“..\calink”) Using a simple text editor such as “EDIT”, or “NOTEPAD”,
open the configuration file and edit the first line. This text will appear on the
top middle of the page in the status screen.
3.3 Setting the number of cinemas displayed in CA-Link
As with changing the title, the number of cinemas is set by editing the
configuration file in the installation directory. The first line has the title shown
in the status screen as described above.
4