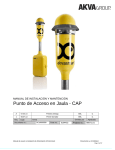
1
INSTALLATION AND USER MANUAL
AKVAconnect 2.0
B
Rev
02.09.13
Date
Document no.:
EBL
Issued
10000637
Installation and user manual AKVAconnect 2.0
Issued by
PÅN
Approved by
Project no.:
Document no. 10000637
Page 1 of 34
The information in this document is subject to change
without notice and should not be construed as a commitment by AKVA group ASA.
AKVA group ASA assumes no responsibility for any errors
that may appear in this document.
In no event shall AKVA group ASA be liable for incidental
or consequential damages arising from use of this document or of the software and hardware described in this
document.
We reserve all rights in this document and in the information contained therein. Reproduction, use or disclosure to
third parties without express authority is strictly forbidden.
Additional copies of this document may be obtained from
AKVA group ASA at its current charge.
© 2012 AKVA group ASA (NO)
AKVA group ASA
Installation and user manual AKVAconnect 2.0
Document no. 10000637
Page 2 of 34
Table of contents
1
Safety ......................................................................................................... 4
2
Introduction ............................................................................................... 5
2.1
Contact information ...................................................................................... 6
3
Information ................................................................................................ 8
3.1
Computer requirements ................................................................................. 8
3.2
Help for AKVAconnect 2.0 .............................................................................. 9
3.3
Process network ........................................................................................... 9
4
Installation ............................................................................................... 10
5
Start up .................................................................................................... 20
6
Set up ....................................................................................................... 21
6.1
Enter the name of the site ........................................................................... 21
6.2
Add cameras .............................................................................................. 22
7
Using AKVAconnect 2.0 ............................................................................ 25
7.1
Toolbar ..................................................................................................... 25
7.2
Choose number of camera views on screens ................................................... 26
7.3
Backup ...................................................................................................... 27
7.4
Restore ..................................................................................................... 28
7.5
Process network ......................................................................................... 30
8
Frequently asked questions ...................................................................... 31
Deviation form ................................................................................................. 32
Notes ............................................................................................................... 33
Installation and user manual AKVAconnect 2.0
Document no. 10000637
Page 3 of 34
1 Safety
Make sure that suspensions and ropes for camera and winch do
not interfere with any other equipment mounted inside the cage,
the Akvasmart rotor spreader for instance. This is to make sure
that the ropes can be moved freely and to avoid damages during
use or bad weather, and after storms.
It is very important to let personnel working on the cage edge
know when remote controlling of the winch happens.
Read both this AKVAconnect 2.0 user manual AND the user
manual for your Akvasmart camera before mounting and using
this equipment.
Installation and user manual AKVAconnect 2.0
Document no. 10000637
Side 4 of 34
2 Introduction
This user manual is part of the equipment delivered with
AKVAconnect 2.0. Preserve the manual for as long as the
feed system is used, and make sure that all changes to
the equipment are being noted in the manual.
Thank you for choosing AKVA group ASA as supplier for your
process controller. Do not hesitate contacting us if you need
more information regarding use or maintenance for your
product.
With four main brands, AKVA group ASA is a world leading
supplier of technical aquaculture equipment. Since 1980 we
have developed and produced fish farming equipment, both for
cages at sea and for land based hatcheries. AKVA represents an
industrial standard, which is presumed to be the turn key to the
future. Research, project management, fast deliveries and
customer follow-up have been our focus to ensure that we
contribute to a positive development within the agriculture
industry. Our goal is to deliver the best possible and most cost
efficient equipment in order to keep preserving sustainable
farming.
We have a wide variety of products, for example: plastic and
steel cages, high pressure washers, net washers, boats, feed
barges, feeding systems, cameras, sensor systems, under water
lighting, software for fish farming and recycling systems.
This User Manual enables the operator to operate and maintain
the Vicass HD Biomass Estimator in a safe and economically way.
Safety – both for the user and for the equipment, is our main
focus when developing products.
All of our equipments are pre-installed, tested and delivered
from our own production department. This means that you have
total control over which components you can choose from,
Installation and user manual AKVAconnect 2.0
Document no. 10000637
Page 5 of 34
grouping collocation, testing and deliveries. Our production staff
consists of people with great expertise and engagement for
producing the best possible products for you. Having our own
production site gives you excellent service in case something
should go wrong, or if you are in need of any assistance. Our
service staff is available on the telephone or on location in order
to assist you if necessary.
Safety - both for the users and the products is our main focus
while developing products. We ask you to read chapter 1 Safety
thoroughly before using AKVAconnect 2.0.
This entire manual and especially Chapter 1 Safety must
be read and understood before commencing any work
with AKVAconnect 2.0.
Purpose
- safety
- installation
- use
- answer day to
day questions
The purpose of this manual is to make the user use AKVAconnect
2.0 in a safe and economical way. The manual will show how to
install the software to the feeding barge computer, how to use
the program and it will also answer most day to day questions. If
there is anything you do not find the answer to in this manual,
please contact our service department, your subcontractor, your
local AKCA office or our main office in Norway for assistance and
help to find a solution to your problem.
2.1 Contact information
AKVA group ASA - Bryne (Head office)
Nordlysveien 4
PO. Box 271
4340 Bryne
Norway
tel. +47 - 51 77 85 00
fax. +47 - 51 77 85 01
Support Hardware and AKVAconnect 2.0
tel. + 47 - 51 77 85 03
[email protected]
Support Fishtalk
tel. +47 - 73 84 28 20
[email protected]
Installation and user manual AKVAconnect 2.0
Document no. 10000637
Page 6 of 34
Chile
AKVA group Chile
Ruta 5 Sur Km. 1030
Puerto Montt, Chile
t. +56 - 65 250250
f. +56 - 65 257119
UK (Scotland)
AKCA group Scotland Ltd.
36F Shore Street
Inverness, Scotland, UK IV1 1NF
t. +44 (0)1463 221 444
f. +44 (0)1463 223 535
North Americas
AKVA group North America Inc,
1495 Baikie Rd, PO Box 397, Campbell River
BC, V9W 5B6 Canada
t. +1 - 250-286-8802
f. +1 - 250-286-8805
WiseDynamics Ltd.
5251 Duke Street, Suite 606, Duke Tower, Scotia Square
Halifax, NS, B3J 1P3 Canada
t. +1 - 902-482-2663
f. +1 - 902-405-3373
Installation and user manual AKVAconnect 2.0
Document no. 10000637
Page 7 of 34
3 Information
AKVAconnect 2.0
Built on February 20th 2013 at 14:52:15 (7663)
Copyright 2008-2013, AKVA group ASA, Piscada AS
AKVAconnect 2.0 is a new process control software platform
designed for optimal industrial control for processes and
activities. It connects and keeps control over everything from
local farm sites to large international aquaculture corporations.
The system is compatible with all types of equipment, sensors
and technical installations. Smart 3D design with interactive
control functions makes it incredibly easy to operate.
In the future, this software will be adjusted to work with new
equipment.
Wireless coupling allows up to 6 feeding lines connected at the
same time. Images from one camera per feeding line may then
be shown at the same time.
Hard wired cameras may transfer an endless number of camera
images and it is possible to view them all at the same time (only
restricted by number of screens).
Never exit the Piscada server, this has to run in order to use
AKVAconnect 2.0.
3.1 Computer requirements
Processor: Intel® Core i5
RAM: 4GB
Display card: GeForce 210 1GB RAM, and enough outputs for the
desired number of screens
Hard disk: 250 GB
Operating system: Microsoft Windows 7 64-bit
Installation and user manual AKVAconnect 2.0
Document no. 10000637
Page 8 of 34
3.2 Help for AKVAconnect 2.0
AKVA group ASA has produced a help file for AKVAconnect 2.0,
as an addition to the printed user manual. This help file is always
available in the AKVAconnect 2.0 software. To open the help file,
click on the ‘Help’ icon inside AKVAconnect 2.0s front page, and
a help pdf-manual, similar to the one you are reading at this
moment, will open on the screen.
It is possible to navigate around in the digital manual, and this
makes it easy to find needed information and answers to any
questions the user may have. Search for words inside the
manual by typing Ctrl+F, then type what you are looking for.
3.3 Process network
With AKVAconnect 2.0 it is possible to use a wireless network
with up to 50km range for surveillance of several sites from one
barge or other similar location.
Installation and user manual AKVAconnect 2.0
Document no. 10000637
Page 9 of 34
4 Installation
Before mounting camera, winch, CAP and other components controlled
by AKVAconnect 2.0, read these product’s respective manuals to ensure
safe operations.
Step 1
Firstly, choose language for the installation. Choose between
Norwegian, English and Spanish from the roll-down menu. Click
ok to approve and move to the next step.
Step 2
The simple installation instructions starts:
Next>: Starts the installation wizard
Cancel: Cancels the installation
Installation and user manual AKVAconnect 2.0
Document no. 10000637
Page 10 of 34
Step 3
This is where the program’s saving location is decided. It is most
common to save it in Program Files. It is important to make sure
that there is enough available storage space for the program on
the chosen hard disk. The AKVAconnect 2.0 software takes up
about 400MB, but video recordings require a lot more space. The
user has to make sure that required space is available.
<Back: Takes you to the precious interface
Next>: Takes you to component choice after storage location for
AKVAconnect 2.0 is set
Cancel: Cancels the installation
Installation and user manual AKVAconnect 2.0
Document no. 10000637
Page 11 of 34
Step 4
Choose all* components if this is the first time AKVAconnect 2.0
is installed to your computer. Choose what you need if you are
installing something extra to an existing AKVAconnect 2.0
program.
*Mobile Service is only chosen if the program is supposed to be used on a mobile
client (mobile-phone, iPad, tablet computer etc.), AKVAconnect 2.0 on mobile
clients require a different license.
<Back: Takes you back to the previous interface
Next>: When components are chosen, move on to short cut
location
Cancel: Cancels the installation
Installation and user manual AKVAconnect 2.0
Document no. 10000637
Page 12 of 34
Step 5
This is where the AKVAconnect 2.0 short cut is placed. The
AKVAconnect 2.0 installation wizard suggests that the short cut
is saved in the AKVAconnect 2.0 folder in the Start Menu, it is
recommended to follow this suggestion.
<Back: Takes you back to the previous interface
Next>: When desired short cut is set up, move on to choose the
desired version
Cancel: Cancels the installation
Installation and user manual AKVAconnect 2.0
Document no. 10000637
Page 13 of 34
Step 6
Choose Full version
– Your license decides what You have access to.
<Back: Takes you back to the previous interface
Next>: When desired version is chosen, move on to installation
Cancel: Cancels the installation
Installation and user manual AKVAconnect 2.0
Document no. 10000637
Page 14 of 34
Step 7
Now, everything is ready to start up the installation.
<Back: Takes you back to the previous interface
Next>: Starts up the AKVAconnect 2.0 installation on your
computer
Cancel: Cancels the installation
Installation and user manual AKVAconnect 2.0
Document no. 10000637
Page 15 of 34
Step 8
The green bar shows how far the installation has come. When
the gray bar is filled up with green, the installation is done.
Cancel: Cancels the installation
Installation and user manual AKVAconnect 2.0
Document no. 10000637
Page 16 of 34
Step 9
Completing the installation is done here, follow these
instructions:
□ Install MySQL:
- check the box if this is a new installation
□ Launch installer for AKVAcontrol CCS:
- check the box if Akva Control 10.0 integration is used
□
Install camera drivers:
- always check this box when installing cameras
□
Start Piscada-server after installation:
- always check this box
Finish: Completes the installation
Installation and user manual AKVAconnect 2.0
Document no. 10000637
Page 17 of 34
Step 10
The computer finishes the installation and these two (or three)
interfaces appear in your screen. User/installation contractor has
to press any key to move on to the next one.
Press any key to continue.
Press any key to continue.
(This last window will only appear if Mobile service is chosen in
step 4.)
Press any key to continue.
Installation and user manual AKVAconnect 2.0
Document no. 10000637
Page 18 of 34
Step 11
Type the name of the location under ‘Server name’.
Always use small letters/characters consistently, making it
easier for yourself, Your colleagues and our service personnel.
Step 12
This interface appears when the installation is complete. Make
sure that all status indicators are green. If any of the indicators
are not green, you need to find out what is causing the problem
or disconnection.
Installation and user manual AKVAconnect 2.0
Document no. 10000637
Page 19 of 34
5 Start up
1 Log in with user name and password
Standard user name is admin and standard password is akva.
2 Choose camera overview
This is the image you see on your screen before cameras are
added in AKVAconnect 2.0:
Make sure to have an overview over IP addresses and port
numbers before setup (chapter 6) is actuated.
Installation and user manual AKVAconnect 2.0
Document no. 10000637
Page 20 of 34
6 Set up
6.1 Enter the name of the site
After logging in, go to ‘Camera Setup’ (as shown in chapter 5).
This is where AKVAconnect 2.0 surveillance takes place.
- ‘Setup’ takes You to setup for camera coordinates
- ‘Server’ shows the name of the facility
- ‘Profile’ lets You decide how many video images you want to
view at a time (1,2,4 or 6).
- ‘Facility’ on top:
- choose site in the roll-up menu (only when You have access
to more than one site)
‘Facility’ in bottom:
Choose if quality or bandwidth should be preferred when displaying the video images:
- None: if it does not matter which one is preferred (in case
the bandwidth is good enough, that it will not matter anyway)
- Quality: if video viewing is a top priority (using as much
bandwidth as necessary)
Installation and user manual AKVAconnect 2.0
Document no. 10000637
Page 21 of 34
- Bandwidth: if bandwidth capacity controls the quality (if
other network tasks are preferred and video image quality
is varied)
- Mobile: only if images shall be shown on a mobile device
- Balanced: if the quality can vary with available bandwidth
To hide the control panel (the bottom tool-bar), type and hold
Ctrl, then type H. Only the images will show on the screen. To
show the control panel again, type Ctrl+H again.
6.2 Add cameras
Make sure that You have a overview over IP addresses and port
numbers before starting the set up process.
Click on the channel where you want to add the camera and
click ‘Add’
Installation and user manual AKVAconnect 2.0
Document no. 10000637
Page 22 of 34
6.2.1 Edit Basic information
ID
Fill in name and description for the channel
Camera
Fill in the IP address of the camera
Alternative address is only filled in if external networks
are used. If external networks are not used, type the
camera IP address here as well.
Stream (compressing type): Normally H264(Axis)
Type:
SmartBox / SmartCAP / iCap (internal use() / Axis IP
SmartBox and SmartCAP are analogue and wireless,
and have to be added under “Channel”.
iCap and Axis IP are digital and you can choose to
either add them under “Channel” or “Axis IP Camera”.
□
Use alternative encoder-path - only for internal use.
PELCO communication settings
PELCO ID - The camera’s ID-number
PELCO IP - IP for the video serveren connected to the
instruction radio
Alternative address - only used with external networks.
Installation and user manual AKVAconnect 2.0
Document no. 10000637
Page 23 of 34
6.2.2 Testing the connection
When everything is filled out, make sure that everything is ok by
clicking the ‘Test connection’ button (bottom right side).
If everything is ok, all test indicators should be green:
Installation and user manual AKVAconnect 2.0
Document no. 10000637
Page 24 of 34
7 Using AKVAconnect 2.0
7.1 Toolbar
7.1.1 Open toolbar
To open the toolbar, move the mouse pointer to the upper area
of the AKVAconnect 2.0 window (image 1.) and the toolbar
comes out automatically (image 2.). It stays there for 5-6
seconds and disappears again after this. It may be brought back
any time.
1.
Place mouse pointer in this area
2.
7.1.2 Fix the toolbar
Hold in the Ctrl-key and press T.
If this does not work, try this:
‘Set-up’ - ‘Application settings’:
1. Click ‘Set-up’ in the toolbar (marked 1)
2. Choose ‘Application setttings under personal (marked 2)
3. Un-check the chack-box ‘Hide toolbar automatically’
(marked 3)
Installation and user manual AKVAconnect 2.0
Document no. 10000637
Page 25 of 34
7.2 Choose number of camera views on screens
When all cameras are added in setup, and all test indicators are
green, you may add 6 camera images to one screen at a time.
Choose from the coloured numbers 1,2,4 and 6 from the bottom
left side in the AKVAconnect 2.0 interface.
If you are using several screens at the same time, right click
anywhere in the interface and choose ‘Show copy’ and a new
copy pops up in your screen. Drag and drop this window to the
desired screen.
To vary which camera to use, click inside the camera square and
the frame will become yellow (see the upper middle image
marked ‘Merd 10’ (meaning Cage 10)). When the camera-image
is “marked”, positions can be controlled by using arrow keys.
The Tab-key takes you to the next image, Shift+Tab takes you to
the previous image.
The video image can also be shown over the entire screen (full
screen) by double clicking it (or choose 1 under ‘Profile’). To
return to normal view, click the Esc-key (or choose 2,4 or 6
under ‘Profile’).
Installation and user manual AKVAconnect 2.0
Document no. 10000637
Page 26 of 34
7.3 Backup
Backup should be done after every change is performed to the
system.
1 Toolbar -> ‘Set-up’ (marked 1.) -> ‘Back-up and restore’
(marked 2.)
2 Choose ‘Back-up’ (marked 3.)
3 Leave all check boxes under ‘Back-up’ not checked
4 Click ‘Back-up’ (marked 4.) -> Enter a name to the back-up
(e.g the date) -> OK
5 To change saving location for the back-up, click on
‘Change Location’
6 The back-up is saved
7 Click close when the back up is ready
Installation and user manual AKVAconnect 2.0
Document no. 10000637
Page 27 of 34
7.4 Restore
If the configuration is broken, or if AKVAconnect 2.0 is moved to
another computer (remember to get a new licence for the new
computer!), ‘Restore from back-up’ is necessary. Use a USB
memory stick, external hard disk or similar devices.
1 Follow the Back up instructions (chapter 7.3) up to point 2
2 Choose ‘Restore’ (in stead of Back up) in Backup and
restore (marked 3.)
3 Choose saving location for the back-up (marked 4.)
4 Click on the Back-up you wish to restore from (marked 5.)
5 Click ‘Restore’ (marked 6.)
Installation and user manual AKVAconnect 2.0
Document no. 10000637
Page 28 of 34
8 Leave both check boxes un-checked, and click ‘Start
Import’
9 ‘Close’ when the import is done and restoration is finished
(when this interface comes up:)
Installation and user manual AKVAconnect 2.0
Document no. 10000637
Page 29 of 34
7.5 Process network
With AKVAconnect 2.0 it is possible to use a wireless network
with up to 50km range for surveillance of several sites from one
barge or other similar location.
Add sites
To add a site to Your user, make sure that to have the correct
license and follow these instructions:
Toolbar -> Setup (1.) -> System (2.) -> Process network (3.)
(4.): Fill in site name and remember to use only small characters!, leave Server info checked on, fill in correct IP address,
user name and password, and click OK.
Restart AKVAconnect 2.0 to access the new site.
Installation and user manual AKVAconnect 2.0
Document no. 10000637
Page 30 of 34
8 Frequently asked questions
1 I get this warning when I try using AKVAconnect 2.0 - what
is wrong?
Your license has expired, and You need to contact
your supplier in order to get the license renewed.
2 Make sure that the Piscada server is running all the time
while using AKVAconnect 2.0. If this server is closed,
AKVAconnect 2.0 will not work, and this warning will appear
in the right side of the top line of the window (next to OK):
Piscada is shut down by clicking File -> Exit, but this must
not be done when the AKVAconnect 2.0 program is running.
If the server is shut down by accident or a system crash, it
can be restarted by:
1. Open ‘All programs’ in the Windows start menu
2. Open the ‘AKVAconnect 2.0’ folder
3. Open the ‘Server’ folder
4. Click ‘Piscada Server’
5. The Piscada server starts up
Installation and user manual AKVAconnect 2.0
Document no. 10000637
Page 31 of 34
12 Deviation form
Deviation control
Unit:
No:
Producer:
Prod.no.:
Purchase year:
Deviation description:
Follow up proposition:
Date and signature, declarer
Follow up directed:
Status:
New action for deviation no.:
Date and signature, follow up:
Make copies of this deviation registration form.
Installation and user manual AKVAconnect 2.0
Document no. 10000637
Page 32 of 34
of 34
Notes
Installation and user manual AKVAconnect 2.0
Document no. 10000637
Page 33 of 34
of 34
Installation and user manual AKVAconnect 2.0
Document no. 10000637
Page 34 of 34