1
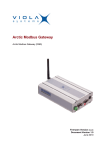
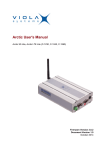
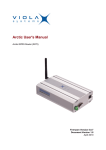
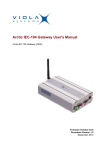
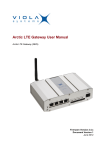
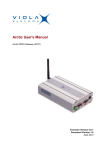
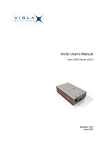
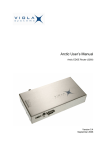
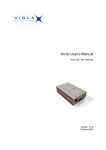
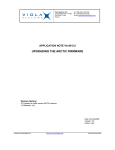
Viola M2M Gateway Enterprise Edition User
Manual
Viola M2M Gateway Enterprise Edition (2505)
Firmware Version 2.4
Document Version 3.0
October 2010
User Manual
Viola M2M Gateway Enterprise
Edition
Copyright and Trademark
Copyright © 2008-2010, Viola Systems Ltd. All rights to this manual are owned
solely by Viola Systems Ltd. (referred elsewhere in this User’s Manual as
Viola Systems). All rights reserved. No part of this manual may be transmitted
or reproduced in any form or by any means without a prior written permission
from Viola Systems.
Ethernet™ is a trademark of XEROX Corporation. Windows™ and Internet
Explorer™ are trademarks of Microsoft Corporation. Netscape™ is a
trademark of Netscape Communications Corporation. All other product names
mentioned in this manual are the property of their respective owners, whose
rights regarding the trademarks are acknowledged.
Viola Systems Ltd.
Lemminkäisenkatu 14-18 A
FI-20520 Turku
Finland
E-mail: [email protected]
Technical Support
Phone: +358 20 1226 226
Fax: +358 20 1226 220
E-mail: [email protected]
Internet: http://www.violasystems.com
Firmware Version 2.4
2
Document Version 3.0
User Manual
Viola M2M Gateway Enterprise
Edition
Disclaimer
Viola Systems reserves the right to change the technical specifications
or functions of its products or to discontinue the manufacture of any of its
products or to discontinue the support of any of its products without any
written announcement and urges its customers to ensure that the information
at their disposal is valid.
Viola software and programs are delivered “as is”. The manufacturer does not
grant any kind of warranty including guarantees on suitability and applicability
to a certain application. Under no circumstance is the manufacturer or the
developer of a program responsible for any damage possibly caused by the
use of a program. The names of the programs as well as all copyrights relating
to the programs are the sole property of Viola Systems. Any transfer, licensing
to a third party, leasing, renting, transportation, copying, editing, translating,
modifying into another programming language or reverse engineering for any
intent is forbidden without the written consent of Viola Systems.
Viola Systems has attempted to verify that the information in this manual is
correct with regard to the state of products and software on the publication
date of the manual. We assume no responsibility for possible errors which
may appear in this manual. Information in this manual may change without
prior notice from Viola Systems.
Firmware Version 2.4
3
Document Version 3.0
User Manual
Viola M2M Gateway Enterprise
Edition
Declaration of Conformity
(according to ISO/IEC Guide 22 and EN 45014)
Manufacturer’s Name: Viola Systems Ltd.
Manufacturer’s Address:
Lemminkäisenkatu 14-18 A
FI-20520 Turku
Finland
declares that this product:
Product Name:
Viola M2M Gateway Enterprise Edition
conforms to the following standards:
EMC:
EN 55022 Emission Test (Class A)
1. Radiated Emissions (30-1000MHz)
2. Conducted Emissions (0.15-30MHz)
EN 50082-1 Immunity Test
1. IEC 801-3: Radio Frequency Electromagnetic Field
2. IEC 801-2: Electrostatic Discharge
3. IEC 801-4: Fast Transients, AC Power Ports and Signal cables
Supplementary Information:
“The product complies with the requirements of the Low Voltage Directive
73/23/EEC and EMC directive 89/336/EEC.”
Warning!
This is a Class A product. In a domestic environment this product may cause
radio Interference which may make it necessary for the user to take adequate
measures.
Manufacturer’s Contact Information:
Viola Systems Ltd.
Lemminkäisenkatu 14-18 A
FI-20520 Turku
Finland
Phone: +358 20 1226 226
Fax: +358 20 1226 220
Firmware Version 2.4
4
Document Version 3.0
User Manual
Viola M2M Gateway Enterprise
Edition
Warranty and Safety Instructions
Read these safety instructions carefully before using the products mentioned
in this manual:
Warranty will be void if the product is used in any way in contradiction with the
instructions given in this manual or if the product has been tampered with.
The devices mentioned in this manual are to be used only according to the
instructions described in this manual. Faultless and safe operation of the
devices can be guaranteed only if the transport, storage, operation and
handling of the devices is appropriate. This also applies to the maintenance of
the products.
To prevent damage both the product and any terminal devices must always
be switched OFF before connecting or disconnecting any cables. It should
be ascertained that different devices used have the same ground potential.
Before connecting any power cables the output voltage of the power supply
should be checked.
This product is not fault-tolerant and is not designed, manufactured
or intended for use or resale as on-line control equipment or as part
of such equipment in any hazardous environment requiring fail- safe
performance, such as in the operation of nuclear facilities, aircraft navigation
or communication systems, air traffic control, direct life support machines,
or weapons systems, in which the failure of Viola Systems manufactured
hardware or software could lead directly to death, personal injury, or severe
physical or environmental damage.
Firmware Version 2.4
5
Document Version 3.0
User Manual
Viola M2M Gateway Enterprise
Edition
Revisions
Date
Document
Version
Firmware
Version
Description of Changes
10/2010
3.0
2.4
Manual released
Firmware Version 2.4
6
Document Version 3.0
User Manual
Viola M2M Gateway Enterprise
Edition
Contents
COPYRIGHT AND TRADEMARK ........................................................................................ 2
DISCLAIMER..........................................................................................................................3
DECLARATION OF CONFORMITY...................................................................................... 4
WARRANTY AND SAFETY INSTRUCTIONS.......................................................................5
REVISIONS............................................................................................................................ 6
1. INTRODUCTION............................................................................................................... 9
1.1
1.2
1.3
1.4
About Viola M2M Gateway................................................................................................... 9
M2M Gateway Features........................................................................................................9
Packaging information......................................................................................................... 10
Hardware description...........................................................................................................10
1.4.1 Front panel.............................................................................................................. 10
1.4.2 Back Panel.............................................................................................................. 10
1.4.3 Product label........................................................................................................... 11
2. NETWORK REQUIREMENTS........................................................................................ 12
2.1
2.2
2.3
2.4
2.5
2.6
Connection Principle............................................................................................................12
Minimum Network Requirements........................................................................................ 12
Routing Setup......................................................................................................................13
Other Network Services...................................................................................................... 13
Recommended Network Setup........................................................................................... 13
Using the Second Ethernet Port......................................................................................... 14
3. QUICK INSTALLATION...................................................................................................15
3.1
Setting IP Address Using Web Browser............................................................................. 15
4. NETWORK CONFIGURATION....................................................................................... 18
4.1
Configuration screens..........................................................................................................18
5. VPN CONNECTIVITY..................................................................................................... 19
5.1
5.2
5.3
5.4
VPN requirements............................................................................................................... 19
Available VPN types............................................................................................................19
Typical connection scheme.................................................................................................19
Typical connection scheme with routing............................................................................. 20
6. SSH-VPN CONFIGURATION......................................................................................... 22
6.1
6.2
6.3
6.4
6.5
6.6
6.7
Introduction to SSH-VPN.................................................................................................... 22
SSH-VPN Configuration screen.......................................................................................... 22
Creating new connection.....................................................................................................23
Checking connection........................................................................................................... 24
Finalising SSH-VPN setup.................................................................................................. 24
Editing existing connection..................................................................................................25
SSH port configuration........................................................................................................ 25
7. L2TP-VPN CONFIGURATION........................................................................................ 26
7.1
7.2
7.3
Introduction to L2TP-VPN................................................................................................... 26
L2TP-VPN configuration screen..........................................................................................26
Creating new connection.....................................................................................................27
8. OPENVPN CONFIGURATION........................................................................................ 28
Firmware Version 2.4
7
Document Version 3.0
User Manual
Viola M2M Gateway Enterprise
Edition
9. ADDITIONAL SYSTEM CONFIGURATION.................................................................... 29
9.1
9.2
9.3
9.4
9.5
9.6
9.7
Changing system password................................................................................................ 29
Firewall.................................................................................................................................29
9.2.1 Firewall configuration screen.................................................................................. 29
9.2.2 Changing firewall rules............................................................................................30
Date and time......................................................................................................................30
9.3.1 Manual configuration............................................................................................... 31
9.3.2 Automatic configuration with NTP...........................................................................31
Backup................................................................................................................................. 31
9.4.1 Backup screen........................................................................................................ 31
9.4.2 Creating backups.................................................................................................... 32
9.4.3 Restoring backups.................................................................................................. 32
9.4.4 Moving backups between units...............................................................................32
System logs......................................................................................................................... 33
Supportlog............................................................................................................................33
Factory default settings....................................................................................................... 34
10.ADVANCED SETTINGS..................................................................................................35
10.1 Command Line Shell...........................................................................................................35
10.2 Advanced UI Menus............................................................................................................35
10.2.1 System menu.......................................................................................................... 35
10.2.2 Networking menu.................................................................................................... 35
10.2.3 Others menu........................................................................................................... 35
11.TROUBLESHOOTING.....................................................................................................37
12.SPECIFICATIONS ..........................................................................................................38
13.LIMITED WARRANTY.....................................................................................................39
14.TECHNICAL SUPPORT ................................................................................................ 40
Firmware Version 2.4
8
Document Version 3.0
User Manual
Viola M2M Gateway Enterprise
Edition
1 Introduction
This document describes how to configure the Viola M2M Gateway product.
1.1
About Viola M2M Gateway
The Viola M2M Gateway is a network device that enables VPN connection
between company network and remote Arctic devices. It can also be used to
control and monitor Arctic devices in local or remote networks. Concept of the
Viola M2M Gateway is described in figure 1.
Figure 1. Viola M2M Gateway Concept
Only a computer with network connection and a HTML browser is required to
configure the M2M Gateway. Using the M2M Gateway Web user interface you
can configure and view the status of the remote Arctic devices and configure
the VPN connection between M2M Gateway and Arctic device. Arctics have
a WWW user interface which can be used to configure them using a HTML
browser.
For the rest of this documentation, the Viola M2M Gateway is referred as M2M
Gateway.
1.2
M2M Gateway Features
The M2M Gateway offers different advanced features for network usage.
In most simple usage only VPN feature is used, but M2M Gateway makes
possible to make complex network configurations.
Routing
M2M Gateway can forward packets to local Ethernet (eth0) which it is
connected to company network. Also it is possible to route packets to second
Ethernet (eth1) of M2M Gateway. More complex routing solutions can be
made but they need consultation of your local network administrator.
Firewall
The M2M Gateway has internal firewall with graphical user interface. It is
possible to connect M2M Gateway directly to the Internet and filter unwanted
connections without external firewall. The recommended method is to use a
dedicated firewall and install M2M Gateway behind it.
VPN
VPN is used to connect remote Arctic devices to local network. The
connection is initiated by Arctic and the M2M Gateway decides based
on its configuration does it allow remote Arctic start VPN connection.
Firmware Version 2.4
9
Document Version 3.0
User Manual
Viola M2M Gateway Enterprise
Edition
VPN connection can be disabled from M2M Gateway. If the connection is
terminated for some reason, it gets connected automatically by back up.
Remote Management
M2M Gateway offers full remote management. Also traditional console access
is available using SSH.
1.3
Packaging information
The product package should contain the following items:
■ Viola M2M Gateway
1.4
1.4.1
■
Power cord
■
Viola M2M Gateway Quick Start Guide
Hardware description
Front panel
Table 1: Front panel LED description
LED color
Name
Description
Green
Power
Lit when power is on
Yellow
HDD
Lit when IDE hard drive is accessed
Figure 2. M2M Gateway front panel
1.4.2
Back Panel
The M2M Gateway has power connector on the right side of the back panel.
Ethernet interfaces are located in the left side of the back panel. See Figure 4
for connector locations. Depending on the network configuration only one of
them or both are used. The first Ethernet port (eth0) is always used and it is
the left most Ethernet connector located to right from USB connectors.
Figure 3. M2M Gateway back panel
Firmware Version 2.4
10
Document Version 3.0
User Manual
Viola M2M Gateway Enterprise
Edition
1. PCI Express expansion
2. PCI Express expansion
3. Power supply, bay #2 *)
4. Power supply, bay #1 *)
5. NIC 2 (eth1) *)
6. NIC 2 (eth1) *)
7. Keyboard ps2 connector
8. Mouse
9. VGA connector
10.Serial connector
11.USB connector
12.USB connector
13.iLO 2 NIC connector
**) Mandatory connections
1.4.3
Product label
Product label is found on the bottom of the device and it contains the basic
information about the unit such as product name, serial number and Ethernet
MAC address.
Figure 4. Product label
Firmware Version 2.4
11
Document Version 3.0
User Manual
Viola M2M Gateway Enterprise
Edition
2 Network Requirements
M2M Gateway works properly when the required parameters which are
described in this chapter are configured. For your network settings, contact
your local network administrator.
Note!
Misconfiguration of the M2M Gateway can seriously hinder your network.
Make sure you verify your network configuration with local network
administrator.
2.1
Connection Principle
Company Intranet is normally connected to Internet via firewall. Figure 6
shows the M2M Gateway connected to the Demilitarized Zone (DMZ) of the
firewall. This configuration allows hosts from Company Intranet to connect via
firewall to the M2M Gateway. Other configurations are also possible.
E.g. subnets and proxy ARP can be used.
Figure 5. DMZ Connection
Note!
It is possible that the internal routing in company intranet may require
configuration in order to integrate M2M Gateway to an existing network.
2.2
Minimum Network Requirements
The M2M Gateway requires the following settings:
■ One public IP address for M2M Gateway
■
SSH port (default 22) unblocked for incoming connections to M2M Gateway
from the remote network
Although this configuration is minimal, it can be used for testing and evaluating
more complex systems. It is always recommended to consult local network
administrator when installing new servers to the public network.
Firmware Version 2.4
12
Document Version 3.0
User Manual
Viola M2M Gateway Enterprise
Edition
2.3
Routing Setup
When the M2M Gateway is installed to the existing network, some
configuration is required to add the route to the M2M Gateway and devices
behind it. For example, local firewall to router needs to be aware of routes
going via the M2M Gateway. Routing can be complex to setup in large
networks and it is recommend to consult local network administrator also
about routing.
2.4
Other Network Services
M2M Gateway network services are listed in table 1. The only mandatory
service is Secure Shell (SSH). SSH server listen to the incoming connections
from Arctic devices in port 22 (default). This port must not be blocked by
any firewall otherwise the remote Arctic devices are not able to open VPN
connections to the M2M Gateway.
Arctic uses ICMP ECHO (ping) messages to check its network connection to
the M2M Gateway. By default, the private IP address of the VPN peer is used
as the target for the network connection status check. i.e. the M2M Gateway is
not required to accept ICMP ECHO messages.
The network connection status check can also be made using some public
IP address (e.g. the public IP address of the M2M Gateway). In this case the
target host of the network connection check is required to accept ICMP ECHO
messages and that they are not blocked by any firewall.
2.5
Recommended Network Setup
The M2M Gateway is recommended to be connected to a DMZ of a firewall.
This way the M2M Gateway can have public or private IP address depending
on the firewall configuration. When placed in DMZ, the firewall protects
efficiently against any unauthorized access to the M2M Gateway. Only
incoming SSH connections are required to have access to DMZ zone.
Services other than SSH are optional.
If the M2M Gateway is located in the DMZ and it has a private IP address,
the firewall has to support port forwarding or destination network address
translation (DNAT). For firewall configuration, please refer to your firewall
documentation or to your local network administrator.
Firmware Version 2.4
13
Document Version 3.0
User Manual
Viola M2M Gateway Enterprise
Edition
Figure 6. Recommended network setup
2.6
Using the Second Ethernet Port
If a firewall or network configuration does not allow the use of a DMZ or only
few host has to have access to the M2M Gateway, the second Ethernet can
be used. The second Ethernet of the M2M Gateway can be enabled from the
Webmin configuration interface.Web user interface.. The IP address of the
second Ethernet of the M2M Gateway is then used as the default gateway for
the devices connected to the second Ethernet port.
This configuration is relatively easy to setup and it is the easiest way of setting
up the M2M Gateway.
Figure 7. Second Ethernet port in use
Firmware Version 2.4
14
Document Version 3.0
User Manual
Viola M2M Gateway Enterprise
Edition
3 Quick Installation
This chapter describes how to configure the network interfaces on M2M
Gateway.
3.1
Setting IP Address Using Web Browser
This section describes how to change factory default IP address for the first
time.
1. Connect the cross-over Ethernet cable between Viola M2M Gateway
(Ethernet 0 connector) and your configuration computer.
2. Configure your computer to use the same IP address space than
Viola M2M Gateway (laptop IP for example 10.10.10.11 with netmask
255.0.0.0). Check with ping command.
3. Connect to the Viola M2M Gateway using your web browser. The default
IP address of Viola M2M Gateway is 10.10.10.10 (netmask 255.0.0.0).
Note that you have to connect to a HTTPS port 10000 (see figure 8).
Figure 8. Browser https example
4. Your browser might mention about certificates, you can safely ignore them
at this point.
5. When you get to the login screen enter username and password and press
Login button.
Figure 9. Login Screen
Note!
Default username is viola-adm and default password is violam2m. It is
recommended that the default password is changed before the product is
connected to a public network.
Firmware Version 2.4
15
Document Version 3.0
User Manual
Viola M2M Gateway Enterprise
Edition
6. Now you should be logged in a see a main configuration menu. Icons
on the blue background are primary navigation icons and they are
always visible on the screen. Icons lower are secondary navigation icons
and clicking them allows the user to change the specific settings they
represent. See figure 10.
Figure 10. Main Configuration Menu
7. Select Network Configuration icon on the first page.
8. From the next screen select Network Interfaces icon.
9. Below the text "Interfaces Activated at Boot Time" select eth0.
Figure 11. Select eth0 interface
10. Enter your preferred configuration to the configuration fields.
Figure 12. Ethernet Configuration
Firmware Version 2.4
16
Document Version 3.0
User Manual
Viola M2M Gateway Enterprise
Edition
11. Press Save and Apply button when you are ready to activate your new
settings.
Note!
The existing web browser connection hangs up after you apply the settings, so
open a new connection to the new IP address (check your Ethernet cabling)
12. Now you should be able to connect to the M2M Gateway with your new IP
address.
Firmware Version 2.4
17
Document Version 3.0
User Manual
Viola M2M Gateway Enterprise
Edition
4 Network Configuration
This chapter describes how to configure network interfaces on M2M Gateway.
4.1
Configuration screens
Network configuration screens can be found from main menu and pressing
Network Configuration icon.
Figure 13. Network Configuration Menu
Network Interfaces
Displays running network configuration on the top on Interfaces Active
Now list. This list contains all the interfaces running locally, including VPN
interfaces. On the bottom there is a listing of physical interfaces (eth0 and
eth1). Interface confiuration can be changed by pressing underlined interface
name. See figure 14.
Figure 14. Network Interface List
Routing and Gateways
Configures default route, static routes and displays running routes. Default
route can be changed from this screen. Enter the correct interface and IP
address and press Save button.
Note!
Do not define more than one default route.
Hostname and DNS Client
Configures hostname and DNS settings.
Host Addresses
Shows hostnames assigned to IP addresses.
Firmware Version 2.4
18
Document Version 3.0
User Manual
Viola M2M Gateway Enterprise
Edition
5 VPN connectivity
5.1
VPN requirements
VPN implementation on M2M Gateway requires:
■ Open port in firewall for selected VPN server port
■
Fixed IP address for M2M Gateway accessible from public Internet or used
APN
■
Remote client to connect to M2M Gateway (most commonly Viola Arctic
product)
■
Usually third node to monitor the connections and to access remote nodes
(laptop, central management)
Note!
The M2M Gateway needs a fixed IP address.
5.2
Available VPN types
The available VPN types are L2TP, SSH and OpenVPN. A comparison is
shown in table 2.
Table 2: VPN comparison table
VPN
Type
Description
EncryptionDefault
port
SSH-VPN
Default tunnel for Viola Arctic products
yes
22 TCP
L2TP-VPN Lighter but less secure alternative to SSHVPN
no
1701 UDP
OpenVPN
yes
1194 UDP
Best option for laptops and remote
management
Selection of VPN depends on requirements, available link capacity and used
hardware.
5.3
Typical connection scheme
Typical connection scheme is described in figure 15:
Firmware Version 2.4
19
Document Version 3.0
User Manual
Viola M2M Gateway Enterprise
Edition
Figure 15. Typical VPN Connection
Network configuration in VPN tunneling will be easier if some rules are
followed:
■ Network addresses can not overlap, it is always best to use dedicated IP
address range for VPN tunnels. Remember that VPN tunnel addresses are
only visible between M2M Gateway and remote node.
5.4
■
Netmasks should be strict to prevent network overlapping.
■
Draw a network diagram with all the relevant information about the network
you are building.
Typical connection scheme with routing
This example shows a little larger system. This common setup is practical in
connecting remote networks to as a part of local network. This could be used
to connect isolated remote stations to local monitor station.
Figure 16. Typical network setup with routing
The basic rules explained in the previous example are valid also in this
example. Please take some time to browse the user interfaces of both M2M
Gateway and Arctic to become familiar with the settings
Firmware Version 2.4
20
Document Version 3.0
User Manual
Viola M2M Gateway Enterprise
Edition
Select routing mode to Tunnel the following network. IP address and netmask
is the address that is located in the opposite side of the tunnel. For example,
on Arctic set IP address to be the address that is assigned to the eth1 of M2M
Gateway and vice versa.
Firmware Version 2.4
21
Document Version 3.0
User Manual
Viola M2M Gateway Enterprise
Edition
6 SSH-VPN Configuration
This chapter describes how to use SSH-VPN module on Viola M2M Gateway.
6.1
Introduction to SSH-VPN
SSH-VPN uses SSH keys and remote nodes hostname to authenticate and
validate remote connections. It is the default VPN for Viola Arctic products.
6.2
SSH-VPN Configuration screen
Configuration screen can be divided into different regions as shown below:
Figure 17. SSH-VPN configuration screen
■
On the top are summary about peers and their last check.
■
Configured connections are listed next. If the number of peers is over 500,
list is divided to multiple pages. Below the list are connection test buttons.
■
Key management field is located below peer list. Here are listed only those
peers that do not have a key yet. If existing key for a peer needs to be
changed, it must be done by editing the peer.
■
On a bottom is SSH port configuration field.
Using action buttons on the peer list, the connections can be managed and
monitored easily. See figure 18.
Figure 18. SSH-VPN Peer Listing
Possible actions are (from left to right):
1. Connectivity test selection box
2. Peer status icon (enabled or disabled)
Firmware Version 2.4
22
Document Version 3.0
User Manual
Viola M2M Gateway Enterprise
Edition
3. Key status icon
4. Peer name
5. Interface assigned to peer
6. IP pair assigned to tunnel
7. Routing mode (none or network)
8. Remote IP if routing mode is set to network
9. Netmask if routing mode is set to network
10.Status (Active or Inactive)
11.Check status from last check (n/a, OK or Failed)
12.Enable/Disable button
13.Edit button
14.Remove button
6.3
Creating new connection
To configure a new connection:
1. Go to SSH-VPN configuration page.
2. Press Add peer button (located between peer list and key management
box). See figure 17.
3. Enter values to fields. Required fields are peer name and IP pair. See
figure 19.
Note!
Peer name must be same than hostname on Arctic.
4. Press Confirm button and return to previous screen.
Figure 19. SSH-VPN peer creation screen
5.
6.
7.
8.
After a new peer has been created, it will show up in peer list and its status
will be disabled. To enable it, the keys must be exchanged between Viola
M2M Gateway and Arctic.To do this:
Open Arctic user interface and SSH-VPN configuration screen on M2M
Gateway to separate web browser windows.
On the Arctic, navigate to Network->SSH-VPN page.
Copy key from Arctic to M2M (see figure 6.4).
Select correct peer from list on M2M, paste Arctic key below and press
Enter key button.
Firmware Version 2.4
23
Document Version 3.0
User Manual
Viola M2M Gateway Enterprise
Edition
9. Copy M2M key from Server public key field.
10. Copy key from M2M to Arctic (see figure 20).
Figure 20. SSH-VPN key exchange
After the keys are exchanged, the peer can be enabled on the M2M
Gateway. Just press Enable button on the peer list. Please note that the
Arctic needs to be restarted before the connection comes up. After the
Arctic restarts and connects, the peer status can be checked on the M2M
by selecting a checkbox on the peer list and pressing Start check button.
For more information about configuring Arctic, refer to Arctic User Manual.
6.4
Checking connection
The Connection status displayed on SSH-VPN page does not update
automatically, it has to be updated manually and the current status needs to
be checked.
To check the current status of a peer:
1. Checked peers are selected by using checkboxes next to peer names.
Peers can be selected individually or they all can be selected using Check
all button.
2. Connection check is started by pressing Start check button. After the
check is done, the results are displayed above the peer list (Checked n
Peers -> n OK | n Failed date).
3. Results for individual peers can be seen on Check column on peer list.
Note!
Peer interface tells which interface is assigned to a peer. It is a local interface
on M2M Gateway and it can not be used to determine the current connection
status.
6.5
Finalising SSH-VPN setup
After all the peers have been configured, do the following:
Firmware Version 2.4
24
Document Version 3.0
User Manual
Viola M2M Gateway Enterprise
Edition
1. Keys need to be locked. This can be done by pressing Lock keys button.
This lock the keys and prevent their accidental deletion.
2. Create a backup. Instructions for this can be found in section 9.4.
6.6
Editing existing connection
Peers can be edited by selecting Edit button from the peer list. All the
parameters except peer name can be changed from this edit screen. Note that
the keys must be unlocked if keys need to be changed.
Figure 21. SSH-VPN Peer Edit screen
6.7
SSH port configuration
Default port for SSH is 22. It is recommended to change this to something less
common to increase system security. Changing SSH port on M2M Gateway is
done by entering new port to a configuration field located in the bottom of the
SSH-VPN configuration screen and pressing Change port button.
Note!
Changing the SSH port on M2M Gateway requires configuration changes to
SSH-VPN connected Arctics as well. Also remote SSH access has to use new
port.
Firmware Version 2.4
25
Document Version 3.0
User Manual
Viola M2M Gateway Enterprise
Edition
7 L2TP-VPN Configuration
7.1
Introduction to L2TP-VPN
L2TP-VPN uses username and password to authenticate and validate remote
connections. It is available on Viola Arctic products.
7.2
L2TP-VPN configuration screen
Configuration screen is shown in figure 22.
Figure 22. L2TP-VPN configuration screen
Using action buttons on the peer list, the connections can be managed and
monitored easily. See figure 23. Possible actions are (from left to right):
Figure 23. L2TP-VPN peer listing
1. Connectivity test selection box
2. Peer status icon (enabled or disabled)
3. Peer name
4. Interface, available if peer is up
5. IP pair assigned to tunnel
6. Routing mode (none or network)
7. Remote IP if routing mode is set to network
8. Netmask if routing mode is set to network
9. L2TP username
10.L2TP password
Firmware Version 2.4
26
Document Version 3.0
User Manual
Viola M2M Gateway Enterprise
Edition
11.Status (Active or Inactive)
12.Status (Active or Inactive)
13.Enable/Disable button
14.Edit button
15.Remove button
7.3
Creating new connection
To create new connection:
1. From the L2TP-VPN configuration screen, select Add peer button.
2. Fill in the settings for the tunnel. For simple point-to-point tunnel only peer
name and IP pair are needed. Peer name is the hostname of the Viola
Arctic that forms the other end of the tunnel. IP pair is an IP pair that does
not con ict with any other address used. See figure 24.
3. Routing mode selects if the network on the other side of the tunnel is
routed thorough the tunnel. Remote network IP and network mask define
the remote network routed thorough the tunnel.
4. Username and password must be the same than on the Viola Arctic.
5. When you are done, press Confirm button to save the settings. The tunnel
should now be added to the tunnel list.
6. Enable the tunnel by clicking Enable text.
7. The connection can be tested by selecting the checkbox next to the peer
name and pressing the Start check button. See figure 22.
Figure 24. L2TP-VPN new peer
Firmware Version 2.4
27
Document Version 3.0
User Manual
Viola M2M Gateway Enterprise
Edition
8 OpenVPN Configuration
Please refer to Viola Systems' OpenVPN application note.
Firmware Version 2.4
28
Document Version 3.0
User Manual
Viola M2M Gateway Enterprise
Edition
9 Additional System Configuration
9.1
Changing system password
It is always recommended that the default password will be changed during
the installation.
To change the password for user interface login:
1.
2.
3.
4.
From the top icon row on the blue background, select System icon.
From the System page select Change Passwords icon.
From the user list select user viola-adm.
Enter new system password and press Change to commit the new
password. See figure 9.1.
Figure 25. Password change screen
The only users who can log in a system are viola-adm and root.
■ User viola-adm is the only one who can log in to a web user interface.
■
9.2
User root can log in only locally, remote root access is restricted.
Firewall
Firewall in an important part of the M2M Gateway product. Firewall should
always be turned on and configured as strict as possible to keep out any
unauthorized traffic.
Note!
It is not recommended to use M2M Gateway without firewall turned on if
connected to any public network.
For more detailed explanation about firewall configuration, refer to application
note Configuring Viola M2M Gateway firewall.
9.2.1
Firewall configuration screen
To reach the firewall configuration screen:
Firmware Version 2.4
29
Document Version 3.0
User Manual
Viola M2M Gateway Enterprise
Edition
1. Login to M2M Gateway and enter the web user interface main menu.
2. From the top icon row on the blue background, select Networking icon.
3. From the Networking page select Linux Firewall icon.
The firewall configuration is divided into sections: Firewall has three chains
(input, forward and output) which are listed separately.
Figure 26. Firewall Chain Listing
On the bottom there are action buttons which can be used to apply or
revert the changes.
Figure 27. Firewall Action buttons
9.2.2
Changing firewall rules
Default firewall rules allow only Arctic traffic. Rules can be changed in firewall
configuration screen:
1. Existing firewall rules can be modified by clicking the Action text (colored
Drop/Accept).
2. Adding new rules can be done by clicking the blue arrows on the left side
of the rules.
3. Modified rules can be applied or old rules can be reset using the buttons at
the end of the page.
The modified rules have to be applied by pressing Apply Configuration
button before they are in use.
9.3
Date and time
It is important to have date and time set up correctly if certificate-based VPNs
are in use.
To configure date and time:
Firmware Version 2.4
30
Document Version 3.0
User Manual
Viola M2M Gateway Enterprise
Edition
1. Login to M2M Gateway and enter the web user interface main menu.
2. From the top icon row on the blue background, select System icon.
3. From the System page select System Time icon.
There are two methods to configure system time, manual and automatic
with NTP protocol.
9.3.1
Manual configuration
To configure system time manually:
Enter time and date to system time and press Apply, then Set system time to
hardware time.
Figure 28. Manual System Time Configuration
9.3.2
Automatic configuration with NTP
To configure system time automatically with NTP protocol:
Enter valid ntp server address to timeserver field and press Sync and Apply
button on the bottom of the screen.
Figure 29. Automatic System Time Configuration
9.4
Backup
The Backup module saves user made settings of the Viola M2M Gateway. It
backups configuration files and keys of VPN tunnels and firewall settings.
9.4.1
Backup screen
Backup screen can be found from the Web user interface main screen. Press
Viola M2M Backup icon to open backup screen.
Firmware Version 2.4
31
Document Version 3.0
User Manual
Viola M2M Gateway Enterprise
Edition
Figure 30. Backup Screen
9.4.2
Creating backups
From the first page select Viola M2M Backup icon and press create backup
button to create a backup file. When the backup is created succesfully, a
notification text appears.
Figure 31. Backup created message
9.4.3
Restoring backups
Press open button to select the backup you want to restore and press restore
backup button to restore the backup.
Figure 32. Backup Restore Selection
9.4.4
Moving backups between units
To restore a backup on a different machine, the backup file has to be copied
into the /opt/viola/m2mBackups/ directory on the second machine. In addition,
the MD5 file also has to be copied onto the new machine. This file has
to copied into the /opt/viola/MD5/ directory. After restoring the backup as
described above, the IP address has to be changed to the IP address of
Firmware Version 2.4
32
Document Version 3.0
User Manual
Viola M2M Gateway Enterprise
Edition
the machine the backup was created on. Afterwards the secondary unit can
replace the primary unit seamlessly without any further configuration.
9.5
System logs
To reach the system logs:
1. Login to M2M Gateway and enter the web user interface main menu.
2. From the top icon row on the blue background, select System icon.
3. From the System page select System Logs icon.
Logs can be searched with defined text or just show last n entries.
Figure 33. System Log View
OpenVPN has its own logs which can be found from OpenVPN
configuration.
9.6
Supportlog
Supportlog is a module that helps Viola Systems' technical support team in
troubleshooting situations. It generates a collection of data from system that
helps identifying the problem. It can generate a log package that can be emailed to Viola Systems' technical support. It is possible to collect all the data
or smaller selection.
Firmware Version 2.4
33
Document Version 3.0
User Manual
Viola M2M Gateway Enterprise
Edition
Figure 34. Supportlog Screen
9.7
Factory default settings
Factory default settings can be restored by selecting factoryBackup from
backup restore selection screen. See section 9.4.
Firmware Version 2.4
34
Document Version 3.0
User Manual
Viola M2M Gateway Enterprise
Edition
10 Advanced settings
These configuration options are targeted for advanced users only. Under
normal operation, these should not be changed.
10.1
Command Line Shell
The Connection status displayed on SSH-VPN page does not update
automatically, it has to be updated manually and the current status needs to
be checked.
10.2
10.2.1
Advanced UI Menus
System menu
■
Bootup and Shutdown: change process and system level services on
startup
■
Bootup and Shutdown: change process and system level services on
startup
Figure 35. System Menu
10.2.2
■
SysV Init Configuration: innitab configuration (runlevels) for system startup
■
System and Server Status: N/A, reserved for future use
Networking menu
■
SSH Server: Advanced SSH server configurations. Under normal
operation, only SSH port is changed from SSH-VPN user interface.
■
SSH/Telnet Login: debugging console, not recommended for normal
usage 28
Figure 36. Networking menu
10.2.3
Others menu
■
Command Shell: debugging console for system level commands
■
Webmin Actions Log: Web user interface access log data
Firmware Version 2.4
35
Document Version 3.0
User Manual
Viola M2M Gateway Enterprise
Edition
Figure 37. Others Menu
Firmware Version 2.4
36
Document Version 3.0
User Manual
Viola M2M Gateway Enterprise
Edition
11 Troubleshooting
This Chapter provides a list of the common problems encountered while
installing, configuring or administering the Arctic. If you are unable to resolve
your problem, refer to the Warranty and Technical Support Sections at the end
of this User’s Guide for information about contacting Viola Systems Technical
Support representatives.
Q: When setting up routing mode \tunnel the following network", routing to
M2M Gateway eth1 does not work?
A: Check that IP forwarding has been enabled and internal firewall does not
block packets.
Q: From Arctic Ethernet connection to M2M Gateway Ethernet is not working?
A: Check that IP forwarding has been enabled on Arctic.
Q: If only one public IP is available, can the M2M Gateway be used?
A: Yes, if firewall connected to public IP can forward incoming SSH
connections to the M2M Gateway.
Firmware Version 2.4
37
Document Version 3.0
User Manual
Viola M2M Gateway Enterprise
Edition
12 Specifications
Table 3: Technical specifications
Processor
Intel Celeron 2.5GHz
Memory
512Mb
Hard Drive
80Gb
Input voltage
100-240VAC (5A max)
Casing
Metal 19in rack mountable
Operating temperature
0 to 45 C
Storage temperature
-20 to +45 C
Humidity
10 to 90 % RH non-cond.
Network connection
2x Ethernet RJ-45 (10/100/1000 Base-T)
Approvals
CE, FCC
Firmware Version 2.4
38
Document Version 3.0
User Manual
Viola M2M Gateway Enterprise
Edition
13 Limited Warranty
Coverage
Viola Systems warrants this hardware product to be free from defects in
materials and workmanship for the warranty period. This non-transferable,
limited warranty is only to you, the first end-user purchaser. The warranty
begins on the date of purchase and lasts for the period specified below:
Viola M2M Gateway : one (1) year
Excluded Products and Problems
This warranty does not apply to: (a) Viola Systems software products; (b)
expendable components such as cables and connectors; or (c) third party
products, hardware or software, supplied with the warranted product. Viola
Systems makes no warranty of any kind on such products which, if included,
are provided "AS IS." Excluded is damage caused by accident, misuse, abuse,
unusually heavy use, or external environmental causes.
Remedies
Your sole and exclusive remedy for a covered defect is repair or replacement
of the defective product, at Viola Systems’ sole option and expense, and
Viola Systems may use new or refurbished parts or products to do so. If Viola
Systems is unable to repair or replace a defective product, your alternate
exclusive remedy shall be a refund of the original purchase price.
The above is Viola Systems’ entire obligation to you under this warranty.
IN NO EVENT SHALL VIOLA SYSTEMS BE LIABLE FOR INDIRECT,
INCIDENTAL, CONSEQUENTIAL OR SPECIAL DAMAGES OR LOSSES,
INCLUDING LOSS OF DATA, USE, OR PROFITS EVEN IF VIOLA SYSTEMS
HAS BEEN ADVISED OF THE POSSIBILITY OF SUCH DAMAGES. In no
event shall Viola Systems’ liability exceed the original purchase price of the
device server. Some states or countries do not allow the exclusion or limitation
of incidental or consequential damages, so the above limitation or exclusion
may not apply to you.
Obtaining Warranty Service
You must notify Viola Systems within the warranty period to receive warranty
service. During the warranty period, Viola Systems will repair or replace, at
its option, any defective products or parts at no additional charge, provided
that the product is returned, shipping prepaid, to Viola Systems. All replaced
parts and products become the property of Viola Systems. Before returning
any product for repair, customers are required to contact the Viola Systems.
Firmware Version 2.4
39
Document Version 3.0
User Manual
Viola M2M Gateway Enterprise
Edition
14 Technical Support
Contacting Technical Support
Phone: +358 20 1226 226
Fax: +358 20 1226 220
E-mail: [email protected]
Internet: http://www.violasystems.com
Recording Arctic Information
Before contacting our Technical Support staff, please record (if possible) the
following information about your Arctic product:
Product name:
___________________________________________________
Serial no:
_______________________________________________________
Note the status of your Arctic in the space below before contacting technical
support. Include information about error messages, diagnostic test results, and
problems with specific applications.
___________________________________________________________________
___________________________________________________________________
___________________________________________________________________
Firmware Version 2.4
40
Document Version 3.0