1
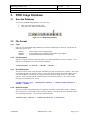
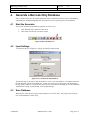
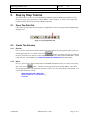
Metalcraft, Inc. RFID Image Database Tool User's Guide Version 4.0 RFID Image Database Tool User's Guide Document ID: DTUG Version: 4.0 Date: April 25, 2002 Revision History Date February 22, 2002 Version 1.0 Description Created document Author Timothy A. Herrick March 29, 2002 2.0 Added to Preface section 1 Timothy A. Herrick March 30, 2002 3.0 Added Step by Step Tutorial Timothy A. Herrick April 24, 2002 4.0 Added Section for Barcode only generator Timothy A. Herrick Confidential Metalcraft, Inc., 2002 Page 2 of 13 RFID Image Database Tool User's Guide Document ID: DTUG Version: 4.0 Date: April 25, 2002 Table of Contents Preface 1. 2. 3. 4. What is the RFID Image Database Tool A Short History Documentation Resources Terminology and Notation 5 5 5 5 5 1. Image Schema 1.1 Overview 1.2 Tags 1.2.1 Barcode 1.2.2 Block 1.2.3 Field 1.2.4 String 1.2.5 Integer 1.2.6 Double 1.3 Save A Schema 1.4 Load A Schema 1.5 Create A Schema 6 6 6 6 6 6 6 6 7 7 7 7 2. Input Data 2.1 File Format 2.2 Open the Input Data File 8 8 8 3. RFID Image Database 3.1 Save the Database 3.2 File Format 3.2.1 Types 3.2.2 File Description 3.2.3 Record Descriptor 3.2.4 Buffer Descriptor 9 9 9 9 9 9 9 4. Generate a Barcode Only Database 4.1 Start the Generator 4.2 Input Settings 4.3 Save Database 10 10 10 10 5. Step by Step Tutorial 5.1 Open The Data File 5.2 Create The Schema 5.2.1 Barcode 5.2.2 Block 5.2.3 Field 5.2.4 Done with the schema 5.3 Save Database 11 11 11 11 11 12 12 13 Confidential Metalcraft, Inc., 2002 Page 3 of 13 RFID Image Database Tool User's Guide Document ID: DTUG Version: 4.0 Date: April 25, 2002 Table of Figures Figure 1-1 Save Schema Icon Figure 1-2 Open Schema Icon Figure 1-3 Insert Tag Toolbar Figure 2-1 Open Input Data File Figure 3-1 Save RFID Image Database Figure 4-1 Barcode Only Icon Figure 4-2 Create Barcode Only Database Figure 5-1 Open Input Data File Figure 5-2 Save Database Confidential 7 7 7 8 9 10 10 11 13 Metalcraft, Inc., 2002 Page 4 of 13 RFID Image Database Tool User's Guide Document ID: DTUG Version: 4.0 Date: April 25, 2002 Preface 1. What is the RFID Image Database Tool The RFID Image Database Tool is used to create databases of RFID images for use with Metalcraft’s RFID Label Read/Write System. Basically, you’ll start with a tab-delimited table of information. You’ll create a schema to describe how the information is put together to form an RFID image. The tool will then apply the schema to each record in the table and create the RFID Image Database to be used with the Software Processing and Control System (SPCS). 2. A Short History The Software Processing and Control Subsystem (SPCS) and the RFID Image Database Tool were originally developed by Iowa State’s May02-01 senior design team. These combined with Metalcraft’s transport subsystem form Metalcraft’s RFID Label Read/Write and Transport System. 3. Documentation Resources 1. 2. 3. 4. RFID Image Database Tool User’s Guide, DTUG, V4.0, 2002 RFID Label Read/Write System Developer’s Guide, DEVG, V1.0, 2002 Software Processing and Control Subsystem User’s Manual, SPCSUM, V1.0, 2002 Terminology and Notation RFID Image A record containing the binary data to be programmed into RFID tags, a description of where in the tag to put it and the associated barcode (if one exists). RFID Image Database A collection of RFID Images Schema Description of RFID Image structure Software Processing and Control System (SPCS) The software system that controls the devices and web handler that actually writes the RFID labels. Confidential Metalcraft, Inc., 2002 Page 5 of 13 RFID Image Database Tool User's Guide Document ID: DTUG Version: 4.0 Date: April 25, 2002 1. Image Schema 1.1 Overview The image schema is used to describe the format of the images to be generated. The schema is described using a very simple markup language similar to XML and HTML. 1.2 Tags 1.2.1 Barcode USAGE: <BARCODE>barcode</BARCODE> The barcode tag associates barcode data with the image. The identifier between the tags is the name of the column in the data file that contains the barcode data. Note this information will not be written to the RFID label. It is only used to associate images with barcodes so the Software Processing and Control System can find the right image for each label. 1.2.2 Block USAGE: <BLOCK Address="0x00000000"> </BLOCK> Everything appearing between the block tags will be written to the RFID transponder starting at the given address. 1.2.3 Field USAGE: <FIELD Type="TYPE">field</FIELD> The field tag inserts data from a field in the data file. The type attribute signifies how data is stored in the RFID transponder. TYPE can be: STRING INTEGER DOUBLE – – – Stored as a null terminated ASCII character string Stored as a 32-bit little endian integer Stored as a 64-bit double precision floating-point number (Little endian) The identifier between the tags is the name of the column in the data file that contains the data. 1.2.4 String USAGE: <STRING>String data</STRING> The string tag inserts static text into the image. The text between the tags is stored as a null terminated ASCII character string in the RFID transponder. 1.2.5 Integer USAGE: <INTEGER>1</INTEGER> The integer tag inserts a static integer into the image. The number between the tags is stored as a 32-bit little endian integer in the RFID transponder. Confidential Metalcraft, Inc., 2002 Page 6 of 13 RFID Image Database Tool User's Guide Document ID: DTUG 1.2.6 Version: 4.0 Date: April 25, 2002 Double USAGE: <DOUBLE>1.100000</DOUBLE> The double tag inserts a static floating point number into the image. The number between the tags is stored as a 64-bit double precision floating-point number in the RFID transponder. 1.3 Save A Schema You can save a schema by one of four ways: • • • • Click “Save Schema” under the File menu Click “Save As” under the File menu Pressing Ctrl+S Click on the save schema icon on the toolbar Figure 1-1 Save Schema Icon 1.4 Load A Schema You can load a previously saved schema three ways: • • • Click “Open Schema” under the File menu Pressing Ctrl+O Click on the open schema icon on the toolbar Figure 1-2 Open Schema Icon 1.5 Create A Schema To create the schema you can use the buttons on the Insert Tag Toolbar or type the schema directly into the edit window. Figure 1-3 Insert Tag Toolbar Confidential Metalcraft, Inc., 2002 Page 7 of 13 RFID Image Database Tool User's Guide Document ID: DTUG 2. Input Data 2.1 File Format Version: 4.0 Date: April 25, 2002 The input data file is a tabbed delimited text file, a format easily exported from Microsoft Excel and other applications. It is important though, that the first record contains the names of the columns. 2.2 Open the Input Data File You can load the input data file one of two ways: • • Click “Open Data” under the File menu Click on the open data icon on the toolbar Figure 2-1 Open Input Data File Once a data file has been loaded the Open Input Data File icon will turn green. Only one data file can be used at a time. To load a new data file, just click on the icon or menu item again. You do not have to close and reopen the program. Confidential Metalcraft, Inc., 2002 Page 8 of 13 RFID Image Database Tool User's Guide Document ID: DTUG Version: 4.0 Date: April 25, 2002 3. RFID Image Database 3.1 Save the Database You can save the RFID Image Database one of two ways: • • Click “Save Data” under the File menu Click on the save data icon on the toolbar Figure 3-1 Save RFID Image Database 3.2 File Format 3.2.1 Types Items are stored in the RFID Image Database based on the standard types in the IA32. Specifically the following types are used. UINT32 DOUBLE STRING 3.2.2 – – – A little endian, 32-bit, unsigned integer A 64-bit double precision floating-point number (Little endian) A null terminated ASCII character string File Description The first four bytes in the file contain the number of records in the database stored as a UINT32. Next follows a record descriptor for each record in the database. <UINT32>Number of Records | RECORD | RECORD | … 3.2.3 Record Descriptor The first four bytes of the record descriptor contain the size of the record stored as a UINT32. The record size includes the four bytes that store the size. Next comes the barcode data associated with the record stored as a STRING. If no barcode is associated with the record, the string consists of a single null character. Next comes the number of buffers in the record stored as a UINT32. Next comes a buffer descriptor for each buffer in the record. <UINT32>record size | <STRING>barcodeData | <UINT32>numberOfBuffers | BUFFER | BUFFER | … 3.2.4 Buffer Descriptor The first four bytes of the buffer descriptor contain the start address for the buffer stored as a UINT32. Next comes the size of the buffer in bytes stored as a UINT32. Note this is the size of the buffer not the size of the buffer descriptor. Last comes the actual buffer data. <UINT32>start address | <UINT32>bufferSize | bufferdata Confidential Metalcraft, Inc., 2002 Page 9 of 13 RFID Image Database Tool User's Guide Document ID: DTUG 4. Version: 4.0 Date: April 25, 2002 Generate a Barcode Only Database Since a majority of the jobs will require that the barcode be read from the label be written to the RFID tag and nothing else, the RFID Image Database Tool allows the user to quickly generate such a database. 4.1 Start the Generator You can start the barcode only database generator one of two ways: • • Click “Barcode Only” under the Create menu Click on the barcode only icon on the toolbar Figure 4-1 Barcode Only Icon 4.2 Input Settings A window like the one in Figure 4-2 will pop up asking for input settings. Figure 4-2 Create Barcode Only Database The barcode range is the range of barcode numbers to create. The “Start Address” is the address where the barcode should be written into the RFID tag. Usually, the customer will want to start at the beginning of the tag, which is address 0. Lastly, the user can select to store the data on the RFID tag as a null terminated ASCII character string or a little endian, 32-bit, unsigned integer. 4.3 Save Database When the user clicks OK, the program will prompt the user for a file name. The program will notify the user when the database is done saving. Confidential Metalcraft, Inc., 2002 Page 10 of 13 RFID Image Database Tool User's Guide Document ID: DTUG 5. Version: 4.0 Date: April 25, 2002 Step by Step Tutorial This tutorial shows you how to create a RFID Image Database using the RFID Image Database Tool by taking you step by step in generating a sample database. In this example, we want to create images that program a label’s barcode into the label’s RFID Transponder. 5.1 Open The Data File Click on the open input data file icon and open “SampleData.txt” that was packaged with the RFID Image Database Tool. Figure 5-1 Open Input Data File 5.2 Create The Schema 5.2.1 Barcode First we want to associate the barcode with the image so the Software Processing and Control System can find the right image later. To do this, click on the button. A window will come up containing the list of columns in your data file. In this sample, there is only one column named “BARCODE”. Select it and click OK. You should now see <BARCODE>BARCODE</BARCODE>in the edit window. 5.2.2 Block Next, we want to insert a block and state where in the RFID transponder memory we want to start writing data. Click on the button. A window will pop up asking for the starting address. We want to start writing information at the beginning of memory so enter “0” (zero) in the edit box and click OK. The edit window should now contain: <BARCODE>BARCODE</BARCODE> <BLOCK Address="0x00000000"> </BLOCK> Confidential Metalcraft, Inc., 2002 Page 11 of 13 RFID Image Database Tool User's Guide Document ID: DTUG 5.2.3 Version: 4.0 Date: April 25, 2002 Field Now we want to add the data that will actually get written to the label. First click after <BLOCK Address="0x00000000"> in the edit window to place the insertion cursor there. The insertion cursor button. A window comes up which contains two list is a vertical blinking bar. Now click the boxes. The list box on the left contains a list of data types. We want to write our data as an ASCII string so select “STRING”. The right list box contains a list of list of columns in your data file. In this sample, there is only one column named “BARCODE”, select it. The window should look like this: Click OK to continue. The edit window should now contain the following: <BARCODE>BARCODE</BARCODE> <BLOCK Address="0x00000000"> <FIELD Type="STRING">BARCODE</FIELD> </BLOCK> 5.2.4 Done with the schema The schema is now done. You could save it if you want to but there really is no need here. Also, you could have typed: <BARCODE>BARCODE</BARCODE> <BLOCK Address="0x00000000"> <FIELD Type="STRING">BARCODE</FIELD> </BLOCK> directly into the edit window. This tutorial used the button method just to show you how it worked. Confidential Metalcraft, Inc., 2002 Page 12 of 13 RFID Image Database Tool User's Guide Document ID: DTUG 5.3 Version: 4.0 Date: April 25, 2002 Save Database Finally, in order to create the RFID Image Database, click on the save database icon. Figure 5-2 Save Database When the save dialog box comes up, give the file a name and click save. When the database is done saving you should see: Click OK and that’s it, you’re done! Have fun! Confidential Metalcraft, Inc., 2002 Page 13 of 13