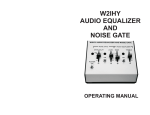
1
Modifications for the KENWOOD
created 28-03-2002 from www.mods.dk
(AT-50)
AT-50 Blows ACCY fuse in TS-50S English language
(AT-50)
AT-50 Blows ACCY fuse in TS-50S (Part 2) English language
(AT-50)
AT-50 Mechanical stability English language
(DG-1)
Service Note on DG-1 English language
(DG-1)
DG-1 Standard service procedure English language
(DG-5)
Repairing DG-5 English language
(DG-5)
Reparing DG-5 English language
(DG-5)
Theory of Operation English language
(DG-5)
DG-5 Standard service procedure English language
(GENERAL) KENWOOD TH-series HT TNC Interconnection English language
(GENERAL) Service manual rx section level diagrams English language
(GENERAL) How to build COMPUTER INTERFACE English language
(GENERAL) How to remove Display-Scratches English language
(GENERAL) Kenwood 4 pin microphone connections to TNC English language
(GENERAL) Kenwood 6 pin microphone connections to TNC English language
(GENERAL) Kenwood 8 pin microphone connections to TNC English language
(GENERAL) Kenwwod mic modification English language
(GENERAL) Optional narrow ceramic filters English language
(GENERAL) VFO-230 Operation on 240V AC English language
(GENERAL) Service manual TX level diagrams English language
(GENERAL) Power module heat sink compound English language
(GENERAL) The MIC pin configurations English language
(MC-44)
MC-44DM Microphone audio improvements English language
(MC-44)
MC44/MC44DM Intermittent modulation English language
(MC-45)
Making the MC-45 Microphone work on the TR-7400A English language
(MC-46)
MC-46 DTMF Mic. With older equipment English language
(MC-48)
MC-48B Mic element change English language
(MC-50)
VOX-3 Sensitivity and Delay English language
(MC-55)
MC-55 Change in mic element (T91-0328-08) English language
(MC-60)
Modifikation MC-60 German language
(MC-60)
Kenwood MC-60 Microphone Mod (Connect to ICOM IC-746) English language
(MC-60)
Remove RFI in the MC60 English language
(MC-85)
Mod for MC-85 MIC and RC-1A phone English language
(MC-85)
Connect Kenwood MC-85 to Yaesu FT-100 English language
(PS-430)
No protection on Powersupply English language
(PS-430)
PS-430 Voltage increase with TH-205/215 English language
(PS-50)
PS-50 Improved Voltage Surge Protection English language
(QR-666)
QR-666 VFO stability English language
(R-1000)
Kenwood R-1000 muting English language
(R-1000)
R-1000 AGC, AM bandwidth changes English language
(R-1000)
R-1000 RF attenuator 10 dB step option English language
(R-5000)
Kenwood R5000 Modification Notes English language
(R-5000)
R-5000 No Freq. Change thru Computer Interface English language
(R-5000)
Increase the MW sensitivity for R-5000 English language
(R-599)
Service Notes on R-599A/D English language
(R-599)
Removing CB Band from R-599A/D English language
(RC-10)
RC-10 Hang up time/timeout timer settings English language
(RC-10)
RC-10 Alternator noise English language
Da rogerk alle 17.55 , 03/04/2007
(RC-1A)
Mod for MC-85 MIC and RC-1A phone English language
(RM-76)
RM-76 Battery Back Up Power English language
(RM-76)
RM-76 Microprocessor failure English language
(SM-220)
SM-220 Shield Installation English language
(SM-220)
Feedback Between Pan display and IF Out English language
(SM-230)
SM-230 Bandscope attenuator English language
(SM-230)
SM-230 RTTY cross pattern attenuation English language
(SMC-34)
SMC-34 Distorted/muffled transmit audio English language
(T-599)
Service Notes on T-599A/D English language
(T-599)
Reducing 120Hz hum in T-599D English language
(TF-541)
TF541E & 9k6 so gehts German language
(TH-205)
TH-205/215 Protection Fuse Replacement English language
(TH-205)
144 - 165 TX/RX mod for the TH-205 English language
(TH-205)
Expanding TX and RX for Kenwwod TH-205 English language
(TH-205)
TH-205/215/415 Volume/squelch control improvement English language
(TH-205)
TH-205 Signal-To-Noise ratio improvement English language
(TH-205)
TH-205/215/315/415 PTT knob installation procedure English language
(TH-215)
TH-205/215 Protection Fuse Replacement English language
(TH-215)
TH-215A to TNC English language
(TH-215)
KENWOOD TH-215A out-of-band mod English language
(TH-215)
A TH215 no audio fix English language
(TH-215)
TH-215 jumper modification English language
(TH-215)
TH-205/215/415 Volume/squelch control improvement English language
(TH-215)
TH-215/415 TX signal-To-Noise ratio improvements English language
(TH-215)
TH-205/215/315/415 PTT knob installation procedure English language
(TH-215)
TH-215A handheld transceiver 12.5KHz modification English language
(TH-22)
TH-22E and CLONE English language
(TH-22)
TH-22AT Beyond Mars Modification English language
(TH-22)
Expanding TH-22 to 136-174 MHz English language
(TH-22)
KENWOOD TH-22E xpansion...WARNING English language
(TH-22)
TH-22/42A/E Memory loss improvement English language
(TH-225)
Kenwood TH225A modifications English language
(TH-25)
TH-25AT MARS/CAP modification English language
(TH-25)
KENWOOD TH-25/45 out of banad modifications English language
(TH-25)
TH-25/45AT Automatic Power OFF Function English language
(TH-25)
EXT TX ON THE: TH-26AT/TH-45AT/TH-75A HT's English language
(TH-25)
TH-25/45 W/TSU-6 Tone alert improvements English language
(TH-26)
EXT TX ON THE: TH-26AT/TH-45AT/TH-75A HT's English language
(TH-26)
Expanding frequency range for the TH-26E English language
(TH-26)
Expanding frequency range for the TH-26E English language
(TH-26)
TH-26A Internal bridges English language
(TH-2600) Mod to open TX on the Kenwood TH-2600-a English language
(TH-27)
Keyboard Mods to access AM detector and change band English language
(TH-27)
TH-27A/E Low TX power English language
(TH-28)
Secret function manual of the KENWOOD TH-28e/48e porto English language
(TH-28)
TH28 Send memory to other radio English language
(TH-28)
Accus in BT8 (TH28/48/78) English language
(TH-28)
TH-28/48/78 Difficult battery insertion English language
(TH-28)
TH-28/48A/E CTCSS tone error English language
(TH-315)
TH-205/215/315/415 PTT knob installation procedure English language
(TH-405)
Umbau TH-405e auf 9k6 German language
(TH-415)
TH-205/215/415 Volume/squelch control improvement English language
(TH-415)
TH-215/415 TX signal-To-Noise ratio improvements English language
(TH-415)
TH-205/215/315/415 PTT knob installation procedure English language
(TH-42)
TH-22/42A/E Memory loss improvement English language
(TH-45)
KENWOOD TH-25/45 out of band modifications English language
(TH-45)
TH-45E auf 9k6 German language
(TH-45)
TH-25/45AT Automatic Power OFF Function English language
(TH-45)
TH-25/45 W/TSU-6 Tone alert improvements English language
(TH-46)
Extended RX/TX for TH-46 English language
(TH-47)
TH-47A Mods for ext frq English language
(TH-48)
Secret function manual of the KENWOOD TH-28e/48e porto English language
(TH-48)
Extended UHF TX. Also VHF/UHF/Cellular RX Modification English language
(TH-48)
TH-28/48/78 Difficult battery insertion English language
(TH-48)
TH-28/48A/E CTCSS tone error English language
(TH-48)
TH-48A Microprocessor change English language
(TH-75)
TX across entire tuning range TH-75A English language
(TH-75)
9600 baud with the TH 75 English language
(TH-75)
TH-75A MARS/CAP modification English language
(TH-75)
TH-75E auf 9k6 German language
(TH-75)
TH-75A No TX on VHF using a vehicle battery supply English language
(TH-75)
TH-75A Intermittent memory loss English language
(TH-77)
Umbauanleitung fuer das TH77e von Kenwood fuer 9600 Baud German language
(TH-77)
Expanded RX/TX for TH-77A English language
(TH-77)
receive AM aircraft English language
(TH-77)
Crossband repeat English language
(TH-77)
TH-77A PLL Unlock Override Mod English language
(TH-77)
Pushing the TH-77A UHF receiver higher in frequency English language
(TH-77)
TH-77A Memory loss with low battery pack English language
(TH-78)
Basics of modifying the Kenwood TH-78a English language
(TH-78)
Potential case design flaw English language
(TH-78)
C-17 design flaw English language
(TH-78)
Mutually exclusive mods English language
(TH-78)
The beyond MARS mod English language
(TH-78)
The CAP/MARS mod English language
(TH-78)
The extended receive mod English language
(TH-78)
The cross-band repeat mod English language
(TH-78)
Toggle SHIFT button function English language
(TH-78)
Toggle CALL button function English language
(TH-78)
Observations on post-mod performance English language
(TH-78)
Cloning English language
(TH-78)
Cellular Telephones English language
(TH-78)
Battery life on the TH-78A English language
(TH-78)
Game Mode English language
(TH-78)
TH-78 - antenna hints English language
(TH-78)
9600 Baud FSK-Modifikation für das Kenwood TH-78E German language
(TH-78)
TH78A, USA model don't have 1750 Hz English language
(TH-78)
Crossband repeat, extended RX/TX English language
(TH-78)
TH-78A Clone failure w/ME-1 installed English language
(TH-78)
TH-78A Call channel tone frequency error (Revised) English language
(TH-78)
TH-78A/E Left encoder inoperative English language
(TH-78)
TH-28/48/78 Difficult battery insertion English language
(TH-78)
TH-78A Microprocessor change English language
(TH-79)
TH-79 clone memory contense of two radio English language
(TH-79)
TH-79A extended RX and TX range for new radio English language
(TH-79)
TH-79A Wide Band Modification English language
(TH-79)
MARS/CAP modification for the new Kenwood TH-79A English language
(TH-79)
Hidden options TH-79 English language
(TH-79)
TH-79 WIDEBAND-RX ONLY English language
(TH-79)
Umbau TH79e auf 9k6 German language
(TH-79)
Kenwood TH-79A(D) Review English language
(TH-79)
Remote Base Operation with Kenwood 732/733 English language
(TH-79)
Post Modification Spec Sheet English language
(TH-79)
Cross Band Repeat English language
(TH-79)
TH-79 Save function & packet! English language
(TH-79)
TH-79 FAQ 3.5 by DG8NGN English language
(TH-79)
DTMF-based message translator English language
(TH-79)
TH-79 FAQ 3.5 by DG8NGN German language
(TH-D7A)
Kenwood TH-D7a TX band modification English language
(TH-D7A)
TH-D7A Firmware upgrade English language
(TH-D7A)
TH-D7A/E Conversion Document English language
(TH-D7a)
Memory Control Program for TH-D7 V. 0.01 Beta English language
(TH-D7E)
TH-D7E extended RX English language
(TH-D7E)
Changes a TH-D7E into a TH-D7A and enables the SKY-COMMAND option English language
(TH-D7E)
TH-D7A/E Conversion Document English language
(TH-D7E)
Memory Control Program for TH-D7 v. 0.01 Beta English language
(TH-F6)
Extended transmit for TH-F6A/E English language
(TH-F6)
PC-programming cable for Kenwood TH-G71A / TH-F6A English language
(TH-F7)
Extended TX Mods by G1IVG English language
(TH-G71A) TH-G71A Beyond Mars modification English language
(TH-G71A) PC-programming cable for Kenwood TH-G71A / TH-F6A English language
(TH-G71E) TH-G71E repeater shift English language
(TH-G71E) Il nuovo KENWOOD TH-G71E by HB9OAE Other language
(TK-240)
Kenwood TK-240 programmed with 16 channels English language
(TK-270)
TK370/270 high-band h/t radio instructions English language
(TK-340)
TK340 Programming Information English language
(TK-370)
TK370/270 high-band h/t radio instructions English language
(TK-705)
Revised TK-705D & TK-805D programming English language
(TK-760)
Programming Kenwood TK-760 mobile English language
(TK-768)
Programmin a TK-768 or TK-768H English language
(TK-805)
Kenwood TK-805D programming English language
(TK-805)
Revised TK-705D & TK-805D programming English language
(TM-201)
TM-201/401 Increased TX Audio English language
(TM-211)
TM-211 out of band modifications English language
(TM-211)
Extended range! English language
(TM-221)
General Coverage XMIT - TM-221/A English language
(TM-221)
TM-221A Final Module Hints English language
(TM-221)
TM-221A No TX in High Power Due to Voltage Drop English language
(TM-221)
Extended range English language
(TM-231)
TM-231A MARS/CAP modification English language
(TM-231)
TM-231A Out of band English language
(TM-231)
TM-231 Low Mic Audio Fix English language
(TM-231)
TM-231A Intermittent memory loss English language
(TM-241)
TM-241A RX/TX mods English language
(TM-251)
This is the wide-banding modification for the Kenwood TM-251E English language
(TM-2530) TM-2530/2550/2570 MARS/CAP English language
(TM-255)
Solution 9k6 TM255/455 English language
(TM-255)
Mods for the Kenwood TM-255E English language
(TM-2550) TM-2530/2550/2570 MARS/CAP English language
(TM-2550) TM-2550 DCL Call Sign Data English language
(TM-2570) TM-2530/2550/2570 MARS/CAP English language
(TM-2570) TM-2570 Low TX Power Output English language
(TM-261)
TM-261a Extended frequency English language
(TM-261)
Kenwood TM-261a 136-174 MHz transmitt modification English language
(TM-261)
TM-261 Mike Button English language
(TM-321)
TM-321A Mars/cap mod English language
(TM-321)
TM-321A Weak mic audio fix English language
(TM-321)
TM-321A Mod to Squelch thw audio at mic pin 6 English language
(TM-321)
Packet mod for TM-321 English language
(TM-321)
TM-321A Loss of TX audio with MC-48B English language
(TM-3530) TM-3530 Noisy transmit English language
(TM-3530) Extended TX for the Kenwood TM 3530a 220MHz radio English language
(TM-401)
Umbau TM401A auf 9600bd und mehr German language
(TM-401)
TM-201/401 Increased TX Audio English language
(TM-411)
TM-411 Low/No Receiver Sensitivity English language
(TM-411)
TM-411A Microprocessor change English language
(TM-421)
TM-421ES fuer 9600 Baud German language
(TM-421)
TM-421a TX mod English language
(TM-431)
TM-431A Wide Band Transmit Modification English language
(TM-431)
9600 mod for TM431A English language
(TM-431)
TM-431E fuer 9600 Baud German language
(TM-431)
Measure deviation using TM231,431,531 English language
(TM-441)
TM-441E Umbau 9k6 German language
(TM-441)
QRG mod for Kenwood TM-441E German language
(TM-451)
Frequency expansion for the Kenwood TM 451 E English language
(TM-451)
TM-451E Low Power Mod English language
(TM-455)
Solution 9k6 TM255/455 English language
(TM-455)
TM-455A/E Change in pin diode English language
(TM-461)
Expand the TX to 420 to 450MHz English language
(TM-531)
TM-531 & 9600 Baud English language
(TM-531)
Measure deviation using TM231,431,531 English language
(TM-531)
TM-531A 20 MHz offset modification English language
(TM-621)
TM-621 to 9600 baud English language
(TM-621)
Modulations mod for TM-261 English language
(TM-631)
TM-631/731A Memory loss modification English language
(TM-631)
TM-731A/631A Final board C17 change English language
(TM-642)
TM-642/742/942A Microprocessor change English language
(TM-642)
Microprocessor Change, TM642/742/942 English language
(TM-701)
TM-701A repeater cross-band modification English language
(TM-701)
TM-701 transmitting and receiving from 136-175MHz English language
(TM-701)
TM-701A Intermittent memory loss English language
(TM-702)
KENWOOD TM-702 to 9600 baud English language
(TM-702)
KENWOOD TM-702E & mods. for function trsponder English language
(TM-702)
Ecco una nuova modifica per il Kenwood TM702 Other language
(TM-702)
Extended RX and TX for TM-702E English language
(TM-721)
Modification from Kenwood on the TM-721A for adding cross-band English language
(TM-721)
Time-out timer English language
(TM-721)
Tuning the 721 UHF for 460 MHz English language
(TM-721)
New LCD Readout for Kenwood TM-721A English language
(TM-721)
IC-721E RX/TX mod 142 - 152 MHz mods English language
(TM-721)
TM-721A wide band mod English language
(TM-721)
The programming resistors do the following English language
(TM-721)
Modifying the Kenwood TM-721A for Extended UHF Coverage English language
(TM-721)
TM-721A Low/No VHF Transmit Power English language
(TM-721)
TM-721A for 9600 baud English language
(TM-721)
TM-721 cross-band repeater (another) English language
(TM-721)
TM-721A Microcomputer Lock-up English language
(TM-721)
TM-721A S-Meter deflection due to pulse noise English language
(TM-721)
TM-721A AF pa white noise with squelch on English language
(TM-731)
TM-731 frequency and cross band repeater English language
(TM-731)
TM731 & 9600 Bps English language
(TM-731)
TM-731 fuer 9600 Baud German language
(TM-731)
TM-731A Hooking to TNCS English language
(TM-731)
Kenwood Cross Band Repeat: How to USE it English language
(TM-731)
Kenwood TM-731A firmware bug English language
(TM-731)
TM-631/731A Memory loss modification English language
(TM-731)
TM-731A/631A Final board C17 change English language
(TM-731)
TM-731e Frequenz erweiterung German language
(TM-732)
AIR CLONING (Does not work in K1 or E1 Mod modes) English language
(TM-732)
PAGING ANSWERBACK (Does not work in K1 or E1 Mod modes) English language
(TM-732)
Memory recovery English language
(TM-732)
Subjective Impressions English language
(TM-732)
800 MHZ RECEIVE English language
(TM-732)
Hard-wire cloning English language
(TM-732)
TM-732E fuer 9600 German language
(TM-732)
TM-732 gets hot English language
(TM-732)
AM detector control English language
(TM-732)
Extended RX & TX Mods English language
(TM-732)
9600 baud UHF packet radio mods English language
(TM-732)
TM-732A 2 Meter transmit interference on 70 CM English language
(TM-732)
TM-732A/E Change in chip fuse rating English language
(TM-732)
TM-732A Low cross-band repeater audio English language
(TM-732)
TM-732A/E Noise at squelch ON/OFF English language
(TM-732)
TM-732A S-meter squelch scan stop improvement English language
(TM-732)
TM-732A Protection of Q201 in 430 MHz unit English language
(TM-732)
TM-732A Control PC Board B+ foil damage English language
(TM-732)
TM-732A/E APC circuit improvement English language
(TM-732)
TM-732 partial display or no power up English language
(TM-733)
TM733 with 2 antenna-sockets English language
(TM-733)
TM733 and 9k6 Bps English language
(TM-733)
TM733 & 9K6 English language
(TM-733)
TM-733E MOD 9k6 english English language
(TM-733)
MODS OF KENWOOD TM-733 for Japanese version English language
(TM-733)
TM-733A Quick Reference Guide English language
(TM-733)
Extended RF Modifications English language
(TM-733)
DTMF Remote via Microphone English language
(TM-733)
Cross Band Repeating English language
(TM-733)
DTMF Paging and Squelch English language
(TM-733)
Wireless Cloning English language
(TM-733)
TM-733A PL Tone Distortion English language
(TM-733)
External DTMF Remote Control English language
(TM-733)
TM-733 data pinouts descriptions English language
(TM-733)
TM-733A PL tone bleed through English language
(TM-733)
TM-733 quick operation guide English language
(TM-741)
Umbau des TRX Kenwood TM-741 E fuer 9600bd German language
(TM-741)
TM-741ATE Frequency enion English language
(TM-741)
TM-741a/e AM recleppion with 28 and 50 mhz unit English language
(TM-741)
TM-741 A/E 900 MHz band receptton with 430 MHz unit English language
(TM-741)
TM-741A/E memory channel doubling English language
(TM-741)
TM-741A/E extended paging functions English language
(TM-741)
TM-741/E DTE DISPLAY Format English language
(TM-741)
TM-741A/E DC ERDISPLAY English language
(TM-741)
TM 741A/E headlight linkage dimmer English language
(TM-741)
TM 741A/E game mode English language
(TM-741)
Kenwood TM-741a GAME Dox English language
(TM-741)
Display test English language
(TM-741)
Hearing birdies in the 440 MHz position English language
(TM-741)
TM-741A/E repeater modification (transponder functions) English language
(TM-741)
TM-741a All-Band mod for new Kenwood Tri-Bander English language
(TM-742)
Microprocessor Change, TM642/742/942 English language
(TM-742)
Modification of TM-742 & 942 English language
(TM-742)
Extended frequency for TM-742E English language
(TM-742)
Fan Delay time setting English language
(TM-742)
Wireless remote control with DTMF handheld transceiver English language
(TM-742)
CHANGE YOUR TM-742E TO A TM-942E (who don't exist on the market) English language
(TM-742)
TM-742/942 Beyond Mars/CAP Mod. Guide English language
(TM-742)
TM-742/942 28 MHz/50 MHz RC TX failure English language
(TM-742)
TM-742/942A Microprocessor change English language
(TM-742)
TM-642/742/942A Microprocessor change English language
(TM-742)
TM-742 Control Unit X53-346X-XX **B/2** TX Mod English language
(TM-941)
Kenwood TM-941A undocumented feature English language
(TM-942)
Microprocessor Change, TM642/742/942 English language
(TM-942)
Modification of TM-742 & 942 English language
(TM-942)
TM-742/942 Beyond Mars/CAP Mod. Guide English language
(TM-942)
TM-742/942 28 MHz/50 MHz RC TX failure English language
(TM-942)
TM-742/942A Microprocessor change English language
(TM-942)
TM-642/742/942A Microprocessor change English language
(TM-D700) KENWOOD TM-D700A Extended TX MOD (easy 3 steps) English language
(TM-D700) TM-D700 CAP/MARS English language
(TM-D700) Kenwood TM-D700A service mode English language
(TM-D700) TM-D700A/E Cross band repeat English language
(TM-D700) Repeater functions. U.S.A. / Canada only English language
(TM-D700) Enable Crossband Repeater Function TM-D700E Version English language
(TM-D700) Update for the Kenwood TM-D700A/E Deviation level English language
(TM-D700) Demonstration mode for TM-D700 English language
(TM-D700) TM-D700A MC53-DM MIC PTT Spring tension MOD English language
(TM-D700) TM-D700E Sky command/Remote enable English language
(TM-G707) Extended RX and TX for Kenwood TM-G707 English language
(TM-G707) Extended RX MOD for Kenwood TM-G707A English language
(TM-G707) Low Audio Fix for Kenwood TM-G707 English language
(TM-V7A)
Expanding the Kenwood TM-V7: A & E versions English language
(TM-V7A)
PG-4S programmer cable for the TM-V7x German language
(TM-V7A)
TM-V7A Ext. remote control operation English language
(TM-V7A)
Conversion document English language
(TM-V7A)
Computer interface for TM-V7A&E English language
(TM-V7E)
TM-V7E mike & PF1 <> PF4 (1750hz) English language
(TM-V7E)
Expanding the Kenwood TM-V7: A & E versions English language
(TM-V7E)
PG-4S programmer cable for the TM-V7x German language
(TM-V7E)
Expanded RX/TX and crossband repeater English language
(TM-V7E)
Conversion document English language
(TM-V7E)
Computer interface for TM-V7A&E English language
(TR-2200) Service notes on TR-2200A English language
(TR-2200) Adapting the TR-2200A antenna to early Trio and Drake Portables. English language
(TR-2400) TR-2400 Volume Control Replacement English language
(TR-2400) TR-2400 Battery Charger Failure English language
(TR-2400) Speaker Mic for TR-2400 English language
(TR-2400) TR-2400 Tone Encoder RFI English language
(TR-2400) TR-2400 Unwanted Noise: Tone or burst at TX English language
(TR-2400) TR-2400 Display or Keyboard trouble English language
(TR-2400) TR-2400 RX low, Intermittent, or distorted English language
(TR-2400) TR-2400 Scratchy TX English language
(TR-2400) TR-2400 Optional charge input protection English language
(TR-2400) TR-2400 Offset failure English language
(TR-2400) TR-2400 unlock English language
(TR-2400) TR-2400 pulse noise English language
(TR-2400) TR-2400 TX noise English language
(TR-2500) TR-2500/3500 dip switch setting English language
(TR-2500) TR-2500 RX IMD Improvement English language
(TR-2600) Extended frequency TR-2600A English language
(TR-2600) TR-2600A PLL Unlock Troubleshooting English language
(TR-2600) How to fix TR-2600 keypad English language
(TR-2600) TR-2600A PLL unlock English language
(TR-3500) TR-2500/3500 dip switch setting English language
(TR-3500) Extended frequency TR-2600A English language
(TR-7200) Service notes on TR-7200A English language
(TR-7400) Service Notes on TR-7400A English language
(TR-7400) Arcing in TR-7400A final section English language
(TR-7400) Changes in PO Unit of the TR-7400A English language
(TR-7400) Making meter lamp in TR-7400A last longer English language
(TR-751)
TR851E & TR751E with 9600 English language
(TR-751)
TR-751A out of band mod English language
(TR-751)
Kenwood TR-751 mod sheet English language
(TR-7600) Alternator Whine, TR-7600/7625 English language
(TR-7600) Correcting Frequency Difference Between RM-76 and TR-7600/TR-7625 English language
(TR-7600) TR-7600/7625 Audio tone on TX English language
(TR-7600) TR-7600/7625 Optional ceramic filter English language
(TR-7600) TR-7600, TR-7625 Battery Memory Backup English language
(TR-7625) Alternator Whine, TR-7600/7625 English language
(TR-7625) TR-7625 Intermittent TX English language
(TR-7625) Correcting Frequency Difference Between RM-76 and TR-7600/TR-7625 English language
(TR-7625) TR-7600/7625 Audio tone on TX English language
(TR-7625) TR-7600/7625 Optional ceramic filter English language
(TR-7625) TR-7600, TR-7625 Battery Memory Backup English language
(TR-7625) TR-7625 Final module replacement English language
(TR-7625) TR-7625 Hybrid amplifier module substitution English language
(TR-7730) TR-7730 Transmitter Freq Response, Voice or DTMF English language
(TR-7800) TR-7800 Loss of Memory English language
(TR-7800) TR-7800/TR-9000 Optional Ceramic Filters English language
(TR-7800) TR-7800 Tone pad conversion for 4th column function English language
(TR-7800) TR-7800 Pulse noise English language
(TR-7800) TR-7800 Optional continuous charge for internal batteries English language
(TR-7800) Memory Channel 7 Indicator Erratic English language
(TR-7800) TR-7800, TR-7850 Memory Improvements English language
(TR-7850) TR-7850 RF LED Meter English language
(TR-7850) Memory Channel 7 Indicator Erratic English language
(TR-7850) TR-7800, TR-7850 Memory Improvements English language
(TR-7900) TR-7800/TR-9000 Optional Ceramic Filters English language
(TR-7930) TR-7930 info English language
(TR-7930) TR-7930/7950 transceiver for packet/rtty operation English language
(TR-7930) TR-7950/30 RX Interference English language
(TR-7930) TR-7850/30 RX interference English language
(TR-7930) Kenwood TR-7930 Udvidet TX/RX Danish language
(TR-7950) TR-7950 PA module mod English language
(TR-7950) TR-7930/7950 transceiver for packet/rtty operation English language
(TR-7950) TR-7950 screwup on the power-output English language
(TR-7950) TR-7950/30 RX Interference English language
(TR-7950) TR-7850/30 RX interference English language
(TR-8300) TR-8300 Alignment English language
(TR-8400) TR-8400 auf 9k6 German language
(TR-8400) TR-8400 Transmit Delay Time English language
(TR-8400) TR-8400 Transmitter Freq Response, Voice or DTMF English language
(TR-8400) TR-8400 Sub-audible Encode Installation English language
(TR-8400) TR-8400 RX internal sporious signals English language
(TR-851)
TR851E & TR751E with 9600 English language
(TR-851)
TR851 & 9600 Bps English language
(TR-851)
Umbau TR-851E > 9600Bd German language
(TR-9000) TR-9200/TR-9000 Optional Ceramic Filters English language
(TR-9000) TR-9000 CW, SSB TX instability English language
(TR-9000) TR-9000 TX pulse noise in SSB mode English language
(TR-9000) TR-9000 Transmitter Side Carrier Balance English language
(TR-9000) TR-9000 Temperature Stability Improvement English language
(TR-9130) TR-9130 Low Drive Level English language
(TR-9200) TR-9200/TR-9000 Optional Ceramic Filters English language
(TR-9250) TR-9250 RF LED Meter English language
(TR-9350) TR-9350/30 RX Interference English language
(TR-9500) TR-9500 fuer 9600bd German language
(TS-120)
Hum in SSB TX, TS-120S and others English language
(TS-120)
TS-120S VFO Stability English language
(TS-120)
TS-120S VOX operation pick-up time English language
(TS-120)
TS-120S Final Transistor Replacement English language
(TS-120)
TS-120S Ant Input Transformer Replacement English language
(TS-120)
TS-120 Repair Notes English language
(TS-120)
TS-120S Band Pass Filter Change English language
(TS-120)
TS-120S TX oscillation English language
(TS-120)
TS-120S Full CW output in ssb mode English language
(TS-120)
TS-120V: Reduced RX current consumption English language
(TS-120)
TS-120S, TS-180S phone patch terminal addition English language
(TS-120)
TS-120S Final protection English language
(TS-120)
TS-120S Ant input transformator replacement (2) English language
(TS-130)
TS-130S TX oscillation English language
(TS-140)
TS-140S Sidetone Mod English language
(TS-140)
TS-140S Intermittent loss of TX power English language
(TS-140)
Broadcast Sensitivity Modification for the TS680S / 140S English language
(TS-140)
TS-140S TX All Freq Mod English language
(TS-140)
TS-140S Momentary transmission when VOX is turned on English language
(TS-140)
Kenwood TS-140S tip English language
(TS-180)
TS-180S Trouble Sheet English language
(TS-180)
TS-180S Use with a Linear Amplifier English language
(TS-180)
TS-180S Low Pass Filter Optional Changes English language
(TS-180)
BS-8 Alignment with the TS-180S Transceiver English language
(TS-180)
TS-180S CW Delay During VOX Memory Operation English language
(TS-180)
TS-180S Low 40M ALC English language
(TS-180)
TS-180S VFO Stability English language
(TS-180)
TS-180S Increase of RX Audio Output English language
(TS-180)
TS-180S IF output #2 Level Change for SM-220 English language
(TS-180)
TS-180S DFC hum with PS-30 English language
(TS-180)
TS-120S, TS-180S phone patch terminal addition English language
(TS-180)
TS-180S DFC English language
(TS-180)
TS-180S DFC Instability English language
(TS-2000) TS-2000 Mars/Cap Mod English language
(TS-2000) TS-2000 modification information (TX and RX) English language
(TS-2000) Sensitivity Kenwood TS-2000 English language
(TS-2000) Firmware upgrade for TS-2000 English language
(TS-2000) ARCP-2000 windows CAT software for Kenwoods TS-2000 English language
(TS-2400) TS-2400 out-of-band mod English language
(TS-2400) TR-2400 Unwanted Noise: Tone or burst at TX English language
(TS-2400) TR-2400 Display or Keyboard trouble English language
(TS-2400) TR-2400 RX low, INtermittent, or distorted English language
(TS-430)
TS-430S Noise blanker improvements English language
(TS-430)
Kenwood ts-430 AGC mod English language
(TS-430)
Transmit enable for mars/cap frq for the TS-430S English language
(TS-430)
Mods for the kenwood TS430S for amtor English language
(TS-430)
TS430 power fault - ANSWERS English language
(TS-430)
TS-430S Intermittent PLL Unlock in FM/AM English language
(TS-430)
TS-430S PLL Unlock at High Temperatures (Revision) English language
(TS-430)
TS-430 extended coverage. Include 0-150 KHz English language
(TS-430)
TS-430S Reset the microprocessor English language
(TS-430)
Kenwood TS-430S, no display, no RX/TX with certain modes English language
(TS-430)
No signal on the meter English language
(TS-430)
TS-430S 500KHz Hetrodyne English language
(TS-430)
TS-430 Notch Control English language
(TS-430)
TS-430S AM Wide/Narrow filter selection English language
(TS-430)
TS-430 receiver internal beat English language
(TS-430)
TS-430S Low/intermittent RX English language
(TS-430)
Circuit Improvements for the TS-430S English language
(TS-430)
Some repair hints for TS-430 English language
(TS-430)
General coverage in transmission for the Kenwood TS-430S English language
(TS-430)
TS430s low RX English language
(TS-440)
TS-440S Digital Audio Modification English language
(TS-440)
TS-440 Fan Temperature Modification English language
(TS-440)
Possible cure for TS440 showing dots only on display English language
(TS-440)
Undocumented feature English language
(TS-440)
Serial interface English language
(TS-440)
A few adjustments you should know English language
(TS-440)
TS-440S modification to use antenna tuner English language
(TS-440)
TS-440S display calibration English language
(TS-440)
Connection of the KENWOOD TS440S to a DATA English language
(TS-440)
Kenwood Computer Interface Instructions English language
(TS-440)
TS-440S increase the power by ALC control English language
(TS-440)
TS-440 with PIN-Diods English language
(TS-440)
TS-440S Operation with the MC-85 English language
(TS-440)
TS-440S Notch filter low frequency improvements English language
(TS-440)
TS-440S Protecting Q33 English language
(TS-440)
TS-440S Case Screws binding in the heat sink English language
(TS-440)
TS-440 RX Audio Mods English language
(TS-440)
TS-440S SSB Power-adjustment English language
(TS-440)
TS-440S Intermittent operation English language
(TS-440)
TS-440S PLL unlock due to VCO #5 English language
(TS-440)
TS-440S PLL unlock due to VCO #1 English language
(TS-440)
TS440S mod for improved receive sensitivity of 0.5 to 1.6MHz English language
(TS-440)
Circuit Improvements for the TS-440S English language
(TS-450)
KAM-PLUS Problems!! with TS-450 & 850 English language
(TS-450)
General coverage transmisson modification for the TS-450 and TS-690 English language
(TS-450)
TS-450S Intermittent receive fixed English language
(TS-450)
TS-450,TS-850 feedback,ACC-2 Conn English language
(TS-450)
TS-450 hidden functions English language
(TS-450)
TS-450S and KAM Plus info English language
(TS-450)
Micro-input RFI modification TS450-TS690 Kenwood English language
(TS-450)
TS-450/690 Calibration cable change English language
(TS-450)
TS-450/690 Distorted TX w/TNC English language
(TS-450)
TS-450S TX frequency response English language
(TS-450)
TS-450/690 Low mic gain w/DSP-100 English language
(TS-450)
TS-450S Parts change English language
(TS-450)
TS-450S/690S Noisy encoder English language
(TS-50)
TS50 FIX: LCD display dark English language
(TS-50)
TS50<-->AT50 communication English language
(TS-50)
TS-50 Power Mod for QRP English language
(TS-50)
TX Coverage mod TS-50 English language
(TS-50)
CAT control for TS-50S English language
(TS-50)
Important note to 0-30 MHz TRX mods English language
(TS-50)
New version. General TX for TS-50 English language
(TS-50)
TS-50S Lithium battery replacement notes English language
(TS-50)
TS-50S "Hello" displayed during TX English language
(TS-50)
TS-50S Antenna lead wire English language
(TS-50)
TS-50S Mechanical noise from final unit English language
(TS-50)
TS-50 Modification Full time "Double-Zero" English language
(TS-50)
TX 0-30 MHz for the new TS-50 (May 2001) English language
(TS-50)
TS-50 High-Power-Modification English language
(TS-50)
Kenwood TS-50S Wideband TX & double zero readout English language
(TS-50)
TS-50S Australian Extended Tx English language
(TS-520)
TS-520, TS-820 CW filter select control English language
(TS-520)
DG-5 Standard Service Procedure English language
(TS-520)
Service notes on TS-520 English language
(TS-520)
TS-520S -6v Supply Failure English language
(TS-520)
TS-520/520S CW Frequency Shift English language
(TS-520)
TS-520 Increased sensitivity, Better audio and Amplitude Modulation English language
(TS-520)
Kenwood TS-520S for QRP English language
(TS-520)
TS-520S MARS Mod for 4.0-4.6MHz English language
(TS-520)
TS-520 Novice Operation (75 watts) English language
(TS-520)
AM Broadcarst interferenc in TS-520 English language
(TS-520)
TS-520/520S BS-5 Sweep interference English language
(TS-520)
Adding IF output to the TS-520 and TS-520S tranceivers for use with th SM-220 English language
(TS-520)
DS-2 Replaces DS-1A DC-DC Converter English language
(TS-520)
Increase the semsitivity for 10 and 15 meter band English language
(TS-530)
QRO Modification to TS-830S, TS-530S English language
(TS-530)
TS-530S Low Voltage Supply Optional Improvements English language
(TS-530)
TS-530S IF Unit Q2, Q7 Protection English language
(TS-530)
TS-530 WARC bands English language
(TS-570)
Problem width the memories English language
(TS-570)
TS570D : durchg. Sendebere German language
(TS-570)
Kenwood TS-570D MARS/CAP Modification English language
(TS-570)
TS-570 Batteries English language
(TS-570)
Kenwood TS-570DG MARS/CAP Modification English language
(TS-570)
TS-570 Back-up battery current drain English language
(TS-570)
How to find out the real version of TS570DG English language
(TS-60)
TS-60S(E) extended receive English language
(TS-660)
TS-660 Microprocessor Latchup English language
(TS-660)
TS-660 Coverage to cover 20-33MHz and 46-55MHz English language
(TS-680)
TS680s Squelch mods - adds squelch to all modes English language
(TS-680)
TS-680 6 Meter power output increase English language
(TS-680)
Broadcast Sensitivity Modification for the TS680S / 140S English language
(TS-680)
TS680 Freq Extend mod English language
(TS-690)
TS-690 50 MHz modulation problem solved English language
(TS-690)
General coverage transmisson modiication for the TS-450 and TS-690 English language
(TS-690)
Micro-input RFI modification TS450-TS690 Kenwood English language
(TS-690)
TS-690S 30KHz-60MHz RX English language
(TS-690)
TS-450/690 Calibration cable change English language
(TS-690)
TS-450/690 Distorted TX w/TNC English language
(TS-690)
TS-450/690 Low mic gain w/DSP-100 English language
(TS-690)
TS-450S/690S Noisy encoder English language
(TS-690)
Kenwood TS-690 30KHz-60MHhz RX without modding English language
(TS-700)
9600 and TS-700a English language
(TS-700)
Service notes on TS-700A English language
(TS-700)
TS-700A for Repeater operation in Europe English language
(TS-700)
Replacement of 9V regulator IC MFC.4060 with improved MC1723CL-A English language
(TS-700)
TS 700 CW QRG same as USB English language
(TS-700)
Distorted mic signal for TR-7200G & TS-700 English language
(TS-700)
Put CW on USB for the Kenwood TS-700A, S, SP English language
(TS-700)
Modifikationen für Kenwood TS-700 German language
(TS-711)
General coverage xmit - TS-711 English language
(TS-711)
9K6 baud modifications for KENWOOD TS-711 & TS-811 English language
(TS-711)
To expand coverage to 141.0 - 150.995 MHz English language
(TS-711)
Betr.: 9600 Bd G3RUH-Modem an TS 711/811 German language
(TS-711)
IF Amp for TS-711A English language
(TS-770)
Modification Kenwood TS-770E for 9600 baud (G3RUH) English language
(TS-780)
TS-780 für 9k6 baud German language
(TS-790)
TS-790 mods.for G3RUH/TAPR-PSK English language
(TS-790)
TS-790A for use with the paccomm MC-NB96 G3RUH English language
(TS-790)
TS-790 & 9600 Baud Operation (Rev 2) English language
(TS-790)
UO-14 RX frequency tracking for TS-790/FT-736 English language
(TS-790)
TS-790 cross band repeater mod English language
(TS-790)
TS-790 with serial frequency control English language
(TS-790)
TS790E - Burned out diode English language
(TS-790)
800MHz Recieve Mod for Kenwood TS-790 English language
(TS-790)
TS-790 SSB Power Increase English language
(TS-790)
TS-790 A/E 9600bd via ACC4 port RX-problem English language
(TS-790)
Kenwood TS790 ALC-modification English language
(TS-790)
Convert TS790E to the USA TS790K and RX/TX mod English language
(TS-790)
TS790 SSB Power Up English language
(TS-811)
9K6 baud modifications for KENWOOD TS-711 & TS-811 English language
(TS-811)
Betr.: 9600 Bd G3RUH-Modem an TS 711/811 German language
(TS-811)
16kHz-Filter für TS-811E (9600bd-paketierer) German language
(TS-820)
TS-820 Fix the problem with the display English language
(TS-820)
New Display Tube for DG-1 English language
(TS-820)
TS-520, TS-820 CW filter select control English language
(TS-820)
Installing AUX Band in TS-820 (RX only) English language
(TS-820)
TA7201P Substitution Parts Kit English language
(TS-820)
TS-820 Speech Processor Alignment English language
(TS-820)
General Notes on TS-820S English language
(TS-820)
TS-820 RIT modification English language
(TS-820)
Microphone input attenuator for TS-820 English language
(TS-820)
General Alignment Procedure for the TS-820(s) English language
(TS-820)
DS-2 Replaces DS-1A DC-DC Converter English language
(TS-830)
Modification to TS-830S, TS-530S English language
(TS-830)
TS-830S Frequency Shift English language
(TS-830)
Amtor modification English language
(TS-830)
Warc modification English language
(TS-830)
VFO-230 fine tune mod correction English language
(TS-830)
TS-830S Low Voltage Supply Optional Improvements English language
(TS-830)
Kenwood TS-830 filter modification English language
(TS-830)
TS-830S Operation on 240V AC English language
(TS-830)
TS-830S Low voltage Supply Optional Improvements English language
(TS-830)
TS-830S Noise Blanker Optional Improvements English language
(TS-830)
TS-830S Transmitter "Talkback" English language
(TS-830)
TS-830 Frequency Drift English language
(TS-830)
TS-830S Frequency Drift - "FIX" switch English language
(TS-850)
TS-850S observations English language
(TS-850)
TS-850S All band transmit English language
(TS-850)
TS-850S Broadcast Band Sensitivity English language
(TS-850)
TS-850S Additional Front Panel Functions English language
(TS-850)
Step by step instructions to disable the broadcast band attenuation for TS-850S English language
(TS-850)
TS-850? ACC-2 audio problem English language
(TS-850)
Adjustable moni. on CW, TS-850S English language
(TS-850)
TS-850 service manual, error corection English language
(TS-850)
TS-850S and speaker/headph English language
(TS-850)
TS-850 and Ten-Tec Titan 425 PA English language
(TS-850)
KAM-PLUS Problems!! with TS-450 & 850 English language
(TS-850)
TS-450,TS-850 feedback,ACC-2 Conn English language
(TS-850)
Modification for External keying, while using the internal keyer English language
(TS-850)
TS-850 Separate Receive Antenna Modification English language
(TS-850)
TS-850 Separate RX antenna input mod English language
(TS-850)
The switch box English language
(TS-850)
Computer Interface for the TS-850, without using the IF-232 Level Converter English language
(TS-850)
TS-850 Power Output Control English language
(TS-850)
TS-850 Level Attenuator for DRU-2 playback audio English language
(TS-850)
TS850 + Transverter oder Preselektor German language
(TS-850)
TS-850S Distorted TX w/TNC connected English language
(TS-850)
TS-850S Low/no Receive sensitivity English language
(TS-850)
TS-850S No audio from VS-2 English language
(TS-850)
TS-850S Mixer FET change English language
(TS-850)
TS-850S "Click noise" with NOTCH ON English language
(TS-850)
Full transmit for the UK version of TS-850S English language
(TS-850)
TS-850 2nd RX output mod English language
(TS-870)
Frequency expansion for the TS-870S English language
(TS-870)
TS870 DSP XCVR specs English language
(TS-870)
TS-870S S-Meter pin with repeated RX/TX switching English language
(TS-870)
TS-870S Receiver circuit changes English language
(TS-870)
Making super radio out of TS-870 English language
(TS-870)
Kenwood TS870S - ALC-Mod. English language
(TS-870)
TS-870 Output Power >100W English language
(TS-870)
TS870 external receive antenna switching English language
(TS-870)
[CQ-Contest] Collins Filters in Contest Rigs English language
(TS-870)
Use TS-870 as a contest rig English language
(TS-870)
TS-870S Service Menu Setup Tweaking v1.1 (13 Oct 2000) English language
(TS-930)
TS-930S PLL Unlock English language
(TS-930)
TS-930S Service Notes on AT-930 English language
(TS-930)
TS-930S Intermittent TX Power Output English language
(TS-930)
Tuning Mods TM-930 English language
(TS-930)
Amtor keying mod English language
(TS-930)
TS-930S CW Pitch Tone Shift English language
(TS-930)
TS-930S 15 Meter Internal Beat Tone English language
(TS-930)
TS-930S RF Feedback English language
(TS-930)
TS-930S SSB TX Tone Quality English language
(TS-930)
Error in the operator's manual of the DIGITAL UNIT pin English language
(TS-930)
Incorrect AC line voltage setting English language
(TS-930)
TS-930S CW Hetrodyne Tone English language
(TS-930)
TS-930S Low RX sensitivity English language
(TS-930)
TS-930S CW VBT English language
(TS-930)
TS-930S Audio oscillation English language
(TS-930)
TS-930S Feedback into MIC CRT English language
(TS-930)
TS-930S ALC level drift 28 MHz CW English language
(TS-930)
TS-930S Power Supply surge protection English language
(TS-930)
TS-930S Noisy Power Supply Fan English language
(TS-930)
Expanded R.F. on the Kenwood TS 930 S English language
(TS-930)
Digital Unit through-plated hole defects and their symptoms English language
(TS-930)
W6NL Mods for the TS-930 (Very long) English language
(TS-940)
TS-940S LCD Clock Display Erratic Operation English language
(TS-940)
TS-940S SSB Talk Power Improvement English language
(TS-940)
TS-940S Erratic display English language
(TS-940)
RX AUDIO English language
(TS-940)
Amtor switching time English language
(TS-940)
ALC time constant English language
(TS-940)
TS-940 Mod for MARS and all band operations English language
(TS-940)
TS-940S PLL unlock English language
(TS-940)
TS-940S Antenna Tuner Relays English language
(TS-940)
TS-940S PLL unlock English language
(TS-940)
TS-940S AVR unit capacitor change English language
(TS-940)
TS-940S AGC circuit improvements English language
(TS-940)
TS-940S Signal to noise ratio improvement English language
(TS-940)
TS-940S VCO carrier to noise ratio improvement English language
(TS-940)
TS-940S Squelch switching noise English language
(TS-940)
TS-940S MRF-485 Driver Transistor Notes English language
(TS-940)
TS-940 PA drivers replacement English language
(TS-950)
TS-950SD general coverage transmit mod English language
(TS-950)
Kenwood TS-950 Power On Funktions English language
(TS-950)
Kenwood TS-950-SDX Allows sub-rcvr to be on different band than Main receiver English language
(TS-950)
TS-950SD Speech processor noise English language
(TS-950)
TS-950SD N.B. Gate switching noise English language
(TS-950)
TS-950SD Early protection with TL-922A English language
(TS-950)
TS-950SD RX digital noise English language
(TS-950)
TS-950SD Two second TX power delay with MONI on English language
(TS-950)
TS-950/SD Receiver noise English language
(TS-950)
TS-950S/SD TX image on 18.115 MHz English language
(TS-950)
TS-950S/SD 80 meter spurious emission English language
(TS-950)
TS-950S Final bias circuit change English language
(TS-950)
TS-950S Rear panel cooling fan English language
(TS-950)
TS-950SDX Mode switching English language
(TS-950)
TS-950SDX No beep in headphones English language
(TS-950)
TS-950SDX Distorted DRU-2 TX audio English language
(TS-950)
TS-950SDX w/K1EA Ver. 8 Program (Revised) English language
(TS-950)
TS-950SDX Speech processor English language
(TS-950)
TS-950SDX 3rd order IMD standardization English language
(TS-950)
TS-950SDX Key click w/bug type keyer English language
(TS-950)
TS-950 Hum with monitor ON English language
(TS-950)
TS-950 Noise with Sub-Band noise blanker ON English language
(TS-950)
TS-950 14.200 MHz transmit spur English language
(TS-950)
TS-950 Low power output after temp. protection English language
(TS-950)
TS-950 Infinite SWR at beginning of transmission English language
(TS-950)
TS-950 Smoke from antenna tuner unit English language
(TS-950)
TS-950S/SDX Transmit spur English language
(TS-950)
TS-950SDX "click noise" with NOTCH ON English language
(TS-950)
TS-950SDX YG-455S-1 Installation note English language
(TS-950)
TS-950SDX No VFO B after "split" English language
(TS-950)
TS-950SDX Carrier point adjustment English language
(TS-950)
TS-950SDX Sub band residual noise English language
(TS-950)
TS-950SD 18.115 MHz spur English language
(TS-950)
TS-950SDX Change of Gate resistor type English language
(TS-950)
Countermeassure against cold solder joint at the resistor block; CP1-CP4 in the PLL unit. English language
(TS-950)
Kenwood TS-950S & TS-950SD RF gain mod English language
(TS-950)
Implementation of the K6XX QSK Waveform Mod in the TS-950SD English language
(TS-950)
TS-950 SO2 Adjust English language
(TS-950)
Using Subreceiver to Improve TS-950 Noise Blanker English language
(TW-4000) Umbau des Kenwood TW4000A für den Betrieb mit 9600 Baud Modem G3RUH German language
(TW-4000) Kenwood TW-4000 for CAP English language
(TW-4100) Modificatie KENWOOD TW-4100E voor subtone Other language
(TW-4100) BandMod for TW4100 English language
(TW-4100) TW-4100 repeater stop scan on the UHF band English language
(VFO-120) VFO-120 Dial Lamp Switching Circuit English language
22-04-2000
(AT-50) AT-50 Blows ACCY fuse in TS-50S
Author: Kenwood Communication, inc.
Service Bulletin no. 1010 (30 April 1993)
Symptom:
Attempting to tune the AT-50 when it is connected to an antenna with a relatively high SWR value might cause the ACCY fuse to open
in the TS-50S. This change will correct this tendency.
Parts required:
.047 µF disc ceramic capacitors, CK45B1H473Z, QTY. 2
Procedure:
1. Remove the top cover from the antenna tuner.
2. Locate X53-3470-00 D/4 (It is attached to the top left side of the chassis with the foil side up).
3. Add the two .047 µF capacitors as shown in the drawing below.
4. Replace the top cover.
No additional adjustment or modification will be required.
Caution: This modification requires soldering equipment rated for CMOS type circuits. It
also requires familiarity with surface mount soldering techniques. If you do not have the
proper equipment or knowledge do not attempt this modification yourself. Seek qualified
assistance.
Time required for this modification is 30 minutes or less.
This modification is read 996 times.
23-04-2000
(AT-50) AT-50 Blows ACCY fuse in TS-50S (Part 2)
top of page
Author: Kenwood Communication, inc.
Service Bulletin no. 1025 (25 June 1993)
(Supercedes ASB-1010 dated 30 April, 1993)
Symptom:
Attempting to tune the AT-50 when it is connected to an antenna with a relatively high SWR value, especially on the 3.5 MHz band
might cause the ACCY fuse to open in the TS-50S.
Parts required:
Qty
2
Description
Toroidal coil
Kenwood Part No.
L33-0699-05
Circuit description
NA
Procedure:
1. Remove the top and bottom covers from the antenna tuner.
2. Locate X53-3470-00 D/4 (it is attached to the top left side of the chassis with the foil side up).
3. Remove the two .047 µF capacitors shown in figure 1 if they are present.
4. Cut the foil and add one of the toroidal inductors as shown in figure 2.
5. Turn the tuner over and locate capacitor C123 and C124, as shown in figure 3.
6. Move the capacitors (or add new capacitors) to the locations shown in figure 3.
7. Cut the foil path and add the remaining totoidal inductor as shown in figure 3.
8. Remove jumper W106 as shown in figure 3. (Note: remove the jumper from the component side of the board).
9. Add a jumper from the ATG foil to W104 as shown in figure 3.
10. Replace the top and bottom covers.
No additional adjustment or modification will be required.
Caution: This modification requires soldering equipment rated for CMOS type circuits. It also requires familiarity with surface mount
soldering techniques. If you do not have the proper equipment or knowledge do not attempt this modification yourself. Seek qualified
assistance.
Time required for this modification is 30 minutes or less.
top of page
This modification is read 869 times.
23-04-2000
(AT-50) AT-50 Mechanical stability
Author: Kenwood Communication, inc.
Service Bulletin no. 1054 (28 March 1994)
Symptom:
When the unit is placed on a flat surface it appears to be slightly unstable, i.e. rocks back and forth when pressing down on the left
front corner of the unit.
Procedure:
Add a flat spacer at the location shown between the chassis and the bottom cover.
Parts required:
Qty
1
Description
Spacer
New Part No.
J30-0597-04
Circuit Description
NA
Time required for this modification is 15 minutes or less.
This modification is read 900 times.
top of page
13-02-2000
(DG-1) Service Note on DG-1
Author: Trio-Kenwood Communication, inc.
Service bulletin no. 26 (25-10-1977)
It is out experience here in the Compton service facility that the vast mejority of DG-1 problems are not component failure, but cold
solder connections on the digital PCB (X54-1160-00)
The second most frequent problem is dirty Molex connectors between the 2 PCB's in the DG-1.
Recommended service procedure: Remove both boards. Using a fine point, low wattaga iron (less then 45W), and a good quality, low
flux content solder, carefully resolder all components. (There are 18 of these points - only one id not top accessible, but is located
under IC 11 and can be resoldered from the bottom).
Resolder the Molex connectors. There are 9 print-thru's where solder may not have flowed thru to the component side.
Using a good quality tuner cleaner with solicona lubricant, spray both boards Molex connectors and work the pins in 3 or 4 times to
insure good contact. Ressamble and final chack.
Total time on the bench: 20 minutes. We will allow up to 1 hour only warranty labor time.
This modification is read 502 times.
top of page
20-02-2000
(DG-1) DG-1 Standard service procedure
Author: Trio-Kenwood Communication, inc.
Service Bulletin no. 53 (10-8-1979)
Introduction
A majority of DG-1 failures are caused by either dirty connectors, or cold soldered connector pins between the top and bottom foil
paths of the double printed board.
Before any component level service is attempted, it is advisable to eliminate the possibility of an intermittent connection causing or
complicating Counter failure.
1.
2.
3.
4.
5.
6.
7.
Physically disconnect the main power cord!
Remove cabinet covers; top with speaker lead, and bottom.
Unplug the top and bottom connectors from the DG-1 unit.
remove the Digital Unit assembly by removing 4 screws from the chassis underside.
Disassemble the Digital Unit; remove 8 screw and slide off the cover.
Remove both PC Board, 4 screws each.
For those connector pins joining top and bottom foil paths; reheat pin, flow .031" diameter solder from the top to insure the
solder joint through the PC Board.
8. Wash the board to board Molex connectors with FRESH trichlorethelyne. Heat dry and inspect for flux residue. If necessary,
reclean. Also remove the pin connectors from the DG-1 chassis, (note they insort from the Digital PC Board side) and clean in
FRESH trichlor. Heat dry and spray with silicone lubricant.
Spray into the board mounted connectors with silicone.
9. Reassemble by reversing step 8,6 and 5.
10. Reinstall by reversing step 4, 3, and 2.
How to solder on the DG-1 board.
1.
2.
3.
4.
5.
Use a low power pencil, 35 W or less!
Use rosin code solder, small diameter.
Do not create solder bridge or splotches.
Do not overheat or otherwise lift the foil from the board.
Wash excess flux away with FRESH trichloretheylyne and a small flux brush. Neatness counts -- it's YOUR radio.
Note:
1. The best possible method of cleaning the Molex connectors is by ultrasonic cleaner and fresh solvent. Otherwise, use a spray.
2. In extreme cases, replace the Molex connectors, 6 pieces E40-0607-05.
3. For 15 & 10M invalid numbers, such a backward "6", replace D13, D14 SV-03 on the Counter Mix unit X54-1150-00. These are
three section diodes (three junctions in one package) V21-0007-05.
4. For random or rolling display which will not correct by cleaning connectors, etc., check the CCR mixer input level. It should be
50mV measured width a high RF VTVM, and can be adjusted by TC-1 on the IF unit X48-1150-00, and measured o the IF TP6.
(TS-820S Service Manual states 0.1mV- correct this to 50mV).
This modification is read 483 times.
top of page
13-02-2000
(DG-5) Repairing DG-5
Author: Trio-Kenwood Communication, inc.
The most common problem we have found with the DG-5 to date has been associated with the RCA type jacks. The majority of the DG5's we have received here for repair have had dirty center pins on the jacks. The cause appears to be excessive rosin from soldering
running into the center pin.
The standard repair has been to clean the center pin with solvent. Another possible problem is a cold solder connection at the RCA
jack. You should also chack the interconnecting cables for continuity. This should take care of about 90% of the DG-5 repairs you will
See.
This modification is read 590 times.
top of page
19-02-2000
(DG-5) Reparing DG-5
Author: Trio-Kenwood Communication, inc.
Service bulletin no. 28 (3-2-1978)
1. Symptoms: Two dots on LED display
Check: Het input and VFO input connections (Dirty, intermittant, missing).
2. Display reading wrong frequency
Check: If display frequency is reading off by 2MHz and last four digits on display reading (894.9) check carrier input wire (dirty,
intermittant, missing).
3. No display or dim display, digits missing.
Check: 5V reg (IC power) not working or plated thru holes not plated thru.
Above are common mechanical failures that occure with DG-5. We suggest the following troubleshooting procedure:
A. Power all power supply levels.
B. Reference oscillator (Q21) and divider chain IC5-IC11 (RF, waveforms, DC).
C. Carrier, VFO and het, also counter (when spplicable) for RF, waveforms and DC levels; See service manual for proper levels.
Note: Operation of the circuits are essential before proceeding.
It's been Kenwood's experience that when problems do occure with the DG-5 that spproximately 90% of the problem will be caused by
insufficent solder connectiond and not the actual components themselves.
Note: We suggest the following procedure if BUFFERS, MIXERS and OSCILLATORS are working properly: See service manual for
proper levels.
Check
A. All solder connections (loose or good).
B. Solder all plated thru holes; 32 gauge wire inserted in plate holes tajes approximately 30 minutes to do and 15 very, very
effective.
Service suggestions:
A heat gun and freeze spray often are very effective in locating cold or non-plated thru holes.
A. Heat board with head gun (expands board).
This often caused dormant or loose connection to appear.
top of page
This modification is read 569 times.
19-02-2000
(DG-5) Theory of Operation
Author: Trio-Kenwood Communication, inc.
Service bulletin no. 29 (8-2-1978)
The DG-5 is a dynamic display type frequency counter. All this means is that fewer wires and decode drivers are needed for frequency
displaying.
We shall start the explanation of the DG-5 with the reference osc. (Q21). This circuit provides the timing pulses, calibration and
scanning pulses for operation of the DG-5. The ten MHz ref. osc. is divided 1/10 by IC5 to provide calibrated one MHz output. It is
then further divided by IC6 and IC7 1/100. The divided signal is then passed thru IC8 which consists of two sections, a 1/5 amd 1/2
divider. The divide by 1/5 section now gives a resultant 2KHz signal on its output. This is the scanning pulse. IC40 receives the
scanning pulse which is a decode driver (Neg. Logic Type) is used to switch Q25-Q30 via terminals T1-T6 to put a plus voltage on
display D1-D3 (LED Type).
At the same time, outputs T1-T6 of IC41 are inverted by IC42 positive logic and the B.C.D information is presented to IC32-IC37 the
and-orinvert gates which provide the conditional inputs for the multiplexer or distributor. IC38 provides Neg. Logic inversion for IC39,
the decode driver.
The multiplexer information starts with the heterodyne of three components, ref. osc., carrier and VFO input signals.
IC26-IC31 are the multiplexer inputs. These are latches which store B.C.D informationuntil they are told to release their output by IC3
the strobe or latch signal.
I will mention now, that if the HET or VFO input signal are absebt, that the blanking circuits will take effect. At this time the HET input
is amplified and is wave-shaped by the Schmidt Trigger IC1 and IC1B. The carrier outputis then mixed with the belance mixer Q16 and
Q17. Its output is then mixed again with VFO and its output appears on Q18 drain. Its buffered by Q19 and waved-shaped by IC2B.
This output is placed on timing window IC2C. Two signals are presented to the timing window; 1) signal to be measured, 2) gating
signal .1 sec. in length (IC11 pin 8).
The DG-5 contains two window circuits IC2C and IC1C. IC1C forms the HET counter window circuit and IC2C forms the preset counter
circuit.
With a gate signal the HET counter begins to count the pulses which pass thru the gate, and se does the preset counter circuit. The
outputs of the timing windows are a ratio of signal input divided by gate pulse. Example, with a .1 sec. gating pulse the display would
be updated once ever .2 sec period. If a 1.2MHz input was measured, the display would read "1200" in KHz. The gated output
information of IC1C is then distributed on the HET counters IC-12-IC18. At this time it should be realized that IC41 the decode driver
is used merely to supply a puls voltage to display and is controlled by 2 KHz scaning pulse. IC2D is gated with the same . 1 sec. pulse
and the output signal to be measured is the ratio of signal input (VFO. ref. and carrier) divided by gate pulse.
Both HET and preset B.C.D. information is presented to latch circuits which is then sent to decode driver IC39 for display information.
Since only one decode driver is being used for all displays, the conditional inputs of IC32-IC37 must be turned "on" and "off" quickly in
order not to be detectable by the human eye. This is done easily by the high speed TTL circuits.
Note: The display scheme of the DG-1 and DG-5 are essentially the same. The theory of operation is therefore applicable to the DG-1
display as well.
top of page
This modification is read 567 times.
20-02-2000
(DG-5) DG-5 Standard service procedure
Author: Trio-Kenwood Communication, inc.
Service Bulletin no. 54 (10-8-1979)
(Supplement to the DG-5 Service Manual)
Introduction
A majority DG-5 failures are caused by nothing more than an intermittent opening of a plated-through hole connecting top and bottom
foil paths of the PC Board.
Before any component level service is attempted, it is advisable to eliminate the possibility of an intermittent connection causing or
complicating Counter failure.
Procedure:
1.
2.
3.
4.
Disconnect all cables.
Remove cabinet; 2 screws at the rear, 2 screws with star washers on the bottom.
Disassemble display from chassis; 4 countersunk screws on the side rails.
The display unit has 2 through holes without leads, and the Counter main Board has 82 through holes without leads passing
through them. Ideal service would be to first remove all solder from these holes using devices as a Pace Sodr-X Tractor, EREM
Soldovac, or WIK-IT braid. Then pass a length of #24 tinned bare wire into each clean through hole, solder, and clip flush. For
the 10 holes listed under IC's solder sparingly so as not to create a solder bridge under the component. For the remaining 72
holes, inspect each "pinned" connection from both sides to insure (1) no bridge and (2) a good solder joint.
5. Wash the Display to Counter Board PC Board connectors (male and female) with FRESH trichlorethelyne. Heat dry and inspect for
flux residue. Spray the connectors with silicone.
6. Similarly, clean and coat the rear panel RCA jacks as in step 5.
7. Reassemble, reversing step 3,2,1.
How to solder on the DG-5 PC Board
1.
2.
3.
4.
5.
Use a low power pencil, 35W or less!
Use rosin core solder, small diameter.
Do not create solder bridge or splotches.
Do not overheat or otherwise lift the foil from the board.
Wash excess flux away with FRESH trichlor. and a small flux brush. Neatness counts - it's YOUR radio.
Through hole accounting
Display unit - 2
Counter unit - 82
Total 84
Locations:
a. Under; IC2, 4, 13, 20-25, 34 1 each
Total - 10
b. Adjacent or
between;
IC3, 13-14, 15-16, 22-23
IC1-2, 6, 18
IC12
- 1 each
- 2 each
- 3 each
Total - 13.
c. Located between
rows;
IC13-18, 20-25
20-25, 26-31
IC26-31, 32-37
IC32-37, 38-39
-
5
10
15
25
Total - 55
d. At rear
panel;
Total - 4
FS7805 regulator
2SD235 transistor
-1
-3
e. Display unit - 2
Additional Point
1. R126 & R129 are power resistors located at the left rear corner of the PCB. remove the tubing from their outside legs and
resolder each lead to the top foil path. Specific symptom for this failure is no display, & NO DECIMALS.
2. For counters which "roll", random count, or inject hash noise back into the TS-520/520S especially when hot, install an additional
.1uF @ 12V bypass cap across the FS7805 regulator on the foil side of the PCB from the center ground lead to the outside leg,
across C89.
3. For complaint of "hum" or Digital noise from the DG-5 back into the TS-520/s, both during RX & TX, tighten the mounting screws
which supply ground to the Carrier unit X50-0009-01 in the transceiver.
This modification is read 566 times.
top of page
19-07-1998
(GENERAL) KENWOOD TH-series HT TNC Interconnection
The following is a suggested circuit for connecting a packet TNC to a Kenwood TH-series HT. Included is the TH-21/31/41, the TH205/215/315/415, and the new TH-25/45 series HTs.
The connections are as follows:
A sub-miniature plug is used for receive audio. The tip of this plug is audio out; the sleeve of this plug is the common ground for PTT,
transmit audio, and receive audio.
A miniature stereo plug is used for transmit audio and PTT. Connect the middle "ring" of the plug to the TNC audio out through a 0.2
uf cap (for DC isolation). Connect the sleeve of the plug to the TNC PTT. The plug's tip is unused.
Set the TNC audio for 50 to 80 mv audio output into a 2K ohm impedance.
This modification is read 950 times.
top of page
19-07-1998
(GENERAL) Service manual rx section level diagrams
Author: Trio-Kenwood Communication, inc.
Service Bulletin no. 941 (28-10-1988)
Introduction
This bulletin will explain the development and use of Kenwood Service Manual receiver section level diagrams. Since they list typical
RF and audio levels, the diagrams provide the most efficient means of locating a faulty RX circuit in a transceiver.
In the past, Kenwood has recorded RF levels in volts (V), decibels (dB), and more recently dBu and dBm. Conversion tables and an
equation are provided at the end of this text so you can change the RF levels to the form of your choice.
Using the level diagrams require basic test equipment and a couple of test fixtures. One fixture is an 8 ohm non inductive load that
replaces the internal speaker. The other is an injection probe. It is used to inject RF from your signal generator into specific sections of
the receiver. Both fixtures are discussed at the end of this text.
How the rx section level diagram is developed
This section will describe how the level diagrams are made for CW and SSB transceivers. It will then discuss the different methods
used for FM transceivers.
A working transceiver is tuned to its center frequency. For HF rigs, this would be 14.200MHz. A Standard Signal Generator (SSG) set
to the same frequency is connected to the antenna terminal of the transceiver. The SSG is set to a level that will not allow the AGC
circuits to function (no S-METER reading). For HF rigs, this would typically be 0dBµ (0.5µV).
An 8 ohm load is inserted into the external speaker jack and the AF gain control is adjusted to obtain 0.68V across the load (measured
with an AF VTVM). The AF gain setting is not changed from this point on. The SSG is replaced with a 50 ohm load to terminate the
antenna input.
An injection probe is connected to the SSG. The ground clip is attached to the chassis of the transceiver. The probe is placed at the
first point listed on the level diagram just past the antenna input. The SSG level is adjusted until the audio output is again 0.68V. The
SSG level is then listed on the diagram as a typical reference for that point. This process is repeated until all measuring points are
assigned a reference level.
NOTES
After each mixer stage, the SSG must be adjusted to the respective IF frequency. As an example, after the first mixer on the TS-940S,
the frequency would be set to 45.05MHz. After the second mixer, the frequency would be set to 8.83MHz.
The levels in the audio stage of the receiver are measured with an AF VTVM. These measurements are made when the SSG is
connected to antenna terminal (just after the AF gain is set).
FM rx section level diagrams
FM transceiver level diagrams are made in the same fashion as CW/SSB diagrams. The transceiver is tuned to its center frequency (or
close to it). A low level signal is applied to the antenna terminal. The audio output is held constant while the injection method is used.
The differences are as follows:
On some FM transceivers, the injected signal is modulated (typically a 1KHz tone at +/- 3.0KHz deviation is used). Other transceivers
are tested without modulation.
On some transceivers, the constant output is measured at 12dB SINAD. On others it is measured at 20dB of noise quieting (NQ).
Each Service Manual level diagram contains footnotes that describe the method used. Due to the variations and available test
equipment, it may be necessary to change the initial set up and then write your own level diagram.
Using the level diagram to troubleshoot a faulty receiver
It is not practical to set the audio output to a specified level by injecting a signal into the antenna terminal of a transceiver that has
low sensitivity. In many cases, the input signal would be so strong that it would attack the AGC circuits. This would cause all
measurements in the receiver to vary from the typical levels in the diagram. The best approach to this situation is to start at the end
of the receiver circuit and work towards the antenna.
Connect a 50 ohm load to the antenna terminal and an 8 ohm load to the external speaker jack. Inject a signal at the end of the IF
stage. The IF frequency and required level are listed on the Service Manual level diagram. Adjust the AF gain control to obtain the
specified audio level at the 8 ohm load. Do not change the AF gain setting from this point on. Inject the next signal in the middle of
the receiver chain (again refer to the level diagram for the frequency and level). If the audio comes up to the specified level, the faulty
component is somewhere between the antenna terminal and the middle of the receiver. If the audio does not come up, the bad
component is between the two injection points.
Decibels
As mentioned in the instruction, Kenwood Service Manuals have listed levels in V, dB, dBµ, and dBm. Unless otherwise specified in the
footnotes on the level diagram, dB and dBµ levels are equal.
Aside from the conversion tables on page 6, a conversion equation and examples are provided.
V(out)
dB = 20 log ---------V (in)
Equation:
In the equation, solving for dB would yield a value that is the difference between the two voltages. In other words, suppose you
already know that 2µV = 12 dBµ and 15.8 µV = 30 dBµ. You can see that the difference is 18 dBµ. Plugging these µV values into the
equation would yield the same result. With this in mind, one can plug in a known voltage from a conversion table, plug in a voltage
not listed in the table, and find the dB difference. To make the answer simplistic, use 0.5 µV for dB/dBµ and 224 mV for dBm. Since
they equal 0 dB/0 dBµ/0 dBm respectively, the difference is the actual value of the unknown voltage.
Example: Given 0.5 µV = 0 dBµ,
Find the dBµ value of 6 µV.
-6
6 X 10
Xdbµ = 20 log -------6
.5 X 10
Xdbµ = 20 log 12
XdBµ = 20 (1.08)
Xdbµ = 21.6
X = 21.6 dBµ
|
|
|
|
|
|
|
|
|
|
|
|
|
|
|
|
|
|
Example: Given 224 mV = 0 dBm,
find the dBm value of 6 µV.
-6
6 X 10
Xdbµ = 20 log -------3
224 X 10
-6
XdBm = 20 log 26.8 X 10
XdBm = 20 (-4.6)
XdBm = -91.4
X = -91.4 dBm
-6
Reminder: 6 µV = 6 X 10
-3
224 mV = 224 X 10
= 0.000006
= .0224
The next injection point would again cut the chain in half in order to work towards the faulty component. For instance, if the problem
is between the antenna terminal and the middle of the receiver, inject the next signal in the middle of those two points. Continue in
this manner until the problem can be isolated to a small portion of the circuit.
NOTE
Do not forget that D.C. measurements around an isolated circuit are necessary. For instance, an amplifier will not have any gain if an
open resistor cuts off the supply voltage.
Injection probe
An injection probe is a coax that connects to your SSG, has a 0.01uF capacitor on the center conductor of the coax, and a tip
connected to the other end of the capacitor. The shield of the coax connects to a ground clip. Many electronic supply shops sale
injection probes. If you decide to purchase one, make sure it contains a 0.01uF capacitor between the tip and center conductor of the
coax (used to block D.C.). If you decide to fabricate your own cable, it can be done with a few simple parts as shown in Figure 1.
8 OHM load
An 8 ohm non inductive load is used to substitute the internal speaker on the transceiver. The load is connected to the external
speaker jack for convenience. For the purpose of troubleshooting a faulty receiver, it is not necessary to purchase a precision 8 ohm
resistor (also, precision resistors are inductive). Six carbon composite 47 ohm, 1/2 watt resistors connected in parallel make an
adequate load. Figure 2 shows a typical 8 ohm load fabrication.
Suppose you are given a dB value from the level diagram and you want to know its equivalent voltage:
Example: Given 0.5 µV = 0 dBµ,
Find the dBµ value of 55dBµ.
X
55 = 20 log -------6
.5 X 10
X
2.75 = 20 log -------6
.5 X 10
X
antilog 2.75 = 20 log -------6
.5 X 10
-6
562.3 (.5 X 10
) = X
-6
281 X 10
= X
281 µV = A
Japanese "SSG"
-6dB
0dB
6dB
12dB
24dB
30dB
40dB
50dB
60dB
70dB
80dB
90dB
100dB
120dB
|
|
|
|
|
|
|
|
|
|
|
|
|
|
|
|
|
|
|
|
|
|
|
|
|
|
|
Example: Given 224 mV = 0 dBm,
find the dBm value of -55 dBm.
X
-55 = 20 log --------3
224 X 10
X
-2.75 = 20 log --------3
224 X 10
X
antilog -2.75 = 20 log --------3
224 X 10
-6
398.7 X 10
= X
-6
398.7 X 10
= X
398.7 µV = X
American "SSG"
-----------------------------------------------------------------------------------------------------------------------------------------------------------------------------------------------------------------------------------------------------------------------------------------------------------------------------------------------------------------------------------------------------------------------
0.25µV
0.5µV
1µV
2µV
8µV
15.8µV
50µV
158µV
500µV
1.58mV
5mV
15.8mV
50mV
0.5V
TABLE 1 (dB or dBu to V conversion)
Japanese "SSG"
American "SSG"
-119dBm ------------------------------113dBm ------------------------------107dBm ------------------------------101dBm ------------------------------88.9dBm -----------------------------83dBm -------------------------------73dBm -------------------------------63dBm -------------------------------53dBm -------------------------------43dBm -------------------------------33dBm -------------------------------23dBm -------------------------------13dBm ------------------------------0dBm ------------------------------7dBm -------------------------------
0.25µV
0.5µV
1µV
2µV
8µV
15.8µV
50µV
158µV
500µV
1.58mV
5mV
15.8mV
50mV
224mV
.5V
TABLE 2 (dBm to V conversion)
top of page
This modification is read 1011 times.
19-07-1998
(GENERAL) How to build COMPUTER INTERFACE
-
Kenwood models:
TS-140
TS-721
TS-440
TS-811
TS-450
TS-850
TS-680
TS-940
TS-690
TS-950
TS-711
KENWOOD RS-232 INTERFACE
( P.C.)
DB-25S (DB-9S)
+---------------------+
+----- 7
(5)
¦
¦
¦
¦
MAX-232
¦
+++
6
¦
+ +-------+ ¦
78L05
¦
+--¦+--¦1
16+--+
+-- 5
(8)
+-----+
¦
¦
+ ¦
¦
¦
+12V ---¦I
O+----+------¦+--¦2
15+--+
+-- 4
(7)
¦ G ¦ ¦ +¦
¦
¦
¦ +++
RxD
+-----+ ¦ --- +------¦3
14+------------------ 3
(2)
¦
¦ --+ ¦
¦
TxD
¦
¦ ¦
+--¦+--¦4
13+------------------ 2
(3)
¦
¦ ¦
¦
¦
¦
+++
¦ +++ +------¦5
12+--------+
1
¦
+
¦
¦
¦
¦
+--¦+--¦6
11+-----+ ¦
¦
¦
¦
¦
¦ ¦
¦
¦
¦7
10+
¦ ¦
( RADIO )
¦
+++
¦
¦
¦ ¦
¦
¦8
9+
¦ ¦
DIN
¦
+-------+
¦ ¦
¦
¦ ¦
6
¦
¦ ¦
+------------------------+ ¦ ¦
+-- 5 (RTS)
¦ ¦ ¦
¦
74LS04
¦ ¦ ¦
+-- 4 (CTS)
+-------+ ¦ ¦ ¦
¦1
14+--+ ¦ ¦ +------ 3 (/RXD)
¦
¦
¦ ¦ ¦
¦2
13+------------------ 2 (/TXD)
¦
¦
¦ ¦ ¦
¦3
12+-----+ ¦ ¦
+-- 1 (GND)
¦
¦
¦ ¦
¦
¦4
11+--------+ ¦ +++
¦
¦
¦
¦5
10+-----------+
¦
¦
¦6
9+
¦
¦
+--¦7
8+
¦ +-------+
+++
NOTES:
1. All capacitors are 22uF 16v
2. Radio connector is a 6 PIN DIN
This modification is read 1287 times.
top of page
19-07-1998
(GENERAL) How to remove Display-Scratches
hello, kenwood-fans!
Since a few minutes i'm happy about the new outlook of my ts440's display: it's free of scratches now!
During the last two years i used it as a mobile rig and had a lot of fun with it. now it is replaced by a ts50 (works very well!).
During that mobile application the plastic cover of the display was damaged by little scratches- not too deep at all, but unpleasant to
look on. may be, i touched it with the mike or car key.
So, back in the shack, i looked for a method to get it clear.
How?
With tooth paste!
No joke, it really works!
That's the way:
1. Clean the display with a wet(!) clean cloth
2. Cover areas not to be treated with insulating tape or s.e.
3. Take one wet edge of a cloth (i used that one from the kitchen reserved for to dry the finest dishes) and put it over your
forefinger
4. Take a piece of tooth paste (the old fashioned white one, that contents polishing elements, i used "thera med", made by henkel")
on that finger
5. Polish the dispaly's surface by wiping in rotations -not strictly in one direction only- about 2 or 3 minutes
6. Clean the area with a fresh, but wet(!) cloth
7. Dry it with the other -dry- part of the clean cloth
8. Remove tapes
9. Injoy perfect brand new looking display!
Honestly said, it's not originally my idea. I was inspired by a friend of mine, who gave me this advice for a similar application (glass
cover of my watch).
I'm not sure, if it works with icom or yaesu devices, so don't tell them (hi).
top of page
This modification is read 1046 times.
19-07-1998
(GENERAL) Kenwood 4 pin microphone connections to TNC
u
1
4
2
3
Pin 1 = MIC input
Pin 2 = PTT (Push To Talk)
Pin 3 = Ground
Pin 4 = Ground
NOTE
Please make sure that you are familiar with the pin numbers on the mic sokets (fitted to end of mic leads) before you make any
connections.
This modification is read 831 times.
top of page
19-07-1998
(GENERAL) Kenwood 6 pin microphone connections to TNC
u
5
1
6
4
2
3
Pin 1 = MIC input
Pin 2 = PTT (Push To Talk)
Pin 3 =
Pin 4 =
Pin 5 =
Pin 6 = Ground
NOTE
Please make sure that you are familiar with the pin numbers on the mic sokets (fitted to end of mic leads) before you make any
connections.
top of page
This modification is read 829 times.
19-07-1998
(GENERAL) Kenwood 8 pin microphone connections to TNC
u
1
2
7
8
3
6
5
4
Pin 1 = MIC input
Pin 2 = PTT (Push To Talk)
Pin 3 =
Pin 4 =
Pin 5 =
Pin 6 =
Pin 7 = Ground
Pin 8 = Ground
NOTE
Please make sure that you are familiar with the pin numbers on the mic sokets (fitted to end of mic leads) before you make any
connections.
This modification is read 933 times.
top of page
23-08-1998
(GENERAL) Kenwwod mic modification
The following concerns modificatio of some Kenwood Microphone.
Note: What follows is just suggested, proceed at your own risk.
If you have a Kenwood TM-xxxE (European version) trans', Than your mic, probably has 1750 Hz baton, Which is useless in some
countries (not if you are a jammer Hi). This baton can Probably be transformed to have another transceiver function.
I myself, tested the above & succeeded with both: TM-241E & TM-741E (of which the mic's slightly differ).
GENERALLY (at least in the two above) the 1750 Hz baton provides aprox' 7.5v (when depressed), in order to generate the tone.
While the other 3 control baton on the mic provide lower voltage levels (aprox' 1.5v & 3.5v if i remember correctly). The idea is simply
to disconnect the 7.5v at the baton input & to connect the other voltage level (1.5v or 3.5, I forgot which).
To do this follow the next modif' stages.
MODIFICATION STAGES:
1. Disconnect the 7.5 voltage level by cutting the only jumper on the print. (to be sure measure 7.5v relative to ground on it, on
the 741E mic it is symbolized by J1)
the TM-741E
ZDDDDDDDDDDDDDDDDDDDDDD?
3
ZDDDDDD? 3
3
3 ptt 3 3
3
3switch3 3
3
@DDDDDDY 3
3
DD
3
3
J1
3
3
3
3
3
@DDDDDDDDDDDDDDDDDDDDDDY
the TM-241E
ZDDDDDDDDDDDDDDDDDDDDDD?
3
ZDDDDDD? 3
3
3 ptt 3 3
3
3switch3 3
3
@DDDDDDY 3
3
DD
3
3
J3
3
3
3
3
3
@DDDDDDDDDDDDDDDDDDDDDDY
2. Short the 2 connections on:
the TM-741E
ZDDDDDDDDDDDDDDDDDDDDDD?
3 ZDDDD?
3
3 3
3
3
3
3
3 3 3 3 3 3 3 3 3 3
3
O
O
O
O
3
3
3
3
3
3
3
3
3
3
3
3
3
3
3
3 1750 VFO
MR
PF 3
3
3
3
3
3Microphone T91-0398-XX3
@DDDDDDDDDDDDDDDDDDDDDDY
The new function becoms:
^
3
3
default:call
programable:PF4
the TM-241E
ZDDDDDDDDDDDDDDDDDDDDDD?
3
ZDD?
3
3
3 3
3
3
3
3 3 3 3 3 3 3 3 3 3
3
O
O
O
O
3
3
3
3
3
3
3
3
3
3
3
3
3
3
3
3 1750 VFO
MR
PF 3
3
3
3
3
3Microphone T91-0398-X53
@DDDDDDDDDDDDDDDDDDDDDDY
^
3
3
call
----
DE Ze'ev 4X4CV @4X1RU.ISR.MDLE
This modification is read 1164 times.
20-02-2000
(GENERAL) Optional narrow ceramic filters
top of page
Author: Trio-Kenwood Communication, inc.
Service Bulletin no. 49
The optional filters listed below are for a narrower bandpass. Some will have different input & output impedance, & some will require
new mounting holes. Only one will require a component change.
Model
Standard Option
Installation
TR-2200DA
CFM-455E CFR-455G Just replace
TR-7200A
CFR-455F
CFR-455G Just replace
CFS-455G Modify PCB mounting
TS-700A/S/SP CFR-455F
CFR-455G Just replace
CFS-455G Just replace
TR-7400A
CFR-455G Just replace
CFR-455F
CFL-455F Replace C101 470pF to .00uF
TR-7600/7625 CFR-455F2 CFR-455G Replace C101 with .001uF &
modify PCB mounting.
TR-8300
CFM-455R CFM-455F Just replace
Specification
Filter
Model
Part
Number
-3 dB Down -6 dB Down
Impedance
Bandwidth Bandwidth Bandwidth In/Out
More than
± 8KHz
60dB
± 16KHz
1500 ohm
CFR-455F L72-0037-05 ± 4.5KHz
± 6KHz
70dB
± 16KHz
2000 ohm
CFR-455G L72-0302-05
----
± 4KHz
70dB
± 16KHz
2000 ohm
CFS-455G L72-0303-05
----
± 4KHz
80dB
± 16KHz
2000 ohm
CFT-455F2 L72-0309-05 ± 5KHz
± 7.5KHz
60dB
± 16KHz
1500 ohm
CFL-455F
L72-0306-05 ± 4.2KHz
± 6KHz
70dB
± 16KHz
2000 ohm
CFM-455F L72-0000-00 ± 4.2KHz
± 6KHz
± 12 KHz
2000 ohm
CFM-455E L72-0025-05
More than
± 5.5KHz
top of page
This modification is read 882 times.
02-04-2000
(GENERAL) VFO-230 Operation on 240V AC
Author: Trio-Kenwood Communication, inc.
Service Bulletin no. 838 (15-12-1980)
To operate the VFO-230 on 240V AC, the power transformer primary tap must be rewired from 120V to either the 220V or 240V tap.
1. Unplug the AC power cable and VFO interconnecting cable.
2. Remove the top cover.
3. Move the AC line from the 120V (Red) to either the 220V (Green) or 240V (Blue) transformer winding.
4. Change the AC fuse from 0.5A to 0.3A. Tag the power cord at the back of the unit to indicate that the transformer is wired for
240V AC, and the power fuse should be 0.3A and not 0.5A.
5. Replace the top cover and cable up to verify your work.
top of page
This modification is read 790 times.
16-04-2000
(GENERAL) Service manual TX level diagrams
Author: Trio-Kenwood Communication, inc.
Service Bulletin no. 942 (30-10-1988)
Introduction
Kenwood service manual transmit level diagrams provide typical RF levels found in working transceivers. This information provides a
fast method of locating a faulty circuit in a transmitter chain. To use the level diagrams, an AF VTVM, RF VTVM, and 50 ohm resistive
load are required. In addition, since many units are tested with the drive output terminated into the load, a coax cable must be
fabricated. A sample cable is shown below.
How the TX level diagram is developed
The transmit level diagrams are developed in a similar manner as the receive diagrams. Basically, a working transceiver is tuned for a
specified output power at center frequency. The mic audio circuit is measured with an AF VTVM and the RF circuit is measured with an
RF VTVM. The results are listed on the diagram as typical levels for a working transceiver. The exact setup used to make a diagram
varies with the model. The setup details are listed in footnotes on the diagram. No matter what procedure is used, the end result is a
list of typical levels for a working transceiver.
For the most part, variations in setup include what mode is used, if audio is applied to the mic input, and what reference is used for
power output. Additionally, many units have the drive signal connected directly to a 50 ohm load. This requires a fabricated coax cable
that can be inserted into the drive socket and attached to a load. A coax cable with a terminal that fits the drive socket is available in
the Kenwood Parts Department. SB-905 lists the part numbers of coax cables that are available in several lengths and style. Once a
cable is obtained, a connector that matches your 50 ohm load can be soldered to the cable.
Using the TX level diagrams
As mentioned above, certain units are terminated at the drive output. This procedure can be used in troubleshooting to determine if
normal drive power is available. Simply connect the fabricated coax cable to the drive terminal and the 50 ohm load. If the load
receives full drive power as indicated on the level diagram, the trouble spot is in the Final or LPF unit. In this case, reconnect the Final
unit and continue checking towards the antenna terminal. If low drive is measured, continue measuring toward the mic input until a
faulty circuit is found.
Note
Once a faulty circuit is isolated, DC measurements must be made to determine if normal supply voltage is present.
This modification is read 1002 times.
top of page
23-04-2000
(GENERAL) Power module heat sink compound
Author: Kenwood Communication, inc.
Service Bulletin no. 1055 (28 March 1994)
Symptom:
Several current and past model transceivers do not use Heat Sink Compound on the power modules. Our engineering department
determined through testing, that those models with fine casting or machined areas under the power module do not really require its
use. Several service facilities and customers have questioned this and are concerned that this could eventually cause failure of the
power modules(s).
Corrective Action:
In order to ameliorate any anxiety to increase you confidence out engineers recommend that you use Silicone Heat Compound
whenever replacing any of these devices or whenever they must be lifted for service of other components on the board. Our
production lines begin using this compound again as added protection for these devices.
Parts required:
Qty
1
Description
Silicone Heat Sink Compound
New Part No.
W01-0411-05
Circuit Description
NA
This modification is read 821 times.
top of page
16-05-2001
(GENERAL) The MIC pin configurations
Author: Robert - [email protected]
To thos who may desire to use a microphone with different transciever (other than the microphone brand)
For Kenwood Mic to work with a Icom Radio wire the mic plug as discribed below The wire on
Pin #1
#2
#3
#4
#5
#6
#7
#8
stays on Pin #1
move to Pin #5
stays on Pin #3
stays on Pin #4
move to Pin #2
move to Pin #8
stays on Pin #7
move to Pin #6
For Icom Mic to Kenwood Radio you must preform a special Mod on the mic (also on this web site).
For Kenwood Mic to work with a Yaesu Radio wire the mic plug as described below. The wire on
Pin #1
#2
#3
#4
#5
#6
#7
#8
move to Pin #8
move to Pin #6
stays on Pin #3
move to Pin #1
un-solder and tape
un-solder and tape
stays on Pin #7
move to Pin #2 & #5
For Yaesu Mic to work with a Kenwood Radio just reverse the procedure described above.
Thanks
Robert
This modification is read 1145 times.
top of page
20-04-2000
(MC-44) MC-44DM Microphone audio improvements
Author: Trio-Kenwood Communication, inc.
Service Bulletin no. 958 (12-1-1990)
There are several ways to increase the transmit audio level when using an MC-44DM. If you are using a single band transceiver such
as the TM-231A, you can turn up the deviation control inside the transceiver. Do not turn up the deviation controls in dual banders
such the TM-731A because the audio will distort during repeater cross band operations.
Inside the microphone, there is a felt pad lightly glued to the microphone element housing. Removing the pad will increase the audio
level.
If more level is desired, the microphone element can be changed to a more sensitive element. The element can be ordered though
Kenwood's Parts Department.
ECM (microphone element) Part# T91-0393-08
top of page
This modification is read 615 times.
23-04-2000
(MC-44) MC44/MC44DM Intermittent modulation
Author: Kenwood Communication, inc.
Service Bulletin no. 1022 (18 May 1993)
Symptom:
Microphone audio is mechanically intermittent, i.e. striking the microphone will cause audio to be lost or restored.
Cause:
The lead wire of capacitor C8 might be shorting out against the case of the ECM unit.
Correct action:
Re-install the capacitor so that the leads cannot touch the ECM case.
Make sure the leads of
C8 100 pF capacitor do
not touch the ECM
case.
Time required for this modification is 15 minutes or less.
This modification is read 553 times.
top of page
19-07-1998
(MC-45) Making the MC-45 Microphone work on the TR-7400A
Author: Trio-Kenwood Communication, inc.
Service bulletin no. 35 (22-5-1979)
The MC-45 Touch Tone Microphone is supplied with a 5 pin connector installed on it. This allows it to be used with the TR-7600 and tr7625 2M FM transceivers. The MC-45 may also be used with the TR-7400 if the microphone plug is changed to the 4 pin type used on
the "TR-7400" (E07-0403-05) and the microphone socket ont he TR-7400A is modified to supply power to the microphone.
The 5 pin microphone connector is changed so the PTT ground and microphone ground wires are connected together on the 4 pin plug.
This means the wires on pins 4 and 5 of the 5 pin plug will be connected to pin 3 of the 4 pin plug. The other PTT lead ( on pin 2)
would go to pin 2. The microphone hot lead goes from pin 1 to pin 1. The power lead ( on pin. 3) would be connected to pin 4 of the 4
pin plug.
The TR-7400A modification requires removing the front panel and Display Unit (X54-1210-10) so you may get to the microphone
socket. The switch board may not be removed.
The front panel is removed by taking off all the knobs first. The "MHz" switch knob is push-on type. All the other knobs are held on by
set screws. (Be sure to note the position they are in so they will be reinstalled correctly.) The front panel is then removed by taking
out the 4 screws (2 on each side) that hld the front panel on. You should remove the volume/squelch control at this time by loosening
the nut and sliding the control up from the sub-panel.
Unplug all 6 display digit boards from the Display Unit (X54-1210-10). Be sure to keep the digit boards in order, as there are 4
different types used. The display unit is secured by 4 screws. Three of these screws are visible now. The screw that is nearest the Smeter also holds a bracket for 2 LED's. Remove this screw and carefully lift out the bracket. This will reveal the fourth screw. Remove
the three screws that are left holding the Display Unit in place. Thie display unit may now be lifted out by the back of the circuit board
to give you enough room to work on the microphone connector.
There is a jumper wire between pins 3 and 4 on the microphone socket. Remove this jumper. Pin 4 is the lowerof these two pins.
Install a wire from pin 4 to terminal C9 on the TX unit (X56-1210-10).
Reinstall the indicator unit (X54-1210-10) and replace the digit boards. Put the volume/squelch potentiometer back in place, next
mount the front panel and knobs. This completes the modification.
The modified MC-45 microphone may now be connected to the TR-7400A. Depressing any key on the keypad will activate the PTT
circuit and the tone circuit. There is also a short delay of 1/2 second that the PTT circuit will remain closed after the key has been
released. This will allow you to key up several numbers without dropping the carrier.
This modification is read 366 times.
top of page
19-07-1998
(MC-46) MC-46 DTMF Mic. With older equipment
The MC-46 DTMF (Dual Tone Multi Frequency, or Touchtone (TM)) microphone may be adapted for operation with any VHF or UHF
radio by changing the supplied six pin mic connector to a five pin, four pin, or other connector, as required. Radios not originally
supplied with regulated, filtered B+ at the mic connector need also to be modified to power the microphone.
The MC-46 standard six pin mic connector is part no E07-0651-05, and is wired:
Pin 1
2
3
4
5
6
White
Red
Blue
Green
Brown
Shield
Mic Output
PTT
Down
Up
B+ (8.5 VDC +/- 10%)
The Four pin connector part no is E07-0403-05. Radios built with a four pin jack do not supply B+ to operate the mic, and must be
modified to deliver a constant source of DC to operate the mic and DTMF keyboard. Any Kenwood product of this vintage will have a
B+ line designated "C9" (Common 9V DC), wich is regulated, filtered, and noise-free. Rewire the mic as described below:
Pin 1
2
3
4
White
Red
Shield
Brown
Mic Output
PTT
Common Ground
C9
Rewire the radio mic jack: pin 3 to common ground, pin 4 to C9.
Rewire the stock mic for pin 3 common ground. Otherwise, the mic element will be returned to C9, instead of ground. Note this
change on the radio schematic.
The Five pin connector part no. is E07--551-05. Radios built with a 5 pin jack supply correct B+ for a DTMF mic (originally designated
MC-45, and no longer available). Wire the mic as described below:
Pin 1 White
2 Red
3 Brown
4,5 Shield
Mic Output
PTT
B+
Common Ground
Mating chassis connectors are:
Four Pin
Five Pin
Six Pin
E06-0403-05
E06-0552-05
E06-651-05
This modification is read 309 times.
top of page
21-04-2000
(MC-48) MC-48B Mic element change
Author: Kenwood Communication, inc.
Service Bulletin no. 983 (6-2-1991)
The original microphone element has been replaced. The new element has two connections and is much smaller than the original three
connection element. When installing the new element, connect the wires as shown below. A 33 Kohm, ¼ watt resistor must be placed
in series with the yellow wire. The rubber spacer is placed in front of the element when the microphone is assembled. The metal
spacer can be discarded.
Mic element part # T97-1024-08
This modification is read 329 times.
top of page
13-02-2000
(MC-50) VOX-3 Sensitivity and Delay
Author: Trio-Kenwood Communication, inc.
Service bulletin no. 15 (26-5-1977)
There have been a few instances of improper VOX operation when the MC-50 microphone is used. The sensitivity of the VOX-3 may be
increased by removing R-4 and connecting R-3 directly to ground.
Also install a 220mfd 25Vdc electrolytic in parallel with C-6.
(These parts are all on the X54-1010-00 board.) If the VOX delay is insufficient, change C-10 (on the X54-0001-00 board) from
3.3mfd 50Vdc to a 10mfd 50Vdc capacitor. Shown below is a modified schematic showing these changes.
This modification is read 879 times.
top of page
20-04-2000
(MC-55) MC-55 Change in mic element (T91-0328-08)
Author: Trio-Kenwood Communication, inc.
Service Bulletin no. 953 (4-5-1989)
The new Mic element for an MC-55 comes in two pieces. One piece is a two pin ECM and the other piece is a spacer. The spacer is
required as the new ECM is half the side of the old one. The wiring configuration is somewhat changed for the installation of the new
Mic element. The figures below show the original configuration, the new configuration, and the assembly. The black wire is not used
with the new ECM and a 330 ohm resistor is installed on the foil side of the microphone amplifier board. The leads of the resistor
should be insulated with electricians tape or shrink tubing.
This modification is read 332 times.
top of page
11-07-2000
(MC-60) Modifikation MC-60
Author: Wolfgang Kind - [email protected]
Sehr geehrte YL´s und OM´s,
nachdem an mich mehrfach der Wunsch herangetragen wurde, eine Modifikation für das MC-60 zu publizieren, da dieses Mikrofon
nachweislich nicht einstrahlfest ist, möchte ich dies hiermit nachholen.
Ich habe seinerzeit mein MC-60 in Verbindung mit einem TS-870 benutzt und war aufgrund von HF-Einstrahlungen ins Mikro-fon auf
allen 9 Amateurfunkbändern völlig unverständlich.
Daraufhin habe ich mir 3 Drosselspulen der Firma Neosid (100 oder 220µH) von der Firma Conrad Electronic (Stück 0,80DM) besorgt
und wie folgt eingelötet:
Zuerst habe ich das Kabel zum Umschalter auf der Bodenplatte abgezogen und anschließend die kleine Verstärkerplatine ausgebaut
und so positioniert, daß die Taster auf der Rückseite dieser Platine zum Körper zeigen.
Anschließend habe ich zuerst den Schalter auf der Bodenplatte durch 2 Drosselspulen nachgebildet. Hierzu werden die Löt-punkte der
Buchse des Kabels, die zur Bodenplatte führen, wie folgt durch je eine Drosselspule gebrückt. Von links zählend lötet man über die
Lötpunkte 2+3 und 5+6 jeweils eine Drosselspule o.g. Typs.
Danach muß noch der gelbe vom Mikrofon zum Verstärkereingang führende Draht verdrosselt werden. Am besten geschieht dies
dadurch, indem man direkt hinter der Buchse, an die das Mikrofonkabel geführt wird, auf der Platine die Leiterbahn zum
Verstärkereingang unterbricht und über diese Unterbrechung ebenfalls eine Drosselspule o.g. Typs lötet.
Werden die Drosselspulen mit kurzen Anschlußdrähten liegend auf der Platine plaziert, so läßt sich anschließend die Platine problemlos
wieder einbauen.
Nach dieser kleinen preiswerten Modifikation waren bei mir die HF-Einstrahlungen auf allen 9 Amateurfunkbändern gänzlich
verschwunden und ich habe diese triviale Änderung noch bei zwei anderen Mikrofonen gleichen Typs erfolgreich durchgeführt.
Eine Unterbrechung der bei diesem Mikrofontyp viel zitierten Masseschleife führte in meinem Fall zu keinem Erfolg.
This modification is read 1897 times.
top of page
20-08-2000
(MC-60) Kenwood MC-60 Microphone Mod (Connect to ICOM IC-746)
At a Ham Fest last year I purchased a Kenwood MC-60 microphone with the intention of using it with my ICOM IC-746 transceiver.
Figuring out the microphone and PTT connections was pretty straight forward. However making the Up and Down switch work with my
ICOM was not that straight forward. Kenwood uses separate lines for the Up and Down functions while ICOM uses one. Having other
things to do at the time, I simply hooked up the microphone and the PTT switch and used it without the Up/Down function.
Now I'm sorry I took so long to get back to the project. After doing some investigation I figured out (using the original ICOM
microphone) that the Up function on the ICOM was achieved by grounding pin 3 on the ICOM microphone connector. The Down
function was done by grounding pin 3 through a 470 ohm resistor. The solution was simple. Add a 470 ohm resistor across pins 3 and
4 on the back of the connector in the base of the MC-60 and connect pin 4 of the microphone to pin 3 on the ICOM.
David M. Hitchner - [email protected]
Baton Rouge, LA
KD5EIS - [email protected]
Baton Rouge Area Scanning
This modification is read 1732 times.
top of page
17-08-2001
(MC-60) Remove RFI in the MC60
Author: DA1LDN - [email protected]
Here's a simple solution to delete the rfi in the mc60.
I had this problem on 10m and sometimes on 15m.Only when the beam turned to a certain direction and when the processor is put
on.
I didn't wanted to make soldering (capacitors) into the microphone. So I just put a ferrit baton (5 cm long) in each extremity of the
spiral microphone cable and it works well. Now all is ok and the ferrit baton are hidden with the spiral. Simple and easy!
Good luck!
DA1LDN-ON4JM
This modification is read 2184 times.
top of page
19-07-1998
(MC-85) Mod for MC-85 MIC and RC-1A phone
I am a Ham Radio Operator (call signed 4Z4MJ). My station is exclusively Kenwood (TS-940s, TL-922, TR-2400, TR-7950, MC- 85, and
the PC-1A phone patch) and I'm very content of having the honor to belong to the Kenwood family.
In Israel, I work as an electronic design engineer and on my free time, I'm always anxious to solve design problems and add my own
modifications to the shack. I would like to present you the modifications I have made and hope they might be helpful. (The mods deal
with the MC-85 microphone and the PC-1A phone patch; I enclose them with this letter and emphasize the changes with the yellow
marker, So let's start........
When I purchased my TS-940S with the MC-85 microphone, I was very happy with the 940 but sad about the 85. The problem was
R.F. feedback when I was touching the microphone's goose- neck with my hand, (or when the linear was on, it happened without even
having to touch the mic).
Not only that, I was not able to function the S-201 (mic selector of the MC-85) if I was connecting more than one rig to the MC-85. At
first I thought my MC-85 is malfunctioning, but from talking with five other hams in Israel who own the MC-85, I heard that they all
suffer the same problems!!
The main problem was caused because of a ground loop. There were two (2) grounds to ECM unit (you know it's illegal).
The ground on the p.c. near the Q1 transistor is absolutely fine, but what about the one that makes a ground connection between the
ECM unit and the top of the goose neck? The solution is described on the enclosed paper marked (1). The addition of (2) and (3) were
needed to give more R.F.
attenuation to the common mode and to the differential mode rejection respectively.
In summary, (2) and (3) are necessary but (1) is a MUST. These mods cured completely all the RF feedback problems that one can
have with the MC-85. Before closing the microphone's base cover, I added a few more mods. I hope they are clear from the modified
scheme and the notes. (Notice that all these mods can be done without having to remove the printed circuit board.) A similar thing
happened wtih the PC1-A phone patch...started because of a "serious" problem and ended with extra "very helpful" mods.
The "serious" problem was that no matter how loud I put the RX gain control, there was never enough audio to the telephone line, and
not only that, the audio was distorted! (See IRI of April, 1987, Issue No. 64, Page K64, where C.M.
Luchessa WN6O, suffers a similar problem and asks: "Any remedial information will be appreciated".) The problem was solved by
changing D5 and D6 (originally they were clipping the audio at 0.7 volts). I made the change by putting 3 silicon diodes on each leg,
so now the clipping is done above 2 volts, and not at 0.7 volts, R11 was changed from 27 to 10 ohms. Again, before closing the
patch's cover, I added a few more mods.
A. I couldn't work vox properly with the PC-1A because I couldn't null deep enough the bridge. VR1 was partly nulling at the far end of
it's position. Adding a 1.5k ohm in parallel with R5 (or alternatively just changing R5 to a single 470 ohm resistor) brought the null to
the mid-position of VR-1.
B. Although the null is now centered, it was not deep enough. Adding on 0.1 uf disk capacitor in parallel with RF balanced the reactive
component of the bridge, the null became extremely sharp!
C. An addition of a high pass filter to the patch that gives the same effect as the "low cut" position on the MC-85 microphone was
"very helpful" when the PC-1A was connected to the SSB HF ring. The filter is simply made of a 10K ohm resistor and an 0.02 uf
capacitor. (see it on the modified scheme (next month)).
With all the changes I made to both the PC-1A and the MC-85, I'm most satisfied and I would very much like to hear your remarks
(maybe published in the I.R.I. too!).
User comment
Date: 02-02-2002
From: PT2OM - Marcelo
Subject: mc85 mods
The instructions not is complete. Where the instructions number 1, 2 and 3 ??
top of page
This modification is read 1278 times.
03-02-2001
(MC-85) Connect Kenwood MC-85 to Yaesu FT-100
Author: Björn Karlsson - [email protected]
Connect other microphone to Yaesu FT-100.
Here´s a description on how connect Kenwood MC-85 to Yaesu FT-100
It was problems was PTT switch shall connect.
Here below does I a description how microphone shall connect to radio and which components that be needed.
Components
A:= 82 Kohm
B:= 39 Kohm
C:= 27 Kohm
82K be needed to Up switch
39K be needed to Down switch
27K be needed to PTT switch
Kenwood MC-85
5 4 6
4
3
<->Connect to digits in modular
Connection. (2 and 6 connect along
in the mic Before the connect to pin 4
in modular connection.)
6-pins modular jack
Mic-jack Yaesu FT-100 / 90 / 8100.
Pin
Pin
Pin
Pin
Pin
1:
2:
3:
4:
5:
SW 2 multi-function switching
N.C. (9600bps packet data output FT-90)
+9v
GND
Microphone Input
Pin 6: SW 1 PTT, UP och DOWN
73 Bjorn SM5SWI
This modification is read 1148 times.
top of page
19-07-1998
(PS-430) No protection on Powersupply
Hallo Guys.
I had have some problems with originale Kenwood Powersupply (PS-430) The final-solid-states has brooken on it, so absolutly no
protections on this Equipment, and the full 24V DC came to my rig. And i seen it only when the ventilator beginns to run, (faster as
usual) so some minutes i had 24V on my TS-690S , because the display on this Rig has no usual scale-lamps.
But it seem to be, no dommage on the Rig detectable for the moment.
When i repaired than the supply i made a little change on it. So take a look on your Powersupply iff they has an overvoltageprotection,
iff not you can use following very simple, but sure circuit.
+13.8 V <- from
_________________________ Regulation
-> +24 V
Fuse
¦
________¦----¦_________
¦
¦----¦
¦
/
Zd 14 or 15V 1W
¦
/--¦
¦
¦
_¦_
Th ¦
¦ ¦ R1 100 1/2w
__¦__
¦_¦
/
¦
/
¦
¦\_________¦
¦
¦
¦
_¦_
¦
¦ ¦ R2 1K 1/2w
¦
¦_¦
-> -24 V
¦
¦
_______________________¦__________¦______________________
Explication :
Iff the Outputvoltage (13.8V) came over the Zenerdiode + the ignition-voltage from the Thyristor, this will be Shortcircuit the +24V
and the - So the fuse will be smelting, and no dommage on your Equipment.
Important the fuse and the Thyristor must been adapt to your Power, not that the Thyristor are broking and the fuse not.
This modification is read 657 times.
top of page
16-04-2000
(PS-430) PS-430 Voltage increase with TH-205/215
Author: Trio-Kenwood Communication, inc.
Service Bulletin no. 938 (2-6-1988)
When the PS-430 is used as an external D.C. power supply for the TH-203/215, the output voltage may increase to approximately 20V
due to RF feedback. This condition is restricted to operating in the high power mode with the supplied helical antenna. Adding a bypass capacitor between the base and emitter of Q2 on the AVR board of the PS-430 will correct this occurrence.
Required parts:
1000 pF, 50V capacitor (CK45B1H102K)
1. Remove power from the PS-430.
2. Remove top cover of the power supply (10 screws).
3. Locate transistor Q2 on the upper left hand side of the AVR board (X43-1440-00). The transistor and thermistor TH1 are covered
with a piece of shrink tubing to keep them in close contact with one another.
4. Remove the shrink tubing from Q2 and TH1.
5. Tack solder a 1000 pF capacitor between the two outside leads of Q2 (base and emitter).
6. Reinstall the shrink tubing (if it no longer fits, just make sure that the thermistor is in physical contact with the transistor).
7. Reinstall the top cover.
This modification is not covered under warranty.
Time required for this modification is ½ hour or less.
This modification is read 628 times.
top of page
19-07-1998
(PS-50) PS-50 Improved Voltage Surge Protection
Author: Trio-Kenwood Communication, inc.
Service Bulletin no. 914 (23-5-1986)
We have received a few reports regarding the loss of transistor Q4, resistors R2, and R3, and zener diode D4 on the AVR UNIT.
Apparently a voltage surge on the power input might cause D4 to short. If this occurs the surge current thru resistors R2 and R3 could
be high causing the failure of the two resistors and Q4.
Procedure:
On the AVR unit X43-1520-00 open or remove diode D4.
If you receive a unit with no output voltage check D4, R2, R3 and Q4. You should replace R2, R3, and Q4 if there is any sign of
damage to any of these components.
This change applies to serial numbers before 7040001.
Time required for this change is 1/2 hour or less.
This modification is read 474 times.
top of page
12-02-2000
(QR-666) QR-666 VFO stability
Author: Trio-Kenwood Communication, inc.
Service bulletin no. 3 (10-01-1975)
Trio-Kenwood is extremely proud af the reliability of our communications gear. Quality control is performed at our Toykyo factoyr as
well as Gardena, California facility.
We have found that a small percentage of the QR-666 SWL receivers may have a slight case of instability if carelessly handled in
shipping.
Here is a simplecure we've found to eliminate the symptons:
Check all screws which hold the RF circuit board (the one with band switch attached). Check top and bottom screws (holding spacers
to shassis).
You'll probably never have this problem, but.......
This modification is read 278 times.
top of page
19-07-1998
(R-1000) Kenwood R-1000 muting
Author: Trio-Kenwood Communication, inc.
Service Bulletin no. 805 (7-2-1980)
Mute Circuit:
The R-1000 has a mute circuit four use in combination with a transceiver or transmitter.
The R-1000 RF stage will mute by grounding pin 7 on the remote terminal.
(See Fig 3-9) in the opertors manual.
This information was inadvertantly omitted from the Owners Manual, and will be included in manuals for serial number 0030502 and
above.
This modification is read 786 times.
top of page
19-03-2000
(R-1000) R-1000 AGC, AM bandwidth changes
Author: Trio-Kenwood Communication, inc.
Service Bulletin no. 813 (19-2-1980)
AGC
To shorten the AM AGC time constant, C2, the AGC capacitor may be changed from the original 4.7uF, or simply delete C2 by clipping
out the 4.7uF as supplied. Access to this component is by removing the top case. On early models, C2 is located behind the MODE
switch, and on later models, is located on the RX unit as C138 adjacent to connector 13.
AM Bandwidth optional wiring
If you desire substituting the AM 6KHz filter in favor of the 12KHz for AM WIDE, and the 2.7KHz filter for AM narrow, install the
optional BWK-1 connector kit (see reverse) in-line at connector 3 on the RX unit X55-1250-00.
24 HR clock
Contrary to popular rumor, the clock module IS NOYT convertable to 24 hour format.
BWK-1
The BWK-1 is an optional AGC and Narrow bandwidth kit for early production R-1000 receivers. It allows using the SSB 2.7KHz filter
for AM narrow, and includes a 1uF cap for shortening the AGC time constant.
This kit includes instruction to fabricate and install the connector and to locate and replace the cap. This does require some technical
ability.
This kit is for serial numbers before: 0030001-0051600 & 0060001-0060400 cap change and before serial numbers 010xxxx for
selectivity. Later production has the 1uF cap, and internally selectable AM bandwidth.
Contents of this kit:
1. Diode
1. Male connector 3 pin
1. Female connector 3 pin
2. Female connector pins
1. 1uF @ 16V (or greater) capacitor
1. instruction sheet
Additional Requirement
45 Watt or smaller soldering pencil.
60/40 rosin core solder
small cutting plier
#2 Philips screwdriver
Installation:
Install as outlined on the reverse side of the instruction. Disconnect power before opening the R-1000.
Connector fabrication read before proceeding.
1. Cut the leads on the diode to approximately 3mm or 1/8 inch, and save the cut leads.
2. Lay the connectors diode, leads and female connectors out just as pictured. Be sure the index on the diode and each connector is
as shown:
3. Solder the diode and leads the Female connector pins.
4. Insert the Female connector pins in the Female connector so the metal tabs lock into the plastic connector.
5. Solder the diode and leads to the Male connector. Fabrication is complete.
top of page
This modification is read 822 times.
19-03-2000
(R-1000) R-1000 RF attenuator 10 dB step option
Author: Trio-Kenwood Communication, inc.
Service Bulletin no. 823 (22-4-1980)
The RF Attenuator may be converted from the standard 20 dB step to 10 dB by replacing resistors on the RX unit X55-1250-00.
Replace
With
R1
2
3
4
5
6
7
8
9
10
11
12
13
14
15
16
17
18
No Change
R3 1.2K
1.8K
R7 1.2K
4.7K
15K
1.8K
1.2K
No Change
R16 56ohm
No Change
100 ohm
68 ohm
R13 220 ohm
820 ohm
100 ohm
No Change
R12 56 ohm
Type
R (Radial)
R
A (Axial)
A
R
A
R
A
R
A
A
A
A
R
Note: How to Solder on the PC Board.
1.
2.
3.
4.
5.
Use a LOW POWER PENCIL, 35W or less.
Use rosin cone solder, small diameter.
Do NOT create solder bridges or splotches.
Do NOT overhead or otherwise lift the foil from the board.
Wash exoess flux away with RESH trichlor, and a small flux brush. Neatness counts- It's YOUR radio.
This modification is read 744 times.
top of page
19-07-1998
(R-5000) Kenwood R5000 Modification Notes
The following describes some option jumpers and other features I have found in the Kenwood R-5000 receiver.
The R5000 is fairly delicate internally, so you should not undertake these modifications if you are not fairly confident of your ability to
work with delicate electronics (or to repair it if necessary). In particular, the receiver's numerous circuit boards are connected together
with wire harnesses made of relatively fine and delicate wires. Also, some of the boards (particularly the IF board) have small
"daughter boards" containing small surface mount parts vertically attached to the main board. These are also fairly fragile, and caution
is required in handling them.
EXPANSION FEATURES
The R5000 has six "Expansion Feature" options which are not documented in the user manuals. These are controlled by jumpers
(actually diodes) on the CPU board, which is attached to the back of the receiver's front control panel, underneath a metal RF shield.
Unfortunately, you must completely remove the receiver's covers, and unfasten the front panel, in order to access these.
Gaining Access to the Jumpers
To access the jumpers, remove the top and bottom covers of the receiver by removing the eight silver screws which hold each cover in
place. Use caution at this point, since the radio will be sitting only on its internal chassis, and delicate parts will be exposed.
Next, remove the four flat silver screws which were *under* the covers (NOT the black screws that are visible with the covers on)
which hold the front panel onto the main chassis. Be sure the receiver is sitting on a solid table so that the front panel will not fall off
when you do this, since there are a large number of wire harnesses connecting to the CPU board. Very carefully pull the front panel
forward and rotate it so that you can get access to the back of the front panel.
Loosen the five small metal screws (two at the top, three at the bottom) which hold the RF shield in place over the CPU board. The
holes in the shield the screws go into are slots, which allow you to slide the shield off without removing the screws completely. This is
fortunate since the screws are fairly small. Remove the RF shield.
One other thing to note involves installing the optional filters.
First, I found that the AM filter which came with the radio introduced a whistle into most AM signals. I replaced it with the optional AM
filter, and it eliminated the whistle (and gave a "fuller" sound to the AM).
Also, note that if you install other filters, you have to install them "in order" -- in other words, the narrowest has to go in the N
position, the next narrowest in the M1 position. Note that the M2 position is already occupied (as shipped) by a high-quality SSB filter.
The reason they have to be in order is that as you select narrower and narrower filters, the wider filters remain in the circuit, so if you
put a narrower filter in M1 than you have in N, it will stay enabled even when you select the wider filter, causing the wider filter to
have no effect.
It's a little unfortunate that it works that way, since the M1 filter is only enabled by the switch (not in AUTO mode), which would be
ideal for the very-narrow YK88CN filter. I have identified a modification to make M1 be selected only when the switch is in the M1
position; it involves disconnecting 1/2 of a dual diode and soldering a diode between two prod the PK232.
top of page
This modification is read 1027 times.
19-07-1998
(R-5000) R-5000 No Freq. Change thru Computer Interface
Author: Trio-Kenwood Communication, inc.
Service Bulletin no. 919 (21-7-1987)
R-5000 receivers below serial number 804xxxx may not change frequency when operated with a personal computer/interface. To
allow correct operation, rplace IC-52 on the Control Unit. The correct part number for IC-52 is MBM27C128-25JA2.
CAUTION:
The R-5000 incorporates CMOS technology. Observe precautions for handling electrostatic sensitive devices.
This modification may be performed under warranty.
Time required for this change is 1/2 hour or less.
This modification is read 896 times.
top of page
27-02-2000
(R-5000) Increase the MW sensitivity for R-5000
This modification increases the MW sensitivity of the Kenwood R-5000:
This will help for MW DX or while using a loop antenna when more gain can be useful. All mods are performed on the RF board, on the
side nearest to the antenna connectors.
Jumper R10 with a short length of wire, and cut R11. Cut R9 and put a 470 Ohm resistor in series.
A quick version of this modification is to clip either one [NOT BOTH] of R9 or R11.
This modification is read 928 times.
top of page
13-02-2000
(R-599) Service Notes on R-599A/D
Author: Trio-Kenwood Communication, inc.
Service bulletin no. 8 (2-11-1977)
1.
2.
3.
4.
5.
6.
7.
8.
VFO Drift: Bad Q1 3SK22(Y) (40-0016-18). Also change R1 270K to 1M Q1 bias.
Low sensitivity: Check Q1 3SK22(GR) (X44-0020-00).
No Tranceive operation: Check for dirty contact of transceive switch or broken wires at switch.
Receiver sensitivity: Q4 2SC733(Y) on IF unit (X48-0011-00).
No receive with tranceive switch in the TX or reverse: Check for cut coax at VFO terminal of IF unit (X48-0011-00).
No VFO receiver: Check L3 at Q1 in VFO (X40-0016-00).
Receiver 10 to 20 dB down: Check protection diodes D1, D2 1N60 at (X44-0020-00).
FM doesn't work: Check T8 discriminator transformer on (X48-0011-00).
This modification is read 655 times.
top of page
19-02-2000
(R-599) Removing CB Band from R-599A/D
Author: Trio-Kenwood Communication, inc.
Service bulletin no. 31 (15-3-1978)
One of the items in the FCC's expansion of the CB band to 40 channels was to require all receivers that have a speciffic CB or 11
meter band be type accepted.
The R-599A and R-599D receivers have not been type accepted and we do not plan to have this done as they are designed for the
ham bands, We have therefore removed the CB position from the current production of R-599D receivers and this band position is now
labled AUX.
This ruling also applies to any used R-599A or R-599D receiver you may have in stock. The following instructions are for removing the
CB band. This will satisfy the FCC and make the receiver saleable.
1.
2.
3.
4.
5.
6.
7.
8.
9.
10.
11.
12.
13.
Remove top cover.
Remove bottom cover.
Remove shield plate from coil pack.
Set band switch to 14 MHz.
Remove the black wire from the OSC coil Unit. (This wire is on the top side.)
Loosen screws on shaft coupling and slide shaft out about 2 inches.
Unsolder the OSC coil Unit from the mounting bracket and remove it from the coil pack.
Unsolder and remove the CB coil and crystal.
Replace the OSC Coil Unit and solder it in.
Slide the band switch shaft in place, making sure that each wafer is properly indexed.
Resolder the black wire to the OSC Coil Unit.
Replace all cover.
Check for prpper operation.
This modification is read 599 times.
top of page
16-04-2000
(RC-10) RC-10 Hang up time/timeout timer settings
Author: Trio-Kenwood Communication, inc.
Service Bulletin no. 922 (2-11-1987)
The RC-10 hang up time and timeout timer (Cross-Band Repeater function) are preset at the factory for three seconds and three
minutes respectively. Should it become necessary, the RC-10 can be following procedure will allow the user to select the best setting
for his requirements.
Procedure:
1. Disconnect the RC-10 from all other equipment.
2. Using a thin plastic tool, remove the KENWOOD badge from the handset.
3. Underneath the badge are two holes in the handset. Remove the machine screw from the left hole.
4. At the bottom of the handset locate two small holes in the plastic molding (see figure 1). Press a narrow alignment tool into both
holes and pry the handset apart (be careful not to break the short wires inside).
5. Remove the PTT and AF level knobs.
6. Remove the three 3 x 6 mm machine screws that secure the metal shield to the handset.
7. Lift the AF unit and shield to expose the Keyboard assembly.
8. Locate resistors R8 - 11 on the Keyboard assembly (figure 2).
9. Connect the left side of the resistor to the ground side (right side) of capacitors C8 - 11. Use the timing chart and figure 2 for
timing configurations.
10. Reassemble the handset. Route all wires under the cut outs on the shield. Do not pinch any wires.
+------------------------------------------------------------------+
|
HANG UP TIME
TIMEOUT TIMER |
+------------------------------------------------------------------+
|
R10
R11
R8
R9 |
| 0
SEC
0
0
0 SEC
0
0 |
| 0.25 SEC
0
1
30 SEC
0
1 |
| 0.50 SEC
1
0
1 MIN
1
0 |
| 3
SEC
1
1
3 MIN
1
1 |
+------------------------------------------------------------------+
|
1: Do not connect to ground
|
|
0: Connect to ground
|
+------------------------------------------------------------------+
This modification is read 489 times.
top of page
16-04-2000
(RC-10) RC-10 Alternator noise
Author: Trio-Kenwood Communication, inc.
Service Bulletin no. 927 (28-10-1988)
When two transceivers are connected to the RC-10, alternator noise may be induced in the mic circuits. The following modification will
correct this condition.
Parts required:
600 ohm isolation transformer
470 µH ferri-inductor
W05-0222-00
L40-471-05
qty 2.
qty 1.
1. Remove the base plate from the RC-10 (6 screws on the plate; 1 screws on the back panel).
2. Add the ferri-inductor between pins 7 and 8 of the connector B as shown below.
3. Locate connectors J2 on the AF unit (X49-3010-XX B/3).
4. Add a transformer in each mic circuit as shown below.
5. Using double sided tape, secure each transformer to the side wall on the base.
This modification may be covered under warranty.
Time required for this modification is ½ hour or less.
This modification is read 469 times.
top of page
19-07-1998
(RC-1A) Mod for MC-85 MIC and RC-1A phone
I am a Ham Radio Operator (call signed 4Z4MJ). My station is exclusively Kenwood (TS-940s, TL-922, TR-2400, TR-7950, MC- 85, and
the PC-1A phone patch) and I'm very content of having the honor to belong to the Kenwood family.
In Israel, I work as an electronic design engineer and on my free time, I'm always anxious to solve design problems and add my own
modifications to the shack. I would like to present you the modifications I have made and hope they might be helpful. (The mods deal
with the MC-85 microphone and the PC-1A phone patch; I enclose them with this letter and emphasize the changes with the yellow
marker, So let's start........
When I purchased my TS-940S with the MC-85 microphone, I was very happy with the 940 but sad about the 85. The problem was
R.F. feedback when I was touching the microphone's goose- neck with my hand, (or when the linear was on, it happened without even
having to touch the mic).
Not only that, I was not able to function the S-201 (mic selector of the MC-85) if I was connecting more than one rig to the MC-85. At
first I thought my MC-85 is malfunctioning, but from talking with five other hams in Israel who own the MC-85, I heard that they all
suffer the same problems!!
The main problem was caused because of a ground loop. There were two (2) grounds to ECM unit (you know it's illegal).
The ground on the p.c. near the Q1 transistor is absolutely fine, but what about the one that makes a ground connection between the
ECM unit and the top of the goose neck? The solution is described on the enclosed paper marked (1). The addition of (2) and (3) were
needed to give more R.F.
attenuation to the common mode and to the differential mode rejection respectively.
In summary, (2) and (3) are necessary but (1) is a MUST. These mods cured completely all the RF feedback problems that one can
have with the MC-85. Before closing the microphone's base cover, I added a few more mods. I hope they are clear from the modified
scheme and the notes. (Notice that all these mods can be done without having to remove the printed circuit board.) A similar thing
happened wtih the PC1-A phone patch...started because of a "serious" problem and ended with extra "very helpful" mods.
The "serious" problem was that no matter how loud I put the RX gain control, there was never enough audio to the telephone line, and
not only that, the audio was distorted! (See IRI of April, 1987, Issue No. 64, Page K64, where C.M.
Luchessa WN6O, suffers a similar problem and asks: "Any remedial information will be appreciated".) The problem was solved by
changing D5 and D6 (originally they were clipping the audio at 0.7 volts). I made the change by putting 3 silicon diodes on each leg,
so now the clipping is done above 2 volts, and not at 0.7 volts, R11 was changed from 27 to 10 ohms. Again, before closing the
patch's cover, I added a few more mods.
A. I couldn't work vox properly with the PC-1A because I couldn't null deep enough the bridge. VR1 was partly nulling at the far end of
it's position. Adding a 1.5k ohm in parallel with R5 (or alternatively just changing R5 to a single 470 ohm resistor) brought the null to
the mid-position of VR-1.
B. Although the null is now centered, it was not deep enough. Adding on 0.1 uf disk capacitor in parallel with RF balanced the reactive
component of the bridge, the null became extremely sharp!
C. An addition of a high pass filter to the patch that gives the same effect as the "low cut" position on the MC-85 microphone was
"very helpful" when the PC-1A was connected to the SSB HF ring. The filter is simply made of a 10K ohm resistor and an 0.02 uf
capacitor. (see it on the modified scheme (next month)).
With all the changes I made to both the PC-1A and the MC-85, I'm most satisfied and I would very much like to hear your remarks
(maybe published in the I.R.I. too!).
top of page
This modification is read 241 times.
18-03-2000
(RM-76) RM-76 Battery Back Up Power
Author: Trio-Kenwood Communication, inc.
Service Bulletin no. 59 (14-12-1979)
To retain memory in the RM-76, an optional DC Cable and usersupplied battery may be used. This would be useful where transferring
the unit Base to Mobile, or when operating on an AC supply which cannot be run continuously.
Connect a DC Cable assembly, E30-0220-05, as illustrated. This will connect at the RM-76 rear panel.
Battery recommendation is 7.5V DC.
Current drain is less then 50mA at memory on.
This modification is read 425 times.
top of page
18-03-2000
(RM-76) RM-76 Microprocessor failure
Author: Trio-Kenwood Communication, inc.
Service Bulletin no. 802 (8-2-1980)
When servicing an RM-76 for IC5 failure, also check pin 39 vdd voltage which should be approximately 6 V DC. Higher voltage will lead
to premature second failure. An incidental symptom for this problem would be such reports as all "8's" before total failure.
Replace IC5 and IC2, NJM78L06A, the 6V regulator for the Microprocessor. Also check IC1 FS7806M, which supplies regulated 6V for
all other sections. Failure of this regulator (at about 10V DC) will give all logic hi's.
This modification is read 427 times.
top of page
18-03-2000
(SM-220) SM-220 Shield Installation
Author: Trio-Kenwood Communication, inc.
Service Bulletin no. 57 (30-11-1979)
For Sweep interference from the SM-220 back into either a TS-520 or TS-180S, install an additional shield in the RF compartment in
the SM-220.
1.
2.
3.
4.
5.
6.
7.
Disconnect the power cord from the back of the scope.
Remove the scope top cover.
Loosen the function and RF ATT shaft couplers using a 1,5 mm allen key. Withdraw the shafts away from the RF compartment.
Remove RF compartment screws from the rear panel.
Remove 4 screws to open the RF comp.
Remove one screw to remove internal shield.
C6, a .01uF. runs from the Function Switch to a ground point under the RF ATT switch. Cut the ground lead and shorten so the
cap is grounded to the ground point under the Function Switch.
8. R2, a 10 Kohm, is attached to the terminal strip directly under the Function Switch. Reposition this resistor from the top of the
terminal strip the bottom of the strip.
9. Install the additional shield to the ground point under the Function Switch.
10. Reverse disassembly procedure to reassemble.
This modification is read 768 times.
top of page
18-03-2000
(SM-220) Feedback Between Pan display and IF Out
Author: Trio-Kenwood Communication, inc.
Service Bulletin no. 66 (25-7-1978)
We have found a few cases of feedback when the pan display option was installed in the SM-220 Station Monitor. This is due to the
isolated ground of the BS-5 or BS-8 pan display option.
It may be remedied by grounding the case of the input transformator in the BS-5 or BS-8 to the case. (See drawing below.) This
change will be incorporated in all future delivered of the BS-5 and BS-8.
top of page
This modification is read 730 times.
20-04-2000
(SM-230) SM-230 Bandscope attenuator
Author: Trio-Kenwood Communication, inc.
Service Bulletin no. 970 (29-5-1990)
When the SM-230 is used as a bandscope, the attenuator circuit is bypassed. Sometimes it is necessary to use the attenuator during
strong signal reception or high noise conditions. The following modification will allow the attenuator circuit to function in the
bandscope mode.
Required parts:
W05-0309-00 ATT SUB-UNIT
1. Disconnect the power cord patch cords.
2. Remove the top cover (6 screws).
3. Remove the Horizontal unit's mounting screw and secure the ATT sub-unit with the supplied 2.6mm screw washer.
4. Remove connector P12 from the Horizontal unit and insert it into jack P1 on the ATT sub-unit.
5. Insert connector JA from the ATT sub-unit into jack P12 on the Horizontal unit.
6. Insert the two wire plug, supplied in the kit, into jack P2 on the ATT sub-unit.
7. Solder the exposed ends of the red and the brown wires to the Panel units as shown in figure 2.
8. Solder the two jumper wires (they look like resistors) as shown in figure 2.
This modification may be covered under warranty.
Time required to perform the modification is ½ hour or less.
top of page
This modification is read 628 times.
21-04-2000
(SM-230) SM-230 RTTY cross pattern attenuation
Author: Kenwood Communication, inc.
Service Bulletin no. 975 (8-8-1990)
Some users of the SM-230 have reported that the MARK and SPACE gain adjustment do not sufficiently reduce the signals to display
them on the CRT. The following modification will correct this condition.
Required parts:
680 ohm 1/8 watt resistor. RD14CB2B681J QTY. 2
1. Disconnect the power cord and controls cables.
2. Remove the top cover (6 screws).
3. Locate the Horizontal unit. This board is vertically mounted on the right side of the SM-230.
4. Locate resistors R318 and R322 on the Horizontal unit.
5. Replace R318 and R322 with 680 ohm resistors.
6. Assemble the SM-230.
7. Adjust the MARK and SPACE gain adjustments as necessary to obtain the correct cross pattern.
Time required to perform this modification is 1 hour or less.
top of page
This modification is read 568 times.
23-04-2000
(SMC-34) SMC-34 Distorted/muffled transmit audio
Author: Kenwood Communication, inc.
Service Bulletin no. 1031 (20 July 1993)
Symptom:
Transmit audio from the SMC-34 sounds distorted or muffled as compared with the audio provided by the transceiver own
microphone.
Corrective action:
Replace the front of the microphone, add a cushion inside the microphone well and change the plastic sheet inside the microphone
well.
Parts required:
Qty
1
1
1
Description
Front Case
Cushion
Sheet
Kenwood Part No.
A02-1696-18
G13-1397-08
G11-0692-08
Circuit description
NA
NA
NA
Procedure:
1. Remove the three small black Phillip's head screws from the rear of the speaker microphone.
2. Carefully remove the back cover. The "Lock Switch" lever and PTT lever can now be removed.
3. Remove the volume control knob by pulling straight away from the case.
4. Remove the two small black Phillips's head screws that secure the PC Board assembly to the front case of the microphone. You
can now gently lift the PC Board assembly straight up and away from the front case.
5. Remove the packing, screen, and sheet from the front case of the speaker microphone.
6. Insert the cushion, sheet, screen and backing as shown in the accompanying illustrations.
7. Reverse steps 1 - 4 to reassemble the unit. Note: Carefully remove the rubber gasket from the old front case and position it in
the new front case groove before replacing the rear case.
Time required for this modification is .5 hour or less.
top of page
This modification is read 390 times.
12-02-2000
(T-599) Service Notes on T-599A/D
Author: Trio-Kenwood Communication, inc.
Service bulletin no. 7 (2-11-1977)
1. No ALC - Drive 10 meters: Check for loose contact at oscillator wafer on coil pack.
2. No TX any band: Check the T1 on generator board (X52-0009-00).
3. No TX: Bad driver FET Q1 3SK22(GR) on X47-0004-00).
4. No relay action when TX: Bad Q8 2SA562(Y). When replacing Q8 change resistor R16 to 4.7 ohm.
5. Rubber belt sliping on drive and load: TKC has Chain Modification Kit.
6. No drive when shock: Check for loose output terminals af final rotary switch (S10-1002-05).
7. No output on any band: Check T2 GEN unit (X42-0009-00).
8. No TX: Check final relay for burned contacts. (S51-4017-15).
9. Bias current too high and blows fuse: Check for bad 6-7001A and shorted cathode resistors 10 ohm.
10. Cannot neutralize: Make sure shield is properly installed on driver 12BY7.
11. No output from generator unit (X52-0009-00): Bad Q4 TA7045.
12. No 9 Volt out at AVR (X43-0010-00): CHeck Q1 2SA606(L).
13. Low output power: If American 12BY7 is used in driver circuit, this can cause parasitic oscillation. Please use standard Kenwood
replacement tubes.
14. Blows fuse: Check for shorted electrlytics at power supply (X43-0011-00).
15. AC hum on SSB transmission: Send for TKC bulletin.
This modification is read 582 times.
top of page
13-02-2000
(T-599) Reducing 120Hz hum in T-599D
Author: Trio-Kenwood Communication, inc.
Service bulletin no. 17 (6-9-1977)
There hace been some cases of 120Hz hum in the T-599D. This may be reduced by removing L-1 (1mH) on the generator unit (X520009-00) and replacing it with a 47 ohm resistor. Shown below is the generator unit board with this change.
This modification is read 529 times.
top of page
19-07-1998
(TF-541) TF541E & 9k6 so gehts
Hallo Kenwood-TF541E-User
hier ein Vorschlag um den TF541E am TNC2c zu betreiben .
Erst mal die Erklärung warum das gerät nicht auf Sendung geht :
Der TNC hat auf der Data-Leitung oder Signal-Ausgang zum tnc ständig eine Gleichspannung von 2 Volt anstehen . Diese 2 Volt
verhindern das das Gerät auf Sendung geht .Kann man kontrolieren wenn man die Modulationsleitung ablötet und dann mit einem
Packet-Programm versucht zu senden .jetzt geht es ,aber nur ssolange bis die Leitung wieder dran ist . wie auch beim TNC2S mit
G3RUH-Modem muss auch hier die Leitung mit einer Schaltung getrennt werden .
Dazu wird benötigt :
1 x 74HC132
1x 4066
2 Fassungen 14 polig
1 Condensator 68pF (Folie oder Plattencondensator)
ein Stückchen Lochrastenplatine und etwas Draht
Die beiden Fassungen auf die Lochraster-Platine setzen (und anlöten natürlich) jetzt festlegen in welche das 74HC132 soll und in
welche das 4066
beide Chips bekommen +5 Volt auf pin 14 und Masse auf pin 7 Die Spannung kann man von der g3ruh-platine abnehmen
(Highspeedleiste)
jetzt einen Draht vom Flachbandkabel (lötseite des G3RUH Pin 7+8) (PTT) zum 74HC132 (oder Fassung) auf pin1+2 löten und von
pin3 zum 4066 pin 13 verbinden
Die Adern 9+10 (Modulation zum RX/TX ) trennen und das Ende das vom G3RUH kommt auf den 4066 Pin 1 löten (evt mit einen
Draht verlängern).
nun kommt der Condensator mit einem Beim auf Pin 2 (4066) und an das andere Bein kommt das Ende das zum Stecker geht .
Die Platine kann jetzt mit einem Stückchen Teppichklebeband neben dem G3RUH im Gehäuse festgeklebt werden .Aufpassen das es
keine leitenden Verbindungen zum Gehäuse giebt (Kurzschlussgefahr) .
Jetzt können die IC's in die Fassungen gesetzt werden und schon kanns losgehen
Ich habe die Schaltung in meinem TNC2S eingebaut .Bei mir wurde allerdings der Empfänger durch die Dauerspannung unempfindlich
Als ich nun von DG2BAQ die Schwierigkeiten mit dem TNC2C hörte und ich die Unterlagen vom TNC2C durchsah kam mir die Idee das
es der gleiche Grund sein könnte und ich probierte es aus (siehe oben Draht ablöten usw.).
Dann versuchte ich als erstes den Vorschlag nur mit dem Condensator aber das brachte nicht den vollen Erfolg .In Verbindung mit der
Schaltung allerdings klappt es jetzt ausgezeichnet .
This modification is read 222 times.
top of page
19-07-1998
(TH-205) TH-205/215 Protection Fuse Replacement
Author: Trio-Kenwood Communication, inc.
Service Bulletin no. 920 (22-7-1987)
When a plug other than the PG-2V or PG-3C is inserted into the DC IN jack, the ground side of the jack may not disconnect. This may
cause the external DC power to be supplied directly to the internal battery which results in overheating the battery and blowing the
fuse. To protect the battery, replace the fuse with a protection diode, part number ERB83-004.
Note models with serial numbers greater than 801XXXX allready incorporate this diode as D16.
This modification may be performed under warranty.
Time required for this change is 1/2 hour or less.
This modification is read 515 times.
top of page
19-07-1998
(TH-205) 144 - 165 TX/RX mod for the TH-205
To open your th-205,215,or 225 all you have to do is take out the screws on the back, and gently open up the front of the unit...
Locate the obvious 4 jumper bridges on the pc board. The bridges are numbered j-1, j-2, j-3, and j-4..Jumper j-3 has already been
cut...
Carefully snip jumpers j-1 and j-2 and ever so slightly seperate the snipped bridges to insure no-contact betwen the points..
Reassemble the unit..Look at your instruction manual and reset the microprocessor..The mod will not work until you reset the mpu...
The info. For reset is near the back of the manual..After that the unit is wide open to operate between 144 to 165.
This modification is read 581 times.
06-01-2000
(TH-205) Expanding TX and RX for Kenwwod TH-205
top of page
Remove rear cover from handheld, on the board you will see easily three solder links, bridge the left and the middle links.
Turn the radio back on.
This mod expands the RX more than the TX.
This modification is read 568 times.
top of page
16-04-2000
(TH-205) TH-205/215/415 Volume/squelch control improvement
Author: Trio-Kenwood Communication, inc.
Service Bulletin no. 944 (28-10-1988)
The transceivers mentioned above can be mechanically improved by adding a bracket assembly to the volume and squelch controls.
The bracket assembly is being used in current production and is available for older units from the Kenwood Parts Department.
Bracket Ass'y (W05-0235-00)
1. Disconnect the battery pack and antenna.
2. Remove the 7 screws from the panel of the transceiver (Figure 1).
3. Lift the front panel from the transceiver and lay it to the right side.
4. Disconnect the 2 flex cables and remove the 3 screws from the IF unit (Figure 2).
5. Pull the top panel off and the remove the IF unit.
6. Remove the knobs and black cloth from the volume and squelch controls.
7. Inspect the controls to insure they are mounted flush to the board. If they are not flush, completely desolder and resolder the
controls.
8. Insert the bracket over the controls and tighten the nuts (tighten the nut on the volume control first). See figure 3 for the
bracket assembly view.
9. Assemble the transceiver be reversing steps 1 - 6.
This modification may be covered under warranty.
Time required for this modification is ½ hour or less.
This modification is read 511 times.
top of page
16-04-2000
(TH-205) TH-205 Signal-To-Noise ratio improvement
Author: Trio-Kenwood Communication, inc.
Service Bulletin no. 945 (28-10-1988)
During strong signal reception, the noise level may appear to increase due to unstable action of the active filter in the PLL. To improve
the sig-to-noise ratio, install a 390 Kohm resistor on the emitter of Q12 (active filter) as described below.
Required parts:
390 Kohm chip resistor (RK73FB2A394J)
1. Disconnect the battery and antenna.
2. Remove the 7 screws from the back panel of the transceiver (figure 1).
3. Lift the front panel from the transceiver and lay it to the right side.
4. Disconnect the 2 flex cables and remove the 3 screws from the IF unit (figure 2).
5. Pull the top panel off and then remove the IF unit.
6. Remove the 8 screws from the RF unit and unplug connector CN2 (figure 3). Remove the RF unit from the back cover.
7. Locate capacitor C82 on the foil side of the RF unit (figure 4).
8. Solder the 390 Kohm chip resistor directly on top of C82.
9. Assemble the transceiver by reversing steps 1 - 6.
This modification may be covered under warranty.
Time required for this modification is ½ hour or less.
top of page
This modification is read 518 times.
21-04-2000
(TH-205) TH-205/215/315/415 PTT knob installation procedure
Author: Kenwood Communication, inc.
Service Bulletin no. 987 (11-6-1991)
The original plastic knob (K29-3054-15) has been replaced with a rubber knob (K29-3054-35). The PTT mounting guide on the front
panel must be removed to allow the new knob to be installed. The following procedure will explain the installation procedure.
1. Disconnect the battery pack and antenna.
2. Remove the four screws from the back panel.
3. Carefully lift the front panel up and lay it into the right side of the body of the transceiver.
4. Disconnect the front panel from the body of the transceiver.
5. The plastic PTT knob is held in place with three tabs. Press in the bottom tab and then push the knob out of the front panel.
6. Push in the guide to crease it's two legs where they join the front panel.
7. Wiggle the guide back and forth until it breaks off the front panel. Discard the guide and plastic knob.
8. Install the rubber knob on the front panel. The side with the square tab goes toward the bottom of the front panel.
This modification is read 511 times.
top of page
19-07-1998
(TH-215) TH-205/215 Protection Fuse Replacement
Author: Trio-Kenwood Communication, inc.
Service Bulletin no. 920 (22-7-1987)
When a plug other than the PG-2V or PG-3C is inserted into the DC IN jack, the ground side of the jack may not disconnect. This may
cause the external DC power to be supplied directly to the internal battery which results in overheating the battery and blowing the
fuse. To protect the battery, replace the fuse with a protection diode, part number ERB83-004.
Note models with serial numbers greater than 801XXXX allready incorporate this diode as D16.
This modification may be performed under warranty.
Time required for this change is 1/2 hour or less.
This modification is read 613 times.
19-07-1998
(TH-215) TH-215A to TNC
top of page
The hook-up of a th-215a to my pac-comm tiny 2 tnc was very easy. There are no components involved in the connection. All you
need are two phone plugs: 1 sub mini, and 1 stereo(3 conductor) mini.
Both available from radio shack,two to a pack.
if you have a kenwood speaker mike, then the instruction sheet will contain a drawing showing the basic connecting lines. if not, heres
how its done:
The sub-mini is the speaker plug. The center pin goes to the speaker pin on the 5 pin din on the tnc, the shaft is the ground.
On the mini stereo plug, you dont use the center pin, just the two shaft connections. the short shaft goes to mike, the long shaft is the
push to talk......thats it, four wires to the connector that goes to the tnc plug, and youre in business!!
One very very important thing-----always make sure that all battery save functions on the handy talkie are off. if it isnt, a slight delay
in receiving will cause retrys from the station sending to you, and will delay packet reception at your end. please make careful note of
this. Any questions, reply to K2JOV, HARRY, at N2ELC-4 BBS in n.j......good luck!!
This modification is read 610 times.
top of page
19-07-1998
(TH-215) KENWOOD TH-215A out-of-band mod
1.
2.
3.
4.
Remove two screws from belt clip
Remove 4 screws from back of radio
Slide front assembly off
Locate set of 4 jumpers:
J4:
J3:
J2:
J1:
intact
cut
cut
cut
(top front inside)
+--------------------------------------+
|
|
|
|
|
+--------+
|
|
|
|
|
|
|
|
|
|
+--------+
|
|
|
|
+--------+
|
|
|
|
|
|
J4 o---o
|
|
|
|
J3 o) (o
+--------+
|
|
J2 o) (o
|
|
J1 o) (o
|
|
|
|
|
|
|
|
SPKR
|
|
|
|
|
|
mic
|
|
|
+--------------------------------------+
5. Reassemble radio.
6. Reset microprocessor: Turn radio on while simultaneously pressing both _F_ key and _ENTER_ key.
<
This modification is read 752 times.
19-07-1998
(TH-215) A TH215 no audio fix
Newsgroups: rec.ham-radio
Subject: Re: Kenwood TH-215A no audio problem
Organization: Hewlett-Packard Co., Corvallis, OR, USA
PROBLEM:
>In a sample population of about 60 amateurs in this town, three of us
>own Kenwood TH-215A HT's, all purchased separately at different times
>from different sources....
>ALL THREE have developed an audio problem in the last eight months:
top of page
>the audio (both from the microphone and from the keypad) simply
>disappears at unpredictable intervals. And all three can be "fixed"
>by WHACKING the HT with the palm of one's hand--until it happens again.
A POSSIBLE FIX:
You guys may be in luck, since I fixed mine -- I have the service manual and decided to jump in (I had upgraded the software and you
have to pull the unit completely open to do it -- ). Anyway, I was using the rig one day and the next -- no audio -- just a slight noise
that appeared to be white noise from the final audio buffer. When plugging in the speaker mike -- same problem. Touch the TTPAD
and get your ears blown away -- I think beep also worked. Kenwood had no knowledge of previous problems.
I had to rig-up a jumper ribbon cable so I could lay the rig out for testing and immediately checked the input audio to the volume
control.
No problem -- but there was nothing coming out the other side. I jumpered the pot (i.e. simulate pot max volume) and my ears were
hurting. Upon removal of the pot I found a crack on the ALPS pc board that has the leads mounted to it. Apparently, I must have hit
the volume control pot the previous day and cracked the pot trace (again this trace was part of the pot not the rig pcb). I had noticed
when I disassembled the unit that there was no nut on the pot to hold it in place (none on the squelch either). The volume pot is right
at the edge of the unit and is the most likely knob to get hit.
When parts arrived, it came with a nut so I installed it to help prevent this problem in the future -- no problems since.
I think the switched volume pot cost $4.95 + $3.00 shipping.
I also picked up a set of backcase screws -- very small heads but very long screws to replace my old ones -$.05 - Make sure you have
a "good" screwdriver that really fits.)
All these problems sound like the same thing. I have never had any problems with my rig, and I bought one of the first ones out.
(Hence, the software update to give me the ability to lock out memory channels during scan.)
User comment
Date: 04-01-2002
From: Brent Corbin, wy6s
Subject: Audio problems on all th-x15's?
Wow - I bought two th-315's, and have precisely this problem with one of them.
More than likely the problem afflicts the entire th-x15 series. Replacing the
volume pot (in my case, to repair earthquake damage) did not fix the problem
on the transmit audio - it did fix similar behavior in the receive audio caused
by a broken pot trace.
top of page
This modification is read 612 times.
19-07-1998
(TH-215) TH-215 jumper modification
The Th215 tranceiver can be modificated by setting jumpers in the following positions:
J1 J2 J3 J4
RX
TX
step
DTMF
TONE
__________________________________________________________________________
1
1
1
1
144-146Mhz
1
1
1
0
141-163Mhz
0
1
1
1
144-146Mhz
1
0
1
1
0
1
1
1
0
0
20k
YES
38 tone
5k
YES
38 tone
<==
5k
NO
TONE1750hz
144-146Mhz
<==
5k
NO
1750 hz
0
144-146Mhz
<==
12.5k
NO
TONE/1750hz
1
0
144-146Mhz
<==
12.5k
NO
1750 hz
0
1
1
144-148Mhz
<==
5k
YES
38 tone
1
1
0
1
141-163Mhz
144-148
5k
YES
38 tone
0
1
0
1
141-163Mhz
141-151
5k
YES
38 tone
0
0
0
1
141-163Mhz
<==
5k
YES
38 tone
0
0
1
0
134-148Mhz
<==
5k
YES
38 tone
1
0
0
1
154-174Mhz
<==
5k
YES
38 tone
0 = No jumper
1 = jumpered
<==
144-146
73 de Rune, LA9HAA @ LA1B
Packet: [email protected]
E-mail: [email protected]
Message timed: 17:31 on 20 Sep 95
This modification is read 695 times.
top of page
16-04-2000
(TH-215) TH-205/215/415 Volume/squelch control improvement
Author: Trio-Kenwood Communication, inc.
Service Bulletin no. 944 (28-10-1988)
The transceivers mentioned above can be mechanically improved by adding a bracket assembly to the volume and squelch controls.
The bracket assembly is being used in current production and is available for older units from the Kenwood Parts Department.
Bracket Ass'y (W05-0235-00)
1. Disconnect the battery pack and antenna.
2. Remove the 7 screws from the panel of the transceiver (Figure 1).
3. Lift the front panel from the transceiver and lay it to the right side.
4. Disconnect the 2 flex cables and remove the 3 screws from the IF unit (Figure 2).
5. Pull the top panel off and the remove the IF unit.
6. Remove the knobs and black cloth from the volume and squelch controls.
7. Inspect the controls to insure they are mounted flush to the board. If they are not flush, completely desolder and resolder the
controls.
8. Insert the bracket over the controls and tighten the nuts (tighten the nut on the volume control first). See figure 3 for the
bracket assembly view.
9. Assemble the transceiver be reversing steps 1 - 6.
This modification may be covered under warranty.
Time required for this modification is ½ hour or less.
This modification is read 594 times.
top of page
16-04-2000
(TH-215) TH-215/415 TX signal-To-Noise ratio improvements
Author: Trio-Kenwood Communication, inc.
Service Bulletin no. 946 (28-10-1988)
The TH-215/415 transmit signal-to-noise ratio is typically 30 dB. This ratio is more then sufficient for routine operations. For those
users who would like to obtain additional performance, the following modification will provide an improvement of 5 to 8 dB.
Required parts:
47 ohm 1/10 watt chip resistor
220 ohm 1/10 watt carbon resistor
22 µF 6.3V Electrolytic capacitor
1 µF 50V Electrolytic capacitor
(RK73FB2A470J)
(RD14BB2B221J)
(CE04CW0J220M)
(C90-1248-05)
1. Disconnect the battery and antenna.
2. Remove the 7 screws from the back panel of the transceiver (figure 1).
3. Lift the front panel from the transceiver and lay it to the right side.
4. Disconnect the 2 flex cables and remove the 3 screws from the IF unit (figure 2).
5. Pull the top panel off and then remove the IF unit.
6. Remove the 8 screws from the RF unit and unplug connector CN2 (figure 3). Remove the RF unit from the back cover.
7. Locate R50 (TH-215) or R60 TH-415) on the foil side of the RF unit (figure 4). Replace the resistor with a 47 ohm chip resistor.
8. On the component side of the IF unit, add a 1 µF capacitor as shown in figure 5.
9. Also on the component side, cut one foil, add a 220 ohm resistor, and add a 22 µF capacitor as shown in figure 6.
10. Assemble the transceiver by reversing steps 1 - 6.
>
This is an optional change that may not be covered under warranty.
Time required for this modification is 1 hour or less.
This modification is read 596 times.
top of page
21-04-2000
(TH-215) TH-205/215/315/415 PTT knob installation procedure
Author: Kenwood Communication, inc.
Service Bulletin no. 987 (11-6-1991)
The original plastic knob (K29-3054-15) has been replaced with a rubber knob (K29-3054-35). The PTT mounting guide on the front
panel must be removed to allow the new knob to be installed. The following procedure will explain the installation procedure.
1. Disconnect the battery pack and antenna.
2. Remove the four screws from the back panel.
3. Carefully lift the front panel up and lay it into the right side of the body of the transceiver.
4. Disconnect the front panel from the body of the transceiver.
5. The plastic PTT knob is held in place with three tabs. Press in the bottom tab and then push the knob out of the front panel.
6. Push in the guide to crease it's two legs where they join the front panel.
7. Wiggle the guide back and forth until it breaks off the front panel. Discard the guide and plastic knob.
8. Install the rubber knob on the front panel. The side with the square tab goes toward the bottom of the front panel.
This modification is read 579 times.
top of page
16-12-2001
(TH-215) TH-215A handheld transceiver 12.5KHz modification
Author: Brian G8OSN - [email protected]
I recently inherited a Kenwood TH215 which I decided to press into service but I really wanted the convenience of 12.5KHz channel
spacing - the original offering only 5,10,15,20 or 25Khz spacing.
A trawel of the Web turned up various erroneous or incomplete data - none of which quite did the job. However, this data (from
various sources), combined with some help from another amateur, and a bit of 'head scatching' solved the problem.
The modification is in three parts:
1. Modification of the display and entry logic by use of the 'customer jumpers' J1 to J4. (this data is generally freely available but is
only part of the storey!)
2. Change the reference xtal from 12.8MHz to 16 MHz.
3. Adjust the deviatation to suit 12.5kHz spacing.
Note: After this modificatiom the radio will work between 144 & 145.9875MHz, with 1750 Hz tone and +/- 600 repeater shift. If
anyone cracks the same mod with CTCSS I'd like to know how it is done, please.
Setting the Customer Jumpers
1. Battery, rubber duck and belt clip (2 screws)
2. Remove 4 screws from back of radio
3. Gentley pull front assembly (keyboard & display) off and fold to side.
4. You will find the 'customer jumpers' on the rear of the keyboard pcb. It may be necessary to GENTLEY peal back the cloth cover
over the main uP.
5. Set jumpers to: J1 cut, J2 jumpered, J3 jumpered, J4 cut.
(top front inside)
+--------------------------------------+
|
|
|
|
|
+--------+
|
|
|
|
|
|
|
|
|
|
+--------+
|
|
|
|
+--------+
|
|
| main
|
|
J4:
J3:
J2:
J1:
cut
jumper
jumper
cut
|
J4 o
o
| uP
|
|
|
J3 o---o
+--------+
|
|
J2 o---o
|
|
J1 o
o
|
|
|
|
|
|
|
|
|
|
|
|
|
|
|
|
|
+--------------------------------------+
6. Replace cloth cover on uP (if disturbed)- it should just press back.
Changing the Reference Xtal
1. Remove volume and squelch knobs and rubber connector cover
2. Remove 3 small screws, 2 from sides holding top panel and 1 from back, near belt clip holes. Remove top panel.
3. Remove 3 screws securing IF PCB (1 between vol and squelch pots, 2 at bottem edge of PCB.)
4. GENTLY remove IF PCB and put to one side, still connected to the front panel assembly.
5. Remove screws securing remaining (RF) PCB- including those on the PA heatsink.
6. Locate the reference Xtal near the corner of the RF PCB, diagonally oppersite the antenna BNC.
7. Remove reference Xtal (12.8MHz) and replace with 16MHz Xtal (wire ended) ENSURING you include insulating sleeve from the
original Xtal. Secure new Xtal with small piece of double sided tape.
8. Replace RF PCB, checking mounting screws for PA heatsink.
9. If you have a suitable extension cable for the RF/IF PCB link use it. Connect a dummy load and power and check and adjust Tx
frequency using small trimmer by the reference Xtal. Aim to be within 200Hz or so at 145Hz.
10. If you don't have a suitable cable, replace IF PCB (no need to screw down but check alignment), connect dummy load and power
and check Tx frequency. If it is off frequency, remove power, IF board, tweak xtal trimmer, reassemble and try again. Two or
three goes should get you on frequency.
11. Replace IF PCB mounnting screws, top cover, small screws, knobs etc. but not the front case assembly.
12. If you have a deviation meter, adjust VR7 (2/3 way down IF PCB on left) for 3Khz peak dev.
13. Without a deviation meter, I'm afraid it is trial and error with either a local colleague or the local repeater at a quiet time.
14. Complete reassembly of the radio.
Note: The above modification has been successfully completed by me on my th215. i make no other claims and accept no
responsibility for your success or failure.
The above modification is based on a combination of information from various sources and some original investigation by me. all
sources acknowledged.
73
Brian
G8OSN
11/9/2000
This modification is read 518 times.
top of page
19-07-1998
(TH-22) TH-22E and CLONE
After expanding of TH-22E by cutting the wire, I have gained much wider band and several options. "CLONE" is the one of them.
You can run it by pressing the REV button when turning on the handie. The text "CLONE" will appear on the display and you can start
cloning by pressing the PTT.
This modification is read 1642 times.
top of page
19-07-1998
(TH-22) TH-22AT Beyond Mars Modification
This Mod is TH-22AT Beyond Mars Modification Dated November 12, 1993 from Kenwood.
1.
2.
3.
4.
5.
6.
7.
8.
9.
10.
Turn off the power.
Remove the batery pack.
Remove the two long screws from the rear or the case.
Remove the two knobs from the top of the unit.
Remove the rubber top panel.
Squeeze the bottom of the front panel togather an GENTLY separate the two case halfs. Use caution so that you do not damage
the thin ribbon cable connecting the front panel to the main unit.
Remove diode D208. Located on the circuit board behind the front panel. See ascii artwork below.
Place the diode you just removed (D208) in the location shown for D212 and solder in place. Observe proper polarity. The diode
should face the same direction as diode D210 and D211.
Reverse steps 1-6 to reasemble.
Reset the microprocessor.
|
|
|
|
|
|
|
|
|
|
|
|
--|C|
|N|
|2|
|0|
|3|
---
[D206]
[D207]
[D208]
[D209]
[D210]
[D211]
{D212}
{D213}
____|-----|
|
|
|
| SP | MIC |
|
|
|
----------^-----^--------
This modification requires soldering equipment rated for CMOS type circuits. It also requires familiarity with surface mount soldering
techniques.
Date: 19-01-2002
User comment
From: Lanfah
Subject: What does it do?
What does the modification do and how does it improve it?
This modification is read 1884 times.
top of page
19-07-1998
(TH-22) Expanding TH-22 to 136-174 MHz
Hello OM's
the only modification I know and have tested with my TH22E is expanding it to 136-174Mhz range and turning into US mode.
Unfortunately I don't think it is possible without opening the case. Here's how to do it:
1. Remove battery pack and reasseble the case. Open the case carefuly as there's special tape-connector connecting both halves.
2. Find the little cabels on the top-right corner of the silverplate (on the LCD display part).
3. One of the cabels in marked as "CH". Cutting this will turn your th22e into channel-only TRX (number of channels will correspond
to the memory settings). Better don't cut this - you can set the same from the menu.
4. Next cabel (to the left of that "CH") keeps the range reduction. Cutting this will expand your portable and turn into US-mode.
5. Close the case, replace screws, etc. and reset your TH22E (by pressing F-key when turning on).
here comes the schema of this:
+-----------------+
¦
- -ch¦+¦
This is the half with LCD display.
¦
cut --> ¦ ¦ ¦ ++ PTT The look from the silverplate side.
¦
this
- - ¦ ++
¦
cable
¦ ¦
¦
¦ ¦
¦
¦ ¦
¦
¦ ¦
¦
¦
¦
¦
+-----------------+
In US-mode you can also use the CLONE-MODE. Just keep pressed the the REV/SHIFT key when turning on. Press PTT to start cloning
to the other TH22E.
top of page
This modification is read 2141 times.
19-07-1998
(TH-22) KENWOOD TH-22E xpansion...WARNING
Hi there.
For those of you wondering how to expand the freq. coverage of your TH22E, this is how you do it:
Remove battery and unscrew the two screws holding the front and back of the rig together. Carefully squeeze the sides of the bottom
of the rig together so that the back cover comes unclipped from the from and ease forward to clear the LEDs on top (you will need to
peel back the rubber top).
Inside, you will see two green wires marked W201 and W202. Cutting W202 will expand the TH22E from 137MHz to 174MHz on
receive AND TRANSMIT.
DO NOT CUT W201! as this will cause the rig only to operate on the memory channel setting and THIS CANNOT BE REVERSED
(Meaning that your TH22 will have to be returned to the manufacturer).
Replace backplate and battery.
I hope this is of help to some of you. The W202 mod has been tried by the supplier and the set appears to be working very well. There
are some diodes nearby which I assume can be altered to give different RX/TX settings. Any suggestions.
top of page
This modification is read 1930 times.
23-04-2000
(TH-22) TH-22/42A/E Memory loss improvement
Author: Kenwood Communication, inc.
Service Bulletin no. 1057 (28 March 1994)
Symptom:
Memory loss can occasionally occur if the following procedure is observed:
1. Program the memory with any desired information.
2. Allow the battery pack with to drain down over an extended period of time without turning off the transceiver. For example turn
the volume control up and squelch off. After approximately 8 hours the battery voltage will drop to approximately 3 - 4 Vdc.
3. Turn off the POWER SW.
4. Connect a DC voltage supply or a fully charged battery pack.
5. Turn on the POWER SW.
6. Memory will have been lost.
Corrective Action:
Replace microprocessor IC206 with the improved part listed below. This part incorporates an software improvement to correct this
symptom.
Parts required:
Qty
1
Description
Microprocessor
Old part No.
HD404629B17TF
New Part No.
HD404629B49TF
Circuit Description
IC206
Time required for this modification is 60 minutes or less.
This modification is read 1524 times.
top of page
19-07-1998
(TH-225) Kenwood TH225A modifications
The TH-251A is very similar to the TH-225A. The following TH-215A mod has been tested on the TH-225A and seems to work, thanks
Steve(W9OMX).
All the standard disclaimers apply, use at your own risk, etc.
73's John - WA8ZGO - [email protected]
Date: 2 May 88 15:22:00 GMT
Posted by: [email protected]
Subject: Kenwood TH-215A modification
KENWOOD TH-215A handheld transceiver out-of-band modification:
1.
2.
3.
4.
Remove two screws from belt clip
Remove 4 screws from back of radio
Slide front assembly off
Locate set of 4 jumpers:
J4:
J3:
J2:
J1:
intact
cut
cut
cut
(top front inside)
+--------------------------------------+
|
|
|
|
|
+--------+
|
|
|
|
|
|
|
|
|
|
+--------+
|
|
|
|
+--------+
|
|
|
|
|
|
J4 o---o
|
|
|
|
J3 o) (o
+--------+
|
|
J2 o) (o
|
|
J1 o) (o
|
|
|
|
|
|
|
|
SPKR
|
|
|
|
|
|
mic
|
|
|
+--------------------------------------+
5. Reassemble radio.
6. Reset microprocessor: Turn radio on while simultaneously pressing both _F_ key and _ENTER_ key.
This modification is read 407 times.
top of page
19-07-1998
(TH-25) TH-25AT MARS/CAP modification
The following modifications will allow the TH-25AT to transmit from 141.000 to 162.995 MHz. Specifications are guaranteed for the
Amateur band only. The transceiver may require realignment of the PLL circuits.
1.
2.
3.
4.
5.
6.
Disconnect battery pack and antenna.
Remove the volume, squelch and tuning control knobs by pulling them straight up from the top panel.
Using a 7mm spanner wrench, remove the nut from the volume control and the nut from the tuning control.
Remove one screw from the back of the radio, by the PTT switch.
Remove one screw near the speaker jack.
Remove two screws from the battery terminal plate:
--- remove ---/
+---------------------+
[ 0
0 [
[
[
[
+------+
[
[
[
[
[
[
+------+
[
[
[
[ O
O [
+---------------------+
7. Carefully pull the front panel up from the transceiver (do not break the wires connected between the front panel and the body of
the transceiver). Lay the front panel to the side of the transceiver (keep track of the PTT and F.LOCK covers if they come off).
8. Gently lift the top panel from the transceiver by pulling it forward and then up (the O-ring on the BNC connector will produce
some tension).
9. Rotate the top panel toward the front of the radio to expose the 3/4 x 3/4" board.
10. Using a 45 watt (or less) soldering iron that has an isolated or grounded tip, unsolder and remove chip resistors R19, R20 and
R21 from the control unit (X53-3080-02).
11. Carefully reassemble the transceiver by reversing steps 1-9. Pull the BNC connector O-ring up a little before installing the top
panel.
12. Reset the microprocessor by following the procedure in the instruction manual (p. 16) called CLEARING ALL MEMORY.
Disclaimers:
The source of this information is unknown and not personally verified. It is illegal to transmit outside the ham bands with this
equipment.
Frank W9MKV [email protected]
top of page
This modification is read 695 times.
19-07-1998
(TH-25) KENWOOD TH-25/45 out of banad modifications
Here are some mods for the TH-25AT and the TH-45AT. Please note that I do not encourage transmitting on a frequency for which you
do not have a license, nor do I encourage transmitting on a non-amateur frequency without FCC type accepted equipment (in the
United States).
First let me recommend that you buy the service manuals for these radios. The service manual is not expensive (about $15 I think)
and it will greatly help you in performing these modifications.
Look at the schematic for your radio. In the lower left hand corner is an IC labled IC2. This is an ASIC microprocessor. At the lower
right hand corner of this uP are several diodes and pull-up/pull-down resistors. They are D4, D3, R19, R18, R28, R20, R21, R22, R25,
R26, and a couple of resistors that are not even on the schematic that attach to B2 (pin 51 on IC2) and B3 (pin 50 on IC2). The TH45AT schematic shows R23 on the ASIC uP pin B2.
The schematic for the TH-25AT shows:
TH-25A
TH-25A
TH-25AT
TH-25AT
TH-25E
TH-25E
M,M2
M3,M4,X
K
M,M2
T
W
-12
-23
-11
-12
-52
-62
R18-R21
O
O
O
O
X
X
R25
X
X
O
X
X
O
R26,27
X
X
X
X
O
O
R28
X
O
X
X
O
O
R36
X
X
X
X
O
O
And the schematic for the TH-45AT shows:
TH-45A
TH-45A
TH-45AT
TH-45AT
TH-45AT
TH-45E
TH-45E
M1,M2,X
M3,M4
K
M1,M2
M3,M4
T
W
-21
-22
-10
-21
-22
-51
-61
R19-R21
O
O
O
O
O
X
X
R22
O
X
X
O
X
O
O
R23
O
O
O
O
O
X
X
R25
X
X
X
X
X
X
O
R26,27
X
X
X
X
X
O
O
R28
O
X
O
O
X
X
O
R36
X
X
X
X
X
O
O
where O means USED, and X means NOT USED.
On the TH-25AT:
(All frequencies given in MHz.)
R22 in
R28 out
This is how the radio is delivered in the USA. TX 144-1, 141-163
(I think).
R22 out
R28 in
The radio tunes from 142-151. This may be the modification given to US MARS members. I don't remember where the unit will
transmit. It may or may not transmit outside the range from 144-148.
R22 in
R28 in
The radio tunes only from 144-148.
R22 out
R28 out
Frequencies may be selected from 100-200 MHz (on the display only - your PLL will not lock up in this entire range). In addition, TX is
possible where your PLL locks up.
R25 out
Removing R25 disables automatic offset selection.
R23 and R24 are used for selecting the step size for tuning. I can't remember which positions are for which step sizes, and alas I
didn't write down what I found. If you want to play with this, go ahead.
On the TH-45AT:
(All frequencies are given in MHz.)
R18 in
R28 in
This is how the radio is delivered in the USA. The radio covers 438-450 MHz.
R18 in
R20 out
The radio is prohibited from tuning outside 440-450 MHz.
R18 out
R28 in
The radio will only tune from 215-230 MHz. Note that the PLL would not lock up! (What did you expect?) Could it be possible that
Kenwood originally planned a 220 version of this radio, but then scrapped their plans?
R18 out
R28 out
The radio will tune from 200-500 MHz (on the display only - your PLL will not lock up over this entire range). Transmitting is possible
anywhere your PLL will lock up.
Some of the above codes are:
K
USA
T
England
X
Australia
M
Other Areas
These components are found on the flexible circuit board under the display. To get to them, take the radio apart. Some unsoldering of
obvious grounding wires may be necessary. You will see where the flexible circuit board plugs into a socket on the main circuit board.
Before unplugging it, make sure you know what's in the memories, because they will be lost. Unplug the flexible circuit board and
unfold it so that the components are accesable. One of the fold-out parts of the flexible board will look something like this:
+----------------+
! R
R R D3 R R !
! 2
2 2
7 2 !
! 5
3 2
1 !
!
!
! R O
O R20!
! 2 O
O R19!
! 6 O
O R18!
!
O
O R28!
!
!
!
R !
!
D4 6 !
!
+-------+
!
!
!
!
The O's are solder pads.
The fold out board is actually square, but with only characters for graphics, I couldn't draw it that way.
On both radios, R36 is for the European tone burst to "whistle up" repeaters.
On both radios, D4 is for selecting the type of display. With D4 in, the display is normal. With D4 removed, the display is a channel
display.
D3 is for selecting VHF or UHF. With D4 in, the radio thinks its a VHF radio. With D4 removed, the radio thinks its a UHF radio. Don't
change this on your radio.
I have found a quick and easy way to retune your PLL (in the TH45-AT) with a minimum of test equipment. All you need is a scope
and a small tuning tool. First, take off the battery pack holder plate. Then, remove the silvery sticker covering the tuning pot access
holes. If the radio is positioned on its back, with the top folded over so that the touch tone pad is also facing down, the test point you
want (TP1) is on the bottom half of the radio, near the center (left to right), and close to the battery; the tuning pot you want (TC1) is
on the bottom, and closest to the PTT switch. Under no circumstances change the tuning of TC51. This is used to calibrate the output
of the radio with the display the radio is giving; you don't want to mess with it. Once again, the Service Manual makes it very clear
where these points are, if you are having trouble with my descriptions. On with retuning the PLL.
With the radio on, and receiving, monitor the voltage and the waveform on test point TC1.
Tune the radio DOWNWARDS in frequency until the PLL unlocks. Note that the radio will beep when this happens, and the waveform
on TP1 will change. Tune the radio about 1 MHz higher so that the PLL locks up again, and note the voltage on the testpoint, TP1.
Now, tune the radio to the LOWEST frequency that you want to be able to receive. Adjust TC1 until the voltage on the test point TP1 is
the same as what was noted earlier. Button the radio back up, and you're done. You will not be able to tune the PLL to any range you
want.
There are limits. On my radio, I have been able to retune the radio so that I can recieve from 439.2-468.6 MHz with a set of batteries
fresh out of the charger. The tuning range will probably diminish as the battery voltage decreases. I have not retuned the PLL on my
2m HT, but I'd imagine the same technique will prove fruitful.
I may have some more information on these radios someplace. If I can find it, I will add to this posting, and post it again with the
updated information. Enjoy. Kenneth J. Hendrickson N8DGN
top of page
This modification is read 702 times.
19-07-1998
(TH-25) TH-25/45AT Automatic Power OFF Function
Author: Trio-Kenwood Communication, inc.
Service Bulletin no. 939 (2-6-1988)
Some users of the TH-25AT/45AT have expressed a desire to defeat the automatic power off function. The following modification will
explain how to do this. It should be noted that this modification does not effect the battery saver function.
Required Part:
Diode Kenwood Part #1SS133
1. Disconnect the battery pack and antenna.
2. Remove the Volume, Squelch, and Tuning Control knobs by pulling them straight up from the top panel.
3. Using a 7mm spanner wrench, remove the nut from the volume control and the nut from the tuning control.
4. Remove one screw located by the PTT switch. (Figure 1).
5. Remove one screw located by the speaker jack. (Figure 2).
6. Remove two screws from the battery terminal plate. (Figure 3).
7. Carefully pull the front panel up from the transceiver (do not break the wires connected between the front panel and the body of
the transceiver.) Lay the front panel to the side of the transceiver (Keep track of the F.LOCK cover if it comes off.)
8. Remove the PTT cover.
9. Remove one screw from the PTT switch unit. (Figure 4).
10. Gently lift the top panel from the transceiver by pulling it forward and then up (the O ring on the BNC connector will produce
some tension.)
11. Carefully unfold the flex Printed Circuit Board (PCB) to expose IC2. (Figure 5).
12. Using a 45 watt (or less) soldering iron that has an isolated or grounded tip, add a diode between pins 23 and 58 of IC2. (Figure
6).
13. Carefully assemble the transceiver by reversing step 1-11. Pull the BNC connector "O" ring up a little before installing the top
panel.
14. Reset the microprocessor by following the procedure in the instruction manual (page 16) called CLEARING ALL MEMORY.
This is an optional change that is not covered under warranty.
Time required for this modification is 1 hour or less.
SYSOP NOTES:
Later versions of the TH-25/45AT came with a programmable defeat for the Auto power off function. Do not install this modification if
your manual provides a procedure for turning the power off function off! Step 11 tells you to carefully unfold the flexible pc board. It is
extremely important that you do not try and bend the board in a direction that is opposite from its current bend. To do so will break
the board or the foil traces inside the board!
top of page
This modification is read 615 times.
19-07-1998
(TH-25) EXT TX ON THE: TH-26AT/TH-45AT/TH-75A HT's
On the three above units a jumper wire controls the TX frequency coverage. By removing the jumper you will extend TX from 142152Mhz.
By removing a diode you can extend the TX coverage to the limits of the VCO. Both the jumper wire and the diode are located on the
"CONTROL UNIT".
On the TH-26AT this is just a bare jumper wire, TH-45AT ???, TH75A it is a green wire labled W1. Removing or lifting D4 on the TH75A extends TX from 136-174Mhz and 335-512Mhz.
On the TH-26/TH-46 models this would be 136-174Mhz and 335-512Mhz respectivly.
top of page
This modification is read 610 times.
16-04-2000
(TH-25) TH-25/45 W/TSU-6 Tone alert improvements
Author: Trio-Kenwood Communication, inc.
Service Bulletin no. 932 (11-4-1988)
When using the TH-25/45 in combination with the TSU-6 you may experience erratic operation of the tone alert function. This may be
due to an incoming signal that is over-modulated, distorted, or noisy. The following modification will correct this tendency.
Required parts:
22 µF, 6.3V electrolytic capacitor
56 Kohm, 1/8 watt carbon resistor
Diode
part # CE04CW0J220J
part # RD14BB2B563J
part # 1SS133
1. Remove the TSU-6 from the TH-25/45 (refer to theTH-25/45 instruction manual for details).
2. Cut the blue wire (pin # 4) approximately 5 mm from the connector for the TSU-6.
3. Solder the components to the blue wire and ground as shown in figure 1. Note that the cathode side of the diode goes toward the
TSU-6 connector. Use the leg of the VCO shield to ground the negative side of the capacitor.
4. Insulate the components with electrical tape to prevent shorting.
5. Install the TSU-6 in the tH-25/45. Route the components so that the battery terminal plate does not bow when installed.
Figure 1.
This modification may be covered under warranty.
Time required for this modification is ½ hour or less.
This modification is read 606 times.
top of page
19-07-1998
(TH-26) EXT TX ON THE: TH-26AT/TH-45AT/TH-75A HT's
On the three above units a jumper wire controls the TX frequency coverage. By removing the jumper you will extend TX from 142152Mhz.
By removing a diode you can extend the TX coverage to the limits of the VCO. Both the jumper wire and the diode are located on the
"CONTROL UNIT".
On the TH-26AT this is just a bare jumper wire, TH-45AT ???, TH75A it is a green wire labled W1. Removing or lifting D4 on the TH75A extends TX from 136-174Mhz and 335-512Mhz.
On the TH-26/TH-46 models this would be 136-174Mhz and 335-512Mhz respectivly.
This modification is read 801 times.
top of page
28-08-1999
(TH-26) Expanding frequency range for the TH-26E
Hello OM/YL,
Something on expanding frequency range for Kenwood's TH26E.
To expand frequency range is very simple, you just have to remove the little piece of wire called JP1 on the schematic diagram, it is
placed on the left side near the batterypack. This modification makes it possible to transmit and receive over the range of 136.000MHz
to 173.995Mhz.
Further expansion is not possible, the PLL doesn't lock anymore. (expanding TX Frequency range outside 144 -146 Mhz is in some
countries illegal as we all know). It is also possible to expand RX only. To enable this hardware modification is not nessecary!
Execute the following steps..
1. Put the TH 26E into the VFO Mode
2. Press the Call button,
3. Keep the Call button pressed in and press the MR button also The decimal point on the display will start to blink and when the TH
26E is in the 'beep mode' it will also start to beep at a frequency of 1 Hz.
4. Press the Call button, You will see that a frequency of 245.??? Mhz appears, (the decimals are dependent of the value witch was
inserted before starting the programming...)
5. Press the F key and load the 245.??? Mhz into the VFO..
6. Switch your handheld transceiver off
7. Press the REV button while turning the TH 26E on.. The Upper level of frequency is now set to 245.??? Mhz
You must adjust the VFO lowest and highest frequency according to your PLL lockingrange. My TH 26E PLL locks over a range from
144.000 Mhz to 173.995Mhz. This software modification does not damage the TH26E!
Only reception below 144.000 Mhz is not possible... You can set the TH 26E into normal mode by resetting the VFO.
I'd like to know where my message is received, and if you are succesfull modifying Your TH 26E...
Also I like to know if there are more intresting modifications on this type of tranceiver. Please let me know!
Goodluck and '73 From Hengelo The Netherlands JO32KG
Peter (PB0ANS @ PI8DAZ.nld.eu).
This modification is read 795 times.
top of page
28-08-1999
(TH-26) Expanding frequency range for the TH-26E
Author: Mathijs PE1NTP
Schema Kenwood SMC 33 Handmicrofoon met A.B.
(c) 1992 Mathijs PE1NTP
This modification is read 731 times.
top of page
21-04-2000
(TH-26) TH-26A Internal bridges
Author: Kenwood Communication, inc.
Service Bulletin no. 976 (8-8-1990)
The TH-26A has two internal bridges. One is at 145.645 MHz and the other is at 147.200 MHz. The first one is caused by the CPU clock
and the second one is caused by the PLL reference crystal. The bridge related to the CPU clock can be corrected by changing R78 on
the Control board from 3.9 Kohm to 6.8 Kohm and adding a ground to R64. The birdie related to the reference crystal can be
corrected by changing L12 on the TX/RX (B/2) board from a 10 µH inductor to a 1 mH inductor.
Required parts:
RK73GB1J682J
L40-1021-14
6.8 Kohm chip resistor
1 mH inductor
To change R78:
1. Disconnect the battery pack and antenna.
2. Remove the three case screws and four battery plate screws. Figure 1.
3. Lift the front panel from the body of the transceiver.
4. Do not lose the rubber cover for the DC IN jack.
5. Locate R78 on the Control board inside the front panel. Figure 2.
6. Replace R78 with a 6.8 Kohm chip resistor.
7. Install a jumper wire from R64 to the mounting plate behind the PTT switch. Figure 2.
To change L12:
8. Remove the four screws from the TX/RX (A/2) board. Figure 3.
9. Carefully lift the TX/RX (A/2) board up and rotate it and the front panel assembly to the right of the transceiver.
10. Do not lose the rubber cover from the SPEAKER/MIC jack and the plastic piece from the battery release.
11. Remove the two screws from the power module shield and set the screws and shield aside. Figure 4.
12. Remove the four screws from the TX/RX (B/2) board. Figure 4.
13. Remove the three black screws from the back panel that secure the antenna BNC connector.
14. Carefully lift the TX/RX (B/2) board off the back panel.
15. Locate L12 on the TX/RX (B/2) board. Figure 4.
16. Replace L12 with a 1 mH inductor.
17. Assemble the transceiver.
Time required to perform this modification is 1 hour or less.
This modification is read 766 times.
top of page
19-07-1998
(TH-2600) Mod to open TX on the Kenwood TH-2600-a
1.
2.
3.
4.
5.
6.
7.
To access the 2600 loosen the two large screws on the sides of the unit with a coin.
Remove the 3 very small phillips head screws on the back-side of the unit
Remove the battery.
In the base of the unit you will see four phillips head screws remove the two that hold down the front of the unit (speaker side)
kinsert screwdriver into base & twist --you will hear a "pop" as the two halvs separate.
Carefully lift front & let it turn to the right, as there is a ribbon connection between the front cover & the chassis.
In the lower right hand corner of the p.c. board you will see a row of diodes on end (abt 7), snip the top two. (They may already
have a solder joint, as these are used in bench test)
8. Note: these are diodes d-32 & d-33 the board you are working on is x55-1380-10 a/2
9. Reverse the process, & there you have it......
This modification is read 316 times.
top of page
19-07-1998
(TH-27) Keyboard Mods to access AM detector and change band
A full review of the Kenwood TH27a ran in the March Issue 1991 of CQ
●
●
●
●
●
●
●
●
Press the ENT key once or twice to place HT in VFO mode and in the 2m band
Depress the F key for 2 secs. (Note flashing F in lower right corner)
Release F key and press MHz key
HT will shift to 118.00 MHz and activate the am detector
Store any freqs from 118-138 into memory
Hit F key till it flashes
Hit MHz key
Your back on 139-170MHz with FM detector
This is a very sophisticated HT and now a great bargin
73-AB4VJ
This modification is read 769 times.
top of page
21-04-2000
(TH-27) TH-27A/E Low TX power
Author: Kenwood Communication, inc.
Service Bulletin no. 991 (11 May 1992)
We have noticed some variation in the output power provided by Toshiba S-AV22A power modules with a production code of "11".
Modules with this production code might exhibit low or no transmitter output power. This procedure will correct this problem.
Parts required:
0.01 µF axial lead capacitor, (C91-0769-05)
Procedure:
1. Remove chip capacitor C17 and C18 from the TX-RX unit (X57-3640-11).
2. Install the new axial lead capacitor as shown in the accompanying diagram.
Note: Deleting C17 and C18 alone will not correct this symptom. The new C18 will be used to stabilize circuit performance. Deleting
C17 alone will not cure the symptom.
Time required for this modification is 30 minutes or less.
This modification is read 736 times.
top of page
19-07-1998
(TH-28) Secret function manual of the KENWOOD TH-28e/48e porto
u>TH-28e/48e RX EXPANSION (ON)
Press PTT + VFO, then POWER ON.
New RX ranges TH28e after this modification:
VHF Band 136 - 174 Mhz (FM)
UHF Band 400 - 520 Mhz (FM)
TH48e:
UHF Band 400 - 470 Mhz (FM)
VHF Band 136 - 174 Mhz (FM)
TH28e Air Band Expansion
Press F key for 1 sec. Then press LOW key.
New RX ranges
108 - 118 Mhz (FM)
118 - 136 Mhz (AM)
TH28e 340 - 400 Mhz Expansion
Remove the diode D8 from the control unit. (FM mode only) With Air Band and 340 Mhz expansion, operating band can be changed:
_________
_________
__________
---->I AMATEUR I====I 340 Mhz I--->I AIR BAND I_____
I
I_________I
I_________I
I__________I
I
I___________________________________________________I
TH48e 340 MHZ & 900 MHZ EXPANSION
Remove the diode D8 from the control unit to cover 340 - 400 Mhz and 800 - 950 Mhz FM mode.
_________
_________
_________
--->I AMATEUR I--->I 340 Mhz I--->I 900 Mhz I_____
I
I_________I
I_________I
I_________I
I
I__________________________________________________I
TH-28e/48e TX EXPANSION
Remove the diode D10 from the control unit.
New TX ranges after this modification:
TH28e:
VHF Band 136.000 - 174.250 Mhz (FM)
TH48e:
UHF Band 400.000 - 470.000 Mhz (FM)
Note:
Manufacturer guarantees TX/RX specification only in amateur band. The above frequency range is for the microprocessor's range so
that the receiver sensitivity or TX output power of expanded band may be reduced.
TH-48E TX/RX 432-438 Mhz LIMITED RANGE
Remove the diode D14 from the control unit.
TH28e/48e CROSS BAND REPEATER
Remove the diode D4 then press F key for 1 sec. and press 0 key.
TH-28a/e-48a/e FREQUENCY EXTENSION
Open the case and remove or add the destination chip diode D10, D11, D14 and D15 on the component side of the control unit.
(X53-340X-XX, X53-341X-XX)
The frequncy can then be extended as shown in the table 1 an 2 on page 3 and 4.(See the destination chip diode position drawing on
the attached sheet.)
Notes:
The frequency display range may differ from the PLL lock range.
___________________________________________________________________
I
I
360-Mhz band
I
Air band
I
I===================I=======================I=======================I
I
Step
I5,10,15,20,12.5,25 Khz I5,10,15,20,12.5,25 Khz I
I-------------------I-----------------------I-----------------------I
I Frequency range I340.000-399.987.5 Mhz I 100.000 - 117.975 Mhz I
I
I
FM
I
FM
I
I
I
I 118.000 - 135.995 Mhz I
I
I
I
AM
I
I-------------------I-----------------------I-----------------------I
I Initial frequency I
340.000 Mhz
I
118.000 Mhz
I
I___________________I_______________________I_______________________I
Initial step value is 12.5 Khz for 360-Mhz band and 25 Khz for Air band.
TH-48a/e BAND EXTENSION
The 360 Mhz band and the 800 Mhz band can be received. To expand the 360-Mhz band and the 800-Mhz band remove chip diode D8
of the control unit as shown in table 2.
You can switch between the UHF amateur band the 360-Mhz band and the 800-Mhz band by pressing the [ F ] key for 1 sec. and then
the [ LOW ] key.
___________________________________________________________________
I
I
360-Mhz band
I
800-Mhz band
I
I===================I=======================I=======================I
I
Step
I5,10,15,20,12.5,25 Khz I
12.5,25 Khz
I
I-------------------I-----------------------I-----------------------I
I Frequency range I 340.000-399.987.5 Mhz I 800.000-949.987.5 Mhz I
I
I
FM
I
FM
I
I-------------------I-----------------------I-----------------------I
I Initial frequency I
340.000 Mhz
I
850.000 Mhz
I
I___________________I_______________________I_______________________I
Note:
Program scan is not possible over several bands, but is possible within each band.
Initial step value is 12.5 Khz.
Table 1 TH28a/e
__________________________________________________________________
I
Destination bit
I
IGuaranteed I TX (Mhz) I RX (Mhz) I
I________________________IDestI___________I___________I___________I
I B4 I B3 I B2 I B1 I B0 I
I Min I Max I Min I Max I Min I Max I
I----I----I----I----I----I----I-----I-----I-----I-----I-----I-----I
I O I O I O I X I O I E2 I 144 I 146 I 136 I 174 I 136 I 174 I
I----I----I----I----I----I----I-----I-----I-----I-----I-----I-----I
I O I O I O I X I X I E2 I 144 I 146 I 136 I 174 I 136 I 174 I
I----I----I----I----I----I----I-----I-----I-----I-----I-----I-----I
I O I X I O I X I O I M2 I 144 I 148 I 136 I 174 I 136 I 174 I
I----I----I----I----I----I----I-----I-----I-----I-----I-----I-----I
I O I X I O I X I X I M2 I 144 I 148 I 136 I 174 I 136 I 174 I
I----I----I----I----I----I----I-----I-----I-----I-----I-----I-----I
I X I O I O I X I O I X2 I 144 I 148 I 136 I 174 I 136 I 174 I
I----I----I----I----I----I----I-----I-----I-----I-----I-----I-----I
I X I O I O I X I X I X2 I 144 I 148 I 136 I 174 I 136 I 174 I
I----I----I----I----I----I----I-----I-----I-----I-----I-----I-----I
I X I O I X I X I O I K2 I 144 I 148 I 142 I 152 I 136 I 174 I
I----I----I----I----I----I----I-----I-----I-----I-----I-----I-----I
I X I O I X I X I X I K2 I 144 I 148 I 142 I 152 I 136 I 174 I
I____I____I____I____I____I____I_____I_____I_____I_____I_____I_____I
D15 D11 D14 D10 D8
:
O = Jumpered
X = No jumper
:
......<............<.............<.............<.............<....:
:
____________
:
I Sub-UHF
:______________________________________________________I____________
I Reset I Offset I Shift I Auto I 1750 I Air I 360 I RX (Mhz) I
I freq- I freq- I freq- I shiftI tone I band I band I-----------I
I
I
I
I
I
I
I
I Min I Max I
I-------I--------I-------I------I------I-------I-------I-----I-----I
I 144 I 0.6
I 12.5 I O
I
O I
O
I
I 400 I 520 I
I-------I--------I-------I------I------I-------I-------I-----I-----I
I 144 I 0.6
I 12.5 I O
I
O I
O
I
O
I 400 I 520 I
I-------I--------I-------I------I------I-------I-------I-----I-----I
I 144 I 0.6
I 12.5 I
I
I
O
I
I 400 I 520 I
I-------I--------I-------I------I------I-------I-------I-----I-----I
I 144 I 0.6
I 12.5 I
I
I
O
I
O
I 400 I 520 I
I-------I--------I-------I------I------I-------I-------I-----I-----I
I 144 I 0.6
I
5
I O
I
I
O
I
I 400 I 520 I
I-------I--------I-------I------I------I-------I-------I-----I-----I
I 144 I 0.6
I
5
I O
I
I
O
I
O
I 400 I 520 I
I-------I--------I-------I------I------I-------I-------I-----I-----I
I 144 I 0.6
I
5
I O
I
I
O
I
I 438 I 450 I
I-------I--------I-------I------I------I-------I-------I-----I-----I
I 144 I 0.6
I
5
I O
I
I
O
I
O
I 400 I 520 I
I_______I________I_______I______I______I_______I_______I_____I_____I
:
:
......<............<.............<.............<.............<.....:
:
:______________
Sub-UHF
I
______________I
I Reset I Step I
.......>.....I-------I------I
I freq. I freq.I
:
I 430 I 25 I
I
I
I
:
I-------I------I
I-------I------I
:
I 430 I 25 I
I 430 I 25 I
:
I-------I------I
I-------I------I
:
I 440 I 25 I
I 430 I 25 I
:
I-------I------I
I-------I------I
:
I 440 I 25 I
I 400 I 25 I
:
I_______I______I
I-------I------I
:
I 400 I 25 I
:
I-------I------I....>.:
Table 2 TH48a/e
__________________________________________________________________
I
Destination bit
I
IGuaranteed I TX (Mhz) I RX (Mhz) I
I________________________IDestI___________I___________I___________I
I B4 I B3 I B2 I B1 I B0 I
I Min I Max I Min I Max I Min I Max I
I----I----I----I----I----I----I-----I-----I-----I-----I-----I-----I
I O I O I X I O I O I E3 I 430 I 440 I 400 I 470 I 400 I 470 I
I----I----I----I----I----I----I-----I-----I-----I-----I-----I-----I
I O I O I X I O I X I E3 I 430 I 440 I 400 I 470 I 400 I 470 I
I----I----I----I----I----I----I-----I-----I-----I-----I-----I-----I
I O I X I O I X I O I M2 I 430 I 440 I 400 I 470 I 400 I 470 I
I----I----I----I----I----I----I-----I-----I-----I-----I-----I-----I
I O I X I O I X I X I M2 I 430 I 440 I 400 I 470 I 400 I 470 I
I----I----I----I----I----I----I-----I-----I-----I-----I-----I-----I
I X I O I O I X I O I X2 I 430 I 440 I 400 I 470 I 400 I 470 I
I----I----I----I----I----I----I-----I-----I-----I-----I-----I-----I
I X I O I O I X I X I X2 I 430 I 440 I 400 I 470 I 400 I 470 I
I----I----I----I----I----I----I-----I-----I-----I-----I-----I-----I
I X I O I X I X I O I K2 I 438 I 450 I 400 I 470 I 400 I 470 I
I----I----I----I----I----I----I-----I-----I-----I-----I-----I-----I
I X I O I X I X I X I K2 I 438 I 450 I 400 I 470 I 400 I 470 I
I____I____I____I____I____I____I_____I_____I_____I_____I_____I_____I
D15 D11 D14 D10 D8
:
O = Jumpered
X = No jumper
:
......<............<.............<.............<.............<....:
:
____________
:
I Sub-VHF
:______________________________________________________I____________
I Reset I Offset I Shift I Auto I 1750 I 360 I 800 I RX (Mhz) I
I freq- I freq- I freq- I shiftI tone I band I band I-----------I
I
I
I
I
I
I
I
I Min I Max I
I-------I--------I-------I------I------I-------I-------I-----I-----I
I 430 I
*
I
25 I
I
O I
I
I 136 I 174 I
I-------I--------I-------I------I------I-------I-------I-----I-----I
I 430 I
*
I
25 I
I
O I
O
I
O
I 136 I 174 I
I-------I--------I-------I------I------I-------I-------I-----I-----I
I 430 I
5
I
25 I
I
I
I
I 136 I 174 I
I-------I--------I-------I------I------I-------I-------I-----I-----I
I 430 I
5
I
25 I
I
I
O
I
O
I 136 I 174 I
I-------I--------I-------I------I------I-------I-------I-----I-----I
I 430 I
5
I
25 I
I
I
I
I 136 I 174 I
I-------I--------I-------I------I------I-------I-------I-----I-----I
I 430 I
5
I
25 I
I
I
O
I
O
I 136 I 174 I
I-------I--------I-------I------I------I-------I-------I-----I-----I
I 440 I
5
I
25 I
I
I
I
I 136 I 174 I
I-------I--------I-------I------I------I-------I-------I-----I-----I
I 440 I
5
I
25 I
I
I
O
I
O
I 136 I 174 I
I_______I________I_______I______I______I_______I_______I_____I_____I
* = 1.6M, -7.6M
:
:
......<............<.............<.............<.............<.....:
:
:______________
Sub-UHF
I
______________I
I Reset I Step I
.......>.....I-------I------I
I freq. I freq.I
:
I 144 I
5 I
I
I
I
:
I-------I------I
I-------I------I
:
I 144 I
5 I
I 144 I 12.5 I
:
I-------I------I
I-------I------I
:
I 144 I
5 I
I 144 I 12.5 I
:
I-------I------I
I-------I------I
:
I 144 I
5 I
I 136 I 12.5 I
:
I_______I______I
I-------I------I
:
I 136 I 12.5 I
:
I-------I------I....>.:
CLONING BY RADIO
1. Overview of the clone function. (The function does not require frequency expansion.)
Since 240 channels are available if an option is installed, it is laborious to write the same memory channel frequency data into
several transceivers. Once you write data into one transceiver, you can duplicate it in several others in a single operation with
the clone function. (You can write data without installing an option.)
2. How to use the clone function.
Transmitter setup:
1. Write the required memory channel frequency data into the transceiver.
2. Set the transmit frequency.
3. Switch the power off, hold down the 7 key on an F series tranceiver or the MR and PTT keys on a K series, and switch the
power on again.
"CLONE" appears on the display.
(The transmit output is automatically set to "economic low".)
Receiver setup:
1. Set the frequency of the transceiver to the transmit frequency of the transmitter.
2. Switch the power off, hold down the 7 key on an F series transceiver or the MR and PTT keys on a K series one, and switch
the power on again.
"CLONE" appears on the display.
Press the PTT key on the transmitter. The clone function works automatically. When cloning ends, the frequency is displayed
again.
It takes about four minutes to transfer frequency data for 40 channels, and about nine minutes to transfer frequency data for
240 channels.
If the receiver is an F series one and the frequency is displayed again, switch the power off, hold down the F key, and switch the
power on again (VFO reset). If the receiver is a K series one and the frequency is displayed again, switch the power off and on
again.
Thus, cloning lets you copy the channel data stored in the transmitter to other transceivers in a single operation. To stop cloning,
switch the power off and on again.
__________________________________
I
I
I
I
I
I
I
I
I
I
I
I
I
Control Unit
TH28a/e : X53-340X-XX
TH48a/e : X53-341X-XX
D15
D14
\_ _/
I
I
I
I
I
I
I
I
I
I
I
I
I
Bit
Bit
Bit
Bit
Bit
0.....D8
1.....D10
2.....D14
3.....D11
4.....D15
(MA110)
(MA110)
(MA110)
(MA110)
(MA110)
I
I I I
I
I
I_I_I
D10 D8
I
I
_ _/ _/
I
I
D11-I I I I I
I
I
I_I_I I_I
I
I__________________________________I
I
I
I
Control Unit
I
I
X53-3420-00 A/5
I
I
I
I
.............
I
I
:
:
I
I
:
CPU
: ___
I
I
:
: I___I D1
I
I
:
: I___I D2
I
I
:...........: I___I D3
I
I
I___I D4
I
I
I___I D5
I
I
I___I D6
I
I
I
I__________________________________I
top of page
This modification is read 1879 times.
19-07-1998
(TH-28) TH28 Send memory to other radio
To transfer memories from one radio to another,you can clone two TH-28a's.
Each radio must either have the ME-1 installed or no ME-1 installed,but they both must be the same!
Radio A will be the radio that SENDS the memories!
Radio B will receive the memories!
1.
2.
3.
4.
5.
6.
7.
8.
9.
10.
11.
12.
Turn on Radio B and enter say 144MHZ into all the memories you are going to CLONE TO.
Say radio A has 125 memories,enter 144MHZ into 125 of radio B's memories. This ENABLES or turns ON radio B's memories.
Turn both radios off then on.
Enter a simplex frequency into both radios and make sure you use the VFO mode.
Turn on radio A while pushing button 7 at the same time,the display should read"CLONE".
Turn on radio B while pushing button 7 at the same time,the display should read"CLONE".
Press PTT or push-to-talk on radio A!
You will hear tones on both radios which go real fast and vary in pitch.
Leave the radios for about 15-20 minutes so they can finish.
The tones will be repititous-this will indicate the transfer was successful.
Turn off radio A,you might hafto disconnect the battery.
Turn off radio B,then check the memories.
This does work,I tried it myself 125 memory transfer in 15 minutes PL's,odd offsets and all.Call channel is not transferred!If this does
not work,try a few times.
Special thanks to N2OUM and N2PPT!
73 DE N2PPV
top of page
This modification is read 1276 times.
19-07-1998
(TH-28) Accus in BT8 (TH28/48/78)
Hallo (X)YLs, OMs and Kenwood TH 28-owners
It is possible to use your Kenwood TH 28 (but I think also in a similar modification your TH 48 or TH 78) with the Battery-Case BT8
and NiCd-Accus. But how can you charge them ?
** The proposal here worked fine with my equipment, but if you do not have proper tools, soldering-eqipment and skill, pse do not try
this modification! I don't give any waranty and you perform this modification on your own risk and responsibility.
But nevertheless vy 55 ! **
If you look on the top-side of the BT8-case and the original BP13- accu you'll see the following (not to scale !)
TOP-VIEW
Accu (BP 13)
Battery Case BT 8
+-------------+
¦+B
-¦
¦
¦
¦ +A
¦
¦
¦
+--_________--+
+-------------+
K+-¦+B
-¦
- ¦
¦
A+-¦ +A
¦
¦
¦
+--_________--+
BAT85
added
(+--_________--+ means the side of BP13/BT8 with the fixture-clamp)
+B means the battery-plus, +A the accu-plus
-- is the common grond (accu- and battery minus.)
DC-voltage is supplied to the DC-in jack of the TH28 and by this the +A gives the charging-current for the BP13 via an internal currentsource
For charging NiCd-accus in the BT8 you only have to add a diode between +A an +B.
I used a Schottky-Diode BAT 85 (30V/200 mA) which has a lower flow-voltage than a silicium-diode, which will also work. (Anode to
+A and Cathode to +B, so the charge-current will also go into the battery-pack and charge the NiCd there with ca. 60 mA.)
!! WARNING: So never use batteries with external DC-voltage supplied after this modification, as this will 'charge' the normal
batteries, which might explode and cause serious damage not only to your TH28 !!!
I could not manage it to get the diode onto the top-side of the BT8, so I opened my TH 28 (see instruction-manual) and solderd this
diode onto the leads of the built-in double-diode of the charger-board. (D 201 on board X53-3400-00). This reqires a diode with a
small case, a 1N4001 will be too big and has not enough thin wires to bend them for good soldering inside the TH28-case.
(The diode D 201 disables the accu- or battery supply when the external DC-voltage is applied at the DC-in jack.)
The double-diode D201 you will find on one side of the charger-board, the two wires on one side go to +A and +B of the battery-case,
check with ohm-meter.
Be careful not to damage the internal flexibel board connecting the keyboard/processor-unit and the rest...
I hope that this info might be useful as the original accu-packs of Kenwood are not the cheapest ones...
top of page
This modification is read 1286 times.
23-04-2000
(TH-28) TH-28/48/78 Difficult battery insertion
Author: Kenwood Communication, inc.
Service Bulletin no. 1028 (29 June 1993)
Symptom:
Insertion of the battery into the transceiver is difficult or impossible due to problems with the release lever.
Corrective Action:
●
●
A temporary cure is provide by loosening the two screws securing the holder, shifting the holder to the extreme left, then
retightening the screws.
A permanent fix is provide by replacing the holder and release level with new parts that have been deburred and modified to
allow relocation of the release level.
Parts required:
Qty
1
1
Description
Holder
Release lever
Kenwood Part No.
J19-1515-23
D10-0610-13
Circuit description
NA
NA
Time required for this modification is 30 minutes or less.
This modification is read 1209 times.
top of page
23-04-2000
(TH-28) TH-28/48A/E CTCSS tone error
Author: Kenwood Communication, inc.
Service Bulletin no. 1037 (18 March 1994)
Symptom:
Several reports were received on early model TH-28/48's concerning an inability to access sub-audible tone controlled repeaters. This
symptom only occurred when the repeater required the use of any of the following tones:
131.8 Hz
136.5 Hz
173.8 Hz
Corrective Action:
A microprocessor software error is responsible for this symptom. Replacing microprocessor IC6 on board X53-3400 (TH-28) or X533410 (TH-48) with the part listed below will correct this symptom.
Parts required:
Qty
1
Description
Microprocessor
Old part No.
HD404629A73H
New Part No
HD404729A79H
Circuit desc.
IC6
Caution: This modification requires soldering equipment rated for CMOS type circuits. It also requires familiarity with surface mount
soldering techniques. If you do not have the proper equipment or knowledge do not attempt this modification yourself. Seek qualified
assistance.
Time required for this modification is 30 minutes or less.
top of page
This modification is read 1206 times.
21-04-2000
(TH-315) TH-205/215/315/415 PTT knob installation procedure
Author: Kenwood Communication, inc.
Service Bulletin no. 987 (11-6-1991)
The original plastic knob (K29-3054-15) has been replaced with a rubber knob (K29-3054-35). The PTT mounting guide on the front
panel must be removed to allow the new knob to be installed. The following procedure will explain the installation procedure.
1. Disconnect the battery pack and antenna.
2. Remove the four screws from the back panel.
3. Carefully lift the front panel up and lay it into the right side of the body of the transceiver.
4. Disconnect the front panel from the body of the transceiver.
5. The plastic PTT knob is held in place with three tabs. Press in the bottom tab and then push the knob out of the front panel.
6. Push in the guide to crease it's two legs where they join the front panel.
7. Wiggle the guide back and forth until it breaks off the front panel. Discard the guide and plastic knob.
8. Install the rubber knob on the front panel. The side with the square tab goes toward the bottom of the front panel.
This modification is read 258 times.
top of page
19-07-1998
(TH-405) Umbau TH-405e auf 9k6
de DB8IE @ DB0SHG
Nach der grossen Resonanz auf meine Frage, ob eine Umbauanleitung des TH405 interessant sei,nun die Anleitung dazu:
Die vier Schrauben auf der Rueckseite loesen und dann vorsichtig die Vorder- seite abheben.Dann die zwei Folienleiterbahnen aus den
Fassungen ziehen.
Vorher die Arretierung an den Fassungen nach oben schieben.
Die Frontseite erstmal ausser Reichweite des Loetkolbens deponieren.Jetzt muessen Lautstaerke und Squelch-Drehknopf abgezogen
werden.
Dazu von innen mit Schraubendreher etwas nachhelfen.Die drei Schrauben(eine oben und zwei unten) der oberen Platine loesen und
dann die Platine nach oben rausziehen. Das geht etwas schwer,weil sie noch durch einen Steckverbinder gehalten wird.
Auf dieser Platine befindet sich unten rechts das Demodulator-IC IC 1,dort wird an Pin 9 direkt ein abgeschirmtes Kabel angeloetet,
die Abschirmung davon irgendwo an einer Durchkontaktierung der Masseflaeche der Platine.
Dieses Kabel ist der NF-Ausgang zum Modem.
Damit ist die Empfangsseite schon erledigt, es folgt der Anschluss an den Sender:
Dieser wird an der Steckerleiste auf der Platine an Pin 12 vorgenommen.
Dazu ist der Elko C85, der unter der Steckerleiste sehr gut zu erkennen ist, ausgeloetet. Dort wo der Plusanschluss sass, also am
rechten Loetauge, wird die Seele eines zweiten Koaxkabels eingeloetet. Die Abschirmung kommt wieder an Masse, also an die gleiche
oder auch eine andere Durchkontaktierung wie das erste abgeschirmte Kabel. Mit dieser Leitung wird dem Sender das
Modulationssignal zugefuehrt.
Das war schon der komplette Umbau,ich habe die beiden abgeschirmten Leitungen durch ein kleines Loch in der Seitenwand der Front
nach aussen gefuehrt.
Der Haken an der Sache: Man kann jetzt den Modulationsverstaerker nicht mehr benutzen und nur noch in 9k6 arbeiten.
Abhilfe:
Drittes Koaxkabel rausfuehren, dabei den Elko links wieder mit dem Anschluss_ einloeten und den Pluspol mit der Seele des dritten
abgesch. Kabels verbinden. Abschirmung wie gehabt an Masse. Bringt man am anderen Ende nun eine Klinkensteckverbindung an, so
kann man NF-Ein und Ausgang des Funkgeraetes zusammenstecken und es auch wieder in Fonie oder 1k2 benutzen.
Was nicht so schoen aussieht, sind die nach aussen gefuehrten Kabel, aber fuer 3.5 mm Buchsen war leider etwas zuwenig Platz.
Vielleicht faellt jemandem ja noch etwas Besseres ein?
Nach dem Zusammenbau sollte nun 9k6 Betrieb mit einem TX-Delay von 12-15 moeglich sein. Wichtig ist vor allen Dingen, das bei
Empfang das Sendesignal des Modems abgeschaltet ist, also Jumper passend setzen! (Ich hatte das zuerst vergessen und wunderte
mich ueber das starke Rauschen beim Empfang,hi.)
Lob auch an die Leute von Kenwood,die Funke ist sehr servicefreundlich aufgebaut und gut zugaenglich!
Also jetzt ran an den Loetkolben, es lohnt sich. Das Feeling in 9k6 laesst keinen Vergleich zu, man muss es mal erlebt haben.
Fuer etwaige "Unfaelle" mit dem Handy oder auch dem Loetkolben uebernehme ich im uebrigen null Haftung, aber Ihr werdet das
Ding schon kaputtkriegen,hi!
73 & 55 von Frank,DB8IE @ DB0SHG-1
This modification is read 263 times.
top of page
16-04-2000
(TH-415) TH-205/215/415 Volume/squelch control improvement
Author: Trio-Kenwood Communication, inc.
Service Bulletin no. 944 (28-10-1988)
The transceivers mentioned above can be mechanically improved by adding a bracket assembly to the volume and squelch controls.
The bracket assembly is being used in current production and is available for older units from the Kenwood Parts Department.
Bracket Ass'y (W05-0235-00)
1. Disconnect the battery pack and antenna.
2. Remove the 7 screws from the panel of the transceiver (Figure 1).
3. Lift the front panel from the transceiver and lay it to the right side.
4. Disconnect the 2 flex cables and remove the 3 screws from the IF unit (Figure 2).
5. Pull the top panel off and the remove the IF unit.
6. Remove the knobs and black cloth from the volume and squelch controls.
7. Inspect the controls to insure they are mounted flush to the board. If they are not flush, completely desolder and resolder the
controls.
8. Insert the bracket over the controls and tighten the nuts (tighten the nut on the volume control first). See figure 3 for the
bracket assembly view.
9. Assemble the transceiver be reversing steps 1 - 6.
This modification may be covered under warranty.
Time required for this modification is ½ hour or less.
This modification is read 472 times.
top of page
16-04-2000
(TH-415) TH-215/415 TX signal-To-Noise ratio improvements
Author: Trio-Kenwood Communication, inc.
Service Bulletin no. 946 (28-10-1988)
The TH-215/415 transmit signal-to-noise ratio is typically 30 dB. This ratio is more then sufficient for routine operations. For those
users who would like to obtain additional performance, the following modification will provide an improvement of 5 to 8 dB.
Required parts:
47 ohm 1/10 watt chip resistor
220 ohm 1/10 watt carbon resistor
22 µF 6.3V Electrolytic capacitor
1 µF 50V Electrolytic capacitor
(RK73FB2A470J)
(RD14BB2B221J)
(CE04CW0J220M)
(C90-1248-05)
1. Disconnect the battery and antenna.
2. Remove the 7 screws from the back panel of the transceiver (figure 1).
3. Lift the front panel from the transceiver and lay it to the right side.
4. Disconnect the 2 flex cables and remove the 3 screws from the IF unit (figure 2).
5. Pull the top panel off and then remove the IF unit.
6. Remove the 8 screws from the RF unit and unplug connector CN2 (figure 3). Remove the RF unit from the back cover.
7. Locate R50 (TH-215) or R60 TH-415) on the foil side of the RF unit (figure 4). Replace the resistor with a 47 ohm chip resistor.
8. On the component side of the IF unit, add a 1 µF capacitor as shown in figure 5.
9. Also on the component side, cut one foil, add a 220 ohm resistor, and add a 22 µF capacitor as shown in figure 6.
10. Assemble the transceiver by reversing steps 1 - 6.
>
This is an optional change that may not be covered under warranty.
Time required for this modification is 1 hour or less.
This modification is read 475 times.
top of page
21-04-2000
(TH-415) TH-205/215/315/415 PTT knob installation procedure
Author: Kenwood Communication, inc.
Service Bulletin no. 987 (11-6-1991)
The original plastic knob (K29-3054-15) has been replaced with a rubber knob (K29-3054-35). The PTT mounting guide on the front
panel must be removed to allow the new knob to be installed. The following procedure will explain the installation procedure.
1. Disconnect the battery pack and antenna.
2. Remove the four screws from the back panel.
3. Carefully lift the front panel up and lay it into the right side of the body of the transceiver.
4. Disconnect the front panel from the body of the transceiver.
5. The plastic PTT knob is held in place with three tabs. Press in the bottom tab and then push the knob out of the front panel.
6. Push in the guide to crease it's two legs where they join the front panel.
7. Wiggle the guide back and forth until it breaks off the front panel. Discard the guide and plastic knob.
8. Install the rubber knob on the front panel. The side with the square tab goes toward the bottom of the front panel.
top of page
This modification is read 465 times.
23-04-2000
(TH-42) TH-22/42A/E Memory loss improvement
Author: Kenwood Communication, inc.
Service Bulletin no. 1057 (28 March 1994)
Symptom:
Memory loss can occasionally occur if the following procedure is observed:
1. Program the memory with any desired information.
2. Allow the battery pack with to drain down over an extended period of time without turning off the transceiver. For example turn
the volume control up and squelch off. After approximately 8 hours the battery voltage will drop to approximately 3 - 4 Vdc.
3. Turn off the POWER SW.
4. Connect a DC voltage supply or a fully charged battery pack.
5. Turn on the POWER SW.
6. Memory will have been lost.
Corrective Action:
Replace microprocessor IC206 with the improved part listed below. This part incorporates an software improvement to correct this
symptom.
Parts required:
Qty
1
Description
Microprocessor
Old part No.
HD404629B17TF
New Part No.
HD404629B49TF
Circuit Description
IC206
Time required for this modification is 60 minutes or less.
This modification is read 364 times.
top of page
19-07-1998
(TH-45) KENWOOD TH-25/45 out of band modifications
Here are some mods for the TH-25AT and the TH-45AT. Please note that I do not encourage transmitting on a frequency for which you
do not have a license, nor do I encourage transmitting on a non-amateur frequency without FCC type accepted equipment (in the
United States).
First let me recommend that you buy the service manuals for these radios. The service manual is not expensive (about $15 I think)
and it will greatly help you in performing these modifications.
Look at the schematic for your radio. In the lower left hand corner is an IC labled IC2. This is an ASIC microprocessor. At the lower
right hand corner of this uP are several diodes and pull-up/pull-down resistors. They are D4, D3, R19, R18, R28, R20, R21, R22, R25,
R26, and a couple of resistors that are not even on the schematic that attach to B2 (pin 51 on IC2) and B3 (pin 50 on IC2). The TH45AT schematic shows R23 on the ASIC uP pin B2.
The schematic for the TH-25AT shows:
TH-25A
TH-25A
TH-25AT
TH-25AT
TH-25E
TH-25E
M,M2
M3,M4,X
K
M,M2
T
W
-12
-23
-11
-12
-52
-62
R18-R21
O
O
O
O
X
X
R25
X
X
O
X
X
O
R26,27
X
X
X
X
O
O
R28
X
O
X
X
O
O
R36
X
X
X
X
O
O
And the schematic for the TH-45AT shows:
TH-45A
TH-45A
TH-45AT
TH-45AT
TH-45AT
TH-45E
TH-45E
M1,M2,X
M3,M4
K
M1,M2
M3,M4
T
W
-21
-22
-10
-21
-22
-51
-61
R19-R21
O
O
O
O
O
X
X
R22
O
X
X
O
X
O
O
R23
O
O
O
O
O
X
X
R25
X
X
X
X
X
X
O
R26,27
X
X
X
X
X
O
O
R28
O
X
O
O
X
X
O
R36
X
X
X
X
X
O
O
where O means USED, and X means NOT USED.
On the TH-25AT:
(All frequencies given in MHz.)
R22 in
R28 out
This is how the radio is delivered in the USA. TX 144-1, 141-163
(I think).
R22 out
R28 in
The radio tunes from 142-151. This may be the modification given to US MARS members. I don't remember where the unit will
transmit. It may or may not transmit outside the range from 144-148.
R22 in
R28 in
The radio tunes only from 144-148.
R22 out
R28 out
Frequencies may be selected from 100-200 MHz (on the display only - your PLL will not lock up in this entire range). In addition, TX is
possible where your PLL locks up.
R25 out
Removing R25 disables automatic offset selection.
R23 and R24 are used for selecting the step size for tuning. I can't remember which positions are for which step sizes, and alas I
didn't write down what I found. If you want to play with this, go ahead.
On the TH-45AT:
(All frequencies are given in MHz.)
R18 in
R28 in
This is how the radio is delivered in the USA. The radio covers 438-450 MHz.
R18 in
R20 out
The radio is prohibited from tuning outside 440-450 MHz.
R18 out
R28 in
The radio will only tune from 215-230 MHz. Note that the PLL would not lock up! (What did you expect?) Could it be possible that
Kenwood originally planned a 220 version of this radio, but then scrapped their plans?
R18 out
R28 out
The radio will tune from 200-500 MHz (on the display only - your PLL will not lock up over this entire range). Transmitting is possible
anywhere your PLL will lock up.
Some of the above codes are:
K
USA
T
England
X
Australia
M
Other Areas
These components are found on the flexible circuit board under the display. To get to them, take the radio apart. Some unsoldering of
obvious grounding wires may be necessary. You will see where the flexible circuit board plugs into a socket on the main circuit board.
Before unplugging it, make sure you know what's in the memories, because they will be lost. Unplug the flexible circuit board and
unfold it so that the components are accesable. One of the fold-out parts of the flexible board will look something like this:
+----------------+
! R
R R D3 R R !
! 2
2 2
7 2 !
! 5
3 2
1 !
!
!
! R O
O R20!
! 2 O
O R19!
! 6 O
O R18!
!
O
O R28!
!
!
!
R !
!
D4 6 !
!
+-------+
!
!
!
!
The O's are solder pads.
The fold out board is actually square, but with only characters for graphics, I couldn't draw it that way.
On both radios, R36 is for the European tone burst to "whistle up" repeaters.
On both radios, D4 is for selecting the type of display. With D4 in, the display is normal. With D4 removed, the display is a channel
display.
D3 is for selecting VHF or UHF. With D4 in, the radio thinks its a VHF radio. With D4 removed, the radio thinks its a UHF radio. Don't
change this on your radio.
I have found a quick and easy way to retune your PLL (in the TH45-AT) with a minimum of test equipment. All you need is a scope
and a small tuning tool. First, take off the battery pack holder plate. Then, remove the silvery sticker covering the tuning pot access
holes. If the radio is positioned on its back, with the top folded over so that the touch tone pad is also facing down, the test point you
want (TP1) is on the bottom half of the radio, near the center (left to right), and close to the battery; the tuning pot you want (TC1) is
on the bottom, and closest to the PTT switch. Under no circumstances change the tuning of TC51. This is used to calibrate the output
of the radio with the display the radio is giving; you don't want to mess with it. Once again, the Service Manual makes it very clear
where these points are, if you are having trouble with my descriptions. On with retuning the PLL.
With the radio on, and receiving, monitor the voltage and the waveform on test point TC1.
Tune the radio DOWNWARDS in frequency until the PLL unlocks. Note that the radio will beep when this happens, and the waveform
on TP1 will change. Tune the radio about 1 MHz higher so that the PLL locks up again, and note the voltage on the testpoint, TP1.
Now, tune the radio to the LOWEST frequency that you want to be able to receive. Adjust TC1 until the voltage on the test point TP1 is
the same as what was noted earlier. Button the radio back up, and you're done. You will not be able to tune the PLL to any range you
want.
There are limits. On my radio, I have been able to retune the radio so that I can recieve from 439.2-468.6 MHz with a set of batteries
fresh out of the charger. The tuning range will probably diminish as the battery voltage decreases. I have not retuned the PLL on my
2m HT, but I'd imagine the same technique will prove fruitful.
I may have some more information on these radios someplace. If I can find it, I will add to this posting, and post it again with the
updated information. Enjoy. Kenneth J. Hendrickson N8DGN
This modification is read 547 times.
top of page
19-07-1998
(TH-45) TH-45E auf 9k6
From: DL5RDO @ DB0RGB.#BAY.DEU.EU
Hallo OMs,
hier ist eine Modifikationsanleitung für das TH45E von Kenwood zum Betrieb mit 9600 Baud:
1. Öffnen des Geräts
●
●
●
●
●
Batteriepack abnehmen
die 4 Schrauben für die Batterie-Kontaktplatte entfernen
die beiden Schrauben rechts am Rückteil entfernen
die Schraube, die sich links in einer Aussparung des Rückteils befindet, ebenfalls entfernen.
vorsichtig das Kunststoffvorderteil des Geräts abziehen.
2. Abnehmen der Weißblechabschirmung
Im Gerät befindet über den Platinen eine Weißblechabschirmung, die mit insgesamt sieben Schrauben befestigt ist. Diese Schrauben
alle entfernen. Danach die beiden Lötstellen oben an der Abschirmung lösen und die ent- sprechenden Drähte vorsichtig zur Seite
biegen. Das Blech kann dann abge- nommen werden.
3. RX-Anschluß
Auf der IF-Platine (die dritte, stehend eingebaute Platine, von rechts gezählt) befindet sich das ZF-IC TK 10485 M. An Pin 11 dieses
ICs ist ein geschirmter Draht anzulöten. Der richtige Pin ist derjenige, der zu einem SMD-Kondensator geht. (Wenn das Gerät mit der
rechten Seite nach unten liegt, ist es der obere rechte Pin). Man sollte möglichst auch den Anschluß der Abschirmung vor dem
Zusammenbau an die Weißblechplatte anlöten.
4. TX-Anschluß
Die (am besten zugänglichste) Stelle für den TX-Anschluß ist das Hubpoti.
Es ist schon vor dem Abnehmen der Weißblechabschirmung im unteren Teil des Geräts erkennbar. (Daneben befindet sich ein
isolierter Draht.)
An den rechten Anschluß des Potis ist ein ebenfalls geschirmter Draht anzu- löten. Auch hier wieder Masseanschluß an die
Weißblechplatte.
Der andere Anschluß am Poti geht übrigens nach Masse, was mit einem Ohmmeter leicht zu verifizieren ist, falls Unklarheit über den
richtigen Pin herrscht. Keinesfalls am Hubpoti herumdrehen, der Hub wird im TNC eingestellt!
5. PTT-Anschluß
Man kann der Einfachheit halber den PTT-Anschluß von außen über die MIC-Klinkenbuchse vornehmen. Wer will, kann auch innen
anschließen. Nach Abschrauben der beiden Buchsen ist die entsprechende Stelle leicht zugänglich.
6. Zusammenbau
Prinzipiell ist umgekehrt wie unter 1. und 2. vorzugehen. Dabei aber nicht vergessen, die Drähte an die Weißblechplatte wieder
anzulöten.
7. Herausführen der Drähte
Durch die Kompaktheit des Geräts bedingt ist es nicht einfach, die Drähte nach außen zu führen. Eine Lösung wäre, die Anschlüsse an
den Klinkenbuchsen zu benutzen. Dann kann man aber leider kein Speakermike mehr verwenden. Ansonsten bleibt es jedem selbst
überlassen, wie er es am geschicktesten anstellt. (Ich weiß es übrigens selbst noch nicht...)
8. Test und TNC-Einstellungen
Bei mir wird ein TNC2H von DK9SJ verwendet, alle Angaben beziehen sich darauf. Empfangsmäßig sollte das Gerät auf 9k6 sofort
funktionieren.
Auf der Senderseite ist es schon schwieriger, da die Hubeinstellung sehr kritisch ist. Bei mir ist das Hubpoti im TNC etwa ein Viertel
aufgedreht.
Hier ist u. U. längeres Probieren angesagt.
Beim Sendefilter hat sich bei mir die Einstellung 3 als die beste erwiesen. (Also die beiden rechten DIP-Schalter nach oben.)
Zwar habe ich den Eindruck, daß beim Senden gelegentlich ein Paket verloren geht, aber im allgemeinen kann man damit recht gut
arbeiten.
TXDelay ist auf 180 ms gesetzt. (Parameter T= 18)
9. Abschließende Bemerkungen
Ich hoffe, daß ich mit dieser Beschreibung dem einen oder anderen OM den Einstieg in die 9k6-Welt ermöglicht habe. Sollten
Unklarheiten über die Modifikation bestehen, bin ich gerne bereit, noch genauere Infos zu geben.
Für evtl. auftretende Schäden kann ich allerdings keinerlei Haftung übernehmen.
73 de Dieter, DL5RDO @ DB0RGB.#BAY.DEU.EU
top of page
This modification is read 490 times.
19-07-1998
(TH-45) TH-25/45AT Automatic Power OFF Function
Author: Trio-Kenwood Communication, inc.
Service Bulletin no. 939 (2-6-1988)
Some users of the TH-25AT/45AT have expressed a desire to defeat the automatic power off function. The following modification will
explain how to do this. It should be noted that this modification does not effect the battery saver function.
Required Part:
Diode Kenwood Part #1SS133
1. Disconnect the battery pack and antenna.
2. Remove the Volume, Squelch, and Tuning Control knobs by pulling them straight up from the top panel.
3. Using a 7mm spanner wrench, remove the nut from the volume control and the nut from the tuning control.
4. Remove one screw located by the PTT switch. (Figure 1).
5. Remove one screw located by the speaker jack. (Figure 2).
6. Remove two screws from the battery terminal plate. (Figure 3).
7. Carefully pull the front panel up from the transceiver (do not break the wires connected between the front panel and the body of
the transceiver.) Lay the front panel to the side of the transceiver (Keep track of the F.LOCK cover if it comes off.)
8. Remove the PTT cover.
9. Remove one screw from the PTT switch unit. (Figure 4).
10. Gently lift the top panel from the transceiver by pulling it forward and then up (the O ring on the BNC connector will produce
some tension.)
11. Carefully unfold the flex Printed Circuit Board (PCB) to expose IC2. (Figure 5).
12. Using a 45 watt (or less) soldering iron that has an isolated or grounded tip, add a diode between pins 23 and 58 of IC2. (Figure
6).
13. Carefully assemble the transceiver by reversing step 1-11. Pull the BNC connector "O" ring up a little before installing the top
panel.
14. Reset the microprocessor by following the procedure in the instruction manual (page 16) called CLEARING ALL MEMORY.
This is an optional change that is not covered under warranty.
Time required for this modification is 1 hour or less.
SYSOP NOTES:
Later versions of the TH-25/45AT came with a programmable defeat for the Auto power off function. Do not install this modification if
your manual provides a procedure for turning the power off function off! Step 11 tells you to carefully unfold the flexible pc board. It is
extremely important that you do not try and bend the board in a direction that is opposite from its current bend. To do so will break
the board or the foil traces inside the board!
top of page
This modification is read 481 times.
16-04-2000
(TH-45) TH-25/45 W/TSU-6 Tone alert improvements
Author: Trio-Kenwood Communication, inc.
Service Bulletin no. 932 (11-4-1988)
When using the TH-25/45 in combination with the TSU-6 you may experience erratic operation of the tone alert function. This may be
due to an incoming signal that is over-modulated, distorted, or noisy. The following modification will correct this tendency.
Required parts:
22 µF, 6.3V electrolytic capacitor
56 Kohm, 1/8 watt carbon resistor
Diode
part # CE04CW0J220J
part # RD14BB2B563J
part # 1SS133
1. Remove the TSU-6 from the TH-25/45 (refer to theTH-25/45 instruction manual for details).
2. Cut the blue wire (pin # 4) approximately 5 mm from the connector for the TSU-6.
3. Solder the components to the blue wire and ground as shown in figure 1. Note that the cathode side of the diode goes toward the
TSU-6 connector. Use the leg of the VCO shield to ground the negative side of the capacitor.
4. Insulate the components with electrical tape to prevent shorting.
5. Install the TSU-6 in the tH-25/45. Route the components so that the battery terminal plate does not bow when installed.
Figure 1.
This modification may be covered under warranty.
Time required for this modification is ½ hour or less.
top of page
This modification is read 478 times.
12-03-2000
(TH-46) Extended RX/TX for TH-46
+--------------------------------+------------------------+-----------------------------+-----------------------------------+
|
Level of extension
|
Ordinary extension
|
Reception extension
|
Transmission/Reception
extension |
+--------------------------------+------------+-----------+-----------------------------+-----------------------------------+
| Modification
|Cut b0 (JP1)| Delete b1 | Delete a6 (&24,R21, and R20)| Delete a6 (R24) and R21
(width R20)|
+------------------+-------------+------------+-----------+---------------+-------------+-----------------------------------+
|
| Destination |
K
|
W
|
K
|
W
|
All
destinations
|
|
Label
+-------------+------------+-----------+---------------+-------------+-----------------------------------+
|
| Transmission| 400 ~ 470 | 400 ~ 470 |
400 ~ 470
| 430 ~ 440 |
400 ~ 500
|
|
| Reception
| 400 ~ 470 | 400 ~ 470 |
400 ~ 500
| 400 ~ 500 |
400 ~ 500
|
+------------------+-------------+------------+-----------+---------------+-------------+-----------------------------------+
| Guide values of | Transmission| 405 ~ 460 | 405 ~ 460 |
405 ~ 460
| 430 ~ 440 |
405 ~ 460
|
| PLL lock ranges* | Reception
| 405 ~ 460 | 405 ~ 460 |
405 ~ 460
| 405 ~ 460 |
405 ~ 460
|
+------------------+-------------+------------+-----------+---------------+-------------+-----------------------------------+
* The PLL lock ranges are guide values. Unstable operation my occur around the upper/lower limits of frequency. For use at
frequencies around the upper/lower limits of the lock range or soutside the lock range, readjust the lock range.
Adjusting the lock range:
TX-RX unit X57-3520-21. VCO coil L1 (Common transmission/reception.)
Date: 12-03-2000
User comment
From: webmaster
Subject: Blurred text.
Under the table "Reception/Modification" the label "Delete a6 (&24,R21, and R20)", i'm not sure about the text "&24", maybe the "&"
character is another character. It was a very bad picture i have to read from.
Mail me if you have any changes
This modification is read 369 times.
top of page
19-07-1998
(TH-47) TH-47A Mods for ext frq
1. Remove battery and antenna.
2. Remove case as follows: Remove volume,squelch and tuning knobs by pulling straight off.Remove shaft nuts using needle nose
pliers or other such tool.Remove 4 screws from the case.NOTE: Do not remove the 2 screws that are on either side of battery
release latch.Lift plasctic top from radio while separating the radio halves.
3. Open the radio up like a book and place on work surface.
4. Cut or unsolder green wire loop on the control board.
5. Reassemble radio,Reset microprocessor.
Radio will cover 400-470 MHZ.While scanning,a beeping sound will be heard at the band edges indicating PLL unlock condition.To
eliminate this annoyance:
1. Open up radio as indicated above.
2. Lift up microprocessor IC303 leg # 62(This is the bottom microproccessor) (Third leg on left side from the bottom)This should be
done only by those comfortable working with SMT components.
3. reassemble radio.
Radio will now cover 400-470 MHZ RCV/XMIT with no annoying beeps during scanning.Leg # 62 is the UL input to the microprocessor
to tell it that an unlock condition is ocurring.With no input,the Microprocessor thinks that the radio is always locked,and no error beeps
will sound.This MOD also allows XMIT,but that is the price you have to pay :-)
I have done this MOD to my radio with no ill effects.This MOD should also work on the TH-27A.
This modification is read 293 times.
top of page
19-07-1998
(TH-48) Secret function manual of the KENWOOD TH-28e/48e porto
TH-28e/48e RX EXPANSION (ON)
Press PTT + VFO, then POWER ON.
New RX ranges TH28e after this modification:
VHF Band 136 - 174 Mhz (FM)
UHF Band 400 - 520 Mhz (FM)
TH48e:
UHF Band 400 - 470 Mhz (FM)
VHF Band 136 - 174 Mhz (FM)
TH28e Air Band Expansion
Press F key for 1 sec. Then press LOW key.
New RX ranges
108 - 118 Mhz (FM)
118 - 136 Mhz (AM)
TH28e 340 - 400 Mhz Expansion
Remove the diode D8 from the control unit. (FM mode only) With Air Band and 340 Mhz expansion, operating band can be changed:
_________
_________
__________
---->I AMATEUR I====I 340 Mhz I--->I AIR BAND I_____
I
I_________I
I_________I
I__________I
I
I___________________________________________________I
TH48e 340 MHZ & 900 MHZ EXPANSION
Remove the diode D8 from the control unit to cover 340 - 400 Mhz and 800 - 950 Mhz FM mode.
_________
_________
_________
--->I AMATEUR I--->I 340 Mhz I--->I 900 Mhz I_____
I
I_________I
I_________I
I_________I
I
I__________________________________________________I
TH-28e/48e TX EXPANSION
Remove the diode D10 from the control unit.
New TX ranges after this modification:
TH28e:
VHF Band 136.000 - 174.250 Mhz (FM)
TH48e:
UHF Band 400.000 - 470.000 Mhz (FM)
Note:
Manufacturer guarantees TX/RX specification only in amateur band. The above frequency range is for the microprocessor's range so
that the receiver sensitivity or TX output power of expanded band may be reduced.
TH-48E TX/RX 432-438 Mhz LIMITED RANGE
Remove the diode D14 from the control unit.
TH28e/48e CROSS BAND REPEATER
Remove the diode D4 then press F key for 1 sec. and press 0 key.
TH-28a/e-48a/e FREQUENCY EXTENSION
Open the case and remove or add the destination chip diode D10, D11, D14 and D15 on the component side of the control unit.
(X53-340X-XX, X53-341X-XX)
The frequncy can then be extended as shown in the table 1 an 2 on page 3 and 4.(See the destination chip diode position drawing on
the attached sheet.)
Notes:
The frequency display range may differ from the PLL lock range.
___________________________________________________________________
I
I
360-Mhz band
I
Air band
I
I===================I=======================I=======================I
I
Step
I5,10,15,20,12.5,25 Khz I5,10,15,20,12.5,25 Khz I
I-------------------I-----------------------I-----------------------I
I Frequency range I340.000-399.987.5 Mhz I 100.000 - 117.975 Mhz I
I
I
FM
I
FM
I
I
I
I 118.000 - 135.995 Mhz I
I
I
I
AM
I
I-------------------I-----------------------I-----------------------I
I Initial frequency I
340.000 Mhz
I
118.000 Mhz
I
I___________________I_______________________I_______________________I
Initial step value is 12.5 Khz for 360-Mhz band and 25 Khz for Air band.
TH-48a/e BAND EXTENSION
The 360 Mhz band and the 800 Mhz band can be received. To expand the 360-Mhz band and the 800-Mhz band remove chip diode D8
of the control unit as shown in table 2.
You can switch between the UHF amateur band the 360-Mhz band and the 800-Mhz band by pressing the [ F ] key for 1 sec. and then
the [ LOW ] key.
___________________________________________________________________
I
I
360-Mhz band
I
800-Mhz band
I
I===================I=======================I=======================I
I
Step
I5,10,15,20,12.5,25 Khz I
12.5,25 Khz
I
I-------------------I-----------------------I-----------------------I
I Frequency range I 340.000-399.987.5 Mhz I 800.000-949.987.5 Mhz I
I
I
FM
I
FM
I
I-------------------I-----------------------I-----------------------I
I Initial frequency I
340.000 Mhz
I
850.000 Mhz
I
I___________________I_______________________I_______________________I
Note:
Program scan is not possible over several bands, but is possible within each band.
Initial step value is 12.5 Khz.
Table 1 TH28a/e
__________________________________________________________________
I
Destination bit
I
IGuaranteed I TX (Mhz) I RX (Mhz) I
I________________________IDestI___________I___________I___________I
I B4 I B3 I B2 I B1 I B0 I
I Min I Max I Min I Max I Min I Max I
I----I----I----I----I----I----I-----I-----I-----I-----I-----I-----I
I O I O I O I X I O I E2 I 144 I 146 I 136 I 174 I 136 I 174 I
I----I----I----I----I----I----I-----I-----I-----I-----I-----I-----I
I O I O I O I X I X I E2 I 144 I 146 I 136 I 174 I 136 I 174 I
I----I----I----I----I----I----I-----I-----I-----I-----I-----I-----I
I O I X I O I X I O I M2 I 144 I 148 I 136 I 174 I 136 I 174 I
I----I----I----I----I----I----I-----I-----I-----I-----I-----I-----I
I O I X I O I X I X I M2 I 144 I 148 I 136 I 174 I 136 I 174 I
I----I----I----I----I----I----I-----I-----I-----I-----I-----I-----I
I X I O I O I X I O I X2 I 144 I 148 I 136 I 174 I 136 I 174 I
I----I----I----I----I----I----I-----I-----I-----I-----I-----I-----I
I X I O I O I X I X I X2 I 144 I 148 I 136 I 174 I 136 I 174 I
I----I----I----I----I----I----I-----I-----I-----I-----I-----I-----I
I X I O I X I X I O I K2 I 144 I 148 I 142 I 152 I 136 I 174 I
I----I----I----I----I----I----I-----I-----I-----I-----I-----I-----I
I X I O I X I X I X I K2 I 144 I 148 I 142 I 152 I 136 I 174 I
I____I____I____I____I____I____I_____I_____I_____I_____I_____I_____I
D15 D11 D14 D10 D8
:
O = Jumpered
X = No jumper
:
......<............<.............<.............<.............<....:
:
____________
:
I Sub-UHF
:______________________________________________________I____________
I Reset I Offset I Shift I Auto I 1750 I Air I 360 I RX (Mhz) I
I freq- I freq- I freq- I shiftI tone I band I band I-----------I
I
I
I
I
I
I
I
I Min I Max I
I-------I--------I-------I------I------I-------I-------I-----I-----I
I 144 I 0.6
I 12.5 I O
I
O I
O
I
I 400 I 520 I
I-------I--------I-------I------I------I-------I-------I-----I-----I
I 144 I 0.6
I 12.5 I O
I
O I
O
I
O
I 400 I 520 I
I-------I--------I-------I------I------I-------I-------I-----I-----I
I 144 I 0.6
I 12.5 I
I
I
O
I
I 400 I 520 I
I-------I--------I-------I------I------I-------I-------I-----I-----I
I 144 I 0.6
I 12.5 I
I
I
O
I
O
I 400 I 520 I
I-------I--------I-------I------I------I-------I-------I-----I-----I
I 144 I 0.6
I
5
I O
I
I
O
I
I 400 I 520 I
I-------I--------I-------I------I------I-------I-------I-----I-----I
I 144 I 0.6
I
5
I O
I
I
O
I
O
I 400 I 520 I
I-------I--------I-------I------I------I-------I-------I-----I-----I
I 144 I 0.6
I
5
I O
I
I
O
I
I 438 I 450 I
I-------I--------I-------I------I------I-------I-------I-----I-----I
I 144 I 0.6
I
5
I O
I
I
O
I
O
I 400 I 520 I
I_______I________I_______I______I______I_______I_______I_____I_____I
:
:
......<............<.............<.............<.............<.....:
:
:______________
Sub-UHF
I
______________I
I Reset I Step I
.......>.....I-------I------I
I freq. I freq.I
:
I 430 I 25 I
I
I
I
:
I-------I------I
I-------I------I
:
I 430 I 25 I
I 430 I 25 I
:
I-------I------I
I-------I------I
:
I 440 I 25 I
I 430 I 25 I
:
I-------I------I
I-------I------I
:
I 440 I 25 I
I 400 I 25 I
:
I_______I______I
I-------I------I
:
I 400 I 25 I
:
I-------I------I....>.:
Table 2 TH48a/e
__________________________________________________________________
I
Destination bit
I
IGuaranteed I TX (Mhz) I RX (Mhz) I
I________________________IDestI___________I___________I___________I
I B4 I B3 I B2 I B1 I B0 I
I Min I Max I Min I Max I Min I Max I
I----I----I----I----I----I----I-----I-----I-----I-----I-----I-----I
I O I O I X I O I O I E3 I 430 I 440 I 400 I 470 I 400 I 470 I
I----I----I----I----I----I----I-----I-----I-----I-----I-----I-----I
I O I O I X I O I X I E3 I 430 I 440 I 400 I 470 I 400 I 470 I
I----I----I----I----I----I----I-----I-----I-----I-----I-----I-----I
I O I X I O I X I O I M2 I 430 I 440 I 400 I 470 I 400 I 470 I
I----I----I----I----I----I----I-----I-----I-----I-----I-----I-----I
I O I X I O I X I X I M2 I 430 I 440 I 400 I 470 I 400 I 470 I
I----I----I----I----I----I----I-----I-----I-----I-----I-----I-----I
I X I O I O I X I O I X2 I 430 I 440 I 400 I 470 I 400 I 470 I
I----I----I----I----I----I----I-----I-----I-----I-----I-----I-----I
I X I O I O I X I X I X2 I 430 I 440 I 400 I 470 I 400 I 470 I
I----I----I----I----I----I----I-----I-----I-----I-----I-----I-----I
I X I O I X I X I O I K2 I 438 I 450 I 400 I 470 I 400 I 470 I
I----I----I----I----I----I----I-----I-----I-----I-----I-----I-----I
I X I O I X I X I X I K2 I 438 I 450 I 400 I 470 I 400 I 470 I
I____I____I____I____I____I____I_____I_____I_____I_____I_____I_____I
D15 D11 D14 D10 D8
:
O = Jumpered
X = No jumper
:
......<............<.............<.............<.............<....:
:
____________
:
I Sub-VHF
:______________________________________________________I____________
I Reset I Offset I Shift I Auto I 1750 I 360 I 800 I RX (Mhz) I
I freq- I freq- I freq- I shiftI tone I band I band I-----------I
I
I
I
I
I
I
I
I Min I Max I
I-------I--------I-------I------I------I-------I-------I-----I-----I
I 430 I
*
I
25 I
I
O I
I
I 136 I 174 I
I-------I--------I-------I------I------I-------I-------I-----I-----I
I 430 I
*
I
25 I
I
O I
O
I
O
I 136 I 174 I
I-------I--------I-------I------I------I-------I-------I-----I-----I
I 430 I
5
I
25 I
I
I
I
I 136 I 174 I
I-------I--------I-------I------I------I-------I-------I-----I-----I
I 430 I
5
I
25 I
I
I
O
I
O
I 136 I 174 I
I-------I--------I-------I------I------I-------I-------I-----I-----I
I 430 I
5
I
25 I
I
I
I
I 136 I 174 I
I-------I--------I-------I------I------I-------I-------I-----I-----I
I 430 I
5
I
25 I
I
I
O
I
O
I 136 I 174 I
I-------I--------I-------I------I------I-------I-------I-----I-----I
I 440 I
5
I
25 I
I
I
I
I 136 I 174 I
I-------I--------I-------I------I------I-------I-------I-----I-----I
I 440 I
5
I
25 I
I
I
O
I
O
I 136 I 174 I
I_______I________I_______I______I______I_______I_______I_____I_____I
* = 1.6M, -7.6M
:
:
......<............<.............<.............<.............<.....:
:
:______________
Sub-UHF
I
______________I
I Reset I Step I
.......>.....I-------I------I
I freq. I freq.I
:
I 144 I
5 I
I
I
I
:
I-------I------I
I-------I------I
:
I 144 I
5 I
I 144 I 12.5 I
:
I-------I------I
I-------I------I
:
I 144 I
5 I
I 144 I 12.5 I
:
I-------I------I
I-------I------I
:
I 144 I
5 I
I 136 I 12.5 I
:
I_______I______I
I-------I------I
:
I 136 I 12.5 I
:
I-------I------I....>.:
CLONING BY RADIO
1. Overview of the clone function. (The function does not require frequency expansion.)
Since 240 channels are available if an option is installed, it is laborious to write the same memory channel frequency data into
several transceivers. Once you write data into one transceiver, you can duplicate it in several others in a single operation with
the clone function. (You can write data without installing an option.)
2. How to use the clone function.
Transmitter setup:
1. Write the required memory channel frequency data into the transceiver.
2. Set the transmit frequency.
3. Switch the power off, hold down the 7 key on an F series tranceiver or the MR and PTT keys on a K series, and switch the
power on again.
"CLONE" appears on the display.
(The transmit output is automatically set to "economic low".)
Receiver setup:
1. Set the frequency of the transceiver to the transmit frequency of the transmitter.
2. Switch the power off, hold down the 7 key on an F series transceiver or the MR and PTT keys on a K series one, and switch
the power on again.
"CLONE" appears on the display.
Press the PTT key on the transmitter. The clone function works automatically. When cloning ends, the frequency is displayed
again.
It takes about four minutes to transfer frequency data for 40 channels, and about nine minutes to transfer frequency data for
240 channels.
If the receiver is an F series one and the frequency is displayed again, switch the power off, hold down the F key, and switch the
power on again (VFO reset). If the receiver is a K series one and the frequency is displayed again, switch the power off and on
again.
Thus, cloning lets you copy the channel data stored in the transmitter to other transceivers in a single operation. To stop cloning,
switch the power off and on again.
__________________________________
I
I
I
I
I
I
I
I
I
I
I
Control Unit
TH28a/e : X53-340X-XX
TH48a/e : X53-341X-XX
I
I
I
I
I
I
I
I
I
I
I
Bit
Bit
Bit
Bit
Bit
0.....D8
1.....D10
2.....D14
3.....D11
4.....D15
(MA110)
(MA110)
(MA110)
(MA110)
(MA110)
I
D15
D14
I
I
\_ _/
I
I
I I I
I
I
I_I_I
D10 D8
I
I
_ _/ _/
I
I
D11-I I I I I
I
I
I_I_I I_I
I
I__________________________________I
I
I
I
Control Unit
I
I
X53-3420-00 A/5
I
I
I
I
.............
I
I
:
:
I
I
:
CPU
: ___
I
I
:
: I___I D1
I
I
:
: I___I D2
I
I
:...........: I___I D3
I
I
I___I D4
I
I
I___I D5
I
I
I___I D6
I
I
I
I__________________________________I
top of page
This modification is read 852 times.
27-03-2000
(TH-48) Extended UHF TX. Also VHF/UHF/Cellular RX Modification
Author: Colin G1IVG - [email protected]
RX Coverage After Modification.
VHF.
UHF.
Cellular.
136 MHz to 174 MHz FM
340 MHz to 470 MHz FM
800 MHz to 950 MHz FM
(To select the different UHF bands after the modification you must make sure that you are in UHF VFO mode, then press for two two
seconds and then . This toggles the different UHF bands).
Procedure.
1. Remove the battery.
2. Remove the four screws on the rear of the radio (not the belt clip screws).
3. To open the radio, I found it best to put your thumb into the battery compartment and by applying slight pressure on the inside
of the rear cover, with your thumb the radio will open.
4. As you open the case, take care not to damage the ribbon cable.
5. Put the radio face down on a clean surface with the front of the radio facing down and to the right. The back of the radio should
then be to the left and on it's back.
6. Look at the photo below for the location of the surface mount resistors.
7. On my radio, originally there were two green link wires fitted to the PCB. The photo below shows my radio after modification.
The wire link to remove is "W1". However leave link "W2" in place.
8. Now you need to configure the small surface mount resistors as shown in the photo. Just copy the configuration as shown and
this will give you the coverage printed above. Take care when removing the resistors as to much heat from your soldering iron
will lift the PCB track and possibly destroy your Kenwood TH48. If your not sure then ask an experienced technician to do the
soldering etc.
9. Then reassemble the radio, taking care not to trap the existing link wire "W2" between the two parts of the case. Also take care
again of the ribbon cable.
Layout of surface mount resistors and green link "W2"
After the modification.
These modifications work 100% on my own Kenwood TH48E, the serial number of my radio is 60100848. However I can't guarantee
they will work on your particular model. (The serial number can be found inside the battery compartment of the radio).
top of page
This modification is read 790 times.
23-04-2000
(TH-48) TH-28/48/78 Difficult battery insertion
Author: Kenwood Communication, inc.
Service Bulletin no. 1028 (29 June 1993)
Symptom:
Insertion of the battery into the transceiver is difficult or impossible due to problems with the release lever.
Corrective Action:
●
●
A temporary cure is provide by loosening the two screws securing the holder, shifting the holder to the extreme left, then
retightening the screws.
A permanent fix is provide by replacing the holder and release level with new parts that have been deburred and modified to
allow relocation of the release level.
Parts required:
Qty
1
1
Description
Holder
Release lever
Kenwood Part No.
J19-1515-23
D10-0610-13
Circuit description
NA
NA
Time required for this modification is 30 minutes or less.
This modification is read 685 times.
top of page
23-04-2000
(TH-48) TH-28/48A/E CTCSS tone error
Author: Kenwood Communication, inc.
Service Bulletin no. 1037 (18 March 1994)
Symptom:
Several reports were received on early model TH-28/48's concerning an inability to access sub-audible tone controlled repeaters. This
symptom only occurred when the repeater required the use of any of the following tones:
131.8 Hz
136.5 Hz
173.8 Hz
Corrective Action:
A microprocessor software error is responsible for this symptom. Replacing microprocessor IC6 on board X53-3400 (TH-28) or X533410 (TH-48) with the part listed below will correct this symptom.
Parts required:
Qty
1
Description
Microprocessor
Old part No.
HD404629A73H
New Part No
HD404729A79H
Circuit desc.
IC6
Caution: This modification requires soldering equipment rated for CMOS type circuits. It also requires familiarity with surface mount
soldering techniques. If you do not have the proper equipment or knowledge do not attempt this modification yourself. Seek qualified
assistance.
Time required for this modification is 30 minutes or less.
top of page
This modification is read 666 times.
23-04-2000
(TH-48) TH-48A Microprocessor change
Author: Kenwood Communication, inc.
Service Bulletin no. 1039 (10 February 1994)
Symptom:
Due to a recent rule change by the FCC it is no longer possible to supply transceivers, or provide replacement microprocessor that
would allow a transceiver to receive in the 800 MHz band.
Corrective action:
The microprocessor program of IC5 has been modified to prevent 800 MHz band reception. Production has been changed beginning
with serial number lot 510xxxx. Units produced after this point will not be capable of 800 MHz reception.
Parts required:
Qty
1
Description
Microprocessor
Old part No.
HD404629A79H
New Part No
HD404629B44H
Procedure:
When ordering a replacement microprocessor you will be supplied with the new version. Please make sure your customer understands
the limitations of this new
This modification is read 683 times.
top of page
19-07-1998
(TH-75) TX across entire tuning range TH-75A
I have a couple of mods that you may or may not have. For the TH-75A MARS/CAP mod, removing D4 will allow TX across entire
tuning range, except that actual TX range will be limited by tuning of the PLL.
For the TM-731A, there is a "Beyond MARS/CAP transmit Modification". It provides TX from 136 to 174 and 400 to 500 MHz. Again,
actual TX range limited by PLL tuning. If you don't already have this and would like it, I'll send a copy if you furnish me your address.
It involves cutting R25 on the control unit, and installing a jumper (diagram required to locate position), then two resets in a row.
I have tested these mods on my own rigs.
73 - Kevin, KD2SL @ KC3BQ
This modification is read 740 times.
top of page
19-07-1998
(TH-75) 9600 baud with the TH 75
I tested the follwing modification only for the 430 MHz part. Perhaps it works also on 2 meters if you try the modification on the 144
MHz IF-Unit.
For opening the TH 75 follow the instructions of the manual page 31 ( installation of the TSU-Unit ).
After opening the handy, it is not necessary to disconnect any connectors between the front and rear part. All connections have to
done at the rear part.
-TXOn the right side of the open handy is a connector (No. 201). The wires of this connector are leading to the lower board of the rear
Part.
Disconnect this connector. Next remove the five screws holding the upper board. Now it is possible to lift this board for about 5 mm.
On the lower side of the board are the solder pins of the connector which was opened before. Solder a thin wire to pin No 5. (Start
counting at the antenna side of the TH 75).
This wire can be connected direct to the TX-Exit of your TNC, if this exit has A/C level only. If the TNC has also D/C level add a
capacitor of about 4.5 to 6.8 uF.
-RXA little bit higher to the connector were the TX line was connected is the UHF - IF unit (X58-3610-00). It is a small additional board
over the main board. You will find the IC TK10485M on this small board. Solder a wire to pin No 11, the first one the left side (Start
counting again at the antenna Side). This pin is connected to a capacitor. In order to prevent the IC from being demaged, I
recomment to do the soldering at this capacitor.
This wire can be connected direct to the TNC.
If you need for some reason the squelch of the TH 75 during 9K6 operation, add a resistor of 10 KOhms in the RX line.
These are all modifications necessary for 9K6, and now you can start closing the TH 75. If you do not instaubber cap of the DC IN
Terminal, you have a fine little gap for the wires. But it is also possible to install an additional jack if the TSU-6 unit is not installed.
The ground connection can be made via the speaker jack. The PTT line of the TNC should be connected to the MIC jack.
The TH 75 is able to work with a TX-Delay of 150 - 170 ms (> T15) which is a good value for a modified PLL TRX.
This modification is read 626 times.
top of page
19-07-1998
(TH-75) TH-75A MARS/CAP modification
This modification will allow the TH-75A to transmit from 142 to 152 MHz and 420 to 450 MHz. Specifications are guaranteed for the
Amateur Bands only. Through the transceiver will display 136 to 174 MHz and 335 to 512 MHz, the PLL circuit may not lock through
the entire range.
Modification procedure
1.
2.
3.
4.
5.
6.
Disconnect the battery and antenna.
Remove the three case screws and two battery plate screws.
Lift the front panel from the body of the transceiver, but do not disconnect the two flex cables.
Cut the green jumper wire (W1) that is located to the left side of the CPU in the front panel assembly.
Assemble the transceiver by reversing steps 1-3.
Reset the CPU by holding the M key as the power is turned on.
I have tried it and it works.
Suresh Kagoo N9GSA
Internet : [email protected]
Bitnet : SKAGOO@MEMSTVX1
top of page
This modification is read 644 times.
31-03-1999
(TH-75) TH-75E auf 9k6
de DL8FCL @ DK0MTV.#RPL.DEU.EU
Seit einigen Tagen benutze ich ein TH-75E mit recht gutem Erfolg für PR mit 9600 Baud. Der Umbau ist sehr einfach durchzuführen,
und sollte jedem gelingen, der schon einmal einen Lötkolben in der Hand hatte.
Zuerst öffnet man das Gehäuse. Die zu entfernenten Schrauben kann man sich auf der letzten Seite der Bedienungsanleitung
anschauen (Einbauanleitung für CTCSS unit TSU-6). Das Gerät soll selbstverständlich spannungsfrei sein.
Alle Anschlüsse werden an dem rückwärtigen Teil des Handies angelötet, aber man muß die Verbindungen zu dem vorderen Teil (der
mit der Anzeige und Tastatur) nicht abtrennen.
--TX-Auf der rechten Seite sieht man eine Steckverbindung (Nr. 201), deren Kabel nach unten in das Gehäuse verschwindet. Diese
Verbindung muß man vorsichtig lösen. Nun löst man die 5 Schrauben, mit denen die gesamte Platine mit dem Rest verbunden ist.
Jetzt kann man die Platine etwas nach oben biegen und sieht an der Unterseite die Lötstifte der Steckverbindung, die man zuerst
gelöst hat.
An den Stift Nr. 5 von oben gezählt lötet man einen dünnen Draht. Diesen Draht kann man direkt mit dem TX-Ausgang des TNC
verbinden.
--RX-Ein Stück oberhalb der Steckverbindung, an der das TX-Signal eingespeist wird befindet sich die UHF IF Unit (X58-3610-00) als eine
separate Platine, die auf die Hauptplatine aufgesetzt ist. Hier muß man den RX-Anschluß anlöten, da dies direkt an dem Diskriminator
geschehen muß. Der richtige Punkt ist der Pin Nr.11 des IF-IC TK10485M. Dies ist der auf der linken Seite der 1. von oben gezählt.
Von diesem Pin geht die Leiterbahn zu einem Kondensator. Ich habe den Draht an dessen Kontakt in Richtung IC angelötet, damit ich
auf gar keinen Fall das IC beschädige.
Das war es, man kann das Gerät wieder zusammenbauen. Die Drähte kann man neben der Stromversorgungsbuchse nach außen
führen, wenn man die Gummikappe wegläßt. Dort gibt es dann einen kleinen Spalt der sich dafür eignet. Man kann aber auch eine
kleine Buchse in das Gerät direkt über dem Lautsprecher einbauen. Dies geht allerdings nur, wenn die CTCSS-Unit nicht eingebaut
wurde. Die PTT-Leitung des TNC schließt man ganz einfach an die Mikrofonbuchse mit einem 3,5 mm Stereo-Stecker an. Dadurch ist
auch das eingebaute Mikrofon abgeschaltet. Die Masseverbindung stellt man am Besten über die Lautsprecherbuchse her. Das hat den
Vorteil, daß auch der Lautsprecher abgeschaltet ist. Er neigt sonst zu Knackgeräuschen, selbst wenn die NF ganz zugedreht ist.
Ich habe noch keine Messungen (Augen-Diagnostik, BERT) durchführen können, aber praktische Tests auf DB0SPC haben zu
vorzüglichen Resultaten geführt. Das TX-Delay habe ich auf 150 ms eingestellt, und bin in der Lage 5000 Bytes in weniger als 15
Sekunden auszulesen. Ich verwende einen TNC2H der Fa. SYMEK und habe bei der Einstellung des Sendefilters die besten Erfahrungen
mit der Einstellung Nr. 1 gemacht. Die Einstellung des Hubes im TNC war auch nicht sehr schwierig, ich habe ganz einfach mit dem
geringsten Hub angefangen und dann langsam aufgedreht, bis der Digi mir antwortete. Danach habe ich etwas oberhalb dieses
Punktes hin und her gedreht, bis ich die besten Resultate erziehlte.
Für eventuelle Fehler übernehme ich natürlich keine Haftung, bin ich aber gerne bereit Fragen zu beantworten.
Ich wünsche viel Spaß beim Basteln und bei PR mit 9K6.
vy 73 es 55, Walter DL8FCL @ DK0MTV
This modification is read 600 times.
top of page
20-04-2000
(TH-75) TH-75A No TX on VHF using a vehicle battery supply
Author: Trio-Kenwood Communication, inc.
Service Bulletin no. 957 (9-1-1990)
When the TH-75A is connected to a vehicle battery, ignition or alternator noise can be induced on the DC line. When the transceiver is
in the automatic battery saver mode, the noise pulses overcharge C348 on the RF board causing it to short. The supply current opens
L218 and the foil trace at this coil. To protect the transceiver, a Zener diode will be used to clamp the SBR line.
The Zener should be solder between the SBR side of L218 and the shielding case of L221 on the component side of the RF board (X533370-11) (A/3). The Service Manual disassembly instructions will be required to perform this modification.
Note: This modification has already been performed on models stating with serial number 007xxxx.
Required part:
22V Zener diode (UZP-22B)
This is an optional change that is not covered under warranty.
Time to perform this modification is 1 hour or less.
top of page
This modification is read 608 times.
21-04-2000
(TH-75) TH-75A Intermittent memory loss
Author: Kenwood Communication, inc.
Service Bulletin no. 978 (8-8-1990)
Some TH-75A owners have reported that the transceiver intermittently loses its memory channel information after transmitting. Other
users have reported symptoms such as key board lock up after transmitting. The following modification will re-configure the PTT input
to the microprocessor to correct these conditions.
Required parts:
33 Kohm chip resistor
470 pF ceramic capacitor
PTT tactile switch
RK73GB1J333J
CK45B1H471K
S40-1415-05
1. Disconnect the battery and antenna.
2. Remove the three case screws and two battery plate screws. Figure 1.
3. Lift the front panel from the body of the transceiver and disconnect the two flex cables. To open the connectors push the tabs
towards the flex cables and gently lift up. Figure 2.
4. Remove the 4 screws from the Control board inside the front panel. Figure 3.
5. Remove the 3 screws from the speaker mount. Figure 3.
6. Carefully lift the Control board, PTT switch assembly, speaker, and mic element from the front panel. Do not break any wires.
7. Lay the Control board on a soft cloth to avoid scratching the LCD.
8. Locate chip capacitor C2 on the Control board. Figure 4.
9. Replace C2 with a 33 Kohm chip resistor.
10. Remove the protective coating from the foil between pin 58 of the microprocessor and chip resistor R8. Presolder the exposed
foil. Figure 5.
11. Size, cut, and bend the leads of the 470 pF ceramic capacitor and then install the component between pin 59 of the
microprocessor and the ground side of the 33 Kohm chip resistor. Figure 6.
12. Remove the screw from the PTT switch assembly and then remove the rubber PTT cover from the board. Be careful not to lose
the black plastic plate that fits inside the rubber cover.
13. Remove the PTT switch from the board.
14. Cut the tabs off the bottom of the new PTT switch to allow the switch to lay flush on the board. Figure 7.
15. Install the PTT switch.
16. Assemble the transceiver.
Time required to perform this modification is 1 hour or less.
top of page
This modification is read 612 times.
19-07-1998
(TH-77) Umbauanleitung fuer das TH77e von Kenwood fuer 9600 Baud
de DG1KWA @ DB0IZ.#NRW.DEU.EU
Hallo Oms,
hier ist eine Umbauanleitung fuer das TH77e von Kenwood.
Ich uebernehme keine Verantwortung fuer die Richtigkeit der Anleitung und auch nicht fuer Schaeden am Geraet die durch den Umbau
entstehen.
Der Umbau spielt sich in der TX-RX Unit (X57-363X-XX:RFU)(B/3) ab.
1. Oeffnen des Geraetes (Spannungsfrei ?!!)
2. Jetzt sieht man auf die Steuerplatine des TH77e (Teil mit Tastatur) und auf die VHF TX-RX Unit. Jetzt geht man hin und loest
vorsichtig die Schrauben der VHF Unit. Dann hebelt man die VHF Unit vorsichtig ein bisschen hoch um die Verbindung mit der
UHF Unit zu trennen. Jetzt kann man durch leichtes ziehen die VHF Unit von dem Stecker, der am Flachbandkabel ist, trennen.
Die Schrauben und die Unit beiseite legen.
Jetzt kann man das Flachbandkabel ganz abziehen (Vorsicht, das Zeug ist empfindlich). Dann loest man die Schrauben des
Bleches, welches ueber der UHF-Unit liegt. Als naechstes, nach Entfernen des Bleches, kann man die UHF Unit loesen (Achtung:
Draht von der BNC-Buchse muss abgeloetet werden) und herausnehmen.
3. Jetzt loetet man einen Draht an Pin 9 des IC 202 (MC 3372D) an (unter der Platine).
An diesem Pin steht das Signal vom Diskriminator zur Verfuegung. Hier wird also der Eingang des Modems angeschlossen (NFin
oder DEMOD).
4. Zusammenbau des TH77e bis auf die Metallschiene fuer den Akku.
5. Jetzt loetet man einen Draht an den 21 poligen Steckverbinder 201 Pin 2 an. Hier wird die Modulationsspannung angeschlossen.
Die Zaehlweise ist von rechts nach links, wenn der TRX so liegt, dass die Frontplatte oben ist.
***** Draht
*
(MODU)
*
20
18
16
14
12
10
8
6
4 *2*
21
19
17
15
13
11
9
7
5
3 * 1
Steckverbinder 201
Ueber dem Steckverbinder 201 liegt der Steckverbinder fuer die VHF-Unit.
Damit sind die Umbauten am Geraet abgeschlossen.
Man sollte sich aber Gedanken machen, wo man die beiden Draehte herausfuehrt. Ich habe den Schieber von der
Akkuverriegelung weggelassen und dort die beiden Draehte herausgezogen.
6. Jetzt kann man das G3RUH-Modem bzw. das TNC anschliessen. Als erstes nimmt man den Draht fuer den Empfang. Man stellt
das TH77e auf ein 9600 PR-QRG. Sind die Frames einwandfrei zu dekodieren hat man diesen Teil schon einmal richtig gemacht
(evtl. kann eine Widerstandsanpassung not- wendig sein, ein 10kOhm Spannungsteiler sollte reichen).
7. Als naechstes kann man die Sendeleitung anschliessen. Die PTT wird ueber die vorhandenen Buchsen angeschlossen und an den
verbliebenen Draht den Ausgang des G3RUH. Mit Hilfe eines Kontrollempfaengers kann man die Staerke der Modulation
einstellen. Ist auch dieser Teil erledigt kann man versuchen den Digi zu connecten. Ich habe ein Txdelay von 16 benutzt. Wenn
der Connect kommt, hat man es geschafft.
Das Lesen einer grossen Rubrik muss einwandfrei moeglich sein.
Das TH77e kann weiter ohne Probleme fuer FM benutzt werden, weil der Mikrofonverstaerker nicht abgetrennt wurde. Auch braucht
man beim 9600 Baud Betrieb keine Stoerungen befuerchten, weil durch das Stecken des 3,5mm- Steckers fuer die PTT das interne
Mirko abgeschaltet wird.
Ein von mir durchgefuehrter BERT (Bit Error Test) ergab keine besondere 9600 Baud-Tauglichkeit, aber es geht. Das Txdelay sollte
man so niedrig wie nur moeglich einstellen, ich denke 10 wird noch drin sein.
Viel Spass mit 9600 Baud.
Nachtrag:
Angeregt zum Umbau und Schreiben dieser Anleitung wurde ich von DL1KBB.
Er hat sein TH77e als erstes umgebaut und mir eine kleine Umbauanleitung zukommen lassen. Ich danke ihm dafuer noch einmal.
vy 73/55 de DG1KWA / Andreas @DB0IZ
This modification is read 868 times.
top of page
19-07-1998
(TH-77) Expanded RX/TX for TH-77A
From the factory, it can receive 138-174MHz and seems to do it quite More? y
well with the supplied rubber duck antenÿþìÿücan receive 438-450MHz and, likewise, does this quite well too! One very interesting
feature of the TH77A is that it can do *DUAL* UHF receive! To do this it uses the VHF receive section and you have less sensitivity,
but I really haven't noticed much signal degredation at all.
NOW! On to the *EXTRA* capabilities (there are other BASIC functions that I didn't mention, those were just the highlights).
After making a few modifications to this radio, you can get it to do the regular stuff that the IC24AT will do, such as AM aircraft,
expanded UHF (400-512 depending on PLL lock) and 800-950 (again, depending on PLL lock) in addition to cross band repeat.
HOW DO YOU DO THIS!?
Easy (if you've got a steady had for removing a chip resistor!).
Open it up. There are 3 screws visible on the outside and 4 more More? y
underneath the battery pack. Unlike most radios, this one doesn't have a spring for the battery release switch. It gets spring action
from the metal plate that you will remove when you take out the four screws.
Anyway, the area you will be working in is on the control board which is fixed to the front section of the radio. In particular, look for
the yellow electrolytic capacitor (its yellow in mine) that is at the dead center of the board (there are two IC's, one above this and 1
below this). You will have to remove the electrolytic capacitor (C124) and set it aside for a few minutes. You will be putting it back
afterward. The reason for removing this is so that you can remove a chip resistor that is underneath it. To avoid tearing the flex board
foil traces, do not bend the leads of the capacitor.
There is a green wire that is connected to one side of this capacitor. If you disconnect one side of this green wire, you will get RX from
400-512 (PLL lock depends on the radio, but you can DIAL from 400 to 512). Orient the radio so that the volume controls and BNC are
at 12 O'Clock on your table (farthest from you) and the bottom (where the battery connects) is at 6 O'Clocüàhe area where you More?
y
removed the capacitor, you will see a blank space where there could have been a chip resistor followed by two chip resistors side-byside and in the next row below that, you will see 3 more that are side-by-side.
There is one to the left of these two rows that is kind of off center. Now, there are three ways to configure this radio at this point:
1. With one side of the green wire pulled, you will have 136-174 RX, 400-512 RX. If that's all you want, you are done.
2. By removing the rightmost chip resistor (R129), in addition to keeping one side of the green wire disconnected, you will have 136174 RX, 400-512 RX, 118-136 AM RX, 800-950 RX.
3. By removing both of the chip resistors, in addition to putting the green wire BACK where it belongs, you will have 136-174
RX/TX, 400-512 RX/TX, 118-136 AM RX and 800-950 RX.
All three of these options include, of course, putting the electrolytic capacitor back in place afterwards.
NOTE! ONCE YOU START DOING THIS STUFF, YOUR MEMORIES AND POWER ON SWITCH More? y
CONFIGURATIONS WILL ALL BE LOST! MAKE A NOTE OF HOW YOU ARE SETUP BEFORE YOU BEGIN!
I I I
--------__
!
! ! !
!
! !__!
!
!
!
! =rr <------- remove the right one for AM/800-950 RX
! r
!
remove both to also get extended TX
!
rrr
/
! ___
!
! ! !
!
! !__!
!
!_________!
Layout shown with electrolytic capacitor C124 removed
The best way to do this is to heat up both sides of the resistor and More? y
push it out of the way with something small. At least this was the best way for me! Once it's out, put the capacitor back in place and
close it up. (Put the green wire back also, if you are making the out of band TX mod too!)
This modification is read 1187 times.
top of page
19-07-1998
(TH-77) receive AM aircraft
To receive AM aircraft, get the VHF side in the main band and hit the ENT key twice to go to the VFO. Once you are in the VFO, hit the
UxU key twice. Once for dual UHF receive and the 2nd time for AM (118-136).
To receive 800-950, get the UHF side in the main band and hit the ENT key twice to go to the VFO. Once you are in the VFO, hit the
UxU key once.
This modification is read 958 times.
top of page
19-07-1998
(TH-77) Crossband repeat
To enable crossband repeat, hold down the SUB BAND UP ARROW key while turning on power. To disable, do the same thing again.
Kenwood says that both bands can contain shift information but only one band can include an encode/decode tone.
This modification is read 873 times.
top of page
19-07-1998
(TH-77) TH-77A PLL Unlock Override Mod
After receiving the service manual and completing the 'chip resistor' mods for my TH-77A, I have another mod to share.
Some of you may have been annoyed at the constant beeping when the PLL is not in lock even though you are able to listen at a given
frequency. Yet adjusting the VFOs is quite a task. They are both shielded and soldered to the board. There is no external access to the
VFO can for any adjustments. In fact, there are no adjustable coils or trimmers in the VFO!
I have found my VFO range to be quite adequate, however, just the beeps were bothersome. But not anymore! Here is a simple mod
which defeats the PLL unlock signal from reaching the CPU. There are some pros and cons associated with this however :
*** Pro ***
●
●
●
The receiver never beeps anymore even though you have a marginal battery (which affects VFO/PLL lock) and are capable of
receiving the given freq.
Since the receiver no longer beeps, you can dial thru frequencies quickly without waiting a full half-second for the display to
change each time the radio beeps.
When an out of band transmit is attempted, the transmitter no longer shuts off after 1 second due to marginal PLL lock.
*** Con ***
●
●
You will not know, w/o some sort of monitor receiver, if you are xmitting when far out of band. That is because the meter will
show full scale even if the PLL is out of lock and not transmitting on frequency.
At the extreme edges of PLL lock, the VFO will vary widely in 'sling-shot' fashion until lock occurs (sometimes after 1 full second).
This means your transmitted signal may be all over the band until lock occurs.
If you feel the pro outweigh the con, you may be interested in performing this mod. Be aware, that YOU are responsible for the purity,
accuracy and stability of any transmissions you make from your TH-77A. THIS MODIFICATION WILL DEFINITELY VOID YOUR
WARRANTY AND PERMIT OUT-OF-BAND TRANSMISSIONS OF QUESTIONABLE QUALITY AT CERTAIN FREQUENCIES. You should not
perform any out-of-band transmissions with this modification in place. THE INTENT OF THIS MODIFICATION IS TO ALLEVIATE PLL
LOCK PROBLEMS IN *RECEIVE* ONLY!!
Now that the legalities are done, on with the mod. (Because I am too lazy to make drawings and directions, I have copied the one
below from an earlier mod posted about the TH-77A - with the required changes)
MODIFICATIONS FOR IGNORING PLL UNLOCK
Open up the radio. There are 3 screws visible on the outside and 4 more underneath where the battery pack goes.
Locate the control board which is fixed to the front section of the radio. Look for the 100uF electrolytic capacitor (it's yellow in mine)
that is at the dead center of the board (there are two IC's, one above it and one below it). It is most likely a PC mount (NOT an axial
type capacitor with one lead on each end) capacitor lying on its side. You will be attaching a single wire to the negative lead of this
100uF capacitor. To avoid tearing the flex board foil traces, do not bend the leads of the capacitor.
Orient the radio so that the volume controls and BNC are at 12 O'Clock on your table (farthest from you) and the bottom (where the
battery connects) is at 6 O'Clock (nearest you). Looking at the lower IC which should be a rectangular NEC 75116GF-67x-3BE, there
are 19 pins running along the lower edge closest to where the battery connects. There should be an embossed dimple or dot on the
lower left corner of the IC to indicate pin 1. As you count from the left, locate pins 12 and 13. These two pins are defined as follows:
pin 12 - VHF Unlock Input
pin 13 - UHF Unlock Input
Normally these pins are low to indicate the PLL is in lock. When you change frequency, they *momentarily* go high (at worst about
250 milliseconds) while the VFO comes into lock. If the pulse stays high for longer than this period the CPU interprets this as a
marginal lock and begins to beep. What we are going to do is permanently ground these pins (or just one if you prefer) to trick the
CPU into thinking the PLL's are always in lock. There is no need to worry about shorting the output of the PLL's unlock pin since there
is a 4.7K resistor between it and the CPU pins.
The best way to do this is with some fine gauge wire (I used #30 wire-wrap). If you are going to disable both VHF and UHF unlock,
you can just short pins 12 and 13 together. Then connect the other end of your wire to the negative lead of that 100uF capacitor you
found earlier. Here is a little pictorial to clear things up:
-||
-||
-||
/
/
/
-------------------------|
|
|
|
|
|
+---------+
|
|
|
|
|
|
| Hitachi |
|
|
|
|
|
|
---------+
|
|
|
|
X
| | |
|
| +----X
|
| |
/
| |
/
| | /--------------|
| | | NEC
|
|
| | |
|
|
| | |
|
|
| | | .
|
|
| | ---------------/
|
| | 1
11
1
|
| |
23
9
|
| ----------++
|
--------------------------
The X's are where the 100uF capacitor is soldered to the board. Just tack your wire onto the capacitor's negative lead or onto it's
circuit pad.
That's it! Of course this mod does nothing for you unless you have already completed the 'chip resistor' mods for allowing out of band
reception. Try dialing up a frequency that used to beep every time your rotated the tuning knob (most likely a 800 Mhz frequency). It
should no longer beep. In fact you could probably dialup 512 Mhz and key up the transmitter and get a full scale reading. But
remember, your VFO probably won't get that high anyway, and you are most likely transmitting at some frequency where the VFO
tops out at and begins to ripple in frequency as it fruitlessly attempts to lock.
SOME PERSONAL OBSERVATIONS
After retuning my UHF front end, I can now listen to some public service frequencies in peace, without the annoying beep. However,
keep in mind that if you are listening to something at 490 Mhz, your VFO is running way down at about 432 Mhz. I think a number of
people feel that if they can receive at a given frequency (even marginally) they should be able to key up solidly.
If you like living dangerously and transmitting out-of-band please be considerate and know the limitations of your TH-77A. Although
being able to transmit out-of-band with this non FCC type-accepted is risky enough, I must reiterate that YOU must now be watchful
about your TH-77A operation. With this mod in place, the TH-77A will NO LONGER protect you from transmitting with a marginal
output. The transmitter will key up whenever you ask it to, even while the PLL is still hunting for lock. However, I'm sure most of you
will perform this mod simply to make receiving out-of-band more enjoyable as I've found.
Well, I hope this information helps you get more from you new toy! Happy monitoring!
Clifford K. Yamamoto - KA6JRG Email: [email protected]
This modification is read 902 times.
top of page
19-07-1998
(TH-77) Pushing the TH-77A UHF receiver higher in frequency
Have you ever wondered if the TH-77A UHF receiver could be "squeezed" out further beyond the end of the amateur band at 450MHz?
If you've already made the chip resistor mods that allow you to go beyond 450MHz then you're half way there! When I made the chip
resistor mod I was hoping to hear activity up in the 480MHz area, and hopefully in the 506MHz area also. Well, the 480MHz region
was quite noisy and I always had to find a hot spot to listen. Needless to say that the 506MHz region was non-existent. (NOTE: Even
after these adjustments the 506MHz region was not very good in my radio. However, I have seen some radios that work rather well at
506MHz without this adjustment!). So, I decided to "take a look" inside and see if there was anything in there that I could "turn" to
improve reception. It turns out that there is a bandpass filter in the front end of the radio that can be re-tuned to your liking.
Finding the bandpass filter on the schematic
Grab your schematic diagram entitled, "TH-77A/77E Schematic Diagram" and flip it over to the back side. Locate the antenna input at
the upper right of the schematic. Follow the trace from the antenna to the left towards the "UHF Pwr Amp Unit". Just before this unit
follow the trace down through L207, Q207 and then stop at L226 just before Q206. If you look at the "TH-77A/77E Block Diagram"
and follow the same flow you will see the bandpass filter between Q207 and Q206.
Finding the bandpass filter in the radio
It's time to open the radio up! Since you've already made the chip resistor mods we'll assume that you know how to carefully open up
the radio. Once open, you'll be working with the front half of the radio (opposite that where you made the chip resistor mods). This
half of the radio is where all the RF is done (both TX and RX). There is a VHF board and a UHF board. Unfortunately, the VHF board is
on top so it must be removed to gain access to the UHF board. Observe the screws that are holding down the board. Carefully remove
them and put them in a place so that you know which holes they go back into. Once the screws are removed you'll have to "work" the
board out of the header connector towards the bottom of the radio. It goes without saying, but BE CAREFUL!! Once you've removed
the board you'll see a metal plate that separates this VHF board from the UHF board. Fortunately, Kenwood made three holes in the
metal plate to access the bandpass filter that you've just found!
Tuning the bandpass filter
I was a bit anxious to "play" with the bandpass filter so when I did mine it was around 2am at home so I didn't have a RF generator to
do it properly. I would suggest that you use a RF generator, if possible, so that you can keep track of the sensitivity of the receiver in
the amateur band. Without a generator you'll have to tune to a high frequency that you are interested in receiving (hoping that the
channel is active) and then tweak the bandpass filter to improve reception. Then you'll have to switch back to the amateur band and
key up a repeater to see what the sensitivity is like.
Since I did not use a RF generator I can only give my view of how it should be done. I would connect the RF generator to the radio
and dial up a frequency that I am interested in being able to receive. Then, start with the generator output very low (modulated with a
1KHz tone at 2 or 3KHz deviation) and bring it up slowly until you begin to hear the tone in the receiver. At this point, adjust the
bandpass filter a little at a time, making note of where the coil screw is before you begin to move it so you can go back if things are
not working out. I wouldn't adjust the bandpass filter to get too much improvement because any improvement at this frequency
means a degredation in the amateur band. You don't want to be too far away from the 0.18uV sensitivity specification for the amateur
band. You'll have to play with it to find the spot where the tradeoffs are acceptable. One thing I can't remember, though, is whether
you have to put the VHF board back in each time you make an adjustment so the radio will work (in order to listen to the speaker).
That may have been necessary to "transmit" since in my case I had to kerchunk a UHF repeater to test my sensitivity in the amateur
band.
I was interested in getting the 506MHz region to work better, but I had to give up on that. It is much better than it was without
making these adjustments, but I still need to be in the primary coverage area for the 506MHz transmitter to hear it "ok".
Once you're satisfied with the performance, put the VHF board back in, screw everything down and close the radio up. Another good
test of how your radio is performing in the amateur band is to switch the VHF side into UHF operation. Dial up your favorite UHF
repeater on both the "VHF doing UHF" side and the normal UHF side. Then kerchunk the repeater and do a quick comparision of the SMeter's. (This might be a good comparision to try before hand also to get an idea of how the two compare before making these
adjustments).
That's about it! Enjoy the extra capabilties of your radio! Now, since we can hear all these other frequencies i'm anxious to hear from
anyone who can find out how to modify the radio to get more memory channels, HI HI!
Gerald J. Walsh
[email protected]
KB6OOC@W6VIO.#SOCA.CA.USA.NA
This modification is read 923 times.
top of page
21-04-2000
(TH-77) TH-77A Memory loss with low battery pack
Author: Kenwood Communication, inc.
Service Bulletin no. 981 (6-2-1991)
Some of the TH-75A handhelds in serial number range S/N 206xxxxx intermittently lose memory when the NiCad battery pack
becomes discharged. The following modification will correct this condition. The TH-77A transceivers in serial number range S/N
207xxxxx and above will incorporate a change in the microprocessor to prevent this condition.
This modification requires the ability to desolder a surface mounted microminiature chip resistor from a flex PC board. If you do not
remove microminiature chip resistors from flex PC boards on a regular basis, DO NOT attempt this modification.
Be sure to remove the battery terminal plate instep 2. If the battery terminal plate is left on the transceiver (only the top 2 screws
removed) the flex cable for the CTCSS unit can be damaged.
Required parts:
33 Kohm chip resistor, RK73GB1J333J
1. Disconnect the battery and antenna.
2. Remove the 4 screws from the battery terminal plate and then remove the plate. Figure 1.
3. Remove three case screws from the transceiver. Figure 1.
4. Carefully open the transceiver. Be careful not to break the flex cable that connects the front panel Control board to the body of
the transceiver.
5. Locate chip resistor R301 on the Control board inside the front panel of the transceiver. Figure 2.
6. Check for a solder bridge between the foil trace connected to the bottom of………… The rest of the composing is missing, please
mail me if you have this.
7. Remove chip resistor R301.
Recommended method: Use a hot air jet system to melt the solder on both sides of the resistors. When the solder is molten,
remove the chip resistor with a pair of tweezers.
Optional method: Use a wedge shaped soldering iron tip to melt the solder on both sides of the resistor at one time. As the
solder melts, the chip resistor will lift from the board and stick to the soldering tip. Do not attempt to pry the chip resistor from
the board. Figure 3.
8. Install a 33 Kohm chip resistor in place of R301. Do not re-connect the solder bridge removed in step 6.
9. Assemble the transceiver. Make sure the CTCSS board is positioned correctly so the flex cable is not stressed. Do not force the
radio together.
Time required to perform this modification is 1 hour or less.
This modification is read 854 times.
top of page
19-07-1998
(TH-78) Basics of modifying the Kenwood TH-78a
To open the radio, follow the instructions on page 64 of the manual.
(Unscrew four screws and break apart the radio halves.) The two TX/RX busy indicators (LEDs) have rubber seals placed over them.
These have a tendency to fall off when opening or closing the radio.
All position references in this document assume that you are looking at the CPU board with the rotary encoders and TX/RX busy
indicators at the top.
If you have installed the ME-1 EEPROM, I recommend that you temporarily remove it to facilitate access to the diodes.
You'll see a brass shield about one centimeter square covering the processor chip and the surface-mount diodes on the back half of
the radio.
De-solder the shield's four corners and remove it. (I used an right angle surgical tweezers in conjunction with the pin-point soldering
iron to lift the brass shield.)
Uncovered are the processor (which we ignore) and six surface-mount diodes, numbered sequentially from one through six (D1 - D6),
top to bottom. These are about one millimeter wide; remember the note about skill and finesse.
New model radios also have two large loops of green wire, numbered one through two (W1 - W2), bottom to top.
You'll need a pinpoint-tip soldering iron and some braid to wick away the solder before you lift out the diode. Alternatively, Rich Garcia
([email protected]) suggests leaving the diode in place. "I found if you BRIEFLY touch the iron to the right side lead while gently
pulling up on the SMC diode it should completely come off without needing to apply heat to the other side and further risk board
damage."
After you perform some or all of the mods listed below, replace the brass shield and re-assemble the radio. Then reset the processor
(as documented) and re-enter any frequencies into memory.
This modification is read 1738 times.
top of page
19-07-1998
(TH-78) Potential case design flaw
From [email protected] (which no longer exists):
In the course of performing mods on my Kenwood TH-78a dual band handheld, I've discovered a potential flaw in the case design.
While handling my walkie one day (after the mods were done), the display went blank and I could not turn the radio back on. With the
radio split in half again, I could turn the radio back on but discovered all the memories were erased. The cause turned out to be some
component pins on the front face coming in contact with the square bodies of the two volume/channel/squelch switches, when the
case is screwed back together snuggly. I placed small strips of electrical tape on the sides of the switches to insulate, and
reassembled; problem solved. Now I have to reprogram the darn thing....
[email protected] (Mark Olson) said:
There is a warning on some of the rig mod bulletin boards about this. The problem is that pins on the back side of the PCB that is
mounted on the front half of the TH78 can come into contact with the volume control housings mounted on the PCB on the other half
of the unit. My radio had this problem until I put electrical tape across these housings. Symptoms were: Display blanking momentarily
and the unit power cycling, sometimes causing memory erase, when pressure was applied to the front of the unit or to the volume
controls. I originally thought that it was a loose battery connection...
Open up the radio and you will see what I mean... Believe me, the fix is simple and it works.
This modification is read 1360 times.
19-07-1998
(TH-78) C-17 design flaw
top of page
[email protected] said:
"The 78A WILL lose C-17 on the control board if dropped, period. This causes loss on receive audio on the left-hand side of the radio.
The solder pads for that cap are not big enough. If you find the need to replace C-17, use a gap-fill cyanoacrylate glue like Zap-A-Gap
(tm) to increase the device footprint. I have learned the hard way.
Otherwise, I have found it to be a fine radio. My only problems have been related to the C-17 issue and attempts to rectify it. Had I
been given the above advice, it would have been a one-time only issue. As it is, I took out one of the microprocessors yesterday
looking for a bad solder joint that was induced by my attempt to solve the C-17 problem (sigh). This radio gets a lot of use and a lot
of travel. C-17 is the only thing that I have broken with the case closed.
top of page
This modification is read 1281 times.
19-07-1998
(TH-78) Mutually exclusive mods
Some of these mods are reputed to be mutually exclusive. You must choose one of the following levels of performance:
The "beyond MARS" mod - gets you the widest tx/rx
The "MARS/CAPS" mod - halfway there
The "extended receive" mod - more of a good thing
plus
The "cross-band repeat" mod - a repeater that weighs almost nothing
There is no mods that manipulate diodes D1 or D2 (I've seen it suggested elsewhere that this is toggles the USA/Europe-ness).
[email protected] suggests:
"I think removal of D1 causes "Forced Channelized Mode", at least on the "new" radios. If you put both VHF and UHF memories into a
TH78A without D1 and power on, you are stuck in channel mode until you do a full memory reset. Remember, you can't add
frequencies or do any tuning in channel mode.
If you think about it, you'll want to be very careful not to let D1's circut become an open circut.
top of page
This modification is read 1335 times.
19-07-1998
(TH-78) The beyond MARS mod
This mod provides the widest possible range of tx/rx. The mother of all TH-78a mods.
To mod (early model): remove diode D5 only.
To mod (late model): remove diode D3 and cut wire W1. D5 has priority over D3, so if you've already made the mods for the old
model (which included the removal of D5) you must resolder D3 into D5.
Yields RX 50-179.995, TX 136-179.995, RX 300-399.995, RX 400-511.995, TX 400-511.995, RX 800-999.995.
To use: buttons operate the same way as described in the "extended receive" mod, except that you can transmit on a much wider
range.
NOTE TO ALL: I haven't been able to verify the actual operation of my radio on all these freqs. Kenwood talks about the difference
between the "dialable" range and the operating range. I'd like to come up with a chart for each level of mod that combines the above
and the two following offerings. Help me, please.
* * * * * * * * * * * * * * * * * * * * * * * * * * * *
Left VFO
50.000-85.2x (with beep)
85.2x-179.995
300.00-399.975
400.000-511.9875
Right VFO
50.000-110.xxx (with beep)
110.xxx-179.995
400.000-511.9875
800.00-999.9875
* * * * * * * * * * * * * * * * * * * * * * * * * * * *
Receive
--------------50-135.995 (AM)
136-179.995
300-399 (AM & FM)
VHF
"
"
Transmit
--------------(NA)
136-179.995
(NA)
400-511.99
SUB-UHF
400-511.99
400-511.99
900-949.9875
50-179.995 (FM)
UHF
"
SUB-VHF
400-511.99
(NA)
136-179.995
top of page
This modification is read 1389 times.
19-07-1998
(TH-78) The CAP/MARS mod
This doesn't cover as much room as the beyond MARS mod does, but may be more appropriate for those who use the CAP or MARS
frequencies.
To mod (both early and late models): remove D6 only.
Yields RX 118-173.995, TX 142-151.995, RX 400-511.995, TX 425-454.995.
top of page
This modification is read 1269 times.
19-07-1998
(TH-78) The extended receive mod
This is the mod that's usually given to hams to pacify them (the beyond MARS mod is closely guarded).
To mod (both early and late models): remove diode D5.
To use: press "F" for one second and then pressing the Band button will switch the UHF VFO to a 800-999.995 MHz band and the VHF
VFO to a 300-399.995 MHz band. The regular VHF VFO can now receive down to 50 Mhz.
top of page
This modification is read 1436 times.
19-07-1998
(TH-78) The cross-band repeat mod
To mod: remove diode D4.
To use: press "F" for one second, then "0". Repeat to disable. The MHz dot will flash when in repeater mode.
Date: 29-12-2001
User comment
From: DO1MOS
Subject: Cross-Band-Repeater Operation with bad audio?
Hello everyone,
my problem is the bad audio on Crossband-Repeater operation. By using this mod, the audio sounds like a tin. I use the TH-78E. Can
U help me?
Thanks, we will meet us at HAMRADIO in Germany
Sascha, do1mos
This modification is read 1324 times.
top of page
19-07-1998
(TH-78) Toggle SHIFT button function
Press SHIFT during power-up This is described in the manual, but the documentation is not complete. The TH-78A can operate in two
modes: In SPLIT mode, non-standard offsets (i.e. split frequencies) are supported, but the default offset is not programmable. In
SHIFT mode, non-standard offsets are not allowed, but the default offset is programmable. To select the default offset, press F for 1
second, then SHIFT. See p. 30 of the manual for details on changing the default offset.
This modification is read 1235 times.
top of page
19-07-1998
(TH-78) Toggle CALL button function
Press CALL during power-up. The CALL button can operate in one of two modes. In the default mode (CALLSW), it switches between
the call channel and the last memory channel (if in memory recall mode) or last frequency (if in VFO mode).
After toggling the CALL button functionality (VMC), it will switch from the VFO to the last memory channel and then back to the CALL
channel.
This modification is read 1183 times.
top of page
19-07-1998
(TH-78) Observations on post-mod performance
Rich Garcia ([email protected]) observes "all original functions have maintained the same which is great. Aircraft band which was
accessible before the mod remains with the same characteristics. It seems that VHF-High band has improved a bit on sensivity where
it was dead as a dog before the mod (above 155.000MHz) but the 162.000 MHz band where weather radio is is still a bit deaf for
reception at any distance but about 20 Miles. This depends on your (or my) terrain and transmitter output power.
"On UHF all public safety frequencies up to about 500 MHz seem to come in well but sensivity greatly drops from there (we really can't
ask for more).
Frequencies can be programed in up to the 920MHz ham band but I have no way of measuring sensivity. 800MHz works but the
signals are very weak, you must be near the transmitter for reception. Assuming you are in the town or city where the transmissions
originate it should work.
"Transmit is enabled up to and incl. 500MHz but after testing this on a frequency counter I find that a signal is only generated to about
490 MHz, even though the trans. LED shows output in the higher frequencies.
"Crossband repeat seems to work fine but the audio is unacceptable for use, BE AWARE the radio gets HOT! Prolonged use or use on a
busy frequency would not be recommended. Also remember this is a dual band HT please use a proper antenna while in this mode to
avoid a high SWR, we should all know better... Right?"
Someone else said:
"I found that marine weather reports at 162.40MHz in my area were received much better on the SUB-VHF band, than on the VHF
band...
"If you are having problems with intermod, try switching bands (i.e. using the SUB-VHF band rather than the VHF band.)"
This modification is read 1248 times.
top of page
19-07-1998
(TH-78) Cloning
The TH-78a's memory can be copied from one TH-78a to another TH-78a entirely through radio waves "over the air" (i.e. without
cables or other special equipment). Theoretically, this could be done via repeaters, although I've never heard it done. Allegedly this
requires a mod that includes removal of D5 or D6, but I haven't researched it.
Cloning is a real boon to groups that want a bunch of radios to contain the same memories, such as amateur radio clubs, search and
rescue units, and people too lazy to program their radios. Of course, given that the ME-1 memory expansion unit has 250 memories,
laziness is understandable :-)
1. Set both radios to the same frequency.
2. Activate both radios by pressing the '0' key while turning the power on. The radios will display the word "clone".
3. Now, click the PTT button of the "master" radio. The radio will transmit in the economy low power mode. This may take about 4
minutes for fifty channels, or 20 minutes for the 250-memory ME-1. When the data has been transferred, both radios will revert
back to their original frequency.
(It is recommended that a dummy load be used to prevent unwanted interference.)
4. Turn both radios off and then on again. The slave is now a mirror-image of the master radio.
This modification is read 1208 times.
top of page
19-07-1998
(TH-78) Cellular Telephones
Cellular phones operate at (tx) 824.040 - 848.970 (rx) 869.040 - 893.970, within reach of your modified TH-78a. The increments are,
however, every 30kHz; the TH-78a will only increment in 25kHz steps at this frequency range, so the exact cellular frequency cannot
be tuned in (most of the time).
This modification is read 1479 times.
top of page
19-07-1998
(TH-78) Battery life on the TH-78A
[email protected] (Eric Williams) says:
Some people have complained about the battery life on the TH-78A. I came up with these tips by checking out the power consumption
under various configurations. In the case of power-saver mode, figuring out the average current with my DVM was impossible, so I
ran the radio on a large capacitor and timed how long it took to die. These tips won't solve everything, but they might help.
The rig draws close to 2ma even with the power turned off, so don't leave the rig off with the battery installed for several days and
expect full capacity to be maintained.
If you're only using one of the bands, shut down the other to extend your battery's life -- current consumption with the squelch closed
is cut by almost a third.
If you're monitoring two frequencies on the same band, use the f2 button to receive both simultaneously rather than scanning
between them -- the battery saver with two receivers will use about half the current of one receiver that is scanning.
You can make up a battery pack by putting nickel metal hydride AA cells in a BT-8 battery holder. A small strip of aluminum from the
positive battery terminal to the depression in the top of the case will allow you to recharge the pack inside the rig. This will give you
1000mah capacity without enlarging the size of the radio, and NiMH cells have no memory effect. (But they *are* expensive.)
This modification is read 1360 times.
top of page
19-07-1998
(TH-78) Game Mode
[email protected] (who no longer exists), who credits
[email protected] for "much of this".
To enter the game mode press M and PTT during power-up. Be careful not to accidentally reset the memory, which happens with M +
power-up. (Don't freak; you'll see the same "all screen items lit" when entering game mode as when you reset memory.) To exit the
game mode at any time, press the LAMP key. The volume, lamp, or frequency settings can't be changed while in game mode.
The top part of the display will show "H.00", which represents the high score. The lower part shows a scrolling message, "PRESS ANY
KEY". Pushing any key starts a "Follow Simon" type game. The display will briefly show one of the characters '1', '2', '3', or 'F'. Press
the corresponding key. The game consists of repeating the displayed character sequence, which increases by one character each
round.
After you "win" the Simon memory game by getting correctly entering a sequence of twenty characters, the next game is a draw
poker game.
The way it works is that you choose your bet (from 1 to 10) by pressing '2' to increment the bet and '5' to decrement the bet. Then,
press 'F' to deal the five cards. The face value of the cards is displayed, and the suits can be seen at any time by holding down the PTT
key. Any number of cards may be discarded, and to select (or deselect) a card for discarding, press the keys '1', '2', '3', '4', or '5'. If a
card is selected for discard, it is displayed "face-down".
Press 'F' again to draw new cards. Your new cards will be displayed, and then if your hand is 2-pair or better, the screen will show the
rank of your hand on the left (2P for 2-pair, 4K for four-of-a-kind, etc.). On the right the pay-off for that hand will be displayed. Your
bet is multiplied by the pay-off factor,and the resulting pile of cash is displayed in the right hand side of the upper screen. (The lefthand side of the upper screen contains your table stakes, which are initially 100 coins from winning the Simon game.)
If you win the poker hand, pressing any key steps into the next stage. If you lose the poker hand, your bet is deducted from your
stakes and you are asked to start another poker hand. In the next stage, you are asked "TRYB/S" which means, "Do you want to try
double-or-nothing in a guessing game for Big or Small cards?" Press 'F' for yes, press TONE for no. If you say no, your winnings are
credited into your stakes and you are asked to start another poker hand. If you say yes, then a single shuffling/incrementing card is
displayed on the left, and three stars are displayed on the right. You have to choose to go for either BIG or SMALL, by pressing '2' or
'5'. You can keep pressing '2' and '5' to change your mind. When you are ready, you must try to hit the 'F' key to stop the rotating
card display, and the card will show, and you will either win, lose, or draw. If you draw, you have to play big/small again, I think. If
you lose, your winnings are gone and you can play poker again. If you win, your winnings double and you are asked whether you want
to play big/small again.
The payoffs on the poker are set against you, odds-wise; the double-or-nothing game includes a draw, so the odds are against the
player there unless you can time hitting the 'F' key to win more than half the rounds. I haven't managed to do this, so I don't know if
there is anything beyond this, all I know is that when the table stakes are exhausted, you go back to playing Simon again.
This modification is read 1335 times.
top of page
19-07-1998
(TH-78) TH-78 - antenna hints
Hello everybody! Recently I decided to check the performances of small "Duckie" antenna specified as T90-0444-XX in TH78 manual.
I found that on 2 mtrs band this antenna, at first, has quite narrow bandwidth and, at second, tuned about 144.000 MHz or even
some lower ( at the same time 70cm bandwidth seems to be enough...).
Because of "integrated design" of this antenna it would be nonsence to cut the top end, so I tried to find another way to tune it to the
middle of 2m band. At last, the problem has been successfully solved! So, you can easy tune the central frequency up to 147 MHz just place a copper ring in the middle of conical surface of antenna ( between "OO"s as shown below ):
+---------------Ê--¦-- ¦
¦
+-----------------------------+
¦-- ¦ K E N W O¦O D
¦ dual band antenna
¦)
¦-- ¦
¦
/+-----------------------------+
+---------------ð---/
copper ring (about 13 mm internal diameter)
The ring made of 0.3 mm wire gave me frequency shift from 144 to 145 MHz; if you need higher frequency, you should use wider ring
( about 4...5 mm for 147 MHz ) - you can solder it of thin copper.
Don't use SWR meter for tuning! The best device is scanning scope or, at least, simplest RF field meter and your HT as VHF generator.
That's all... 73, de Serge.
RK3AXJ @RK3KP.MSK.RUS.EU 28-Aug-94
This modification is read 1424 times.
top of page
19-07-1998
(TH-78) 9600 Baud FSK-Modifikation für das Kenwood TH-78E
From: DG1SFJ @ DB0RBS.#BW.DEU.EU
Hallo Kenwood-Freunde,
hier bekommt Ihr nun die Anleitung zum Modifizieren eures TH-78's, um damit 9k6 zu machen...
Ich übernehme keine Verantwortung für die Richtigkeit der in der Anleitung gemachten Angaben und für Schäden die im und am Gerät
durch die Modifikation entstehen. Die Anleitung ist etwas größer geworden, dafür aber (hoffe ich) einfacher und auch für Nicht-Profis
(etwas Löterfahrung braucht man schon!!) verständlich.
1. Öffnen des Gerätes:
Alle Stecker incl. Antennenkabel abziehen, die beiden Drehknöpfe und danach die Squelch-Regler abziehen. Den Akku entfernen und
mit einer halboffenen Schere oder Zange die beiden Kranz-Muttern an den Squelch-Reglern rausdrehen. Jetzt fällt der obere
Gehäusedeckel ab, aber auf die beiden Gummiringe auf den LED's achten, sie fallen leicht runter...
Auf der Rückseite des Gerätes die 3 Schrauben lösen, ebenso wie die kleine Schraube an der Seite beim Antennenanschluß. Vorsichtig
das Gehäuse öffnen. Nun die Hälfte mit der LCD-Anzeige nach links legen, und die andere nach rechts (wer hätte dies gedacht :-)
An der Platine mit den Akkukontakten die zwei kleinen Schrauben unten rechts und links losschrauben, und das Kabel davon abziehen.
Diese Platine könnt ihr nun zur Seite legen, und das CTCSS-Modul sollte, falls vorhanden nun dem Gerät sanft entnommen werden.
Jetzt nur noch die drei Schrauben auf der Platine lösen, auf der die Squelch-Regler sitzen. Dann das geschirmte Kabel, das ebenfalls
auf der Platine sitzt und nachher durch ein Loch in dieser verschwindet, aus der Buchse rausziehen. Nun die gesamte Platine und die
Gehäusehälfte(LCD) nach rechts legen, und auf das kleine Kabel von eben und auf das Flachbandkabel aufpassen...
Damit liegt die Rückseite der Platine mit den Squelchreglern vor euch bereit für die Modifikation (letzte Möglichkeit zum Aufgeben des
ganzen Vorhabens ;-)
2. RX-Modifikation:
Auf dieser vorher genannten Platinenseite befinden sich nun 2 Empfänger-IC's des Typs MC3372D, je einer für VHF und UHF. Auf dem
Schaltplan befinden wir uns nun auf der (X57-409X-XX B/4) TR-RX Unit, wobei das UHF-IC dort IC303 heißt. Dort greift ihr das
Diskriminator-Signal von Pin 9 ab. Um nun den richtigen IC auf der Platine mit dem Lötkolben zu traktiern, legt ihr diese wie folgt vor
euch:
Die Squelch-Regler zeigen nach rechts, ein Flachbandkabel geht von oben zur Druckguß-Schalenhälfte des Gehäuses. Nach unten geht
das andere Flachbandkabel Richtung LCD-Gehäuseteil. Das UHF-Empfänger IC liegt nun weiter rechts, nahe einem IC mit der
Aufschrift "4560 246" in der Nähe der Squelch-Regler. Wenn ihr diese habt, so lötet ihr nun ein Kabel an Pin 9 an den MC3372D (in
diesem Fall oben rechts das letzte Pin). Es gelten die üblichen Tips für SMD-Löten (vorher noch mal üben!). Das Kabel nun um ca. 90
Grad nach rechts biegen, Richtung Squelch-Regler. (solltet ihr es Richtung Akku biegen, und da auch langführen, dann bekommt ihr
ein übles Rauschen auf dem gesamten UHF-Band und die Squelch läßt sich nicht mehr schließen...). Abgeschirmtes Kabel ist also
anzuraten, ich habe keines verwendet, allerdings unter Beachtung der Richtung des Kabels wie oben beschrieben.
Damit ist der Demodulator-Ausgang vom UHF-Empfänger IC schon mal nach aussen gelegt und ihr seid (hoffentlich) bereit für das
Abgreifen der TX-MOD vom Flachbandkabel.
3. TX-Modifikation:
Dieser Teil der "Modifikation" ist eigentlich auch kein Problem, man sollte nur ruhige Hände und scharfe Augen haben...
Der Umbau spielt sich wieder in der (X57-409X-XX B/4) TR-RX UNIT ab, wobei die uns interessierende Leitung vom
Mikrofonverstärker (IC 301) über ein Poti (VR302) zum Flachbandkabel links auf dem Schaltplan geht, welches dort mit B bezeichnet
wird. Das Signal liegt von unten aus gezählt an Leitung 11 (MODU) an. Wenn die Platine genauso wie vorher vor euch liegt, so seht ihr
oben ein Flachbandkabel aus Plastik, das in die Gehäusehälfte geht, die mit einer Druckgußhaube abgedeckt ist (genau die mit dem
Antennenanschluß), und rechts wieder die Drehregler.
An diesem Flachband-Kabel werden nun von links nach rechts genau 11 in Worten ELF Leitungen abgezählt. Es sieht so aus, als ob
keine Leiterbahn von da aus weiterführt, da die Platine aber innen noch eine Schicht hat, kann man das jetzt noch nicht erkennen. Um
die Zählrichtung noch mal zu verdeutlichen: Rechts die Squelch-Regler, links gar nichts, und von links aus die Leitungen des
Flachbandkabels abzählen 1,2,3,...,11 und an dieser Leitung liegt die Modulation für den VCO. Also genau hier, wo das Flachbandkabel
an der Platine festgelötet ist, wird nun ein Kabel angelötet, aber aufpassen:Erstens hält so ein Kunststoff-Flachbandkabel nicht viel
Löterei aus und zweitens ist schnell mal eine danebenliegende Leitung auf der Platine mitangelötet (ist mir beinahe passiert...). Das
Kabel nun wie vorher auf dem kürzesten Wege nach oben zu den Squelchreglern legen.
4. Letzte Schritte:
So, die typischen 2 Drähte sind angelötet, ist auch keine Brücke unerwünscht entstanden ?! OK, dann das ganze Gerät in umgekehrter
Reihen-folge wie beim Zerlegen unter Punkt 1 wieder zusammenbauen, kurzer Funktionstest, und dann kann das ganze schon an das
FSK-Modem angeschlossen werden. Im TNC-Handbuch sollte man nun nachlesen, wie die Modulation am besten einzustellen ist (ich
habe das mit einem zweiten Empfänger getan).
Gedanken muß man sich nur noch über die Verbindung zur Aussenwelt machen, entweder einen kleinen Platinensteckverbinder (3polig und einen Pol davon abfeilen) oder eine 2,5mm Monobuchse (paßt wahrscheinlich ebenso nur ab- gefeilt rein) in den Platz (von
oben auf die Funke gesehen) zwischen Antenne und erstem Drehknopf, weil hier der einzige "große" Platz ist. Bei mir hängen zur Zeit
einfach die beiden Kabel oben heraus. Wer eine bessere Lösung hat, sollte mir diese unbedingt schreiben !
5. Ergebnis:
Angeschlossen habe ich mein TH78E an einen TNC 2 H, auf den sich das nun folgende Ergebnis bezieht:
Die TXDELAY arbeitet mit 10 einwandfrei bei mir, mit 9 wird es etwas weniger gut, und 8 war bei mir die untere Grenze. Weniger ging
absolut nicht, und ich nehme zur Zeit 10 oder 9.
Die Filter am TNC habe ich noch nicht mit einem Bit-Error-Test geprüft, wenn ihr sowas mal macht würde ich mich freuen, wenn ihr
mir die Ergebnisse per PR an meine Box DB0RBS schicken könntet.
Das TH-78 ist bestimmt nicht ideal für FSK, aber wenn es wie bei mir das einzige 9K6-fähige Gerät ist, so geht das glaub ich schon.
Das ganze habe ich so seit einem Monat in Betrieb, und es scheint dem Funkgerät nicht zu schaden. Dankeschön noch an Andre,
DG3SDK, der mir beim Umbau geholfen hat !
So, und nun viel Spaß mit 9600 Baud PR !
Wenn ihr euren Funk auch mal umgebaut habt, dann schreibt mir doch mal, damit ich seh, wie es bei euch so geklappt hat ... ihr dürft
mir natürlich auch schreiben, wenn es noch Fragen oder Probleme gibt !
Ansonsten 73 und 55 von Jochen, QTH Schwieberdingen, DG1SFJ @ DB0RBS
This modification is read 1229 times.
19-07-1998
(TH-78) TH78A, USA model don't have 1750 Hz
top of page
TH-78A (U.S.A. version) --> TH78E (European version) MODS.
If you bought a TH78A in the USA you don't have the 1750 Hz repeater tone access, but you can change that !
Apart from the well-known six diodes, the new CPU has 2 green wires.
In order to use the TH78A in EU, you must do the following:
1. First you have to remove D2 for the standard EU bands (144-146 and 430-440 MHz).
2. Now control that the 2 green wires and the 5 other diodes are installed (D1, D3, D4, D5 and D6).
3. If you need band expantion and components location, please see the mods below.
Although the TH78A has a special bandpass filter for the US 70cm band, I could not notice a decrease in sensitivity in the EU part of
the 70 cm band.
There is a function change for 3 knobs; please see below and also p. 6 and 7 of your INSTRUCTION MANUAL.
TH-78A
-->
TH-78E
--------------------------LAMP
-->
TONE 1750 Hz
CALL
-->
LAMP
TONE
-->
CALL
Now, you can choice between the CTCSS tones and the 1750 Hz with the following sequence: F + LAMP (the new TONE !) and then
the right rotary encoder to make your frequency choice.
This modification is read 1218 times.
top of page
23-01-1999
(TH-78) Crossband repeat, extended RX/TX
Owner assumes all responsibility for modifying or using these modifications!.
The following mods will provide for Crossband Repeat and extended receive and transmit on the Kenwood TH-78A HT.
I believe other functions are also enabled by these mods. which I have not found yet but I will update the file as news progresses.
Diode #4- Crossband Repeat
Diode #5- Extended Receive and out of band Transmit.
Remove all screws and open radio as explained in the Kenwood manual for installing the memory expansion module.
On the back cover you will find the memory expansion module socket and a copper shield to the upper left corner of it.
Under this shield their will be a row of SMC diodes which are unmarked in a vertical configuration to the lower right portion covered by
the shield.
1. Remove the shield at its four corners with a solder sucker and SMALL! iron.
2. Carefully count down from the 1st diode in the row to the fourth one and remove for crossband repeat.
HINT: I found if you BRIEFLY touch the iron to the right side lead while gently pulling up on the SMC diode it should completely
come off without needing to apply heat to the other side and further risk board damage.
I used a pair of right angle surgical tweezers for this.
3. Just as above you may remove the fifth diode to preform the extended receive and transmit modification.
4. Reset the CPU (yes you will loose all of your programed memories! argh!) by pressing Function for more than one second and
then "0".
YOU HAVE NOW COMPLETED THE MODIFICATIONS!
5. For 800Mhz go to the UHF band with the band switch and press Function for more than one second quickly following with a press
of the Band switch again. 8---.-- will appear.
6. For 300MHz go to the VHF band and repeat as above. Original bands are restored by repeating the "F Band" sequence.
MY observations... All original functions have maintained the same which is great. Aircraft band which was accessible before the mod
remains with the same characteristics. It seems that VHF-High band has improved a bit on sensivity where it was dead as a dog
before the mod (above 155.000MHz) but the 162.000 MHz band where weather radio is is still a bit deaf for reception at any distance
but about 20 Miles. This depends on your (or my) terrain and transmitter output power.
On UHF all public safety frequencies up to about 500 MHz seem to come in well but sensivity greatly drops from there (we really can't
ask for more). Frequencies can be programed in up to the 920MHz ham band but I have no way of measuring sensivity. 800MHz
works but the signals are very weak, you must be near the transmitter for reception. Assuming you are in the town or city where the
transmissions originate it should work.
Transmit is enabled up to and incl. 500MHz but after testing this on a frequency counter I find that a signal is only generated to about
490 MHz, even though the trans. LED shows output in the higher frequencies.
Crossband repeat seems to work fine but the audio is unacceptable for use, BE AWARE the radio gets HOT! Prolonged use or use on a
busy frequency would not be recommended. Also remember this is a dual band HT please use a proper antenna while in this mode to
avoid a high SWR, we should all know better... Right?
After first booting up the CPU in the mod I found that the message screen showed "Cloning" so it seems that this radio now has
cloning capabilities. After searching I have found that holding the "0" key and powering up the radio will display the clone feature, see
below for further explination.This leads me to believe that this HT may have some more "Hidden" features that I am trying to find,
some may be useful.
Thanks to Gary KC8UD who sent me the following via packet .....
CLONING:
The TH-78 can be cloned without cloning cables or special equipment. It is done entirely with RF, and, in fact, can be transmitted over
the air, and even via repeaters. This may be extremely useful for those users who do not have the patience to program their own
radios themselves. This application would also be useful for clubs and user groups. (However, this can take as long as 50 minutes with
the ME-1 expansion module. It is recommended that a dummy load be used to prevent unwanted QRM.)
1. Both radios must be on the same frequency.
2. Activate both radios by pressing the "0" key while turning the power on. The radios will display CLONE.
3. Now, click the PTT of the "master" radio. The radio will transmit in the conomy low power mode. This may take about 4 minutes
for fifty channels.
hen the data has been transferred, both radios will revert back to the riginal frequency.
4. Turn both radios off and then on again. They will now operate normaly while the slave radio has the same memory contents as
the master radio.
FREQUENCY EXPANSION
(1) You can receive from 340 - 399.987 Mhz FM by removing chip diode D8 on the ontrol unit. To access this function, press the [F]
key for one second, and then the [LOW] key. This toggles between AMATEUR, AIR band (AM) and 360 Mhz.
AM and FM modes are selected automatically, depending on frequency.
** Since "F" for a second and "Low" toggles the power output, I wonder **
There is also a couple of arcade type games on the TH-78A. To start the game you pres and hold [PTT] and [M] keys while turning the
unit on. The first game is a follow me type game. The radio beeps and shows a sequence of numbers flashing on the screen. You have
to match the same sequence on the tone pad. Each time the sequence gets longer by one number. You have to keep remembering the
sequence as one gets added each time. Once you get to a certain high score on that game, it breaks into a poker type game. To exit
the game mode press the LAMP key at any time. The receiver still works in the game mode and you can adjust volume but no other
features.
RG> The games seem to work fine and it is interesting that they have inserted that into the programing of the chips. Does anyone
know of any further features in the radio be it games or radio functions.
This modification is read 1384 times.
top of page
21-04-2000
(TH-78) TH-78A Clone failure w/ME-1 installed
Author: Kenwood Communication, inc.
Service Bulletin no. 997 (3 August 1992)
Some TH-78A owners have reported a failure of the cloning feature after the ME-1 Memory expansion unit is installed. The following
modification will correct this problem.
Note: Since the Cloning feature is not one that is mentioned in the operators manual, and is basically an unsupported feature, we do
not anticipate many reports of this symptom.
Warning: This radio uses micro-sized surface mount component, and/or multi-layer circuit boards. If you are not familiar with the
techniques for service of this type of equipment do not attempt this modification yourself. You will invalidate your warranty if you
attempt to modify the equipment and damage the radio. If you are at all in doubt about your qualification to perform this modification
you should seek qualified assistance.
Required parts:
IC-7 Microprocessor, (HD404629A32H)
Procedure:
1. Remove the battery, and antenna.
2. Remove the 3 small black #0 phillips head screws from the rear panel of the transceiver and the 1 small black #0 phillips head
screw from the side of the transceiver near the antenna connector.
3. Carefully separate the front panel from the rear of the transceiver and fold it over to allow access to the rear of the front panel.
4. Unsolder the brass shield from the circuit board (4 solder points).
5. Locate IC7 the largest of the two IC's under the shield, unsolder and remove.
6. Install the replacement part. Make sure there are no solder bridges or cold solder connections.
7. Reverse steps 1 - 4 to reassemble.
8. Press and hold the "M" key on the front panel, turn on the power, then release the "M" key to reset the microprocessor.
This modification may be covered under warranty.
Time required for this modification is 1 hour or less.
top of page
This modification is read 1171 times.
22-04-2000
(TH-78) TH-78A Call channel tone frequency error (Revised)
Author: Kenwood Communication, inc.
Service Bulletin no. 1008 (27 May 1993)
Symptom:
When the TSU-7 CTCSS unit is installed the tone frequency of the CALL CH is overwritten under the following circumstances:
1.
2.
3.
4.
Program the Call Channel with a tone between 67.0 Hz and 114.8 Hz. For example: 100.0 Hz.
Program any memory channel with any frequency and tone frequency. For example: 118.8 Hz.
Recall the memory channel to the VFO.
Recall the CALL channel. The tone frequency of the call channel changes to that of the memory channel. (Changes from the
programmed 100.0 Hz in the example to 118.8 Hz).
Parts required:
IC-5, Original part 75517GF-155-3B9, change to: 75517GF-170-3B9
Procedure:
This symptom is caused by a microprocessor programming error. The cure is to replace the microprocessor (Control Unit X53-342000, IC-5) with the replacement part.
Note: Units with serial numbers 404xxxxx - 406xxxxx have a limited production microprocessor installed. This microprocessor
incorporates the correction for this error. The part is labeled 75P518GF-JDF3. You do not need to replace this IC. Units with serial
number 407xxx and after will have the 75517GF-170-3B9 microprocessor installed at the factory.
Caution: This modification requires soldering equipment rated for CMOS type circuits. It also requires familiarity with surface mount
soldering techniques. If you do not have the proper equipment or knowledge do not attempt this modification yourself. Seek qualified
assistance.
Time required for this modification is 1 hour or less.
top of page
This modification is read 1169 times.
22-04-2000
(TH-78) TH-78A/E Left encoder inoperative
Author: Kenwood Communication, inc.
Service Bulletin no. 1013 (7 May 1993)
Symptom:
The left encoder on the top panel does not work. This symptom usually occurs when the unit is reassembled after service.
Cause:
If the front panel is removed without removing the top panel the Control unit might come in contact with the encoder mounting
hardware. This causes chip resistor R97 to be sheared from the board.
Correct Action:
Delete chip resistor R97 from the control unit and add a short jumper wire in its place. Resistor R97 was used to prevent feedback
during transmit. It has confirmed by our engineering staff that the performance of the circuit will not be adversely affected by this
change.
Time required for this modification is 30 minutes or less.
top of page
This modification is read 1215 times.
23-04-2000
(TH-78) TH-28/48/78 Difficult battery insertion
Author: Kenwood Communication, inc.
Service Bulletin no. 1028 (29 June 1993)
Symptom:
Insertion of the battery into the transceiver is difficult or impossible due to problems with the release lever.
Corrective Action:
●
●
A temporary cure is provide by loosening the two screws securing the holder, shifting the holder to the extreme left, then
retightening the screws.
A permanent fix is provide by replacing the holder and release level with new parts that have been deburred and modified to
allow relocation of the release level.
Parts required:
Qty
1
1
Description
Holder
Release lever
Kenwood Part No.
J19-1515-23
D10-0610-13
Circuit description
NA
NA
Time required for this modification is 30 minutes or less.
This modification is read 1214 times.
23-04-2000
(TH-78) TH-78A Microprocessor change
top of page
Author: Kenwood Communication, inc.
Service Bulletin no. 1038 (10 February 1994)
Symptom:
Due to a recent rule change by the FCC it is no longer possible to supply transceivers, or provide replacement microprocessor that
would allow a transceiver to receive in the 800 MHz band.
Corrective action:
The microprocessor program of IC5 has been modified to prevent 800 MHz band reception. Production has been changed beginning
with serial number lot 510xxxx. Units produced after this point will not be capable of 800 MHz reception.
Parts required:
Qty
1
Description
Microprocessor
Old part No.
75517GF-170-3B9
New Part No
75517GF-257-3B9
Procedure:
When ordering a replacement microprocessor you will be supplied with the new version. Please make sure your customer understands
the limitations of this new
This modification is read 1317 times.
top of page
19-07-1998
(TH-79) TH-79 clone memory contense of two radio
Dear friends
Hope a lot of you enjoy to play with the TH 79. I want to explain how to clone the memory contense of two radios on the air. The
clone procedure is same with all others. ( use of DTMF tones, do not disturb transmission etc.)
You must take care that both radios are really same: both have extended range or not, both are E-version or not etc.
It will cause some problems if you try to clone i.e. an E version without expansion into a A- or J version.
If you have both radios please hold down the -0- key / PAG L Key when you switxh on the radio. So you see the letters CLONE on the
display. Please push the ptt on the radio which has to be the master.
It takes a time to transmit all memory with maybe names, call sign etc.
After Clone is finished you see END written in Display. Best is to switch of both radios. After switching on again you will have two same
radios !
Enjoy it and best wishes..
73 from hanno
This modification is read 1740 times.
top of page
19-07-1998
(TH-79) TH-79A extended RX and TX range for new radio
Remove diodes D304 and D307.
Thats all...Don't cut the green wire, or install any jumpers as before.
Just take out these diodes...A WHOLE lot easier than moving and jumpering..
With this mod the capability is same as the other mod, ie: 67-174.995 and 400-511.995 RX, 136-174.995 and 400-511.995 TX.
Mine wouldn't recieve all the way down to 67 MHz, but it did go to 85 MHz.
It changes to AM receive below 136 MHZ automatically.
My TX power was gone above 505 MHz but was solid elsewhere in VHF and UHF.
Enjoy, but don't create problems with the new capability...Wouldn't it be nice if Kenwood would make a RX only mod with these
capabilities and we wouldn't have to worry about accidental transmissions where we shouldn't be transmitting. I, for one, don't want
or need to TX, just RX...
73, Cole AA7RDAugust 11, 1994
This modification is read 2698 times.
top of page
19-07-1998
(TH-79) TH-79A Wide Band Modification
Following is a modification for the Kenwood TH-79A Dual Band HT which opens it up to tuning from 67-174 MHz and 400-511 MHz.
Actual receive was 85-135.995 AM and 136-179.995 FM with reasonable (0.5 microvolt or better) sensitivity at all the points I
measured. Transmit was 136-179.995 and 400-511 with power dropping off at the ends but still usable (about 0.5w on the high scale
at the band edges).
This mod is the official one from Kenwood, taken from a data sheet put out by them. It supercedes an earlier one I posted involving
moving some diodes. As usual, I take no responsibility for the mods, or your use of the unit after mod. Please exercise good
judgement and don't endanger our ham bands with your irresponsible actions.
WARNING-CAUTION-LOOKOUT-ETC!!!
The diodes to be moved are microscopic!! About 1mm long by 0.5mm wide.
This mod should be done by professionals on a closed track only.
Children, do not attempt this at home!! Requires extremely small soldering tools and MUCH skill.
1. Open the unit by removing three screws from the back and one under the DC power input cover. Carefully separate the front and
back pieces. The two case halves may be disconnected by pulling the wired plug and by prying the brown latch on the ribbon
cable connector up enough to release it.
2. On the front PC board in the lower right corner as viewed from the rear with the knobs pointing up there are seven spots for
diodes in a row, with one diode missing.
| o o o o x o o |
________________|
2 3 4 5 6 7 8
The numbers are D302-D308, left to right, with D306 missing.
3. Remove diodes D304 and D307.
4. Reassemble and apply power. Mod complete.
PS:
Just cutting the green wire by the recharging jack is the MARS mod.. Don't cut if you intend to do the above mod.. Good Luck.Cole
AA7RD
This modification is read 2415 times.
top of page
19-07-1998
(TH-79) MARS/CAP modification for the new Kenwood TH-79A
Here is the MARS/CAP modification for the new Kenwood TH-79A dual-band HT. Usual disclaimers about doing mods apply.
1. Remove battery.
2. Open case by first removing 3 screws (#00 Phillips) on back and 1 screw on side hidden underneath the rubber flap covering the
DC power jack. Gently pry apart starting at top; BNC connector will move with back, knobs with front.
3. Spread unit out. Wires will "hinge" on the side with the PTT button.
4. Looking on the back of the keypad (front) half, locate green wire on upper left, just below the CTCSS decoder module.
5. Neatly cut this green wire, and tuck back in so ends won't touch each other or other components.
6. Reassemble.
Programmed memory will be lost since the CPU will notice the strap change and reset itself.
End result Before: VHF RX - 118.000-173.995 TX - 144.000-147.995
UHF RX - 438.000-449.995 TX - 438.000-449.995
After: VHF RX - 118.000-173.995 TX - 142.000-151.995
UHF RX - 420.000-449.995 TX - 420.000-449.995
Automatic repeater offset and shift selections remain normal.
If I read the schematic right, the green wire corresponds to "W301", which also serves the same purpose as removing "D308". More
research needs to be done on other mods; I'm especially interested in extending UHF receive beyond 450. There is a row of diodes
right below the uC which appear to be D302 through D308, the configuration straps. HOWEVER - I need to caution anybody thinking
about playing with the diode straps that it will not be a casual operation. For one thing, the diodes are SMD "603" style - extra, extra
tiny - and the plastic board hold-downs molded into the front case are right on the landings for most of the diodes. This means that
the board will have to be removed from the case (a very involved procedure), and working with the tiny diodes *will* require
magnification tools as well as the correct micro-tip iron. It is not a job for the inexperienced or all-thumbs.
Also, as noted previously, the non-US versions of the TH-79 have an 800 MHz receive section. All RF components of this section are
not present in the US version. Frankly, it would easier to import a gray-market version of the radio than it would be to attempt
restoring this coverage in the US with parts.
...mike musick/N0QBF
This modification is read 1912 times.
top of page
19-07-1998
(TH-79) Hidden options TH-79
Playing around with my Kenwood TH-79 handheld, I discovered some "hidden" possibilities that are not mentioned in the user manual.
A. Clone:
Action to be taken by both stations:
1.
2.
3.
4.
Switch power off
Press both the PTT and the VFO key, and keep them pressed while switching the power on
Switch power off again
Press the PAG.L key (figure zero) and keep pressed while switching on the power again Now, in the display the indication CLONE
will appear
As soon as the station that will transmit presses the PTT switch for a while, cloning will start. This will take several minutes.
After cloning is finished, the transmitting station's display will return to "normal", whereas the display of the receiving station will
indicate END.
B. Switching to other VFO's (other bands)
As you may know, in the menu 4 VFO's are possible, namely menu nrs. 13, 14, 20 and 21. Menu 13 and 14 being the "standard"
VFO's for vhf and uhf and menu 20 and 21 for the bands 300-399 Mc and 800-999 MHz.
It appeared to me that the vhf band (menu 13) can be switched to 300-399 Mc (menu 20), whereas the uhf band (menu 14) can be
switched to 800-999 Mc (menu 21).
Just make the band you like to change the active band (PTT indication in the display near to the frequency) and then first press the
function key, followed by pressing the LOW(hi/lo/el) key.
Needless to say that in order to be able to receive those "alternative" frequencies the handheld should have been modified (in my case
I provisionally did cut the green wire).
I hope you will enjoy these "hidden" options.
In case I do discover more of them, I will share them with you.
On the other hand, if you have further information on hidden options and/or modification I would be please to know them as well.
Best 73 from
Hans - PA3ESZ @ PI8VNW.
This modification is read 2351 times.
top of page
19-07-1998
(TH-79) TH-79 WIDEBAND-RX ONLY
Yeahh, this is the modification you all have been wating for !!!
Recently I purchased a TH-79A in the United States having the idea that is was possible to convert it to a model TH79E.
After some research i discovered that it was possible to make a TH79E.
Inspired by this succes i wanted to have the extra RX possibilities, and after the so called 'green-wire' cut i had the wanted RX but also
TX. Because of government regulations this extra TX it is not allowed in Holland. So i searched a little farther and fixed the job.
The following modification is called the E3 modification.
This modification gives you:
TX 430-440 MHz and TX 144-146 and RX for all built in frequencies that the hardware of your radio is capable to receive.
What to do ?
Find some one that can manage very tiny SMD components. Cut the green wire and change your diodes under the CPU so that it looks
like this:
X
X
-
-
X
X
X
X
X
R
D
D
D
D
D
D
D
R
5
0
2
3
0
2
3
0
3
3
0
4
3
0
5
3
0
6
3
0
7
3
0
8
4
0
2
X
R
D
=
=
=
=
component present
no diode here
Resistor
Diode
R 402 and R 502 are only displayed for reference.
Hint ! in the SCHEMATIC DIAGRAM you received with your radio there is also a diode program diagram wich lists the E3 version and
other versions also.
For example the K version is the American version. Please note that in this table D 302 and D 305 are not drawn, and have to be
present.
Background information:
I chose for the E3 type because i had a modification note of the TM 733.
In this note i read what the different type's (letters) had for operating RX/TX frequency's.
So if you want to find out what the other types would do see if you can put your hand on this TM 733 modification note.
WARNING:
The radio you purchased is very expensive, don't give me the blame if something does not work.
If you diside to make this modification is on your risk only !!!
THIS IS A SPECIALIST JOB BE WARE OF THE TINY COMPONENTS !!
For stations who live nearby i can give assistence.
REMARKS
Only the normal TH79E HARDWARE is capable of receiving 900 MHz.
This is not possible for the other versions.
FINALY
I hope you will enjoy these "hidden" options.
In case I do discover more of them, I will share them with you.
On the other hand, if you have further information on hidden options and/or modifications I would be please to know them as well.
Best 73 from
Ron - PE1OZH @PI8EZQ
This modification is read 2054 times.
top of page
19-07-1998
(TH-79) Umbau TH79e auf 9k6
From: DG3MMU @ DB0KCP.#BAY.DEU.EU (Andreas)
Hier kommt ne Anleitung zum Umbau des TH-79e auf 9k6.
1. Oeffnen des Gerätes:
Alle Stecker incl. Antennenkabel abziehen, den Akku entfernen.
Auf der Rueckseite des Geraetes die 3 Schrauben loesen, ebenso wie die kleine Schraube an der Seite beim Antennenanschluss.
Vorsichtig das Gehaeuse oeffnen. Nun die Haelfte mit der LCD-Anzeige nach links legen, und die andere nach rechts (wer haette das
gedacht :-)
Falls ein CTCSS-Modul drinne ist, kommt das auch raus :-)
2. RX-Modifikation:
Die vier Schrauben in der (ich nenn sie mal) "Power"-Haelfte (mit den beiden HF-Hybrids und dem vielen Kupferblech) rausschrauben
und vorsichtig rausnehmen. Dazu muss noch die BNC-Buchse weggeloetet werden.
Auf der Unterseite gibts nen IC Marke Motorola MC3372D (Demodulator), der ist fuer UHF. Das RX-Kabel wird da am Pin 9 angeloetet.
Damit ist der RX-Ausgang vom UHF-Empfänger IC schon mal fertig :-)
3. TX-Modifikation:
Im zweiten Gehaeusedeckel (mit den Potis und den MIC/Lautsprecher-Buchsen) gibt es eine "Tochterplatine", die den Mikrophon-Amp
beherbergt.
Einfach die Platine runtermachen, ein Draht an den Widerstand neben dem IC 308 (TA75W558F) und das ist die TX-Einspeisung.
Ich hoffe, in der kleinen Zeichnung kann man was erkennen :-)
Der Draht wird am oberen Kontakt vom R angeloetet (wo das R steht), der betreffende Widerstand ist ein groesserer Widerstand als
es die andren sind.
+------------------------------+
!
R +
!
! ##
+ ***(IC308)
!
! ##
***
!
! ##
!
! ##
!
! ##
!
+------------------------------+
Steckkontakt zur
grossen Platine
Wenn fertig, wieder die Platine auf den Kontakt stecken.
4. Letzte Schritte:
So, die typischen 2 Draehte sind angeloetet, ist auch keine Bruecke unerwuenscht entstanden ?! OK, dann das ganze Geraet in
umgekehrter Reihenfolge wie beim Zerlegen unter Punkt 1 wieder zusammenbauen, kurzer Funktionstest, und dann kann das ganze
schon an das FSK-Modem angeschlossen werden.
Gedanken muss man sich nur noch über die Verbindung zur Aussenwelt machen, entweder einen kleinen Platinensteckverbinder (3polig und einen Pol davon abfeilen) oder eine 2,5mm Monobuchse (passt wahrscheinlich ebenso nur abgefeilt rein) ins Geraet
reinbauen.
Ich uebernehme keine Verantwortung für die Richtigkeit der in der Anleitung gemachten Angaben und für Schaeden die im und am
Geraet durch die Modifikation entstehen. Die Anleitung ist etwas groesser geworden, dafür aber (hoffe ich) einfacher und auch für
Nicht-Profis (etwas Loeterfahrung braucht man schon!!) verständlich.
Ok, 73 de Andy DG3MMU @ DB0KCP.#BAY.DEU.EU
This modification is read 1680 times.
top of page
19-07-1998
(TH-79) Kenwood TH-79A(D) Review
The TH-79A(D)'s approach to programming is largely intuitive, and that's an advantage when you're trying to become acquainted.
Jumping from memory channels to VFO (and back) is as simple as pressing a single button. The same is true for hopping from 2
meters to 70 cm, or vice versa. When you're in the memory mode, twisting a single knob will step you through the channels. The
same knob functions as a free- wheeling frequency control when in the VFO mode.
If you forget how to use a specific feature, the "guide" function is ready to assist. Simply press the F key followed by the GUIDE
button. By rotating the ENC knob, you're presented with a list of functions. Each is described with text flowing from right to left across
the display, Thanks to Kenwood's unique dot-matrix LCD, the scrolling instructions are easy to read.
After you've programmed the TH-79A(D), you can share the contents of the memory channels with other TH-79s through a wireless
cloning feature. In fact, one TH-79A(D) can upload data to several others at once!
Several team members commented favorably on the multipurpose timer functions.
A battery-saving mode shuts down many of the energy-intensive functions if the radio is not used after 10 seconds. The time-out
timer answers the prayers of many long-winded hams. If your favorite repeater drops out after, say, three minutes of continuous
babble, you can program the timer to cut you off well before then. (The TH-79A(D) simply drops back to the receive mode.) Finally,
the TH-79A(D) offers a timer that shuts down the radio completely if it hasn't been used for one hour. All of these timers are
programmable, or they can be disabled altogether.
One interesting feature of the TH-79A(D) is not mentioned in the manual, although it is mentioned in the advertising: AM aircraft
receive capability.
As it turns out, the TH-79A(D) has a hot aircraft receiver. Team members enjoyed listening to airliners in contact with Boston Center,
or on approach to Bradley International Airport near Hartford, Connecticut.
The TH-79A(D) was judged awkward in only one respect: the operation of the squelch. There is no squelch control on the TH-79A(D)
in the traditional sense (a knob). Instead, you must select among several squelch levels by bringing up the appropriate program
menu. Most team members didn't find it too objection-able, but it might drive you up the wall if you're the type who often fiddles with
the squelch.
Reprinted with permission from JULY 1995 QST, © ARRL
This modification is read 1818 times.
top of page
19-07-1998
(TH-79) Remote Base Operation with Kenwood 732/733
Kenwood has now simplified remote base operation of their mobile rigs with the TH79.
I will not give a step by step on how to control the mobile rigs, since they are different. Hoewever, to really understand this feature, I
would first get to know the remote control feature on the mobile very well. This makes the following explanation a little clearer!
To access this feature, hold [PTT] and [MR] while [POWER ON].
The display will indicate -RC-, which I presume means 'Remote Control'.
If you have correctly matched your DTSS codes, frequencies, etc, the dual bander's keypad now becomes a function pad. Pressing
certain keys enables or disables functions on the mobile rig by sending the DTMF sequences for you.
Please note that all this fuction does is send the DTMF tones over the air to control your mobile rig. I have not made a list of what
each key does, but as the 79 sends the DTMF tones, the display will indicate the function. (i.e. - RPT ON, RPT OFF, TONE ON, TONE
OFF, etc.)
73 de Clayton
KD4IDN
And this from Chuck Scott, N8DNX...
"The "RC" function is configured to directly control radios such as the TM-732. In fact, if you look at the layout of the microphone
remote commands for the 732 it very closely matches the key assignments for of the "RC" mode. Since I have a TM-732 installed in
my car, I had a chance to try this out and it's VERY convenient. Everything from direct frequency entry with the "F" key to enabling XBand repeat. I'm really surprised they aren't marketing this feature of the radio.
This modification is read 1648 times.
top of page
19-07-1998
(TH-79) Post Modification Spec Sheet
Author: Clayton Wagar, KD4IDN
Here is a small chart showing the measured specifictions of TH79 S/N 60300272 after modification. The measurements were made
with an IFR 1200S Service Monitor, on the bench, with a 6V power supply. Your milage may vary - these are just what happened with
mine, and I would suspect that most units are pretty similar.
73 de Clayton
KD4IDN
Band - VHF ----------------------------------------------------Frequency
Sens (uV)
Power
Mode
-----------------------108
4
A3
110
2
"
115
.75
"
120
.40
"
125
.30
"
130
.30
"
135
.30
"
140
.12
2.9
F3
145
.12
2.9
"
150
.13
2.8
"
155
.15
2.4
"
160
.18
1.9
"
165
.20
1.45
"
170
.21
1.10
"
175
.30
0.85
"
179.995
.35
0.70
"
Band - VHF (2) (set to 300Mhz) -------------------------------Frequency
Sens (uV)
Power
Mode
-----------------------300
50/75
A3/F3
320
4/20
"
340
.3/.6
"
360
.2/.5
"
380
.2/.6
"
400
.2/.75
"
Band - UHF ----------------------------------------------------Frequency
Sens (uV)
Power
Mode
-----------------------400
11
1.0
F3
410
4
1.5
"
420
1
1.85
"
430
.2
2.2
"
435
.12
2.3
"
440
.10
2.5
"
445
.10
2.5
"
450
.10
2.5
"
455
.15
2.3
"
460
.16
2.3
"
465
.20
2.0
"
470
.45
1.8
"
480
1
1.6
"
490
2
1.3
"
500
6
1.1
"
510
no RX over 509 0.8
"
This modification is read 1779 times.
top of page
19-07-1998
(TH-79) Cross Band Repeat
from Chuck Scott, N8DNX
The TH-79 does go into X-Band repeat. Press the "F" key then the "MONI" key to enter repeat mode.
Use the same to return to normal.
There is a 10 min transmit limit so it's not useable for long duration monitoring of a continuous transmission. That's understandable in
light of the number of horror stories I've heard of people frying their HT's in repeat mode.
This modification is read 1916 times.
top of page
03-01-1999
(TH-79) TH-79 Save function & packet!
From: [email protected]
From some testing I've done it looks like it's necessary to set the SAVE mode on the TH-79's menu to OFF for proper packet radio
operation.
When this function is ON, my PR system misses the first FBB UNPROTO updates after an update request (originating from my station)
unless another packet arriving in between the request and the first UNPROTO packet 'wakes' up the TH-79.
If not woken up the RX seems to miss (some of) the first update packet and Winpack shows only the second and following, which
generates repeated requests for an update of the message list. The updates go to the FBB Unproto buffer, but the BBS system keeps
repeating them all over and over again including one final time when the first FBB UNPROTO update does happen to get registered and
the buffer clears.
When I first got the TH-79, I measured current consumption and saw it going down during standby without a signal, then when a
signal was received the current would go up and stay 'high' for a rather short while after the signal had disappeared and then it would
go to sleep again. This behaviour is present when the SAVE mode is enabled. I assume the squelch is too slow for packet when the
SAVE mode is enabled. (I need to have the squelch at position 4, btw, because of digital noise on 144,675 MHz.)
Does anybody else have the same experience with the TH-79 SAVE mode and the FBB UNPROTO updates?
tu es 73 de Arjen, OH2ZAZ@OH2RBI
Current QTH: Helsinki - KP20LD
This modification is read 1763 times.
top of page
28-10-2001
(TH-79) TH-79 FAQ 3.5 by DG8NGN
Author: Jann DG8NGN - [email protected]
Hello TH79 fans.
Once again a new version (3.5) of my FAQ for the Kenwood handheld
TH79. Have Fun. Modifications, tips and everything about the TH79
are welcome !
1.0 RX/TX expansion TH79 and diode configurations
TX/RX-Qrgs after the modification:
In the upper receiver/transmitter
(better use for 2 m)
RX: 118
136
300
410
TX: 136
410
-135
-173
-399
-469
-173
-469
MHz
MHz
MHz
MHz
MHz
MHz
(VHF)
(VHF)
(VHF)
(UHF)
(VHF)
(UHF)
AM
FM
AM/FM
FM
FM
FM
In the lower receiver/transmitter:
(better use for 70 cm)
RX: 124,6-173
410 -469
800 -999
TX: 136 -173
410 -469
MHz
MHz
MHz
MHz
MHz
(VHF)
(UHF)
(UHF)
(VHF)
(UHF)
FM
FM
FM
FM
FM
The modifications have been done with the TH79E with the serial number
90200050.
Models with the serial number 60900100 and lower (memory skipping
function F+L. OUT doesn't work) can use new frequencys like 67-117 RX,
400-409 RX/TX and 470-511 RX/TX. But the PLL doesn´t work fine in that
areas. The Frequencys are flashing in the display. Between 67 and 85 MHz
there is no RX possible. So Kenwood decided to cancel the frequencyarea
in the following models of the TH79. The microprocessor has been changed.
After the modification the TH79 have to be programed again.
To use the areas of 300-399 MHz and 800-999 MHz you have to
push <F> + <LOW(HI/LO/EL)> (transmit power button) in the
VFO mode at the corresponding reciever. After that you can
store the frequencies.
1.1 preparation
a . remove microphone, accumulator, antenna
b . remove the screw at the direct current socket and the little screws
on the back with a fitting screw driver.
c . open the TH79 and put the front of the transmitter on the display.
1.2 modification
a.remove the green wire near to the CTCSS socket.
b.on the main board there are down on the right corner
a row of a SMD resistance and 7 SMD diodes with missing
1 diode already. The diodes are labeled with an "A".
c. Now you have to remove the third diode (D306) from the right end
counted
Here´s a little graphic:
Before:
R D - D D D D D |
________________|
1 2 3 4 5 6 7 8
Afterward:
R D - D D - D D |
________________|
1 2 3 4 5 6 7 8
R=resistance
D=diode
=nothing
d. put together again and program the TH79 again :-)
1.3 diode configuration in other countrys
Modell
Area
Operat.
range
TH79A-C
China
136-180
400-512
TH79A-K
America
Display
range
Initial values
Freq Step Offset Tone
144M 12.5k +-5.7M 88.5
430M 25k
+-10M 88.5
144-148
144-148 144M 5k
(118-174) (118-174)
438-450
438-450 440M 25k
+-0.6M 88.5
+-5M
144M 5k
+-0.6M 88.5
440M 25k
+-5M
TH79A-K3 America
tx-mod
136-180
(67-180)
400-512
144M 5k
+-0.6M 88.5
440M 25k
+-5M
TH79A-K4 America 142-152
rx-mod
(67-180)
marse
420-450
+add.
(400-512)
144M 5k
+-0.6M 88.5
440M 25k
+-5M
TH79A-K5 America
rx-mod
+add.
144M 5k
+-0.6M 88.5
440M 25k
+-5M
TH79E-E
144-148
(67-180)
438-450
(400-512)
Austral. 144-148
(118-174)
430-440
144-148 144M 5k
(67-180)
430-440 430M 25k
Europe
144-146
430-440
144-146
430-440
TH79E-E2 Italy
136-174
(118-174)
410-470
TH79E-E3 England
144-146
430-440
TH79E-E4
144-146
432-438
TH79A-M
General
TH79A-M2 General
144-148
430-440
136-174
(118-174)
410-470
D
D
D
D
D
D
D
D
D
D
D
D
D
D
D
D
-
D
D
D
D
D
D
D
D
D
D
D
D
D
D
D
D
D
D
D
D
D
D
D
D
D
D
D
D
D
D
88.5
88.5
X57-4400-71
88.5
X57-4402-71
136-180 144M 12.5k +-0.6M 1750
(67-180)
400-512 430M 25k
+-1.6M
-7.6M 1750
X57-4402-72
144-146
430-440
X57-4402-73
144M 12.5k +-0.6M 1750
430M 25k
+-1.6M
-7.6M 1750
144M 12.5k +-0.6M 1750
432M 25k
+-1.6M 1750
144-148
430-440
144M 12.5k +-0.6M 88.5
430M 25k
+-5M 88.5
X57-4400-21
136-180 144M 12.5k +-0.6M 88.5
(67-180)
400-512 430M 25k
+-5M
88.5
X57-4400-22
3 3 3 3 3 3 3
0 0 0 0 0 0 0
2 3 4 5 6 7 8
D
D
D
D
D
D
D
D
D
D
D
D
D
88.5
144M 12.5k +-0.6M 1750
430M 25k
+-1.6M
-7.6M 1750
Diode:
C
K
K2
K3
K4
K5
X
E
E2
E3
E4
M
M2
88.5
+-0.6M 88.5
+-5M
X57-4400-11
88.5
TH79A-K2 America 142-152
rx-mod (118-174)
marse
420-450
TH79A-X
Tx-Rx unit no.
D
D
D
D
D
D
-
D = Diode
- = nothing
Changes between TH79E and TH79A
TH79E "Tone" = TH79A "Lamp"
TH79E "Lamp" = TH79A "Call Function"
1.4 Further diode configurations
general descripton of the seperate diodes
D302 Channel display mode
D303 D304 D305 Channel display mode and key lock
D306 Crossband repeater, answerback
D307 D308 Frequency extension
(Informations from Kenwood)
Removing of Diode:
D302 Takes modifictaion of point 3.0 in permanent duration
D305 activates additional key lock function of function in point 3.0
D308 corresponding the green wire near CTCSS-bush
Diode configuration for
RX: 118-173 MHz
300-399 MHz
410-469 MHz
800-999 MHz
TX: 144-146 MHz
430-440 MHz
That configuration is necessary in countrys where the
ability to transmit outside amateur radio bands isn´t
allowed (e.g. netherlands)
R D - - D D D D |
________________|
3 3 3 3 3 3 3
0 0 0 0 0 0 0
1 2 3 4 5 6 7 8
R = resistance
D = diode
- = nothing
2.0 additional functions of the TH79 after the modification
of point 1
2.1 Crossbandrepeater
With that function, the TH79 can work like a repeater.
It is only possible to cross frequencies from the UHF-RX to the
VHF-TX or from the VHF-RX to the UHF-TX.
Just view the RX/TX list of point 1.
For activating the mode push <F>+<Moni>.
Switching off again with <Moni>. You should
choose the right TX-power before.
The TH79 stopps crossing, after 3 minutes sending all the time,
not to damage the TH79.
The CTCSS-modul can be of use to select wanted signals.
2.2 Cloning
With that funtion it´s possible to transfer the memory
of the TH79 to antoher TH79. But you have to care, because
only TH79s of the same diodeconfiguration can be cloned.
For example you can´t clone a TH79E with a TH79A. Maybe
it´s possible to save your memory on tape or so.
a. Push PTT- and VFO-button during switching on.
(You need only to do that at the first time Cloning)
b. Choose TX-Qrg and TX-Power
c. Turn off
d. Push 0 during switching on. CLONE appears on the display.
e. Take other TH79 in Cloning mode.
f. Push PTT at the sending TH79 and wait about 4-5 minutes
g. After successful Cloning both TH79 displays END.
Recieving TH79 will display ERROR, if there has been any
errors during transmission.
2.3 new menu items
a. menu item 18 AnswerBack: ON/OFF
With this menu item it is possible to switch on/off the
automatic confirmation of a pagingcall in the Pagemodus.
b. menu item 19 FM/AM Mode: FM/AM
With this menu item you can toggle between AM- and FMMode in frequency area 300-399 MHz.
You can see the decimal line (4*2 pixels) in AM-Mode and
the decimal point (2*2 pixels) in FM-Mode on the display
between chosen frequency.
c. menu item 20 Prog VFO: 300-399
You can choose the VFO area between 300 and 399 MHz.
d. menu item 21 Prog VFO: 800-999
You can choose the VFO area between 800 and 999 MHz.
2.4 text messages
With the TH79 you´re able to send and recieve text messages.
Recieving:
The function DT(ss) or PAG(e) must be switch on to use this
feature. On the display must PAG or DT appear.
Transmitting:
The message may not be longer than 6 signs and will be
transfered by DTMF. Here´s a conversion table:
0 = 0
Q = 1+A
Z = 1+B
= 1+C
1 = 1
A = 2+A
B = 2+B
C = 2+C
2 = 2
D = 3+A
E = 3+B
F = 3+C
3 = 3
G = 4+A
H = 4+B
I = 4+C
4 = 4
J = 5+A
K = 5+B
L = 5+C
5 = 5
M = 6+A
N = 6+B
O = 6+C
6 = 6
P = 7+A
R = 7+B
S = 7+C
7 = 7
T = 8+A
U = 8+B
V = 8+C
8 = 8
W = 9+A
X = 9+B
Y = 9+C
9 = 9
You have to send out the message like this:
<DTSS- or PAGE-number of the receiver>#<message in DTMF>#
E.g.: DTSS or page number of the Reciever: 275
Message: "TEST" = 8A3B7C8A
Petition: 275#8A3B7C8A#
Of course the DTMF memory can be used for that, too.
I´ll send a program to caculate the codes for the text
messages from SQ1BSE in the BBS.
You can test that feature with only one TH79 ! You can
use the third harmonic wave for that test. The Duplexmode (F+DUP) must be activated. Try it !
E.g.: 1.
2.
3.
4.
5.
6.
7.
8.
Adjust 144.900 MHz on the upper TRX.
Use only low transmit power or dummyload
Adjust 434.700 MHz on the lower TRX.
Activate Duplexmode (F+DUP)
Activate DTSS on the lower reciever.
Choose DT-code
Reduce volume
During transmitting with the upper TRX you have to
enter e.g.: 275#8A3B7C8A#
9. Now you´ll be able to see the result on the display
for the lower TRX.
3.0 Channel display mode
After activating that function the TH79 shows only the stored
memorys like that: CH (memorynumber). With that you´re able to
disable the free choice of frequencys and you can only use the
stored memorys. The function can be activated by pressing
the BAND VxV, UxU button during switching the TH79 on.
4.0 (not testet yet)
5.0 sensitiveness TH79
Results only have to be regarded as guide values.
Frequency [MHz] | performance [dBm] tension [uV]
-----------------------------------------------118
AM
|
-110
0.71
120
AM
|
-115
0.4
125
AM
|
-125
0.12
130
AM
|
-127
0.1
136
FM
|
-122
0.18
140
"
|
-126
0.11
145
|
-129
0.08
150
|
-129
0.08
155
|
-125
0.12
160
165
170
173
|
|
|
|
-122
-118
-116
-114
0.18
0.28
0.35
0.45
300
310
320
330
340
350
360
370
380
390
399
AM
"
|
|
|
|
|
|
|
|
|
|
|
-95
-109
-124
-128
-131
-135
-135
-136
-136
-136
-135
3.9
0.8
0.14
0.09
0.06
0.04
0.04
0.04
0.04
0.04
0.04
410
415
420
425
430
435
440
445
450
455
460
465
469
FM
"
|
|
|
|
|
|
|
|
|
|
|
|
|
-109
-116
-123
-126
-128
-128
-128
-127
-125
-122
-118
-114
-111
0.8
0.35
0.16
0.11
0.09
0.09
0.09
0.1
0.12
0.18
0.28
0.45
0.63
800
825
850
875
900
925
950
975
999
FM
"
|
|
|
|
|
|
|
|
|
-85
-90
-95
-100
-105
-110
-110
-110
-110
12.6
7.1
3.9
2.2
1.25
0.71
0.71
0.71
0.71
6.0 Modification TH79 for 2m/70cm 9K6/Pocsag/ACARS RX! TX? :
Well, a really difficult thing...
There will be no problems with recieving 9k6 signals or
512, 1200 or 2400 baud Pocsag signals. Further ARCARS on
the 2m band is no problem, too.
There will be problems with TX. Who has a better idea
to solve the problems than my following ???
Depending on DIGI you have more or less success with 9K6-TX.
I have tested DB0ABH (about 15 km) and DB0ZB (about 80 km).
DB0ABH has only got every 20th frame, but DB0ZB every 1,5th.
Short Frames go quite speedy, but the longer ones are causing
waiting for hours :-(
The TH79 tries to adjust the frequency during transmission :-(
But the TX-Delay of the TH79 is really great. You can choose
are TX-Delay of 8-9.
DL1RNO Juri and I are developing a 2-Point modulation to solve
that problem.
Are there any other ideas to solve that problem ???
Unfortunately, I couldn't test Pocsag TX yet.
For RX-Broadcast, of course it´s a fine thing.
You can find the layouts for help in the BBS, too.
6.1 preparation
a. Remove microphone, accumulator, antenna
b. Remove the screw at the direct current socket and the little screws
on the back with a fitting screw driver.
c. Open TH79 and remove CTCSS cap
d. Turn the front of TH79 on the display on the left side and the back
on the right side
e. For better working you have to remove the flat ribbon cable.
Use a little screw driver for removing the cable out of its
fastening. Now you can pull out the cable. After that you have to
remove the red-black-yellow wire from the mainboard by hand.
6.2 RX-modification 70cm
a. You have to solder the connection of the antenna socket away.
antenna socket. Push the wire a bit away during soldering.
b. You can pull the black plastic away, after you have removed
the sealing ring around the antenna socket. You should remove
a bit of the foam material before.
c. Remove 2 screws at the antenna socket. After that you can
remove 5 screws of the sheet copper. (Perhaps 1 screw hides
under the foam material or under the flat ribbon cable).
Now you can remove the board from the back.
d. Now we care about the back of the board.
You can get the RX-signal from the IC MC3372D (16 pins) from
Motorola (UHF-Demodulator). The RX-cable have to be connected
with Pin 9 (above on the right of the IC). The cable can be
carried out like this:
*-------*
!
!
*---------------------------*
!
!
*---*
!
!
!
!
!
!
!
!
!
*--*
!
!
!IC!
!
!
*--*
cable run
!
!
############## !
!
........<= solder
# !run cables through here
!
! 3372 !
here
####
!
! PIAK !
*---*
!
*------*
!
!
*----------*
!
!
!
IC
!
!
!
*----------*
!
!
!
*-----------------------------------*
e. Care about the length of the cable !
Put together again. Don´t forget the antenna socket...
6.3 Rx-modification 2m
a. You have to solder the connection of the antenna socket away.
antenna socket. Push the wire a bit away during soldering.
b. You can pull the black plastic away, after you have removed
the sealing ring around the antenna socket. You should remove
a bit of the foam material before.
c. Remove 2 screws at the antenna socket. After that you can
remove 5 screws of the sheet copper. (Perhaps 1 screw hides
under the foam material or under the flat ribbon cable).
Now you can remove the board from the back.
d. Now we care about the back of the board.
You can get the RX-signal from the IC TK10930V (24 pins, VHFDemodulator). The RX-cable have to be connected with Pin 12
(below on the right of the IC). The cable can be carried out
like this:
*-------*
!
!
*---------------------------*
!
!
*---*
!
!
!
!
!
!
!
!
!
*--*
!
!
!IC!
!
!
*--*
!
!
!
!
*------*
! run cables through here
!
! 3372 !
! #
!
! PIAK !
*-#-*
!
*------*
# !
!
*----------* # !
!
!
10930 !### !
!
!
A42 !#
!
!
............# <=!solder here
*-----------------------------------*
e. Care about the length of the cable !
Put together again. Don´t forget the antenna socket...
6.4 TX-modification 2m/70cm
a. There is a doughter board put on the main board in the TH79.
You have to pull the transparent foil over the board.
b. The graphic shows you how to connect the TX feeding.
#run cable here
*------------------------------#------------*
!
#
!
! *--* *--*
#
!
! !PO! !TI!
*--------*
# *--------* !
! *--* *--*
!ATMEL707!
# ! LM301 ! !
! *--* *--*
*--------*
# *--------* !
! !PO! !TI!
#
!
! *--* *--*
#
!
!
#
!
!
*--*
#
!
!
!PO!
#
!
!
*--*
. . . .-c-*C*# <= solder !
!
*--*
! TC7660 !
on here !
!
!TI!
*--------*
!
!
*--*
!
*-------------------------------------------*
At the 5th pin (above at the right) of the IC TC7660 there
are two capacitors in line. You have to solder on the cable
at the second capacitor on the negativ pole.
6.5 Connection
a. I have a good tip (if there´s no CTCSS unit) to construct
a connection without any cables hanging out of the TH79.
Get a single-breasted socket strip and a containing fitting
pin contact strip. Break out 2 pieces.
b. Now you have to solder the cables with the socket strip.
The cable must reach to the CTCSS slide-in.
c. For better remembering mark RX or TX with color.
Now you can stuck the socket strip on the board, but
try to stuck it, so that the CTCSS cap can be still insert.
d. Stuck a bit insulating tape on the socket strip, because
maybe the sheet copper will contact the pins.
e. Before using the 9k6 TX/RX feature you need only remove the
CTCSS cap with the fingernail or a thin screw driver.
The TH79 looks like before....
7.0 Repairing the TH79
7.1 Frequency regulator jumps ? Volume regulator scratches ?
You have to take the front of the TH79 apart to remove
the regulators for processing.
a. Remove microphone, accumulator, antenna
b. Remove the screw at the direct current socket and the little screws
on the back with a fitting screw driver.
c. Open TH79 and remove CTCSS cap
d. For better working you have to remove the flat ribbon cable.
Use a little screw driver for removing the cable out of its
fastening. Now you can pull out the cable. After that remove
the plug between the regulators (cable: yellow, black, red).
Now you can work with the front of the TH79 fine.
e. Remove volume regulator cap and frequency regulator cap.
f. Now you can remove the black cap on the top of the TH79.
g. Remove sealing ring of the regulators.
h. Nut of the regulators can be removed with a 10s fork key.
i. Remove the golden 2 screws on the board.
j. Push the metal over the regulators a bit up and lift the
board a bit up. Push the microphone ports a bit to the side
during pulling the board up. Attention: Don´t lose the
LOCK-Key.
k. Now pull the plastic (under the plastic is the keypad)
at the fastenings for the board up and take it away.
After that you´ll have the front board incl. display
in your hand.
l. Then you have to solder off the regulators with its mini
boards from the main board. Okay, now you have the
regulators incl. mini boards in your hand.
7.1.1 The frequency regulator
The clamping ring below the frequency regulator must be removed.
Attention: Clamping rings are perhaps jumping far away.
Now you can take the inner pin out and remove the dirt
with e.g. a cloth. (my pin was a bit black).
Then you have to use contact spray to clean the regulator.
Put the pin back again and remove it again. Repeat that as long
as it will be clean enough. Now the regulator will
not jump any longer (hope so)
Be carefully when you solder the regulator back again.
7.1.2 The volume regulator
Pull up the pin of the regulator to use contact spray.
Rotate the regulator during using contact spray.
You can use it on the lower side of the regulator, too.
After that the regulator will not scratch any more.
Be carefully when you solder the regulator back again.
7.2 Dust behind the display? Buttons don't work?
Open the TH79 like in point 6.1 described.
Now you can easily wipe the display off with a cloth
and freeing the TH79 from dust inside. Alternatively you
can also open the display at the sides with a little
screwdriver, although the TH79 is shut.
You can simply clean the Keypad with soap and water.
Often dust or grease under the buttons prevent contacts.
7.3 Scratched display?
Try "acrylic glass & repair" paste for doing this job.
There´s no matter to polish the inner LCD-Display heavier.
After this the TH79 looks as new ...
7.4 funny behaviour of the TH79 ?
2m TX doesn´t work ? Squelch all the time open ?
Maybe it´s the flat cable between the two main boards !
On the ends of the cable there can be no contact an more :-(
Just try to cut the cable at the ends and sand it a bit.
Maybe it works again. It´s not very expensive, when you
want a new cable from Kenwood.
7.5 voltage error ?
Maybe the contact between the doughter board an the main board
isn´t correct.
Okay, don´t wonder, when you use your TH79 with 20 volts :-)
7.6 display contrast problems ?
There are often contact problems between the main board and
the display. To fix the problem fasten the screws at the
backside of the display. Now the display should work again.
You can lock the screws with some nail-paint for example.
8.0 technical Information
8.1 Transmitpower of the TH79
12V DC:
VHF up to 5,0 watts
UHF up to 3,5 watts
6V DC (600mAh Akkupack PB-32)
VHF up to 2,5 watts
UHF up to 2,0 watts
8.2 TOT-function
After 10 minutes sending all the time the TH79 stopps sending
because of the heath. The function is included in the microprocessor and can´t be deactivatet :-( With the older TH79s
(see 1.0) it´s possible to activate the 10 minutes TX function.
Press VFO- or MR-button till the beep and press now while holding
the VFO- or MR-button the PTT-button. Function is activated.
Who needs Infos from the service manual of the TH79 ?
I´ve got it ! Just E-mail me for further Information.
Tips and tricks pse to DG8NGN @DB0ABH.#BAY.DEU.EU or JANN @GMX.DE
Special Thanks to SQ1BSE Pawel, DD1JD Dirk, DL1RNO Juri
and DF9ZR Peter
73 and 55
Jann from Nuremberg
top of page
This modification is read 1621 times.
28-10-2001
(TH-79) DTMF-based message translator
Author: SQ1BSE
DTMF-based message translator for TH-79E HT
Developed using Amiga by SQ1BSE
top of page
This modification is read 1449 times.
29-10-2001
(TH-79) TH-79 FAQ 3.5 by DG8NGN
Author: DG8NGN - [email protected]
Hallo TH79-Fans.
Hier mal wieder eine neue Version (3.5) der FAQ für das
Kenwood Handfunkgerät TH79. Viel Spaß. Anregungen, Verbesserungen
und Modifikationen sind sehr erwünscht...
1.0 RX/TX-Erweiterung und Diodenkonfigurationen
max. TX/RX-Qrgs nach der folgenden Modifikation:
Im oberen Empfänger/Sender
(besser für 2m geeignet)
RX: 118
136
300
410
TX: 136
410
-135
-173
-399
-469
-173
-469
MHz
MHz
MHz
MHz
MHz
MHz
(VHF)
(VHF)
(VHF)
(UHF)
(VHF)
(UHF)
AM
FM
AM/FM
FM
FM
FM
Im unterem Empfänger/Sender:
(besser für 70cm geeignet)
RX: 124,6-173
410 -469
800 -999
TX: 136 -173
410 -469
MHz
MHz
MHz
MHz
MHz
(VHF)
(UHF)
(UHF)
(VHF)
(UHF)
FM
FM
FM
FM
FM
Die Modifikationen wurden am TH79E mit der Seriennummer
90200050 gemacht.
Bei Modellen mit der Seriennummer 60900100 (Speicherüberspringfunktion F + L.OUT geht nicht) und darunter wird der Bereich
67-179 RX, 400-511 RX/TX verfügbar. Allerdings rastet die PLL
unter etwa 88 MHz schon nicht mehr. Nicht zu vergessen ist,
dass eh alles unter 118 MHz nur als AM zu empfangen ist.
Ein Arbeiten in diesem zusätzlichen Bereich ist kaum möglich
und wurde daher in der nächsten Generation des TH79 gleich
weggelassen. Der Mikroprozessor wurde gewechselt.
Nach der Modifikation muß das Gerät neu programmiert werden.
Um nun in die Bereiche 300-399 MHz und 800-999 MHz zu kommen,
muss man am entsprechenden Empfänger <F> + <LOW(HI/LO/EL)>
(Sendeleistungsknopf) im VFO-Modus drücken. Danach können
in diesem Bereich die Frequenzen abgespeichert werden.
1.1 Vorbereitung
a. Mikrofon, Akku, Antenne entfernen
b. Schraube an der Gleichstrombuchse und die kleinen Schrauben
auf der Rückseite mit einem passenden Kreuzschlitzschraubendreher entfernen
c. Gerät öffnen und Vorderseite des Gerätes auf das Display
legen
1.2 Umbau
a. Den grünen Draht nähe CTCSS-Buchse entfernen
b. Auf der Hauptplatine befinden sich unten rechts in der Ecke
in einer Reihe ein SMD-Widerstand und 7 SMD-Dioden mit der
Aufschrift "A", wo bereits eine fehlt.
c. Jetzt muss die dritte Diode (D306) von rechts aus entfernt
werden.
Hier eine kleine Grafik:
vorher:
R D - D D D D D |
________________|
3 3 3 3 3 3 3
0 0 0 0 0 0 0
1 2 3 4 5 6 7 8
R = Widerstand
D = Diode
- = nichts
nachher:
R D - D D - D D |
________________|
3 3 3 3 3 3 3
0 0 0 0 0 0 0
1 2 3 4 5 6 7 8
d. Gerät wieder zusammenbauen und neu programmieren :-)
1.3 Länderspezifische Diodenkonfigurationen
Modell
Area
Operat.
range
TH79A-C
China
136-180
400-512
TH79A-K
America
Display
range
Initial values
Freq Step Offset Tone
144M 12.5k +-5.7M 88.5
430M 25k
+-10M 88.5
144-148
144-148 144M 5k
(118-174) (118-174)
438-450
438-450 440M 25k
+-0.6M 88.5
+-5M
144M 5k
+-0.6M 88.5
440M 25k
+-5M
TH79A-K3 America
tx-mod
136-180
(67-180)
400-512
144M 5k
+-0.6M 88.5
440M 25k
+-5M
TH79A-K4 America 142-152
rx-mod
(67-180)
marse
420-450
+add.
(400-512)
144M 5k
+-0.6M 88.5
440M 25k
+-5M
TH79A-K5 America
rx-mod
+add.
144M 5k
+-0.6M 88.5
440M 25k
+-5M
TH79E-E
144-148
(67-180)
438-450
(400-512)
Austral. 144-148
(118-174)
430-440
144-148 144M 5k
(67-180)
430-440 430M 25k
Europe
144-146
430-440
TH79E-E2 Italy
144-146
430-440
136-174
(118-174)
410-470
TH79E-E3 England
144-146
430-440
TH79E-E4
144-146
432-438
TH79A-M
General
TH79A-M2 General
Diode:
144-148
430-440
136-174
(118-174)
410-470
88.5
88.5
88.5
88.5
+-0.6M 88.5
+-5M
X57-4400-11
88.5
TH79A-K2 America 142-152
rx-mod (118-174)
marse
420-450
TH79A-X
Tx-Rx unit no.
X57-4400-71
88.5
144M 12.5k +-0.6M 1750
430M 25k
+-1.6M
-7.6M 1750
X57-4402-71
136-180 144M 12.5k +-0.6M 1750
(67-180)
400-512 430M 25k
+-1.6M
-7.6M 1750
X57-4402-72
144-146
430-440
X57-4402-73
144M 12.5k +-0.6M 1750
430M 25k
+-1.6M
-7.6M 1750
144M 12.5k +-0.6M 1750
432M 25k
+-1.6M 1750
144-148
430-440
144M 12.5k +-0.6M 88.5
430M 25k
+-5M 88.5
X57-4400-21
136-180 144M 12.5k +-0.6M 88.5
(67-180)
400-512 430M 25k
+-5M
88.5
X57-4400-22
3 3 3 3 3 3 3
0 0 0 0 0 0 0
2 3 4 5 6 7 8
C
K
K2
K3
K4
K5
X
E
E2
E3
E4
M
M2
D
D
D
D
D
D
D
D
D
D
D
D
D
D
D
D
D
D
D
D
D
D
D
D
D
D
D
D
D
-
D
D
D
D
D
D
D
D
D
D
D
D
D
D
D
D
D
D
D
D
D
D
D
D
D
D
D
D
D
D
D
D
D
D
D
D
-
D = Diode
- = nichts
Änderungen zwischen TH79E und TH79A
TH79E "Tone" = TH79A "Lamp"
TH79E "Lamp" = TH79A "Call Function"
1.4 Weitere Diodenkonfigurationen
Allgemeine Beschreibung der einzelnen Dioden:
D302 Channel display mode
D303 D304 D305 Channel display mode and key lock
D306 Crossband repeater, answerback
D307 D308 Frequency extension
(Informationen von Kenwood)
Entfernen der Diode:
D302 erhält die Funktion unter 3.0 beschrieben dauerhaft
D305 aktiviert zusätzlich zur unter 3.0 beschriebenen Funktion
die Tastensperre
D308 entspricht dem grünen Draht nähe CTCSS-Buchse
Diodenkonfiguration für
RX: 118-173 MHz
300-399 MHz
410-469 MHz
800-999 MHz
TX: 144-146 MHz
430-440 MHz
Diese Konfiguration wird in Ländern benötigt, die die
TX-Modifikation ausserhalb des Amateurfunkbereiches nicht
erlauben. (z.B. Niederlande)
R D - - D D D D |
________________|
3 3 3 3 3 3 3
0 0 0 0 0 0 0
1 2 3 4 5 6 7 8
R = Widerstand
D = Diode
- = nichts
2.0 zusätzliche Funktionen des Gerätes nach der Modifikation
von Punkt 1
2.1 Crossbandrepeater
Mit der Crossbandrepeaterfunktion ist es möglich
das Eingangssignal auf einer anderen Frequenz automatisch wieder auszusenden.
Beim Crossbandbetrieb ist es nur möglich Frequenzen
vom UHF-RX zum VHF-TX oder vom VHF-RX zum UHF-TX zu
crossen. Zu Beachten ist die RX/TX-Liste von Punkt 1.
Zum Aktivieren des Modus muss <F>+<Moni> gedrückt
werden. Abschalten mit <Moni>. Vorher sollte
man die gewünschte TX-Leistung einstellen.
Wenn der TH79 länger als 3 Minuten dauersendet beim Crossen,
dann schaltet die Crossbandrepeaterfunktion sicherheitshalber ab.
Das CTCSS-Modul kann zum Selektieren des zu crossende Signals
verwendet werden.
Crossbandrepeaterbetrieb in EINE Richtung:
Wenn das VHF-Band für TX gesperrt werden soll, dann muß man auf dem
VHF-Band ein Memoryspeicher mit der VHF-RX-Frequenz abgespeichert
werden und eine exotische Ablage in den AM-Frequenzbereich 118-136
MHz programmiert werden. Alternativ kann auch im Menü die StandardAblage für den VHF-Bereich auf 99,95 gestellet werden und die
Standardablage aktiviert werden.
Wenn das UHF-Band für TX gesperrt werden soll, dann muß man die
Standartablage auf 99,95 stellen und auf der RX-Frequenz aktiviert
werden.
2.2 Clonen
Mit der Cloningfunktion ist es möglich den gesamten
Speicher des TH79 zu einem anderem TH79 zu übertragen.
Dabei ist darauf zu achten, dass beide TH79 die gleichen
Modifikationen besitzen, also es kann z.B. kein TH79A
auf den TH79E oder ein TH79E mit RX-Erweiterung auf einen
normalen TH79E geclont werden. Angeblich soll sogar eine
Sicherung auf Tonband funktionieren. Die Sendeleistung
wird beim Clonen automatisch auf Stufe EL beschränkt.
a. Während dem Einschalten PTT und VFO drücken
(wird nur beim ersten Mal "Clonen" benötigt um den Prozessor zu
programmieren)
b. Sendefrequenz auswählen
c. Ausschalten
d. Während dem Einschalten 0 drücken. CLONE erscheint
im Display
e. Partnergerät in den Clonemodus bringen
f. Beim Sendegerät kurz PTT drücken und ca. 4-5 Minuten
warten
g. Bei erfolgreichem Clonen zeigen beide Geräte im
Display END an. Bei einem Fehler erscheind ERROR
beim Empfängergerät.
2.3 neue Menüpunkte
a. Menüpunkt 18 AnswerBack: ON/OFF
Mit diesem Menüpunkt ist es möglich die automatische
Rückbestätigung eines Pagerufes im Pagemodus ein- bzw.
auszuschalten.
b. Menüpunkt 19 FM/AM Mode: FM/AM
Mit diesem Menüpunkt kann man zwischen AM- und FMModus im Bereich 300-399 MHz umschalten.
Im AM-Modus ist der Dezimalstrich (4*2 Pixel) und im
FM-Modus der Dezimalpunkt (2*2 Pixel) zwischen der
eingestellten Frequenz zu sehen.
c. Menüpunkt 20 Prog VFO: 300-399
Hier kann der VFO-Bereich für das Gerät zwischen
300 und 399 MHz eingestellt werden.
d. Menüpunkt 21 Prog VFO: 800-999
Hier kann der VFO-Bereich für das Gerät zwischen
800 und 999 MHz eingestellt werden.
2.4 Textnachrichten
Mit dem TH79 ist es möglich zu einem anderen TH79 Textnachrichten
zu verschicken:
Empfang:
Das Gerät muss im DT(ss) oder PAG(e)-Modus stehen.
Die Anzeige DT bzw. PAG muss im Display angezeigt werden.
Senden:
Die Nachricht darf nicht länger als 6 Zeichen sein und
wird per DTMF übertragen. Hierzu folgende Umrechnungstabelle:
0 = 0
Q = 1+A
Z = 1+B
= 1+C
1 = 1
A = 2+A
B = 2+B
C = 2+C
2 = 2
D = 3+A
E = 3+B
F = 3+C
3 = 3
G = 4+A
H = 4+B
I = 4+C
4 = 4
J = 5+A
K = 5+B
L = 5+C
5 = 5
M = 6+A
N = 6+B
O = 6+C
6 = 6
P = 7+A
R = 7+B
S = 7+C
7 = 7
T = 8+A
U = 8+B
V = 8+C
8 = 8
W = 9+A
X = 9+B
Y = 9+C
9 = 9
So wird die Nachricht verschickt:
<DTSS- oder PAGE-Nummer des Empfängers>#<Nachricht in DTMF>#
z.B.: DTSS- oder PAGE-Nummer des Empfänges: 275
Nachricht: "TEST" = 8A3B7C8A
Eingabe: 275#8A3B7C8A#
Der DTMF-Speicher kann natürlich dafür genutzt werden.
Zum Berechnen dieser Textnachrichten füge ich ein DOS-Progamm
von SQ1BSE am Ende der FAQ mit ein.
Zum Ausprobieren und Testen mit nur einem Gerät kann ich
empfehlen die 3 Oberwelle im Duplexmodus (F + DUP)
auszuprobieren.
z.B.: 1.
2.
3.
4.
5.
6.
7.
8.
9.
Oben 144,900 MHz einstellen
Geringe Sendeleistung oder Dummyload verwenden
Unten 434,700 MHz einstellen
Duplexmodus aktivieren (F+DUP)
Unten DTSS aktivieren
Unten DT-Code einstellen
Unten Volume runterdrehen
Oben während dem Senden z.B.: 275#8A3B7C8A# eingeben
Das Ergebnis müsste man nun im unterem Displayteil
sehen können.
Dadurch wird es auch möglich auf die schon empfangen Nachrichten
nochmal zuzugreifen, wenn man sie versehentlich durch z.B. Drücken
der PTT-Taste übersehen hat.
Der Empfangspuffer speichert bis zu 10 Nachrichten und kann mit
dem Frequenzdrehregler durchgesehen werden. Beim Ausschalten des
Gerätes gehen alle Nachrichten verloren.
3.0 Channel Display Mode
Nach Aktivierung dieser Funktion zeigt das TH79 nur noch die
abgespeicherten Speicher mit CH <Speichernummer>. Dadurch wird
die freie Wahl der Frequenz gesperrt und man kann nur noch die
abgespeicherten Frequenzen benutzen. Die Funktion kann man durch
Einschalten des Gerätes mit gleichzeitigem Drücken der BAND
VxV, UxU Taste aktivieren.
4.0 Fernsteuerung des TM-732 oder TM-742 über den TH79
Wer schreibt eine Beschreibung der Fernsteuerung für diese
FAQ ? Ich habe leider keines der beiden Geräte. Die
Application Notes darüber können von mir im JPG-Format
bezogen werden oder vom Kenwood FTP-Server ftp.kenwood.net
heruntergeladen werden.
5.0 Empfindlichkeit TH-79E
Werte sind nur als Richtwerte zu betrachten.
Frequenz [MHz] | Leistung [dBm] Spannung [uV]
-----------------------------------------------118
AM
|
-110
0.71
120
AM
|
-115
0.4
125
AM
|
-125
0.12
130
AM
|
-127
0.1
136
FM
|
-122
0.18
140
FM
|
-126
0.11
145
FM
|
-129
0.08
150
FM
|
-129
0.08
155
FM
|
-125
0.12
160
FM
|
-122
0.18
165
FM
|
-118
0.28
170
FM
|
-116
0.35
173
FM
|
-114
0.45
300
310
320
330
340
350
360
370
AM
AM
AM
AM
AM
AM
AM
AM
|
|
|
|
|
|
|
|
-95
-109
-124
-128
-131
-135
-135
-136
3.9
0.8
0.14
0.09
0.06
0.04
0.04
0.04
380
390
399
AM
AM
AM
|
|
|
-136
-136
-135
0.04
0.04
0.04
410
415
420
425
430
435
440
445
450
455
460
465
469
FM
FM
FM
FM
FM
FM
FM
FM
FM
FM
FM
FM
FM
|
|
|
|
|
|
|
|
|
|
|
|
|
-109
-116
-123
-126
-128
-128
-128
-127
-125
-122
-118
-114
-111
0.8
0.35
0.16
0.11
0.09
0.09
0.09
0.1
0.12
0.18
0.28
0.45
0.63
800
825
850
875
900
925
950
975
999
FM
FM
FM
FM
FM
FM
FM
FM
FM
|
|
|
|
|
|
|
|
|
-85
-90
-95
-100
-105
-110
-110
-110
-110
12.6
7.1
3.9
2.2
1.25
0.71
0.71
0.71
0.71
6.0 Umbau TH79 für 2m/70cm 9K6/Pocsag/ACARS RX ! TX ? :
Tja, ein recht schwieriges Kapitel...
Mit RX hat man beim TH79 keine Probleme. Das funktioniert
einwandfrei. Pocsag 512, 1200 und 2400 Baud ist auch kein
Problem. ACARS auf der Frequenz 131,725 MHz sollte auch
gehen.
Bei TX gibt es allerdings Probleme. Wer hierzu eine bessere
Lösung als folgende hat, der möchte diese doch preisgeben.
Je nach DIGI hat man mehr oder weniger Erfolge mit 9k6-TX.
Ich habe DB0ABH (ca. 15 KM) und DB0ZB (ca. 80 KM) getestet.
Bei DB0ABH kam jedes 20te und bei DB0ZB jedes 1,5te Frame an.
Das ganze ist eher ein Glücksspiel, ob es geht oder nicht.
Meist gehen kurze Frames recht zügig, doch bei längeren
Frames versucht der TH79 die Frequenz nachzuregeln :-(
Hat jemand ein Idee was man da machen könnte ???
Die PLL des TH79 ist recht schnell, so dass TX-Delay
von 8-9 im PR-Betrieb ohne weiteres möglich ist.
DL1RNO (Juri) und ich sind zur Zeit daran eine
2-Punktmodulation für das Gerät zu realisieren.
Die zwei extra verschiedenen 9k6-Modi des TNC2Multi müsste
das Gerät aber auch so ohne Probleme mitmachen...
Pocsag TX konnte ich leider noch nicht testen.
Für RX-Broadcast ist das natürlich eine feine Sache.
Viel Erfolg beim Umbau.
Als Hilfestellung spiel ich auch noch das Platinenlayout
für den Umbau mit ein.
6.1 Vorbereitung
a. Mikrofon, Akku, Antenne entfernen
b. Schraube an der Gleichstrombuchse und die kleinen Schrauben
auf der Rückseite mit einem passenden Kreuzschlitzschraubendreher entfernen
c. Gerät öffnen und CTCSS-Kappe entfernen (falls kein CTCSS-Modul
vorhanden)
d. Vorderseite des Gerätes auf das Display auf die linke Seite
legen und die Rückseite auf die rechte Seite legen.
e. Zum besseren Arbeiten muss das Flachbandkabel (recht empfindlich)
auf der links liegenden Geräteseite ausgesteckt werden. Dazu mit
einem kleinen Schlitzschraubendreher an den Seiten der Kabelbefestigung das braune Befestigungsteil nach oben hebeln. Jetzt
kann das Kabel herrausgezogen werden. Danach muss man noch die
Stromversorgung rot-schwarz-gelbes Kabel aus der Buchse herrausziehen.
6.2 RX-Modifikation 70cm
a. Auf der rechts liegenden Seite befindet sich eine schwarze Plastikummantelung um die Antennenbuchse herrum. Zum Entfernen der
Plastikumantelung hebelt man entweder den Dichtungsring um die
Buchse herum heraus, oder wendet mehr Kraft beim Herrausziehen an.
Vorher sollte man vielleicht ein bischen die Schaumstoffbefestigung
abziehen.
b. Jetzt müssen die beiden Schrauben der Antennenbuchse entfernt
werden. Danach kann die Antennenbuchse recht leicht weggelötet
werden. Vielleicht dazu den Draht während dem Löten etwas nach
links drücken.
c. Jetzt können die 5 Schrauben vom Kupferblech entfernt werden.
(vielleicht versteckt sich mal wieder eine Schraube unter dem
Schaumstoff oder unter dem Flachbandkabel :-))
Jetzt kann man die Platine von der Rückwand des Gehäuses trennen.
d. Des weiteren betrachten wir die Unterseite der entnommenen
Platine. Die Entnahme des RX-Signals erfolgt am IC MC3372D
(16-beinig) von Motorola (UHF-Demodulator). Das RX-Kabel wird
dort am Pin 9 (ganz oben rechts vom IC) angelötet. Das Kabel
kann man am geschicktesten wie gefolgt auf die andere Seite
gebracht werden. Hier eine kleine Grafik zur Verdeutlichung:
*-------*
!
!
*---------------------------*
!
!
*---*
!
!
!
!
!
!
!
!
!
*--*
!
!
!IC!
!
!
*--*
Kabelführung !
!
############## !
!
........<= hier
# ! Kabel hier durchziehen
!
! 3372 !
anlöten ####
!
! PIAK !
*---*
!
*------*
!
!
*----------*
!
!
! 10930
!
!
!
!
A42
!
!
!
*----------*
!
*-----------------------------------*
e. Ist das Kabel auch nicht zu kurz ?!? Jetzt kann diese
Seite wieder zusammengebaut werden. Vergesst den Antennenanschluss nicht :-)
6.3 RX-Modifikation 2m
a. Auf der rechts liegenden Seite des Gerätes befindet sich die
Antennenbuchse. An dieser Buchse muss der Anschluss weggelötet
werden. Dazu muss der Draht während dem Löten nach links gedrückt werden.
b. Jetzt kann die schwarze Plastikummantelung um die Antennenbuchse herrausgenommen werden. Dazu hebelt man entweder den
Dichtungsring um die Buchse herum heraus, oder wendet mehr Kraft
beim Herrausziehen an. Vorher sollte man vielleicht ein bischen
die Schaumstoffbefestigung abziehen.
c. Jetzt müssen die beiden Schrauben der Antennenbuchse entfernt
werden. Danach die 5 Schrauben vom Kupferblech entfernen.
(vielleicht versteckt sich mal wieder eine Schraube unter dem
Schaumstoff oder unter dem Flachbandkabel :-))
Jetzt kann man die Platine von der Rückwand des Gehäuses trennen.
d. Des weiteren betrachten wir die Unterseite der entnommenen
Platine. Die Entnahme des RX-Signals erfolgt am IC TK10930V
(24-beinig,VHF-Demodulator). Das RX-Kabel wird dort am Pin 12
(ganz unten rechts) vom IC angelötet. Das Kabel kann man am
geschicktesten wie gefolgt auf die andere Seite gebracht werden.
Hier eine kleine Grafik zur Verdeutlichung:
*-------*
!
!
*---------------------------*
!
!
*---*
!
!
!
!
!
!
!
!
!
*--*
!
!
!IC!
!
!
*--*
!
!
!
!
*------*
! Kabel hier durchziehen
!
! 3372 !
! #
!
! PIAK !
*-#-*
!
*------*
# !
!
*----------* # !
!
!
10930 !### !
!
!
A42 !#
!
!
............# <=!hier anlöten
*-----------------------------------*
e. Ist das Kabel auch nicht zu kurz ?!? Jetzt kann diese
Seite wieder zusammengebaut werden. Vergesst den Antennenanschluss nicht :-)
6.4 TX-Modifikation 2m/70cm
a. Auf der links liegenden Seite des Gerätes befindet sich eine
aufgesteckte Tochterplatine. Die darauf aufgeklebte Durchsichtsfolie muss abgezogen werden.
b. Wer auf der kleinen Platine nicht im Gerät löten will, der
kann die Platine auch aus der Fassung herrausziehen, nachdem
man den kleinen Stift unten rechts an der Platine abgelötet
hat. Ich habe wieder eine kleine Grafik vorbereitet.
#Kabel so verlegen
*------------------------------#------------*
!
#
!
! *--* *--*
#
!
! !PO! !TI!
*--------*
# *--------* !
! *--* *--*
!ATMEL707!
# ! LM301 ! !
! *--* *--*
*--------*
# *--------* !
! !PO! !TI!
#
!
! *--* *--*
#
!
!
#
!
!
*--*
#
!
!
!PO!
#
!
!
*--*
. . . .-c-*C*# <= hier
!
!
*--*
! TC7660 !
anlöten !
!
!TI!
*--------*
!
!
*--*
!
*-------------------------------------------*
Am 5ten Pin (oben rechts) des ICs TC7660 geht eine Leiterbahn
an einen kleineren Kondensator. Danach gehts auf gleicher
höhe zum großen Kondensator C332. Dort erfolgt die TX-Einspeisung am negativen Pol (nach dem Kondensator). Dann
kann das Kabel verlegt werden und die Klarsichtfolie wieder
daraufgedrückt werden.
6.5 Anschluß
a. Für den Anschluß wird es kein Patentrezept geben, aber ich
habe einen guten Tip (wenn kein CTCSS-Modul vorhanden ist),
wie man den Anschluß realisieren kann, ohne das Kabel rumhängen :-) Man besorge sich eine einreihige Buchsenleiste und
eine passende Stiftleiste. Jeweils 2 bzw. 3 Stück herrausbrechen.
b. Jetzt verlötet man das RX/TX-Kabel mit dem Buchsenpaar so,
dass das Kabel bis Höhe CTCSS-Einschub langt.
c. Am besten markiert man sich mit Farbe die RX- oder TX-Buchse.
Nun wird auf der links liegenden Seite das Buchsenpaar so auf
die Platine geklebt, dass die CTCSS-Kappe noch reinpasst.
d. Es sollte vielleicht noch ein Stück Isolierband auf das
Buchsenstück geklebt werden, damit beim Zusammenbauen
das Kupferblech nicht die Buchsen berührt.
e. Vor dem 9k6-Betrieb kann jetzt ganz einfach die Kappe
mit dem Fingernagel herrausgehebelt werden und das Handy
schaut aus wie vorher :-)
7. Reperatur des Gerätes
7.1 Frequenzdrehregler springt ? Volumeregler kratzt ?
Hierzu muss die vordere Seite des TH79 zerlegt werden um
die Regler für die Bearbeitung auszubauen.
a. Mikrofon, Akku, Antenne entfernen
b. Schraube an der Gleichstrombuchse und die kleinen Schrauben
auf der Rückseite mit einem passenden Kreuzschlitzschraubendreher entfernen
c. Gerät öffnen und CTCSS-Kappe entfernen (falls kein CTCSS-Modul
vorhanden)
d. Zum besseren Arbeiten muss das Flachbandkabel auf der links
liegenden Geräteseite ausgesteckt werden. Dazu mit einem kleinen
Schlitzschraubendreher an den Seiten der Kabelbefestigung das
braune Befestigungsteil nach oben hebeln. Jetzt kann das Kabel
herrausgezogen werden. Danach noch den Stecker zwischen
den Reglern (Kabel: gelb, schwarz, rot) wegziehen. Jetzt
kann man wunderbar mit der Vorderseite des TH79 arbeiten.
Volumeregler und Frequenzdrehregler abziehen.
Jetzt kann die aufgesteckte Kappe oben abgezogen werden.
Dichtungsring der Regler abziehen
Muttern der Regler mit einem 10er Gabelschlüssel entfernen.
Platinenbefestigung durch lösen der goldenen 2 Schrauben
(über der 2,5mm Buchse und auf gleicher Höhe neben dem IC)
entfernen.
j. Blech über den Reglern ein bischen nach oben drücken und die
Platine ein Stück anheben. Mikrofonanschlußbuchsen klein wenig
nach außen drücken und Platine ein Stück nach oben hochziehen.
Ja, der Gummiblock für PTT, Tone und Moni muss nicht extra
entfernt werden. Es klappt auch so.
Achtung: Tastenlockschieber kann leicht rausfallen !
k. Jetzt das Plastik, unter dem sich der Tastenblock befindet,
an den Befestigungen für die Platine nach oben ziehen und
herrausnehmen. Jetzt müsste man die Vorderplatine incl.
Display in der Hand haben.
l. Danach müssen die Regler deren Miniplatinen aus der Hauptplatine entlötet werden. Passt dabei auf die Leiterbahnen
auf der Hauptplatine auf. Die lösen sich recht schnell ab.
Am besten Entlötlitze benutzen. Ich hoffe ihr habt die Regler
jetzt lose in der Hand
e.
f.
g.
h.
i.
7.1.1 Der Frequenzdrehregler
Der Klemmring unten am Regler muß entfernt werden. Achtung:
So ein Ring springt gerne weit weg. Danach kann der innere
Stift herrausgenommen werden und mit einem Tuch sauber
gemacht werden (bei mir war er ein bischen schwarz).
In den Regler sprüht man genügend Kontaktspray hinein und
steckt den Stift wieder rein. Danach so oft wiederholen,
bis kein schwarzer Dreck mehr zu sehen ist. Nach dieser
Aktion sollte der Drehregler nicht mehr springen.
Beim Einbau sollte man auf die Lötstellen, die recht
nah aneinander liegen, achten !!
Vor dem Zusammenschrauben des Gerätes vielleicht mal
Punkt 7.2 druchlesen.
7.1.2 Der Volumeregler
Den Stift des Reglers muß man nach oben ziehen und in die
winzige Lücke das Kontaktspray reintröpfeln lassen. Dabei
den Regler immer drehen, damit die Flüssigkeit hineinlaufen
kann. Man kann noch versuchen auf der Rückseite etwas
hineinlaufen zu lassen. Nach dieser Aktion sollte der Volumeregler nicht mehr kratzen. Beim Einbau sollte man auf die
Lötstellen, die recht nah aneinander liegen, achten !!
Vor dem Zusammenschrauben des Gerätes vielleicht mal
Punkt 7.2 druchlesen.
7.2 Staub hinter dem Display ? Tasten funktionieren nicht ?
Am besten das Gerät wie in Punkt 6.1 beschrieben öffnen.
Man kann jetzt leicht das Display mit einem Tuch abwischen
und das Gerät innen von Staub befreien. Alternativ kann
man auch das Display an den Seiten mit einem kleinen
Schraubendreher herraushebeln.
Das Keypad kann man einfach mit Seife und Wasser abwaschen.
Meist steht viel Staub bzw. Fett unter den Tasten, das den
Kontakt verhindern kann.
7.3 Verkratzes Display ?
Probiert einfach eine Acrylglas Polier&Repair Paste aus.
Selbst die innere LCD-Anzeige hält stärkeren Druck beim
Polieren aus, falls diese auch verkratzt sein sollte.
Schaut danach wie neu aus...
7.4 seltsames Verhalten des TH79 ?
Tja, jetzt schmeisst doch nicht gleich euren TH79 weg !
Ich war auch schon am verzweifeln und habe festgestellt,
dass sich der TH79 sehr komisch verhält (sendet nicht auf
2m, sendet gar nicht, tut so als würde er senden usw...),
wenn das innere Flachbandkabel beschädigt ist. Meistens
ist an den Enden die Knickstelle die Ursache für das Übel.
Dort fehlt der Kontakt im Kabel, aber man kann sich z.B.
durch Abschneiden des Kabels an dieser Stelle und folgendem
Abschleifen der Isolierung helfen. Als Ersatzteil kann man
es auch für ca. 20 Märker nachbestellen.
7.5 Voltage Error im Display ?
Schaut mal nach, ob der Kontakt von der Tochterplatine zur
Mutterplatine noch in Ordnung ist.
Natürlich kann es auch sein, dass der TH79 zuviel Spannung
bekommt.
7.6 Displaykontrastprobleme ?
Meistens gibt es Kontaktschwierigkeiten zwischen dem LCDDisplay und den entsprechenden Leiterbahnen.
Zur Lösung des Problem einfach die kleinen Kreuzschlitzschrauben an der Leiterplatte unter dem Display ein
bischen nachziehen. Dadurch werden die Kontaktschwierigkeiten des Display-Leitgummis mit der Leiterplatte behoben.
Evtl. kann man noch Schraubenfestiger oder Nagellack auf
Schrauben schmieren, dass sie sich nicht wieder lösen.
7.7 Lebensdauer des Akkupacks vorbei ?
Hier eine Version von DL1RNO Juri:
Wechsel der Akkus im Akkupack PB-32
Mittels Sägemesser die beiden Akkupackhaelften aufsaegen.
Plus- und Minusschiene mit Seitenschneider an den Akkus
trennen.
Akkus entnehmen.
Loetfahne an der Diode - Kathodenseite trennen.
Grundplatte mit Diode abnehmen.
Minusloetfahne der Grundplatte bei 2 abtrennen.
Temperaturschalter und Isolierplatten entfernen.
Neue Akkus entsprechend zusammenloeten.
Isolierplatten einlegen nicht vergessen.
Akkus ins Pack einlegen, Anschluesse vorsichtig anloeten.
Gehaeuse mit Plastikkleber zusammenloeten.
Vorher unbedingt an den Kontakten U Messen, -falls doch eine
Kontaktierung misslungen ist.
Akkus: Habe kaum Anbieter finden koennen.
Typ: P40/700LF Hoehe 28mm Durchmesser 16mm passt (Fa. Kusch)
5 Stueck.
Auf den Akkus steht: 70AFK als Typ, sie besitzen 700mAh, also
besser als die Orginalen.
Aufbau des Akkupacks:
oben
+--------------| ________
+
|
| ________+
|
| |
________ |
|___| Diode
< ________+
+
|
Thermoschalter ________
|
| |
| ________+|____|___| |
|
|
|___+------+
8. Technische Informationen
8.1 Ausgangsleistung in den Amateurfunkbändern in Abhängigkeit
der Versorgungspannung
12V DC (Netzteil):
VHF bis 5,0 W
UHF bis 3,5 W
6V DC (600mAh Akkupack PB-32)
VHF bis 2,5 W
UHF bis 2,0 W
8.2 TOT-Funktion
Der TH79 schaltet nach 10 Minuten DauerTX aus Sicherheitsgründen (Überhitzung) ab. Diese Sicherheitsfunktion ist
Microprozessor gesteuert und kann nicht deaktiviert werden.
Mit der älteren Generation (siehe 1.0) ist es möglich ein
DauerTXbetrieb per Tastenkombination für 10 Minuten zu
aktivieren. VFO- oder MR-Taste drücken bis ein Pieps zu
hören ist und danach zusätzlich PTT drücken. Loslassen.
Wer Infos aus dem Servicemanual für den TH79 braucht soll sich bei
mir melden ! Ich verleihe es auch gerne mal.
Tips und Tricks pse to DG8NGN @DB0ABH.#BAY.DEU.EU or JANN @GMX.DE
Special Thanks to SQ1BSE Pawel, DD1JD Dirk, DL1RNO Juri, PA3GQJ Erik
DC2FR Wolfgang and DF9ZR Peter
73 und 55 vom Jann aus Nürnberg
This modification is read 1577 times.
top of page
20-02-1999
(TH-D7A) Kenwood TH-D7a TX band modification
Allows TX 136 - 173.995 and 400 - 479.995
Although I have performed this modification on my own radio with no problems noted, I take no responsibility in the accuracy of the
procedure shown below. If you do not feel comfortable working with small surface mount components, you should not be performing
this procedure.
1. Using Kenwoods program, download all saved settings from your radio. (All settings will be erased on power up after this mod)
2. Remove battery, antenna and freq/volume control knobs.
3. Loosen both fasteners from the antenna base and the freq/volume control shaft.
4. Remove the four screws that secure the back of the radio.
5. Pull the top plastic piece with the Led's off the top of the radio.
6. Gently pull on the rubber gasket that goes around the top of the radio.
7. Pull the bottom of the radio appart gently.Note: There will still be a ribbon cable connecting both parts (see picture). I removed
the ribbon cable to make it easier to work on.
8. Pull the brown part of the ribbon cable connector upwards using your fingernail or small screwdriver. This will release the ribbon
cable.
9. Locate the green wire. Under the green wire there are four small diodes in a neat row (they should have a miniature A on them if
your eyesight is good). Using a soldering iron, remove the middle two diodes.
10. Put the radio back together in the reverse order it was taken appart.
Modification Notes:
It has been suggested that modifications to the TH-D7a may somehow void the manufacturers free firmware update that is said to be
in the works. While I don't believe my modified transmitter will have any problems in getting its deserved firmware update, I did
however save both diodes for future replacement if it ever becomes necessary. This may be a good idea if you were ever to want to
"trade in" your radio to a store, or if warranty work is needed. (Just in case)
KD6VYV
Comments, additions? Email [email protected]
This modification is read 2375 times.
top of page
23-04-2000
(TH-D7A) TH-D7A Firmware upgrade
Author: Kenwood Communication, inc.
Service Bulletin no. 1063 (24 February 1999)
UPGRADE INFORMATION:
The firmware in the TH-D7A can be upgraded to allow the following features and functions:
In GPS mode, recognize latitude and longitude to the "ten-thousandths" of a decimal place (4-digit precision). Currently it reads to the
"hundredth" position.
In GPS mode, recognize negative temperatures such as - 20 degrees Fahrenheit.
Allow a comma to be used in the middle of a Command Sentence. The original firmware recognizes a comma as the end of a sentence.
UPGRADE PROCEDURE:
Send your TH-D7A to Kenwood Svc Ctr West for firmware upgrade. There is no need to call for an appointment or return
authorization.
Kenwood Svc Ctr West
13030 Alondra Blvd. #104
Cerritos, CA. 90701-2257
(562) 483-8740
Mon. – Friday 9:00AM – 6:00PM PST
At this time, only KSC-West can upgrade the firmware in the TH-D7A since special equipment is required to perform the work.
NOTE:
This upgrade applies to units with serial number 010xxxxx and below. New firmware was used in production from 011xxxxx. So that
there is no confusion, the following serial numbers have not yet been produced. When they are produced, they will have the new
firmware installed.
012xxxxx, 100xxxxx, 101xxxxx, 102xxxxx, ………..
This bulletin only applies to TH-D7A transceivers sold in the USA. This information may not be valid for other TH-D7 equipment sold in
Europe or other markets.
This upgrade is covered under the 1-year warranty period to the original owner.
This modification is read 1868 times.
27-10-2001
(TH-D7A) TH-D7A/E Conversion Document
Converting the TH-D7A/E makes possible the following function expansion.
●
●
Reception band expansion
118 MHz (air) band (K type suppoted)
Frequency band expansion
144 MHz band (Excepting sub 144MHz band)
430 (440) MHz band
●
Channel display mode
●
118 MHz FM/AM switching (K type suppoted)
1. Destination and microcomputer
There are types of microcomputers: the E type and the K destination type.
2. Destination diode
The destination is distinguished by the combination of four diodes for the control unit (X57-570X-XX)(B/4).
top of page
Destination diode Ref. No. D508 D507 D503 D502/Jumper
Destination diode No.
3
2
1
0
3. Destination list
The destination tables for the diode combination are Tables 1, 2.
4. Conversion method
Reception band and frequency band expansion
●
●
●
Eliminating one destination diode (D502) (actually, cutting short jumper W500) makes possible 118MHz band reception. (K type
suppoted) Also, the 144MHz and 430MHz (440MHz) band frequencies are extended.
For the conversion, W500 (short jumper) on the solder side of the B/4 control unit board is cut. Also, the destination can be
changed as in Table 1 and 2 by the presence/absence of destination diodes D503, D507, and D508.
After reception expansion, the band can be switched as follows with the [F] -> [A/B] key.
A Band (Upper Display)
144MHz <-> 118MHz
B Band (Lower Display)
430(440)MHz <-> sub 144MHz
Reference data for reception sensitivity and transmission output after the convesion are in Table 3 throiugh Table 5.
Adjustment method
The receive expansion band (118Mhz) was set at the factory prior to delivery. When realignment is required, place this unit in SET
mode and use the following procedure.
Set mode usage
The SET mode is used to adjust this unit. SET mode allows setting the level of the following items.
1. Squelch threshold on each band
2. S meter each band: 1st segment/All segment: ON
3. Hi/Lo/EL transmit output on each band
4. Overvoltage warning threshold (13.8V)
The level entered in SET mode is written on the EEPROM. This means the written data is kept intact even if power is cut off or the unit
is reset.
When replacing the EEPROM all items must be rewritten (reset).
Setting Procedure
Open the unit as shown, turn the power on (POWER ON) and momentarily short the SET point on the component (soldered) side of the
TX-RX unit (B/4) with tweezers or similar tool. (See the figure below.)
A beep tone sounds and a [--] mark appears on the display. This shows the unit is now in "SET mode".
Operation
1. Set the squelch threshold
●
Use the
key to align the bottom of the display with 'SQ' of the squelch adjust screen. Use the [BAND] key and select the
band and frequency with the encoder.
●
inputte SSG into the antenna termnal.
●
Pressing the
●
Set all the receive bands in the same way.
key sets the squelch threshold.
2. Set the S meter
●
Use the
key to align the bottom of the display with 'SM' of the S meter adjust screen. Use the [BAND] key and select the
band and frequency with the encoder.
●
Input the specified signal from the SSG into the antenna terminal.
●
Press the
●
Set all the receive bands in the same way.
key to turn on the 1st segment or press the
key to turn on all segments.
Entry Values
Input the SSG level for each band setting from the ANT terminal and press the correct key.
Other Items
1. Each setting you make is overwritten on the previous data so you can enter settings in any order or make individual settings.
2. The real-time display is updated every 200ms.
3. Items which have not been set are shown with an "FF" on the display.
4. Turn off the power (POWER OFF) in order to cancel "SET mode".
5. Reset the VFO after finished with the previous steps.
●
After making the Receive Expand Modification perform 118 Mhz band FM/AM switching in 'SET mode'.
1 Select the 118Mhz band and press the [MENU] key to alternately switch between AM and FM.
(When in AM, the MHz dot becomes an elongated horizontal bar.
After canceling SET mode, refer to the "Instruction Manual" for selecting AM/FM.
Channel Display Mode
Channel display mode is for showing only the memory channel numbers without displaying the frequency.
Use either of the following 2 methods to enter channel display mode.
Method 1 : Turn power on while holding down the [A/B] keys. (Check the instruction manual since this is referred to there.)
Method 2 : Remove a component from the printed circuit board.
Set channel display mode by removing the channel display dip diode (D516). When channel display is set with this method you cannot
return to the frequency display. (The channel display dip diode (D516) must once again be installed on the board in order to used the
frequency display.
• The mode sets to channel mode. VFO mode and CALL mode can no longer be set.
Operating Method
Before attempting the modification, write the data you need into the memory channel. (Write in at least one channel.)
1. Write the desired data into the memory channel.
2. The channel display mode switches alternately switches on or off each time power is turned on while the [A/B] keys are held
down. A memory name appears for channels in which a memory name is registered. However a CH is displayed for channels in
which nothing was registered.
Doing the Modification
Channel Display Mode
Use a solder iron and remove the dip diode (D516) on the soldered side of the control unit (B/4) circuit board (back side of
display).
Caution
• You cannot set channel display mode unless at least one memory channel has been registered.
Click to enlarge
Click to enlarge
Click to enlarge
Click to enlarge
top of page
This modification is read 1414 times.
28-10-2001
(TH-D7a) Memory Control Program for TH-D7 V. 0.01 Beta
Author: Kenwood
Download Memory Control Program for TH-D7 V. 0.01 Beta
top of page
This modification is read 1300 times.
03-01-1999
(TH-D7E) TH-D7E extended RX
From: PA0HWB@PI8HWB.#NBW.NLD.EU
As a former owner of a TH79E and now playing with the TH-D7E, i wondered if RX-EXTENSION was as simpel as just cutting one
wire...
The answer is YES..... just follow these steps :
●
●
●
●
●
●
●
●
●
Remove the battery-pack
Remove the 4 srews on the backside-edges
Remove the 2 knobs on top of the TH-D7E (volume and scrolling)
Remove the nuts of the antenna-connector and the roraty switch
Remove the TOP-cover
Carefully remove the metal-embedded-printed circuitboard (don't break the rubber sealingstrip!)
Look for a little GREEN wire near the speaker-connection on the PC-board
Just CUT the GREEN WIRE
Reassemble the TH-D7E in the reverse way
Now you have extended RX : Band A
136 - 174 Mhz
SUBband A 118 - 136 Mhz - AM or FM
Band B
400 - 480 Mhz
I didn't look for further command-expansion or additional options, so keep me posted for changes, related to the RX-expansion.
Enjoy your wide-range reception with the TH-D7E
Best 73, Hans Pa0hwb @ PI8HWB
Date: 15-08-2001
User comment
From: Peter Koch
Subject: How to open
Thanks to Peter Koch for the good pictures.
Click on any photo to enlarge the photo.
This modification is read 3254 times.
top of page
10-03-2001
(TH-D7E) Changes a TH-D7E into a TH-D7A and enables the SKY-COMMAND option
Author: PA3DFH, Robert - [email protected]
Although I have performed this modification on my own radio with no problems noted, I take no responsibility in the accuracy of the
procedure shown below. If you do not feel comfortable working with small surface mount components, you should not be performing
this procedure.
Using Kenwoods program, download all saved settings from your radio. (All settings will be erased on power up after this mod).
*****WARNING*****
Don't restore the memory channels as they force the radio to go into 'channel' mode because there seems to be an incompatibility
between a TH-D7E and a TH-D7A PC file. The only way to get rid of this channel mode is restoring the data again to the radio.
It's probably easier and saver to make the radio setting manually after this modification.
Remove battery, antenna and freq/volume control knobs.
Loosen both fasteners from the antenna base and the freq/volume control shaft.
Remove the four screws that secure the back of the radio.
Pull the top plastic piece with the Led's off the top of the radio.
Gently pull on the rubber gasket that goes around the top of the radio.
Pull the bottom of the radio appart gently.Note: There will still be a ribbon cable connecting both parts.
Locate the green wire. Under the green wire there are three small diodes in a neat row and place for number four (they should have a
miniature A on them if your eyesight is good). mount diode number 4 (a drop of solder probably also does it but I did not check it).
Put the radio back together in the reverse order it was taken appart.
After this the radio has changed into an A version which meens that:
●
●
●
●
1750 Hz tone does not work anymore
the center frequencies have changed
the default shift on 70 cm has changed to 5MHz
But the big fun: SKY COMMAND (menu 4) has been enabled. This is a very nice feature in combination with a TS2000 (see the
TS2000 section on how to modify that radio for sky command.
PA3DFH (Robert, [email protected])
User comment
Date: 14-02-2002
From: Aris SV2GQN
Subject: broblem mod th-d7e
73"
my name is Aris, i have a mod broblem with enable skycomand to th-d7e
i did this mod and stop work the up/down left/right cersor olso the rigth side of butons
any help adout this?
note:the th-d7 is the 1'version
top of page
This modification is read 2936 times.
27-10-2001
(TH-D7E) TH-D7A/E Conversion Document
Converting the TH-D7A/E makes possible the following function expansion.
●
●
Reception band expansion
118 MHz (air) band (K type suppoted)
Frequency band expansion
144 MHz band (Excepting sub 144MHz band)
430 (440) MHz band
●
Channel display mode
●
118 MHz FM/AM switching (K type suppoted)
1. Destination and microcomputer
There are types of microcomputers: the E type and the K destination type.
2. Destination diode
The destination is distinguished by the combination of four diodes for the control unit (X57-570X-XX)(B/4).
Destination diode Ref. No. D508 D507 D503 D502/Jumper
Destination diode No.
3
2
1
0
3. Destination list
The destination tables for the diode combination are Tables 1, 2.
4. Conversion method
Reception band and frequency band expansion
●
●
Eliminating one destination diode (D502) (actually, cutting short jumper W500) makes possible 118MHz band reception. (K type
suppoted) Also, the 144MHz and 430MHz (440MHz) band frequencies are extended.
For the conversion, W500 (short jumper) on the solder side of the B/4 control unit board is cut. Also, the destination can be
changed as in Table 1 and 2 by the presence/absence of destination diodes D503, D507, and D508.
●
After reception expansion, the band can be switched as follows with the [F] -> [A/B] key.
A Band (Upper Display)
144MHz <-> 118MHz
B Band (Lower Display)
430(440)MHz <-> sub 144MHz
Reference data for reception sensitivity and transmission output after the convesion are in Table 3 throiugh Table 5.
Adjustment method
The receive expansion band (118Mhz) was set at the factory prior to delivery. When realignment is required, place this unit in SET
mode and use the following procedure.
Set mode usage
The SET mode is used to adjust this unit. SET mode allows setting the level of the following items.
1. Squelch threshold on each band
2. S meter each band: 1st segment/All segment: ON
3. Hi/Lo/EL transmit output on each band
4. Overvoltage warning threshold (13.8V)
The level entered in SET mode is written on the EEPROM. This means the written data is kept intact even if power is cut off or the unit
is reset.
When replacing the EEPROM all items must be rewritten (reset).
Setting Procedure
Open the unit as shown, turn the power on (POWER ON) and momentarily short the SET point on the component (soldered) side of the
TX-RX unit (B/4) with tweezers or similar tool. (See the figure below.)
A beep tone sounds and a [--] mark appears on the display. This shows the unit is now in "SET mode".
Operation
1. Set the squelch threshold
●
Use the
key to align the bottom of the display with 'SQ' of the squelch adjust screen. Use the [BAND] key and select the
band and frequency with the encoder.
●
inputte SSG into the antenna termnal.
●
Pressing the
●
Set all the receive bands in the same way.
key sets the squelch threshold.
2. Set the S meter
●
Use the
key to align the bottom of the display with 'SM' of the S meter adjust screen. Use the [BAND] key and select the
band and frequency with the encoder.
●
Input the specified signal from the SSG into the antenna terminal.
●
Press the
●
Set all the receive bands in the same way.
key to turn on the 1st segment or press the
key to turn on all segments.
Entry Values
Input the SSG level for each band setting from the ANT terminal and press the correct key.
Other Items
1. Each setting you make is overwritten on the previous data so you can enter settings in any order or make individual settings.
2. The real-time display is updated every 200ms.
3. Items which have not been set are shown with an "FF" on the display.
4. Turn off the power (POWER OFF) in order to cancel "SET mode".
5. Reset the VFO after finished with the previous steps.
●
After making the Receive Expand Modification perform 118 Mhz band FM/AM switching in 'SET mode'.
1 Select the 118Mhz band and press the [MENU] key to alternately switch between AM and FM.
(When in AM, the MHz dot becomes an elongated horizontal bar.
After canceling SET mode, refer to the "Instruction Manual" for selecting AM/FM.
Channel Display Mode
Channel display mode is for showing only the memory channel numbers without displaying the frequency.
Use either of the following 2 methods to enter channel display mode.
Method 1 : Turn power on while holding down the [A/B] keys. (Check the instruction manual since this is referred to there.)
Method 2 : Remove a component from the printed circuit board.
Set channel display mode by removing the channel display dip diode (D516). When channel display is set with this method you cannot
return to the frequency display. (The channel display dip diode (D516) must once again be installed on the board in order to used the
frequency display.
• The mode sets to channel mode. VFO mode and CALL mode can no longer be set.
Operating Method
Before attempting the modification, write the data you need into the memory channel. (Write in at least one channel.)
1. Write the desired data into the memory channel.
2. The channel display mode switches alternately switches on or off each time power is turned on while the [A/B] keys are held
down. A memory name appears for channels in which a memory name is registered. However a CH is displayed for channels in
which nothing was registered.
Doing the Modification
Channel Display Mode
Use a solder iron and remove the dip diode (D516) on the soldered side of the control unit (B/4) circuit board (back side of
display).
Caution
• You cannot set channel display mode unless at least one memory channel has been registered.
Click to enlarge
Click to enlarge
Click to enlarge
Click to enlarge
This modification is read 2254 times.
top of page
28-10-2001
(TH-D7E) Memory Control Program for TH-D7 v. 0.01 Beta
Author: Kenwood
Download Memory Control Program for TH-D7 V. 0.01 Beta
This modification is read 2014 times.
top of page
29-09-2001
(TH-F6) Extended transmit for TH-F6A/E
This mod expand the frequency range to:
TH-F6A
TH-F6A
TH-F7E
TH-F7E
can
can
can
can
receive 142-152, 216-235, 420-450 MHz on A-band.
transmit 137-174, 216-235, 410-470 MHz.
receive 137-174, 410-470 MHz on A-band.
transmit 137-174, 410-470 MHz.
First remove the grey plastic Mic speaker Cover on the side of the radio (trust me if you forget it will be impossible to get it apart!).
Then the ant. and the vol tunning knob and the nuts below then, take the battery off and remove the two screws below the battery
pack.
Take the cover off very slow cause you damage the speaker wire if you mess up and go fast!.. You can leave the speaker
connnected, just push the top part off to the side very gently!
Once in the radio look over to the left side below the Mic...
You will see a series of three diodes remove the top one (See photos)
Look below the last diode and you will see a chip resistor (See photos)
I heated them very quick and placed a thin jewelers screwdrive under neeth and it came right off the board.
Just another note, make sure that the joystick mounts correct or else it might not function correct.
Caution:
These mods WILL reset and initialise the memory contents. So, write down important memory channel frequencies before performing
the mod.
This modification is read 6771 times.
top of page
28-01-2002
(TH-F6) PC-programming cable for Kenwood TH-G71A / TH-F6A
Author: [email protected] - KB7QPK.MODIFICATION.NET
*Note: The interface described here has been verified to work on the TH-G71 and also the the TH-F6A/TH-F7E.
●
●
●
●
●
●
●
●
Background
Plug pinout
Schematic
Building a homemade interface
Implementations built by other hams
Using the interface / Software
Debugging problems with the interface
Programming the radio with a PC
Background
I wanted to make my own cable to program my Kenwood TH-G71A ham radio with a PC, but the owner's manual simply did not show
the pinout needed for the connector plugs. I searched the web but was not able to find this information but I did discover that several
other radios used an RS-232-to-logic (0-3.3V) level-shifter and a Full-duplex serial connection (separate RXD / TXD), and found
schematics for such interfaces for other radios. I also found a device called the "MAK interface" which claimed to work with the THG71A, and the web site listed an interface cable.
With these clues, and after studing the signals coming out of the radio (and lots of debug time ...), I finally figured out the plug
connections at the radio end.
I was able to use basically the same interface schematic that was claimed to work for the Kenwood PG-4S cable (which is used for the
TM-G707 / TM-V7 radios instead of the Kenwood TH-G71).
Refer to http://www.fiberpipe.net/~tateb/pg4s.html for the schematic for the PG-4S interface:
The DB-9 connector to the PC is the same, but the connector on radio side is different. (Instead of the 6-pin mini-DIN connector, use
the 2.5mm and 3.5mm phono plugs for the TH-G71)
Refer to Drawing at the URL above (Tate Belden's site), right hand side, starting at the top:
1. Ignore the tie between pins 4 and 5 of the mini-DIN connector. (There is no such tie on the TH-G71 Cable)
2. The interface's "TXD" goes to Ring of 2.5mm plug. (cathode of the diode on the interface)
3. The interface's "RxD" goes to the Shield of 3.5mm plug. (collector of NPN on interface) (Or just use a mono 1/8" jack and
connect this to the shield!)
4. GND goes to shield of the 2.5mm plug.
5. The tips of both plugs are No-connect.
Schematic tweaks:
Note: If you have an interface that already works on another radio such as the Kenwood TM-G707 / TM-V7, then you may not need to
make these changes!
1. Change R1 from 150ohm to 1K ohm (this is the resistor feeding the zener diode). I found that 150ohms loaded the line too much
and the resulting voltage was too low to power the interface from the Serial port. If you have problems, be sure that the cathode
of the Zener is at about 4.9V. I found that the interface worked down to about 3.2V when I just powered this from a variable
power supply instead of through the PC serial port (after removing R1 and the zener and just applying voltage at C1)
2. add a 150K ohm resistor between the Radio TXD to gnd. I did this just to keep the voltage down on the TxD pin because the
radio seems to be 3.3V I/O pin (not 5V)
TH-G71 PC cable interface plugs.
_________
2.5mm plug
(3/32")
|
|
|
shield ring tip
|_______ __ __
|
| |
|_______|__|__/
|
|
---------
|
|
GND
|
|_ N/C
|
Radio TXD (out)
_________
3.5mm plug
(1/8")
shield ring tip
|_______ __ __
|
| |
|
| |
|---- N/C
|_______|__|__/
|
|
|_________ N/C
--------|
|________ Radio RxD (in)
|
|
|
|
|
Update: Dec 2001: The Kenwood manual for the newer TH-F6 radio shows the pinout for the Plugs (page 46). Through
Dec 17, 2001, this web page showed the Ring and Shield of the 3.5mm plug both shorted together, but I have updated the
plug pinout to match the Kenwood documentation, and I confirmed that it does work as shown, without the connection to
the ring.
I was able to find a 90-degree "elbow" shaped, 2.5mm stereo plug at Radio Shack (p/n 274-298).
Here is the resulting schematic:
Disclaimer: Although this works fine for me, use at your own risk.
Building it - my homemade interface
I built the interface on a Small PC board originally purchased from Circuit Specialists , Mesa, AZ.
It is "Datak" brand prototyping board part number 12-607.
(RadioShack.com carried them as p/n 910-3811 (in their catalog) but I don't see them on-line anymore.)
A recent Google Search on datak 12-607 found the following as possible sources:
●
●
Ocean State Electronics (Westerly, RI. (800)866-6626) [email protected]
Willy's Electronic Supply (National City, CA. (619)477-2119) [email protected]
Click a figure to pop up a larger view of that figure in a new window.
Interface Photo 1
Interface Photo 2
Component Placement Diagram
Other implementations
PT2RFL, Rubens Fiuza Lima, is a professional circuit board designer who designed this tiny two-sided
surface-mount board (blank board shown here) which fits inside a DB-9. He had several PCB's fabricated.
More photos here.
Torbjörn Söderberg (SM4XDJ) in Sweden managed to fit the entire circuit board inside a DB-9 Clamshellstyle connector for his TH-F7E (European version of the TH-F6A). More photos here.
Torbjörn used R1=150ohm and omitted R7, as in the original schematic mentioned earlier.
Bill Verstelle (N7OQ [email protected]) made a ~1" x 2" printed circuit board which he fit into a film
canister.
Using the interface / software
1. For TH-G71: Menu 15, TC ON
Tranceiver Control must be enabled, or else you will get a communication timeout error when trying to communicate with the
radio after connecting the cable up to your PC. "TC ON" enables the plugs on the side to work as data lines instead of as external
mic/speaker.
Press the "F" button, and then Band, turn the main tuning
knob to Menu 15 Transceiver Control and turn it ON for
programming. You will need to use a free com port (Com 1 or 2) on the PC.
Note: For the TH-F6 radio, the Kenwood manual states: Access Menu No. 9 and select "PC"
2. Kenwood Programming software
Download the PC Programming s/w from Kenwood FTP site ftp://ftp.kenwood.net or web page http://www.kenwood.net/amateur
-> downloads -> software -> THG71A
You should see the files mg71200.exe and readme.txt.
Install the software and Run mcp-g71.exe. go to file menu, and be sure your com port is set correctly, then turn on radio, and
plug in, and do "Radio-> Read". Try it a few times -- I found that it sometimes said something like "Communication timeout" the
first time I tried after connecting up the interface.
Debugging problems with the interface
1. Be sure you have done everything listed under "Use". If you are really stuck, you can try these checks:
2. Verify power + side:
A. With the interface connected to the pc, connect a meter to node 1 (cathode of the Zener) and ground.
B. In the MCP program, do radio->read (you should see "reading data from radio") As it is "trying" to read the radio, quickly
check the voltage.
C. The voltage should be about 4-5 Volts. This is needed to power the interface from the serial port.
Note: The voltage at the RTS and CTS pins of the DB-9 connector will NEGATIVE when the Com port is inactive (when you
are not trying to read or write to the radio with the software). But the voltage will go POSITIVE (about 9V on my PC) when
the Com port is active.
Condition
RTS/CTS Voltage
Com port idle, not reading/writing radio about -6 to -12V
Com port active, reading/writing radio
about +6 to +12V
D. If you don't have good power here, something is wrong. (This is why I increased R1 resistance from the original schematic as the original lower value loaded my serial port down too much due to the diode at node 1).
You can power the interface externally:
Remove the rts/cts connections from the PC and just power node 1 with a battery or external power supply. This was the
main problem I had getting my interface working (besides trying to figure out the pinouts of kenwood jacks).
3. Verify power negative (-) side:
A. With the interface connected to the pc, connect a meter to node 7 (negative terminal of the Cap C2)
B. In the MCP program, do radio->read (you should see "reading data from radio" As it is "trying" to read the radio, quickly
check the voltage.
C. The voltage should be negative (more negative than about -5 or -6V) This is needed to generate a negative voltage back to
the PC RxD.
4. If this power is good in the previous steps, but the interface still does not work, recheck the interface to make sure everything is
wired up correctly including all ground connections, and the pinouts the serial port DB connector. Check all part values and that
the polarity of caps is correct, and that NPN and PNP transistor are wired up the correct way.
5. If that does not find any problems, I would then test the interface to be sure it does the correct level-shifting and "inversion" of
the levels from the PC (RS-232) to lower-voltage for the Radio.
This can be a bit tricky and you need some power supplies and clips todo this, with the interface disconnected from the PC and
the Radio.
Basically, you want to verify the following:
A. With TXD (out from the radio) = 0V, the RxD to PC should be about 5V
B. With TXD (out from the radio) = 3-5V, the RxD to PC should be between -5V to -12V.
C. With TXD (out from the PC) between -5V to -12V, the RxD to the Radio should be "floating" (Q2 off) (and the weak pullup in
radio pulls the node to a logic "high" value)
D. With TXD (out of the PC) > 5V or so, the RxD to Radio should be 0V (Q2 is "on").
But the catch is that the interface generates the -12V (or so) by the switching on TXD. So you need to fake it out to be sure you
have this voltage (which should be there in step 3c) because you don't have the interface connected to the PC anymore.
Otherwise, you won't get the negative voltage in step 5B.
Programming the TH-G71
See this page for information used to program and control the TH-G71 through a serial port. Serial Port command protocol is provided.
This is useful if you are interested in how Kenwood's MCP memory control program works, or if you are interested in programming the
radio using a PC.
Chris Koza KB7QPK
This modification is read 1780 times.
top of page
02-01-2002
(TH-F7) Extended TX Mods by G1IVG
Author: Colin - G1IVG - [email protected]
Notes:
This modification will reset your radio and therefore clear all pre-programmed memories etc.
If you have never removed surface mount devices before, then experiment on some old PCB's first, before destroying or making a
mess of your new radio.
Make sure you use a low wattage soldering iron and tweezers to lift the components from the PCB.
If you decide to do this modification, you do entirely at your own risk.
1. Remove the battery from the radio.
2. Remove the grey rubber protective cover from the right hand side of the radio.
3. Remove the black plastic volume and frequency change knobs by gently pulling them vertically.
4. Remove the locking nut from the SMA aerial connector.
5. Remove the locking nut from the frequency change encoder / volume control shaft.
6. With the battery removed, look at the rear of the radio and remove the two screws at the bottom.
7. To open your radio's case. It's best to gently open the radio from the bottom until you have a gap of about 10mm. Then hold the
front panel in the palm of your left hand and gently slide the main body of the radio downwards with your right hand, until the
aerial and frequency change encoder shaft are clear of the holes in the top panel of the radio. Take care not to open the radio to
fast, because the internal speaker wires are very short.
8. With the radio opened up like a book, look at the left hand side of the PCB just to the left of the PCB mounted microphone. You
should see two diodes and also a open pad just below were another diode could be fitted.
These photo's shows radio before modification.
9. Remove only the top diode. There still should be a diode in the middle position and the bottom position should be left empty as
original.
10. Finally look just below the lower open pad (3rd position) you should see a resistor to the left of the key pad number "1". This also
must be removed to complete the modification.
This photo shows radio after modification.
11. Reassemble the radio taking care not to trap the speaker wires and also check that the small joystick and keypad membrane
seats correctly.
OK That's it.........................
The TH-F7E will now Transmit and Receive on the "A" band from:
137MHz to 174MHz FM.
410MHz to 470MHz FM.
Warning.
Always use a tuned aerial for the frequency you intend to transmit on, as the original supplied aerial is only designed for use on our
amateur 2m and 70cms bands.
If your aerial is not tuned for the frequency you wish to transmit on, damage to the PA in the radio can be caused if you transmit on
high or even low power.............................You have been warned!!!!
Date: 24-03-2002
User comment
From: dg5mec
Subject: Warning Kenwood TH-F7 extended TX
I have one little warning when using an F7 with extended TX range. Transmitting in the upper 2m band (above 160 MHz or so) with a
non-resonant antenna (like the original antenna is in this range) can fry the UHF(!) RX preamp transistor.
It is an GaAs-Fet (seems to be an 3SK299), an replacement is difficult to find.
I had three defective transceivers, all with rx sensitivity around 1 uV at 430 MHz, and although there is no evidence that really this
was the reason it is almost for sure that the owners fried their F7 this way!
Date: 26-03-2002
User comment
From: dg5mec
Subject: Replacement found.
I even fried my own radio this way, but I was able to fix it;
Replaced the 3SK299 with a CF739, unfortunately this one has a bigger housing and was a bit hard to get in place, but now the radio
is like new (with the tester even a bit more sensitive, but in all-days use just identical to the original state), and this transistor seems
to be more robust, I was up to now not able to kill it any more :)
This modification is read 2234 times.
top of page
19-07-1998
(TH-G71A) TH-G71A Beyond Mars modification
Author: Jerry, KK6YO
11/03/97
This modification is provided "as is" and is subject to change without notice, Kenwood Service Corporation (Nor I) make any warranty
of any kind with regards to This modification procedure, including, But not limited to, the implied warranties of merchantabilty and
fitness for any purpose. Kenwood Service Corporation(And I) shall not be liable for any error or for incidental or consequential damage
in conjuction with the furnishing, performance, or use of this modification procedure.
Modification procedure.
1. Remove The battery Pack and antenna.
2. Open the SPKR/MIC dust cover.
3. Remove the three screws from the back panel of the transceiver
4. Carefully lift up the bottom end of the back panel and pull the entire back panel towards the bottom of the transceiver to clear
the antenna connector from The top pnnel. Do not break the ribbon cable That connects the back panel PCB to the front case
PCB.
5. Set the back panel to the left side of the front case.
6. Locate and remove diode D512 and D513 from the bottom right side of the front case PCB.
7. Assemble the transceiver by reversing the steps listed above. The transciever will automatically reset when turned on.
TX Capability.
136.000 - 173.995MHz
400.000 - 469.995MHz
RX Capability.
118.000 - 173.995MHz,
320.000 - 399.99375MHz,
849.000 - 868.9875MHz
400.000 800.000 894.000 -
469.995MHz
823.9875MHz
949.9875MHz
Note: This change also allows the transceiver to access a previously suppressed menu number 16. this menu allows the transceiver to
switch between FM and AM in the ll8Mhz- 136.000MHz range.
Another Note: If you only want to expand the RX,Remove D512 ONLY.
For MARS/CAP TX expand only, cut the green wire(W500)ONLY.
Here is a drawing of the radio. (Which tells you just about everything you need to know.)
Date: 08-09-2001
User comment
From: Mark
Subject: Soldering tip
For those who want to do this mod, but haven't the steadiest of hands for micro soldering, here's how I did it:
I removed the tip from my 15 Watt pencil iron (Radio Shack one with the blue handle), bent a small needle around the screw that
holds the tip in, and secured it. I bent the other end down for the sake of not having anything else touch the radio. I secured the gun
with those "Helping Hands" that Radio Shack sells (Those alligator clips on movable arms, with a heavy base).
Once heated up, I took another pin (One with a larger head for manuverability), and pried up the diode. Worked great! I can't
believe the sensitivity on 800 trunking! I only did the recieve mod (D512). The transmit mod made no sense to do, since
transmitting outside of the Amateur Bands is illegal.
Note: Your radio will reset when powered up. Write down your memories, or if you have the computer interface, do a save.
Remember, if you are doing the computer programming, to set menu item #15 to "on", since computer control is defaulted off.
Also, the usual disclaimer: Use this info at your own risk. Your warranty can be voided by improper procedure of attempting this
mod. If you aren't sure you can complete this mod on your own, have someone do it for you. I won't be responsible for a cooked
radio.
73/Mark/W4KSR.
This modification is read 2440 times.
28-01-2002
(TH-G71A) PC-programming cable for Kenwood TH-G71A / TH-F6A
Author: [email protected] - KB7QPK.MODIFICATION.NET
*Note: The interface described here has been verified to work on the TH-G71 and also the the TH-F6A/TH-F7E.
●
●
●
●
●
●
●
●
Background
Plug pinout
Schematic
Building a homemade interface
Implementations built by other hams
Using the interface / Software
Debugging problems with the interface
Programming the radio with a PC
Background
top of page
I wanted to make my own cable to program my Kenwood TH-G71A ham radio with a PC, but the owner's manual simply did not show
the pinout needed for the connector plugs. I searched the web but was not able to find this information but I did discover that several
other radios used an RS-232-to-logic (0-3.3V) level-shifter and a Full-duplex serial connection (separate RXD / TXD), and found
schematics for such interfaces for other radios. I also found a device called the "MAK interface" which claimed to work with the THG71A, and the web site listed an interface cable.
With these clues, and after studing the signals coming out of the radio (and lots of debug time ...), I finally figured out the plug
connections at the radio end.
I was able to use basically the same interface schematic that was claimed to work for the Kenwood PG-4S cable (which is used for the
TM-G707 / TM-V7 radios instead of the Kenwood TH-G71).
Refer to http://www.fiberpipe.net/~tateb/pg4s.html for the schematic for the PG-4S interface:
The DB-9 connector to the PC is the same, but the connector on radio side is different. (Instead of the 6-pin mini-DIN connector, use
the 2.5mm and 3.5mm phono plugs for the TH-G71)
Refer to Drawing at the URL above (Tate Belden's site), right hand side, starting at the top:
1. Ignore the tie between pins 4 and 5 of the mini-DIN connector. (There is no such tie on the TH-G71 Cable)
2. The interface's "TXD" goes to Ring of 2.5mm plug. (cathode of the diode on the interface)
3. The interface's "RxD" goes to the Shield of 3.5mm plug. (collector of NPN on interface) (Or just use a mono 1/8" jack and
connect this to the shield!)
4. GND goes to shield of the 2.5mm plug.
5. The tips of both plugs are No-connect.
Schematic tweaks:
Note: If you have an interface that already works on another radio such as the Kenwood TM-G707 / TM-V7, then you may not need to
make these changes!
1. Change R1 from 150ohm to 1K ohm (this is the resistor feeding the zener diode). I found that 150ohms loaded the line too much
and the resulting voltage was too low to power the interface from the Serial port. If you have problems, be sure that the cathode
of the Zener is at about 4.9V. I found that the interface worked down to about 3.2V when I just powered this from a variable
power supply instead of through the PC serial port (after removing R1 and the zener and just applying voltage at C1)
2. add a 150K ohm resistor between the Radio TXD to gnd. I did this just to keep the voltage down on the TxD pin because the
radio seems to be 3.3V I/O pin (not 5V)
TH-G71 PC cable interface plugs.
_________
2.5mm plug
(3/32")
shield ring tip
|_______ __ __
|
| |
|_______|__|__/
| |
|
|_ N/C
--------|
|
GND
Radio TXD (out)
|
|
|
|
_________
3.5mm plug
(1/8")
shield ring tip
|_______ __ __
|
| |
|
| |
|---- N/C
|_______|__|__/
|
|
|_________ N/C
--------|
|________ Radio RxD (in)
|
|
|
|
|
Update: Dec 2001: The Kenwood manual for the newer TH-F6 radio shows the pinout for the Plugs (page 46). Through
Dec 17, 2001, this web page showed the Ring and Shield of the 3.5mm plug both shorted together, but I have updated the
plug pinout to match the Kenwood documentation, and I confirmed that it does work as shown, without the connection to
the ring.
I was able to find a 90-degree "elbow" shaped, 2.5mm stereo plug at Radio Shack (p/n 274-298).
Here is the resulting schematic:
Disclaimer: Although this works fine for me, use at your own risk.
Building it - my homemade interface
I built the interface on a Small PC board originally purchased from Circuit Specialists , Mesa, AZ.
It is "Datak" brand prototyping board part number 12-607.
(RadioShack.com carried them as p/n 910-3811 (in their catalog) but I don't see them on-line anymore.)
A recent Google Search on datak 12-607 found the following as possible sources:
●
●
Ocean State Electronics (Westerly, RI. (800)866-6626) [email protected]
Willy's Electronic Supply (National City, CA. (619)477-2119) [email protected]
Click a figure to pop up a larger view of that figure in a new window.
Interface Photo 1
Interface Photo 2
Other implementations
Component Placement Diagram
PT2RFL, Rubens Fiuza Lima, is a professional circuit board designer who designed this tiny two-sided
surface-mount board (blank board shown here) which fits inside a DB-9. He had several PCB's fabricated.
More photos here.
Torbjörn Söderberg (SM4XDJ) in Sweden managed to fit the entire circuit board inside a DB-9 Clamshellstyle connector for his TH-F7E (European version of the TH-F6A). More photos here.
Torbjörn used R1=150ohm and omitted R7, as in the original schematic mentioned earlier.
Bill Verstelle (N7OQ [email protected]) made a ~1" x 2" printed circuit board which he fit into a film
canister.
Using the interface / software
1. For TH-G71: Menu 15, TC ON
Tranceiver Control must be enabled, or else you will get a communication timeout error when trying to communicate with the
radio after connecting the cable up to your PC. "TC ON" enables the plugs on the side to work as data lines instead of as external
mic/speaker.
Press the "F" button, and then Band, turn the main tuning
knob to Menu 15 Transceiver Control and turn it ON for
programming. You will need to use a free com port (Com 1 or 2) on the PC.
Note: For the TH-F6 radio, the Kenwood manual states: Access Menu No. 9 and select "PC"
2. Kenwood Programming software
Download the PC Programming s/w from Kenwood FTP site ftp://ftp.kenwood.net or web page http://www.kenwood.net/amateur
-> downloads -> software -> THG71A
You should see the files mg71200.exe and readme.txt.
Install the software and Run mcp-g71.exe. go to file menu, and be sure your com port is set correctly, then turn on radio, and
plug in, and do "Radio-> Read". Try it a few times -- I found that it sometimes said something like "Communication timeout" the
first time I tried after connecting up the interface.
Debugging problems with the interface
1. Be sure you have done everything listed under "Use". If you are really stuck, you can try these checks:
2. Verify power + side:
A. With the interface connected to the pc, connect a meter to node 1 (cathode of the Zener) and ground.
B. In the MCP program, do radio->read (you should see "reading data from radio") As it is "trying" to read the radio, quickly
check the voltage.
C. The voltage should be about 4-5 Volts. This is needed to power the interface from the serial port.
Note: The voltage at the RTS and CTS pins of the DB-9 connector will NEGATIVE when the Com port is inactive (when you
are not trying to read or write to the radio with the software). But the voltage will go POSITIVE (about 9V on my PC) when
the Com port is active.
Condition
RTS/CTS Voltage
Com port idle, not reading/writing radio about -6 to -12V
Com port active, reading/writing radio
about +6 to +12V
D. If you don't have good power here, something is wrong. (This is why I increased R1 resistance from the original schematic as the original lower value loaded my serial port down too much due to the diode at node 1).
You can power the interface externally:
Remove the rts/cts connections from the PC and just power node 1 with a battery or external power supply. This was the
main problem I had getting my interface working (besides trying to figure out the pinouts of kenwood jacks).
3. Verify power negative (-) side:
A. With the interface connected to the pc, connect a meter to node 7 (negative terminal of the Cap C2)
B. In the MCP program, do radio->read (you should see "reading data from radio" As it is "trying" to read the radio, quickly
check the voltage.
C. The voltage should be negative (more negative than about -5 or -6V) This is needed to generate a negative voltage back to
the PC RxD.
4. If this power is good in the previous steps, but the interface still does not work, recheck the interface to make sure everything is
wired up correctly including all ground connections, and the pinouts the serial port DB connector. Check all part values and that
the polarity of caps is correct, and that NPN and PNP transistor are wired up the correct way.
5. If that does not find any problems, I would then test the interface to be sure it does the correct level-shifting and "inversion" of
the levels from the PC (RS-232) to lower-voltage for the Radio.
This can be a bit tricky and you need some power supplies and clips todo this, with the interface disconnected from the PC and
the Radio.
Basically, you want to verify the following:
A. With TXD (out from the radio) = 0V, the RxD to PC should be about 5V
B. With TXD (out from the radio) = 3-5V, the RxD to PC should be between -5V to -12V.
C. With TXD (out from the PC) between -5V to -12V, the RxD to the Radio should be "floating" (Q2 off) (and the weak pullup in
radio pulls the node to a logic "high" value)
D. With TXD (out of the PC) > 5V or so, the RxD to Radio should be 0V (Q2 is "on").
But the catch is that the interface generates the -12V (or so) by the switching on TXD. So you need to fake it out to be sure you
have this voltage (which should be there in step 3c) because you don't have the interface connected to the PC anymore.
Otherwise, you won't get the negative voltage in step 5B.
Programming the TH-G71
See this page for information used to program and control the TH-G71 through a serial port. Serial Port command protocol is provided.
This is useful if you are interested in how Kenwood's MCP memory control program works, or if you are interested in programming the
radio using a PC.
Chris Koza KB7QPK
This modification is read 798 times.
top of page
02-12-1999
(TH-G71E) TH-G71E repeater shift
To modificate a TH-G71E, you just have to cut the green wire as you can see at the photo from the TH-G71A.
Now you can send and receive just like the A, but with european repeater shift!
This modification is read 1568 times.
top of page
30-04-2000
(TH-G71E) Il nuovo KENWOOD TH-G71E by HB9OAE
Author: Maico Kelly - [email protected]
Nuovo ricetrasmettitore palmare VHF/UHF a doppia banda Tastiera illuminata e memoria alfanumerica Menu' di sistema Un ulteriore
aiuto all'operatore e' fornito dal menu' di sistema in grado di controllare con facilita' tutte le funzioni disponibili.
Potenza e prestazioni elevate Grazie all'antenna dalle elevate prestazioni, e' in grado di erogare fino a 6 W (VHF) 5,5 W (UHF) con
alimentazione diretta a 13,8 V cc.
E' inoltre possibile regolare la potenza RF su 3 livelli.
200 canali multifunzioni In ogni canale e' possibile registrare tutti i valori di frequenza, shift, dicitura alfanumerica.
CTCSS encoder/decoder di serie.
MIL STD810E rispondente alle severe norme MIL STD810E. memorie DTMF , e' possibile memorizzare l'apparato tramite PC.
APO funzione di autospegnimento.
TIMER di fine trasmissione.
Circuito economizzatore di batteria.
PREZZO:£.730.000 da www.radiosystem.it , da www.radaufunk.com SFR. 440.MODIFICA ricevuta da IW4BMP
Esiste una modifica unica che provvede ad allargare la banda operativa sia in ricezione che in trasmissione per il TH-G71. Occorre
aprire l'apparato facendo attenzione al flat cable che trattiene la parte frontale con quella posteriore, nella parte frontale, all'interno,
individuare un ponticello di filo verde (di solito) situato nell'angolo del circuito stampato in basso a destra. Richiudere l'apparato
eseguire un reset ed ora é pronto per trasmettere: 136/174 e 400/470 mHz e ricevere : 118/136 in AM 320/400 800/950 FM.
Buon divertimento e 73s' de [email protected] maico.
This modification is read 1465 times.
13-11-2000
(TK-240) Kenwood TK-240 programmed with 16 channels
Author: Thomas Scherrer-Tangen
This Kenwood handie can be programmed with 16 Channels in the VHF band.
Full RX and TX from about 130MHz to 170MHz, with a resolution of 6.25 KHz.
It can also transmit a pilot (subtone) also programable.
Programming instructions:
●
Remove the small black plastic sticker, then 4 holes with 4 small PCB contacts can be seen.
●
Turn radio off
●
make contact in hole 2 (see picture)
●
and press the SQ open key,
●
at the same time turn radio on.
Now ALL channels has been erased at radio is reset.
Display shows 1 150 0000, the first small 1 is the channel, then the RX freq is 150.0000 MHz.
●
Now use the channel button to adjust to the disired freq, pres the Light button for 1 MHZ range when adjusting.
●
Now save RX freq in channel 1 with the TX button, display show 1 ------- now same procidure for the TX freq.
●
then pres TX again and OFF shows in the display, this is the pilot tone. adjust to the disired freq and press TX.
●
now Channel 2 shows.... go on to END shows, turn off and on again.. done.
Enter EDIT mode:
●
Turn radio off
●
make contact in hole 2
●
and press the LIGHT key,
Now you can see all freqs and edit whay ever you want, use TX as the enter key.
top of page
Thomas Scherrer-Tangen
This modification is read 1116 times.
top of page
23-11-2001
(TK-270) TK370/270 high-band h/t radio instructions
Author: Etchenique Fabian - [email protected]
To place unit in programming mode: With power OFF, hold down the ! button (upper side button above PTT (Push-To-Talk) key with a
square molded on it) with left index finger and the DIAL button with left thumb. Turn on unit. Hold buttons down until SEL appears on
the display. Release buttons. Press TA button. CH 1 will appear in display. Unit is now in programming mode.
To program (change) frequencies in any of the 32 channel positions: Use the rotary channel selector knob to scroll to the desired
channel position (CH 1 through CH 32). Press the PTT key on the left side of the unit. The channel's receive frequency will be
displayed. To change the frequency in small increments: use the rotary channel selector knob to move up or down.
To change the frequency in 1 MHz (large) increments, press and hold the ! button and use the rotary channel selector knob to scroll
up or down in 1 MHz increments. The same method is used to alter transmit frequencies.
Programming sequence 'positions' for each channel (controlled by pressing the PTT key while in programming mode and on the
desired channel). Repeated PTT pressing is known as scrolling.
1st - press of the PTT key - Receive frequency,
2nd - Receive tone,
3rd - Transmit frequency, 4th - Transmit tone,
5th - (off),
6th - (off),
7th - Channel in/out of scan list (Add or dEL),
8th - (off),
9th - (off),
10th - Transmit power (H) = high.
Tones - sub-audible tones are used to eliminate the reception of undesired signals or to allow access to specific repeater sites (tones 1
through 8, listed on channel card). Displayed numbers are the tone frequency, in Hz (cycles per second).
To program/modify tones: while tone status is displayed (by scrolling to position 2 for receive tone or 4 for transmit tone) in the
programming sequence, either rotate the channel selector knob until the desired tone is displayed or use the LO key to turn the tone
function OFF or enable the programming of the tone function (display the tone) from OFF. Note: The display of 023 is not a valid tone
and should be scrolled past and not be used.
To leave programming mode, use the PTT key to scroll until CH 1 through CH 32 or OFF is displayed. Turn radio off. Unit is ready to be
used when it is turned on again.
Non-Programming mode Functions
To add or delete a channel from the scan list: scroll to the desired channel (using the rotary channel knob). Press and hold the lower
side button (below the ! button) and press the SCN button. Release the buttons. A small "A" displayed above the channel number
indicates that the channel is in (added) to the scan list.
Squelch adjustment: To increase the squelch level (to eliminate interference) or lower the squelch level (to receive weak
transmissions), first ensure that the .scan mode is off. Press and hold down the lower side button (below the ! button) and then press
the LO button. Release the side button. Unit is now in squelch adjustment mode (with SqL displayed). Squelch level is from 0
(unsquelched) to 9 (full squelch). 4 to 6 is normal range. Use rotary channel selector knob to scroll to desired setting. Pressing the LO
key will exit the squelch adjustment mode.
To enter the 'car-to-car' (direct/talk-around/non-repeater) mode, press the TA button. tA (and the channel number) will be displayed.
To exit, press the TA button again.
To illuminate the display window: press the ! button. Press the button again to turn the lamp off.
This modification is read 808 times.
top of page
27-03-2000
(TK-340) TK340 Programming Information
Author: Colin G1IVG - [email protected]
(UHF 16 Channel FM Transceiver)
1. Remove black plastic sticker from the rear panel of the radio at the top to expose a row of four gold coloured contacts
2. Locate the third one from the left-hand side
3. Using a small piece of wire short out the inner connection to the outer connection.
4. With the connections shorted and the radio turned off press and hold the lamp button (the lower most button located on the left
hand side of the radio looking from the front view) and turn on the radio.
5. The display will show the receive frequency of channel 1useing the dial knob (located at the top of the radio on the right hand
side looking from the front view) rotate this to give the required frequency.
6. If you require fast tuning press and hold the function button (located on the left hand side looking from the front of the radio)
whilst rotating the dial knob.
7. As you press the PTT button (located on the left hand side of the radio the largest button located in the centre of the three
buttons) the radio will then display the RX CTCSS tone frequency, to select the required tone rotate the dial knob.
8. Next press the PTT switch and the radio will display the TX frequency tune as previously explained as you did for tuning the RX
frequency.
9. Press the PTT switch again and it will display the TX CTCSS tone, set up as you did for the RX CTCSS and then press the PTT
switch, do this for, as many channels are required.
10. To skip programming channels press the PTT switch 4 times to go to the next channel.
11. Repeat this until you see on the display a message, which reads “END”, now turn off the radio.
12. Turn the radio on again and your radio is now programmed.
Depending on the original frequencies programmed into the radio you may need to adjust the VCO, good luck
This modification is read 1123 times.
top of page
23-11-2001
(TK-370) TK370/270 high-band h/t radio instructions
Author: Etchenique Fabian - [email protected]
To place unit in programming mode: With power OFF, hold down the ! button (upper side button above PTT (Push-To-Talk) key with a
square molded on it) with left index finger and the DIAL button with left thumb. Turn on unit. Hold buttons down until SEL appears on
the display. Release buttons. Press TA button. CH 1 will appear in display. Unit is now in programming mode.
To program (change) frequencies in any of the 32 channel positions: Use the rotary channel selector knob to scroll to the desired
channel position (CH 1 through CH 32). Press the PTT key on the left side of the unit. The channel's receive frequency will be
displayed. To change the frequency in small increments: use the rotary channel selector knob to move up or down.
To change the frequency in 1 MHz (large) increments, press and hold the ! button and use the rotary channel selector knob to scroll
up or down in 1 MHz increments. The same method is used to alter transmit frequencies.
Programming sequence 'positions' for each channel (controlled by pressing the PTT key while in programming mode and on the
desired channel). Repeated PTT pressing is known as scrolling.
1st - press of the PTT key - Receive frequency,
2nd - Receive tone,
3rd - Transmit frequency, 4th - Transmit tone,
5th - (off),
6th - (off),
7th - Channel in/out of scan list (Add or dEL),
8th - (off),
9th - (off),
10th - Transmit power (H) = high.
Tones - sub-audible tones are used to eliminate the reception of undesired signals or to allow access to specific repeater sites (tones 1
through 8, listed on channel card). Displayed numbers are the tone frequency, in Hz (cycles per second).
To program/modify tones: while tone status is displayed (by scrolling to position 2 for receive tone or 4 for transmit tone) in the
programming sequence, either rotate the channel selector knob until the desired tone is displayed or use the LO key to turn the tone
function OFF or enable the programming of the tone function (display the tone) from OFF. Note: The display of 023 is not a valid tone
and should be scrolled past and not be used.
To leave programming mode, use the PTT key to scroll until CH 1 through CH 32 or OFF is displayed. Turn radio off. Unit is ready to be
used when it is turned on again.
Non-Programming mode Functions
To add or delete a channel from the scan list: scroll to the desired channel (using the rotary channel knob). Press and hold the lower
side button (below the ! button) and press the SCN button. Release the buttons. A small "A" displayed above the channel number
indicates that the channel is in (added) to the scan list.
Squelch adjustment: To increase the squelch level (to eliminate interference) or lower the squelch level (to receive weak
transmissions), first ensure that the .scan mode is off. Press and hold down the lower side button (below the ! button) and then press
the LO button. Release the side button. Unit is now in squelch adjustment mode (with SqL displayed). Squelch level is from 0
(unsquelched) to 9 (full squelch). 4 to 6 is normal range. Use rotary channel selector knob to scroll to desired setting. Pressing the LO
key will exit the squelch adjustment mode.
To enter the 'car-to-car' (direct/talk-around/non-repeater) mode, press the TA button. tA (and the channel number) will be displayed.
To exit, press the TA button again.
To illuminate the display window: press the ! button. Press the button again to turn the lamp off.
This modification is read 839 times.
top of page
22-03-2002
(TK-705) Revised TK-705D & TK-805D programming
Author: KC7GF - [email protected]
Beginning with SN 41200000 severaI new programming features were included in these models. These new features include a
programmable Monitor Switch function, OFF-HOOK Scanning. OFF-HOOK decode, Transmit Revert Channel (for off-hook scanning),
and an additional Scan Resume Delay (for the transmit revert channel). This Service Bulletin is revised to include the programming
procedure for these new features in the self-programming mode.
Entering the self programming mode is accomplished by turning on the power switch while pressing a combination of buttons which
act as an interlock. Jumper CN-8 located on the main board behind the display is in the SET position when the radio is shipped from
the factory. This enables self programming. If CN-8 is moved to the USE position, which is recommended prior to delivering the radio
to the customer, the self programming mode cannot be entered. ( The radio may be operated with the jumper in the set mode, but
after exiting programming mode it will revert back to displaying channel numbers, not frequencies.)
Prior to initial programming, you may want to perform a Memory CIear. With CN8 in the set mode: SIMULTANEOUSLY press and hold
the AUX. and SCAN and D/A while turning the power switch ON". This will remove any frequencies which were factory installed for
testing purposes. The radio automatically enters the Option setting mode during memory clear.
To enter the Option Setting Mode without clearing memory, SIMULTANEOUSLY press and hold AUX and SCAN buttons while turning
power ON (CN-8 on the main board must be in the set position).
OPTION SETTING MODE
(Pressing PTT between all functions stores the data and changes to next function)
Function
Display
Rotate channel selector to select
Press
1 Band range
150.000~ 100Mhz SECTION (150-450)
PTT
2 Time out timer
t OFF
Off-30-60-90-120-180 Sec (default=off)
PTT
3 Busy ch lockout
b On
Off/on (default = on) no TX when channel is busy
PTT
4 DEL/ADD condition
dA On
On=user select, off=fixed see RX ch & DEL/ADD
PTT
5 Mic hook operation' H On
On=scan on hook, PTT off hook, mon off hook,
PTT
Off=no scan, ptt on or off hook, no off hook monitor
6 Priority channel
FI=FIXED US=user selectable (default=fixed)
P FI
PTT
Additional features from sn 41200000
7 Monitor switch
En On
On=press to disable decode, hold to disable Sq.
Off=press to disable Squelch (default =on)
PTT
8 Off hook monitor
dE Off
On= no off hook monitor, off=monitor off hook
PTT
9 Off hook scan
sc Off
On= off hook scan, off=scan on hook only
PTT
10 END
END
(turn off power)
RECOMMENDATIONS for NEW FEATURE SELECTIONS.
●
●
●
Off Hook Monitor (dE OFF) is only enabled when On-Hook Scan is selected (SC=OFF)
The "Last Called" option in the revert channel selection is supported in units bearing SN of 50700000 and higher only. Prior to
this S/N, the "Last CalIed revert feature operated according to specifications outlined for certain export models only.
The Revert channel during On-Hook scanning is the Priority channel only. The revert channel and Resume B selection is skipped
during self programming when On Hook scanning is selected.
In the user mode, the display skips unprogrammed channels. During programming mode any mistakes in programming can be
reprogrammed over but channels cannot be deleted once entered unless memory is cleared, and all desired information
reprogrammed. When all desired tone and frequency entries are completed, continue pressing PTT (stepping across unprogrammed
channels) until END is displayed. If any undesired channels were displayed prior to END, the memory must be cleared and
reprogrammed. (memories may be cleared individually when using the KPG6D programming software by hitting all spaces.
FREQUENCY PROGRAMMING MODE
TK-705D AND TK-805D FREQUENCY, AUXILIARY & SCAN Programming
To enter the frequency programming mode, SIMULTANEOUSLY press and hold the "AUX and "D/A buttons while turning power "'ON"
(CN-8 on the main board must be in the SET position)
CH1 - RX FREQ
Set ch1 RX freq by turning channel selector, hold AUX key when turning to change 1mhz
Press SCAN to change channel step from 10 and 12.5kc UHF or 5 and 6.25kc VHF
Press D/A key to enable delete/add scan function for this channel
Press REC to enable AUX switch function on this channel (selected later) PTT
RX TONE TYPE
Use ch selector to set RX tone type, QT (tone) or DQT (digital) DQT only on D model PTT
RX TONE FREQ
Display reads St for tone or S dt for digital
Set receive tone or digital with ch selector=.1hz, Ch sel+AUX for 1’s digit, REC for 10’s digit on tone. For digital, ch selector =
1’s, AUX +ch sel = 10’s, REC+ch sel = 100’s, SCAN=normal/ inverse (note that non-standard tones can be selected for both tone
or digital) PTT
TX FREQUENCY
Note: when TX settings are being programmed the TX symbol (--^) will be displayed
Use ch selector to set TX freq (or press PTT to set no tx (RX only channel), Ch sel+AUX=1mhz
Use SCAN button to set step size (see above, same as RX) PTT
TX TONE TYPE
Set TX tone type (see above)
TX TONE FREQ
Set tone freq (see above) PTT
-----> Repeat the above for CH2 to CH16 (bypass any channel by pressing PTT on blank "---.---"” channel.)
AFTER CHANNEL 16, PROGRAMMING ENTERS OPTION SELECT MENU (use Channel Sel to select option) AUX Set AUX button function,
DRS=digital recording (must have option board), 2tonE= two tone sequential decode, dt=DTMF, tA= talkaround. Only one AUX
condition can be set for all channels, however it can be turned on or off for specific channels in operation mode. PTT
RESUME A TIME
Set resume scanning delay time after receiving call in .5 second steps, PTT
RESUME B TIME
Set delay before scanning resumes after transmitting (in off hook scan mode) .5 sec, PTT
FIXED PRI CH
If option setting for priority is set at FI, fixed priority, select ch number, if set at US (user selectable) this will be skipped during
programming, PTT
LOOKBACK A TIME
This sets the time between samples when looking back at the priority channel PTT
LOOKBACK B TIME
This sets the time between samples when looking back at the priority channel when the priority channel is busy but the signal
does not have the PL tone you have programmed into the priority channel. PTT
REVERT CH (only enabled during off hook scan)
Use ch sel to set the channel the transmitter will revert to when PTT is pressed during off hook scan.
St = last channel selected before the scan switch was pressed
P CH = priority channel
CA CH = last channel a call was received on
US CH = last channel used (that was transmitted on) before scan switch was pressed PTT/ END
In programming mode pressing the MON (SPKR symbol) button and turning the channel selector knob will take you back or forward in
the menu selections in case you make a mistake or decide to make changes to previous settings while programming. In operation
mode, to add/delete channels for scanning, press scan and add/delete button.
Adjustment pots on theTK705D/805D, facing front of radio, left to right back row.
VR4=max deviation set , VR3=Mic sensitivity set , VR7=dig waveform bal (set for squarest digital waveform as seen at output
frequency on service monitor), VR6=PL tone level (500 to 750 ~), VR5=power out (set to 27W) right side of silver VCO box
VR1=preset squelch level, VR2=ABTO (this is the level control when using the digital audio recording option board).
TC1= frequency (TCXO) adjustment (NOTE:THIS IS ONLY ON THE 705D, THE 805D FREQUENCY ADJUSTMENT IS LOCATED ON THE
TCXO MODULE WHICH IS TO THE RIGHT OF THE SILVER VCO BOX TC1 on the 805 is a RF stage alignment cap...)
RA/RD jumper (CN7).
Is for use when using the radio with the digital recording option. RA position is for audio that follows the squelched audio, RD position
is for unsquelched audio, (noise and audio).
This modification is read 42 times.
top of page
17-09-2000
(TK-760) Programming Kenwood TK-760 mobile
1. Press and hold "A" key while turning the power on. ("SEL" will be displayed)
2. Press "MON" ("CH 1" should be displayed.)
3. Press "SCAN" or "D/A" to select the channel to edit (1 - 32).
4. Press "CHANNEL DOWN" to view the receive frequency
5. If you see "------------" press "CHANNEL UP" and then use the following to set the required frequency. If you see a frequency and
it is wrong, use the following to change it.
■
"VOLUME UP" and "VOLUME DOWN" keys set the megahertz of frequency. ( ---.000 )
■
"SCAN" and "D/A" keys set the kilohertz of frequency. ( 154.--- )
6. Press "CHANNEL DOWN" to advance.
7. Do you need a "Receive CTCSS tone"? If not, then press "CHANNEL DOWN"
If you need a tone, and you see "OFF", press "CHANNEL UP", then use "SCAN" or "D/A" to change it to what you want. If you see
the wrong tone frequency just use "SCAN" or "D/A" to change it to what you want.
8. Press "CHANNEL DOWN" to advance to transmit frequency.
9. If you see "------------" press "CHANNEL UP" and then use the following to set the required frequency. If you see a frequency and
it is wrong, use the following to change it.
■
"VOLUME UP" and "VOLUME DOWN" keys set the megahertz of frequency. ( ---.000 )
■
"SCAN" and "D/A" keys set the kilohertz of frequency. ( 154.--- )
10. Press "CHANNEL DOWN" to advance.
11. Do you need a "Transmit CTCSS tone"? If not, then press "CHANNEL DOWN"
If you need a tone, and you see "OFF", press "CHANNEL UP", then use "SCAN" or "D/A" to change it to what you want. If you see
the wrong tone frequency just use "SCAN" or "D/A" to change it to what you want.
12. Press "CHANNEL DOWN" to advance.
13. Do this a couple of times to step through to the next channel. (Channel number will appear.)
IMPORTANT - When you are done, turn the radio off, wait a second, turn it back on. You are ready to use it.
May/00
This modification is read 1278 times.
top of page
16-04-2001
(TK-768) Programmin a TK-768 or TK-768H
Author: - [email protected]
●
Press and hold "A" key while turning the power on.
"Prog" will be displayed shortly. And "Sel" will be displayed
●
Press "MON" ("CH 1" should be displayed.)
●
Press "SCAN" or "D/A" to select the channel to edit (1 - 32).
●
Press "CHANNEL DOWN" to view the receive frequency
If you see "------------" press "CHANNEL UP" and then use the following to set the required frequency.
If you see a frequency and it is wrong, use the following to change it.
●
"VOLUME UP" and "VOLUME DOWN" keys set the megahertz of frequency. ( ---.000 ) SCAN" and "D/A" keys set the kilohertz of
frequency. ( 154.--- )
●
Press "CHANNEL DOWN" to advance.
Do you need a "Receive CTCSS tone"?
If not, then press "CHANNEL DOWN"
If you need a tone, and you see "OFF", press "CHANNEL UP", then use "SCAN" or "D/A" to change it to what you want. If you see
the wrong tone frequency just use "SCAN" or "D/A" to change it to what you want.
●
Press "CHANNEL DOWN" to advance to transmit frequency.
If you see "------------" press "CHANNEL UP" and then use the following to set the required frequency.
If you see a frequency and it is wrong, use the following to change it.
●
●
"VOLUME UP" and "VOLUME DOWN" keys set the megahertz of frequency. ( ---.000 ) "SCAN" and "D/A" keys set the kilohertz of
frequency. ( 154.--- )
Press "CHANNEL DOWN" to advance.
Do you need a "Transmit CTCSS tone"?
If not, then press "CHANNEL DOWN"
If you need a tone, and you see "OFF", press "CHANNEL UP", then use "SCAN" or "D/A" to change it to what you want. If you see
the wrong tone frequency just use "SCAN" or "D/A" to change it to what you want.
●
Press "CHANNEL DOWN" to advance.
Do this a couple of times to step through to the next channel. (Channel number will appear.)
VERY IMPORTANT - When you are done, turn the radio off, wait a second, turn it back on.
top of page
This modification is read 749 times.
08-07-2001
(TK-805) Kenwood TK-805D programming
Author: Keith Beckmann - [email protected]
Kenwood TK-805D Operation
Controls:
●
●
●
●
●
●
●
●
I/O - On/Off Switch
- Monitor Mode (Squelch open)
AUX - Auxiliary Mode
REC SCAN - Scan Mode
D/A - Delete / Add
Volume - Volume Control
- Selects Channel
Display:
●
●
●
●
●
●
CH x - Channel x selected
TA x - Channel x in Turn-Around mode (Simplex)
SCAN - In active scan mode
SC x - In scan mode, but stopped on channel x
AUX - This channel has AUX (Simplex) mode enabled
ADD - This channel is in scanning table
Kenwood TK-805D Setup
To enter setup mode:
1. Turn radio on while holding AUX and SCAN
2. Unit will beep 3 times.
3. Use PTT to save selection.
Function
Display
Selections
Band Range
450.000
150/250/350/450 MHz
Time Out Timer
t Off
Off, 30, 60, 90, 120, 180 Seconds
Busy Channel Lockout
b On
On - Enabled
Off - Disabled
Del/Add Condition
dA On
On - User selectable
Off - Fixed
Mic Hook Operation
H On
On - Scan on hook, PTT off hook, Monitor off Hook
Off - Scan disabled, PTT on or Off Hook, No off Hook Monitor
Priority Channel
P Fl
Fl - Fixed Priority
US - User Selectable
Monitor Switch
En On
On - Press to disable decode, hold to disable squelch
Off - Press to disable squelch
Off-Hook Monitor
dE Off
On - No Off Hook Monitor
Off - Monitor Off Hook *
Off-Hook Scan
SC On
On - Off Hook Scan
Off - Scan On-Hook Only
* Off Hook Monitor (dE Off) is only enabled when On-Hook Scan (SC Off) is Selected.
When you reach END, you can power the radio off.
Kenwood TK-805D Channel Programming
Note: While in the programming mode, switches have these functions:
●
●
●
●
●
●
- Hold to step forward and backward thru programming (Use
to move).
AUX - Hold for 1MHz step rate.
REC - Turns AUX indicator On/Off (Auxiliary mode enabled/disabled).
SCAN - Toggles between 10 KHz and 12.5 KHz frequency steps.
D/A - Turns ADD indicator On/Off (In/Out of scanning table).
- Change Selection
To enter programming mode:
1. Press turn radio on while holding AUX and D/A
2. Unit will beep 4 times.
3. Use PTT to save selection.
Function
Options
RX Frequency
390.000 to 490.000 MHz (Hold AUX for 1 MHz steps)
RX Tone type
Soff - No tone
S dt - Digital PL
S t - PL Tone
RX PL frequency
67.0 to 250.3 Hz (Digital: 000 - 777, SCAN inverts)
(Hold REC for 10 Hz steps, Hold AUX for 1 Hz steps)
TX Frequency
390.000 to 490.000 MHz (Hold AUX for 1 MHz steps)
TX Tone type
Soff - No tone
S dt - Digital PL
S t - PL Tone
TX PL frequency
667.0 to 250.3 Hz (Digital: 000 - 777, SCAN inverts)
(Hold REC for 10 Hz steps, Hold AUX for 1 Hz steps)
Repeat above steps for all channels. The channel number is shown in the lower right corner.
Note: A display of
-.---
Indicates the channel is not programmed.
When channel 16 has been programmed, continue with settings below:
Kenwood TK-805D Channel Programming
Function
Display
Selections
Aux selection
tA
tA - Talk-Around (Simplex)
DRS - Digital Recording System
2tonE - 2 Tone sequential decode
dt - DTMF Decode
Scan Resume RX
rA 3.0
1.0 to 8.0 Seconds
Scan Resume TX
rb 3.0
1.0 to 8.0 Seconds
Fixed Priority Channel
P-
P - No priority Channel
P xx - Channel xx is priority channel
Lookback A
La 1.0
1.0 to 8.0 Seconds
Loopback B
Lb 1.0
1.0 to 8.0 Seconds
Revert Channel*
CA cH
sT - Selected Channel (Last channel selected before SCAN pressed)
P - Priority Channel
CA - Last RX channel used
US - Last TX channel used
* Revert channel is the channel the transmitter will switch to automatically, when PTT is pressed during off-hook scan.
When you reach END, you can power the radio off.
Note: The only way to clear a channel is to clear memory.
Clear Memory
Power radio on while holding AUX + SCAN + D/A
From: KC7GF
User comment
Date: 21-03-2002
Subject: 805/705 models
The programming listed for the TK805D also works for the TK705D. The 805 is UHF, the 705 is VHF but the programming steps are
the same. Note that there is a earlier 705/805 model without the D. This model does not do DCS (digital coded squelch) and does
not have scan and all the programming features of the D model. Some functions are set by switches on the board. All units will easily
program into the ham bands. If you need more info on either one of these models, send me email at [email protected].
From: KC7GF
User comment
Date: 22-03-2002
Subject: Enableing program mode
In order to enable programming of the 705/805D radios, an internal jumper behind the display labeled SET/USER must be in the SET
position. After programming, the jumper can be left in either position for use. Leaving it in the SET position lets the user put the
radio in program mode without removing the case.
top of page
This modification is read 1291 times.
22-03-2002
(TK-805) Revised TK-705D & TK-805D programming
Author: KC7GF - [email protected]
Beginning with SN 41200000 severaI new programming features were included in these models. These new features include a
programmable Monitor Switch function, OFF-HOOK Scanning. OFF-HOOK decode, Transmit Revert Channel (for off-hook scanning),
and an additional Scan Resume Delay (for the transmit revert channel). This Service Bulletin is revised to include the programming
procedure for these new features in the self-programming mode.
Entering the self programming mode is accomplished by turning on the power switch while pressing a combination of buttons which
act as an interlock. Jumper CN-8 located on the main board behind the display is in the SET position when the radio is shipped from
the factory. This enables self programming. If CN-8 is moved to the USE position, which is recommended prior to delivering the radio
to the customer, the self programming mode cannot be entered. ( The radio may be operated with the jumper in the set mode, but
after exiting programming mode it will revert back to displaying channel numbers, not frequencies.)
Prior to initial programming, you may want to perform a Memory CIear. With CN8 in the set mode: SIMULTANEOUSLY press and hold
the AUX. and SCAN and D/A while turning the power switch ON". This will remove any frequencies which were factory installed for
testing purposes. The radio automatically enters the Option setting mode during memory clear.
To enter the Option Setting Mode without clearing memory, SIMULTANEOUSLY press and hold AUX and SCAN buttons while turning
power ON (CN-8 on the main board must be in the set position).
OPTION SETTING MODE
(Pressing PTT between all functions stores the data and changes to next function)
Function
Display
Rotate channel selector to select
Press
1 Band range
150.000~ 100Mhz SECTION (150-450)
PTT
2 Time out timer
t OFF
Off-30-60-90-120-180 Sec (default=off)
PTT
3 Busy ch lockout
b On
Off/on (default = on) no TX when channel is busy
PTT
4 DEL/ADD condition
dA On
On=user select, off=fixed see RX ch & DEL/ADD
PTT
5 Mic hook operation' H On
On=scan on hook, PTT off hook, mon off hook,
PTT
Off=no scan, ptt on or off hook, no off hook monitor
6 Priority channel
FI=FIXED US=user selectable (default=fixed)
P FI
Additional features from sn 41200000
PTT
7 Monitor switch
En On
On=press to disable decode, hold to disable Sq.
Off=press to disable Squelch (default =on)
PTT
8 Off hook monitor
dE Off
On= no off hook monitor, off=monitor off hook
PTT
9 Off hook scan
sc Off
On= off hook scan, off=scan on hook only
PTT
10 END
END
(turn off power)
RECOMMENDATIONS for NEW FEATURE SELECTIONS.
●
●
●
Off Hook Monitor (dE OFF) is only enabled when On-Hook Scan is selected (SC=OFF)
The "Last Called" option in the revert channel selection is supported in units bearing SN of 50700000 and higher only. Prior to
this S/N, the "Last CalIed revert feature operated according to specifications outlined for certain export models only.
The Revert channel during On-Hook scanning is the Priority channel only. The revert channel and Resume B selection is skipped
during self programming when On Hook scanning is selected.
In the user mode, the display skips unprogrammed channels. During programming mode any mistakes in programming can be
reprogrammed over but channels cannot be deleted once entered unless memory is cleared, and all desired information
reprogrammed. When all desired tone and frequency entries are completed, continue pressing PTT (stepping across unprogrammed
channels) until END is displayed. If any undesired channels were displayed prior to END, the memory must be cleared and
reprogrammed. (memories may be cleared individually when using the KPG6D programming software by hitting all spaces.
FREQUENCY PROGRAMMING MODE
TK-705D AND TK-805D FREQUENCY, AUXILIARY & SCAN Programming
To enter the frequency programming mode, SIMULTANEOUSLY press and hold the "AUX and "D/A buttons while turning power "'ON"
(CN-8 on the main board must be in the SET position)
CH1 - RX FREQ
Set ch1 RX freq by turning channel selector, hold AUX key when turning to change 1mhz
Press SCAN to change channel step from 10 and 12.5kc UHF or 5 and 6.25kc VHF
Press D/A key to enable delete/add scan function for this channel
Press REC to enable AUX switch function on this channel (selected later) PTT
RX TONE TYPE
Use ch selector to set RX tone type, QT (tone) or DQT (digital) DQT only on D model PTT
RX TONE FREQ
Display reads St for tone or S dt for digital
Set receive tone or digital with ch selector=.1hz, Ch sel+AUX for 1’s digit, REC for 10’s digit on tone. For digital, ch selector =
1’s, AUX +ch sel = 10’s, REC+ch sel = 100’s, SCAN=normal/ inverse (note that non-standard tones can be selected for both tone
or digital) PTT
TX FREQUENCY
Note: when TX settings are being programmed the TX symbol (--^) will be displayed
Use ch selector to set TX freq (or press PTT to set no tx (RX only channel), Ch sel+AUX=1mhz
Use SCAN button to set step size (see above, same as RX) PTT
TX TONE TYPE
Set TX tone type (see above)
TX TONE FREQ
Set tone freq (see above) PTT
-----> Repeat the above for CH2 to CH16 (bypass any channel by pressing PTT on blank "---.---"” channel.)
AFTER CHANNEL 16, PROGRAMMING ENTERS OPTION SELECT MENU (use Channel Sel to select option) AUX Set AUX button function,
DRS=digital recording (must have option board), 2tonE= two tone sequential decode, dt=DTMF, tA= talkaround. Only one AUX
condition can be set for all channels, however it can be turned on or off for specific channels in operation mode. PTT
RESUME A TIME
Set resume scanning delay time after receiving call in .5 second steps, PTT
RESUME B TIME
Set delay before scanning resumes after transmitting (in off hook scan mode) .5 sec, PTT
FIXED PRI CH
If option setting for priority is set at FI, fixed priority, select ch number, if set at US (user selectable) this will be skipped during
programming, PTT
LOOKBACK A TIME
This sets the time between samples when looking back at the priority channel PTT
LOOKBACK B TIME
This sets the time between samples when looking back at the priority channel when the priority channel is busy but the signal
does not have the PL tone you have programmed into the priority channel. PTT
REVERT CH (only enabled during off hook scan)
Use ch sel to set the channel the transmitter will revert to when PTT is pressed during off hook scan.
St = last channel selected before the scan switch was pressed
P CH = priority channel
CA CH = last channel a call was received on
US CH = last channel used (that was transmitted on) before scan switch was pressed PTT/ END
In programming mode pressing the MON (SPKR symbol) button and turning the channel selector knob will take you back or forward in
the menu selections in case you make a mistake or decide to make changes to previous settings while programming. In operation
mode, to add/delete channels for scanning, press scan and add/delete button.
Adjustment pots on theTK705D/805D, facing front of radio, left to right back row.
VR4=max deviation set , VR3=Mic sensitivity set , VR7=dig waveform bal (set for squarest digital waveform as seen at output
frequency on service monitor), VR6=PL tone level (500 to 750 ~), VR5=power out (set to 27W) right side of silver VCO box
VR1=preset squelch level, VR2=ABTO (this is the level control when using the digital audio recording option board).
TC1= frequency (TCXO) adjustment (NOTE:THIS IS ONLY ON THE 705D, THE 805D FREQUENCY ADJUSTMENT IS LOCATED ON THE
TCXO MODULE WHICH IS TO THE RIGHT OF THE SILVER VCO BOX TC1 on the 805 is a RF stage alignment cap...)
RA/RD jumper (CN7).
Is for use when using the radio with the digital recording option. RA position is for audio that follows the squelched audio, RD position
is for unsquelched audio, (noise and audio).
This modification is read 45 times.
19-07-1998
(TM-201) TM-201/401 Increased TX Audio
top of page
Author: Trio-Kenwood Communication, inc.
Service Bulletin no. 880 (25-10-1983)
Some users of the TM-201 or TM-401 have reported they would like a slight increase in the microphone gain. Since there is no internal
microphone gain control on these radios, as simple mdification to the supplied MC-48 microphone will accomplish the same results.
Proceed as follows:
1.
2.
3.
4.
5.
6.
7.
8.
Unplug the microphone from the radio.
Remove the 3 Phillips head screws securing the rear of the microphone. (A number 2 tip is recommended.)
Remove the push-to-talk (PTT) switch bar, paying particular attention to how it is installed.
Gently remove the small printed circuit board by lifting straight up, and swing the board over t allow access to the component
side of the board.
Remove resistor R10, a 560 ohm 1/4 watt resistor.
Adjust VR1 Counterclockwise (CCW) 60 degrees.
Carefully reassemble the microphone, paying particular attention to the routing of the various wires, placement of the cirucit
board, and the PTT bar.
Reconnect the microphone to the radio and verify correct operation. Modification is now complete.
Time required for this modification is 1/2 hour or less.
top of page
This modification is read 424 times.
19-07-1998
(TM-211) TM-211 out of band modifications
The following is a simple modification for the TM-221 rig:
1.
2.
3.
4.
Locate the control unit board (X53-3040-XX) located behind the front panel.
Right below the channel select rotary switch and opposite the M.IN Sw. you will find R24 and R25.(foil side)
Remove R25 for 142.00 thru 151.995 Mhz RX TX
Move R25 to space for R24 for 138.00 thru 154.000 Mhz TX RX (Range will vary slightly from set to set)
Info provided by N2EYR @ WA2SNA-1 / Eddy Salvador
top of page
This modification is read 572 times.
19-07-1998
(TM-211) Extended range!
To get your 221A to recieve from 138-174 MHz you need to remove the front panel and gain access to the chip resistors and
rearrange thenm as follows:
R22 R23 R24 R25
X
O
O
X
X=Connected
O=Left out
If you are running a vk version removal of R24 is all that is needed. The tx will remain at 144-148MHz even after the mod.
GEOFF VK3KGH @ VK3RPA
This modification is read 542 times.
top of page
19-07-1998
(TM-221) General Coverage XMIT - TM-221/A
1. Remove top and bottom covers, remove locking ring on mic connector.
Carefully remove plastic cover.
2. Pull front of radio off (plug in connector)
3. Locate the control unit (xx53-3040-xx)
4. Remove the small resistor chip from r25, this gives you xmit from
(142.000 thru 151.995)
5. Replace the same resistor chip from last step on to the same board at r24 which is empty, this gives you xmit from (138.000
thru 154.000) Each set will give diffrent range depending on the vco setting, some Well xmit higher than 154.000 and some will
shut off lower. This can be changed by resetting the vco.
top of page
This modification is read 960 times.
19-07-1998
(TM-221) TM-221A Final Module Hints
Author: Trio-Kenwood Communication, inc.
Service Bulletin no. 934 (11-4-1988)
When the Final module is replaced in a TM-221A, there is a possiblity that the transmit power will not go higher than 47 watts, even
witht he APC turned OFF. This is due to variances in input impedance of Final Modules.
To correct this condition, an 8 pF capacitor can be added between the input of the module and ground. With some modules, a value
between 8 pF and 15 pF will be required. Try to choose a value as close to 8 pF as possible to prevent oscillation. The capacitor should
be designated as C19 on the Final Unit (X45-1360-02).
Required Part
8pF Ceramic Capacitor
Part # CC45CH1H080D
Alignment:
1. Turn the APC off (TX-RX unit VR-6: Clockwise).
2. Adjust TC3 TC4 (TX-RX) for maximum power supply current. Since the APC is off, the Final will produce very high power output.
It is important to perform this step as quickly as possible.
3. Adjust the APC for 45 Watts.
This modification may be performed under warranty.
Time required for this modification is 0.25 hrs or less.
top of page
This modification is read 853 times.
19-07-1998
(TM-221) TM-221A No TX in High Power Due to Voltage Drop
Author: Trio-Kenwood Communication, inc.
Service Bulletin no. 933 (11-4-1988)
Some TM-221A transceivers may intermittently not transmit in the high power mode. This condition may be the result of a voltage
drop at the fuse terminals on the power cord. To prevent a voltage drop, solder the terminals by following the procedure below.
1. Disconnect the antenna and power supply.
2. Open and remove the plastic fuse holder.
3. Remove the fuse from the terminals.
4. Flow solder between the terminals and the exposed strands of the cable. (See the figure below).
5. Allow the terminals to cool and then reinstall the fuse and close the holder.
This modification may be covered under warranty.
Time required for this modification is 0.25 hrs or less.
top of page
This modification is read 777 times.
24-01-1999
(TM-221) Extended range
The get your 221A to recieve from 138-174 Mhz you need to remove the front panel and gain access to the chip resistors and rearrange them as follows:
R22
R23
R24
R25
X
O
O
X
X = Connected
O = Left out
If you are running a vk version removal of R24 is all that is needed. The TX will remain at 144-148 Mhz even after the mod.
This modification is read 887 times.
top of page
19-07-1998
(TM-231) TM-231A MARS/CAP modification
1.
2.
3.
4.
5.
6.
Disconnect power
remove top cover
Locate a green jumper wire sticking out of the front panel assembly (behind VFO switch)
cut the jumper in half. Insulate the ends if bare wire is sticking out
Assemble radio
reset the microprocessor (hold mr key and turn on power)
this mod will allow the TM-231a to transmit from 142-151.995 MHz
N7LMJ @ KB7CFD.ID.USA.NA
This modification is read 868 times.
top of page
19-07-1998
(TM-231) TM-231A Out of band
05/20/90
This document describes the steps in enabling out of band transmit to the Kenwood 231A 2 meter transceiver. This modification will
allow transmit throughout the 136.000 to 173.995 Mhz range. I do not condone, authorize or any way promote illegal out of band
communication. More than likely, performing this modification will void the warranty, also no guarantees are made and you are at
your own risk. In other words, don't blame me if you kill your radio! Please read all of text before deciding or continuing. Also
performing either the MARS/CAP mod or the full extended transmit mod will erase the memories.
First of all you should be aware that this modification disables the automatic ARRL transmit offset feature. Second, if you do not feel
comfortable taking your radio apart, soldering to a surface mount board, or working with very small items, please find someone who
can help you.
Ok, now with all that out of the way, here we go. You will need: a VERY small soldering iron with a tip no larger than about a sixteenth
of an inch, a phillips screwdriver, a pair of VERY small tweezers or forceps, some very thin solder, a 1N914, or similiar glass diode
(NOTE: if you have a chip diode of similiar rating, all the better!), a small box to put all the tiny parts in. Also a small vise or circuit
board holder and a pair of external snap ring pliers are helpful. At this time it would be a good idea to write down the memories on a
piece of paper, as doing the mod erases the memories. Disconnect the microphone, power, and antenna.
MAKE SURE NO POWER IS CONNECTED TO THE RADIO!
1. Take the radio apart --- Remove the 4 black phillips head screws from the top and bottom black metal shields, put them in the
small box so as not to lose them. Remove the two metal covers and put them aside.
Note:
If you just want to mod the radio for MARS/CAP, just remove the top cover and clip the GREEN wire just above the VFO,MR,MHZ
switches, and replace the top cover. This extends transmit about 3 Mhz on either side of the ham band.
Place the radio on a pad or soft STATIC free work area. Looking at the front of the radio, you will see how the black face plate is
held in place by 4 little plastic keepers that run over metal bumps in the sub-frame. By GENTLY inserting your finger nail and
pushing each keeper, you will be able to remove the face plate, be careful, its plastic. Pull the volume, squelch and frequency
selector knobs off, the freq. selector is a real bear, but a strong steady pull will remove it. Next, using a pair of pliers or a set of
external snap ring pliers, remove the mic connector ring nut from the mic connector, now remove the nut that is on the freq.
selector. Again put all the parts in the small box. Gently remove the LCD assembly from the radio. You will see a series of silver
springs mounted horizontaly on the back of the LCD assembly, these mate with short silver pins on the cpu board. Put the LCD
assembly aside in a safe STATIC free place. The next step is to remove the metal shield that covers the cpu board. Do this by
removing 4 screws, two are located on the short sides and the other two are located on the top and bottom of the radio. Put the
screws in the small box for safe keeping. Gently remove the metal plate from the radio and put it aside. Finally the cpu board
must be removed. If your radio has the CTCSS encoder and/or the DRU voice recorder, you must remove these before
continuing. Consult the manual and reverse the installation procedures to remove them. Be careful when pulling the small white
multi pin connectors, forceps work the best. There are 3 screws that hold the cpu board on to the radio frame. Two are located to
the right of the frequency selector and the third is located near the squelch control. Also there are two multi pin connectors
located at the bottom of the backside of the cpu board that connect to the rf portion of the radio. Remove the 3 screws making
sure not to drop them on the board. (Remember the battery backup!) Now using your thumbs at the bottom, and your fore
fingers at the top of the board, gently disconnect and remove the cpu board. Be careful in handling the board as it contains many
static sensitive components. Always hold the board by the sides as to not touch any traces or pin leads. If you have a small vise
or circuit board holder, place the board in it, solder side up, so the row of switches (Call, F, Shift, Tone, Rev, Drs) are pointing
toword you.
What needs to be done, is to solder a diode to the pads located under the tone switch. (S205) This is D209 on the schematic.
Note that Kenwood calls the radio with this diode installed a -21 version, for use in "other areas". You will probobly notice how
small and how thinly spaced the pads are, and you will be wondering how that BIG diode is going to fit!...
2. Making the mod --- If you have a chip diode that will fit, skip this part. Otherwise, like me, you will have to fabricate your own
SMT diode. Do this by bending the leads of the diode under the body and clipping the remaining lead lengths so that space
between the leads are equal to the spacing of pads on the board. THE DIODE MUST BE POSITIONED SO THAT THE CATHODE IS
POINTING DOWN, TOWARD THE CPU CHIP. THIS IS VERY IMPORTANT.
Try making about 5 of these guys, taking each one and visually fitting it to the pads. Look at the overall height compared to the
height of the connectors. Also look at the pad spacing, a magnifiying glass works well unless you have eyes like a microscope.
Once you've selected the best one, tin the leads of the diode so just a quick tap of the hot soldering iron will "plant" the part on
the pads. Now, holding the diode in the proper orientation, tack down one lead, (hopefully you didn't drink too much coffee this
morning!), then, using the tweezers orient the other lead and tack it down with the soldering iron. You shouldn't need any
additional solder, just the solder on the pad and the tinning on the diode leads. Using the magnifiying glass, FULLY INSPECT THE
CONNECTION, making sure there are no solder bridges and that the diode is positioned properly with the cathode pointing
toward the cpu. Once you are satisfied proceed with step 3.
3. Button it up --- Reverse the take down procedure to put the radio back together. Attach the cpu board by aligning the connectors
on the back, press firmly to engage the connectors, insert the 3 screws and tighten, remember the radio frame is aluminum, so
don't strip them out. Attach the metal sub frame using the 4 screws. Gently place the LCD sub assembly on top and hold it in
place so the little springs make contact while you attach the microphone connector ring nut and the freq. selector nut. Tighten
them down. Press the plastic face plate so that the little keepers "snap" over the bumps. Re-attach the CTCSS and/or DRU if
applicable. Replace the top and bottom black covers with the four screws. Check the small box and make sure you don't have
any "spare" parts.
That's it, just connect power, antenna and the microphone. Turning on the power will reset the radio erasing all memories. Oh well...
This modification is read 982 times.
top of page
19-07-1998
(TM-231) TM-231 Low Mic Audio Fix
A quick and dirty fix for the knwd tm231a low mic output till (if) knwd comes out with a fix is to bypass r 63 (3.3k). r 63 and r64 form
a voltage divider at the input to the mic amp. r63 is on the bottom of the rig. with the bottom cover off and the front of the rig facing
you, locate the mic amp board 3610 which stands vertically off the mother board. follow the 3rd pin from the left to r63. a jumper
here gives the tx audio a nice boost. be sure to readjust the dtmf output in the mic (the only pot in the mic). 73 and good luck. greg.
This modification is read 780 times.
top of page
20-04-2000
(TM-231) TM-231A Intermittent memory loss
Author: Trio-Kenwood Communication, inc.
Service Bulletin no. 966 (4-4-1990)
Some TM-231A owners have reported that the transceiver intermittently loses its memory channel information at power on. The
following modification will absorb pulses on the CPU interrupt line (INT4) and reconfigure the backup switching circuit to avoid
unintentional memory loss.
This modification should be performed on a Dealer level as they have the correct tools to disassemble the transceiver.
Required parts:
220 µF, 6.3 V Electrolytic capacitor
0.01 µF ceramic capacitor
0.022 µF ceramic capacitor
2.2 Kohm chip resistor
1 Kohm carbon resistor
3.0 V Zener diode
CE04NW0J221M
CK45B1H103K
C91-0475-05
RK73FB2A222J
RD14BB2C102J
MTZ3.0JB
1. Disconnect the power supply, antenna, and microphone.
2. Remove the top and bottom covers (4 screws). You may want to disconnect the speaker and set it aside with the speaker mount.
3. Remove the knobs from the front panel.
4. Remove the nut from the microphone jack and the 11mm nut from the channel selector switch.
5. Remove the 4 screws that secure the front panel to the body of the transceiver.
6. Pull the front panel off the transceiver to expose the Control board.
7. Remove the 3 screws from the Control board. Gently pull the board off the transceiver.
8. Perform the changes shown in the accompany diagram. C202 is on the component side of the Control board. All other work will
be done on the foil side of the board.
This modification may be covered under warranty.
Time required to perform the modification is 1 hour or less.
top of page
This modification is read 844 times.
19-07-1998
(TM-241) TM-241A RX/TX mods
This mod is only intended for experimental applications only! Know what freq you are on and don't use this mod if you are not for
sure.
The TM-421a is capable of transmitting from 136 to 174 MHz when the following modification is performed. The transmitter
specifications will vary from published in-band specifications.
1. Remove the top and bottom covers from the transciever.
2. Remove the knobs from the front panel.
3. Remove the nut from the mic jack and the nut from the channel selector switch.
4. Remove the 4 screws that secure the front panel to the body of the transceiver.
5. Pull the front panel off the transceiver to expose the Control board.
6. Remove the 3 screws from the Control board. Gently pull the board off the transceiver.
7. Cut the GREEN jumper wire on the Control board.
8. Install an MA141A chip diode or 1N914 diode as D209 on the Control Board.
9. Reassemble the transceiver by reversing steps 1 - 6.
10. Reset the microprocessor by holding in the MR key as power is turned on.
+-------------------------------------------------------------------------+
¦
D209
¦
¦
+-+
+-----+
¦
¦
¦Ú¦- ¦--¦Ú+---+
¦
¦
¦ ¦
¦
¦
¦ ¦
¦
¦
¦ ¦ ¦ ¦
¦
¦
¦ ¦ +-+
¦
¦ +-----------------------+
+-------------------------+
¦
¦ ¦ [] [] [] [] [] [] [] ¦
--+
¦ [] [] [] [] [] [] [] [] ¦
¦
¦ +-----------------------+
---+
+-------------------------+
¦
¦
¦
¦
¦
+-------------------------------------------------------------------------+
Date: 22-09-2001
User comment
From: Scott D
Subject: More info
Clip green wire on opposite side of board. W202 above the volume knob. In between the VFO and MR buttons.
1N914, 1N4148, or MA141A glass diode or similiar surface mount diode will work fine.
If you using a glass diode it is easier to solder to the red dots. Be careful to get the cathode and anode oriented correctly or it will
not work.
top of page
This modification is read 2335 times.
17-07-1999
(TM-251) This is the wide-banding modification for the Kenwood TM-251E
Author: Robert Vea. GM7AVE - [email protected]
This is an update to the original file sent out. Hopefully this one gets out un-corrupted. There are no changes to the mod listed so if
you have previously modified the radio OK, then you do not need this file.
The Mod...
This is the wide-banding modification for the Kenwood TM-251E
This file is written by Robert GM7AVE, who performed this mod to a friends radio. Be careful if you decide to do this mod. Check if this
mod is valid for your model before doing it. You may contact me at: [email protected]
The mod begins...
1.
2.
3.
4.
5.
6.
7.
8.
9.
10.
11.
12.
13.
14.
15.
Remove both lids,
Remove facia, knobs and vfo nut,
Remove the screw between the volume and squelch pots,
Remove the LCD, carefully, the connectors are fragile,
Remove the cage, it is held on by 4 screws,
Remove the 2 screws holding the control unit in place,
If fitted now remove the memory expansion and CTCSS boards,
The memories will still be there when you are re-building.
Now read this carefully, VERY VERY GENTLY pull of the control unit, this has 2 small connectors holding it in place.
If you are not careful enough, this PCB will flick off into orbit, and possibly be damaged.
Here we are, getting the soldering iron ready...
Locate D417 on the PCB. It is the one at the edge of the board, very close the IC401 which is a MD6433388F (Opposite side to
knobs.)
To confirm this diode is the correct one, check using a digital meter that one end is connected to pin 60 of the above chip. The
other end should be connected to pin 65 of the same chip VIA a 100ohm resistor.
Remove this diode. Check to see if the wire links are attached. If they are (I don't expect them to be) then remove them. These
are marked W1, W2, W3 on the PCB.
Go have a cup of coffee now, then come back and put the radio back together again.
Do a CPU reset by powering up with MR pressed (Bye memories!)
Note: Sometimes a CPU reset isn't required, so do not do this initially, only do a reset if the radio malfunctions in some way
when powered up.
Oh look, the radio will now receive and transmit from 136MHz to 174MHz, and also receive from 300Mhz to 470MHz.
If you also look at the menu's avaiable you will see a new one.
End of mod. Did you succeed or kill the radio? Let me know ok?
Mail to Robert Veal on FORTH VIEW BBS (0131 660 6680)
E-Mail to [email protected]
Mobile telephone - Voda 0468 176788
GM7AVE @ GB7EDN (MRSGB) Stingray Systems(1996)
This modification is read 938 times.
top of page
19-07-1998
(TM-2530) TM-2530/2550/2570 MARS/CAP
The TM-2500 series radios may be easily modified for use on MARS/CAP frequencies from 141-150.995 MHz.
Locate the control unit (X54-1860-XX) on the bottom of the radio. This is the same board that the TU-7, and or MU-1 are mounted on.
Just to the left of IC3 you will find a row of diodes. Cut diodes D8, and D11. After the diodes have been cut you will have to "reset" the
microprocessor.
Microprocessor Reset.
1. Press and hold the [PS] key.
2. Turn ON the power switch.
3. Release the [PS] key.
All of your programmed data such as memory channel data, DCL data, and Phone number data will be erased and you will have to
reprogram them. If the radio is not reset, it will not recognize that you have cut the two diodes.
This modification is read 257 times.
top of page
19-07-1998
(TM-255) Solution 9k6 TM255/455
Dear OM's
This is what I found a service technical report from Kenwood acc. TM255 and TM455 9600bps Date November 8, 1994
SUBJECT: Countermessure against modulation during packet 9600bps operation.
Phenomenon:
A trouble modulation malfunction during packet 9600bps operation was found in the manufacturing process even trough there in input
in the DATA terminal.
Pay heed to this trouble in replacing the analog switch IC13.
Cause:
This trouble is cuased by variation in the analog switch IC13.
Even if the 9600bps SW Tr.(Q20:DTA124EK) has been turned ON, the analog switch IC remains unstable.
Counter messure:
We decided to raise the analog switch IC13 voltage while the 9600bps SW TR. (Q20:DTA124EK) is in action by changing the chip
resistor R117 in the TX-RX-unit of TM455A/E and of TM255A/E.....etc.
R117=10K to be replaced with 3K3
So if you have problems with those two say to your dealer to ask for SERVICE TECHNICAL REPORT No. B510-94-081E page 1/2 and
page 2/2
73's DE PAT KE6MIQ
This modification is read 1025 times.
top of page
06-08-1999
(TM-255) Mods for the Kenwood TM-255E
Adjust LOW power setting
The way to adjust low power is to regulate VR401. This trimmer can be found under the speaker (regulates power between 2 and 30
watts).
Adjust HI power setting
To regulate the power of the HI position is to adjust VR601. You can find this trimmer on the back left side (remove top and locate the
alu cover).
Please be carefully when you dismount and locate the trimmer.
Adjust TX-Power/SWR ratio
At the same place you can find VR603 and that is the SWR protection control. Be carefull when adjusting this trimmer, because it
protects your transceiver against bad SWR, but can be usefull when power drops to much on relative good SWR.
Adjust AGC
To adjust the AGC time constant of the transceiver locate VR402 that can be found on the left side at the center when removing the
top.
Note:
Please be carefully with these adjustments! All modifications you make is totaly at your own risk.
If you have any other mods for this good transceiver then please contact me.
73's De Guy ON1DHT @ ON0BWP.#BTN.BEL.EU
QTH: Aalst, Belgium, JO20AW
E-mail: [email protected]
Website: http://users.skynet.be/on1dht
This modification is read 1205 times.
top of page
19-07-1998
(TM-2550) TM-2530/2550/2570 MARS/CAP
The TM-2500 series radios may be easily modified for use on MARS/CAP frequencies from 141-150.995 MHz.
Locate the control unit (X54-1860-XX) on the bottom of the radio. This is the same board that the TU-7, and or MU-1 are mounted on.
Just to the left of IC3 you will find a row of diodes. Cut diodes D8, and D11. After the diodes have been cut you will have to "reset" the
microprocessor.
Microprocessor Reset.
1. Press and hold the [PS] key.
2. Turn ON the power switch.
3. Release the [PS] key.
All of your programmed data such as memory channel data, DCL data, and Phone number data will be erased and you will have to
reprogram them. If the radio is not reset, it will not recognize that you have cut the two diodes.
top of page
This modification is read 631 times.
19-07-1998
(TM-2550) TM-2550 DCL Call Sign Data
Author: Trio-Kenwood Communication, inc.
Service Bulletin no. 904 (7-2-1986)
Some owners of the TM-2530/50/70 have reported a loss of the DCL system call sign data when the power switch is turned off. The
call sign data actually remains in memory, but timing prevents its utilization in some radios. Adding a resistor will correct this problem.
If you receive a radio that exhibits this symptom add a 47K ohm resistor to IC3 to the Slave CPU on the control unit (X53-1440-XX)
between pins 4 and 20. Cover the resistor leads with "spaghetti" type insulation. Adding the resistor to radios that do not have this
symptom will not cause any problems, so you may wish to add the resistor if you receive a radio for service for some other problem.
Solder the 47 Kohm resistor directly to pins
4 and 20 of IC13. Don't overheat or use too
much solder. You must use an iron with
vltage isolation on the tip!.
Before soldering unplug the DC power cable and antenna from the radio.
When soldering to this IC you must use a soldering iron that provides voltage isolation on the tip since IC3 is a CMOS device and can
be easily damaged by static electricity or voltage on your iron. Use normal CMOS precautions. One final precaution: Don't bridge any
of the pins on the IC with excess solder!
Time required for this modification is 1/2 hour or less.
This modification is read 604 times.
top of page
19-07-1998
(TM-2570) TM-2530/2550/2570 MARS/CAP
The TM-2500 series radios may be easily modified for use on MARS/CAP frequencies from 141-150.995 MHz.
Locate the control unit (X54-1860-XX) on the bottom of the radio. This is the same board that the TU-7, and or MU-1 are mounted on.
Just to the left of IC3 you will find a row of diodes. Cut diodes D8, and D11. After the diodes have been cut you will have to "reset" the
microprocessor.
Microprocessor Reset.
1. Press and hold the [PS] key.
2. Turn ON the power switch.
3. Release the [PS] key.
All of your programmed data such as memory channel data, DCL data, and Phone number data will be erased and you will have to
reprogram them. If the radio is not reset, it will not recognize that you have cut the two diodes.
This modification is read 573 times.
top of page
19-07-1998
(TM-2570) TM-2570 Low TX Power Output
Author: Trio-Kenwood Communication, inc.
Service Bulletin no. 906 (18-3-1986)
Some owners of the TM-2570 have reportecd low transmitter power when the radio is used with an antenna having reasonably low
VSWR (1.5:1)
Procedure:
1.
2.
3.
4.
5.
Remove the bottom cover on the heat sink.
Ensure that C72 is installed correctly. (Refer to Service Manual)
Squeeze the coils of L16 closer together.
Make sure that C72 and L14 are as far away from each other as possible, move the capacitor, not the inductor.
Readjust VR1-VR4, according to the instructions provided in the Service Manual. The protection circuit, VR4, should be adjusted
for 8A at 146.000 Mhz rather than the values indicated in the Service manual. Change your service manual to reflect this value.
6. Replace the bottom cover to complete the procedure.
Time required for this modification is 1/2 hour or less.
This modification is read 568 times.
top of page
21-03-1999
(TM-261) TM-261a Extended frequency
If all u want is 142 to 152 cut green wire closest to the face of the radio.
If you want full covradge cut the one farthest from the face there both very close togather and green.
top of page
This modification is read 1982 times.
28-08-1999
(TM-261) Kenwood TM-261a 136-174 MHz transmitt modification
Take off top cover cut two green wires only two there i think called w1 w2.
Transmitt from 136 to 174.
Date: 14-05-2000
User comment
From: Unknown
Subject:
Another guy has write this to me, for the same modification.
Open top case. There are two green wires. The closest to the face is W1. The other is W2. Cut W2 and that gives you transmit on
136-174.
I also tried just cutting W1 which gave me nothing.
Cutting both wires also gave me nohing.
Date: 27-08-2000
User comment
From: unknown
Subject:
The mods listed which require cutting two green wires did not work at first when performed.
I remember having to do more with the wire before the change occurred. I cut the two wires and held down one of the menu buttons
while powering up the unit. However, the band did not open up. I then powered down the unit and stripped a short lead from each of
the 2 cut ends of the two cut wires. I then turned on the radio and rubbed the two ends of one wire together for a moment and then
did the same for the other cut wire while the unit was on. I then reset the radio and it opened the band.
When the the wires touched again while the unit was off, the unit reset and I had to open it up and play around with it again to open
it up. (It seemed to set the radio back to it's original band settings.) Once the radio works out of band, make sure you do not
connect the two wires even for a moment. The radio seems very sensitive. Hopefully this will help those who have problems.
(Do ! not cross the two green wires with each other. Only connect the cut ends of each wire with the other end of the original cut
wire)
Date: 23-05-2001
User comment
From: Russ WI9B
Subject: Reset the VCO
Cut the green wire (W-1), then push "MR" and the "ON" buttons at the same time. When the screen lihts up with all the segments
shown, push "MR" again. Basically you reset the VCO as shown on page 29 of the owners manual.
Russ WI9B
Date: 30-08-2001
User comment
From: Bo Van Hassel (W7RTK)
Subject: Complete mod
This is the correct mod for the tm 261a extended tx.. I complied this mod from the other mods on this page and have come up with
the correct one.
●
First, take top cover off radio.
●
Next, locate the two green wires toward the face of the radio.
●
Then, cut and tape the bare ends of W1. Do not let the wires touch each other again. W1 is the green wire above W2 (see
illistration below)
Do not cut W2 as this will make the 136-174 TX mod not work!!!
●
Reassemble radio and with the radio off, press and hold the "MR" button and turn the radio on.
As WI9B says, when the screen lights up with all of the segments shown, before the test segments go off, push "MR" again, and you
will now tx from 136Mhz to 174Mhz.
73/DE/BO/W7RTK
W1--W2---
+----------------------+
|
| ------------ gold square in radio
+----------------------+
0--------------------0
0--------------------0
This modification is read 2172 times.
top of page
03-03-2002
(TM-261) TM-261 Mike Button
Author: Mike W8RY - [email protected]
The Kenwood TM-261 2Mtr xcvr microphone displays an annoying feature: After you've had it for a while, the Mike Button must be
pressed harder and harder in order to keep it transmitting. Eventually, the button is so intermittent that you want to strangle it with
its own cord. The fix is simple.
Open up the Mike case (three screws) and carefully lift the back off, so small parts don't fall out onto the floor, such as the clear
plastic piece, and the spring. Look at the mike button lever inside, and you will see that pressing the mike button causes a little red
piece of rubber to press a microswitch, which actually keys the rig.
As this little piece of rubber gets old, it gets soft, and won't reliably press the microswitch, causing the transmitter to turn off
frequently. This little piece of sponge rubber is a little bit smaller than a pencil eraser, so i removed it, and replaced it with a trimmed
pencil eraser, which is not quite as thick as the original piece of ! sponge rubber. It has to be a bit thinner, so you don't apply too
much pressure to the microswitch when you key the mike, causing the microswitch to bend or break off the PC board.
I used a dab of rubber cement to hold the eraser in place, and let it dry for a couple of hours before reassembling the microphone.
Now it works fine, and my fingers aren't hurting from having to grip the mike button in a deathgrip to make it work!.
73 de Mike W8RY
This modification is read 297 times.
top of page
19-07-1998
(TM-321) TM-321A Mars/cap mod
To give the TM321 tx coverage from (142 0r 143, don't remember which) to 151.995 mhz, remove the top cover.
Look for a loop of wire comming from the display area (the board with the CPU) and going right back.
Cutting this wire and then doing a CPU reset is all you need to do.
Takes about 2 minutes. Be sure that the ends of the wire don't short to something.
This modification is read 490 times.
top of page
19-07-1998
(TM-321) TM-321A Weak mic audio fix
A quick and dirty fix for the knwd tm231a low mic output: knwd comes out with a fix which is to bypass r 63 (3.3K). R 63 and r64
form a voltage divider at the input to the mic amp. R63 is on the bottom of the rig. With the bottom cover off and the front of the rig
facing you, locate the mic amp board 3610 which stands vertically off the mother board. Follow the 3rd pin from the left to r63. A
jumper here gives the tx audio a nice boost. Be sure to readjust the dtmf output in the mic (the only pot in the mic).
This modification is read 462 times.
top of page
19-07-1998
(TM-321) TM-321A Mod to Squelch thw audio at mic pin 6
The following is an easy mod to squelch the audio at mic pin 6 for tnc's
Without true dcd: obtain from kenwood a 2sd1757(k) (surface mount transistor). Install emitter to mic pin 8, collector to mic pin 6,
and jumper from base to the unused pin on connector 202. Using the unused pin rather than running the jumper to the mother board
preserves the plug in feature of the front panel.
Connect one end of a 4.7K resistor (i used a 6.8K) to the mute line (ic 5 pin 7), and connect the other end to the unused pin of
connector 4, which mates with connector 202. This new circuit is a close copy of the af mute circuit that squelches the rx audio at the
speaker. It works perfect with my paccomm micropower 2. The hardest part of the mod is removing the locking ring around the mic
connector. I used a modified table fork! good luck.
This modification is read 453 times.
top of page
19-07-1998
(TM-321) Packet mod for TM-321
8 Nov 89
From: [email protected] (Robert Casey)
The following is an easy mod to squelch the audio at mic pin 6 for tnc's
Without true DCD: obtain from Kenwood a 2SD1757(K) (surface mount transistor). Install emitter to mic pin 8, collector to mic pin 6,
and jumper from base to the unused pin on connector 202. Using the unused pin rather than running the jumper to the mother board
preserves the plug in feature of the front panel.
Connect one end of a 4.7 K resistor (i used A 6.8 K) to the mute line (IC 5 pin 7), and connect the other end to the unused pin of
connector 4, which mates with connector 202. This new circuit is a close copy of the af mute circuit that squelches the RX audio at the
speaker. It works perfect with my paccomm micropower 2. The hardest part of the mod is removing the locking ring around the mic
connector. I used a modified table fork! Good luck.
This modification is read 455 times.
top of page
16-04-2000
(TM-321) TM-321A Loss of TX audio with MC-48B
Author: Trio-Kenwood Communication, inc.
Service Bulletin no. 935 (2-6-1988)
When en MC-48B is used with the TM-321A, transmit audio may be suppressed do to RF feedback. This occurrence is restricted to
mobile operation where the antenna is in close proximity to the microphone. The audio can be restored by adding a 100 pF capacitor
directly to the mic element terminals.
Required parts:
100 pF, 50V capacitor. Part number CK45B1H101K or CC45B1H101K
1. Remove the 3 screws from the mic case (See figure 1). Carefully open the case.
2. Pull the PC board, PTT knob, and PTT micro switch out of the mic case to expose the mic element cover (See figure 2).
3. Remove the 3 screws and mounting clips (See figure 3) securing the element cover. Remove the PTT spring. Pull the mic element
and cover out of the case.
4. Remove the element from the rubber cover.
5. Install and solder the capacitor directly to the mic element terminals where the brown and white wires are connected (See figure
4). To avoid damaging the element, use a low wattage soldering iron.
6. Carefully assemble the mic by reversing steps 1 - 4.
This modification may be covered under warranty.
Time required for this modification is ½ hour or less.
top of page
This modification is read 460 times.
16-04-2000
(TM-3530) TM-3530 Noisy transmit
Author: Trio-Kenwood Communication, inc.
Service Bulletin no. 925 (2-11-1987)
In some early model of TM-3530 transceiver transmit noise may be generated as the unit warms up. The following procedure will
reduce the noise.
1. Disconnect the power cord and antenna.
2. Remove the top and bottom covers.
3. Replace L3 on the Compound unit (part number L15-0308-06). Before soldering the coil to the board, place a drop of contact or
silicon glus under the coil to prevent mechanical vibration.
4. On the Compound unit, solder two springs (part number G02-0550-04) to the heat sink as shown in figure 1. The springs must
be mounted high enough to make firm contact with the top cover when installed.
5. On the PLL unit, solder a spring (part number F10-1206-04) to the TX VCO shield (See figure 2). The spring must make firm
contact with the bottom cover when installed.
Caution: The next step requires complete disassembly of the front panel and Display unit. This step may be reserved for problem
units.
6. On the Display unit, replace jumper JP3 with a diode (part number 1S1555) as shown in figure 3.
7. Reassemble the transceiver and test the modulation for correct adjustment:
1.
2.
3.
4.
5.
Apply a 1 KHz, 50mV signal to pin 1of the mic jack.
Turn VR7 on the Compound unit fully CCW.
Use a service monitor, linear detector, or deviation meter to measure the TX deviation at the antenna jack.
Adjust VR5 on the Compound unit for +/- 4.5 KHz.
Reduce the mic signal to 5 mV. Adjust VR7 for +/- 3.0 KHz.
Figure 1.
Figure 2.
Figure 3.
Time required for this modification is 1 hour or less.
This modification is read 443 times.
top of page
01-09-2001
(TM-3530) Extended TX for the Kenwood TM 3530a 220MHz radio
Author: Bo (W7RTK) - [email protected]
First, my radio's serial is 8,080,XXX so if your radio is close, it should work.
This radio is the big brother to the Kenwood TM 2530a except it xmitts from 220Mhz to 225Mhz out of the box. I will show you how to
make it tx from 220Mhz to 229.995Mhz...
1. With the radio upside down and the face facing you, remove bottom screws.
2. Remove the bottom panel and locate the control unit number X53-1440-XX
3. Locate the big chip marked above it as IC 3 (see illistration below)
4. Just to the left of IC3, you will see a row of diodes D9, D10, D11, D12 and D8. D9, D10 and D12 have already been removed
from factory in my radio.
5. Cut diodes D8 and D11.
6. After cutting diodes, reassemble the radio, and then you must reset the microprocesser or the mod will not take effect.
Here are the steps,
1. With the radio off, press and hold the "PS" key.
2. Turn on radio.
3. Release the "PS" key.
Remember, when you reset the microprosser, you will lose ALL memory channels and phone numbers. So write everthing down first.
Your radio should now tx from 220Mhz to 229.995.
D8 D12 D11 D10 D9
0
X
0
X
X
IC 3
+-----------------------+
|
|
|
|
+-----------------------+
Have fun. 73/DE/BO/W7RTK
This modification is read 547 times.
top of page
19-07-1998
(TM-401) Umbau TM401A auf 9600bd und mehr
de DD4JN @ DB0IZ
Hallo liebe User,
um mit dem Kenwood TM401A in 9600bd in 9600bd QRV werden zu können, muß man erst den Filter "L7" mit der Bezeichnug
CFW455F (12,5KHz) gegen einen breiteren, z.B. 20KHz oder besser, gleich auch für höhere Baudraten 30KHz, z.B. CFW455B
einsetzen.
Um die RX-Daten abzugreifen, oder den keramischen Filter zu tauschen, muß man den oberen Deckel entfernen. Die RX-Daten müßen
im Sternpunkt zwischen R31, R30, C33 und C40 abgegriffen werden.
Die TX-Daten werden, nachdem die Unterseite des TRX entfernt wurde, zwischen R91 und C93 eingespeist. Der Punkt befindet sich in
der Nähe von Q54, dem IC NJM4558. Der Widerstand R91 steht senkrecht auf der Platine. Der obere Anschlussdraht ist lackiert. Farbe
abkratzen und TXD-Leitung anlöten, fertig.
Bei Tx-Problemen muss man die richtige Filterstellung der G3RUH-Filter heraus suchen. Führt das auch zu keinem Erfolg, rät es sich,
einen einfachen Umschalter 9K6 oder NF-Mike dazwischen zu schalten. Die Leitungen für den externen Umschalter habe ich durch das
weglassen einer Seitenwand nach außen geführt.
Die Leitungen vom Modem in den TRX habe ich durch Einbau einer anderen Remote-Buchse realisiert. Ich habe dafür die alte RemoteBuchse, sie ist nur geklammert, entfernt und von der Steckerleiste abgezogen. Dafür habe ich eine neue Buchse eingesetzt und mit
den Leitungen TXD, RXD, PTT und Masse belegt.
Bei auftretenden Problemen oder Fragen stehe ich gerne zur Verfügung.
Viel Spaß beim Umbau wünscht Norbert, DD4JN
This modification is read 450 times.
top of page
19-07-1998
(TM-401) TM-201/401 Increased TX Audio
Author: Trio-Kenwood Communication, inc.
Service Bulletin no. 880 (25-10-1983)
Some users of the TM-201 or TM-401 have reported they would like a slight increase in the microphone gain. Since there is no internal
microphone gain control on these radios, as simple mdification to the supplied MC-48 microphone will accomplish the same results.
Proceed as follows:
1.
2.
3.
4.
5.
6.
7.
8.
Unplug the microphone from the radio.
Remove the 3 Phillips head screws securing the rear of the microphone. (A number 2 tip is recommended.)
Remove the push-to-talk (PTT) switch bar, paying particular attention to how it is installed.
Gently remove the small printed circuit board by lifting straight up, and swing the board over t allow access to the component
side of the board.
Remove resistor R10, a 560 ohm 1/4 watt resistor.
Adjust VR1 Counterclockwise (CCW) 60 degrees.
Carefully reassemble the microphone, paying particular attention to the routing of the various wires, placement of the cirucit
board, and the PTT bar.
Reconnect the microphone to the radio and verify correct operation. Modification is now complete.
Time required for this modification is 1/2 hour or less.
top of page
This modification is read 465 times.
19-07-1998
(TM-411) TM-411 Low/No Receiver Sensitivity
2-14-85
Some users of the TM-411 have reported a loss of receiver sensitivity.
This may occasionally be traced to a loss of oscillation in the 2nd Oscillator, L29, on Unit A. Changing the below listed parts should
correct anly loss of sensitivity due to problems in the 2nd Oscillator.
O A Unit (X44-1600-00) change the following parts:
XTAL L29 to L77-0873-05
C15 to a 1.5 pf cap.
C54 to a 33 pf cap.
Time required for this modification is 1/2 hour or less.
top of page
This modification is read 487 times.
23-04-2000
(TM-411) TM-411A Microprocessor change
Author: Kenwood Communication, inc.
Service Bulletin no. 1041 (10 February 1994)
Symptom:
Due to a recent rule change by the FCC it is no longer possible to supply transceivers, or provide replacement microprocessor that
would allow a transceiver to receive in the 800 MHz band.
Corrective action:
The microprocessor program of IC5 has been modified to prevent 800 MHz band reception. Production has been changed beginning
with serial number lot 510xxxx. Units produced after this point will not be capable of 800 MHz reception.
Parts required:
Qty
1
Description
Microprocessor
Old part No.
75116GF-E83-3BE
New Part No
75116GF-J19-3BE
Procedure:
When ordering a replacement microprocessor you will be supplied with the new version. Please make sure your customer understands
the limitations of this new
This modification is read 494 times.
top of page
19-07-1998
(TM-421) TM-421ES fuer 9600 Baud
de DL8XAW @ DL8XAW.HH.DEU.EU
Moin alle zusammen...
Ich möchte an dieser Stelle mal über die Möglichkeit berichten, mit dem Kenwood TM421es 9600 Baud zu fahren.
Der "Umbau" ( wenn's denn wirklich einer ist ) ist kinderleicht. Beansprucht vielleicht 15 Minuten incl. nachsehen im Schaltplan. Aber
nun an's eingemachte...
Fangen wir mit dem Einfachsten an: Die RX-NF...
Sie kann DIREKT an der MIKE-Buchse abgenommen werden ( PIN 6 ) und steht sofort zur Verfügung.
Und nun zur SENDE-NF...
Man sehe in die Schaltung, suche VR3 ( in der Schaltung links unten ist ein gestrichelter Kasten: MIC (X59-3160-00)). Am Schleifer
von VR3 ist man schon fast richtig. Man verfolge nun die Leitung weiter in Richtung "C9". Die Leitung geht also an PIN 3 des MICModuls und kommt auf PIN 2 wieder raus.
Und genau der Pin wird angezapft und die TX-NF dort eingebracht.
Das Modul steht hochkant im TRX und hat 11 Pins. PIN 1 + 11 liegen auf Masse.
Wenn der TRX auf dem Rücken liegt ( mit dem Display zum Körper ) ist das dann der 2te PIN von rechts...
Nun muß nur noch ein R 56k und ein C 100nF in Reihe in die TX-NF, und schon gehts...
TX-Modem -> 100 nF -> 56K -> PIN 2 vom Modul.
Für die Leitung sollte man was abgeschirmtes nehmen. Ich habe hier Koaxkabel entsprechender "dünne" verwendet, und es geht wie
wild ( allen Unkenrufen zum trotz ).
Leider sieht's mit der Durchführung des Kabels nach aussen etwas mies aus (der TRX iss ja auch sehr klein ). Aber man kann den
Deckel aufbiegen oder anbohren und sich so einen Ausgang schaffen. Der Phantasie sind keine Grenzen gesetz....hi.
Ich hoffe, dem Einen oder Anderen geholfen, zumindest die Angst genommen zu haben. Der TM421es geht wirklich hervorragend für
9k6.
...das Modem hier ist ein TNC2H...und spielt UFB.
73, Jörg, DL8XAW @ DB0HBS+++
=============================================================================
from dj9km @ db0gv.#hes.deu.eu
Modifikation des Kenwood TM-421E für 9600 Baud Betrieb.
Diese Modifikation ist bei vielen Kenwood Geraeten der Serie TM-XXX - auch Duobandgeraeten - moeglich und ausprobiert worden.
Bauteile haben natuerlich eine andere Bezeichnung und Lage im Geraet.
Das TM-421E - und natuerlich auch andere so modifizierte Kenwoodgeraete - sind nach dem aufstecken des Mikrofons auch weiterhin
füer FM-Fonie Betrieb geeignet.
Am Empfangsteil des FM-Transceivers ist keine Modifikation der Schaltung noetig. Das RX-Signal liegt am 8-pol Mikrophonstecker an
Pin 6 mit einem Pegel von 150 mV / 600 Ohm an. Dieses Signal fuehre ich direkt zu meinem TNC2H. Bei vielen Geraeten der Kenwood
TM-Reihe ist dieses Signal direkt vom Diskriminator auf den Pin 6 des Mikroeingangs herausgefuehrt.
Um mechanische Arbeiten zu verhindern und den Originalzustand des Geraetes weitestgehend zu erhalten habe ich das TX-Signal
ueber eine "stillgelegte" UP- bezw. DOWN-Tastenleitung in das TM-421E gefuehrt. Dazu bietet sich der Pin 3(=DOWN) oder Pin
4(=UP) an.
Dazu die 12 Schrauben des Ober- und Unterdeckels entfernen. 3 Knoepfe abziehen. Die schwarze Fronteinheit nach vorne abziehen.
Diese Fronteinheit wird nur durch zwei Nuten an der Unter- und Oberseite gehalten. Die Schalter "LOW" und "POWER" um 90 Grad
vom Schalterkoerper abschieben. Plastikscheiben von "VOL" und "SQL" Achsen entfernen. Ueberwurfmutter und Distanzscheibe vom 8pol Mikroeingang entfernen. Den Blechrahmen durch loesen der beiden Schrauben rechts und links vorsichtig nach vorne abziehen.
Die nun freiliegende Prozessorplatine durch loesen der drei Kreuzschlitzschrauben loesen und komplette Platine von der
Steckverbindung zur Geraetebasis abziehen. Die Leiterbahn zum Mikro Pin 4(=UP) direkt an dem Mikrosteckereingang auftrennen. Ein
duennes Koaxialkabel ( am besten geeignet 2 mm Teflonkabel ) mit Innenleiter an Pin 4 und und Mantel an die Blechdurchfuehrung
des "SQL" Potis anloeten und mit einen Stueck Klebeband gegen Kurzschluß nach hinten absichern. Das Koaxkabel durch den
Ausbruch neben der Buchsenleiste nach oben zur Bestueckungsseite herausfuehren.
In Umgekehrter Reihenfolge Frontteileinheit wieder zusammenbauen.
Das TX-Signal wird wie folgt zur MIC-Platine (TM-421E = X59-3160-00) gefuehrt :
______________________
(koaxkabel-)
I
_____
I <---(massebruecke lochrasterplat.)
pin-4-mikro--O-----I_15k_I---II---O----------------O-------pin-2-mic
_I_
0.1uf
_I_
(masse /// koax)
(masse /// koax)
Den 15 KOhm Widerstand und den 0.1uf Kondensator fixiert man auf einem Stueck Lochrasterplatine und schraubt die Platine in der
Mitte der Bestueckungsseite an einem angedeuteten Loch am Alu-Spritzgußrahmen mit einer Blechtreibschraube fest.
Von der Lochrasterplatine fuehrt man das TX-Signal wieder ueber ein duennes Koaxkabel zur MIC-Subplatine. Die Platine befindet sich
beim TM-421E auf der Bestueckungsseite stehend zwischen den Reglern VR3 und VR4/VR7. Im TM-421E ist sie auf der Rueckseite mit 3160-00 bezeichnet.
Eingespeist wird das Signal an pin 2 auf der Loetseite der Basisplatine.
Pin 1 der stehenden Subplatine ist auf der Bestueckungsseite mit einem (gruenen) Punkt gekennzeichnet. Einen geeigneten
Masseanschluß fuer das Koaxkabel sucht man sich in der Naehe der MIC-Subplatine auf der Loetseite der Basisplatine des Geraetes
mit einem Ohmmeter. Koaxkabelanschluss auf der Unterseite ebenfalls mit einem Stueck Klebeband gegen den Deckel absichern.
Abgleich :
Der NF-Abgleich muss sehr sorgfaeltig erfolgen, da durch die umgangenen Begrenzerstufen die Varicap (TM-421E = D2) im VCO
schnell ueberfahren wird und es sodann zu sehr breitem Signal und anderen "Schmutzeffekten" kommt. Ich bin folgendermaßen
vorgegangen : Mit einem Scope habe ich mir den Hub des 1750 Hz Ruftones an pin 2 der MIC-Subplatine angesehen und dann in
meinem TNC2H mit dem Regler P1 (Mod-Vol) den gleichen NF-Pegel eingestellt.
Unbedingt notwendig ist die genaue Einstellung der Ausgangsfrequenz mit einem zuverlaessigen Frquenzzaehler. Bei meinem TM-421E
lag sie inzwischen um ca. 1.6 khz daneben, was bei FM-Foniebetrieb ziemlich unerheblich ist, aber bei Packet-Betrieb bedingt durch
die 9600 Baud Bandbreite zu Problemen fuehrt. Beim TM-421E ist das mit dem Trimmer TC3 moeglich.
Als Filterstellung im TNC2H benutze ich :
Dip-switch
Dip-switch
Dip-switch
Dip-switch
5
6
7
8
unten
oben
unten
oben
Diese Einstellung ist fuer die meisten Kenwoodgeraete der Serie TM-XXX zu ge- brauchen.
Damit ist der Abgleich beendet. Absolut optimal ist der 9600 Baud Betrieb mit einem PLL Geraet, welches fuer FM-Fonie konzipiert
wurde, natuerlich nicht.
Ein Datendurchsatzvergleich, durchgefuehrt an DB0SPC mit einem Testfile von 5000 Byte, zeigt fuer einen speziellen 9600 Baud
Transceiver eine Uebertragungszeit auf der Strecke von ca. 10-15 Sekunden an. Das umgebaute TM-421E kommt dabei auf ca. 20-25
Sekunden.
So dann viel Spass und Erfolg beim Umbau und natuerlich am 9600 Baud Betrieb ...
de Klaus - dj9km @ db0gv.#hes.deu.eu
This modification is read 570 times.
top of page
19-07-1998
(TM-421) TM-421a TX mod
This mod is only intended for experimental applications only! Know what freq you are on and don't use this mod if you are not for
sure.
The TM-421a is capable of transmitting from 136 to 174 MHz when the following modification is performed. The transmitter
specifications will vary from published in-band specifications.
1.
2.
3.
4.
5.
6.
7.
8.
9.
10.
Remove the top and bottom covers from the transciever.
Remove the knobs from the front panel.
Remove the nut from the mic jack and the nut from the channel selector switch.
Remove the 4 screws that secure the front panel to the body of the transceiver
Pull the front panel off the transceiver to expose the Control board.
Remove the 3 screws from the Control board. Gently pull the board off the transceiver.
Cut the GREEN jumper wire on the Control board.
Install an MA141A chip diode or 1N914 diode as D209 on the Control Board.
Reassemble the transceiver by reversing steps 1 - 6.
Reset the microprocessor by holding in the MR key as power is turned on.
This modification is read 645 times.
top of page
19-07-1998
(TM-431) TM-431A Wide Band Transmit Modification
This modification allows the TM-431A transceiver to transmit and receive from 420.000 MHz through 444.975 MHz with essentially full
power throughout the band.
1.
2.
3.
4.
5.
6.
Disconnect power
Remove top cover
Locate a green jumper wire sticking out of the front panel assembly (behind VFO switch)
Cut the jumper in half and insulate the ends
Assemble radio
This will reset the microprocessor and you will have to reprogram all channels
top of page
This modification is read 562 times.
19-07-1998
(TM-431) 9600 mod for TM431A
Connect TX data to MO input at PLL circuit board (X58-3480-00) through a 100 kohm resistor.
Connect RX data to DET output pin 12 at IC1 (FM IF HIC)
The only problem is that you must mute the TX data when you RX, because this way you modulate the PLL.
You can find these pins when you open the bottom cover.
Locate the four points where the PLL circuit cover is soldered to.
They are marked with 0 in the drawing.
FRONT PANEL
0
o
o
o
0
o
o
o
MO> o
0
0
oooooooooooooooo
^DET
73 de Wes OH3NWQ @ OH3RBR.#TRE.FIN.EU
PS. I have tried this - it works.
This modification is read 500 times.
top of page
19-07-1998
(TM-431) TM-431E fuer 9600 Baud
de DL1YCL @ DB0SGL
Hallo OM's!
benutze seit langem meinen TM431E fuer 9600 Baud. Habe dazu PIN MO der PLL mit der zuvor mit einem Messer getrennten
Lautsprecherbuchse verbunden.
im schaltbild steht:
X58-3480-00
PLL
darunter das ic der anschluss rechts oben heisst MO Speise nun also die 9600 Baud-AFSK ueber die Lautsprecherbuchse ein.
Das Demodulatorsignal liegt an der Mikrofonbuchse (PIN 6) und kann sofort verwendet werden.
Der TM431E ist ein geradezu ideales Geraet fuer 9k6.
Es kann sein, dass der Kondensator von MO (C 55 = .001) nach Masse (SMD-Technik) ausgeloetet werden muss, um den
Frequenzgang der 9k6 AFSK nicht zu beeinflussen. Ich habs gemacht.
Wuerde vorher aber mal probieren, ob man auf das Ausloeten auch verzichten kann.
1200 Baud speise ich ueber die Mikrofonbuchse ein. Das Demodulatorsignal an Pin 6 verwende ich fuer meine beiden Modems, 9k6
und 1k2.
Viel Spass
dies ist eine information von Christian in Hohenaspe, DK1QG JO43SX @ DB0HES ich markus aus datteln dl1ycl@db0sgl habe diese
aenderung noch nicht durchgefuehrt und gebe diese information ohne gewaehr weiter.
da ich so viele anfragen wegen des umbaus des tm431 bekommen habe spiele ich die info in die kenwood-rubrik ein.
also alles ohne gewaehr und mit doppelten boden hihi.
ihr koennt mir ja mal eine kurze info zukommen kassen ob der umbau geklappt hat da ich ihn selbst erst noch durchfuehren
muss(warte noch auf mein tnc2h) so das wars von mir
73 markus
This modification is read 488 times.
top of page
19-07-1998
(TM-431) Measure deviation using TM231,431,531
From AA9HX - ON7WP @ ON7RC.BT.BEL.EU
To all technical kenwood freaks,
All people clever enought to know that they have to do something about the tremendous amount of people constantly overdeviating,
mainly all using off the shelf kenwood equipment, coming straight from the factory adjusted at 6,7 or EVEN 8 KHz Peak deviation !!!!
This article describes how YOU can use your kenwood transceiver TM231, TM431, TM531 and apparently also the TMX41 range to
measure ON THE AIR deviation of repeaters and all other stations...
The principle of measurement is indeed very simple and DOES NOT NEED ANY MOD INSIDE YOUR TRANSCEIVER NOR EVEN OPENING
IT !!!
Your microphone connector provides at pin 6 an audio output, straight from the FM detector. As all kenwoods use the same detector
chip and coil, all give the same output voltage for a given deviation. The output at this pin 6 (and pin 8 as a ground) is linear up to 5
KHz deviation. As the IARU standard for amateur radio communication is 3 kHz peak deviation, this range from 0-5 KHz is perfect.
Connect your oscilloscope to pin 6 and 8 as ground, 400 mV peak to peak voltage corresponds to 3 kHz deviation. So 200 mV is 1,5
KHz deviation and so on.
CTCSS deviation should be around 300 Hz although most kenwood transceivers only react well from 400 Hz.
Packet should be set to approximately 2 KHz.
And additional an extra tip for improving the modulation quality of your kenwood TMx31:
As the microphone amplifier is quite overdriven, modulation sounds very rough, due to extreme clipping of the signal, especially a
nuisance in noisy environments, such as when mobiling in a not so luxury car.
This can become much better just by changing or in some cases adding the input resistor of the microphone amplifier. Differnt types
are used depen- ding on the market the transceiver was designed for. As they still believe at kenwood that europe uses a 25 kHz
raster and the states 20 kHz, europe types get lesser attenuation before the amplifier then stateside trx's.
Hey You there at the kenwood factory reading this: whole europe is changing to a 12,5 kHz raster, so will you please stop delivering
your transceivers and portabels with a deviation standard dating from jurassic park time !!!
schematic info:
Deviation potmeter TM231 VR3 and decrease R64
Deviation potmeter TM431 VR2 and decrease R58
Deviation potmeter TM531 VR3 and decrease R60
So remember 3 kHz is the standard, do not discuss wether it is good or not, IT IS THE STANDARD FOR AMATEUR RADIO.
It is the only way to live peacefully and to prevent wars between adjacent repeater or simplex channels.
(and by the way, narrowing the receiver bandwidth extends your range...)
Im looking forward to all comments, and I hope that somebody of the kenwood technical crew also will read this and do something
about the adjustment of the new transceivers...
73 from Pedro M.J. WYNS AA9HX, ON4AWQ, ON7WP,
full licensed transceiver doctor... HI !
ON7WP @ ON7RC.BT.BEL.EU
This modification is read 508 times.
top of page
19-07-1998
(TM-441) TM-441E Umbau 9k6
de DC2FG @ DB0GV.HES.DEU.EU
Vorneweg: Der Umbau ist recht einfach.
Die Sende/Empfangsumschaltung kann man nach wie vor an der Mikebuchse abnehmen..ist klar (Pin 2).
RX KANN man auch dort abnehmen (Pin 6), der Pegel ist etwas kleiner als im Geraet (kommt halt aufs Modem an, was man da
braucht); ich hab eins von dk9sj, da gehts hier wunderbar.
Ansonsten nimmt man Rx im Geraet ab wie folgt:
Unteren Gehaeusedeckel abschrauben, Geraet so legen, dass Frontplatte von einem weg zeigt (wir blicken nun auf die Loetseite der
Platine).
Die Mikebuchse sollte sich nun oben rechts befinden; zwischen Frontteil des Geraetes und Platine sieht man nun 2 jeweils 13-Polige
Anschluesse - nur der rechte interessiert uns:
Obere Reihe, der 3. Anschluss von rechts (RD heisst er), da ist die RX, die wir wollen. Der ganz rechte Punkt ist Masse (fuer die
Abschirmung).
Man sieht, an der Mikebuchse ists einfacher....
TX:
Geraet so liegen lassen wie bisher.
Vom rechten Geraeterand aus ca. 9 cm und von den Kuehlrippen aus 3,5 cm; das ist der Bereich in dem wir wirken wollen !
Dort nun verlaeuft senkrecht nach oben eine Anschlussleiste der Unit 3480.
Der unterste Pin (Nr.1) ist TX, dort wollen wir einspeisen !
Schraeg rechts unter Pin 1 (auf ca. 5 Uhr) ist ein dicker Loetpunkt fuer die Masse.
Von dem Pin 1, an dem wir einspeisen, gehts uebrigens via C53 zum Hubpoti VR 2; das noch als Anhaltspunkt. Sehen tut man das Poti
auf der Bestueckungsseite, es ist auf der Platine mit VR 2 beschriftet.
Tja, das war es schon.
Wie man nun wo die abgeschirmten Kabel verlegt, moege jeder nach eigener Kreativitaet entscheiden.
Viel Spass beim basteln !
Mein besonderer Dank geht hier an DC3KM und DJ0MDJ, die mir wertvolle Hilfen gaben.
Falls eine aehnliche Anleitung schon mal in den Boxen stand, sei auch diesem "Ureinspieler" gedankt, leider ist sein Beitrag dann in
den mir erreichbaren Mailboxen der Lifetime zum Opfer gefallen.
73, Alex. DC2FG @db0gv
This modification is read 750 times.
top of page
01-10-2000
(TM-441) QRG mod for Kenwood TM-441E
Author: Oliver, DG7XO - [email protected]
Hallo, hier eine kleine Anleitung, wie man mit dem Kenwood TM-441E einen Frequenzbereich von 340-512 MHz erreichen kann.
Unter der Prozssor Platine (Frontplatine) direkt unter der "TONE-Taste" befindet sich eine Diode D209.
Dazu muss man die Mic-Buchsenmutter lösen, sowie alle Einstellregler. Danach kann man das Plastikgehäue abnehmen. Die LCDEinheit ist nur gesteckt und kann jetzt abgezogen werden. Danach den Metallrahmen (4 Schrauben) abnehmen und die
Prozessoreinheit abziehen, die aber mit 2 Schrauben noch gesichert ist !
Auf der Rückseite einfach die Diode D209 ablöten oder den einzelnet Pin hochbiegen und schon kann man von ca 340-512 MHz
empfangen. Senden geht auch, nur ist mir nicht bekannt, in welchem Bereich.
Wiegesagt, die Diode ist GENAU unter der Tone-Taste !
Für enstandenen Schäden kann natürlich keine Haftung übernommen werden.
vy 73 de Oliver, DG7XO, [email protected]
This modification is read 744 times.
top of page
19-07-1998
(TM-451) Frequency expansion for the Kenwood TM 451 E
Demontage:
At first remove the upper case-cover, then the speaker can be removed and pull the connector of the speaker.
Then remove the lower part of the case. Then pull off the 3 knobs on the front side and remove the front side paneel. Bee carful, the
front paneel is fixed through 4 straps which can break. Lift the straps carfully with a little screw driver or with Your fingers then pull
the front paneel forward.
On the front side of the TRX loose 1 screw and the screws of the tuning knob. Loose the display with the transparent plastic frame
carfully in forward. Remove the power button to side. A metall frame is fixed with 4 screws on side. Remove screws an pull the metall
frame forward. The 2 screws of the processor platine front side can now be removed. Before taking out the processor platine, remove
CTSS- or DFMF-units if they are there.
The processor platine is linked with 2 connectors with the F-platine. Pull these connectors softly! Take the platine with Your fingers
near the connectors.
The processor is signed with "D 6433388F" and it is an 80-pin square SMD- ic. One edge is a little cut off, here begins the pin
numbering counterclockwise. Between pin 64 and 65 that is right above the marked edge is a diode with a resistor in row connected.
It is a smd-diode in a black pastic case. Remove it fully or solder it off only on 1 pin. Do not remove the diode in a field which is white
framed.
Write down what You do when demounting the case and mount all together. At last make a reset (described in the manual).
What is new?
TM 451 E RX ranges:
136-173,995 MHz all rasters
300-469,995 MHz all rasters
800-999,9875 MHz only 12,5 and 25 kHz Raster
TX Range: 410-469,995 MHz all Rasters
To help with this mod. You want to be looking in the area were the lithium battery is. With the battery facing you, the IC is to your
left. In my 451E the IC Chip D 6433388F is not visible because of a sticker on the chip.
Refer to the schemetic if in doughbt that's what I did! Still with the battery facing you, look left and at the top of the chip and from
right to left count 5, this is pin 64 and 65. Now above you'll see a resistor with white edges, and directly above you'll see the black
diode! that's horizontal, just unsolder one leg.
And don't for get to rerset the rig! But mine did it automaticly Hi.
I take no responsability if you damage your radio, proceed at your own risk, but it worked for me!
This modification is read 745 times.
top of page
19-07-1998
(TM-451) TM-451E Low Power Mod
Open the upper panel, this one where you can put the ME-1
With the display front of you and the dissipator to the bottom, you will see at the upper right corner near the radiator some very small
pot. VR The good one to turn for reducing power is VR102.
A screwdriver is all you need for this mod.
This modification is read 643 times.
top of page
19-07-1998
(TM-455) Solution 9k6 TM255/455
Dear OM's
This is what I found a service technical report from Kenwood acc. TM255 and TM455 9600bps Date November 8, 1994
SUBJECT: Countermessure against modulation during packet 9600bps operation.
Phenomenon:
A trouble modulation malfunction during packet 9600bps operation was found in the manufacturing process even trough there in input
in the DATA terminal.
Pay heed to this trouble in replacing the analog switch IC13.
Cause:
This trouble is cuased by variation in the analog switch IC13.
Even if the 9600bps SW Tr.(Q20:DTA124EK) has been turned ON, the analog switch IC remains unstable.
Counter messure:
We decided to raise the analog switch IC13 voltage while the 9600bps SW TR. (Q20:DTA124EK) is in action by changing the chip
resistor R117 in the TX-RX-unit of TM455A/E and of TM255A/E.....etc.
R117=10K to be replaced with 3K3
So if you have problems with those two say to your dealer to ask for SERVICE TECHNICAL REPORT No. B510-94-081E page 1/2 and
page 2/2
73's DE PAT KE6MIQ
top of page
This modification is read 626 times.
23-04-2000
(TM-455) TM-455A/E Change in pin diode
Author: Kenwood Communication, inc.
Service Bulletin no. 1058 (6 May 1994)
Symptom:
Some early versions of the TM-566A/E have been discovered with a bad solder connection at the final module pin diode, D601. If the
impedance of this devices is too low, the power consumption for this devices goes up. This increased power consumption might cause
excessive heating of the solder connections, and may result in a failure of the connection(s) after long FM transmission.
Countermeasure:
On the TX/RX unit replace diode D601 with a UM9401, change R606 to 100 ohm, change C623 to 5 pF, and C624 to 12 pF. After
replacing these parts, readjust the NULL and Protection circuit using the procedure provided in the service manual.
Parts required:
Qty
1
1
1
1
Description
Pin diode
100 ohm chip resistor
5 pF chip capacitor
6 pF chip capacitor
Part No.
UM9401
RS14DB3A101J
CM73F2H050D
CM73F2H060D
Circuit Description
D601
R606
C623
C624
Time required for this modification is 60 minutes or less.
This modification is read 662 times.
17-11-2000
(TM-461) Expand the TX to 420 to 450MHz
Author: SM4RNA, Anders - [email protected]
●
Take top cover off.
●
Locate the green wire called W2.
●
Cut and insulate both ends.
●
Do a full re-set of the radio.
top of page
This modification is read 333 times.
top of page
19-07-1998
(TM-531) TM-531 & 9600 Baud
To use the Kenwood TM531 with a g3ruh 9600 Baud modem:
1. PLL-unit modifiation:
Change R56 to 3k.
Change C56, 57 to 10uF/10v.
2. Main board:
Remove C55, 70, 118.
3. TXA:
TXA via 150k to MO (pll-unit).
4. RXA:
RXA to pin 12 ic2 (main board).
5. Change C34 (ruh board) to 1uF (mkm).
6. You'll need a eprom COA.
7. Solder a ptc (siemens b30-0845-05 (60 Gr. Celius)), on the VCO-unit.
73's, Ed. PE1NAT
----------------------------------------------------------------I received your mail today morning,on Dec., 15.
I'm using TM-531 on G3RUH type 9600bps modem.
We ha local aria network using 9600bps modem.
It is working well,now. But, beginning of this network is not easy.
You can connect G3RUH type modem as follow.
1. TXA
Take off the shielding plate under the main PCB.
Search for VR3 on main PCB.
VR3 is indicated on PCB "MAX DEV" for adjust maximum deviation.
The slider of this VR is connected to MD pin of VCO through C55 capacitor.
Connect TXA to MD pin of VCO using resister(56k to 100kohm) and capacitor 0.1uF,connected in series,like follow.
TXA ---II------///----MD(VCO)
0.1uF
56k to 100kohm
If you get weary to take off shielding plate,you may connect the TXA to hot end of VR3, using the resister and capacitor as aforesaid.
TM-531 & 9600 Bps.
2. RXA
Search for IC2 on main PCB.
IC2 is a 16 pin hybrid IC for IF AMP and discriminator.
You can discriminate pin number of this IC from printed symbol on the main PCB, and grand pin.
Pin 2 and 16 is connected to grand.
pin 5 is output for ceramic filter(CF1),and pin 7 is input from the filter.
Connect RXA to pin 12(DET) directly.
9600bps on 1200MHz band is very difficult. Because,frequency stability is not enough. And, IF band width is not enough,too.
We are developing SMC transceiver for G3RUH modem on 144,430,1200MHz band.
It has high stability PLL OSC(about 1ppm) and good linearity modulator (voltage controlled X'tal OSC)
Sammy JE1RLA @ JE1RLA
This modification is read 494 times.
19-07-1998
(TM-531) Measure deviation using TM231,431,531
top of page
From AA9HX - ON7WP @ ON7RC.BT.BEL.EU
To all technical kenwood freaks,
All people clever enought to know that they have to do something about the tremendous amount of people constantly overdeviating,
mainly all using off the shelf kenwood equipment, coming straight from the factory adjusted at 6,7 or EVEN 8 KHz Peak deviation !!!!
This article describes how YOU can use your kenwood transceiver TM231, TM431, TM531 and apparently also the TMX41 range to
measure ON THE AIR deviation of repeaters and all other stations...
The principle of measurement is indeed very simple and DOES NOT NEED ANY MOD INSIDE YOUR TRANSCEIVER NOR EVEN OPENING
IT !!!
Your microphone connector provides at pin 6 an audio output, straight from the FM detector. As all kenwoods use the same detector
chip and coil, all give the same output voltage for a given deviation. The output at this pin 6 (and pin 8 as a ground) is linear up to 5
KHz deviation. As the IARU standard for amateur radio communication is 3 kHz peak deviation, this range from 0-5 KHz is perfect.
Connect your oscilloscope to pin 6 and 8 as ground, 400 mV peak to peak voltage corresponds to 3 kHz deviation. So 200 mV is 1,5
KHz deviation and so on.
CTCSS deviation should be around 300 Hz although most kenwood transceivers only react well from 400 Hz.
Packet should be set to approximately 2 KHz.
And additional an extra tip for improving the modulation quality of your kenwood TMx31:
As the microphone amplifier is quite overdriven, modulation sounds very rough, due to extreme clipping of the signal, especially a
nuisance in noisy environments, such as when mobiling in a not so luxury car.
This can become much better just by changing or in some cases adding the input resistor of the microphone amplifier. Differnt types
are used depen- ding on the market the transceiver was designed for. As they still believe at kenwood that europe uses a 25 kHz
raster and the states 20 kHz, europe types get lesser attenuation before the amplifier then stateside trx's.
Hey You there at the kenwood factory reading this: whole europe is changing to a 12,5 kHz raster, so will you please stop delivering
your transceivers and portabels with a deviation standard dating from jurassic park time !!!
schematic info:
Deviation potmeter TM231 VR3 and decrease R64
Deviation potmeter TM431 VR2 and decrease R58
Deviation potmeter TM531 VR3 and decrease R60
So remember 3 kHz is the standard, do not discuss wether it is good or not, IT IS THE STANDARD FOR AMATEUR RADIO.
It is the only way to live peacefully and to prevent wars between adjacent repeater or simplex channels.
(and by the way, narrowing the receiver bandwidth extends your range...)
Im looking forward to all comments, and I hope that somebody of the kenwood technical crew also will read this and do something
about the adjustment of the new transceivers...
73 from Pedro M.J. WYNS AA9HX, ON4AWQ, ON7WP,
full licensed transceiver doctor... HI !
ON7WP @ ON7RC.BT.BEL.EU
top of page
This modification is read 482 times.
20-04-2000
(TM-531) TM-531A 20 MHz offset modification
Author: Trio-Kenwood Communication, inc.
Service Bulletin no. 956 (9-1-1990)
The TM-531A offset can be changed from 12 MHz to 20 MHz be performing the following modification. Once the modification is done,
only 20 MHz can be selected. It is recommended that this modification be performed at the dealer level since they have the correct
tools to disassemble the transceiver.
Required tools:
Spanner wrench
11mm wrench
(W05-T004)
(W05-T009)
for mic jack nut
for rotary encoder nut
1. Disconnect the power supply and antenna.
2. Remove the top and bottom covers (2 screws on each cover).
3. Pull the 3 knobs off the front panel.
4. Remove the nut from the microphone jack.
5. Remove the nut from the rotary encoder.
6. Remove the 4 screws from the front panel assembly (1 on each side, 1 on top, and 1 on the bottom).
7. Pull the front panel off the body of the transceiver.
8. Remove the 3 screws from the TX-RX board (X57-3340-11 B/2).
9. Pull the board off the body of the transceiver, but do not disconnect the wire harness.
10. Locate D208 on the foil side of the TX-RX board (figure 1).
11. Desolder and remove the diode.
12. Assemble the transceiver be reversing steps 1 - 9.
This is an optional change that is not covered under warranty.
Time required to perform this modification is ½ hour.
This modification is read 491 times.
top of page
19-07-1998
(TM-621) TM-621 to 9600 baud
The mods to do 9600 baud packet using a K9NG or G3RUH modem are fairly simple to do with the Kenwood TM-721/621 radios. Look
at your schematic.
Receive data is taken from the dicriminator output. Look for the 3.3K resistor comming off pin 9 of the last IF stage. Connect a 1K
series resistor from the modem RX input to the junction of the .001 and 3.3K.
PTT is taken off pin 2 on the microphone connector. TX data is fed through a 1K series resistor to the top of VR3 (the deviation
conltrol).
This method has been tested and works quite well on 440 MHz and 220 MHz. The mods haven't fully been tested on the 2 meter
portion of the radio.
The TM-731 radio is different enough to cause problems. What needs to be done is to add another RX Mute transistor. (Look at the
schematic and see how the TX deviation is shorted to ground during receive.) Use a plain NPN and a pair of 10K resistors (copy the
one used on VR3 in the schematic). Take the TX data and feed it to the collector through a series 1K resistor, and then feed that
through another 1K resistor to the wiper of the deviation pot. This was a result of Kenwood changing the deviation pot value from 10K
to 100K. (It wasn't broken, but they fixed it anyway.)
As with any modifications, take reasonable care, and I won't be responsible if you trash your radio. BE CAREFUL; it is full of surface
mount devices.
This MOD file was written by Jeff, WA6FWI @ WB6YMH.#SOCA.CA.USA.NA
Schematics and layouts are available by request through the author.
top of page
This modification is read 464 times.
08-08-2001
(TM-621) Modulations mod for TM-261
Author: KC8EVB - [email protected]
The modulation that is set on the TM-261A from the factory isn't always up to snuff. After having to repeat myself for about the 50th
time in a month, I decide it was time to "turn it up".
1. Open the top of radio by removing to 2 screws and pulling up from the back of the lid.
2. Find VR3 and adjust clockwise until desired audio level is reached. (Mine is set to about > up)
3. Put the lid back on and stop repeating yourself.
73, KC8EVB [email protected]
top of page
This modification is read 568 times.
21-04-2000
(TM-631) TM-631/731A Memory loss modification
Author: Kenwood Communication, inc.
Service Bulletin no. 972 (8-8-1990)
Some TM-631/731A owners have reported that the transceiver intermittently loses its memory channel information when the power
switch is turned on. The following modification will absorb pulses on the CPU interrupt line (INT4) and reconfigure the backup
switching circuit to avoid unintentional memory loss.
Read all instructions before proceeding. Do not attempt this modification if it is beyond your capability.
Required parts: ZKIT-731MEMO
The kit contains:
Part #
NJM78L06A
1SS133
MTZ3.0JB
CE04NW0J221M
C91-0457-05
CK45B1H103K
RD14BB2C103J
RD14BB2C102J
RD14BB2C472J
RD73FB2A472J
Description
6 V AVR
Diode
3.0 V Zener diode
220 µF, 6.3 V Electrolytic capacitor
0.022 µF ceramic capacitor
0.01 µF ceramic capacitor
10 Kohm, 1/6 watt resistor
1 Kohm, 1/6 watt resistor
4.7 Kohm, 1/6 watt resistor
4.7 Kohm, 1/10 watt resistor
QTY.
1
1
1
1
1
1
1
1
1
2
1. Disconnect the power supply, antenna, and microphone.
2. Remove the top and bottom covers (12 screws). Do not damage the speaker wires when removing the top cover.
3. Pull the Main Encode, Volume, and Main Squelch knobs off the front panel. If a knob does not easily pull off, wrap a cloth around
the knob and carefully pull it off with a pair of pliers. Be careful not to crush or scar the knob.
4. Remove the two brass colored screws from the top of the plastic front panel. Figure 1.
5. Gently lift the two tabs on the bottom of the front panel and then pull the front panel off the transceiver. Figure 2.
6. Remove the two black shades from the Balance and Sub-Squelch controls. Figure 3.
7. Remove the three brass colored screws from Control board B/3. Figure 3.
8. Remove the brass colored screw that is mounted on the front panel chassis above the Power switch. Figure 4.
9. Remove the brass colored screw that is mounted on the front panel chassis to the right of the microphone jack. Figure 4.
10. Carefully pull Control board (B/3) away from the body of the transceiver.
11. Disconnect the two "wire type" cables from the body of the transceiver.
12. Disconnect the two flex cables from the Control board. The flex cables simply pull out of the connectors.
13. Remove IC102 from the Control board. Since this device is glued to the board, use a needle tip tool to lift each pin as you melt
the solder. Then pry the chip off the board with a craft knife. Figure 6.
14. Remove any excess glue and solder from the area where IC102 was located.
15. Remove chip resistor R103. Do not melt connector CN101. Figure 6.
16. Cut the foil pattern between connector CN101 and chip capacitor C102. Make the cut as close to connector CN101 as possible.
Figure 6.
17. Prepare the 1SS133 diode for installation. The cathode lead will be cut and bent 90°. The diode must lay flat on the board and
the cathode lead cannot touch the cut in foil. Once the diode leads are prepared, solder the diode in place. Figure 7.
18. Prepare the NJM78L06A 6 V AVR for installation as shown in figure 8. The leads to this device are vary soft and can break when
bent too often. Make each bend only once.
19. The 6 V AVR will be mounted in place where IC102 was located. The board must first be prepared for the installation. Remove
the protective coating from the foils as shown in Figure 7. These are the foils that where connected to pins 2 and 7 of IC102 and
the ground foil that runs under the device.
20. Place the 6 V AVR on the board and make sure the leads contact the foils. Cut the leads to size and then solder the device to the
board. Figure 9.
21. Prepare the 0.01 µF capacitor, 10 Kohm resistor, and 4.7 Kohm resistor for installation. Place the parts on the board to size and
cut the leads. Once the parts are prepared, solder them to the board. Figure 10.
22. Locate R105. If the component is 47 Kohm, change it to a 4.7 Kohm chip resistor. The component's value can be determined by
the numbers written on the case. If the device is labeled 473, it is a 47 Kohm resistor and needs to be replaced. If the device is
labeled 472, it is a 4.7 Kohm resistor and does not need to be replaced. Figure 10.
23. Straighten the tabs that hold the LCD assembly to the Control board. Carefully pull the LCD assembly off the Control board (do
not break the flex cable). Figure 5.
24. Remove C123. This chip capacitor is located in the corner of the board under the LCD assembly. Figure 11.
25. Remove the protective coating from the foils as shown in figure 11.
26. Place the 3.0V zener diode on the board. Size and cut the diode's cathode lead. Solder the lead to the board. Figure 12.
27. Place the 1K ohm resistor on the board. The body of the resistor must be parallel to the diode. Size and cut the resistor's left
hand lead. Solder the lead to the board. Figure 12.
28. Bend the diode's anode lead and solder it to the resistor's right hand lead. Do not allow the leads to touch the board. Trim the
leads after soldering. Figure 12.
29. Prepare the 0.22 uF capacitor for installation. Place the component on the board to size and cut the leads. Figure 12.
30. Solder the left hand lead to the junction of the zener diode and 1 K ohm resistor. Do not let the connection touch the board.
Figure 12.
31. Solder the right hand lead to the board as shown. Figure 12.
32. Replace C107 with the 220 uF electrolytic. C107 is located between the Main and Sub rotary endoders. Figure 3.
33. Mount the LCD assembly an the Control board and bend the four tabs to hold it in place. Make sure the LCD does not touch the
leads of the new parts.
34. Connect the two flex cables to the Control board and then plug the two "wire type" connectors into the body of the transceiver.
35. Mount the Control board on the body of the transceiver and secure it with the three brass colored screws that go through the
Control board. Be careful not to pinch any wires.
36. Install the brass colored screw that goed above the power switch and install the brass colored screw that goes to the right of the
microphone jack.
37. Install the two black shades on the Balance and Sub-Squelch controls.
38. Slide the lock, balance, and Sub-Squelch controls to the left.
39. Slide the Lock, Balance, and Sub-Squelch knobs on the plastic front panel to the left.
40. Gently install the plastic front panel on the front panel assembly. Do not force the installation.
41. Install the two brass colored screws on the top of the plastic front panel.
42. Install the Main Encode, Volume, and Main Squelch knobs.
43. Remove the two screws from the small board where the positive power lead connects on the bottom of the transceiver.
44. Solder the remaining 4.7 Kohm chip resistor to the foil side of the board. Figure 13.
45. Mount the board and install the covers on the transceiver.
This modification may be covered under warranty.
Time required to perform this modification is 1 hour or less.
top of page
This modification is read 481 times.
21-04-2000
(TM-631) TM-731A/631A Final board C17 change
Author: Kenwood Communication, inc.
Service Bulletin no. 977 (8-8-1990)
Bypass capacitor C17 on the 144 MHz Final board has been changed in production from a "flat package" chip capacitor to a "cylindrical
package". The change prevents the capacitor from fracturing. If C17 fractures, the output of the power module can burn C17, R11,
and L6. Additionally, Q1 on the TX/RX 144 MHz board may be damaged.
C17 should be changed as a part of routine maintenance when a TM-731A/631A is received for service. The new style capacitor part
number is CK41FY1E102M. For field service, a 0.001 µF, 25 V disc ceramic capacitor can be used.
The production change started at serial number 108xxxx.
To replace C17:
1. Disconnect the power supply and antenna.
2. Remove the top cover. Do not damage the speaker wires.
3. Remove the shield plate from the VHF Final unit (4 screws). Figure 1.
4. Remove the 7 screws that secure the final board to the chassis. Figure 2.
5. Remove the 2 screws that secure the power module to the chassis. Figure 2.
6. Remove the 2 screws that secure the VHF antenna coax to the heat sink.
7. Desolder the center conductor and shield of the VHF antenna coax from the final board and pull the coax out of the heat sink.
Figure 2.
8. Desolder the terminal next to pin 3 of the power module. Figure 2.
9. Rotate the board toward the front of the transceiver to expose the foil side of the board.
10. Inspect the solder at the terminals the antenna coax was soldered to. They may need to be resoldered.
11. Replace C17. Figure 3.
12. If you are serving a TM-731A/631A that has been damage, check R11 and L6. The coil may have pin hole burn marks in its
insulation and the resistor may be open. In addition, check Q1 on the RX/TX (144 MHz) board. If it is damage, the receiver
sensitivity will be low.
13. If the Final board has been burned, it can be repaired. The carbon must be completely removed from the board to prevent the
board from burning any further (carbon tracking of the RF signal). The burned area should be filled with epoxy an the lands must
be repaired.
This modification may be covered under warranty during the warranty period.
Time required to perform this modification is 1 hour or less.
top of page
This modification is read 466 times.
23-04-2000
(TM-642) TM-642/742/942A Microprocessor change
Author: Kenwood Communication, inc.
Service Bulletin no. 1040 (10 February 1994)
Symptom:
Due to a recent rule change by the FCC it is no longer possible to supply transceivers, or provide replacement microprocessor that
would allow a transceiver to receive in the 800 MHz band.
Corrective action:
The microprocessor program of IC5 has been modified to prevent 800 MHz band reception. Production has been changed beginning
with serial number lot 510xxxx. Units produced after this point will not be capable of 800 MHz reception.
Parts required:
Qty
1
Description
Microprocessor
Old part No.
HD6433388A22F
New Part No
HD6433388A25F
Procedure:
When ordering a replacement microprocessor you will be supplied with the new version. Please make sure your customer understands
the limitations of this new
This modification is read 465 times.
top of page
23-04-2000
(TM-642) Microprocessor Change, TM642/742/942
Author: Kenwood Communication, inc.
Service Bulletin no. 1042 (28 March 1994)
This bulletin supercedes ASB-1033.
Symptom:
Reports of problems with microprocessor lock-up when using S-meter squelch, problems with storage/recall of PL tone frequencies of
203.5 Hz. and/or 114.8 Hz., or problems with a lack of transmit on the UHF band modules during Remote operation can be corrected
using the changes noted in this bulletin.
Notes:
1. All TM-642A transceivers work fine and do not require any changes.
2. TM-742/942's that exhibit any of these symptoms with serial numbers between 412XXXX and 509XXXX need only change IC1 on
X53-3460-21 B/2.
3. TM-742/942's that exhibit any of these symptoms with serial numbers of 412XXXX and below must also change IC1 on X54-313011.
4. TM-742's with serial numbers of 509XXXX and greater have had these changes incorporated in production.
5. Some TM-742's and TM-942's below serial number 509XXXX were returned to Japan for modification. If the unit that you have
has a black dot on the box near the serial number it has already been modified and requires no further action.
Parts Required:
Qty
1
1
Description
Old Part No.
Microprocessor HD6433388A07F
or
HD6433388A14F
Microprocessor HD404719A26H
New Part No.
HD6433388A22F
Circuit Description
IC-1
HD404719A32H
IC-1
Caution: This modification requires advanced surface mount soldering equipment that is rated for CMOS circuits. It also requires
familiarity with advanced surface mount soldering techniques. If you do not have the proper equipment or knowledge do not attempt
this modification yourself.
Attemping to remove and replace either IC without the proper equipment and techniques can easiy damage the circuit boards and void
your warranty.
Seek qualified assistance from your closest Kenwood Service Center (Long Beach, CA, or Virginia Beach, VA).
Time required for this moditication is 90 minutes or less.
This modification is read 463 times.
top of page
19-07-1998
(TM-701) TM-701A repeater cross-band modification
Perform the following modifications to allow the TM-701A to operate in the repeater cross-band mode.
MODIFICATION:
1. Disconnect the power supply and antenna.
2. Remove the top and bottom covers (12 screws). Disconnect the speaker wire from the transceiver.
3. Locate the green jumper wire show in figure 1. Using a sharp pair of wire cutters, cut the jumper in half.(green jumper)
______
______________ |
|_____
|
TOP
<|---- Green Jumper
|
|
|
|
|
Heat sink
|
|
|
|
|
/
figure 1
CAUTION:
Cutting the green jumper allows the TM-701A to transmit from 142 to 151.995 MHZ. Protect your license by only using
frequencies that you are authorized to transmit on.
4. Solder a jumper wire to the foil side of the TX-RX board as shown in figure 2.
______
^
__|
|________|________________
|
Display side
|
|
X ......
|
|
X ......
|
|
- ----|
|
|
..............
| <---------.
|
Pin #3
:____________|
:
figure 2
X = Screw
ADD Jumper
5. Assemble the transceiver by reversing steps 1 -2.
6. Reset the microprocessor by holding in the MR key as the power is turned on.
The repeater cross-band operation allows the TM-701a to receive on one band and re-transmit the signal on the other band. The TM701a alternately displays the two bands until a signal is received. The transceiver will then display the band that is re-transmitting the
signal. The SHIFT function cannot be used during the repeater cross- band operation. If the TONE or CTCSS function is required, only
one ETA tone can be used for the two bands.
OPERATING PROCEDURE
1. Select the operating frequencies for both bands.
2. Set the squelch control to the threshold point. The TM-701a will transmit in the repeater cross-band mode if the squelch control
is set too low or a signal is received.
3. Place the transceiver in the duplex mode (F + DUP).
4. Press the F key for longer than one second. The F indicator will flash.
5. Press the LOW key. The transceiver will now enter the repeater cross-band mode of operation.
6. To cancel the operation and return to the VFO mode, press the VFO key.
Figure 2
rear of radio
-----------------------------------------------------!
!
!
!
!
o
!
!
o
!
!
o
!
!
o
!
!
o o
!
!
o o
!
!
o o
!
!
o o
!
!
o o
!
! __add__________Xo
!
! i
o
!
! i
o
!
! i
!
! i ooooooooooooooooooooooooooooooo
!
! i
!
! -------i
!
!
i
!
!
Xo@o
!
!
!
!
ooooooooooooooo
!
!
oooooooooooooooooooo
!
_____________________________________________________
mic plug
(radio bottom)
(Jumper wire from X to X)
This modification is read 694 times.
top of page
19-07-1998
(TM-701) TM-701 transmitting and receiving from 136-175MHz
The Kenwood TM-701 A is capable of transmitting and receiving from 136-175 MHz. and from 340-512 MHz. when the following mods.
Cut the GREEN jumper wire on the Control PC Board behind the front panel.
The control PCB # is X57-3350-00. Add Diode D207 and D 209 (1ss181 or equiv) a 1n914 should work fine. Anode goes to the
switches and the cathode to the IC (IC201).
2. Reset the microprocessor by holding in the "MR" key as the power is turned on.
to access the Control PCB:
1.
2.
3.
4.
5.
6.
7.
remove top bottom covers.
remove knobs pulling them straight off of the front panel.
Remove plastic faceplate.
remove 4 screws on front panel metal spacer and remove panel.
remove plastic panel/LCD by pulling straight off of the rig toward front.
remove the 3 screws from the Control PCB and pull straight off of the chassis.
Diodes mount on the back of the PCB at S205 and S209. The Andoe goes toward the switches and the cathode goes away from
the switches.
D209 goes to S205 (TONE switch)
D207 goes to S209 (MR switch)
D208 goes to S204 CAUTION remove D208 only if you want to change the split from +- 5 Mc to +- 1.6 and - y6 Mc (european
split).
replace all parts in reverse order. There is no RF circuit adjustments needed for this mod.
If there are any questions please call me at N4LDG PBBS Miami or write me at 11102 S.W. 117 Street Miami, Fl 33176 Hope you can
now enjoy a nice rig!
John KA4ZAY Miami
top of page
This modification is read 703 times.
20-04-2000
(TM-701) TM-701A Intermittent memory loss
Author: Trio-Kenwood Communication, inc.
Service Bulletin no. 966 (4-4-1990)
Some TM-231A owners have reported that the transceiver intermittently loses its memory channel information at power on. The
following modification will absorb pulses on the CPU interrupt line (INT4) and reconfigure the backup switching circuit to avoid
unintentional memory loss.
This modification should be performed on a Dealer level as they have the correct tools to disassemble the transceiver.
Required parts:
220 µF, 6.3 V Electrolytic capacitor
0.01 µF ceramic capacitor
0.022 µF ceramic capacitor
2.2 Kohm chip resistor
1 Kohm carbon resistor
3.0 V Zener diode
CE04NW0J221M
CK45B1H103K
C91-0475-05
RK73FB2A222J
RD14BB2C102J
MTZ3.0JB
1. Disconnect the power supply, antenna, and microphone.
2. Remove the top and bottom covers (12 screws). Disconnect the speaker plug when the top cover is removed
3. Remove the knobs from the front panel.
4. Remove the nut from the microphone jack and the 11mm nut from the channel selector switch.
5. Remove the 4 screws that secure the front panel to the body of the transceiver.
6. Pull the front panel off the transceiver to expose the Control board.
7. Remove the 3 screws from the Control board. Gently pull the board off the transceiver.
8. Perform the changes shown in the accompany diagram. C202 is on the component side of the Control board. All other work will
be done on the foil side of the board.
This modification may be covered under warranty.
Time required to perform the modification is 1 hour or less.
top of page
This modification is read 642 times.
19-07-1998
(TM-702) KENWOOD TM-702 to 9600 baud
Traduction by IK6SBE
The following description refers to the modification of RTX double band KENWOOD TM702E with the pourpose of enabling the
operation at 9600 Baud with the use of modem G3RUH.
The radio functions very well and herebelow the details.
Please note that i have made the necessary connections on the main grid, souldering side, on minus of the PTT.
For the reception i have connected the audio plug for the two meters directly on the PIN 12 of IC 11, and for the 70cm directly on the
PIN 12 of IC 3.
For the trasmission on 2 meters i made the contact between the resistor SMD R70 of value 0 and the trimmer VR4 while for the 70cm
i made the contact between the resistor SMD R67 with value 10K and the trimmer VR3. I souldered the plug on PTT directly on the
back of the microphone plug on PIN 2.
For the connections i have used earthed 5 poles cable and earthed it on the MIC AMP earth, thus on PIN 1 but earthing can be done
anyhow.
Initially i have tried to keep together the connections of the two bands thus using the same conductor for the RX of the the 2 meters
and the RX of the 70 cm as well for the TX.
However i have obtained etter results during transmission with separate connections. This explains the use of 5 poles cables.
Eventually the afore mentioned cable was been inserted through the same hole of the power supply cable.
Of course i have removed the cut protection rubber on the hole.
For the utilization of one band or the other , i commute the connections from the radio at the inlet of the modem in the TNC. That is
all.
I remain at your disposal for further clarification.
Ciao from Lino ik3ngu@i3xty of Treviso
This modification is read 714 times.
top of page
19-07-1998
(TM-702) KENWOOD TM-702E & mods. for function trsponder
TRADUCTION BY IK6SBE
I will explain the modification necessary to operate TM702E as a true transponder.
Open the radio from the lower side. Lay it on the table with the front side towards your chest. You will see six screws that sipport the
circuit card. Refer to the nearest screw from the front at 2 cm on the left there is a tin place in proximity of a brown resistor mounted
horizontally. Solder a piece of wirw on the tin place. The other point were to solder is another tin place which is located, tacking in
consideration the previous screw, as follows: above the screw there are two rows of soldering placed vertically (they are the only
ones); consider the one on the right abd starting counting from the bottom (front side) at the second pin there is the other tin place
where to solder the othe tip of the wire (it is just a bridge) you cannot fail as the two tin places are the only ones free from any
soldering. however pay attention to count from the bottom otherwise if you start from the top (but there is the first pin)you find
another tin place similar to the others which i don't know the effect of...
Remember to remove the mike when you activate the transponder othewise the back ground noise will be transmitted.
This modification is easier ti make than to explain, The transponder is activated by F + BAND and pression again F for more than 1
second until flashing and then press low.
73 and good luck. Aldo.
This modification is read 767 times.
top of page
12-11-2000
(TM-702) Ecco una nuova modifica per il Kenwood TM702
Author: Fernando Rocca - [email protected]
Ho trovato che è possibile unire l'rx uhf e vhf prelevando il segnale non direttamente dai singoli discriminatori miscelato, bensì
commutato dal comando Band.
Questo segnale è disponibile alluscita del connettore dell'unità TSU-6 al pin 2 RD ovvero a fianco della massa pin 1.
Per chi non ha lo schema il connettore di cui parlo ha 10 contatti, di cui 4 a destra, 3 vuoti al centro, e 3 a sinistra. Dei 3 a sinistra RD
è il secondo.
Il segnale così come è non può essere utilizzato essendo necessario disaccopiarlo in alternata con un condensatore da 100nF; qualche
modem o tnc ha già l'input disaccopiato il mio YAM no.
Se non sono stato abbastanza chiaro sono a vostra disposizione, mi trovate in packet IS0UWS@IS0DVM in internet e-mail
[email protected].
Buon lavoro e 73 de Nando IS0UWS.
This modification is read 713 times.
top of page
12-10-2001
(TM-702) Extended RX and TX for TM-702E
Author: GJ - [email protected]
For an Modification of Rx and Tx on both bands do this:
●
●
Remove the upper case ( the one with the speaker)
After you remove the case you see on the left corner (display side) a little green wire.
Cut this wire.
After you turn your Kenwood on, it gives you RX 136-174 and 340-512 Mhz.
And also TX 136-174 and 340-512 Mhz.
This modification is read 771 times.
top of page
19-07-1998
(TM-721) Modification from Kenwood on the TM-721A for adding cross-band
To operate the TM-721A in the repeater cross-band mode, chip resistor R121 on the control unit (X53-3130-XX) (B/3), must be
removed. The following modification will detail how to access the resistor.
1.
2.
3.
4.
5.
6.
7.
8.
Disconnect the power supply and antenna from the transceiver.
Remove the top and bottom covers (11 screws). Do not damage the speaker wires when removing the top cover.
Remove the silver colored screws from the front panel chassis (2 on each side, 1 on top, and 1 on the bottom).
Carefully pull the front panel away from the body of the transceiver (do not disconnect any cables).
Locate chip resistor R121 on the Control unit inside the front panel. Unsolder & remove the resistor.
If you wish to disable the built-in 3 minute time-out timer, also remove resistor R122 on the Control unit inside the front panel.
To place unit in repeater mode, press F key.
Press the A.B.C. key within 5 seconds of pressing the F key. Three dots should be lit in the main display. Unit will now operate as
a cross-band repeater.
This modification is read 712 times.
top of page
19-07-1998
(TM-721) Time-out timer
The TM721A provides a built-in 3 minute time-out timer. This automatic- ally places the transceiver in the receive mode after 3
minutes of continuous transmit. This function can be defeated by removing resistor R122 on the control unit inside the front panel.
This modification is read 600 times.
top of page
19-07-1998
(TM-721) Tuning the 721 UHF for 460 MHz
Author: Edward Thomas, N2IHN
1. FIND L4 & L3 on bottom of set, turn 4 screws CCW @ 3 turns.
2. PEAK TC1, TC2,TC3 for signal strength.
3. May need to tune TC102 for transmit output and TC101 for recv.
This modification is read 681 times.
top of page
19-07-1998
(TM-721) New LCD Readout for Kenwood TM-721A
I just replaced the LCD readout on the TM-721A and thought you may be interested in my experience. The replacement is easy and
gives the desired result: the readout is easy to read in high ambient light. The TM-621A can be upgraded with the same unit.
I ordered the unit from Kenwood amateur equipment division parts department which you can call at (213) 639-7140 (639-4200 and
639-9000 are alternate phone numbers I have seen on the PBBS board) and order part number B38033705, or just ask for the LCD
conversion for the TM-721A. The price is $37 plus California state tax and S&H, which came to $43.50. They will take credit card
charge over the phone.
What you get is the complete LCD display unit with its two IC drivers. On the schematic that comes with your radio you can identify
the subassembly as the one labeled "LCD ASS'Y" which is connected to the control unit by an 8- conductor ribbon cable, which you
must unsolder to free to old unit and resolder for the new one. The LCD subunit is attached to the control unit assembly by bent tabs
which are easily undone. The ribbon cable comes with a small section of pressure-sensitive adhesive to help position it for soldering.
Complete step-by-step instructions come with the unit.
Installation requires a small soldering iron and is not difficult.
The results are quite good: there is no functional difference in the way the radio operates. I suspect that the new LCD is electrically
identical to the old. If you have modified your radio to operate as a cross-band repeater, you retain that function. The display consists
of black digits on a milky- white background. The incandescent lamps behind it operate as before, and I find that even in the "dim"
mode that the legibility is good in low light. In bright sunlight, the back illumination is no longer relevant, and the readability is very
good. Since bright lamp operation is not really required, they should last forever.
The old unit is not destroyed upon removal. You can return to the old readout at any time (which is prettier as it is in color). Kenwood
is to be congratulated for recognizing the problem with a large installed base of TM- 721A's and making this field fix available.
While you have your radio open, you may want to activate the cross-band repeater function. Lay the CPU board down so the two
ribbon cables come off to the north. A little northeast of the lithium cell, just east of the bare copper landing at the top of the board is
chip resistor R121. Carefully remove it (you will probably break it). Now, you can put your radio in the cross-band repeater mode by
hitting "f" "ABC". The mode is indicated by three decimal points in both main and subband frequency readouts and a signal heard on
either band is retransmitted on the other. A three minute timer is in effect, which may be turned off by removing R122 (not tested).
Return to normal operation by again hitting "f" "ABC". During repeater operation, all other functions are locked out. Of course, the TM721A does not auto- identify, so it must be under direct operator control.
John, W6BM @ W6PW, in Berkeley
This modification is read 635 times.
top of page
19-07-1998
(TM-721) IC-721E RX/TX mod 142 - 152 MHz mods
The following will allow the TM-721A to transmit on the VHF band from 142.000 to 151.995mhz. Specifications are guaranteed for the
Amateur bands only.
MODIFICATION PROCEDURE
1. Disconnect the antenna, mic, and power cord.
2. Remove the bottom cover from the transceiver (6 screws).
3. Locate resistor R57 on Control Unit (X53-3130-00) (A/3). The resistor can be seen by looking through the cutout of the chassis
just behind the front panel. Please note that R57 is on the bottom of the unit and should not be confused with R58 on the top of
the unit.
4. Using a sharp pair of wire cutters, cut the resistor lead.
5. Reinstall the bottom cover.
6. Reset the microprocessor by following the procedure on page 22 of the instruction manual entitled MICROPROCESSOR
INITIALIZATION.
NOTE:
Performing the previous mod will automatically reset the processor. At least it did when I performed the mod.
You can determine that when you turn the unit on and have lost all your memory settings.
NOTE:
Performing this mod does not give you the license to transmit in these newly acquired frequencies unless you have the permits.
This modification is read 639 times.
top of page
19-07-1998
(TM-721) TM-721A wide band mod
To modify the 721, remove the top & bottom covers.
Remove the 2 screws on each side that hold the front panel to the main unit.
[You can just loosen the bottom 2 screws, 1 on each side don't actually remove them.
Then remove the 2 screws in the top center & bottom center that hold the display to the main unit (all silver screws, not the black
ones).
Now you can swivel the panel out & down.
Look at the back of the display unit. To the left of the Microprocessor near the lithium batttery you will see 3 chip resistors in a pattern
like this:
H= chip resistor
X= blank space
--------------------> H X H H
add a jumper (or ideally a zero ohm chip resistor where the X is.
Hold the F key while turning the radio on.
The display will go from:
100 - 200 MHz on VHF
400 - 500 MHz on UHF
WARNING!!!
Remember to write all your frequencies down before you start because you WILL lose them on both bands once you add the jumper
even if you do not reset with the F key.
RELAYED BY...N0KGX...GENE
This modification is read 721 times.
top of page
19-07-1998
(TM-721) The programming resistors do the following
1.
2.
3.
4.
5.
Select the European frequency bands (430 - 440)
Select MARS/CAP xmit freqs (141 - 150)
Select unrestricted out-of-band xmit (add a jumper)
Select cross-band repeater mod
Disable built-in 3 minute timeout timer for crossband repeater.
Number 1 was easy, I just installed a jumper where there were a pair of empty pads next to a row of four or five other 0 ohm
(jumper) "resistors".
I found this quite useless and promptly removed it.
Number 2 is also very easy, but unnessary for 90% of us. If you need MARS/CAP then you'll be able to get the details from Kenwood.
Number 3 is somewhat of a mystery as I've been told the jumper position but have been unable to find it on the board. My interest
was in opening up the UHF receive to hear the public service channels. Unfortuneatly, this mod opens up transmit as well, on both
bands and apparently without restriction (as the gossip goes).
Number 4 is real easy and involves removing the resistor marked R121 on the schematic.
Number 5 is also easy and just remove R122 to do it. (I haven't though)
What I'd like to know concerns the remote control capabilities that are available through the microphone plug. From looking at the
manual, it's clear that when the RC-10 remote control handset is used, many of the radio's front panel controls are made remotely
available. Does anybody know the manner in which the three data pins on the mike plug are used for this. The three pins are PTT, UP
and DOWN (in normal mode). Presumably, there is a way to communicate with the onboard microprocessor using these pins. If so,
then somebody could concievably use their PC to control the radio.
This modification is read 615 times.
top of page
19-07-1998
(TM-721) Modifying the Kenwood TM-721A for Extended UHF Coverage
Well I finally uncovered the specifics of the mod which will extend the UHF coverage of the TM-721A. This mod changes the UHF
receive from it's factory setting of 438 - 449.995 mhz to approximately 420-460 MHZ. There are some peculiarities surrounding this
mod so I'll describe them first.
First of all, this mod will allow the UHF digital display to traverse from 400.000 to 499.995. The radio will not, however, tune this
entire range due to a combination of a limited synthesizer lock range and the input RF amplifier bandwidth. The apparent useful tuning
range is about 420-460, with sensitivity dropping off sharply at either end.
Naturally, the best performance is in the middle (the Ham Band :-).
Similarly, the VHF tuning range is extended in the same manner. After the mod is made, the VHF side will apparently tune from
between 100-199 mhz but as stated above, there is little or no response outside of the published range (138-170 mhz), due to the
same reasons as stated above.
As a final side effect, note that performing this mod will remove all out-of-band transmit restrictions on the rig, for both VHF and UHF.
After the mod is in place, the radio will transmit on any frequency that it can tune to.
DISCLAIMER:
The author of this report wishes to strongly remind those who perform this mod that it is ILLEGAL to transmit on any frequencies
outside of the ham bands, EVEN IF YOU ARE OTHERWISE LICENSED TO DO SO. This is because of the radio's lack of FCC type
acceptance for these frequencies. So beware! Unauthorized use of this feature could be hazardous to your ticket. MARS/CAP users are
probably OK with a permit.
Now for the nuts and bolts.....
MODIFICATION PROCEDURE
1. Turn the radio on and write down all of your memory channel frequency assignments, PL codes and anything else you have in
memory - It will all have to be reprogrammed after the mod. After writing down all of your data, turn off the unit and disconnect
it from the antenna and power supply.
2. Next, remove the bottom cover on the unit. Note: this radio contains a number of CMOS parts which could be damaged by static
discharge. Take all of the regular precautions to make sure that you and your tools are properly grounded for anti-static work.
Note that there is a hole in the rear of the subchassis which supports the controller circuit board in which you can see a small,
black, 1/4 watt resistor which is labeled on the board as R57. Using a small pair of sharp cutters, clip the lead on the end of the
resistor. It is not necessary to remove the part, just clip one end and bend it slightly out of the way.
3. Next, remove the top cover and then open the front panel assembly into the service position. To do this, remove the four silver
screws, one on the top, one on the bottom, and one from each side. Two of the screws are in slotted holes. Loosen the screws in
the slotted holes slightly so as to allow the front panel to be pulled out and swung down in a hinge-like fashion. Once open, set
the radio on a table with the hinged front panel hanging over the edge of your workbench.
Familiarize yourself with the inside of this compartment. The most notable features are a silver, button type lithium battery to
the left of center and a large, multi-pin microprocessor chip on the right. DO NOT DISCONNECT ANY OF THE RIBBON CABLES.
4. Locate the lithium battery and to it's left you will notice a row of five programming resistor positions, with the middle position
vacant. The arrangement looks something like this:
|
|
____
______
|
I I:II
(Bat-)
|MPU |
|
(tery)
|
|
|
--------|
|
I <- R121 (remove for cross-band repeater operation)
______________________________________________
VVV front of rig VVV
The (:) above indicates where a jumper is to be placed. Use care in soldering since everything is quite small.
5. Reassemble the unit in the reverse order as described above. When you power the rig up, the display should show 440.000 and
144.000 on the displays. It is now ready for operation. If necessary, perform the microprocessor reset function by holding down
the F button while turning on the power. Reprogram the unit with the data you saved in step 1.
Comments:
There is nothing special about operating the rig once the modification is made. All functions operate exactly as before except that the
range on each band is extended as described above. You will probably want to program the band scan limiting channels (A and B) on
both bands since otherwise your vfo scanning will be too broad and will spend a lot of time scanning in areas which it cannot receive.
In addition, my rig also has the cross-band repeater mod. I do not know if having this is a prerequisite to performing the mod
mentioned above. If it is, then R121 will also have to be removed. The cross- band repeater mod has already been discussed on the
net so I won't go into it at this time.
Enjoy this mod but don't endanger your license! Don't transmit out of band and don't allow others to, even if they're licensed for those
frequencies!
top of page
This modification is read 672 times.
19-07-1998
(TM-721) TM-721A Low/No VHF Transmit Power
Author: Trio-Kenwood Communication, inc.
Service Bulletin no. 931 (11-4-1988)
Some early model TM-721A transceivers may develop low or no output power on the VHF band. This may be caused by coil L6 or L9
on the final unit. The coils should be inspected for burn marks on their insulation. If any flaw is detected in the insulation, replace the
coild with a wider spaced coil.
Required parts:
Coil, 9.5T L6, L9 Part Number L34-1238-05
1. Disconnect the power supply and antenna from the transceiver.
2. Remove the top and bottom covers (12 screws). Do not damage the speaker wires when removing the top cover.
3. Remove the VHF Final unit shield (4 screws) from the top of the TM-721A.
4. Unsolder the Final module (Q1), antenna coax, and terminal pin W4 from the Final board.
5. Unplug the wires at connectors CN2, CN3, and CN4 on the VHF TX-RX unit(top side of the transceiver.)
6. Unplug the wires at connector CN10 on the UHF TX-RX unit (bottom side of the transceiver.)
7. Remove the 7 screws from the VHF Final unit. Remove the Final unit fromt he transceiver.
8. Unsolder an remove the coil (L6 or L9). Install and solder the new coil.
9. Assemble the transceiver by reversing steps 1 - 7.
This modification may be performed under warranty.
Time required for this change is 1 hour or less.
This modification is read 603 times.
top of page
19-07-1998
(TM-721) TM-721A for 9600 baud
The mods to do 9600 baud packet using a K9NG or G3RUH modem are fairly simple to do with the Kenwood TM-721/621 radios. Look
at your schematic.
Receive data is taken from the dicriminator output. Look for the 3.3K resistor comming off pin 9 of the last IF stage. Connect a 1K
series resistor from the modem RX input to the junction of the .001 and 3.3K.
PTT is taken off pin 2 on the microphone connector. TX data is fed through a 1K series resistor to the top of VR3 (the deviation
conltrol).
This method has been tested and works quite well on 440 MHz and 220 MHz. The mods haven't fully been tested on the 2 meter
portion of the radio.
The TM-731 radio is different enough to cause problems. What needs to be done is to add another RX Mute transistor. (Look at the
schematic and see how the TX deviation is shorted to ground during receive.) Use a plain NPN and a pair of 10K resistors (copy the
one used on VR3 in the schematic). Take the TX data and feed it to the collector through a series 1K resistor, and then feed that
through another 1K resistor to the wiper of the deviation pot. This was a result of Kenwood changing the deviation pot value from 10K
to 100K. (It wasn't broken, but they fixed it anyway.)
As with any modifications, take reasonable care, and I won't be responsible if you trash your radio. BE CAREFUL; it is full of surface
mount devices.
This MOD file was written by Jeff, WA6FWI @ WB6YMH.#SOCA.CA.USA.NA Schematics and layouts are available by request through
the author.
This modification is read 587 times.
top of page
17-07-1999
(TM-721) TM-721 cross-band repeater (another)
Chip resistor R121 on the Control Unit must be removed. Here is how.
1. Disconnect po and antenna
2. Remove top and bottom covers 2 screws)
3. Remove the silver coloured screws from the front panel chassis.
(2 on each side, 1 on p, 1 on bottom)
4. Pulfront panel away from the dio but DO NOT disconnect cables.
5. Locate chip resistor R121 on the Control Unit and desolder. When looking at the Control U, you will see the lithiuattery located to
left of centre and the power switch sub-assembly located on the bottom right. Look at the centre of lithium battery a you will see
R121 locatedown and to the left of the battery close to the bottom edge of the board about 3/4" left of centre of the battery.
Remove ts chip resistor.
6. re is also a 3 minute timut timer that will place the radio into the receive mode after 3 minutes of continuous transmit. I removed
mine and I willescribe the location of R1 which defeats the timer. If you look again at the lithium battery, look at the bottom
edge of e battery and then over tohe right about 1 inch from the bottom centre of the battery and you will come across an upper
set of 2 resistors and below that another set of 5 resistors (chip type). Remove the first resistor (left one) in the upper set.
OPERATION
Repeater cross-band operation allows the 721 to receive on one band and retransmit the signal on the other band. An incoming signal
will automatically be swithched to the subband. The 721 will then re transmit the signal from the main band. Each band may contain
offset and subaudible tone information with the tsu-6 tone board.
The encode and decode tones for a single band must be the same. Each band may contain a separate sub-audible tone frequency.
1.
2.
3.
4.
5.
Select the first frequency in the main band and select a repeater offset if desired.
Select TONE if needed.
Press the BAND key to transfer contents of MAIN into SUB.
Select the second frequency and if desired a CTCSS tone.
Adjust the main and sub band squelches to the threshold.
ENABLING CROSS BAND REPEATER
1. Press the F (orange function) key
2. Press the A.B.C. key within 5 seconds of step 1 Three dots will light in the decimal place locations in the MAIN band.
The repeater will always transmit out of the main band. I will give you an example of accessing a 70cm repeater with a 2m handheld
on a simplex freq.
Desired repeater RX 444.8 TX 449.8 2m 145.54
In main band enter 145.54 and press BAND key to transfer to sub display. Enter 444.8 with + offset. Press F + A.B.C.
Key up simplex handheld and you will see the sub-band receive your frequency and at the same time you will see the main band key
up and transmit on 449.8 Mhz.
Release the simplex PTT on the handheld and the radio will quickly flip 145.54 into the MAIN band and 444.8 into the sub-band. The
70cm repeater will be transmitting to your radio in the sub-band at 444.8 and the 721 will be transmitting out of the MAIN band on
154.54.
Neat stuff !!!! Warning, disconnect your mic or be quiet and DOUBLE WARNING DO NOT PUT A 2M repeater in the MAIN and a 70CM in
the sub or they will continually key up each other back and forththrough the 721. Also notthat when the 721 is transtting on the MAIN
band ouo your 2M simplex radio and receiving a signal from the 70cm repeater, you will not be able to gain control of the transmitter
of your 721 until the 70 cm tail drops as the radio does not sample the incoming audio for a carrier while transmitting.
The mod is neat and if you disable the tail timer on your 70 cm repeater, this works great in situations where a hand held ( 1 watt)
cannot access the 2M repeater.
This modification is read 649 times.
top of page
16-04-2000
(TM-721) TM-721A Microcomputer Lock-up
Author: Trio-Kenwood Communication, inc.
Service Bulletin no. 930 (11-4-1988)
Some early model TM-721A transceiver may malfunction when nearby transmissions (such as operating a handheld too close to the
unit) enter the microprocessor reset circuit. As the RF energy enters the circuit, the microprocessor ceases to function which results in
shutting off the sub-display, receiver, and transmitter. Adding a capacitor to the base of the reset switching transistor on the control
unit will correct the condition. The following procedure will detail how to access the transistor.
Required parts:
C124 1000pF 50V chip capacitor (CK73FB1H102K)
1. Disconnect the power supply and antenna from the transceiver.
2. Pull the Volume, Main squelch, and Main tuning knobs from the front panel.
3. Remove the top and bottom covers (12 screws). Do not damage the speaker wire when removing the top cover.
4. Remove the silver colored screws from the front panel chassis (2 on each side, 1 on top, and 1 on the bottom).
5. Carefully pull the front panel assembly cut from the body of the transceiver (do not disconnect any cables).
6. Remove the 2 brass colored screws from the top of the plastic front panel.
7. Lift the 2 tabs on the bottom of the front panel and pull the panel off the assembly. Do not loose the black shades positioned
over the Balance and Sub-squelch switches. Keep the switch assembly intact ad much as possible.
8. Straighten the display unit mounting clips and pull the display unit from the control board (do not disconnect the cable).
9. Locate Q102 on the top right hand side of the control board (next to the volume control).
10. Add a 1000pF chip capacitor between the base of Q102 and ground (the capacitor will physically be mounted between C123 and
R141).
11. Assemble the transceiver by reversing the steps above.
This modification may be covered under warranty.
Time required for this modification is 1.5 hour or less.
This modification is read 594 times.
top of page
16-04-2000
(TM-721) TM-721A S-Meter deflection due to pulse noise
Author: Trio-Kenwood Communication, inc.
Service Bulletin no. 936 (2-6-1988)
When the TM-721 is operated mobile, strong ignition noise generated by motorcycles may cause the S-meter to deflect on the VHF
band. The ignition noise cannot be mistaken for a signal because the busy light does not come on, but the S-meter deflection may be
distracting. The following modification will prevent this occurrence.
Parts required:
10 pF, 50 V chip capacitor
0.47 µF, 25 V chip capacitor
CC41FCH1A100D
C92-0003-05
1. Disconnect the power supply and antenna from the transceiver.
2. Remove the top cover. Disconnect the speaker wires.
3. Unplug all connectors on the TX-RX (VHF) unit. Remove the 7 screws securing the board to the transceiver and then remove the
board from the transceiver.
4. Desolder and remove C39 from the bottom of the board. Install and solder a 10 pF capacitor in place of C39 (Figure 1).
5. Add a 0.47 µF capacitor from the junction of R39 and D11 to ground (Figure 1). Install the TX-RX unit.
S-Meter alignment
1. Apply power to the transceiver.
2. Set the transceiver to receive at 146.040 MHz.
3. Inject a -1dBµ (0.45µV) signal into the VHF antenna connector.
4. Adjust VR2 on the TX-RX (VHF) unit to obtain an S-1 indication on the display.
5. Increase the input signal to 30dBµ (15.8µV) an verify that all the LED's light.
6. Disconnect the signal generator. Turn the transceiver off. Install the top cover (don't forget to plug in the speaker).
This modification may not be covered under warranty.
Time required for this modification is 1 hour or less.
This modification is read 570 times.
top of page
16-04-2000
(TM-721) TM-721A AF pa white noise with squelch on
Author: Trio-Kenwood Communication, inc.
Service Bulletin no. 937 (2-6-1988)
Some users of the TM-721A may detect white noise from the speaker with the squelch turned on. The noise can be reduced by
lowering the gain of the Audio Frequency Power Amplifier. To compensate for the reduction, the gain of the pre-amplifiers will be
increased. In addition, the beep level will be raised.
Required parts:
12 Kohm 1/10 watt chip resistor
18 Kohm 1/10 watt chip resistor
RK73FB2A123J
RK73FB2A183J
1. Disconnect the power supply and antenna from the transceiver.
2. Remove the top and bottom covers (12 screws). Do not damage the speaker wires when removing the top cover.
3. Unplug all connectors from the TX-RX (VHF) unit on the bottom of the transceiver. Remove the 7 screws from the board and then
pull the board from the transceiver.
4. Unplug all connectors from the TX-RX (UHF) unit on the bottom of the transceiver. Remove the 6 screws from the board and then
pull the board from the transceiver.
5. Remove the silver colored screws from the front panel chassis (2 on each side, 1 on top, and 1 on the bottom).
6. Pull the front panel assembly away from the body of the transceiver (do not disconnect any cables).
7. Remove the 6 screws from the Control unit (A/3) which is mounted on the body of the transceiver.
8. Pull the board away from the transceiver, but do not disconnect the red and black wires. Keep track of the two short coax cables
that run under the Control unit. The cables connect between both TX-RX units.
9. On the component side of the Control board (the side with the majority of connectors) replace R7 with an 18 Kohm chip resistor
(figure 1).
10. Assemble the front panel by reversing step 5 - 8. Do not forget to run the two short coax cables (mentioned in step 8) under the
Control unit.
11. On the foil side of the TX-RX (UHF) unit, remove chip resistors R37 and R41 (Figure 2).
12. On the foil side of the TX-RX (VHF) unit, replace R43 with a 12 Kohm chip resistor (figure 3).
13. Assemble the transceiver by reversing step 1 - 4.
This modification may not be covered under warranty.
Time required for this modification is 1.5 hour or less.
This modification is read 573 times.
top of page
19-07-1998
(TM-731) TM-731 frequency and cross band repeater
The TM-731a will transcive between 136-174 MHz and 400-500 MHz as well as perform cross band repeter function when the following
modifications are performed.
1.
2.
3.
4.
5.
Remove both the top and bottom cover. Disassemble the front panel such that the control unit (X53-3250-XX) is accessable.
Remove R121, R123 and R25. While R125 snd R124 must be present.
If the time-out timer function is not desired, remouve R122 as well.
Reassemble the unit and perform a microprocessor reset before operating the set.
Preserve your license by operating whithin the bands it is cover for.
This modification is read 1097 times.
top of page
19-07-1998
(TM-731) TM731 & 9600 Bps
The TM731 is different enought to cause problems.
What need to be done is to add another RX Mute transistor. (look the schematics and see how the TX deviation is shorted to ground
during receive.)
Use a plain NPN and a pair of 10k resistor (copy the one used on VR3 in the schematics.)
Take the TX DATA and feed it to the collector through a series 1k resistor, and then feed that through another 1k resistor to the wiper
on the deviator pot.
This was a result of Kenwood changing the deviation pot value from 10k to 100k (it's wasn't broken, but they fixed it anyway.) It is
full of surface mount devices.
Article of Jeff WA6FWI @ WB6YMH.#SOCA.CA
From: CQ USA - June/92
This modification is read 829 times.
top of page
19-07-1998
(TM-731) TM-731 fuer 9600 Baud
de DG5EM @ DB0IZ
Umbaumassnahmen beim TM 731 von Kenwood zum betrieb mit G3RUH-Modem 9600 Baud
Das Geraet von der Seite oben die Platte abschrauben, wo sich auf dem rueckseitigen Kuehlkoerper die Blindbuchse mit Stopfen
befindet.
Kontrollieren ob man wirklich die 430er-UNIT vor sich hat hi.
Diesen Stopfen entfernen und das Loch als Eingang fuer das 4-Ader abgeschirmte Tonkabel benutzen. (Zugentlasstung nicht
vergessen!) Von dem Einbau einer Klinkenbuchse oder aehnlichen rate ich ab, besser ist es aussen eine Steckverbindung vorzusehen,
um den TRX vom Modem zu trennen.
Sollte sich das Tonkabel nun im TRX befinden und die Adern sind abisoliert, kann der Loetkolben angeschmissen werden.
Die Leitung RX-Audio vom G3RUH-Modem an Pin 9 von IC3 (MC3361/SMD) loeten. (feine Spitze ist beim Loetkolben angesagt).
Nun schaut man auf eine 4polige Steckerleiste, die im Schaltplan als Nr.12 angegeben ist.Die vierte Ader davon hat die Bezeichnung
MDI.
Sie verbindet den Mikrofonverstaerker-Ausgang mit dem Hubpoti VR3. Diese Ader wird jetzt aufgetrennt und ein 12V-Reed-Relais
Oeffner- Kontakt dazwischen gesetzt.(Das anbringen des Relais muss jeder selber austueffteln da in erster Linie von der Bauform
abhaengig) An der Relaisspule nun eine der restlichen 3 Adern des Tonkabels anloeten ,spaeter wird ueber diese Ader 12V vom
Modem kommend herangefuehrt.Also....Modem eingeschaltet = Paket
Modem ausgeschaltet = Phonie
Die Leitung TX-Audio vom G3RUH-Modem an das heisse Ende loeten, also in Richtung dem Hubpoti VR3 gesehen.
***auf KEINEM Fall am Hubpoti im TRX eine Einstellung vornehmen!***
Der Hub wird ausschliesslich am G3RUH-Modem bestimmt.
Das anloeten der letzten verbliebenen Ader, der PTT-Leitung, ist schon etwas umstaendlicher.Schliesslich muss man irgendwie an die
Mikrofonbuchse von hinter her dran.
Wer nicht die Lust hat alles weiter zu zerlegen, kann auch wie bisher die PTT vorne per Stecker anschliessen.
Von innen her ist es allerdings eleganter, da das Mikro dranbleiben kann und die laestige umstoepselei umgangen wird.
An dieser Stelle sei dringend erwaehnt, das nur gutes Tonkabel verwendung finden sollte, mit DICHTER Abschirmung.
Eine gute Kontaktgabe mit der Geraetemasse ist entscheidend fuer ein sauberes Sende-und Empfangssignal.
HINWEISE:
Mikmiken wie das einfuegen von einem zusaetzlichen Relais fuer ZU - und ABschalten der Sende-NF sind NICHT noetig und auch
garnicht wuenschenswert.Das TXD wuerde doch negativ darunter leiden. Die NF-Abschaltung uebernimmt der spezielle
Schalttransistor Q18.
Er ist in der Lage im Empfangsfall die Sende-NF vom G3RUH sicher zu unterdruecken (nach Masse zu ziehen).
Ansonsten waere es auch garnicht moeglich ein empfangenes Signal richtig zu decodieren (gaebe nur Mischprodukte).
Der 455khz-Filter CF1, brauchte bisher nie gegen einen breiteren getauscht werden.
Zum Abgleich ist nur zu erwaehnen, das der Sende-NF-Hub vom Modem so klein als moeglich gehalten wird.Das kommt der PLL sehr
zu gute (Regelneigung ist kleiner) und schont das Bandraster.
Als Faustformel hat sich erwiesen das der Hub "gut" ist, wenn er sich mit dem Grundrauschen auf einer Ebene befindet.
Kann mit 2ten TRX oder Hilfe von einem anderen OM schnell eingestellt werden.
TXD unter 11 ist moeglich und sollte auch !darunter! betrieben werden, da bei einem 96er-Einstieg ein zu hohes TXD die Suppe
versalzen kann.
Schwierigkeiten sind nur bekannt gworden bei betrieb ueber einen Duplex-Digi.Manche Exemplare rasten wohl bei grosser QRGAenderung nicht rechtzeitig ein und HOEREN dadurch extrem zu SPAET!
Ich habe diese Anleitung jetzt mal veroeffentlicht, da nun genug Erfahrung mit diesem PLL-Mobil-TRX in bezug auf 9600bd gemacht
sind.
Als Abschluss moechte ich dennoch ausdruecklich betonen, das die Verwendung von PLL-Geraeten NICHT auf Dauer zu empfehlen ist.
Es ist nur eine Frage der Zeit bis die neueren Digi,s (96er sind gemeint) auf wesentliche schnellere Parameter eingestellt werden.
Ich selber benutze einen IC475E von Icom, der fast wie geschaffen ist fuer diesen betrieb (ueber diesen TRX hab ich schonmal was
veroeffentlicht).
vermutlich sind mir bei dieser Beschreibung ein paar Fehler unterlaufen (oder doch diesesmal nicht)?
Fragen zu diesem Thema und Erfolgsmeldungen bitte zu richten an
DG5EM , Helmut @ DB0IZ
This modification is read 765 times.
19-07-1998
(TM-731) TM-731A Hooking to TNCS
top of page
Marty Goodman KC6YKC
June 1992
Home packet BBS: WD6CMU Richmond, Northern CA
I recently acquired both a PK88 TNC and a Kenwood 731a dual band mobile transceiver. I wanted to hook the Kenwood to the PK88.
What I found was that the audio output on pin 6 of the eight pin microphone connector on the front panel was not the same as the
audio that comes out of the speaker or out of the rear speaker connector.
What you get out the audio from the front panel mic connector on pin 6 is an UNSQUELCHED audio. Kenwood does this, apparantly, to
support their RC10 remote controller for the unit, to allow the RC10 independent control over the squelch on the audio at the RC10's
speaker. This causes a problem, for when you feed that into the audio input of the PK88, its DCD light stays on ALL THE TIME. The
PK88 will receive data just fine when hooked to pin 6 of the TM731a mike connector, but it will refuse to key the transmitter because it
perpetually thinks the air is "busy".
The simple approach to hooking the PK232 to the Kenwood involves using a separate cable with a 1/8 in mini phono plug at each end,
and run that between the audio phono connector on the PK88 and the speaker output jack for "main audio" on the TM731a. This will
allow packet operation, and is no doubt the approach that virtually everyone uses. There are some drawbacks to this arrangement,
tho.
Using two cables is a tad clumsey. Worse, when you plug in the cable in the rear speaker connector, there is no way to enable the
speaker to audibly check your signal. It also makes it impossible to make a switch box to switch the TM731a from packet to audio
operation at the flick of a switch, for as long as the phono plug is plugged into the back of the TM731a, you CAN NOT enable its
internal speaker. Finally, this arrangement requires you to adjust the volume control to the right level and leave it there.
What follows is a mod that give you a SQUELCHED, LINE LEVEL audio signal available on pin 6 of the microphone connector. With such
an arrangement, you can turn your speaker volume up and down as you like, and it will not affect the audio going to the packet box.
You can use a single cable to connect the packet box to the transceiver, and it is easy to rig up a switch box that switches between the
packet box and the hand microphone. The only disadvantage of doing this mod is that your TM731a will NO LONGER be compatible
with the RC10 remote control device.
The Modification:
This modification requires skill at fine soldering, a good ultra fine-tipped pencil type soldering iron, and a short piece of 28 gauge
stranded wire. You really should have at hand a Kenwood service manual for this rig, with complete schematic and board layout
diagrams, before you attempt it, tho I HAVE tried to write my description so that you can do the mod without a service manual at
hand.
1. Turn off power and disconnect the rig from its source of power
2. Remove the BOTTOM cover of the rig.
3. Lay the rig on your work table with the front panel pointing away from you, and its rear heat sink pointing toward you. On the
right will be the main volume and squelch control. Look at the little connectors that hook the front panel of the radio to the board
you have exposed and are looking at. On the extreme left is one connector with eight pins in a row, with the third pin from the
left unused. To the right of that is a five pin connector with the middle pin not used. To the right of that connector is an
electrolytic capacitor, to the right of the cap is a two pin connector, and to the right of the two pin connector is a phillips screw
that is one of the screws that hold the board you are looking at inside the rig.
4.
5.
6.
7.
8.
Locate that five pin connector mentioned above, the one that has its middle pin unused. The SECOND WIRE from the LEFT of
that connector should be a RED wire. That spot on the connector will be labelled on the main board you are looking at as "RDM".
CUT this red wire about three quarters of an inch from where it leaves the connector. Tape up the portion that goes to the
connector.
Strip off about a quarter inch of insulation from the portion of the red wire that dives into the rig and heads toward the front
panel.
Locate "IC 8" on the radio. This is actually NOT a real integrated circuit, but rather is one of six little vertical circuit boards that
jut up like fins from the main board. IC 8 is the left most of the six such boards, and is right next to IC 9, which is a zig zag in
line pin integrated circuit. IC 8 is located just toward you from the five pin connector with the four wires... the one from which
you cut the red wire. IC 8 is labelled as "IC 8" in silk screening on the circuit board.
Solder a short length (2 or three inches) of stranded, insulated, 28 gauge wire to pin 9 of IC 8. Pin 9 of IC 8 is the next to last
pin of this single in line pin "IC". The "last" pin of IC 8, or pin 10, is located closest to the rear of the rig (closest to you, given
the orientation of the rig that I suggested).
Now solder the other end of this wire to the stripped, cut portion of the red wire that you prepared in step 5 above.
That's it! you now have modified your rig to provide line level, squelched audio on pin 6 of the microphone connector.
For those technically inclined, you should note that this audio is leaving an audio amplifier, and going thru both a 1K ohm resistor and
a .1 mfd capacitor before it arrives on pin 6 of the microphone connector. Thus the signal is DC-blocked and reasonably protected
against minor nastiness that might appear on pin 6.
I'd appreciate any feedback from those attempting this modification, tho of course I must note I cannot take responsibility for any
harm that may come to your radio due to either proper or improper implimentation of this modification. I CAN say honestly that I
HAVE done this to my radio, and it appears to work quite well.
This modification is read 803 times.
top of page
19-07-1998
(TM-731) Kenwood Cross Band Repeat: How to USE it
Hardware information for modifying the Kenwood TM-731A for cross band repeat is widely available on many packet bulletin boards.
However, information on how to impliment cross band repeat is often not present along with the description of the hardware mods.
What follows is KENWOOD's documentation on how to USE the TM731a after it has been modified for cross band repeat:
Text of Kenwood Sheet on using Cross Band Repeat on the TM-731A:
The repeater corss-band operation allows the TM-731A to receive on one band and re-tramsmit the signal on the other band. An
incoming signal will automatically be switched to the sub-band. The TM731A will then re-transmit the signal from the main band. Each
band may contain shift information. Only one band can contain sub audible tone information (the optional TSU-6 ... currently called by
Kenwood the KQT8... is required for tone decode). If one band requires a sub-audible tone, either select the TONE function for encode
or the CTCSS function for encode / decode. DO NOT turn both TONE and CTCSS on in the one band.
1. Select the first frequency in the main band. If required, select the offset.
2. Press the BAND key to move the contents of the main display to the sub-display.
3. Now select the second frequency and offset.
4. If Tone or CTCSS is required for one of the bands, continue with this step. If Tone or CTCSS is not required, go to step 5.
1. Place the operating frequency that requirs TONE or CTCSS in the main band (use the BAND key).
2. Select the sub-audible tone by pressing the F key and then the T.SEL key. Rotate the main encoder knob until the desired
tone is displayed. Press any front panel key to display the operating frequency.
3. If only the TONE function is required, press the TONE key (the [T] indicator will light in the display).
4. If the CTCSS function is required, do not turn the TONE function on. Instead, press the F key and then the CTCSS key (the
[CTCSS] indicator will light in the display. If the CTCSS arrow is not pointing towards the main display, press the F key and
then press the CTCSS SEL key.
5. Adjust the main and sub-band squelch controls to the threshold point. The TM-731A will transmit in the repeater cross band
mode if the squelch controls are set too low or a signal is received. (comment: setting both squelch controls properly is VERY
important!)
6. Note:
The next step will place the unit in the repeater cross-band mode
Press the F key and then press the A.B.C. key. Three dots should be lit in both display frequencies. The unit will now operate as a
cross band repeater as described above.
7. To take the TM-731A out of the cross-band repeat mode, repeat step 6.
This modification is read 892 times.
top of page
19-07-1998
(TM-731) Kenwood TM-731A firmware bug
The Kenwood TM731A dual bander has a firmware bug that breaks the 2m VFO scanner in certain circumstances, that is, the 2m VFO
scanner won't work properly if certain PL tones are stored into memory 1. So far, all tested 731A's have had this problem. The highest
serial number tested was 72713. To demonstrate the problem, perform this experiment:
1. If not already done, load search bounds into memories A and B of the 2m unit. Verify that the VFO scanner works.
2. Change the PL tone for memory 1 to (for example) 91.5: select memory 1, press F VFO to transfer it to the VFO, then press F
TSEL and select 91.5 Hz PL tone, then store back into memory 1 by pressing F MR.
3. Set the VFO to a frequency outside the range given in memories A and B, then start the VFO scanning (by pressing VFO for a few
seconds).
4. If your radio has the bug, it will alternate between the frequencies stored in memories A and B. If you start the scan while the
VFO is within the search range, it will scan up until the top limit is reached, then begin alternating between the two limit
frequencies.
5. To restore 2m VFO scanning, program memory 1 with one of the several PL tones acceptable ... the default of 88.5 Hz works
fine.
6. The 70cm unit does not appear to have this problem.
top of page
This modification is read 891 times.
21-04-2000
(TM-731) TM-631/731A Memory loss modification
Author: Kenwood Communication, inc.
Service Bulletin no. 972 (8-8-1990)
Some TM-631/731A owners have reported that the transceiver intermittently loses its memory channel information when the power
switch is turned on. The following modification will absorb pulses on the CPU interrupt line (INT4) and reconfigure the backup
switching circuit to avoid unintentional memory loss.
Read all instructions before proceeding. Do not attempt this modification if it is beyond your capability.
Required parts: ZKIT-731MEMO
The kit contains:
Part #
NJM78L06A
1SS133
MTZ3.0JB
CE04NW0J221M
C91-0457-05
CK45B1H103K
RD14BB2C103J
RD14BB2C102J
RD14BB2C472J
RD73FB2A472J
Description
6 V AVR
Diode
3.0 V Zener diode
220 µF, 6.3 V Electrolytic capacitor
0.022 µF ceramic capacitor
0.01 µF ceramic capacitor
10 Kohm, 1/6 watt resistor
1 Kohm, 1/6 watt resistor
4.7 Kohm, 1/6 watt resistor
4.7 Kohm, 1/10 watt resistor
QTY.
1
1
1
1
1
1
1
1
1
2
1. Disconnect the power supply, antenna, and microphone.
2. Remove the top and bottom covers (12 screws). Do not damage the speaker wires when removing the top cover.
3. Pull the Main Encode, Volume, and Main Squelch knobs off the front panel. If a knob does not easily pull off, wrap a cloth around
the knob and carefully pull it off with a pair of pliers. Be careful not to crush or scar the knob.
4. Remove the two brass colored screws from the top of the plastic front panel. Figure 1.
5. Gently lift the two tabs on the bottom of the front panel and then pull the front panel off the transceiver. Figure 2.
6. Remove the two black shades from the Balance and Sub-Squelch controls. Figure 3.
7. Remove the three brass colored screws from Control board B/3. Figure 3.
8. Remove the brass colored screw that is mounted on the front panel chassis above the Power switch. Figure 4.
9. Remove the brass colored screw that is mounted on the front panel chassis to the right of the microphone jack. Figure 4.
10. Carefully pull Control board (B/3) away from the body of the transceiver.
11. Disconnect the two "wire type" cables from the body of the transceiver.
12. Disconnect the two flex cables from the Control board. The flex cables simply pull out of the connectors.
13. Remove IC102 from the Control board. Since this device is glued to the board, use a needle tip tool to lift each pin as you melt
the solder. Then pry the chip off the board with a craft knife. Figure 6.
14. Remove any excess glue and solder from the area where IC102 was located.
15. Remove chip resistor R103. Do not melt connector CN101. Figure 6.
16. Cut the foil pattern between connector CN101 and chip capacitor C102. Make the cut as close to connector CN101 as possible.
Figure 6.
17. Prepare the 1SS133 diode for installation. The cathode lead will be cut and bent 90°. The diode must lay flat on the board and
the cathode lead cannot touch the cut in foil. Once the diode leads are prepared, solder the diode in place. Figure 7.
18. Prepare the NJM78L06A 6 V AVR for installation as shown in figure 8. The leads to this device are vary soft and can break when
bent too often. Make each bend only once.
19. The 6 V AVR will be mounted in place where IC102 was located. The board must first be prepared for the installation. Remove
the protective coating from the foils as shown in Figure 7. These are the foils that where connected to pins 2 and 7 of IC102 and
the ground foil that runs under the device.
20. Place the 6 V AVR on the board and make sure the leads contact the foils. Cut the leads to size and then solder the device to the
board. Figure 9.
21. Prepare the 0.01 µF capacitor, 10 Kohm resistor, and 4.7 Kohm resistor for installation. Place the parts on the board to size and
cut the leads. Once the parts are prepared, solder them to the board. Figure 10.
22. Locate R105. If the component is 47 Kohm, change it to a 4.7 Kohm chip resistor. The component's value can be determined by
the numbers written on the case. If the device is labeled 473, it is a 47 Kohm resistor and needs to be replaced. If the device is
labeled 472, it is a 4.7 Kohm resistor and does not need to be replaced. Figure 10.
23. Straighten the tabs that hold the LCD assembly to the Control board. Carefully pull the LCD assembly off the Control board (do
not break the flex cable). Figure 5.
24. Remove C123. This chip capacitor is located in the corner of the board under the LCD assembly. Figure 11.
25. Remove the protective coating from the foils as shown in figure 11.
26. Place the 3.0V zener diode on the board. Size and cut the diode's cathode lead. Solder the lead to the board. Figure 12.
27. Place the 1K ohm resistor on the board. The body of the resistor must be parallel to the diode. Size and cut the resistor's left
hand lead. Solder the lead to the board. Figure 12.
28. Bend the diode's anode lead and solder it to the resistor's right hand lead. Do not allow the leads to touch the board. Trim the
leads after soldering. Figure 12.
29. Prepare the 0.22 uF capacitor for installation. Place the component on the board to size and cut the leads. Figure 12.
30. Solder the left hand lead to the junction of the zener diode and 1 K ohm resistor. Do not let the connection touch the board.
Figure 12.
31. Solder the right hand lead to the board as shown. Figure 12.
32. Replace C107 with the 220 uF electrolytic. C107 is located between the Main and Sub rotary endoders. Figure 3.
33. Mount the LCD assembly an the Control board and bend the four tabs to hold it in place. Make sure the LCD does not touch the
leads of the new parts.
34. Connect the two flex cables to the Control board and then plug the two "wire type" connectors into the body of the transceiver.
35. Mount the Control board on the body of the transceiver and secure it with the three brass colored screws that go through the
Control board. Be careful not to pinch any wires.
36. Install the brass colored screw that goed above the power switch and install the brass colored screw that goes to the right of the
microphone jack.
37. Install the two black shades on the Balance and Sub-Squelch controls.
38. Slide the lock, balance, and Sub-Squelch controls to the left.
39. Slide the Lock, Balance, and Sub-Squelch knobs on the plastic front panel to the left.
40. Gently install the plastic front panel on the front panel assembly. Do not force the installation.
41. Install the two brass colored screws on the top of the plastic front panel.
42. Install the Main Encode, Volume, and Main Squelch knobs.
43. Remove the two screws from the small board where the positive power lead connects on the bottom of the transceiver.
44. Solder the remaining 4.7 Kohm chip resistor to the foil side of the board. Figure 13.
45. Mount the board and install the covers on the transceiver.
This modification may be covered under warranty.
Time required to perform this modification is 1 hour or less.
This modification is read 845 times.
top of page
21-04-2000
(TM-731) TM-731A/631A Final board C17 change
Author: Kenwood Communication, inc.
Service Bulletin no. 977 (8-8-1990)
Bypass capacitor C17 on the 144 MHz Final board has been changed in production from a "flat package" chip capacitor to a "cylindrical
package". The change prevents the capacitor from fracturing. If C17 fractures, the output of the power module can burn C17, R11,
and L6. Additionally, Q1 on the TX/RX 144 MHz board may be damaged.
C17 should be changed as a part of routine maintenance when a TM-731A/631A is received for service. The new style capacitor part
number is CK41FY1E102M. For field service, a 0.001 µF, 25 V disc ceramic capacitor can be used.
The production change started at serial number 108xxxx.
To replace C17:
1. Disconnect the power supply and antenna.
2. Remove the top cover. Do not damage the speaker wires.
3. Remove the shield plate from the VHF Final unit (4 screws). Figure 1.
4. Remove the 7 screws that secure the final board to the chassis. Figure 2.
5. Remove the 2 screws that secure the power module to the chassis. Figure 2.
6. Remove the 2 screws that secure the VHF antenna coax to the heat sink.
7. Desolder the center conductor and shield of the VHF antenna coax from the final board and pull the coax out of the heat sink.
Figure 2.
8. Desolder the terminal next to pin 3 of the power module. Figure 2.
9. Rotate the board toward the front of the transceiver to expose the foil side of the board.
10. Inspect the solder at the terminals the antenna coax was soldered to. They may need to be resoldered.
11. Replace C17. Figure 3.
12. If you are serving a TM-731A/631A that has been damage, check R11 and L6. The coil may have pin hole burn marks in its
insulation and the resistor may be open. In addition, check Q1 on the RX/TX (144 MHz) board. If it is damage, the receiver
sensitivity will be low.
13. If the Final board has been burned, it can be repaired. The carbon must be completely removed from the board to prevent the
board from burning any further (carbon tracking of the RF signal). The burned area should be filled with epoxy an the lands must
be repaired.
This modification may be covered under warranty during the warranty period.
Time required to perform this modification is 1 hour or less.
This modification is read 828 times.
top of page
12-03-2002
(TM-731) TM-731e Frequenz erweiterung
Author: - [email protected]
Frequenz erweiterung für TM-731E 136-174 MHz und 400-500 MHz!
1. Beide Gehäuseteile entfernen!
2. Die Displayeinheit demontieren!(Control Unit x53-3250-xx)
3. Nur die R25 entfernen! nicht wie in der amerikanischen ausführung!
4. Zusammenbauen und einen Reset durchführen! (MR gedrückthalten und Gerät einschalten! (RESET) ) Das wars dann auch schon
und müßte funktionieren!
Viel glück!
This modification is read 136 times.
top of page
19-07-1998
(TM-732) AIR CLONING (Does not work in K1 or E1 Mod modes)
This procedure allows you to clone a second transciever as above, over the air. The data is transmitted automatically using DTMF
tones. During transmission (which is one-way only), the master will automatically switch to LOW power. To be legal, use only a UHF
cloning frequency.
This procedure is not enabled in the stock transciever. At a minimum, you must cut the green wire to make iwork.
1. Configure master transciever's memories as desired. Select UHF simplex transmit frequency and set PTT to UF H(will work on
VHF but is not recommended).
2. Switch the power OFF. Press and hold the CALL and DTSS tutons and turn the power back ON. "CLonE" appears in display.
3. Set the receive frequency on the slave transciever the same as that of the master. Turn power off, hold down call and dtss keys
and turn power on. 'clone' appears in display.
4. Press the ptt on the master's microphone. Data transmission will begin. In case of a receive error, the slave transciever will
display 'err'. when the prcedureo is complete, both radios will display 'end'.
This modification is read 938 times.
top of page
19-07-1998
(TM-732) PAGING ANSWERBACK (Does not work in K1 or E1 Mod modes)
The exact operation of this feature is unclear but the folling description has been given:
1. To enable, hold down the F key and press the TONE key.
2. Do disable, repeat step 1
When enabled, documentation says: "If a maching code is received and the other transciever is no longer BUSY, the code of the local
transciever is sent to the other transciever. The answerback function then turns off."
This modification is read 886 times.
top of page
19-07-1998
(TM-732) Memory recovery
(requires DTMF microphone)
(Documentation of this "feature" is diffiult to comprehend but perhaps someone will figure out what it does.. I suspect that
"RECOVERY" refers to returning the memories to their original state after changing the split memory layout.)
1. Hold down F and C.SEL, turn on power
2. Press D, followed by 7 on the microphone. "Inspection Mode" is now enabled.
3. To cancel, press and hold F and then C.SEL
"Note:
Before recovery, the memory channels must be returned to the previous state (number of split memories, etc.)."
This modification is read 919 times.
top of page
19-07-1998
(TM-732) Subjective Impressions
Being a TM-741 owner, there were a couple of things that I mied on the 732. First, there's no real-time clock, no sleep timer, no
programmable ON time/ OFF time feature. There is an APO (automatic power off) with a preset time of 2:59:00 of inactivity until
power down.
Another complaint is the slow scanning speed. The unit will scan VFO or memory at no more than about 5 channels/frequencies per
second per band. I consider this to be terribly slow in today's age. The slowness is probably due to the fact that the remote contains
all of the scanning logic and because the data path between the head and the base is over a 2 wire serial data stream.
Anotherp erennial complaint is that the radio does not cover the entire UHF frequency band of 420-450 Mhz. As shipped, the unit will
only operate over the range from 438 to 450, (transmit or receive) which I find objectionable.
The manual is of typical quality and fairly complete although not well indexed. There are so many functions that a cheat sheet is
needed but as mentioned, was sadly not included. In typical fashion I note that the Japanese have never been able to adequately and
clearly explain how DTMF Squelch and Paging works. They've tried diagrams and jinglish explanations but in the end you still end up
reading the instructions over and over before you fully understand them. I'd love to see a plain English discussion of how the DTMF
features are intended to work and how they really work in practice. Fllow that with a step by step example and we'd probably have
something that could be more popular.
One of my reasons for buying the radio was to use the remote mounted head option. The option, the PG-4K kit, is advertised as a 13
foot extension. What you don't find out until you buy it, however, is that only the display cable is 13 feet long and the microphone
cable is only half that! To me this meant that although the display cable would let me trunk mount the base, there was no way I could
get by with a 6 foot microphone cable. The solution: buy the PG-4M(?) which is the longer model for another $30! Needless to say,
I'm not a happy camper! Are you listening Kenwood????
On a positive note about the remote cabling, at least with the 732 it is possible to roll your own. The 4 conductor head to chassis
connector cable could be easily spliced and extended, and an ordinary RJ-45 extension cable could be used for the microphone. For
many folks, however, it's probably easier to just buy the short ($47) or the long ($78) cable kit.
The extension cable issue aside however, it still looks like it will be a very good radio. As always, after spending a big wad of cash I'm
automatically inclined to say that I like the radio. This is no exception, the TM-732 does a fine job at heading off the competition at a
good price-performance point.
The price is the same as the older TM-731 which was around $650 retail (real price, not the bogus MSRP).
To conclude, I think Kenwood has come up with a fine replacement for the 731, and has put a lot of thought put into the design of the
732.
Operating Features
Kenwood has done a fairly good job at maintaining a consistent user interface between their models. Being familiar with the 241 and
741, I found it pretty intuitive to operate. Not intuitive enough, however, to venture out of the house without taking the operators
manual along since they sadly omitted a quick reference card (like the give out with the 741). Unless otherwise noted, the 732
generally has the same basic feature set as the TM-241 plus several extras.
The following is an unordered list of outstanding bits of trivia regarding the 732's features:
1. Dual In-Band Receive: Competitive pressures (e.g. Icom's 2410) has now made this a standard. You can set the display to receive
any combination of: VHF/UHF, VHF/VHF or UHF/UHF. This capability is quite well engineered and makes it possible to transmit as well
as receive on either band's second display. It is not possible (understandably) to have a full duplex QSO on an in-band setup. In other
words, when you set the radio to monitor two UHF or two VHF frequencies, one of these frequencies is muted when you transmit on
the other. This is not so when the selection is VHF/UHF, where the receiving band is not mut during transmit.
Looking at the schematic, the dual in-band receive is well implemented with each of the transceiver boards having two receiver front
end units (RF amp and mixers), one for each band. There are some unsymmetrical aspects to the dual in-band receive. First, the UHF
receiver does not have an AM mode which means that you cannot monitor AM aircraft spectrum at 118-136 MHz with the UHF
receiver. Similarly, you cannot monitor 800 MHz with the VHF receiver. Each of these modes AM aircraft and 800 MHz, are unique to
the VHF and UHF receivers respetively.
A nice touch is that even though the second receiver is utilized on the other band, the transmitter is automatically switched back to
the proper band which allows you to transmit on either of the two frequencies while using the dual in-band mode.
2. Smart Mute: The MUTE function is now intelligent in that it mutes the non-PTT band only when necessary. This means that the
audio muting (actually, 20Db of audio attenationu) is switched into the auxiliary band only when something i being received on the
primary band. Previous Kenwood rigs muted the auxiliary band at all times when the MUTE function was active.
3. More programmable microphone function keys: Previous Kenwoods allowed you to program the PF mcrophone key only.
With the 732, you may program any of ttop 4 function keys (CALL, VFO, MR and PF), even for example, with such multi-key
sequences as [F][VFO].
4. New Display Lighting: The display is the now-standard black letters on a light background. Like the 741, it has 4 light levels, plus
OFF (no light) which is interesting. Also, there's a special feature which when enabled mkes the display jump up to the next brighter
display level whenever a button or key is pressed, returning to the dim level after 5 seconds of inactivity. When used with the OFF
level it gives you a display which is completely dark at night and comes on only when you need it. There is, however, a small green
LED off of the display which remains lit at all times to show which band is in use.
5. Memory: As advertised the radio comes with 25 full-however, is that you can have up to 64 memories if you are wiling to forgo the
odd-offset capability to varying degrees. For example, if you can live with only 5 odd-offsets then you'll get 30 memories per band. If
you don't need any odd-offsets then you get 32 memories per band. In addition, you can apportion the 64 available slots between the
two bands in whatever ratio that you desire (in 5 channel increments). In other words, you can configure for 50 UHF memories and 14
VHF memories if you like.
M
22 21 20 19
K1 0 1
K2 1 1
CUT
K3 1 0
K4 0 1
M1 0 0
M2 0 1
DEFAULT)
E1 0 0
E2 1 0
E3 0 0
E4 1 1
E5 1 0
C1 0 0
VHF
UHF
SHIFT
800
144-148
144-148
438-450
438-450
.6/5
.6/5
X
0
0
1
1
0
1
0
0
1 142-152 420-450 .6/5
0 136-174 410-470 .6/5
0 144-148 430-440 .6/5
0 136-174 410-470 .6/5
1
1
1
0
1
0
0
0
1
0
1
1
144-146
136-174
144-146
144-146
136-174
136-174
0 = RESISTOR IN
430-440
432-438
410-470
430-440
410-470
340-512
.6/(1.6)
.6/1.6
.6/(1.6)
.6/(1.6)
.6/(1.6)
5.7/10
REMARKS
STD. US VERSION
US AFTER GREEN WIRE
XF
X
MARS/CAP MOD
ALL BAND MOD
GENERIC INT'L MODEL
ALL BAND INT'L (430
X
STD EUROPE MODEL
DENMARK
X
X
X
X
EUROPE ALL BAND
CHINA MODEL
1 = RESISTOR OUT
Notes:
1.
2.
3.
4.
5.
6.
7.
All 'resistors' o ohms (wire jumper ok)
Green wire is equivalent to R22 - present in K1 model Press ENTER to continue (A to abort) -->
0 = RESISTOR PRESENT, 1 = RESISTOR ABSENT
Standard shifts in MHz VHF/UHF. those listed as (1.6) also DO -7.6
Codes not listed are used in japan version, special cpu required
M Column is factory mode number
K2 mod includes 410-770 receive and enables cloning feature to perform any of these mods, remove the back cover from the
remote head unit. Resistor numbers clearly marked on board along top.
top of page
This modification is read 958 times.
19-07-1998
(TM-732) 800 MHZ RECEIVE
To enable 800 receive, switch to uhf vfo (not available in uxu), press and hold mhz button until 800.000 appears.
A capacitor must be added (c348) to enable the 800 receiver.
to add, remove uhf transciever board and next to the pad of n 1 of ic-202 (on the foil side), add a 2.2 pf chip capacitor.
a wire can be used instead of the capacitor but sensitivity will be reduced. (see schematic diagram for reason).
top of page
This modification is read 1138 times.
19-07-1998
(TM-732) Hard-wire cloning
(works in all confguration modes)
This procedure allows you to clone the entire memory of a 'maer' transciever into the memory of a 'slave' transciever.
First, construct an rj-45 jumper cable as follows:
------!
!-----UP ----------------------------- UP
E ----------------------------- E
PTT ----------------------------- DOWN
DOWN ----------------------------- PTT
------!
!------
Note that ptt and down
are crossed end-to-end
For hacker's reference: UP=CLK, PTT=SO/, DOWN=SI
1.
2.
3.
4.
5.
Configure the master transciever's memories as desired.
Switch power off, hold down f and mhz keys and switch power back on while holding keys. Display wi show 'clone'.
Set the slave transciever in the clone mode (as in step 2).
Plug the cable into the two radios (which end doesot matter).
Press the call button on the master. When 'end' is displayed, operation is complete.
This modification is read 896 times.
top of page
19-07-1998
(TM-732) TM-732E fuer 9600
Hallo, habe meinen Kenwood TM-732E erfolgreich umgebaut auf 9600Baud.
NF Ausgang zum TNC an TX-RX UNIT/430 MHz an IC201 (KCDO4) Pin 12 Signal DET.
NF Eingang vom TNC an TX-RX UNIT/430 MHz an Leitung R257 nach VR202 Sig.
MAX DEV.
PTT an Microfonbuche gegen Masse.
Fragen Ueber Box DB0IZ oder Digi DB0END in 1200Baud oder 0202/521349.
73 55 Joerg aus Wuppertal DD8JM.
This modification is read 908 times.
top of page
19-07-1998
(TM-732) TM-732 gets hot
Cause:
De Fan on the backside doesn't work correctly.
Solution:
Solder a transistor (eg BSX20) clote to the Fan-connector:
Collector: to the Fan-connector (closest totthe 12V-wire)
Emmitor : to GND
Base : to 7808 regulator (closest pin to the Front)
The Fan will now operate whenever the transceiver is switched on.
This modification is read 985 times.
top of page
19-07-1998
(TM-732) AM detector control
The AM Detctor, which automatically comes on below 136 MHz, can be forced ON at any VHF frequency by pressing the F and MUTE
keys while applying power. Radio continues to transmit FM but receives AM. Changing frequencies or memory channels will cancel the
forced AM mode. This capability could be useful for listening to the USAF Thunderbirds which sometimes operate in the 143 MHZ band
using AM.
This modification is read 976 times.
27-03-2000
(TM-732) Extended RX & TX Mods
top of page
Author: Colin G1IVG - [email protected]
Note this mod is for a Standard Kenwood TM732E (European) model type "E1". However if you have a USA version see the resistor
matrix below for different configurations etc.
1. Remove power cables and coax etc. from radio.
2. By pressing the small release clip on the left of the display, remove the remote head from the main body of the radio.
3. Remove the access cover on the rear of the remote head unit.
4.
5.
6.
7.
8.
Disconnect the white connector, leaving the remote head separate from the main body of the radio.
On the back of the remote head remove the two screws.
Now you should be able to see the PCB of the remote head.
If you look above the white connector "CN 1" you will see four "0" Ohm resistor positions, labeled R19,R20,R21 & R22.
You need to configure the resistors as in the photo below.
Photo shows radio after modification.
Modification matrix for the KENWOOD TM-732
Model
Resistors
21 20 19
1 0 1
1 0 1
0 0 1
1 1 0
0 0 0
1 0 0
22
K1
0
K2
1
K3
1
K4
0
M1
0
M2
0
default)
E1
0
E2
1
E3
0
E4
1
E5
1
TX/RX
C1
0
TX Ranges
UHF
438-450
438-450
420-450
410-470
430-440
410-470
VHF
144-148
144-148
142-152
136-174
144-148
136-174
STD
SHIFT
.6/5
.6/5
.6/5
.6/5
.6/5
.6/5
0
0
0
1
0
1
1
1
0
1
0
0
1
0
1
144-146
136-174
144-146
144-146
136-174
430-440
432-438
410-470
430-440
410-470
.6/(1.6)
.6/1.6
.6/(1.6)
.6/(1.6)
.6/(1.6)
0
0
1
136-174
340-512
5.7/10
800MHz
x
x
x
x
x
x
x
x
Remarks
Std. US Version
US After green wire cut
MARS/CAP Mod
All Band Mod
Generic Int'l Model
All Band Int'l (430
Std Europe Model
Denmark
Europe All Band
China Model
Notes:
1.
2.
3.
4.
5.
6.
7.
All "resistors" O ohms (wire jumper OK)
Green wire is equivalent to R22 - present in K1 model
0 = resistor present, 1 = resistor absent
Standard shifts in MHz VHF/UHF. Those listed as (1.6) also do -7.6
Codes not listed are used in Japan version, special CPU required
M column is factory MODE number
K2 Mod includes 410-470 RECEIVE and enables CLONING features
This modification works 100% on my Kenwood TM732E. If you decide to carryout the same modification on your Kenwood TM732,
then you do so at your own risk.
This modification is read 1214 times.
top of page
27-03-2000
(TM-732) 9600 baud UHF packet radio mods
Author: Colin G1IVG - [email protected]
Note: These mods are for 9600 baud on 70cms (UHF) only.
9600 TX mods (UHF).
1. Find the TX audio deviation potentiometer VR202 (47K).
2. You need to feed the TNC's 9600 baud TX audio, to a point between VR202 and resistor R257 (27K). This must be fed in series
with a 0.1uf ceramic capacitor and a 56k ¼ watt resistor. Use screened cable and connect the screen to a nearby GND
connection. On my radio I connected the TX Audio to the actual potentometer, were it leads to R257.
9600 RX mods (UHF).
Find IC201 (FM IF module). Connect a screened wire from pin 12 (DET) to your TNC's 9600 baud RX audio input. Connect the screen
to a near by GND connection.
PTT Connection.
Remove the front panel and gain access to the PCB of the control head. You need to connect a wire from the PTT line of your TNC to
the PCB at back of the MIC connector. Pin 5 of the MIC connector is the PTT.
1200 baud Packet Connection.
For normal 1200 baud packet use, just connect your TNC to the MIC connector, for all TX and RX audio plus the PTT control.
This modification is read 911 times.
top of page
21-04-2000
(TM-732) TM-732A 2 Meter transmit interference on 70 CM
Author: Kenwood Communication, inc.
Service Bulletin no. 996 (20 May 1992)
Reports of 70 cm receiver interference might occur when transmission is attempted on two meters. This is caused by a harmonic
relationship that occurs between 2 meter frequencies and the IF image frequency. The resulting signal enters IC201 (FM HIC) on the
8R line of the 430 MHz TX/RX unit.
Addition of a chip bead and bypass capacitor on the 8R line will correct this tendency.
Parts required:
470 pF chip capacitor
Chip bead
CK73FB1H471K
L92-0131-05
Note: Don't confuse the chip capacitor with the chip bead. They have the same shape. The chip bead is black and the chip capacitor is
brown so it should be a simple matter to identify the correct part.
Time required for this modification is 30 minutes.
top of page
This modification is read 966 times.
22-04-2000
(TM-732) TM-732A/E Change in chip fuse rating
Author: Kenwood Communication, inc.
Service Bulletin no. 1005 (10 May 1993)
Parts change:
Change the chip fuse from 1 A to 1.2 A in the 430 MHz unit (X57-4000-11 B/4) whenever servicing this board.
Parts required:
F201, chip fuse, 1.2 Amp, (F53-0095-05), QTY. 1
Caution: This modification requires soldering equipment rated for CMOS type circuits. It also requires familiarity with surface mount
soldering techniques. If you do not have the proper equipment or knowledge do not attempt this modification yourself. Seek qualified
assistance.
Time required for this modification is 15 minutes or less.
This modification is read 907 times.
top of page
22-04-2000
(TM-732) TM-732A Low cross-band repeater audio
Author: Kenwood Communication, inc.
Service Bulletin no. 1011 (3 May 1993)
Symptom:
Improper DTMF operation and low microphone audio have been reported by several owners of the TM-732A when the units are
operated in the Cross-band repeat mode.
Parts required:
R468
39 Kohm chip resistor
C453
.01 µF chip capacitor
RK73FB2A393J
CK73FB1E103K
QTY. 1
QTY. 1
Procedure:
1. Detach the front panel assembly from the chassis.
2. Remove the top and bottom covers from the chassis.
3. Remove the small countersunk Phillips head screws from the sides of the chassis. These are used to secure the two brackets that
holds the plastic front cover to the chassis. Gently pull the plastic cover assembly forward and remove it from the chassis.
4. The TX/RX Control unit should now be visible on the front of the chassis assembly.
5. Replace R468 and C453 shown in the accompanying diagram.
6. Reverse steps 1 - 3 to reassemble the transceiver.
No additional adjustment or modification will be required.
Caution: This modification requires soldering equipment rated for CMOS type circuits. It
also requires familiarity with surface mount soldering techniques. If you do not have the
proper equipment or knowledge do not attempt this modification yourself. Seek qualified
assistance.
Time required for this modification is 30 minutes or less.
This modification is read 977 times.
top of page
22-04-2000
(TM-732) TM-732A/E Noise at squelch ON/OFF
Author: Kenwood Communication, inc.
Service Bulletin no. 1014 (10 May 1993)
Symptom:
While receiving a signal on one band a noise is heard in the speaker whenever the squelch on the other band opens or closes.
Correct Action:
Add a 330 ohm resistor and 4.7 µF capacitor to the 5C line in the control unit (X57-4000-11 C/4). Cut the 5C line and add the 330
ohm resistor in series.
Parts required:
330 ohm resistor
4.7 µF capacitor
RD14BB2C331J
C92-0507-05
QTY. 1
QTY. 1
Caution: This modification requires soldering equipment rated for CMOS type
circuits. It also requires familiarity with surface mount soldering techniques. If you do
not have the proper equipment or knowledge do not attempt this modification
yourself. Seek qualified assistance.
Time required for this modification is 30 minutes or less.
top of page
This modification is read 879 times.
23-04-2000
(TM-732) TM-732A S-meter squelch scan stop improvement
Author: Kenwood Communication, inc.
Service Bulletin no. 1023 (26 May 1993)
Symptom:
On some early versions of the TM-732 scan will not stop when operating in the S-meter squelch mode, even when the transceiver
receives a signal with the same level as specified when initiating the S-meter squelch mode.
Correct action:
Change the value of C42 in the 144 MHz TX/RX unit (X57-4000 A/4) and C242 in the 430 MHz TX/RX unit (X57-4000 B/4) from 1 µF
to 0.47 µF.
Parts required:
Qty
2
Description
0.47 µF capacitor
Kenwood Part No.
CK73FF1C474Z
Circuit description
C42, C242
Caution: This modification requires soldering equipment rated for CMOS
type circuits. It also requires familiarity with surface mount soldering
techniques. If you do not have the proper equipment or knowledge do not
attempt this modification yourself. Seek qualified assistance.
Time required for this modification is 30 minutes or less.
top of page
This modification is read 870 times.
23-04-2000
(TM-732) TM-732A Protection of Q201 in 430 MHz unit
Author: Kenwood Communication, inc.
Service Bulletin no. 1027 (28 June 1993)
Symptom:
Q201 the first RF amplifier in the 430 MHz unit fails at random.
Corrective action:
Addition of diode D218 in parallel with diode D214 in the RA line provides increased surge protection for Q201.
Parts required:
Qty
1
Description
Diode
Kenwood Part No.
HSK277
Circuit description
D218
Caution: This modification requires soldering equipment rated for CMOS type circuits. It also requires familiarity with surface mount
soldering techniques. If you do not have the proper equipment or knowledge do not attempt this modification yourself. Seek qualified
assistance.
Time required for this modification is 30 minutes or less.
This modification is read 898 times.
top of page
23-04-2000
(TM-732) TM-732A Control PC Board B+ foil damage
Author: Kenwood Communication, inc.
Service Bulletin no. 1051 (28 March 1994)
Symptom:
Unable to turn on the power. No DISPLAY illumination, radio does not function.
Countermeasure:
The B+ circuit foil path near connector CN403 of the CONTROL units is burned open. This symptom can occur when the front panel is
unplugged from the main chassis while the power is till turned on. Adding the resistor shown in series with the "B" line will help to
limit current flow and prevent/limit this symptom from occurring.
Parts required:
Qty
1
Description
4.7 ohm chip resistor
New Part No.
R92-1281-05
Circuit Description
R290
Caution: This modification requires soldering equipment rated for CMOS type circuits. It also requires familiarity with surface mount
soldering techniques. If you do not have the proper equipment or knowledge do not attempt this modification yourself. Seek qualified
assistance from your closest Kenwood Service Center (Long Beach, CA, or Virginia Beach, VA).
Time required for this modification is 60 minutes or less.
top of page
This modification is read 889 times.
23-04-2000
(TM-732) TM-732A/E APC circuit improvement
Author: Kenwood Communication, inc.
Service Bulletin no. 1056 (28 March 1994)
Symptom:
Failure of APC circuit transistor Q232 can occasionally be attributed to the gain dispersion charcteristic of the VHF power module.
Some of these devices allow normal transmit power output even with reduced "DB" terminal voltages. If the units is then operated for
extended transmit key down periods Q232 can overheat and fail.
Corrective Action:
1. Measure the transmit power output and the "DB" terminal voltage at a dial frequency of 145.02 MHz.
2. Add the 1 dB circuit if the transmitter power is 60 watt or greater and the "DB" terminal voltage is 10 Vdc or less.
3. After adding the attenuator, re-adjust the transmitter output power for 50 watt and check the "DB" voltage. The "DB" voltage
should now fall between 10 and 11 Vdc. If it does not adjust the values for R98, R100, and R99 until this voltage range is
obtained.
Parts required:
Qty
*
*
*
Description
820 ohm chip resistor
470 ohm chip resistor
270 ohm chip resistor
New Part No.
RK73FB2A821J
RK73FB2A471J
RK73FB2A271J
Circuit Description
R98, R100
R98, R100
R98, R100
*
*
*
5.6 ohm chip resistor
10 ohm chip resistor
18 ohm chip resistor
RK73FB2A5R6J
RK73FB2A100J
RK73FB2A108J
R99
R99
R99
* Note: Quantities vary depending upon level of attenuation required to meet requirement of step 3.
Pad Attenuation R98,R100
R99
1 dB
820 ohm
5.6 ohm
2 dB
470 ohm
10 ohm
3 dB
270 ohm
18 ohm
Time required for this modification is 60 minutes or less.
This modification is read 909 times.
top of page
23-12-2000
(TM-732) TM-732 partial display or no power up
Author: Pete Webster - GM7EEY - [email protected]
I have had 2 sets with similar faults.
On the back of the display board there is an electrolytic capacitor C8, this had leaked causing the through plated copper track to
dissolve.
This track carries 5v from the regulator to the rest of the circuit, simply by soldering through a wire link cured the fault. My own set
had a partial display with no RX but ok TX, it only showed the first 2 digits of the UHF band frequency. The other set would not power
up at all until repaired.
This repair does mean removing the LCD display from the board so be very careful on assembly otherwise it will not function properly.
GM7EEY
This modification is read 940 times.
top of page
19-07-1998
(TM-733) TM733 with 2 antenna-sockets
Hello Kenwood-user,
As I started to use the TM733E on my 3 bander COMET 901 , I had to modify my transceiver. As I think some off you use a 3 way
splitter to connect several transceivers at the same time there was a problem,I could not use the 23cm band and the splitter anymore
sinds the TM733E came with only one antenna socket (mixed VHF and UHF).
After looking around in different shops, I was unable to find a splitter that had the UHF and VHF together on one socket and the 23cm
band on another.
So I decided to have a look at the schematics off the TM733E and noticed the US version has 2 antenna sockets.
Modifying the rig is very simple:
Make a second antenna cable with PL259 socket or get it at your local Kenwood dealer (some 15$) (same cable as on the other mobile
dual banders ...TM701 etc.)Open both sides off the transceiver.
Take off the plastic cover off the spare hole at the back.
Insert and solder the new antenna cable.
Take away the connection (one big pin) from the VHF to the UHF pc-board with a good solderpump.
Your rig has now 2 antenna-inputs ,one for VHF ,one for UHF.
This mod. is also interesting for those who often use the CROSSBANDREPEATER, sinds you can now connect a vertical to the 70cm tx
and a beam to the 2m part or the other way round.
Good luck with the modification and ...
have as much fun with the TM733E as i do !
73 de Jan ON1BJC @ ON4ABG
This modification is read 1435 times.
top of page
19-07-1998
(TM-733) TM733 and 9k6 Bps
As I first started to use the TM733E on 9600Bps ,it didn't work very well.
Rx 9600Bps was no problem but the TX-side was poor in transmission-speed.
After having a look at the SERVICE MANUAL i discovered that the audiosignal from the G3RUH should at least be 2 Volts PEP.
This information is not in the original manual delivered with the TM733E.
Txdelay starts at 200mS and combination nr 9 (strap settings G3RUH) seems to be the best to get minimum errors ...
Hoping to set some off you on the right track now...
73 de Jan ON1BJC @ ON4ABG
This modification is read 1218 times.
top of page
19-07-1998
(TM-733) TM733 & 9K6
Well John, i'm sorry i have to say this but the Kenwood TM733 is definitely NOT suited for 9600bd operation. It has several serious
design bugs.
●
●
PLL modulation, thereby giving very bad Bit Error Rate figures because of the bad lf response of the modulation circuits. At 64
Hz, there is a 4.5 dB rise.
Slow tx<>rx switching. The TM733 needs 100-150 milliseconds to turn around. If your opponent (satellite or earth station) is
faster with replying you keep on missing his first packet.
These problems are very common in the current generation "9600bd ready" transceivers. The Icom IC281/481, Yeasu 5100 and many
others suffer from these problems.
The Kenwood TM733 has another design bug :
●
If you try to make more than about 2.5 KHz deviation via the data port, the modulation gets very distorded. This is not easy
noticable, since 9k6 modulation sounds like noise, and distorded 9k6 also sounds as noise.. This problem is seen at more than
one TM733, throughout Europe.
I sure hope you can send this thing back and get your money back, John.
This modification is read 1158 times.
top of page
19-07-1998
(TM-733) TM-733E MOD 9k6 english
After I bought a Kenwood TM-733E transceiver for packet radio I was very disappointed about the bad modulation in the 9600 baud
packet mode on the 430 mc band. For many digipeaters the tranceiver produced insufficient fm deviation. If you increase the
modulation voltage you will get a strong distortion of your signal. The german Kenwood office was unable or unwilling to fix this
problem.
After some experiments I found the following solution for my transceiver:
Increase the internal packet radio modulation signal for the 70cm band by reducing the value of a SMD resistor. The resistor lives on
the TX-RX Unit/Control board (X57-436X-XX)(C/4). The resistor is named R536 and it has a value of 56 kOhm. I reduced itïs value by
soldering an additional SMD resistor of 30 kOhm on itïs top.
The two resistors form a new value of 19 kOhm. This will increase the modulation voltage for the PLL unit and you need less input
signal on the data input at the socket J402. My tranceiver makes now a deviation of 3.5 kHz with 1V/pp instead of 2.2 kHz with 2V/pp
before.
There is less distortion than before. Concerning 9k6 packet radio the TM-733E has a bad frequency characteristic. It can be fixed with
a suitable selection of the modem transmission filter. The following selection was the best for my TNC2H:
0 0 1 1 (switches 5 to 8, 1 = up, 0 = down).
Please note:
I am not responsible for your modifications.
You will do it at your own risk!
You need:
15 to 20 minutes time, a magnifying glass a screw driver (X), a needle type soldering iron and a SMD resistor of round about 30 kOhm
1.
2.
3.
4.
5.
6.
7.
Remove the top cover ( 4 screws )
Remove the bottom cover ( 4 screws )
Remove the front panel ( no screws! )
Remove the plastic front cover ( 6 plastic snappers )
Disconnect the two flat cables on the front board ( shift the bolts )
Remove the front board ( 2 screws )
Find the SMD resistor named R536 ( the print on the resistor reads 563, it is located on the back side of the front board between
the two flat cable sockets, use a magnifying glass! )
8. Solder the 30 KOhm SMD resistor on top of the R536
9. Reassemble the other way round ( good luck ! )
When the modification is done you have to setup your modem (modulation voltage and filter selection) again.
Concerning Kenwoods bad support in germany my next packet radio tranceiver will be from a different manufacturer.
Please send me a message with your results. Good success!
vy 73 Norbert DC6BC @ DB0IZ.#NRW.DEU.EU
top of page
This modification is read 1181 times.
19-07-1998
(TM-733) MODS OF KENWOOD TM-733 for Japanese version
Maybe there are some difference for USA , EU and another vartion. So please use caution.
1. Remove the control panel. You can find CPU board.
2. Remove 2 screws on this board. Then turn insde out this board.
3. You can find a chip that printed [ 000 ] on this board.
--------------------------------------xx
I
O
O I
I
---------------------------------------
I
I
I
xx meams [ 000 ]
O means hole of screw
4. After remove this chip [ 000 ] , you can recieve as ffollows.
on 144MHz
118-173MHz
130-173MHz
300-469MHz
on 430MHz
118-173MHz
300-469MHz
800-900MHz
On 144MHz side , press [ MHz ] key more than 1 sec. , change mode for AM.
On 430MHz side , change band for 800Mhz.
This modification is read 1148 times.
19-07-1998
(TM-733) TM-733A Quick Reference Guide
top of page
Assembly Mode Test
In the TM-733 Service Manual, it describes a test mode that I haven't seen mentioned anywhere else. So, here's the scoop:
Entering Assembly Mode: [CALL] + [MUTE] + [Power On]
All LCD segments should come on. (To exit, power off.)
Press the [VFO] key. *This must always be done first*
The serial port is checked and "F" with "80" on the display indicates test passed. "1" or "2" means failure.
Different keys now show different displays, with [LOW], [SHIFT], [TONE], and [REV] also adjusting the backlight intensity.
Set the dials to minimum, then press the [MR] key. Each of the dials shows the digitized level.
This looks useful for checking all the keys and dials when you suspect a bad connection.
Kenwood TM-733A Quick Reference Guide by Brad Killebrew N5LJV
----------------------------------------------------------------------------[#]
[KEY]
[KEY1]+[KEY2]
[KEY1],[KEY2]
[KEY]+[PWR]
[KEY1]+[KEY2]+[PWR]
[F] (1s)
[KEY] (1s)
[F],[KEY] (1s)
PRESS A NUMBER, NOT THE POUND SIGN.
PRESS AND RELEASE [KEY]
PRESS AND HOLD [KEY1] DOWN, THEN PRESS [KEY2]
PRESS [KEY1] MOMENTARILY, THEN PRESS [KEY2]
WITH POWER OFF, PRESS AND HOLD [KEY] THEN HIT [PWR]
YOU GET THE IDEA.
PRESS AND HOLD [F] FOR ONE SECOND. "F" THEN BLINKS.
PRESS AND HOLD [KEY] FOR ONE SEOND.
PRESS [F] MOMENTARILY, THEN PRESS [KEY] FOR ONE SEC.
-----------------------------------------------------------------------------
The following entries are in alphabetical order.
1 MHZ/10 MHZ TUNING TOGGLE
ADVNACED INTERCEPT POINT (AIP)
ALL LOCK
AM/FM MODE
AUTO DIMMER CHANGE
AUTOMATIC BAND CHANGE (A.B.C.)
AUTOMATIC OFFET (CANCELLING)
AUTOMATIC POWER OFF (APO)
AUTOMATIC SIMPLEX CHECKER
AUTOMATIC SQUELCH
AUTOMATIC TONE FREQUENCY ID
BAND SCAN
BEEP LOUDNESS
BLANKING A BAND DISPLAY
CALL CHANNEL CHANGING (ODD SPLIT)
CALL CHANNEL CHANGING (SIMPLEX,DUPLEX)
CALL CHANNEL RECALLING
CALL/MEMORY SCAN
CALL/VFO SCAN
CANCELLING AUTOMATIC OFFET
CHANGING CALL CHANNEL (ODD SPLIT)
CHANGING CALL CHANNEL (SIMPLEX,DUPLEX)
CHANNEL DISPLAY FUNCTION
CONFIRMING PROGRAMMABLE LIMITS
CTCSS
CTCSS TONE FREQUENCY (SELECTING)
DIMMER (AUTO CHANGE)
DIMMER (DISPLAY)
DISPLAY DIMMER
DISPLAY DOMONSTRATION MODE
DTMF CONFIRMATION TONES
DTMF IN AUTOMATIC DIALER (STORING)
DTMF NUMBERS (RECALLING STORED)
DTMF NUMBERS (TRANSMITTING STORED)
DUAL TONE SQUELCH SYSTEM (DTSS)
DUAL TONE SQUELCH SYSTEM (TONE SELECT)
ERASING MEMORY CHANNELS
ERASING PROGRAMMABLE MEMORY
FREQUENCY READOUT BY BEEPS
FREQUENCY STEP SIZE
FULL RESET (MINUS PM)
FULL RESET (PLUS PM)
INITIALIZE FULL RESET (MINUS PM)
INITIALIZE FULL RESET (PLUS PM)
[VFO],[F]+[MHZ]
[F]+[A.B.C.]
[F],[MHZ],[PWR],[F]+[PWR]
[MHZ] (1s)
[F]+[LOW]+[PWR]
[F],[A.B.C.]
[VFO]+[REV]+[PWR]
[F] (1s),[MHZ]
[REV] (1s)
[MHZ] + [PWR]
[TONE] (1s)
[VFO] (1s)
[F] (1s),[BEEP]
[F] (1s), [BAND SEL]
(RX FR),[F],[C.IN] (1s),(TX FR)[CALL]
[F],[C.IN]
[CALL]
[MR],[CALL] (1s)
[VFO],[CALL] (1s)
[VFO]+[REV]+[PWR]
(RX FR),[F],[C.IN] (1s),(TX FR)[CALL]
[F],[C.IN]
[REV]+[PRW]
[F]+[VFO],(L.SHOWN),[MR](U.SHOWN)
[TONE],TOGLE TILL "CT" APPEARS
[F] (1s),[T.SEL],[UP]/[DOWN]
[F]+[LOW]+[PWR]
[F],[DIM]
[F],[DIM]
[CALL]+[PWR]
[PTT]+[DWN]+[PWR]
[F]+[CALL]+[PWR],{#'s},[PF],[#]
[F]+[CALL]+[PWR],[MR],[#]
[PTT]+[PF],[#]
[F],[DTSS]
[F] (1s),[C.SEL],[#],[SHIFT],ETC.
[MR],[F]+[MR]
[F]+[PM],[#],[MR]
[F]+[TONE]+[PWR],[PF]
[VFO],[F],[STEP]
[MR]+[PWR],[F],[MR]
[MR]+[PWR],[MR]
[MR]+[PWR],[F],[MR]
[MR]+[PWR],[MR]
INITIALIZE VFO BOTH BANDS
INITIALIZE VFO ONE BAND
LOCK (ALL)
LOCK (TRANCEIVER)
LOCK (TRANSMIT BAND)
LOCKING OUT MEMORY CHANNELS
MEMORY CHANNELS (LOCKING OUT)
MEMORY ERASING CHANNELS
MEMORY RECALLING CALL CHANNEL
MEMORY SCAN
MEMORY TO VFO TRANSFER
MEMORY WRITING (ODD SPLIT)
MEMORY WRITING (SIMPLEX, DUPLEX)
MUTE
PACKET BAUD RATE TOGLE
POWER OUTPUT
PROGRAMMABLE BAND SCAN
PROGRAMMABLE LIMITS (CONFIRMING)
PROGRAMMABLE MEMORY (ERASING)
PROGRAMMABLE MEMORY (RECALLING)
PROGRAMMABLE MEMORY (STORING)
PROGRAMMABLE MEMORY SCAN
RD OUTPUT SQUELCH CONTROL
RECALLING MEMORY CALL CHANNEL
RECALLING PROGRAMMABLE MEMORY
RECALLING STORED DTMF NUMBERS
RECEIVE AUDIO SWITCHING
REMOTE CONTROL MODE
S-METER SQUELCH
SCAN (BAND SCAN)
SCAN (CALL/MEMORY)
SCAN (CALL/VFO)
SCAN (PROGRAMMABLE BAND SCAN)
SCAN (PROGRAMMABLE MEMORY)
SCAN MEMORY
SCAN RESUME TOGLE (CO, TO)
SELECTING A CTCSS TONE FREQUENCY
SQUELCH (AUTOMATIC)
SQUELCH (RD OUTPUT CONTROL)
SQUELCH (S-METER)
SQUELCH HANG TIME
STORING DTMF IN AUTOMATIC DIALER
STORING PROGRAMMABLE MEMORY
TIME-OUT TIMER
TONE ALERT
TONE ALERT - CHANGE TONE
TRANCEIVER LOCK
TRANSMIT BAND LOCK
TRANSMITTING STORED DTMF NUMBERS
UHF+UHF OPERATION
VFO TUNING LIMITS
VHF+VHF OPERATION
WRITING MEMORY (ODD SPLIT)
WRITING MEMORY (SIMPLEX, DUPLEX)
[VFO]+[PWR]
[VFO]+[BAND SEL]+[PWR]
[F],[MHZ],[PWR],[F]+[PWR]
[F],[MHZ]
[F],[BAND SEL]
[MR],[F] (1s),[MR]
[MR],[F] (1s),[MR]
[MR],[F]+[MR]
[CALL]
[MR] (1s)
[F],[VFO]
(RX FRQ),[F],[MR] (1s),(TX FRQ)[MR]
[F],(FREQ),[MR]
[MUTE]
[F]+[STEP]
[LOW]
[F]+[VFO],(L.FRQ),[MR],(U.FRQ),[MR]
[F]+[VFO],(L.SHOWN),[MR](U.SHOWN)
[F]+[PM],[#],[MR]
[PM],[#]
[F],[PM],[#]
[PM]+[PWR],[PM] (1s)
[TONE]+[PWR]
[CALL]
[PM],[#]
[F]+[CALL]+[PWR],[MR],[#]
[F] (1s) [CONT SEL]
[F]+[CONT SEL]
[F] (1s), [S.QSL]
[VFO] (1s)
[MR],[CALL] (1s)
[VFO],[CALL] (1s)
[F]+[VFO],(L.FRQ),[MR],(U.FRQ),[MR]
[PM]+[PWR],[PM] (1s)
[MR] (1s)
[F] (1s),[VFO]
[F] (1s),[T.SEL],[UP]/[DOWN]
[MHZ] + [PWR]
[TONE]+[PWR]
[F] (1s), [S.QSL]
[F]+[DIM]
[F]+[CALL]+[PWR],{#'s},[PF],[#]
[F],[PM],[#]
[F] (1s),[TOT]
[F],[T.ALT]
[F]+[SHIFT]+[PWR]
[F],[MHZ]
[F],[BAND SEL]
[PTT]+[PF],[#]
[F],[CONT SEL]
[F]+[C.IN],(L.FRQ)[MR],(U.FRQ)[MR]
[F],[CONT SEL]
(RX FRQ),[F],[MR] (1s),(TX FRQ)[MR]
[F],(FREQ),[MR]
If you have additions or corrections to this file, please send it to Brad Killebrew N5LJV at [email protected], or packet
n5ljv@f6cnb.#setx.tx.usa.na.
Standard Disclaimer: The authors take absolutely no responsibility for the material presented in this document. The procedures
contained herein work on the author's radios, but proceed at your own risk.
This modification is read 1338 times.
19-07-1998
(TM-733) Extended RF Modifications
Refer to diagram below.
Remove power source from the radio.
Remove the display panel.
Remove the top cover the radio.
Face the front of the radio away from you.
Remove the speaker.
top of page
Looking from the back of the radio, the control board is vertically mounted just behind the front panel wall (which can be removed
easily if better access is needed.)
Just to the right of a chip labeled XRU4066BCF and just to the left of two green wires (B2 & B3 which are draped over the board to the
rear) are two zero-ohm SMT resistors, B0 and B1, marked "000".
Remove B0. (the one on the left - furthest from the green wires)
Taking it out might be a bit tricky. It's glued down for surface-mount assembly. Be careful not to pull the trace from the board.
Perform a CPU reset by holding [MR] while turning on the radio.
It will then ask if it is "OK?" to reset, press [MR] again.
The ranges after modification are as follows:
Tx: 136-174 410-470
Rx: 118-174 300-470
The cellular band is indeed missing.
ONLY Removing Jumper 1 (B2) is the MARS/CAP modification.
** Diagram of specified area on Control Board **
EDGE OF BOARD, viewed from the rear, looking toward front panel
_______
-|
|-| XRU
|-| 4066BF|-|
|-|
|-|
|-|_______|-
___
| _ |
B0| |
|_|
|___|
Green jumper wires (B2, B3)
___
___
___
___
| _ |
|_ _|
|_ _|
|___|
B1| |
B2 |
B3 |
|_|
_|_
_|_
___
|___|
|___|
|___|
|___|
_______
-|
|-|
|-|
|-|
|-|
|-|
|-|_______|-
The jumpers are actually soldered on the other side of the board, but the loops come up over the top and hang over the B0/B1 side.
B0=R414
B1=R412
Here's something interesting! According the Kenwood rep I spoke to, performing this mod *does not* void your factory warranty. The
same goes for any Kenwood published service bulletin or modification info. We are encouraged to perform the repairs ourselves to
save them the trouble and expence.
top of page
This modification is read 1576 times.
19-07-1998
(TM-733) DTMF Remote via Microphone
The TM-733 is fully DTMF remotable via the microphone (documented). The radio can also be externally DTMF controllable with an HT,
but that will be described later.
The DTMF control keys are exactly as shown on page 81 of the manual. Note that the microphone is active all the time, so any
ambient DTMF tones near your mic will also change rig settings. This includes tones coming in on the other band and out the speaker.
Date: 30-01-2002
User comment
From: KB7RBR / Bob Canestrini
Subject: DTMF via Mike.
Kenwood describes a fix for this in their Application Note AAN-0003. The App note is for an MC-45DM but Kenwood states this same
mod will work for the MC-53DM found on the TM-733.
I have not tried this mod yet as the part that Kenwood says to use (DTC1435) is an elusive one.
Date: 02-02-2002
Subject: Live mike fix
User comment
From: KB7RBR
Sorry everyone, I blew it in the above text. The AAN from Kenwood is AAN-0021R1 and describes the "Correct" procedure for this fix.
The procedure takes about 15 minutes and requires a DTC143ES Transistor (Or Equivilent NTE2367) This is a digital transistor
package that includes two biasing resistors.
1. Open the mike by removing the three rear screws.
2. Pull off the lock switch and clear plastic dust guard.
3. Locate the two Mike element solder joints on the back of the PCB.
4. Solder the Emitter and the Collector of the transistor across the mike element. (Note the Flat side of the transistor will face the
PCB)
5. Solder a short length of wire to the Base lead from the transistor and run it to the solder pad junction of D2 and D3. (Lower Left
corner of the PCB.)
6. I found it helpful to have a short length of shrink tube to insulate this lead.
7. Reassemble the mike and you're back on the air.
This mod has worked out fantastic for me...no more switching bands, power or frequency while monitoring a busy repeater.
73 de KB7RBR
This modification is read 1127 times.
top of page
19-07-1998
(TM-733) Cross Band Repeating
Cross band repeat isn't documented but comes ready from the factory.
To enable cross band repeat from the front panel, first select a band by pressing BAND SELECT. Then, change the control to the other
band by hitting [CONT SEL]. Next, press [F] for one second, then the "X" button (far right side). Decimals will appear between the
Kilohertz digits, and the "ON" indicator will light momentarily. The microphone sequence to enable cross band repeat while in remote
control mode is "DC".
The transmitter hang time can be toggled between 500ms to 0ms by turning on the radio with [LOW] pressed. They also recommend
enabling the Time-out Timer, for obvious reasons.
Note that the TM-733 can also be used as a "one-way" cross-band repeater.
For example, if you can receive a distant repeater with your HT, but have difficulty getting into it, you can use the TM-733 to boost
your transmitted signal. To set this up, just omit the part where you "change the control to the other band by pressing [CONT SEL]."
Doing this will setup the TM-733 to repeat your signal to the other band, but will not retransmit the distant station back to you. If this
sounds ambiguous, play around with it a little and it will begin to make sense.
This modification is read 1365 times.
top of page
19-07-1998
(TM-733) DTMF Paging and Squelch
The DTMF Paging & DTMF Squelch protocol (AAA*BBB) is compatible with the Yaesu 530 and all Kenwood radios supporting this.
This modification is read 1072 times.
top of page
19-07-1998
(TM-733) Wireless Cloning
The advertised but undocumented Wireless Clone function is described in App Note AAN-0008 which they will mail out on request.
(Maybe if enough people ask for it, they will include all the functions in future instruction manuals.) In summary:
●
●
●
●
●
●
●
Prepare the two radios for simplex operation on the same frequency.
Turn both radios off
Press [CALL]+[SHIFT] + [Pwr On].
This should place the radios is clone mode with "CLonE" on the display.
Press PTT on the "Master" radio momentarily. This will start sending the programming DTMF tones.
After all data has been transferred, the display of all radios will read "End", indicating success.
If the signal is interrupted or corrupted, the "Slave" displays will read "Err". Turn them off and try again.
Notes:
●
●
Both the Master and Slave radios must have the same number of memory channels available for each band. Example: You can
not clone a stock Master to a Slave with ME-1 memory expansion.
You can not clone between different Kenwood radio models, even if they seem identical.
Be careful when using the clone feature. It has been known to wipe out or scramble memories on the master radio during or right
after clone.
top of page
This modification is read 1136 times.
19-07-1998
(TM-733) TM-733A PL Tone Distortion
Author: Kenwood Communication, inc.
Service Bulletin no. 1060 (30 AUgust 1994)
Symptom:
Transmitted PL tones at the receiving station have a relatively high level of distortion. This is easily seen when the incoming signal is
viewed on an oscilloscope.
Countermeasure
Change the value of the "Pull-up" resistors in the PL tone encoder circuit as shown in the accompanying chart and illustration. This
reduces the distortion from around 9% to approximately 4%.
Part
---R542
R543
R544
R545
R546
R547
R548
OLD value
--------1.8k
1.8k
1.8k
1.8k
1.8k
1.8k
1.8k
NEW value
--------2.7k
3.3k
4.7k
6.8k
10k
10k
10k
Procedure:
1. Disconnect the power cable, microphone and antenna's, etc.
2. Detach the front panel and set it aside.
3. Remove the top and bottom covers.
4. Remove the speaker and speaker mounting bracket.
5. Disengage the plastic front panel from the main chassis.
6. Carefully disconnect the two ribbon cables from the Tx/Rx unit C/4.
7. Remove the two Phillips head screws that secure the Tx/Rx unit to the chassis.
8. Turn the circuit board over and replace the resistors using the parts list and illustration as a guide.
9. Reverse steps 1-7 for reassembly.
TX-RX Unit (X57-4360-00)
Foil Side View
--------------------------------------------------------------R
5
4
7
R
5
4
6
R
5
4
4
R542
R543
R545
(IC403 on component side)
R
5
4
8
_______
-|
|-|
|-|
|-| IC402 |-|
|-
-|
|-|_______|-
Caution: This modification requires advanced surface mount soldering equipment that is rated for CMOS circuits. It also requires
familiarity with advanced surface mount soldering techniques. If you do not have the proper equipment or knowledge do not attempt
this modification yourself. Seek qualified assistance from your closest Kenwood Service Center (Long Beach, CA, or Virginia Beach,
VA).
Extra note, these nots is not from Kenwood.
The Service Manual specifies a test for the PL. The technician is simply required to verify that any one PL tone is between 500 and
1500 Hz deviation. This is quite a wide tolerance range! The "standard" PL tone deviation should be 750 Hz. Twice that strong might
be too strong and become audible. There are no trim-pots on the PL deviation, so I'm guessing that the deviation is pretty constant
from radio to radio.
The dirty PL is definitely found on early models, but we have had many reports that the PL problem has been fixed in newer versions
of the radio. If you purchased your radio after September 15, 1994, (or your serial number is greater than 55000000) it's a good
chance that you may not have the PL problem.
The other problem concerns the DTMF Confirmation Tones. This feature is off by default (I wonder why :), while it seems pretty useful.
To turn it on, press [PTT] + [Down] on the microphone while powering the radio on. This will generate short DTMF confirmation tones
whenever you send DTMF over the air from the keypad. Unfortunately, it mangles the beginning of the outgoing DTMF tone! This is
serious enough that most local repeaters can't detect the tone, or count it as two tones.
Get a receiver and listen to what you are sending out when the Confirmation tones are enabled. It sounds to me like they may be
mixing the confirmation tone in with the real tone and getting some destructive interference. Just a guess, though.
I called a Kenwood technician (Ricardo) and worked with him on the phone to reproduce the problem there. So, as of today, this is a
Known Problem, and they are looking into a fix. :-)
I am really curious to know what they would say if other folks called up and complained about this problem. Would they deny hearing
about it, or would it really be a Known Problem? Might give some insight into the PL-noise denial thing anyway. :-)
Personally, I'm much more concerned about the noisy PL than the DTMF confirmation tones, since I can just shut those off and
pretend that feature doesn't exist. If enough people call about the PL problem, maybe they will come out with a real fix and offer it
under warranty to all the radios out there (since they're all pretty new). My guess is that it will involve a free TSU-8 tone decode
module, but don't hold your breath. :-)
top of page
This modification is read 1091 times.
19-07-1998
(TM-733) External DTMF Remote Control
The following procedure places the 733 in External DTMF Remote Control.
Note that this mode is different than DTMF Remote Mode. This mode concerns the control of the 733 with an HT, and not the
microphone.
●
●
●
●
●
●
●
●
●
●
●
Press Band Select and select the UHF band.
Pick a UHF control frequency.
Turn on the UHF DTSS function and select a tone sequence. (p. 89)
Turn the UHF DTSS function back off.
Press Band Select to move to the VHF band.
Press [CONT SEL] to move control back to the UHF band.
Turn OFF the radio, press and hold [CONT SEL] while turning the radio back on, then release [CONT SEL]. The S-meter scale and
the DT indicators for the UHF band will begin flashing. The LOCK indicator will turn ON, and most front-panel keys (except PWR)
will be disabled.
To begin remote control, you should key the external radio and press the following key sequence: "Axxx#" where "xxx" is the
preset DTSS code selected earlier.
If the proper code is received by the 733, the beeper will sound and the DT indicator will stop flashing. The radio can now be
remotely controlled using the function chart below.
To return to standby mode, press "A#" on the remote radio.
To return the radio to normal operation, turn the radio off, then press and hold [CONT SEL] while turning the radio back on.
Refer to this chart when using the TM-733 in "External DTMF Control".
1
T.ALT ON
4
2
TONE ON
5
3
CTCSS ON
A
ENTER
6
B
T.ALT OFF
TONE OFF
CTCSS OFF
TONE SEL
7
CALL
8
VFO
9
MEMORY
C
REPEATER ON
*
DOWN
0
POWER LEVEL
#
UP
D
REPEATER OFF
There are no "shifted" functions. Just one function per button.
After you hit "B" for TONE SELECT, press * or # to go up or down, and same is true when in VFO mode or in MEMORY mode. Tones 7,
8, and 9 mimic the three buttons at the top of the 733 mic.
Pressing "C" places the radio in cross band repeat mode. You will recognize this because of the dots between Kilohertz digits. After
pressing "C", put the radio back into standby mode with "A#". The 733 will now cross band repeat. To disable cross band repeat, place
the radio back into the External DTMF Remote Control with "Axxx#". If you can read through the lines, the 733 is capable of operating
as a frequency agile remote base. Now Kenwood just needs a CW IDer!
top of page
This modification is read 1107 times.
24-01-1999
(TM-733) TM-733 data pinouts descriptions
o
o
o
o
o
o
On the booklet it says
1 = pkd packet data input transmit data frm tnc to tranciever.
2 = de ground for pkd.
3 = pks packet standbye tnc can use this pin to inhibit the the transciever microphone input while transmiting packet signals.
4 = pr9 detects 9600 bps data (500 mvp-p/10 kohms).
5 = pri detects 1200 bps data (300mvp-p/10kohms).
6 = sqc squelch control output inhibits tnc data transmit while transceiver squelch is open.
Prevents interference to voice communications on the same frequency. allso prevents retries. output level
open squelch: +5 v (high)
closed squelch: 0v (low)
I bought a baycom board,ive tried to put the baycom boad 5 pin din plug to this but faild so far on one attempt,if you are very good
with the practical side of radio's could you please tell me the proper way to wire my kenwood tm 733e up the the baycom.
73 - MIKE, 2E1FCG @ GB7SYP
top of page
This modification is read 1170 times.
23-04-2000
(TM-733) TM-733A PL tone bleed through
Author: Kenwood Communication, inc.
Service Bulletin no. 1061 (16 September 1994)
Symptom:
When transmitting a PL tone a "humming noise" might be heard coming from the internal speaker of the TM-733A. This caused by a
difference of potential between the tone generating circuit and the AF amplifier circuit.
Countermeasure:
This symptom is corrected by tying the ground connections in the AF amplifier and Tone generating circuit together.
Parts required:
Qty
2
2
1*
Description
Screw
star washers
Small gauge hookup wire
Old part No.
N87-2606-46
New Part No.
N87-2608-46
N16-0026-46
Procedure:
1. Disconnect the power cable, microphone and antenna's etc.
2. Detach the front panel and set it aside.
3. Remove the top and bottom covers.
4. Remove the speaker and speaker mounting bracket.
5. Disengage the plastic front panel from the main chassis.
6. Remove the two Phillips head screws that secure the TX/RX unit to the chassis.
7. Install the new screws and star washers.
8. Solder a jumper wire from the ground side of C424 and pin number 8 of IC7 as shown in the accompanying illustration.
9. Reverse steps 1 - 5 for reassemble.
Caution: This modification requires soldering equipment rated for CMOS type circuits. It also requires familiarity with surface mount
soldering techniques. If you do not have the proper equipment or knowledge do not attempt this modification yourself. Seek qualified
assistance from your closest Kenwood Service Center (Long Beach, CA, or Virginia Beach, VA).
Time required for this modification is 30 minutes or less.
This modification is read 1101 times.
top of page
18-11-2001
(TM-733) TM-733 quick operation guide
Author: Frank, ZP5FGS - [email protected]
Tired of carring the operation manual in my car while operating my TS-733 A, I decided to make a "One Page Reference Manual" with
almost all info needed.
Operating the 733 on a "not every day basis" wihtout the manual is not easy because some settings do not follow a logic secuence, as
you find it for example in Icom or others, and you may forget them.
The 733 is very rich in features and different settings, so it's a good advise to carry the Op. Manual with you, or at least have a short
version like this.
The One Page version is an Microsoft Excel file.
73 de Frank, ZP5FGS
This modification is read 1103 times.
top of page
19-07-1998
(TM-741) Umbau des TRX Kenwood TM-741 E fuer 9600bd
de DL1OBO @ DK0MAV.NDS.DEU.EU
Ich hatte ja schon mehrere FM-Geraete fuer 9k6 in Betrieb,aber mit dem TM-741 E ging es am besten ! ! !
Mir ist es gelungen den TM741 E für 9600bd zunutzen,und von Umbau kann eigentlich auch nicht die Rede sein,denn Umgebaut wird
nichts.
Bei mir und mit DB0SHG klappt es ufb, auch mit DB0FD (was ich nur im Rauschen aus der City von Hameln höre geht es super.....
Beim Umbau bitte ich mit besonderer Vorsicht an den SMD-TRX heranzugehen. Für Schäden die aus diesem Beitrag entstehen
übernehme ich keine Haftung !
Verwendetes Modem: TNC2C mit 9,8 Mhz und G3RUH-9k6 -Modem
Prinzipiell: Bei 9600bd wird die 9k6 NF-in/out im TRX abgegriffen.
ACHTUNG :
Der 741 sollte UNBEDINGT SPANNUNGSFREI sein !!!
1. Mann oeffne den TM741 vorsichtig ! ! !
Indem man beide Deckel entferne und das Bedienteil beiseite legt . Dann entfernt man die 70cm Unit (TX-RX UNIT/440M),und legt Sie
vorsich auf den Tisch.
Dann das Abschirmblech entfernen.
--------------------------------------------------------------------------NUN NUR KEIN ANGST HI,denn es ist nicht so wild wie es aussieht.
ABER VORSICHT IST GEBOTEN ! ! !
--------------------------------------------------------------------------2. Abgriff der NF am DISKRIMINATOR
Das 9k6 RX-Signal wird unmittelbar am Pin 12 des IC 1 (KCDO4) abgegriffen. Mit der Abschirmung geht man auf Pin 16. Man loete am
besten auf der Platinenseite !
3. Einspeisung des 9k6 TX-Signal....
So,die NF vom G3RUH wird zwischen VR2 & C 40 eingespeisst. Das war es nun fast schon....
Die beiden Abgeschirmten Kabel habe ich nun aus der vorgesehenen Oeffnung (die mit einer Gummikappe abgedeckt war) nach
draussen gefuehrt,und mit einer Diodenbuchse versehen.
Die PTT habe ich an der Mikebuchse abgenommen.
4. So,nun kommen wir zum Abgleich:
Ich setze vorraus,dass Tnc,Modem und TM 741 E richtig verdrahtet sind.
RX,TX und Masse aus der 5 Poligen Diodenbuchse, PTT wie gewohnt aus der Mikrofonbuchse.
a) Das Potis von G3RUH ganz zudrehen( höchsten Widerstand einstellen.) Also 0 Volt USS
Bei mir geht es am besten,wenn alle Jumper vom G3RUH (JMP 1-4) entfernt sind.
Wenn Ihr nun mitlesen können ist die halbe Miete gewonnen!
b) Nun der Sendeabgleich.
Ein Kontrollempfänger (Handy) leistet dazu wertvolle Dienste. Ich habe es auch ohne Oszilloskop hinbekommen.
Nun auf Monitor-Kanal schaltem und TX-Dealay auf 120, damit der Sender schoen lange hochgetastet wird.
Drueckt man nun Return,ist in Kontrollempfaenger nur der Traeger zuhoeren.Nun das Poti von G3RUH Millimeterweise aufdrehen,bis
das 9k6 Rauschen zuhoeren ist.
c) Nun in die nächste Mailbox. Aber erstmal TX-Dealy ZURUECKSTELLEN,bei mir geht es mit TX-Delay 15 noch gut.Aber da muss man
etwas PROBIEREN !
Dort eine grosse Rubrik ablisten lassen. Dieses Listen muß EINWAND- FREI funktionieren !!!!
Wenn der Digi die Listingnummern 2..3 mal wiederholt, ist dies nicht OK ! Mit den JMP 1-4 etwas probieren bei mir geht es ohne
Jumper am besten, evtl. kann es auch an den TNC-Parametern liegen.
Meine für DB0SHG & DB0FD : W 15 T 15 P 64
Evtl. mit den Parametern spielen....
d) SO,DASS WAR ES EIGENTLICH SCHON. Viel Spaß beim Umbau...
Ich arbeite nun schon ca.14 Tage mit dem TM741 E in 9k6, und es geht ueber DB0SHG und DB0FD ohne FEHLER...
So liebe 9k6 Freunde,sollten noch spezielle Fragen auftreten,dann schreibt mir ruhig.Auch ueber Verbesserungsvorschlaege wuerde
ich mich freuen..... Eine gute Hilfe bei der ganzen 9k6 Geschichte ist das Buch vom DG3RBU 9600-Bd FSK-Technik nach G3RUHStandard..
Denn man lernt immer wieder etwas dazu
vy,73 aus Hameln an der Weser Andreas / DL1OBO @ DK0MAV DEU.EU
========================================================
From: DL6RDS @ DB0RGB.BAY.DEU.EU
Hallo TM 741-E Freunde,
Seit ein paar Tagen bin ich in 70 und 23cm mit dem 741er in 9600BD QRV.
Ich habe mich bei dem Umbau, besser gesagt beim anzapfen,der RX und TX Leitungen in 70cm genau and den Vorschlag von DL1OBO
gehalten.
(siehe unter den Board Kenwood in den Mailboxen) In 23cm ist das anzapfen aber genauso unproblematisch...
Eine kleine Sache noch voraus !
Für Schüden die aus diesen Beitrag entstehen }bernehme ich keine Haftung!!!
Die ganze Sache ist aber f}r einen Bastler kein Problem.
Bei mir funktioniert das ganze recht gut !
Umbau der 1200M TX-RX Unit
1. Abgriff der NF (RX) am DISKRIMINATOR
Das 9k6 RX-Signal wird unmittelbar am Pin 12 des IC 2 (KCDO4) abgegriffen.Mit der Abschirmung geht man aud den Pin 16 des
IC 2.Diesen Punkt kann man am besten auf der Platinenseite er- reichen!
2. Einspeisung des 9k6 TX-Signals an VCO PLL
Die NF vom G3RUH wird zwischen VR3(MAX DEV) und R47 eingespeist. In 23cm ist der Einspeisepunkt bei mir vor dem Poti
VR3,da sonst der Sender vom 741er nicht die Zeit die man durch ein langes TX- Delay zum probieren einstellt hochgetastet
wurde!! Ich habe diesen Punkt direkt an einem Abgriff des Poti VR3 ange- l|tet.Das Poti VR 3 ist auf der Best}ckungsseite des
1200M RX-TX (lage siehe Skizze).
3. PTT Leitung
Die PTT-Leitung habe ich vorne an den 8-Poligen Modular Plug vom Mikrofon angezapft (L|tpunkt Platinenseite).
...so das wars dann schon f}r das Anzapfen am 23cm Modul!
Der Senderabgleich usw ist genauso wie bei dem 70cm Modul.Andreas DL1OBO hat in seiner Umbaubeschreibung dazu schon
alles leicht und verst{ndlich beschrieben.
4. Skizze
23cm Modul (auf die Best}ckungsseite geschaut)
==========
|--------------------------|
------------------------------------|
|
|
----------|
|
VR3 -> |
|
|
|
- - |
|
|
| IC 2-> ................
^ ----------|
|(stehend)
^
^
|
|
|
|
|
VR3 (L|tpunkt) TX
|
|
Pin 12
Pin 16
|
|
(DET RX)
(masse)
|
|
|
|
|-------------------------------------------|
|
|
|
|
|
|
|
|
|
|
|
|
|
|------------------|
Bei den anbringen der RX-Leitung ist zu beachten das diese am besten an der Platinen-Seite angel|tet wird!! Im Bild oben sieht
man die Best}ckungsseite !!
Ich hoffe die Skizze ist eine kleine Hilfe!! Ich }bernehme aber keine Garantie f}r die Richtigkeit!!
Anmerkung
Nach den "Umbau" ist zeitaufwendigste Arbeit das ausprobiern der Jumper F1-F4 am G3RUH Modem.Bei DL1OBO funktionierte es am
besten wenn alle Jumper ge|ffnet waren.
Ich benutze den TNC 2H von Landolt Computer (1200/9600BD umschaltbar).
Bei mir funktionierte es bei folgenden Einstellungen am besten!!
TNC: G3RUH Modem Jumper 1,2 offen und Jumper 3,4 geschlossen
TNC-Parameter: TX-Delay ab 20 (741er schaltet etwas tr{ge)
T=20 , P=255 , W=10
Mit den Parametern und den Jumpern mu~ halt die beste Stellung herausgefunden werden damit keine Packete st{ndig wiederholt
werden.Am besten probiert man das ganze mit einer geduldigen Gegenstation.
Besonderen Dank an dieser Stelle an Christian,DL5RL mit deren Hilfe (Gegenstation in 70+23cm) ich die ganzen Tests wunderbar
durchf}hren konnte.
Also viel Spa~ beim "Anzapfen" der 9k6 Leitungen.
73 de Michael aus Regensburg JN69BA via DB0RGB
This modification is read 760 times.
top of page
19-07-1998
(TM-741) TM-741ATE Frequency enion
Phase 1
a. S1ide the release knob on the front panel to the right and remove the panel (be careful with the cable between the panel and the
main unit.)
b. Cut the green wire located in the left side (tape the bare ends of the wire to prevent shos.)
c. Switch the power on (a melody sounds to confirm the change.)
Phase 2
a. Unplug the connectors of the cable between the panel and the main unit.
b. Remove the two screws on the rear of the panel and open the rear of the case.
c. On the left side of the lithium batterv there are four jumpers marked R54, RSi, R5ndR57 corresponding respectively to bO, bl, b2
ana b3 bits described beloSSt the four bits as required for your country:
- European Countries:
mode5
b3 = O
ba = 1
b1 = O
bO = 1
- USA, Canada and Asia:
mode $0-3
b3 =0
b2 = O
b1 = 1
bO = 1
WARNING: O => jumper , 1 > no jumper.
d) Refit the rear of the case by reversing the order of disassemoly.
Frequency range after modification (*)
+--------------------------------------------------------------+
|
|| rx range || tx range ||
SHIFT
|
| unit || min | max || min | max ||
EUROPE
| USA CAN ASIA |
|------||------------------------||----------------------------|
|
28 || 18 | 54 || 26 | 45 || +/- 100 KHz |
idem
|
|
50 || 40 | 90 || 46 | 76 || +/1 MHz |
idem
|
| 144 || 118 | 174 || 136 | 174 || +/- 600 KHz |
idem
|
| 220 || 215 | 260 || 215 | 235 || +/- 1.6 MHz |
idem
|
| 430 || 410 | 470 || 410 | 470 || +/-1.6,-7.6 | +/5 MHz |
| 1200 ||1100 |1400 ||1100 |1400 || +35, -6 MHz | +/-12,-20MHz |
--------------------------------------------------------------+
This modification is read 868 times.
top of page
19-07-1998
(TM-741) TM-741a/e AM recleppion with 28 and 50 mhz unit
a) Press the F key, then press BELL; key within ten seconds. An A is displayed at the hundred-MHz position to indicate AM mode.
b) To rr to FM mode press the F again, then press the BELL; within ten seconds
This modification is read 764 times.
top of page
19-07-1998
(TM-741) TM-741 A/E 900 MHz band receptton with 430 MHz unit
To change to the 900-MHZ band. select the 430-MHnd, then press and hold down the [MHZ; key for at least a second. NOW 850.000
(initial setting) is displayed.
To return to the 430-MHZ band, press the [MHz] key again for at least a second.
Addling a secondary 900-MHz dedicated antenna at the 430-MHZ unit
1. remove the power supply cable from the power supply or battery.
2. remothe 430-MHz band unit with care.
For removal procedure see the instructionNAL - unit INSTALLATION, reversing the order of the procedure and... using the brain:
3. Remove the shield plate (12 screws.)
4. Solder a coaxial cable (0.8 d) to the input side of IC9 (center is aligned with the IC9, ground at right side.)
5. Pass the cable through the notch and install the shield plate.
6. Reassemble the main unlit.
This modification is read 827 times.
top of page
19-07-1998
(TM-741) TM-741A/E memory channel doubling
Each band can be switched to the normal memory C100 channels) and rear memory (100 channels). Each band can contain 200
channel and... yes, a total of 600 channels can De used for three bands
SORRY! This function can be enabled only by extending the receive frequency see bulletin #1 of this
FREQUENCYEXTENSIoNSNEVERENDHISTORY.)
To switch the memory, hold down the F; key and press the rev; key:
Normal Memory 100 ch <--> Rear Memory (100 Ch)
The functions of the rear memory are the same as the normal memory, but memory channels are displayed as follows (rather than 01
to 00):
a1 -b0 ==01-10
b1-c0==11-20
c1- d0== 21-30
d1-eo==31-40
e1-fo==41-50
f1-g0==51-60
g1-h0==61-71
h1-i0==71-80
.1-j0==81-90
j1-aa==91-100
This modification is read 759 times.
top of page
19-07-1998
(TM-741) TM-741A/E extended paging functions
Preliminary
Cut the frequency extension jumper as described in Phase 1 of the bulletin #1.
Answer back function
Hidden function of the paging function.
If the answerback function is on, the code of the local transceiver is automatically transmitted to the other tranciver when the correct
code is received to confirm the code has been received.
OPERATION
After the correct code is received, if there is no busy signal, the code of the local transceiver is automatically trangmitted to the other
transceiver.
ON/OFF
To turn the answer-back on and off, hold down the
F; key and press then the Call key.
Automatic release function
Hidden function of the paging function.
OPERATION
If the automatic release function is on, paging is terminated automatically when transmission ends after a call is received.
ON/OFF
To turn the function on and off, hold down the
[ F; key and press then the jSHIFT; key.
This modification is read 743 times.
top of page
19-07-1998
(TM-741) TM-741/E DTE DISPLAY Format
The normal date format is YEAR-MONTH-DAY. It can be changed to YEAR-PAY-MONTH.
1. Remove the front panel and locate R60 and R61
(Where is Holmes?)
2. Move R61 (that is below R60) to the left.
3. Repack the front panel with care.
This modification is read 769 times.
top of page
19-07-1998
(TM-741) TM-741A/E DC ERDISPLAY
Make the following change to display the sb line voltage on the? memory channel section when the tieis displayed.
1. Remove the front panel and loca R60 and R61
Where is Holmes?)
2. Move R60 That is above R61) to the left.
3. Repack the front panel with care.
Since the voltage of the Sb line to the panel is displayed, it changes due to the loss caused by the wie nd connctor
This modification is read 742 times.
top of page
19-07-1998
(TM-741) TM 741A/E headlight linkage dimmer
Make the following change to reduce the dimmer level by one step when the headlight is turned on (d4 remain unchanged).
1. Install DTC144EK on the panel printed circuit board (below R60 and R61
2. connect the load from the ILUMI pin of the panel printed circuit board to the 12 V side Where 12 V is output whene light is turned
on) of the position light of the car.
This modification is read 753 times.
top of page
19-07-1998
(TM-741) TM 741A/E game mode
Simple me, such as a roulette game and a shooting game, and music can be played using the frequenay display.
To enter game mode, hold down the F] key and the MUTE key, and switch the power on.
1-2-3 is shown on the display, band SEL A; selects Roulette, BAND SEL B; selects Shooting, and jBAND SEL C; selects Music.
To return to game selection mode, press the VFO] key.
To exit game mode, press the microphone key or switch power off.
Roulette Game
* When the roulette game starts, the display shows [000], the transceiver enters the receive mode with the power on, and th three
digis bein to rn raidly.
, Wen the MUTE key is pressed, [000 on the display can be changed: BAND SEL A; stop the leftmost digit, BAND SEL B; stops the
middle digit, and BAND SEL C] stops the rightmost digit. Other keys are not accepted.
A if the three digits match, the LED and illumination lamp flash and sound effects are produced.
* if 1231 ;E displayed, a fanfare sounds. If the MUTE; key is pressed game mode is exited and the transceiver functions normally.
Shooting game
* When the shooting game starts, your score is shown in display: section A, and cannon balls, target and remaining cannons are
shown in display section C, starting from the left.
A If the LOW; key is pressed, the game starts. The "number" attacks from the left of display 8. Take aim at the enemy "number" with
the [TONE; key key, and shoot with the [mute key. You win if 16 enemies are shot per screen. Thirty cannon balls can he used per
screen. Each time you clear a screen, the speed increases. If eight screens are cleared, the first screen returns. The process is
repeated.
When the music feature is selected, ENJOY SOUND PLAY; is displayed and the following tones can be produced:
MR
KHz
CALL
F
BELL
TONE
REV
=
=
=
=
=
=
A
A#
B
c
C#
D
D#
BTSS = E
MUTE
CScL
BSEL
CSRL
BSEL
CSEL
BSEL
A
A
B
B
C
C
=
=
=
=
=
F
F#
G
G#
A
A@
B
This modification is read 765 times.
top of page
19-07-1998
(TM-741) Kenwood TM-741a GAME Dox
Introduction:
There are actually three GAMES "hidden" on the Kenwood TM-741a Multiband Transceiver. These are UNDOCUMENTED and I'm not
exactly sure who originally found these games??.. (I came across a brief description of these hidden games on rec.radio.amateur.misc
on UseNet, but no one had the complete original Post!)
How to access "Game Mode":
1) Turn OFF the TM-741a.
2) Hold the [F] + [MUTE] and turn ON the TM-741a.
(You should see: -1- -2- -3- on your display, you're now in "Game Mode"!!)
3) Select the Game you wish to play by hitting the appropriate Band Select Button. ( -1- = Band Sel 1 ; -2- = Band Sel 2 ; -3- = Band
Sel 3 )
-1- ==> SLOT MACHINE Game
-2- ==> SPACE INVADERS Game
-3- ==> MUSICAL KEYBOARD
NOTE!
The [VFO] will always exit you to the Main Game Menu (-1- -2- -3-).. The [MUTE] will normally Start the Game.
Game #1: SLOT MACHINE:
To play... Hit [MUTE] to start the numbers tumbling. Starting from the left and proceeding to the right, hit the Band Select Buttons to
stop each number! If you don't get a 3-in-a-row match, the radio plays a sound and the game is over. ([MUTE] to play again). If you
match 3-in-a-row, then...well I won't spoil it for you!.. (It's neat!!)
Remember; [VFO] to return to the Game Menu.
Game #2: SPACE INVADERS:
The Display... You will see the following display:
000000 ------ 0-0
(Score) (Invaders) (Selected Number - Number of Lives Left)
To play... Hit the [LOW] key to begin. The radio will then put a random number from 0 - 9 in the first position in the dashes.. ( 4----- )
you must then use the [TONE] key to select the number the radio selected and then quickly hit the [MUTE] key to "fire" it. The
number will then disappear and a new one will appear!.. If you don't act fast, the number will move to the second dash and another
random number will appear, ( 84---- ).. If you're not keeping up, eventually the numbers will reach then last dash line and you will
lose a life!!.. (Once all lives are lost, the game is over!) Also, you must "destroy" 30 numbers before moving onto the next round!..
Each round will start getting faster and faster!!.. So be prepared!! (It really gets TOUGH!!) All throughout the game it will keep score
of how many "hits" you made.. (I believe it's 10 points a hit, I think!)..
Remember; Hit [VFO] to return to Game Menu.
Game #3: MUSICAL KEYBOARD:
I don't think this is actually a "Game"??.. What I've been able to figure out is that when you select this "game" the following message
appears on the display: Enjoy Sound Play
At this point, the whole keypad on the face-plate of the TM-741a is a "Musical Keyboard"!!.. Try it, hit any of the keys, Band Select
Buttons; Cont Sel Buttons; [MUTE]; [TONE]; [MHZ]; Etc...etc..etc... (Except for the [VFO] key, that returns you to the Game Menu!)
This modification is read 720 times.
top of page
19-07-1998
(TM-741) Display test
Hold down F and MHZ while turning on power. This activates the display test mode where all segments and indicators are lit. Note the
"ACC" indicator at the lower right. ACC is not defined in the manual, however I saw it come on once one night after I started the car
with the radio turned on. The display lit up ACC and the UHF frequency display showed some sort of HEX code (a ROM checksum
maybe?).
This modification is read 755 times.
top of page
19-07-1998
(TM-741) Hearing birdies in the 440 MHz position
Nov 91
Are you hearing "birdies" in the 440 MHz position on your new Kenwood TM-741A?
I've had the problem with mine, and have been talking with other people who are having the same problem. Kenwood couldn't
duplicate the problem and returned my 440 deck. The problem appears either as weak wandering carriers, or intermods with other
input signals. Seldom is the signal strength greater than S2, but the squelch stays open most of the time. K6DYD has traced the
problem to instability in the RF front-end (Q1, Q2), which is electronically switch out of the signal path by IC8 when out-of-band
frequencies are selected. The solution appears to be placing a 220-ohm 1/4-watt resistor from pin-10 of IC8 to ground--this damping
in what appears to be a signal leakage path prevents the unstability or parasitic oscillations causing the problem. He further observed
that, if the control head is modified for full-frequency operation by removing the jumpers labeled R54 and R55, the RF preamp is
continuously removed from the signal path unless the GREEN WIRE on the processor motherboard has been cut. During proper
operation, pin-9 of IC8 should change state when tuning in-band vs. out-of-band.
The 220 MHz deck seems to enjoy having its VCO modulated by AC coming in the power cord. Alternator whine is annoyingly present
during both transmission and reception. No cure identified yet.
For those of you that want 220-440-1200, simply remove the 144 module, move the power cable into another module, restuff the
frame, restart while reseting the VFO limits... Works fine.
I would appreciate hearing from any of you having similiar problems; writing to customer relations is also a good idea. If you're
considering one of these units but don't want the 2M deck, also write Kenwood. I've lost count of people who said they wanted this
option. I'd like to be able to get all the decks separately from the bare frame.
All in all, it's a nice radio--it just has growing pains; the sooner Kenwood owns up to the problems and fixes them, the more they'll
sell.
-Bob Buaas K6KGS (Internet: [email protected]) (Phone: 714/968-0070)
This modification is read 733 times.
19-07-1998
(TM-741) TM-741A/E repeater modification (transponder functions)
WARNING:
Extended continous transmission may cause a failure of the equipment. See "transmission time limit" below.
Preliminary hardware modification
a. Loosen the four screws on the side of the set.
Remove the four screws on the bottom of the set.
Remove the bottom of the case.
b. Locate the two jumpers on the Control Unit, on the opposite side of the panel (see in figure, below.)
+--------------------------------------------------------------+
|
| | <----- remove (blue)
|
|
|
|
|
|
CONTROL UNIT
|
|
________
|
|
| ic 2 |
|
|
|________|
|
top of page
+--------------------------------------------------------------+
panel side
c. Remove the blue chip jumper (0 OHM). Use a soldering iron with a thin tip in order not to damage other components or patterns.
d. Refit the rear of the case by reversing the order of disassembly.
Fixed-band repeater operation
With the fixed-band repeater, the transmission band is fixed, and if a signal come in on the remaining band, and the BUSY turns on,
the transmit mode is entered and modulation is done using the received signal.
a. If the option band is present, turn off one of the three band.
b. Set the frequencies of two bands (rx/tx split are also permitted.)
c. Set a band as the transmission (PTT display) and operation (green indicator) band (press the band select key.)
d. Hold down the [F] key for at least a second (the red led flashes), then press the [MUTE] key.
Cross-band repeater operation
When the cross-band repeater function is being used, a signal enters one of two bands. Busy turns on, the other band enters the
transmit mode and modulation is done with the received signal.
a. Set the frequencies of two bands (rx/tx repeater split are also allowed.)
b. Set a band as the transmit band (PTT display) and the other as the operation band (green indicator). This arrangement can be
reversed.
c. Hold down the [F] key for at least a second (the red led flashes), then press the [MUTE] key. The dots on both frequency display
flash, and the cross-band repeater works. Only reception is possible in the remaining band.
Dual-in repeater operation (when the option band is installed)
With the dual-in repeater, the transmit band is fixed, and if a signal comes in on one of the other bands, Busy turns on, transmit mode
is entered and modulation is done using the received signal.
a. Set the frequencies of all three bands.
b. Set a band as the transmission (PTT display) and operation (green indicator) band (press the band select key.)
c. Hold down the [F] key for at least a second (the red led flashes), then press the [MUTE] key.
The dots on the frequency display light.
Turn-off repeater
To turn the repeater off, hold down the [F] key for at least a second (the red led flashes), then press the [MUTE] key.
The state before setting returns.
Repeater transmission time limit setting
The repeater transmission time limit is set with the time-out timer (TOT). The time can be set to 3, 5, 10, 20, 30 minutes, or OFF.
(See the item about the TOT of the main unit.)
Be happy and 73 de Antonello is0xse,
Cagliari, Sardegna, Italia, Europa... MONDO!!!!!
IS0XSE @ IW0UHD.ITA.EU
This modification is read 851 times.
22-08-1999
(TM-741) TM-741a All-Band mod for new Kenwood Tri-Bander
top of page
To enable FM transmit from 136-174, 410-470, do the following:
1.
2.
3.
4.
5.
6.
7.
Remove the front panel.
Don't cut the green wire. If it is cut, splice it back.
Disconnect front panel unit cable.
Remove two screws in front panel back and remove rear cover.
Locate row of resistors next to Lithium Battery.
Remove R54 and R55 - clearly marked, the two nearest the battery.
Reassemble. No MPU reset necessary.
Note: Removing only R54 enables MARS/CAP only. Removing bothenables all.-fred-Fred Lloyd AA7BQ
Date: 09-12-1999
User comment
From: Tony Bamberger
Subject: Corrections
I have the following corrections to Fred's mods for the new kenwood TM-741a multi band radio...> Hot off the presses...>
>
>
>
>
>
>
>
>
>
>
to enable FM transmit from 136-174, 410-470, do the following:>
1. Remove the front panel.
2. Don't cut the green wire. If it is cut, splice it back.
3. Disconnect front panel unit cable.
4. Remove two screws in front panel back and remove rear cover.
5. Locate row of resistors next to Lithium Battery.
6. Remove R54 and R55 - clearly marked, the two nearest the battery.
7. Reassemble. No MPU reset necessary.>
Note: Removing only R54 enables MARS/CAP only. Removing both
enables all.
This is not 100% correct. According to the mod sheets i have from kenwood, you have to cut the green wire and remove R54 for
mars/cap mod.
For the DC-light mod, you resplice the green wire (if cut) and remove both R54 and R55.
One side note, no reset is needed as mentioned above, but it does wipe out the values stored in the vfo memories (at least on the
radio's mod'ed around here). As long as we're talking mods...
For extended receive only other than the 144 & 440 (which are already extended) you only cut the green wire. This gives you 10
meter coverage from 18-54 mhz, 6 meter coverage from 40-90 mhz, 220 coverage from 215-260 mhz and 1.2 GHz coverage from
1100-1400 mhz.
Note that these only apply if the specific module is installed in the radio (i.e. 10 meter, 6 meter, 220 or 1.2 ghz)...
top of page
This modification is read 969 times.
19-07-1998
(TM-742) Microprocessor Change, TM642/742/942
Author: Kenwood Communication, inc.
This bulletin supercedes ASB-1033.
Service Bulletin no. 1042 (28 March 1994)
Symptom:
Reports of problems with microprocessor lock-up when using S-meter squelch, problems with storage/recall of PL tone frequencies of
203.5 Hz. and/or 114.8 Hz., or problems with a lack of transmit on the UHF band modules during Remote operation can be corrected
using the changes noted in this bulletin.
Notes:
1. All TM-642A transceivers work fine and do not require any changes.
2. TM-742/942's that exhibit any of these symptoms with serial numbers between 412XXXX and 509XXXX need only change IC1 on
X53-3460-21 B/2.
3. TM-742/942's that exhibit any of these symptoms with serial numbers of 412XXXX and below must also change IC1 on X54-313011.
4. TM-742's with serial numbers of 509XXXX and greater have had these changes incorporated in production.
5. Some TM-742's and TM-942's below serial number 509XXXX were returned to Japan for modification. If the unit that you have
has a black dot on the box near the serial number it has already been modified and requires no further action.
Parts Required:
Qty
1
1
Description
Old Part No.
Microprocessor HD6433388A07F
or
HD6433388A14F
Microprocessor HD404719A26H
New Part No.
HD6433388A22F
Circuit Description
IC-1
HD404719A32H
IC-1
Caution: This modification requires advanced surface mount soldering equipment that is rated for CMOS circuits. It also requires
familiarity with advanced surface mount soldering techniques. If you do not have the proper equipment or knowledge do not attempt
this modification yourself.
Attemping to remove and replace either IC without the proper equipment and techniques can easiy damage the circuit boards and void
your warranty.
Seek qualified assistance from your closest Kenwood Service Center (Long Beach, CA, or Virginia Beach, VA).
Time required for this moditication is 90 minutes or less.
top of page
This modification is read 1092 times.
19-07-1998
(TM-742) Modification of TM-742 & 942
Open the lower panel of TM-742.
****** There are TWO version. Please check which version your rig is.******
FRONT PANEL IS UPER SIDE
___
___
___
___
<<=== BAND SEL
---|-|-------------------------------|-|----|-|----|-|-------|
|
|______________*_______________________________*_______________|
|
11
2222
|
|
111
22
22
|
|
11
22
|
|
11
22
|
|
11
22222222
|
|
|
|
|
~~~~~~~~~~~~~~~~~~~~~~~~~~~~~~~~~~~~~~~~~~~~~~~~~~~~~~~~~~~~~~~~~~~~~~~~~
1. ****** FOR OLD VERSION ******
SEE THE POINT OF [ 2 ] .If you can find a small board masked with black sponge , your TM-742 is OLD VERSION.
2. On right side small board , there are three lines. Make short circuit with midlle line and lower line.
1. ****** FOR NEW VERSION ******
SEE THE POINT OF [ 2 ] . If you can not find a small board , your rig is NEW VERSION.
2. SEE THE POINT OF [ 1 ]. There is a chip [ 2R7 ] . And below this chip [ 2R7 ] , there are small chip [ 473 ] .
[ GRAPHIC IS FOR JA VERSION ]
*-*-*-*-*-*-*-*
R R R X
R = chip [ 473 ]
* * * * * * * *
* * * * * * * *
Make short circuit two X point.
X
R
Maybe on your TM-742,there are chip [ 473 ]
*-*-*-*-*-*-*-*
with different patern. This graphic is for
JA version. So please try until modification
will succeed.
OPERATION
1.
2.
3.
4.
5.
6.
ON 144MHz press band sel more than 1sec . mode change AM <-> FM.
ON 430MHz ditto band change 430 <-> 870
ON 1200MHz ditto 1200 <-> 870
[F] + BELL -> repeater dual RCV.
118-136MHz mode chang to am automaticaly.
X-band repeater operation. Select one band by [BAND SEL] select onother band by [CONT SEL]. Press [F] key more than 1sec.
Press [MUTE] Key. X-band operation will work. Press [F] then [MUTE] key -> cancel X-band repeater operation.
73s DE JP1LRT @ JL1YVX.10.JNET1.JPN.AS
YOSHIHARU "KEI" TSUKUURA
top of page
This modification is read 1216 times.
19-07-1998
(TM-742) Extended frequency for TM-742E
Before open your TM-742E, be sure you have disconnect the power. Don't do this modifications if you hare not sure or if you have not
the necessary knowledge in eletronics to do this !
Open the lower panel (see your User Manual for details)
You will have something who looks like that :
_
_
_
_
I I
I I I I I I
-----------------------------------------I
Here I
I
I_________I
Control Unit
I
I
X53-346X-XX A/2
I
------------------------------------------
<== Vol. & Squelch Boutton
You can find a range of CMS chip resistors who looks like that :
0
1
_______________________________
# #
#-# Bit 0
#-#
# # Bit 1
# #
#-# Bit 2
#-#
# # Bit 3
#-#
# # Bit 4
# #
#-# Fan Delay Bit 0
# #
#-# Fan Delay Bit 1
# #
# # Repeater Bit
With bit
bit
bit
bit
bit
0
1
2
3
4
set
set
set
set
set
to
to
to
to
to
# #
#-#
mean no CMS Chip resistor
mean CMS Chip resistor
1
0
1
0
0
You have the extended frequency on VHF from 118 to 174 MHz
You have the extended frequency on UHF from 410 to 470 MHz
You have the extended frequency on UHF from 800 to 1000MHz
On 144MHz, if you press MHZ Key more than 1 second, mode change AM<=>FM
On 430MHz, if you press MHZ Key more than 1 second, band change 430<=>870
Note that from 118 to 136MHz, the mode change automaticaly from FM to AM and you can see a "A" which replace the One hundred
MHz (ex : A18.125MHz)
You have the repeater possibility (for more detail, see page 59 of your Kenwood Instruction Manual)
In fact, your TM-742E now as mostly the same functions that the TM-742A which is for the US market.
This modification is read 1231 times.
19-07-1998
(TM-742) Fan Delay time setting
top of page
The fan can be controlled by setting the chip resistor (R66 & R65, 47kHom) for fan delay bits 1 and 0 as follows :
----------------------------------------------------------------------FAN CONTROL
| Fan Delay bit 1 | Fan Delay bit 0
|
----------------------------------------------------------------------On when power is On
|
0
|
0
|
----------------------------------------------------------------------On during transmission
|
0
|
1
|
----------------------------------------------------------------------On during transmission and
|
|
|
for 1 minute after trans. end |
1
|
0
|
----------------------------------------------------------------------On during transmission and
|
|
|
for 2 minuntes after trans end|
1
|
1
|
-----------------------------------------------------------------------
This modification is read 986 times.
top of page
19-07-1998
(TM-742) Wireless remote control with DTMF handheld transceiver
When you use the MC-45DME microphone, you can of course have the remote function which is explain in the Instruction Manual on
page 61 "Remote Control by DTMF Microphone".
When you put the TM-742E in Remote Control mode by pressing more than 1 second the "F" key then the "RC" key, you can control
some of the function with a Handheld DTMF like the TH-28E or TH-22...
It is not write in the Kenwood Instruction Manual how to use it. So I had some difficulty to find some of the possible remote functions.
If you find more of them, I will be happy if you told me about them.
This modification is read 965 times.
top of page
19-07-1998
(TM-742) CHANGE YOUR TM-742E TO A TM-942E (who don't exist on the market)
If you want to put the 1200MHz band unit, you simply reffer to your Kenwood Instruction Manual and you have a display who looks
like that :
________________________________
| 1296.000 | 144.550 | 432.800 |
-------------------------------|=
0
######## . 0
0
0 |
--------------------------------
This is not really convenient as the logique would be to have the 1200MHz display at the far right of the Transceiver.
So if you want to have something who looks like the TM-942A but with a TM-742E + 1200MHz band unit, just change the 144 and
430MHz band unit lower (reffer to the Kenwood Instruction Manual page 94 and after, just like if you install an optional unit), then you
will have this :
-------------------------------| 144.550 | 432.800 | 1296.000 |
-------------------------------|=
0
######## . 0
0
0 |
--------------------------------
You can also change in anyway all of the band unit to have the 430MHz on the left, 144MHz on the right...etc... just imagine what you
want to have.
This modification is read 1099 times.
top of page
28-03-1999
(TM-742) TM-742/942 Beyond Mars/CAP Mod. Guide
Procedure:
1. Detach the front panel from the main chassis.
2. Remove the bottom cover of the transceiver by removing the 4 screws on the bottom of the cover and loosening the 4 screws on
the side of the unit.
3. Orient the radio so the bottom is up and the front panel area is near your chest. Near the front panel area you will find a large
board, this is the control unit.
4. Remove the chip resistors "Y" noted in the diagram below, and reinstall them in position "Z" as shown.
5. Reinstall the bottom cover of the transceiver and reattach the front panel.
6. Reset the microprocessor. Press and hold the MR key while the power is switched on. Then release the MR key. This will erase all
operator programmed data.
7. The frequency range after modification will be:
28
Mhz Band:
50
Mhz Band:
144 Mhz Band:
220 Mhz Band:
440 Mhz Band:
1.2 Ghz Band
RX:
18.0 thru 54.0 Mhz
TX:
26.0 thru 45.0 Mhz
RX:
40.0 thru 90.0 Mhz
TX:
46.0 thru 76.0 Mhz
TX: 136.0 thru 174.0 Mhz
RX: 215.0 thru 260.0 Mhz
TX: 215.0 thru 235.0 Mhz
TX: 410.0 thru 470.0 Mhz
RX/TX: 1100.0 thru 1400.0 Mhz
Please note that these are theoretical ranges only. Not all radios will be capable of tuning the entire range.
Control Unit X53-346X-XX A/2
_____________________________________
I
I
---- ---I
Z IIYY
I
---- ---I
oooo oooo
I
---- ---I
IIIY
ZZ
I
---- ---I
2 I
R I
7 I
Remove Y resistors and
reinstall in position Z
top of page
This modification is read 1104 times.
23-04-2000
(TM-742) TM-742/942 28 MHz/50 MHz RC TX failure
Author: Kenwood Communication, inc.
Service Bulletin no. 1029 (29 June 1993)
Symptom:
During RC operation (remove Control) the 28 MHz and 50 MHz modules do not transmit after a frequency within the affected band is
entered from the microphone keypad. Pressing the PTT key will cause a beep to be sounded but the radio will not transmit. This error
is a result of a programming error in two of the microprocessors.
Corrective action:
Replace IC1 on the Control unit X53-3460 B/2 and IC1 on the Display unit X54-3130 A/3 to correct this symptom:
Parts required:
Qty
1
1
Description
Control unit microprocessor
Display unit microprocessor
Kenwood Part No.
HD6433388A07F
HD404719A32H
Circuit description
IC1
IC1
Note:
To activate the RC function after changing these two parts you need only press the RC key on the font panel of the radio. This method
differs from the original method which required use of the "F" key and the "RC" key.
Caution: This modification requires soldering equipment rated for CMOS type circuits. It also requires familiarity with surface mount
soldering techniques. If you do not have the proper equipment or knowledge do not attempt this modification yourself. Seek qualified
assistance.
Time required for this modification is 1.5 hour or less.
top of page
This modification is read 977 times.
23-04-2000
(TM-742) TM-742/942A Microprocessor change
Author: Kenwood Communication, inc.
Service Bulletin no. 1033 (29 November 1993)
Symptom:
Reports of problems with microprocessor lock-up when using S-meter squelch, problems with storage/recall of PL tone frequencies of
203.5 Hz. and/or 114.8 Hz., or problems with a lack of transmit on the UHF band modules during Remote operation can be corrected
using the changes noted in this bulletin. Units that exhibit any of these symptoms with serial numbers between 412xxxx and 507xxxx
need only change IC 1 on X53-3460-21 B/2. Units that exhibit any of these symptoms with serial numbers of 412xxxx and below must
also change IC1 on X54-3130-11. Units with serial numbers of 507xxxx and greater have had these changes incorporated in
production.
Parts required:
Qty
1
Description
Microprocessor
1
Microprocessor
Old part No.
HD6433388A07F
or
HD6433388A14F
HD404719A26H
New Part No
HD6433388A22F
HD404719A32H
Circuit desc.
IC1
IC1
Caution: This modification requires advanced surface mount soldering equipment that is rated for CMOS circuits. It also requires
familiarity with advanced surface mount soldering techniques. If you do not have the proper equipment or knowledge do not attempt
this modification yourself. Attempting to remove and replace either IC without the proper equipment and techniques can easily
damage the circuit boards and void your warranty. Seek qualified assistance from your closest Kenwood Service Center (Long Beach,
CA, or Virginia Beach, VA).
Time required for this modification is 90 minutes or less.
top of page
This modification is read 976 times.
23-04-2000
(TM-742) TM-642/742/942A Microprocessor change
Author: Kenwood Communication, inc.
Service Bulletin no. 1040 (10 February 1994)
Symptom:
Due to a recent rule change by the FCC it is no longer possible to supply transceivers, or provide replacement microprocessor that
would allow a transceiver to receive in the 800 MHz band.
Corrective action:
The microprocessor program of IC5 has been modified to prevent 800 MHz band reception. Production has been changed beginning
with serial number lot 510xxxx. Units produced after this point will not be capable of 800 MHz reception.
Parts required:
Qty
1
Description
Microprocessor
Old part No.
HD6433388A22F
New Part No
HD6433388A25F
Procedure:
When ordering a replacement microprocessor you will be supplied with the new version. Please make sure your customer understands
the limitations of this new
This modification is read 933 times.
top of page
25-11-2000
(TM-742) TM-742 Control Unit X53-346X-XX **B/2** TX Mod
Procedure:
1. Remove the bottom cover of the transceiver by removing the 4 screws on the bottom of the cover and loosening the 4 screws on
the side of the unit.
2. Orient the radio so the bottom is up and the front display is near your chest. Near the front display area you will find a metal
cover over the a section of the board, remove the two screws that hold it down in front It will now be necessary to bend the
metal cover up to gain access.
3. Locate the grouping of 473 chip resistor pads on the right, above the chip labeled 2R7.
This is what the [473] chip resistors grouping look like:
--------+-------| X X X
--------+-------o o o o | o o o o
--------+-------X X X X |
X
--------+-------1 2 3 4
5 6 7 8
Here is what I have read pertaining to the TM-742 w/
Control Unit X53-346X-XX *A/2*
Old version mod, per JP1LRT & N8QXP:
Make a short circuit with middle line and lower line on all pads New version mod, per JP1LRT & N8QXP:
Short the upper part of pad 8, & the lower of pad 5.
Universal mod TM-742/942, per VE2PAL:
Move the [473] chip resistor on pad 4 up, & chips 7 & 8 down.
None of these worked for me with the B/2 contol head.
So I figured this out myself.
Short the lower part of pad 7. No need to reset the radio, it does that automatically. Note the automatic repater offset will be disabled.
After the mod:
28
Mhz Band:
50
Mhz Band:
144 Mhz Band:
220 Mhz Band:
440 Mhz Band:
1.2 Ghz Band
RX:
18.0
TX:
26.0
RX:
40.0
TX:
46.0
RX/TX: 136.0
RX:
215.0
TX:
215.0
TX:
410.0
RX/TX: 1100.0
thru
54.0
thru
45.0
thru
90.0
thru
76.0
thru 174.0
thru 260.0
thru 235.0
thru 470.0
thru 1400.0
MHz
MHz
MHz
MHz
MHz
MHz
MHz
MHz
MHz
Please note that these are theoretical ranges only. Not all radios will be capable of tuning the entire range.
This modification is read 1048 times.
top of page
19-07-1998
(TM-941) Kenwood TM-941A undocumented feature
Documentation follows....
This modification is not really a modification, but an undocumented feature that Kenwood Corporation has no record of.
This modification has not been completely tested, so those who feel brave enough to try this out are welcome to it, but I am not
responsible for any ill-effects as a result of utilizing this feature.
What this feature offers to the end-user is an extremely powerful feature: doubling your memory capacity. With the Kenwood TM941A, the radio has ONE VFO, ONE CALL, and 100 memory positions that are labelled 00 thru 99. This feature offers the user another
100 memory positions PER BAND!!!
How to perform this undocumented feature:
1. Have the radio turned on.
2. Press F and REV simultaneously.
3. Memory position A1 will show; this memory position cannot be eliminated thru the MR/F function.
4. Work the VFO in a similar manner that you would with the radio in normal mode.
5. When you save the memory position, take a look around at the layout of these memory positions -- the memories are labelled
hexidecimally; that is, they are labelled AA thru A9, B0 thru B9 until you have reached J9. J9 is the 100th position in this alter
memory area.
6. When you are finished, just press the F and the REV buttons simultaneously, and you are back in the normal memory area.
As stated before, this feature has been found to be static in nature; that is, when the power is turned off, the memory positions are
still retained and do not interfer with the original memory area. Mind you, this memory feature has not been completely tested, SO BE
EXTRMELY CAREFUL! I ASSUME NO LIABILITY FOR FINDING THIS FEATURE SINCE I AM DOING THIS AS A BENEFIT TO AMATEUR
RADIO!
BTW, Kenwood does not have any records and/or any comments regarding this feature. I suspect that this feature is for diagnostic
purposes and should be treated as such. Forewarned is forearmed!
top of page
This modification is read 337 times.
19-07-1998
(TM-942) Microprocessor Change, TM642/742/942
Author: Kenwood Communication, inc.
Service Bulletin no. 1042 (28 March 1994)
This bulletin supercedes ASB-1033.
Symptom:
Reports of problems with microprocessor lock-up when using S-meter squelch, problems with storage/recall of PL tone frequencies of
203.5 Hz. and/or 114.8 Hz., or problems with a lack of transmit on the UHF band modules during Remote operation can be corrected
using the changes noted in this bulletin.
Notes:
1. All TM-642A transceivers work fine and do not require any changes.
2. TM-742/942's that exhibit any of these symptoms with serial numbers between 412XXXX and 509XXXX need only change IC1 on
X53-3460-21 B/2.
3. TM-742/942's that exhibit any of these symptoms with serial numbers of 412XXXX and below must also change IC1 on X54-313011.
4. TM-742's with serial numbers of 509XXXX and greater have had these changes incorporated in production.
5. Some TM-742's and TM-942's below serial number 509XXXX were returned to Japan for modification. If the unit that you have
has a black dot on the box near the serial number it has already been modified and requires no further action.
Parts Required:
Qty
1
1
Description
Old Part No.
Microprocessor HD6433388A07F
or
HD6433388A14F
Microprocessor HD404719A26H
New Part No.
HD6433388A22F
Circuit Description
IC-1
HD404719A32H
IC-1
Caution: This modification requires advanced surface mount soldering equipment that is rated for CMOS circuits. It also requires
familiarity with advanced surface mount soldering techniques. If you do not have the proper equipment or knowledge do not attempt
this modification yourself.
Attemping to remove and replace either IC without the proper equipment and techniques can easiy damage the circuit boards and void
your warranty.
Seek qualified assistance from your closest Kenwood Service Center (Long Beach, CA, or Virginia Beach, VA).
Time required for this moditication is 90 minutes or less.
This modification is read 477 times.
top of page
19-07-1998
(TM-942) Modification of TM-742 & 942
pen the lower panel of TM-742.
****** There are TWO version. Please check which version your rig is.******
FRONT PANEL IS UPER SIDE
___
___
___
___
<<=== BAND SEL
---|-|-------------------------------|-|----|-|----|-|-------|
|
|______________*_______________________________*_______________|
|
11
2222
|
|
111
22
22
|
|
11
22
|
|
11
22
|
|
11
22222222
|
|
|
|
|
~~~~~~~~~~~~~~~~~~~~~~~~~~~~~~~~~~~~~~~~~~~~~~~~~~~~~~~~~~~~~~~~~~~~~~~~~
1. ****** FOR OLD VERSION ******
SEE THE POINT OF [ 2 ] .If you can find a small board masked with black sponge , your TM-742 is OLD VERSION.
2. On right side small board , there are three lines. Make short circuit with midlle line and lower line.
1. ****** FOR NEW VERSION ******
SEE THE POINT OF [ 2 ] . If you can not find a small board , your rig is NEW VERSION.
2. SEE THE POINT OF [ 1 ]. There is a chip [ 2R7 ] . And below this chip [ 2R7 ] , there are small chip [ 473 ] .
[ GRAPHIC IS FOR JA VERSION ]
*-*-*-*-*-*-*-*
R R R X
R = chip [ 473 ]
* * * * * * * *
* * * * * * * *
Make short circuit two X point.
X
R
Maybe on your TM-742,there are chip [ 473 ]
*-*-*-*-*-*-*-*
with different patern. This graphic is for
JA version. So please try until modification
will succeed.
OPERATION
1.
2.
3.
4.
5.
6.
ON 144MHz press band sel more than 1sec . mode change AM <-> FM.
ON 430MHz ditto band change 430 <-> 870
ON 1200MHz ditto 1200 <-> 870
[F] + BELL -> repeater dual RCV.
118-136MHz mode chang to am automaticaly.
X-band repeater operation. Select one band by [BAND SEL] select onother band by [CONT SEL]. Press [F] key more than 1sec.
Press [MUTE] Key. X-band operation will work. Press [F] then [MUTE] key -> cancel X-band repeater operation.
73s DE JP1LRT @ JL1YVX.10.JNET1.JPN.AS
YOSHIHARU "KEI" TSUKUURA
This modification is read 500 times.
top of page
28-03-1999
(TM-942) TM-742/942 Beyond Mars/CAP Mod. Guide
Procedure:
1. Detach the front panel from the main chassis.
2. Remove the bottom cover of the transceiver by removing the 4 screws on the bottom of the cover and loosening the 4 screws on
the side of the unit.
3. Orient the radio so the bottom is up and the front panel area is near your chest. Near the front panel area you will find a large
board, this is the control unit.
4. Remove the chip resistors "Y" noted in the diagram below, and reinstall them in position "Z" as shown.
5. Reinstall the bottom cover of the transceiver and reattach the front panel.
6. Reset the microprocessor. Press and hold the MR key while the power is switched on. Then release the MR key. This will erase all
operator programmed data.
7. The frequency range after modification will be:
28
Mhz Band:
50
Mhz Band:
144 Mhz Band:
220 Mhz Band:
440 Mhz Band:
1.2 Ghz Band
RX:
18.0 thru 54.0 Mhz
TX:
26.0 thru 45.0 Mhz
RX:
40.0 thru 90.0 Mhz
TX:
46.0 thru 76.0 Mhz
TX: 136.0 thru 174.0 Mhz
RX: 215.0 thru 260.0 Mhz
TX: 215.0 thru 235.0 Mhz
TX: 410.0 thru 470.0 Mhz
RX/TX: 1100.0 thru 1400.0 Mhz
Please note that these are theoretical ranges only. Not all radios will be capable of tuning the entire range.
Control Unit X53-346X-XX A/2
_____________________________________
I
I
---- ---I
Z IIYY
I
---- ---I
oooo oooo
I
---- ---I
IIIY
ZZ
I
---- ---I
2 I
R I
7 I
Remove Y resistors and
reinstall in position Z
top of page
This modification is read 492 times.
23-04-2000
(TM-942) TM-742/942 28 MHz/50 MHz RC TX failure
Author: Kenwood Communication, inc.
Service Bulletin no. 1029 (29 June 1993)
Symptom:
During RC operation (remove Control) the 28 MHz and 50 MHz modules do not transmit after a frequency within the affected band is
entered from the microphone keypad. Pressing the PTT key will cause a beep to be sounded but the radio will not transmit. This error
is a result of a programming error in two of the microprocessors.
Corrective action:
Replace IC1 on the Control unit X53-3460 B/2 and IC1 on the Display unit X54-3130 A/3 to correct this symptom:
Parts required:
Qty
1
1
Description
Control unit microprocessor
Display unit microprocessor
Kenwood Part No.
HD6433388A07F
HD404719A32H
Circuit description
IC1
IC1
Note:
To activate the RC function after changing these two parts you need only press the RC key on the font panel of the radio. This method
differs from the original method which required use of the "F" key and the "RC" key.
Caution: This modification requires soldering equipment rated for CMOS type circuits. It also requires familiarity with surface mount
soldering techniques. If you do not have the proper equipment or knowledge do not attempt this modification yourself. Seek qualified
assistance.
Time required for this modification is 1.5 hour or less.
This modification is read 470 times.
top of page
23-04-2000
(TM-942) TM-742/942A Microprocessor change
Author: Kenwood Communication, inc.
Service Bulletin no. 1033 (29 November 1993)
Symptom:
Reports of problems with microprocessor lock-up when using S-meter squelch, problems with storage/recall of PL tone frequencies of
203.5 Hz. and/or 114.8 Hz., or problems with a lack of transmit on the UHF band modules during Remote operation can be corrected
using the changes noted in this bulletin. Units that exhibit any of these symptoms with serial numbers between 412xxxx and 507xxxx
need only change IC 1 on X53-3460-21 B/2. Units that exhibit any of these symptoms with serial numbers of 412xxxx and below must
also change IC1 on X54-3130-11. Units with serial numbers of 507xxxx and greater have had these changes incorporated in
production.
Parts required:
Qty
1
Description
Microprocessor
1
Microprocessor
Old part No.
HD6433388A07F
or
HD6433388A14F
HD404719A26H
New Part No
HD6433388A22F
HD404719A32H
Circuit desc.
IC1
IC1
Caution: This modification requires advanced surface mount soldering equipment that is rated for CMOS circuits. It also requires
familiarity with advanced surface mount soldering techniques. If you do not have the proper equipment or knowledge do not attempt
this modification yourself. Attempting to remove and replace either IC without the proper equipment and techniques can easily
damage the circuit boards and void your warranty. Seek qualified assistance from your closest Kenwood Service Center (Long Beach,
CA, or Virginia Beach, VA).
Time required for this modification is 90 minutes or less.
top of page
This modification is read 463 times.
23-04-2000
(TM-942) TM-642/742/942A Microprocessor change
Author: Kenwood Communication, inc.
Service Bulletin no. 1040 (10 February 1994)
Symptom:
Due to a recent rule change by the FCC it is no longer possible to supply transceivers, or provide replacement microprocessor that
would allow a transceiver to receive in the 800 MHz band.
Corrective action:
The microprocessor program of IC5 has been modified to prevent 800 MHz band reception. Production has been changed beginning
with serial number lot 510xxxx. Units produced after this point will not be capable of 800 MHz reception.
Parts required:
Qty
1
Description
Microprocessor
Old part No.
HD6433388A22F
New Part No
HD6433388A25F
Procedure:
When ordering a replacement microprocessor you will be supplied with the new version. Please make sure your customer understands
the limitations of this new
This modification is read 472 times.
top of page
05-01-2000
(TM-D700) KENWOOD TM-D700A Extended TX MOD (easy 3 steps)
Just received my new rig, neither the supplier nor Kenwood had the mods available to date.
1. Remove the bottom cover, 5 screws (not the speaker side).
2. Locate and remove "W601" (chip resistor) and "W602" (green wire). They are located within 2 inches of the optional VS-3 voice
synthesizer board.
3. Reassemble radio and after power-up, press the reset switch on the front of radio.
Here is your new TRANSMIT range
136.000 - 174.995
400.000 - 469.995
This is the RECEIVE range (mode selected).
118.000
136.000
200.000
300.000
400.000
800.000
849.000
894.000
934.000
- 135.995
- 199.995
- 299.995
- 399.995
- 523.995
- 823.990
- 869.990
- 913.990
- 1299.990
If anyone finds other mods please drop me a line. [email protected]
This modification is read 4692 times.
top of page
20-01-2000
(TM-D700) TM-D700 CAP/MARS
Thanks to KD4CWB for the basis for this modification
To modify the transmitter to cover 142 - 151.995 Mhz and 420-449.995 Mhz, perform the following steps:
1. MOST IMPORTANT - this mod will do a reset on your radio and erase ALL of your settings (memory, APRS, menus, etc.). Use
the computer program to pull all of the settings out BEFORE you go any further. Or if no computer, a very large tablet. This radio
has many many programable features.
2. Turn off the radio and disconnect the power
3. Remove the five screws from bottom cover (not the side with the speaker).
4. Remove the bottom cover. It may take a little prying with a small screwdriver.
REMEMBER if you haven't saved your settings, all will be lost if you proceed beyond this point.
5. Cut ONLY the famous Kenwood green wire, located near the voice synthesizer board connector. The green wire ties two PC board
lands together and is about 1/2" long. Make sure the ends can't short against anything.
6. Reinstall the bottom cover.
7. Reapply power and turn the radio on (it will automatically reset).
8. Use the computer program to reinstall all of your operating parameters. I found that the load ALL function did not seem to do
everything. Try the load MEMORY and MENU selections too. Or prepare to spend a whole bunch of time re-entering all of your
parameters that you wrote down in step 1.
This modification is read 3542 times.
top of page
08-04-2000
(TM-D700) Kenwood TM-D700A service mode
Author: Steven Seeger - [email protected]
The TM-D700 A/E has a service mode that lets you adjust many parameters of the radio for both bands. The setup is easy, and the
following things can be adjusted:
Squelch open sensitivity
S meter calibration
Transmission output power (adjust at lower limit frequency, center frequency, upper frequency of both bands)
Transmission deviation
DCS modulation balance
Tone deviation
DCS deviation
To get into the mode, short pins 3 and 6 of the 6 pin data radio terminal.
_6___
/ O||O
| O
O|3
|
OO |
---------/
Sorry for the bad drawing, but consider each O a pin on the jack. The center slot for the plastic tab in the connector is on top of this.
Pin 6 is on the upper left, pin 3 is on the right middle. With the radio powered off, short these two pins together.
Now, hold down the F and the TONE key and turn the power ON. The radio will come up with 144.000 and some data on the right
side. The menus will look like they do when you're in the MNU. Use the left and right buttons to change things.
Using the <- and -> selections on the menu, you can scroll through the options. According to this spec sheet here, the radio can be
set to 60W on 2 meters and 42W on 440. ALL ADJUSTMENTS ARE MADE FOR EACH BAND SEPARATELY.
Be sure to do power adjustment into a 50 ohm dummy load!
Do not worry if you don't recognize these menu names. Many of them are graphical on the bottom that change with the mode you're
in.
VFO, MR, ENCODER (the left wheel), MHZ, and BAND SEL (the buttons you push to change bands) all function in this mode.
To adjust squelch sensitivity, put the desired signal on the antenna connector and press SET. (menu item on the bottom.)
To adjust the S meter, put a signal you want for S1 on the connector and press the S1 button on the bottom. Same goes for S7.
Output power is adjusted by selecting FREQ1,2, or 3 which sets different frequencies. Key down the mic and transmit into the dummy
load. Turn the encoder left or right to adjust output power. Press LOW to adjust for low, medium, and high power. (make high power
5W and low power 50W, impress your friends!)
Transmission deviation is adjusted with the <- and -> buttons. There's a MAX DEV setting if you want to bleed over to adjacant
frequencies. (piss off your friends!) Press the SET key to set it.
DCS modulation balance is set with <- and -> and by pressing the SET key.
Same goes for TONE deviation and DCS deviation.
Enjoy!
-Steve KF6WJH
This modification is read 3586 times.
top of page
04-06-2000
(TM-D700) TM-D700A/E Cross band repeat
Author: Kenwood Communication, inc.
Modification procedures for models to other Type (Transmitter band expansion, ext)
Set a desired destination by adding or deleting three chip jumpers (R659, R661, R662) and a lead jumper (W602) on the foil side of
the TX-RX unit (X57-586X-XX). (Refer to the attached tables 2 to 19 for details.) [Didn't get a copy of those].
1. Remove R659 and W062 to extend the transmitting band.
2. Remove R675 to modify the channel display mode. [Shows channel instead of frequency?]
3. Remove R674 to modify the repeater.
(Repeater in TM-D700A to U.S.A./Canada has already been modified before factory)
Another note not from Kenwwod.
I have looked at the board and cannot find R674, however there are tow chip resistors (0 ohm?) labelled REPTER and CH. Ay a guess
these are R674 and R675 respectively. I may try to remove REPTER later and watch the results.
Usual caveats in place, if it breaks because of these mods, you are on your own.
This modification is read 3445 times.
top of page
06-08-2000
(TM-D700) Repeater functions. U.S.A. / Canada only
Author: Marcel Chabot - [email protected]
This transceiver is capabie of receiving signals on one band and retransmitting signals on the other band. This function repeats signals
originating from one band, using the other band. For exampie, a signal received on band A (VHF) is retransrnitted on band B (UHF).
Similarly, a signal received on band B (UHF) is retransmitted on band A (VHF).
Access Menu 1-7-6 (REPEATER) and select Loeked" band Repeater or Cross-band Repeater. The default is "OFF".
Looked-band Repeater
The transceiver always uses the same band to receive or transmit a signal as a repeater. Belore accessing Menu 1-7-6, select one
band as the TX band and the en other band as the control band.
Cross-band Repeater
If receiving a signal on the TX band, the transoeiver switehes the eurrent RX only band to the TX band. Before accessing Menu 1-7-6,
select the sarne band as the TX and control bands.
82
If necessary, you can cause this transceiver to rernain in the transmit mode for 500 ms after signals drop. Access Menu 1-7-5
(REPEATER HOLD) and select "ON".
Note:
■
■
You cannot activate tbc Repeater function after recalling the same frequency band (VHF or UHF) on band A and B, or while
blanking a band display.
Activating the Repeater function switches OFFAutomatic Band Change (A.B.C.) orautomatic Simplex Check (ASC).
■
■
The Time-Out Timer is locked at 3 minutes.
After activating the Repeater function, you cannot access Menu Nos. other than 1-7-5 and 1-7-6.
This modification is read 3034 times.
top of page
06-08-2000
(TM-D700) Enable Crossband Repeater Function TM-D700E Version
Author: Robert PD0PVL - [email protected]
To enable crossband repeater function in the TM-D700E Remove 0 ohm resistor above the word repter writen on the pcb. it works fine
here.
This modification is read 3108 times.
top of page
24-09-2000
(TM-D700) Update for the Kenwood TM-D700A/E Deviation level
Author: Kiely Petersen ZL1WPK - [email protected]
To adjust the Transmission deviation level you need to get into the service mode.
Then scroll through the options to the deviation section.
Then press and hold the Mic (PTT) in then turn the tuning control to select the deviation you want. Then Press the SET key to set it.
Both VHF/UHF need to be adjust separately.
Kiely Petersen ZL1WPK
This modification is read 3143 times.
top of page
05-11-2000
(TM-D700) Demonstration mode for TM-D700
Author: Kiely Petersen - ZL1WPK - [email protected]
To see a demonstration mode press and hold the (F) Key and Turn the radio on
Stop the demonstration Turn radio off then press (F) Key and Turn the radio on
This modification is read 3085 times.
top of page
21-11-2000
(TM-D700) TM-D700A MC53-DM MIC PTT Spring tension MOD
Author: Scott, KF4NDQ
This reduces the pressure required to key the mic to about half or less. (Sorry I do not have any measuring instruments). Perform at
your own risk.
1. Turn off radio. Leave Mic connected to radio and radio connected to power. This will reduce the chances of static discharge
blowing the IC behind the cover. Ground yourself.
2. Remove the 3 screws from the back of the mic and gently remove cover. Inside the large PTT housing you will notice a spring
with BLACK foam in it as well as a piece of RED foam that comes in contact with the actual PTT micro switch.
3. From the bottom of the PTT pull upwards until the PTT housing comes out of the MIC housing. Take care not to damage the RED
foam.
4. Pull the spring with the BLACK foam out of the PTT housing. Store in a safe place as you may not like the difference it makes.
5. Carefully reinsert the PTT housing, again taking care not to damage the RED foam.
6. Replace the rear cover. DO NOT OVERTIGHTEN SCREWS. Test PTT. Test APRS messaging from Keypad. This will verify the IC has
not been damaged.
Hope it works for you!
Scott
KF4NDQ
This modification is read 2884 times.
top of page
26-03-2002
(TM-D700) TM-D700E Sky command/Remote enable
Author: David Bray - [email protected]
1. Cross band repeater : Remove R674.
(I cant guess the reason of muffled and poor sound)
2. Sky Command : A chip jumper (0ohm) must be soldered onto the place for "R662".
To activate sky command function, it is not necessary to change the firmware.
But this modification may expands TX/RX frequency range.
Note: This basically changes the model from TM-D700E to TM-D700A(USA Model).Back-up your data with a PC as the mod will reset
your radio. When you re-load the data, change the model to TM-D700A.
Download picture.
This modification is read 63 times.
top of page
19-07-1998
(TM-G707) Extended RX and TX for Kenwood TM-G707
1. Remove the dettacheble front from the tranceiver.
2. Remove the bottom case. (4 srews in each corner).
3. Put the tranceiver in front of you, upside down, with the antenna connecter pointed at you.
4. Locate in the upper right corner on the small vertical placed print (witch is located behind the display adaptor) a group of 4 small
0 Ohm resistors in smd format, numbered 0-1-2-3.
5. Remove or lift resistor 0 for extended RX
RX
RX
RX
RX
RX
band
band
band
band
band
1
2
3
4
5
=
=
=
=
=
118-136
136-174
300-400
400-520
800-999
Mhz
Mhz
Mhz
Mhz
Mhz
AM
FM
FM
FM
FM
6. Remove or lift resistor 3 for extended TX
TX band 2 = 136-174 Mhz FM
TX band 4 = 400-520 Mhz FM
Note:
When these two resistors are removed or lifted, in the MENU there will be een extra menu-choise (number 0) to switch between AM
and FM on all 5 bands (AM only receive).
Date: 16-04-2001
User comment
From: unknown
Subject: Correct mod!
The mod listed for super-expanded frequency coverage (RX and TX) of the Kenwood TM-G707 is incorrect!
I have read multiple reports (also on QRZ) that for the expanded frequency coverage, it is necessary to remove the SMT resistor
marked "1", NOT the one marked "0".
This is INCORRECT, at least in my radio, which was purchased NEW on 4-3-01. Removal of resistor "1" changed my radio from the
"American" version to the "European" version (described in more detail in the instruction manual), which actually DECREASED the
frequency coverage to LESS than it was before modification (again, both RX and TX were severely limited)!
Also, the ability to program the microphone buttons yourself was totally disabled. I called Kenwood and they couldn't help me, since
the mod I'd performed was not endorsed by Kenwood.
I put resistor "1" back in place, and removed resistor "0". All the disabled functions were restored, and the frequency modification
(both RX and TX) was completed. This correction may not be the case with all of the TM-G707's out there, so my advice is to remove
only one side of the resistor you choose to try. Using your soldering iron, heat it up and just bend it up far enough to break the
connection, without removing it completely from the PCB.
If you notice undesireable changes in your radio, reconnect it and try the other one. There are only 2 of these resistors in my radio,
so it should be a simple process of elimination. Good Luck!
Date: 28-01-2002
User comment
From: Lion Templin KB9ENE
Subject: Another variant to the TM-G707 resistor removal mod
The "resistor removal" mods listed here are almost right for my TM-G707, which has a serial number series 301xxxxx. Only two of
the SMT resistors were present, 0 and 1. Removing 0 opened up the extended RX capability, however, it resulted in leaving the radio
in limited TX on 440 (probably the European band limits). Removing resistor 1 opened up extended TX, and removed the limitation
previously imposed on 440.
At the end of the mod I had NO resistors on any of the 4 available pads.
Date: 30-01-2002
Subject: Incorrect Information
User comment
From: Nathan
The person that has typed up this modification has made a nice mistake which cost me quite abit of money.
The radio no amtter what country version it is USA or European will not do about 470mhz Transmit but will on the recieve.
The US version comes with only resisters 0 and 1 if you remove both your get extended RX & TX.
In regards to the Euro version you remove the resisters as per the instructions in the above mod.
Date: 15-02-2002
User comment
From: Chris VE3NGW/W4 FLORIDA
Subject: WARNING! DO NOT REMOVE THE DIODES
Subject: WARNING! From CK Radio Florida
Please DO NOT remove the diodes on this radio.
Certain versions of this radio are different and by removing the diodes you will cause the radio to become innoperative.
All you need to cover Tx-Rx Expansion is to
Turn the radio upside down.
Take off the bottom cover 4 screws.
Remove the cover.
Look towards the front of the radio and locate the vertical display board.
Look for two thin green wires behind the two diodes mentioned
in the previous articles.
CUT the green wire furthest away from the side of the radio
that the mic connector is on.
THAT'S ALL YOU NEED TO DO.
This mod works on the TM-733 and the TM-G707.
Good Luck, 73 Chris
This modification is read 2846 times.
top of page
12-01-2001
(TM-G707) Extended RX MOD for Kenwood TM-G707A
Author: Kenwood
This from the Kenwood Factory Website...
1. Disconnect power cord and antenna from transceiver
2. Detach the head
3. Remove Top and Bottom screws (9 total)
4. Lift the locking tabs on top and bottom side of the front panel, pull the front panel forward to expose the control board. DO NOT
BREAK THE TWO RIBBON CABLES!!!! They connect the control board to the TX-RX board.
5. Remove the single screw from the control board to access the bottom of the board (component side). There is NO need to
disconnect the ribbon cables!!
6. Locate the TWO GREEN JUMPER WIRES on the component side of the control board.
7. Cut the one labeled W501 (SEE ILLUSTRATION)AND IF NEED BE INSULATE THE END TO PREVENT CONTACT.
8. Re-assemble and power up unit. It will automatically reset.
New receive capability118.00-173.995
320.00-399.995
400.00-523.995
800.00-823.9875
849.00-865.9875
894.00-949.9875
Date: 15-02-2002
User comment
From: Chris VE3NGW/W4 FLORIDA
Subject: WARNING! From CK Radio Florida
Please DO NOT remove the diodes on this radio.
Certain versions of this radio are different and by removing the diodes you will cause the radio to become innoperative.
All you need to cover Tx-Rx Expansion is to
Turn the radio upside down.
Take off the bottom cover 4 screws.
Remove the cover.
Look towards the front of the radio and locate the vertical display board.
Look for two thin green wires behind the two diodes mentioned
in the previous articles.
CUT the green wire furthest away from the side of the radio
that the mic connector is on.
THAT'S ALL YOU NEED TO DO.
This mod works on the TM-733 and the TM-G707.
Good Luck, 73 Chris
Date: 20-02-2002
User comment
From: Gary AB7NI
Subject: Update mod
On mine the first green wire cut opened up the RX, but I also needed to cut the second green wire for expanded transmit of 142151Mhz. It would not TX beyond those points. Anyone else have a differenct result?
This modification is read 2266 times.
top of page
08-03-2002
(TM-G707) Low Audio Fix for Kenwood TM-G707
Author: Jim WD0JIM - [email protected]
I have two of these rigs and both had low audio. I searched the Internet for a solution and could not find one so I spent $23.00 and
purchased the service manual. So for everyone that has low audio here is my gift to you!
**Perform at your own risk**
1. Place the radio into Service Adjustment Mode by shorting pins 3 (PKS) and 6 (SQC) on the data jack on the front left side of the
radio under the protective cap.
2. Power up the radio while holding "F" key and "TONE" key
3. Put radio into VFO mode and select a 2 meter frequency and monitor it with another rig. (I used headphones to prevent
feedback)
4. Press MNU to activate adjustment mode
5. Press the keys to get to the DEVI menu
6. Key mic and speak and listen through other radio.
7. Turn the encoder knob until you hear the audio level you want. Mine sounded good when the value was "BB"
8. Press "OK" button to save new deviation value.
9. Press MNU to return to VFO mode.
10. Select a 440 frequency and repeat steps 3-9 for the 440 band. Deviation is set independently for each band.
11. When complete, power off radio and remove shorting plug. Your radio no longer has low audio!
** Tip for shorting plug**
I purchased a PS/2 keyboard extension cable as the connector is the same and inserted a wire between pins 3 + 6 to put into
adjustment mode.
Pin 3 is at the 3 o'clock position and pin 6 is at the 10 o'clock position when looking at the front of the rig and the connector is on your
left hand.
Good luck and 73.
Jim WD0JIM
top of page
This modification is read 297 times.
28-03-1999
(TM-V7A) Expanding the Kenwood TM-V7: A & E versions
Original TM-V7A Mod from [email protected] (MR CORY B MCDONALD)
Additional TM-V7E notes from [email protected] (Mike Bowyer)
Original TM-V7A Mod:
Remove the top and bottom covers.
Look at the vertical p.c. board behind the front of the radio. There will be 2 small chip resistors on the left side of the board.
Carefully remove the one with the number 0. It will be the one closest to the left near the grounding spring. You will probably have to
scrape it off with a pair of needle nose pliers.
After you remove it the VFO ranges should be:
VHF TX 136.995 - 173.995. RX should be 118-174.
UHF TX should be 410-469.995 RX should be 300-470.
Additional TM-V7E notes:
There is a row of five numbered links on the edge of the front panel board.
In my E version radio, 0, 2 & 3 were made as standard. I now have only one link fitted in the number 4 position which enables the
repeater function not defaulted in European versions. I have removed all other links.
I can now also receive the AM Aircraft band (118-137MHz). It is possible to change from AM to FM by pressing the MHz button for 1
second. Plus I have discovered doing the same key press (MHz for 1s) in the UHF band gives a 800-999Mhz RX band.
The European version has a 1750Hz tone-burst function, a modified band plan for the auto-repeater shift function, adds a -7.6Mhz
repeater shift and sets the band limits to 144-146 & 430-440 - the AM Air band & 800Mhz bands are disabled. All these European
'features' are lost when the radio is expanded.
(The repeater offsets are still programmable, but you must learn how to whistle at 1750Hz). I think the only other difference between
the A and E versions is that the E version has an N type antenna connector fitted.
Making link number 5 causes the radio to power up in a Memory recall mode (i.e., with channel numbers) and so is not overly useful!
I'm not sure exactly what links 0, 1, 2, & 3 all do individually! Maybe other configurations are possible: any information would be
gratefully received.
As for RF performance, the front-end (and PA) must be tweaked to use frequencies other than the factory alligned defaults, with a
little tweaking out of band performance should come good (at the expense of regular 2m/70cm performance).
The chip resistors are SMD zero ohm things - a wire link (or solder blob) will do the same job. They can be carefully removed (for reuse) by using a fine tipped iron, de-solder braid, and a pair of long nose pliers or tweezers. The front board can be carefully detached
from the rest of the radio to make removing the links easier.
Mike Bowyer.
Date: 13-10-2001
User comment
From: Bg36c
Subject: DTSS
The DTSS will be disabled and no longer function after performing this mod. At least it doesn't on my radio anymore.
This modification is read 3106 times.
02-12-1999
(TM-V7A) PG-4S programmer cable for the TM-V7x
top of page
Author: Wulf, DB8KY
NOTE: This is not a copy of the existing PG-4S cable but a replacement designed by DB8KY.
One of the most handy things about this transceiver is: you can program this transceiver by computer. You can download the software from the Kenwood site but there no datasheet of the PG4S cable which you require. I found a datasheet which replace the PG-4S cable and is designed by DB8KY. I made this cable and it works fine on my transceiver.
The manual is written in German by DB8KY. He said he never tried this cable on a TM-V7, but it works very good on my transceiver. So here below you will see the instructions.
Have fun! PE1PTS
Der Kenwood TM-G707E ist ja ein schoenes Geraet und die Vergabe von Speichernamen ein nettes Feature, wenn man das alles nur vom Rechner aus programmieren koennte...
Kann man, die Software dazu steht bei Kenwood auf der Web-Seite, dann fehlt nur das Kabel zum Anschluss an den Rechner. Ich habe zwar keine Ahnung was sich in dem original PG-4S
Kabel von Kenwood abspielt, wenn man den TM-G707E aber in den Clone-Mode versetzt und sich mal die Signale auf der Mini-DIN Buchse ansieht wird klar, dass es sich bei der Elektronik im
Kabel um einen TTL/RS232-Wandler handeln muss. Die unten dargestellte Schaltung erfuellt diese Aufgabe bei mir jedenfalls klaglos. Ich denke das ganze funktioniert auch am TM-V7E.
Wie funktioniert es:
Die Verbindung zwischen Pin 4 und 5 benoetigt der Kenwood wohl um von FSK auf seriellen Betrieb umzuschalten. Das Signal vom PC zieht ueber R5 mit T2 den RxD-Eingang am Kenwood
low, hier ist intern offensichtlich bereits ein Pull-up
Widerstand vorhanden. Schwieriger ist der Weg vom Kenwood zum PC, der Kenwood gibt nur ein TTL-Signal aus, der serielle Eingang am PC will aber +/- ca. 10V sehen. Also muessen zwei
Hilfsspannungen gewonnen werden. Aus dem RTS-Signal
des PC wird ueber R1 eine positive Spannung gewonnen und mit D1 und C1 stabilisiert. Aus dem TxD-Signal des PC wird ueber D3 und R6 dann noch eine negative Spannung gewonnen und
mit C2 gepuffert. Dann kann der Kenwood mit den Sendedaten ueber T1 jetzt zwischen der positiven und negativen Spannung umschalten.
Ich habe das ganze in den Sub-D Stecker reingefummelt.
Viel Spass damit wuenscht Wulf, DB8KY
DB8KY @DB0RWI.#NRW.DEU.EU
(Wer das nachbaut tut es auf seine eigene Verantwortung)
PC D-Sub 9pin TM-G707E 6pol. Mini-DIN
R1/R6 = 150 Ohm
R2 22 kOhm
R3 10 kOhm
R4 33 kOhm
R5 15 kOhm
C1/C2 = 1uF/16V Elko
D1 = Z-Diode 5,1 Volt
D2/D3 = 1N4148 oder aehnlich
T1 = BC558A oder aehnlich
T2 = BC337 oder aehnlich
For an English Interpretation, visit KC7ZRU's pages. Includes RS part numbers, re-drawn schematic and user comments.
This modification is read 2163 times.
top of page
28-10-2001
(TM-V7A) TM-V7A Ext. remote control operation
Author: Kenwood
AAN-0020 (12-12-1996)
External remote control of the TM-V7A transceiver using DTMF tones that are transmitted by another transceiver is possible using the
following procedure:
1. Ensure the UHF control frequency of the TM-V7A and the remote transceiver are the same.
2. Turn on the DTSS function for the TM-V7A UHF-band and select DTSS tone sequence.
3. Turn the DTSS function for the UHF band on the TM-V7A OFF.
4. Press the "Band selector" button for the VHF band on the TM-V7A.
5. Turn OFF the TM-V7A, press and hold the CONT SEL. Key, turn ON the TM-V7A and the release the CONT SEL. Key.
6. This will place the transceiver in the EXT standby mode. The words "EXT REMOTE" are displayed, the "DT" indication for the UHF
band will begin flashing, the LOCK indication will turn ON and all front panel keys on the TM-V7A will be disabled except the
"PWR" key, and the microphone keys.
7. To begin remote control you should key the transceiver and press the following key sequence:
[A] [*] [*][*][#], where "***" is the preset DTSS code selected in step 2.
8. If the proper code is received by the TM-V7A the beeper will sound, and the "DT" indicator will stop flashing. This indicates the
transceiver can now be remotely controlled from the external transceiver. See the Ext. Remote Function" chart below of the
bulletin for those functions that can be controlled.
9. When you have finished and wish to return to the EXT standby mode, you should press:
[A][*]
10. The "DT" indicator on the TM-V7A will begin flashing to confirm the radio again in the standby mode.
11. To return to normal operation, turn the transceiver OFF, press and hold the CONT SEL. Key, and then turn the radio back on.
Repeat one more time.
This modification is read 1952 times.
top of page
28-10-2001
(TM-V7A) Conversion document
1. Conversion function items and conversion types
1.
2.
3.
4.
Reception wide band .... [Conversion A] ...... K destinations outside 800-MHz band support
Cross band repeater ... [Conversions A and B] .... Complete with K destination measures
Page answer back ... [Conversions A and B] ... Complete with K destination measures
DTMF remote ..... [*]
* Operates even without conversion, but some items function when Conversions A and B are made.
2. Conversion Methode
1. Conversion location
Remove the power cord from the main unit, remove the upper/lower case, flip down the panel as in the figure below, than
operate.
Factory setting destination jumper table.
Destination jumper
Destination
Bit Ref. no. (K destination) K
M
E
3
R542 (W501)
O
X
O
2
R543 (W502)
O
X
O
1
R544
O
O
X
0
R546
O
X
O
O:= Jumper
X:= No jumper
Conversion A ..... Reception wide band (Already dealt with for M destinations)
E destination ..... Eliminates mounted chip jumper resistor R542 (0 ohm).
K destination ..... Cuts the mounted jumper wire (W501).
Conversion B ...... Repeater/answer back (Already dealt with for K destinations)
Chip jumper resistor 0 ohm added (R92-0670-05)
* The chip removed in Conversion A can be used in Conversion B.
* When adding or eliminating the chip jumper resistor, be careful not to peel off any printed circuit pattern and not to harm any
other parts.
2. Contents of settings by destination
For the list of contents of settings for each destination, see (Appendix tables 1 - 5).
This modification is read 1821 times.
top of page
28-10-2001
(TM-V7A) Computer interface for TM-V7A&E
Author: Jann DG8NGN - [email protected]
To program your memories of the Kenwood TM-V7 you need this interface. The software is downloadable at Kenwoods Webpage
www.kenwood.net, or here. Download the MV7101.EXE file. The software can only communicate with serial port 1 or 2!
mods.dk/manuals/kenwood/TM-V7_MCP-V7_Version_1.01_Memory_Control_Program.zip
Parts list. R1/R6 = 150 Ohm
R2 = 22 Kohm
R3 = 10 Kohm
R4 = 33 Kohm
R5 = 15 Kohm
C1/C2 = 1uF/16V
D1 = 5,1 V Zenerdiode
D2/D3 = 1N4148 or equal
T1 = BC558A or equal
T2 = BC337 or equal
top of page
This modification is read 1885 times.
19-07-1998
(TM-V7E) TM-V7E mike & PF1 <> PF4 (1750hz)
TM-V7(E)
---------UP ---+------------------+
|
|
PF3
+100K+--o/o--------+
|
|
PF4
+22k+---o/o--------+
|
8V -> frei/free/libre
|
|
GND(masse)---------------+--o/o---+
|
|
DWN---+------------------+
|
|
|
|
PF1
+100K+--o/o--------+
|
|
|
|
PF2
+22K+---o/o--------+
|
|
STBY(ptt)-------------------------+---> PTT
GND(mic)------o/o---Mic 600ohm
MIC------------------/
NC:-> frei/free/libre
Legende:
o/o = Schalter oder Taster / switch / bouton ou interrupteur
This modification is read 1951 times.
top of page
28-03-1999
(TM-V7E) Expanding the Kenwood TM-V7: A & E versions
Original TM-V7A Mod from [email protected] (MR CORY B MCDONALD)
Additional TM-V7E notes from [email protected] (Mike Bowyer)
Original TM-V7A Mod:
Remove the top and bottom covers.
Look at the vertical p.c. board behind the front of the radio. There will be 2 small chip resistors on the left side of the board.
Carefully remove the one with the number 0. It will be the one closest to the left near the grounding spring. You will probably have to
scrape it off with a pair of needle nose pliers.
After you remove it the VFO ranges should be:
VHF TX 136.995 - 173.995. RX should be 118-174.
UHF TX should be 410-469.995 RX should be 300-470.
Additional TM-V7E notes:
There is a row of five numbered links on the edge of the front panel board.
In my E version radio, 0, 2 & 3 were made as standard. I now have only one link fitted in the number 4 position which enables the
repeater function not defaulted in European versions. I have removed all other links.
I can now also receive the AM Aircraft band (118-137MHz). It is possible to change from AM to FM by pressing the MHz button for 1
second. Plus I have discovered doing the same key press (MHz for 1s) in the UHF band gives a 800-999Mhz RX band.
The European version has a 1750Hz tone-burst function, a modified band plan for the auto-repeater shift function, adds a -7.6Mhz
repeater shift and sets the band limits to 144-146 & 430-440 - the AM Air band & 800Mhz bands are disabled. All these European
'features' are lost when the radio is expanded.
(The repeater offsets are still programmable, but you must learn how to whistle at 1750Hz). I think the only other difference between
the A and E versions is that the E version has an N type antenna connector fitted.
Making link number 5 causes the radio to power up in a Memory recall mode (i.e., with channel numbers) and so is not overly useful!
I'm not sure exactly what links 0, 1, 2, & 3 all do individually! Maybe other configurations are possible: any information would be
gratefully received.
As for RF performance, the front-end (and PA) must be tweaked to use frequencies other than the factory alligned defaults, with a
little tweaking out of band performance should come good (at the expense of regular 2m/70cm performance).
The chip resistors are SMD zero ohm things - a wire link (or solder blob) will do the same job. They can be carefully removed (for reuse) by using a fine tipped iron, de-solder braid, and a pair of long nose pliers or tweezers. The front board can be carefully detached
from the rest of the radio to make removing the links easier.
Mike Bowyer.
Date: 13-10-2001
User comment
From: Bg36c
Subject: DTSS
The DTSS will be disabled and no longer function after performing this mod. At least it doesn't on my radio anymore.
Date: 02-02-2002
User comment
From: philip
Subject: kenwood tmv7 extended tx
with reference to the above mod ,yes all works fine but no extended tx
i have no jumpers conected from 0 to 4 no 4 has a wire jumper,this enables extended rx, but to extend the tx you must add a wire
jumper to no 2 .
regards phil
This modification is read 2350 times.
top of page
02-12-1999
(TM-V7E) PG-4S programmer cable for the TM-V7x
Author: Wulf, DB8KY
NOTE: This is not a copy of the existing PG-4S cable but a replacement designed by DB8KY.
One of the most handy things about this transceiver is: you can program this transceiver by computer. You can download the software from the Kenwood site but there no datasheet of the PG4S cable which you require. I found a datasheet which replace the PG-4S cable and is designed by DB8KY. I made this cable and it works fine on my transceiver.
The manual is written in German by DB8KY. He said he never tried this cable on a TM-V7, but it works very good on my transceiver. So here below you will see the instructions.
Have fun! PE1PTS
Der Kenwood TM-G707E ist ja ein schoenes Geraet und die Vergabe von Speichernamen ein nettes Feature, wenn man das alles nur vom Rechner aus programmieren koennte...
Kann man, die Software dazu steht bei Kenwood auf der Web-Seite, dann fehlt nur das Kabel zum Anschluss an den Rechner. Ich habe zwar keine Ahnung was sich in dem original PG-4S
Kabel von Kenwood abspielt, wenn man den TM-G707E aber in den Clone-Mode versetzt und sich mal die Signale auf der Mini-DIN Buchse ansieht wird klar, dass es sich bei der Elektronik im
Kabel um einen TTL/RS232-Wandler handeln muss. Die unten dargestellte Schaltung erfuellt diese Aufgabe bei mir jedenfalls klaglos. Ich denke das ganze funktioniert auch am TM-V7E.
Wie funktioniert es:
Die Verbindung zwischen Pin 4 und 5 benoetigt der Kenwood wohl um von FSK auf seriellen Betrieb umzuschalten. Das Signal vom PC zieht ueber R5 mit T2 den RxD-Eingang am Kenwood
low, hier ist intern offensichtlich bereits ein Pull-up
Widerstand vorhanden. Schwieriger ist der Weg vom Kenwood zum PC, der Kenwood gibt nur ein TTL-Signal aus, der serielle Eingang am PC will aber +/- ca. 10V sehen. Also muessen zwei
Hilfsspannungen gewonnen werden. Aus dem RTS-Signal
des PC wird ueber R1 eine positive Spannung gewonnen und mit D1 und C1 stabilisiert. Aus dem TxD-Signal des PC wird ueber D3 und R6 dann noch eine negative Spannung gewonnen und
mit C2 gepuffert. Dann kann der Kenwood mit den Sendedaten ueber T1 jetzt zwischen der positiven und negativen Spannung umschalten.
Ich habe das ganze in den Sub-D Stecker reingefummelt.
Viel Spass damit wuenscht Wulf, DB8KY
DB8KY @DB0RWI.#NRW.DEU.EU
(Wer das nachbaut tut es auf seine eigene Verantwortung)
PC D-Sub 9pin TM-G707E 6pol. Mini-DIN
R1/R6 = 150 Ohm
R2 22 kOhm
R3 10 kOhm
R4 33 kOhm
R5 15 kOhm
C1/C2 = 1uF/16V Elko
D1 = Z-Diode 5,1 Volt
D2/D3 = 1N4148 oder aehnlich
T1 = BC558A oder aehnlich
T2 = BC337 oder aehnlich
For an English Interpretation, visit KC7ZRU's pages. Includes RS part numbers, re-drawn schematic and user comments.
This modification is read 2056 times.
top of page
02-07-2000
(TM-V7E) Expanded RX/TX and crossband repeater
If you want just mod the RX QRG remove the resistor R546.
For the TX-RX mod remove R542 & R546
3210
OOXO
XOXO
OOXX
XOXX
TX
144/146
144/146
144/146
136/174
RX
144/146
144/146
118/174
118/174
TX
430/440
432/438
430/440
410/470
RX
430/440
432/438
300/470
300/470
REM:With one of this 4 mods you can have the 1750 of the mike.
But if you want have the bigest mod (but no 1750) you can try:
XXXX
XXXO
136/174 118/174
136/174 118/174
410/470 300/524
410/470 300/524
For the cross band repeater jump the strap 4
----------------------------------------------------------------------------0 1 2 3 4
5 6
----------------------------------------------------------------------------3=
2=
1=
0=
R542 (W501)
R543 (W502)
R544
R546
O = JUMPER
X = NO JUMPER
top of page
This modification is read 2355 times.
28-10-2001
(TM-V7E) Conversion document
1. Conversion function items and conversion types
1.
2.
3.
4.
Reception wide band .... [Conversion A] ...... K destinations outside 800-MHz band support
Cross band repeater ... [Conversions A and B] .... Complete with K destination measures
Page answer back ... [Conversions A and B] ... Complete with K destination measures
DTMF remote ..... [*]
* Operates even without conversion, but some items function when Conversions A and B are made.
2. Conversion Methode
1. Conversion location
Remove the power cord from the main unit, remove the upper/lower case, flip down the panel as in the figure below, than
operate.
Factory setting destination jumper table.
Destination jumper
Destination
Bit Ref. no. (K destination) K
M
E
3
R542 (W501)
O
X
O
2
R543 (W502)
O
X
O
1
R544
O
O
X
0
R546
O
X
O
O:= Jumper
X:= No jumper
Conversion A ..... Reception wide band (Already dealt with for M destinations)
E destination ..... Eliminates mounted chip jumper resistor R542 (0 ohm).
K destination ..... Cuts the mounted jumper wire (W501).
Conversion B ...... Repeater/answer back (Already dealt with for K destinations)
Chip jumper resistor 0 ohm added (R92-0670-05)
* The chip removed in Conversion A can be used in Conversion B.
* When adding or eliminating the chip jumper resistor, be careful not to peel off any printed circuit pattern and not to harm any
other parts.
2. Contents of settings by destination
For the list of contents of settings for each destination, see (Appendix tables 1 - 5).
This modification is read 1671 times.
top of page
28-10-2001
(TM-V7E) Computer interface for TM-V7A&E
Author: Jann DG8NGN - [email protected]
To program your memories of the Kenwood TM-V7 you need this interface. The software is downloadable at Kenwoods Webpage
www.kenwood.net, or here. Download the MV7101.EXE file. The software can only communicate with serial port 1 or 2!
mods.dk/manuals/kenwood/TM-V7_MCP-V7_Version_1.01_Memory_Control_Program.zip
Parts list. R1/R6 = 150 Ohm
R2 = 22 Kohm
R3 = 10 Kohm
R4 = 33 Kohm
R5 = 15 Kohm
C1/C2 = 1uF/16V
D1 = 5,1 V Zenerdiode
D2/D3 = 1N4148 or equal
T1 = BC558A or equal
T2 = BC337 or equal
top of page
This modification is read 1755 times.
19-07-1998
(TR-2200) Service notes on TR-2200A
Author: Trio-Kenwood Communication, inc.
TRANSMITTER
1.
2.
3.
4.
5.
6.
7.
8.
9.
Service bulletin no. 22 (31-10-1977)
No TX RF output: Bad 2SC1169 Q9 on X56-1210-11.
No TX: Shield plate touching to circuit board under Q8 driver 2SC741.
No TX: Open D2 MI301 on X5501130-01.
No TX: Repair broken RCT line from crystal deck to TX oscillator.
No TX: Bad Q13 2SA562Y. No T13 voltage on TX X56-1210-00.
No modulation: Bad D4 1s1658 on X56-1210-11.
No TX: Capacitor C21 lead touching to ground at Q4 on X56-1210-11.
No TX: No collector voltage to Q7 Q8. Bad Q15 2SC735 Hi/Low control for Q14 on X56-1210-11.
TX distortion: Check D3 Zener 9 volt supply regulator for TX low level stages on X56-1210-11.
GENERAL Note On TR-2200A
1. Battery plate overheats: If the red and yellow leads of the external DC cord are connected together, the battery plate will
overheat.
RECEIVER
1.
2.
3.
4.
5.
6.
7.
8.
9.
10.
Receive Sensitivity poor: Bad 10.245 MHz xtal on X55-1130-11.
Receive Sensitivity poor: Bad MI301 D4 on X56-1080-00.
Receive Sensitivity poor: Bad Q1 3SK41L on X55-1130-11.
Bo battery operation: Miscontact of internal switch in power jack.
No C9 B+ to receiver: Bad Q12 2SC496 on X56-1210-11.
Batteries will not charge: Check for a shorted battery plate.
Low Rx sensitivity: Bad D3 1S2588.
No squelch: Check Q15 2SC458 on X55-1130-11.
Poor squelch when cold: Replace D14-16 1N60.
No audio: Bad qudio IC NPC575 Q16 on X56-1210-11.
This modification is read 547 times.
top of page
13-02-2000
(TR-2200) Adapting the TR-2200A antenna to early Trio and Drake Portables.
Author: Trio-Kenwood Communication, inc.
Service bulletin no. 11 (13-1-1977)
We have had several inquiries about adapting the TR-2200A whip antenna to the Drake TR-22C and Trio TR-2200. We now have a kit
of parts to do this. Following is a copy of the instruction sheet supplyed with each kit.
TR-2200 Antenna Kit Instructions
No. Part Name
Part Number Qty
1
Whip Antenna
T90-0082-05 1
2
Antenna Connector J32-0230-04
3
Washer
N19-0282-04 2
4
Insulating Ring
N19-0283-04 2
5
Antenna Lug
E23-0097-04 1
6
Nut
N14-0116-04 1
7
Pipe
F29-0018-14
8
Ground Lug
E23-0015-04 3
9
Screw
3x6 mm
10
Cable with Lapacitor
1
1
1
1
1. Remove original antenna.
2. Enlarge antenna hole to 9.5 mm.
3. Install parts 1 thru 8 as shown in the exploded view below.
4. Remove coaxial cable that runs from the original whip antenna th the SO-239.
5. Connect original coaial cable from terminals ANT and E to the external antenna connector (SO-239). (This cable originally went
from terminals ANT and E to the whip antenna.)
6. Locate the 2 "L" brackets mounting the TX unit to the side and install 2 ground luge between the bracket and the side out the
unit.
7. Install the coaxial cable so that the end with the capacitor is aat the SO-239.
8. Solder the free end of the capacitor to the center pin of the SO-239 and solder the coax braid to the ground terminal.
9. Mount the last ground lug with 3x6 mm screw at the hole next to the whip antenna.
10. Solder the braid of the supplied coax to the ground lug instalkled in Step 9 and the center conductor of the coax to the antenna
lug 2.
11. Carefully solder the coax braid to the 2 lugs installed in Step 6. (See diagram below.)
This modification is read 502 times.
top of page
19-07-1998
(TR-2400) TR-2400 Volume Control Replacement
Author: Trio-Kenwood Communication, inc.
Service Bulletin no. 819 (20-3-1980)
When replacing the volume control in a TR-2400, certain precautions should be observed to insure against inducing new problems to
either the control or the radio.
When installing a replacement volume control R05-2409-05, soolder the leads to the potentiometer sparingly, to prevent flux or solder
from running down the tabs and into the joint between the tab and the deposited resistance material. If this precaution is not
observed, future failure of the new control is possible.
Secondly, when reassembling the radio, tape insulate the PCB ground pathe directly adjacent to the power switch tabs on the volume
control. This will prevent accidental shorting of the battery to ground, and loss of the B+ RF choke, L101.
Note:
Reference page 2, Service Bulletin #808, issued 2/12/80 for a picture of the PCB/Vol control insulation.
top of page
This modification is read 463 times.
19-07-1998
(TR-2400) TR-2400 Battery Charger Failure
Author: Trio-Kenwood Communication, inc.
Service Bulletin no. 822 (22-4-1980)
The stock charger (W09-0307-05) supplied with the TR-2400 may be rapaired and/or tested as necessary.
Open circuit, the charger should deliver 18-20V. Current when charging sould be 45mA.
Contained in the charger, in series with the output is a 120 ohm 1/2 watt current limiting resistor. Under normal use (including
momentary short circuit test) this part should not fail.
If you receive a charger with no output, the unit may be opened by fracturing the glued seam by a sharp moderate hammer blow.
Place the charger on its side ofon a hard, flat surface. A layer of cloth at top and bottom will protect the case from marring. Strike the
seam first on one side, and then the other. The case should open in two pieces.
Replace the 120 ohm 1/2 W resistor with a 1 W resistor. After replacing and before closing the unit, perform voltage and current
checks. A spot of glue or cement at each corner will reseal the charger.
top of page
This modification is read 473 times.
19-07-1998
(TR-2400) Speaker Mic for TR-2400
Author: Trio-Kenwood Communication, inc.
Service Bulletin no. 864 (20-3-1983)
The SMC-25 Speaker Microphone may be adapted for use with the TR-2400 by performing the following:
Parts Required:
Qty
1
1
Part No.
E30-1628-08
J42-0429-08
Description
SMC-24 Cable Assembly
SMC-25 Bushing
Procedure:
1.
2.
3.
4.
5.
Remove the three chrome and one black Phillips head screws from the microphone case.
Seperate the case falfs and remove the PTT switch, the microphone and the speaker assembly.
Carefully pry the brass clamp from the SMC-24 cable assembly, and remove the hard rubber bushing.
Slide the SMC-25 bushing (J42-0429-08) onto the cable and replace the brass clamp.
Remove the SMC-25 cable assembly from the speaker, PTT switch and the microphone. Leave the small resistor (Parallel cap on
some models) connected to the mic element for now. Also save the small black and the small brown wire from the SM-25 Cable.
6. Solder the white wire from the SMC-24 cable to one side of the resistor on the mic element and the small brown wire to the mic
element at the other side of the resistor. The resistor and capacitor may now be removed.
7. Assemble the remaining components: Short black wire to center pin of PTT switch, red wire to switch common, Blue wire to one
side of the speaker, and the remaining wires to the other side of the speaker (1 short brown, one long brown, and one short
black.
8. Replace the back cover, and lapel clip, to complete the procedure.
Note: This change may be performed at the owners option and may not be performed in warranty.
This modification is read 476 times.
top of page
19-07-1998
(TR-2400) TR-2400 Tone Encoder RFI
Author: Trio-Kenwood Communication, inc.
Service Bulletin no. 58 (14-12-1979)
In some cases, users may report RF interference, or motor-boating, when using a tone encoder in their TR-2400. A secondary
complaint of excessive tone level may also be encountered.
1. For RFI, bypass the B+ terminal to ground with a 100 uf cap.
2. For excessive tone input to the TR-2400, install a 100 K ohm resistor between the encoder and the TR-2400 Tone input terminal.
top of page
This modification is read 459 times.
19-07-1998
(TR-2400) TR-2400 Unwanted Noise: Tone or burst at TX
Author: Trio-Kenwood Communication, inc.
Service Bulletin no. 809 (13-2-1980)
For complaints of a tone burst type noise, or simply a noise, at initial key down, suspect either a broken losse component, or incorrect
valued component on the RX TX unit.
On the RX TX unit, Q16 emitter, check C82, a 33 uf tantalum cap for broken connection.
If you find a 22 uf cap at C82 replace it with a 33 uf cap.
top of page
This modification is read 448 times.
19-07-1998
(TR-2400) TR-2400 Display or Keyboard trouble
Author: Trio-Kenwood Communication, inc.
Service Bulletin no. 810 (20-2-1980)
Display
An intermittent or blank digit may be caused by either a broken lead, or intermittently shorting lead on the PLL unit.
On the PLL unit, look in the area of Q12, the touchtone generator. Between Q12 and the board edge locate the D1-D4 lines. Inspect
this area for either an open (Broken) lead, or shorted (pinched) lead. Repair as necessary, and check lead dress before reassembly.
Keyboard
An intermittent or inoperative keyboard row or column may be caused by a torn or pinched lead, or a cracked diode.
Again, in the area of Q12, inspect the "T" and "Y" lines for shorts or open connections, and inspect diodes D19-D26 for physical
breakage.
This modification is read 478 times.
top of page
19-07-1998
(TR-2400) TR-2400 RX low, Intermittent, or distorted
Author: Trio-Kenwood Communication, inc.
Service Bulletin no. 811 (20-2-1980)
For any of the above complaints, suspect a broken loose component in the RX IF or audio output circuit on the RX TX unit. Simply pull
up on the leads and resolder.
Adjacent to Q9, the audio output IC, find C49, a 1uf cap. If broken loose from the board, audio output may be down, while current
consumption may be up from the normal 30mA to about 100mA due to the audio output amp oscillating.
Adjacent to L10, the discriminator, locate C33, a .033uf cap. If this component is broken loose, audio output may be up approximately
6 dB with excessive high frequency audio response.
This modification is read 456 times.
top of page
19-07-1998
(TR-2400) TR-2400 Scratchy TX
Author: Trio-Kenwood Communication, inc.
Service Bulletin no. 818 (20-3-1980)
Complaints of scratch audio, noise when flexing the antenna, or noisy audio when handling the unit during transmit may be remedied
by tightening the Printed Circuit Board screws.
To disassemble the unit remove the back cover and battery compartment screws. INspec t the VCO shield solder points along the edge
and bottom of the PLL board. Resolder if you find a broken solder bond.
Flex the metal frame several times to reseat the board, and retighten the board mounting screws. Be certain the flat metal spring has
good tension when installed between the RX TX unit a fram (below the PTT switch).
This modification is read 448 times.
top of page
18-03-2000
(TR-2400) TR-2400 Optional charge input protection
Author: Trio-Kenwood Communication, inc.
Service Bulletin no. 807 (8-2-1980)
Some users may request addition of a series diode to the Charge Jack to prevent inadvertent shorting of the battery pack if a
voltmeter probe, headphone jack, or other conductor accidentally shorts across the external Charge Jack.
This can be used only for the standard wall changer. The optional fast chargers require battery voltage be available at the charge jack
as feedback to the changer regulator.
Add a S1 diode in series with the battery changer line, at the Charger Jack. Observe battery polarity, as shown. Charging current will
drop approximately 2 mA.
Note:
1. Si diode must be rated at least 200 mA.
2. Install carefully-don't short the YELLOW B+ lead when reassembling.
This modification is read 454 times.
top of page
18-03-2000
(TR-2400) TR-2400 Offset failure
Author: Trio-Kenwood Communication, inc.
Service Bulletin no. 808 (12-2-1980)
For intermittent or no offset, suspect as intermittent abort between the metal body of the REV NOR SW and an adjustment jumper on
the PCB, or intermittent contact between the volume control metal body and the PLL PCB.
1. Disassemble the radio and inspect the board to the right of the REV/NOR SW. Using a small flat blade screwdriver or similar tool,
gently pry the short metal jumper and the metal body switch tab apart. This should clear the offset trouble. (Fig.1)
2. Run a strip of cloth tape (nul vinyl tape) approximately ½ inch wide, across the top edge of the Display unit directly under the
volume control. This will prevent the control using from intermittently touching the PCB and causing loss of offset functions. In
similar manner, add insulation as shown at "B" and "C". (Fig.2)
3. When reassembling, make certain the PLL unit does not inadvertently ground the power switch tab. (Fig.3)
This modification is read 457 times.
top of page
19-03-2000
(TR-2400) TR-2400 unlock
Author: Trio-Kenwood Communication, inc.
Service Bulletin no. 814 (19-2-1980)
For apparent unlock, or either RX or TX failure, suspect not PLL unlock, but low RX or TX XTAL activity. Adding or replacing circuit
components and returning the oscillator will cure the problem.
For NO RX
Suspect low XTAL activity for X3 on the RX unit. At Q1, add 7-12pF Base to Emitter. At Q5 replace L5, 22uH with a 15uH with choke,
L40-1501-05. Adjust TC1 for 42.6 MHz in RX.
For NO TX
Suspect low XTAL activity for X2. At Q4, add 7-12pF Base to Emitter. Replace L15, 22uH with a 15uH choke. L40-1501-05. Adjust TC2
for exact 146MHz transmit frequency. At the base Q4, also check L2 for intermittent shorting against the Display unit mounting screw.
This modification is read 483 times.
19-03-2000
(TR-2400) TR-2400 pulse noise
top of page
Author: Trio-Kenwood Communication, inc.
Service Bulletin no. 815 (13-2-1980)
For elimination of pulse type noise, either in receiver, include by the LCD oscillator, or in transmit, inducted by stray RF in the H.T.,
install additional chokes and a capacitor as detailed.
Disassembly:
1.
2.
3.
4.
Disconnect the battery pack and remove from the unit.
Remove the 4 case screws, plus two battery pack compartment screws.
Seperate the front and rear halves of the radio. Do not tear wires!
Unscrew two screws and two threaded retainers holding the PLL unit X50-1640-10. Slide the unit down to clear the three push
switches from the top panel.
5. Seperate the PLL and RX/TX unit. Remove the fish paper insulation from between the two boards.
TX RF noise:
1. On the RX/TX unit, locate the battery ground (BLACK) lead soldered to the right edge of the PCB. Desolder this line and install a
choke with ferrite bead L33-0632-05. Resolder along the bottom edge of the board, as shown.
2. Also on the RX/TX unit, locate the YELLOW lead attached to the foil aide of the charge jack J1. Install a .001uF capacitor across
J1 to ground as shown.
TX or RX LCD pulse noise:
1. On the display unit X54-1480-10 locate the YELLOW lead marked B+. Resolder this lead and install a 1uH choke L40-1032-03 in
series. Lead dress MUST be as shown for physical clearance.
2. Also on the Display unit, adjacent to the B+ lead, desolder the GREEN E (earth) lead and the BLACK E lead, and wire as shown to
another 1uH choke, L40-1021-03. Again, observe physical parts placement for clearance.
3. For reassemble, reverse step 5 through 1. If components where installed as specified, there will be no clearance problems.
top of page
This modification is read 450 times.
19-03-2000
(TR-2400) TR-2400 TX noise
Author: Trio-Kenwood Communication, inc.
Service Bulletin no. 830 (31-7-1980)
Some units may exhibit excessive background noise (up to several hundred Hertz deviation). This may be reduced or eliminated by
installing an additional shield between the Display and PLL units.
This changes applies only to units between serial numbers 011xxxx and 101xxxx. Radios before this group (with a momentary REV
switch) will not show improvement by addition of this shield. Refer to Service Bulletin #815 for this early group.
Units appearing with serial numbers after 101xxxx will have this shield factory installed.
Parts supplied:
N09-0627-05
F10-1627-05
Pan head screw
Shield w/lead
3 pcs.
1 pcs.
1.
2.
3.
4.
5.
Remove 4 rear case screws, and 2 screws from inside the battery compartment.
Spperate front case body. DON'T tear leads.
Remove 2 small and three large screws from the bottom edge of the Display unit. Save the two small screws.
Installing the three pan head screws in place of the round head screws.
Install the shield foam towards the Display. Lift the protective plastic only enough to secure the shield with the two small screws.
Cover the screw heads with the plastic film.
6. Secure the shield ground under the small Philips screw located between the BUSY/OPEN and S TONE switches.
7. When reassembling, the wiring harness must be positioned to the right of crystal X2 (44.1666MHz) or the case will not close
correctly, and wires will be pinched.
8. Close the case and reinstall 6 screws.
Installation time for this shield is approximately ½ hour.
top of page
This modification is read 452 times.
19-07-1998
(TR-2500) TR-2500/3500 dip switch setting
The following is a list of the Dip Switch settings for the Kenwood TR-2500/3500.
It is mainly intended for those who have the radio but lack the info.
1=ON
0=OFF
FREQUENCY
--------67.0
71.9
74.4
77.0
SWITCHES
!1-2-3-4-5-6
----------1 1 1 1 1 1
1 1 1 1 0 1
1 1 1 0 1 1
1 1 1 1 0 0
79.7
82.5
85.4
88.5
91.5
94.8
100.0
103.5
107.2
110.9
114.8
118.8
123.0
127.3
131.8
136.5
141.3
146.2
151.4
156.7
162.2
167.9
173.8
179.9
186.2
192.8
203.5
210.7
218.1
225.7
233.6
241.8
250.3
1
1
1
1
1
1
1
1
1
1
1
1
1
1
1
1
1
0
0
0
0
0
0
0
0
0
0
0
0
0
0
0
0
1
1
1
1
0
1
1
1
1
0
0
0
0
0
0
0
0
1
0
1
1
1
1
1
1
0
0
0
0
0
0
0
0
0
1
0
1
1
0
0
0
0
1
1
1
1
0
0
0
0
1
1
1
1
0
0
0
0
1
1
1
1
0
0
0
0
1
0
0
0
1
1
1
0
0
1
1
0
0
1
1
0
0
1
1
0
0
1
1
0
0
1
1
0
0
1
1
0
0
1
0
1
0
1
0
0
0
0
0
0
0
0
0
0
0
0
0
0
0
0
0
0
0
0
0
0
0
0
0
0
0
0
1
1
1
0
1
1
0
1
0
1
0
1
0
1
0
1
0
1
0
1
0
1
0
1
0
1
0
1
0
1
0
1
0
73s from Alan
N6QOG @ K6RAU.#NOCAL.CA.USA.NA.
top of page
This modification is read 640 times.
08-04-2000
(TR-2500) TR-2500 RX IMD Improvement
Author: Trio-Kenwood Communication, inc.
Service Bulletin no. 858 (24-5-1982)
RX intermodulation distortion may be improved by reducing second conversion oscillator harmonic content and level. No adjustments
are required. This may be applied to a unit specifically exhibiting out-of-band intermodulation distortion. It is, however, not a general
improvement.
On the TX RX unit X44-1460-xx, perform the following changes:
R55
C73
C74
from
47 Kohm
47pF
100pF
to
delete
33pF
150pF
(CC4SSL1H330J)
(CC4SSL1H151J)
Add a shield between Q1, (R3, C5) and C73 (from L1 to near X1).
These changes are at the owner's option, and may not be installed in-warranty.
Note: The information presented is complete and accurate to the best of our knowledge. However, Trio-Kenwood Communications
assumes no liability either for your work, or for consequential damage resulting from your work.
top of page
This modification is read 636 times.
19-07-1998
(TR-2600) Extended frequency TR-2600A
Here is some info on the kenwood model tr-2600a handie - talkie....
If you want to be able to transmit on the extended freq area then do the following mod....
1. Remove the front cover of the radio
2. Locate the ic chip in the lower right hand corner.
3. Find the 2 diodes number d32 and d33 (they should be the top two on the right side of the ic chip, also they have ben cut
beforenand (re-soldered)
4. Un-solder the two diodes (breaking their connection).
5. Replace the front ctver.
6. Re-install the battery and turn the unit on, then push the reset button on the back.
The tr-2600a should now be reprogramed and it should also transmit anywhere it will recieve...
I forgot to add that d32 and d33 on the recieve board (but that is what is under the front cover).
Jim - KD0PJ
top of page
This modification is read 545 times.
19-07-1998
(TR-2600) TR-2600A PLL Unlock Troubleshooting
Author: Trio-Kenwood Communication, inc.
Service Bulletin no. 901 (18-10-1985)
The owners manual for the TR-2600A lists the lithium battery as a possible cause of the display showing UL. You may wish to check
the battery, but realistically on a new radio this is probably not the reason for the unlock condition.
If the radio showl UL when first turned on you should perform the following test. This will help you to isolate the symptom:
1. With the radio turned OFF, press and hold the 5 key, and then turn on the radio. Release the 5 key. If the display shows a
frequency indication you may have a pad X2 on the TX unit.
2. If there is no frequency display other than UL then proceed with step II.
3. You may also wish to check crystal X1 the Reference oscillator (10.240 MHz at pin 16 or 17 of IC1.)
There are several other points to check.
1. Check trimmer capacitors TC , TC5 and TC6. If you press on the trimmer and the UL dissappears replace the trimmer.
2. Check pin number 18 of IC1, it should be 5.4 - 6 vdc.
a. If the voltage is over 6.5vdc replace Q17, Q18, and IC1.
b. If the voltage is less than 5vdc replace Q17 and Q18.
3. Check the CLK signal at the flex pc board connector, and pin 10 of IC1.
a. The CLK signal should be aprox 4 - 4.4 vdc.
Pin 10 should be aprx. 0 - .2 vdc.
b. If pin 10 is high check Q16, and for cold soldering on the flexible pc board between the keyboard and the RX unit.
4. Check the alignment of the PLL section, as given in the Service manual.
5. Press the RESET pushbutton on the back of the radio.
Time required for this modification is 1/2 hour or less.
This modification is read 486 times.
top of page
19-07-1998
(TR-2600) How to fix TR-2600 keypad
I have a TR-2600, and a few years ago the keypad failed. The symptom was that buttons in one column of the pad did not work. I
opened the radio up hoping to find a loose wire that I could re-attach--no such luck.
The "keypad" is a PC board mounted directly behind the buttons. There are several diodes (and little else) on the board. I checked the
diode closest to the affected buttons, and it had failed. Once it was replaced with a garden-variety switching diode, the radio worked
fine. So, a new keypad may not be necessary. I hope this helps.
This modification is read 472 times.
top of page
15-04-2000
(TR-2600) TR-2600A PLL unlock
Author: Trio-Kenwood Communication, inc.
Service Bulletin no. 903 (14-1-1986)
Some cases of PLL on the TR-2600A may be caused a failure of the crystal oscillator circuit X2, X3, and Q13. This may be corrected by
performing the following changes.
On the TX unit (X56-1470-10)
Replace Diodes D13, and D14 (MA856) with a series pair of BA282's as shown in the diagram below. Also change resistor R54 to 47
ohm as shown.
Parts required:
BA-282 diode, 4 each.
47 ohm chip resistor (RD73FB2A470J), 1 each.
This change is applicable to serial numbers before SN 702xxxx.
Time required for this modification is 1 hour or less.
top of page
This modification is read 488 times.
19-07-1998
(TR-3500) TR-2500/3500 dip switch setting
The following is a list of the Dip Switch settings for the Kenwood TR-2500/3500.
It is mainly intended for those who have the radio but lack the info.
1=ON
0=OFF
FREQUENCY
--------67.0
71.9
74.4
77.0
79.7
82.5
85.4
88.5
91.5
94.8
100.0
103.5
107.2
110.9
114.8
118.8
123.0
127.3
131.8
136.5
141.3
146.2
151.4
156.7
162.2
167.9
173.8
179.9
186.2
192.8
203.5
210.7
218.1
225.7
233.6
241.8
250.3
SWITCHES
!1-2-3-4-5-6
----------1 1 1 1 1 1
1 1 1 1 0 1
1 1 1 0 1 1
1 1 1 1 0 0
1 1 0 1 1 1
1 1 1 0 0 1
1 1 0 0 1 1
1 1 1 0 0 0
1 0 1 1 1 1
1 1 0 1 0 1
1 1 0 1 0 0
1 1 0 0 0 1
1 1 0 0 0 0
1 0 1 1 0 1
1 0 1 1 0 0
1 0 1 0 0 1
1 0 1 0 0 0
1 0 0 1 0 1
1 0 0 1 0 0
1 0 0 0 0 1
1 0 0 0 0 0
0 1 1 1 0 1
0 0 1 1 0 0
0 1 1 0 0 1
0 1 1 0 0 0
0 1 0 1 0 1
0 1 0 1 0 0
0 1 0 0 0 1
0 1 0 0 0 0
0 0 1 1 0 1
0 0 1 1 0 0
0 0 1 0 0 1
0 0 1 0 0 0
0 0 0 1 0 1
0 0 0 1 0 0
0 0 0 0 0 1
0 0 0 0 0 0
73s from Alan
N6QOG @ K6RAU.#NOCAL.CA.USA.NA.
top of page
This modification is read 447 times.
19-07-1998
(TR-3500) Extended frequency TR-2600A
Here is some info on the kenwood model tr-2600a handie - talkie....
If you want to be able to transmit on the extended freq area then do the following mod....
1. Remove the front cover of the radio
2. Locate the ic chip in the lower right hand corner.
3. Find the 2 diodes number d32 and d33 (they should be the top two on the right side of the ic chip, also they have ben cut
beforenand (re-soldered)
4. Un-solder the two diodes (breaking their connection).
5. Replace the front ctver.
6. Re-install the battery and turn the unit on, then push the reset button on the back.
The tr-2600a should now be reprogramed and it should also transmit anywhere it will recieve...
I forgot to add that d32 and d33 on the recieve board (but that is what is under the front cover).
Jim - KD0PJ
top of page
This modification is read 447 times.
19-07-1998
(TR-7200) Service notes on TR-7200A
Author: Trio-Kenwood Communication, inc.
Service bulletin no. 23 (31-10-1977)
Receiver
1. No squelch: Check C84 47uf on X55-1110-11.
2. Intermittant receive: Check for D14 touching to ground on X55-1110-11.
3. Both Q17, Q18 audio transistors burned up: Send for bulletin before replacing.
4. Poor receiver sensitivity: Check for proper output of Q10 10.245 MHz stage. If it is defective replace xtal.
5. No receiver audio noise: Check L23 discriminator coil.
6. No receiver: No C9 voltage at X55-1110-11.
7. Receiver sensitivity poor: Check D2 MI301.
Transmitter
1. Distortion on audio TX: Bad Q8 TA7061 IC.
2. No TX HI: Check for shorting terminals at HI/Low switch.
3. No TX: Check for proper T9 voltage at X56-1190-11.
4. No TX: Collector voltage SB at X45-1080-00. Check Q9 2SA496Y.
5. No TX: Check D1 MI301.
Date: 20-04-2001
From: Jan Steen [email protected]
The problem, as described for the TR-7200G (distorted mic.signal) can also be applied for the TS-700, which uses the same mic.
preamp TA7061.
The signal sounds ugly noisy. The replacement of the preamp was efficient. I discovered it myself and used the preamp from an old
7200.
This modification is read 332 times.
top of page
19-07-1998
(TR-7400) Service Notes on TR-7400A
Author: Trio-Kenwood Communication, inc.
PLL and LED Display
Service bulletin no. 18 (6-10-1977)
1. No transmit or PLL unlock light on: R-27 shorted to shield at D-1 on VCO Unit (X50-1370-10).
2. LED display changes when pushing on LED boards: Remove LED display boards on display mother board. Trim all wires as close
to the circuit board as possible. Insulate the foil side of the board with thin plastic and reinstall.
3. PLL unlock light on: Check for 9 volts at 9V terminal on VCO Unit (X50-1370-10). Check Q10 (2SC496) and zener D5 (WZ-061)
on this board.
4. PLL unlock light on and no signal at PI terminal on PD Unit (X50-1380- 10): Check for open ferri-inductor L1 in emitter lead of Q1
on VCO Unit (X50-1370-10).
5. PLL unlock light on and no signal at pin 3 of IC4 on PD Unit (X50- 1380-10): Check for proper divide down signals on IC10, 5, 6,
7, 8.
6. Digits in display are intermittent or some segments are not properly lit: Reseat the connectors on the Display Unit (X54-121010). (Push them with a small screw driver.)
7. PLL unlock light stays on when unit is first turned on or cold: Change R4 on the PD Unit (X50-1380-10) from 470 ohms to 47
ohms.
8. PLL unlock light is on for about 2 minutes when the unit is first turned on and the inputs to IC4 on the PD Unit are ok, but there
is no output: Defective IC-4.
9. LED display changes when slightly turning or pressing down on channel select knobs: Check for loose solder connections on the
circuit board under the BCD switches. (ON bottom of unit.)
10. One segement of one LED is dim: LED may be defective or the resistor network may not be properly soldered.
11. Speaker howl at high volume levels: Reseal the VCO coil (inside small shield box) on the VCO unit (X50-1370-10). use Q dope or
a small amount of Epoxy glue. The VCO must be retuned after the glue dries.
12. -600 KHz offset does not work: Check for open ferri-inductor L1 on PD unit (X50-1380-10)
13. LR frequency cannot be adjusted to meet specifications: Check for proper frequency at TP1 on the PD unit. It should be
2.56000MHz. (Must use a 33 pf capacitor when counting this frequency)
Receiver
1. Receiver sensitivity down 30db: Check voltage at the drain of Q1 (3SK41L) on the RX Unit (X55-1150-10). It should be 7 volts. If
it is "0vdc", check for shorted feet-thru capacitor in the helical resonator. It may be necessary to replace the helical resonator.
2. No receive: Check C9 voltage. Q27 (CSC496) on RX unit may be defective.
3. No receive and no C9 voltage: Check Q28 (CSC496) and zener D16 (WZ090) on the RX unit.
4. Intermittent receiver audio: Check for shorted terminals on the volume and squelch controls.
5. Receiver sensitivity down: Check for proper level of LR signal. If down, check diode D-6 (1S2588) on the VCO Unit (X50-137010).
6. Receiver audio jumping up and down: Check C59 and C62 on RX unit.
7. No receive or low sensitivity: Check for proper output of 10.245MHz oscillator. The 10. 245 MHz crystal may be defective.
8. Intermittent receive: Check discriminator colil L14 on RX Unit. It may be open.
9. Meter lamp out: Replace small lamp (B30-9996-05) as follows:
1.
2.
3.
4.
5.
Remove meter
Remove wires
Remove small circuit board
Replace lamp
Reassemble
Transmitter
1. No meter indication but output power OK: Check for broken wire at terminal SM1 on the RX Unit.
2. Transmitter intermittent when keyed rapidly: Defective D3 (MI402) on PA unit (X45-1090-10).
3. Position of L2 in PA unit: The proper position of this coil is directly on the collector tabs of Q2 (2N6083). This applies to 45XXXX
serial numbers only.
4. Background noise on transmit: Reverse coil L1 on the TX unit (X56- 1230-10).
5. RF meter works when first key transmitter an then fails: Check for pinched RF sens wire at coil L7 in PA unit. Widen this coil if
necessary.
6. Transmitter off frequency and receiver on frequency: Adjust coil L3 on TX Unit for correct frequency.
7. No RF output: Diode D3 (MI402) in PA unit shorted or improperly soldered. If this diode is replaced, keep the leads as short as
possible an build up solder on the foil side of the board.
8. Low output power: Loose connection at TC3 in PA Unit.
9. No RF output and receiver sensitivity dow 30db: Diode D2 (MI301) on the PA Unit may be defective. Also check D3 (MI402) on
this board. Q1 (3SK41L) on the RX unit may also be defective.
10. Intermittent or no transmit: Check for loose connection at Q15 (2SC908) on the TX Unit. Also check the heat sink for this
transistor.
11. No RF output but drive to PA Unit is OK: Check for proper SB voltage. It should be 11 to 12 vdc when transmitteing into a 50
ohm load. If it is 0vdc check Q10 (2SC496) on the TX Unit.
12. No Modulation: Capacitor C4 (0.1 ufd tantalum) on TX unit may be open.
13. No modulation: Check for pinched pins at microphone jack.
14. No RF output on one band: Check for proper alignment of potentiometers VR61, 62, and 63.
15. No RF output: L4 not soldered to base of Q4 (2SC458B) in PA Unit.
This modification is read 589 times.
top of page
13-02-2000
(TR-7400) Arcing in TR-7400A final section
Author: Trio-Kenwood Communication, inc.
Service bulletin no. 10 (13-1-1977)
There may be some cases of arcing to ground beneath coil L-6 at the collector of Q-2 (2N6083) inside the final unit X45-10-90-10.
This is due to minute differences in the circuit board trace dimensions and a residue af flux on the board.
If this should occur, remove L-6 and clean all traces of carbon and flux from the circuit board. Resolder the edges of the tracer and
remove any flux left from soldering. Modify L-6 as shown:
reinstall L-6 and check for rated output. A slight retuning of TC-4 may be required.
This modification is read 502 times.
top of page
20-02-2000
(TR-7400) Changes in PO Unit of the TR-7400A
Author: Trio-Kenwood Communication, inc.
Service bulletin no. 32 (19-1-1979)
There was a temporary production change in the PO Unit of the TR-7400A. This change effected the 73XXXX and 74XXXX series units
only. The change was made because of the Motorola MC-4016P IC was not available. The Texas Instruments SN74LS192 IC was used
as a replacement. It is not a direct replacement, though. It was also necessary to change IC-8 from a TD-3400AP to a TD3404. This
series of PO Units is easily recongnized because of the three SN74LS192 IS's are mounted in sockest instead of being soldered in
place. The PC board was changed to J25-2512-03T instead of J25-2512-03 for this change. The schematic is shown below.
This modification is read 517 times.
top of page
20-02-2000
(TR-7400) Making meter lamp in TR-7400A last longer
Author: Trio-Kenwood Communication, inc.
Service bulletin no. 34 (15-5-1979)
The life of the meter Lamp in the TR-7400A may be extended by inserting a 22ohm 1/4W resistor in series it. This resistor may be
conveniently mounted on the circuit board that holds the lamp by cutting foil path on one side of the lamp and soldering the resistor
across the break in the foil path. A drawing of the circuit board with the resistor added is shown below.
This modification is read 500 times.
top of page
19-07-1998
(TR-751) TR851E & TR751E with 9600
Hello, Carl!
I have read one of your messages - you have asked for modifications of TR851.
I am also using TR851E (European Version) and TR751E with my 9600 BD- Modem (G3RUH) with the following modifications:
When you remove the bottom panel, you can see immediately all you need to do the modifications:
Varicap Diode D21
IF-Filter CF1
Discriminator IC2
View from bottom side:
Power in
Antenna
---------------------------------------------------------------------I
I
.
.
.
.
.
.
I
I
I
Quartz
I
I
1
2
I
I
-D21I
I
I---I
..I
I
I...I CF1
I
I
I---I
I
I
I
I
1
I
I
--------------------I
I
I IC 2 TA7761P
I
I
I
--------------------I
I
9
I
I
I
---------------------------------------------------------------------Microphone
Tuning Knob
Volume Contr.
IC 2 Discriminator
PIN 9 of IC 2 ------->- Capacitor (100nF) ------> -RX-Audio G3RUH-Modem
D21 Varicap-Diode
Pin 2 (has no ring!!) --------> TX-Audio G3RUH-Modem
IF-Filter (G3RUH recommands changing)
Replace CF1 ( 55 F ) with CFM 455 D
I thougt that the replacement of CF1 was too difficult for me. So I have asked a good friend to remove the PCB and to replace the
filter...no problem, he said, and for him it was really not a problem.
The other modifications I have done by myself .
I have done the same modification to TR751 without changing the IF-Filter, because I only need TR 751 for uplink.
The components on the PC Board are close one to another, but I think that other TX/RX are more problematicly to modify.
This modification is read 1258 times.
top of page
02-07-2000
(TR-751) TR-751A out of band mod
1. Disconnect the power and ant.
2. Remove case.
3. Locate the control unit.
4. Cut diode D1. located to left of 1C3.
5. Reassemble the radio.
6. Reset cpu.
This modification is read 1511 times.
02-07-2000
(TR-751) Kenwood TR-751 mod sheet
Author: PE-1MXV - Peter de Blecourt - [email protected]
Look in schematic plan for location of diodes D3, D4, D5, D6, D7.
They are located at printed circuit in rightcorner behind frontpanel.
D3 D4 D5 D6 D7 Omschrijving
0
1
1
1
1
European version
x
x
x
x
0
Step 5kHz / 10 kHz (FM)
x
x
x
x
1
Step 12.5kHz / 5 kHz (FM)
x
x
0
0
x
Tone button : Call Channel.
Funct and Voice buttons : select CTCSS
x
x
0
1
x
Toon button : When PTT pressed 1,5s 1750 Hz tone (UK version).
Funct and Voice buttons : no funktion.
x
x
1
0
x
Tone button : Call Channel.
Funct and Voice buttons : select CTCSS
x
x
1
1
x
Toon button : When pressed 1750 Hz tone. TX transmitting !!!
Funct and Voice buttons : no funktion.
0
0
x
x
x
Rx / Tx 144 - 146 MHz
top of page
0
1
x
x
x
Rx / Tx 144 - 146 MHz
1
0
x
x
x
Rx / Tx 144 - 148 MHz
1
1
x
x
x
Rx / Tx 142 - 149 MHz
0
0
0
0
1
TR-751 met CTCSS
Step 12.5kHz / 5 kHz (FM)
Tone button : call channel.
Funct and Voice buttons : select CTCSS
Rx / Tx 144 - 146 MHz
0
No diode present
1
Diode present
This modification is read 1546 times.
top of page
19-07-1998
(TR-7600) Alternator Whine, TR-7600/7625
Author: Trio-Kenwood Communication, inc.
Service bulletin no. 39 (9-7-1979)
In some mobile installations, alternator whine may be heard during transmit. External B+ filtering does not have sufficient effect.
In some instances, using the cigarette lighter will cause this problem. Running off the fuse block, and even directly from the battery
may still not eliminate the noise.
First, check power line routing in the engine compartment. It should be kept clear of all secondary HV harness wiring, and clear of the
alternator, regulator, and ignition primary circuits. Careful routing should reduce or eliminate noise coming in through the power line.
Check for clean ground connections at the antenna and radio.
Check for clean and tight battery connections.
If all of these measures fail, replace L22 on the VCO unit X50-1580-10 from the original green coil, to either an orange or black coil.
No adjustments should be necessary.
Old part number L40-1021-03 1mH
New part number L40-1021-43 1mH
Please notate your Service Manual.
This modification is read 439 times.
top of page
20-02-2000
(TR-7600) Correcting Frequency Difference Between RM-76 and TR-7600/TR-7625
Author: Trio-Kenwood Communication, inc.
Service bulletin no. 33 (19-3-1979)
The RM-76 will be about 500Hz higher in frequency then the TR-7600/TR-7625. This will not present any problem most of the time.
Out specified tolerance is ±750Hz.
The operating frequency may be out of the receiver input of a repeater if the transceiver is turned slightly high however.
The frequency difference may be corrected by adding additional diodes in series with both the 02 and 52 lines in the RM-76. This is
shown in the figure below.
The foil paths from the connector to diodes D18 and D19 are cut and the new diodes soldered on the foil side of the board. The
cathode and of the diodes is soldered to the connector side. We recommend using either 1S2076 or 1S1555 diodes.
top of page
This modification is read 440 times.
20-02-2000
(TR-7600) TR-7600/7625 Audio tone on TX
Author: Trio-Kenwood Communication, inc.
Service bulletin no. 45 (10-8-1979)
Some TR-7600/7625 users report a 0w-background tone during TX, especially noticeable at full quieting by the receiving station.
On the PLL unit X50-1580-00, changes:
●
●
●
●
L18 from 22uH
C61 from 22pF
C60 from 22pF
C42 from 22pF
to
to
to
to
33uH
33pF
10pF
39pF, or bridge 18pF across foil side & leave original C42 in place. No adjustment necessary.
New Part L18 33uH L40-3301-03
This modification is read 437 times.
top of page
20-02-2000
(TR-7600) TR-7600/7625 Optional ceramic filter
Author: Trio-Kenwood Communication, inc.
Service Bulletin no. 50 (9-8-1979)
Adjacent channel rejection may be improved by changing one capacitor & installing an optional narrow ceramic filter. On the TX RX
unit X44-1320-10, change;
●
●
L41, CFT-455 F2 to CFL-455 F
C101, from 470pF to .001uF
Old Part L41 L72-0309-05 CFT-455 F2
New Part L41 L72-0306-05 CFL-455 F
This modification is read 427 times.
top of page
18-03-2000
(TR-7600) TR-7600, TR-7625 Battery Memory Backup
Author: Trio-Kenwood Communication, inc.
Service Bulletin no. 806 (7-2-1980)
Memory in either radio may be retained by installing a battery inside the unit. This feature would be useful when transporting the
radio base to mobile, or when operating base. The AC supply can be shut off while retaining the single memory.
Obtain and install a small 6V DC battery, appropriately secured and insulated, inside the radio. Wire as illustrated through a diode.
Current drain will be approximately 0.5 mA with the mail supply OFF.
This modification is read 442 times.
top of page
19-07-1998
(TR-7625) Alternator Whine, TR-7600/7625
Author: Trio-Kenwood Communication, inc.
Service bulletin no. 39 (9-7-1979)
In some mobile installations, alternator whine may be heard during transmit. External B+ filtering does not have sufficient effect.
In some instances, using the cigarette lighter will cause this problem. Running off the fuse block, and even directly from the battery
may still not eliminate the noise.
First, check power line routing in the engine compartment. It should be kept clear of all secondary HV harness wiring, and clear of the
alternator, regulator, and ignition primary circuits. Careful routing should reduce or eliminate noise coming in through the power line.
Check for clean ground connections at the antenna and radio.
Check for clean and tight battery connections.
If all of these measures fail, replace L22 on the VCO unit X50-1580-10 from the original green coil, to either an orange or black coil.
No adjustments should be necessary.
Old part number L40-1021-03 1mH
New part number L40-1021-43 1mH
Please notate your Service Manual.
This modification is read 491 times.
top of page
19-07-1998
(TR-7625) TR-7625 Intermittent TX
Author: Trio-Kenwood Communication, inc.
Service Bulletin no. 804 (7-2-1980)
When servicing a TR-7625 for mechanically intermittent TX, check the heavy WHITE DRB lead at the push-on connector directly in
front of relay RL1 on the RX TX unit.
This post may either become seperated from the land, or the land may crack from vibration. Resolder the post, plus reinforce the
connection with a small piece of solid wire soldered on the foil side of the board.
This modification is read 485 times.
top of page
20-02-2000
(TR-7625) Correcting Frequency Difference Between RM-76 and TR-7600/TR-7625
Author: Trio-Kenwood Communication, inc.
Service bulletin no. 33 (19-3-1979)
The RM-76 will be about 500Hz higher in frequency then the TR-7600/TR-7625. This will not present any problem most of the time.
Out specified tolerance is ±750Hz.
The operating frequency may be out of the receiver input of a repeater if the transceiver is turned slightly high however.
The frequency difference may be corrected by adding additional diodes in series with both the 02 and 52 lines in the RM-76. This is
shown in the figure below.
The foil paths from the connector to diodes D18 and D19 are cut and the new diodes soldered on the foil side of the board. The
cathode and of the diodes is soldered to the connector side. We recommend using either 1S2076 or 1S1555 diodes.
top of page
This modification is read 476 times.
20-02-2000
(TR-7625) TR-7600/7625 Audio tone on TX
Author: Trio-Kenwood Communication, inc.
Service bulletin no. 45 (10-8-1979)
Some TR-7600/7625 users report a 0w-background tone during TX, especially noticeable at full quieting by the receiving station.
On the PLL unit X50-1580-00, changes:
●
●
●
●
L18 from 22uH
C61 from 22pF
C60 from 22pF
C42 from 22pF
to
to
to
to
33uH
33pF
10pF
39pF, or bridge 18pF across foil side & leave original C42 in place. No adjustment necessary.
New Part L18 33uH L40-3301-03
This modification is read 480 times.
top of page
20-02-2000
(TR-7625) TR-7600/7625 Optional ceramic filter
Author: Trio-Kenwood Communication, inc.
Service Bulletin no. 50 (9-8-1979)
Adjacent channel rejection may be improved by changing one capacitor & installing an optional narrow ceramic filter. On the TX RX
unit X44-1320-10, change;
●
●
L41, CFT-455 F2 to CFL-455 F
C101, from 470pF to .001uF
Old Part L41 L72-0309-05 CFT-455 F2
New Part L41 L72-0306-05 CFL-455 F
This modification is read 468 times.
top of page
18-03-2000
(TR-7625) TR-7600, TR-7625 Battery Memory Backup
Author: Trio-Kenwood Communication, inc.
Service Bulletin no. 806 (7-2-1980)
Memory in either radio may be retained by installing a battery inside the unit. This feature would be useful when transporting the
radio base to mobile, or when operating base. The AC supply can be shut off while retaining the single memory.
Obtain and install a small 6V DC battery, appropriately secured and insulated, inside the radio. Wire as illustrated through a diode.
Current drain will be approximately 0.5 mA with the mail supply OFF.
This modification is read 473 times.
top of page
19-03-2000
(TR-7625) TR-7625 Final module replacement
Author: Trio-Kenwood Communication, inc.
Service Bulletin no. 820
When replacing the output hybrid with a "red dot" unit, an additional 47pF cap must be installed between the M57712H output
terminal and the RFO warp post.
Install the M57712H with white silicone heat sink compound. Install a 47pF as shown between the hybrid output and the RFO terminal.
Spread L21 as necessary for at least 30W output at approximately 5.5A total current consumption.
Note: Hybrids not having a red Mitsubishi logo do not require the additional cap or adjustment.
This modification is read 482 times.
top of page
19-03-2000
(TR-7625) TR-7625 Hybrid amplifier module substitution
Author: Trio-Kenwood Communication, inc.
Service Bulletin no. 826 (30-5-1980)
(Supercedes #820)
Final modules obtained from Trio-Kenwood Communication’s Parts Department after 1/5-1980 MUST be installed as outlined. Two
versions of the hybrid may be supplied, either marked as an M57712H, or as an M57733. This information applies in either case.
Installations:
1. Remove and delete C49, 22pF
2. Add a ground lug adjacent to the RFI terminal.
3. Add 10pF across the RFI terminal and ground.
Adjustment:
1. Adjust TC2 for maximum output at 146MHz2. Adjust VR4 for 5W output at 146MHZ, low power.
New part: 10pF C45CH1000
top of page
This modification is read 483 times.
19-07-1998
(TR-7730) TR-7730 Transmitter Freq Response, Voice or DTMF
Author: Trio-Kenwood Communication, inc.
Service Bulletin no. 854 (25-1-1982)
Operator complaints of insufficient lows in transmit, or faulty Autopatch operation traceable to incorrect twist (high to low tone group
balance) may be remedied by changing two capacitors at the mic amplifier input.
On the RX/TX unit X44-1450-61, change C78 and C81 from 0.1uf to 1.0uf, 35v tantalum (CS15E1V010M) to increase low frequency
transmitter frequency response. Adjust Deviation (VR3) or mic gain (VR2) as necessary.
Installation time for this procedure is 1/2 or less.
top of page
This modification is read 304 times.
19-07-1998
(TR-7800) TR-7800 Loss of Memory
Author: Trio-Kenwood Communication, inc.
Service Bulletin no. 829 (31-7-1980)
Intermittent loss of memory may be corrected by adding one resistor at the microprocessor on the control unit.
Procedure:
1.
2.
3.
4.
5.
Remove bottom cover, 4 screws.
From the Control unit X53-1180-xx unplug the rear mounted connectors 8-11.
Remove 6 screws from the board.
Swing the unit forward.
Install a 470K ohm 1/8 watt or larger resistor from connector 11, "UP" pin, to ground. (microprocessor pin 35, PA2 port). Space
is limited: Be certain not to create a solder bridge when installing the resistor.
6. Reverse steps 4-1 for reassembly.
This modification is read 611 times.
19-07-1998
(TR-7800) TR-7800/TR-9000 Optional Ceramic Filters
top of page
10-10-80
FM Adjacent channel rejection in either unit may be improved by installing an optional narrow ceramic filter.
Filter
CFK-455F
CFK-455G
Part No.
L72-0304-05
(CFK-455G)*
-6db Bandwidth -70db Bandwidth Retail
+/- 6 kHz
+/- 12 kHz
$ 33.50
+/- 4 kHz
+/- 10 kHz
$ 33.50
* Not original part. No computer part number.
Location:
TR-7800, RX unit X55-1270-10 part, L10
TR-9000, RX unit X55-1260-11 part, CF1
To install, desolder the original filter and clear the second set of holes for the optional filter. Solder the new filter in place. Be sure all
pins are actually soldered, and that there are no solder bridges between pins or across the printed circuit board. Clip the pins flush to
the board, and reinstall the circuit board.
Note: Squelch operation will vary from unit to unit with an optional narrow filter. Tighter coupling from the detector to the squelch
circuit may be tried to restore "original feel".
top of page
This modification is read 578 times.
19-03-2000
(TR-7800) TR-7800 Tone pad conversion for 4th column function
Author: Trio-Kenwood Communication, inc.
Service Bulletin no. 828 (3-6-1980)
Users who desire ABCD control functions may be accommodate by an alteration to the Control unit and to the REV switch. This switch
will then perform dual functions.
1. Remove top and bottom covers, 4 screws each.
2. To free the front panel remove 4 screws securing the front panel bracket to the side frame.
3. Unplug 5 multiconnectors from the Control unit along the front and left edges of the board.
4. Remove 6 screws from the Control unit and swing the board over.
5. Remove and save R51 22 Kohm located between IC's Q19 and Q28. (Q28 pin 5).
6. Resolder this 22 Kohm resistor to Q28 pin 5, and solder another 22 Kohm resistor to Q28 pin 9. Using a short piece of hookup
wire, extend these connections t the REV switch as shown.
7. Connect a line from the center switch contact to the original feed point of R51, which is the B3 line.
8. To reassemble, reverse steps 4 through 1.
To operate the ABCD column, hold the REV switch IN and key the 3, 6, 9, or # keys. Normal 3rd column tones are supplied when the
REV switch is not depressed. The receive REV function is not altered by this change.
Note: This switch is a DPDT and many have both sets of contacts bridged. Free one set of contacts for this new function.
This modification is read 580 times.
top of page
02-04-2000
(TR-7800) TR-7800 Pulse noise
Author: Trio-Kenwood Communication, inc.
Service Bulletin no. 834 (6-1-1981)
Low level Pulse Noise reported in high power TX, or as a buzz from the speaker during TX, may be reduced or eliminated by the
following steps.
1. If not already present, install a shield (F11-0781-04) and two 1000pF capacitors (C52-1710-26) at the final amplifier module
M57733 as shown.
2. On the RX unit X55-1270-10 add three additional 1000pF caps (c52-1710-26) and one additional 470pF cap (C52-1747-16) as
shown.
Installattion time for this precedure is approximately ½ hour.
top of page
This modification is read 571 times.
02-04-2000
(TR-7800) TR-7800 Optional continuous charge for internal batteries
Author: Trio-Kenwood Communication, inc.
Service Bulletin no. 836 (19-11-1980)
The internal batteries for memory back-up charge only when the radio is on. If the radio is used less than 2 hours a day, the internal
batteries may not charge sufficiently to retain memory if the main power is diconnected. This optional chanhe mey be made to
continuously charge the internal batteris from the main power source, whether the radio is on or off.
1. On the RX unit X55-1270-10, change R94 from 56 ohm to 120 ohm, ½W.
2. Cut the foil at the input to Q27 and connect via a 3/4" lead to the BB terminal on connector 1.
3. Battery charge current will be 15mA nominal.
Notes:
1. The radio should be connected directly to the vahicle battery and not through the ignition switch.
2. Turn the radio off before connecting or disconnecting the power cable.
For early units:
3. Before closing the case, check alearance from the back of the battery case to the shassis. If very close, add suitable insulation
between the battery case and chassis.
4. Check for the presence of a 470 kohm 1/8W resistor which should be located on the bottom of the Control unit X53-1180-xx,
Connector 11, UP pin. Add if not already installed (and see Service Bulletin #829).
top of page
This modification is read 591 times.
08-04-2000
(TR-7800) Memory Channel 7 Indicator Erratic
Author: Trio-Kenwood Communication, inc.
Service Bulletin no. 860 (14-4-1982)
When Memory Channel 7 is selected, the LED may fail to indicate the number 7, although frequency is correctly recalled and all other
operations are normal. Cause is incorrect voltage level at Q16 & Q17, and is related to individual differences between these IC's.
Correction is by changing one resistor value on the control unit.
On the control unit X53-1130-xx, replace R38 from 3.9 Kohm to a 1.8 Kohm resistor (RD14CB2E182J). No adjustments are required.
This change should be perform only as necessary, and applies to units before serial number 205xxxx.
Installation time for this procedure is ½ hour or less.
top of page
This modification is read 572 times.
08-04-2000
(TR-7800) TR-7800, TR-7850 Memory Improvements
Author: Trio-Kenwood Communication, inc.
Service Bulletin no. 861 (5-4-1982)
TR-7800 & TR-7850 memory retention may be improved by the following changes on the control and RX units.
Control unit X53-1180-xx
1. If not already present, add a 470 Kohm ½W resistor (RD14BB2B474J) (R54) on the foil side of the board from connector 11 UP
line to ground. (Unite before serial number 1119391).
2. If not already present, add a 470 Kohm ½W resistor (RD14BB2B474J) (R55) on the foil side of the board connector 11 DOWN
line to ground. (Unite before serial number 1119391).
3. Hard-wire the two via holes (through hole without components leads installed) along the foil trace between Q18 pin 1 and L1.
4. Change D1 from an ZX-060 (6V, 5%) to a WZ-040 (VII-4102-40) (4V, 10%) Zener.
5. Check D3 for leakage, which would load the MB line voltage below it normal 5.2 V DC setting.
RX unit X55-1270-xx
1. TR-7800: Change R94 from 56 ohm to 150 ohm ½W (RD14CB2E151J).
2. TR-7850: Change R94 from 100 ohm to 150 ohm ½W (RD14CB2E151J).
3. Cut the foil at the input to Q27, and connect Q27 input to the BB terminal. Connector 1 for constant battery charge at Power
switch Off, and floating battery charge when using a TK-1 or BC-1 charger unit for memory back-up in base station operation.
4. Check D18 for leakage, loading the MB line.
Note:
1. With 13.8V DC applied to the radio, and the power switch OFF, adjust VR2 on the RX unit for 5.2V DC at connector 1, MB
terminal.
2. We recommend using either Sanyo or GE NiCad Batteries. We suggest not using Radio Shack or Eveready batteries in these
radios.
3. If memory loss persists after all changes and checks suspect control unit Q18 is defective.
This modification is read 606 times.
top of page
19-07-1998
(TR-7850) TR-7850 RF LED Meter
Author: Trio-Kenwood Communication, inc.
Service Bulletin no. 846 (29-7-1981)
The RF LEd meter may show reduced output after continuous transmission, while output actually remains constant. Changing
components on the final unit will correct this problem. This change applies to units before serial number 201XXXX.
Procedure:
1.
2.
3.
4.
5.
Remove the top cover (four screws), and unplug the speaker.
Remove the bottom cover (four screws).
Remove four scress holding the heatsink and swing the sink down.
Without changing coil spacing, desolder L6 which connects from the ANT pad aon the final unit to the PL-259, at the final unit.
Remove five screws holding the final unit pcb X45-1180-10, one screw holding Q6 2SD880, and two screws holding the final
hybrid module Q1, M57726.
6. Change the following parts:
C15 1pf to 2pf (CC45CH1H020C)
D3 1N60 to 1S1587 (V11-0370-05)
R8 820 ohm to 1.2K (RD14CD2E122J)
7. Insure adequate thermal compound on Q1 and Q6, and that the mica washer is correctly positioned under Q6. Reverse steps 5
and 4 to partially assemble.
8. Cable-up power and a dummy load. Readjust VR1 on the final unit at 147.000 MHz, high power setting for 5 LED's ON. Switch to
low power and verify 3 LEDs ON.
9. Remove power from the unit and complete reassebly by reversing steps 3, 2, and 1.
Note: installation time for this procedure is 1/2 hour or less.
top of page
This modification is read 544 times.
08-04-2000
(TR-7850) Memory Channel 7 Indicator Erratic
Author: Trio-Kenwood Communication, inc.
Service Bulletin no. 860 (14-4-1982)
When Memory Channel 7 is selected, the LED may fail to indicate the number 7, although frequency is correctly recalled and all other
operations are normal. Cause is incorrect voltage level at Q16 & Q17, and is related to individual differences between these IC's.
Correction is by changing one resistor value on the control unit.
On the control unit X53-1130-xx, replace R38 from 3.9 Kohm to a 1.8 Kohm resistor (RD14CB2E182J). No adjustments are required.
This change should be perform only as necessary, and applies to units before serial number 205xxxx.
Installation time for this procedure is ½ hour or less.
This modification is read 498 times.
08-04-2000
(TR-7850) TR-7800, TR-7850 Memory Improvements
top of page
Author: Trio-Kenwood Communication, inc.
Service Bulletin no. 861 (5-4-1982)
TR-7800 & TR-7850 memory retention may be improved by the following changes on the control and RX units.
Control unit X53-1180-xx
1. If not already present, add a 470 Kohm ½W resistor (RD14BB2B474J) (R54) on the foil side of the board from connector 11 UP
line to ground. (Unite before serial number 1119391).
2. If not already present, add a 470 Kohm ½W resistor (RD14BB2B474J) (R55) on the foil side of the board connector 11 DOWN
line to ground. (Unite before serial number 1119391).
3. Hard-wire the two via holes (through hole without components leads installed) along the foil trace between Q18 pin 1 and L1.
4. Change D1 from an ZX-060 (6V, 5%) to a WZ-040 (VII-4102-40) (4V, 10%) Zener.
5. Check D3 for leakage, which would load the MB line voltage below it normal 5.2 V DC setting.
RX unit X55-1270-xx
1. TR-7800: Change R94 from 56 ohm to 150 ohm ½W (RD14CB2E151J).
2. TR-7850: Change R94 from 100 ohm to 150 ohm ½W (RD14CB2E151J).
3. Cut the foil at the input to Q27, and connect Q27 input to the BB terminal. Connector 1 for constant battery charge at Power
switch Off, and floating battery charge when using a TK-1 or BC-1 charger unit for memory back-up in base station operation.
4. Check D18 for leakage, loading the MB line.
Note:
1. With 13.8V DC applied to the radio, and the power switch OFF, adjust VR2 on the RX unit for 5.2V DC at connector 1, MB
terminal.
2. We recommend using either Sanyo or GE NiCad Batteries. We suggest not using Radio Shack or Eveready batteries in these
radios.
3. If memory loss persists after all changes and checks suspect control unit Q18 is defective.
top of page
This modification is read 532 times.
19-07-1998
(TR-7900) TR-7800/TR-9000 Optional Ceramic Filters
10-10-80
FM Adjacent channel rejection in either unit may be improved by installing an optional narrow ceramic filter.
Filter
CFK-455F
CFK-455G
Part No.
L72-0304-05
(CFK-455G)*
-6db Bandwidth -70db Bandwidth Retail
+/- 6 kHz
+/- 12 kHz
$ 33.50
+/- 4 kHz
+/- 10 kHz
$ 33.50
* Not original part. No computer part number.
Location:
TR-7800, RX unit X55-1270-10 part, L10
TR-9000, RX unit X55-1260-11 part, CF1
To install, desolder the original filter and clear the second set of holes for the optional filter. Solder the new filter in place. Be sure all
pins are actually soldered, and that there are no solder bridges between pins or across the printed circuit board. Clip the pins flush to
the board, and reinstall the circuit board.
Note: Squelch operation will vary from unit to unit with an optional narrow filter. Tighter coupling from the detector to the squelch
circuit may be tried to restore "original feel".
top of page
This modification is read 206 times.
19-07-1998
(TR-7930) TR-7930 info
Insert the spread terminal "8-m" into the top of plug "j-18" so it fits around the top of terminal "ap".This is a fairly tight fit, so use
care not to bend the terminals by using too much pressure.
About half of terminal "8-m" will stick up above the top of terminal "ap". The lower part will be firmly sleeved around terminal "ap"
inside the plug.
Dress the wire around the left side of the board.
Replace speaker plug and install top cover.
Plug tnc cable with ptt/audio in/audio out/ground connectons into mic connector and it's ready to go on packet/rtty.
No soldering is required and unit can be returned to original state at any time if necessary.
top of page
This modification is read 517 times.
19-07-1998
(TR-7930) TR-7930/7950 transceiver for packet/rtty operation
Circuit modification for Kenwood TR7930/7950 transceiver
for packet/rtty operation
by: WA4IXN
This modification provides controlable audio output to pin 5 of the mic connector for single plug packet/ rtty operation.
Remove top cover of transceiver and carefully disconnect speaker lead plug from "rx unit" board.
Locate plugs"j-13" on the right front of the "rx unit" board and "j-18" on the left rear side of the board.
Notice which wire goes to pin "8-m" on "j-13" and to pin #5 on the mic connector.
Remove plug "j-13" from the board and locate the spring tab on the side of the plug that holds the "8-m" connector in place.
Using a small awl or pointed tool, press the tab down and carefully pull the "8-m" connector from the plug.
Work the wire from the harness so it will reach back along the left side of the board to plug "j-18".
Using the awl or small pointed tool, carefully spread the "8-m" connector a slight amount so it can be fitted Like a sleeve over another
connector of the same size.
locate terminal "ap" on plug "j-18".
Insert the spread terminal "8-m" into the top of plug "j-18" so it fits around the top of terminal "ap". This is a fairly tight fit, so use
care not to bend the terminals by using too much pressure.
About half of terminal "8-m" will stick up above the top of terminal "ap". The lower part will be firmly sleeved around terminal "ap"
inside the plug.
Dress the wire around the left side of the board.
Replace speaker plug and install top cover.
plug tnc cable with ptt/audio in/audio out/ground connectons into mic connector and it's ready to go on packet/rtty.
No soldering is required and unit can be returned to original state at any time if necessary.
This modification is read 462 times.
top of page
19-07-1998
(TR-7930) TR-7950/30 RX Interference
4-8-83
Some users have reported FM Broadcast or TV video carrier interference to the receiver. Normally the TR-7950/30 has excellent two
signal intermodulation characteristics. For a reported case of Broadcast or TV IMD the following modification may reduce or eliminate
the interference.
Parts Required
Qty Description
1 MI-308 Diode
Procedure
1. REmove the top and bottom covers.
2. Remove the 4 screws that secure the heat sink assembly to the rear of the set. Gently pull the heat sink assembly to the rear, to
allow access to the final unit X54-1270-1-,11.
3. Remove the 5 screws securing the PC board to the heat sink. Remove the 2 screws securing the final module (M57733/M57726)
and remove the screw that secures Q2 to the heat sink. Carefully desolder L9 from the antenna connector. (Dont change the
spacing of the coils!!!)
4. Gently fold the assembly over to allow access to the foils side of the final assembly and remove D2, and replace it with the MI308 diode.
5. Reverse steps 1-3 to reassemble. Reconnect L9 but don't change the spacing of the coils. Use heat sink compound when
replacing the final module.
This is an optional change and may not be performed in warranty.
This modification is read 455 times.
top of page
09-04-2000
(TR-7930) TR-7850/30 RX interference
Author: Trio-Kenwood Communication, inc.
Service Bulletin no. 870 (8-4-1983)
Some users have reported FM broadcast or TV video carrier interference to the receiver. Normally the TR-7850/30 has excellent two
signal intermodulation characteristics. For a reported case of broadcast or TV IMD the following modification may reduce or eliminate
the interference.
Parts required
Qty
1
Description
M1-308 Diode
Procedure
1. Remove the top and bottom covers.
2. Remove the 4 screws that secure the heat sink assembly to the rear of the set. Gently pull the heat sink assembly to the rear, to
allow access to the final unit (X54-1270-10,11).
3. Remove the 5 screws securing the PC board to the heat sink. Remove the 2 screws securing the final module (M5733/M57726)
and remove the screw that secures Q2 to the heat sink. Carefully desolder L9 from the antenna connector.
4. Gently fold the assembly over to allow access to the foil side of the final assembly and remove D2, (figure 1), and replace it with
the MT-308.
5. Reverse step 1 - 3 to reassemble. See figure 2 for proper connection of L9. Use heat sink compound when replacing the final
module.
Note: This is an optional change and may not be performed in-warranty.
This modification is read 464 times.
17-02-2001
(TR-7930) Kenwood TR-7930 Udvidet TX/RX
Author: OZ3AEV Jesper - [email protected]
1. Pil bunden af radioen tag fronten mod dig selv.
2. Find den store ic der hedder d7508c 017,den sider i midten af radioen.
3. I venstre side side af den store IC sider 2 dioder klip D16.
4. Samel radioen og reset den.
Nu er der TX - RX fra 142MHz til 149MHz.
top of page
Hvis man samtig klipper diode D17 køre den det amrikanske repeater step.
73
OZ3AEV Jesper.
top of page
This modification is read 464 times.
19-07-1998
(TR-7950) TR-7950 PA module mod
Just found a Kenwood screwup on the tr-7950. On the power-output board where the PA module is connected is a 470 uf Cap
designated C 1. The silkscreen on the board shows the + terminal going to gnd.
The origional cap that was factory installed was installed with the positive lead going to the + on the board. This is obviously wrong as
the Gnd Foil is the minus lead not the + lead. The cap had swolen up and burst due to incorrect installation. Almost blew another cap
till I verified that the MINUS goes to the foil, not the way its marked on the PC board.
If you have a 7950 or 7930 you would do well to pull off the back and inspect the Cap installed at C1. Its the only large filter cap on
this board so its easy to locate. If the case looks bulged, better get another cap and install it correctly. 73, N5WX @ N5WX.OK
top of page
This modification is read 629 times.
19-07-1998
(TR-7950) TR-7930/7950 transceiver for packet/rtty operation
Circuit modification for Kenwood TR7930/7950 transceiver
for packet/rtty operation
by: WA4IXN
This modification provides controlable audio output to pin 5 of the mic connector for single plug packet/ rtty operation.
Remove top cover of transceiver and carefully disconnect speaker lead plug from "rx unit" board.
Locate plugs"j-13" on the right front of the "rx unit" board and "j-18" on the left rear side of the board.
Notice which wire goes to pin "8-m" on "j-13" and to pin #5 on the mic connector.
Remove plug "j-13" from the board and locate the spring tab on the side of the plug that holds the "8-m" connector in place.
Using a small awl or pointed tool, press the tab down and carefully pull the "8-m" connector from the plug.
Work the wire from the harness so it will reach back along the left side of the board to plug "j-18".
Using the awl or small pointed tool, carefully spread the "8-m" connector a slight amount so it can be fitted Like a sleeve over another
connector of the same size.
locate terminal "ap" on plug "j-18".
Insert the spread terminal "8-m" into the top of plug "j-18" so it fits around the top of terminal "ap". This is a fairly tight fit, so use
care not to bend the terminals by using too much pressure.
About half of terminal "8-m" will stick up above the top of terminal "ap". The lower part will be firmly sleeved around terminal "ap"
inside the plug.
Dress the wire around the left side of the board.
Replace speaker plug and install top cover.
plug tnc cable with ptt/audio in/audio out/ground connectons into mic connector and it's ready to go on packet/rtty.
No soldering is required and unit can be returned to original state at any time if necessary.
This modification is read 585 times.
top of page
19-07-1998
(TR-7950) TR-7950 screwup on the power-output
Just found a Kenwood screwup on the tr-7950. On the power-output board where the PA module is connected is a 470 uf Cap
designated C 1. The silkscreen on the board shows the + terminal going to gnd.
The origional cap that was factory installed was installed with the positive lead going to the + on the board. This is obviously wrong as
the Gnd Foil is the minus lead not the + lead. The cap had swolen up and burst due to incorrect installation. Almost blew another cap
till I verified that the MINUS goes to the foil, not the way its marked on the PC board.
If you have a 7950 or 7930 you would do well to pull off the back and inspect the Cap installed at C1. Its the only large filter cap on
this board so its easy to locate. If the case looks bulged, better get another cap and install it correctly. 73, N5WX @ N5WX.OK
This modification is read 609 times.
top of page
19-07-1998
(TR-7950) TR-7950/30 RX Interference
4-8-83
Some users have reported FM Broadcast or TV video carrier interference to the receiver. Normally the TR-7950/30 has excellent two
signal intermodulation characteristics. For a reported case of Broadcast or TV IMD the following modification may reduce or eliminate
the interference.
Parts Required
Qty Description
1 MI-308 Diode
Procedure
1. REmove the top and bottom covers.
2. Remove the 4 screws that secure the heat sink assembly to the rear of the set. Gently pull the heat sink assembly to the rear, to
allow access to the final unit X54-1270-1-,11.
3. Remove the 5 screws securing the PC board to the heat sink. Remove the 2 screws securing the final module (M57733/M57726)
and remove the screw that secures Q2 to the heat sink. Carefully desolder L9 from the antenna connector. (Dont change the
spacing of the coils!!!)
4. Gently fold the assembly over to allow access to the foils side of the final assembly and remove D2, and replace it with the MI308 diode.
5. Reverse steps 1-3 to reassemble. Reconnect L9 but don't change the spacing of the coils. Use heat sink compound when
replacing the final module.
This is an optional change and may not be performed in warranty.
This modification is read 584 times.
top of page
09-04-2000
(TR-7950) TR-7850/30 RX interference
Author: Trio-Kenwood Communication, inc.
Service Bulletin no. 870 (8-4-1983)
Some users have reported FM broadcast or TV video carrier interference to the receiver. Normally the TR-7850/30 has excellent two
signal intermodulation characteristics. For a reported case of broadcast or TV IMD the following modification may reduce or eliminate
the interference.
Parts required
Qty
1
Description
M1-308 Diode
Procedure
1. Remove the top and bottom covers.
2. Remove the 4 screws that secure the heat sink assembly to the rear of the set. Gently pull the heat sink assembly to the rear, to
allow access to the final unit (X54-1270-10,11).
3. Remove the 5 screws securing the PC board to the heat sink. Remove the 2 screws securing the final module (M5733/M57726)
and remove the screw that secures Q2 to the heat sink. Carefully desolder L9 from the antenna connector.
4. Gently fold the assembly over to allow access to the foil side of the final assembly and remove D2, (figure 1), and replace it with
the MT-308.
5. Reverse step 1 - 3 to reassemble. See figure 2 for proper connection of L9. Use heat sink compound when replacing the final
module.
Note: This is an optional change and may not be performed in-warranty.
This modification is read 562 times.
top of page
19-07-1998
(TR-8300) TR-8300 Alignment
Author: Trio-Kenwood Communication, inc.
Service bulletin no. 16 (02-06-1977)
The TR08300 is a 440 MHz FM transceiver that is factory tuned to transmit from 445.0 MHz to 450 MHz and receive from 442.0 MHz to
447.0 MHz.
However, in some areas the operating ranges are different. The TR-8300 may be retuned for these other operating ranges. All
adjustments should be made in the center of the 5 MHz range desired.
RX ALIGNMENT:
Adjust the oscillator coil L14 1/2 to 1/4 turn counterclockwise until the LED in the channel indicator window turns on. This indicates
that the oscillator is now working. Connect a signal generator to the TR-8300 and adjust L15, L16, TC-6 and TC-7 for maximum "S"
meter indication. (These should be very small adjustments.) Adjust TC-5 in the helical resonator for maximum "S" meter indication.
This is the only adjustment made to the helical reasonator.
TX ALIGNMENT:
Connect a wattmeter and dummy load to the TR-8300. Adjust the oscillator coil L3 for maximum RF output. No other transmitter
alignment should be necessary.
This modification is read 226 times.
top of page
19-07-1998
(TR-8400) TR-8400 auf 9k6
de DG6DBF @ DB0END.#NRW.DEU.EU
Hallo !
Ich habe hier noch die Anleitung wie man den Kenwood TR-8400 (altes PLL-Rastermonster) auf 9k6 Umbaut. Dabei ist noch eine
Modifikation wie man die Umschaltung auf senden verbessern (verschnellern) kann.
Hier nun die Modifikationen:
Das tuning des TXDelays hab ich ausprobiert, leider hatte ich keinen 390 Ohm Widerstand zur Hand, mit 470 Ohm kommt man auf
160mS Umschaltzeit.
Obs noch schneller geht probier ich nochmal aus wenn ich die notwendige Modifikation für 9k6 vorgenommen habe, mangels Modem
hab ich das noch nicht in angriff genommen. Dann kann ich auch was über Tauglichkeit usw. berichten.
73s Holger dg6dbf @ dk0mwx
-----------------------------------------------------------de DL1YDD @ DB0IZ
TR-8400 Transmit Delay Time
PLL lockup time when switching from receive to transmit may be shortened for faster transmitter response. This change applies to
units before serial number 1060455.
On the PLL unit X50-1670-xx, check the values of R31 (390 ohm) and C47, C48 (6.8uf) near Q7 and Q8. If these component values
differ, change as required. This will give approximately a 0.12 second delay, which should be satisfactory for practical use. However, if
shorter delay is required, replace R31 with an 820 ohm resistor. This will yield an approximate 0.096 second turn-on delay.
No adjustment is required after this part change.
Note: When R31 is 820 ohms, CTCSS (Subtone) will be slightly distorted.
Installation time for this procedure is 1/2 or less.
-----------------------------------------------------------de DL1ZAX @ DB0EAM
Hallo 9600 Baud User
Da ich auf meine Anfrage "Umbau Kenwood TR-8400 auf 9600 Baud" keine Antwort bekommen habe, blieb mir nichts anderes uebrig
es selber zu versuchen. Dank der Hilfe von DB8AS und DG9FU war das dann auch gar nicht so schwer.
Das RX-Signal kann man auf der Platine "RX.TX UNIT(X44-1340-61)" an der Diode D7, nach der Spule L10 abgreiffen.
Diese Platine ist auf der Unterseite von dem Geraet, also da wo der Lautsprecher ist.
Die Diode ist links neben der Stelle wo der Lautsprecher bei geschlossenem Deckel sitzt (Bedienelemente zeigen zu Ihnen).
An D8 kann man die Abschirmung des Verbindungskabels zum G3RUH Modem anschliessen, sie liegt auf Masse.
Das TX-Signal wird ueber ein Relais der Diode D1 zu gefuehrt.
Diese Diode befindet sich auf der Platine "PLL UNIT(X50-1670-61)" unter dem Blech, hinten links auf der Oberseite des Geraetes.
Das TX-Signal vom G3RUH-Modem muss ueber ein Relais angeschlossen werden welches von der PTT des TNC2 geschaltet wird.
Bei Empfang darf das TX-Signal nicht an der Diode anliegen.
Dazu habe ich das PTT Signal ueber den freien Pin von der Mikrofonbuchse zum Relais im innern des Geraetes gefuehrt.
Das Relais hat zwei Kontakte, ueber den einen wird das PR-Signal geschaltet und ueber den anderen Kontakt wird die PTT vom TR8400 geschaltet.
Dadurch kann man das Geraet auch nach dem Umbau mit einem Mikrofon betreiben ohne das es zu problemem kommt.
Dieser Umbau arbeitet ohne Probleme.
Fals noch fragen sind, nur mut...
vy 73 de DL1ZAX Dietmar @ DB0EAM
This modification is read 462 times.
top of page
19-07-1998
(TR-8400) TR-8400 Transmit Delay Time
Author: Trio-Kenwood Communication, inc.
Service Bulletin no. 855 (25-1-1982)
PLL lockup time when switching from receive to transmit may be shortened for faster transmitter response. This change applies to
units before serial number 1060455.
On the PLL unit X50-1670-xx, check the values of R31 (390 ohm) and C47, C48 (6.8uf) near Q7 and Q8. If these component values
differ, change as required. This will give approximately a 0.12 second delay, which should be satisfactory for practical use. However, if
shorter delay is required, replace R31 with an 820 ohm resistor. This will yield an approximate 0.096 second turn-on delay.
No adjustment is required after this part change.
Note: When R31 is 820 ohms, CTCSS (Subtone) will be slightly distorted.
Installation time for this procedure is 1/2 or less.
This modification is read 443 times.
top of page
19-07-1998
(TR-8400) TR-8400 Transmitter Freq Response, Voice or DTMF
Author: Trio-Kenwood Communication, inc.
Service Bulletin no. 853 (25-1-1982)
Operator complaints of insufficient lows in transmit, or faulty Autopatch operation traceable to incorrect twist (high to low tone group
balance) may be remedied by changing two capacitors at the mic amplifier input.
On the RX/TX unit X44-1340-11, change C62 and C65 from 0.1uf to 1.0uf, 35v tantalum (CS15E1V010M) to increase low frequency
transmitter frequency response. Adjust Deviation (VR3) or mic gain (VR2) as necessary.
Installation time for this procedure is 1/2 or less.
This modification is read 435 times.
top of page
02-04-2000
(TR-8400) TR-8400 Sub-audible Encode Installation
Author: Trio-Kenwood Communication, inc.
Service Bulletin no. 843 (18-2-1981)
When installing a sub-audible encode in a first-lot radio, change the Tone switch power source from the 8C (common) to the 9T
(transmit) line. This will prevent the encoder from distorting the receiver when the Tone switch is ON.
Preocedure.
1. Remove the bottom cover (2 long screws, rear, 3 short screws, front) and unplug the speaker.
2. Cut the GRAY lead to the Tone switch wiper one inch from the switch. Tape-insulate the long lead to the harness.
3. Connect the switch wiper to the Mic connector, pin 5.
(See Fig. 1)
4. Install the encoder, connect the speaker, and replace the bottom cover.
For complaints of distorted sub-audible tone in a first-lot unit, replacing components and readjusting the PLL will reduce or eliminate
distortion.
Procedure.
1. Remove the top cover (4 screws).
2. Remove the rubber conductive shield.
3. remove the aluminum cover from the PLL unit X50-1670-xx (17 screws).
4. Unplug connectors J2-J6.
5. Remove 11 screws and 2 threaded studs securing the PLL printed circuit board. Shift the board to the rear, then swing up and
tothe right.
6. Use Wikit or a desoldering tool to remove and replace:
Component
R30
R31
C47
c48
was
12 Kohm
820 ohm
6.8uF
6.8uF
replace width (vicinity of Q7)
18Kohm 1/4W
390 ohm 1/4W
15uF Tantalum (observe polarity)
15uF Tantalum (observe polarity)
Note: Don't create solder-bridges or lift the foil.
7. Reverse steps 5, 4, 3 to partially reassemble.
8. Perform the PLL adjustment listed in the Service Manual, page 24, item 2.
9. Reverse steps 2 & 1 for final assembly.
This modification is read 439 times.
02-04-2000
(TR-8400) TR-8400 RX internal sporious signals
top of page
Author: Trio-Kenwood Communication, inc.
Service Bulletin no. 845 (22-5-1981)
Receiver internal sporious signals occuring at xx1.7 MHz and xx6.7 MHz may be reduced or eliminated by adding an additional ground
and bypass capacitor in the PLL. These are third overtone (21.6 MHz) products of the PLL IF (7.2 MHz). This applied to all units before
S/N 111xxxx.
Procedure.
1.
2.
3.
4.
5.
6.
Remove the top cover (4 screws).
Remove the rubber conductive shield.
Remove the aluminum cover from the PLL unit X50-1670-xx (17 screws).
As illustrated, solder a jumper between the DBM and VCO compartments.
Solder a .01uF 50V disc ceramic capacitor (CK45F1A103Z) from the DBM shield to the case of Q4 (3SK76 or 3SK92).
Reverse steps 3-1 to reassemble.
Note: Installation time for this procedure is ½ hour or less.
This modification is read 434 times.
top of page
19-07-1998
(TR-851) TR851E & TR751E with 9600
Hello, Carl!
I have read one of your messages - you have asked for modifications of TR851.
I am also using TR851E (European Version) and TR751E with my 9600 BD- Modem (G3RUH) with the following modifications:
When you remove the bottom panel, you can see immediately all you need to do the modifications:
Varicap Diode D21
IF-Filter CF1
Discriminator IC2
View from bottom side:
Power in
Antenna
---------------------------------------------------------------------I
I
.
.
.
.
.
.
I
I
I
Quartz
I
I
1
2
I
I
-D21I
I
I---I
..I
I
I...I CF1
I
I
I---I
I
I
I
I
1
I
I
--------------------I
I
I IC 2 TA7761P
I
I
I
--------------------I
I
9
I
I
I
---------------------------------------------------------------------Microphone
Tuning Knob
Volume Contr.
IC 2 Discriminator
PIN 9 of IC 2 ------->- Capacitor (100nF) ------> -RX-Audio G3RUH-Modem
D21 Varicap-Diode
Pin 2 (has no ring!!) --------> TX-Audio G3RUH-Modem
IF-Filter (G3RUH recommands changing)
Replace CF1 ( 55 F ) with CFM 455 D
I thougt that the replacement of CF1 was too difficult for me. So I have asked a good friend to remove the PCB and to replace the
filter...no problem, he said, and for him it was really not a problem.
The other modifications I have done by myself .
I have done the same modification to TR751 without changing the IF-Filter, because I only need TR 751 for uplink.
The components on the PC Board are close one to another, but I think that other TX/RX are more problematicly to modify.
This modification is read 532 times.
top of page
19-07-1998
(TR-851) TR851 & 9600 Bps
TR-851: Salida de audio del discriminador.
Para obtener el audio desde el discriminador en este equipo, la operaci¢n es muy sencilla, pues ya la tenemos en un conector, que
soportar el m¢dulo opcional DCL.
1. Localizar el conector 2 en la placa Composite Unit (RX). Esta se encuentra en la parte inferior del equipo. El conector est pr¢ximo
al frontal.
2. Soldar un hilo (deber ser apantallado), al pin 1 del conector 2; la malla al pin 2 del conector 2.
3. Llevar el cable apantallado a un conector, o bien aprovechar uno de los agujeros a ambos lados del equipo, que servir¡an para el
soporte de m¢vil.
4. Si accidentalmente se produjera un cortocircuito en este cable, no supondr¡a da¤o alguno, pues en serie tenemos R139 de 33K,
lo que nos evitar¡a el deterioro de IC2.
5. Si ya se encuentra conectado el m¢dulo DCL, no se ver afectado su funcionamiento.
Eso es todo. No he realizado medidas de respuesta en el receptor, aunque puedo afirmar que se obtendr un ancho de banda suficiente
para los requerimientos del modem de 9600 de G3RUH.
En mi caso, yo uso habitualmente el TR-851 para recibir al UO-14, sin ning£n tipo de problemas.
This modification is read 491 times.
top of page
19-07-1998
(TR-851) Umbau TR-851E > 9600Bd
Es ist Vollbracht, ich habe mein TR-851 E für 9600 Baud, naja umgebaut ist wahrscheinlich der falsche Ausdruck! Man könnte eher
sagen "angezapft".
Im Grunde genommen war es einfach, wenn da nicht immer diese Felsen rumliegen würden, die man sich selber in den Weg gelegt
hat, um dann im richtigen Moment drüber zustolpern. Aber das ist eine andere Story.
Also nun endlich die Anzapfgeschichte: als erstes Schaltplan raus und mit dem Finger den feinen schwarzen Linien, die von der
Mikrofonbuchse über ein paar Ecken gehend, hinterher (hab inzwischen schon einen Bleistift genommen).
Irgendwann kam ich dann bei der COMPOSTE UNIT (RX) (X60-1320-0) raus. Dort habe ich mir für die Modulation die Diode D21
ausgesucht. Die ist im Plan gleich rechts unterhalb des MIC AMP. Die NF wollte ich an einem Stecker abgreifen der mit der DCLAuswertung verdrahtet ist und bei mir nicht benötigt wird, da in meinem Gerät sowas nicht drin ist. Der Stecker befindet sich im
Schaltplan auf auch auf der Composite Unit und da wiederum auf der unteren Seite im ersten drittel von links und trägt die
Bezeichnung: "2". Am Pin 1 steht mir, über den R134 (33k) ausgekoppelt, die NF zur Verfügung. Von Pin 2, dieses Steckers, habe ich
gleich die Masse abgegriffen.
Nun zu den Örtlichkeiten im Funkgerät. Man öffne den Deckel unterhalb der Funke, ich sag das bloß deshalb weil man meistens den
falschen aufmacht (so gehts mir jedenfalls), und schon sitzt man vor der Composite Unit!
Vorsicht Lautsprecherkabel!!
Zum leichteren auffinden der Diode und des Steckers gebe ich Lage der Bauteile Quasi im Koordinatensystem an. Das Gerät liegt also
sozusagen Kiel-oben und mit dem Bedienteil zum Bauch (sofern vorhanden) gewandt da, dann habe ich die linke, zum Körper
zeigende Ecke, zum Nullpunkt erklärt.
Die Diode befindet sich ca. 73mm nach rechts und 88mm nach oben, der Stecker 61mm nach rechts und 55mm nach oben und ist auf
der Platine mit J2 markiert.
Ich kopple die Modulationsspannung, an die D21 über einen zusätzlichen Widerstand (bei mir 22k) ein, den ich von oben an die
Kathode gelötet habe.
Die PTT habe ich an den Stecker J204, der sich auf der Control Unit befindet, angelötet. Dazu muß man das Bedienteil wegklappen.
Der J204 ist nicht weit weg von der Mic Buchse.
Ich benütze das 851er in Verbindung mit dem DF9IC Modem, auf der USSC-Karte von Baycom Team. Feine Sache! Wenn ich meine
Lötstellen (am Modem) alle durchgezählt hätte, dann wärs auf Anhieb gegangen. Also wenns nicht gehen sollte, obwohl der Digi wie
ein Hammer ankommt --- Lötstellen nachschaun.
So nun hoffe ich, daß ich nix vergessen habe.
Meine Rechtschreibung und meine Interpunktion, bitte ich zu verzeihen. Ist halt nicht meine starke Seite.
Viel Spaß, 73 + "96" edi dg1mfx @ db0aab
====================================================
de DL1SDX @ DB0ULM.#BAY.DEU.EU
Zusammen mit etlichen Umbauanleitungen zum TR851 auf 9600Bd haben mich auch einige ebenso interessierte OMs gebeten, ihnen
evt. etwa erhaltenen Infos zum Thema zukommen zu lassen. Da das Interesse an dieser Modifikation bzw.
"Anzapfung" also verbreitet ist, im Folgenden ein Auszug aus verschiedenen msgs, die ich bekommen habe, und für die auch
entsprechende Erfolgsmeldungen vorliegen.
Für die Richtigkeit der Angaben kann ich nicht garantieren,
Selbst probiert habe ich die Anpassung noch nicht, da momentan noch kein entsprechendes Modem. Urheberrechte habe ich natürlich
auch keine berücksichtigt jedoch nochmals herzlichen Dank an alle fleißigen Schreiber!
9600 Baud mit dem Kenwood TR-851E
***************************************************************
Sinngemaess:
*
Die TX-Ltg. vom TNC/Modem wird an die Kathode von
*
D 21 ueber einen 22k Widerstand angeschlossen.
*
*
Die RX-Ltg. kann man am Stecker J2 anschließen,
*
diese liegt dann ueber R 139 (33k) an
*
Pin 9 des IC 2 **Achtung, siehe unten!!!***
***************************************************************
Genau so bin ich auch bei dem "Umbau" des Gerätes vorgegangen. Leider stellte sich im Betrieb heraus, dass einige Packete von mir
nicht aufgenommen werden konnten.
Daraufhin entschloss ich mich, mir ein Service-Manual zu kaufen um der Sache mal auf den Grund zu gehen.
Wie ich nun herausfand, hat sich im Schaltbild ein kleiner Fehler eingeschlichen. Und zwar endet die andere Seite des R 139 nicht
Schaltbild eingezeichnet am Pin 9 des IC 2, sondern zwischen C 67 und C 66. Somit ergibt sich, wenn ich mich nicht irre an dieser
Stelle ein wunderschoenes RC-Glied ( Tiefpass ) Und der "nuppelt" dann anscheinend, dass EIN oder ANDERE weg.
(Herausgefunden durch Vergleichen des Schaltbildes mit dem Layout)
******Schliesst man nun die Ltg. anstelle an J 2 direkt an Pin
******IC 2 an, so funktioniert das sofort korrekt.*************
Mit dem so "angezapften" Gerät und einem TNC 2 H konnte ich in TCP/IP auf einer ruhigen Frequenz in FTP einen mittleren
Datendurchsatz von 755/sec. erreichen.
Ich hoffe dem EIN oder ANDEREN damit geholfen zu haben und wünsche allen weiterhin ein froehliches Basteln und viel Spass in 9k6.
***UNTERSEITE VOM TR 851***
***************************************************************
*
*
*
*
hier R22 KOhm TX an 180° DIN PIN 1 zum TN
*
¦
*
+ _____D21
*
*
IC 2
*
IC-TA 7761 ®----------¬
*
+----------+
*
RX PIN 9 +
+PIN 15 Masse an DIN
*
an DIN 180° PIN 4
*
*
***************************************************************
PTT an Stecker hinter Display löten an weißen Stecker, mit Ohmm prüfen, dann an PIN 3 180° DIN St. zum TNC.
alles klar?
Und noch eine Variante, etwas verfeinert, im Prinzip aber wie oben:
Ich betreibe seit ca. 1 Jahr die in 9K6 und das ding rennt "wie Sau"...hi also...
TX:
als erstes die Kap. Diode D21 suchen, nebenan sitzt ein Xtal mit 10,695MHz an die Kathode lötest du VORSICHTIG und ZÜGIG einen
Widerstand mit 27K damit gehst Du direkt über ein abgeschirmtes Kabel zum TX-OUT des Tnc.
RX:
Den Stecker 2 suchen und am Pin RD vorsichtig die Isolierung etwas entfernen. Dort wird auch ein Kabel angelötet, die Abschirmung
direkt daneben an Pin E. Den Stecker findest Du auf der Unterseite, Front zum Bauch an der Kante zur Front ca. 2cm von Links....
Die beiden Kabel habe ich auf die MIC-Buchse gelegt und dort dafür einfach 2 Pins zweckentfremdet, zb MR und M-UP. Dadurch hat
man keine losen Kabel rumhängen.
Wenn Du gleichzeitig in 1K2 umschaltbar Betrieb machen willst, dann musst Du am 3105 den Vorwiderstand entfernen, damit Du auf
ca. 1VSS kommst.
Der RX-Pegel reicht voll und ganz aus, und bei schwachen Signalen unter S4 macht das 9K6 Modem bei mir nurnoch Rejects.....was
solls
Wichtig ist, das Du die Sende-Nf beim Empfang nicht abzuschalten brauchst!!!!!
Mit dem TX-Delay konnte ich in einem Link mit einer anderen 851 auf 5 herunter, alle andern Parameter auf Kampf. Damit schafft
man ca. 850/s, schneller geht nicht...hi
So, viel spaß beim Umbau und schreib mal, wie es klappt
Ich hoffe, damit einigen von Euch geholfen zu haben, wie gesagt, ich gebe diese Infos nur an die allg. Kenwood-Rubrik weiter, der
Inhalt stammt aus Infos, die mir auf eine entsprechende Anfrage freundlicherweise zugingen.
73's und awdh,
Robert, DL1SDX @ DB0ULM
top of page
This modification is read 516 times.
19-07-1998
(TR-9000) TR-9200/TR-9000 Optional Ceramic Filters
FM Adjacent channel rejection in either unit may be improved by installing an optional narrow ceramic filter.
Filter
CFK-455F
CFK-455G
Part No.
L72-0304-05
(CFK-455G)*
* Not original part.
-6db Bandwidth -70db Bandwidth Retail
+/- 6 kHz
+/- 12 kHz
33.50
+/- 4 kHz
+/- 10 kHz
33.50
No computer part number.
Location: TR-9200, RX unit X55-1270-10 part, L10
TR-9000, RX unit X55-1260-11 part, CF1
To install, desolder the original filter and clear the second set of holes for the optional filter. Solder the new filter in place. Be sure all
pins are actually soldered, and that there are no solder bridges between pins or across the printed circuit board. Clip the pins flush to
the board, and reinstall the circuit board.
Note: Squelch operation will vary from unit to unit with an optional narrow filter. Tighter coupling from the detector to the squelch
circuit may be tried to restore "original feel".
top of page
This modification is read 713 times.
19-03-2000
(TR-9000) TR-9000 CW, SSB TX instability
Author: Trio-Kenwood Communication, inc.
Service Bulletin no. 824 (29-5-1980)
Complainte of FMing in SSB, or CW chirp may be eliminated by minor changes to the TX mixer circuit.
On the TX unit X56-1370-10, perform the following changes:
1. Cut the LT foil path.
2. Install a 47 ohm resistor on the foil side of the PCB.
3. Remove R27, 3.3 Kohm and delete.
4. Jumper the cut foil.
5. Install a 2.2 Kohm resistor from Q12 Collector to the modified LT foil on the foil side of the PCB.
top of page
This modification is read 744 times.
19-03-2000
(TR-9000) TR-9000 TX pulse noise in SSB mode
Author: Trio-Kenwood Communication, inc.
Service Bulletin no. 825 (2-6-1980)
Pulse noise heard during SSB transmission may be reduced or eliminated by adding one capacitor to the TX unit.
On the TX unit X56-1307-10 add a 22uF 16V radial lead cap to the PMB line, as illustrated, on the foil side of the PCB.
No adjustment are necessary.
This modification is read 698 times.
top of page
08-04-2000
(TR-9000) TR-9000 Transmitter Side Carrier Balance
Author: Trio-Kenwood Communication, inc.
Service Bulletin no. 849 (30-7-1981)
Distorted sideband transmission may have one of two causes. If normal alignment docs cure the problem, distortion or poor carrier
suppression may be improved by rercuting two leads in the wire harness.
Perform these initial checks first:
1. On early units, ascertain that R74, 47 ohm is on the TX unit X55-1370-10 between connector 33, the LT line, and R27, 2,2 Kohm
(vicinity of Q5, Q6), and that R27 is 2.2 Kohm. (Service Bulletin #824).
2. Verify TR-900 Service Manual alignments, General section steps 4 (PLL), and 5 (HET frequency alignment).
3. TX section, steps #4 (power adjustment), 9 (SSB mic gain), 10 (carrier point) & 11 (carrier suppression).
Procedure:
1. Remove the bottom cover and unplug the speaker.
2. With the radio upside down and facing forward, locate connectors 8 and 10 at the front of the RX unit X55-1260-00. Connector
#8, pin 3 (violet) is the -6V DC line from the TX unit, connector # 31, pin 1. Connector # 10, pins 7 (signal) and 8 (ground)
(green coaxial cable) is the MS pins 5 (sig) and 4 (gnd).
3. Carefully cut the cable ties (without cutting any leads) securing these two lines in the wire harness which runs to the left, around
the upright Control unit, and then right behind the front panel ad far as the Mode switch.
4. Carefully unplug each of these connectors by gripping the connector housing with a long-nosed plier.
5. Extract the terminal from the housing by depressing the locking tab and simultaneously withdrawing the lead with terminal. (See
illustration below).
6. Reroute these two lines from the behind the Mode switch, between the chassis and control unit, then left to their original
connectors. Reinstall the terminals in their original positions in the connector housing.
7. Coil the excess of each lead and secure with cable ties. Retie the harness behind the front panel, along the left of the chassis,
and back behind the control unit.
8. Readjust carrier suppression. Mod SW:USB, Mic terminal terminated with 470 ohm. On the RX unit, alternately adjust TC1 & VR6
for minimum output at 145 MHz. Carrier should be at least -40dB down.
9. Work is complete. Replace the bottom cover.
This modification is read 711 times.
top of page
08-04-2000
(TR-9000) TR-9000 Temperature Stability Improvement
Author: Trio-Kenwood Communication, inc.
Service Bulletin no. 859 (14-4-1982)
PLL noise or unlock at high temperature may be cured by changing a mixer feed point in the PLL.
Measure TP3 on the PLL unit. If greater then 0.5V RMS signal is available, this change will not be required.
If less than this level is present proceed.
On the PLL unit X50-1620-00 at Q13:
1. Remove and delete C23.
2. Connect Q13 emitter to L5 "hot" (original C23 take-off.)
3. Realign L5, 6, 7 for at least 0.5V RMS at TP3.
Note: Installation time for this procedure is ½ hour or less.
Alignment note: To align L6 & 7, first position the slugs flush with the tops of the coils, then alternately adjust these two coils for
maximum output at the first peak into the coil (fundamental frequency). Then align L5 for maximum.
top of page
This modification is read 726 times.
19-07-1998
(TR-9130) TR-9130 Low Drive Level
Author: Trio-Kenwood Communication, inc.
Service Bulletin no. 871 (5-7-1983)
For reported cases of low transmit power output check the level of the TX driver transistor Q7 of the Drive unit (X$7-1090-00). If the
TX drive level is low make the following changes.
Q7
R36
Old Part
3SK97
100 ohms
New Part
3SK122(L)
68 ohms
Time required for this change is 1/2 hour.
top of page
This modification is read 612 times.
19-07-1998
(TR-9200) TR-9200/TR-9000 Optional Ceramic Filters
FM Adjacent channel rejection in either unit may be improved by installing an optional narrow ceramic filter.
Filter
CFK-455F
CFK-455G
Part No.
L72-0304-05
(CFK-455G)*
* Not original part.
-6db Bandwidth -70db Bandwidth Retail
+/- 6 kHz
+/- 12 kHz
33.50
+/- 4 kHz
+/- 10 kHz
33.50
No computer part number.
Location: TR-9200, RX unit X55-1270-10 part, L10
TR-9000, RX unit X55-1260-11 part, CF1
To install, desolder the original filter and clear the second set of holes for the optional filter. Solder the new filter in place. Be sure all
pins are actually soldered, and that there are no solder bridges between pins or across the printed circuit board. Clip the pins flush to
the board, and reinstall the circuit board.
Note: Squelch operation will vary from unit to unit with an optional narrow filter. Tighter coupling from the detector to the squelch
circuit may be tried to restore "original feel".
This modification is read 206 times.
top of page
19-07-1998
(TR-9250) TR-9250 RF LED Meter
The RF LEd meter may show reduced output after continuous transmission, while output actually remains constant. Changing
components on the final unit will correct this problem. This change applies to units before serial number 201XXXX.
Procedure:
1.
2.
3.
4.
5.
Remove the top cover (four screws), and unplug the speaker.
Remove the bottom cover (four screws).
Remove four scress holding the heatsink and swing the sink down.
Without changing coil spacing, desolder L6 which connects from the ANT pad aon the final unit to the PL-259, at the final unit.
Remove five screws holding the final unit pcb X45-1180-10, one screw holding Q6 2SD880, and two screws holding the final
hybrid module Q1, M57726.
6. Change the following parts:
C15 1pf to 2pf (CC45CH1H020C)
D3 1N60 to 1S1587 (V11-0370-05)
R8 820 ohm to 1.2K (RD14CD2E122J)
7. Insure adequate thermal compound on Q1 and Q6, and that the mica washer is correctly positioned under Q6. Reverse steps 5
and 4 to partially assemble.
8. Cable-up power and a dummy load. Readjust VR1 on the final unit at 147.000 MHz, high power setting for 5 LED's ON. Switch to
low power and verify 3 LEDs ON.
9. Remove power from the unit and complete reassebly by reversing steps 3, 2, and 1.
Note installation time for this procedure is 1/2 hour or less.
This modification is read 206 times.
top of page
19-07-1998
(TR-9350) TR-9350/30 RX Interference
Some users have reported FM Broadcast or TV video carrier interference to the receiver. Normally the TR-9350/30 has excellent two
signal intermodulation characteristics. For a reported case of Broadcast or TV IMD the following modification may reduce or eliminate
the interference.
Parts Required
Qty Description
1 MI-308 Diode
Procedure
1. Remove the top and bottom covers.
2. Remove the 4 screws that secure the heat sink assembly to the rear of the set. Gently pull the heat sink assembly to the rear, to
allow access to the final unit X54-1270-1-,11.
3. Remove the 5 screws securing the PC board to the heat sink. Remove the 2 screws securing the final module (M57733/M57726)
and remove the screw that secures Q2 to the heat sink. Carefully desolder L9 from the antenna connector. (Dont change the
spacing of the coils!!!)
4. Gently fold the assembly over to allow access to the foils side of the final assembly and remove D2, and replace it with the MI308 diode.
5. Reverse steps 1-3 to reassemble. Reconnect L9 but don't change the spacing of the coils. Use heat sink compound when
replacing the final module.
top of page
This modification is read 224 times.
19-07-1998
(TR-9500) TR-9500 fuer 9600bd
Hallo 9600 Baud Fans,
hier ein kurzer Hinweis, wie ich mein 9600 Baud Modem von G3RUH an meinem Kenwood TR9500 angeschlossen habe.
Verbesserungen sind sicherlich moeglich. Die Empfangs-NF nehme ich ab an der Verbindung R42/R43 auf der IF-Unit.
Das Sendesignal speise ich ein an der Verbindung C18/C19 auf der CAR-Unit. Die PTT-Leitung verdrahte ich wie gewohnt.
Nun viel Spass beim "High-Speed-PR" auf 70cm.
Ciao es vy 73 de Werner, DL5DAA @ DB0IZ
This modification is read 276 times.
top of page
19-07-1998
(TS-120) Hum in SSB TX, TS-120S and others
Author: Trio-Kenwood Communication, inc.
Service bulletin no. 48 (9-8-1979)
Some TS-120S users may complain of a hum during SSB operation, which may be caused by RF feedback. There may be various
reasons for this complaint.
1.
2.
3.
4.
Bad feedline and antenna system ground.
Poor Mic hookup or shielding.
Vertical antenna with poor or no radial system.
For base operation with other than a PS-30 Power supply:
Poor regulation and insufficient filtering in the supply.
5. Linear amplifier creating hi RF field near the operating position.
6. RF induced back into the power supply causing falsie protection (other than PS-30).
7. RF pickup by any cables to or from ancillary equipment.
Prevention is the best cure. For those cases where all normal measures have been tried, try installing a .01uF bypass cap across the
mic input jack between pins 1 and 4.
Some AFSK operators may have similar RF feedback problems with TS-820S or TS-520S. Bypass the mic ground pin to the chassis,
pin 3 to 4 and in extreme cases, install a ferrite bead on the Mic coax center conductor at the microphone connector.
Please annotate your service manual.
This modification is read 1238 times.
top of page
19-07-1998
(TS-120) TS-120S VFO Stability
Author: Trio-Kenwood Communication, inc.
(Supercedes 7/9/79 bulletin)
Service Bulletin no. 827 (6-6-1980)
VFO drift characteristics may be improved by changing component values and location in the VFO.
This change applies to serial numbers before 00100001.
Note: DO NOT disturb lead dress or component placement while working inside the VFO.
1.
2.
3.
4.
5.
Remove the VFO unit by four 3mm hex head bolts.
Withdraw out the front panel and unplug the leads.
Remove the VFO cover by 5 phillips head screws.
Remove C17, and C18 from the PCB. Thes may be cut flush to the board.
Reposition the Ground terminal for the Variabel Capacitor by heating the post and pushing it through to the opposite side of the
PCB.
6. Install paralleled 10pF green and 18pF yellow caps from the bottom tank coil terminal (LH) to the modified Ground post. Position
the caps near the coil, not the PCB. Make certain the ground lead doesn't touch the coil or coil mounting.
7. To reassemble, perform steps 3,2,1. Snug all VFO case screws. A later complaint of frequency jump would indicate a loose VFO
shell.
New Parts:
10pf CC45SG1H100J
18pf CC45RG1H180J
Analog Dial Calibration:
1. Turn the main dial fully CCW. The red cursor should line up with the VFO mark on the sub-dial. If it does not, remove the main
knob, loosen set screws and align the scale start point with the red cursor.
2. Turn the main knob to 50 kHz analog. Adjust the aluminum slip sub-dial to line up with any one of the larger black dial marks.
3. Note the digital error. If it is MORE than 2 kHz adjust the VFO trimmer cap TC1 (center under the seal tape) to exactly 50.0 on
the digital readout.
4. Turn the main knob to 450 analog. If the digital error is less than 2 kHz it is in spec. If the digital error is greate, proceed:
For instance if the digital error is 14.454.0 (plus 4 kHz), multiply the error times 4 (16 kHz) and adjust the VFO trimmer cap to
the desired frequency (14.450.0) less the error, or 14.434.0. Next adjust the VFO inductor L10 (front under the seal tape) back
up to the desired frequency of 14.450.0.
5. If the error in step 4 was in the minus direction, reverse the direction of correction adjustment in step 4.
6. VFO linearity final check: The digital readout and analog dial should agree to within +/- kHz at every 100 kHz dial point.
This modification is read 1250 times.
top of page
19-07-1998
(TS-120) TS-120S VOX operation pick-up time
Author: Trio-Kenwood Communication, inc.
Service bulletin no. 37 (10-7-1979)
High speed CW ops may inquire about partial loss of the first character when operating VOX-CW. The transceiver will operate up to
about 20WPM before this is apparent.
Improvement may be had by changing three components on the RF Unit X44-1260-01.
Production later than serial # 940701 has this change.
Please notate your Service Manual.
This modification is read 1024 times.
top of page
19-07-1998
(TS-120) TS-120S Final Transistor Replacement
Author: Trio-Kenwood Communication, inc.
Service bulletin no. 38 (10-7-1979)
When ordering single replacement 2SC2290 Final transistors for the TS-120S, please specify the hfe rank, by color. When replacing
pairs of finals, always select the same hfe randk for both transistors.
Rank designation will be found printed on the transistor, directly under the transistor number.
Rank:
R
O
Y
30-65
55-95
85-150
Please return all defective 2SC2290 finals to the attention of the TRIO- KENWOOD service department, along with the warranty claim
form.
This modification is read 1182 times.
top of page
19-07-1998
(TS-120) TS-120S Ant Input Transformer Replacement
Author: Trio-Kenwood Communication, inc.
Service bulletin no. 40 (12-7-1979)
Ts-120S transceivers subject to strong static fields or similar high current atmospheric discharges may suddenly exhibit low RX
sensitivity on all bands. TX will be OK. You may suspect T1 on the RF unit X44-1260-01.
When replacing or ordering T1, L43-0696-35, also check the value of C20.
If it is 33pF, just replace and repeak the transformer.
First production transceivers will have a 15pF cap for C20. When changing T1, also replace C20 with a 33pF capacitor, and repeak the
circuit.
Old
New
Old
New
part number:
L34-0696-05
Antenna Coil
part number:
L34-0696-35
Capacitor was 15pF, replace with
part number:
CC45RH1H330J
33pf
top of page
This modification is read 1046 times.
19-07-1998
(TS-120) TS-120 Repair Notes
Author: Trio-Kenwood Communication, inc.
Service Bulletin no. 60 (18-12-1979)
Symptom
Repair
No CW, No Audio
Receiver Sens Down
Analog Dial Cal OFF
Carrier in SSB
Loss of Digital
Smoke at Final Unit
Sidetone oscillator Q25 on AF GEN unit 2SC1815
T1, L34--696-35 on RF unit Shorted
Mechanical Adjustment
RF unit D2 and D3 shorted see TKC Service Bulletin
Check P5/J5 on Carrier Unit
Check for long eds of wire shorted to case inside
final unit also burned L10 and L11, L40-1011-04
(100uH)
IF shift control turned max CW
The RF gain control was turned max CCW
Replace the TEMP comp CAP C17
Check the Carrier Point adjust and make sure final
bias is set to 150 Ma
Check D15 PLL unit
Check the Final transistors
The BCD rotary band switch has a broken wafer.
The BCD divider Q16, 74LS163 on PLL unit bad.
Check the BCD inputs against the pin 2 frequency.
Check ground screws and tighten at Relay Unit X411250
Solder short across pins 1-2 J29 IF Unit
After the CW filter was installed the pins were
not cut off shorting the signal to ground.
Perform VFO tracking adjustment at 50 and 450
40M 50W and 10M 10W bad finals
Core on the VCO transformer for 15M broken
Shorted trace at Band switch under IF unit
All bands, Q12 SN16913 on AF gen unit, 2SK19GR bad
L25 open on the RF unit Small gree inductor
Q12 mixer on the PLL unit bad
Q26 mixer on PLL unit bad
Pin 5 of J5 on AF GEN unit loose
D26 and Q24 2SA562 on AF gen unit bad
R8 220 ohm at key jack burned open. Make sure
customer uses shielded line on CW KEY.
On 15M band only with antenna HF oscillation when
first speaking. Install Ferrite bead on base of
first mic amp Q18 AF GEN UNIT.
Loss of AVB Voltage at RF unit. Check Q9 2SA473
on the filter unit, also check 6 volt Zener diode.
SSB Audio bad
Power on Meter Max
VFO freq drift
TX Audio BAD
PLL digital NG
High IC in RX
15 Meters only
RX TX only 10M
28.5 HF Osc
No CW Filter
No RX
Analog dial off
TX out 40M only
No 15M
3.5 and 7 Band same
Low RF out
No TX all bands
No digital no TX
No RX no digital
INtermitt SSB AUdio
No key or TX
No TX
15M osc.
No TX
top of page
This modification is read 1238 times.
19-07-1998
(TS-120) TS-120S Band Pass Filter Change
Author: Trio-Kenwood Communication, inc.
Service Bulletin no. 816 (7-2-1980)
For complaints of out of band interference, especially BCI, the BPF (Bandpass filter) terminating resistors may be changed for an
improvement of approximately 10dB.
On the RF unit X44-1260-01 change R3,5,7,9,11 from 1.5K ohm to 470 ohm. No adjustments are required.
top of page
This modification is read 1050 times.
19-07-1998
(TS-120) TS-120S TX oscillation
Author: Trio-Kenwood Communication, inc.
Service Bulletin no. 844 (21-5-1981)
The TS-120S may exhitbit intermittent oscillation on the 15M, 10M and/or 20M bands. Symptoms may be no control of Carrier level,
full current or ALC in either CW or SSB after initial keying or modulation, or "full output both forward and reflected".
1.
2.
3.
4.
5.
6.
Physically disconnect power from the radio.
Make certain the Antenna fitting is tight to the rear panel.
Remove covers. Unplug speaker lead.
Check for loose screws securing the RF unit X44-1260-01 and the relay unit X41-1250-00 (locarted over the RF unit).
On the RF unit, check diodes D2, 3 and 8 for high reverse leakage. If in doubt, replace.
If not already present on the RF unit, make the following changes:
R47
R50
C61
Add
D8.
(33 ohm) change to 10 ohm Radial
(RD12CY2E100J)
(560 ohm) change to 680 ohm Radial
(RD12CY2E681J)
(220 pF) Remove
2 1S1587 (V11-0370-05) diodes in series, anode to ground from the junction of C4 and
Note:Diode I.D. 1S1587 = 1S1585. Added diodes may induce RX IMD. If se, delete.
7. As illustrated, carefully cut the cable ties on the wire harness (without cutting thr wires) as it rounds the corner behind the PLL
unit X50-1490-00.
8. Seperate the AVB line, a white/brown line from the filter unit X51-1200-00 to the RF unit X44-1250-01.
9. Adjscent to the rear of the PLL and to the left you will see a five pin terminal strip. The two right-hand most terminals are
bridged. Without breaking the terminal or strip, remove the heavy yellow, and light red and green lines and transfer them to the
adjacent terminal. There will now be seven lines, plus the positive end of the C1 on the second terminal. Be sure to cut the wire
jumper between these two terminals.
10. The free terminal will be a tie point for the AVB line bypass capacitor. Solder a .01uF 50V disc ceramic (C52-1710-36) between
ground and the first free terminal. Use spaghetti to insulate the leads. Then solder the AVB line to the .010uF cap.
11. Rerie the cable herness with nylon cable ties (J61-0401-05).
12. Replace the covers and speaker lead. Power-up and verify correct operation.
Note: Installation time for this procedure is approximately ½ hour.
This modification is read 1152 times.
top of page
19-07-1998
(TS-120) TS-120S Full CW output in ssb mode
Hight reverse leakage, ou shorting of D2 and sometime D3 on the RF UNIT X44-1260-01, will provide an unwanted DC voltage path
which gives full CW output while in the SSB mode. Carrier control has no effect, and RX is not affected.
Replace D2, 1S2588, check D3, 1s1587, and install an additional diodo, D8, a 1S1585 on the foil side of the RF unit.
To install, swing the rf unit up. Remove the shield from under the IF unit, exposing the foil side of the RF unit.
Using a razor or X-ACTO Knife, carefuly cut the land between C4 and C20. Solder the additional 1S1585 across the the cut and
observe polarity Replace D2, the 1S2588. Some RF units have a 12 PF cap soldered on the foil side of the board, across T1; C20 will
be missing.
Remove the 12 PF cap, and install C20, 33 PF in the board.
Production later than 080001 has this change.
This modification is read 1106 times.
top of page
14-01-2000
(TS-120) TS-120V: Reduced RX current consumption
Author: Joachim Seibert - [email protected]
The TS-120V is equipped with a two bulb lightshow. Remember that the chassis really warms up above the VFO-scale and the Smeter...
I replaced the two bulbs with green ultra-bright LEDs and matching resistors in series. The resistors give you a chance to adjust a
pleasant illumination level (I always felt the lightbulbs beeing to bright). As standart LEDs are a little thicker than the original Kenwood
bulbs one need to cut off a part of the VFO-scale lighting rubber mounting sleeve's rear portion. Cut of the bulb's wires close to the
glas body, they will perfectly serve the new LED-R combinations.
Experience:
●
●
●
●
RX current went down by 300mA
scales do not dazzle anymore in a darker shack
chassis does not heat up as fast as before
(still some heat above the frequency counter)
=> less VFO drift than before
I will not sign responsible for any damage produced with this modification!
This modification is read 1101 times.
top of page
20-02-2000
(TS-120) TS-120S, TS-180S phone patch terminal addition
Author: Trio-Kenwood Communication, inc.
Service bulletin no. 44 (6-9-1979)
Kenwood recommends the PC-1 Phone Patch for all of our radios. Most other phone patches will work satisfactorily without any
modification to the radio, requiring only an external speaker connection, and that the Mic line be run through the patch.
For those operators who desire a Patch input similar to the TS-520S or TS-820S, an input connection and terminal must be added at
the Mic input preamp circuit.
Fixed Divider
Use a 100Kohm in series, with a 10Kohm to ground on the input side of the 100Kohm resistor. Use shielded line, and connect as
follows:
TS-120S
On the IF Gen unit X49-1110-01 install the fixed divider at the junction of R43 10K, C42 100pF, & C43 1uF (input of Q18). Add an RCA
jack, or use remote pins 7 and ground for input.
TS-180S
On the IF Gen unit X48-1240-00 install the fixed divider at the junction of R167 10K, C128 .001uF, & C129 1uF (input of Q32). Add an
RCA jack, or use remote pins 7 and ground for input.
top of page
This modification is read 1008 times.
20-02-2000
(TS-120) TS-120S Final protection
Author: Trio-Kenwood Communication, inc.
Service Bulletin no. 51 (27-7-1979)
If for any reason work is performed in the Final unit, install two additional parts to the Filter unit X51-1200-00. This will improve
protection action.
Procedure:
1. Remove top and bottom covers.
2. Remove Final unit (6screws).
3. Filter unit X51-1200-00 will be exposed. Install between Q3 Base, and TP1, series wired diode and resistor D14 and R34.
No adjustment are necessary
New part number D14 1S1555
R34 4.7Kohm
V11-0076-05
Please notate your Service Manual
top of page
This modification is read 1144 times.
19-03-2000
(TS-120) TS-120S Ant input transformator replacement (2)
Author: Trio-Kenwood Communication, inc.
Service Bulletin no. 831 (12-8-1980)
TS-120s Ant Transformator Replacement: New Part.
Supercedes bulletin #40 7/12/79
Transceivers subject to strong static fields, high RF, or similar high current atmospheric discharges may suddenly exhibit low
sensitivity on all bands. TX will not be effected. Suspect T1 on the RF unit, X44-1260-01.
When replacing T1, L43, 0696-35, check that the value of C20 is 33pF. Early units may have a 15pF for C20, and may have T1 as L430696-05. In either case, replace the transformer with an L43-0929-15. If C20 is 15pF, replace it with a 33pF capacitor. Since T1 is a
broadband transformer, no adjustment is necessary.
In addition, add two 1S1587 diodes after the transformer as shown to further protect the receiver.
Installation time for this procedure is approximately ½ hour.
This modification is read 1061 times.
14-11-2001
(TS-130) TS-130S TX oscillation
Author: F6HQP Marc - [email protected]
The problem is full output both forward and reflected on 20 and 17
The modification is made after read ''TS-120S TX ocillation'' of 19/07/98
●
remove up cover (8 screws)
●
remove the ''relay unit X41-1300-00'' (2 screws)
top of page
●
remove the screw under the ''relay unit'' on the ''RF unit X44-1380-00'' just near the coil L48. Put a terminal and replace the
screw. The terminal is now to the ground.
●
solder a 10nF ceramic between the terminal and the coil L48.
●
replace the ''relay unit'' and the cover.
F6HQP Marc
This modification is read 938 times.
top of page
19-07-1998
(TS-140) TS-140S Sidetone Mod
I recently purchased a Kenwood TS-140S after using it on CW for about a week, I decided to try it on SSB and AM. When I pushed the
AM and SSB mode switches, I heard a constant audio tone emanating from the rig. As I diconnected the rig, preparing to return it to
the factory, the tone stopped.
Investigating the circuit diagram, I noted that the CW key has to be unplugged to kill the sidetone. There is no mention of this in the
Instruction Manual.
Perhaps my experience may save others the frustration I encountered.
Also, amateurs should pay attention to the proper use of receiver noise blankers. I know of instances where operators were handing
out reports of distorted signals to outhers, only to discover that it was their improper use of the receiver noise blanker that was
producing the distortion...
Ed, W6XM
This modification is read 1453 times.
top of page
19-07-1998
(TS-140) TS-140S Intermittent loss of TX power
Author: Trio-Kenwood Communication, inc.
Service Bulletin no. 928 (11-4-1988)
In some TS-140S transceivers, the drive transistor, Q2, is not firmly mounted to the heatsink. This can cause a loss of transmit power
after the unit warms up. The following modification will correct this condition.
1. Disconnect the TS-140S from the antenna and power supply.
2. Remove the top and bottom covers. Open the sub-chassis. Refer to the instruction manual for step by step instructions.
3. Remove the shield plate from the sub-chassis (12 screws) to expose the filter an final units. Do not loose the 2 springs that are
secured by the right side screws.
4. Resolder Q2 so that the transistor makes firm contact with the heat sink on the Final unit. Tighten the transistor's mounting
screw. (See the diagram below).
5. Assemble the transceiver by reversing steps 1 through 3.
This modification may be performed under warranty.
Time required for this change is 1/2 hour or less.
top of page
This modification is read 1485 times.
19-07-1998
(TS-140) Broadcast Sensitivity Modification for the TS680S / 140S
Between .500 and 1.6 MHz attenuation is added to reduce? front-end overload on the Broadcast band. Some of us BCB DXers find this
a HIGHLY undesirable feature. If I want attenuation I will use the front panel switch. The following mod will restore the sensitivity Cut the land between IC1 pin 11 and R7 (SIGNAL UNIT, M54581P)
Cut the trace between IC1 pin 12 and R10
Add a small signal diode (1N914, 1N4148) between IC1 pin 11 and R7 (Cathode towards R7)
Add a small signal diode between IC1 pin 12 and R7 (Cathode towards R7)
Trace the lands from pin 11 and 12 of IC1 and you will find a good place (to the left of connector CN5) to cut these traces as well as
pad to solder the diodes to.
top of page
This modification is read 1461 times.
19-07-1998
(TS-140) TS-140S TX All Freq Mod
To enable the TS-140S for transmitting on all bands:
1.
2.
3.
4.
5.
6.
Disconnect radio from power supply and antenna
Remove top and Bottom covers
Locate the control board (I believe it is on the bottom --NOT BEHIND TH THE KNOBS LIKE THE 440!!)
Cut D31 on the control board
Reassemble the radio
Reset the radio by holding the A=B switch while powering up the rig.
Disclaimer: This Modification is for those who need it to operate MARS only.
top of page
This modification is read 1945 times.
16-04-2000
(TS-140) TS-140S Momentary transmission when VOX is turned on
Author: Trio-Kenwood Communication, inc.
Service Bulletin no. 929 (11-4-1988)
When the VOX switch is turned on immediately after the power switch is depressed, the TS-140S may trip into the transmit mode.
This condition can be corrected be changing the value of chip capacitor C504 on the Signal unit. The following procedure will detail
how to access the capacitor.
Required parts:
C504 0.001µF, 50V chip capacitor (CK73FB1H102K)
1. Disconnect the TS-140S from the antenna and power supply.
2. Remove the top and bottom covers (12 screws). Remove the 4 sub-chassis mounting screws. Swing the sub-chassis to the left to
expose the Signal unit. If required, refer to the instruction manual for illustrations.
Note: Refer to figure 1 for the next steps.
3. Unplug the wires at connector CN4, CN12, CN18, CN19, and CN20.
4. Remove the nine screws from the signal unit.
5. Slide the Signal unit forward until the external speaker jack clear the back panel cutout.
6. Carefully lift the Signal unit up from the back side and rotate it toward the front panel to expose the bottom of the board.
7. Locate chic capacitor C504 on the bottom of the board (see figure 2). If required, refer to the service manual board diagrams for
details.
8. Unsolder and remove the C504.
9. Install and solder the .001 µF capacitor in place of C504.
10. Assemble the transceiver be reversing the above steps.
This modification may be covered under warranty.
Time required for this modification is 1 hour or less.
top of page
This modification is read 1286 times.
15-11-2001
(TS-140) Kenwood TS-140S tip
Author: Bernd DH4MBM - [email protected]
I had much problems with my Kenwood TS140-S and no Circuit Diagram..
The digits of the display began flickering after about 10 minutes and the display showed nonsens. The relais of the PA made much
noise... After switching the trx off it worked again .. for ten minutes.
The kenwood homepages were no help either...
I opend it carefully, disconnected all HF connectors and cleanded them with a rubber gum ( I don´t know the exact term, but I mean
that thing I drove my teacher mad in drawing ! ) and it was a little better. After a tip from packet radio, I removed the EProm on the
Upper platine (circuit board) and cleaned its legs V E R R Y carefully on the same way. Now the TS140S works propperly since 8
weeks.
73 de Bernd DH4MBM
top of page
This modification is read 1464 times.
19-07-1998
(TS-180) TS-180S Trouble Sheet
Author: Trio-Kenwood Communication, inc.
Service Bulletin no. 61 (18-12-1979)
ALC deflection low Replace D21 on IF unit from 7.1 to 9.0V zener.
Readjust all ALC pots.
IF #2 OUtput low Bridge R77 position, replace R78 with R77 470 ohms. See TKC service Bulletin.
RX Noise (OSC CAR leakage) Shorten L31, L33 leads as much as possible.
Increase NB effectiveness Replace L31, L33 for 33 uh to 27uh, with SHORT leads.
RX noise from strong signals Replace L30 10uh on the IF with self shielding type (new part L40-1035-21).
TX audio distortion Adjust T15 on the IF approx 1/2 turn back, readjust all ALC pots up.
10 M PLL unlock change: R77 from 6.8 K to 4.7 K ohm, R94 from 8.2 K to 6.8 K ohm on the PLL unit.
TX audio distortion Adjust 10 W bias for 150mA, 100 W bias for 100mA.
Unlocked all bands Check L2, (Q2 B+) in the PLL unit.
FM'ing with DFC See service bullein of 9/10 for L12, L13 change and add resistor and shield.
40 Mlow alc, See bulletin 9/14 change C14, 17.
top of page
This modification is read 725 times.
19-07-1998
(TS-180) TS-180S Use with a Linear Amplifier
Author: Trio-Kenwood Communication, inc.
Service Bulletin no. 817 (20-3-1980)
1. Fast Protection with a Linear:
For complaints of fast protection, such as when operating CW semibreak-in with a linear, check C73 at the base of Q1 on the LPF
unit X51-1180-00. If it is a 1uf, change to 3.3 uf, 25v or greater. This will compensate for slow linear relay closure.
2. Premature Protection
The radio should protect at 3:1 SWR, or at 24W open (no) load. To test the protection circuit, load the radio at 24W into a know
500 ohm dummy load through a Bird 43 wattmeter. Disconnect the load from the wattmeter. The protection light should just lite.
Adjust the protection pot VR1 on the LPF unit for protectio at 24W with no load.
3. For complaints of VOX CYCLING, MEMORY JUMP, READOUT JUMP, or TONE "BEEP" at key up or down with a linear amp, suspect
linear induced relay transients entering the radio via the ASSY relay wiring.
For example, DRAKE L4B linears before Serial Number 5500 do not have a quench diode across the DC operated relay. Install a
1N4005 or equivalent across the relay in the linear to eliminate the back EMF induced by the linear into the TS-180S. Similarly,
Henry linears also don't have a diode across the relay and may give these symptoms when operated with a TS-180S.
top of page
This modification is read 659 times.
19-07-1998
(TS-180) TS-180S Low Pass Filter Optional Changes
Author: Trio-Kenwood Communication, inc.
Service bulletin no. 41 (4-9-1979)
1. Transmitter ALC levels may be increased by these optional component changes. Check for correct component values when
installing the CK-18 kit.
On the LPF Unit X51-1180-00 change:
7 MHz
C14 from 470pf to 390pf
C17 from 470pf to 390pf
(CM93D2H391J)
(CM93D2H391J)
18 and 21 MHz
C25
C26
C28
C29
from
from
from
from
27pf
82pf
82pf
27pf
to
to
to
to
39pf
68pf
120pf
39pf
(CC45CH2H390J)
(CC45CH2H680J)
(CC45CH2H121J)
(CC45CH2H390J)
24.5 and 28 MHz
C30 from 18pf to 39pf
C34 from 18pf to 39pf
(CC45CH2H390J)
(CC45CH2H390J)
All capacitors should be 500V silver mica or disc ceramic, 5%.
ALC Adjustment. After these component changes, perform ALC alignments 4-4, 4-5, and 4-6 as listed in the Service Manual. Be
sure to adjust to spec.; incorrect meter zero (4-4), output exceeding 95W (4-5), or failure to peak T1 (RF unit) and L15 (IF unit)
(4-6) will result in low or no ALC and possible future damage to the power amplifier.
2. Fast protection with a linear amplifier. While working in the LPF unit, check the value of C73 (base of Q1). If it is 1uf, change to a
3.3 uf @ 25v dc tantalum (CS15E1E3R3M). This will compensate fro slow linear amplifier relay closure.
Note:
These changes are at the owners option and may not be performed in warranty.
top of page
This modification is read 593 times.
19-07-1998
(TS-180) BS-8 Alignment with the TS-180S Transceiver
The SM-220/BS-8 scope combination are fully compatible with the TS-180S transceiver. However, as the TS-180S does not have a
25kHz calibrator, BS-8 alignment will not be in accordance with the SM-220 Operating Manual.
Procedure:
Install the BS-8 in accordance with the SM-220 Manual, however, leave the scope covers off until step 1 is completed (If input
alignment.) See note 1.2.
Perform steps 8.4.1, 8.4.2. steps 8.4.3, 8.4.4 do not apply to the TS-180S. After step 8.4.2. continue:
1. With the Marker ON, turn the transceiver ON, and in the USB mode, any band, you should hear the scope Marker directly injected
into the IF.
Peak T201, the BS-8 input IF transformer, for maximum signal into the TS-180S. This transformer is not shown in Fig. 8-2, but is
the only other adjustment on the BS-8, and is located below the three identified sccess openings. If you cannot hear the Scope
Marker in the TS-180S, turn the marker off and tune a local station on the 1.5 MHz band. Peak the drive control, and then peak
T1 in the BS-8 for maximum amplitude at scope center and equal roll-off at the display edges. See note 1 Page 2.
2. Turn of TS-180S, 1.5 MHz band, and tune to the local AM broadcast station nearest 1.6 MHz.
3. Enter this frequency in the M1 Memory. Depress the DSP/Diff pushbutton for a differential display.
4. Tune up and down approximately 100KHz, observing the scope display. Note the verticale displacement of the original frequency
to the left and right. If equal, or linear displacement is obseved, stop.
5. If the display does not shift equally when tuned up or down frequency, adjust VR202 for linearity of scan width. Then reset to the
center frequency (by the cope Marker or retuning the transceiver). Reset TC201 if necessary. Repeat two or three times for
correct scope center frequency, and linear display.
6. Turn the TS-180S off, and the scope marker on. Switching between 100khz and 20khz scan widths, the marker should appear at
scoep center, and should not shift. Repeat step 5 if there is a shift.
Notes:
1. A Bs-8 previously aligned to a TS-820 or TS-820S need only have step 1., input alignment, performed.
2. Preset TC201, VR201, VR202 at their center. When alignment is complete, these adjustments should not be at their extreme
limits. This will result in unstable Pan display operation. Rather, they should be somewhat within their center range.
Please make these changes in your service manual.
top of page
This modification is read 619 times.
19-07-1998
(TS-180) TS-180S CW Delay During VOX Memory Operation
Author: Trio-Kenwood Communication, inc.
Service Bulletin no. 803 (7-2-1980)
Some operators may report missing the first dit during CW VOX operation on the memories. This will occur only in early units, and
may be improved by changing one capacitor in the DFC.
On the DFC VCO unit X50-1550-00, check C3 at the base of Q3. If C3 is a 22uF electrolytic, change to a .01uf disc.
No adjustments are necessary.
This modification is read 573 times.
top of page
19-07-1998
(TS-180) TS-180S Low 40M ALC
9-14-79
Please annotate your service manual.
Some operators may experience intermittent reduction or loss of ALC, especially after several minutes transmit time.
On the LPF unit X51-1180-00, change C14, C17 from 470 pf to 390 pF. Check ALC level and adjust if necessary, per section 406 ALC
meter adjustmet, TS-180S service Manual.
New part: CM93D2H390J 390pF +/- 5% 500v mica or ceramic
Please annotate your Service Manual.
top of page
This modification is read 587 times.
19-07-1998
(TS-180) TS-180S VFO Stability
Author: Trio-Kenwood Communication, inc.
Service Bulletin no. 839 (29-12-1980)
VFO drift characteristics may be improved by changing a capacitor value and location in the VFO.
1. Begin by calibrating the analog dial to the Digital Display at 14.000.0 MHz. DO NOT disturb this calibration while working on the
VFO.
2. Turn off the main power and remove the VFO unit by two 3mm hex head bolts.
3. Withdraw out the front panel and unplug the leads.
4. Remove the VFO cover by five Phillips head screws.
5. Remove C17 from the PCB. This may be cut flush to the board.
6. Install the 18 pF yellow cap across the tank coil terminals. Position the cap near the coil.
7. To reassemble, performs steps 3, 2. Snug all VFO case screws. A later complaint of frequency jump would indicate a loose VFO
shell.
8. Turn on the radio and check analog dial calibration against the Digital Display. Adjust VC1 (center of the Seal Tape) only if the
zero-point has moved.
9. VFO linearity final check: The Digital readout and analog dial should agree to within +/- 2 kHz at every 100 kHz dial point.
New Part: 18 pF CC45RC1H180J
Old Part: 18 pF CC45PG1H180J
Analog Dial Calibration
1. Calibrate the main knob to 50 kHz analog against the digital display.
2. Note the digital error. If it is more than 2 kHz adjust the VFO trimmer cap VC1 (center under the sealing tape) to exactly 50.0 on
the digital readout.
3. Turn the main knob to 450 analog. If the digital error is less than 2 kHz it is in spec. If the digital error greater, proceed:
For instance, if the digital error is 14.454.0 (plus 4 kHz), multiply the error times 4 (16 kHz) and adjust the VFO trimmer cap to
the desired frequency (14.450.0) LESS the error, or 14.434.0. Next, adjust the VFO inductor L1 (front under the sealing tape)
back up to the desired frequency of 14.450.0.
4. If the error in step 3 was in the minus direction, reverse the direction of correction adjustment.
5. VFO linearity final check: The digital readout and analog dial should agree to within +/- 2 kHz at every 100 kHz dial point.
This modification is read 627 times.
top of page
19-07-1998
(TS-180) TS-180S Increase of RX Audio Output
Author: Trio-Kenwood Communication, inc.
Service Bulletin no. 47 (30-7-1979)
RX audio output from the TS-180S may be increased a total of 4.7 dB. This is an optional change which you can make at the owners
request.
On the IF unit X48-1240-00 change components:
R206 2.2K change to 1 K ohn
R207 2.2K change to 4.7 K ohm
On the AF Gain Control, between pin 1 and 3;
C4 .047uF change to .027uF mylar
Please notate your service manual.
This modification is read 595 times.
top of page
19-07-1998
(TS-180) TS-180S IF output #2 Level Change for SM-220
Author: Trio-Kenwood Communication, inc.
Service bulletin no. 42 (4-9-1979)
TS-180S owners who desire to operate an SM-220 for IF output display will require a wiring change to the IF unit X48-1240-00. No
additional parts and no adjustments are required.
Remove R77, 470 ohm, and replace with wire jumper. Remove R78, 56 ohm, and replace with old R77. The 56 ohm resistor is not
used.
With AGC on, gain should be adequate for about a 3/4 screen display.
This modification is read 586 times.
top of page
20-02-2000
(TS-180) TS-180S DFC hum with PS-30
Author: Trio-Kenwood Communication, inc.
Service bulletin no. 36 (10-7-1979)
Some TS-180S users may report erratic DFC, and audio hum. You will find they have placed the PS-30 to the left of the transceiver.
Hum is induced from the PS-30 into the DFC.
We are awaiting modification and production changes. Mean while, please be award of this problem. Temporarily moving the PS-30 to
the right hand side of the transceiver will cure the problem. Spacing the two units with the SP-180, or just separating at least two
inches will also cure the hum. When full information is available, we will follow up.
Please advise your Service and Sales personal.
This modification is read 574 times.
top of page
20-02-2000
(TS-180) TS-120S, TS-180S phone patch terminal addition
Author: Trio-Kenwood Communication, inc.
Service bulletin no. 44 (6-9-1979)
Kenwood recommends the PC-1 Phone Patch for all of our radios. Most other phone patches will work satisfactorily without any
modification to the radio, requiring only an external speaker connection, and that the Mic line be run through the patch.
For those operators who desire a Patch input similar to the TS-520S or TS-820S, an input connection and terminal must be added at
the Mic input preamp circuit.
Fixed Divider
Use a 100Kohm in series, with a 10Kohm to ground on the input side of the 100Kohm resistor. Use shielded line, and connect as
follows:
TS-120S
On the IF Gen unit X49-1110-01 install the fixed divider at the junction of R43 10K, C42 100pF, & C43 1uF (input of Q18). Add an RCA
jack, or use remote pins 7 and ground for input.
TS-180S
On the IF Gen unit X48-1240-00 install the fixed divider at the junction of R167 10K, C128 .001uF, & C129 1uF (input of Q32). Add an
RCA jack, or use remote pins 7 and ground for input.
top of page
This modification is read 579 times.
18-03-2000
(TS-180) TS-180S DFC
Author: Trio-Kenwood Communication, inc.
Service Bulletin no. 56 (10-09-1979)
For complaints of either induced power supply hum, or intermittent frequency stability while using the DFC, perform the following
changes to the VCO unit X50-1550-00:
1. Install a 330 Kohm resistor between Q11 G1 & the 8V line.
Connect from L7 at C12 to Q11 G1, at R35.
2. Replace L12 68uH with new part L40-6831-21.
3. Replace L13 150 µH with new part L40-1541-27.
4. Install magnetic shield as illustrated. Use the two existing screws, plus double faced tape to prevent vibration.
No adjustments are necessary.
Note: On page 37 of the Service Manual, the VCO Board view shows reversed callouts for Q11 & Q15. D & S, and G1 & G2 are
transposed.
This bulletin supercedes previous DFC bulletins of 7/10/79 and 7/13/79.
This modification is read 611 times.
top of page
18-03-2000
(TS-180) TS-180S DFC Instability
Author: Trio-Kenwood Communication, inc.
Service Bulletin no. 67 (13-7-1979)
TS-180S operators may report intermittent DFC instability, especially at 10 KHz even points. This may be characterized in some cases
as PM'ing.
On the VCO unit X50-1550-00, install a 330 Kohm resistor between Q11 G1, and the 8V line. Connect from L7 at C12 to Q11 G1. at
R35.
No adjustments are necessary.
Note: On page 37 of the Service Manual, the Board view of the VCO unit contains reversed callouts for Q11 & Q15 FET's, D & S, and
G1 & G2 are transposed.
This modification is read 592 times.
top of page
03-03-2001
(TS-2000) TS-2000 Mars/Cap Mod
Author: M0DZO & G4KQU - [email protected]
●
Disconnect power cord and antenna from the transceiver.
●
Remove the top and bottom covers.
●
Remove the top screw from each side of the front panel assembly.
●
●
Loosen the bottom screw from each side of the front panel assembly.
Carefully rotate the front panel forward to gain access to the control board(X53-3910-11). This board is mounted vertically
against the body of the transceiver. It is not the board that is mounted in the front panel assembly.
●
Locate and remove resistor R53 from the control board.
●
Assemble the transceiver then perform the CPU reset procedure by holding the A=B button in while turning on the power.
Transmit Range: 1.705-30MHz, 49-54MHz, 142-152MHz, 420-450MHz, 1240-1300MHz.
This modification is read 4222 times.
top of page
04-03-2001
(TS-2000) TS-2000 modification information (TX and RX)
Author: - [email protected]
I got the modification information on the TS-2000 from reliable sources recently. The info. seems to be correct. My TS-2000 (K-type)
worked.
1. Remove the top and bottom cover.
2. Loosen the 4 screws that tighen the front panel.
3. Pull the front panel forward, holding the upper part.
4. You will see a fan on the left.
5. At the bottom right of the fan, there are jumpers.
●
Remove R52 to expand the RX frequency.
●
Remove R53 to expand the TX frequency.
●
Remove R54 to expand the features.
(Cross-band Repeat, SkyCommand, External Remote and etc.)
R52 and R54 have been already removed on my transceiver.
After the modification, it transmits:
1.705 - 30MHz, 49-54MHz, 142-152MHz, 420-450MHz.
* It does not expand too much, though :-(
Oh, I forgot one important thing.
You must perform ALL RESET by pressing and hold [A=B] key when you turn on the transceiver. (You will lose all the memory data).
This modification is read 4871 times.
top of page
30-05-2001
(TS-2000) Sensitivity Kenwood TS-2000
Author: Hans - PA3HGT
Sensitivity Kenwood TS2000 measured with Rohde & Schwartz CMS52
10dB/sinad SSB
freq.
1 Mc
1,8 Mc
3,7 Mc
7 Mc
10 Mc
14 Mc
18 Mc
21 Mc
24 Mc
28 Mc
50,1 Mc
145 Mc
430 Mc
440 Mc
uV
1,127
0,35
0,4
0,39
< 0,045
0,21
0,113
0,194
0,126
0,091
0,106
0,093
0,07
0,082
12 dB/sinad FM
dBm
-106
-115,9
-115
-115,1
< -133,9
-120,4
-125,9
-121
-120
-127,9
-126,5
-127,6
-130
-128,7
Uv
0,163
0,184
0,19
0,14
0,146
dBm
-122,8
-121,5
-121,4
-123,6
-123,7
The valeus are measured with the pre-amp on .
73 , Hans , PA3HGT
This modification is read 4057 times.
top of page
12-07-2001
(TS-2000) Firmware upgrade for TS-2000
Firmware upgrade for TS-2000.
This modification is read 4304 times.
top of page
01-01-2002
(TS-2000) ARCP-2000 windows CAT software for Kenwoods TS-2000
Author: Kenwood
Notice
Support for customers using ARCP-2000 Radio Control Program.
December 5, 2001
We've updated ARCP-2000 Radio Control Program Ver 1.01 to Ver 1.02. We are offering Ver 1.02 as a download to owners of Ver 1.00
and Ver 1.01. This update can be downloaded from below.
ARCP-2000 Radio Control Program Ver 1.01 update to Ver 1.02 details:(December 05, 2001)
1. Resolves the issue where received data is not updated in the terminal window while continually monitoring packet data.
2. Readability of characters within the terminal window has been improved.
ARCP-2000 Radio Control Program Ver 1.00 update to Ver 1.01 details:(March 30, 2001)
1. SUB frequency display direct entry not possible in satellite mode issue resolved.
2. Resolves frequency number adjustment issue in MAIN display and SUB display while in satellite mode.
3. Resolves the issue where in bands that CTRL is not displayed, MODE is not displayed correctly when calling up satellite memory.
4. Resolves the issue where only 7 characters could be entered in the satellite memory channel name. Now up to 8 characters may
be entered.
Download
Note: Download is only available to purchasers of the ARCP-2000 Radio Control Program Ver 1.00 and Ver 1.01.
Please note that 'Ver 1.00' can also be updated to 'Ver 1.02'.
Please note that even if software is downloaded, it cannot be used by non-purchasers.
Installation instructions:
1. Execute downloaded file and extract the ARCP-2000 installation program into a designated folder.
2. In the previously designated folder, a folder labeled Arcp2000 will be created. There you will find a folder labeled "disk1".
Execute the Setup.exe file within the "disk1" folder to begin installation.
3. Once installation begins, follow the instructions to continue with installation.
Latest update: ARCP-2000 Ver 1.02: Arcp102.exe 2.4MB. Mirror
This modification is read 2361 times.
top of page
19-07-1998
(TS-2400) TS-2400 out-of-band mod
Locate the rx unit.
Cut the diodes D32 and D33 located inside the DTMF ic.
Is this simple or what?!
This modification is read 599 times.
top of page
19-07-1998
(TS-2400) TR-2400 Unwanted Noise: Tone or burst at TX
2-13-80
For complaints of a tone burst type noise, or simply a noise, at initial key down, suspect either a broken losse component, or incorrect
valued component on the RX TX unit.
On the RX TX unit, Q16 emitter, check C82, a 33 uf tantalum cap for broken connection.
If you find a 22 uf cap at C82 replace it with a 33 uf cap.
This modification is read 465 times.
top of page
19-07-1998
(TS-2400) TR-2400 Display or Keyboard trouble
2-20-80
Display
An intermittent or blank digit may be caused by either a broken lead, or intermittently shorting lead on the PLL unit.
On the PLL unit, look in the area of Q12, the touchtone generator. Between Q12 and the board edge locate the D1-D4 lines. Inspect
this area for either an open (Broken) lead, or shorted (pinched) lead. Repair as necessary, and check lead dress before reassembly.
Keyboard
An intermittent or inoperative keyboard row or column may be caused by a torn or pinched lead, or a cracked diode.
Again, in the area of Q12, inspect the "T" and "Y" lines for shorts or open connections, and inspect diodes D19-D26 for physical
breakage.
This modification is read 485 times.
top of page
19-07-1998
(TS-2400) TR-2400 RX low, INtermittent, or distorted
2-20-80
For any of the above complaints, suspect a broken loose component in the RX IF or audio output circuit on the RX TX unit. Simply pull
up on the leads and resolder.
Adjacent to Q9, the audio output IC, find C49, a 1uf cap. If broken loose from the board, audio output may be down, while current
consumption may be up from the normal 30mA to about 100mA due to the audio output amp oscillating.
Adjacent to L10, the discriminator, locate C33, a .033uf cap. If this component is broken loose, audio output may be up approximately
6 dB with excessive high frequency audio response.
top of page
This modification is read 469 times.
19-07-1998
(TS-430) TS-430S Noise blanker improvements
Author: Trio-Kenwood Communication, inc.
Service Bulletin no. 887 (17-10-1984)
Some operators have indicated a desire to have their TS-430S noise blanker operate similar to the noise blankers in the TS120S/130S series. By performing the following modification the operator will be able to increase the effectiveness of the TS-430S
Noise Blanker circuit.
Procedure
On the RF unit (X44-1510-xx) change the following components.
R80 change to a 100 Kohm ¼ Watt resistor (RD14CB2E104J)
R81 change to a 56 Kohm ¼ Watt resistor (RD14CB2E563J)
C125 change to a 560pF 25V disc capacitor (CK45BIH561K)
This is an optional change and may not be performed in-warranty.
No realignment is required.
This modification is read 1472 times.
19-07-1998
(TS-430) Kenwood ts-430 AGC mod
The type of speech processor circuit used in the ts-430 is an agc (automatic gain control) driven audio frequency amplifier.
By decreasing the time constant substantially, the speech processing effect will be improved.
The modification is very simple.
Replace capacitor c104 4.5 uf on the if board by a smaller value of o.47 uf.
To Modify This Capacitor
1.
2.
3.
4.
5.
Remove the if board as indicated for the cw filter installation.
Remove c104 from the board.
Mount a 0.47 uf capacitor on the board.
Mount the if board as indicated by cw filter installation.
You are now fully operational again.
top of page
6. Adjust the mic gain without the processor until normal alc deviation.
7. Switch the processor on and adjust vr7 near c104 until normal ALC deviation. (do not alter the mic gain at this time)
8. Enjoy the speech processor improvement.
This modification is read 1482 times.
top of page
19-07-1998
(TS-430) Transmit enable for mars/cap frq for the TS-430S
For MARS and CAP transmit capability, a minor change is required:
1. Unplug the DC power cable.
2. Remove the top and bottom covers of the set.
3. Locate the RF unit connector 10. Diode D39 is near the connector (labeled D39 on the circuit board). Take a small pair of
diagonal cutters and clip the lead at the top of the bend.
4. Locate IC-2 on the Control Unit, under the IF unit. Resistor R148 is near IC-2, clip the resistor lead.
5. This completes the modification. Reassemble the unit, being careful not to pinch any leads.
This modification is read 1629 times.
top of page
19-07-1998
(TS-430) Mods for the kenwood TS430S for amtor
The mods are as follows:On the I.F.board change C-164 from 0.22mfd to 10nfd..50v change C-60 from 10mfd to 4.7mfd. 16v....
Parallel a 150kohm resistor across R.109 usuing a small switch or by whatever means you can design to switch this resistor in and
out.
In for arq and out for all other modes. some people use the send/rec switch, others have used the noise blanker switch. I have used a
small mini switch which i have mounted in place of the left front rubber foot.
It will probaly help to cut diode d-50 on the i.f.board. If you use a 500hz filter in the cwn or ssbn position then parallel a 10mfd
capacitor across C-10 or C-8. add a 10mfd capacitor across C-161.(actually i found that these last two were not necessary in my
430S.)
You will find it best to take the audio from in front of the volume control, but those people usuing audio from the speaker socket seem
to get ok results. Really you can get away with just the first two mods, change C-60 and C-164. this originally came from VK2AGE.
73s de larry in ravenshoe.
This modification is read 1374 times.
top of page
19-07-1998
(TS-430) TS430 power fault - ANSWERS
Follows my original posting and answers.
>As you read in the subject I have some sporadic but very annoying troubles
>with my 1988 Kenwood TS430s. This is what happens to my gear (and the same
>occours to the rig of a friend of mine):
>
>Approx. every 3-4 hours of CW operation (while working without any problem)
>the power output drops down to a few watt (tipically duringa pileup and when
>the dx sent 'ik3huk 599...'). During this power-loss the ALC level is low
>(regularly).
>To have back the full power I have to do the following:
>-Turn CARRIER knob fully clockwise (full power position - ALC doesn't move)
>-Key down for several seconds (very looooong time when in pileup)
>
>I sent the radio to a laboratory for repair (and friend of mine did the same)
>but they're not able to reproduce the power-fault when the radio is on their
>table. They cleaned up all the relais, but the RTX is still loosing power.
This sounds suspiciously like a problem I had with my 430 on voice. It would behave quite similarly, losing power and becoming
distorted on an occasional basis. There was a well reported problem with early 430's where the finals were riveted, but not soldered,
and the rivets could eventually develop a high electical resistance, with ensuing power problems. This was diagnosed and corrected by
Kenwood early, so I doubt it would be a problem in a unit manufactured as late as yours. (I bought mine in late 1984, and it already
had a modified PA -- believe me, I checked!)
My problem turned out to be a marginal connection in the internal switch on the XVTR jack on the back of the rig. This is the
connector with 8 pins. The switch is integral to the connector and works when the plug is inserted. The fix was to insert and remove
the plug in the jack several times. Since I have done this, my 430 has never shown this symptom again.
I wish I could claim to have deduced this myself, but it was pointed out to me by a friend who read it in a snippet from someone in
QST. To whoever took the time to send in that suggestion, I am eternally grateful. Hope this solves your problem, too.
-Rob Stampfli [email protected]
The neat thing about standards:
614-864-9377 HAM RADIO: [email protected] There are so many to choose from.
-------------------------------------------------------------------------------
To all Kenwood users:
The 430 has a corresponding problem to the older rigs:
specifically the 520(S), 820(S), 530S, and 830S rigs....
Power drops while running... if this occurs, tighten the screws on the driver board and IF board.
Had this happen to me and friends a few times...also watch out for the coax connector on the back...they get loose too...no lock
washer on the back.
73,
Tom
[email protected]
------------------------------------------------------------------------Diego,
I had a similar problem with a 430. Mine was intermittent. Finally one cold day [0c] it became permanent. I traced my problem to an
open via connection on one of the final transistor bases. This resulted in that device not getting a dc return to ground. I re-soldered
the via to my success!
I found it by checking dc bias on each final transistor and found one being different in voltage reading.
Good luck,
regards
George Hawkins
-------------------------------------------------------------------------------Here is a solution I heard of for a problem like yours. Perhaps it will be of use to you. Luckily, I have not had any problems with my
TS430S. I'm very pleased with it.
Hope this is of use to you.
73 es GL.... Mark KG7JL
--------------------------------------------------------------------------------KD7EV advises intermittent power output problems on his '430 was cured by installing a more conventional nut on the rear panel UHF
style antenna connector. Apparently a faulty ground connection at this point caused a change in the VSWR which affected the sensing
circuit and thus reducing the RF output power.
-------------------------------------------------------------------------------Guarda che io ho lo stesso problema con un ICOM IC-745. Ogni tanto la c'e' una protezione che va in funzione e la potenza va giu'. Nel
caso mio probabilmente c'e' un problema di corrente di fuga da compensare opportunamente, ma per te potresti provare a vedere se
con una semplice vantola puoi risolvere il caso. Infine, tanto per confermare che per me i diavoletti che muovono gli elettroni esistono,
il problema c'e' solo di estate, quando la temperatura esterna e' sopra i 20 gradi (... qui in Olanda). Faccio notare che dentro casa la
temperatura e' circa la stessa.
Saluti
I0WTD-PA3FWP
Stefano
(In this article Stefano I0WTD told that he had a similar problem on his IC745 and suggested to put a blower on the radio to solve it
out. 'His' power fault happened only on summer. (mine in winter too !!) ik3huk)
This modification is read 1493 times.
top of page
19-07-1998
(TS-430) TS-430S Intermittent PLL Unlock in FM/AM
Author: Trio-Kenwood Communication, inc.
Service Bulletin no. 888 (17-10-1984)
Some owners of the TS-430S have reported intermittent loss of transmit and Receive when operating in the FM or AM modes, along
with a loss of the digital display.
The cause of this may be due to a loss of the FM/AM Heterodyne Oscillator signal. Replacing the components listed below will correct
most instances of this failure.
Procedure:
ON the Control Unit (X53-1290-XX) change R131 to a 22 K ohm 1/4 watt carbon resistor, and change C144 to a 3 pF 25v Disc ceramic
capacitor.
Time required for this modification is 30 minutes.
No realignment is required.
top of page
This modification is read 1298 times.
19-07-1998
(TS-430) TS-430S PLL Unlock at High Temperatures (Revision)
Author: Trio-Kenwood Communication, inc.
Service Bulletin no. 895 (14-9-1985)
This service bulletin supercedes bulletin 891, which concerned low input level to IC-16 as the radio warmed up. This bulletin
incorporates information contained in Bulletin 891 plus additional information.
PROCEDURE:
On the Control Unit (X53-1290-XX)
Check transistor Q8. If it is not a 2SC1815Y change it to this type (Serial numbers 408XXXX-509XXXX).
For serial numbers before 408XXXX change R29 to 820 ohms and C41 to 100 pF.
In addition to the changes listed above check for the following signals:
(You must check these at a dial frequency of exactly 14.000.000 MHz)
TP-1
TP-2
TP-3
TP-4
6.0v (L18 adjusts)
70 MHz
45.3 MHz
6.35v (L10 adjusts)
Time required for this modification is 1 hour or less.
This modification is read 1267 times.
top of page
19-07-1998
(TS-430) TS-430 extended coverage. Include 0-150 KHz
Author: Wim Beekman
Date: 25-Oct-1988
This modification is to include the receiving range from the TS430 from 0-150 kHz.
Connect a resistor from 1K from IC1 pin 14 to ground in the PLL Unit.
(Pin 14 from IC1 goes to the base of a transistor.)
The best way to do this, is by soldering the resistor at the solder side of the PLL Unit PCB.
This modification is read 1686 times.
top of page
19-07-1998
(TS-430) TS-430S Reset the microprocessor
For those of you wanting to know how to reset the microprocessor in the TS-430S, here's what it looks like in the service manual:
1) FUNCTION SW:A
POWER SW:OFF
Set the POWER SW ON
while depressing the A=B
key. Then release the
A=B key.
Hope this helps someone...
This modification is read 1456 times.
26-01-2000
(TS-430) Kenwood TS-430S, no display, no RX/TX with certain modes
top of page
Author: Colin Robertson - [email protected]
I recently acquired a Kenwood TS-430 with an intermittent fault. The rig would occasionally perform normally but the rest of the time
the display and RX would be dead only in the LSB, USB and CW modes. The rig would also not transmit in all modes.
The number of factory “add-on” components found under the PC boards on the rig was a real surprise. The Control and IF boards were
first checked for dry joints and several were found, but the fault persisted. All switching circuits appeared to check out fine. After
searching the Web for assistance, a mod described in a Kenwood Bulletin for a similar display problem was tried without success. A
change in our hot summer weather seemed to indicate the problem was temperature related as the rig worked normally for longer
periods under colder conditions. Freeze spray was then tried on all accessible components on the Control and IF Unit boards. No joy!
A QSO with Roger ZS1J, who used to run a ham radio outlet in Natal for several years, had him recalling a similar problem he had
encountered some years ago on two TS430’s brought in for repair. The culprit in both cases turned out to be leaking LED’s on the
mode selector switch indicators. He suggested this area be check out.
Removal of plug 13 from the Control Unit board (X53-1290-00) proved Roger correct and brought the rig back to life. There was a
very low leakage on the LSB, USB and CW indicator LED’s. Exact replacement LED’s for D3- D7 were not obtainable locally, so to get
around this, 1N4004 diodes were installed in series with the 5 leads on plug 13. The diodes were soldered directly onto the pins in
plug 13 (with cathodes facing away from the plug side), and the plug reconnected to the board. The rig is now fully functional again.
It‘s incredible that the same LED’s should fail in three different rigs! Obviously just a bad batch of components used! Maybe this mod
can restore a dead TS-430 that someone has given up on.
Colin Robertson
ZS2CR
East London, South Africa
25 January 2000
Packet: ZS2CR @ ZS0ELD
e-Mail: R. [email protected]
top of page
This modification is read 1371 times.
23-03-2000
(TS-430) No signal on the meter
Author: Mike WP4COQ - [email protected]
I have a Kenwood TS430 that was transmiting and receiving fine except that the signal meter was not showing any signal on the
AM,CW,LSB,USB.
I open the radio and found that the VR3 pot that is on the X48-1370-00 board was defective, i just replaced the pot with a new one
and it start to receive the signals again.
top of page
This modification is read 1302 times.
09-04-2000
(TS-430) TS-430S 500KHz Hetrodyne
Author: Trio-Kenwood Communication, inc.
Service Bulletin no. 865 (23-3-1983)
Some users of the TS-430S have reported a hetrodyne signal at the 500KHz point on the band. This tone may be reduced or
eliminated by the following procedure.
Parts required
Qty
1
1
1
Description
.001 µF disc cap.
220 pF disc cap.
470 µH coil
Procedure
Kenwood parts number
CC45B1H102K
CC45SL1H221J
L40-4711-13
1. Remove top and bottom covers.
2. Turn radio bottom up and locate PLL unit (X50-1910-00).
3. Remove the sex (6) screws securing the PLL unit to the chassises and fold the unit over, to allow access to the foil side of the
circuit board.
4. Remove the jumper wire that is installed between TP-1 and C6. Install the parallel circuit consisting of the 220 pF capacitor and
the 470 µH coil in its place. See figure 2.
5. Install the .001 µF capacitor as shown in figure 2.
6. Reinstall the PLL unit and replace the top and bottom covers.
7. No alignment is required.
Note: This change may be performed at the owners option and may not be performed in-warranty.
This modification is read 1278 times.
top of page
09-04-2000
(TS-430) TS-430 Notch Control
Author: Trio-Kenwood Communication, inc.
Service Bulletin no. 882 (7-11-1983)
Notch/Squelch control (VR5) may be replaced with part number R24-9403-15, to allow greater flexibility in adjustment. As can be
seen from the chart below, the curve is smoother on the high frequency side (1 KHz to 2.7 KHz), making tuning easier. VR5 is located
on Switch unit (X41-1470-00).
This modification is read 1349 times.
top of page
09-04-2000
(TS-430) TS-430S AM Wide/Narrow filter selection
Author: Trio-Kenwood Communication, inc.
Service Bulletin no. 883 (8-12-1983)
This procedure will allow selection of the Wide or the Narrow filter for AM.
Parts list
Qty
2
4
1
2
2
1
Description
2SA1115(E) Transistor
1S1555 Diode
4.7 Kohm 1/8 Watt
22 Kohm 1/8 Watt
47 Kohm 1/8 Watt
Insulated hookup wire ½28
goage or larger
Short jumper
Circuit designation
Q401, Q402
D401-D404
R405
R403, R404
R401, R402
Modification procedure:
Caution: This modification requires advance soldering and printed circuit board modification techniques, and should only
be performed by experienced kit builders and or technicians. If you are at all unsure of your ability to install this
modification after reading these instructions, please have someone with more experience perform the modification for
you.
1. Remove the power connector from the radio.
2. Using a #2 Philips screwdriver, remove the top cover (8 screws). Be careful of the VOX controls, and the speaker lead, which
may be unplugged.
3. Loosen the two countersunk side screws and remove the 2 screws securing the IF unit bracket. Swing the bracket up slightly to
access and remove the two heat sink screws, Swing the assembly down.
4. Remove 7 screws from the IF unit. Protect the top of the front panel from scratching.
5. Desolder IB1 and discard (use a 45 watt or less iron, and solder wicking).
6. Locate the white jumper wire that is plugged on to the "S" terminal of the IF unit. Desolder the wire from its present location,
and reinstall as shown in figure 1.
7. Install a short jumper wire, as shown in figure 1.
8. Cut the foil paths as shown in figure 2. There are five locations that must be cut. CAUTION: Ensure you cut only the traces as
shown in the figure. Spend a little extra time to ensure you have correctly identified the trace to cut.
9. Install J401, J402 (may all ready be installed), J403, D403, D404, R403, R404, and R405 as shown in figure 2 (use the shortest
lead lengths possible). Check to ensure there are no solder bridges, or splashes on the board.
10. Install Q401, Q402, R401, R402, D401 and D402 as shown on figure 2, again being careful to check for solder bridges, short,
etc.
11. Check to see if D82 is installed, as shown in figure 1. If it is not, install it (1S1555). D83 should also be installed on the foil side
of the board, as shown in figure 2.
Note: Some unit's have D82 and D83 installed, if so go to step 12.
12. Move the filter select jumper to the "A" pin, as shown in figure 1.
13. On control unit (x53-1290-00), cut the lead of resistor R129.
14. Solder a jumper wire to the metal lead of resistor R129, as shown in figure 5. Connect the other end to IF units connector 18 pin
2 from the foil side of the board as shown in figure 4. The wire may be conveniently routed between the circuit board and the
chassis.
15. Install insulating tape below the area of the modification to ensure that no components short out against the case.
16. This completes the modification procedure. The TS-430S will now select either AM Wide or Narrow. Before reassemble, go back
through the procedure and check you work, to ensure no errors have been made.
Note: This is an optional change and may no be performed in-warranty.
top of page
This modification is read 1353 times.
09-04-2000
(TS-430) TS-430 receiver internal beat
Author: Trio-Kenwood Communication, inc.
Service Bulletin no. 885 (27-1-1984)
For reports of an internal beat at 20.415 MHz or at 21.526 MHz perform the following modification.
1. On the RF unit (X44-1510-00) add a short jumper wire from the primary ground of transformer T2 to the primary ground of T3
as shown.
2. Add a jumper from the ground of the secondary of T3 to the ground side of capacitor C194, as shown.
3. Solder a jumper from the shield surrounding T1 to the shield surrounding T2, T3 etc. It may be possible to just bridge the two
cases together with solder, either way is acceptable.
4. On PLL unit (X50-1910-00) locate the position shown for capacitor C57. This capacitor was not installed at the factory, install a
.01 µF 25V disc ceramic capacitor.
This change is applicable to units prior to serial number 407xxxx.
Time required for this modification is ½ hour or less.
This modification may be performed in-warranty on a case by case basic.
This modification is read 1282 times.
top of page
15-04-2000
(TS-430) TS-430S Low/intermittent RX
Author: Trio-Kenwood Communication, inc.
Service Bulletin no. 902 (18-10-1985)
Low or intermittent receive on the TS-430S may be caused by a poor contact on one or more of the LPF relays. In most cases the
following procedure will correct this problem without having to replace relays. The procedure has two steps; first initial cleaning of the
contact by passing a relatively high current thru them (about 500 mA), and then installing a contact maintenance circuit that will apply
a relatively low current (about 8 mA) whenever a new band is selected.
Procedure:
I. Initial contact cleaning procedure.
Parts List:
56 ohm 5W ceramic resistor (R92-0622-05)… 2 mA
1. Press and hold the "UP" bandswitch of the TS-430S (ensure the 1 MHz switch is ON).
2. Apply 13.8V DC to the antenna terminal thru a 28 ohm, 10W resistor for approximately 1 minute. This will cycle thru all the
relays and burn any axidation/contamination from the contacts.
II. Contact maintenance circuit installation.
Part List:
Terminal Strip (E22-0371-05)
C1, C2 (CK45D2H473M) .47 µF 500V
C3 (C91-0117-05) .01 µF 50V
L1 (L33-0259-05) 470 µH
R1 (RD14CB2E102J) 1 Kohm ¼ Watt
Small length of hookup wire ………. 6 inches
1. Disconnect the center lead of the coaxial cable from the antenna terminal.
2. Install the contact maintenance circuit as shown in the accompanying diagrams. Attach the terminal lug strip with one of
the filter unit over screws.
3. Solder the 0v lead to the "JP" terminal of the Filter Unit.
This procedure should may be performed only to those units received for this specific repair symptom. Time required for this
procedure is 1 hour or less.
Date: 27-01-2002
User comment
From: KEN W2GIW
Subject: 56 ohm vs 28 ohm resistors
Mod talks about 28 ohm and 56 ohm resistors. Which one goes between the power supply and the radio?
Date: 25-03-2002
User comment
From: MC44
Subject: Re: 56 ohm vs 28 ohm resistors
As the diagram states, use either one 10 Watt 28ohm resister or two 5W 56ohm resisters.
Troy
This modification is read 1366 times.
top of page
24-07-2001
(TS-430) Circuit Improvements for the TS-430S
Author: Richard L. Measures, AG6K
Note: The component locater information is correct with the operator facing the front of the radio.
Problem: Poor noise-blanker [NB] performance on pulse noise. This is caused by an over-enthusiastic NB AGC which causes the NB to
shut down prematurely. Fix: Change R81 on the RF unit from a 10K Ohm to a 24 -30K Ohm. R81 is near the front of the board
between connectors #7 and #16.
Problem: Lack the transmit capability on non-amateur frequencies. Fix: On the RF Unit , remove connector #10 and remove pins #2
and #3 by pressing the release tabs on the side of the connector with a small jeweler's screwdriver and sliding the pins in the direction
of their wires. The loose pins should be covered with insulating tubing so they won't short out to the other circuits.
Problem: 9.5db of treble roll-off at 2800Hz in the receive audio. This makes the audio sound muffled and hard to understand. Fix: On
the IF Unit, between L4 and connector #24, change C42 from a .033µF to a .003µF - .0047 µF non-inductive capacitor. A disc ceramic
capacitor or a non-inductive Mylar unit will do the job. Note: To prevent operator fatigue, after this modification is made, the RF Gain
control should not be operated any higher than is necessary to just begin to hear the sky-noise on the particular band being used. In
this way, weak stations can still be heard, but the background sky-noise will not become annoying.
Problem: Lack of crispness in transmit audio. This can be due to the carrier oscillators periodically needing adjustment as the
components in the radio age. The adjustment is made on the Control Unit. Two, small ceramic trimmer capacitors are located next to
two crystals in the lower left hand corner of the board. The designators are TC3 and TC4. The capacitor nearest the front of the radio
adjusts LSB. The other capacitor TC4 , adjusts USB. With the IF shift on "0" , these adjustments can be set "by ear" while listening to
a broadcast station tuned to zero -beat. The carrier oscillators can also be adjusted by transmitting into a wattmeter/dummy load
while feeding about a milli-volt of audio into the microphone jack. As the audio frequency varies, the power output will fall off at the
edges of the crystal filter passband, or "window". Set the audio frequency to 1000Hz and adjust the microphone gain to produce 40
watts output. Lower the frequency to about 300Hz . Adjust the carrier oscillator to produce 10 watts. The rest of the problem is caused
by a 4.5db roll-off at 2800Hz in the microphone amplifier. Fix: Change C96 on the IF Unit, next to connector #10, from .015µF to a
.001µF [1000pF/1nF] disc-ceramic capacitor.
Problem: Noisy Transmit/Receive Relay. Cutting R28 {2.2k Ohm, 1/4 W} on the X41-1470 Switch Unit , behind the ATTN Switch ,
will reduce the noise to less than 1/2 by stopping the ATTN Relay from activating on transmit. In late serial number TS-430S', it is
easier to cut the only white wire that goes to the Switch Unit than to cut R28.
Problem: Intermittent ALC during transmit and/or intermittent reduction or loss of power output. The power output can sometimes
be restored to normal by turning up the microphone gain or by dropping the radio a few inches. Signal reports of intermittent transmit
audio distortion are normal.
Note: If the radio continues to be operated after displaying these symptoms, the eventual result is often catastrophic failure of Q2, Q3
[RF driver-transistors], and Q7 [bias-transistor] on the 100W Final Unit.
Why: This problem is caused by repeated thermal expansion and contraction of the cheap, phenolic printed circuit board [PCB] which
eventually breaks the two, plated-through the circuit board connections between the output of the 10W driver stage and the input
[base] connections to the 100W RF final transistors, Q4 and Q5. When the break occurs, the RF from the drivers does not reach the
input [bases] of the final transistors, so there is no load on the driver output transformer, T2. Without a load on its secondary, the
peak RF voltage across the primary of T2 runs wild and breaks down the collectors of the driver transistors. When the driver
transistors fail and short,, they destroy the bias transistor, Q7, as well. Changing these components is an unpleasant and uncheap job.
Worse than that, the same components will most likely fail again unless the real problem on the PCB is taken care of. Fix: On the
component side of the 100W Final Unit circuit board, install a jumper wire between the (outer) end of R12 that is nearest to the base
of Q4 and the base lead of Q4. Install a jumper wire between the (outer) end of R13 that is nearest to the base of Q5 and the base
lead of Q5. These two jumper wires make sure that the driver RF arrives at the final amplifier transistors, whether or not the platedtrough connections are are doing their job.
Another method of fixing the problem is to solder Z-wires in the plated through holes. [a Z-wire is a wire that is passed through the
board and whose ends are bent in opposite directions so that it will stay in place during soldering]
Problem: AGC / S-Meter overshoot. This affects the receive audio, causing it to loose volume for about 2 seconds after switching from
transmit to receive when a >S9 signal, is on frequency. When this problem occurs, the S-meter will temporarily zoom up to 30db
above the real signal level. Turning the RF Gain control down is no help. Fix: Most of the trouble is caused by R32 on the IF Unit. R32
is located behind the CW filter space on the circuit board. R32 should be changed from a 390K Ohm to 2.2M Ohm - 3.0M Ohm. The
lesser part of the problem is caused by R40 on the RF unit - which is between connectors #4 and #15. R40 is changed from a 470K
Ohm to a 20K Ohm - 47K Ohm.
Problem: Complaints of buckshot or splatter from other operators who are using adjacent frequencies. This problem can be caused by
improper bias setting for the driver and the final in the 100W Final Unit. The Service Manual describes a simple method of setting the
two bias adjustments. A much more common reason for causing splatter is excessive ALC. Here's why: The TS-430S has a sluggish
ALC metering circuit and an ALC characteristic that needlessly delays the ALC attack [throttle-down] time. The ALC meter barely
moves when there is already an abundance of ALC activity taking place. So, if the ALC meter indicates a mid-scale / normal amount of
ALC, the radio is being overdriven. Under this condition, due to the built-in too-lengthy ALC attack characteristic, the radio will
produce power output peaks of 140W at the beginning of loud syllables. These peaks can be observed accurately on an oscilloscope.
Most power meters are not capable of observing the <2mS overshoot. 140 watts of PEP output may sound good, but it is beyond the
linear output power capabilities of the final transistors. The net result is rotten splatter. To reduce splatter, the microphone gain
should be adjusted so that the ALC-meter barely moves on loud voice peaks. For those operators who like to see the meter jump
whilst talking into the microphone, operating the radio correctly is going to cause emotional stress. This problem can be alleviated by
increasing the sensitivity, full clockwise, of the ALC meter adjustment, VR11, on the IF Unit. This will make the ALC meter indication
quite lively and some operators quite happy. VR11, which is located on the right/front of the board, is very close to, and easy to
confuse with, VR12 which should not be adjusted except per the directions in the Service Manual.
top of page
This modification is read 1628 times.
26-07-2001
(TS-430) Some repair hints for TS-430
Author: Chris, HB9BJL - [email protected]
1. no display, no TX/RX with certain modes
I read the article of Colin Robertson and I would like to tell you that my TS 430 S had exactly the same problem a few years ago
soon after purchase. The solution was to replace the excessively leaking Diodes D3 - D7 but that meant to remove the front
pane. It took the Kenwood dealer quite a long time to repair it. Meanwhile the exact replacement might not be available
anymore. Therefore it might be a good idea indeed to add the diodes in series as you have described.
2. Low/intermittent RX
After a few years of usage I faced the Low / intermittent RX problem. The problem were the Fujitsu print relays on the LPF board.
I got around this by replacing all of them. Lucky enough I was able to find them with a major electronics parts distributor who
has Fujitsu relays in store.
73s from Switzerland
Chris, HB9BJL
[email protected]
top of page
This modification is read 1691 times.
05-10-2001
(TS-430) General coverage in transmission for the Kenwood TS-430S
1. On the the bottom board of the transceicer find the RF-UNIT (X44-1510-11).
2. Near the two plugs numbered 9 and 10 , you will see two diodes called D39 and D40.
3. Simply cut the two diodes D39 and D40 on the RF-UNIT.
Date: 12-02-2002
User comment
From: fy5ls
Subject: ts 430s general coverage modification
cutting the 2 diodes d39 d40 does not do anything; removing the plug n°10 does the same : nothing
do you have an other trick ?
73
marc fy5ls
This modification is read 1681 times.
top of page
16-12-2001
(TS-430) TS430s low RX
Author: Beavan Gwilt - [email protected]
After 17 years service my TS430s also exhibited the problem of low RX over frequency ranges which coincided with the ranges of the
LPF's on the filter unit.
Fix:
1. Remove filter board, and remove plastic covers of the relays by gently prizing with a small sharp-edged screwdriver.
2. Cut a narrow strip of photo-copy paper, insert it between the contacts, and apply pressure to the contacts as you withdraw the
paper. Paper is relatively abrasive, and this will clean the contacts.
3. I found that that some of the contacts hardly made contact before the relay armature was fully home. Fixed by bending the
contact finger so that the contacts made before the armature was home - this ensures adequate contact pressure.
This modification is read 1029 times.
top of page
19-07-1998
(TS-440) TS-440S Digital Audio Modification
NOTICE:
Please be very careful with your transcievers, and we accept no responsiablity for any damage that may be incurred, and this
modification may, and proably would be cause for any WARENTY to be DISCONTINUED.
This Modification allows for the Kenwood TS-440s transceiver to have the data audio on PIN 11 of the 13 pin DIN connector ACC JACK
2. Later models may or maynot have a correction for this, but my PK-232, or for that fact NONE of my TNC's would drive the audio to
the PIN 11 of ACC JACK 2. Encountering this problem, and having another H.F. transceiver I have been using the REMOTE connector,
and using an audio input to the AFSK IN RCA type connector. This would allow me to use the same cable with my TS-180s also.
Anyway this modification moves the wire's from the AFSK IN to the ACC 2 connector. This should only take about 20 to 30 minutes to
preform this change, and most of the time is used up with the removal, and replacement of the THREE covers of the transceivers
cabinet.
The circuit boards to work with, are called:
DISPLAY UNIT (X54-1870-00) (C/4) This has the ACC 2 JACK.
SWITCH UNIT (X41-1610-00) (M/14) This has the AFSK INPUT.
The eaiest way is to remove these two boards 4 screws hold the ACC 2 JACK, and 2 screws hold the AFSK INPUT board in and they are
located at the rear of the transceiver. If you are interested in following the SCEHMATIC in your manual, the leads you will be working
with are ANI, and GROUND which is the PURPLE LEADS, and the FSI lead and GROUND, which are the GREEN leads.
The problem is that when kenwood designed this rig, they brought the DATA INPUT(ANI) from the ACC2 JACK to connector J25 of the
IF UNIT.
This coming in after the Processor, and Microphone Amplifier does not allow sufficent amplification of the signal, thus very low, or no
audio at all. What this modification does is swap at the rear of the RIG the FSI, and ANI signals, Which also could be done on the IF
UNIT board, and for some may actually be eaiser. In my case the leads were just a bit too short to allow this modification to be
accomplished on the IF UNIT.
MODIFICATION
1.
2.
3.
4.
5.
6.
7.
8.
9.
10.
11.
12.
13.
14.
15.
16.
Be shure to have on a work bench, and NO POWER APPLIED!
Remove the TWO BOTTOM covers, One MAIN cover, and the smaller cover to the REAR of the transceiver.
Remove the TOP cover.
Remove the FOUR screws holding the AUTOMATIC ANTENNA TUNER.
Place the transceiver on it's side with the BOTTOM towards you, and the FRONT to your LEFT.
Being very careful, remove the antenna tuner and allow it to hang.
Remove the TWO SCREWS that HOLD the AFSK INPUT board.
Remove the FOUR SCREWS that HOLD the ACC 2 JACK board.
Carefully from the inside of the transceiver, pull these TWO boards out.
Near the Bottom edge of the ACC 2 JACK board, is a TWO lead connettor, unplug this. The leads should be PURPLE.
On the AFSK INPUT board, there is a 6 PIN connector, unplug this. The leads you will be working with are GREEN in color.
Note how the PURPLE leads are connected to the connector itself, and remove these two leads by inserting a very small
screwdriver into the slot on side, and being very gental, push the leads out one at a time.
Now remove the GREEN leads the same manor.
Insert the GREEN leads into the 2 PIN connector, the BLAC lead is the GROUND, and the WHITE or perhaps YELLOW is the AUDIO
lead.
Insert the PURPLE leads into the 6 PIN connector, noting that the smaller lead is the AUDIO lead, and it connects to PIN 2, the
other lead, being BLACK goes into PIN 1.
Now reassemble in reverse order the BOARDS, and start at STEP 11, and work in reverse to STEP 1.
This modification is read 2423 times.
top of page
19-07-1998
(TS-440) TS-440 Fan Temperature Modification
I don't know about you, but I don't think solid state equipment needs to run hot enough to fry an egg on. The fan on the 440 is set to
come on at 50 deg C. That makes the heatsink hot enough that you can only put your hand on it for about 3 seconds without being in
pain.
Looking at the schematic and pondering the situation, I decided that it would be quite easy to change the "trigger" point for fan
operation. This mod will do just that and not effect the "high-temp-shutdown" mode that is provided in case the fan dies. Actually, it
wouldn't be a bad idea to make the same sort of mod to that circuit too, but let's just do this one for now. I'll put out another bulletin
on this if I go into the failsafe circuit.
The fan is controlled by two sensing circuits on the FINAL UNIT. On the schematic, Q9(1/2) is the failsafe trigger that activates the
powerdown circuit in case the final reaches 80 deg C. It won't normally do this, even under continuous keydown conditions, unless the
fan has failed.
Q9(2/2) is the stage that controls operation of the fan. It is a simple voltage comparator and therefore can be made to trigger
wherever you want.
TH1 is a thermistor with a negative coefficient. That is, when the temp rises, the resistance goes down. This pulls the - input to
Q9(2/2) lower and lower until it is at or below the 2.26v reference that is present on the + input of the same stage. At that point, the
output flips high and turns on Q8, thus turning on the fan. By raising the reference voltage at the + input, the TH1 voltage will fall to
the reference voltage sooner and turn on the fan at a cooler temperature. By clipping the top loop of R27 on the final unit (2.2k res.
that provides reference voltage) and temporarily inserting a 5k precision multi-turn pot in series with it, I determined that I liked the
way it operated with about 800 ohms extra resistance in the circuit.
I then installed an 820 ohm fixed resistor in series with the cut loop. I also put a very small dab of silicon seal between the new
"hung" resistor and the ferrite transformer right next to it so that there would be no added strain on the remains of R27. The
alternative would be to remove the final unit completely and do the mod the right way, replacing the complete R27 with a 3k resistor.
This was a step that I didn't really want to perform on a two week old rig. When you choose your series resistance, remember that the
more resistance you add to it, the sooner the fan will turn on. If you go too high, it will be on all the time.
This modification brings the fan on at least 10 deg. earlier. By the way, my only reservation about this mod is the added wear and tear
on the fan unit itself. I have been buying parts from Kenwood for about 10 years now and they have always seemed remarkably
inexpensive. Ordering a spare fan to have on hand seems like a very reasonable thing to do if you are worried about it.
This modification is read 2135 times.
top of page
19-07-1998
(TS-440) Possible cure for TS440 showing dots only on display
The most common reason for the the display to show only dots, is that one of the phase locked loops is not locked. So take of the top
cover. You will be looking at the IF unit. This board is mounted in a hinged frame. It hinges on two screws near the front pannel sides.
So remove the other two screws near the final unit instead and hinge the IF board towards you. You now uncovered the PLL unit.
There are five PLL's on this board. Each one has a pin indicating if its loop is locked or not. So get out a volt meter and set it for 5
volts full scale. Now check pin 2 for each of the following IC's. IC18, IC1, IC4, IC9.
Also check pin 7 of IC17. If all the loops are locked, you would see a steady voltage there in the neighbourhood of 4.7 volts. If any of
the loops is not locked, one of these pins has a voltage well below 1 volt.
Note the IC number so you can look up which VCO you may have to tune a bit so it will lock again.
IC18 VCO#5 T20
IC1
VCO#4 T1
IC4
VCO#3 T2
IC9
VCO#2 T9
The above are all located on the PLL board.
The VCO for IC17 is actualy one out of four different VCO's selected on the RF board. Which one of these depends on what band is
selected.
If you have display dots on all the bands, then you have no problem with the PLL made up with IC17. So you only have to adjust
either T1, T2, T9 or T20.
Now here it goes. Make sure you have an alignment tool that isn't to small or to large for the slots in the slugs in the coils (T1, T2,
etc.) Also, absolutely don't turn any other coil than the one that belongs to the unlocked PLL. If you do so anyway without a service
manual and proper equip- ment, then you are likely stupid.
Only turn the indicated slug. First turn it 1/4 clock wise and see if it is ok now. If not, turn it 1/4 counter clockwise and see if it works.
I suggest that you don't try more than one half turn either way. If you think that it needs to go that far, it likely has an other problem.
If the display dot problem only shows up on some but not all band, send me a note and I will see if I can help you.
The correct way would be to use a good voltmeter and follow the service manual for this adjustment. But in most cases, the above will
do fine. I don't work for Kwood, I don't have a 440. Just a service manual for one. But I did cure some of the above problems.
top of page
This modification is read 2385 times.
19-07-1998
(TS-440) Undocumented feature
The TS440 is nice. Here's what I've found out about it that isn't in the operation manual (in some random order):
Diode options: There are a bunch of configuration options controlled by clipping or inserting diodes on the back of the control board.
You get to it by taking the top and bottom covers off (a bunch of silver screws), loosening the front panel (4 flat-head silver screws,
NOT the black ones). Then you have:
diode
----D65
D66
D67
D73
D78
D79
D80
controls
-------mode confirmation
display resolution
memory protect
CW shift
WARC 24MHx band tx
WARC 18MHz band tx
General Coverage tx
in
---------Morse
100 Hz
none
800 Hz
disabled
disabled
disabled
out (cut)
---------single beep
10 Hz
on
400 Hz
enabled
enabled
enabled
Self-Test: You can run a rather complete test of the control logic by the built-in "semi-self-test", a series of 56 routines. To run this,
turn the unit on whilst holding the AM and T-F SET switches pushed in. It changes to the next test when you turn the VFO knob
clockwise. Turn the power OFF to reset the unit.
Test
What it does
-----------------------------------------------------0
all positions in display light
1
all segments in display dark
2
all positions in display light
3
all segments in display dark
4
one digit lighted (rightmost)
5
next digit lighted
6
next digit lighted
7
next digit lighted
8
next digit lighted
9
next digit lighted
10
next digit lighted
11
next digit lighted
12
next digit lighted
13
next digit lighted
14
next digit lighted
15
next digit lighted
16
next digit lighted (leftmost)
17
beeper sounds
18
beeper silent
19
all mode LEDs ON
20
all mode LEDs OFF
21
receive
22
transmit
--------------------------------------------------------------------------
The following tests change internal signals. They are most useful if you are trying to trace the circuits controlled by these signals.
You'll need a s service manual (or at least a schematic) to made reals sense of these.
23
24
25
26
27
28
29
30
31
32
33
34
35
36
Band select - all lines high
BAND select - all lines low
PD select - all lines high
PD select - all lines low
ENF select - all lines high
ENF select - all lines low
ENP select - a:ll lines high
ENP select - all lines low
RES select - all lines high
RES select - all lines low
CO select - all lines high
CO select - all lines low
AX select - all lines high
AX select - all lines low
these next tests check the outputs of the 8255 parallel port interfaces, which select several internal functions.
37
38
39
40
41
42
43
44
(IC2) port A all lines high
(IC2) port A all lines low
(IC2) port B all lines high
(IC2) port B all lines low
(IC2) port C0-C3 high, C4-C7 low
(IC2) port C0-C3 low, C4-C7 high
(IC53) port C all lines high
(IC53) port C all lines low
Following display busy lines and scan lines in the rightmost 9 digits of the display. You will push buttons to cause the digit to change
from a 1 to a 0 indicating that the associated button has been pushed.
test
bit8
bit7
---------45
LOCK
46 (none)
47 (key scanner)
48
1
6
49
2
7
50
3
8
51
4
9
52
5
0
53
bit6
---AT
bit5
---Mic UP
V/M
M>V
SCAN
M.IN
CLEAR
ENT
RIT
XIT
T-Fset
1Mhz
DOWN
bit4
---Mic DN
bit3
---PTT/AT
VOICE
A/B
SPLIT
A=B
dip1
UP
bit2
----
bit1
----
bit0
---VS1
dip3
dip2
dip8
dip4
dip6
dip9
dip5
dip7
dip10
(the digits 0-9 are on the front panel keyboard; dip2-dip10 are the segments of S50, the SSB frequency response dipswitch on the
rear of the control unit printed circuit board.)
54 not used
55 not used
56 END
This modification is read 2685 times.
top of page
19-07-1998
(TS-440) Serial interface
The TS440 has a serial ASCII interface option. You have to insert two chips into sockets on the back of the control unit circuit board to
take advantage of this. IC54 is an 8251A Uart, and IC55 is a CD4040 divider. These chips are available from Kenwood together with a
interface manual, or you can buy them at your local chip shop for about $6.00 or so. When inserted, the transceiver speaks 4800 baud
ascii in/out the 6-pin DIN connector ACC-1 on the rear. The signals are from the 8251, but are inverted in a 74LS04 and RFI filtered
before being brought out to the world. An interface box with inverter, RFI filter, power supply, opto-isolator, RS232 level shifters, and
power supply is available from Kenwood for about $49.00, or you can build your own.
(Depending on how much your computer radiates and how sensitive to RF it is, you may only need 5v, +/-12v, a 74LS14, MC1488,
and MC1489. If your computer has a TTL level serial port, perhaps all you'll need is the 74LS14. If you're not confident of being able
to solve the possible digital/RF interface problems yourself, the $49 interface is proably a good buy.)
pin
--1
2
3
4
5
6
ACC-1 Serial Interface
signal
---------------------------------------------------signal ground
data from transceiver
data to tranceiver
cts to transceiver - computer can throttle output
cts to computer - transceiver can throttle input
no connection
SSB frequency response dipswitch: located on the back of the control unit, this adjusts the frequency response of the upper and lower
sideband modulators to compensate for component variations. Changing it isn't a good idea, since you have to have a two-tone
oscillator and have to reset the carrier suppression adjustment if you do. The service manual explains this process; I'm including this
here so that people who have been wondering what the dipswitch does won't screw themselves by flipping switches to see what
happens.
This modification is read 2216 times.
top of page
19-07-1998
(TS-440) A few adjustments you should know
A few adjustments you should know about (read the service manual before you tweak wildly on these!):
tweaker
------RF-VR3
RF-VR6
IF-VR2
IF-VR3
IF-VR4
IF-VR9
IF-VR10
what it does
----------------------------------------------FM Microphone Gain
FM Deviation - set to 4.6KHz on dev meter
S-meter zero - set to zero with 50 ohm dummy load
S-meter S9 - set to S9 with 40dbu input 14.175MHz USB
Squelch threshold - close at 12 o'clock with
mode = CW and filter WIDE
CW side tone level - as you like it
Beep tone level - as you like it
Someone wanted to know what the difference between the DATA connections on ACC-2 and the AFSK connectors was. On output,
none; the AFSK and the DATA out pin on ACC-2 are connected together, and are fed from the high side of the volume control - they
are receiver audio BEFORE the cw sidetone, beeper, and voice response unit are mixed in, and should be a constant level independent
of the AF gain setting. The AFSK input is different from the DATA IN connection; AFSK and microphone signals both go through the
mike preamp and speech processor; the DATA input bypasses both. The MIC GAIN pot does control all three input levels.
(as a note, you can tap preamped/processed audio OUT of the DATA IN connection, since it is just a tap on the output of the
preamp/processor. This is also the feed into the FM modulator. But NOTE that the MIC GAIN pot doesn't adjust the mic gain on FM there is a separate tweaker for that.)
This modification is read 2520 times.
top of page
19-07-1998
(TS-440) TS-440S modification to use antenna tuner
Remove case from rig. Remove (4) screws that holds antenna tuner in place. Next slide antenna tuner out to get to the coax
connections. Remove the in coax attached to antenna tunerfrom FO connector on filter unit (X51-1340-00). Remove coax from out
connector on antenna tuner and install in FO CONNECTOR ON FILTER UNIT. Unplug and remove switch unit (X41-1610-00 N-14) from
rig.
Remove short wire from antenna connector to PC BOARD. Cut coax on the in connector of antenna tuner in half and connect cut end
to switch unit PC BOARD Where short antenna wire was removed and shield to ground. Solder other half of coax to antenna connector
and shield to ground, and plug other end into out conector of antenna tuner. Your still have control of antenna tuner with auto and
thru switch. It works very well. Maybe someone can use this idea.
This modification is read 2226 times.
top of page
19-07-1998
(TS-440) TS-440S display calibration
I found there was some shift in the reference oscillator frequency of my TS-440S. This can be noticed and corrected as follows:
1. Remove the top and bottom covers from thd radio.
2. Do not disconnect the speaker cable.
3. Connect the supplied calibration cable between RF Unit and PLL unit, as shown in "Kenwood TS-440S Instruction Manual" on
Page 24 in Section 5-8-3.
4. Set VFO A to 10.001.00 MHz LSB and VFO B to 9.999.00 MHz USB.
5. Pushing the A/B function button, you can have different audio signals, if that 36 MHz reference oscillator is miwadjusted.
6. Using a small flat bladed scredriver, adjust trimmer capacitor TC1, near connector 8 of the PLL Unit (the location shown in
Instruction Manual in the same section as above) until those audio frequencies from VFO's A and B are equal.
7. Disconnect the calibration cable and reassemble the radio. This procedure can be done by ear with good accuracy without any
measuring equipment. WWV is too weak here in Finland to use it as comparative signal for the procedured described in
"Instruction Manual", Section 5-8-3.
This modification is read 2070 times.
top of page
19-07-1998
(TS-440) Connection of the KENWOOD TS440S to a DATA
Connection of the KENWOOD TS440S to a DATA terminal such as a Kantronics KAM using the rear ACC2 13 pin jack.
____ 4
GROUND ___ |
|____ 8
|
|___ 12
2
1
7
6
5
11
10
/
3
MIC
____________/
9____________
|
13
|
|
|
|
|
\_/
\_/
=====
=====
|
|
|___________________|
|
|
|
|
PTT
Pins
|
Application
----------------------------------------------------------------3
4
8
12
9
13
Data output - not used as the level is very low
the prefered connection is via the speaker output
this also allows fine adjustment of level to
enable best decoding. (A switch on the speaker to
'mute' it when required is a good idea.)
Ground - you may have to experiment with these
connections to eliminate RF feedback and noise.
Here they are all strapped.
Mic mute - prevents audio pickup from the mic when
earthed. By connecting to the PTT line as shown
through a diode automatically MUTES the mic when
using data. When the front panel PTT or MIC PTT
are used the microphone is 'live'.
Standby - PTT which when taken to ground puts the set
'on air'. By connecting through a diode as shown
doesn't affect the PTT operation but allows auto
mic muting.
The diodes used can be virtually anything, here they are IN4148.
The INPUT audio to pin 11 must be quite a high level. If using a KAM you are certainly going to have to change the HF LEVEL JUMPER
in the KAM. The level of the KAM as shipped suites connection to the FRONT PANEL MIC but not the rear connector, you can however
correct this with the jumper. People using the PK232 have complained of NO TX AUDIO, I suspect the level is so low that only local
minitoring will show a level present.
This modification is read 2076 times.
top of page
19-07-1998
(TS-440) Kenwood Computer Interface Instructions
These Instructions are TS-440 specific, but the basics also apply to the TS-940, TS-811 and TS-711.
It is possible to save yourself a few dollars and lose nothing in quality by buying the parts to upgrade your Kenwood radio for
computer control. Just purchase the parts were you find them and install them using the instructions in the Radio's Manual.
IC 54 is a uPD-8251-AC
Serial Communications Interface.
Commonly called an 8251A
($1.89 Mail Order)
IC 55 is a TC-4040-BP
12 Stage CMOS Divider.
Commonly called a 4040
($0.69 Mail Order)
The IC-10 Interface Kit from Kenwood Contains ONLY these two parts and less instructions than are in this file. The only thing you are
going to miss, is the $22+ price tag on the IC-10 Kit.
Signals are
Baud rate is
Format is
TTL levels (NOT RS-232)
4800 (1200 Opt.)
ASCII Serial; 1 Start, 8 Data, 2 Stops
The Baud rate may be changed to 1200 Baud by removing jumper W50 and installing a jumper from the left pad to the center pad as
viewed from the front of the radio. This will become obvious once you have the radio opened up. Many other Baud rates are possible,
just look at the schematic.
As long as you are in the radio, lift D-60 to enable the 10 Hz. display. The main tuning knob is varing this digit, so you might as well
see it. It also helps when using RIT/XIT as the RIT/XIT display does not resolve the 0.01 KHz. digit. This Modification is in the Radio's
Book.
Not in the book is the fact that if you lift D-80 and do an MPU reset, you will be able to transmit on any frequency between 1.5 and
30.0 MHz. This means you will be able to work the Mars nets, Etc. Do not transmit out of band. It is illegal even if it is accidental.
Some computers use TTL levels on their serial ports. If so, here is a time when you will not have to convert it to RS-232.
The IF-232 Interface from Kenwood is a 1488 and a 1489 chip in a box. These are an RS-232 Quad Line Driver and Receiver and are
available at Radio Shack for $1.29 Each. Here is an easy project that will save you a lot over the $69+ Kenwood price of the IF-232
Interface. The 1488 needs a + and - supply.
Unregulated + and - 12vdc is just fine. Get the +5 vdc for the 1489 by putting a 7805 regulator on the +12 vdc supply. 100 mA.
is about the max you'll draw, so the smallest transformer you can find will still be plenty large. Don't forget to series up two of each
gate to cancel the inversion that the 1480's produce.
ACC-1
Connector
Use a 6 Pin DIN Connector.
(Radio Shack $1.29)
Pin
Signal Comments
________________________
1
2
3
4
5
6
Gnd
TXD
RXD
CTS
RTS
Signal Ground
Serial Data from Radio to Computer
Serial Data from Computer to Radio
Computer Ready; (Radio Input)
Radio Ready;
(Radio Output)
No Connection
Pins 4 and 5 may be left Unconnected.
***** Command Description for Kenwood Computer Interface *****
______________________________________________________________
Auto Information
________________
AIn;
The Radio Will Send the Status Info Automatically
Whenever the Operator Manually Varies any Function
on the Radio which is Covered in the IF; Command
Where
n = 0 for Auto Info OFF
1 for Auto Info On
The Status Information Will be Sent in the Form :
As defined in the IF; Command
Display Memory
______________
DMnnnn;
This is a Factory Diagnostic Function
and is of no practical use to the operator
The Contents of the MPU Memory will be Read
Where
nnnn = MPU Address (0000 Thru FFFF (HEX))
The Contents of the MPU Memory Will be Sent in the Form :
DMnnnn-aabbccddeeffgghhiijjkk;
Where
nnnn = MPU Address (0000 Thru FFFF (HEX))
aa~~kk = Hex Number Pairs Of Next 16 Locations
Down
____
DN;
The Frequency or Memory Channel
Will Decrement One Step
Frequency VFO A / VFO B Request
_______________________________
FA;
FB;
The Frequency in the Selected VFO Will be Read
The Frequency Will be
FAggmmmkkkhhh;
or
FBggmmmkkkhhh;
Where
gg =
mmm =
kkk =
hhh =
Sent in the Form:
GHz.
MHz.
kHz.
Hz.
Value
Value
Value
Value
Frequency VFO A / VFO B Select
______________________________
FAggmmmkkkhhh;
FBggmmmkkkhhh;
The VFO Selected Will be Set to the Frequency Defined
Where
gg = GHz. Value (May be sent As 00 or Spaces)
mmm = MHz. Value
kkk = kHz. Value
hhh = Hz. Value
Function Select
_______________
FNn;
The Function Defined Will
Where
n = 0 for
1 for
2 for
be Selected
VFO A
VFO B
MEMORY
Identify Model Request
______________________
ID;
The Model of the Radio Will
ID00n;
Where : n = 1 for a
n = 2 for a
n = 3 for a
n = 4 for a
be sent in the Form :
TS-940 (*)
TS-811 (*)
TS-711 (*)
TS-440
Read Information Request
________________________
IF;
The Status Information Will be Sent in the Form :
IFggmmmkkkhhh
snnnzrx yytdfcp
Where
gg~~hhh = Value as defined in FA Command
s = "+" or "-" Value of RIT/XIT
nnn = Value of RIT/XIT (n.nn kHz.)
z = "0" (Not Used in TS-440)
r = Value as defined in RT Command
x = Value as defined in XT Command
yy = Memory Channel No.
t = 0 for Receive
1 for Transmit
d = Value as defined in MD Command
f = Value as defined in FN Command
c = Value as defined in SC Command
p = Value as defined in SP Command
Lock Knob
_________
LKn;
The Manual Frequency Control Functions Will be Disabled
Where
n = 0 for Lock OFF
1 for Lock ON
Memory Channel Select
_____________________
MCxmm;
The Memory Channel Defined Will be Selected
Where: x = Don't Care
(Use "0" or Space)
mm = Memory Channel No. (00 thru 99)
Mode Select
___________
MDn;
The Mode Defined Will
Where: n = 1
2
3
4
5
6
Be Selected
for LSB
for USB
for CW
for FM
for AM
for FSK
Memory Read
____________
MRnxrr;
The Memory Channel Defined Will be Read
Where: n = 0 for RX VFO
1 FOR TX VFO (Split Channels Only)
x = Don't Care
(Use "0" or Space)
rr = Memory Channel No.
(00 thru 99)
The Memory Information will be sent in the Form :
MRn rrggmmmkkkhhhdz
;
Where: n = 0 for RX VFO
1 FOR TX VFO (Split Channels Only)
rr = Memory Channel No.
(00 thru 99)
gg~~hhh = Value as defined in FA Command
d = Value as defined in MD Command
z = "0" (Not Used in TS-440)
(Note: Four trailing Spaces)
Memory Write
____________
MWnxrrggmmmkkkhhhdzxxxx;
The Memory Selected Will be Set to the Frequency Defined
Where: n = 0 for RX VFO
1 for TX VFO (Split Channels Only)
x = Don't Care (Use "0" or Space)
rr = Memory Channel No.
(00 thru 99)
gg~~hhh = Value as defined in FA Command
d = Value as defined in MD Command
z = "0" (Not Used in TS-440)
RIT/XIT Clear
_____________
RC;
The RIT/XIT will be set to 0.00 kHz.
RIT/XIT Down
____________
RD;
The RIT/XIT will Decrement by 0.01 KHz. (10 Hz.)
RIT/XIT UP
__________
RU;
The RIT/XIT will Increment by 0.01 KHz. (10 Hz.)
This modification is read 2146 times.
19-07-1998
(TS-440) TS-440S increase the power by ALC control
top of page
This article also tells how to increase the power of the TS-440 by adjusting the internal ALC control. The procedure is applicable to
other rigs.
Illustration captions:
1. Remove 17 screws holding on the bottom and top covers. The bottom cover comes off, and the top cover is carefully removed
and put next to the radio. It is till connected via the speaker wire.
2. Gain access to the front of the unit by removing two top side screws and loosening two bottom side screws. This allows the front
assembly to swing open.
3. Remove the shiny silver control board protection plate. This requires removing two screws on the top and three screws on the
bottom. Lift the plate out completely. Locate diode D-80 in the bottom left-hand corner. Snip it for all-band transmit.
4. Now locate D-66 and snip. It adds 10 Hertz readout to your digital frequency display.
5. Carefully reassemble the control plate using a magnetized tiny screwdriver to hold the five tiny screws in place. Don't pinch any
wires. Also, close up the front and replace the top and bottom covers with 17 screws.
6. Connect power. Depress A=B switch and turn on the power simultaneously. This resets the microprocessor for all-band transmit
and 10 Hz frequency display.
top of page
This modification is read 2336 times.
19-07-1998
(TS-440) TS-440 with PIN-Diods
Hallo, ts440-owners!
Recently i read about an upgrade for the ts440 concerning the bandswitc-diods.
Originally, there are simple switching types built in. For better high level performance i decided to replace D2,3,4,5,6,7,...23,68 by the
ECG553 PIN Diode.
The result was not so doubtless positive. i could not really confirm an advantage. unfortunately, i have no measuring equipment for
determining the intercept point.
But on 40m , where i sometimes have problems using a 160/80/40/30/20m 5-band fullsize dipole, i still suffer intermodulation effects.
I can not really say, if it is much better after the replacement, but i'm sure, it isn't worse (hi).
Some remarkable progress was the usage of the built-in tuner in the receiving pass. that really helped espacially on the 10mc band to
overcome the problems of interference.
But best results and a final solution i found in using an external preselector as described in the cq-dl several times.
That really did it! Of course you need to add on to cinch connectors at the rear panel.
It is no real problem.
so, my advice:
dodn't modificate the diods or use of the tuner for reception.
The result is too poor compared with that of an external preselector.
Date: 30-01-2002
User comment
From: rolf heidenborg SM0CLS
Subject: BC-stn(s) heard regardles of VFO qrg .
I mounted a new 1st mixer, a highlevel injection module type and used old tstrs as as aplifiers and got rid of the bc-stn in the
background
regardless of VFO setting .
I think there is an oscillation,parasitic,somewhere around the first mixer or that diodes therearound for filterswitching goes into
mixing
and "resend" their mixing which then is heard.Will more current through these diodes cure the problem ?
73
Rolf SM0CLS
This modification is read 2095 times.
19-07-1998
(TS-440) TS-440S Operation with the MC-85
top of page
Author: Trio-Kenwood Communication, inc.
Service Bulletin no. 947 (20-1-1989)
With some TS-440S transceivers, insufficient modulation may occur when the MC-85 compression switch is turned on. This may be
caused by too much of a voltage drop across resistor R172 on the IF unit of the transceiver . If this is found to be the case, change the
resistor from 1K ohm to 100 ohms.
Required part
100 Ohm, 1/6 Watt resistor (RD14CB2C101J)
PROCEDURE:
1. Disconnect the power supply and antenna from the transceiver.
2. Using a #2 Phillips screw driver, remove the 9 screws from the top cover of the transceiver. Remove the cover and unplug the
speaker wire.
3. Locate resistor R172 on the component side of the IF board (Figure 1).
4. Using a #1 Phillips screw driver, remove the 7 screws that secure the IF unit to the chassis of the transceiver.
5. Pull the board up and rotate it towards the front of the transceiver to expose the foil side of the board.
6. Desolder and remove resistor R172 from the board.
7. Install and solder the 100 ohm resistor in place of R172.
8. Assemble the transceiver by reversing steps 1 - 5.
This modification may be covered under warranty.
Time required for this modification is 0.5 hrs or less.
This modification is read 1940 times.
top of page
19-07-1998
(TS-440) TS-440S Notch filter low frequency improvements
Author: Trio-Kenwood Communication, inc.
Service Bulletin no. 948 (20-1-1989)
The low frequency attenuation characteristics of the notch filter can be improved by reducing the input level to the notch filter chip
(IC1). To compensate for the loss of input level, the amount of negative feedback to the audio amplifier (IC7) will need to be reduced.
This modification is already incorporated in all models beginning with serial number 704XXXX.
Required parts:
120K Ohm, 1/6 Watt resistor ........ RD14CB2C124J
390 Ohm,
1/6 Watt resistor ........ RD14CB2C391J
1. Disconnect the power supply and antenna.
2. Using a #2 Phillips screw driver, remove the 9 screws from the top cover. Remove the top cover from the transceiver and unplug
the speaker wire.
3. Locate resistors R86 and R229 on the component side of the IF board (Figure 1).
4. Using a #1 Phillips screw driver, remove the 7 screws that secure the IF unit to the chassis of the transceiver.
5. Pull the board up and rotate it towards the front of the transceiver to expose the foil side of the board.
6. Desolder and remove both resistors from the board.
7. Install and solder a 102K ohm resistor in place of R86.
8. Install and solder a 390 ohm resistor in place of R229.
9. Assemble the transceiver by reversing steps 1 - 5.
This is an optional change that may not be performed under warranty.
Time required for this modification is 0.5 hrs or less.
This modification is read 1909 times.
top of page
19-07-1998
(TS-440) TS-440S Protecting Q33
Author: Trio-Kenwood Communication, inc.
Service Bulletin no. 949 (20-1-1989)
If pin 7 (RL) of the remote connector is accidently connected to ground, current from the 14 volt line (14L) will damage transistor Q33
on the IF unit. This will prevent the radio from transmitting. To protect Q33, a 4.7 ohm resistor should be installed in series with the
RL line on the foil side of the IF board. In the event that pin 7 is connected to ground, the resistor will open, but the transceiver will
still be capable of transmitting.
Required part:
4.7 Ohm, 1/6 Watt resistor ........ RD14CB2C4R7J
1. Disconnect the power supply and antenna from the transceiver.
2. Using a #2 Phillips screw driver, remove the 9 screws from the top cover of the transceiver. Remove the cover and unplug the
speaker wire.
3. Locate connector 19 on the IF unit.
4. Using a #1 Phillips screw driver, remove the 7 screws that secure the IF unit to the chassis of the transceiver.
5. Pull the board up and rotate it towards the front of the transceiver to expose the foil side of the board.
6. On the foil side of the board, locate the trace that is connected to pin 3 (brown wire) of connector 19.
7. Using a craft knife, cut the trace comming from pin three so as to open the foil trace.
8. Solder the 4.7 ohm resistor across the now open trace (i.e. in series with the trace).
9. Assemble the transceiver by reversing steps 1 - 5.
This is an optional change that may not be covered under warranty.
Time required for this modification is 0.5 hrs or less.
This modification is read 1934 times.
top of page
19-07-1998
(TS-440) TS-440S Case Screws binding in the heat sink
Author: Trio-Kenwood Communication, inc.
Service Bulletin no. 950 (20-1-1989)
Occassionally a case screw that fastens to the heat sink of the TS-440S will cross thread or bind when it is being inserted or removed.
Binding may be caused by tooling marks on the screw or by burrs on the tapped threads in the heat sink. When a screw starts to bind,
DO NOT TRY TO FORCE IT! as this may cause the head to shear off. If the screw is being removed and it starts to bind, return the
transceiver to KENWOOD. Do not make attempts to remove the screw. In addition, if a transceiver is being brought to you with a scrw
sheared off, return the unit to KENWOOD. Do not attempt to drill out the screw.
If a screw starts to bind when it is being installed, carefully back it out. Inspect the screw for marks or burrs and replace it if it is
questionable. Since the threads in the heat sink may be causing the screw to bind, they should be cleaned by running a 3 x 0.5 mm
tap into each hole.
The tap is inexpensive and can be obtained at may of the larger hardware stores.
To avoid cross threading, make sure the covers are properly aligned when they are being installed. Proper alignment means that there
is a clear path for the screw to turn into the heat sink.
This assures that the screw does not rub against the case and result in it turning into the heat sink at an angle.
This modification is read 1820 times.
top of page
19-07-1998
(TS-440) TS-440 RX Audio Mods
Here's some easy modifications to improve the rx audio fidelity of Kenwood TS-440's. All references below are to the IF board
component designations.
●
Increase C60 to a .47uf or 1 uf. This will increase low frequency response on all modes.
●
Decrease C51 to .01 uf. This will increase high frequency response on SSB/CW.
●
Try removing R263 (tacked on the bottom of the board on my early production unit). This will lower in amplitude the audio
coming out of the detectors and improved the smoothness (a real technical term) of the audio, especially on AM signals.
And, of course, I take no responsibilty for anything you do to your radio. Be careful. The IF board on the 440' is about the easiest one
to get at.
73/Dave [email protected]
This modification is read 2128 times.
top of page
13-05-1999
(TS-440) TS-440S SSB Power-adjustment
From: PA3FKO@PI8ZWL.#OVL.NLD.EU
Hello TS 440 user..
The last few weeks I've seen questions of how to make the power in SSB mode for the TS440S adjustable without changing the MicGain. It's a very easy job to do.
Take off the top cover of the rig.
At that moment you have a sight on the first unit (IF-Unit)
Than you have to look for Diode 49.
You will find Diode 49 at about 5 CM from the backend of the unit and about 6,5 CM from the leftside of the unit.
Just next of C138 and between plug 38? (red/orange wires) and plug 26 (black-cover/blank wires) Just cut that Diode 49,bend one
part a little away and leave the part's where they are. It's the best way to do I think.
Replace the topcover.
From now on it is possible to adjust only the power in SSB mode by just turning the CARRIER Control at the front of your rig and leave
the Mic-gain for where it is.
Turning counterclock will minimize the power until a 20mW or something like that.
Because most TS440 users have'nt used their carrier control that much I think it's better to pull off the MIC/CAR knobs and spray
some contact cleaner in the shafts. (I know,it's not the best way).
When you switch your rig into the CW mode you can adjust the power in what you like,switch the mode in to USB or LSB and if it is
correct the power will not come above the level that what you have adjusted in the CW mode.
Just simple , is'nt it?
Of course you will do this all in your own responsibility because I won't take any!!! Agree?
Vy 73 Willem.
This modification is read 2523 times.
top of page
16-04-2000
(TS-440) TS-440S Intermittent operation
Author: Trio-Kenwood Communication, inc.
Service Bulletin no. 952 (24-1-1989)
When intermittent problems such as erratic display, loss of front panel control, or frequency lock-up are encountered, the PLL and
Control circuits must be checked to determine which circuit is malfunctioning. While any number of components may cause such
problems, if the Control circuit is suspect, there is a possibility that the ROM socket is at fault. The socket should be tested to
determine if it is making good electrical contact with each pin on the ROM. If it is found to be defective, remove the socket and solder
the ROM directly to the board. The ROM is IC52 on Control unit (B/2). It should be noted that units with serial number of 909xxxx and
above do not incorporate a socket.
Caution
Removing the socket requires good soldering skills. The ROM is mounted on the Digital A unit and is designated as IC2. The board,
being double sided, has solder connections on both component and foil sides. When the socket is removed, it is very important to
insure that each pin is completely solder free. Having to pry up on the socket means that it is not completely desoldered and will
cause the circuit foils to tear.
When performing any work on the Control boards, CMOS handling techniques must be observed. Such techniques include using a
grounded or isolated soldering tip, avoid touching the pins of IC chips with your fingers, and ground yourself with a wrist ground strap.
To remove the socket:
1. Disconnect the power supply and antenna.
2. Remove both the top and bottom covers from the transceiver. Disconnect the speaker cable from the transceiver.
3. Remove 2 countersunk screws from each side of the front panel chassis and gently pull the front panel forward.
4. Loosen the 5 round head screws (2 on top and 3 on the bottom) that secure the shield plate inside the front panel and then
remove the plate.
5. Set the transceiver on its left side and fold the front panel back to expose Control board (B/2). Do not stress the cables.
6. While avoiding contact with the pins, remove the ROM (IC52) and set it aside on anti-static foam.
7. Unplug connectors 56 - 58 from Control board (B/2).
8. Remove 3 brass screws from Control board (B/2). Do not remove the fourth screw that connects to the angle bracket. Instead,
remove the brass screw from the Control board (A/2) so the angle bracket stays with the top board.
9. Fold the top board towards the body of the transceiver. Be very careful not to stress the flat ribbon cables that are soldered
between the two boards.
Note
If the foil side of the board id not sufficiently exposed for desoldering purposes, remove the 3 hex bosses from the bottom Control
board. Pull both boards forward and open them like a book to allow the best access to the foil side of Control board (B/2).
10. Carefully desolder the socket and remove it from the board. Do not pry up on the socket. If it does not easily pull off the board,
the top foils are still soldered to the socket.
11. Install the ROM in the board and solder it in place.
12. Assemble the transceiver by reversing steps 1 - 9. If the bottom board was removed, do not pinch the wire harness under the
board during installation. If the harness produces excessive stress on the board, solder connections may become intermittent.
This modification may be covered under warranty during the warranty period.
Time required for this modification is 1.5 hour or less.
This modification is read 2081 times.
top of page
21-04-2000
(TS-440) TS-440S PLL unlock due to VCO #5
Author: Kenwood Communication, inc.
Service Bulletin no. 973 (8-8-1990)
The VCO and active low pass filter are sealed in synthetic rubber to mechanically stabilize them during mobile operation. Over a period
of several years, the rubber's insulation properties can break down. This may be caused be repeated temperature variations. This can
cause the VCO to vary in frequency which will force the loop to unlock or cause the audio to warble.
This modification will correct or prevent an unlock caused be VCO #5.
Required parts:
2SC2459(BL)
1SV153
Transistor
Varactor diode
QTY. 2
QTY. 1
1. Disconnect the power supply and antenna.
2. Remove the top and bottom covers. Do not damage the speaker wires when removing the top cover.
3. Remove the two screws from the rear of the IF unit and raise the unit to expose the PLL board.
4. Remove the 8 screws from the PLL board and disconnect all the cables going to the board.
5. Remove the board from the transceiver.
6. Remove the shield cover from VCO #5. Desolder and remove the shield from the PLL board.
7. Carefully remove the synthetic rubber from the area of Q34, Q35, and D14. The rubber must be picked off the board with pointed
tweezers or some other tool. It cannot be removed with any type of solvent as this will harm the components in the area.
8. Desolder and remove Q34, Q35, and D14 from the PLL board.
9. Check the component side of the board to make sure all the rubber in the area of Q34, Q35, and D14 is removed.
10. Once the rubber is removed, replace Q34, Q35 and D14 with new components.
11. Inspect and resolder the foil side of the PLL board under VCO #5.
12. Install the VCO shield on the PLL board and solder it in place.
13. Seal the VCO with hot melt glue (glue stick used in a hot melt glue gun). Apply the glue to the circuit from the glue gun. Once
the area i covered, use the hot air gun to flow the glue around the components. Do not overheat the components.
14. Install the PLL board in the transceiver.
15. Apply power to the transceiver and allow it to run in receive for about a half hour so the transceiver's temperature stabilizes.
16. Set the operating frequency to 14.200 MHz.
17. Adjust T20 to obtain 5 Vdc at TP11 (the exposed lead of L40) measured with a DVM or VTVM. Do not use a VOM. After adjusting
the VCO, bench run the transceiver for an hour or more to make sure the circuit is stable.
18. Assemble the transceiver.
Time required to perform this modification is 1 hour or less.
top of page
This modification is read 2171 times.
21-04-2000
(TS-440) TS-440S PLL unlock due to VCO #1
Author: Kenwood Communication, inc.
Service Bulletin no. 974 (8-8-1990)
The TS-440S Control unit supplies band information to four circuits in the transceiver. The circuits are the receiver front end Band
Pass Filter (BPF), the antenna tuner (AT), the transmitter Low Pass Filter (LPF), and the VCO circuits on the RF board that are part of
PLL #1.
There are ten receiver front end BPFs that are diode switched into operation. If one of the diodes (D4-D23) becomes shorted or leaky,
the band information is felt at two BPFs at one time. The voltage going through the bad diode will loop back to the VCO circuit,
antenna tuner circuit, and LPF circuit.
The unwanted voltage will then create one or more of the following symptoms:
A. PLL unlock (the transceiver only displays decimals).
B. No antenna tuner operation.
C. Low receiver sensitivity.
D. Low or no transmit power output.
E. Distorted transmit audio.
F. RF feedback.
The most common symptom is the PLL unlock. To test the diodes, remove the large shield on the RF board to expose the BPF circuits.
Reset the transceiver by holding in the A=B button as power is turned on. Even if the display only shows decimals, only the BPF for 14
MHz should be turned on. Using a DC voltmeter, measure the voltage at coils L11, L15, L21, L28, L34, L40, L46, L52, L58, and L62.
Only coil L52 should measure 8 Vdc. The other coils should read 0 Vdc. If one reads 0.5 - 8 Vdc, replace the two diodes in that BPF
circuit.
Coil/Diode/frequency range relationship:
L11
L21
L34
L46
L58
D4
D8
D12
D16
D20
D5
D9
D13
D17
D21
0
1.6
4
7.5
14.5
-
0.5 MHz
2.5 MHz
6 MHz
10.5 MHz
22 MHz
L15
L28
L40
L52
L62
D6
D10
D14
D18
D22
D7
D11
D15
D19
D23
Replacement diode part number
1S2588 or 1SS91S:
BA282
D4, 6, 8, 10, 12, 14, 16, 18, 20, 22
D5, 7, 9, 11, 13, 15, 17, 19, 21, 23
0.5
2.5
6
10.5
22
-
1.6 MHz
4 MHz
7.5 MHz
14.5 MHz
30 MHz
Time required to perform this modification is 1 hour or less.
This modification is read 2075 times.
top of page
15-10-2000
(TS-440) TS440S mod for improved receive sensitivity of 0.5 to 1.6MHz
Author: Robert Casey - [email protected]
TS440S mod for increasing sensitivity on the MW AM broadcast band:
(Removes MW attenuator pad). The TS440S has an attenuation pad hard wired on the spectrum between 500KHz and 1600KHz. You
can open up sensitivity by removing it. On the RF unit board, clip a lead on R13 68 ohms), clip a lead on R14 (68 ohms), and solder a
jumper across R12 (220 ohms). These are under a shield held down by screws on the RF board.
I've noticed no intermod problems and only the strongest stations (above S + 40) overload (which can be solved by using the front
panel attenuator button).
Proceed at your own risk.
This modification is read 2111 times.
top of page
24-07-2001
(TS-440) Circuit Improvements for the TS-440S
Author: Richard L. Measures, AG6K
Problem: Limited transmit frequency coverage.
Fix: Cut D80 on the Control Unit for 1.6MHz to 30MHz transmit capability. D80 is about 2" from D66, which is cut for 10Hz frequency
readout.
Problem: Lack of crispness in the RX audio, which makes the sibilant parts of human speech hard to distinguish from each other. This
is caused by a -p;5db roll-off at 3000Hz in the RX audio.
Fix: Change C51 [0.033µF] on the IF Unit, near L5, to .005µF [5000pF/5nF]. This will reduce the roll-off to a more acceptable
-p;1.4db at 3000Hz. "After modification, the RF Gain control should be backed off [CCW] until the band/sky-noise decreases to a
comfortable listening level. This will not interfere with the reception of moderately weak signals.
Problem: Even while listening on a large, external speaker, music sounds flat and tinny because the audio frequency response rolls
off below 200Hz.
Fix: There are a number of capacitors in the RX audio amplifier circuits that can be increased in capacitance to restore the low-end
audio. These capacitors are in the IF Unit. They are: C60, C66. C67, C69, C170 and C175. The increase in capacitance should be 4
times. {Note: Some capacitors in the audio circuitry can not be arbitrarily increased in value without causing unacceptable tradeoffs.}
C175 can be replaced with a 1000µF, 10V unit, whose full-length leads are sheathed in Teflon sleeving, except for the last 8mm, to
allow soldering to the PC board. This is done because the board-space allotment for the stock C175 is too small for the larger,
replacement unit. The new capacitor is folded over and tucked in appropriately.
Problem: Tinny/thin-sounding transmit audio.
Fix On the IF Unit, change C135 {0.1µF}, near the center-board fastening screw, to 0.47µF.
Problem: The stock, muRata CFJ455K14 SSB filter in the 455KHz IF has a selectivity shape-factor of 2 to 1. This is definitely less than
wonderful. The stock SSB filter in the TS-830S and TS-940S has about the same bandwidth at minus 50db, but it has a much better
shape factor and it is mechanically and electrically interchangeable with the stock filter in the TS-440S. The better filter is a muRata
CFJ455K12 or CFJ455V12, which will noticeably improve the transmit and receive, SSB audio quality of the TS-440S. This filter is
available from Trio-Kenwood as p/n: L72-0333-05 for $42.89 {Dec 1989}. If you want SSB double-filtering in the 440's RX, the TS940S' matching, 8.83MHz, YK-88-S1, 2.7kHz SSB filter is available from Trio-Kenwood as p/n L71-0222-05]. for $66.62 {Dec 1989}.
This filter goes in the optional SSB filter space on the IF Unit. For listening to an uncastrated-male voice, the YK-88-S1 will produce
better-sounding, and more understandable, audio than the Kenwood-recommended optional YK-88-S, 2.4kHz filter. A pair of TS-940
SSB filters will give the 440 the same superb selectivity that comes with the 940.
Alignment: Supply a signal to the receiver. Set the TS-440S' selectivity switch to M2, the single filter position. The USB and LSB
carrier oscillators [DIP switches on Control Unit] should be reset so that there is roughly 20db of RX, SSB carrier-suppression for each
sideband at zerobeat. [use the 440's 20db ATTN as a standard] {Use 15db rolloff at zero-beat for more low-end audio, or 25db roll-off
for more high-end audio and/or better unwanted sideband suppression} This completes the alignment of the carrier oscillators. >>> If
you installed BOTH filters: on LSB tune the 440 above the calibrator's zerobeat frequency and note the 20db (or the roll-off db you
used above) roll-off point. This should be around 3.1KHz, ±200Hz higher than zerobeat. Put this frequency & LSB into VFO B. Put the
zerobeat frequency & LSB into VFO A. With the Selectivity switch set to M1 [double SSB filter], the 8.375MHz oscillator on the IF Unit
is adjusted [TC2, in the lower left corner of the PC board] so that the improved skirt selectivity on the double filter position is equally
distributed between the zerobeat 20db rolloff point [VFO A] and the high-frequency 20db rolloff point [VFO B]. The comparison can be
done by watching the S meter and repeatedly pushing the A/B button on the 440. [use fast AGC to reduce settling time] Note 1: TC2
is installed backwards on the PC board so that the rotor adjustment slot on TC2 is hot instead of grounded. This causes the
capacitance of TC2 to change when a metal screwdriver is used to make the adjustment.
To fix this problem, TC2 is removed, reversed 180 degrees and re-soldered on the PC board. Note 2: see IF Unit schematic, CF2, the
AM filter. There is a 1K Ohm resistor [R49] in series with the input [D13] to the filter. This resistor provides a closer impedance match
between the 2000 Ohm filter and the source [L4]. A similar resistor can be installed in series with D12 at the input to CF1.
Problem: RX audio distortion. {This problem seems to be more prevalent in early production radios. There may have been a recent
factory component change to reduce receive distortion.} There is one designed-in source of distortion and several other possible
sources of distortion. The designed-in source of distortion exists because not enough forward bias current is applied to the switch
diodes that select the SSB [D23] , AM [D24] , and FM [D25] audio detectors. Here's why: A mixer is a nonlinear device. Nonlinearity
and distortion go hand in hand. Diodes make good mixers when their forward current is in the range of 0.05mA to about 0.6mA. At
currents above 1.5mA, diodes are reasonably linear and they make good switches. The switch diodes in the TS-440S have enabling
currents of from 0.2mA for FM to 0.28mA for SSB, so the switch diodes are operating in the region of maximum nonlinearity, which
results in distortion. The fix is simple: Increase the forward bias DC-current through the diodes to roughly 2mA. This is accomplished
by decreasing the resistance of each DC-bias resistor to about 1k Ohm. When these resistors are decreased in value, the 5000 Ohm
impedance of the low-level audio circuits decreases to about 500 Ohms and the values of the coupling capacitors must be increased
accordingly to prevent a rolloff of the low frequencies. Similarly, the resistors that are in series with the audio signals in these circuits
must be decreased in value to offset signal attenuation. The capacitance of the filter capacitors between switch diode bias resistors
(for SSB: C52, 4.7µF) must be increased to compensate for the decreased value of the bias resistors.
Fix for SSB audio detector and D23 switch: In the left, rear corner of the IF Unit, change: R71, R73, R74, and R85 to 1k Ohm; C53 to
47µF, 10V [XL=68 Ohms at 50Hz]; C52 to 22µF, 16V.
I'm guessing that similar changes can be made in the AM and FM detectors. This project can become tricky since some of the needed
changes can also affect the transmit÷receive transition performance of the radio. Thus, it may be necessary to compromise by
lowering the switch diode bias current to about 1mA. In general, this can be done by using 2k Ohm, instead of 1k Ohm, bias resistors.
If, after the changes are incorporated, you can still hear RX distortion on SSB, the problem may lie at the
[right-adjacent} product detector. Possible FIX: Install the missing injection-oscillator terminating-resistor at the product detector.
This resistor is 62 Ohm, 1/8W or 1/4W. It is soldered under the IF Unit PC board, near L5. The terminating-resistor is soldered to the
junction of R69 and R70 and the ground foil at the edge of the PC board. If the distortion persists, you may have an unmatched set of
Germanium product-detector diodes: D19, D20, D21, and D22. These diodes can be replaced with Schottky diodes. The product
detector balance should then be checked and adjusted as follows: Connect an RF detector to the emitter of Q9/R77. R77 sticks up
from the board at one end so that the test connection can be easily made. The RF detector can be an oscilloscope, detector/probe for
a DMM, or a 455KHz receiver coupled through a 10pF capacitor. With no signal input to the ANT jack, turn the RF Gain on the 440 to
zero. Set mode to USB, IF Shift to detent. Adjust TC1 [also installed backwards, like TC2] for minimum RF. End of test. Reset the RF
Gain control to normal.
Problem: AGC overshoot while receiving strong SSB signals. The symptom is audio distortion on peaks only. The distortion is reduced
when the RF-gain control is backed off.
Fix: On the RF Unit, near J13, near Q5, change R42 from 470k Ohm to 10k Ohm. This speeds up the attack response of the AGC.
Problem: TX frequency response is not the same as RX frequency response with the IF Shift control set on detent.
Fix: Connect a frequency counter to IF Unit, J26, pin 2 and ground. With the IF Shift on detent, the frequency [roughly 455kHz] of the
carrier oscillator should not change between TX and RX. If the frequency changes, adjust VR7 until the frequencies are equal. VR7 is
just behind the MIC pot and the top of the front panel; it is mounted on a small, PC board.
Intermittents. The interconnecting wires in the TS-440S are copper. The tin-plated single-row connector pins that are crimped to
these copper wires form a dissimilar metal junction that is subject to electrolytic action due to moisture in the air. Some of these
crimp connections may eventually fail to provide electrical contact due to electrolysis.
Fix: Remove the defective connector pin by depressing the ratchet-tab in the slot on the side of the connector pin and pulling the
freed pin from the connector body. [The ratchet-tab can be depressed with a small screwdriver.] The copper wire that protrudes past
the crimp is then electrically bonded to the pin with solder or Silver Print [GC Electronics] conductive paint. The wire/crimp junction
should be inspected with a magnifier before the pin is re-inserted into the connector. If a wire/crimp junction is soldered instead of
being dabbed with conductive paint, it is difficult to prevent the heat from melting the plastic insulation on the wire. If soldering is the
choice, the rosin flux residue should be removed from the pin with alcohol, or acetone.
The same type of intermittent problem may also occur in the coaxial connectors. The fix is to apply conductive paint between the
crimp on the center conductor pin and the copper wire.
An intermittent frequency display or wandering SSB receive frequency can be caused by a dirty socket-to-chip contact on IC52 in the
Control Unit.
On later production radios, IC52 may be soldered in. The same symptoms can also be caused by a bad solder connection on R152 in
the 36MHz VCO [VCO #5] at the front-center of the PLL Unit, near T20. Another common problem with VCO5 is L41 [10µH] which
apparently suffers from an intermittent internal connection. L41 is potted, so the best fix may be to replace it.
A very common problem with VCO5 is that the type of glue that is used to mechanically bond the components together appears to
absorb moisture from the air (it is hygroscopic). Since water has a dielectric constant of 79, its presence can cause much grief in an
RF circuit. Thus, the moisture that is absorbed into the glue can cause the oscillator to unlock.
Fix: Remove the original glue with solvent and a knife. If the glue is not replaced, VCO5 will exhibit microphonic problems. Some
types of clear hot-glue seem to work well for replacing the original glue. Re-adjust VCO5 after the glue has set up.
Problem: No direct access to RX input or RX mute. These capabilities are necessary if the 440 is to be used as a slave-receiver in
conjunction with another transceiver.
Fix: On the IF Unit, connect a wire from the base of Q39 to J22, pin 2. Remove R176, near J22. On the X41-1610-00, (M/14) Switch
Unit at the rear of the 440, jumper across R46 [10K Ohm]. The RX will now mute when the FSK IN jack is grounded. {FSK TX is still
possible if the AFSK is fed into the MIC jack through a 10 to 1 voltage divider.} The receiver input access can be brought out to the
ACC 3 connector by connecting a 27 Ohm to 51 Ohm 1/4W resistor to J29, pin 2 on the X41-1610-00, (N/14 ) Switch Unit. A short
length of wire connects the other end of the 1/4W resistor to the center of the ACC 3 jack which is now the RX input. When slaved to
another transceiver through the transverter port, this arrangement allows the operator to simultaneously listen on 2 frequencies with
stereo earphones. This provides an advantage to the user when working DX on split frequencies.
Problem: There is no way to adjust the reference frequency oscillator with the case on. If the frequency is adjusted with the case off,
the frequency will be different with the case on.
Fix: drill a 7mm to 8mm hole in the left side of the bottom half of the case. The hole should line up with TC1 on the PLL Unit. The
position of the hole can be located with the case in place. The horizontal measurement is 122mm back from the edge of the front
panel that wraps around the left side of the radio. The vertical measurement is 6mm below the edge of the top half of the case that
overlaps the bottom half of the case.
To adjust TC1: [You must have 10Hz readout enabled] Tune to 10.00000 MHz WWV, USB or LSB. Select W [wide] on the selectivity
switch. Wait until the tone modulation is present. You will hear both sidebands. If the 2 tones are not the same, adjust TC1 until the
tones zerobeat.
Problem: On QSK and on SSB VOX, it does no good to back off the RF Gain control to reduce the nuisance of static crashes or band
noise. This is because the factory stock receiver comes on full-bore whenever the TS-440S transitions from TX to RX - even if the RF
Gain is backed off!
Fix: On the IF Unit, change R36, near Q5, to 2M Ohm; change R60, near Q7, to 510K Ohm. ± a few standard values will make little
difference.
Problem: Your own transmit RF gets into the TS-440S through the EXT SP jack and causes audio rectification that is heard in the
external speaker.
Fix: The sleeve/shield terminal on the EXT SP jack should be bypassed to ground on the (G/14) Switch Unit with a 2nF to 20nF, 500V,
disc ceramic capacitor.
If the problem is most severe on 10 meters, try 2nF [.002µF]. If the trouble is most severe on 80m or 40m, try 20nF [.02µF].
Problem: You can hear distorted audio coming out of the internal speaker while you are transmitting on SSB.
Fix: Remove the top cover on the radio and re-position the internal speaker wires away from the area around the SSB filters. The
speaker wires should be confined to the area around the speaker plug on the IF Unit. Also, keep the speaker wires away from the
Control Unit behind the digital display.
Problem: Key-clicks on CW. This is caused by too fast (500µS) RF output rise [make] and fall [break] times.
Fix: On the IF Unit, change C168, near Q49, to .22µF; change R225 to 33K Ohm-43K Ohm. {the factory's "fix" for this problem is OK
on make but it still clicks on break}. Unfortunately, fixing the key-click problem also seems to affect the full breakin make timing in
the 440 which clips the first dit. Thus, if you want to use the 440 on full, instead of semi, breakin, you must put up with the key-clicks.
Problem: The amplifier-keying-relay, RY2 on the (N/14) Switch Unit, makes too much noise, or the contacts on RY2 have burned and
pitted, or all of the above. Another problem with RY2 is that it is too slow to use with a full-QSK amplifier. This needless make-delay
can cause the amplifier to hot-switch, burning the contacts in its QSK-relays.
Fix: replace RY2 with an NPN switching transistor and fix the current pulse problem that pitted the relay contacts, which may also
damage the transistor. [only works for amplifiers with positive voltage relay control]. If your amplifier uses positive 110V for the relay
control, like the SB-220 and the TL-922, the relay pitting is caused by the current pulse from the repeated shorting out of the charged
.02µF bypass capacitor across the amplifier's relay control jack. The bypass-capacitor can be removed if shielded wire is used for the
interconnection cable to the transceiver. Another fix is to install a 150 Ohm to 200 Ohm, 1/4W series resistor at the relay control jack
to limit the discharge current to a value that the relay or switching transistor can handle. The bypass capacitor is connected to the
relay-side of the resistor.
Transistor Installation Notes: The N/14 Switch Unit is located just behind the ANT RF connector on the rear panel. The small
access panel on the bottom, rear of the radio is removed to gain access to the N/14 Switch Unit. Two chassis-ground connections and
one center pin connection must be unsoldered from the RF connector before the Switch Unit can be removed. Unplug the three
connectors, remove the two sheet metal screws, and lift out the Switch Unit. Unsolder and remove RY2, D16, and the white jumperwire and the pin that it plugs into. Install one 1k Ohm resistor each in place of D16 and in place of the jumper-wire and its pin. The
transistor will solder in place of the relay if its full length leads are bent to fit the available holes. The emitter goes to common-ground,
as does the trace to J30, pin4 [CMC], the ground return for the relay control circuit. The base lead connects to the trace that goes to
R2 {D16} and C37. The collector solders to the trace that connects to J30, pin 2 [TXC].
Problem: Poor skirt selectivity on AM.
Fix: The unsatisfactory, stock, TS-440S AM filter, CF2, can be directly replaced with the better performing, AM-narrow, 6KHz filter
from the Trio-Kenwood R-1000 receiver. The part number of this filter is L72-0319-05 and the price is $9.10 {Dec 1989}. It is
available as a replacement part. Even though the better filter has more pin connections and is physically larger than the original filter,
the IF Unit printed circuit board was designed to accept either AM filter. The design engineers must have realized that some people
would want to install a good AM filter.
CF2 is a small, black, cube-shaped plastic component at the rear of the IF Unit just slightly to the right of left-to-right circuit board
center. No realignment is necessary after the AM filter is replaced.
Maintenance: The VFO tuning knob should be removed, after loosening the 1.5mm hex-socket set-screw, and the tuning shaft's
bushing-bearing should be lubricated with a modern semi-synthetic lubricant like Break Free or Tri Flow. The quantity of lubricant used
should be small and the radio should be tipped back to help the lubricant run down into the bushing-bearing. This should be done once
when the radio is new and roughly every 4-years thereafter.
Double-sideband modification for the TS-440S
Occasionally, it may become advantageous to use double-sideband-transmit and single-sideband receive mode in order to thwart the
efforts of radio sociopaths who are gratified by interfering with others. DSB-xmit/SSB-RX mode gives the non-interfering stations the
option of listening to the sideband that has the least amount of interference.
To install DSB capability in the TS-440S, the audio processor switch is rewired so that when the switch is depressed, the carrier is
removed from the AM transmit signal. Without a carrier, AM becomes DSB. {The DSB modification will disable the less-than-worthless
audio-PROCessor in the TS-440S.}
The modification: On the IF Unit [the top board] locate R179, which is between IC4 and Connector 21 at the front, left of the circuit
board. Remove R179 and connect a jumper wire from the right hand, empty solder-pad hole on the circuit board [collector of Q41] to
the junction of D45 and R196, which is straight back on the circuit board, just to the left of IC5; about 4cm from the rear of the circuit
board.
To enable DSB transmit/SSB receive, "SPLIT" operation is utilized:
1. Program VFO A=B.
2. Program VFO A for either USB or LSB, depending on which one has the least interference.
3. Program VFO B for AM and push the PROC [DSB] switch in to remove the AM carrier.
4. Select VFO A.
5. Program SPLIT operation. The 440 will now listen on VFO A and transmiton VFO B.
6. Set the carrier control straight up to position #5 [12 o'clock].
7. While transmitting, adjust the MIC gain control for a small amount of ALC. This keeps the DSB bandwidth to a minimum.
While listening [VFO A], it may be necessary to select the sideband that has the least amount of interference. If your friends are also
transmitting on DSB, you may be able to continue communicating, despite the efforts of those who would like to spoil the enjoyment
of others.
>>>DSB should not be used unless the other sideband is vacant. If the interfering station or stations can cause the group that they
are interfering with to interfere with a third group, it will definitely make their day.
Most jammers enjoy being talked about, either positively of negatively. This is why they usually switch back and forth between receive
and transmit. If you want a jammer to stick around, talk about him. Stupid insults usually work best.
top of page
This modification is read 2581 times.
19-07-1998
(TS-450) KAM-PLUS Problems!! with TS-450 & 850
Hello All,,
A common problem when using a KAM-Plus multimode with the Kenwood TS-850 or TS-450 occurs when the KAM-Plus is coupled to
the Accessory-2 socket on the back of the transceiver, producing noticable distortion of the transmitted audio when using the
microphone in SSB mode..
The problem is easy to cure by disconnecting the Accessory-2 plug from the back of the tranceiver, but this meant moving the
transceiver around every time one wished to operate on SSB..
The problem is caused by the input sensitivity of the rear Accessory-2 socket being set to high, so that it picks up very low level noise
from the KAM-Plus and associated computer wiring, this mixes with the microphone signal, to produce the distortion.
The cure is to reduce the input sensitivity of the radio, thus reducing the chance of distortion, also it goes without saying that the
output from the KAM-Plus must be increased to compensate for this.
With both the TS-450 and TS-850, adjusting the input sensitivity is straight forward and the transceiver manuals show you the
appropriate control and its location.. This is in both cases VR18 to be found on the main board of the radio,(refer to manual) in
practice I found that it was best to adjust this control fully counterclockwise..
Then we need to adjust the output from the KAM-Plus by varying potentiometer R28 and setting removable link (K9), this link is
factory set on one post only, (in the open position)!! this should be connected shorting the two posts, thus putting the KAM-Plus into
the high output position, and then potentiometer R-28 is adjusted to give full power out from your HF radio with very little ALC
deflection, when the MIC gain is in the normal operating position..
Then I am sure you will find that your problem is over, you can now simply change from digital modes to SSB.. Remember if you have
your Beacon activated to turn it OFF or it could cause a few comments when operating SSB..
top of page
This modification is read 1384 times.
19-07-1998
(TS-450) General coverage transmisson modification for the TS-450 and TS-690
1.
2.
3.
4.
Remove all screws of top and bottom case.
Remove two screws of front panel (left and right top sie),and loosen two srews of front panel (left and right bottom side).
Remove all screws of digital unit ( X46-312X-XX ).
Cut the chip diode D27 (RL73) on digital unit rear side.
\\\\\\\\\\\\\\\\\\\\\\\\\\\\
[
\
[
\__ __
[ \_ Bat. _
[
[
[
[
__\__
\\\\\\
[
\\
[
[
[_\_[
[
[
[
[
[
[
[ [
[
[
[
[
[
[
[
[
[
[
[
->I- D27 (RL73) CUT THIS
[
[
[
__ __
[\\\\\_
->I- D26
[
[\[
->I- D25 [
[
->I- D24 [
[
->I- D23 [
[
->I- D22 [
[
->I- D21 [
[
->I- D20 [
________________________________________________________
DIGITAL JNIT (X46-312X-XX)
Component side view
Best 73 Eric St-Pascal Kam. Qc. VE2MEL
This modification is read 1987 times.
top of page
19-07-1998
(TS-450) TS-450S Intermittent receive fixed
After making a careful mobile installation, WB0BQV found his TS450S to have intermittent receive. He removed the screw that was
going through the coax in his car and made a second installation in his truck. More intermittent. With some careful diagnosis he found
that moving the coax connector up and down caused the change in signal. With the radio opened up, I found that moving the coax
connector was breaking the contact between the wire from the center conductor and the board (W1 in the schematic). To save on
pulling the filter board, I used a short piece of very flexible test prod wire to connect from the center of the UHF connector to W6 on
the top of the PC board. W6 jumps over the contacts of a relay used only in the TS-690S. For added security, I also added another
wire of the same material from the ground lug on the UHF connector to the end of D11 away from the coax connector. So now if the
flexible back panel breaks the other wire too, it won't have so much effect. The coax connector is mounted on a 1/32" plated steel
panel so is excessively flexible in mounting. Ideally that connector should be mounted far more stiffly for those that use real RG-8
coax.
This modification is read 1418 times.
top of page
19-07-1998
(TS-450) TS-450,TS-850 feedback,ACC-2 Conn
Hi if you are using the ACC-2 connector to interface with your multi-mode controller, you may have had a problem with your
transmitted audio signal being distorted, to eliminate this see bellow.
1. Set your meter on the radio to read ALC
2. PK232 OWNERS: if alsso using a VHF tranceiver, adjust the AFSK level for proper VHF operation as expalained in chapter 3 of the
operating manual.If not adjust for proper SSB operation.
DSP - 1232 / DSP - 2232 Owners: Adjust the appropriate AFSK level control for proper SSB operation as expalined in chapter 3
of the operating manual.
3. Place the TNC in calibrate mode and press K to key the radio.
4. Adjust VR-13 on the TS-450 or VR-18 on the TS-850 so that the meter "Just comes off the peg" as described in the section titled
"SSB Tranciever Final Adjustments" (in the TNC operating manual).
5. Press Q to quit the CALIBRATE mode
This modification should not affect any of the other normal operations of the radio..
Copy of service bulletin from AEA
This modification is read 1276 times.
top of page
19-07-1998
(TS-450) TS-450 hidden functions
As users of the Kenwood TS-450S already known it is possible to configure the set to personel needs by hold down some buttons
during Power on.
There are three buttons listed in the manual.
The menu of Power ON + LSB/USB is listed on page 54 from the manual
The menu of Power ON + M.IN is listed on page 55
The menu of Power ON + ENT is listed on page 83
As often usual in microprocessor controled equipment there are hidden keyboard combinations who make it possible to configure more
functions then is listed in the manual.
At Power on + CLR + ENT a reset to factory defaults is taken place.
All memory programming is lost !
All filters are available (also these who are not fitted)
But there is something more!!
The receiver is able to receive from 30 kHz to 40 MHz
Transmitting is possible on
1620 kHz
3500 kHz
7000 kHz
10.0 MHz
14.0 MHz
18.0 MHz
21.0 MHz
24.5 MHz
28.0 MHz
to
to
to
to
to
to
to
to
to
2000 kHz
4000 kHz
7500 kHz
10.5 MHz
14.5 MHz
19.0 MHZ
21.5 MHz
25.0 MHz
30.0 MHz
Unfortunately after power off and switching on the programming is returnd to the most of the old values, but the 100 memory places
are still empty.
So one advice before start of experimenting note the contens of the memory places and configuration on a piece of paper, and read
the "F" manual .
Until now I do not have a method to program the expanded receiving and transmitting frequencys into the TS-450S.
If someone knows how to do this plaese let me know.
This modification is read 2092 times.
top of page
19-07-1998
(TS-450) TS-450S and KAM Plus info
Hi just found out a KINK in hooking up the TS450S to a KAM Plus for AMTOR op.
You have to turn ur Delay and CAR control to 0 to get it to work mode A.
Neither control should be active when running AMTOR LSB but they are, TRUST ME.
This modification is read 1238 times.
top of page
20-02-1999
(TS-450) Micro-input RFI modification TS450-TS690 Kenwood
By Pedro M.J. Wyns, RF- and biomedical-engineer.
History:
After buying a ts690 I got considerable trouble with the vox circuitry.
The Vox gain was always too high due to an excessive feedback resistance in the vox amplfier. Apparently a PCB-mounting failure as
the schematic carried the right value. After correcting this problem I still got RF problems with nearby antennas, blocking the
transmitter in TX.
Problem:
lack of decent RF-filtering on the micro-input circuitry.
Solution:
adding ferromagnetic cores and adjusting rc-filters on the IF-board.
Action:
remove the connectors on the right hand side of the IF board (underside transceiver front towards you). Unscrew the board and fold
over to the left. Add 22 nF parallel to R282 1k on t he micro entry close to Connector 6. Add 1nF parallel to C177 close to the IC-15
input. Add 1nF parall el to C217 close to the vox amplifier.
Remove te micro in and ground from the number 6 connector. Feed the white micro wire through a two hole ferrite core. Feed the
inner conductor through a small ferrite core as well Reconnect...
If you might be using an MFJ (=major fucking junk) voice keyer, disconnect the shit-unshielded micro cable and replace by high
quality twin balanced micro cable. Only use PTT, Mic and GND.
This concludes the mod. Don't even think of doing this without the service man ual and some smd-practice.
Good Luck
Pedro M.J. Wyns
[email protected]
Moutstraat 7
B-2220 Hallaar
Belgium-Europe
Fax +32 15 303115
top of page
This modification is read 1339 times.
21-04-2000
(TS-450) TS-450/690 Calibration cable change
Author: Kenwood Communication, inc.
Service Bulletin no. 995 (11 May 1992)
The TS-450/690 may not calibrate properly against WWW (JJY) when using the calibration cable that is supplied with early versions of
these sets, (serial numbers below 311xxxx) and when an antenna that is shorted for DC is used. A dipole with a balun is a prime
example of a DC shorted wire. A minor circuit modification that adds a 100 pF isolation capacitor should also be performed. Please
refer to the diagrams below for modification notes.
Parts required:
E37-0280-05
CK73FCH1H101J
Calibration cable assembly
100 pF capacitor
1 Ea.
1 Ea.
Time required for this modification is 30 minutes.
This modification is read 1288 times.
top of page
22-04-2000
(TS-450) TS-450/690 Distorted TX w/TNC
Author: Kenwood Communication, inc.
Service Bulletin no. 1002 (18 November 1992)
Note: This bulletin supercedes bulletin ASB-994, dated 10 April, 1992.
We have received several reports of distorted transmitter audio when using a TNC controller such as the AEA PK-232 or Kantronic
KAM, etc. The symptom will generally disappear if the transceiver and TNC units are powered from different sources.
Cause:
The audio output level form the TNC is generally too high and causes overload of the microphone amplifier circuit. In previous models
such as the TS-440S the incoming TNC audio was inserted after the microphone amplifier. With the TS-850S it is inserted before the
microphone amplifier. Just moving the insertion point to the output of the circuit is satisfactory since the drive level for FM packet is
higher then that required for SSB.
Procedure:
1. Add a 10 dB attenuator to the PKD line on the IF unit (X48-3090-XX). This will prevent overmodulation of the microphone input
circuit.
a. Change chip resistor R233 from 10 Kohm to 18 Kohm (RK73FB2A183J)
b. Change chip resistor R234 from 1 Kohm to 8.2 Kohm (RK73FB2A822J).
c. Delete chip capacitor C173 (100 pF) and add chip resistor R299, 1.5 Kohm (RK73FB2A152J).
2. Add the following note to page 35 and 37 of the Instruction manual.
3. When adjusting for proper ALC levels with an AFSK RTTY terminal or Packet TNC terminal you should adjust VR-13 on the IF Unit
for a reading similar to the one shown in the accompanying diagram.
Note: The transceiver and RTTY or TNC terminal should use separate power supplies, in order to prevent RFI (Radio Frequency
Interference).
Caution: This modification requires soldering equipment rated for CMOS type circuits. It also requires familiarity with surface mount
soldering techniques. If you do not have the proper equipment or knowledge do not attempt this modification yourself. Seek qualified
assistance.
Time required for this modification is ½ hour or less.
This modification is read 1227 times.
top of page
22-04-2000
(TS-450) TS-450S TX frequency response
Author: Kenwood Communication, inc.
Service Bulletin no. 1004 (21 December 1992)
We have received several reports concerning the transmit audio quality of this unit. Several reporters noted that the signal sounded
"hard" or had a reduced bandwidth, while others noted a difference in the noise quality when switching between USB and LSB. We
noticed a significant difference between the output power in LSB and USB on some of these sets.
Cause:
Improper adjustment of the 8.83 MHz tuning coils (L73, L76) on the RF unit (X44-3130-00) can cause these symptoms. The coils have
two tuning points. One is reached when the tuning slug project above the surface of the coilk form. When tuned in this manner the
bandwidth becomes narrow then normal and causes the symptoms noted above.
Alignment procedure:
1. Adjustment should be performed with the YK-88S1 (2.4 KHz) filter in line. If this filter is not preset you should select the THRU
position for the 8.83 MHz IF.
2. Adjust L73 and L76 according to the instructions provided in the service manual (Item 6 of the Receiver adjustment). Ensure that
the slug are preset well down in the coil form, then adjust for peak. You should reach this point before the top of the slug exist
the coil form.
3. Next, readjust L74 and L75 (Item 8 of the Receiver adjustment).
a. Select the 6 KHz filter for both the 8.83 MHz IF and the 455 KHz IF.
b. Select a dial frequency of 14.100.4 MHz.
c. Select the USB mode.
d. Adjust L74 and L75 for maximum.
e. Select the LSB mode.
f. Readjust L74 and L75 for maximum.
g. Repeat steps 3c - 3f several times until you obtain a difference of 2 dB or less in the AF output when switching between
USB and LSB.
4. Check Item 14, CAR point adjustment (Transmitter section) Menu items 11 and 12, and confirm that the transmitter power is
equal for USB and LSB.
Time required for this modification is 30 minutes or less.
top of page
This modification is read 1529 times.
23-04-2000
(TS-450) TS-450/690 Low mic gain w/DSP-100
Author: Kenwood Communication, inc.
Service Bulletin no. 1032 (9 August 1993)
Symptom:
Proper microphone gain/ALC readings cannot be obtained unless the user adjusts the TX GAIN potentiometer on the rear of the DSP100. This irregularity is caused of the DSP-100 MIC amplifier (IC-5).
Corrective action:
Remove capacitor C200 from the IF unit on the transceiver, and replace it with R300, a chip jumper wire.
Parts required:
Qty
1
Description
Chip jumper
Kenwood Part No.
R92-0670-05
Circuit description
R300
Caution: This modification requires soldering equipment rated for CMOS type circuits. It also requires familiarity with surface mount
soldering techniques. If you do not have the proper equipment or knowledge do not attempt this modification yourself. Seek qualified
assistance.
Time required for this modification is 1 hour or less.
This modification is read 1274 times.
top of page
23-04-2000
(TS-450) TS-450S Parts change
Author: Kenwood Communication, inc.
Service Bulletin no. 1036 (8 December 1993)
The 2SC2509 driver transistor are no longer available. They have been discontinued by the manufacturer. A substitute transistor
(2SC3133) is available but requires some minor circuit changes. These changes are detailed below.
Parts required:
Qty
2
2
1
2
1
Description
Driver transistor
330 ohm 1 watt carbon resistor
.047 µF ceramic capacitor
220 pF ceramic capacitor
560 pF ceramic capacitor
Kenwood Part No.
2SC3133
RC05GF2H331J
C91-0119-05
CC45SL2H221J
CC45SL2H561J
Circuit description
Q2, Q3
R8, R9
C2
C64, C65
C63
Note: C64 and C65 should be soldered directly to the collector and emitter pins of the final transistor Q4 and Q5.
Time required for this modification is 60 minutes or less.
top of page
This modification is read 1495 times.
23-04-2000
(TS-450) TS-450S/690S Noisy encoder
Author: Kenwood Communication, inc.
Service Bulletin no. 1059 (7 July 1994)
Symptom:
When tuning the Main Encoder of the TS-450S/690S with bare hands you may encounter a "scratching" noise in the speaker if an
antenna with a high SWR is used. If gloves are worn no problem is encountered. This occurs because the shaft of the encoder is not
grounded.
Countermeasure: Replace the Main Encoder with one that has a grounded shaft.
Parts required:
Qty
1
2
Description
Main encoder
Mounting screws
Part No.
W02-1836-05
N90-3006-46
Note: You must use the new mounting screws listed above with the replacement encoder.
Time required for this modification is 30 minutes or less.
This modification is read 1298 times.
top of page
19-07-1998
(TS-50) TS50 FIX: LCD display dark
From: DJ7UA @ DB0QS.#NRW.DEU.EU (Mario)
Problem:
No display illumination, LEDs On Air, AT TUNE no function The menu item 2 has no effect, display keeps always dark.
All other functions normal.
Possible reason:
Bad contact LCD Assy for 5V line to R9, R10 and IC5.
Power on the TS50 and check voltage at R9/R10.
If voltage is 0V, but display readout is active, the reason might be as discribed.
Measurement to fix it:
Look for the small hole near R9 at the LCD Assy, component side view, where the contact between the two sides of the LCD Assy is
located.
If you have no service manual:
This is the side oriented to the front side of the device.
R9/R10 are located close to the two LEDs.
Take a small size needle to pick through the contact hole to encrease the diameter.
Make a contact between the two layers by soldering a piece of wire across the hole.
Check the 5V at R9/R10.
73, Mario
DJ7UA
top of page
This modification is read 2268 times.
19-07-1998
(TS-50) TS50<-->AT50 communication
+-------------------------------------------------+
¦
TS-50 <--> AT-50
Communication
¦
+-------------------------------------------------¦
¦
as measured/discovered by DF6KR
¦
¦
No guarantee for whatsoever....
¦
+-------------------------------------------------+
Communication method:
Tranfer rate:
Synchronization:
Parity:
Signal format:
Serial interface
4800 bps
Start-stop (Asynchronous)
None
TTL level (!)
+---+
+-------------------+
¦
+---+
¦
¦
1
¦ 2 ¦
3
¦
ACC
¦ +---+ +---+ +---+ ¦
¦ ¦ 4 ¦
5
¦ 6 ¦ ¦
¦ +---+
+---+ ¦
+-------------------+
Rear Panel Connector ACC
1:
2:
Ground
TT (TS50<--AT50)TTL!
3:
4:
5:
6:
TS (TS50-->AT50)TTL!
N.C.
ATG (signal ground)
+13.8V from TS50
Timing:
1. at Power-on:
===============
+------------------+ ++1
++3++6
TT--+
+---------------------->
|
| |
| |
|
1.45 sec---+ |
| |
+--+
++2
+-+4,5
TS--+ +--------------------------------------->
|
|<- 600ms->|
0 + 90ms
resume time
t
Signal:
1
3
6
TT: ;;;;;0C;___0D01;__________0F11;
2
4
5
TS: ________0C;_____0D01;0F11;____
1:
2:
3:
4:
5:
6:
Power on comm.
Power on answer
Auto on request
Auto resume finished
ok at50
ok answer ts50
2. DOWN-UP-Communication
========================
TT: 0E02;__________0F11;__
TS: _____0E02;0F11;_______
same:
0E04;0E04;0F11;0F11;
0E05;0E05;0F11;0F11;
0E06;0E06;0F11;0F11;
0E07;0E07;0F11;0F11;
0E08;0E08;0F11;0F11;
0E09;0E09;0F11;0F11;
0E0B;0E0B;0F11;0F11;
0E0C;0E0C;0F11;0F11;
0E01;0E01;0F11;0F11;
UP
UP
UP
UP
UP
UP
UP
UP
UP
- UP from 1.8 to 3.5
3.5 -->
7
-->
10 -->
14 -->
18 -->
21 -->
24.5-->
28 -->
29 -->
7
10
14
18
21
24.5
28
29
1.8
DOWNs
0E0C;0E0C;0F11;0F11;
0E0B;0E0B;0F11;0F11;
.
.
0E01;0E01;0F11;0F11;
TUNE:
AUTO OFF (THRU):
AUTO ON:
tune error:
0D03;0D03;0F41;0F41;
0D00;0D00;
0D01;0D01;
0d03;0d03;0F83;0F83;
top of page
This modification is read 2183 times.
19-07-1998
(TS-50) TS-50 Power Mod for QRP
"Honey - I Shrunk the Rig"
by Bob Gobrick WA6ERB
No this is not an article about Kenwood shrinking their new TS-50 HF rig into a "CB" sized package, but the "shrinking" of the low
power level on the TS-50 from 10 watts to 5 watts output in order to "officially" comply with the nationally recognized QRP power level
for contest operation.
Prepare yourself before you remove any covers from the TS-50 - this is no Hallicrafters (feel a little dated) with 6L6's glowing in the
inside. All components are surface mounted and to conserve space surface mounted subassemblies stand up at right angles all over
the place. No place to work with that stubby tipped Weller soldering gun. But have no fear, this QRP mod is simple - you just need a
screwdriver with a blade the size of a toothpick.
If you check the schematics you will see on the TX/RX board two potentiometers to set the Low 10 watt (pot VR15) and Medium 50
watt (pot VR16) power levels. The high power level is fixed at 100 watts by resistor R214. Our goal is to get to VR15 and set it for a 5
watt output.
First remove the top cover, set aside speaker and remove the latched speaker bracket (gives you better operating room). Locate two
teeny-weeny pots next to IF filter module in the middle of the TX/RX board. The pot closest to the front panel is VR15 (low power
adjust) and the one closest to the back of the rig is VR16 (medium power adjust) - the pots are somewhat marked on the PC board.
Hook up a QRP wattmeter, dummy load and power and while in th low power mode adjust the pot (I used a flat blade calibration tool I
had around) for 5 watts. That's it. You may notice that you can crank the pot all the way down to 0 watts so set where you want. I
suspect the medium power adjustment with VR16 can also go to zero so maybe you can go QRPp by setting the low power pot for 999
mw and the medium power pot for 5 watt.
PS: Kenwood Service cautioned that their automatic antenna tuner requires 10 watts to actuate so this adjustment may affect that
operation. You may want to check if Kenwood actuates the low power mode when the antenna Tune button is pressed. Also don't
expect to run this rig off of a small solar cell for field day - the unit and all of it's surface mounted components draws a bit of power enough for the internal fan to come on even in the QRP low power mode.
This modification is read 2316 times.
top of page
19-07-1998
(TS-50) TX Coverage mod TS-50
Hi folks,
I just got a spanking new Kenwood TS-50S.
Searching around the local LLBBS's I found a very simple mod for full transmit from 1.7 - 30 mhz....
Remove the bottom cover of the TS-50
Locate the PLL board -- it is the pc board on top of the main board, it has a shield on it's right side.
Locate the only non-surface mounted component on the PLL board -- look near the rear left-hand side of the pll board (front of radio
facing you) and remove the very obvious diode. You can't miss, ther's only one.
Replace cover.
Perform microprocessor reset as described in your manual.
This modification is read 3039 times.
top of page
23-01-1999
(TS-50) CAT control for TS-50S
From: [email protected]
I wish to offer an cheap solution for solid work with CAT control with your transceiver Kenwood TS-50S and PC. After long
examinations and testing.
I found out following solutions as most acceptable:
1. Interface IF-10D (227DM) and serial interface RS-232C (283DM) with program.
2. Interface IF-10D,line DIN6P connector and DB9 for PC (COM1), 2 germanium diodes, 2 condesators 10nF, which acts as RS-232C
!
3. Small home made interface, in SMD technology, on the PCB 2x3 cm,integrate with TS-50S on the lower side of its PCB. The
connecting line with PC can be home made. This can be done by specialists which can achieve an cheap solution.
The most convenient solution is mentioned under 2. Software is selected between 40 different solutions.The best one that made by
N3EQF, RIG-EQF ver. 1.02. He is well known author for LOG-EQF software. This software is produced for TS-940S ?, but it works OK
with TS-50S. The program runs after command RIG-EQF 1, for COM1 and RIG-EQF 2, for COM2. I tested program on laptop
T2200SX25 and on PC 80386DX40.
The program is easy to use, with simple commands. The program can be activated only if all his hardwware is on, interface, PC and TS50S. When the program is active the working frquecy is displayed,very precisely registering each change, then RIT control,
modulation, VFO A and B, SPLIT etc.
Option O has possibility to input 22 different QRGs, modulations, descriptions and call sigs. Then you can choose any of them with
coursor.
With key P is possible to obtain scanning of frequency in the wished range,then step raster and speed.
The second program , witch works the same things, but in litlle bit reduced range, is KEN-AE6G, dated 1990. it has VFO A and B
control, and M memmory control. It is intended for use with TS-440 and TS-940s!
I include the plan of connection for IF-10D to DB9 pin PC port. The software can be downloaded from BBS and programs are very well
sorted on FBBS of IV3LAV-8 via IR3GO (gonode). Using yapp protocol all can be quickly dowwnloaded from subfolder RTX. Names are
RIG-EQF.ZIP 71.005 bytes, and TS50.ZIP - 6.847 byta. Detail description, schemas and know-how will be published in "Radio
HRS",edition of 9A union.
On my TS-50S I tried the work with 2 computers: laptop worked with CAT-control, while PC 386 worked with SSTV (Hi )! The work
was stable.
I wish to all CAT enthusiasts a lot of pleasure.
Vy 73 de [email protected] !
Connection "home made" cable to IF-10D to PC:
IF-10D
_________
PC-DB9
_____________
DIN6P.
1. o GND------------------------------------------------o 5.(GND)
2. o TXD------------------------------------------------o 2.(RXD)
3. o RXD---------------------------I>I------------------o 3.(TXD)
|--I I--|
4. o CTS-----------------------------------I>I----------o 7.(RTS)
|---I I---|
5. o RTS------------------------------------------------o 8.(CTS)
6. N.C.
-I>I- germanium dioda -in ser!
--I I---paralel diods kond 10nF
de Iko-73!
top of page
This modification is read 2258 times.
14-02-1999
(TS-50) Important note to 0-30 MHz TRX mods
If you want to make your TS50 tranceiving 0-30 and find more then 1 diode in your radio, PLZ watch out! Dnt remove diode nr1!
Remove nr5.
If you remove diode nr1 your radio is history!
top of page
This modification is read 2722 times.
19-01-2000
(TS-50) New version. General TX for TS-50
The new version of the TS 50 has three non surface mount diodes to be cut for general TX.
top of page
This modification is read 2576 times.
22-04-2000
(TS-50) TS-50S Lithium battery replacement notes
Author: Kenwood Communication, inc.
Service Bulletin no. 1015 (10 May 1993)
Procedure:
Immediately after replacing the Lithium battery you must cycle the radio ON then OFF. Failure to follow this procedure will result in
premature failure of the battery. If the power is not cycled ON then OFF the microprocessor will immediately begin drawing
approximately 1 mA of power from the Lithium battery, resulting in poor battery life.
When the battery is replaced we recommend the insulation sheet also be changed. Part numbers for the battery and insulation sheet
follow.
Parts required:
Qty
1
1
Description
Lithium battery
Insulating sheet
Kenwood Part No.
W09-0515-05
F20-0521-04
Circuit description
BA1
--
Caution: This modification requires soldering equipment rated for CMOS type circuits. It also requires familiarity with surface mount
soldering techniques. If you do not have the proper equipment or knowledge do not attempt this modification yourself. Seek qualified
assistance.
Time required for this modification is 15 minutes or less.
top of page
This modification is read 2071 times.
23-04-2000
(TS-50) TS-50S "Hello" displayed during TX
Author: Kenwood Communication, inc.
Service Bulletin no. 1030 (29 June 1993)
Symptom:
Occasionally an "Hello" message will appear in the display of the transceiver when the TS-50S is loaded into a antenna without the use
of an antenna tuner. This symptom usually occurs when the negative terminal of the power supply is floating (un-grounded for RF).
This can result in RF feedback that causes the supply voltage to exceed to 16 Vdc.
Corrective action:
1. Cut the Final Unit PC Board foil in two places, as shown below.
2. Add a .01 µF chip capacitor (C125) as shown below.
3. Add a 10 µH chip Ferri-inductor (L102) as shown below.
4. Add an insulated jumper wire as shown below.
Parts required:
Qty
1
1
Description
.1 µF chip capacitor
10 µH Ferri-inductor
Kenwood Part No.
CK73EB1E104K
L40-1001-48
Circuit description
C125
L102
Caution: This modification requires soldering equipment rated for CMOS type circuits. It also requires familiarity with surface mount
soldering techniques. If you do not have the proper equipment or knowledge do not attempt this modification yourself. Seek qualified
assistance.
Time required for this modification is 30 minutes or less.
This modification is read 2276 times.
top of page
23-04-2000
(TS-50) TS-50S Antenna lead wire
Author: Kenwood Communication, inc.
Service Bulletin no. 1035 (7 December 1993)
Symptom:
Several users have reported a problem with the antenna lead connection, i.e. the lead that connects the antenna connector to the
Filter unit (X53-3120-xx). Originally this connection was made by a zero ohm resistor. If excessive stress is placed on the antenna
connector this lead is easily broken, with a resulting loss of receiver sensitivity and transmitter power. The use of a small flexible
jumper wire will increase the flexibility of this connection, thus minimizing the effect of mechanical stress.
Parts required:
Qty
Description
1 Cable
New part No.
E37-0445-05
Circuit description
W2
Procedure:
Remove the zero ohm resistor and replace it with the small piece of cable. See accompanying diagram.
Caution: This modification requires soldering equipment rated for CMOS type circuits. It also requires familiarity with surface mount
soldering techniques. If you do not have the proper equipment or knowledge do not attempt this modification yourself. Seek qualified
assistance from your closest Kenwood Service Center (Long Beach, CA, or Virginia Beach, VA).
Time required for this modification is 30 minutes or less.
top of page
This modification is read 2232 times.
23-04-2000
(TS-50) TS-50S Mechanical noise from final unit
Author: Kenwood Communication, inc.
Service Bulletin no. 1044 (28 March 1994)
Symptom:
When the transceiver is subjected to vibration a mechanical noise can be heard from the output transformer area. This has led to
concern by several consumers that something is loose or improperly installed.
Corrective Action:
In order to ease consumer concern toy should add a cushion under transformer L4 as shown in the accompanying diagram, and
replace transformer L13 at the same time. This transformer has been fastened to the circuit board with high temperature adhesive, so
use caution when removing it from the circuit board.
Parts required:
Qty
1
1
Description
Cushion
Output transformer
Old part No.
NA
L39-1209-25
New Part No
G13-0871-04
L39-1252-05
Circuit Description
(Under L4)
L13
Time required for this modification is 30 minutes or less.
This modification is read 1982 times.
top of page
27-01-2001
(TS-50) TS-50 Modification Full time "Double-Zero"
Author: Chris Arnold - [email protected]
This modification makes the "double zero" display full time.)
1. Turn on radio
2. Go to MENU 'B', item #70.
3. Program [85] into item 70. This puts the 'double-zero' on the #4 (PF4) button on the microphone. Press the F-LOCK to get out of
the menu function.
4. Press 'F-LOCK' [ON].
5. Press and hold PF4 button on mic.
6. While holding PF4 button down on the mic, press and hold the [SPLIT] button.
7. Release the PF4 button -then- release the SPLIT button.
8. Turn F-LOCK [off].
9. Go back to MENU 'B', item '70', and remove [85] or change the number.
This modification is read 2434 times.
top of page
16-06-2001
(TS-50) TX 0-30 MHz for the new TS-50 (May 2001)
Author: - [email protected]
ON the new version are 4 diode on de board.
Cut remove all, D1 D3 D4 D5
Then RESET the Kenwood TS-50
This modification is read 2814 times.
top of page
08-08-2001
(TS-50) TS-50 High-Power-Modification
Author: Joe, DL6IB - [email protected]
As the most of you TS-50-Users surely know, it is possible to increase the Medium-Power, the Low-Power but not the High-PowerSetting. Reason: There is no Trim-Pot, it is a small SMD-Resistor. With that small Modification you'll get a Trim-Pot and the TS-50 is
able to run up to 180 W output without any problems.
1. Remove Top-Cover and hook out the internal speaker. Place the rig top up, display to you. The area you need is closed to the left
side of the CW-Filter-Board on the main-RF-Board, where the Filter-Board is screwed on.
On the board is printed on 'PL', 'PM', 'PH' and an arrow. Above are two pots and two little black chips, the right one (SMDResistor) is very closed to the second pot.
2. Remove this SMD-Resistor (R214, 10k), wich is located closed above the two pots for Med and Low. It is a VERY small black chip,
marked with '103'. Be CAREFULL while soldering!!
3. Make yourselfe a small Board, 25 mm long, 8-10 mm wide. At one end drill a centered 3mm-hole closed to the edge of the
board.
4. Solder one konventional 4k7-Resitor (standing, a 5k6 or 6k8 also can do it) and a konventional 10k-Trim-Pot (lying) in serial
order on this board.
Make sure, you make no shorts and build the circuit as narrow as possible and very closed to the reverse end, from where you
drilled the hole in - you later need 10mm space at the drilled end!
5. Connect two two fine wires (length aprox. 20 mm) at the ends of this little circuit and solder it (CAREFULLY!!) to the free solderjoints of the resistor. To make it a bit easier: the right one you can solder to a joint about 4mm away of it - just follow the small
trace to the right and you will find this lonesome contact.
6. Remove the screw of the CW-Filter-Board, place your little board hole-on-hole on top of the Filter-Board and Re-Screw the two
boards together to the main-board. So your little "Tuning-Unit" is fixed, hanging above the Med- and Low-pot.
7. Connect the rig to a power-supply (25-30 Amps!), a power-meter, a dummy-load and switch it on. No smoke? So you might
have done everything all right ;-)
8. Push a FM-Carrier on 14Mhz and set the 'new' pot on the desired output. My TS-50 can do max 185 Watts but I have adjustet it
to 150-160, so it modulates fine 130 Watts SSB with the original mike - what a difference to that 70 before... Don't adjust it to
high, think about your finals and filters!
Thanks to Jim Duarte for this photo.
Note: You are making this Mod on your own risk, I am NOT responsible!
Good luck, 73's
Joe, DL6IB
www.dl6ib.de
[email protected]
This modification is read 3419 times.
top of page
12-10-2001
(TS-50) Kenwood TS-50S Wideband TX & double zero readout
Author: Gerry - [email protected]
I purchased a new TS-50S in May 2001, to enable Wideband TX cut D3 &D4 on the digital unit X46 - 315X - XX.
I purchased another new TS-50S today 10/10/2001 the mod is the same except cut D5 as well to enable.
Enable this mod entirely at your own risk and responsibility.
Note; enabling the double zero mod you will lose the RIT display, it's activation is now indicated by a beep. To reverse enable a partial
reset by holding down A/B and switch on, or, retain the 70/85 key 4 mic sett