1
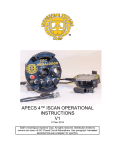
Unisense UnderWater Meter UNISENSE A/S · DENMARK www.unisense.com · [email protected] Notice to Purchaser This product is for research use only. Not for use in human diagnostic or therapeutic procedures. Warning Microsensors have very pointed tips and must be handled with care to avoid personal injury and only by trained personnel. Unisense A/S recommends users to attend instruction courses to ensure proper use of the products. Warranty and Liability The UnderWater Meter is covered by a 1 year limited warranty. The warranty does not include repair or replacement necessitated by accident, neglect, misuse, unauthorized repair, or modification of the product. In no event will Unisense A/S be liable for any direct, indirect, consequential or incidental damages, including lost profits, or for any claim by any third party, arising out of the use, the results of use, or the inability to use this product. Repair or Adjustment Equipment that is not covered by the warranty will, if possible, be repaired by Unisense A/S with appropriate charges paid by the customer. In case of return of equipment please contact us for return authorization. For further information please see the documents Conditions for Sale and Delivery for Unisense and Warranty and Shipping Information as well as the manuals for the respective products. 3 Contents Unisense ............................................................................................................................................... 1 UnderWater Meter .............................................................................................................................. 1 Notice to Purchaser.............................................................................................................................. 3 Warning ................................................................................................................................................ 3 Warranty and Liability .......................................................................................................................... 3 Repair or Adjustment ........................................................................................................................... 3 Contents ............................................................................................................................................... 4 Congratulations with your new Unisense UnderWater Meter! .......................................................... 5 Included Items...................................................................................................................................... 6 Specifications ....................................................................................................................................... 6 GENERAL WARNINGS ........................................................................................................................... 7 Description of Hardware ...................................................................................................................... 7 UnderWater Meter .......................................................................................................................... 8 Connections ..................................................................................................................................... 8 Datalogger ........................................................................................................................................ 8 In Situ Amplifier Units ...................................................................................................................... 8 Batteries and Charging ..................................................................................................................... 9 Communication Cable .................................................................................................................... 10 Magnet Stick .................................................................................................................................. 10 Dummy Connectors ....................................................................................................................... 10 Getting Started ................................................................................................................................... 11 Making Measurements ...................................................................................................................... 11 Transfer of Data ................................................................................................................................. 12 Storage ............................................................................................................................................... 14 Maintenance ...................................................................................................................................... 14 Operating the Menus ......................................................................................................................... 15 Troubleshooting ................................................................................................................................. 18 UNISENSE A/S · DENMARK www.unisense.com · [email protected] Congratulations with your new Unisense UnderWater Meter! The Unisense UnderWater Meter is a versatile four-channel amplifier and data logger for field and underwater applications that can be used with all Unisense in situ micro- and macrosensors. Overview The Unisense UnderWater Meter is an excellent tool for researchers who would like to verify laboratory results in the field. While laboratory equipment is not suitable for humid or rainy conditions, the robust UnderWater Meter can be used in humid rain forests or wetlands, as well as by scuba divers under water on coral reefs, in aquatic plant beds, in fast flowing streams or in muddy estuaries. Support, ordering, and contact information To order products or if you encounter any problems or need scientific/technical assistance, please do not hesitate to contact our sales and support team. We will respond to your inquiry within one working day. E-mail: [email protected] Unisense A/S Tueager 1 DK-8200 Aarhus N, Denmark Tel: +45 8944 9500 Fax: +45 8944 9549 Further documentation and support is available at www.unisense.com Notice to purchaser: The UnderWater Meter is a research-use only instrument. Manual version: 2.3 5 Included Items 1 UnderWater Meter for four channels with display, datalogger and internal battery 1-4 In Situ amplifier units 1 battery charger 1 USB communication cable 1 magnet stick for operating the UnderWater Meter 7 dummy connectors Spare kit 1 user manual and documentation Functional features: - Four channels for measuring with microsensors - OLED display with operation menu and visualization of all four sensor signals - built-in data logger which can log time-stamped sensor signals continuously or as singleshot measurements - easy operation with magnetic contact - rechargeable internal battery pack - analog output – cable not included Specifications Runtime on fully charged battery No. of channels Waterproof depth Operating conditions Connections Power Analog output range Log Memory Sampling interval, Normal mode Sampling interval, One-shot mode Dimensions Weight in air Weight in water 25 hrs at 25C 4 Maximum 30 m -5 to 40 °C Subconn LiPol 13.200 mAh, 7,4V 5V 200 million samples 1 Hz 1 second 400*115*140 mm (W*D*H) 3.6 kg 1.8 kg UNISENSE A/S · DENMARK www.unisense.com · [email protected] GENERAL WARNINGS Remember to mount a dummy connector in any unused Subconn bulkhead on the UnderWater Meter before using it under water! Neglect of this can result in short-circuits and damage of the instrument and wrong measurements. Do not apply any deformation forces to the clear Perspex cylinder (e.g. by strapping other equipment onto it) as this may cause leakage. Use the metal rods instead. Take care not to mount sensors onto the wrong type of amplifier; a wrong connection may destroy the sensor. To make sure that the UnderWater Meter always is in working order, please make sure to carefully read the chapters concerning the Battery and Charging instructions and UnderWater Meter Maintenance. Repairs are only to be carried out by Unisense authorized service personnel. Description of Hardware The UnderWater Meter and the parts that belong to it are shown in Figure 1 and will be described in the following sections. Figur 1- The UnderWater Meter with parts 7 UnderWater Meter The UnderWater Meter system consists of the UnderWater Meter housing, which contains battery, power and signal circuitry, datalogger, display, and magnetic switch activation circuitry. The housing of the UnderWater Meter is made of POM, AISI 316 steel and Perspex. Connections are made with Subconn connectors. The housing is rated to a depth of 30 m. Connections Subconn connectors for in situ amplifiers, charging and communication are found at the two ends of the UnderWater Meter: Left end for in situ amplifiers Right end for charging and communication CH 1 to CH 4 are for connection of in situ amplifiers with connectors and sensors. Measurements are logged by channel number, so make sure to keep track of your order of connection. CHARGING is for charging the battery or running on external power. USB/DATA is for transfer of data to PC via the USB communication cable ANALOG OUT is for real time recording of data by external datalogger. Cable not included. Please contact [email protected] for further information. NOTE: pictures are shown without dummy connectors – do NOT use the UnderWater Meter under any field conditions unless dummy connectors are mounted on all un-used Subconn’s. Datalogger There is one data logger in the UnderWater Meter with a memory capacity of 200 million samples. In Situ Amplifier Units The microsensor signal is measured and amplified in the in situ amplifier units. The in situ amplifiers are specific to each sensor type and it is important to only connect matching sensors and in situ amplifiers. The microsensor is attached to the amplifier unit with a specialized connector. See the sensor connector instructions for details on mounting sensors in connectors. UNISENSE A/S · DENMARK www.unisense.com · [email protected] In situ amplifier unis, left: potentiometric (e.g. pH, redox), right: amperometric (e.g. O2, H2S). Batteries and Charging Batteries can only be charged at operating temperatures from 0-30 °C. The UnderWater Meter contains an internal rechargeable battery. The battery is a Lithium-ion polymer type (LiPol). It has a very low self-discharge rate and will remain charged for at least one year when not used. NOTE: Air transport of LiPol batteries is regulated due to potential hazard. When travelling, keep the battery Material Safety Data Sheet with the UnderWater Meter, to verify that the battery load is not prohibitive. Battery charger Charging the battery If the batteries run low, or the UnderWater Meter automatically turns off (battery protection mode), it is time to recharge the UnderWater Meter. Plug the charger into the charger connector of the UnderWater Meter. The UnderWater Meter turns on during charging, but will not allow polarization of sensors or measurements. If charging initiates with the UnderWater Meter turned on, the display will prompt you to choose between charging only and continuing working using external power without charging. Disconnecting during and after charging will turn the UnderWater Meter off. Charging takes approximately 3-4 hours. 9 Communication Cable The communication cable is used for USB connectivity between the UnderWater Meter and a PC. The cable is not for underwater use, but it can sustain water spills. Remember to mount a dummy in the bulkhead connector before use under water. Communication cable Magnet Stick The magnet trigger stick is used for all operations like on/off, changing settings in the menu of the UnderWater Meter and data logging. Magnetic stick Dummy Connectors Dummy connectors must be used on all un-used Subconns when using the UnderWater Meter in any field conditions Dummy connector UNISENSE A/S · DENMARK www.unisense.com · [email protected] Getting Started 1. Turn on the UnderWater Meter using the magnetic stick by holding it towards the on/off button on the top. The display should now turn on and show a booting menu. 2. Make sure the battery in the battery compartment is charged (see Batteries and section). 3. Connect the amplifier units to the UnderWater Meter housing and tighten the engaging nut. NOTE: To avoid damage to the amplifier unit cables, it is necessary to plug and unplug straight and not twist the cable. 4. Connect the appropriate sensors to the amplifier units. For preparing in situ sensors, see the in situ connector manual. Make sure you connect the sensors to the appropriate type of unit, which is indicated on the amplifier unit cable. Connecting amperometric sensors (e.g. oxygen and hydrogen sulfide) should result in a significant signal increase on the display, which will stabilize during some minutes. See the sensor manuals for details on stabilization. Connecting potentiometric electrodes (redox or pH) results in erratic and drifting signals until the electrode/sensor is immersed in the same aquatic solution as its reference electrode. 5. Calibration and measurements can now be performed. See the sensor manuals and the Making measurements section for details. In some instances, the electrical fields emitted by nearby equipment (e.g. fluorescent lamps) can disturb the delicate microsensor signals. If it is not possible to remove the source of this electrical noise, make a grounding connection between the metal housing on the amplifier unit and the measurement/calibration medium with a metal wire (Grounding clip provided in Spare Kit). 6. Now make your measurements, either by selecting “auto data logging” or “manual data logging” using the magnetic stick as described in the Making measurements section. Making Measurements Preparations 1) When turning the UnderWater Meter on without sensors attached, the channels with in situ amplifiers (ISA) for amperometric sensors will show a signal around 0 mV (+/-25 mV). The reason for not showing exactly 0 is due to the offset in the electronics and will disappear when an in situ amplifier is connected. The mV channels (redox or pH) are noisesensitive and the signal will drift up and down in an unpredictable way, until the electrodes are attached and submerged in water. 2) Connect sensors to the matching in situ amplifier. 11 NOTE: if a sensor is connected to the wrong in situ amplifier type, the sensor may be damaged. NOTE: Remember to insert dummy connectors into ALL unused Subconns before usage in water, to avoid short-circuits and potential damage to the instrument. 3) Calibrate the sensors as described in the sensor manuals. Field measurements 1) Bring the UnderWater Meter with amplifiers and sensors mounted including the sensor guide and the magnet stick to the study site. Place the instrument such that the sensors can be applied to the study site and the display can be observed at the same time. 2) Remove sensor protection using the alignment tool (see In Situ Connector System manual) 3) Place the sensor tips (manually or with a micromanipulator for fine-tip sensors) at the location of interest. 4) Watch the display to ensure that the sensors function and allow the sensors to settle according to their response times. 5) To log a sample, place the tip of the magnet stick near over the Event key. A green LED light will indicate sampling of data. NOTE! In manual logging mode, the data loggers cannot log faster than every 1 seconds. If the magnet relay is activated twice at a shorter interval, the LED will light, but only the first activation results in logging of data. Transfer of Data From the Logging tab select “Transfer logged data to PC..”. Follow the data transfer wizard. The 3 displayed dialogs are shown on the next page UNISENSE A/S · DENMARK www.unisense.com · [email protected] The transferred file will be called “datalog.txt” and can be opened as txt file or imported to e.g. Excel for further analysis. 13 NOTE: data format is using US regional setting using period “.” as decimal separator and your PC settings must be set to this when copying data into Excel. Alternatively use the Excel import data facility applying period as decimal separator Storage Storage of the UnderWater Meter following measurements and experiments. - Protect the sensor tips with the transport protection tubes - With amplifier units and sensors connected, rinse the UnderWater Meter in fresh water to minimize corrosion. Dry the UnderWater Meter and amplifier units with a soft cloth - Store the UnderWater Meter in a dry place at room temperature. For sensor storage, see the sensor manuals. WARNING: do not expose the UnderWater Meter to ethanol or other solvents, as the materials may be severely damaged. Maintenance - Always keep dummy connectors in unused Subconn connectors to avoid short-circuits and the deposition of dust and particles in the connectors. Clean outer surfaces with fresh water and maybe soap – never ethanol or other solvents! Lubricate the Subconn connectors with a fine layer of silicone (Molykote 44 medium) grease before use. UNISENSE A/S · DENMARK www.unisense.com · [email protected] Operating the Menus The OLED display and magnetic keys Keys: Event key: Arrow keys: Select key: Single activation with magnetic stick activates measurement in both manual logging mode and auto logging mode Long pressing (3 seconds) in auto logging mode terminates auto data logging Short pressing during auto logging mode generates a time stamped event mark in the data file. Moving up, down, left and right in the menus. Increasing or decreasing setting values. Select setting and moving in and out of menus. The measurement tab Displays the live value of the sensor grown front and the last measured value in subscript. 15 Use the Arrow keys to move to a given channel and then the Select key to enter the channel configuration menu Offset: Gain factor: ADC range: Default value is 0mV. Option to add or subtract a fixed value to data points. Default value is 1,0. Allows amplification of signal. Gain range is 1-10. Default value is +/-5 V. Range is +/- 1 to 10V. Select the smallest range that will allow measurement of the highest expected value in order to obtain the best data resolution. The Logging tab Logging mode: Logging interval: Tranfer logged data to PC: Delete logged data: Log File Size: Choose Manual (one-shot) or Auto-logging mode. Set time for logging interval when using Auto-logging. To transfer file via USB connection. Delete log file saved on the UnderWater Meter. Size of log file. UNISENSE A/S · DENMARK www.unisense.com · [email protected] The Settings tab To set Time, Date and Power saving time. Power saving will turn of screen but continue data logging. Start SW update: Starts software wizard for upgrading UnderWater Meter firmware. The About tab Provides information about embedded Firmware version and Serial number. Please provide this information when contacting technical support. 17 Troubleshooting Condition: Unstable signals (1) Cause: The (amperometric) sensor is broken. Action: inspect the sensor and change it if broken. Condition: Unstable signals (2) Cause: Fluctuating electrical fields (e.g. lab equipment or lamps) interfere with the signal. This is mostly observed indoors, e.g. in laboratories. Action: 1) Turn off un-necessary equipment or move the UnderWater Meter to a different location. 2) Make a ground connection between the water to be measured in and the metal housing of the in situ amplifier. A grounding clip with wire is provided with the Spare Kit that comes with the UnderWater Meter Condition: Unstable signals (3) Cause: The battery voltage level is low. Action: Charge the battery. Condition: Other signal problems Cause: The function of the electronic circuits has been disrupted, e.g. due to water intrusion into the UnderWater Meter. Action: Contact Unisense A/S. Condition: Battery icon is flashing - Battery will not charge Cause: Temperature is not within battery charging temperature Action: Restart charging by unplugging/re-plugging charger when correct temperature is obtained. If this does not solve the problem then contact Unisense A/S. Condition: The UnderWater Meter fails to turn on or does not react to magnetic stick commands Action: 1) Reset the instrument by holding the magnetic stick over the power on switch for more than 10 s. 2) The screen will flash once 3) Turn the instrument on again UNISENSE A/S · DENMARK www.unisense.com · [email protected] 19 UNISENSE A/S · DENMARK www.unisense.com · [email protected]