1
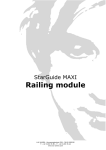
StarGuide MINI
Railing module
LUX LUMEN - Kernenergiestraat 53A - 2610 WILRIJK - BELGIUM
T: +32 3 293 35 50 – F: +32 3 293 35 44
www.lux-lumen.com
CONTENT
1 PICTURE .................................................................................. 2
1.1 GENERAL ....................................................................................... 2
2 DIMENSIONS ........................................................................... 3
3 SAFETY INFORMATION ............................................................ 4
3.1
3.2
3.3
3.4
3.5
SYMBOLS ...................................................................................... 4
PROTECTION FROM ELECTRIC SHOCK ....................................................... 5
PROTECTIONS FROM FIRE AND BURNS...................................................... 5
PROTECTION FROM INJURY .................................................................. 6
DISPOSING OF THIS PRODUCT .............................................................. 6
4 PHYSICAL INSTALLATION ....................................................... 7
4.1
4.2
4.3
4.4
UNPACKING .................................................................................... 7
LOCATION AND ORIENTATION ............................................................... 8
MOUNTING..................................................................................... 8
CUTOUT ........................................................................................ 8
5 EXTERNAL CONNECTIONS........................................................ 9
5.1 DC POWER AT INPUT. ........................................................................ 9
6 EMC AND SAFETY REQUIREMENTS. ........................................ 10
7 INSTALLATION SETUP. .......................................................... 11
7.1 SPECIFICATION.............................................................................. 11
7.2 INSTALLATION. .............................................................................. 12
7.3 CHOICE OF POWER SUPPLY. ............................................................... 18
8 SERVICE AND MAINTENANCE. ............................................... 19
8.1 SAFETY PRECAUTIONS. ..................................................................... 19
8.2 CLEANING.................................................................................... 19
9 WARRANTY. ........................................................................... 20
9.1 APPLICATION OF WARRANTY. .............................................................. 20
9.2 RMA PROCEDURE. .......................................................................... 22
10 USED LIST OF ABBREVIATIONS. ......................................... 23
StarGuide MINI
p.1/24
LUX LUMEN - Kernenergiestraat 53A - 2610 WILRIJK - BELGIUM
T: +32 3 293 35 50 – F: +32 3 293 35 44
www.lux-lumen.com
1
Picture
1.1 General
StarGuide MINI
p.2/24
LUX LUMEN - Kernenergiestraat 53A - 2610 WILRIJK - BELGIUM
T: +32 3 293 35 50 – F: +32 3 293 35 44
www.lux-lumen.com
2
Dimensions
StarGuide MINI
p.3/24
LUX LUMEN - Kernenergiestraat 53A - 2610 WILRIJK - BELGIUM
T: +32 3 293 35 50 – F: +32 3 293 35 44
www.lux-lumen.com
3
Safety information
Before installing, powering up, or servicing the StarGuide MINI
led-unit, it his highly recommended that you read this manual,
and you insure yourself that you completely understand its
content. Observe the safety precautions in this manual. Install
and operate the led-unit only as described in this manual, and in
conformity with local regulations. If you have any questions how
to operate this product safely, please contact your point of sales.
3.1 Symbols
Following symbols are used to identify important safety
information on the product and in this manual.
StarGuide MINI
p.4/24
LUX LUMEN - Kernenergiestraat 53A - 2610 WILRIJK - BELGIUM
T: +32 3 293 35 50 – F: +32 3 293 35 44
www.lux-lumen.com
3.2 Protection from electric shock
Although this device itself does not operate with dangerous
voltages, the installation in which is intended to be used, can
contain dangerous voltages.
Shut down the power of the complete installation before carrying
out any installation, or maintenance work.
Use only AC to DC current controlled 350 mA power sources,
suitable for the application, and conform to local regulations.
Please ensure yourself that the AC to DC current controlled
power supply is able to deliver the rated requirements of the
complete installation.
If any cable, seal or housing is damaged, cracked, or reformed,
disconnect the power of the installation immediately.
For any additional servicing, not described in this manual, please
contact your point of sales.
3.3 Protections from fire and burns
Do not operate this led-unit if ambient temperatures, is above
45°C (113°F). It might be necessary to allow the led-unit to cool
down for 5 minutes, before servicing.
Do not modify the led-fixture, in a way, not described in this
manual.
StarGuide MINI
p.5/24
LUX LUMEN - Kernenergiestraat 53A - 2610 WILRIJK - BELGIUM
T: +32 3 293 35 50 – F: +32 3 293 35 44
www.lux-lumen.com
3.4 Protection from injury
Ensure yourself that all components, covers is securely fastened.
Verify that the led unit is firmly fixed to its supporting railing.
Ensure yourself that the vibration, will not loosen the screws,
which hold the module. Take precautions if necessary by
applying a low grade locking glue. (Loctite® 222)
3.5 Disposing of this product
This led-lighting device is manufactured in compliance with
directive of the European community: ‘waste of electrical and
electronically equipment’. Please help to preserve our
environment, and ensure that this product will be recycled
properly at the end of its life.
StarGuide MINI
p.6/24
LUX LUMEN - Kernenergiestraat 53A - 2610 WILRIJK - BELGIUM
T: +32 3 293 35 50 – F: +32 3 293 35 44
www.lux-lumen.com
4
Physical installation
Thank you for selecting this StarGuide MINI led-unit as best
solution in your setup.
Warning! Read the safety precautions in this manual before
integrating this card into your installation.
Installation must be carried out by qualified professionals only.
4.1 Unpacking
The StarGuide modules are only sold in sets, together with their
dedicated power supply and all accessories.
The following items are included in your set:
• A number of Star guide MINI led-units each with its two
allen key bolts:
• A number of push seal connectors (named further in this
document: Scotchlok™)
• An allen key nr 2:
• A tube, or flacon with threat locking glue.
StarGuide MINI
p.7/24
LUX LUMEN - Kernenergiestraat 53A - 2610 WILRIJK - BELGIUM
T: +32 3 293 35 50 – F: +32 3 293 35 44
www.lux-lumen.com
• A dedicated led-driver.
Sets are delivered in a carton box and protective antistatic
packaging, with this manual.
4.2 Location and orientation
This StarGuide MINI led-unit itself can be used in all different
directions and orientations.
4.3 Mounting
The StarGuide MINI led-unit is designed to be used on a
stainless steel tube of 33.7 mm diameter, wall-thickness of 2
mm. Due to the unique concept of fixation, installation can be
done easily, with the help of a small allen Key.
In case of problems, or doubts, please contact your point of sale.
4.4 Cutout
Dimensions of cutout in the tube can be found here:
StarGuide MINI
p.8/24
LUX LUMEN - Kernenergiestraat 53A - 2610 WILRIJK - BELGIUM
T: +32 3 293 35 50 – F: +32 3 293 35 44
www.lux-lumen.com
5
External connections
5.1 DC power at input
Safety precautions
Never connect the live power on the input terminals of the
StarGuide MINI led-unit!
In case of doubts, contact your point of sale.
Polarity
The StarGuide MINI led-unit is polarity sensitive. So observe
polarity and colour cabling:
• Red = positive
• Black = negative
Power supply: Rated current
The rated input current of the Railing module is 350 mA DC.
Verify that the your power supply has a current controlled
output. If you are not sure do not connect the power supply! In
case of doubt, please contact your point of sale.
Power supply: Rated current
A StarGuide MINI led-unit consumes approx 1 watt power, which
results at 350 mA at a forward voltage of ±2.8 to 3.2 Volt.
StarGuide MINI
p.9/24
LUX LUMEN - Kernenergiestraat 53A - 2610 WILRIJK - BELGIUM
T: +32 3 293 35 50 – F: +32 3 293 35 44
www.lux-lumen.com
6
EMC and safety requirements
The StarGuide MINI led-unit is fully compliant to the LVD and
EMC directive of the European council, if used in a properly
designed setup.
EMC requirements of the power supply:
The StarGuide MINI led-unit is only intended to be used in
lighting applications, and as such, the complete assembly of led
unit and power supply needs to be fully compliant with the
harmonized standards.
Immunity according to:
• EN 61547:2009 (General EMC immunity requirements
lighting eq.)
• EN 61000-4-1:2006 (General immunity testing techniques)
• EN 61000-4-2:2008 (ESD immunity test)
• EN 61000-4-3:2006 + A1:2007 (Radiated immunity test)
• EN 61000-4-4:2004 (Fast transients and burst immunity)
• EN 61000-4-5:2005 (Surge immunity test)
• EN 61000-4-6:2008 (Conducted immunity test)
• EN 61000-4-8:1993 (Magnetic field immunity test)
• EN 61000-4-11:2004 (Voltage variations immunity test)
• EN 61000-6-1:2005 (Generic standards for immunity)
Emission according to:
• EN 61000-3-2:2005+A1:2008+A2:2009 (Harmonics
emission test<16A)
• EN 61000-3-3:2008 (Flicker+ voltage changes limits< 16A)
• EN 55015:2006+A2:2009 (Conducted + radiated emission
lighting equipment)
To achieve this compliance, a proper power supply must be
supplied. In case of doubts, contact your point of sale.
LVD requirements of the power supply:
The StarGuide MINI led-unit is only intended to be used in
lighting applications, and as such, the complete assembly of led
unit and power supply needs to be fully compliant with following
harmonized standards:
• EN 60598: general requirements of lighting equipment.
StarGuide MINI
p.10/24
LUX LUMEN - Kernenergiestraat 53A - 2610 WILRIJK - BELGIUM
T: +32 3 293 35 50 – F: +32 3 293 35 44
www.lux-lumen.com
The module can be categorized according to EN 60598 as
following:
• SELV class III
• Power supply-cord type Z, no removal, without permanent
damage to the unit.
• IP 67 for the StarGuide MINI led-unit.
• IK 06 for the StarGuide MINI led-unit.
Please note that although the unit seems to be SELV, the
complete installation is not SELV, and the railing needs a proper
safety earth connection!
7
Installation setup
7.1 Specification
The StarGuide MINI led-unit is a small and efficient solution
which can be easily integrated in a circular railing tube.
It uses a current controlled power supply and all modules are
connected in series. Up to 100 modules can be connected in
series, depending on the power supply used.
Please note that dangerous voltages are used. Always
disconnect the main power of the complete installation, before
executing any works on the installation.
• Power consumption each StarGuide MINI led-unit: 1,2 W
• Rated current input: 350 mA
• Forward voltage over the led: ±2.8 to 3.2 volt depending on
binning and color
• Ingress protection: IP 67
• Impact protection: IK 06
• Weight: 32 gr
• Body material: 15 µM anodized aluminum
• Transparent glass cover
• Resin epoxy based, and heat conductive
The led-unit is equipped with a ‘antifuse’, so in case of failure of
one module in a series string, all other modules remain fully
functional.
Standard cable length is 1200 mm for positive polarity, and 200
mm for negative polarity, so maximum pitch is approx 100 cm
between the modules.
StarGuide MINI
p.11/24
LUX LUMEN - Kernenergiestraat 53A - 2610 WILRIJK - BELGIUM
T: +32 3 293 35 50 – F: +32 3 293 35 44
www.lux-lumen.com
The module is polarity sensitive.
Connections are done by using Scotchlok™ connectors, supplied
together with the StarGuide MINI led-unit.
7.2 Installation
Tools
The installation of the StarGuide MINI led-unit is straightforward,
and needs mainly two tools:
• Allen key NR 2:
• Universal Pliers:
Note: A dedicated crimping tool is available to shrink the
Scotchlok™ connectors. In case of a bigger installation, it might
be useful to have this crimping tool in your tool set.
This tool is available at your point of sale.
StarGuide MINI
p.12/24
LUX LUMEN - Kernenergiestraat 53A - 2610 WILRIJK - BELGIUM
T: +32 3 293 35 50 – F: +32 3 293 35 44
www.lux-lumen.com
SCHEMATIC of installation
So the units are connected in series in one string of elements. A
‘retour line’ makes the loop closed with the power supply.
Each red wire is connected with the black wire, coming from its
neighbour. The electrical connection is made with the supplied
Scotchlok™ connectors.
STEP1:
Insert a black cable at the last cutout, direction to the leddriver.
So the cable is from end to begin of the railing, and has enough
cable length to be connected to the driver.
The result will be like this:
At the place of the last module, leave approx 20 cm cable out of
the tube, and tape it the tube, so it will not get lost in the tube.
StarGuide MINI
p.13/24
LUX LUMEN - Kernenergiestraat 53A - 2610 WILRIJK - BELGIUM
T: +32 3 293 35 50 – F: +32 3 293 35 44
www.lux-lumen.com
STEP 2:
Start the installation at the last module, by connecting the black
cable on the module, with the black ‘loop-back cable’ by using
the Scotchlok™ connector. Please note: this is the only place,
where a black cable is connected with another black cable.
Insert the trimmed wire ends into the connector. Do not strip the
wires. Make sure all wires are inserted past the metal element to
the back wall of the connector.
Take a universal pliers, and place the connector between the
jaws.
Make sure the two black wires remain fully inserted to the back
wall of the connector.
StarGuide MINI
p.14/24
LUX LUMEN - Kernenergiestraat 53A - 2610 WILRIJK - BELGIUM
T: +32 3 293 35 50 – F: +32 3 293 35 44
www.lux-lumen.com
Squeeze the handles of the pliers, so the red cap remains flush
with the rim of the connector body.
You will see that a gel, which is located in the red cap, will be
injected in the cable insertions.
After verifying that the cable is still in good position, you can put
the Scotchlok™ connector in the tube.
STEP 3:
Insert the red cable in the cutout, and glide it in to the next
module.
StarGuide MINI
p.15/24
LUX LUMEN - Kernenergiestraat 53A - 2610 WILRIJK - BELGIUM
T: +32 3 293 35 50 – F: +32 3 293 35 44
www.lux-lumen.com
STEP 4:
Make sure both screws are like on following photo and apply
some thread locking glue to both screws.
After applying the glue, turn the screws back to approx this
situation:
STEP 5:
Insert the module into the cutout. The screw has to be approx 10
mm visible from the front.
StarGuide MINI
p.16/24
LUX LUMEN - Kernenergiestraat 53A - 2610 WILRIJK - BELGIUM
T: +32 3 293 35 50 – F: +32 3 293 35 44
www.lux-lumen.com
STEP 6:
Insert both screws complete to the end, make sure you do not
perforate the black ‘loop-back’ cable.
The result is looking like this:
STEP 7:
Proceed with next module, starting from step 3.
Note: the installer has to ensure him(her)-self that the screw will
not perforate any of the cabling, located in the railing!!
Never use an electrical tool to fasten the fixing screws in the
led-module.
StarGuide MINI
p.17/24
LUX LUMEN - Kernenergiestraat 53A - 2610 WILRIJK - BELGIUM
T: +32 3 293 35 50 – F: +32 3 293 35 44
www.lux-lumen.com
STEP 8:
At the beginning of the setup, you will have the black loop-back
cable, and a red cable, coming from the first module. These
cables need to be connected to the power supply, delivered
together with your setup.
7.3 Choice of power supply
Since this led-unit is current driven, the voltage that the power
supply has to deliver, is dependent on the number of modules
that are connected in series.
The voltage drop over one module is approx 3 volt.
So in case of 12 modules, the current in the circuit will be 350
mA, and the voltage drop over the complete circuit will be:
12 modules x 3 volt(over one module) = 36 volt.
It is important to understand that not all current sources are
capable of producing a current of 350 mA at 36 volt.
In this example, the power generated by the power supply is:
0,350 (A) x36 (volt) = 12,6 watt.
We specify three different power supply’s to use, depending on
the number of units connected in series.
Number of
modules
1 to 4
Current in
circuit
350 mA
Min
voltage
2V
Max
voltage
14 V
Power
supply mfr.
Lightech
4 to 19
350 mA
12 V
58 V
Lightech
20 to 50
350 mA
60 V
210 V
51 to 100
350 mA
120 V
425 V
Philips
Advance
Phillips
Advance
Power
supply type
LED-4W
350mA
LED-18W
DC350mA
LEDINTA
350C210DHO
LEDINTA
0350C425FO
Manuals of the led-drivers are supplied with your setup.
Note that the power supply LEDINTA 350C210 DHO has a 1-10
volt dim-input. When your setup needs no dimming, the wires
can stay unconnected.
StarGuide MINI
p.18/24
LUX LUMEN - Kernenergiestraat 53A - 2610 WILRIJK - BELGIUM
T: +32 3 293 35 50 – F: +32 3 293 35 44
www.lux-lumen.com
8
Service and maintenance
8.1 Safety precautions
Read carefully the safety information in this manual. Lock out
the power on the entire system and allow all electronic devices
to discharge, and cool down, before executing any service or
maintenance.
8.2 Cleaning
The StarGuide MINI Led-unit itself
Extensive dirt, and particle build-up degrades performance, may
cause overheating can result in damaged led-unit, and power
supply’s. Damage by inadequate cleaning or maintenance is not
covered by the product warranty.
Never use solvents to clean the outer housing of the unit.
StarGuide MINI
p.19/24
LUX LUMEN - Kernenergiestraat 53A - 2610 WILRIJK - BELGIUM
T: +32 3 293 35 50 – F: +32 3 293 35 44
www.lux-lumen.com
9
Warranty
9.1 Application of warranty
Warranty period
Warranty service is valid for one year from the date of purchase
by the consumer, as evidenced by invoice date given out by your
point of sale.
Warranty service
Service under warranty can only be done by Lux Lumen.
Coördinaties:
Lux Lumen
Kernenergiestraat 53 A
2610 Wilrijk
Belgium
Any cost of secure transportation of the product to and from Lux
Lumen service department, will be borne by the customer.
Limitations
Lux Lumen will not warrant the following:
• Periodic check-ups, maintenance and repair or replacement
of parts due to normal wear and tear.
• Consumables
• Any software
• Defects caused by modifications carried out without Lux
Lumen’s approval.
• Damage resulting from the fact that a product is not
conforming to country specific standards or specifications in
another country that the country of purchase.
Costs incurred by Lux Lumen’s service center in making any
adaptations or modifications of a product necessary for country
specific technical or safety standards or specifications, or any
other cost to adjust the product as a result of any specifications
which have changed since the delivery of the product.
StarGuide MINI
p.20/24
LUX LUMEN - Kernenergiestraat 53A - 2610 WILRIJK - BELGIUM
T: +32 3 293 35 50 – F: +32 3 293 35 44
www.lux-lumen.com
Warranty service is excluded if damage or defects have
been caused by:
Improper use, extensive use, handling or operation of the
product as referred to in the user manual or operator manual
and/or relevant user documents, including without limitation,
incorrect storage, dropping, excessive shocks, corrosions, dirt,
water, or sand damage, if the product is not rated to be used in
severe conditions, indicated by its IP and IK degree, mentioned
in the product specifications in this manual.
Repairs, modifications or cleaning carried out by a non Lux
Lumen service centre.
Use of spare parts, software or consumables, which are not
compatible with the product.
Connecting the product to equipment not intended to be used
with this product.
Defects caused by improper condition of the power supply
network.
Inadequate packaging of the product when returning it under the
RMA procedure.
Accidents or disasters or any cause beyond the control of Lux
Lumen, including but not limited to lightning, water, fire, public
disturbances, improper ventilation, and acts of god.
Others
It is the responsibility of the customer to backup and save any
software files and programs before repair and to restore the
same after such repair.
This warranty does not affect the consumer’s statutory rights
under applicable national legislation in force, nor the consumer’s
rights against the retailer arising from the sales/purchase
contract. In the absence of applicable national legislation, this
warranty will be the consumer’s sole and exclusive remedy, and
Lux Lumen cannot be liable for any incidental or consequential
damages for breach of any express or implied warranty of this
product.
For full details of the warranty offered on this product, please
contact Lux Lumen’s service center.
StarGuide MINI
p.21/24
LUX LUMEN - Kernenergiestraat 53A - 2610 WILRIJK - BELGIUM
T: +32 3 293 35 50 – F: +32 3 293 35 44
www.lux-lumen.com
9.2 RMA procedure
To send material back to Lux Lumen, you need a RMA (Return
Material Authorization) document that you will receive from Lux
Lumen.
Without the RMA document, we cannot accept the material.
The procedure to obtain a RMA:
Step1:
Customer contacts Lux Lumen about warranty, defects
if material has to be returned.
Step2:
Lux Lumen sends the customer a filled out RMA document (using
a unique RMA number)
Step3:
Customer sends material (include a copy of the RMA document
with the material)
Step 4:
Lux Lumen evaluates the problem, and informs the client if
repair is done under warranty, or makes an offer to the client for
repair.
Step 5:
The procedure related to lux lumen quality procedures, according
ISO 9001 is started up.
StarGuide MINI
p.22/24
LUX LUMEN - Kernenergiestraat 53A - 2610 WILRIJK - BELGIUM
T: +32 3 293 35 50 – F: +32 3 293 35 44
www.lux-lumen.com
10
Used list of abbreviations
•
•
•
•
•
•
•
•
•
•
•
•
•
•
•
•
•
AC: Alternating current
DC: Direct current
°F: Temperature in degrees Fahrenheit
°C: Temperature in degrees Celsius
LED: Light Emitting Diode
SELV: Safety extra low voltage
mA: Milliampere
V:Volt
EN: European Norm
EMC: Electro Magnetic Compatibility
RMA: Return Material Authorization
ESD: Electro Static Discharge
LVD: Low Voltage Directive
PCS: Pieces.
SELV: Safety Extra Low Voltage
IP: ingress Protection
IK: International Mechanical Protection
StarGuide MINI
p.23/24
LUX LUMEN - Kernenergiestraat 53A - 2610 WILRIJK - BELGIUM
T: +32 3 293 35 50 – F: +32 3 293 35 44
www.lux-lumen.com