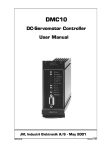
1
COULTER AC•T 5diff Autoloader
Hematology Analyzer
Instructions for Use
PN 624026AE (May 2013)
Manufactured for
Beckman Coulter, Inc.
250 S. Kraemer Blvd.
Brea, CA 92821 U.S.A.
WARNINGS AND PRECAUTIONS
READ ALL PRODUCT MANUALS AND CONSULT WITH BECKMAN COULTER-TRAINED PERSONNEL BEFORE ATTEMPTING
TO OPERATE INSTRUMENT. DO NOT ATTEMPT TO PERFORM ANY PROCEDURE BEFORE CAREFULLY READING ALL
INSTRUCTIONS. ALWAYS FOLLOW PRODUCT LABELING AND MANUFACTURER’S RECOMMENDATIONS. IF IN DOUBT AS
TO HOW TO PROCEED IN ANY SITUATION, CONTACT YOUR BECKMAN COULTER REPRESENTATIVE.
HAZARDS AND OPERATIONAL PRECAUTIONS AND LIMITATIONS
WARNINGS, CAUTIONS, and IMPORTANTS alert you as follows:
WARNING - Can cause injury.
CAUTION - Can cause damage to the instrument.
IMPORTANT - Can cause misleading results.
BECKMAN COULTER, INC. URGES ITS CUSTOMERS TO COMPLY WITH ALL NATIONAL HEALTH AND SAFETY
STANDARDS SUCH AS THE USE OF BARRIER PROTECTION. THIS MAY INCLUDE, BUT IT IS NOT LIMITED TO,
PROTECTIVE EYEWEAR, GLOVES, AND SUITABLE LABORATORY ATTIRE WHEN OPERATING OR MAINTAINING THIS OR
ANY OTHER AUTOMATED LABORATORY ANALYZER.
WARNING Risk of operator injury if:
r All doors, covers and panels are not closed and secured in place prior to and during instrument operation.
r The integrity of safety interlocks and sensors is compromised.
r Instrument alarms and error messages are not acknowledged and acted upon.
r You contact moving parts.
r You mishandle broken parts.
r Doors, covers and panels are not opened, closed, removed and/or replaced with care.
r Improper tools are used for troubleshooting.
To avoid injury:
r Keep doors, covers and panels closed and secured in place while the instrument is in use.
r Take full advantage of the safety features of the instrument. Do not defeat safety interlocks and sensors.
r Acknowledge and act upon instrument alarms and error messages.
r Keep away from moving parts.
r Report any broken parts to your Beckman Coulter Representative.
r Open/remove and close/replace doors, covers and panels with care.
r Use the proper tools when troubleshooting.
CAUTION System integrity might be compromised and operational failures might occur if:
r This equipment is used in a manner other than specified. Operate the instrument as instructed in the Product Manuals.
r You introduce software that is not authorized by Beckman Coulter into your computer. Only operate your system’s
computer with software authorized by Beckman Coulter.
r You install software that is not an original copyrighted version. Only use software that is an original copyrighted
version to prevent virus contamination.
IMPORTANT If you purchased this product from anyone other than Beckman Coulter or an authorized Beckman Coulter
distributor, and, if it is not presently under a Beckman Coulter service maintenance agreement, Beckman Coulter cannot
guarantee that the product is fitted with the most current mandatory engineering revisions or that you will receive the most
current information bulletins concerning the product. If you purchased this product from a third party and would like
further information concerning this topic, call your Beckman Coulter Representative.
REVISION STATUS
Initial Issue, 9/03
Software Version 1.20
Complies with the EU IVD Directive (98/79/EC).
Issue AA, 5/10
Software Version 1.20.
Updates were made to the company corporate address.
Note: Changes that are part of the most recent revision are indicated in text by a bar in the
margin of the amended page.
Issue AB, 08/12
Software Version 1.2.4.
Changes were made to:
r
Ambient Temperature and Humidity
r
Storing Specimens
r
Reagent Consumption
r
SHUTDOWN
r
Extended Cleaning, steps 8 -16
r
Refer to the Hematology Tube List on the BCI website
Issue AC, 01/13
Software Version 1.2.4.
Changes were made to the graphic in step 8 under Extended Cleaning.
Note: Changes that are part of the most recent revision are indicated in text by a bar in the
margin of the amended page.
Issue AD, 02/13
Software Version 1.2.4.
Changes were made to the graphic in step 8 under Procedure for Checking Valves.
Issue AE, 05/13
Software Version 1.2.4.
Changes were made to enable the display settings in the Help files to default to Always on
Top and Maximum to Full Screen.
Note: Changes that are part of the most recent revision are indicated in text by a bar in the
margin of the amended page.
This document applies to the latest software listed and higher versions. When a subsequent software version
changes the information in this document, a new issue will be released to the Beckman Coulter website. For
labeling updates, go to www.beckmancoulter.com and download the most recent manual or system help for
your instrument.
PN 624026AE
iii
REVISION STATUS
iv
PN 624026AE
CONTENTS
WARNINGS AND PRECAUTIONS, ii
REVISION STATUS, iii
CONTENTS, v
INTRODUCTION, xxix
OVERVIEW, xxix
USING YOUR AC•T 5diff AL HEMATOLOGY INSTRUCTIONS FOR USE MANUAL, xxix
ABOUT THIS MANUAL, xxix
CONVENTIONS, xxxi
GRAPHICS, xxxi
SYMBOLS, xxxii
Safety Symbols, xxxii
Tab Symbols, xxxii
1
PN 624026AE
USE AND FUNCTION, 1-1
1.1
INTENDED USE, 1-1
General, 1-1
Purpose, 1-1
System Overview, 1-2
1.2
DESCRIPTIONS, 1-2
AC•T 5diff AL Analyzer, 1-2
Overview of Analyzer, 1-2
Back Panel, 1-4
Warning and Caution Labels, 1-4
Tube Holders, 1-5
Workstation (PC), 1-7
1.3
PANELS, 1-8
1.4
PARAMETERS, 1-8
CBC Panel, 1-8
CBC/DIFF Panel, 1-9
1.5
FEATURES, 1-9
1.6
REPORTS, 1-10
1.7
QUALITY ASSURANCE: CONTROLS, CALIBRATORS, AND IQAP, 1-10
Cell Controls, 1-10
Calibrator, 1-10
IQAP (Interlaboratory Quality Assurance Program), 1-10
XB Analysis in the Analyzer, 1-11
1.8
REAGENTS, 1-12
v
CONTENTS
Recommended Reagents, 1-12
Reagent Descriptions, 1-13
1.9
PRINTER, 1-14
1.10 ORDERING MATERIAL SAFETY DATA SHEETS (MSDS), 1-14
2
vi
OPERATION PRINCIPLES, 2-1
2.1
OVERVIEW, 2-1
2.2
MEASUREMENT PRINCIPLES, 2-1
Coulter Principle, 2-1
Aperture Sensor System, 2-1
Overview, 2-1
Particle Sensing, 2-1
Applying the Coulter Principle, 2-2
2.3
ACV TECHNOLOGY, 2-3
Overview, 2-3
Dual Focused Flow (DFF), 2-3
Flow Cell, 2-3
Focused Flow Impedance, 2-4
Absorbance Cytochemistry, 2-4
Signal Processing, 2-4
Overview, 2-4
Thresholds, 2-4
2.4
WBC/BASO METHODOLOGY, 2-5
2.5
SAMPLE ANALYSIS OVERVIEW, 2-5
Aspiration, 2-5
Dilution, 2-6
CBC Panel, 2-7
CBC/DIFF Panel, 2-7
Delivery, 2-7
2.6
SAMPLE ANALYSIS, 2-8
RBC and Platelet Analysis, 2-8
Parameter Results Obtained from the RBC/Plt Dilution, 2-9
Hgb Measurement, 2-9
WBC Count and Differential, 2-10
Parameter Results Obtained from the WBC/BASO Dilution, 2-11
Differential, 2-11
Parameter Results Obtained from the DIFF Dilution, 2-12
Dilution Summary, 2-13
2.7
PARAMETER DEVELOPMENT, 2-14
RBC Parameters, 2-14
Hct Measurement, 2-14
RBC Count, 2-14
RBC Histogram, 2-14
PN 624026AE
CONTENTS
Parameter Results Obtained Using the RBC Histogram, 2-15
MCH and MCHC Calculations, 2-15
Plt Parameters, 2-16
Overview, 2-16
Interference on the Lower End of the Platelet Distribution Curve, 2-16
Microcytic Interferences on the Upper End of the Platelet Distribution
Curve, 2-16
Parameter Results Obtained Using the Plt Histogram, 2-16
Hgb Determination, 2-17
WBC Count, BASO Count, and DiffPlot Development, 2-18
WBC Count, 2-18
BASO Count, 2-18
DiffPlot Development, 2-19
3
2.8
WORKFLOW AND WORKLISTS, 2-22
Overview, 2-22
Order, 2-23
Worklist, 2-23
2.9
CASSETTE TRANSFER CYCLE, 2-24
SPECIFICATIONS/CHARACTERISTICS, 3-1
3.1
PN 624026AE
INSTRUMENT SPECIFICATIONS, 3-1
Dimensions and Weight, 3-1
Power, 3-1
Supply, 3-1
Consumption, 3-1
Installation Category, 3-1
Grounding Requirements, 3-1
Ambient Temperature and Humidity, 3-2
Storing Specimens, 3-2
Altitude Range, 3-2
Recommended Location, 3-2
Electromagnetic Environment Check, 3-2
Recommended Reagents, 3-2
Recommended Controls, 3-2
Recommended Calibrator, 3-2
Recommended Anticoagulant, 3-3
Sample Volume Aspirated, 3-3
Dilution Ratios, 3-3
Throughput, 3-3
Sample Stability, 3-3
Sample Identification, 3-3
Database Storage, 3-3
Flagging Sets, 3-3
Output, 3-3
Measurements and Computation, 3-4
Counting Aperture Diameters, 3-4
Reagent Consumption, 3-4
Environmental Protection, 3-4
vii
CONTENTS
4
5
viii
3.2
PERFORMANCE SPECIFICATIONS, 3-5
Reproducibility, 3-5
Linearity, 3-5
Accuracy, 3-6
Carryover, 3-6
Reportable Range, 3-7
3.3
PERFORMANCE CHARACTERISTICS, 3-8
Reproducibility, 3-8
Accuracy, 3-8
Carryover, 3-9
3.4
LIMITATIONS, 3-9
Maintenance, 3-9
Blood Specimens, 3-9
Platelet Concentrate Extended Linear and Reportable Ranges, 3-9
3.5
INTERFERING SUBSTANCES, 3-10
PRECAUTIONS/HAZARDS, 4-1
4.1
DEFINITIONS, 4-1
Warnings, 4-1
Cautions, 4-1
Importants, 4-1
Attention, 4-1
4.2
SAFETY PRECAUTIONS, 4-1
Electronic, 4-1
Biological, 4-1
Moving Parts, 4-1
4.3
OPERATIONAL HAZARDS, 4-2
GETTING STARTED, 5-1
5.1
GENERAL, 5-1
5.2
COMMONLY ASKED QUESTIONS, 5-1
5.3
POWERING UP AND LOGGING ON/POWERING DOWN AND LOGGING
OFF, 5-3
Powering Up the System and Logging On, 5-3
Viewing Startup Results, 5-7
Powering Down the System and Logging Off, 5-9
5.4
NEW WORKDAY, 5-11
New Workday Routine, 5-11
No Unmatched Results on Manual Match Screen, 5-11
Unmatched Results on Manual Match Screen, 5-12
New Workday Options, 5-12
What Happens if No New Workday Options are Selected, 5-12
PN 624026AE
CONTENTS
5.5
LOGGING ON (IF SYSTEM IS ALREADY POWERED UP), 5-13
5.6
WORKING WITH BAR-CODE LABELS, 5-15
Placing Labels on Tubes, 5-15
Scanning Barcode Labels with the Optional Barcode Wand, 5-16
5.7
WORKING WITH THE CASSETTES, 5-17
Learning About the Cassettes, 5-17
Inserting Tubes into a Cassette, 5-18
Removing Tubes from a Cassette, 5-19
Loading Cassettes onto the Analyzer, 5-20
Procedure for Loading Cassettes onto the Analyzer, 5-20
Unloading Cassettes from the Analyzer, 5-21
5.8
WORKING WITH THE TUBE HOLDER, 5-22
Placing the Tube Holder in the Analyzer, 5-22
Positioning Tubes in the Tube Holders, 5-22
Position of Tube Holder in the Analyzer, 5-22
Tube Holder Door: 3 Positions, 5-26
5.9
USING THE ONLINE HELP SYSTEM, 5-27
Accessing Online Help, 5-27
5.10 SOFTWARE SCREENS, 5-28
Login Names and Passwords, 5-28
Access Levels and Rights, 5-28
Login Screen, 5-29
Selected Menu Path Icon, 5-29
5.11 MENU PATH, 5-30
Main Menu Screen, 5-30
Setup Menu Options, 5-32
Miscellaneous Setup Options, 5-33
Quality Assurance Setup Options, 5-33
Auto Functions Setup Options, 5-34
System Setup Screen Options, 5-35
Save/Restore Configuration Options, 5-36
Operators Setup Options, 5-37
Flagging Sets Setup Options, 5-38
Logs Menu Options, 5-39
Diagnostics Menu Options, 5-40
Quality Assurance Menu Options, 5-41
QC Screen Options, 5-42
Reproducibility Screen Options, 5-42
Calibration Screen Options, 5-43
IQAP Screen Options, 5-43
XB/XM Screen Options, 5-44
Toolbars, 5-45
• Generic Toolbar, 5-45
• Contextual Toolbar, 5-46
Progress Indicator, 5-47
PN 624026AE
ix
CONTENTS
Tabs, 5-47
Buttons, 5-47
Command Buttons, 5-48
Bitmap Buttons, 5-48
Radio Buttons, 5-48
Fields (Text Boxes), 5-49
Check-Boxes, 5-49
Scrollable Lists, 5-50
5.12 WORKING WITH THE SOFTWARE, 5-51
Using the Mouse, 5-51
Moving the Cursor, 5-52
Viewing Tool Tips, 5-52
Selecting Menu Items, 5-52
Scrolling, 5-52
Active/Inactive Software Icons, 5-53
Selecting Menu Tabs, 5-53
Menu Headings (Screen Names), 5-54
Editing Text, 5-54
Saving Changes, 5-55
Cancelling Unsaved Changes, 5-55
Selecting/De-selecting Software Features, 5-55
5.13 SYSTEM ICONS, 5-57
5.14 UNDERSTANDING HOW FLAGGING SETS ARE APPLIED, 5-58
6
7
x
DAILY ROUTINE, 6-1
6.1
WASTE CONTAINER LEVEL CHECK, 6-1
6.2
PRINTER CHECK, 6-1
6.3
STARTUP, 6-1
Overview, 6-1
Background Counts, 6-1
Startup Procedure, 6-2
“Reagent Expired” During Startup, 6-4
6.4
SHUTDOWN, 6-5
Automatic Shutdown, 6-5
Manual Shutdown Procedure, 6-5
QUALITY ASSURANCE, 7-1
7.1
INTRODUCTION, 7-1
Understanding the QA Menu Screen, 7-1
7.2
QUALITY CONTROL (QC), 7-2
Overview, 7-2
QC Techniques, 7-2
Controls Processing, 7-3
How QC Runs are Analyzed, 7-3
PN 624026AE
CONTENTS
QC Screens, 7-3
8
PN 624026AE
7.3
RUNNING CELL CONTROLS, 7-3
Running Cell Controls: Autoloader Mode With Barcode ID, 7-4
Running Cell Controls: Autoloader Mode Without Barcode ID, 7-9
Running Cell Controls: Manual (Stat) Mode, 7-15
Reviewing Control Results, 7-20
Displaying QC Results, 7-22
Understanding the QC Results Screens, 7-25
Understanding the QC Levey-Jennings Graph Screen, 7-25
Understanding the QC Data Grid Screen, 7-27
Understanding QC Graphics Screen, 7-29
Adding/Editing QC Result Comments, 7-30
Printing/Transmitting Saved Cell Control Results, 7-30
Printing Control Results from the QC Levey-Jennings Graphs Screen, 7-30
Printing/Transmitting Control Results from the QC Data Grid Screen, 7-33
Printing Control Results from the QC Graphics Screen, 7-36
7.4
DOWNLOADING CELL CONTROL RESULTS FOR IQAP, 7-39
Overview, 7-39
Controls Processing, 7-39
Understanding the IQAP Download Screen, 7-40
Preparing for IQAP Download, 7-41
Downloading Results to Diskette for IQAP Submission, 7-42
7.5
DELETING QC RUNS/FILES, 7-46
Deleting the Last QC Run, 7-46
Deleting One or More QC Runs, 7-48
7.6
XB ANALYSIS, 7-51
Definition, 7-51
Using XB, 7-51
Reviewing XB/XM Analysis Information, 7-52
Reviewing XB/XM Graphs Screen, 7-52
Viewing XB Batch Details Screen and Including/Excluding XB Data, 7-54
• Procedure to View XB Batch Details Screen and to Include/Exclude XB
Data, 7-55
SAMPLE ANALYSIS, 8-1
8.1
PREPARE THE SYSTEM FOR PROCESSING, 8-1
8.2
COLLECT AND MIX THE SPECIMEN, 8-1
8.3
DETERMINING HOW TO RUN THE SAMPLES, 8-2
8.4
RUNNING MANUAL (STAT) SAMPLES, 8-2
Running Manual (Stat) Samples, 8-2
Procedure for Running Manual (Stat) Samples: Order On Worklist or Not
Using Worklist, 8-3
Procedure for Running Manual (Stat) Samples: No Order on Worklist and You
Want to Assign Demographics, 8-7
xi
CONTENTS
9
8.5
RUNNING WORKLIST SAMPLES IN AUTOLOADER MODE, 8-12
Worklist: Barcode Positive ID, Manual Match ON, 8-12
No Worklist: Barcode Positive ID, Manual Match OFF, 8-18
Worklist: Cass./Position Positive ID, Manual Match ON, 8-22
No Worklist: Cass./Position Positive ID, Manual Match OFF, 8-29
8.6
RE-RUNNING SAMPLES, 8-32
Manual Reruns, 8-32
Automatic Reruns, 8-33
Identifying Rerun Results, 8-33
8.7
ENTERING SAMPLE/PATIENT INFORMATION, 8-34
Required Information, 8-34
Sample ID (Entering/Selecting), 8-35
Panel (Selecting CBC or CBC/DIFF), 8-35
Flagging Set (Selecting), 8-36
Demographics (Entering/Selecting), 8-36
Collect Date/Time (Entering), 8-36
Location (Entering/Selecting), 8-37
Physician (Entering/Selecting), 8-37
Comments (Sample and Patient): Entering/Editing, 8-37
Patient ID (Entering/Editing), 8-38
Name (Locating/Selecting), 8-38
Date of Birth (Entering/Editing), 8-39
Age (Entering/Editing), 8-39
Gender (Selecting), 8-39
8.8
UNDERSTANDING THE WORKLIST SCREENS, 8-40
Overview, 8-40
Understanding the Worklist Grid Screen, 8-41
Understanding the Worklist Cassette Screen, 8-43
8.9
WORKING WITH WORKLIST ORDERS, 8-45
Receiving Worklists from a Host Computer, 8-45
Adding an Order (Entry), 8-45
Adding an Order at the Worklist Grid Screen, 8-45
Adding an Order at the Worklist Cassette Screen, 8-47
Editing a Worklist Order (Entry), 8-49
Deleting a Worklist Order (Entry), 8-51
• To Delete a Worklist Order from the Worklist Grid Screen:, 8-52
• To Delete a Worklist Order from the Worklist Cassette Screen:, 8-53
DATA REVIEW, 9-1
9.1
xii
LOCATING SAMPLE RESULTS, 9-1
Reviewing the Last Sample’s Results, 9-1
Procedure for Viewing the Last Sample’s Results, 9-2
Locating Results on the Results List Screen, 9-2
Understanding the Results List Screen, 9-2
Procedure for Locating Non-Archived Results, 9-4
Sorting Results, 9-5
PN 624026AE
CONTENTS
• To review the patient results screen:, 9-6
• To mark a sample for re-run:, 9-7
Locating Archived Results, 9-8
Understanding the Archives Screen, 9-8
Procedure for Locating Archived Results, 9-8
Searching by Patient ID, 9-10
Searching by Last Name, 9-10
PN 624026AE
9.2
AFTER LOCATING THE SAMPLE RESULTS, 9-11
Understanding the Results Screen, 9-11
9.3
MANUALLY MATCHING SAMPLE RESULTS WITH WORKLIST ORDERS, 9-13
Overview, 9-13
Conditions for Results Going to Manual Match Screen, 9-13
Understanding the Manual Match Screen, 9-14
Manual Match Procedure, 9-15
What to Do If the Correct Order is Not on the Manual Match Screen, 9-18
Moving Unmatched Results to the Results List, 9-18
Adding a Worklist Order for the Result, 9-18
9.4
PRINTING SAMPLE RESULTS, 9-19
Understanding the Results List Screen, 9-19
Understanding the Printing Options for Patient Results, 9-20
Printing Procedure, 9-21
Transmitting Sample Results, 9-22
Understanding the Transmit Options for Patient Results, 9-22
Transmission Procedure, 9-23
9.5
ARCHIVING PATIENT RESULTS, 9-25
9.6
DELETING ARCHIVED PATIENT RESULTS, 9-27
Deleting Patient Results by Run Date, 9-27
Deleting Patient ID or Patient File from Database, 9-30
9.7
REVIEWING RESULTS, 9-34
Introduction, 9-34
Flags and Messages Defined, 9-34
9.8
FLAGS AND MESSAGES GENERATED BY THE INSTRUMENT, 9-35
Parameter Flags, 9-35
Results Exceeding Capacity, 9-35
Hemoglobin Flags, 9-35
• Hgb Blank Error, 9-35
• Hgb Read Error, 9-36
Voteout Flag, 9-36
Patient Range Flags, 9-36
Action Range Flags, 9-36
Control Flags, 9-36
Platelet Concentrate Extended Range Flag, 9-37
Hemoglobin/Hematocrit Ratio Flag (H&H Flag), 9-37
Tree View Flags and Messages, 9-37
xiii
CONTENTS
Flags and Messages for Patient Samples, 9-37
Flags and Messages for QC, Calibration, and Reproducibility Samples, 9-37
Understanding the Flags and Messages Area, 9-37
DiffPlot and Histogram Flags, 9-38
DiffPlot Flags, 9-38
Histogram Flags, 9-43
Interpretive Messages, 9-45
WBC Interpretive Messages, 9-45
RBC Interpretive Messages, 9-46
Plt Interpretive Messages, 9-47
Combination WBC/RBC/Plt Interpretive Messages, 9-47
Analytical Messages, 9-48
DIFF+ and DIFF-, 9-48
CO (DIFF Reject), 9-49
DB (Debris), 9-49
BASO+, 9-50
QA Messages, 9-50
Miscellaneous Messages, 9-51
9.9
ALTERNATIVE FLAG REPORTING FORMATS, 9-51
Detailed Flags Format, 9-51
Suspect Flag Format, 9-51
9.10 FLAG HIERARCHY, 9-52
Replacement Flags Hierarchy, 9-52
Parameter Flags, 9-52
Patient/Action Flags Hierarchy, 9-52
10 CALIBRATION, 10-1
10.1 GENERAL, 10-1
When to Calibrate, 10-1
Recommended Calibration Conditions, 10-1
When to Verify Calibration, 10-1
Understanding the Calibration Screen, 10-2
Understanding the Calibration Setup Screen, 10-3
10.2 PRE-CALIBRATION CHECKS, 10-5
10.3 CALIBRATOR SETUP, 10-6
10.4 AUTO-CALIBRATION, 10-11
Running Calibrator Samples, 10-11
Analyzing the Calibrator in the Autoloader Mode (Recommended), 10-12
Analyzing the Calibrator in the Manual (Stat) Mode, 10-13
Auto-Calibrating the Instrument, 10-15
Selecting the Results to be Used for Auto-Calibration, 10-15
Printing Calibration Results, 10-17
10.5 HOW CALIBRATION SAMPLES ARE INCLUDED/EXCLUDED, 10-17
xiv
PN 624026AE
CONTENTS
11 DIAGNOSTICS, 11-1
11.1 GENERAL MAINTENANCE, 11-1
11.2 MAINTENANCE SCHEDULE, 11-1
11.3 REMOVING PANELS/COVERS, 11-2
Removing the Left Panel, 11-3
Removing the Right Panel, 11-4
Replacing the Right Panel, 11-4
Removing the Top Cover, 11-5
11.4 WASTE HANDLING PROCEDURES, 11-6
Neutralizing the Waste and Treating for Biohazards, 11-6
Handling Expired Reagents, 11-7
11.5 DIAGNOSTICS MENU SCREEN, 11-8
Understanding the Diagnostics Menu Screen, 11-8
Mini-Clean (Running), 11-9
Auto-Clean (Running), 11-10
11.6 DIAGNOSTICS USER SCREEN, 11-11
Understanding the User Screen, 11-11
Hardware Systems, 11-12
Hardware Reset, 11-13
Motors (Checking), 11-14
Overview, 11-14
Procedure for Checking Motors, 11-16
Valves (Checking), 11-18
Overview, 11-18
Valve Locations, 11-19
Procedure for Checking Valves, 11-19
Sensors (Checking), 11-22
Autoloader Test, 11-24
Diluter Systems, 11-27
Drain Baths, 11-27
Prime Reagents, 11-30
Unprime, 11-32
Cleaning Cycles, 11-34
Extended Cleaning, 11-34
Backflush, 11-39
Rinse Flow Cell, 11-41
Others (Diagnostic Functions), 11-43
View the Cycles Counter, 11-44
Park the Syringes, 11-46
Traverse Service Position, 11-48
Edit/Accept Calibration Factors, 11-49
11.7 REPRODUCIBILITY CHECK, 11-52
Understanding the Reproducibility Screen, 11-52
Running a Reproducibility Check in the Manual (Stat) Mode, 11-53
PN 624026AE
xv
CONTENTS
Supplies Needed:, 11-53
Running a Reproducibility Check in the Autoloader Mode, 11-60
Supplies Needed:, 11-60
Printing/Transmitting Reproducibility Results, 11-65
Deleting Reproducibility Results, 11-65
11.8 SHUTTING DOWN WINDOWS-NT (RECOMMENDED), 11-66
11.9 CLEANING THE ANALYZER, 11-66
Cleaning the Tube Holder, 11-66
Cleaning the Outside of the Analyzer, 11-66
Cleaning the Inside of the Analyzer, 11-67
Auto-Clean, 11-67
Shutdown, 11-67
System Cleaning (After Analyzing a Contaminated Sample), 11-68
Cleaning the Baths, 11-73
11.10 COMPONENT LOCATIONS, 11-76
11.11 REPLACEMENT PROCEDURES, 11-82
Overview, 11-82
Replacing Reagents, 11-82
Reagent Location, 11-82
Understanding the Reagent Status Screen, 11-83
Replacing Reagents Procedure, 11-84
Viewing Reagent Levels, 11-84
Replacing the Diluent Reagent, 11-85
Replacing Reagents: Fix, WBC Lyse, Hgb Lyse, or Rinse Reagents, 11-89
Replacing the Waste Container, 11-95
Replacing the Flow Cell Lamp, 11-96
Replacing the Rinse Bath Drain Filter, 11-103
Purpose, 11-103
Supplies Needed, 11-103
Procedure, 11-103
11.12 OPENING THE TUBE HOLDER DOOR IF JAMMED, 11-108
11.13 INSTALLING THE LIFTING HANDLES INTO THE ANALYZER, 11-110
11.14 SYSTEM ERRORS, 11-112
What Error Messages Mean, 11-112
11.15 TROUBLESHOOTING GUIDES, 11-122
11.16 LOGS, 11-124
Overview, 11-124
Understanding the Logs Menu Screen, 11-125
Understanding the Logs, 11-126
Calibration Log, 11-127
Quality Control Log, 11-127
Reagent Log, 11-127
Maintenance Log, 11-127
xvi
PN 624026AE
CONTENTS
Patient/Worklist Log, 11-127
Setup Log, 11-127
Host Log, 11-127
Alarms and Errors Log, 11-127
Startup Log, 11-128
Viewing Logs, 11-128
Adding Comments to the Logs, 11-129
Adding Entries to the Maintenance Log, 11-130
Printing Log Entries, 11-132
A
PN 624026AE
SETUP, A-1
A.1
INSTALLATION, A-1
A.2
DEFAULT CONFIGURATION, A-1
A.3
SETUP OVERVIEW, A-1
Password Requirements, A-1
Changes to Instrument Setup, A-1
Understanding the Setup Screen, A-2
A.4
OPERATIONAL SETUP, A-3
General, A-3
Auto-Numbering (Setting the AUTO_SID Starting Number), A-4
Default Panel (Selecting CBC or CBC/DIFF), A-6
Worklist Match and Manual Match Options, A-9
Worklist, A-9
• Barcode, A-9
• Cass./Position, A-9
Manual Match, A-9
Deciding Which Worklist Match and Manual Match Options to Use, A-9
Possible Workflows and Configurations, A-10
Worklist Match Option (Selecting), A-10
Manual Match (Turning ON or Off), A-12
Logs (Comments Prompt), A-14
RUO Parameters (Enabling/Disabling), A-15
Auto-Stop for QA Messages (Selecting), A-18
Auto-Stop for Number of Consecutive Results With Selected Characteristics
(Selecting), A-20
Location/Physician (Adding/Editing/Deleting), A-22
Adding/Editing Physician and/or Location, A-23
Deleting Physician and/or Location, A-25
Units (Selecting the Reporting Unit), A-27
Changing Reporting Units, A-28
A.5
QUALITY ASSURANCE SETUP, A-30
Shifts (Defining), A-30
Selecting Shifts, A-31
QA Settings (Defining), A-34
XB/XM Options (Enabling/Disabling), A-35
• Setting XB/XM Limits, A-37
xvii
CONTENTS
Minimum Runs Required for Auto-Calibration (Defining), A-40
IQAP ID (Entering/Editing), A-42
CV Limits for Calibration, QC, and/or Reproducibility, A-44
xviii
A.6
SETTING UP A CONTROL FILE, A-46
To manually enter the assigned values and expected ranges:, A-51
To download the assay values and ranges from the floppy:, A-52
Reserving Control Lot Numbers, A-54
Editing Control Target Values, A-56
A.7
AUTO-FUNCTIONS SETUP, A-60
Rerun (Marking a Sample for Automatic Re-run), A-60
Defining Automatic Rerun Criteria (By Flags and/or by Parameters), A-61
Auto-Print (for Patient Results), A-64
Setting the Auto-Print Options for Patient Results, A-65
Auto-Transmit (for Patient Results), A-67
Setting the Auto-Transmit Options for Patient Results, A-68
A.8
SYSTEM SETUP, A-70
Local Settings, A-70
Changing the Current Date/Time and Date/Time Format, A-71
• Changing the Date/Time, A-72
• Changing the Date/Time Format, A-73
Language (Selecting), A-74
Changing Input Locales, A-76
Host (Defining Host Communication Settings), A-78
Printer, A-78
Report Header (Entering/Editing), A-79
Printer, A-82
• Add Printer, A-82
• Printer Properties, A-84
• Set Default Printer, A-86
• Delete Printer, A-88
Patient Report Setup, A-90
• Enable (Define Patient Report Areas), A-93
• Display and Print (Detailed or Suspect Flags), A-95
• Hematology Parameters (Printed), Define for Patient Report, A-97
Auto-Print (Non-Patient Results), A-99
Cycle Options, A-101
Auto-Clean Frequency (Setting), A-102
Daily Workload (Defining for CBC and CBC/DIFF), A-105
New Workday (Defining), A-107
• Procedure for Defining a New Workday, A-108
Startup (Automatic), A-110
Shutdown (Automatic), A-112
A.9
OPERATOR (USERS) SETUP, A-114
Access Rights, A-115
Service, A-115
Supervisors, A-115
Operator, A-115
PN 624026AE
CONTENTS
Operators (Users): Adding/Editing/Deleting, A-115
Adding Users, A-117
Editing User Information, A-119
Deleting Users, A-119
A.10 FLAGGING SETS SETUP, A-120
Flags and Messages, A-120
• Adding/Editing a Flagging Set (Range), A-122
• Copying Settings to Another Flagging Set, A-126
• Setting a Default Flagging Set, A-129
• Restoring Default Values, A-130
Flag Sensitivity and Thresholds, A-130
B
C
D
PN 624026AE
BARCODE SPECIFICATIONS FOR OPTIONAL BARCODE WAND, B-1
B.1
OVERVIEW, B-1
Definition, B-1
B.2
BARCODE LABELS, B-1
Symbologies, B-1
B.3
BARCODE SPECIFICATIONS, B-1
B.4
BARCODE LABEL TEST PAGES, B-3
B.5
OPTIONAL BARCODE WAND CONFIGURATION, B-4
B.6
CODE 39 AND CODABAR BARCODE SCANNER OPTIONS, B-6
B.7
I 2-OF-5 PROGRAMMING OPTIONS AND TEST LABELS, B-8
B.8
CONNECTING THE OPTIONAL BARCODE WAND, B-9
MANUAL CALIBRATION, C-1
C.1
ANALYSIS PROCEDURE, C-1
C.2
CALCULATIONS PROCEDURE, C-2
C.3
CALCULATING NEW CALIBRATION FACTORS, C-2
Calibration Worksheet, C-3
WORKSTATION MANAGEMENT, D-1
D.1
DATABASE MANAGEMENT, D-1
Database Compacting/Cleaning, D-1
D.2
CONFIGURATION SAVE/RESTORE SETUP, D-1
D.3
CONFIGURATION: ANALYZER AND WORKSTATION, D-2
Analyzer Configuration, D-3
• Analyzer Configuration: Save to Hard Disk/Save to Floppy Disk, D-3
• Analyzer Configuration: Restore from Hard Disk/Restore from Floppy
Disk, D-6
xix
CONTENTS
Workstation Configuration, D-8
• Workstation Configuration: Save to Hard Disk/Save to Floppy Disk, D-8
• Workstation Configuration: Restore from Hard Disk/Restore from Floppy
Disk, D-11
D.4
E
xx
DELETE DATABASE, D-14
Understanding the Delete Database Screen, D-14
Procedure to Delete Existing Database, D-15
WORKLIST SCENARIOS, E-1
E.1
USING WORKLISTS, E-1
Overview, E-1
Worklist Processing Conditions for Sample IDs, E-1
E.2
WORKLIST MATCH OPTION SCENARIOS, E-2
Barcode Scenarios, E-2
Scenario #1: Barcode On, Manual Match On, Auto-Print On, No Worklist
Order, E-2
Scenario #2: Barcode On, Manual Match On, Auto-Print On, Worklist Order
Exists With Same Sample ID as on Barcode Label, E-3
Scenario #3: Barcode On, Manual Match Off, Auto-Print On, Worklist Order
Exists with Same Sample ID as on Barcode Label, E-3
Scenario #4: Barcode On, Manual Match Off, Auto-Print On, Worklist Order
Exists but Worklist Sample ID Differs from the Sample ID on the Barcode
Label, E-3
Scenario #5: Barcode On, Manual Match On, Auto-Print On, Worklist Order
Exists but Worklist Sample ID Differs From the Sample ID on the Barcode
Label, E-3
Scenario #6: Barcode On, Manual Match On, Auto-Print On, No Worklist
Order, E-4
Scenario #7: Barcode On, Manual Match Off, No Worklist Order, E-4
Cass./Position Scenarios, E-5
Scenario #1: Cass./Position On, Manual Match On, Auto-Print On, Worklist
Order (Cassette, Position, and Sample ID), No Barcode Label, E-6
Scenario #2: Cass./Position On, Manual Match OFF, Auto-Print On, Worklist
Order (Cassette, Position, and Sample ID), No Barcode Label, E-7
Scenario #3: Cass./Position On, Manual Match On, Auto-Print On, Worklist
Order (Cassette, Position, and Sample ID), Barcode Label, E-7
Scenario #4: Cass./Position On, Manual Match Off, Auto-Print On, Worklist
Order (Cassette, Position, and Sample ID), Barcode Label, E-8
Scenario #5: Cass./Position On, Manual Match On, Auto-Print On, Worklist
Order (Cassette and Position only), Barcode Label, E-8
Scenario #6: Cass./Position On, Manual Match On, Auto-Print On, Worklist
Order (Cassette, Position, and Sample ID), No Barcode Label, E-9
Scenario #7: Cass./Position On, Manual Match Off, Auto-Print On, Worklist
Order (Cassette, Position, and Sample ID), No Barcode Label, E-10
Scenario #8: Cass./Position On, Manual Match On, Auto-Print On, Worklist
Order (Cassette, Position, and Sample ID), Barcode Label, E-10
Scenario #9: Cass./Position On, Manual Match On, Auto-Print On, No
Worklist Order, No Barcode Label, E-12
PN 624026AE
CONTENTS
Scenario #10: Cass./Position On, Manual Match Off, Auto-Print On, No
Worklist Order, No Barcode Label, E-13
Scenario #11: Cass./Position On, Manual Match On, Auto-Print On, No
Worklist Order, Barcode Label, E-13
Scenario #12: Cass./Position On, Manual Match Off, Auto-Print On, No
Worklist Order, No Barcode Label, E-14
Scenario #13: Cass./Position On, Manual Match On, Auto-Print On, Worklist
Order (Sample ID only), Barcode Label, E-15
Scenario #14: Cass./Position On, Manual Match Off, Auto-Print On, Worklist
Order (Sample ID only), Barcode Label, E-16
Scenario #15: Cass./Position On, Manual Match Off, Auto-Print On, Worklist
Order (Cassette, Position, and Sample ID), Barcode Label, E-17
Scenario #16: Cass./Position On, Manual Match Off, Auto-Print On, Worklist
Order (Sample ID only), No Barcode Label, E-18
Scenario #17: Cass./Position On, Manual Match Off, Auto-Print On, Worklist
Order (Cassette, Position, and Sample ID), Barcode Label, E-19
Scenario #18: Cass./Position On, Manual Match On, Auto-Print On, Worklist
Order (Cassette, Position, and Sample ID), Barcode Label, E-20
Printing from the Manual Match Screen Without Matching, E-21
ABBREVIATIONS, Abbreviations-1
LIST OF ABBREVIATIONS, Abbreviations-1
REFERENCES, References-1
LIST OF REFERENCES, References-1
GLOSSARY, Glossary-1
DEFINITIONS, Glossary-1
INDEX, Index-1
BECKMAN COULTER, INC. CUSTOMER END USER LICENSE AGREEMENT, i
TRADEMARKS, iii
PN 624026AE
xxi
ILLUSTRATIONS
1.1
1.2
1.3
1.4
1.5
1.6
1.7
1.8
1.9
1.10
2.1
2.2
2.3
2.4
2.5
2.6
2.7
2.8
2.9
2.10
2.11
2.12
2.13
2.14
2.15
2.16
2.17
2.18
2.19
3.1
5.1
5.2
5.3
5.4
5.5
5.6
5.7
5.8
5.9
5.10
5.11
5.12
5.13
5.14
5.15
5.16
xxii
AC•T 5diff AL Analyzer, 1-1
AL System, 1-2
Overview of Analyzer, 1-3
Analyzer: Back Panel, 1-4
Warning and Caution Labels: Analyzer, 1-4
Tube Holder #1, 1-5
Tube Holder #2, 1-5
Tube Positions in the Tube Holders, 1-6
Workstation (PC), 1-7
Back of Workstation, 1-7
Coulter Principle, 2-2
Dual Focused Flow Process, 2-3
Signal Processing, 2-4
BASO Thresholds, 2-5
Sample Partitions Inside the Probe - CBC/DIFF Panel, 2-6
Sample Partitions Inside the Probe - CBC Panel, 2-6
Bath Assembly, 2-6
Sample Delivery Using Tangential Flow, 2-7
Bath Assembly, 2-8
Bath Assembly, 2-10
Flow Cell Operation, 2-11
DiffPlot Regions, 2-12
Normal DiffPlot, 2-12
Typical RBC Histogram, 2-14
Typical Plt Histogram, 2-16
Area of the Plt Histogram Used to Determine the PDW Parameter Result, 2-17
Areas Used to Determine WBC and BASO Parameter Results, 2-18
DiffPlot Regions, 2-19
Sample Analysis Workflow: With the Worklist, 2-22
Analyzer Dimensions and Weight, 3-1
Startup Status and Results Displayed on the Startup Log, 5-8
Startup Status Displayed on the Background Report, 5-8
New Workday Options: If No Unmatched Results Exist in Manual Match
Screen, 5-11
New Workday Options: If Unmatched Results Exist on Manual Match
Screen, 5-12
Label Placement on Tubes, 5-15
Cassette: Back View, Cassette Number, 5-17
Cassette: Front View, Cassette Style, 5-17
Cassette: Front View, Cassette Barcode Label, 5-17
Cassette: Tube Position Numbers, 5-17
Cassette Input Tray Pushers: Location and Function, 5-20
Tube Holder Door: Open, 5-26
Tube Holder Door: Closed, 5-26
Tube Holder Door: Analysis in Progress, 5-26
Login Screen, 5-29
Selected Menu Path Icon, 5-29
Main Menu Screen, 5-30
PN 624026AE
5.17
5.18
5.19
5.20
5.21
5.22
5.23
5.24
5.25
5.26
5.27
5.28
5.29
5.30
5.31
5.32
5.33
5.34
5.35
5.36
5.37
5.38
5.39
5.40
5.41
5.42
5.43
5.44
5.45
5.46
5.47
5.48
5.49
7.1
7.2
7.3
7.4
7.5
7.6
7.7
8.1
8.2
8.3
8.4
8.5
8.6
8.7
8.8
9.1
9.2
PN 624026AE
Setup Menu Screen, 5-32
Miscellaneous Setup Screen Options, 5-33
Quality Assurance Setup Screen Options, 5-33
Auto Functions Setup Screen Options, 5-34
System Setup Screen Options, 5-35
Save/Restore Configuration Screen Options, 5-36
Operators Setup Screen Options, 5-37
Flagging Sets Setup Screen Options, 5-38
Logs Menu Options, 5-39
Diagnostics Menu Screen Options, 5-40
Quality Assurance Screen, 5-41
QC Screen Options, 5-42
Reproducibility Screen Options, 5-42
Calibration Screen Options, 5-43
IQAP Screen Options, 5-43
XB/XM Screen Options, 5-44
Generic Toolbar, 5-45
Contextual Toolbar, 5-46
Progress Indicator, 5-47
Local Setting Tab, 5-47
Text Button, 5-48
Bitmap Button: Drop-down Box, 5-48
Radio Buttons, 5-48
Fields, 5-49
Boxes, 5-49
Scrollable List, 5-50
Mouse, 5-51
Tool Tip Names, 5-52
Scroll Bars, 5-53
Icon States: Active and Inactive, 5-53
Tabs, 5-53
Screen Name (System is Shown), 5-54
Flagging Set Selection and Update Process, 5-59
QA Menu Screen, 7-1
QC Levey-Jennings Graph Screen, 7-26
QC Data Grid Screen, 7-27
QC Graphics Screen, 7-29
IQAP Download Screen: Defined, 7-40
XB/XM Graphs Screen (9 Parameters XM is Shown), 7-52
XB Batch Details Screen, 7-54
Rerun Order on Worklist, 8-32
Rerun Indicator on Patient Sample Report, 8-33
Patient and Sample Information Fields, 8-34
Right Side of the Worklist Screens, 8-40
Worklist Grid Screen, 8-41
Worklist Cassette Screen, 8-43
Worklist Cassette Screen: Cass./Position Details, 8-44
Worklist Sample ID from Worklist Cassette Screen, 8-44
Run-in-Progress Screen, 9-1
Results List Screen, 9-3
xxiii
9.3
9.4
9.5
9.6
9.7
9.8
9.9
9.10
9.11
9.12
9.13
9.14
9.15
9.16
9.17
9.18
9.19
9.20
9.21
10.1
10.2
10.3
10.4
11.1
11.2
11.3
11.4
11.5
11.6
11.7
11.8
11.9
11.10
11.11
11.12
11.13
11.14
11.15
11.16
11.17
11.18
11.19
11.20
11.21
11.22
A.1
A.2
A.3
xxiv
Results List Screen Column Headings, 9-3
Sort Criteria Columns Defined, 9-5
Results Screen, 9-7
Archives Screen Details, 9-8
Results Screen, 9-11
Manual Match Screen: Details, 9-14
Results List Screen, 9-19
Print Options for Patient Results, 9-20
Transmit Options for Patient Results, 9-22
Flags and Messages: Collapsed View:, 9-38
Flags and Messages: Expanded View, 9-38
WBC/BASO Histogram Flags: CBC Panel, 9-43
WBC/BASO Histogram Flags: CBC/DIFF Panel, 9-43
MICRO and MACRO Regions on RBC Histogram, 9-43
Plt Flags, 9-44
Mobile Threshold Positioned in the Standard Regions (Between 18 fL and 25
fL), 9-44
Mobile Threshold Cannot Be Positioned in the Standard Region, 9-44
Mobile Threshold Cannot Be Positioned, 9-44
Presence of Small Cells in the 2 fL and 3fL Regions, 9-45
Calibration Screen Details, 10-2
Modify Calibration Targets Screen, 10-4
Calibration Runs: Included and Excluded, 10-15
Calibration Log Entry: “Forced” Calibration, 10-18
Analyzer Doors and Covers: Right Side, 11-3
Analyzer Doors and Covers: Left Side, 11-3
Diagnostics Menu Screen, 11-8
Diagnostics User Screen, 11-11
Hardware Systems Screen, 11-12
Diluter Systems Screen, 11-27
Bath Assembly, 11-38
Others Diagnostics Screen, 11-43
Reproducibility Screen Details, 11-52
Inside Left Components, 11-76
Inside Right Components, 11-78
View of the Pneumatics Area, 11-79
Bath Assembly, 11-80
Optical Bench and Pneumatic Assemblies, 11-80
Main Card, 11-81
Computer Workstation: Front View, 11-81
Computer Workstation: Back View, 11-82
Reagent Bottle/Container Location, 11-83
Reagent Status Screen Details, 11-83
Logs Menu Screen, 11-125
Understanding the Logs (Alarms and Errors Log Shown): Details, 11-126
Maintenance Log Entry, 11-132
Setup Menu Screen, A-2
General Tab Settings, A-3
Auto-Stop for Consecutive Results With Selected Characteristics, A-20
PN 624026AE
A.4
A.5
A.6
A.7
A.8
A.9
A.10
A.11
A.12
A.13
A.14
A.15
A.16
A.17
A.18
A.19
A.20
D.1
D.2
PN 624026AE
Location/Physician Screen Details, A-22
Shifts Setup Screen Details, A-30
QA Settings Screen, A-34
Rerun Setup Screen Details, A-60
Auto-Print Setup Screen (for Patient Results): Details, A-64
Auto-Transmit Setup Screen, A-67
Local Settings Setup Screen, A-70
Printer Setup Screen, A-78
Patient Report (CBC/DIFF), A-90
Patient Report: Areas Defined, A-91
Patient Report Setup: Software Overview, A-92
Cycle Options Setup Screen, A-101
Determining If a New Workday is Required, A-107
Users Setup Screen, A-114
Screen Showing a New User to Supervisors Group, A-118
Flags and Messages Setup Screen, A-120
Age Ranges Screen for Flagging Set Setup, A-121
Configuration Save/Restore Screen, D-2
Delete Database Screen, D-14
xxv
TABLES
1.1
1.2
1.3
2.1
2.2
2.3
2.4
2.5
2.6
2.7
2.8
3.1
3.2
3.3
3.4
3.5
3.6
3.7
3.8
3.9
3.10
5.1
5.2
5.3
5.4
5.5
5.6
5.7
7.1
9.1
9.2
9.3
9.4
9.5
9.6
9.7
9.8
9.9
9.10
9.11
9.12
9.13
9.14
11.1
11.2
11.3
11.4
xxvi
CBC Parameters, 1-8
CBC/DIFF Parameters, 1-9
Reagent Descriptions, 1-13
AC•T 5diff AL Analyzer: Measurement Technologies, 2-1
Technical Characteristics for Obtaining RBC and Platelet Counts, 2-8
Technical Characteristics for the Measurement of the Hemoglobin, 2-9
Characteristics Required to Obtain WBC/BASO Results, 2-10
Technical Characteristics for Acquisition of the DiffPlot, 2-12
Summary of Dilutions, 2-13
DiffPlot Regions Defined, 2-20
Immature White Blood Cells, 2-21
Reagent Consumption by Cycle, 3-4
Reproducibility Specifications, 3-5
Linearity Specifications, 3-5
Accuracy Specifications, 3-6
Carryover Specifications, 3-6
Reportable Range, 3-7
Reproducibility Characteristics From a Normal Sample with a Normal WBC
Count, 3-8
Accuracy Characteristics, 3-8
Carryover Characteristics, 3-9
Interfering Substances, 3-10
Commonly Asked Questions, 5-1
Software Menu Access by User Group, 5-28
Main Screen Icons, 5-30
Generic Toolbar Icons, 5-45
Contextual Toolbar Icons, 5-46
Software Icons, 5-57
Pre-Defined Flagging Sets, 5-58
QA Menu Screen Icons, 7-1
Patient Range Flags, 9-36
Action Range Flags, 9-36
Definition of DIFFPLOT Flags, 9-39
Histogram Flags, 9-43
WBC Interpretive Messages, 9-45
RBC Interpretive Messages, 9-46
Plt Interpretive Messages, 9-47
Interpretive Messages from a Combination of WBC/RBC/Plt Action Ranges, 9-47
NRBCs and PLATELET AGGREGATES Interpretive Messages, 9-47
Definition of Analytical Message “CO”, 9-49
Definition of Analytical Message “DB”, 9-49
Definition of Analytical Message “BASO+”, 9-50
QA Messages, 9-50
Miscellaneous Messages, 9-51
Maintenance Schedule, 11-1
Diagnostics Menu Screen Icons, 11-8
Diagnostics User Screen Icons, 11-11
Analyzer Motors: Function and Location, 11-15
PN 624026AE
11.5
11.6
11.7
11.8
A.1
A.2
A.3
A.4
B.1
B.2
B.3
B.4
B.5
B.6
B.7
PN 624026AE
Error Messages, 11-112
Troubleshooting Guide, 11-122
Logs Screen Icons, 11-125
Log Details, 11-127
Instrument Default Settings, A-1
Setup Screen Icons, A-2
Reporting Unit Format, A-27
Daily Workload Runs per Panel, A-105
Default Barcode Settings, B-2
Test Labels With the Check Digit (Checksum), B-3
Test Labels Without the Check Digit, B-4
Barcode Scanner Configuration Sheet, B-4
Code 39 Barcode Scanner Options, B-6
Codabar Barcode Scanner Options, B-7
Interleaved 2-of-5 Options With Fixed Length Characters Test Labels, B-8
xxvii
xxviii
PN 624026AE
INTRODUCTION
OVERVIEW
This introductory section contains the following topics:
r
USING YOUR AC•T 5diff AL HEMATOLOGY INSTRUCTIONS FOR USE MANUAL,
r
ABOUT THIS MANUAL,
r
CONVENTIONS,
r
GRAPHICS, and
r
SYMBOLS.
USING YOUR AC•T 5diff AL HEMATOLOGY INSTRUCTIONS FOR USE MANUAL
Use this manual to find information about:
r
getting started,
r
running your instrument,
r
reviewing results,
r
performing special procedures, such as cleaning, replacing, or adjusting an instrument
component,
r
troubleshooting problems,
r
determining what the instrument does,
r
understanding how to safely operate the instrument,
r
powering up the instrument,
r
customizing the setup, and
r
running controls and samples.
ABOUT THIS MANUAL
The information in this manual is organized as follows:
PN 624026AE
r
Chapter 1, USE AND FUNCTION
Contains the intended use of the instrument, a brief history of the methods used by the
instrument, the reagents, calibrators, and controls used, a brief description of the major
components, and how to work with the software.
r
Chapter 2, OPERATION PRINCIPLES
Contains the descriptions for cell counting and voting and how the parameters are
derived.
r
Chapter 3, SPECIFICATIONS/CHARACTERISTICS
Details instrument specifications, characteristics, and interfering substances.
r
Chapter 4, PRECAUTIONS/HAZARDS
Provides information about key safety issues and contains information on biological
hazards and hazards pertaining to moving parts.
r
Chapter 5, GETTING STARTED
Provides information on using the system’s software and Workstation.
xxix
INTRODUCTION
ABOUT THIS MANUAL
xxx
r
Chapter 6, DAILY ROUTINE
Provides information on doing daily procedures, such as Startup and Shutdown.
r
Chapter 7, QUALITY ASSURANCE
Provides information on how to run quality control material to verify calibration.
r
Chapter 8, SAMPLE ANALYSIS
Provides information on how to run patient blood samples.
r
Chapter 9, DATA REVIEW
Provides information on reviewing sample results, including flagged results
r
Chapter 10, CALIBRATION
Provides procedures for calibrating the instrument, including manually adjusting the
calibration factors.
r
Chapter 11, DIAGNOSTICS
Provides information about special procedures and troubleshooting procedures for the
instrument. Includes topics such as a maintenance schedule, cleaning and replacement
procedures, and what error messages mean.
r
Appendix A, SETUP
Provides procedures on customizing the instrument’s settings, such as date/time,
reporting units, laboratory limits, and others.
r
Appendix B, BARCODE SPECIFICATIONS FOR OPTIONAL BARCODE WAND
Provides a procedure for testing, troubleshooting, and reprogramming the barcode
scanner.
r
Appendix C, MANUAL CALIBRATION
Provides a procedure for manually calibrating the instrument.
r
Appendix D, WORKSTATION MANAGEMENT
Provides information about archive and database management.
r
Appendix E, WORKLIST SCENARIOS
Provides information and flowcharts regarding Worklist scenarios.
r
REFERENCES
Lists references used in this manual.
r
GLOSSARY
Defines terminology used in this manual.
r
ABBREVIATIONS
Defines abbreviations used in this manual.
r
INDEX
Provides page numbers for indexed information.
PN 624026AE
INTRODUCTION
CONVENTIONS
CONVENTIONS
This manual uses the following conventions:
r
Bold font indicates a software option, such as Startup.
r
Italics font indicates screen text displayed on the instrument, such as
Insert tube.
r
AL and instrument are used interchangeably to refer to the AC•T 5diff Autoloader
hematology analyzer.
r
A Note contains supplemental information.
r
An ATTENTION contains information that is important to remember or helpful when
performing a procedure.
r
Main card refers to the main circuit board (card) in the instrument.
r
RBC bath is sometimes referred to as RBC/Plt bath.
r
The terms “screen” and “window’ are used interchangeably.
r
AC•T 5diff Rinse reagent is sometimes referred to as Rinse.
r
AC•T 5diff Fix reagent is sometimes referred to as Fix.
r
AC•T 5diff Hgb Lyse reagent is sometimes referred to as Hgb Lyse.
r
AC•T 5diff WBC Lyse reagent is sometimes referred to as WBC Lyse.
r
AC•T 5diff Diluent reagent is sometimes referred to as Diluent.
r
r
indicates “select” with or “click” the left button on the mouse.
Bold, italics font indicates a procedure heading.
GRAPHICS
All graphics, including screens and printouts, are for illustration purposes only and must not
be used for any other purpose.
PN 624026AE
xxxi
INTRODUCTION
SYMBOLS
SYMBOLS
Safety Symbols
Safety symbols alert you to potentially dangerous conditions. These symbols, together with
text, apply to specific procedures and appear as needed throughout this manual.
Symbol
!
Warning Condition
Action
Biohazard. Consider all materials (specimens,
reagents, controls, and calibrators, and so forth) and
areas these materials come into contact with as
being potentially infectious.
Wear standard laboratory attire
and follow safe laboratory
procedures when handling any
material in the laboratory.
Probe hazard. The probe is sharp and may contain
biohazardous materials, such as controls and
calibrators.
Avoid any unnecessary contact
with the probe and probe area.
Electrical shock hazard. Possibility of electrical
shock when instrument is plugged in to the power
source.
Before continuing, unplug the
AC•T 5diff AL analyzer from the
electrical outlet.
Conditional hazard. Possibility of a hazard based on
specific conditions.
Pay close attention to the
information provided when you
see this symbol.
Tab Symbols
Tabs divide this document into five sections: reference, operation, special procedures and
troubleshooting, appendices, and Workstation. Each tab reflects a unique symbol.
Symbol
Definition
Identifies the reference section.
Identifies the operating instructions section.
Identifies the special procedures and troubleshooting section.
Identifies the appendices section.
Identifies the Workstation management section.
xxxii
PN 624026AE
1USE AND FUNCTION 1
1.1
INTENDED USE
General
Figure 1.1 AC•T 5diff AL Analyzer
The COULTER AC•T 5diff Autoloader
(AL) hematology analyzer (Figures 1.1) is
a 26-parameter, fully automated
hematology analyzer, including a five-part
leukocyte differential counter, capable of
analyzing samples in a closed-vial
Autoloader mode or a Manual (Stat) mode
(open- or closed-vial).
Of the 26 reported parameters:
r
20 parameters are For In Vitro
Diagnostic Use: WBC, RBC, Hgb, Hct,
MCV, MCH, MCHC, RDW, Plt, MPV,
NE%, NE#, LY%, LY#, MO%, MO#,
EO%, EO#, BA%, and BA#.
r
6 parameters are qualitative and are
For Research Use Only. Not for use
in diagnostic procedures. They are:
Pct, PDW, IMM, IMM#, ATL, and
ATL#.
Purpose
The purpose of the AC•T 5diff AL hematology analyzer is to identify normal patient results
with all normal system-generated parameters and to flag or identify patient results that
require additional studies.
PN 624026AE
1-1
USE AND FUNCTION
DESCRIPTIONS
System Overview
The AL system (Figure 1.2) consists of the:
b the Analyzer,
c the Workstation (PC, monitor, keyboard, mouse, and software),
d a printer
e a barcode wand (optional)
IMPORTANT Risk of instrument damage and/or erroneous results if you install additional software onto the
PC or if you use the PC for anything other than stated within this documentation. Use the PC only as
intended with this system.
Figure 1.2 AL System
b
c
d
e
1.2
DESCRIPTIONS
AC•T 5diff AL Analyzer
The Analyzer is further detailed in the following illustrations:
r
r
r
r
Figure 1.3 shows an overview of the Analyzer.
Figure 1.4 shows the back panel of the Analyzer,
Figure 1.5 shows the warning and caution labels on the Analyzer.
Figure 1.6 shows Tube Holder #1.
r
Figure 1.7 shows Tube Holder #2.
r
Figure 1.8 shows the position of tubes in the tube holders.
Overview of Analyzer
WARNING Risk of operator injury when covers and doors are not closed and secured in place before you
operate the instrument. Ensure that all covers and doors are closed and secured before operating the
instrument.
1-2
PN 624026AE
USE AND FUNCTION
DESCRIPTIONS
Figure 1.3 Overview of Analyzer
d
b
e
c
1^
1%
f
1$
1#
i
g
h
1@
1!
1)
j
b
Top cover
j
Tube holder door
c
Front cover
1)
Tube holder
d
Right panel
1!
Left front door
e
Right cover
1@
Cassette input tray
f
ON/OFF switch
1#
Left cover
g
Cassette output tray
1$
Left panel
h
Right front door
1%
Reagent compartment
i
Indicator lights
1^
Reagent door
Note: During analysis, the lights
are illuminated.
PN 624026AE
1-3
1
USE AND FUNCTION
DESCRIPTIONS
Back Panel
Figure 1.4 shows the Analyzer’s back panel.
Figure 1.4 Analyzer: Back Panel
b
g
c
d
e
f
b
Serial number label
c
Power supply cord connector
d
Waste detector sensor cable connector
e
Waste output connector
f
Diluent input connector
g
Workstation connector
Warning and Caution Labels
Pay close attention to the labels on the Analyzer (Figure 1.5). For warning and caution labels
on the Workstation PC, refer to the manufacturer’s manuals.
Figure 1.5 Warning and Caution Labels: Analyzer
MOD
NO.
ASSY
NO.
xxxxxx
100-240
S/N
xxxxxx
50/60
VOLTS
HZ
AMPS
WATTS
MANUFACTURED FOR BECKMAN COULTER INC.
250 S. Kraemer Blvd., Brea, CA 92821
PATENTS ISSUED AND/OR PENDING
MADE IN FRANCE
BECKMAN
COULTER
AUTOMATED DIFFERENTIAL CELL COUNTER
FOR IN VITRO DIAGNOSTIC USE
C
UL
US
LISTED
LABORATORY EQUIPMENT
42DA
CAUTION:
TO REDUCE THE RISK OF ELECTRICAL SHOCK DO NOT REMOVE THE COVER
OR BACK.
REFER SERVICING TO QUALIFIED SERVICE PERSONNEL.
ELECTRIC SHOCK HAZARD. DISCONNECT UNIT FROM POWER SOURCE
PRIOR TO SERVICING.
FOR CONTINUED PROTECTION AGAINSTR FIRE HAZARD, REPLACE ONLY
WITH SAME TYPE AND RATING OF FUSE.
FOR SAFETY REASONS, EQUIPMENT REQUI4RES CONNECTION TO
PROTECTIVE EARTH GROUND.
ATTENTION:
POUR EVITER LES RISQUES DE CHOC ELECTRIQUE NE PAS OTERE LES
CAPOTS.
APPELER UN REPARATEUR QUALIFIE.
RISQUE DE CHOC ELECTRIQUE. DEBRANCHER LE CABLE D'ALIMENTATION
SECTEUR AVENT TOUTE INTERVENTION.
POUR UNE PROTECTION CONTRE LES RISQUES D'INCENDIE N'UTILISER QUE
DES FUSIBLES DE MEME TYPES ET DE MEME CALIBRES.
POUR DES RAISONS DE SECURITE LA MACHINE DOIT ETRE RELIEE A LA
TERRE.
7616155D
1-4
PN 624026AE
USE AND FUNCTION
DESCRIPTIONS
Tube Holders
Two interchangeable tube holders (Figures 1.6 and 1.7) are available for accommodating
various sizes of specimen tubes, microcollection devices, and control vials. Each tube holder
contains four slots in which you can place an open or closed tube/vial.
It is important to note that there is a single point of aspiration at the 12 o’clock position
(referred to as the pierce position) on the Analyzer. To position the desired tube slot in the
12 o’clock pierce position, manually rotate the tube holder clockwise or counterclockwise as
needed. See Positioning Tubes in the Tube Holders in Chapter 5 for additional information on the
pierce position.
Figure 1.6 Tube Holder #1
Slot Designations for Tube Holder #1
b
c
e
b
Position 1
c
Position 2
d
Position 3
e
Position 4
Note: Tube Holder #1 has one dot in the
center.
d
Figure 1.7 Tube Holder #2
Slot Designations for Tube Holder #2
e
b
d
b
Position 1
c
Position 2
d
Position 3
e
Position 4
Note: Tube Holder #2 has two dots in the
center.
c
Each tube/vial has an assigned slot in a tube holder. Refer to the Hematology Tube List
available on the BCI website at www.beckmancoulter.com. Beckman Coulter does not
guarantee the performance of any other tube on this system. Figure 1.8 shows examples of
tubes in their correct slot and tube holder.
PN 624026AE
1-5
1
USE AND FUNCTION
DESCRIPTIONS
Figure 1.8 Tube Positions in the Tube Holders
e
b
c
e
d
b
d
c
Tube Holder #1
Tube Holder #2
7367456A
The following list provides an overview of the tube holders and the tubes/vials they
accommodate. Refer to the Hematology Tube List available on the BCI website at
www.beckmancoulter.com.
Tube Holder #1
Position B
Types of Collection Devices or Control Vials
r
Most 13 mm x 75 mm evacuated specimen tubes containing either
K3EDTA or K2EDTA for collecting whole-blood volumes of
2 to 5 mL
r
COULTER AC•T 5diff Control Plus control tubes
Position C
COULTER AC•T 5diff Cal Calibrator vial
Position D
Sarstedt Monovette® 11.5 mm x 66 mm specimen tube collecting
2.7 mL of whole-blood
Position E
Becton-Dickinson Microtainer for collection of 0.25 to 0.50 mL of
whole-blood
Tube Holder #2
1-6
Position B
Becton-Dickinson Microtainer for collection of 0.25 to 0.50 mL of
whole-blood
Position C
Becton-Dickinson 10.25 mm x 64 mm Vacutainer® for collecting 3 mL
of whole-blood
Position D
RAM Scientific microcollection device for collecting 125 µL of
whole-blood
Position E
13 mm x75 mm specimen tube with multiple labels
PN 624026AE
USE AND FUNCTION
DESCRIPTIONS
Workstation (PC)
Use the Workstation (Figure 1.9) to set up and operate the instrument.
r
Figure 1.9 shows the Workstation.
r
Figure 1.10 shows the back of the Workstation.
Figure 1.9 Workstation (PC)
b
b
Monitor
c
Monitor power ON/OFF button
d
Mouse
e
PC power ON/OFF button
Note: Your monitor may differ from what is shown.
c
e
d
Figure 1.10 Back of Workstation
I
b
Monitor connector
c
Power supply cord connector (PC)
d
Host communications connector
e
Printer connector
bf
c
Analyzer connector
g
Keyboard connector
h
Mouse connector
I
Power supply cord connector (monitor)
Note: Your configuration may vary from what is
shown here.
h
g
f
PN 624026AE
e d
1-7
1
USE AND FUNCTION
PANELS
1.3
PANELS
You can run samples in either the CBC panel or CBC/DIFF panel.
For information on the parameters of each panel, see Heading 1.4, PARAMETERS.
For information on selecting the default panel, see Default Panel (Selecting CBC or
CBC/DIFF) in Appendix A.
1.4
PARAMETERS
CBC Panel
Table 1.1 lists the 12 parameters analyzed in the CBC panel.
Table 1.1 CBC Parameters
Parameter
Definition
WBC
White Blood Cell or leukocyte count
RBC
Red Blood Cell or erythrocyte count
Hgb
Hemoglobin concentration
Hct
Hematocrit (relative volume of erythrocytes within the whole-blood sample)
MCV
Mean Corpuscular (erythrocyte) Volume
MCH
Mean Corpuscular (erythrocyte) Hemoglobin
MCHC
Mean Corpuscular (erythrocyte) Hemoglobin Concentration
RDW
Red Cell (erythrocyte) Distribution Width
Plt
Platelet or thrombocyte count
MPV
Mean Platelet (thrombocyte) Volume
PDW†
Platelet Distribution Width
Pct†
Plateletcrit
†Pct
1-8
and PDW are derived parameters and are For Research Use Only. Not for use in diagnostic procedures.
PN 624026AE
USE AND FUNCTION
FEATURES
CBC/DIFF Panel
Table 1.2 lists the 26 parameters analyzed in the CBC/DIFF panel:
Table 1.2 CBC/DIFF Parameters
Parameter
Definition
WBC
White Blood Cell or leukocyte count
NE%: Neutrophil percentage
NE#: Neutrophil number
LY%: Lymphocyte percentage
LY#: Lymphocyte number,
MO%: Monocyte percentage
MO#: Monocyte number
EO%: Eosinophil percentage
EO#: Eosinophil number
BA%: Basophil percentage
BA#: Basophil number
IMM†: Immature cell percentage
IMM#†: Immature cell number
ATL†: Atypical lymphocyte percentage
ATL#†: Atypical lymphocyte number
RBC
Red Blood Cell or erythrocyte count
Hgb
Hemoglobin concentration
Hct
Hematocrit (relative volume of erythrocytes within the whole-blood sample)
MCV
Mean Corpuscular (erythrocyte) Volume
MCH
Mean Corpuscular (erythrocyte) Hemoglobin
MCHC
Mean Corpuscular (erythrocyte) Hemoglobin Concentration
RDW
Red Cell (erythrocyte) Distribution Width
Plt
Platelet or thrombocyte count
MPV
Mean Platelet (thrombocyte) Volume
PDW†
Platelet Distribution Width
Pct†
Plateletcrit
†Derived parameters are “For Research Use Only. Not for use in diagnostic procedures.”
For additional RUO information, see RUO Parameters (Enabling/Disabling) in Appendix A.
1.5
FEATURES
Instrument features include:
r
r
r
r
r
r
r
r
r
PN 624026AE
Autoloader sampling,
automated calibration,
automated quality control evaluation,
automated patient data storage,
closed vial sampling,
aspiration with probe wipe,
cell control download for IQAP,
12- or 26-parameter analysis with histograms and DiffPlots, and
manually entered, autonumbered, or barcoded patient sample identification.
1-9
1
USE AND FUNCTION
REPORTS
1.6
REPORTS
Sample result reports are printed based on your instrument setup. See • Enable (Define Patient
Report Areas) in Appendix A for details. For instructions on how to use the printer, refer to the
printer’s instruction manual.
In addition to sample reports, the instrument also generates other reports, such as:
1.7
r
Worklist reports,
r
results list reports,
r
control reports, including Levey-Jennings,
r
reproducibility reports,
r
calibration reports,
r
XB/XM reports, including Levey-Jennings,
r
log reports,
r
background (Startup) reports, and
r
setup reports.
QUALITY ASSURANCE: CONTROLS, CALIBRATORS, AND IQAP
Cell Controls
Controls are substances used to monitor instrument performance. By comparing the control
results against the assay (known) value, you can determine your instrument’s accuracy and
reproducibility.
AC•T 5diff Control Plus is available in three levels (low, normal, and high) to provide a stable
reference control for use with this instrument. Refer to the control material package inserts
for additional information, including stability for open- and closed-vial use and for a list of
measured parameters.
Calibrator
A calibrator is a substance traceable to reference methods for the preparation of material used
to calibrate a measurement on an instrument.
AC•T 5diff Cal Calibrator is a recommended alternative to the whole-blood reference method
of calibration and is traceable to reference methods and materials. Use AC•T 5diff Cal
Calibrator to ensure accurate instrument measurements for WBC, RBC, Plt, Hct, and Hgb.
IQAP (Interlaboratory Quality Assurance Program)
Quality Assurance (QA) includes routine maintenance and service in conjunction with the
use of controls and calibrators. The combination of these methods assures complete quality
control and should be applied separately or in combination according to your laboratory,
state, and federal protocols.
For information on determining laboratory procedures, you can purchase the Physician’s
Office Laboratory Guideline (POL2-T) from the National Committee for Clinical Laboratory
Standards (NCCLS) at 940 West Valley Road, Wayne, PA, 19087-1898, USA.
1-10
PN 624026AE
USE AND FUNCTION
QUALITY ASSURANCE: CONTROLS, CALIBRATORS, AND IQAP
Participation in Beckman Coulter’s IQAP helps you interpret control results and correlate
them with your other internal quality control techniques. Your IQAP report will show how
your laboratory performed in comparison with other laboratories. The AL instrument allows
you to save your cell control data to diskette for submission to IQAP. See Heading 7.4,
DOWNLOADING CELL CONTROL RESULTS FOR IQAP for details.
For additional information on IQAP, including how to enroll, contact your Beckman Coulter
representative.
XB Analysis in the Analyzer
Studies4 indicate that the red cell indices (MCV, MCH, and MCHC) of patient populations are
stable over time. This stability characteristic of the indices is the basis of a quality control
technique called XB Analysis.
In a mutually-implemented system, population means (target values) are established by
analyzing as large a sample population as possible, at least 250, but ideally 1,000 blood
samples. (The XB analysis feature of this instrument does all the calculations automatically.)
Once the target values have been established, the XB Analysis can be applied using small
batches (i.e. 20 patient samples per batch) from the patient population.
The instrument is considered “in control” when the batch means are within established limits
of the target values. XB Analysis detects the direction and amount of change due to
instrument, reagent, or sample handling. See Heading 7.6, XB ANALYSIS for additional
information.
The system also offers XM analysis, which extends the statistical process of XB from 3
parameters (MCV, MCH, and MCHC) to 9 parameters (WBC, RBC, Hgb, Hct, MCV, MCH,
MCHC, RDW, and Plt).
PN 624026AE
1-11
1
USE AND FUNCTION
REAGENTS
1.8
REAGENTS
Recommended Reagents
r
AC•T 5diff Diluent,
r
AC•T 5diff Fix,
r
AC•T 5diff WBC Lyse,
r
AC•T 5diff Hgb Lyse, and
r
AC•T 5diff Rinse.
Rinse
Fix
WBC
Lyse
Hgb Lyse
Beckman Coulter recommends these reagents:
These reagents are manufactured by/for Beckman Coulter, Inc., Miami, Florida USA, and
distributed by Beckman Coulter France, SA 33 rue des Vanesses BP 50359 Villepinte 95942
Roissy CDG Cedex.
All stated performance characteristics in this manual are based on the use of the instrument
with the above-referenced reagents. Before using the reagent, refer to the reagent’s
bottle/container label for detailed information, such as stability.
ATTENTION: The open container stability on the reagent labeling applies only to the reagent
when connected to the instrument with approved reagent pickups and caps.
For information on handling reagent waste, see Heading 11.4, WASTE HANDLING
PROCEDURES and Replacing the Waste Container in Chapter 11.
1-12
PN 624026AE
USE AND FUNCTION
REAGENTS
Reagent Descriptions
See Table 1.3.
Table 1.3 Reagent Descriptions
Reagent
Description
AC•T 5diff Diluent
WARNING Risk of explosion if sodium azide is not properly flushed
down the drain with large volumes of water. Sodium azide preservative
may form explosive compounds in metal drain lines. (See National
Institute for Occupational Safety and Health Bulletin: Explosive Azide
Hazards [8/16/76].) When disposing of reagents down the drain, flush
with large volumes of water
Used for counting and differentiating blood cells, AC•T 5diff Diluent is
clear and odorless. Composed of stabilized saline solution containing an
organic buffer and less than 0.1% sodium azide, AC•T 5diff Diluent:
r Dilutes whole-blood samples,
r Stabilizes cell membranes for accurate counting and sizing,
r Conducts aperture current, and
r Rinses instrument components between analyses.
Handle as indicated in this manual. Use at ambient temperature from
18°C to 25°C up to the expiration date indicated on the packaging.
AC•T 5diff Fix
Fix
Used to lyse erythrocytes, fix leukocytes, and differentially stain
granules of monocytes, neutrophils, and eosinophils, AC•T 5diff Fix is a
deep blue aqueous solution that smells like alcohol. AC•T 5diff Fix is
composed of an alcohol solution containing propylene-glycol, a formic
dye, buffers, alkaline salts, wetting agents, and an aldehyde
preservative.
Handle as indicated in this manual. Use at ambient temperature from
18°C to 25°C up to the expiration date indicated on the packaging.
AC•T 5diff WBC Lyse
WBC
Lyse
Hgb Lyse
AC•T 5diff Hgb Lyse
AC•T 5diff Rinse
Used to lyse red blood cells for the leukocyte count and to differentiate
poly-nuclear basophils, AC•T 5diff WBC Lyse is a colorless, aqueous
solution. It is composed of an acidic solution containing a lytic agent.
Handle as indicated in this manual. Use at ambient temperature from
18°C to 25°C up to the expiration date indicated on the packaging.
Used to lyse blood cells and to determine hemoglobin concentration,
AC•T 5diff Hgb Lyse is a clear, aqueous solution and is composed of
potassium cyanide at 0.035, and a quaternary ammonium salt.
Handle as indicated in this manual. Use at ambient temperature from
18°C to 25°C up to the expiration date indicated on the packaging.
Used as a rinsing agent, AC•T 5diff Rinse is a transparent liquid
composed of an enzymatic solution with proteolytic action.
Handle as indicated in this manual. Use at ambient temperature from
18°C to 25°C up to the expiration date indicated on the packaging.
Rinse
PN 624026AE
1-13
1
USE AND FUNCTION
PRINTER
1.9
PRINTER
Use the printer supplied or approved by Beckman Coulter.
1.10 ORDERING MATERIAL SAFETY DATA SHEETS (MSDS)
To obtain an MSDS for Beckman Coulter reagents used on the AC•T 5diff AL analyzer:
1.
2.
On the Internet, go to www.beckmancoulter.com:
a.
Select MSDS from the Customer Support drop-down menu.
b.
Follow the instructions on the screen.
c.
Contact your Beckman Coulter representative if you have difficulty locating the
information.
If you do not have Internet access:
r
In the USA, either call Beckman Coulter Customer Operations (800.526.7694) or
write to:
Beckman Coulter, Inc.
Attn: MSDS Requests
P.O. Box 169015
Miami, FL 33116-9015
r
1-14
Outside the USA, contact your Beckman Coulter representative.
PN 624026AE
2OPERATION PRINCIPLES 2
2.1
OVERVIEW
The AC•T 5diff AL analyzer is a fully-automated hematology analyzer providing a complete
WBC five-part differential, which is determined simultaneously by the ACV (Absorbance
Cytochemistry and Volume) Technology and WBC/BASO methodologies.
The ACV Technology uses absorbance, cytochemistry, and focused flow impedance. The
WBC/BASO methodology uses differential lysis, impedance technology, and differential
thresholds. See Table 2.1.
me
Table 2.1 AC•T 5diff AL Analyzer: Measurement Technologies
Fluid Dynamics
2.2
Technology
Measurements
Output
Dual Focused Flow ACV Technology
Light absorbance of
cytochemically-stained
cells
Lymphocytes, monocytes,
neutrophils, eosinophils,
immature cells, and atypical
lymphocytes
Volume aperture
Differential lysis using the
Coulter Principle
Volume and count
WBC count, basophil
percentage, and basophil
count
Volume aperture
Coulter Principle
Volume and count
RBC count, platelet count,
and hematocrit
MEASUREMENT PRINCIPLES
Coulter Principle
In the AC•T 5diff AL analyzer, the Coulter Principle1 is used to analyze the final RBC/Plt
dilution and the WBC/BASO dilution. This electronic method of counting and sizing particles
is based on the fact that cells, which are poor conductors of electricity, will interrupt a current
flow. The impedance variation generated by the passage of non-conductive cells through a
small, calibrated aperture is used to determine the count (number of particles) and size
(volume) of the particles passing through the aperture within a given time period.
Aperture Sensor System
Overview
The RBC/Plt aperture sensor system determines the cell count and size of red blood cells and
platelets. The WBC/BASO aperture sensor system determines the cell count. The
differentiation between basophils and other white blood cells is related to the AC•T 5diff
WBC Lyse-specific lytic action on the white blood cells in WBC/BASO bath.
Particle Sensing
To sense particles using the Coulter Principle (Figure 2.1), a current flow is established so
changes in that flow can be monitored. In this sensing system, an electrode is located on each
side of the aperture.
The most visible electrode is referred to as the counting head. These electrodes are the
conductive metallic housings attached to the front of the RBC and WBC/BASO baths. The
second electrode, referred to as the bath electrode, is not as noticeable; it is located inside the
bath. The aperture is located between the counting head and the bath electrode.
PN 624026AE
2-1
OPERATION PRINCIPLES
MEASUREMENT PRINCIPLES
Figure 2.1 Coulter Principle
Solution to be analyzed
Vacuum
constant
Current
constant
Volts
Electrodes
Pulse
Time
Analyzing
electronic
circuit
7650331A
When the count circuit is activated and an electronically conductive reagent is in the RBC or
WBC/BASO bath, an electric current continuously passes through the aperture. Current
moving between the two electrodes establishes the electronic flow through the aperture.
Once a sample is aspirated, an aliquot of that aspirated sample is diluted with reagent (an
electrolyte) and is delivered to the RBC or WBC/BASO bath using tangential flow, which
ensures proper mixing of the dilution. When the cells suspended in the conductive reagent
are pulled through a calibrated aperture, the electrical resistance between the two electrodes
increases proportionately with the cell volume (Figure 2.1).
The resistance creates a pulse that is sensed and counted as a particle by the instrument. The
amount of resistance (amplitude of each pulse) is directly related to the size of the particle
that produced it.
The generated pulses have a very low voltage, which the amplification circuit increases so
that the electronic system can better analyze the pulses and eliminate the background noise.
Applying the Coulter Principle
The AC•T 5diff AL analyzer makes several dilutions of an aspirated whole-blood sample. The
RBC/Plt dilution begins in the First Dilution/Hgb bath but is actually analyzed in the RBC
bath. The final dilution in the RBC bath is used to determine the cell count and size of red
blood cells and platelets.
The WBC/BASO aperture sensor system is directly responsible for determining the cell count
and size of white blood cells. The differentiation between basophils and other white blood
cells is also related to the AC•T 5diff WBC Lyse-specific lytic action on these white blood
cells.
Thresholds, which are electronically set size limits, exclude unwanted particles, such as
debris, from the analysis. Particles above the threshold are analyzed, and particles below the
threshold are excluded.
2-2
PN 624026AE
OPERATION PRINCIPLES
ACV TECHNOLOGY
2.3
ACV TECHNOLOGY
Overview
In the DIFF bath, 25 µL of whole blood is mixed with 1,000 µL of AC•T 5diff Fix reagent for
12 seconds, then stabilized with 1,000 µL of AC•T 5diff Diluent for an additional 3 seconds.
This reaction lyses the red blood cells, preserves the leukocytes at their original size, and
differentially stains the lymphocytes, monocytes, neutrophils, and eosinophils, with
eosinophils staining most intensely. The instrument maintains the reagents and reaction at a
regulated temperature of 35°C (95°F).
The lymphocytes, monocytes, neutrophils, and eosinophils each have a unique nuclear and
morphologic structure and staining intensity; therefore, each absorbs light differently. Each
stained cell is individually focused by the Dual Focused Flow (DFF) system and transported
through the flow cell using sample pressure and diluent sheath flow.
Dual Focused Flow (DFF)
DFF (Figure 2.2) fluid dynamics uses a hydrodynamic focusing process to focus individual
cells or particles in a stream of diluent. The focused sample stream of the AC•T 5diff AL
analyzer is about 40 µm in diameter.
Figure 2.2 Dual Focused Flow Process
DFF uses the sheath fluid to surround and force cells suspended in diluent to pass one at a
time through the center of the flow cell. The first sheath flow focuses the sample through the
impedance aperture. The second sheath flow maintains the focused flow of cells as they exit
the aperture into the optical flow cell.
Hydrodynamic focusing in the flow cell enables accurate and rapid cell-by-cell measurements
on a large number of individual cells.
Flow Cell
Sequential analyses for cell volume (impedance) and light absorbance are performed in the
flow cell. A total of 72 µL of sample is injected through the flow cell for 15 seconds. The flow
cell incorporates a 60 µm aperture for cellular volume analysis and a 42 µm measurement
area for light absorbance.
PN 624026AE
2-3
2
OPERATION PRINCIPLES
ACV TECHNOLOGY
Focused Flow Impedance
Focused flow impedance technology measures the electrical resistance of a cell as it passes
through the aperture in the flow cell. The change in resistance is directly proportional to the
volume of the cell.
Absorbance Cytochemistry
As a cell passes through the optical portion of the flow cell, light is scattered in all directions.
A sensor detects only forward scattered light. The optical measurement is derived as a
function of the amount of light lost due to diffraction and absorbance, as compared to full
transmission when no cell is present.
The collected signals are converted into voltage pulses and are processed. The magnitude of
the voltage pulses are proportional to the physical and chemical characteristics of the cells
being analyzed. Light absorbance is related to cellular contents (granularity, nuclear content,
and so forth) after cytochemical staining. These measurements provide the information for
lymphocytes, monocytes, neutrophils, eosinophils, and their precursors.
Signal Processing
Overview
The signals from the flow cell aperture and from the optical measurement are correlated by a
window of time. The optical pulse must be detected within 100 to 300 microseconds of the
impedance pulse, otherwise, the signal is rejected.
The output signals from the focused flow impedance and the light absorbance measurements
are combined to define the WBC differential population clusters. See Figure 2.3.
Figure 2.3 Signal Processing
Thresholds
Most of the population partition thresholds are fixed and give the limits of the morphological
normality of leukocytes. Changes in the morphology of a population are expressed on the
DiffPlot by a shifting of the corresponding population. Volume and absorbance thresholds are
used to detect shifting populations.
2-4
PN 624026AE
OPERATION PRINCIPLES
WBC/BASO METHODOLOGY
2.4
WBC/BASO METHODOLOGY
In the WBC/BASO bath, 10 µL of whole blood is mixed with 2,000 µL of AC•T 5diff WBC
Lyse reagent. This reaction lyses the red blood cells and specifically differentiates between the
basophils and other leukocytes by volume. The instrument maintains the reagents and
reaction at a regulated temperature of 35°C (95°F).
Using a constant vacuum, the instrument then pulls the sample through an 80 µm aperture.
As each cell passes through the aperture, a pulse is generated proportional to the cellular
volume. The total leukocyte count and basophil percentage are determined by specific
thresholds on the WBC/BASO histogram (Figure 2.4.).
Figure 2.4 BASO Thresholds
2.5
SAMPLE ANALYSIS OVERVIEW
Aspiration
When the sampling probe is immersed in a whole-blood sample, the sample is pulled from
the tube into the sampling probe. Depending on the selected panel of operation, the
AC•T 5diff AL analyzer aspirates either 30 µL (CBC panel) or 53 µL (CBC/DIFF panel) of
sample.
The volume of sample aspirated into the sampling probe is sufficient to make all the dilutions
needed to develop parameter results in the selected panel of operation. The aspirated sample
is then partitioned as it is distributed into the designated baths.
Figure 2.5 shows the sample partitioning that occurs in the CBC/DIFF panel. Notice there are
three aliquots of the aspirated whole-blood sample that will be used to make dilutions.
Figure 2.6 shows the sample partitioning that occurs in the CBC panel. Notice there are only
two aliquots of the aspirated whole-blood sample that will be used to make dilutions in this
panel of operation. (The DIFF aliquot is not needed in the CBC panel.)
To ensure sample integrity, the sample aliquot at the tip of the probe is never used to make a
dilution; it is discarded into the Rinse bath.
PN 624026AE
2-5
2
OPERATION PRINCIPLES
SAMPLE ANALYSIS OVERVIEW
Figure 2.5 Sample Partitions Inside the Probe CBC/DIFF Panel
Figure 2.6 Sample Partitions Inside the Probe CBC Panel
Diluent
Air bubble
Diluent
Not used
Air bubble
DIFF dilution
Not used
WBC/BASO dilution
WBC/BASO dilution
RBC/PLT/HGB first dilution
RBC/PLT/HGB first dilution
Not used
Not used
7616001A
7616001A
7616056A
7616056A
Dilution
Using the Sequential Dilution System (SDS) technique, the instrument makes a series of
dilutions in a series of baths (Figure 2.7).
Figure 2.7 Bath Assembly
d
c
b
2-6
e
f
b
Rinse bath
c
First Dilution/Hgb bath
d
DIFF bath
e
RBC bath
f
WBC/BASO bath
PN 624026AE
OPERATION PRINCIPLES
SAMPLE ANALYSIS OVERVIEW
CBC Panel
After aspiration in the CBC panel, aliquots of the whole-blood sample are distributed as
follows (Figure 2.6):
r
The 3 µL sample aliquot at the tip of the probe is discarded into the Rinse bath as the
exterior of the sampling probe is rinsed, ensuring sample integrity.
r
10 µL of sample is delivered to the First Dilution/Hgb bath for use in preparing the
primary RBC/Plt dilution and for measuring the Hgb value.
r
10 µL of sample is delivered to the WBC/BASO bath for the WBC/BASO count.
r
7 µL of remaining sample is discarded into the Rinse bath.
CBC/DIFF Panel
After aspiration in the CBC/DIFF panel, aliquots of the whole-blood sample are distributed as
follows (Figure 2.5):
r
The 3 µL sample aliquot at the tip of the probe is discarded into the Rinse bath as the
exterior of the sampling probe is rinsed, ensuring sample integrity.
r
10 µL of sample is delivered to the First Dilution/Hgb bath for use in preparing the
primary RBC/Plt dilution and for measuring the Hgb value.
r
10 µL of sample is delivered to the WBC/BASO bath for the WBC/BASO count.
r
25 µL of sample is delivered to the DIFF bath for development of the DiffPlot.
r
5 µL of remaining sample is discarded into the Rinse bath.
Delivery
In the CBC and the CBC/DIFF panels, each aliquotted sample is delivered to its appropriate
bath using a tangential flow (Figure 2.8) of reagent. Tangential flow mixes the diluted sample
and minimizes viscosity problems.
Figure 2.8 Sample Delivery Using Tangential Flow
Probe
Reagent
input
Tangential flow
Bath
PN 624026AE
7616002A
2-7
2
OPERATION PRINCIPLES
SAMPLE ANALYSIS
2.6
SAMPLE ANALYSIS
RBC and Platelet Analysis
The RBC/Plt dilution analyzes red blood cells and platelets. This dilution is prepared in two
stages – the primary (first) dilution and the secondary (last) dilution.
The primary dilution is made in the First Dilution/Hgb bath, and the secondary dilution is
made in the RBC bath (Figure 2.9). Table 2.2 summarizes the technical characteristics
required to obtain RBC and Platelet results.
Figure 2.9 Bath Assembly
d
e
f
c
b
b
Rinse bath
c
First Dilution/Hgb bath
d
DIFF bath
e
RBC bath
f
WBC/BASO bath
Table 2.2 Technical Characteristics for Obtaining RBC and Platelet Counts
Dilution Characteristics
Primary Dilution for RBC and Plt:
Initial volume of whole-blood
10 µL
Volume AC•T 5diff diluent
1,700 µL
Primary dilution ratio
1:170
Secondary Dilution for RBC and Plt:
Volume of primary dilution
42.5 µL
Volume AC•T 5diff diluent
2500 µL
Secondary dilution ratio
1:58.8
Final dilution for RBC and Plt results
1:170 x 1:58.8 = 1:10,000
Reaction temperature
35°C (95°F)
Measurement Characteristics
2-8
Method of analysis
Coulter Principle
Aperture diameter
50 µm
Count vacuum
200mb (5.9 in. Hg)
Count period
2x5 seconds
PN 624026AE
OPERATION PRINCIPLES
SAMPLE ANALYSIS
Parameter Results Obtained from the RBC/Plt Dilution
This final 1:10,000 RBC/Plt dilution is used to:
r
Determine the RBC count,
r
Develop the RBC histogram, which is needed to obtain the Hct, MCV, and RDW results,
r
Determine Plt count,
r
Develop the Plt histogram, which is needed to obtain MPV, Pct, and PDW results.
Hgb Measurement
Hemoglobin is determined from the dilution in the First Dilution/Hgb bath (Figure 2.9). This
dilution is prepared in two stages – the primary (first) dilution and the secondary (last)
dilution.
The primary dilution is made and 42.5 µL of that dilution is removed for making the RBC/Plt
dilution. AC•T 5diff Hgb Lyse and additional Diluent are added to make the final 1:250
dilution.
The Hgb concentration is based on the transmittance of light through the optical part of the
First Dilution/Hgb bath using a spectrophotometric technique at a wavelength of 550nm. The
transmittance of the sample dilution is compared to the transmittance of a reagent blank. The
system calculates the Hgb using the blank and sample readings.
Table 2.3 summarizes the technical characteristics required for measuring hemoglobin.
Table 2.3 Technical Characteristics for the Measurement of the Hemoglobin
Dilution Characteristics
Volume of whole-blood
Volume
AC•T
5diff Diluent
10 µL
1700 µL
Preliminary dilution ratio
1:170
Volume of the 1:170 dilution removed
(for making the RBC/Plt dilution)
42.5 µL
Volume of AC•T 5diff Hgb Lyse
400 µL
Additional volume of AC•T 5diff Diluent
400 µL
Final dilution for Hgb determination
1:250
Reaction temperature
35°C (95°F)
Measurement Characteristics
PN 624026AE
Method of analysis
Spectrophotometry
Wavelength
550nm
2-9
2
OPERATION PRINCIPLES
SAMPLE ANALYSIS
WBC Count and Differential
The WBC count is determined twice using two different methodologies:
r
The reference WBC count is the count obtained in the WBC/BASO bath (Figure 2.10).
The WBC count and the BASO count are determined simultaneously.
r
A second WBC count is determined in the flow cell during acquisition of the DiffPlot.
The dilution analyzed in the flow cell is prepared in the DIFF bath (Figure 2.10).
The WBC counts from the two methodologies are compared, and, if they exceed the defined
limits, will be flagged.
Figure 2.10 Bath Assembly
d
e
f
c
b
b
Rinse bath
c
First Dilution/Hgb bath
d
DIFF bath
e
RBC bath
f
WBC/BASO bath
Table 2.4 summarizes the technical characteristics required to obtain WBC and BASO results.
Table 2.4 Characteristics Required to Obtain WBC/BASO Results
Dilution Characteristics
Volume of whole-blood
10 µL
Volume AC•T 5diff WBC Lyse
2,000 µL
Dilution ratio
1:200
Reaction temperature
35°C (95°F)
Measurement Characteristics
2-10
Method of analysis
Coulter Principle
Aperture diameter
80 µm
Count vacuum
200 mb (5.9in. Hg)
Count period
2x6 seconds
PN 624026AE
OPERATION PRINCIPLES
SAMPLE ANALYSIS
Parameter Results Obtained from the WBC/BASO Dilution
The final 1:200 dilution is used to:
r
Determine the WBC count, and
r
Develop the WBC/BASO histogram, which is needed to obtain the BASO count.
Differential
Twenty-five microliters (25 µL) of whole blood are delivered to the DIFF bath in a flow of
AC•T 5diff Fix reagent, which:
r
lyses the red blood cells,
r
stabilizes the WBC in their native forms, and
r
stains the lymphocytes, monocytes, neutrophils, and eosinophils differentially, with
eosinophils staining most intensely.
The solution is then stabilized with Diluent for three seconds and transferred to the
measuring bath. See Figure 2.11. Each cell is measured in absorbance (cytochemistry) and
resistivity (volume).
2) Second focused flow for optical detection
Figure 2.11 Flow Cell Operation
PN 624026AE
1) Primary focused flow for impedance
2-11
2
OPERATION PRINCIPLES
SAMPLE ANALYSIS
Table 2.5 summarizes the technical characteristics required for acquisition of the DiffPlot.
Table 2.5 Technical Characteristics for Acquisition of the DiffPlot
Dilution Characteristics
Volume of whole-blood
25 µL
Volume AC•T 5diff Fix
1,000 µL
Volume AC•T 5diff Diluent
1,000 µL
Final dilution ratio
1:80
Reaction temperature
35°C (95°F)
Incubation duration
12 seconds
Measurement Characteristics
Method of analysis
Impedance with hydrofocus
Aperture diameter
60 µm
Diameter of the flow
42 µm
Injection duration
15 seconds
Data accumulated
12 seconds
Volume injected
72 µL
Parameter Results Obtained from the DIFF Dilution
From the measurements described above, a DiffPlot is developed with optical transmission
(absorbance) on the X-axis and volume on the Y-axis. Figure 2.12 shows the DiffPlot regions.
From the DiffPlot, four out of five leukocyte (white blood cell) populations are determined:
lymphocytes, monocytes, neutrophils, and eosinophils. In a typical whole-blood sample, the
basophil population (determined in the WBC/BASO bath) is very small compared to the other
four white blood cell populations. Figure 2.13 shows a normal DiffPlot generated by the
system.
Figure 2.12 DiffPlot Regions
2-12
Figure 2.13 Normal DiffPlot
PN 624026AE
OPERATION PRINCIPLES
SAMPLE ANALYSIS
Dilution Summary
Table 2.6 summarizes the dilution characteristics required to obtain CBC and CBC/DIFF
parameter results.
Table 2.6 Summary of Dilutions
Technical
Characteristics
Whole-Blood
Volume
Reagent(s)
WBC Count and BASO
Count
(in the WBC/BASO
bath)
10 µL
AC•T 5diff WBC Lyse 2,000 µL
Differential Acquisition
with Differential WBC
Count
(in the DIFF bath)
25 µL
Hgb Measurement
(in the First
Dilution/Hgb bath)
10 µL
RBC and Plt Count
(in the RBC bath)
Note: The primary
dilution (1:170) is made
in the First Dilution/Hgb
bath.
PN 624026AE
Reagent
Volume
Dilution
Ratio
Reaction
Temperature
Final
35°C (95°F)
1:200
AC•T 5diff Fix
1,000 µL
Final
AC•T 5diff Diluent
1,000 µL
1:80
AC•T 5diff Diluent
1700 µL
Preliminary
1:170
After removing
42.5 µL of the 1:170
dilution:
AC•T 5diff Diluent
400 µL
AC•T
400 µL
5diff Hgb Lyse
42.5 µL of the AC•T 5diff Diluent
1:170 dilution
(from the
First
Dilution/Hgb
bath)
2,500 µL
35°C (95°F)
35°C (95°F)
Final
1:250
Secondary
1:58.8
35°C (95°F)
1:170 x
1:58.8 =
Final
1:10,000
2-13
2
OPERATION PRINCIPLES
PARAMETER DEVELOPMENT
2.7
PARAMETER DEVELOPMENT
RBC Parameters
Hct Measurement
Hct measurement: Hct (hematocrit) is the sum of all the digitized pulses. Hct is displayed and
printed as % (percentage). (Note: % is the US unit format. Other formats are available. See
Units (Selecting the Reporting Unit) in Appendix A.
The height of the pulse generated by the passage of a cell through the aperture is directly
proportional to the volume of the analyzed red blood cell.
RBC Count
The instrument uses duplicate counting criteria, voting criteria, and proprietary flagging
information to confirm the parameter result prior to reporting it. To obtain an RBC count
result, the instrument compares the data from the two 5-second count periods then votes and
rejects any questionable data.
RBC count = Number of cells counted per unit volume x Calibration factor.
The RBC count is displayed and printed as: RBC = N x 106 cells/µL.
(Note: cells/µL is the US unit format. Other formats are available. See Units (Selecting the
Reporting Unit)in Appendix A.
RBC Histogram
In addition to being counted, red blood cells (RBCs) are categorized according to size (from
30 fL to 300 fL) by a 256-channel pulse-height analyzer. The pulse-height analyzer uses a
number of thresholds to sort the particles into several size (volume) categories and to develop
a size distribution curve of the particles.
The RBC distribution curve shows cells in their native size. Figure 2.14 is an example of an
RBC histogram with a normal RBC size distribution.
Figure 2.14 Typical RBC Histogram
30
300
7616036A
2-14
PN 624026AE
OPERATION PRINCIPLES
PARAMETER DEVELOPMENT
Parameter Results Obtained Using the RBC Histogram
r MCV calculation: MCV (Mean Cell Volume) is calculated using the Hct and the RBC
count. The MCV is displayed and printed in femtoliters (fL). (Note: fL is the US unit
format. Other formats are available. See Units (Selecting the Reporting Unit) in
Appendix A.
r
RDW calculation: RDW (Red cell Distribution Width) is an index of the variation or
spread in the size of the red blood cells. The study of the RBC distribution detects
erythrocyte anomalies linked to anisocytosis and enables the clinician to follow the
evolution of the width of the curve relative to the cell number and average volume.
Displayed and printed as a percentage, RDW is calculated using the standard deviation
(SD) of the RBC population and the MCV.
K SD
RDW(%) = -------------MCV
where:
K = System constant
SD = Calculated standard deviation based on the red cell distribution
MCV = Mean Cell Volume of the red cells
MCH and MCHC Calculations
r MCH calculation: MCH (Mean Cell Hemoglobin) is calculated from the Hgb value and
the RBC count and describes the average weight of hemoglobin in a red cell. The
calculation for MCH is:
Hgb
MCH (pg) = ------------ × 10
RBC
(Note: pg is the US unit format. Other formats are available. See Units (Selecting the
Reporting Unit) in Appendix A.
r
MCHC calculation: MCHC (Mean Cell Hemoglobin Concentration) is calculated using
the Hgb and Hct values and describes the average concentration of hemoglobin in the
red blood cells. The calculation for MCHC is:
Hgb
MCHC (g/dL) = ---------- × 100
Hct
(Note: g/dL is the US unit format. Other formats are available. See Units (Selecting the
Reporting Unit) in Appendix A.
PN 624026AE
2-15
2
OPERATION PRINCIPLES
PARAMETER DEVELOPMENT
Plt Parameters
Overview
Platelet counting and sizing are also done in the RBC bath. Thresholds separate the platelet
pulses, which are much smaller, from the red blood cell pulses. Platelets are also categorized
according to size by a 256-channel pulse-height analyzer. A pulse-height analyzer uses a
number of thresholds to sort the particles into several size (volume) categories and to develop
a size distribution curve of the particles.
The Plt distribution curve shows cells in their native size. Figure 2.15 is an example of a Plt
histogram with a normal Plt size distribution.
Figure 2.15 Typical Plt Histogram
Interference on the Lower End of the Platelet Distribution Curve
Particles that are approximately platelet size can interfere with the platelet histogram and
count. Small particles, such as micro-bubbles, can interfere at the low end. If the number of
pulses in the 2 to 3 fL region is higher than the predefined limits, an SCL flag appears to alert
the operator that a significant number of small cells or interference, such as micro-bubbles,
are present. Interference that blends in with the lower area of the platelet distribution curve
so there is no clear distinction between ten platelets and the interference suggests the
presence of very small cells, debris, bubbles, or electronic noise. The SCL (small cell) flag
appears, indicating the present of particles in the 2 fL and 3 fL regions.
Microcytic Interferences on the Upper End of the Platelet Distribution Curve
Microcytic red blood cells can intrude at the upper end of the platelet distribution curve. If
the sample contains microcytes, the instrument may be able to successfully eliminate the
influence of this interference by repositioning the variable threshold and excluding the
microcytes.
Parameter Results Obtained Using the Plt Histogram
r Plt Count: The instrument uses duplicate counting criteria, voting criteria, and
proprietary flagging information to confirm the parameter result prior to reporting it. To
obtain a Plt (platelet) count result, the instrument compares the data from the two
5-second count periods then votes and rejects any questionable data.
2-16
PN 624026AE
OPERATION PRINCIPLES
PARAMETER DEVELOPMENT
Plt count = Number of cells counted per unit volume x Calibration factor.
Plt count is displayed and printed as Plt = Nx103 cells/µL.
(Note: cells/µL is the US unit format. Other formats are available. See Units (Selecting
the Reporting Unit) in Appendix A.
r
MPV Measurement: MPV (Mean Platelet Volume) is measured directly from analysis of
the platelet distribution curve. MPV is displayed and printed in femtoliters (fL).
r
Pct Calculation: Pct (plateletcrit) is calculated according to the formula:
3
Plt ( 10 /µL ) × MPV (fL)
Pct% = --------------------------------------------------------------10, 000
r
PDW Calculation: PDW (Platelet Distribution Width) is calculated from the Plt
histogram as the width of the curve between S1 and S2.
As shown in Figure 2.16, S1 and S2 are placed so that:
t
15% of the platelets occur between 2fL and S1.
t
15% of the platelets occur between S2 and the variable upper threshold.
t
The PDW result is determined on the platelets between S1 and S2.
Figure 2.16 Area of the Plt Histogram Used to Determine the PDW Parameter Result
15%
15%
PDW
S1
S2
7615002A
Hgb Determination
The hemoglobin (Hgb) released by the lysis of the red blood cells combines with the
potassium cyanide to form a stable cyanmethemoglobin compound.
This compound is measured through the optical part of the First Dilution/Hgb bath using a
spectrophotometric technique at a wavelength of 550nm. Transmittance of the sample
dilution is compared with the transmittance of a reagent blank. The system calculates the Hgb
using both the blank and sample readings.
The final Hgb result represents: absorbance value obtained x factor of calibration.
Hgb is displayed and printed as Hgb = N g/dL.
(Note: g/dL is the US unit format. Other formats are available. See Units (Selecting the
Reporting Unit) in Appendix A.
PN 624026AE
2-17
2
OPERATION PRINCIPLES
PARAMETER DEVELOPMENT
WBC Count, BASO Count, and DiffPlot Development
WBC Count
The instrument uses duplicate counting criteria, voting criteria, and proprietary flagging
information to confirm the parameter result prior to reporting it. To obtain an WBC (white
blood cell) count result, the instrument compares the data from the two 5-second count
periods then votes and rejects any questionable data. This is the reference WBC count, which
is reported.
A second WBC count is determined in the flow cell during acquisition of the DiffPlot.
WBC count: Number of cells per volume x calibration factor.
BASO Count
Differentiation between basophils and other leukocytes is obtained by means of the
AC•T 5diff WBC Lyse-specific lytic action.
In Figure 2.17, basophils are located in the area between the thresholds labeled c and d. One
hundred percent (100%) of the leukocytes is represented by the total number of nucleated
particles plus the basophils within the area between the thresholds labeled b and d.
The basophil percentage is calculated from the number of particles existing in the area
between the thresholds labeled c and d (Figure 2.17).
Figure 2.17 Areas Used to Determine WBC and BASO Parameter Results
b
c
WBC
d
basophils
BASO count: Number of cells per volume x factor of calibration in percentage relative to the
number of counted cells (BASO plus WBC nuclei).
BASO%
BASO count = ---------------------- × WBC count
WBC%
2-18
PN 624026AE
OPERATION PRINCIPLES
PARAMETER DEVELOPMENT
DiffPlot Development
The instrument’s DiffPlot analysis is based on three essential principles:
1.
Dual Focused Flow (DFF) fluid dynamics, which is a process by which individual cells
or particles are focused in a stream of diluent (hydrodynamic focusing). For additional
information, see Dual Focused Flow (DFF) in this chapter.
2.
The volume measurement (Coulter Principle). For additional information, see Coulter
Principle in this chapter.
3.
The measurement of transmitted light with zero degree (0°) angle, which permits a
response proportional to the internal structure of each cell and its absorbance. For
additional information, see Absorbance Cytochemistry in this chapter.
From these measurements, a DiffPlot is developed with optical transmission (absorbance) on
the X-axis and volume on the Y-axis. See Figure 2.18.
Figure 2.18 DiffPlot Regions
The study of the DiffPlot permits the clear differentiation of four out of five leukocyte
populations. In a typical whole-blood sample, the basophil population is very small when
compared with the other four white cell populations.
For additional DiffPlot information, see the following tables:
PN 624026AE
r
Table 2.7 defines the DiffPlot regions.
r
Table 2.8 defines immature white blood cells.
2-19
2
OPERATION PRINCIPLES
PARAMETER DEVELOPMENT
Table 2.7 DiffPlot Regions Defined
Region
Definition
Neutrophil
(Neut)
Neutrophils, with their cytoplasmic granules and segmented nuclei, scatter light
according to their morphological complexity. A hypersegmented neutrophil
gives an increased optical response when compared to a young neutrophil
population. The higher the complexity of the cell, the further to the right they
appear in the DiffPlot (Figure 2.18).
Lymphocyte
(Lymph)
Lymphocytes, typically being small with regular shape, are
r smaller in volume and lower in absorbance than the other cells, and
r positioned in the lower region of the DiffPlot (Figure 2.18).
Normal lymphocyte populations typically have a homogeneous volume with a
Gaussian (bell-shaped) distribution.
Large lymphocytes, reactive lymphoid forms, stimulated lymphocytes, and
plasma cells are found in the upper portion of the lymphocyte region
(Figure 2.18).
The lower area of the lymphocyte zone is normally empty; however, when small
lymphocytes are present, a population may exist in this area (Figure 2.18).
The presence of platelet aggregates is indicated by a distribution pattern that
moves from the DiffPlot origin into the lymphocyte region (Figure 2.18).
NRBC cytoplasmic membranes lyse like those of mature erythrocytes. The
small nuclei that remain appear in the debris and small lymphocyte regions
(Figure 2.18).
Monocyte
(Mono)
Monocytes are typically large cells with a kidney-shaped nucleus and agranular
cytoplasm. These cells neither scatter nor absorb large amounts of light;
therefore, they are positioned in the lower end of the absorbance axis. Due to
their size, the monocytes are clearly positioned high on the volume axis
(Figure 2.18).
Very large monocytes may be found in the IMM (immature cell) region.
2-20
Eosinophil
(Eos)
With the reagent action, eosinophils are the most intensely stained for optical
separation. Due to the staining intensity and their size, eosinophils show higher
absorbance than the neutrophils, but they will be of similar volume
(Figure 2.18).
Debris
Platelets and debris from erythrocyte lysis represent the background debris
population located in the lower region of the DiffPlot.
PN 624026AE
OPERATION PRINCIPLES
PARAMETER DEVELOPMENT
Table 2.8 Immature White Blood Cells
Immature Cell Type
Definition
Immature Granulocytes
Immature granulocytes are detected by their larger volume and by the presence
of granules that increase the intensity of the scattered light.
Due to their increased volume and similar absorbance, promyelocytes,
myelocytes, and metamyelocytes are located above the neutrophil population
and are typically counted as IMM cells. IMM cells are included in the reported
neutrophil value. See Figure 2.18.
Band Cells
Band cells are typically larger or of similar size to the neutrophils; however, due
to their low level of cellular complexity, they absorb less light. As a result, band
cells tend to appear in the region between the neutrophils and the monocytes.
Blast Cells
Blast cells are generally larger than monocytes and have similar absorbance.
When blast cells are present, they are generally located above the monocytes,
which means they will be included in the IMM cell count.
Small blasts will be located between the normal lymphocyte and monocyte
populations.
PN 624026AE
2-21
2
OPERATION PRINCIPLES
WORKFLOW AND WORKLISTS
2.8
WORKFLOW AND WORKLISTS
Overview
Workflow is the sequence of tasks required to analyze samples and generate patient reports.
Simply stated, it is how work flows through your laboratory.
Using the Worklist feature of this instrument, you can optimize your lab’s workflow for
efficiency based on any combination of workflow scenarios. See Appendix Heading E.1,
USING WORKLISTS.
The following sections describe the workflow based on instrument operation using the
Worklist, which is optional and not required for sample analysis.
To operate without the Worklist, define what the primary sample identification mode is going
to be, either Barcode or Cass./Position. Then set the Manual Match option to OFF. These
conditions are set on the General settings screen. See Worklist Match and Manual Match
Options and Manual Match (Turning ON or Off) in Appendix A.
Under these conditions, when a sample is processed, there will be no Worklist interaction and
the results will be placed on the Results list and be reported according the instrument
configuration.
Figure 2.19 shows the sample analysis workflow for this instrument.
Figure 2.19 Sample Analysis Workflow: With the Worklist
As illustrated in Figure 2.19:
1.
2.
3.
4.
5.
6.
7.
2-22
An order is placed onto the Worklist (by manual entry or by Host download).
The order appears on the Worklist.
The sample is analyzed for that order in the Autoloader mode or the Manual (Stat) mode.
The sample results are generated.
The order is removed from the Worklist (if the results are matched to a Sample ID).
The results are archived at the start of a New Workday.
You can search archived results by Patient ID or run date.
PN 624026AE
OPERATION PRINCIPLES
WORKFLOW AND WORKLISTS
Order
An order is a request for analysis entered into the instrument for a specific sample. Each order
is by a unique Sample ID. Order information consists of three categories:
r
r
r
Patient information
Sample information
Laboratory information
Orders can be entered manually or received from the Host. The minimum requirements for
sample analysis include:
r
r
r
Sample ID (entered manually, downloaded from the Host, or scanned by barcode wand)
Flagging Set (selected from list of existing flagging sets)
Panel (CBC or CBC/DIFF)
If a Sample ID is not entered or received, an AUTO_SID will be assigned to the order and the
flagging set and test panels will be assigned according to the default settings.
It is recommended that you enter as much information for a sample as possible. More
information makes it easier to match a result with a Sample ID.
Worklist
A Worklist is a list of pending orders to be analyzed for the workday.
Once a Worklist order is analyzed:
r
the order is removed from the Worklist;
r
the results are associated with (matched to) the order;
r
the report is printed (if Auto-Print is On);
r
the results are transmitted to the Host (if Auto-Transmission is ON); and
r
the results are archived in the database and can be searched by Patient ID or last name.
Note: If the system is configured to Manual Match ON and a sample analysis is done without
a Worklist order, or if the Worklist Match Option is Barcode and the tube does not have a
barcode label, the results are unmatched. This means that you will need to associate (match)
the results with a Sample ID. See Heading 9.3, MANUALLY MATCHING SAMPLE RESULTS
WITH WORKLIST ORDERS.
If you want to add demographic information for a patient, you must do so before the sample
is analyzed. The information you enter is printed on the final report and transmitted to the
Host computer, if available. Note: You cannot modify demographics received from a Host
computer.
For Worklist setup information, see Heading E.1, USING WORKLISTS. For details on various
Worklist scenarios, see Appendix Heading E.2, WORKLIST MATCH OPTION SCENARIOS.
PN 624026AE
2-23
2
OPERATION PRINCIPLES
CASSETTE TRANSFER CYCLE
2.9
CASSETTE TRANSFER CYCLE
For a better understanding of what happens when a sample is analyzed in the Autoloader
mode, read the following explanation.
Note: For ease of understanding, this explanation details the process for only one sample tube
in the cassette; the process is slightly different for 2 or more tubes.
1.
When
is selected, the cassette transfer cycle begins.
2.
The input mechanism pushes the cassette onto the transfer rail.
3.
The cassette input stop switches are activated, signaling that a cassette is present and
ready to be processed.
4.
The transfer mechanism pulls the cassette into the instrument.
5.
The cassette passes the tube position sensor.
6.
The cassette stops in a specific position where the left grabber of the mixer mechanism
picks up the tube.
7.
The mixer rotates the tube while the cassette is advanced to allow the cassette barcode to
be read.
8.
After the cassette barcode is read, the cassette returns to the position where the left
grabber will place the tube back into the original cassette position.
9.
After rotating the tube 12 times and mixing for 30 seconds, the mixer arm returns the
tube to its original cassette position.
10. The cassette advances past the right grabber to the barcode reader/pierce position, where
the barcode reader reads the tube’s barcode for the first time.
11. The cassette moves back to the right grabber, which picks up the tube.
12. After rotating the tube 12 times, the mixer arm returns the tube to its original cassette
position.
13. The cassette advances to the barcode reader/pierce position, where the barcode reader
reads the tube’s barcode a second time.
14. The piercing mechanism pierces the tube and sample analysis begins.
15. After about 1 minutes, the Analyzer sends the sample results to the database.
16. The cassette advances to the end of the transfer rail and activates the stop transfer
switch.
17. The ejection mechanism pushes the cassette onto the Cassette Output Tray.
18. The input mechanism is activated and attempts to push another cassette onto the
transfer rail, as noted in step 2 above.
19. If no other cassette is present, the system returns to “Ready”.
2-24
PN 624026AE
3SPECIFICATIONS/CHARACTERISTICS 3
3.1
INSTRUMENT SPECIFICATIONS
Dimensions and Weight
See Figure 3.1.
Figure 3.1 Analyzer Dimensions and Weight
55.0 kg
(121.3 lb.)
54.21 cm
(21.5 in.)
WARNING Risk of operator injury if
only one person lifts the instrument.
The instrument has lifting handles and
weighs more than one person should
lift. Therefore, to prevent injury, at least
two people – following appropriate
safety precautions and using the lifting
handles – should lift the instrument
together.
For details on using the lifting handles,
see Heading 11.13, INSTALLING THE
LIFTING HANDLES INTO THE ANALYZER.
81.45 cm
(32.3 in.)
57.73 cm
(22.5 in.)
For the dimensions and weight of the Workstation, refer to the PC, printer, and monitor
documentation from the respective manufacturers.
Power
Supply
r From 100 Vac to 240 Vac (excluding the printer, which is voltage specific, e.g. 100 to 120
Vac or 220 to 240 Vac).
From 50 Hz to 60 Hz.
r
Consumption
Maximum of 800 VA (for the Analyzer, Workstation, and printer).
Installation Category
The instrument is designed to be safe for transient voltages according to Installation
Category II and Pollution Degree 2.
Grounding Requirements
To protect against electrical shock, the wall ground (earth) plug must be correctly connected
to the laboratory grounding electricity installation.
PN 624026AE
3-1
SPECIFICATIONS/CHARACTERISTICS
INSTRUMENT SPECIFICATIONS
Ambient Temperature and Humidity
Operate the system in a room with an ambient temperature between 16° and 34°C
(61°F to 93°F), and humidity no higher than 85% without condensation.
Note: If the instrument is kept at a temperature of less than 10°C (50°F), allow the
instrument to remain idle for one hour at the correct room temperature before use.
Storing Specimens
Analyze specimens as soon as possible for optimum accuracy.
Note: For more information on handling and processing blood specimens, refer to NCCLS
publication H18-A.6
Altitude Range
The instrument can be operated at any altitude up to 3,000 meters (9,800 feet).
Recommended Location
Place the instrument indoors on a clean, level bench or table top. Allow at least 20cm (8 in.)
of space behind the instrument and the Workstation for ventilation. Do not expose the
instrument or the Workstation to sunlight.
Electromagnetic Environment Check
The instrument is designed to produce less than the acceptable level of electromagnetic
interference when properly placed. Electromagnetic interferences are limited to levels that
allow the correct operation of other instruments conforming to their placement.
If there is a problem, ensure that the instrument is not placed near electromagnetic fields or
short wave emissions (such as radar, X-ray machines, scanners, and so forth).
Recommended Reagents
Beckman Coulter recommends these reagents:
r
r
r
r
r
AC•T 5diff Diluent,
AC•T 5diff Fix,
AC•T 5diff WBC Lyse,
AC•T 5diff Hgb Lyse, and
AC•T 5diff Rinse.
See Heading 1.8, REAGENTS for additional information about these reagents.
Recommended Controls
AC•T 5diff Control Plus is the recommended control. See Heading 1.7, QUALITY
ASSURANCE: CONTROLS, CALIBRATORS, AND IQAP for additional information.
Recommended Calibrator
AC•T 5diff Cal Calibrator is the recommended calibrator. See Heading 1.7, QUALITY
ASSURANCE: CONTROLS, CALIBRATORS, AND IQAP for additional information.
3-2
PN 624026AE
SPECIFICATIONS/CHARACTERISTICS
INSTRUMENT SPECIFICATIONS
Recommended Anticoagulant
The recommended anticoagulant is K3EDTA, with the proper proportion of blood to
anticoagulant as specified by the tube manufacturer. K2EDTA is an acceptable alternative.
Sample Volume Aspirated
r
30 µL of whole blood is aspirated in the CBC mode.
r
53 µL of whole blood is aspirated in the CBC/DIFF mode.
Slightly higher volumes may be used depending on such variables as tube fill volume, sample
viscosity and the amount of pressure/vacuum in the tube.
Dilution Ratios
WBC/BASO:
DIFF:
RBC/Plt:
Hgb:
1/200
1/80
1/10,000
1/250
Throughput
The instrument can process up to 80 samples per hour for CBC or CBC/DIFF.
The instrument achieves nominal throughput when used in a routine laboratory environment
with samples having normal hematology parameters. Depending on sample mix and
workflow conditions (e.g. running Stat samples), lower throughput may be observed.
Sample Stability
Sample stability is based on an average of at least 10 clinical normal and abnormal
whole-blood samples.
r
CBC parameters are stable up to 48 hours at room temperature.
r
DIFF parameters are stable up to 24 hours at room temperature.
Sample Identification
You can manually enter a sample ID, setup the instrument to autonumber the IDs, or scan the
tube’s barcode label with the optional hand-held barcode reader.
Database Storage
The system can store up to 10,000 files.
Flagging Sets
The system can accommodate 20 flagging sets:
r
8 are predefined,
r
12 can be added (see Heading A.10, FLAGGING SETS SETUP).
Output
The instrument can transmit sample data to a Host computer. The Sample Results screen
shows the sample identification information, sample results, and any result flags.
PN 624026AE
3-3
3
SPECIFICATIONS/CHARACTERISTICS
INSTRUMENT SPECIFICATIONS
Measurements and Computation
r
Impedance is used to determine WBC, Plt, RBC, and BA.
r
Photometry using cyanmethemoglobin method with 550nm diode light source is used to
determine Hgb.
r
Impedance and light absorbance are used to determine NE, LY, MO, EO, ATL, and IMM.
r
Data that was directly measured is used to compute Hct, MCV, MCH, MCHC, RDW,
MPV, Pct, and PDW.
Counting Aperture Diameters
WBC/BASO: 80 µm
DIFF:
60 µm
RBC/Plt:
50 µm
Reagent Consumption
Table 3.1 shows the instrument’s reagent consumption by cycle.
Table 3.1 Reagent Consumption by Cycle
Reagents
Cycles
Diluent
WBC
Lyse
Rinse
Fix
Hgb Lyse
CBC
27.6 mL
2.1 mL
1.1 mL
NA
0.45 mL
45 seconds
CBC/DIFF
27.6 mL
2.0 mL
1.1 mL
1.0 mL
0.45 mL
45 seconds
Prime Diluent
47.6 mL
NA
NA
NA
NA
3 minutes
Prime Rinse
1.7 mL
NA
24.7 mL NA
NA
1 minute, 24 seconds
Prime Fix
1.6 mL
NA
NA
23.7 mL NA
1 minute, 34 seconds
Prime WBC Lyse
1.7 mL
23.7 mL
1 mL
NA
NA
1 minute, 25 seconds
Prime Hgb Lyse
2.7 mL
NA
NA
NA
8.4 mL
1 minute, 31 seconds
Prime All Reagents
47.6 mL
24.0 mL
25.0 mL 24.0 mL 8.4 mL
7 minutes, 13 seconds
Startup*
61.0 mL
5.1 mL
2.1 mL
2.0 mL
1.0 mL
3 minutes, 35 seconds
Shutdown
33.5 mL
1.0 mL
19.1 mL 1.0 mL
0.5 mL
4 minutes
Rinse Flow Cell
5.0 mL
NA
NA
NA
NA
1 minute, 30 seconds
Auto-Clean
28.2 mL
1.0 mL
1.0 mL
1.0 mL
0.5 mL
1 minute, 33 seconds
Mini-Clean
10.9 mL
2.0 mL
1.0 mL
1.0 mL
0.33 mL
38 seconds
Extended cleaning
39.1 mL
1.0 mL
1.0 mL
1.0 mL
0.5 mL
7 minutes,12 seconds
Backflush**
NA
NA
NA
NA
NA
35 seconds
Duration
* For one background count only.
** Cycle runs automatically after 5 hours 30 minutes of non-use.
Environmental Protection
Removal and recycling of this instrument must be done by a properly qualified laboratory in
accordance with local legislation.
3-4
PN 624026AE
SPECIFICATIONS/CHARACTERISTICS
PERFORMANCE SPECIFICATIONS
3.2
PERFORMANCE SPECIFICATIONS
Performance specifications indicate targeted performance based on established ranges and
parameters.
The stated performance specifications apply to an instrument that has been properly
maintained as indicated in Chapter 11, DIAGNOSTICS, and one that uses only the
recommended reagents listed in Recommended Reagents.
Reproducibility
Reproducibility (Table 3.2) is based on 20 consecutive replicate runs from one normal, fresh
whole-blood sample without flags.
Table 3.2 Reproducibility Specifications
Parameter
CV%
Test Level
WBC
<2.0%
10.0x10³/µL
RBC
<2.0%
5.00x10⁶/µL
Hgb
<1.0%
15.0 g/dL
Hct
<2.0%
45.0%
Plt
<5.0%
300.0x10³/µL
Linearity
Linearity is assessed using a commercially-available low-range and full-range linearity test kit.
When analyzed and results computed according to the manufacturer’s instructions, the
results will be within the limits in Table 3.3.
Table 3.3 Linearity Specifications
Parameter
Units
Linearity Range
Difference
(Whichever is Greater)
WBC
103/µL
0.4 to 120.0
±0.3 or ±7.0%
RBC
106/µL
0.3 to 8.0
±0.07 or ±5.0%
Plt
103/µL
10.0 – 1,000*
±10.0 or ±10.0%
100.0 – 1,900**
Hgb
g/dL
1.3 to 24.0
±0.3 or ±2.0%
Hct
%
2.0 – 67.0
±2.0 or ±3.0%
* whole blood
** An extended platelet linear range and reportable range can be applied if the Platelet Concentrate extended range mode is active and
the sample result for Hgb < 2.0 g/dL and Plt > 15.0 x 10³/µL. If these conditions are met, the Plt result is flagged using the extended
linear and reportable range limits. Additionally, the use of the extended linear and reportable ranges is indicated by a “C” flag next to
the Plt result, and the message “PLT Concentrate” appears in the Tree View Flags and Messages.
PN 624026AE
3-5
3
SPECIFICATIONS/CHARACTERISTICS
PERFORMANCE SPECIFICATIONS
Accuracy
Accuracy (Table 3.4) is assessed by duplicate analysis of morphologically normal,
non-flagged specimens when compared to an automated hematology analyzer that has been
properly calibrated and maintained according to the manufacturer’s recommendation.
Table 3.4 Accuracy Specifications
Parameter
Correlation r
WBC
>0.95
RBC
>0.95
Hgb
>0.95
Hct
>0.95
Plt
>0.95
Carryover
Carryover (Table 3.5) is assessed by analyzing whole blood with high values followed by a
whole blood sample with low values. Each sample is run consecutively in triplicate.
Carryover is calculated as follows:
Low 1 - Low 3
Carryover = -------------------------------------- × 100
High 3 - Low 3
Table 3.5 Carryover Specifications
3-6
Parameter
Carryover
WBC
<2.0%
RBC
<2.0%
Plt
<2.0%
Hgb
<2.0%
PN 624026AE
SPECIFICATIONS/CHARACTERISTICS
PERFORMANCE SPECIFICATIONS
Reportable Range
The reportable range (Table 3.6) is the range of results that the instrument displays, prints,
and transmits. Results between the linear range and the reportable range will be flagged.
Table 3.6 Reportable Range
Parameter
Units
Reportable Range
WBC
103/µL
0.0 – 150.0
RBC
106/µL
0.00 – 18.00
Plt
103/µL
0.0 – 1900.0*
0.0 – 2800.0**
Hct
%
0.0 – 80.0
Hgb
g/dL
0.0 – 30.0
* whole blood
** An extended platelet linear range and reportable range can be applied if the Platelet Concentrate extended range mode is active and
the sample result for Hgb < 2.0 g/dL and Plt > 15.0 x 10³/µL. If these conditions are met, the Plt result is flagged using the extended
linear and reportable range limits. Additionally, the use of the extended linear and reportable ranges is indicated by a “C” flag next to
the Plt result, and the message “PLT Concentrate” appears in the Tree View Flags and Messages.
PN 624026AE
3-7
3
SPECIFICATIONS/CHARACTERISTICS
PERFORMANCE CHARACTERISTICS
3.3
PERFORMANCE CHARACTERISTICS
Performance characteristics indicate actual performance.
The data presented was collected at an internal lab of Beckman Coulter.
Reproducibility
Reproducibility was measured to show precision for a normal WBC count. Table 3.7 shows
the precision values based on 20 replicate samples that were analyzed consecutively on the
same instrument from one normal, fresh, whole-blood sample with a normal WBC and
without flags.
Table 3.7 Reproducibility Characteristics From a Normal Sample with a Normal WBC Count
Parameter
Mean
Standard Deviation (SD) CV%
WBC
6.27
0.08
1.25
RBC
5.38
0.04
0.74
Hgb
15.84
0.055
0.35
Hct
45.72
0.275
0.6
Plt
313
7.78
2.48
Plt*
1,564
14.6
0.93
NE%
56.2
0.8
1.42
LY%
30.4
0.66
2.17
MO%
7.7
0.46
6.01
EO%
4.6
0.32
7.07
BA%
1.1
0.12
11.1
*Platelet Concentrate Mode
Accuracy
Accuracy (Table 3.8) for the CBC and DIFF parameters was defined as agreement between
the comparator instrument and the AC•T 5diff AL analyzer using clinical specimens covering
the expected range of performance.
Table 3.8 Accuracy Characteristics
3-8
Parameter
Correlation r
WBC
0.9995
RBC
0.9979
Hgb
0.9991
Hct
0.9977
Plt
0.9972
Plt*
0.9879
NE%
0.9917
LY%
0.9929
PN 624026AE
SPECIFICATIONS/CHARACTERISTICS
LIMITATIONS
Table 3.8 Accuracy Characteristics (Continued)
Parameter
Correlation r
MO%
0.9539
EO%
0.9841
*Platelet Concentrate Mode
Carryover
Carryover (Table 3.9) was assessed by analyzing whole blood with high values followed by a
whole-blood sample with low values. Each sample was run consecutively in triplicate.
Carryover is calculated as follows:
Low 1 - Low 3
Carryover = -------------------------------------- × 100
High 3 - Low 3
Table 3.9 Carryover Characteristics
Parameter
Units
Low Level
High Level
Carryover
WBC
103/µL
0.80
38.50
0.00
RBC
106/µL
1.67
6.48
0.35
Plt
103/µL
20.0
892.3
0.19
Plt*
103/µL
149.0
1,126
0.68
Hgb
g/dL
5.8
17.10
0.00
*Platelet Concentrate Mode
3.4
LIMITATIONS
Maintenance
Failure to properly execute the maintenance procedures in Chapter 11, DIAGNOSTICS may
compromise the instrument’s reliability.
Blood Specimens
If any abnormal test result (including flagged results or results outside the normal range)
occur, use reference methods or other standard laboratory procedures to verify the results.
For additional information, see Heading 3.5, INTERFERING SUBSTANCES.
Platelet Concentrate Extended Linear and Reportable Ranges
The instrument can be configured to allow the software to classify the sample as a platelet
concentrate based on the Hgb value and the Plt count. When the Platelet Concentrate
extended range ability is activated (by Service), if the sample result for Hgb is less than
2.0 g/dL and the result for Plt is greater than 15.0x10³/µL, the instrument considers the
sample a Plt Concentrate. The Plt result is then flagged using the extended linear and
reportable range limits; a “C” flag appears next to the Plt result; and PLT Concentrate appears
in the Tree View Flags and Messages.
PN 624026AE
3-9
3
SPECIFICATIONS/CHARACTERISTICS
INTERFERING SUBSTANCES
3.5
INTERFERING SUBSTANCES
Table 3.10 shows a list of known limitations of automated blood cell counters that use
impedance and light absorbance as measurement principles.
Table 3.10 Interfering Substances
Parameter Interfering Substance
WBC
Unlysed RBCs: In rare instances, the erythrocytes in the blood sample may not completely
lyse and are detected on the WBC histogram with an *WBC flag or as an elevated baseline on
the lymphocytes. Non-lysed RBCs will cause a falsely elevated WBC count.
Multiple myeloma: The precipitation of proteins in multiple myeloma patients may cause
falsely elevated WBC counts.
Leukemia: A falsely low WBC count may result in this disease state due to the possible
fragility of the leukocytes; some of these cells may be destroyed during counting. WBC
fragments will also interfere with the WBC DIFF parameters.
Chemotherapy: Cytotoxic and immunosuppressive drugs may increase the fragility of the
leukocytes, which may cause falsely low WBC counts.
Cryoglobulins: Increased levels of cryoglobulin that may be associated with myeloma,
carcinoma, leukemia, macroglobulinemia, lymphoproliferative disorders, metastatic tumors,
autoimmune disorders, infections, aneurysm, pregnancy, thromboembolic phenomena,
diabetes, and so forth, can elevate the WBC, RBC, or Plt counts and the Hgb concentration.
The specimen must be warmed to 37°C (99°F) in a water bath for 30 minutes and reanalyzed
immediately (analyzer or manual method).
Agglutinated WBCs: Leukoagglutination.
RBC†
Agglutinated RBCs: May cause a falsely low RBC count. Blood samples containing the
agglutinated RBCs may be suspected by elevated MCH and MCHC values and shown by
examination of the stained blood film.
Cold agglutinins: IgM immunoglobulins elevated in cold agglutinin disease may falsely lower
RBC and Plt counts and falsely increase MCV.
3-10
PN 624026AE
SPECIFICATIONS/CHARACTERISTICS
INTERFERING SUBSTANCES
Table 3.10 Interfering Substances (Continued)
Parameter Interfering Substance
Hgb
Turbidity of the blood sample: Any number of physiologic and/or therapeutic factors may
produce falsely elevated Hgb results. To obtain accurate Hgb results when increased turbidity
of the blood sample occurs, determine the cause of the turbidity and follow the appropriate
method below:
r
Elevated WBC: An extremely elevated WBC will cause excessive light scatter. If this
occurs:
r
1. Use the reference (manual) methods.
2. Centrifuge the diluted sample.
3. Measure the supernatant fluid with a spectrophotometer.
Elevated lipids: Elevated lipids in the blood sample will give the plasma a milky
appearance. This condition can occur with hyperlipidemia, hyperproteinemia (as in
gammapathies), and hyperbilirubinemia. Accurate hemoglobin determinations can be
achieved by using reference (manual) methods and a plasma bank.
r
Increased turbidity: This may be seen in cases where the RBCs are resistant to lysing.
This condition will cause a falsely elevated Hgb result but may be detected by observing
the abnormal MCH, MCHC values, and the increased baseline on the leading edge of the
WBC histogram. Erroneous Hgb results will cause the results of MCH and MCHC to also
be erroneous.
r
Fetal bloods: The mixing of fetal and maternal blood may produce a falsely elevated Hgb
value.
Hct
RBC agglutination: May produce erroneous Hct and MCV values. RBC agglutination may be
detected by observing abnormal MCH and MCHC values, and by examining the stained blood
film. Use the manual method to obtain an accurate Hct value.
MCV
RBC agglutination: May produce an erroneous MCV value. RBC agglutination may be
detected by observing abnormal MCH and MCHC values, and by examining the stained blood
film. Use the manual method to obtain an accurate MCV value.
Excessive numbers of large platelets: This condition and/or the presence of an excessively
high WBC count may interfere with the accurate determination of the MCV value. Carefully
examine the stained blood film to detect the problem.
PN 624026AE
MCH
MCH is determined according to the Hgb value and the RBC count, which means that
anything listed as an interfering substance for Hgb and/or RBC will impact MCH and may
cause erroneous MCH values.
MCHC
MCHC is determined according to the Hgb and Hct values, which means that anything listed
as an interfering substance for Hgb and/or Hct will impact MCHC and may cause erroneous
MCHC values.
RDW
RDW is determined according to the RBC count and may be impacted by the following
conditions:
r
Agglutinated RBCs: May cause a falsely low RBC count and erroneous RDWs. Blood
samples containing the agglutinated RBC may be detected by observing abnormal MCH
and MCHC values and by examining the stained blood film.
r
Nutritional deficiency or blood transfusion: May cause elevated RDW results due to
iron, cobalamin, and/or folate deficiencies.
3-11
3
SPECIFICATIONS/CHARACTERISTICS
INTERFERING SUBSTANCES
Table 3.10 Interfering Substances (Continued)
Parameter Interfering Substance
Plt
Very small RBCs (microcytes), RBC fragments (schistocytes), and WBC fragments: May
interfere with the proper counting of platelets and cause elevated Plt counts.
Agglutinated RBCs: May trap platelets, causing an erroneously low Plt count. The presence of
agglutinated RBCs may be detected by observing abnormal MCH and MCHC values and by
examining the stained blood film.
Excessive numbers of large platelets: May cause an erroneously low Plt count since these
large platelets may exceed the upper threshold for the Plt parameter are not counted.
Chemotherapy: Cytotoxic and immunosuppressive drugs may increase the fragility of these
cells, which may cause low Plt counts. Use the manual (reference) method to obtain an
accurate Plt count.
Elevated triglycerides and/or cholesterol: May interfere with the proper counting of platelets.
Hemolysis: Hemolysed specimens contain RBC stroma which may elevate the Plt count.
ACD (acid-citrate-dextrose) blood: Blood anticoagulated with ACD may contain clumped
platelets, which could depress the Plt count.
Note that, in some patients, platelets can aggregate in the presence of EDTA because of the
occurrence of platelet-specific antibodies. This may cause and erroneously low or decreased
platelet count.
Plt Agglutination: Clumped platelets may cause a decreased Plt count and/or elevated WBC
count; *WBC, SL, and SL1 flags may be generated. Reanalyze the specimen as follows:
MPV‡
1.
Recollect the specimen in sodium citrate anticoagulant to prevent platelet agglutination.
2.
Reanalyze the specimen for only the Plt count.
3.
Correct the final Plt result for the effect of the sodium citrate dilution.
Giant platelets: May exceed the upper threshold of the Plt parameter and may not be counted
as platelets. Consequently, these larger platelets will not be included in the instrument’s
calculation of MPV.
Very small RBCs (microcytes), RBC fragments (schistocytes), and WBC fragments: May
interfere with the proper counting of platelets.
Agglutinated RBCs: May trap platelets, causing an erroneous MPV result. You may be able to
detect the presence of agglutinated RBCs by observing abnormal MCH and MCHC values and
by examining the stained blood film.
Chemotherapy: May also affect the sizing of platelets.
3-12
NE#, NE%
The neutrophil absolute cell count is derived from the WBC count. The presence of excessive
eosinophils, metamyelocytes, myelocytes, promyelocytes, blasts, and plasma cells may
interfere with an accurate neutrophil count. Interfering substances pertaining to WBC also
pertain to the NE# and NE%.
LY#, LY%
The lymphocyte absolute cell count is derived from the WBC count. The presence of
erythroblasts, certain parasites, and RBCs that are resistant to lysis may interfere with an
accurate LY count. Interfering substances pertaining to WBC also pertain to the LY# and LY%.
MO#,
MO%
The mononuclear absolute cell count is derived from the WBC count. The presence of large
lymphocytes, atypical lymphocytes, blasts, and an excessive number of basophils may
interfere with an accurate monocyte count. Interfering substances pertaining to WBC also
pertain to the MO# and MO%.
PN 624026AE
SPECIFICATIONS/CHARACTERISTICS
INTERFERING SUBSTANCES
Table 3.10 Interfering Substances (Continued)
Parameter Interfering Substance
EO#, EO%
The eosinophil absolute cell count is derived from the WBC count. The presence of abnormal
granules (degranulated areas, toxic granules, and so forth) may interfere with the eosinophil
count. Interfering substances pertaining to WBC also pertain to the EO# and EO%.
BA#, BA%
The basophil absolute cell count is derived from the WBC count. Interfering substances
pertaining to WBC also pertain to the BA# and BA%.
†The
RBC dilution contains all formed elements in the blood, erythrocytes, leukocytes, and platelets. During the counting of the RBCs,
platelets are not counted if their size falls below the RBC minimum threshold.
‡Blood samples collected in EDTA will not maintain a stable MPV because platelets swell depending on the time post-collection and
storage temperature.
PN 624026AE
3-13
3
SPECIFICATIONS/CHARACTERISTICS
INTERFERING SUBSTANCES
3-14
PN 624026AE
4PRECAUTIONS/HAZARDS 4
4.1
DEFINITIONS
Warnings
Anything that can cause user injury is considered a hazard and is noted in the text as
WARNING. Warnings appear where needed throughout this manual.
Cautions
Anything that can cause instrument damage is considered a caution and is noted in the text as
CAUTION. Cautions appear where needed throughout this manual.
Importants
Anything that can cause misleading results or data corruption is considered important and is
noted in the text as IMPORTANT. Importants appear where needed throughout this manual.
Attention
An ATTENTION provides additional information to be considered when performing a
procedure.
4.2
SAFETY PRECAUTIONS
Electronic
WARNING Risk of personal injury from electronic shock. Electronic components can shock and injure you.
To prevent possible injury or shock, do not tamper with the instrument and do not remove any components
(covers, doors, panels, and so on) unless otherwise instructed within this document.
Biological
WARNING Risk of personal injury or contamination. If you do not properly shield yourself while using or
servicing the instrument, you may become injured or contaminated. To prevent possible injury or biological
contamination, you must wear proper laboratory attire, including gloves, a laboratory coat, and eye
protection.
Use care when working with pathogenic materials. Be sure that you have a procedure
available to decontaminate the instrument, provide ventilation, and dispose of waste liquid
and sharps. Refer to the following publications for further guidance on decontamination.
r
Biohazards Safety Guide, 1974, National Institute of Health.
r
Classifications of Etiological Agents on the Basis of Hazards, 3d ed., June 1974, Center
for Disease Control, U.S. Public Health Service.
Moving Parts
WARNING Risk of personal injury. Operating the instrument with doors and/or covers open can cause
personal injury. When you operate the instrument, be sure all covers and doors are closed.
PN 624026AE
4-1
PRECAUTIONS/HAZARDS
OPERATIONAL HAZARDS
4.3
OPERATIONAL HAZARDS
Safety symbols alert you to potentially dangerous conditions. These symbols, together with
text, apply to specific procedures and appear as needed throughout this manual.
Symbol
Warning Condition
Action
Biohazard.Consider all materials
(specimens, reagents, controls,
calibrators, and so forth) and areas
Wear standard laboratory attire and follow
safe laboratory procedures when handling any
material in the laboratory.
these materials come into contact
with as being potentially infectious.
!
4-2
Probe hazard. The probe is sharp
and may contain biohazardous
materials, such as controls and
calibrators.
Avoid any unnecessary contact with the probe
and probe area.
Electrical shock hazard. Possibility of
electrical shock when instrument is
plugged into the power source.
Before continuing, unplug the AC•T 5diff AL
analyzer from the electrical outlet.
Conditional hazard. Possibility of a
hazard based on specific conditions.
Pay close attention to the information
provided when you see this symbol.
PN 624026AE
5GETTING STARTED 5
5.1
GENERAL
This chapter provides general information on using the system.
5.2
COMMONLY ASKED QUESTIONS
See Table 5.1.
Table 5.1 Commonly Asked Questions
Startup
System Setup
System Access
Area
PN 624026AE
Question
Answer
Is a password required to use the
system?
The access level “Operator” does not require a password to
operate the system. However, a password may be used. The
access levels “Supervisor” and “Service” required
passwords. For additional information on access rights, see
Access Rights in Appendix A.
Can additional users be added to
the system?
Yes. Additional users can be added. For details, see Operators
(Users): Adding/Editing/Deleting in Appendix A.
Can users with Operator access
change the system setup?
No. Only users with “Supervisor” or “Service” access can
change the system setup. See Password Requirements in
Appendix A.
Can I assign different operator IDs
to each of the operators?
Yes. Each operator can be assigned his/her own ID and
password if required. See Operators (Users):
Adding/Editing/Deleting in Appendix A.
Can the system be set up to
automatically re-run a sample?
Yes. You can define the criteria that the system will use to
automatically re-run a sample. See Rerun (Marking a Sample
for Automatic Re-run) in Appendix A.
Can the system be set up to
automatically print/transmit
patient results?
Yes. You can enable an auto-function feature to automatically
print and/or transmit patient sample results. See Auto-Print
(for Patient Results) and Auto-Transmit (for Patient Results)
in Appendix A.
Can I create a header with my
lab’s information that will appear
on all reports?
Yes. You can create a 2-line report header. See Report Header
(Entering/Editing) in Appendix A.
Can the patient report be
customized?
Yes. You can define certain areas of the patient sample report
to be printed. See Patient Report Setup in Appendix A.
Where can I find Startup results?
You can find Startup results in two places: on the Background
report and in the Startup Log. See Viewing Startup Results in
this chapter.
5-1
GETTING STARTED
COMMONLY ASKED QUESTIONS
Table 5.1 Commonly Asked Questions (Continued)
Sample Analysis and Data Review
Area
Question
Answer
Is there a list of the possible
Worklist scenarios that I can
view?
Yes. Because each lab’s configuration differs, there are
several Worklist Match Option scenarios available. See
Heading E.2, WORKLIST MATCH OPTION SCENARIOS.
What is the minimum specimen
volume required?
Refer to documentation from the tube manufacturer, and
refer to the Hematology Tube List available on the BCI website
at www.beckmancoulter.com.
Can I run stat samples if I am
running other pre-assigned
samples from the Worklist?
Yes. You can run stat samples even if you are already running
samples from the Worklist. See Heading 8.4, RUNNING
MANUAL (STAT) SAMPLES.
When are results placed on the
Manual Match screen?
Results are placed on the Manual Match screen for a number
of reasons. The main reasons are:
r The Manual Match option is ON and there is no order on
the Worklist that matches the Sample ID of the sample
analyzed.
r The positive identifier (Worklist Match option) is set to
Barcode and the system is unable to read a barcode on
the sample analyzed. The results will automatically be
placed on the Manual Match screen even if Manual Match
is OFF.
For additional information, see Heading 9.3, MANUALLY
MATCHING SAMPLE RESULTS WITH WORKLIST ORDERS.
Does the Manual Match option
have to be ON for results to be
placed on the Manual Match
screen?
No. See the above response.
Can I review the WBC, RBC, and
PLT histograms on the screen?
Yes. You can also enlarge the view by clicking on the image.
How do I search the database for
sample results?
You can search the database by run date or by Patient ID. See
Heading 9.1, LOCATING SAMPLE RESULTS.
Does the system have patient
flagging ranges?
Yes. They are called flagging sets. There are 8 ranges based
on age and gender, and 12 user-definable ranges. See
Heading A.10, FLAGGING SETS SETUP.
If a sample is re-run, how will I
know if the results are for the
rerun?
There are two ways to know if the results you are viewing are
for a sample that has been re-run:
Can the Analyzer read barcodes?
Yes. The Analyzer has an internal barcode reader that reads
barcode labels.
For additional information on Manual Match, see Manual
Match (Turning ON or Off) in Appendix A.
r Yes will appear next to Rerun on the patient sample
report. See Identifying Rerun Results in Chapter 8.
r The Result will be identified as 1/1 (1 of 1), 1/2 (1 of 2),
2/2 (2 of 2) on the Results screen. See Understanding the
Results Screen in Chapter 9.
There is also an optional barcode wand that you can use. See
Appendix B, BARCODE SPECIFICATIONS FOR OPTIONAL
BARCODE WAND.
5-2
PN 624026AE
GETTING STARTED
POWERING UP AND LOGGING ON/POWERING DOWN AND LOGGING OFF
Answer
How many times is the barcode
label read in the Autoloader
mode?
Twice: once before mixing and once before piercing. See
Heading 2.9, CASSETTE TRANSFER CYCLE.
IQAP
Area
Can I automatically download my
IQAP data onto a diskette?
Yes. See Heading 7.4, DOWNLOADING CELL CONTROL
RESULTS FOR IQAP.
Does the instrument automatically Yes. With the AC•T 5diff Control Plus cell control, the system
verify that my daily controls are
automatically checks the reference ranges and flags any
within range?
parameters on the control sample that are out of range. The
system also generates Levey-Jennings graphs and statistical
printouts.
Logs
Calibration
Question
Controls
Table 5.1 Commonly Asked Questions (Continued)
5.3
Does the instrument have
automatic calibration?
Yes.The instrument automatically updates the calibration
factors at the end of the successful calibration run. The
system also does a Reproducibility check. See Heading 10.4,
AUTO-CALIBRATION.
What is the purpose of the logs?
The logs contain entries made by the system. You can view
the log entries to get information on various topics. For
detailed information, see Heading 11.16, LOGS.
POWERING UP AND LOGGING ON/POWERING DOWN AND LOGGING OFF
To ensure the correct operation of the system, it is important that the power up and power
down sequences be done in the proper order.
Powering Up the System and Logging On
When instructed in this document, do this procedure to power up the system if it has been
powered down.
Note: If the background fails the limits, the system automatically repeats the background up
to a maximum of 3 times. All results will be posted to the Startup log.
1
Check the waste container to determine if it needs to be replaced. If so, do Replacing the
Waste Container in Chapter 11.
2
Verify that the printer is ready and has
paper. Refer to the printer manual for
details.
Note: Your printer may be different
from what is shown here.
PN 624026AE
5-3
5
GETTING STARTED
POWERING UP AND LOGGING ON/POWERING DOWN AND LOGGING OFF
3
4
Verify that the Analyzer’s ac power cord
is plugged into a power source.
r
If the ac power cord is unplugged,
plug the cord into the instrument
(at the back panel, in the lower left
corner) and/or into an appropriate
ac wall outlet.
r
If your system is plugged into a
line conditioner and not directly
plugged into a wall outlet, verify
all system components are plugged
into the same source.
Turn the Workstation computer on.
a.
Turn the PC on.
b.
Turn the monitor on.
b
a
Allow sufficient time for the computer
to complete its internal checks.
5
At the Analyzer:
a.
Turn the power ON/OFF switch
ON.
b.
Verify that the red LED remains
illuminated.
a
b
5-4
PN 624026AE
GETTING STARTED
POWERING UP AND LOGGING ON/POWERING DOWN AND LOGGING OFF
6
Log in to the system:
a.
Select the Login Name name:
1)
2)
.
Highlight your choice.
b.
Type your password (only required
if you log in as Supervisor or
Service).
c.
Read the license agreement; scroll
down by
d.
7
.
.
If automatic Startup is enabled, Startup automatically runs.
If automatic Startup is disabled,
will flash.
to run a Startup.
(For details on enabling automatic Startup, see Startup (Automatic) in Appendix A.)
The progress bar shows the progress of the Startup routine.
8
Allow Startup to finish.
When it is completed, the Main Menu
screen appears.
PN 624026AE
5-5
5
GETTING STARTED
POWERING UP AND LOGGING ON/POWERING DOWN AND LOGGING OFF
9
If Auto-Print is enabled, the Background report automatically prints with the Startup
results.
If Auto-Print is disabled, do Printing Log Entries in Chapter 11 to print.
(See Auto-Print (Non-Patient Results) in Appendix A for details on enabling the
auto-print feature for Startup results.)
10 Review the Startup results status:
r
If Passed appears, go to step 9.
r
If Failed appears, go to step 11.
11 If Failed appears on any Startup result:
a.
b.
c.
d.
e.
From the Main Menu,
.
.
Evaluate the numeric results.
to run Startup again.
If the Startup fails again, contact a
Beckman Coulter representative.
12 Add comments to the Background report, if desired:
a.
b.
c.
5-6
.
Type your comments.
to save.
PN 624026AE
GETTING STARTED
POWERING UP AND LOGGING ON/POWERING DOWN AND LOGGING OFF
IMPORTANT Risk of inaccurate results if the Analyzer is not properly prepared. Follow the prompts, if any,
on the screen to perform either a Startup or Mini-Clean to prepare the Analyzer. It is not necessary to do
both.
13 If the system has remained idle for a certain period of time, you will be prompted to do a
Startup or a Mini-Clean. See Startup Procedure in Chapter 6 or Mini-Clean (Running) in
Chapter 11.
14 To check the status of the reagents and to see the analysis capacity based on the current
reagent levels, do Viewing Reagent Levels in Chapter 11.
Viewing Startup Results
In addition to checking the limits of the parameters, the system also checks the Hgb Blank
and Read voltages. The following status messages may appear:
r
Passed, which indicates that all checks passed the limits.
r
Failed, which indicates that one or more of the checks failed the limits. If all parameter
values are within limits, the Hgb Blank and Read check failed.
The following messages may also print on patient sample reports:
r
Startup Failed, which means that the patient sample was analyzed after Startup failed.
r
Startup Not Effective, which means that the Startup was not completed while at the
Service access level.
After Startup is completed, you can view the Startup results and status (Passed/Failed). For
details, see:
PN 624026AE
r
Figure 5.1, Startup Status and Results Displayed on the Startup Log
r
Figure 5.2, Startup Status Displayed on the Background Report
5-7
5
GETTING STARTED
POWERING UP AND LOGGING ON/POWERING DOWN AND LOGGING OFF
Figure 5.1 Startup Status and Results Displayed on the Startup Log
The Startup Log
displays the Startup
status and parameter
results. For details on
viewing the Startup
Log, see Viewing Logs
in Chapter 11.
Figure 5.2 Startup Status Displayed on the Background Report
The Background report
displays the Startup
status.
If Auto-Print is enabled
for Startup, the
Background report
automatically prints.
For information on
enabling Auto-Print,
see Auto-Print
(Non-Patient Results)
in Appendix A.
5-8
PN 624026AE
GETTING STARTED
POWERING UP AND LOGGING ON/POWERING DOWN AND LOGGING OFF
Powering Down the System and Logging Off
Before performing certain replacement procedures, you will be instructed to power down the
system to prevent personal injury from electric shock.
There is a proper power down sequence that you must follow to prevent damaging the
system.
When instructed in this document, do this procedure to power down the system if it is on.
PN 624026AE
1
From the Main Menu screen,
2
When the following message appears,
.
.
5-9
5
GETTING STARTED
POWERING UP AND LOGGING ON/POWERING DOWN AND LOGGING OFF
3
4
5
The Login screen appears.
to exit the system.
When “It is now safe to turn off your computer.” appears, turn the Workstation OFF.
Note: Do not
Restart. If you do, you will need to repeat this entire procedure.
6
Turn the Workstation OFF:
a. Turn off the PC.
b. Turn off the monitor.
7
Turn the Analyzer OFF.
ATTENTION: If you are doing a replacement or maintenance procedure that requires you to
open the Analyzer panels, unplug the ac power cord from the ac outlet.
5-10
PN 624026AE
GETTING STARTED
NEW WORKDAY
5.4
NEW WORKDAY
A workday consists of a 24-hour period, and a New Workday begins for your lab based on the
time defined in • Procedure for Defining a New Workday in Appendix A.
The significance of a New Workday is that the system performs certain operations when a
power-up/login occurs on a New Workday.
ATTENTION: For the system to check for a New Workday, you must quit (
) the system
software. If the system determines that the conditions for a New Workday have been met, a
number of options are presented on the login window. See New Workday Routine in this
chapter. If it is determined that the conditions for a New Workday have not been met, the
normal login window is displayed.
New Workday Routine
If the system determines a New Workday, specific conditions occur when Startup begins.
When a New Workday occurs, certain options appear on the Login screen. The options, are
determined by whether there are unmatched results on the Manual Match screen.
r
See No Unmatched Results on Manual Match Screen in this chapter.
r
See Unmatched Results on Manual Match Screen in this chapter.
No Unmatched Results on Manual Match Screen
If there are no unmatched results in the Manual Match screen at the beginning of the New
Workday, certain options appear at the Login screen. See Figure 5.3:
Figure 5.3 New Workday Options: If No Unmatched Results Exist in Manual Match Screen
PN 624026AE
5-11
5
GETTING STARTED
NEW WORKDAY
Unmatched Results on Manual Match Screen
If there are unmatched results in the Manual Match screen at the beginning of the New
Workday, other options appear at the Login screen. See Figure 5.4.
Figure 5.4 New Workday Options: If Unmatched Results Exist on Manual Match Screen
New Workday Options
r
Erase Worklist (erases the Worklist)
r
Reset Autonumbering (resets the Auto-Numbering to the starting number defined in Auto-Numbering
(Setting the AUTO_SID Starting Number) in Appendix A.)
r
Archive Results (archives any results on the results list) Archived results are accessible when
selected.
r
Archive Unmatched Results and Delete Worklist (places all unmatched results from the Manual
Match screen into the archive and deletes the current Worklist. "Unmatched" will appear in the
Miscellaneous Messages section of the Flags and Messages area of the report for the unmatched
results.)
r
Database Maintenance (deletes patient records that do not have corresponding results, compacts the
database, stores the last 1,000 raw results, and backs up the database)
is
What Happens if No New Workday Options are Selected
Regardless of the selections you make, the system automatically:
r
r
r
5-12
Deletes as many old records as necessary until the database totals 9,500. This happens
only if the database exceeded 10,000 records at Startup.
Checks all reagent volumes to ensure there is enough reagent to process the day’s work.
Saves a backup of the database in a different directory.
PN 624026AE
GETTING STARTED
LOGGING ON (IF SYSTEM IS ALREADY POWERED UP)
5.5
LOGGING ON (IF SYSTEM IS ALREADY POWERED UP)
If someone else is already logged onto the system and you need to log on, the existing user
must be logged off before you can log on under your Login Name.
Do this procedure to log on if someone else is already logged on.
1
From the Main Menu screen,
2
When the following message appears,
.
.
The existing user will be logged off and the Login screen appears.
PN 624026AE
5-13
5
GETTING STARTED
LOGGING ON (IF SYSTEM IS ALREADY POWERED UP)
3
Log in:
a.
Select your Login Name name:
1)
2)
b.
c.
5-14
.
Highlight your choice.
Type your password (only required
if you log in as Supervisor or
Service).
.
PN 624026AE
GETTING STARTED
WORKING WITH BAR-CODE LABELS
5.6
WORKING WITH BAR-CODE LABELS
Placing Labels on Tubes
Your lab may use barcode labels or identification labels on the sample tubes.
To maintain a high read rate, keep the barcode label free from blood, scratches, excessive
powder from gloves. and anything else that may interfere with the label’s readability.
When placing barcode labels on a tube:
r
Center the label on the tube (between the bottom of the stopper and the bottom of the
tube.)
r
Place the label parallel to the stopper. If the label is skewed, the scanner may not read it.
r
Place the label smooth and flat against the tube. Gaps and wrinkles may cause the tube to
jam in the Autoloader.
r
Do not place excessive labels on the tubes, as the labels may cause the tube to jam in the
cassette or in the tube holder.
See Figure 5.5.
Figure 5.5 Label Placement on Tubes
b
c
d
B
Correct: The label is properly placed.
C
Incorrect: The label is too far down on the tube and does
not lie flat against the tube.
D
Incorrect; The label is twisted.
e
Incorrect: The label is wrinkled and does not lie flat
against the tube.
f
Incorrect: The label extends beyond the diameter of the
tube.
e
f
PN 624026AE
5-15
5
GETTING STARTED
WORKING WITH BAR-CODE LABELS
Scanning Barcode Labels with the Optional Barcode Wand
If your system is equipped with the barcode wand, you scan the barcode label to enter
information into the system.
1
Anchor the cursor in the field where you want to enter information.
2
Locate the barcoded label.
IMPORTANT Risk of sample mis-identification if the entire barcode is not captured with the barcode
reader, especially with the Interleaved 2-of-5 barcode format. Position the barcode reader such that you
capture the entire barcoded Sample ID. Otherwise, part of the Sample ID may be not scanned, resulting in
mis-identification. Verify the Sample ID was captured correctly.
3
Position the barcode reader over the
barcode label and squeeze the trigger
button.
If the barcode label was successfully
read, the barcode reader beeps, the LED
illuminates on the reader, and the
cursor advances to the next field.
4
5-16
Verify that the information was scanned correctly and placed in the correct field.
PN 624026AE
GETTING STARTED
WORKING WITH THE CASSETTES
5.7
WORKING WITH THE CASSETTES
WARNING Risk of injury/biohazardous conditions if a cassette is not properly handled. Do not use a
cassette for storing or transporting tubes or vials. To ensure tubes/vials remain secured in the
cassettes, always keep cassettes upright and use them only for analysis as described in this manual.
Learning About the Cassettes
A cassette holds the tubes and transports them through the instrument for analysis. Ten
cassette styles are available for use with the AL. All 10 cassette styles are identical; however,
through information encoded in the cassette label, it is possible to instruct the instrument to
sample differently from cassette to cassette to accommodate different tubes.
See Figures 5.6 through 5.9.
Figure 5.6 Cassette: Back View, Cassette Number
Figure 5.7 Cassette: Front View, Cassette Style
The number on the back identifies the
cassette number.
The letter on the front identifies the
cassette style, which defines the tube
type/size.
The system is provided with two types of
indicator codes: A and B. The sampling
conditions for each are defined during
initial setup of your instrument.
Figure 5.8 Cassette: Front View, Cassette Barcode Label
The barcode label on the front is what the
barcode reader scans to determine the
cassette number and cassette style.
Figure 5.9 Cassette: Tube Position Numbers
1)
i j
h
g
e f
d
b c
Each cassette has 10 slots, and each slot
is numbered. This number is referred to as
the “position” number.
When you see Cass./Position, there will be
a number assigned to the cassette (based
on Figure 5.6) and a number assigned to
the position (based on Figure 5.9). When
you load the cassette onto the instrument,
position 1 will be the first into the Analyzer.
PN 624026AE
5-17
5
GETTING STARTED
WORKING WITH THE CASSETTES
Inserting Tubes into a Cassette
If the Worklist Match Option is Barcode, it is important that you load the cassettes correctly so
the Analyzer can read the barcode labels.
IMPORTANT Risk of sample mis-identification if a tube is skipped. The Autoloader will process all tubes
in a cassette. If the bar-code label is missing or cannot be read, an AUTO_SID will be assigned. Ensure
that all sample tubes in a cassette have a legible bar-code label attached. See Heading 5.6, WORKING
WITH BAR-CODE LABELS.
WARNING Risk of injury/biohazardous condition if the sample tube breaks. Use extreme care not to
break a sample tube when loading/unloading it into or removing it from a cassette.
CAUTION Risk of instrument damage, too, if the wrong tube is used in the cassette. Verify the tube is
correct for the cassette being processed.
1
Load the sample tubes into the cassette:
a.
Ensure that the tubes are clean and
dry.
b.
Position the tube with the
bar-code label clearly visible
through the opening.
A
d
c.
Insert the tube, bottom first, into
the cassette.
d.
Push the top of the tube into the
holder until the tube “snaps” into
place.
c
5-18
PN 624026AE
GETTING STARTED
WORKING WITH THE CASSETTES
2
Ensure that the bottom of the tube is resting on the bottom inside of the cassette.
3
Insert the next sample tube into the cassette.
4
Repeat step 3 as needed.
Removing Tubes from a Cassette
WARNING Risk of injury/biohazardous
condition if the sample tube breaks. Use extreme
care not to break a sample tube when
loading/unloading them into/from a cassette.
PN 624026AE
1
Pull the top of the tube out and away
from the cassette.
2
Pull the tube completely out of the cassette.
5-19
5
GETTING STARTED
WORKING WITH THE CASSETTES
Loading Cassettes onto the Analyzer
You can load up to 10 cassettes at once.
!
When the Start Autoloader (
) function is selected, use care when working
around the cassette input tray pushers (Figure 5.10). They move forward with a fair amount
of force to push the cassettes toward the instrument.
Figure 5.10 Cassette Input Tray Pushers: Location and Function
b
c
!
Procedure for Loading Cassettes onto the Analyzer
WARNING Risk of injury/biohazardous conditions if a cassette is not properly handled. Do not use a
cassette for storing or transporting tubes or vials. To ensure tubes/vials remain secured in the
cassettes, always keep cassettes upright and use them only for analysis as described in this manual.
WARNING Risk of injury/biohazardous
condition if the sample tube breaks. Use extreme
care not to break a sample tube.
1
With the back of the cassette facing the
front of the Analyzer, place the cassette
upright on the Cassette Input Tray.
You can load up to 10 cassettes at once.
5-20
PN 624026AE
GETTING STARTED
WORKING WITH THE CASSETTES
WARNING Risk of injury from the cassette pushers.
the cassettes into the instrument.
2
!
The pushers move forward with force to push
When the Start Autoloader (
) function is activated, the Analyzer pushes the
cassettes to the front of the instrument for processing.
Unloading Cassettes from the Analyzer
Once the Analyzer has finished analyzing the samples in the cassette, the cassette is ejected
into the Cassette Output Tray (on the right side of the Analyzer).
The Cassette Output Tray can hold up to 10 cassettes. If the tray is full, the Analyzer will stop
until some of the cassettes are removed and the other cassette(s) can be ejected.
Do this procedure to unload the cassettes from the Analyzer.
WARNING Risk of injury/biohazardous
condition if the sample tube breaks. Use extreme
care not to break a sample tube.
Remove the cassette from the Cassette
Output Tray.
PN 624026AE
5-21
5
GETTING STARTED
WORKING WITH THE TUBE HOLDER
5.8
WORKING WITH THE TUBE HOLDER
Placing the Tube Holder in the Analyzer
Do this procedure to place a tube holder in the Analyzer.
1
2
to open the tube holder door.
Slide the tube holder over the metal
shaft and rotate tube holder slowly
until it “clicks” into place.
Positioning Tubes in the Tube Holders
Some procedures in this manual require you to place a tube (or vial) into the tube holder and
start analysis. There are three factors to be aware of:
1.
The manufacturer and tube name of the cap pierceable tube (vial) that you are using.
Refer to the Hematology Tube List available on the BCI website at
www.beckmancoulter.com.
2.
The position of the tube in the tube holder. See Tube Holders in Chapter 1.
3.
The position of the tube holder in the Analyzer. See Position of Tube Holder in the
Analyzer in this chapter.
Position of Tube Holder in the Analyzer
There is one pierce position in the Analyzer, which means that tube holder must be rotated
such that the tube to be pierced is in the pierce position (12:00 o’clock),
5-22
PN 624026AE
GETTING STARTED
WORKING WITH THE TUBE HOLDER
1
The tube holder door automatically
opens when the system is ready.
2
To avoid possible mis-identification, always verify the Sample ID at the Workstation with
the Sample ID from the tube prior inserting the tube into the instrument.
Beckman Coulter recommends positive tube/sample identification, such as barcode
labels.
WARNING Risk of exposure to biohazardous
material:
1) If you insert an uncapped tube or vial into the
tube holder; the contents may spill out of the tube
or vial, thereby creating a biohazardous condition.
the tube or vial can be cap pierced, then ensure tha
the cap is secure before inserting the tube or vial
into the tube holder.
2) If you insert a tube or vial upside down into the
tube holder. Always insert the tube bottom first int
the holder.
3
Insert the tube (vial) into the
appropriate 12:00 o’clock pierce
position in the tube holder.
For information on the correct position
of each tube within the tube holder,
refer to the Hematology Tube List
available on the BCI website at
www.beckmancoulter.com.
PN 624026AE
5-23
5
GETTING STARTED
WORKING WITH THE TUBE HOLDER
IMPORTANT Risk of erroneous results if the
sample tube is not placed in the holder
correctly and if the tube holder is not positioned
correctly in the instrument. Ensure that the tube
is placed in the 12:00 o’clock pierce position
within the tube holder.
4
Ensure that the tube is in the pierce
position (12:00 o’clock) within the
tube holder.
r
If the tube is in the pierce position
within the holder, do step 5.
r
If the tube is not in the pierce
position within the holder, rotate
the holder until the tube is in the
pierce position.
12:00
If the tube holder is not in the correct
position when you close the door, an
error message will appear.
5
Close the tube holder door by pushing
it gently into the instrument as shown.
The red and green LEDs flash during
analysis.
r
When the red LED remains
illuminated, the system is busy
analyzing the sample.
r
When the green LED remains
illuminated, the instrument is
ready for the next analysis.
Note: The door can only be closed into
sampling position when
selected.
has been
For details about the various positions
of the tube holder door, see Tube
Holder Door: 3 Positions in this
chapter.
5-24
PN 624026AE
GETTING STARTED
WORKING WITH THE TUBE HOLDER
6
When the LED is green (b) and the
tube holder door opens (c), remove
the tube/vial.
b
c
PN 624026AE
5-25
5
GETTING STARTED
WORKING WITH THE TUBE HOLDER
Tube Holder Door: 3 Positions
r Figure 5.11, Tube Holder Door: Open
r
Figure 5.12, Tube Holder Door: Closed
r
Figure 5.13, Tube Holder Door: Analysis in Progress
Figure 5.11 Tube Holder Door: Open
The tube holder door is open and ready to accept
tubes for analysis.
Figure 5.12 Tube Holder Door: Closed
Close the tube holder door when not in use.
Figure 5.13 Tube Holder Door: Analysis in Progress
When processing manual (stat) samples, you will
be prompted to close the tube holder door. When
you do, gently push the door as far in as possible.
Sample analysis begins only when the door is
recessed into the instrument as shown.
5-26
PN 624026AE
GETTING STARTED
USING THE ONLINE HELP SYSTEM
5.9
USING THE ONLINE HELP SYSTEM
Your COULTER AC•T 5diff AL system provides an online Help system that allows you to
search for information on specific system-related topics.
The Help system is an electronic version of the Instructions for Use manual and includes a
table of contents, an index for finding information quickly, and a glossary of definitions.
Accessing Online Help
From the system software,
to access the online Help system. If you cannot access
the online Help system, contact your Beckman Coulter Representative.
Once the online Help is opened,
PN 624026AE
for instructions on using Help.
5-27
5
GETTING STARTED
SOFTWARE SCREENS
5.10 SOFTWARE SCREENS
The Workstation software is based on Windows-NT. Although familiarity with Windows
conventions and use would be beneficial, it is not required.
Login Names and Passwords
When you log on to the system, you are required to select a Login Name. If you are logging on
as a Supervisor or Service, you must enter a password. If logging on as an Operator, a
password is not required.
Access Levels and Rights
Access to software functions is determined by user group access rights. There are three levels
of user groups:
r
Service (password required)
r
Supervisor (password required; default is 123)
r
Operators (no password required unless one was entered with the Operator ID)
When the software is first installed, the system is set up with default users for the 3 groups:
r
The Operator group user is “Opr1”.
r
The Supervisor group user is “Supervisor”.
r
The Service group user is “Service”.
At initial logon, you are required to select one of the default user groups. Logging in as the
Supervisor user allows access to the Setup area of the software and access to the ability to
define your own users and passwords.
See Table 5.3 for additional information.
Table 5.2 Software Menu Access by User Group
Menu Access
User Group
(Setup)
(QC)
(Diagnostics)
(Calibration)
Operator
No
Yes†
Yes‡
No
Supervisor
Yes
Yes
Yes*
Yes
Service
Yes
Yes
Yes
Yes
† No access to Threshold tab on the QC modify target screen. No access to “Delete” function on the QC Grid screen.
‡ No access to Service.
*No access to Holder Adjustment and Cassette Adjustment tabs under Hardware Systems.
5-28
PN 624026AE
GETTING STARTED
SOFTWARE SCREENS
Login Screen
When the software initially loads, a Login window (Figure 5.14) appears. This is where you
select your Login Name and enter your password (if required).
Figure 5.14 Login Screen
Depending on when your lab’s New Workday begins, you may see additional options on the
Login screen. See Heading 5.4, NEW WORKDAY for details.
Selected Menu Path Icon
On the menu screens, you will see a pale gray icon in the upper left corner that shows the
icon you selected to get to the displayed screen. This icon simply serves as a snapshot of
where you are in the software and how you got there. For example, Figure 5.15 shows the
Setup icon, which means that
was last selected.
Figure 5.15 Selected Menu Path Icon
PN 624026AE
5-29
5
GETTING STARTED
MENU PATH
5.11 MENU PATH
Certain software screens offer additional menu options. From the Main Menu screen
(Figure 5.16), the following screens are available and offer additional menu options:
r
Figure 5.17, Setup Menu Screen
r
Figure 5.26, Diagnostics Menu Screen Optionss
r
Figure 5.27, Quality Assurance Screen
Main Menu Screen
The Main Menu screen (Figure 5.16) appears after you log in and Startup is completed. See
Table 5.3 for details about each icon.
Figure 5.16 Main Menu Screen
Table 5.3 Main Screen Icons
Icon
Name
Function
Startup
Initiates the Startup cycle. See Startup Procedure in Chapter 6.
Run-in-Progress
Opens the Run-in-Progress screen, which allows you to view the results
for the last sample analyzed. See • To review the patient results screen: in
Chapter 9.
Setup
Opens the Setup screen, which allows you to define system settings.
r For information about additional screen options available under the
Setup screen, see System Setup Screen Options in this chapter.
r For information about setting up the system, see Appendix A.8,
SYSTEM SETUP
5-30
PN 624026AE
GETTING STARTED
MENU PATH
Table 5.3 Main Screen Icons (Continued)
Icon
Name
Function
Reagents
Opens the Reagents screen, which allows you to view the existing reagent
levels and to change reagents. See Replacing Reagents in Chapter 11.
Logs
Opens the Logs screen, which allows you to view log entries made by the
system. See Heading 11.16, LOGS.
Diagnostics
Opens the Diagnostics screen, which allows you to perform diagnostic
functions.
r For information about diagnostic procedures, see Chapter 11,
DIAGNOSTICS.
r For information about additional screen options available, see
Diagnostics Menu Options in this chapter.
Quality Assurance Opens the Quality Assurance screen, which allows you to run various QA
functions.
r For information about additional screen options available, see Quality
Assurance Menu Options in this chapter.
r For information about the QA functions, see Chapter 7, QUALITY
ASSURANCE.
Shutdown
PN 624026AE
Initiates the Shutdown cycle. See Heading 6.4, SHUTDOWN.
5-31
5
GETTING STARTED
MENU PATH
Setup Menu Options
The following menu options are available from the Setup screen (Figure 5.17):
r
Figure 5.18, Miscellaneous Setup Screen Options
r
Figure 5.19, Quality Assurance Setup Screen Options
r
Figure 5.20, Auto Functions Setup Screen Options
r
Figure 5.21, System Setup Screen Options
r
Figure 5.22, Save/Restore Configuration Screen Options
r
Figure 5.23, Operators Setup Screen Options
r
Figure 5.24, Flagging Sets Setup Screen Options
Figure 5.17 Setup Menu Screen
5-32
PN 624026AE
GETTING STARTED
MENU PATH
Miscellaneous Setup Options
See Figure 5.18.
Figure 5.18 Miscellaneous Setup Screen Options
Quality Assurance Setup Options
See Figure 5.19.
Figure 5.19 Quality Assurance Setup Screen Options
PN 624026AE
5-33
5
GETTING STARTED
MENU PATH
Auto Functions Setup Options
See Figure 5.21.
Figure 5.20 Auto Functions Setup Screen Options
5-34
PN 624026AE
GETTING STARTED
MENU PATH
System Setup Screen Options
See Figure 5.21.
Figure 5.21 System Setup Screen Options
PN 624026AE
5-35
5
GETTING STARTED
MENU PATH
Save/Restore Configuration Options
See Figure 5.22.
Figure 5.22 Save/Restore Configuration Screen Options
5-36
PN 624026AE
GETTING STARTED
MENU PATH
Operators Setup Options
See Figure 5.23.
Figure 5.23 Operators Setup Screen Options
PN 624026AE
5-37
5
GETTING STARTED
MENU PATH
Flagging Sets Setup Options
See Figure 5.24.
Figure 5.24 Flagging Sets Setup Screen Options
5-38
PN 624026AE
GETTING STARTED
MENU PATH
Logs Menu Options
See Figure 5.25.
Figure 5.25 Logs Menu Options
PN 624026AE
5-39
5
GETTING STARTED
MENU PATH
Diagnostics Menu Options
See Figure 5.26.
Figure 5.26 Diagnostics Menu Screen Options
5-40
PN 624026AE
GETTING STARTED
MENU PATH
Quality Assurance Menu Options
The following screens are available from the QA screen:
r
Figure 5.28, QC Screen Options
r
Figure 5.29, Reproducibility Screen Options
r
Figure 5.30, Calibration Screen Options
r
Figure 5.31, IQAP Screen Options
r
Figure 5.32, XB/XM Screen Options
Figure 5.27 Quality Assurance Screen
PN 624026AE
5-41
5
GETTING STARTED
MENU PATH
QC Screen Options
See Figure 5.28.
Figure 5.28 QC Screen Options
Reproducibility Screen Options
See Figure 5.29.
Figure 5.29 Reproducibility Screen Options
5-42
PN 624026AE
GETTING STARTED
MENU PATH
Calibration Screen Options
See Figure 5.30.
Figure 5.30 Calibration Screen Options
IQAP Screen Options
See Figure 5.31.
Figure 5.31 IQAP Screen Options
PN 624026AE
5-43
5
GETTING STARTED
MENU PATH
XB/XM Screen Options
See Figure 5.32
Figure 5.32 XB/XM Screen Options
5-44
PN 624026AE
GETTING STARTED
MENU PATH
Toolbars
There are two distinct toolbars on the Main screen:
r
the main (generic) toolbar (Figure 5.33), and
r
the contextual toolbar (Figure 5.34).
• Generic Toolbar
The generic toolbar (Figure 5.33) always resides on the right of each screen. This toolbar
contains the most frequently used functions and the main cycle launch functions.
If an icon is grayed out, it is unavailable for use on that particular screen.
See Table 5.4 for a description of each icon.
Figure 5.33 Generic Toolbar
Table 5.4 Generic Toolbar Icons
Icon
Name
Function
Stop
Stops the Analyzer at a time you specify (immediately, after a cycle is
completed, or after cassette analysis is completed).
Alarm
Flashes when a problem is detected and opens the Alarm screen when you
click the flashing icon.
Worklist
Launches the Worklist screen and closes all others.
The number of orders (samples to be processed) are indicated below the
icon.
PN 624026AE
5-45
5
GETTING STARTED
MENU PATH
Table 5.4 Generic Toolbar Icons (Continued)
Icon
Name
Function
Start
Autoloader
Starts analyzing the samples in the loaded cassette.
Manual (Stat)
Mode
Allows you to run a manual (stat) sample.
Results
Displays the Results screen; flashes when results have been placed on the
Manual Match screen.
Flashes after you run a manual (stat) sample while the Autoloader mode is
in progress.
The number of results in the list are indicated under the Results icon:
Archive
Displays the Archive screen.
• Contextual Toolbar
The contextual toolbar (Figure 5.34) is located across the bottom of every screen. If an icon is
grayed out, it is unavailable for use on that particular screen.
See Table 5.5 for a description of each icon.
Figure 5.34 Contextual Toolbar
Table 5.5 Contextual Toolbar Icons
Icon
5-46
Name
Function
Help
Opens the online Help.
Print/Transmit
Prints data to a printer or transmits data to the Host computer.
Details
Displays details.
Insert
Allows you to add information.
Delete
Deletes data.
Edit
Allows editing.
PN 624026AE
GETTING STARTED
MENU PATH
Table 5.5 Contextual Toolbar Icons (Continued)
Icon
Name
Function
OK (accept)
Saves information or validates an action.
Cancel
Cancels unsaved changes or actions.
Quit
Exits from the Main Menu screen to Login screen.
Return
Returns to previous screen.
Progress Indicator
For every screen, the date, time, software version, and operator name appear in the status bar.
For Startup, Shutdown, and Calibration, a progress indicator (Figure 5.35) also appears in the
status bar.
Figure 5.35 Progress Indicator
Tabs
Tabs appear at the top of a window and group information related to that window. For
example, Local Settings information is grouped in the window viewable by selecting the Local
Settings tab (Figure 5.36.)
Figure 5.36 Local Setting Tab
Buttons
There are three types of buttons used within this software:
PN 624026AE
r
command (text) buttons,
r
bitmap buttons, and
r
radio buttons.
5-47
5
GETTING STARTED
MENU PATH
Command Buttons
Command buttons contain text and appear within various windows of this software. These
buttons execute functions when selected. See Figure 5.37.
Figure 5.37 Text Button
Bitmap Buttons
Bitmap buttons (Figure 5.38) function the same as command buttons and appear in popup
windows.
Figure 5.38 Bitmap Button: Drop-down Box
Radio Buttons
Radio buttons (Figure 5.39), which appear within various windows of this software, allow
you to choose one of the options presented. For additional information, see
Selecting/De-selecting Software Features in this chapter.
Figure 5.39 Radio Buttons
5-48
PN 624026AE
GETTING STARTED
MENU PATH
Fields (Text Boxes)
Fields (Figure 5.40), which appear within various windows of this software, are rectangular
areas where you can input or display data or other information. Fields are editable when they
appear in white. You can move the cursor to the next field by pressing Ù when in a field. See
Editing Text in this chapter for additional information.
Figure 5.40 Fields
Check-Boxes
Check-boxes, which appear within various windows of this software, allow you to select
(include) or deselect (exclude) options. See Figure 5.41.
Figure 5.41 Boxes
PN 624026AE
5-49
5
GETTING STARTED
MENU PATH
Scrollable Lists
Scrollable lists (Figure 5.42) are lists of information that require you to scroll to see all
available entries.
Figure 5.42 Scrollable List
Note: In some cases, you may have to
5-50
before you can scroll.
PN 624026AE
GETTING STARTED
WORKING WITH THE SOFTWARE
5.12 WORKING WITH THE SOFTWARE
When working with the instrument’s software, be sure you understand the basics of:
r
r
r
r
r
r
r
r
r
r
r
r
Using the Mouse,
Moving the Cursor,
Viewing Tool Tips,
Selecting Menu Items,
Scrolling,
Active/Inactive Software Icons,
Selecting Menu Tabs,
Menu Headings (Screen Names),
Editing Text,
Saving Changes,
Cancelling Unsaved Changes, and
Selecting/De-selecting Software Features.
Using the Mouse
A mouse (Figure 5.43) is connected to your Workstation and allows you to navigate through
the software and to select certain software functions.
Figure 5.43 Mouse
Throughout this manual, you will be instructed to select a software option by “clicking” on it
with the mouse. Do this procedure to learn how.
PN 624026AE
1
Place the cursor over the item you want
to select.
2
Click (press and release) the left mouse button (
).
Note: If the selection is not made, try again; check the connection if necessary. If the
problem persists, contact a Beckman Coulter representative.
5-51
5
GETTING STARTED
WORKING WITH THE SOFTWARE
Moving the Cursor
To move the software cursor
r
move
, or
r
press Ù.
Viewing Tool Tips
To see the function name of a specific icon, without clicking the mouse button, pass the
cursor over the icon until the text appears. See Figure 5.44.
Figure 5.44 Tool Tip Names
Selecting Menu Items
the item you want to select.
Scrolling
Some windows contain information that cannot be viewed all at once on the screen. For those
windows, horizontal and/or vertical scroll bars are available to allow you to scroll across or up
and down the window. See Figure 5.45.
To scroll, do one of the following:
b
c
5-52
.
To scroll,
:
r
the cursor on one of the arrows to scroll the window in the direction of the arrow, or
r
and hold the slider box and drag it along the scroll bar, or.
r
the slider instead of dragging the slider box.
PN 624026AE
GETTING STARTED
WORKING WITH THE SOFTWARE
Figure 5.45 Scroll Bars
Active/Inactive Software Icons
Two states exist for most icons: active and inactive. See Figure 5.46.
r
Active icons appear in color and are available for use.
r
Inactive icons are grayed out and unavailable for use.
Figure 5.46 Icon States: Active and Inactive
(Active)
(Inactive)
Selecting Menu Tabs
Tabs (Figure 5.47) group functions in the same screen.
the desired tab to select.
Figure 5.47 Tabs
PN 624026AE
5-53
5
GETTING STARTED
WORKING WITH THE SOFTWARE
Menu Headings (Screen Names)
Menu headings (Figure 5.48) are the screen names that appear on the current screen so you
know the menu item you selected to get to the current screen.
Figure 5.48 Screen Name (System is Shown)
Editing Text
There may be times when you need to edit text.
1
2
3
4
5
5-54
.
Move the cursor to where you want to edit information.
the left mouse button to anchor the cursor.
Edit the text.
to save the changes.
PN 624026AE
GETTING STARTED
WORKING WITH THE SOFTWARE
Saving Changes
Throughout the procedures, you will be instructed to save information.
to save.
Cancelling Unsaved Changes
As you are making changes, you can cancel without saving them:
r
to cancel all unsaved changes and to remain at the same screen.
r
to cancel all unsaved changes and to return to the previous screen.
Selecting/De-selecting Software Features
Some software screens allow you to select (activate) or de-select (deactivate) certain software
features.
1
2
.
To select options using radio buttons,
desired radio button.
= selected
= not selected
PN 624026AE
5-55
5
GETTING STARTED
WORKING WITH THE SOFTWARE
3
To select check-boxes,
the
check-box to select/deselect (or
include/exclude) the corresponding
feature:
= selected (included).
= not selected (excluded).
5-56
PN 624026AE
GETTING STARTED
SYSTEM ICONS
5.13 SYSTEM ICONS
Icons depict executable functions or status information. Table 5.6 shows some of the
common icons used on this system.
Table 5.6 Software Icons
Startup
Shutdown
Run-inProgress
Setup
Reagents
Logs
Diagnostics
Quality
Assurance
Stop
Worklist
Start
Autoloader
Alarm
Archive
Manual (Stat)
Mode
Results
Help
Print/
Transmit
Details
Insert
Delete
Edit
OK (Accept)
Cancel
Quit
Return
Misc.
Setup
QA Setup
System
Auto
Functions Setup
Setup
Save/Restore
Config.
Operators
Setup
Flagging Sets
Setup
Quality
Control
Calibration
Reproducibility IQAP
XB/XM
Modify Target
Download
Auto-Calibrate
from Floppy
Calibration
Log
Quality
Maintenance
Control Log Log
Patient/
Worklist
Log
Setup Log
Host Log
Reagent
Log
Errors Log
Startup Log
PN 624026AE
5-57
5
GETTING STARTED
UNDERSTANDING HOW FLAGGING SETS ARE APPLIED
5.14 UNDERSTANDING HOW FLAGGING SETS ARE APPLIED
Your system can accommodate up to 20 flagging sets:
r
8 are age and gender based (see Table 5.7), and
r
12 can be added (see Heading A.10, FLAGGING SETS SETUP).
Table 5.7 Pre-Defined Flagging Sets
Flagging Set Name
Age Range
Standard Range
–
Man
> 14 years
Woman
> 14 years
Child 1
Editable; see • Adding/Editing a Flagging Set
(Range) in Appendix A.
Child 2
Editable; see • Adding/Editing a Flagging Set
(Range) in Appendix A.
Child 3
Editable; see • Adding/Editing a Flagging Set
(Range) in Appendix A.
Child 4
Editable; see • Adding/Editing a Flagging Set
(Range) in Appendix A.
Child 5
Editable; see • Adding/Editing a Flagging Set
(Range) in Appendix A.
– No defined range
When your instrument is installed, Standard Range is established as the default flagging set.
However, you can change the default flagging set to meet your laboratory’s needs. For details,
see • Setting a Default Flagging Set in Appendix A.
You can edit the patient limit ranges and action limit ranges for existing flagging sets, except
‘Standard’.
If a result is outside the patient limit range, the result will be flagged in yellow:
r
H for results above the upper patient limit, and
r
L for results below the lower patient limit.
See • Adding/Editing a Flagging Set (Range) in Appendix A for additional information.
If a result is outside the action limit range, the result will be flagged in red:
r
HH for results above the upper action limit, and
r
LL for results below the lower action limit.
Figure 5.49 shows the flagging set selection and update process.
5-58
PN 624026AE
GETTING STARTED
UNDERSTANDING HOW FLAGGING SETS ARE APPLIED
Figure 5.49 Flagging Set Selection and Update Process
Start
No
No
Current
Flagging set based
on Age or Gender
?
Current
Flagging set=
Default Flagging
Set?
Yes
Yes
No
No
Flagging set
remains as
selected
Gender
available
?
Age
≤ 14yr
?
Yes
Yes
Select child
range
Man
Woman
1
5
7367518B
PN 624026AE
5-59
5
GETTING STARTED
UNDERSTANDING HOW FLAGGING SETS ARE APPLIED
5-60
PN 624026AE
6DAILY ROUTINE 6
6.1
WASTE CONTAINER LEVEL CHECK
At the beginning of each day, check the waste container to determine if it needs to be
replaced. If so, follow instructions in the Replacing the Waste Container in Chapter 11.
6.2
PRINTER CHECK
At the beginning of each day (or shift), be sure the printer is ready to print.
1
6.3
Be sure there is an adequate paper supply in the printer.
r
If so, go to step 2.
r
If not, add paper according to the printer’s user manual.
2
Turn the printer on.
3
Be sure the printer is ready. See your printer manual for details.
STARTUP
Overview
The Startup cycle takes about 3 minutes to be completed. If Automatic Startup is enabled,
Startup automatically runs if the instrument is powered up from a powered down state. If
Automatic Startup is disabled on your instrument, see Startup (Automatic) Appendix A for
details.
Startup results automatically display on the Run-in-Progress screen.
During the first Startup after a New Workday, the system checks to see if there is enough
reagent to complete the day’s work. If there is not enough reagent to complete the day’s work,
“Reagent(s) Low. Insufficient Reagent to Complete The Daily Workload” appears. If this occurs:
r
Identify the low reagent and change it according to the Replacing Reagents Procedure in
Chapter 11.
OR
r
Continue and change the reagent when the specific reagent low message is displayed.
Background Counts
If the background counts are not within acceptable limits after the first Startup cycle, the
instrument automatically performs Startup up to two more times. If Startup fails after the
third attempt, a STARTUP FAILED message appears on the screen and on the report.
PN 624026AE
6-1
DAILY ROUTINE
STARTUP
Background limits are fixed and cannot be changed. The acceptable background limits are:
WBC ≤ 0.3 x 10³/µL3
RBC ≤ 0.03 x 10⁶/µL3
Hgb ≤ 0.3 g/dL
Plt ≤ 7.0 x 10³/µL3
Flowcell WBC ≤ 0.3 x 10³/µL3
Startup Procedure
Do this procedure:
r
If Automatic Startup is disabled and you powered up the system.
r
If you want to run Startup again.
r
If
flashes.
The Startup cycle runs for approximately 3 minutes.
1
From the Main Menu screen,
.
When Startup begins, the progress
appears in the status bar.
Startup will be completed in about 3
minutes.
The progress bar shows the progress of
the Startup routine.
6-2
PN 624026AE
DAILY ROUTINE
STARTUP
2
Allow Startup to finish.
When it is completed, the Main Menu
screen appears.
3
If Auto-Print is enabled, the Background report automatically prints with the Startup
results.
If Auto-Print is disabled, do Printing Log Entries in Chapter 11 to print.
(See Auto-Print (Non-Patient Results) in Appendix A for details on enabling the
auto-print feature for Startup results.)
For additional information, see Viewing Startup Results in Chapter 5.
4
5
Review the Startup results status:
r
If Passed appears, go to step 3.
r
If Failed appears, go to step 5.
If Failed appears:
a.
b.
c.
d.
e.
PN 624026AE
From the Main Menu,
.
.
Evaluate the numeric results.
to run Startup again.
If the Startup fails again, contact a
Beckman Coulter representative.
6-3
6
DAILY ROUTINE
STARTUP
6
Add comments to the Background report, if desired:
a.
b.
.
Type your comments.
c.
to save.
“Reagent Expired” During Startup
During Startup, if the system detects the reagent is expired:
1.
Reagent expired appears in the Miscellaneous Messages in the tree view.
2.
flashes.
3.
.
4.
Read the log entry.
5.
You can change the reagent or continue running with the expired reagent.
Note: If you continue running, Reagent expired will appear in Miscellaneous Messages in
the tree view for all samples run with an expired reagent.
6.
To change the reagent:
a.
b.
6-4
to go directly to the Reagent screen.
Change the reagent as described in Replacing Reagents.
PN 624026AE
DAILY ROUTINE
SHUTDOWN
6.4
SHUTDOWN
Perform the Shutdown procedure after every 24 hours of use to cleanse the instrument and
place it in a stand-by mode.
Automatic Shutdown
If automatic Shutdown is enabled, the Shutdown routine will be automatically performed at
the designated time. For information about automatic Shutdown, see Shutdown (Automatic)
in Appendix A.
Manual Shutdown Procedure
If automatic Shutdown is disabled, do the following procedure at the end of each workday.
1
From the Main Menu screen,
.
The instrument cycles Rinse reagent for
cleaning and goes into a stand-by
mode.
PN 624026AE
6-5
6
DAILY ROUTINE
SHUTDOWN
2
When Shutdown is complete, the following screen appears:
r
If you select Exit Windows, the following message appears: It is now safe to turn off
your computer. (Restart is also available.)
You can either turn the instrument off using the Powering Down the System and
Logging Off procedure, or select Restart to restart Windows and display the login
screen.
r
If you select Restart Windows, the login screen appears.
Select the desired option and
3
6-6
.
After doing Shutdown, a Startup Procedure is required before operating the instrument
again.
PN 624026AE
7QUALITY ASSURANCE 7
7.1
INTRODUCTION
Quality Assurance includes routine maintenance and service in conjunction with the use of
controls and calibrators. The combination of these methods provides the assurance of
complete quality control and should be applied separately or in combination according to
your laboratory, state, and federal protocols.
For information on setting up the control files, see Heading A.6, SETTING UP A CONTROL
FILE.
Understanding the QA Menu Screen
See Figure 7.1 and Table 7.1.
Figure 7.1 QA Menu Screen
Table 7.1 QA Menu Screen Icons
Icon
PN 624026AE
Name
Function
Quality Control
Opens the QC screen.
See Heading 7.3, RUNNING CELL CONTROLS.
Calibration
Opens the calibration screen.
See Chapter 10, CALIBRATION.
Reproducibility
Opens the reproducibility screen.
See Heading 11.7, REPRODUCIBILITY CHECK.
IQAP
Opens the IQAP Download screen.
See Heading 7.4, DOWNLOADING CELL CONTROL RESULTS FOR
IQAP.
XB/XM
Opens the XB/XM screen.
See Heading 7.6, XB ANALYSIS.
7-1
QUALITY ASSURANCE
QUALITY CONTROL (QC)
7.2
QUALITY CONTROL (QC)
Overview
Quality control includes monitoring routine performance and service in conjunction with the
use of controls and calibrators. Routinely check results between QC runs. The combination of
these methods provides the assurance of complete quality control.
This instrument incorporates multiple QC techniques. For CBC and CBC/DIFF, the AC•T
5diff Autoloader uses the established technique of commercial controls. The Workstation
stores information about control file setup and control results in the database.
Your laboratory is encouraged to establish acceptance limits for control results based on the
control source, type, and level. By establishing your own limits, you can better understand the
control results and more quickly interpret them.
Beckman Coulter recommends that QC checks be performed using patient or commercial
controls in the Autoloader mode and the Manual (Stat) mode (as required) according to your
laboratory protocol. When using a commercial control, always refer to the package insert for
more detailed product information and mixing instructions.
Failure to recover control values within your laboratory’s expected ranges or the presence of
unexplained shifts or trends in either mode of analysis should be investigated. If control
problems cannot be resolved, contact your Beckman Coulter representative.
Note: Beckman Coulter does not provide support for other vendors’ consumable products.
If the instrument determines a control run has an analytical error, then the control run will be
rejected. A rejected analysis will be stored and a notification will be sent to the QC log with
an automatic comment of “Analytical Error.” Samples with analytical errors are deselected by
default.
For each hematology parameter, the mean values, target values, standard deviation (SD), and
coefficient of variation (CV) will be calculated from the set of selected analyses. The results
will be validated and the data saved for up to 24 control lots. There is no limit on the number
of analyses saved per control file. The grid and graphic data of the last control (valid or
rejected) will be saved.
When the QC result is displayed in the Run-in-Progress screen, the calculations will be made
according to the rules that apply to the QC.
You cannot select to rerun a QC.
QC Techniques
Your laboratory can use these QC techniques with the AC•T 5diff AL instrument:
7-2
r
Daily instrument checks
r
Commercial controls
r
Patient controls
r
XB Analysis
PN 624026AE
QUALITY ASSURANCE
RUNNING CELL CONTROLS
Controls Processing
If a result that has non-numerical parameter results is manually selected for inclusion in the
statistics, the values that have been replaced by the non-numeric flag will be included in the
statistical calculations even though the parameter is shown as a non-numerical flag on the
table. It is recommended that results in the table that have one or more non-numeric flags not
be selected for inclusion in the statistics.
When an IQAP file is created, the system will only include results from the file that are
“selected” in the control file table. If a result with non-numeric flags is selected, an IQAP file
created, the value that generated the flag will be included in the file created and analyzed as
part of the IQAP report. It is recommended that results in the table that have one or more
non-numeric values not be selected.
How QC Runs are Analyzed
Once the QC run is completed, the instrument completes the necessary calculations and
compares the results to the corresponding target values (entered when you set up a control
file in Heading A.6, SETTING UP A CONTROL FILE).
The instrument then determines if the result is within the expected range. If the value is
outside the target range, the result will be flagged H or L and highlighted against a red
background. If the control is out of range, the QC alarm is triggered. Until a QC analysis of
the same lot is run and is within limits, all analyses performed when the QC alarm is activated
will have QC limit flags on the printed/transmitted results to indicate the sample was run
when the QC alarm was activated.
QC Screens
See Understanding the QC Results Screens in this chapter.
7.3
RUNNING CELL CONTROLS
Run cell controls before analyzing patient samples to confirm that the system is operating
within acceptable limits. To control the performance of the instrument, Beckman Coulter
recommends the use of the AC•T 5diff Control Plus cell control, which is available in three
levels (low, normal, and high).
For each set of controls received, be sure that the cell control information and assay values
selected and entered into the instrument are correct for the lot and level of control. For
details, see Heading A.6, SETTING UP A CONTROL FILE.
The Workstation allows you to set up files to store control results for CBC and/or CBC/DIFF
analysis. Before you can store control results in a file, the file must be setup for the
appropriate information, such as control name, Sample (Lot #) ID, assay values, expected
ranges, and so forth. For control material details, refer to the package insert.
Note: The instrument identifies a control sample through the use of the Control lot number
and Sample ID. In the control file, if the Reserved box is checked, the system automatically
assigns any results with the Sample ID matching the lot number into the appropriate file. As a
result, it is not necessary to have the control file open to have the results correctly assigned.
You can preassign controls on the Worklist if required.
PN 624026AE
7-3
7
QUALITY ASSURANCE
RUNNING CELL CONTROLS
You can safely run a patient sample when a control file is open, because patient sample results
do not go into the control database; they go into the patient results database.
You can run QC samples in one of three ways:
r
Running Cell Controls: Autoloader Mode With Barcode ID
r
Running Cell Controls: Autoloader Mode Without Barcode ID
r
Running Cell Controls: Manual (Stat) Mode
Note: If
flashes at any time during cell control analysis, click the icon to open the
Alarms and Errors Log.
Running Cell Controls: Autoloader Mode With Barcode ID
Do this procedure to run a QC sample (cell control material) in the Autoloader Mode with
the QC sample ID being scanned by the barcode reader.
If the control lot number has been “reserved,” the Workstation identifies the sample as a
control and places the results in the appropriate control file based on information entered in
the Sample ID field.
ATTENTION: If there is a situation when the system cannot find a Worklist order for the sample
it is processing (e.g. the barcode was not read and Barcode was the Worklist Match option, the
control lot number is reserved, or the Worklist entry is missing or incorrect for Cass./Position,
the sample results will be placed on the Manual Match screen.
flashes to signify results
are on the Manual Match screen. For information on manually matching the results, see
Manual Match Procedure in Chapter 9.
1
7-4
Are you running a new set of controls?
r
If yes, be sure the new controls have been set up as instructed in Heading A.6,
SETTING UP A CONTROL FILE.
r
If no, go to step 2.
PN 624026AE
QUALITY ASSURANCE
RUNNING CELL CONTROLS
2
From the Main Menu screen,
3
4
.
.
Select the desired control file:
a.
at
or at
.
b.
PN 624026AE
the desired control.
7-5
7
QUALITY ASSURANCE
RUNNING CELL CONTROLS
5
to open the QC Data Grid screen.
6
Verify that the level of control you are
running matches the level you selected.
7
Verify that the control material has not
expired.
1 2 /0 2
E X P .
7-6
8
Mix each control vial according to the instructions in the AC•T 5diff Control Plus cell
control package insert.
9
Inspect the vial’s contents to ensure that all cells are uniformly distributed and that there
is no evidence of deterioration.
PN 624026AE
QUALITY ASSURANCE
RUNNING CELL CONTROLS
10 Load the control vial (with cap on) in
any cassette. Be sure the barcode label
is clearly visible through the opening.
Note: You can load all levels at once
into the same cassette.
WARNING Risk of injury/biohazardous conditions if a cassette is not properly handled. Do not use a
cassette for storing or transporting tubes or vials. To ensure tubes/vials remain secured in the cassettes,
always keep cassettes upright and use them only for analysis as described in this manual.
11 Load the cassette onto the instrument.
!
Be sure your hands are free and clear from the cassette input area before beginning
analysis.
12
to begin analysis.
When analysis is complete, the results are displayed in the Run in Progress screen.
PN 624026AE
7-7
7
QUALITY ASSURANCE
RUNNING CELL CONTROLS
13 To view the results:
r
From the Main Menu screen,
to view.
OR
r
From either QC screen,
run in the selected file).
to view the last control run (not the last control
14 Review the control results as instructed in Reviewing Control Results in this chapter and
as per your lab’s protocol.
15 To manually de-select (exclude) run(s) from the statistics as per your lab’s protocol,
the check-box as needed to de-select ( ).
16 If you did not load all control levels in the same cassette for analysis, repeat steps 6
through 15 for the remaining cell control levels.
17 The control file results automatically print if Auto-Print is enabled.
If Auto-Print is disabled:
a.
b.
c.
.
Select the print option.
.
For information about enabling Auto-Print for control results, see Auto-Print
(Non-Patient Results) in Appendix A.
7-8
PN 624026AE
QUALITY ASSURANCE
RUNNING CELL CONTROLS
Running Cell Controls: Autoloader Mode Without Barcode ID
Do this procedure to run a QC sample (cell control material) in the Autoloader Mode with
the QC sample ID to be entered by you.
Note: The control’s lot number must be reserved. See Reserving Control Lot Numbers in
Appendix A.
ATTENTION: If there is a situation when the system cannot find a Worklist order for the sample
it is processing (e.g. the barcode was not read and Barcode was the Worklist Match option, the
control lot number is reserved, or the Worklist entry is missing or incorrect for Cass./Position,
the sample results will be placed on the Manual Match screen.
flashes to signify results
are on the Manual Match screen. For information on manually matching the results, see
Manual Match Procedure in Chapter 9.
1
2
PN 624026AE
Are you running a new set of controls?
r
If yes, be sure the new controls have been set up as instructed in Heading A.6,
SETTING UP A CONTROL FILE.
r
If no, go to step 2.
From the Main Menu screen,
.
7-9
7
QUALITY ASSURANCE
RUNNING CELL CONTROLS
3
4
.
The QC Levey-Jennings graphs screen
appears.
to open the QC Data Grid
screen.
7-10
PN 624026AE
QUALITY ASSURANCE
RUNNING CELL CONTROLS
5
Manually type the control’s reserved lot number as the Sample ID:
a.
.
b.
.
c.
Enter the cassette number and press Û.
d.
Type the control lot number as the Sample ID.
e.
f.
.
Repeat steps d and e for each control.
6
Verify the level of control you are
running matches the level you selected.
7
Verify that the control material has not
expired.
1 2 /0 2
E X P .
8
PN 624026AE
Mix each control vial according to the instructions in the AC•T 5diff Control Plus cell
control package insert.
7-11
7
QUALITY ASSURANCE
RUNNING CELL CONTROLS
9
Inspect the vial’s contents to ensure that all cells are uniformly distributed and that there
is no evidence of deterioration.
10 Load the control vial(s) (with cap on)
in the correct cassette and position.
11 Verify the control Sample ID on the tube with each tube’s cassette and position on the
Worklist.
WARNING Risk of injury/biohazardous conditions if a cassette is not properly handled. Do not use a
cassette for storing or transporting tubes or vials. To ensure tubes/vials remain secured in the cassettes,
always keep cassettes upright and use them only for analysis as described in this manual.
12 Load the cassette onto the instrument.
7-12
PN 624026AE
QUALITY ASSURANCE
RUNNING CELL CONTROLS
13
.
!
Be sure your hands are free and clear from the cassette input area before beginning
analysis.
14
to begin analysis.
When analysis is complete, the results are displayed in the Run in Progress screen.
15 To view the results:
r
From the Main Menu screen,
to view the results that are
displayed when analysis is
completed.
OR
r
PN 624026AE
From either QC screen,
to view the last control run (not
the last control run in the selected
file).
7-13
7
QUALITY ASSURANCE
RUNNING CELL CONTROLS
16 If the control lot number has been set up as “reserved,” the Workstation identifies the
sample as a control and places the results in the appropriate control file based on
information entered in the Sample ID field.
17 Review the control results as instructed in Reviewing Control Results in this chapter and
as per your lab’s protocol.
18 To manually de-select (exclude) run(s)
from the statistics as per your lab’s
protocol,
the check-box as needed
to de-select ( ).
19 The control file results automatically print if Auto-Print is enabled.
If Auto-Print is disabled:
a.
b.
c.
.
Select the print option.
.
For information about enabling Auto-Print for control results, see Auto-Print
(Non-Patient Results) in Appendix A.
20 Repeat steps 5 through 19 for the remaining cell control levels.
7-14
PN 624026AE
QUALITY ASSURANCE
RUNNING CELL CONTROLS
Running Cell Controls: Manual (Stat) Mode
Do this procedure to run a QC sample (cell control material) in the Manual (Stat) Mode with
the QC sample ID to be entered by you.
ATTENTION: If there is a situation when the system cannot find a Worklist order for the sample
it is processing (e.g. the barcode was not read and Barcode was the Worklist Match option, the
control lot number is reserved, or the Worklist entry is missing or incorrect for Cass./Position),
the sample results will be placed on the Manual Match screen.
flashes to signify results
are on the Manual Match screen. For information on manually matching the results, see
Manual Match Procedure in Chapter 9.
1
2
PN 624026AE
Are you running a new set of controls?
r
If yes, be sure the new controls have been set up as instructed in Heading A.6,
SETTING UP A CONTROL FILE.
r
If no, go to step 2.
From the Main Menu screen,
.
7-15
7
QUALITY ASSURANCE
RUNNING CELL CONTROLS
3
4
.
The QC Levey-Jennings graphs screen
appears.
to open the QC Data Grid
screen.
7-16
PN 624026AE
QUALITY ASSURANCE
RUNNING CELL CONTROLS
5
Enter the control ID in the Sample ID field:
a.
.
b.
Type the reserved lot number for the control in the Sample ID field.
c.
. The following message appears: “When tube holder opens, insert Sample ID
X for analysis.”
d.
Do NOT
; otherwise, you have to begin again.
Note: If the control’s lot number has been reserved when the control file was set up,
manually type the reserved lot number for the control as the Sample ID at the Run
screen:
6
Verify the level of control you are
running matches the level you selected.
7
Verify that the control material has not
expired.
1 2 /0 2
E X P .
8
PN 624026AE
Mix each control vial thoroughly according to the instructions in the AC•T 5diff
Control Plus cell control package insert.
7-17
7
QUALITY ASSURANCE
RUNNING CELL CONTROLS
9
Inspect the vial’s contents to ensure that all cells are uniformly distributed and that there
is no evidence of deterioration.
IMPORTANT Risk of erroneous results and/or
instrument damage if tubes/vials with hard caps
are processed with the caps on. Always remove
hard caps from tubes/vials before processing.
10 Insert the tube/vial correctly into:
r
slot #1 of Tube Holder #1, or
r
slot #4 of Tube Holder #2.
For information about the correct slot
for each tube/vial, refer to the
Hematology Tube List available on the
BCI website at
www.beckmancoulter.com.
IMPORTANT Risk of erroneous results if the
desired sample tube/vial is not positioned in the
pierce position (12 o’clock) in the Analyzer.
12:00
11 Ensure that the tube is in the pierce
position within the tube holder.
7-18
r
If the tube is in the pierce position
(12:00 o’clock) within the holder,
do step 12.
r
If the tube is not in the pierce
position within the holder, rotate
the holder until the tube is in the
pierce position.
PN 624026AE
QUALITY ASSURANCE
RUNNING CELL CONTROLS
12 Close the tube holder door and push it
into the Analyzer to begin analysis.
The red and green LEDs flash:
r
When the red LED remains
illuminated, the system is busy
analyzing the sample.
r
When the green LED remains
illuminated, the instrument is
ready for the next analysis.
13 When the LED is green (b) and the
tube holder door opens (c), remove
the tube/vial.
b
c
If the control lot number has been set
up as “reserved,” the Workstation
identifies the sample as a control and
places the results in the appropriate
control file based on information
entered in the Sample ID field.
14 Review the control results as instructed in Reviewing Control Results in this chapter and
as per your lab’s protocol.
15 To manually de-select (exclude) run(s) from the statistics as per your lab’s protocol,
the check-box as needed to de-select ( ).
PN 624026AE
7-19
7
QUALITY ASSURANCE
RUNNING CELL CONTROLS
16 The control file results automatically print if Auto-Print is enabled.
If Auto-Print is disabled:
a.
b.
c.
.
Select the print option.
.
For information about enabling Auto-Print for control results, see Auto-Print
(Non-Patient Results) in Appendix A.
17 Repeat steps 5 through 16 for the remaining cell control levels.
Reviewing Control Results
Do this procedure immediately following QC analysis to review the control results.
For details about the QC results screens, see Understanding the QC Results Screens in this
chapter.
1
7-20
Review the control results to ensure they are within the acceptable ranges before
analyzing patient samples.
r
If the parameter values of the control results are within the acceptable ranges, you
are ready to analyze patient samples. See Heading 8, SAMPLE ANALYSIS.
r
If one or more parameter results are out of the control range, the out of range result
is backlit in red and the result is flagged with an H or L. The data should be
reviewed according to your laboratory protocol, or go to step 2.
PN 624026AE
QUALITY ASSURANCE
RUNNING CELL CONTROLS
ATTENTION: AC•T 5diff Control Plus cell control is analyzed as a patient sample. Due to the
technology used and the nature of the control material, the basophil analysis generates a
BASO+ analytical alarm and will cause the BA% and the BA# to be inhibited on the Run in
Progress screen, just as a patient sample would if the same result was obtained.
However, to permit the performance of the BA parameter to be assessed, the BA% and BA#
from the AC•T 5diff Control Plus cell control are reported into the control file with an “S” flag
to indicate that these would normally have been suppressed if it was a patient sample.
The S flag prints on the QC report when printed from the QC Data Grid screen.
2
To manually reject results from the control file, de-select (exclude) the run(s) you want
to exclude from the statistics.
= selected (included)
= de-selected (excluded)
3
When control results are not within the acceptable ranges:
a.
Ensure proper mixing and control material integrity, then rerun the control.
If results are still outside the acceptable ranges, do step b.
b.
Analyze a new cell control vial. If the results are still outside the acceptable ranges,
do step c.
c.
Clean the system (see Extended Cleaning in Chapter 11) and rerun the control.
d.
Review the results:
r
If the results are still outside the acceptable ranges, contact a Beckman Coulter
representative.
An out of range control result will appear with an H or L flag.
r
PN 624026AE
If results are within the acceptable ranges, you are ready to analyze patient
samples. See Chapter 8, SAMPLE ANALYSIS.
7-21
7
QUALITY ASSURANCE
RUNNING CELL CONTROLS
4
The control file results automatically print if Auto-Print is enabled.
If Auto-Print is disabled:
a.
b.
c.
.
Select the print option.
.
For information about enabling Auto-Print for control results, see Auto-Print
(Non-Patient Results) in Appendix A.
5
when finished.
Displaying QC Results
Do this procedure to display the QC results in either the Levey-Jennings Control Graphs
screen or the QC Data Grid screen.
For details about the QC results screens, see Understanding the QC Results Screens in this
chapter.
1
From the Main Menu screen,
.
Note: The following describes the
display of a CBC/DIFF file. The steps
for the CBC file are the same. The
difference is that the CBC file will only
contain data for the CBC parameter
(WBC, RBC, Hgb, Hct, MCV, MCH,
MCHC, Plt, and MPV).
7-22
PN 624026AE
QUALITY ASSURANCE
RUNNING CELL CONTROLS
2
.
3
The QC Levey-Jennings graphs screen
appears.
4
Select the control file to be reviewed:
a.
b.
PN 624026AE
at
or at
.
the desired control.
7-23
7
QUALITY ASSURANCE
RUNNING CELL CONTROLS
5
The Levey-Jennings QC graphs appear.
To see the QC Data Grid screen,
.
To return to the Levey-Jennings QC
graphs screen,
6
.
the tab that represents the Levey-Jennings control graph that you want to see. To
view all runs, use the scroll bar at the bottom of the screen.
Note: WBC/RBC/HGB is the default tab displayed.
7-24
PN 624026AE
QUALITY ASSURANCE
RUNNING CELL CONTROLS
7
when you are finished.
Understanding the QC Results Screens
There are four screens related to the QC function:
r
QC Levey-Jennings Graph screen (Figure 7.2)
r
QC Data Grid screen (Figure 7.3)
r
QC Graphics screen (Figure 7.4)
Understanding the QC Levey-Jennings Graph Screen
The Levey-Jennings Graph screen is the default screen displayed when you
,
.
Figure 7.2 shows the Levey-Jennings Graph screen for the CBC/DIFF file.
The parameters are displayed in groups of three depending on the file type, CBC or
CBC/DIFF.
For CBC, there are 4 groups:
r
WBC/RBC/HGB
r
HCT/MCV/MCH
r
MCHC/RDW/PLT
r
MPV
For CBC/DIFF, there are 7 groups:
PN 624026AE
r
WBC/RBC/HGB
r
HCT/MCV/MCH
r
MCHC/RDW/PLT
r
MPV/NE/LY
r
MO/EO/BA
r
NE#/LY#/MO#
r
EO#/BA#
7-25
7
QUALITY ASSURANCE
RUNNING CELL CONTROLS
Figure 7.2 QC Levey-Jennings Graph Screen
7-26
b
Control file name (cannot be edited).
c
Values for the control sample selected by vertical line.
d
Parameter tabs to display graphs.
e
Levey-Jennings graphs for selected tab.
f
Levey-Jennings graph for parameter.
g
Upper control limit on graph.
h
Assigned (target) value.
i
Lower control limit on graph.
j
Data points for each QC result. Only results selected (included) on the control grid are displayed.
1)
Marker that is displayed when you click on a QC point in the graph.
1!
Operator who ran the QC sample.
1@
Date and time QC sample was analyzed.
1#
Displays the QC Graphics screen for the last control run.
1$
Displays QC target setup screen.
1%
Details the last person to set up or modify the control file data.
PN 624026AE
QUALITY ASSURANCE
RUNNING CELL CONTROLS
1^
Displays target values for control file by tab.
1&
DIFF: displays diff parameter target values for the DIFF file only.
1*
CBC: displays CBC parameter target values for the file.
1(
Control expiration date.
2)
Reserved ID indicator: when selected, any sample run with Sample ID matching the lot number is
considered a control and saved in this file.
2!
Lot number of the control.
Understanding the QC Data Grid Screen
The QC Data Grid screen (Figure 7.3) shows the results from each QC run for the selected
control file.
To see this screen,
at the Levey-Jennings Graph screen (Figure 7.2).
Figure 7.3 QC Data Grid Screen
PN 624026AE
b
Control file name (cannot be edited).
c
Check-box that includes or excludes results from statistical calculation and display on the
Levey-Jennings graphs.
d
Operator who ran the QC analysis.
7-27
7
QUALITY ASSURANCE
RUNNING CELL CONTROLS
e
Date and time the QC analysis was done.
f
Parameter results for QC analysis. If result is outside limits, value is backlit in red for an H or L
flag.
g
Scroll bar to display additional results.
h
Control comment entered on QC results screen.
i
Number of runs included in statistics.
j
Statistical calculations based on included runs:
Mean = mean of selected QC results. Displayed in red if greater than the high targets, and
displayed in yellow if lower than the low targets. If a control result is out of target, a QC alarm is
activated.
2SD = standard deviation of the selected QC results.
CV% = Coefficient of variation of the selected QC results. Displayed in red if greater than the
define coefficient.
Lower Limits = low target limit for the QC results.
Target Values = target for the QC results.
Upper Limits = high target limit for the QC results.
Delta Diff = difference between the mean and the target.
1)
Displays the QC Graphics screen for the last control run.
1!
Display QC target setup screen.
1@
Allows display of data by shift.
1#
Details the last person to set up or modify the control file data.
1$
Displays target values for control file by tab:
DIFF: displays diff parameter target values for DIFF file only.
CBC: displays CBC parameter target values for the file.
1%
Control expiration data.
1^
Reserved ID indicator: when selected, any sample run with the Sample ID matching the lot
number is considered a control and saved in this file.
1&
Lot number of control.
1*
Filter options that allow you to filter the displayed data.
All = displays all data
CBC = displays CBC data
CBC/DIFF = displays CBC/DIFF data
7-28
PN 624026AE
QUALITY ASSURANCE
RUNNING CELL CONTROLS
Understanding QC Graphics Screen
The QC Graphics screen (Figure 7.4) displays the last QC result.
Access the QC Graphics screen from either the Levey-Jennings Graph screen or the QC Data
Grid screen by selecting
.
Figure 7.4 QC Graphics Screen
PN 624026AE
b
Control file information. The Sample ID is the Lot Number.
c
QC results.
d
Histograms of QC results. (Click to enlarge.)
e
Analyzer messages.
f
DiffPlot of QC results. (Click to enlarge.)
g
Comment field where you can enter comments (up to 50 characters). For details on adding or
editing a comment, see Adding/Editing QC Result Comments in this chapter. The comment will
appear in the Comment area of the QC Data Grid screen (Figure 7.3).
7-29
7
QUALITY ASSURANCE
RUNNING CELL CONTROLS
Adding/Editing QC Result Comments
Do this procedure to add/edit a comment at the QC Graphics screen.
1.
From the QC Graphics screen,
2.
Anchor the cursor in the Comment field.
3.
Type your comments (up to 50 alphanumeric characters).
4.
.
to save the comment, which now appears on the QC Data Grid screen.
Printing/Transmitting Saved Cell Control Results
Prior to entering new cell control information, print the stored cell control results for your
files.
You can print/transmit the cell control results from the following screens as noted:
r
QC Levey-Jennings Graphs Screen (Figure 7.2) (print)
r
QC Data Grid Screen (Figure 7.3) (print and transmit)
r
QC Graphics Screen (Figure 7.4) (print)
Printing Control Results from the QC Levey-Jennings Graphs Screen
Do this procedure to print cell control results from the QC Levey-Jennings Graphs screen.
1
7-30
Is the Levey-Jennings graph you want to print/transmit already displayed?
r
If yes,
.
r
If no, go to step 2.
PN 624026AE
QUALITY ASSURANCE
RUNNING CELL CONTROLS
2
3
4
PN 624026AE
From the Main Menu screen,
.
.
The QC Levey-Jennings graphs screen
appears.
7-31
7
QUALITY ASSURANCE
RUNNING CELL CONTROLS
5
Select the control file to be reviewed:
a.
b.
6
7
7-32
at
or at
.
the desired control.
to print/transmit the selected control results.
The following message appears:
8
to print.
9
when you are finished.
PN 624026AE
QUALITY ASSURANCE
RUNNING CELL CONTROLS
Printing/Transmitting Control Results from the QC Data Grid Screen
Do this procedure to print/transmit cell control results from the QC Data Grid screen.
1
2
PN 624026AE
From the Main Menu screen,
.
.
7-33
7
QUALITY ASSURANCE
RUNNING CELL CONTROLS
3
The QC Levey-Jennings graphs screen
appears.
to open the QC Data Grid
screen.
4
Select the control file to be reviewed:
a.
b.
5
7-34
at
or at
.
the desired control.
.
PN 624026AE
QUALITY ASSURANCE
RUNNING CELL CONTROLS
6
7
8
9
PN 624026AE
the desired tab:
r
For printing options, verify that
the Print tab is selected.
r
For transmitting options, verify
that the Transmit tab is selected.
(This allows the control results to
be sent to the Host computer, if
applicable.)
the desired option:
to print/transmit the selected cell control results.
When you are finished,
as needed to return to the desired screen.
7-35
7
QUALITY ASSURANCE
RUNNING CELL CONTROLS
Printing Control Results from the QC Graphics Screen
Do this procedure to print cell control results from the QC Graphics screen for the last
control run.
1
2
3
7-36
Is the Graphics screen displayed for the
the control results you want printed?
r
If yes,
and
r
If no, go to step 2.
From the Main Menu screen,
.
.
PN 624026AE
QUALITY ASSURANCE
RUNNING CELL CONTROLS
4
The QC Levey-Jennings graphs screen
appears.
5
Select the control file to be reviewed:
a.
b.
6
at
.
the desired control.
From the QC Levey-Jennings graph
screen,
to view the QC
Graphics screen for the last control run
(not the last control run in the selected
file).
7
PN 624026AE
.
7-37
7
QUALITY ASSURANCE
RUNNING CELL CONTROLS
8
9
7-38
the desired tab:
r
For printing options, verify that
the Print tab is selected.
r
For transmitting options, verify
that the Transmit tab is selected.
(This allows the control results to
be sent to the Host computer, if
applicable.)
the desired option:
10
to print/transmit the selected cell control results.
11
when you are finished.
PN 624026AE
QUALITY ASSURANCE
DOWNLOADING CELL CONTROL RESULTS FOR IQAP
7.4
DOWNLOADING CELL CONTROL RESULTS FOR IQAP
Overview
You can submit your control results to Beckman Coulter for inclusion in Beckman Coulter’s
IQAP program. See IQAP (Interlaboratory Quality Assurance Program) in Chapter 1 for
additional information. The IQAP can provide statistical comparison only for parameters that
have assigned assay values.
To process the cell control data from your instrument, you must submit one output file for
each cell control lot number per shift (i.e. 0, 1, 2, or 3). When you download the cell control
information to a diskette, the instrument assigns a unique filename to that information; part
of the filename will be your IQAP ID.
Beckman Coulter recommends you submit your control data monthly.
Controls Processing
If a result that has non-numerical parameter results is manually selected for inclusion in the
statistics, the values that have been replaced by the non-numeric flag will be included in the
statistical calculations even though the parameter is shown as a non-numeric flag on the
table. It is recommended that results in the table that have one or more non-numeric flags not
be selected for inclusion in the statistics.
When an IQAP file is created, the system will only included results from the file that are
“selected” in the control file table. Review the control file for erroneous data that should not
be included in the IQAP report, and de-select that particular run.
If a result with non-numeric flags is selected and an IQAP file is created, the value that
generated the flag will be included in the file created and analyzed as part of the IQAP report.
It is recommended that results in the table that have one or more non-numeric values not be
selected.
PN 624026AE
7-39
7
QUALITY ASSURANCE
DOWNLOADING CELL CONTROL RESULTS FOR IQAP
Understanding the IQAP Download Screen
Before you proceed with downloading the cell control information to a diskette for IQAP, be
sure you understand the IQAP download screen (Figure 7.5).
Figure 7.5 IQAP Download Screen: Defined
b
Allows you to include/exclude the file.
E
Date of the first run in the control file.
c
Control file name.
F
Date of the last run in the control file.
d
Control material lot number.
Note: Only files that have lot numbers in the same format as AC•T 5diff Control Plus control
material and files with at least one selected result are displayed for inclusion in the IQAP
download.
7-40
PN 624026AE
QUALITY ASSURANCE
DOWNLOADING CELL CONTROL RESULTS FOR IQAP
Preparing for IQAP Download
Do this procedure to prepare for downloading (saving) your cell control results to diskette for
IQAP use. After you do this procedure, do Downloading Results to Diskette for IQAP
Submission.
1
Verify that your IQAP ID has been entered into your instrument. Without the IQAP ID,
your data cannot be downloaded to diskette.
See IQAP ID (Entering/Editing) in Appendix A for details.
2
Review the control summary profile, which shows the individual control runs, mean,
2SD, and number of runs:
a.
.
b.
.
ATTENTION: Incorrect runs will misrepresent the true mean and standard deviation (SD) of that summary
data. Therefore, be sure that the runs you submit are correct.
3
Verify that the data you want to submit is correct.
If necessary, delete any data runs not intended for IQAP submission, such as a control
that was analyzed in the wrong file.
IMPORTANT If you analyzed a control in the wrong file, that run must be excluded from the statistics. If
the run is not excluded, the summary data for that control file will be inaccurate.
Reminder:
To deselect a control run:
a.
b.
PN 624026AE
until
appears.
Repeat step a until you have deselected the runs you want excluded from the
statistics.
7-41
7
QUALITY ASSURANCE
DOWNLOADING CELL CONTROL RESULTS FOR IQAP
4
Print a copy of the control file data for your records.
See Printing/Transmitting Saved Cell Control Results in this chapter.
Downloading Results to Diskette for IQAP Submission
After Preparing for IQAP Download in this chapter, do this procedure to download the
results.
Supplies Needed:
B Formatted, blank diskette (you provide)
B IQAP labels (provided by Beckman Coulter in your IQAP packet)
B 5” to 6.5” board stock return mailers (provided by Beckman Coulter in your IQAP
packet)
1
7-42
From the Main Menu screen,
.
PN 624026AE
QUALITY ASSURANCE
DOWNLOADING CELL CONTROL RESULTS FOR IQAP
2
.
Control files with one or more records
will be displayed for the past three
months, which is determined from
today’s date to the First Run date. For
example, if today’s date is May 11,
control files having February 11 or
later as the First Run date will be
displayed.
3
To select a control file to be downloaded:
a.
b.
until appears.
Repeat step a until only the files you want to include in the download are selected.
ATTENTION: You must use a blank, formatted diskette; otherwise, the download will not be complete and
Operation Failed will appear.
4
PN 624026AE
Insert a blank, formatted diskette into the drive A: of the Workstation’s PC.
7-43
7
QUALITY ASSURANCE
DOWNLOADING CELL CONTROL RESULTS FOR IQAP
5
to begin the download. The following message appears:
r
r
If the IQAP ID is valid, the system downloads the selected control data to the
diskette. The progress indicator in the status bar indicates the progress.
If the IQAP ID is not valid, the following message appears:
1)
2)
r
7-44
.
Verify that the correct IQAP ID was entered into the system.
See IQAP ID (Entering/Editing).
3) Repeat steps 1 through 4.
If the diskette is not blank and formatted, Operation Failed appears. Repeat the
procedure with a blank, formatted disk.
6
Allow the IQAP download to be completed. Wait for the green LED on the Workstation
to stop illuminating before removing the diskette.
7
Remove the diskette.
PN 624026AE
QUALITY ASSURANCE
DOWNLOADING CELL CONTROL RESULTS FOR IQAP
8
Apply a label (provided by Beckman Coulter’s IQAP department) to the disk. The label
identifies the owner of the submission in case the disk becomes corrupted.
9
Insert the disk into a return mailer and mail it to Beckman Coulter’s IQAP department.
ATTENTION: Beckman Coulter suggests that, if possible, until you receive an IQAP report for a particular set
of data, you do not delete that data. There may be times when you need to provide additional information for
the IQAP report; in those instances, you may need to refer to the control data.
10 Delete the cell control files from the system according to your laboratory’s protocol. See
Heading 7.5, DELETING QC RUNS/FILES.
11 Enter your next set of controls (assay values, expected ranges, lot numbers, and
expiration dates for all three levels of controls) as instructed in Heading A.6, SETTING
UP A CONTROL FILE.
PN 624026AE
7-45
7
QUALITY ASSURANCE
DELETING QC RUNS/FILES
7.5
DELETING QC RUNS/FILES
ATTENTION: QC files are made up of individual QC runs.
The following control data delete options are available:
r
Deleting the Last QC Run
r
Deleting One or More QC Runs
Deleting the Last QC Run
Do this procedure to delete the last QC result.
ATTENTION: Control data cannot be recovered once it has been deleted. Therefore, be certain that you want
to delete (erase) the control data before you proceed.
1
Is the last QC result displayed on the QC Graphics screen?
r
r
2
7-46
If yes:
1)
.
2)
to confirm deletion.
If no, go to step 2.
From the Main Menu screen,
.
PN 624026AE
QUALITY ASSURANCE
DELETING QC RUNS/FILES
3
PN 624026AE
.
4
The QC Levey-Jennings graphs screen
appears.
5
to view the QC Graphics
screen for the last run.
7-47
7
QUALITY ASSURANCE
DELETING QC RUNS/FILES
ATTENTION: Control data cannot be recovered once it has been deleted. Therefore, be certain that you want
to delete (erase) the control data before you proceed.
6
, which immediately deletes the control data.
Deleting One or More QC Runs
Do this procedure to delete one or more control runs.
ATTENTION: Control data cannot be recovered once it has been deleted. Therefore, be certain that you want
to delete (erase) the control data before you proceed.
7-48
1
Ensure that you have control summary data to fulfill your regulatory requirements prior
to deleting control files.
2
From the Main Menu screen,
.
PN 624026AE
QUALITY ASSURANCE
DELETING QC RUNS/FILES
3
4
.
The QC Levey-Jennings graphs screen
appears.
5
to view the QC Data Grid
screen.
PN 624026AE
7-49
7
QUALITY ASSURANCE
DELETING QC RUNS/FILES
6
Select the control files you want to
delete.
= included
= excluded
Note: If you want to delete many rows,
you do not have to select them
individually; there is an option called
“Unselected” in the next screen. If you
choose Unselected, all rows not selected
will be deleted, and all rows selected
will not be deleted.
7
.
8
the desired delete option:
r
Unselected (deletes rows with
r
Selected (deletes rows with
r
All (deletes all rows)
)
)
ATTENTION: Control data cannot be recovered
once it has been deleted. Therefore, be certain that
you want to delete (erase) the control data before
you proceed.
9
7-50
to confirm deletion.
PN 624026AE
QUALITY ASSURANCE
XB ANALYSIS
7.6
XB ANALYSIS
Definition
XB Analysis is a QC method that monitors instrument performance by comparing patient
RBC indices (MCV, MCH, and MCHC) with known target values. The method uses these
specific indices because they tend to remain fairly stable and because their values display little
variance from patient to patient.
XB/XM analysis is most effective when large numbers of samples per day are processed. Low
numbers of samples may lead to inappropriate XB flags.
When XB is enabled, the Workstation stores patient RBC results (RBC, Hgb, Hct, MCV, MCH,
and MCHC) after the samples are run.
A result will be excluded from the XB/XM analysis if one of the appropriate parameters:
r
is an incomplete (....)
r
is above the linear range (+++++)
r
has an SCL, MIC, or SCH flag
When a batch of 20 acceptable samples has been collected, the Workstation does the XB
Analysis calculations for the batch means of MCV, MCH, and MCHC. The batch value for
each point is the mean of the results of the last 20 analyses contained in the batch.
The number of parameters tracked for XB Analysis calculation depends upon your lab’s
preferences. Three parameters for XB is called XB. Nine parameter for XB is called XM.
For details, see XB/XM Options (Enabling/Disabling) and • Setting XB/XM Limits in
Appendix A and XB Analysis in the Analyzer in this chapter.
Using XB
When using XB Analysis, be sure to process samples randomly instead of in a group. For
example, if you process chemotherapy or neonate patient samples as a group, the results may
cause the XB to be OUT because the XB calculations will be based on those sample results.
When XB analysis is enabled, the Workstation compares the mean values with the target
values and the percent limits. If the mean values are within the percent limits of the target
values, then XB will be IN. Investigate any batch that is OUT of the XB limits, and record the
information in your logbook.
The Workstation also displays the batch means for each parameter in graph form. The lines
on the graph are from point to point, but when printed, a horizontal bar represents each
mean.
You can delete individual samples from the batch. You may want to do delete a result(s) if,
from review of the data, it represents a non-random sample population or has parameter
results that are exceptionally abnormal. When you delete a sample from the batch, it is
excluded from the calculations for that parameter. The total number of deletes in a batch
cannot exceed 5 because the XB Analysis requires at least 15 MCV, MCH, and MCHC values
in a batch for a valid calculation.
ATTENTION: Remember that abnormal samples should be processed randomly.
PN 624026AE
7-51
7
QUALITY ASSURANCE
XB ANALYSIS
Reviewing XB/XM Analysis Information
The Workstation displays the batch means for each parameter in graph form.
You can exclude individual samples from the batch. However, you can only exclude a
maximum of 5 samples.
Reviewing XB/XM Graphs Screen
XB graphs (Figure 7.6) shows each parameter in reference to the XB limits. The graphics
contain the values of the XB batches. Sixty full points are displayed and printed.
Figure 7.6 XB/XM Graphs Screen (9 Parameters XM is Shown)
Note:
allows you to modify the XB/XM Limits. To do this, see • Setting XB/XM Limits in
Appendix A.
7-52
PN 624026AE
QUALITY ASSURANCE
XB ANALYSIS
Do this procedure to review the XB/XM Analysis graphs.
1
From the Main Menu screen,
2
.
.
Note: If the icon is grayed out, there is
not enough control data for XB.
3
PN 624026AE
The XB/XM graphics screen appears.
r
If your system is setup for 3
parameters, then the 3 Parameters
(XB) screen appears.
r
If your system is setup for 9
parameters, then the 9 Parameters
(XM) screen appears (shown
here).
7-53
7
QUALITY ASSURANCE
XB ANALYSIS
Viewing XB Batch Details Screen and Including/Excluding XB Data
The XB Batch Details screen (Figure 7.7) displays parameter values, batch number, and run
date/time. Statistics includes the means of all the batches and the coefficients of variation for
each. If batch values or means are not within acceptable limits, they are displayed in color:
yellow if low and red if high.
Figure 7.7 XB Batch Details Screen
7-54
PN 624026AE
QUALITY ASSURANCE
XB ANALYSIS
• Procedure to View XB Batch Details Screen and to Include/Exclude XB Data
Do this procedure to review the XB Batch Details screen, which allows you to display details
for a specific batch you select and to exclude up to 5 results from one batch for XB Analysis
calculations.
Note: You can edit only the most current XB batch.
1
2
PN 624026AE
From the Main Menu screen,
.
.
7-55
7
QUALITY ASSURANCE
XB ANALYSIS
3
The XB/XM graphics screen appears.
r
If your system is setup for 3
parameters, then the 3 Parameters
(XB) screen appears.
r
If your system is setup for 9
parameters, then the 9 Parameters
(XM) screen appears (shown
here).
4
.
5
to display the Batch Details
screen.
7-56
PN 624026AE
QUALITY ASSURANCE
XB ANALYSIS
6
To exclude up to five results from the batch:
a.
the box next to the desired result(s) until appears. The instrument
recalculates the batch statistics based on the number of selected analyses.
b.
View the number of selected analyses to confirm you deleted the correct number of
results.
If you try to exclude more than 5, the following message appears:
7
To print the results list for the batch being reviewed,
.
The following message appears:
to print the XB/XM Results List report.
8
PN 624026AE
when you are finished.
7-57
7
QUALITY ASSURANCE
XB ANALYSIS
7-58
PN 624026AE
8SAMPLE ANALYSIS 8
8.1
PREPARE THE SYSTEM FOR PROCESSING
IMPORTANT Risk of inaccurate results if the Analyzer is not properly prepared. Follow the prompts, if any,
on the screen to perform either a Startup or Mini-Clean to prepare the Analyzer. It is not necessary to do
both.
If the system has remained idle for a certain period of time, the system will prompt you to do
a Startup or a Mini-Clean.
8.2
COLLECT AND MIX THE SPECIMEN
IMPORTANT Risk of erroneous results if the specimen collection tube is not filled to the quantity
required by the tube manufacturer. Fill the specimen collection tube as required.
1
Using K3EDTA as the anticoagulant, collect the required amount of venous specimen
according to the tube manufacturer’s requirements. (K2EDTA is an acceptable
alternative.)
Note: You can collect blood into a microcontainer. Refer to the tube manufacturer’s
minimum and maximum fill volumes.
2
PN 624026AE
Mix the blood specimen gently and
thoroughly before analysis according to
the tube manufacturer’s
recommendations and your laboratory’s
protocol.
8-1
SAMPLE ANALYSIS
DETERMINING HOW TO RUN THE SAMPLES
8.3
DETERMINING HOW TO RUN THE SAMPLES
r
For stat samples, see Heading 8.4, RUNNING MANUAL (STAT) SAMPLES.
r
For samples on the Worklist, see Heading 8.5, RUNNING WORKLIST SAMPLES IN
AUTOLOADER MODE.
r
For re-running samples, see Heading 8.6, RE-RUNNING SAMPLES.
IMPORTANT The Run-in-Progress screen (Figure 9.1)is not updated to reflect when a Manual Match is
performed. The Run-in-Progress screen shows the results as analyzed only. Printing prior to Manual
Match from the Run-in-Progress screen is inhibited. The final report prints from the Manual Match screen
after Manual Match has been completed.
8.4
RUNNING MANUAL (STAT) SAMPLES
Do this procedure to run a stat sample for:
r
a sample ID that does not exist on the Worklist, or
r
a sample ID that already exists on the Worklist.
You cannot select multiple entries from the Worklist to be run as stat samples. The samples
are processed based on entry into the Worklist. Therefore, if you have more than one stat
sample to process from the Worklist, repeat the procedure below as required.
Note: If you run a stat sample while the Autoloader mode is in progress,
the stat sample is analyzed.
cassettes already loaded.
flashes after
and the system will continue processing any additional
Running Manual (Stat) Samples
8-2
r
If there is an order on the Worklist or if you are not using Worklist, do Procedure for
Running Manual (Stat) Samples: Order On Worklist or Not Using Worklist.
r
If there is not an order on the Worklist and you want to assign demographics, do
Procedure for Running Manual (Stat) Samples: No Order on Worklist and You Want to
Assign Demographics.
PN 624026AE
SAMPLE ANALYSIS
RUNNING MANUAL (STAT) SAMPLES
Procedure for Running Manual (Stat) Samples: Order On Worklist or Not Using Worklist
Do this procedure to run a manual (stat) sample if there is a Worklist order for this sample or
if you do not use the Worklist.
1
2
.
Enter the Sample ID (up to 16
alphanumeric characters) into the Stat
window, or
to search for the
sample Worklist order. Highlight to
select.
Note: If data is already on the Worklist,
it will automatically populate the fields
and can be confirmed by
3
PN 624026AE
.
Select the desired test panel, CBC or
CBC/DIFF. See Panel (Selecting CBC or
CBC/DIFF) in this chapter.
8-3
8
SAMPLE ANALYSIS
RUNNING MANUAL (STAT) SAMPLES
4
Select the flagging set. See Flagging Set
(Selecting) in this chapter.
5
.
A message appears prompting you to insert the tube into the holder.
IMPORTANT Risk of sample mis-identification if you do not verify the Sample ID displayed at the
Workstation with the Sample ID on the tube prior to analysis.
6
7
8-4
When the tube holder door opens, confirm the Sample ID.
r
If the Sample ID is correct, place the tube in the correct position of the appropriate
holder.
r
If the Sample ID is incorrect,
to exit.
If the information is correct, close the tube holder door to begin analysis.
PN 624026AE
SAMPLE ANALYSIS
RUNNING MANUAL (STAT) SAMPLES
8
After analysis is completed, the results are displayed for review.
9
Repeat steps 2 through 8 for each “stat” sample.
10 To view the results after all samples have been completed:
a.
b.
.
Select the desired result to review.
11 To enter result comments:
a.
b.
PN 624026AE
, if necessary.
Select the result for which you want to add a comment.
c.
.
d.
Type the comment.
e.
.
8-5
8
SAMPLE ANALYSIS
RUNNING MANUAL (STAT) SAMPLES
12 Results are printed/transmitted according to your system setup. If Auto-Print is enabled,
results comments will not be included.
To print/transmit a sample report with the results comments included:
a.
b.
from the Results screen.
Select Print or Transmit from the following window.
c.
to print or transmit.
13 When you are finished analyzing the stat samples,
to exit the Manual (Stat)
mode.
14 Verify the Sample ID and results before reporting the results.
8-6
PN 624026AE
SAMPLE ANALYSIS
RUNNING MANUAL (STAT) SAMPLES
Procedure for Running Manual (Stat) Samples: No Order on Worklist and You Want to Assign
Demographics
Do this procedure to run a manual (stat) sample if there is no Worklist order and you want to
assign demographics.
PN 624026AE
1
.
2
.
3
Enter the Sample ID (up to 16
alphanumeric characters) into the Stat
window.
4
Select the desired test panel. See Panel
(Selecting CBC or CBC/DIFF) in this
chapter.
8-7
8
SAMPLE ANALYSIS
RUNNING MANUAL (STAT) SAMPLES
5
Select the flagging set. See Flagging Set
(Selecting) in this chapter.
6
Enter the appropriate demographics as
required by your lab protocol:
- Collect Date/Time (Entering)
- Location (Entering/Selecting)
- Physician (Entering/Selecting)
- Comments (Sample and Patient):
Entering/Editing
- Patient ID (Entering/Editing)
- Name (Locating/Selecting)
- Date of Birth (Entering/Editing)
- Age (Entering/Editing)
- Gender (Selecting)
If you make a mistake when entering
the demographics,
the entry.
8-8
to clear
PN 624026AE
SAMPLE ANALYSIS
RUNNING MANUAL (STAT) SAMPLES
7
.
A message appears prompting you to insert the tube into the tube holder for analysis.
8
Verify the Sample ID and other information.
If any of the information is incorrect,
to exit.
IMPORTANT Risk of sample mis-identification if you do not verify the Sample ID displayed at the
Workstation with the Sample ID on the tube prior to analysis.
9
If the information is correct, insert the tube into the tube holder.
10 Close the tube holder door for analysis to begin.
After analysis is completed, the results are displayed for review.
PN 624026AE
8-9
8
SAMPLE ANALYSIS
RUNNING MANUAL (STAT) SAMPLES
11 To view the results after all samples have been completed:
a.
b.
.
Select the desired result to review.
12 To enter result comments:
a.
b.
8-10
, if necessary.
Select the result for which you want to add a comment.
c.
.
d.
Type the comment.
e.
.
PN 624026AE
SAMPLE ANALYSIS
RUNNING MANUAL (STAT) SAMPLES
13 Results are printed/transmitted according to your system setup. If Auto-Print is enabled,
results comments will not be included.
To print/transmit a sample report with the results comments included:
a.
b.
c.
from the Results screen.
Select Print or Transmit from the following window.
to print or transmit.
14 The manual (stat) mode screen remains active if you want to run another stat sample.
Repeat steps 2 through 7 for additional manual (stat) samples.
PN 624026AE
8-11
8
SAMPLE ANALYSIS
RUNNING WORKLIST SAMPLES IN AUTOLOADER MODE
15 When you are finished analyzing the stat samples,
to exit the Manual (Stat)
mode.
16 Verify the Sample ID and results before reporting the results.
8.5
RUNNING WORKLIST SAMPLES IN AUTOLOADER MODE
The following procedures are provided:
r
Worklist: Barcode Positive ID, Manual Match ON
r
No Worklist: Barcode Positive ID, Manual Match OFF
r
Worklist: Cass./Position Positive ID, Manual Match ON
r
No Worklist: Cass./Position Positive ID, Manual Match OFF
To learn more about the Worklist feature, see Heading E.2, WORKLIST MATCH OPTION
SCENARIOS.
Worklist: Barcode Positive ID, Manual Match ON
Do this procedure to analyze samples with barcoded Sample IDs from the Worklist with
Manual Match on.
1
8-12
.
PN 624026AE
SAMPLE ANALYSIS
RUNNING WORKLIST SAMPLES IN AUTOLOADER MODE
2
.
3
Enter the Sample ID. See Sample ID
(Entering/Selecting) in this chapter.
4
Select the desired test panel. See Panel
(Selecting CBC or CBC/DIFF) in this
chapter.
5
Select the flagging set, or the flagging
set will be determined by age and
gender.
See Flagging Set (Selecting) in this
chapter.
PN 624026AE
8-13
8
SAMPLE ANALYSIS
RUNNING WORKLIST SAMPLES IN AUTOLOADER MODE
6
Enter the appropriate demographics as
required by your lab protocol:
- Collect Date/Time (Entering)
- Location (Entering/Selecting)
- Physician (Entering/Selecting)
- Comments (Sample and Patient):
Entering/Editing
- Patient ID (Entering/Editing)
- Name (Locating/Selecting)
- Date of Birth (Entering/Editing)
- Age (Entering/Editing)
- Gender (Selecting)
If you make a mistake when entering
the demographics,
the entry.
7
to clear
Load the tubes into the cassette.
IMPORTANT Risk of sample mis-identification if you do not verify the Sample ID displayed at the
Workstation with the Sample ID on the tube prior to analysis.
8
9
8-14
Verify the correct Sample ID for each barcoded tube.
.
PN 624026AE
SAMPLE ANALYSIS
RUNNING WORKLIST SAMPLES IN AUTOLOADER MODE
WARNING Risk of injury/biohazardous conditions if a cassette is not properly handled. Do not use a
cassette for storing or transporting tubes or vials. To ensure tubes/vials remain secured in the
cassettes, always keep cassettes upright and use them only for analysis as described in this manual.
10 Place the cassette in the Cassette Input Tray of the Analyzer. Be sure the cassette is
properly positioned (with the front of the cassette facing the reagent compartment).
(See Loading Cassettes onto the Analyzer in Chapter 5.)
!
Be sure your hands are free and clear from the cassette input area before beginning
analysis.
11
to begin analysis.
While analysis is in progress, the red LED flashes on the front of the Analyzer.
12 To view the results for the last sample analyzed,
.
13 To view the results after all samples have been completed:
a.
b.
PN 624026AE
.
Select the desired result to review.
8-15
8
SAMPLE ANALYSIS
RUNNING WORKLIST SAMPLES IN AUTOLOADER MODE
14 To enter result comments:
a.
b.
, if necessary.
Select the result for which you want to add a comment.
c.
.
d.
Type the comment.
e.
.
15 If there is a situation where the system cannot find a Worklist order for the sample it is
processing (e.g. barcode was not read or the Worklist order is missing or incorrect), the
sample results are placed on the Manual Match screen.
flashes when this happens.
For details, see Manual Match Procedure in Chapter 9.
16 When all samples have been processed, the instrument ejects the cassette into the
Cassette Output Tray.
17 Remove the cassette from the instrument. See Unloading Cassettes from the Analyzer in
Chapter 5.
8-16
PN 624026AE
SAMPLE ANALYSIS
RUNNING WORKLIST SAMPLES IN AUTOLOADER MODE
18 Results are printed/transmitted according to your system setup. If Auto-Print is enabled,
results comments will not be included.
To print/transmit a sample report with the results comments included:
a.
b.
c.
from the Results screen.
Select Print or Transmit from the following window.
to print or transmit.
19 Remove the sample tubes from the cassette.
(See Removing Tubes from a Cassette in Chapter 5.)
20 Verify the Sample ID and results before reporting the results.
PN 624026AE
8-17
8
SAMPLE ANALYSIS
RUNNING WORKLIST SAMPLES IN AUTOLOADER MODE
No Worklist: Barcode Positive ID, Manual Match OFF
Do this procedure to analyze samples with barcoded Sample IDs with no
Worklist/demographic functions, and Manual Match off.
IMPORTANT Risk of sample mis-identification if you do not verify the Sample ID displayed at the
Workstation with the Sample ID on the tube prior to analysis.
1
Load the barcoded sample tubes into the cassette.
2
Verify the correct Sample ID for each tube.
WARNING Risk of injury/biohazardous conditions if a cassette is not properly handled. Do not use a
cassette for storing or transporting tubes or vials. To ensure tubes/vials remain secured in the
cassettes, always keep cassettes upright and use them only for analysis as described in this manual.
3
Place the cassette in the Cassette Input Tray of the Analyzer. Be sure the cassette is
properly positioned (with the front of the cassette facing the reagent compartment).
(See Loading Cassettes onto the Analyzer in Chapter 5.)
!
Be sure your hands are free and clear from the cassette input area before beginning
analysis.
4
to begin analysis.
While analysis is in progress, the red LED flashes on the front of the Analyzer.
8-18
PN 624026AE
SAMPLE ANALYSIS
RUNNING WORKLIST SAMPLES IN AUTOLOADER MODE
5
To view the results for the last sample analyzed,
6
To view the results after all samples have been completed:
a.
b.
7
.
Select the desired result to review.
To enter result comments:
a.
b.
8
.
, if necessary.
Select the result for which you want to add a comment.
c.
.
d.
Type the comment.
e.
.
If there is a situation where the system cannot read the barcode, the sample results are
placed on the Manual Match screen even though the Manual Match is OFF.
when results are placed on the Manual Match screen.
flashes
For details, see Manual Match Procedure in Chapter 9.
9
PN 624026AE
When all samples have been processed, the instrument ejects the cassette into the
Cassette Output Tray.
8-19
8
SAMPLE ANALYSIS
RUNNING WORKLIST SAMPLES IN AUTOLOADER MODE
10 Remove the cassette from the instrument. See Unloading Cassettes from the Analyzer in
Chapter 5.
11 Results are printed/transmitted according to your system setup. If Auto-Print is enabled,
results comments will not be included.
To print/transmit a sample report with the results comments included:
a.
b.
c.
8-20
from the Results screen.
Select Print or Transmit from the following window.
to print or transmit.
PN 624026AE
SAMPLE ANALYSIS
RUNNING WORKLIST SAMPLES IN AUTOLOADER MODE
12 Remove the sample tubes from the cassette.
(See Removing Tubes from a Cassette in Chapter 5.)
13 Verify the Sample ID and results before reporting the results.
PN 624026AE
8-21
8
SAMPLE ANALYSIS
RUNNING WORKLIST SAMPLES IN AUTOLOADER MODE
Worklist: Cass./Position Positive ID, Manual Match ON
ATTENTION: This configuration is for labs that do not use barcoded sample tubes but require
patient demographics be assigned with sample results. The Worklist order can either be
entered manually or downloaded from a Host computer.
IMPORTANT Risk of sample mis-identification if you do not verify the correct cassette and position for each
sample tube. The use of the cassette and position as the positive identifier is not as secure as the use of
barcodes and is not a recommended method of sample identification/operation. If you choose to analyze
samples in this manner, you must verify that the sample tube(s) are placed in the correct cassette and in the
correct position.
Do not use this method of operation if you are using barcoded tubes. The barcode label in this case is
additional sample information and not the primary sample identifier. If a barcode label is not read, the
results will be reported using the Worklist entry information.
Do this procedure to analyze samples without barcoded Sample IDs from the Worklist with
Manual Match on.
1
2
.
If manually entering the Worklist orders,
.
Note: If the Worklist orders were downloaded by a Host computer, verify that they have
been received.
8-22
PN 624026AE
SAMPLE ANALYSIS
RUNNING WORKLIST SAMPLES IN AUTOLOADER MODE
3
Type the cassette number (1 to 10) from the back of the cassette and press Û.
4
Enter the Sample ID. See Sample ID
(Entering/Selecting) in this chapter.
5
Select the desired test panel. See Panel
(Selecting CBC or CBC/DIFF) in this
chapter.
6
Select the flagging set, or the flagging
set will be automatically applied based
on age and gender.
See Flagging Set (Selecting) in
Appendix A.
PN 624026AE
8-23
8
SAMPLE ANALYSIS
RUNNING WORKLIST SAMPLES IN AUTOLOADER MODE
7
Enter the following demographics as
required by your lab protocol:
- Collect Date/Time (Entering)
- Location (Entering/Selecting)
- Physician (Entering/Selecting)
- Comments (Sample and Patient):
Entering/Editing
- Patient ID (Entering/Editing)
- Name (Locating/Selecting)
- Date of Birth (Entering/Editing)
- Age (Entering/Editing)
- Gender (Selecting)
If you make a mistake when entering
the demographics,
the entry.
8
9
8-24
to clear
.
Repeat steps 4 through 8 for each tube.
PN 624026AE
SAMPLE ANALYSIS
RUNNING WORKLIST SAMPLES IN AUTOLOADER MODE
WARNING Risk of injury/biohazardous conditions if a cassette is not properly handled. Do not use a
cassette for storing or transporting tubes or vials. To ensure tubes/vials remain secured in the
cassettes, always keep cassettes upright and use them only for analysis as described in this manual.
10 Load the tube(s) into the correct cassette positions.
IMPORTANT Risk of sample mis-identification or incorrect demographic assignment if the tubes are not
located in the correct cassette and position. Prior to analysis, verify that all tubes are located in the
correct cassette and position as they are entered on your Worklist.
11 Verify the correct identification for each tube.
12 Place the cassette in the Cassette Input Tray of the Analyzer. Be sure the cassette is
properly positioned (with the front of the cassette facing the reagent compartment).
(See Loading Cassettes onto the Analyzer in Chapter 5.)
13
.
!
Be sure your hands are free and clear from the cassette input area before beginning
analysis.
14
to begin analysis.
While analysis is in progress, the red LED flashes on the front of the Analyzer.
PN 624026AE
8-25
8
SAMPLE ANALYSIS
RUNNING WORKLIST SAMPLES IN AUTOLOADER MODE
15 To view the results for the last sample analyzed,
.
16 If there is a situation where the system cannot find a Worklist order for the sample it is
processing (e.g. Worklist order is missing or is incorrect), the sample results are placed
on the Manual Match screen.
flashes when this occurs.
For details, see Manual Match Procedure in Chapter 9.
17 To view the results after all samples have been completed:
a.
b.
.
Select the desired result to review.
18 To enter result comments:
a.
b.
, if necessary.
Select the result for which you want to add a comment.
c.
.
d.
Type the comment.
e.
.
19 When all samples have been processed, the instrument ejects the cassette into the
Cassette Output Tray.
8-26
PN 624026AE
SAMPLE ANALYSIS
RUNNING WORKLIST SAMPLES IN AUTOLOADER MODE
20 Remove the cassette from the instrument. See Unloading Cassettes from the Analyzer in
Chapter 5.
21 Results are printed/transmitted according to your system setup. If Auto-Print is enabled,
results comments will not be included.
To print/transmit a sample report with the results comments included:
a.
b.
from the Results screen.
Select Print or Transmit from the following window.
ATTENTION: It is important that you verify all results as being correctly associated with the
correct patient demographics before reporting.
c.
PN 624026AE
to print or transmit.
8-27
8
SAMPLE ANALYSIS
RUNNING WORKLIST SAMPLES IN AUTOLOADER MODE
22 Remove the sample tubes from the cassette.
(See Removing Tubes from a Cassette in Chapter 5.)
23 Verify the Sample ID and results before reporting the results.
8-28
PN 624026AE
SAMPLE ANALYSIS
RUNNING WORKLIST SAMPLES IN AUTOLOADER MODE
No Worklist: Cass./Position Positive ID, Manual Match OFF
Note: This configuration is for labs that do not use barcoded sample tubes and do not require
that patient demographics be assigned with sample results. With this configuration, there is
no positive identification and results will be printed with an AUTO_SID unless a Sample ID is
read from the sample tube.
1
Load the sample tubes into the cassette.
WARNING Risk of injury/biohazardous conditions if a cassette is not properly handled. Do not use a
cassette for storing or transporting tubes or vials. To ensure tubes/vials remain secured in the
cassettes, always keep cassettes upright and use them only for analysis as described in this manual.
2
Place the cassette in the Cassette Input Tray of the Analyzer. Be sure the cassette is
properly positioned (with the front of the cassette facing the reagent compartment).
(See Loading Cassettes onto the Analyzer in Chapter 5.)
!
Be sure your hands are free and clear from the cassette input area before beginning
analysis.
3
to begin analysis.
While analysis is in progress, the red LED flashes on the front of the Analyzer.
4
PN 624026AE
To view the results for the last sample analyzed,
.
8-29
8
SAMPLE ANALYSIS
RUNNING WORKLIST SAMPLES IN AUTOLOADER MODE
5
To view the results after all samples have been completed:
a.
b.
6
8-30
.
Select the desired result to review.
To enter result comments:
a.
b.
, if necessary.
Select the result for which you want to add a comment.
c.
d.
.
Type the comment.
e.
.
7
When all samples have been processed, the instrument ejects the cassette into the
Cassette Output Tray.
8
Remove the cassette from the instrument. See Unloading Cassettes from the Analyzer in
Chapter 5.
PN 624026AE
SAMPLE ANALYSIS
RUNNING WORKLIST SAMPLES IN AUTOLOADER MODE
9
Results are printed/transmitted according to your system setup. If Auto-Print is enabled,
results comments will not be included.
To print/transmit a sample report with the results comments included:
a.
b.
from the Results screen.
Select Print or Transmit from the following window.
ATTENTION: It is important that you verify all results as being correctly associated with the
correct patient demographics before reporting.
c.
to print or transmit.
10 Remove the sample tubes from the cassette.
(See Removing Tubes from a Cassette in Chapter 5.)
11 Verify the Sample ID and results before reporting the results.
PN 624026AE
8-31
8
SAMPLE ANALYSIS
RE-RUNNING SAMPLES
8.6
RE-RUNNING SAMPLES
There may be instances when you will want to rerun a sample; for example, you may want to
rerun a sample to confirm a suspect result.
r
You can manually select the sample to be re-run (see Manual Reruns in this chapter).
r
If the sample meets the defined criteria for an automatic re-run, a new Worklist order is
created, and the instrument will automatically re-analyze the sample. Both the original
and re-run results will be available for view. For information on automatic re-runs, see
Defining Automatic Rerun Criteria (By Flags and/or by Parameters) in Appendix A and
see Automatic Reruns in this chapter.
Manual Reruns
Do this procedure to re-analyze a sample that was not automatically selected to be rerun.
1.
Locate the results of the sample you want to rerun. See Heading 9.1, LOCATING
SAMPLE RESULTS for details.
2.
From the Results List screen (Figure 9.2), click the desired result. The Results screen
(Figure 9.5) appears.
3.
. The following message appears: A rerun order was created on the Worklist ...
4.
5.
6.
Verify that the Sample ID in the message is correct.
. The sample is marked to be re-run, and the Rerun icon is grayed out.
The system automatically creates an order (Figure 8.1) on the Worklist and allows the
sample to be processed as a “rerun”.
Figure 8.1 Rerun Order on Worklist
Note: Reruns of AUTO_SIDs
with Cass./Position as the
primary identifier require
re-entry on the Worklist
because the cassette/position
is not updated to the Worklist
with “rerun”.
7.
8-32
Analyze the sample from the Worklist.
PN 624026AE
SAMPLE ANALYSIS
RE-RUNNING SAMPLES
Automatic Reruns
The criteria for automatically marking samples to be re-run are defined in Defining Automatic
Rerun Criteria (By Flags and/or by Parameters) Appendix A.
If a sample meets the defined criteria, a Worklist order is created. You can then analyze the
sample as needed.
Identifying Rerun Results
When a patient sample report is printed, Yes will appear near to Rerun on the report. See
Figure 8.2.
Figure 8.2 Rerun Indicator on Patient Sample Report
PN 624026AE
8-33
8
SAMPLE ANALYSIS
ENTERING SAMPLE/PATIENT INFORMATION
8.7
ENTERING SAMPLE/PATIENT INFORMATION
Figure 8.3 shows the patient and sample information fields.
Figure 8.3 Patient and Sample Information Fields
Required Information
The following information is required for every sample:
r
Sample ID (see Sample ID (Entering/Selecting) in this chapter)
r
Panel (see Panel (Selecting CBC or CBC/DIFF) in this chapter)
r
Flagging Set (see Flagging Set (Selecting) in this chapter)
Other demographics are optional. See Demographics (Entering/Selecting) in this chapter.
To create a Worklist order, the information must be entered manually or downloaded from a
Host computer. The manual entry is done using the Worklist add function. For details, see
Adding an Order (Entry) in this chapter.
8-34
PN 624026AE
SAMPLE ANALYSIS
ENTERING SAMPLE/PATIENT INFORMATION
Sample ID (Entering/Selecting)
A Sample ID is required for all orders. You can manually enter the Sample ID at the keyboard
or through scanning with the optional barcode wand. The Sample ID can also be received
from a Host computer.
If a Sample ID is not entered when the order is saved on the Worklist, the system
automatically assigns a Sample ID in the format of AUTO_SIDxxxxxxxx; where each “x” is
replaced by the next logical sequence number. The AUTO_SID can be set to reset and start at
a given number as party of the New Workday process. To select the starting number for the
Auto-Numbering sequence, see Auto-Numbering (Setting the AUTO_SID Starting Number)
in Appendix A.
1.
.
2.
.
3.
To locate a Sample ID already on the Worklist, do one of the following:
a.
at the Sample ID.
b.
Type the Sample ID. As you type each number, the Sample IDs matching the
information are displayed.
c.
Highlight the desired Sample ID and
. The information is placed on the
Worklist entry screen and with the fields populated with any information associated
with the Sample ID.
OR
a.
Type the Sample ID in the Sample ID field (up to 16 alphanumeric characters).
b.
Move the cursor to another field. If any information is associated with that Sample
ID, it is displayed.
c.
.
Panel (Selecting CBC or CBC/DIFF)
1.
2.
3.
4.
PN 624026AE
to select the desired panel, CBC or CBC/DIFF.
Verify the correct panel is displayed.
.
The default panel will automatically be run if no change is made.
8-35
8
SAMPLE ANALYSIS
ENTERING SAMPLE/PATIENT INFORMATION
Flagging Set (Selecting)
The flagging set can be selected manually or automatically if the Age/Date of Birth/Gender
information is entered. The system has the Standard Range set as the default, and this will be
used if no other information is entered. For details on changing the range to be used as the
default, see • Setting a Default Flagging Set in Appendix A.
1.
2.
.
Highlight the desired flagging set as required.
3.
.
Demographics (Entering/Selecting)
Although Sample ID, panel, and flagging set are required for every sample, the following
demographics are optional:
r
r
r
r
r
r
r
r
r
r
collection date/time, see Collect Date/Time (Entering)
location, see Location (Entering/Selecting)
physician, see Physician (Entering/Selecting)
comments about the sample, see Comments (Sample and Patient): Entering/Editing
comments about the patient. see Comments (Sample and Patient): Entering/Editing
patient ID, see Patient ID (Entering/Editing)
patient name, see Name (Locating/Selecting)
date of birth, see Date of Birth (Entering/Editing)
age, see Age (Entering/Editing)
gender, see Gender (Selecting)
Collect Date/Time (Entering)
1.
Anchor the cursor in the first position of the field.
2.
Type the date.
3.
Type the time.
4.
8-36
.
PN 624026AE
SAMPLE ANALYSIS
ENTERING SAMPLE/PATIENT INFORMATION
Location (Entering/Selecting)
1.
2.
.
Highlight the desired location if it appears in the list. Otherwise, type the location name.
3.
.
Physician (Entering/Selecting)
1.
2.
3.
.
Highlight the desired physician’s name if it appears in the list. Otherwise, type the
physician’s name.
.
Comments (Sample and Patient): Entering/Editing
You can type comments (up to 50 alphanumeric characters) for a sample and/or a patient.
1.
PN 624026AE
For sample comments,
.
appears.
For patient comments,
.
appears.
2.
Type the comment.
3.
.
8-37
8
SAMPLE ANALYSIS
ENTERING SAMPLE/PATIENT INFORMATION
Patient ID (Entering/Editing)
ATTENTION: If you enter patient demographic information and do not enter a Patient ID, the
system automatically assigns a Patient ID when the order is saved on the Worklist. The format
is AUTO_PIDxxxxxxxx, where each “x” is replaced by the next logical sequence number.
1.
Anchor the cursor in the first position of the field.
2.
Type the Patient ID.
3.
If the Patient ID entered already exists in the database, the remaining fields (Last Name,
first Name, Date of Birth, Age, and Gender) are automatically populated with any
information already stored when the cursor is moved to the next field.
4.
.
Name (Locating/Selecting)
For the Last Name
To locate a Last Name already in the database:
1.
.
2.
.
3.
at the Last Name field.
4.
Type the patient’s last name. As you type, the records matching the information are
displayed.
5.
Highlight the desired record.
6.
. The information is placed on the Worklist entry screen and the fields are
populated with any information associated with the Last Name.
For the First Name:
1.
2.
8-38
Type the name at
.
.
PN 624026AE
SAMPLE ANALYSIS
ENTERING SAMPLE/PATIENT INFORMATION
Date of Birth (Entering/Editing)
1.
Anchor the cursor in the first position of the field.
2.
Type the patient’s date of birth.
3.
.
Age (Entering/Editing)
If a date of birth has been entered, the patient’s age is automatically entered. If a date of birth
is unavailable, enter the patient’s age.
1.
Anchor the cursor in the first position of the field.
2.
Type the patient’s age.
3.
To indicate the age, use Y for years, M for months, W for weeks, and D for days. (For
example, 40 years should be entered as 40Y.)
4.
.
Gender (Selecting)
1.
2.
3.
PN 624026AE
.
Highlight the patient’s gender.
.
8-39
8
SAMPLE ANALYSIS
UNDERSTANDING THE WORKLIST SCREENS
8.8
UNDERSTANDING THE WORKLIST SCREENS
Overview
There are two screens available for entering and displaying Worklist information: a Worklist
Grid screen and a Worklist Cassette screen.
r
See Figure 8.5, Worklist Grid Screen (
r
See Figure 8.6, Worklist Cassette Screen (
).
).
The right side of both screens is the same (Figure 8.4) and contains the fields where the
information is entered.
Figure 8.4 Right Side of the Worklist Screens
8-40
PN 624026AE
SAMPLE ANALYSIS
UNDERSTANDING THE WORKLIST SCREENS
Understanding the Worklist Grid Screen
The Worklist Grid screen (Figure 8.5) shows entered information in tabular or grid format on
the left of the screen This screen is available when either Barcode or Cass./Position is the
defined Worklist Match Option (positive ID).
The Worklist Grid screen is the primary screen used for entering Worklist order information
when the Worklist Match Option is Barcode. When operating with Worklist Match Option set
to Barcode, it is neither possible nor necessary to enter a cassette and position because the
information is matched based on the sample’s barcode. The cassette and position information
is obtained and provided with the results when the sample is analyzed.
Figure 8.5 Worklist Grid Screen
b
1$
Allows you to select the sample to be
automatically re-run
1%
Patient ID
displays the Worklist Grid screen
c
displays the Worklist Cassette screen
(Figure 8.6). Only available if the Cass./Position
is the Worklist Match Option.
PN 624026AE
d
Cassette number for sample highlighted in 2^
1^
Find (search) icon for the Patient ID
e
Cassette position number for sample
highlighted in 2^
1&
Patient’s last name
f
Sample ID
1*
Patient’s first name
8-41
8
SAMPLE ANALYSIS
UNDERSTANDING THE WORKLIST SCREENS
8-42
g
Collection date and time of sample
1(
Patient’s age
h
Flagging set
2)
Patient’s date of birth
i
Find (search) icon for the Sample ID
2!
Patient’s gender
j
Location
2@
Patient ID
1)
Test panel
2#
Position
1!
Physician
2$
Cassette number. If ? is displayed, it means
the system could not determine the cassette
number.
1@
Opens the Sample comment window
2%
Sample ID. If ? is displayed, it means the
system could not determine the tube’s
position.
1#
Opens the Patient comment window
2^
Worklist orders
PN 624026AE
SAMPLE ANALYSIS
UNDERSTANDING THE WORKLIST SCREENS
Understanding the Worklist Cassette Screen
On the Worklist Cassette screen (Figure 8.6), the entered information is shown on the left of
the screen and is representative of a cassette to facilitate data entry and location of tubes
within the cassette.
This screen is only available if Cass./Position is the selected Worklist Match Option (positive
ID). The Worklist Cassette screen is the primary screen used when entering Worklist
information when the Worklist Match Option is Cass./Position. When operating with the
Worklist Match Option set to Cass./Position, you must enter a cassette and position to indicate
the location of the sample tube to match with the demographics.
Figure 8.6 Worklist Cassette Screen
b
Test panels
f
Information for the tubes currently entered in the
Worklist for the cassette number shown in d
c
Cassette number field where you type the
cassette number
g
Patient/sample information for the tube where h
is pointing
d
Cassette number indicator that reflects
what is typed in c
h
Pointer that indicates the tube for which
information appears in g
e
Position number in the cassette of the
tube where h is pointing
i
Selected test panel indicator that shows which test
has been selected
with
For a better understanding of cassette and position numbers, see Figure 8.7.
PN 624026AE
8-43
8
SAMPLE ANALYSIS
UNDERSTANDING THE WORKLIST SCREENS
Figure 8.7 Worklist Cassette Screen: Cass./Position Details
The cassette number is entered when you create/edit the Worklist (if Cass./Position is the
Worklist Match Option.) If any information has already been entered for this cassette, it will
be displayed.
The pos (position) displayed is based upon the location of the arrow. In Figure 8.7, the arrow
is at position 1; therefore, “1” is reflected in the Pos field. For example, if the arrow were
located next to an empty tube in position 7, “7” would be reflected in the Pos field.
The graphic representation of the cassette is used to facilitate data entry and correct location
of the samples in the cassette. Any position that has information assigned to it will be
indicated by a sample tube containing the Sample ID on the side. See Figure 8.8.
Any position that does not have information assigned to it will be indicated as EMPTY.
Figure 8.8 Worklist Sample ID from Worklist Cassette Screen
8-44
PN 624026AE
SAMPLE ANALYSIS
WORKING WITH WORKLIST ORDERS
8.9
WORKING WITH WORKLIST ORDERS
Receiving Worklists from a Host Computer
If the Host transmission protocol is established, demographics are automatically downloaded
from the host computer. You cannot edit any information downloaded from the host
computer.
Adding an Order (Entry)
Worklist orders (entries) can be added/entered at the Worklist Grid screen or at the Worklist
Cassette Screen. For details:
r
See Adding an Order at the Worklist Grid Screen in this chapter.
r
See Adding an Order at the Worklist Cassette Screen in this chapter.
The following information cannot be edited: results and demographics downloaded from the
Host computer.
Adding an Order at the Worklist Grid Screen
Do this procedure to add an order to the Worklist Grid screen for analysis. Minimum
requirements include:
PN 624026AE
r
Sample ID
r
Flagging Set
r
Panel (CBC or CBC/DIFF)
1
.
2
.
8-45
8
SAMPLE ANALYSIS
WORKING WITH WORKLIST ORDERS
3
4
Enter the information on the right side
of the screen:
r
Sample ID (Entering/Selecting)
r
Flagging Set (Selecting)
r
Panel (Selecting CBC or
CBC/DIFF)
r
Demographics as required by your
lab protocol:
r
- Collect Date/Time
(Entering)
r
- Location
(Entering/Selecting)
r
- Physician
(Entering/Selecting)
r
- Comments (Sample and
Patient): Entering/Editing
r
- Patient ID
(Entering/Editing)
r
- Name (Locating/Selecting)
r
- Date of Birth
(Entering/Editing)
r
- Age (Entering/Editing)
r
- Gender (Selecting)
To add another order,
orders have been entered.
Note: If you
5
and enter the information. Repeat this step until all
, only the information currently displayed will be cleared.
When you are finished adding all the orders,
.
The Worklist is updated to reflect your changes. You may need to scroll to view
everything.
8-46
PN 624026AE
SAMPLE ANALYSIS
WORKING WITH WORKLIST ORDERS
Adding an Order at the Worklist Cassette Screen
Requirements: The Worklist Match Option must be Cass./Position. See Worklist Match and
Manual Match Options in Appendix A.
Do this procedure to add an order to the Worklist Cassette screen for analysis. Minimum
requirements include:
r
Sample ID
r
Flagging Set
r
Panel (CBC or CBC/DIFF)
1
.
2
to open the Worklist Cassette
screen.
PN 624026AE
8-47
8
SAMPLE ANALYSIS
WORKING WITH WORKLIST ORDERS
3
Type the cassette number at
and press Û.
The Worklist Cassette screen appears for that cassette number. There may already be
Worklist orders, or the Worklist for that cassette may be empty.
4
Click the EMPTY slot that corresponds to the desired position number.
If you select 1 as the position, be sure to insert the tube into slot 1 of the cassette.
5
Enter all required Worklist information for this sample.
6
Enter the information on the right side
of the screen:
r
r
r
r
8-48
Sample ID (Entering/Selecting)
Flagging Set (Selecting)
Panel (Selecting CBC or
CBC/DIFF)
Demographics as required by your
lab protocol:
r - Collect Date/Time
(Entering)
r - Location
(Entering/Selecting)
r - Physician
(Entering/Selecting)
r - Comments (Sample and
Patient): Entering/Editing
r - Patient ID
(Entering/Editing)
r - Name (Locating/Selecting)
r - Date of Birth
(Entering/Editing)
r - Age (Entering/Editing)
r - Gender (Selecting)
PN 624026AE
SAMPLE ANALYSIS
WORKING WITH WORKLIST ORDERS
7
.
The Worklist is updated to reflect your changes. You may need to scroll to view
everything.
Editing a Worklist Order (Entry)
Do this procedure to edit a Worklist order before analysis. Note: Everything except the
Sample ID can be changed.
1
2
3
PN 624026AE
.
Highlight the desired order (sample) to be edited.
.
8-49
8
SAMPLE ANALYSIS
WORKING WITH WORKLIST ORDERS
4
Make the desired changes, if any, for:
- Collect Date/Time (Entering)
- Panel (Selecting CBC or CBC/DIFF)
- Flagging Set (Selecting)
- Location (Entering/Selecting)
- Physician (Entering/Selecting)
- Comments (Sample and Patient):
Entering/Editing
- Patient ID (Entering/Editing)
- Name (Locating/Selecting)
- Date of Birth (Entering/Editing)
- Age (Entering/Editing)
- Gender (Selecting)
5
.
The Worklist is updated to reflect your changes. You may need to scroll to view
everything.
8-50
PN 624026AE
SAMPLE ANALYSIS
WORKING WITH WORKLIST ORDERS
Deleting a Worklist Order (Entry)
Worklist orders can be deleted at the Worklist Grid screen or at the Worklist Cassette Screen.
ATTENTION: If you delete a Worklist order for a new Patient ID, any entered demographic
information will be deleted. If the order has a Patient ID already in the system prior to this
Worklist order, then the demographic information for this Patient ID on the Worklist (not in
the database) will be deleted when you delete the order.
Do this procedure if you want to delete an order from the Worklist.
1
2
PN 624026AE
.
Open the desired screen:
r
to open the Worklist Grid screen. Do • To Delete a Worklist Order from
the Worklist Grid Screen:.
r
to open the Worklist Cassette screen. Do • To Delete a Worklist Order
from the Worklist Cassette Screen:.
8-51
8
SAMPLE ANALYSIS
WORKING WITH WORKLIST ORDERS
• To Delete a Worklist Order from the Worklist Grid Screen:
This procedure continues from Deleting a Worklist Order (Entry).
1.
Highlight the order to be deleted.
2.
3.
. The following message appears:
Select the desired option.
r
Delete the order with Sample ID ... will delete the entire order from the Worklist for
that Sample ID.
r
4.
8-52
Delete all orders ... will delete every order on the Worklist.
to delete.
PN 624026AE
SAMPLE ANALYSIS
WORKING WITH WORKLIST ORDERS
• To Delete a Worklist Order from the Worklist Cassette Screen:
This procedure continues from Deleting a Worklist Order (Entry).
1.
Type the cassette number at
2.
Press Û.
.
The Worklist Cassette screen appears for that cassette number. There may already be
Worklist orders, or the Worklist for that cassette may be empty.
3.
Click the tube (order) to be deleted.
4.
Verify the arrow appears next to your selection.
5.
6.
. The following message appears:
Select the desired option:
r
Delete the order with Sample ID ... will delete the entire order from the Worklist for
that Sample ID.
7.
PN 624026AE
r
Delete cassette and position from the order with Sample ID ... clears the cassette and
position fields for that Sample ID but leaves the order on the Worklist.
r
Delete all orders ... will delete every order on the Worklist.
to delete.
8-53
8
SAMPLE ANALYSIS
WORKING WITH WORKLIST ORDERS
8-54
PN 624026AE
9DATA REVIEW 9
9.1
LOCATING SAMPLE RESULTS
You can view results:
r
For the last sample analyzed (see Reviewing the Last Sample’s Results in this chapter).
r
For sample results on the Results screen – not yet archived (see Locating Results on the
Results List Screen in this chapter).
r
For sample results already archived – not available on the Results screen (see Locating
Archived Results in this chapter).
Reviewing the Last Sample’s Results
The Run-in-Progress (Figure 9.1) screen displays the results for the last sample analyzed.
IMPORTANT The Run-in-Progress screen (Figure 9.1) is not updated to reflect when a Manual Match is
performed. The Run-in-Progress screen shows the results as analyzed only. Printing prior to Manual
Match from the Run-in-Progress screen is inhibited. The final report prints from the Manual Match screen
after Manual Match has been completed.
Figure 9.1 Run-in-Progress Screen
PN 624026AE
9-1
DATA REVIEW
LOCATING SAMPLE RESULTS
Procedure for Viewing the Last Sample’s Results
Do this procedure to view the results from the last sample on the Run-in-Progress screen
(Figure 9.1).
1
From the Main Menu screen,
to display the last sample’s results.
2
Verify that the results displayed
correspond to the desired Sample ID
you want to view.
Locating Results on the Results List Screen
There are two screens with the title of “Results”: one lists the results by Sample ID and
another that displays the results based on what is selected from the Results List screen.
Understanding the Results List Screen
The Results screen (Figure 9.2) displays results that are ready to be or already have been
reported.
(Results not ready for reporting (because they are not matched to a Sample ID) are located on
the Match screen (Figure 9.8).
9-2
PN 624026AE
DATA REVIEW
LOCATING SAMPLE RESULTS
Figure 9.2 Results List Screen
If all the column headings (Figure 9.3) do not appear on your screen, you can scroll to the
right to see the remaining columns. You can also resize the column widths to fit more on the
screen.
Figure 9.3 Results List Screen Column Headings
To resize column widths:
1.
Place the cursor exactly on the right side of the column heading you want to resize, and
hold the left mouse button down. The cursor changes into double cross-hairs ( )to
indicate the column can be resized.
For example, if resizing the First Name column, your cursor may look like this:
2.
While continuing to press the left mouse button, move the mouse to resize the column.
ATTENTION: Use care when resizing column widths because you can make a column so narrow
that the entire column disappears.
PN 624026AE
3.
When the column is the desired width, release the left mouse button.
4.
Repeat steps 1 through 3 to resize additional columns.
9-3
9
DATA REVIEW
LOCATING SAMPLE RESULTS
Procedure for Locating Non-Archived Results
Do this procedure to locate a result not previously archived.
1
.
The Results List screen appears.
2
Sort the results, if necessary.
You can sort the results by:
r
r
r
r
See Sorting Results in this chapter.
9-4
PN 624026AE
DATA REVIEW
LOCATING SAMPLE RESULTS
3
Once you have located the desired result, you can:
r
view the report (see • To review the patient results screen: in this chapter)
r
print/transmit the report (see Heading 9.4, PRINTING SAMPLE RESULTS)
r
mark the result to be re-run (see • To mark a sample for re-run: in this chapter)
Sorting Results
You can sort results in ascending or descending order.
The fields sort alphanumerically by character. For example, 10 will appear before 4 because it
is being sorted by the “1” (unless sorted in descending order).
Numbers appear in a sorted list before letters. For example, Sample ID “482” will appear
before Sample ID “N482” (unless sorted in descending order).
To sort by Sample ID, Patient ID, or Run Date/Time:
1.
Double-click the desired column title (Sample ID, Patient ID, or Run Date/Time).
r
If you see ++ next to the column title, the results are sorted in ascending order.
r
If you see -- next to the column title, the results are sorted in descending order.
The ++ and -- appear as shown here:
or
2.
.
Locate the desired result.
To sort by special sort criteria:
Scroll to the right on the Results screen to see the following columns:
See Figure 9.4 for the relationship between the sort criteria and the columns.
Figure 9.4 Sort Criteria Columns Defined
PN 624026AE
9-5
9
DATA REVIEW
LOCATING SAMPLE RESULTS
1.
To select one or more sort criteria,
until
appears.
For example, to locate all results with action limit flags and with DiffPlot/Histogram
flags, select the criteria as shown.
To locate all results with action limits flags, select the criteria as shown.
2.
Once you select a criteria, the sorted results are displayed. For example, this screen
shows the results sorted by Action Limit (AL).
• To review the patient results screen:
1.
From the Results List screen (Figure 9.2),
the desired result.
The Results (Full-View) (Figure 9.5) screen appears.
9-6
PN 624026AE
DATA REVIEW
LOCATING SAMPLE RESULTS
Figure 9.5 Results Screen
2.
To view the previous result,
..
3.
To view the first result,
.
4.
To view the next result,
.
5.
To view the last result,
6.
If a previous or next result is not available, it will be grayed out like this
.
.
Results that appear on a red background indicate an HH or LL flag (outside action limits).
Results that appear on a yellow background indicate an H or L flag (outside patient limits).
See Heading 9.7, REVIEWING RESULTS for details.
• To mark a sample for re-run:
1.
2.
3.
PN 624026AE
From the Results List screen (Figure 9.2), click the desired result. The Results
(Full-View) screen (Figure 9.5) appears.
.
See Manual Reruns in Chapter 8 for additional information.
9-7
9
DATA REVIEW
LOCATING SAMPLE RESULTS
Locating Archived Results
Understanding the Archives Screen
See Figure 9.6.
Figure 9.6 Archives Screen Details
b
Selects all results in the archive list.
e
Allows you to search the archives by run date.
c
De-selects all results in the archive list.
f
Allows you to search the archives by patient
ID or last name.
d
Displays the run date.
g
Displays information for the selected run date.
Procedure for Locating Archived Results
Do this procedure to locate archived sample results.
1
9-8
from the toolbar.
PN 624026AE
DATA REVIEW
LOCATING SAMPLE RESULTS
2
The Archive screen appears.
3
To search for a result by run date:
a.
.
b.
At the Run Date field,
and select the run date.
c.
To select all results for the chosen date,
.
To deselect all selected results for the chosen date,
4
To search for a result by the patient’s ID or last name:
a.
b.
PN 624026AE
.
.
Search:
r
by Patient ID (see Searching by Patient ID in this chapter), or
r
by the patient’s last name (see Searching by Last Name in this chapter)
9-9
9
DATA REVIEW
LOCATING SAMPLE RESULTS
Searching by Patient ID
1.
At the Patient ID field,
2.
Select the Patient ID.
.
Searching by Last Name
1.
At the Last Name field,
2.
At
, type the patient’s last name. As you type, the
indicator moves through the list to locate the last name.
3.
Highlight the desired patient from the list.
4.
9-10
.
. The following screen appears.
PN 624026AE
DATA REVIEW
AFTER LOCATING THE SAMPLE RESULTS
9.2
AFTER LOCATING THE SAMPLE RESULTS
After locating a sample result, you can view, print, and transmit (send) results.
Note: You can delete patient results from Archive only. See Heading 9.6, DELETING
ARCHIVED PATIENT RESULTS.
Understanding the Results Screen
See Figure 9.7.
Figure 9.7 Results Screen
b
Displays the first sample’s results.
c
Displays the previous sample’s results.
d
Automatically creates a re-run for the displayed sample. An order with the same Sample ID and
demographic information is placed on the Worklist.
e
Indicates the results you are viewing out of the number of results available for that sample ID.
For example, 1/1 means that you are viewing the first set of results out of one set available for the
specific Sample ID. 1/2 means that you are viewing the first set of results out of a rerun; 2/2 means
that you are viewing the second set of results for a rerun.
PN 624026AE
f
Displays the next sample’s results.
g
Displays the last sample’s results.
h
Displays all generated flags and interpretive messages, if any. See Heading 9.7, REVIEWING
RESULTS for additional information.
9-11
9
DATA REVIEW
AFTER LOCATING THE SAMPLE RESULTS
i
Allows you to scroll to view additional text in the Flags and Messages area (h).
j
Displays all parameter results, histograms, and DiffPlots:
Normal results (within your defined patient limits and action limits) appear against a white
background.
= results below your defined patient limits appear against a yellow background with
an L.
= results above your defined patient limits appear against a yellow background with
an H.
= results below your defined action limits appear against a red background with an
LL.
= results above your defined action limits appear against a red background with an
HH.
See Heading 9.7, REVIEWING RESULTS for additional information.
@ indicates an RUO (Research Use Only) parameter, and is not for use in diagnostic
procedures. This symbol only appears when the RUO parameters are enabled.
See RUO Parameters (Enabling/Disabling) in Appendix A.
1)
Sample ID and demographic information; based on information entered at the Sample ID screen or
received from the Host.
allows you to enter comments about the result. Comments appear on the printed report.
9-12
PN 624026AE
DATA REVIEW
MANUALLY MATCHING SAMPLE RESULTS WITH WORKLIST ORDERS
9.3
MANUALLY MATCHING SAMPLE RESULTS WITH WORKLIST ORDERS
Overview
The system provides the ability to “trap” results under certain conditions and hold them
before reporting. This function is primarily controlled by the Manual Match configuration. If
Manual Match is ON and the system is unable to automatically identify the correct Worklist
order for the analyzed sample, the results will be held on the Manual Match screen and will
not be reported automatically.
Results can be held at the Manual Match screen even if Manual Match is OFF. For details, see
Conditions for Results Going to Manual Match Screen in this chapter.
Conditions for Results Going to Manual Match Screen
If Manual Match is ON, the following are some of the conditions that cause results to be
posted to the Manual Match screen:
r
r
Barcode Sample ID from tube is not found on the Worklist due to:
t
Sample ID not entered on Worklist
t
Sample ID from the barcode was not read and an AUTO_SID was assigned
Cassette and position not found on the Worklist due to:
t
cassette and position not entered on Worklist
t
partial match where cassette and position are located, but the Sample ID
information is inconsistent
If Manual Match is OFF, the following is one of the conditions that causes results to be posted
to the Manual Match screen:
t
Worklist Match option is set to Barcode, indicating a barcode Sample ID is expected,
but no Sample ID is obtained from the tube.
If a result is placed on the Manual Match screen,
flashes.
It is not possible to have a re-run performed on an unmatched results.
PN 624026AE
9-13
9
DATA REVIEW
MANUALLY MATCHING SAMPLE RESULTS WITH WORKLIST ORDERS
Understanding the Manual Match Screen
See Figure 9.8.
Figure 9.8 Manual Match Screen: Details
9-14
b
Duplicate of the Worklist Grid screen and contains all entries currently on the Worklist.
c
Sample ID as entered on the Worklist.
d
Cassette number entered when the Worklist order was created.
e
Position of the tube in the cassette; entered when the Worklist order was created.
f
Patient ID entered when the Worklist order was created.
g
Last Name of patient entered when the Worklist order was created.
h
Displays information from the order selected on the Worklist (Sample ID, Flagging Sets, Collect
Date/Time, Location, Physician, Patient ID, Last Name, First Name, Date of Birth, Age, and Gender)
and the cassette and position and Run Date/Time from the selected unmatched result.
i
Lists all samples not yet matched with entries on the Worklist.
j
Scroll bars that allow you to scroll right to see additional information.
1)
The selected order is indicated by highlight.
PN 624026AE
DATA REVIEW
MANUALLY MATCHING SAMPLE RESULTS WITH WORKLIST ORDERS
Manual Match Procedure
Do this procedure to match a Worklist order to an instrument-generated result.
1
.
The Results List screen with all matched results appears.
2
.
The Match screen appears.
PN 624026AE
9-15
9
DATA REVIEW
MANUALLY MATCHING SAMPLE RESULTS WITH WORKLIST ORDERS
3
Highlight the required order (e.g. 311929OP) from the Worklist area of the Match
screen.
The information from the selected order on the Worklist is displayed on the right of the
screen in fields with a gray background (Sample ID, Panel, Flagging Sets, Collect
Date/Time, Location, Physician, Patient ID, Last Name, First Name, Date of Birth, Age,
and Gender).
Note: If the appropriate order does not appear, see What to Do If the Correct Order is
Not on the Manual Match Screen in this chapter for your options.
4
Highlight the desired result to be matched with the order previously selected.
The information from the selected result that will be used in the final report is displayed
on the right of the screen in fields that have a teal background (Cassette, Position, and
Run Date/Time).
5
. A confirmation message appears; the Sample ID for the order you selected and
the Sample ID for the result you selected are referenced in the message.
ATTENTION: When manually matching an order and results, the final report will ALWAYS use
the Sample ID from the Worklist order even if a barcode has been read on the tube.
9-16
PN 624026AE
DATA REVIEW
MANUALLY MATCHING SAMPLE RESULTS WITH WORKLIST ORDERS
6
Verify the order and result information.
r
If the information is correct,
to match the order with the result.
r If the information is incorrect,
and repeat steps 3 through 5.
When a Manual Match is performed, the results are always marked with the “Manual
Match” flag. If the order that the results are matched with has a flagging set different
from the one the sample was processed with, the results will be recalculated using the
flagging set of the order, and the results will be marked with the “Recalculated” flag.
IMPORTANT Risk of sample mis-identification if the order Sample ID is not correctly matched to the
sample result. It is recommended that you created a new Worklist order.
PN 624026AE
7
Verify the Sample ID.
8
The order and result are matched and the information appears on the Results List screen.
9
If Auto-Print is enabled, a sample report is printed.
9-17
9
DATA REVIEW
MANUALLY MATCHING SAMPLE RESULTS WITH WORKLIST ORDERS
What to Do If the Correct Order is Not on the Manual Match Screen
If there is a result on the Manual Match screen and the Worklist area displayed on the Manual
Match screen does not contain the correct order, you have two options.
r
r
Moving Unmatched Results to the Results List.
Adding a Worklist Order for the Result.
Moving Unmatched Results to the Results List
An unmatched result is one that is not matched to a Worklist order. Do this procedure if you
want to move unmatched results from the Manual Match screen to the Results List.
1.
At the Manual Match screen, select the desired result without selecting an order.
2.
. The following message appears:
3.
4.
the desired option.
to move the results.
Note: The results will be reported with the Sample ID and flagging set as analyzed and
marked with the “Unmatched” flag.
Adding a Worklist Order for the Result
Do this procedure if you want to add a Worklist order appropriate for a result on the Manual
Match screen.
1.
2.
3.
to exit from the Manual Match screen or
.
Add an order to the Worklist that is appropriate for the result that is on the Manual
Match screen. See Adding an Order (Entry) in Chapter 8.
Return to the Manual Match screen:
a.
4.
9-18
.
b.
.
c. The new Worklist order is now available to match with the results.
Match the results with the order. For details on how to do this, begin at step 3 of the
Manual Match Procedure above.
PN 624026AE
DATA REVIEW
PRINTING SAMPLE RESULTS
9.4
PRINTING SAMPLE RESULTS
You can print from either the Results List screen (Figure 9.2) or from the Results (Full-View)
screen (Figure 9.5).
Understanding the Results List Screen
See Figure 9.9.
Figure 9.9 Results List Screen
b
opens the Manual Match screen (Figure 9.8).
c
Selects/deselects all results in the list.
selects all.
deselects all.
d
archives the results. See Heading 9.5, ARCHIVING PATIENT RESULTS for details.
e
PN 624026AE
Allows you to sort by analytical message, meaning that any result with an analytical message will
be listed. For additional information, see Figure 9.4.
9-19
9
DATA REVIEW
PRINTING SAMPLE RESULTS
f
Allows you to sort by DiffPlot/Histogram, meaning that any result with a DiffPlot/Histogram will be
listed. For additional information, see Figure 9.4.
g
Allows you to sort by patient limit, meaning that any result with a patient limit flag will be listed. For
additional information, see Figure 9.4.
h
Allows you to sort by action limit, meaning that any result with an action limit flag will be listed. For
additional information, see Figure 9.4.
i
Allows you to sort by not printed status, meaning those results not printed will be listed. For
additional information, see Figure 9.4.
j
Allows you to sort by not transmitted status, meaning that those results not transmitted will be
listed. For additional information, see Figure 9.4.
1)
Allows you to include/exclude listed results for printing/transmitting.
Understanding the Printing Options for Patient Results
See Figure 9.10.
Figure 9.10 Print Options for Patient Results
b
Displays the print options.
c
Prints the summary list for all selected rows.
d
Prints the summary list for all rows, whether selected or not.
e
Prints the patient report for the selected rows.
f
Prints the patient report for all rows, whether selected or not.
ATTENTION: Because this option prints a full report for every row, be sure this is the option you
want before selecting OK.
g
9-20
Prints a report for the last patient result.
PN 624026AE
DATA REVIEW
PRINTING SAMPLE RESULTS
IMPORTANT Risk of compromising system functionality if you batch print and/or batch transmit while
receiving a Worklist download from a host and/or while analyzing samples with Auto-Transmit on and
Auto-Print on. Always allow sample analysis and/or the host download to complete before batch printing
and/or batch transmitting.
Printing Procedure
Do this procedure to print sample results.
1
.
The Results List screen appears.
2
PN 624026AE
Select or deselect the results you want to print.
r
To select all results,
r
To deselect all results,
r
To select individual results,
.
.
until
appears.
9-21
9
DATA REVIEW
PRINTING SAMPLE RESULTS
3
.
4
the Print tab.
5
Select the desired print option (see Figure 9.10)
Note: Print Patient Report for All Rows prints a full page report for every row, whether
selected or not.
6
.
Transmitting Sample Results
You can transmit sample results to a Host computer (if applicable).
Understanding the Transmit Options for Patient Results
See Figure 9.11.
Figure 9.11 Transmit Options for Patient Results
9-22
PN 624026AE
DATA REVIEW
PRINTING SAMPLE RESULTS
b
Select this to see the transmit (send)
options.
d
Transmits the selected results to the Host
computer.
c
Transmits only the last result to the Host
computer.
e
Transmits all results, whether selected or not, to
the Host computer.
Sample results will automatically be transmitted to a host computer if the auto-transmission
option is selected and the settings have been defined. See Auto-Transmit (for Patient Results)
in Appendix A.
IMPORTANT Risk of compromising system functionality if you batch print and/or batch transmit while
receiving a Worklist download from a host and/or while analyzing samples with Auto-Transmit on and
Auto-Print on. Always allow sample analysis and/or the host download to complete before batch printing
and/or batch transmitting.
Transmission Procedure
Do this procedure to transmit (send) patient results to the Host computer.
1
.
The Results List screen appears.
PN 624026AE
9-23
9
DATA REVIEW
PRINTING SAMPLE RESULTS
2
3
4
5
Select or deselect the results you want to transmit.
r
To select all results,
r
To deselect all results,
r
To select individual results,
.
.
until
appears.
.
the Transmit tab.
Select the desired transmit option (see Figure 9.11).
ATTENTION: Once transmission begins, it cannot be stopped.
6
9-24
to begin transmitting.
PN 624026AE
DATA REVIEW
ARCHIVING PATIENT RESULTS
9.5
ARCHIVING PATIENT RESULTS
Although you can choose to archive results at the Begin of Day, you can also choose to archive
results from the Results List screen.
Do this procedure if you want to archive patient results currently on the Results List.
1
.
The Results List screen appears.
2
PN 624026AE
. The following message appears:
9-25
9
DATA REVIEW
ARCHIVING PATIENT RESULTS
3
9-26
to archive all results.
PN 624026AE
DATA REVIEW
DELETING ARCHIVED PATIENT RESULTS
9.6
DELETING ARCHIVED PATIENT RESULTS
The delete options include:
r
Deleting Patient Results by Run Date
r
Deleting Patient ID or Patient File from Database
Deleting Patient Results by Run Date
Do this procedure to delete patient results by run date. If you do not know the run date but
you know the Patient ID, do Deleting Patient ID or Patient File from Database.
1
.
The Archives screen appears.
2
PN 624026AE
.
9-27
9
DATA REVIEW
DELETING ARCHIVED PATIENT RESULTS
3
Select the run date for the result(s) you
want to delete:
a.
at
to open the calendar.
b.
Select the run date:
1)
2)
4
9-28
to advance to the
correct month.
the correct date.
The archived results appear for the selected run date.
PN 624026AE
DATA REVIEW
DELETING ARCHIVED PATIENT RESULTS
5
Select the result(s) you want to delete.
r
To select all results,
r
To deselect all results,
r
To select individual results,
6
.
.
until
appears.
.
The following window appears:
7
Select the desired delete option:
r
Selected deletes only the selected results.
r
All deletes all results for that particular run date.
ATTENTION: Once a result is deleted, it cannot be recovered.
8
to delete the results.
Deletion in progress appears while the results are being deleted.
PN 624026AE
9-29
9
DATA REVIEW
DELETING ARCHIVED PATIENT RESULTS
Deleting Patient ID or Patient File from Database
Do this procedure to delete a Patient ID or a patient file from the database.
Note: To delete patient results by run date, do Deleting Patient Results by Run Date.
1
.
The Archives screen appears.
9-30
PN 624026AE
DATA REVIEW
DELETING ARCHIVED PATIENT RESULTS
2
.
The following screen appears:
3
to search for the desired result by last name.
The following screen appears:
PN 624026AE
9-31
9
DATA REVIEW
DELETING ARCHIVED PATIENT RESULTS
4
At
, type the patient’s last name. As you type, the
indicator moves through the list to locate the associated Patient IDs.
5
Highlight the desired result.
Note: If only one result appears, it is automatically highlighted.
6
.
The following window appears:
7
Select the desired delete option:
r
Delete Patient ID for Selected Entry deletes the Patient ID from the database for the
selected result.
r
8
9-32
Delete Patient File deletes the selected patient file from the database.
.
PN 624026AE
DATA REVIEW
DELETING ARCHIVED PATIENT RESULTS
9
A specific message appears based on the option you selected:
r
If you selected Delete Patient ID for Selected Entry, this message appears:
If you continue with this option, the existing Patient ID will be deleted and an
AUTO_PID will be assigned.
r
If you selected Delete Patient File, this message appears.
ATTENTION: Once a Patient ID or a patient file is deleted, it cannot be recovered.
10
PN 624026AE
to delete.
9-33
9
DATA REVIEW
REVIEWING RESULTS
9.7
REVIEWING RESULTS
Introduction
Patient sample results are generated from sample analysis. There may be instances when a
patient sample result is flagged or a parameter numeric result is replaced by a flag.
Carefully review all parameter results, especially results with flags and/or messages.
ATTENTION: Beckman Coulter does not claim to identify every abnormality in all samples. It is
recommended that you use all flagging options to optimize the sensitivity of instrument
results. Additionally, it is recommended that platelet counts less than 20 x 103/µL be
reviewed.
IMPORTANT Risk of result inaccuracy if a transient or partial blockage is not detected by the instrument. In
rare instances, especially for samples where fibrin or other debris is likely to occur (such as pediatric or
oncology samples), a transient or partial blockage may not be detected by the instrument. Therefore, verify
flagged results for accuracy and review any result that exceeds your laboratory’s limits.
ATTENTION: For QC, XB/XM, Reproducibility, and Calibration, only one character is displayed
for flags. For example, you may see a V or R against a red background to indicate the value is
out of range. If the results background is white, the value in within range.
Flags and Messages Defined
Flags and messages are symbols, sets of symbols, letters, or text generated by the instrument
to signal that parameter(s) may need additional review. Flags and messages are linked to
results in a number of ways:
r
Linked to a result when it exceeds the defined limits (e.g. H or L).
r
Linked to a problem in the morphology of the blood cell population (e.g. R).
r
Linked to instrument operation (e.g. DIFF+).
For details, see Heading 9.8, FLAGS AND MESSAGES GENERATED BY THE INSTRUMENT.
Flags and messages may be displayed as:
9-34
r
Replacement flags, also called codes, replace a parameter’s numeric results.
r
Non-replacement flags appear next to the parameter results. Up to three of these flags
can be displayed for a parameter.
r
DiffPlot and Histogram flags appear in the Flags and Messages box in the upper right
corner of the Results screen.
PN 624026AE
DATA REVIEW
FLAGS AND MESSAGES GENERATED BY THE INSTRUMENT
9.8
FLAGS AND MESSAGES GENERATED BY THE INSTRUMENT
The following sections define the flags and messages generated by the instrument:
r
Parameter Flags
r
Tree View Flags and Messages
Parameter Flags
This section defines the parameter flags that can be generated by the instrument:
r
Results Exceeding Capacity
r
Hemoglobin Flags
r
Voteout Flag
r
Patient Range Flags
r
Action Range Flags
r
Control Flags
r
Platelet Concentrate Extended Range Flag
r
Hemoglobin/Hematocrit Ratio Flag (H&H Flag)
Results Exceeding Capacity
If a result exceeds instrument capacity, the result will be indicated as follows:
r
r
r
If the result is below the lower limits of the instrument, the result will be reported as 0.
t WBC reported as 0 if WBC < 0.1 x 10³/µL and RBC is less than 0.01 x 10⁶/µL.
t
RBC reported as 0 if RBC < 0.01 x 10⁶/µL.
t
Hgb reported as 0 if Hgb < 0.1 g/dL.
t
Hct reported as 0 if Hct < 0.1%.
If the result is outside the limits at which the parameter can be calculated, the result is
replaced by . . . ..
If the result is above the instrument’s linear range (Table 3.3), the result is flagged with
+, or if the result is above the instrument’s reportable range (Table 3.6), the result is
replaced by ++++.
Additionally, related parameters may also be flagged or replaced.
Hemoglobin Flags
• Hgb Blank Error
The instrument establishes a reference blank reading and compares each sample blank to the
reference result. If the blank differs from the reference by more than an allowable amount, the
Hgb, MCH, and MCHC results are flagged with a review “R” flag.
If three consecutive samples produce a Hgb blank error, the Hgb, MCH, and MCHC results
are replaced by . . . . on the third sample.
PN 624026AE
9-35
9
DATA REVIEW
FLAGS AND MESSAGES GENERATED BY THE INSTRUMENT
• Hgb Read Error
The instrument reads each sample three times. If the difference among the three readings
exceeds a predefined limit, the Hgb, MCH, and MCHC results are flagged with a voteout “V”
flag.
Voteout Flag
The instrument performs two counts on the WBC, RBC, Hct, and Plt. If the results for the two
counts differ by more than a predefined limit, the WBC, RBC, Hct, and Plt results are flagged
with a voteout “V” flag.
r
r
If the WBC result is flagged with a V, then the DIFF number results are also flagged with
a V.
If the RBC result is flagged with a V, then the MCV, MCH, MCHC, and RDW results are
replaced by . . . ..
r
If the Hct result is flagged with a V, then the MCV and MCHC results are replaced by
. . . ..
r
If the Plt counts votes out, then the Plt result is flagged with a V.
Patient Range Flags
Sample results that appear on a yellow background indicate an H or L flag. See Table 9.1.
Table 9.1 Patient Range Flags
Flag
Description
H
Result is above the patient limit set by your laboratory and may generate an interpretive
message on the printout.
L
Result is below the patient limit set by your laboratory and may generate an interpretive
message on the printout.
Action Range Flags
Sample results that appear on a red background indicate an HH or LL flag. See Table 9.2.
Table 9.2 Action Range Flags
Flag
Description
HH
Result is above the action limit set by your laboratory and may generate an interpretive message
on the printout.
LL
Result is below the action limit set by your laboratory and may generate an interpretive message
on the printout.
Control Flags
The BA% and BA# from the AC•T 5diff Control Plus cell control are reported into the control
file with an “S” flag to indicate that these would normally have been suppressed if it was a
patient sample.
The high and low flags indicate recovery outside the expected ranges. Analytical errors, other
than BASO+, may require review.
9-36
PN 624026AE
DATA REVIEW
FLAGS AND MESSAGES GENERATED BY THE INSTRUMENT
Platelet Concentrate Extended Range Flag
If the Platelet Concentrate extended range flagging mode is active and the instrument
determines that the sample result for Hgb is less than 2.0 g/dL and for Plt is greater than
15.0x10³/µL, the Plt result is flagged using the extended linear and reportable range limits,
resulting in a “C” flag next to the Plt result.
Hemoglobin/Hematocrit Ratio Flag (H&H Flag)
If the [(Hgb g/dL x 3)/Hct%] is <0.8 or >1.2, the RBC, Hgb, MCV, Hct, MCH, MCHC, Plt,
MPV, Pct, and PDW will be flagged with *. The presence of this flag indicates that there may
have been an error in the analytical process.
Tree View Flags and Messages
This section defines the flags and messages displayed in the Flags and Messages area
(Figure 9.12) of the Run-in-Progress screen. (See Understanding the Flags and Messages Area
in this chapter.)
Flags and messages are displayed for patient samples, as well as for QC, calibration, and
reproducibility. For additional information, see Flags and Messages for Patient Samples and
Flags and Messages for QC, Calibration, and Reproducibility Samples.
Flags and Messages for Patient Samples
For patient samples, the following categories of flags and messages are displayed/printed in
tree view format:
r
r
r
r
r
DiffPlot and Histogram Flags
Interpretive Messages
Analytical Messages
QA Messages
Miscellaneous Messages.
Flags and Messages for QC, Calibration, and Reproducibility Samples
For QC, calibration, and reproducibility samples, the following categories of flags and
messages are displayed/printed in tree view format:
r
r
r
Analytical Messages
QA Messages
Miscellaneous Messages
Understanding the Flags and Messages Area
If a sample is flagged, that information appears under the category name to which it applies.
See Figure 9.13.
r
To see the details for each category,
r
To see only the category names again,
to expand the list (see Figure 9.13).
to collapse the list.
You may need to scroll to view all the messages.
PN 624026AE
9-37
9
DATA REVIEW
FLAGS AND MESSAGES GENERATED BY THE INSTRUMENT
Figure 9.12 Flags and Messages: Collapsed View:
Figure 9.13 Flags and Messages: Expanded View
ATTENTION: In rare instances, an unusually high number of flags and messages may appear in
the Flags and Messages area, which will expand the printout to two pages.
DiffPlot and Histogram Flags
DiffPlot Flags
When populations in the DiffPlot exceed the limits set for that region, a review (R) flag will
occur on the DIFF parameter related to that region, and either DiffPlot and Histogram flags or
Analytical Messages will occur and indicate the area within the DiffPlot that is affected.
If the R flag occurs on a DIFF parameter, it is suggested that the result be reviewed according
to your laboratory-defined protocol.
Ten different flags may occur related to the position of the populations within the DiffPlot:
r
SL (small lymphocytes)
r
LN (lower neutrophil)
r
SL1 (small lymphocytes 1)
r
UN (upper neutrophil)
r
NL (neutrophil/lymphocyte)
r
NE (neutrophil/eosinophil)
r
MN (monocyte/neutrophil)
r
ATL (atypical lymphocytes)
r
UM (upper monocyte)
r
IMM (immature cells)
See Table 9.3 for additional information.
9-38
PN 624026AE
DATA REVIEW
FLAGS AND MESSAGES GENERATED BY THE INSTRUMENT
Table 9.3 Definition of DIFFPLOT Flags
DiffPlot
Region
Flag
DiffPlot Region Affected
SL
Description
Flags
Occurs when the
number of particles
counted in the SL
region are higher
than the SL# limit.
R next to:
Default values:
100% or 50
particles.
SL1
Occurs when the
number of particles
in the SL region is
higher than the SL1
number limit and
when the
percentage of
particles in the SL
region, relative to
the lymphocyte
region, exceeds the
SL1 percentage
limit.
Default values: 5%
or 45 particles.
NL
Occurs when the
number of particles
in the NL separation
region is above the
limits set.
Default values: 3%
or 120 particles.
PN 624026AE
NE%, NE#,
LY%, LY#,
MO%, MO#,
EO%, EO#,
ATL%, ATL#,
IMM%, IMM#.
Suspected
Abnormalities
Small
lymphocytes
Plt aggregates
NRBCs
RBCs resistant to
lysis (stroma)
SL displayed
and printed in
DiffPlot and
Histogram
section of the
Flags and
Messages area.
May trigger
interpretive
messages.
NRBCs, Plt
aggregates, and
NRBCs plus Plt
aggregates
Plt aggregates
NRBCs
RBCs resistant to
lysis (stroma)
Small abnormal
lymphocytes
SL1 is
displayed and
printed in the
DiffPlot and
Histogram
section of the
Flags and
Messages area.
R next to:
NE%, NE#,
LY%, and LY#.
NL is displayed
and printed in
the DiffPlot and
Histogram
section of the
Flags and
Messages area.
Small Neutrophils
without granules
and/or slight
nuclear
segmentation
Lymphocytes with
segment nuclei
Neutrophils with
weak membranes
(smudge/smear
cells)
9-39
9
DATA REVIEW
FLAGS AND MESSAGES GENERATED BY THE INSTRUMENT
Table 9.3 Definition of DIFFPLOT Flags (Continued)
DiffPlot
Region
Flag
DiffPlot Region Affected
MN
UM
LN
Description
Flags
Occurs when the
number of particles
in the MN
separation region is
above the limits set.
R next to:
Default values:
100% or 120
particles.
MN is displayed
and printed in
the DiffPlot and
Histogram
section of the
Flags and
Messages area.
Occurs when the
R next to:
number of particles
NE%, NE#,
in UM region is
MO%, MO#,
above the limits set.
IMM%, and
Default values:
IMM#.
1.1% or 999
UM displayed
particles.
and printed in
the DiffPlot and
Histogram
section of the
Flags and
Messages area.
Occurs when the
number of particles
in the LN region is
above the limits set.
Default values:
2.5% or 999
particles.
9-40
ATL%, ATL#,
IMM%, IMM#,
NE%, NE#,
MO%, and MO#
R next to all
WBC DIFF
parameters.
LN is displayed
and printed in
the DiffPlot and
Histogram
section of the
Flags and
Messages area.
Suspected
Abnormalities
Monocytes with
granules or
hyperbasophilic
monocytes
Immature
neutrophils with
non-segmented
nuclei (band cells)
Large monocytes
Hyperbasophilic
monocytes
Myelocytes
Promyelocytes
Large blasts
Neutrophil
degradation due
to improper
storage or sample
age
Plt aggregates
RBCs resistant to
lysis (stroma)
Reagent
contamination
PN 624026AE
DATA REVIEW
FLAGS AND MESSAGES GENERATED BY THE INSTRUMENT
Table 9.3 Definition of DIFFPLOT Flags (Continued)
DiffPlot
Region
Flag
DiffPlot Region Affected
UN
NE
Description
Flags
R next to:
Occurs when the
number of particles NE%, NE#,
in the UN region is
IMM%, IMM#
above the limits set.
UN is displayed
Default values:
and printed in
1.1% or 999
the DiffPlot and
particles.
Histogram
section of the
Flags and
Messages area.
Occurs when the
number of particles
the NE separation
region is above the
limits set.
Default values:
1.1% or 60
particles.
Large neutrophils
Immature
granulocytes:
r Metamyelocytes
r Myelocytes
r Promyelocytes
R next to:
Young eosinophils
IMM% and
IMM#.
Giant
hypersegmented
neutrophils
Replaces NE%,
NE#, EO%, and
EO# with
. . . ..
NE is displayed
and printed in
the DiffPlot and
Histogram
section of the
Flags and
Messages area.
PN 624026AE
Suspected
Abnormalities
Eosinophils with
low
intracytoplasmic
material
(agranular
eosinophils)
9-41
9
DATA REVIEW
FLAGS AND MESSAGES GENERATED BY THE INSTRUMENT
Table 9.3 Definition of DIFFPLOT Flags (Continued)
DiffPlot
Region
Flag
DiffPlot Region Affected
ATL
Suspected
Abnormalities
Description
Flags
Occurs when a
significantly large
population is
located in the ATL
region.
ATL is displayed
and printed in
the DiffPlot and
Histogram
section of the
Flags and
Messages area.
Large
lymphocytes
May be
displayed and
printed as
ATL% and
ATL#.
Plasma cells
IMM is
displayed and
printed in the
DiffPlot and
Histogram
section of the
Flags and
Messages area.
Large monocytes
May be
displayed and
printed as
IMM% and
IMM#.
Large neutrophils
ATL flag is triggered
from the Patient
Limits, and the
interpretive
message (Atypical
Lymphocyte) are
triggered from the
Action Limits.
Reactive
lymphocytes
Stimulated
lymphocytes
Default values: 2%
or 0.2x10⁹/L.
IMM
Occurs when a
significantly large
population of cells
is located in UN,
UM, and channel
127 regions.
IMM flag is
triggered from the
Patient Limits, and
the interpretive
message (Large
Immature Cell) is
triggered from the
Action Limits.
Hyperbasophilic
monocytes
Myelocytes,
metamyelocytes,
promyelocytes
Large blasts
Default values: 2%
or 0.2x10⁹/L.
9-42
PN 624026AE
DATA REVIEW
FLAGS AND MESSAGES GENERATED BY THE INSTRUMENT
Histogram Flags
When histogram populations exceed defined limits, a flag or message will be displayed. See
Table 9.4.
Table 9.4 Histogram Flags
Histogram
Flag
WBC/BASO *WBC
Illustrations of Histogram Flags
Description
Figure 9.14 WBC/BASO Histogram Flags:
CBC Panel
Determined from the ratio of the cells
counted between the 0 channel and
BA1.
WBC
BA1
BA2
BA3
Indicates the presence of an
abnormal number of cells in
comparison to leukocytes. Plt
aggregates and NRBCs may be found
in this region.
*WBC is displayed and printed in the
DiffPlot and Histogram section of the
Flags and Messages area.
Default value: 3.5% or 999 particles.
MB
(Mono
Baso)
Figure 9.15 WBC/BASO Histogram Flags:
CBC/DIFF Panel
BA1
BA2
BA3
BASO
RBC
MICRO Figure 9.16 MICRO and MACRO Regions
and/or on RBC Histogram
MACRO
RBC1
%MICRO
RBC2
%MACRO
Generated when the percentage of
basophils found in the BA channel is
above the percentage of the
LY/MO/NE raw count found on the
DIFF channel.
MB is displayed and printed in the
DiffPlot and Histogram section of the
Flags and Messages area.
MICRO and MACRO flags are
generated when the percentage of
cells counted in the microcytic
(MICRO) and macrocytic (MACRO)
regions compared to the total
number of RBCs are above the
established limits set by your
laboratory. See Figure 9.16.
Thresholds RBC1 and RBC2 define
the MICRO and MACRO regions and
are calculated based on the standard
deviation of a normal RBC
population.
MICRO and/or MACRO are displayed
and printed in the DiffPlot and
Histogram section of the Flags and
Messages area.
Default value: 5% for MICRO and
7.5% for MACRO.
PN 624026AE
9-43
9
DATA REVIEW
FLAGS AND MESSAGES GENERATED BY THE INSTRUMENT
Table 9.4 Histogram Flags (Continued)
Histogram
Flag
Illustrations of Histogram Flags
Description
Plt
MIC
and
SCH
Figure 9.17 Plt Flags
The Plt histogram has 256 channels
between 2 fL and 30 fL. A mobile
threshold (at 25 fL by default)
(Figure 9.17) moves according to the
presence of microcytic RBCs present
in the Plt analysis region. Plt flags
generate when the following three
conditions occur.
3
30
25µ
Figure 9.18 Mobile Threshold Positioned
in the Standard Regions (Between 18 fL
and 25 fL)
1. If the mobile threshold can be
positioned in the standard region,
between 18 fL and 25 fL, MIC
(microcytes) is displayed and
printed in the DiffPlot and
Histogram section of the Flags
and Messages area. See
Figure 9.18.
The Plt result is reliable.
2
18
30
25µ
Figure 9.19 Mobile Threshold Cannot Be
Positioned in the Standard Region
3
18
30
25µ
Figure 9.20 Mobile Threshold Cannot Be
Positioned
2
18
25µ
30
2. If a valley is not detected by the
18 fL threshold, the threshold is
placed at the 18 fL position and
MIC is displayed and printed in
the DiffPlot and Histogram
section of the Flags and
Messages area. If the interference
is significant, the Plt count will
also be flagged with R.
3. If the mobile threshold cannot be
positioned between 18 fL and
25 fL, the threshold is placed at
the 18 fL position, SCH
(schistocytes) is displayed and
printed in the DiffPlot and
Histogram section of the Flags
and Messages area, and the Plt
count is flagged with R.
Suspected abnormalities include
the presence of schistocytes
and/or the presence of Plt
aggregates. See Figure 9.20
The Plt result is not reliable. It is
recommended that you verify the
result by an alternative method as
defined by your laboratory protocol.
9-44
PN 624026AE
DATA REVIEW
FLAGS AND MESSAGES GENERATED BY THE INSTRUMENT
Table 9.4 Histogram Flags (Continued)
Histogram
Flag
Plt
SCL
(continued)
Illustrations of Histogram Flags
Description
Figure 9.21 Presence of Small Cells in
the 2 fL and 3fL Regions
SCL (small cell) indicates the
presence of small cells in the 2fL and
3fL regions. See Figure 9.21. (MPV,
Pct, and PDW reported as . . . .. )
If Plt < 5.0 x 10³/µL, the SCL flag is
not reported.
Rerun the sample and verify the
results.
2 3
Interpretive Messages
ATTENTION: Interpretive messages indicate a possible pathological disorder and should be used
to assist with quick and efficient screening of abnormal samples and for diagnosis. It is
recommended that your laboratory use suitable reference methods to confirm diagnosis.
The interpretive messages print in the Flags and Messages area (Figure 9.13) on the patient
report. Tables 9.5 through 9.9 list interpretive messages and triggering conditions.
Only one DIFF interpretive message can be displayed for each DIFF parameter. The message
generated from the absolute count for that parameter takes priority. For example, if a relative
LYMPHOPENIA (LY% < LY% LL) and an absolute LYMPHOCYTOSIS (LY# > LY# HH) occur,
only the LYMPHOCYTOSIS message will be displayed.
The following sections define:
r
WBC Interpretive Messages,
r
RBC Interpretive Messages,
r
Plt Interpretive Messages, and
r
Combination WBC/RBC/Plt Interpretive Messages.
WBC Interpretive Messages
See Table 9.5.
Table 9.5 WBC Interpretive Messages
PN 624026AE
Printed Message
Triggering Condition
LEUKOCYTOSIS
WBC > WBC HH
LEUKOPENIA
WBC < WBC LL
LYMPHOCYTOSIS
LY# > LY# HH, or LY% > LY% HH
LYMPHOPENIA
LY# < LY# LL, or LY% < LY% LL
NEUTROPHILIA
NE# > NE# HH, or NE% > NE% HH
NEUTROPENIA
NE# < NE# LL, or NE% < NE% LL
EOSINOPHILIA
EO# > EO# HH, or EO% > EO% HH
9-45
9
DATA REVIEW
FLAGS AND MESSAGES GENERATED BY THE INSTRUMENT
Table 9.5 WBC Interpretive Messages (Continued)
Printed Message
Triggering Condition
MONOCYTOSIS
MO# > MO# HH, or MO% > MO% HH
BASOPHILIA
BA# > BA# HH, or BA% > BA% HH
LARGE IMMATURE
CELLS
IMM# > IMM# HH, or IMM% > IMM% HH
ATYPICAL
LYMPHOCYTE
ATL# > ATL# HH, or ATL% > ATL% HH
MYELEMIA
NE% > NE% HH and IMM# > IMM# HH
BLASTS
BA# > BA# HH and IMM# > IMM# HH and UM
LEFT SHIFT
MN or NL and UN
WBC
INTERPRETATION
NOT POSSIBLE
One or more analytical alarms occurred for WBC.
HH = above the action range.
LL = below the action range.
RBC Interpretive Messages
See Table 9.6.
Table 9.6 RBC Interpretive Messages
Message
Triggering Condition
ANEMIA
Hgb < Hgb LL
ANISOCYTOSIS
RDW > RDW HH
HYPOCHROMIA
MCHC < MCHC LL
COLD AGGLUTININ
MCHC > MCHC HH
MICROCYTOSIS
MCV < MCV LL
MACROCYTOSIS
MCV > MCV HH
ERYTHROCYTOSIS
RBC > RBC HH
MICROCYTES
MICRO% > MICRO% Flag Sensitivity limit
MACROCYTES
MACRO% > MACRO% Flag Sensitivity limit
RBC
INTERPRETATION
NOT POSSIBLE
One or more analytical alarms occurred for RBC.
HH = above the action range.
LL = below the action range.
9-46
PN 624026AE
DATA REVIEW
FLAGS AND MESSAGES GENERATED BY THE INSTRUMENT
Plt Interpretive Messages
See Table 9.7.
Table 9.7 Plt Interpretive Messages
Message
Triggering Condition
THROMBOCYTOSIS
Plt > Plt HH
THROMBOCYTOPENIA
Plt < Plt LL
MACROPLATELETS
MPV > 11
MICROCYTES
Derived from Plt histogram
SCHISTOCYTE
Derived from Plt histogram
SMALL CELL (SCL)
Derived from Plt histogram
PLT INTERPRETATION
NOT POSSIBLE
One or more analytical alarms occurred for PLT.
HH = above the action range.
LL = below the action range.
Combination WBC/RBC/Plt Interpretive Messages
r Table 9.8 lists interpretive messages from a combination of WBC/RBC/Plt Action Ranges.
r
Table 9.9 lists conditions causing NRBCS and PLATELET AGGREGATES interpretive
messages.
Table 9.8 Interpretive Messages from a Combination of WBC/RBC/Plt Action Ranges
Message
Triggering Condition
PANCYTOPENIA
WBC < WBC LL and RBC < RBC LL and Plt < Plt LL
LL = below the action range.
Table 9.9 NRBCs and PLATELET AGGREGATES Interpretive Messages
Message
Triggering Condition
PLT AGGREGATES
Plt < 150x103/mm3 and WBC voteout
DB and PDW > 20, or
DB and MPV > 10, or
DB and Plt < 150x103/mm3, or
DB and WBC Voteout
*WBC and PDW > 20, or
*WBC and MPV > 10, or
*WBC and Plt < 150x103/mm3
PN 624026AE
NRBCs
SL, or
SL and WBC Voteout, or
*WBC and WBC Voteout, or
SL1 and WBC Voteout
NRBCs & PLATELET
AGGREGATES
If none of the individual conditions defined for NRBCS or PLATELET
AGGREGATES occur and *WBC or SL1 or WBC Voteout occur.
9-47
9
DATA REVIEW
FLAGS AND MESSAGES GENERATED BY THE INSTRUMENT
Analytical Messages
Analytical messages are displayed when the instrument detects conditions in the analytical
process that may have influenced the result generated.
The analytical messages are:
r
DIFF+ and DIFF-
r
CO (DIFF Reject)
r
DB (Debris)
r
BASO+
r
QA Messages (small cells on Plt histogram)
DIFF+ and DIFFDuring the data collection for the DiffPlot, the instrument also determines the WBC count
from the flow cell.
The WBC flag DIFF- or DIFF+ Analytical message is reported in the Analytical Messages
section of the Flags and Messages area.
r
If the WBC count from the flow cell exceeds the WBC count from the WBC/BASO bath
by more than a predefined amount, DIFF+ is displayed.
r
If the WBC count from the flow cell is less than the WBC count from the WBC/BASO
bath by more than a predefined amount, DIFF- is displayed.
r
When a DIFF- or a DIFF+ flag occurs, the WBC count and all DIFF# parameters are
flagged with an *.
Note: The comparison between the WBC count from the WBC/BASO bath and the WBC
count from the flow cell will not be performed when the sample is analyzed in the CBC mode
or when this option is disabled in setup.
9-48
PN 624026AE
DATA REVIEW
FLAGS AND MESSAGES GENERATED BY THE INSTRUMENT
CO (DIFF Reject)
See Table 9.10.
Table 9.10 Definition of Analytical Message “CO”
DiffPlot
Region
Flag
DiffPlot Region Affected
CO
(Diff
Reject)
Description
Flags
The system detects
a problem with
volume and
absorbance
measurements in
the flow cell.
CO (Diff
Reject) is
displayed and
printed in the
Analytical
Messages
section in the
Flags and
Messages area.
More than 50% of
the pulses were
rejected because
they do not have
optical pulses that
meet internal
criteria (100 to 300
microseconds).
Suspected
Abnormalities
DB (Debris)
See Table 9.11.
Table 9.11 Definition of Analytical Message “DB”
DiffPlot
Region
Flag
DiffPlot Region Affected
DB
Description
Flags
Occurs when the
number of pulses
in the DB region
exceeds the DB#
limit.
DB (Debris) is
displayed and
printed in the
Analytical
Messages
section in the
Flags and
Messages area.
Default values:
100% or 120
particles.
PN 624026AE
Suspected
Abnormalities
Plt aggregates
Increased Plt count
RBCs resistant to
lysis (stroma)
NRBCs
Reagent
contamination
9-49
9
DATA REVIEW
FLAGS AND MESSAGES GENERATED BY THE INSTRUMENT
BASO+
See Table 9.12.
Table 9.12 Definition of Analytical Message “BASO+”
DiffPlot
Region
Flag
DiffPlot Region Affected
BASO+
BA1
BA2
BA3
BASO+
Description
Flags
If the BASO%
exceeds 50%, a
BASO+ flag is
generated. The
basophils are not
taken away from
the DiffPlot
LY/MO/NE
populations.
BASO+ is
displayed and
printed in the
Analytical
Messages
section in the
Flags and
Messages area.
Suspected
Abnormalities
. . . . is displayed
and printed instead
of the BA% and
BA# and BASO+ is
displayed and
printed in the
Analytical
Messages section
of the Flags and
Messages area.
QA Messages
QA messages (Table 9.13) appear when conditions relating to the analysis of a control occurs.
The QA message is removed only after the condition has been corrected.
Any sample analyzed after a QA message has occurred will be reported with the QA message.
Table 9.13 QA Messages
9-50
Message
Description
QC Failed
Patient sample was run after a QC sample that exceeded limits had been run
QC Expired
Patient sample was run after an expired QC had been run
PN 624026AE
DATA REVIEW
ALTERNATIVE FLAG REPORTING FORMATS
Miscellaneous Messages
Miscellaneous messages (Table 9.14) appear when additional information appropriate to the
results occur.
Table 9.14 Miscellaneous Messages
9.9
Message
Description
Manual Match
Results were manually matched with a Worklist order (see Heading 9.3,
MANUALLY MATCHING SAMPLE RESULTS WITH WORKLIST ORDERS)
Unmatch
Results are not matched with a Worklist order and system is expecting a match
Patient Demographics
Modified
Results had been matched with demographics, and a subsequent modification
to the demographics has been made to all results
Recalculated
If the flagging set has been changed since the original sample was flagged, the
results will have been re-assessed against the limits
Reagent Expired
Sample was run with an expired reagent
PLT Concentrate
Patient result flagged using extended linear and reportable range limits
ALTERNATIVE FLAG REPORTING FORMATS
The system provides two formats for reporting the information in the Flags and Messages area
(Figure 9.12). The two formats are Suspect and Detailed.
r
If the Detailed Flags option is selected, samples are flagged using the Detailed format
(default).
r
If the Detailed Flags option is not selected, samples are flagged using the Suspect format.
See • Display and Print (Detailed or Suspect Flags) in Appendix A for information on
selecting the flagging format to be displayed/printed.
Detailed Flags Format
If the Detailed option is selected at the setup screen, the flags are reported (displayed and
printed) in the detailed format as described in previous sections.
Suspect Flag Format
If the Detailed Flags option is not selected at the setup screen, the flags are reported
(displayed and printed) in the Suspect format as follows:
PN 624026AE
r
DB prints as DB.
r
The DIFFPLOT flag replaces the SL, SL1, NL, MN, UM, LN, UN, and NE flags.
r
IMM prints as IMM.
r
ATL prints as ATL.
r
The WBC/BASO flag replaces the *WBC flag.
r
The HISTO flag replaces the MICRO, MACRO, MIC, and SCH flags.
r
The flags will be printed on the patient report in the area labeled “SUSPECT”.
9-51
9
DATA REVIEW
FLAG HIERARCHY
9.10 FLAG HIERARCHY
There are three fields available to display the parameter and patient/action flags. Flags,
therefore, are ranked so that a specific logic is consistently applied to determine which flags
appear in which of the three available fields.
If a +, V, R, or * is generated, it will always display in the first flag field after the parameter
results. In addition, the HH/LL or H/L flag can be displayed with or without the V, R, or *. If
the V, R, or * is present, HH/LL or H/L displays in the second and third flag field. If the V, R,
or * is not present, HH/LL or H/L displays in the first and second field.
Here are some examples:
10.3 V
5.6 *L
35.0 VHH
For specific flag rankings, see:
r
Replacement Flags Hierarchy
r
Parameter Flags
r
Patient/Action Flags Hierarchy
Replacement Flags Hierarchy
Replacement flags are ranked in the following descending order of importance:
++++
....
Parameter Flags
Parameter flags are ranked in the following descending order of importance:
+
V
R
*
Patient/Action Flags Hierarchy
Patient Limits and Action Limits are ranked in the following descending order of importance:
HH/LL
H/L
9-52
PN 624026AE
10CALIBRATION 10
10.1 GENERAL
Calibration is a procedure to standardize the instrument by determining its deviation, if any,
from calibration references and to apply any necessary correction factors.
There are two calibration modes available on this instrument:
r
Auto-calibration, which uses whole blood samples or the calibrator material. (See
Heading 10.4, AUTO-CALIBRATION.)
r
Manual calibration. See Appendix C, MANUAL CALIBRATION.)
The instrument identifies a sample as a calibration sample only if the analysis is started from
the Calibration screen.
Reproducibility is included in the calibration procedure.
When to Calibrate
Calibrate your instrument:
r
During installation, before analyzing samples.
r
After a Beckman Coulter service representative has replaced an analytical component.
r
As instructed by a Beckman Coulter representative.
Recommended Calibration Conditions
Beckman Coulter recommends that you perform the calibration procedure:
r
At ambient operating temperature of 16°C to 34°C (61°F to 93°F).
r
Using AC•T 5diff Cal Calibrator as an alternative to whole blood.
When to Verify Calibration
Verify calibration of your instrument:
r
As required by your laboratory procedures, and as required by local or national
regulations.
r
When cell controls, such as AC•T 5diff Control Plus, exceed the manufacturer’s defined
acceptable limits.
In the normal process of tracking data for an extended period of time, your laboratory can
decide to recalibrate the instrument for a given parameter. Never adjust to a specific value
based on an individual sample result.
For calibration, QC, and reproducibility, rejected results are displayed in the file and are
automatically de-selected (excluded) from the statistics.
PN 624026AE
10-1
CALIBRATION
GENERAL
Understanding the Calibration Screen
Figure 10.1 shows the Calibration screen details.
To access the screen:
1.
2.
From the Main Menu screen,
.
.
Figure 10.1 Calibration Screen Details
10-2
b
Calibrator information entered at the Modify Calibration Targets screen (Figure 10.2):
c
A calibration run, processed at the date and time shown, with parameter results
d
All saved calibration results for the selected calibrator
e
Check-box that allows you to select/deselect the run to be included/excluded in the calibration
data statistics
f
Operator who analyzed the calibrator
g
Date and time the calibrator was analyzed
h
Parameter results for the analyzed calibrator
i
Number of selected calibration runs to be included in the calibration statistics
j
Mean for each parameter using selected calibration results
1)
New calibration factor is the calibration factor based on calculations from the new calibration
data
PN 624026AE
CALIBRATION
GENERAL
1!
Old calibration factor is the current calibration factor
1@
Coefficient of variation for each parameter
1#
Target value for each parameter. The values that appear here are those that are entered during
calibrator setup (see Figure 10.2).
1$
Updates the calibration factors based on the current calibration runs. If differences exceed the
defined limits, you will have the option to calibrate, which is called “forced calibration”.
1%
Opens the Modify Calibration Targets screen
1^
Operator who modified the calibration target values
1&
Date when the operator modified the calibration target values
1*
Calculated calibration results based on the individual calibrator runs to be included (
1(
Allows you to select the parameters) for which you want to accept the new calibration factor;
next to the parameter indicates it is selected
2)
Number of selected calibration runs
2!
Expiration date of the calibrator material
2@
Lot number of the calibrator material; only the lot numbers defined in the Modify Calibration
Targets screen will be displayed in the drop-down list
) in e
Understanding the Calibration Setup Screen
Figure 10.2 shows the Calibration Setup screen details.
To access the screen:
1.
PN 624026AE
From the Main Menu screen,
2.
.
3.
.
.
10-3
1
CALIBRATION
GENERAL
Figure 10.2 Modify Calibration Targets Screen
10-4
b
Calibrator information: lot number, expiration date, date modified, and name of operator who
modified the information.
c
Target values and limits. This information can be downloaded or entered manually. The
information entered here appears on the Calibration Screen (see 1# in Figure 10.1.)
d
Allows you to download target values from a floppy disk.
PN 624026AE
CALIBRATION
PRE-CALIBRATION CHECKS
10.2 PRE-CALIBRATION CHECKS
Before beginning calibration, it is important that you do these pre-calibration checks.
1
2
3
PN 624026AE
Determine if there is enough of each reagent to complete the entire procedure.
r
If not, do Replacing Reagents Procedure.
r
If so, go to step 2.
Verify that the instrument has been shut down, for at least 30 minutes, during the past
24 hours:
r
If not, perform an Extended Cleaning.
r
If so, go to step 3.
Do Heading 6.3, STARTUP.
10-5
1
CALIBRATION
CALIBRATOR SETUP
10.3 CALIBRATOR SETUP
Supplies Needed: AC•T 5diff Cal Calibrator
Access Level: Supervisor or Service.
Do this procedure to prepare the instrument before you run calibration samples.
1
2
10-6
From the Main Menu screen,
.
.
PN 624026AE
CALIBRATION
CALIBRATOR SETUP
3
4
PN 624026AE
at the Calibration screen.
The Calibration Setup screen appears.
10-7
1
CALIBRATION
CALIBRATOR SETUP
5
.
Note: If calibration results exist, the following message appears:
to delete the existing calibration results
6
10-8
Enter the calibration information, target values, and limits:
r
To download the information, do step 7.
r
To manually enter the information, do step 8.
PN 624026AE
CALIBRATION
CALIBRATOR SETUP
7
To download the calibrator information and values from a floppy disk:
a.
b.
. The following message appears.
Insert the correct floppy disk drive A of the Workstation.
c.
d.
to download the values.
If the expiration date on the floppy is expired, the following message appears:
ATTENTION: Beckman Coulter suggests that you do not use calibration material past its
expiration date.
e.
r
To cancel the download,
. Set up a current (not expired) calibrator as
instructed in Heading 10.3, CALIBRATOR SETUP.
r
To download the expired calibrator information,
.
Allow the download to be completed. When the LED on the Workstation PC is no
longer illuminated, remove the disk.
The Expiration Date field displays the date downloaded from the floppy.
PN 624026AE
f.
Do Heading 10.4, AUTO-CALIBRATION.
g.
Verify the values have been downloaded and are correct.
10-9
1
CALIBRATION
CALIBRATOR SETUP
8
To manually enter the calibrator information and values:
a.
Enter the lot number of the calibrator.
b.
Press Ù.
c.
Enter the expiration date from the calibrator’s label:
d.
e.
at the Expiration Date field.
Select the date from the calendar.
Note: If the calibrator is expired, “Invalid Date” appears.
ATTENTION: Beckman Coulter suggests that you do not use calibration material past its
expiration date.
1)
2)
Do Heading 10.3, CALIBRATOR SETUP to set up a current (not expired)
calibrator.
f.
Enter the target values and limits from the calibrator’s assay sheet:
g.
Anchor the cursor in the desired field.
h.
Type the corresponding number from the assay sheet.
i.
Press Ù to move the cursor the next field.
j.
Repeat steps h and i until all target values and limits are entered.
k.
l.
10-10
to acknowledge the message.
to save the input.
Do Heading 10.4, AUTO-CALIBRATION.
PN 624026AE
CALIBRATION
AUTO-CALIBRATION
10.4 AUTO-CALIBRATION
Do this procedure to calibrate the instrument:
r
During installation, before analyzing samples.
r
After a Beckman Coulter service representative has replaced an analytical component.
r
As instructed by a Beckman Coulter representative.
Running Calibrator Samples
Do this procedure to calibrate the instrument.
1
Verify the expiration date on the calibrator.
ATTENTION: Beckman Coulter does not support the use of any material past its expiration date and does not
accept any responsibility for results generated by products used past their expiration dates.
PN 624026AE
2
Prime the instrument according to the instructions on the package insert.
3
Verify that Heading 10.3, CALIBRATOR SETUP was completed for the calibrator that
you are using.
4
From the Main Menu screen,
.
10-11
1
CALIBRATION
AUTO-CALIBRATION
5
6
.
Prepare and mix the calibrator according to the instructions on the package insert.
(If analyzing the calibrator in the Manual (Stat) Mode, be sure to mix the calibrator
before each analysis.)
7
Analyze the calibrator.
r
To analyze the calibrator in the Autoloader Mode, do Analyzing the Calibrator in the
Autoloader Mode (Recommended) in this chapter.
r
To analyze the calibrator in the Manual (Stat) Mode, do Analyzing the Calibrator in
the Manual (Stat) Mode in this chapter.
Analyzing the Calibrator in the Autoloader Mode (Recommended)
Note: This procedure requires a cap-pierceable calibrator that can be analyzed with the cap
on.
This procedure continues from Running Calibrator Samples above.
1.
10-12
At
on the Calibration screen, define the number
of aspirations (runs) to be done with the calibrator. Type at least 5 but no more than 11.
PN 624026AE
CALIBRATION
AUTO-CALIBRATION
2.
.
A message similar to this appears:
3.
Verify that the Lot Number is correct for the Calibrator you are using.
4.
Insert the calibrator (with cap on) into the cassette.
WARNING Risk of injury/biohazardous conditions if a cassette is not properly handled. Do not use a
cassette for storing or transporting tubes or vials. To ensure tubes/vials remain secured in the
cassettes, always keep cassettes upright and use them only for analysis as described in this manual.
5.
Load the cassette onto the instrument.
6.
to begin analysis.
7.
Do Auto-Calibrating the Instrument in this chapter.
Analyzing the Calibrator in the Manual (Stat) Mode
Note: You can use an open vial or cap-pierceable calibrator for this procedure.
This procedure continues from Running Calibrator Samples above.
1.
.
A message similar to this appears:
PN 624026AE
2.
Verify that the Lot Number is correct for the Calibrator you are using.
3.
Mix the calibrator according to the package insert.
10-13
1
CALIBRATION
AUTO-CALIBRATION
CAUTION Risk of damage to the instrument if the calibrator cap is not removed prior to analysis in the
Manual (Stat) mode.
4.
If the calibrator is in a vial with a non-pierceable cap, remove the cap from the vial.
5.
Insert the calibrator vial into the correct position of the proper tube holder. Refer to the
Hematology Tube List available on the BCI website at www.beckmancoulter.com.
Note: Do not
now, or you will have to begin again.
6.
Verify the tube holder is in the 12:00 o’clock pierce position.
7.
Close the tube holder door to begin analysis.
8.
When the tube holder door opens, remove the vial.
IMPORTANT Risk of erroneous results if the calibrator is not thoroughly mixed between each analysis.
Mix according to the instructions in the calibrator material’s package insert.
9.
If the cap has been removed, replace the cap on the calibrator vial.
10. Mix as needed for the next analysis.
11. Repeat steps 5 through 9 until at least 5 calibrator samples have been analyzed.
(The instrument’s autocalibration module calculates statistics on these results to obtain
the best possible calibration factors.)
12. After you analyze the last calibrator sample,
calibrator into the holder.
when prompted to insert the
13. Do Auto-Calibrating the Instrument in this chapter.
10-14
PN 624026AE
CALIBRATION
AUTO-CALIBRATION
Auto-Calibrating the Instrument
After you analyze the calibrator and have at least 5 results, you can select the results to be
used to auto-calibrate the instrument.
The results obtained from analyzing the calibrator appear on the Calibration screen.
Figure 10.3 shows 7 results, 5 of which are selected. (If a result is greater than its defined CV,
the result is displayed in red.)
Figure 10.3 Calibration Runs: Included and Excluded
Selecting the Results to be Used for Auto-Calibration
Review the calibration results to determine if you want to remove one or more calibration
runs from the calibration table. Remember, the instrument requires at least 5 runs to calculate
the calibration statistics.
1.
Verify the desired parameters (WBC, RBC, HBG, HCT, or PLT) are selected for inclusion
in the calibration calculation:
r
To select a parameters,
until
appears.
For example, all parameters selected appears like this:
r
To deselect a parameter,
until
appears.
For example, if you deselect RBC and PLT, the options appear like this:
2.
Once you have selected 5 or more results, print the calibration table (see Printing
Calibration Results in this chapter) and keep a copy for your records.
Calibration passes when:
r
PN 624026AE
the CV% is within the limits (defined in Heading 10.3, CALIBRATOR SETUP),
and
10-15
1
CALIBRATION
AUTO-CALIBRATION
r
the new calibration factors are within 20% of the old calibration factors.
Calibration fails when:
r
the CV% is not within the limits (defined in Heading 10.3, CALIBRATOR
SETUP), and
r
the new calibration factors are greater than 20% of the old calibration factors.
Note: If the following message appears and you
results will be deleted.
3.
, the existing calibration
to initiate auto-calibration. The following message appears:
To print the current calibration values on the Calibration List printout, auto-calibrate,
and delete the calibration table,
4.
10-16
.
Do Heading 7.3, RUNNING CELL CONTROLS in this chapter to verify calibration.
r
If the control is within expected ranges, run samples.
r
If the control is not within expected ranges, call your Beckman Coulter
representative.
PN 624026AE
CALIBRATION
HOW CALIBRATION SAMPLES ARE INCLUDED/EXCLUDED
Printing Calibration Results
1.
From the Calibration screen,
2.
Select the desired print option.
3.
4.
(active only when data is available).
r
Print Selected Results prints only the selected results.
r
Print All Results prints every result, whether selected or not.
r
Print Statistics Only prints the calibration table only.
to print.
Keep a copy of the printout for your records.
10.5 HOW CALIBRATION SAMPLES ARE INCLUDED/EXCLUDED
1.
After a calibration sample is analyzed, the instrument saves the data as calibration data,
not as results data.
2. If a calibration run is accepted:
r the results will be displayed and saved.
r the calibration run will be selected by default.
3. If a calibration run has an Analytical Message, the run will be displayed deselected.
4. Once the calibration run is completed, the instrument completes the necessary
calculations and compares all directly measured parameters’ coefficients of variation
(CVs) to the corresponding target values (entered in CV Limits for Calibration, QC,
and/or Reproducibility in Appendix A) and all calibration coefficients to internal
acceptance criteria.
5. A CV greater than the limit value is displayed in red.
6. A new calibration coefficient with a difference of more than 20% relative to the current
coefficient will be highlighted red. If new calibration factors have been manually entered,
the Calibrator Log will indicate “Forced” calibration. See Figure 10.4.
Note: Calibration results are not sent to the Host computer.
PN 624026AE
10-17
1
CALIBRATION
HOW CALIBRATION SAMPLES ARE INCLUDED/EXCLUDED
Figure 10.4 Calibration Log Entry: “Forced” Calibration
10-18
PN 624026AE
11DIAGNOSTICS 11
11.1 GENERAL MAINTENANCE
This chapter details the AC•T 5diff AL Analyzer maintenance procedures that are your
responsibility. Also included is a troubleshooting guide to help solve possible instrument
problems. Failure to properly execute the maintenance procedures in this chapter may
compromise instrument performance.
Perform maintenance procedures either on a time schedule or on an instrument cycle
schedule. Mark the maintenance dates on your calendar.
CAUTION Incorrectly performed maintenance procedures can damage the AC•T 5diff AL Analyzer. Do not
attempt to do any procedures not included in this manual. Contact a Beckman Coulter representative for
service and maintenance beyond the scope of what is documented in this manual.
11.2 MAINTENANCE SCHEDULE
See Table 11.1.
Table 11.1 Maintenance Schedule
Maintenance Procedure
Frequency
Situation
Startup
Daily
If Automatic Startup is enabled, the Startup
cycle automatically run when you turn on
the instrument.
If Automatic Startup is disabled, do Startup
Procedure. To enable Automatic Startup, do
Startup (Automatic).
PN 624026AE
Shutdown
Daily
Do Heading 6.4, SHUTDOWN to clean the
instrument.
Reproducibility check
For troubleshooting or when
required by your laboratory or
regulatory agency.
See Heading 11.7, REPRODUCIBILITY
CHECK.
Calibration verification
As needed or when required by
your laboratory or regulatory
agency.
See Chapter 10, CALIBRATION.
Replace reagents
When empty or when there is
not enough to complete your
daily workload.
Reagent(s) Low. Insufficient Reagents to
Complete Daily Workload appears. See
Replacing Reagents Procedure in this
chapter.
Extended cleaning
As needed.
Poor instrument performance.
See Extended Cleaning in this chapter.
Hardware Reset
After an emergency stop of the
instrument or when a faulty
operation has been detected.
See Hardware Reset in this chapter.
11-1
DIAGNOSTICS
REMOVING PANELS/COVERS
Table 11.1 Maintenance Schedule (Continued)
Maintenance Procedure
Frequency
Situation
Replace Rinse Drain
Filter
When instructed by a Beckman
Coulter representative.
DRAIN SENSOR TIMEOUT may indicate a
possible filter restriction. See Replacing the
Rinse Bath Drain Filter in this chapter.
Shut down Windows-NT
Monthly
See Heading 11.8, SHUTTING DOWN
WINDOWS-NT (RECOMMENDED).
11.3 REMOVING PANELS/COVERS
Occasionally, you may be instructed to open a door or remove a cover/panel on the Analyzer.
See Figures 11.1 and 11.2. For details regarding specific panels/covers, see:
11-2
r
Removing the Left Panel
r
Removing the Right Panel
r
Replacing the Right Panel
r
Removing the Top Cover
PN 624026AE
DIAGNOSTICS
REMOVING PANELS/COVERS
Figure 11.1 Analyzer Doors and Covers: Right Side
b
b
Right side panel
c
Right cover
d
Right front door
b
Left front door
c
Left cover
d
Left side panel
e
Reagent door
c
d
Figure 11.2 Analyzer Doors and Covers: Left Side
e
d
c
b
Removing the Left Panel
Tools Needed: Allen wrench, 2.5 mm
PN 624026AE
11-3
1
DIAGNOSTICS
REMOVING PANELS/COVERS
b
c
1
Power down the system (see Powering
Down the System and Logging Off in
Chapter 5).
2
Open the reagent compartment door
(b).
3
Using a 2.5 mm Allen wrench, loosen
the hex screws (c) in back.
4
Remove the two screws (d) in front.
5
Slide the panel out.
d
Removing the Right Panel
Tools Needed:
(door key)
b
c
1
Unfasten the screws (b) with the door
key.
2
Slide the panel up.
3
Pull the panel (c) out.
Replacing the Right Panel
Tools Needed:
11-4
(door key)
PN 624026AE
DIAGNOSTICS
REMOVING PANELS/COVERS
c
b
1
Slide the panel (b) into place.
2
Tighten the screws (c) with the door
key.
Removing the Top Cover
Tools Needed: Allen wrench, 2.5 mm
1
PN 624026AE
Power down the system (see Powering
Down the System and Logging Off in
Chapter 5).
2
Remove the left and right side panels as
instructed in Removing the Left Panel
and Removing the Right Panel.
3
Using a 2.5 mm Allen wrench, loosen
the 7 hex screws (b) that secure the
top cover to the instrument frame.
4
Life the cover up (c) and back to
remove it, then set it aside.
c
b
b
b
11-5
1
DIAGNOSTICS
WASTE HANDLING PROCEDURES
11.4 WASTE HANDLING PROCEDURES
Consult the material safety data sheets (MSDS) for additional reagent information. To order
an MSDS, see Heading 1.10, ORDERING MATERIAL SAFETY DATA SHEETS (MSDS).
Neutralizing the Waste and Treating for Biohazards
Do this procedure before capping the waste container for disposal.
WARNING Risk of personal injury if waste is not
neutralized before the waste container is capped.
Non-neutralized waste contents may produce
gas, which can build up pressure in a capped
container. Neutralize waste contents after
removing the waste container and before
capping it for disposal.
1
2
11-6
For 20L of waste liquid, add the
following to the waste container:
a.
50mL of Sodium Hydroxide
solution 200g/L to prevent gas
from forming.
a.
250mL of Sodium Hypochlorite
solution (12% available chlorine)
to treat waste for biohazards.
50mL
250mL
Sodium Hydroxide
Sodium Hypochlorite
20L
Cap the waste container and firmly
tighten the cap to prevent waste
contents from escaping.
PN 624026AE
DIAGNOSTICS
WASTE HANDLING PROCEDURES
3
Dispose of the waste container
according to your laboratory’s
guidelines.
Handling Expired Reagents
Do this procedure to eliminate cyanides from expired AC•T 5diff Hgb Lyse.
b
100mL
For 1L of reagent, add:
a.
50mL of Sodium Hydroxide
solution 200g/L.
b.
100mL of freshly prepared
Ammonium Persulfate solution
500g/L or 50mL of Sodium
Hydroxide solution 500g/L.
c.
Ammonium Persulfate
a
c
50mL
500mL
500mL of Sodium Hypochlorite
solution (30% available chlorine).
Sodium Hydroxide
1L
Hgb Lyse
1
Sodium Hypochlorite
7650043A
Dispose of expired reagents according
to your laboratory’s guidelines.
Hg
b
Ly
se
2
PN 624026AE
11-7
1
DIAGNOSTICS
DIAGNOSTICS MENU SCREEN
11.5 DIAGNOSTICS MENU SCREEN
Understanding the Diagnostics Menu Screen
See Figure 11.3. and Table 11.2.
Figure 11.3 Diagnostics Menu Screen
Table 11.2 Diagnostics Menu Screen Icons
Icon
11-8
Name
Function
Mini-Clean
Launches the Mini-Clean function. See Mini-Clean (Running) in this
chapter.
Auto-Clean
Launches the Auto-Clean function. See Auto-Clean (Running) in this
chapter.
User
Opens the User menu. See Heading 11.6, DIAGNOSTICS USER
SCREEN.
Service
Opens the Service menu. Only accessible by Service personnel.
PN 624026AE
DIAGNOSTICS
DIAGNOSTICS MENU SCREEN
Mini-Clean (Running)
Do this procedure:
PN 624026AE
r
If the system has been idle between 2 and 4 hours.
r
If the Analyzer has been turned off then on again.
1
From the Main Menu screen,
2
to begin the cycle.
.
3
Allow the cycle to be completed.
4
Cycle a sample with known results to verify instrument performance.
11-9
1
DIAGNOSTICS
DIAGNOSTICS MENU SCREEN
5
6
as needed to return to the desired screen.
Resume normal operation.
Auto-Clean (Running)
Do this procedure to run an Auto-Clean cycle.
11-10
1
From the Main Menu screen,
2
to begin the cycle.
.
PN 624026AE
DIAGNOSTICS
DIAGNOSTICS USER SCREEN
3
4
Allow the cycle to be completed.
as needed to return to the desired screen.
11.6 DIAGNOSTICS USER SCREEN
Understanding the User Screen
See Figure 11.4 and Table 11.3.
Figure 11.4 Diagnostics User Screen
Table 11.3 Diagnostics User Screen Icons
Icon
PN 624026AE
Name
Function
Hardware
Systems
Opens the Hardware Systems menu. See Hardware Systems in this
chapter.
Diluter Systems
Opens the Diluter Systems menu. See Diluter Systems in this chapter.
Others
Opens the Others menu. See Others (Diagnostic Functions) in this
chapter.
11-11
1
DIAGNOSTICS
DIAGNOSTICS USER SCREEN
Hardware Systems
The following options are available on the Hardware Systems screen (Figure 11.5):
r
Hardware Reset
r
Motors (Checking)
r
Valves (Checking)
r
Sensors (Checking)
r
Autoloader Test
Figure 11.5 Hardware Systems Screen
11-12
PN 624026AE
DIAGNOSTICS
DIAGNOSTICS USER SCREEN
Hardware Reset
Do a Hardware Reset:
r
if the instrument halts due to error,
r
after an emergency stop of the instrument,
r
when the instrument reports a faulty operation, or
r
when prompted by the instrument.
Hardware Reset:
r
performs a general rinse, draining, and initialization of mechanical assemblies, and
r
resets instrument components, such as motors and valves, to a normal or “home”
position.
1
2
PN 624026AE
From the Main Menu screen,
.
.
11-13
1
DIAGNOSTICS
DIAGNOSTICS USER SCREEN
3
.
4
Hardware Reset tab.
5
Run.
The instrument resets components to a “home” position.
Motors (Checking)
Overview
Motors are used in the Analyzer to:
11-14
r
move the traverse assembly,
r
activate all syringes,
r
activate the piercing mechanism,
r
move the cassettes forward in the cassette input tray,
PN 624026AE
DIAGNOSTICS
DIAGNOSTICS USER SCREEN
r
index the cassettes to the sampling station, and
r
activate the tube mixing arm.
To verify a motor’s function, you will have to:
r
activate the motor, and
r
check the Errors log for error messages generated by the motor’s activity.
For information on motor functions and locations, see Table 11.4.
Table 11.4 Analyzer Motors: Function and Location
Motor
Component Action
Component Location
Cassette input
mechanism
The cassette input mechanism moves the cassette
pushers a short distance forward from the rear of
the cassette input tray and then retracts them. It
does not complete a full cycle.
Rear of the cassette input
tray
Cassette transfer
mechanism
The cassette transfer mechanism moves a short
distance from left to right and then returns. It does
not complete a full cycle.
Lower front compartment,
to the right of the cassette
input tray
Note: To observe the cassette transfer mechanism
movement, open the left front door and look into
the lower front compartment on the right of the
cassette input tray.
Counting syringe
The counting syringe makes a full stroke and
returns to home.
Left compartment
(see Figure 11.10)
Dilution syringes
The dilution (reagent) syringes assembly makes a
full stroke and returns to home.
Left compartment
(see Figure 11.10)
Draining syringe 1
The draining (waste) syringe 1 makes a full stroke
and returns to home.
Right compartment
(see Figure 11.11)
Draining syringe 2
The draining (waste) syringe 1 makes a full stroke
and returns to home.
Left compartment
(see Figure 11.10)
Flowcell syringes
The DIFF syringe assembly makes a full stroke and
returns to home.
Left compartment
(see Figure 11.10)
Piercing mechanism
The piercing mechanism extends the needle, then
retracts it to home.
Upper front compartment
Note: To observe the needle movement, open the
left front door and look into the left side of the
sampling station.
PN 624026AE
Sampling probe
The vertical traverse assembly moves the sampling
probe down, then back up to home.
Right compartment
(see Figure 11.11)
Sampling syringe
The sampling syringe makes a full stroke and
returns to home.
Right compartment
(see Figure 11.11)
11-15
1
DIAGNOSTICS
DIAGNOSTICS USER SCREEN
Table 11.4 Analyzer Motors: Function and Location (Continued)
Motor
Component Action
Component Location
Traverse assembly
The horizontal traverse assembly moves the vertical
traverse assembly to the rear of the Analyzer, then
back, completing a full cycle.
Right compartment
(see Figure 11.11)
Tube mixing
mechanism
The tube mixing mechanism moves the tube mixer
arm in and out.
Lower front compartment,
to the left of and behind the
tube holder
Note: To observe the tube mixer arm movement,
open the left front door and look into the lower front
compartment on the left of the tube holder.
Procedure for Checking Motors
Do this procedure to activate any of the following motors.
r
Diluter Syringes motor
r
Flow Cell Syringes motor
r
Counting Syringe motor
r
Draining Syringe 1 motor
r
Draining Syringe 2 motor
r
Piercing Mechanism motor
r
Cassette Input Mechanism motor
r
Cass. (cassette) Transfer Mechanism motor
r
Tube Mixing Mechanism motor
r
Sampling Probe
r
Traverse Motor
r
Sampling Syringe
ATTENTION: Motors must be checked individually. If you need to check more than one, select
one motor and verify it’s operation before proceeding to the next one.
11-16
PN 624026AE
DIAGNOSTICS
DIAGNOSTICS USER SCREEN
1
PN 624026AE
From the Main Menu screen,
2
.
3
.
.
11-17
1
DIAGNOSTICS
DIAGNOSTICS USER SCREEN
4
Motors tab.
5
the desired motor to be checked.
6
Open the Errors log (see Viewing Logs) to verify that the motor’s activity did not
generate an error message.
7
Repeat steps 5 through 6 for each additional motors.
8
as needed to return to the desired screen.
Valves (Checking)
Overview
Solenoid valves are devices that allow or stop the flow of a pressurized medium.
Check any of the following blocks of valves:
11-18
r
Valves 1 to 12
r
Valves 13 to 19
r
Valves 20 to 23
PN 624026AE
DIAGNOSTICS
DIAGNOSTICS USER SCREEN
r
Valves 24 to 30
r
Valves 31 to 37
Valve Locations
Valves LV1 through LV19 are grouped into two blocks of solenoid valves in the left
compartment (see Figure 11.10).
r
LV1 to LV12 are in a horizontal block at the DIFF and reagent syringes assemblies.
r
LV13 to LV19 are in a vertical block next to the DIFF syringe assembly.
Valves LV20 through LV37 are grouped into three blocks of solenoid valves in the right
compartment (see Figure 11.11).
r
LV20 through LV23 are in a horizontal block at the tope of the traverse assembly,
above the sampling syringe assembly.
r
LV24 to LV30 are in a vertical block beside the Draining Syringe 1.
r
LV31 to LV35 are in a horizontal block below the baths assembly in the baths
enclosure area.
r
LV 36 to LV 37 are in front of the baths assembly in the bath enclosure area.
Procedure for Checking Valves
Tools Needed:
B Allen wrench, 3.0 mm (for accessing valves in the left compartment)
B Straight-blade screwdriver (for accessing valves in the right compartment)
Do this procedure to verify a valve’s operation is smooth and regular. When you use activate a
block, all valves in that block should be energized.
PN 624026AE
1
Power down the system (the Analyzer and the Workstation). See Powering Down the
System and Logging Off in Chapter 5.
2
Determine the location of the solenoid you need to check.
11-19
1
DIAGNOSTICS
DIAGNOSTICS USER SCREEN
3
Remove the necessary panels/covers. See Heading 11.3, REMOVING PANELS/COVERS.
4
Power up the system. See Powering Up the System and Logging On in Chapter 5.
5
From the Main Menu screen,
6
11-20
.
.
PN 624026AE
DIAGNOSTICS
DIAGNOSTICS USER SCREEN
7
.
8
Valves tab.
9
the range of valves to check.
As the solenoids are fired, listen to the cadence to determine if a solenoid is defective.
10 Check the Errors log (see Viewing Logs in this chapter) for any error messages.
11 When the valve performance is acceptable, close all doors and replace all panels/covers.
PN 624026AE
11-21
1
DIAGNOSTICS
DIAGNOSTICS USER SCREEN
12 Repeat step 9 as needed.
13
as needed to return to the desired screen.
Sensors (Checking)
Do this procedure to check any of the following sensors:
r
Input Area Sensors
r
Output Area Sensors
r
Cass. (cassette) Transfer Sensors
r
Cover Sensors
r
Waste Sensor
1
11-22
From the Main Menu screen,
.
PN 624026AE
DIAGNOSTICS
DIAGNOSTICS USER SCREEN
2
.
3
.
4
Sensors tab.
If a sensor indicator is red, contact your
local Beckman Coulter representative.
PN 624026AE
11-23
1
DIAGNOSTICS
DIAGNOSTICS USER SCREEN
5
as needed to return to the desired screen.
Autoloader Test
Do this procedure to test the Autoloader function to ensure that the system detects the tubes
in the correct position and with the correct barcode, if applicable.
1
2
11-24
From the Main Menu screen,
.
.
PN 624026AE
DIAGNOSTICS
DIAGNOSTICS USER SCREEN
3
4
PN 624026AE
.
the Autoloader Test tab.
5
Place tubes in the cassette. If using barcoded tubes, be sure the barcode labels are
positioned so they can be read.
6
. The system moves the cassette to detect if tubes are present, mixing, and if the
barcode is being read.
11-25
1
DIAGNOSTICS
DIAGNOSTICS USER SCREEN
7
View the Autoloader Test screen:
r
If a tube is detected, the respective “Present” box on the Autoloader Test screen
changes to a teal color.
r
If a barcode is present and read, the Sample ID is displayed in the Sample ID field as
shown below.
r
If a barcode is not present or is not read, no Sample ID appears. See position 4 on
the screen shown below.
8
Confirm that the positions indicated on the screen are the correct positions of the tubes
and barcodes in the cassette.
9
Confirm that the cassette number and type are correct.
10 If there is a problem, contact your local Beckman Coulter representative.
11-26
PN 624026AE
DIAGNOSTICS
DIAGNOSTICS USER SCREEN
Diluter Systems
This option allows you to:
r
Drain Baths
r
Prime Reagents
r
Unprime
r
Cleaning Cycles
See Figure 11.6.
Figure 11.6 Diluter Systems Screen
Drain Baths
If you suspect a draining problem with the baths or if there is excessive flagging on CBC
parameters, do this procedure to drain any of the following baths.
PN 624026AE
r
Rinse Bath
r
HGB Bath
r
DIFF Bath
r
RBC/PLT Bath
r
WBC/BASO Bath
r
All (Baths)
11-27
1
DIAGNOSTICS
DIAGNOSTICS USER SCREEN
Once the selected bath is drained, it will be rinsed with Diluent reagent.
1
11-28
From the Main Menu screen,
2
.
3
.
.
PN 624026AE
DIAGNOSTICS
DIAGNOSTICS USER SCREEN
4
Drain Baths tab.
5
the desired bath to drain.
6
Allow the Analyzer to complete the drain function.
7
Repeat step 5 as needed.
8
PN 624026AE
as needed to return to the desired screen.
11-29
1
DIAGNOSTICS
DIAGNOSTICS USER SCREEN
Prime Reagents
The function primes reagents into the instrument. Do this procedure only after service has
been performed on the instrument.
ATTENTION: This function does not reset the reagent cycle. Do not do this procedure when
replacing reagents; the system automatically primes each reagent after it has been replaced.
Do this procedure to prime any of the reagents:
r
Diluent reagent
r
Rinse reagent
r
Fix reagent
r
WBC Lyse reagent
r
HGB Lyse reagent
r
All Reagents
1
2
11-30
From the Main Menu screen,
.
.
PN 624026AE
DIAGNOSTICS
DIAGNOSTICS USER SCREEN
3
.
4
Prime Reagents tab.
5
the desired reagent prime option.
6
Allow the Analyzer to complete the prime function.
Repeat step 5 as needed.
7
PN 624026AE
as needed to return to the desired screen.
11-31
1
DIAGNOSTICS
DIAGNOSTICS USER SCREEN
Unprime
Do this procedure to unprime any of the following reservoirs:
r
Diluent Reservoir
r
All (reservoirs)
1
2
11-32
From the Main Menu screen,
.
.
PN 624026AE
DIAGNOSTICS
DIAGNOSTICS USER SCREEN
3
.
4
Unprime tab.
5
the desired unprime option.
6
Allow the Analyzer to complete the unprime function.
Repeat step 5 as needed.
7
PN 624026AE
as needed to return to the desired screen.
11-33
1
DIAGNOSTICS
DIAGNOSTICS USER SCREEN
Cleaning Cycles
The following cleaning functions are available:
Extended Cleaning
Backflush
Rinse Flow Cell
Extended Cleaning
Do this procedure to clean the baths with a 1% to 2% solution of sodium hypochlorite if:
r
You suspect a clog or fibrin.
r
Directed by a Beckman Coulter representative.
Supplies needed:
B One 5mL syringe
B 50mL of a 1 to 2% chlorine solution produced from high-quality, fragrance-free sodium
hypochlorite
1
H
Prepare a 1% to 2% chlorine solution
using high-quality, fragrance-free
sodium hypochlorite.
500mL
For example:
11-34
r
If using 4% high-quality,
fragrance-free sodium
hypochlorite, dilute with an
equal part of distilled water.
r
If using 10% to 12% high-quality,
fragrance-free sodium
hypochlorite, dilute by adding
10 parts distilled water to 1 part
of the 10% to 12% high-quality,
fragrance-free sodium
hypochlorite.
PN 624026AE
DIAGNOSTICS
DIAGNOSTICS USER SCREEN
2
Remove the right side panel:
a.
Loosen the screws (b) with the
door key.
b.
Pull the panel up (c) to remove.
3
Remove the bath shield and set it
aside.
4
From the Main Menu screen,
b
c
.
5
PN 624026AE
.
11-35
1
DIAGNOSTICS
DIAGNOSTICS USER SCREEN
6
.
7
Cleaning Cycles tab.
8
Extended Cleaning.
The following message appears.
:
11-36
PN 624026AE
DIAGNOSTICS
DIAGNOSTICS USER SCREEN
9
to begin the extended cleaning cycle.
After about a minute, the following message appears.
Note: Do not
until after you dispense the cleaning solution into the baths.
WARNING Risk of contamination. If you do not
properly shield yourself while decontaminating
the instrument, you may become contaminated.
To prevent possible biological contamination,
you must use appropriate barrier protections
(safety glasses, a lab coat, gloves, and so forth)
when performing this procedure.
10 Dispense 3 mL of the 1% to 2%
chlorine solution into each bath.
11 Press
-ORPress Enter to continue.
PN 624026AE
11-37
1
DIAGNOSTICS
DIAGNOSTICS USER SCREEN
12 Message appears on screen to pour 3 mL of extended cleaning reagent into the
WBC/Baso bath.
13 Dispense 3mL of the 1% to 2% chlorine solution into the WBC/Baso bath.
Figure 11.7 Bath Assembly
f
b
c
d
e
b
Rinse bath
c
First Dilution/Hgb bath
d
DIFF bath
e
RBC bath
f
WBC/BASO bath (closest to the rear of the
instrument)
14 Replace the bath shield.
11-38
PN 624026AE
DIAGNOSTICS
DIAGNOSTICS USER SCREEN
15 Replace the right side panel:
a.
Slide the panel (b) into place.
b.
Tighten the screws (c) with the
door key.
c
b
16
-ORPress Enter to initiate the cycle.
17 Allow the Analyzer to complete the cleaning procedure. (Note: It takes about 5
minutes for the cycle to complete.)
The system will automatically flush to remove the chlorine solution that you dispensed
in step 10.
18
as needed to return to the desired screen.
Backflush
The backflush feature pushes pressure through the rear of the apertures to remove blockages.
Do this procedure if you suspect blocked apertures.
1
PN 624026AE
From the Main Menu screen,
.
11-39
1
DIAGNOSTICS
DIAGNOSTICS USER SCREEN
2
.
3
.
4
11-40
Cleaning Cycles tab.
PN 624026AE
DIAGNOSTICS
DIAGNOSTICS USER SCREEN
5
6
7
Backflush.
Allow the Analyzer to complete the backflush function.
as needed to return to the desired screen.
Rinse Flow Cell
This procedure rinses the Analyzer’s flow cell with Diluent reagent. Do this procedure:
r
to remove bubbles from the flow cell, or
r
if there is excessive flagging on DIFF parameters
1
PN 624026AE
From the Main Menu screen,
.
11-41
1
DIAGNOSTICS
DIAGNOSTICS USER SCREEN
2
.
3
.
4
11-42
Cleaning Cycles tab.
PN 624026AE
DIAGNOSTICS
DIAGNOSTICS USER SCREEN
5
Rinse Flow Cell.
6
Allow the Analyzer to complete the rinse flow cell function.
7
as needed to return to the desired screen.
Others (Diagnostic Functions)
This option allows you to:
r
View the Cycles Counter
r
Park the Syringes
r
Traverse Service Position
r
Edit/Accept Calibration Factors (Supervisor or Service Use Only)
See Figure 11.8.
Figure 11.8 Others Diagnostics Screen
PN 624026AE
11-43
1
DIAGNOSTICS
DIAGNOSTICS USER SCREEN
View the Cycles Counter
The instrument counts the number of cycles run after the software is installed for:
r
CBC
r
CBC/DIFF,
r
Startup,
r
Shutdown
r
Auto-Clean
Do this procedure to view the number of cycles analyzed by the instrument.
1
2
11-44
From the Main Menu screen,
.
.
PN 624026AE
DIAGNOSTICS
DIAGNOSTICS USER SCREEN
3
4
5
PN 624026AE
.
View the cycle count information.
as needed to return to the desired screen.
11-45
1
DIAGNOSTICS
DIAGNOSTICS USER SCREEN
Park the Syringes
Do this procedure to park the syringes if the instrument will be transported or will not be
used for a long time.
1
2
11-46
From the Main Menu screen,
.
.
PN 624026AE
DIAGNOSTICS
DIAGNOSTICS USER SCREEN
3
4
5
6
PN 624026AE
.
Run Park Syringes.
Allow the Analyzer to complete the function.
as needed to return to the desired screen.
11-47
1
DIAGNOSTICS
DIAGNOSTICS USER SCREEN
Traverse Service Position
Do this procedure to put the traverse assembly in a “service” position for easy access.
1
11-48
From the Main Menu screen,
2
.
3
.
.
PN 624026AE
DIAGNOSTICS
DIAGNOSTICS USER SCREEN
4
5
6
Run Traverse Service Pos.
Allow the Analyzer to complete the function.
as needed to return to the desired screen.
Edit/Accept Calibration Factors
Note: For Supervisor or Service use only.
Do this procedure to edit/accept the calibration factors.
1
PN 624026AE
From the Main Menu screen,
.
11-49
1
DIAGNOSTICS
DIAGNOSTICS USER SCREEN
11-50
2
.
3
.
4
.
PN 624026AE
DIAGNOSTICS
DIAGNOSTICS USER SCREEN
ATTENTION: If you are doing this procedure because you received the Calibration factors
modified. Run calibration. message, do not enter new calibration factors. Go to step 7.
5
6
7
8
PN 624026AE
Enter the desired calibration factors.
a.
Highlight the number to edit.
b.
Type the new number.
c.
Press Ù to advance to the next field if necessary.
d.
Repeat steps a through c as needed.
Verify the calibration factors are correct.
Accept Values to save the new calibration factors.
as needed to return to the desired screen.
11-51
1
DIAGNOSTICS
REPRODUCIBILITY CHECK
11.7 REPRODUCIBILITY CHECK
Reproducibility (sometimes referred to as precision) measures the instrument’s ability to
reproduce similar results (within established limits) when a sample is consecutively run.
The closeness of the results for the same sample indicates the instrument’s precision.
Understanding the Reproducibility Screen
See Figure 11.9.
Figure 11.9 Reproducibility Screen Details
11-52
b
Indicates the mode (Autoloader or Manual) in which the Reproducibility analyses will be run.
c
Displays the number of aspirations to be performed in the Autoloader mode.
d
Parameters result for each sample. Use scroll bar (1#) to see additional parameters.
e
Panel selector that allows you to select CBC or CBC/DIFF.
f
Calculated statistics for included (
g
Range is the difference between the maximum (h) and minimum (i) values.
h
Maximum is the highest target value.
i
Minimum is the lowest target value.
j
Coefficient of variation of the selected Reproducibility runs; displayed in red if greater than the CV
defined by the operator.
) runs.
PN 624026AE
DIAGNOSTICS
REPRODUCIBILITY CHECK
1)
Standard deviation of the selected Reproducibility runs.
1!
Mean of selected Reproducibility results.
1@
The number of selected runs used in the calculations in f.
1#
The scroll bar that lets you scroll to see additional parameters in d.
1$
Date and time the Reproducibility run was done.
1%
Operator who ran the Reproducibility run.
1^
Allows you to include/exclude a Reproducibility run for the calculations in f.
Running a Reproducibility Check in the Manual (Stat) Mode
Do this procedure to run a Reproducibility check in the Manual (Stat) Mode:
r
as required by your state or regulatory agencies, or
r
for troubleshooting purposes.
For information on running in the Autoloader Mode, see Running a Reproducibility Check in
the Autoloader Mode in this chapter.
Supplies Needed:
r For closed-vial analysis, 3 Vacutainer tubes of fresh, normal whole-blood samples (as
defined by your lab) that can be aspirated a maximum of 7 times each.
r
1
PN 624026AE
For tubes other than Vacutainer:
t
have enough tubes to obtain a total of 20 aspirations
t
run the samples using open-vial analysis
From the Main Menu screen,
.
11-53
1
DIAGNOSTICS
REPRODUCIBILITY CHECK
2
3
11-54
.
If there are existing runs, the following message appears:
r
To delete all Reproducibility runs,
.
r
To acknowledge the message and not delete the Reproducibility runs,
.
PN 624026AE
DIAGNOSTICS
REPRODUCIBILITY CHECK
4
5
a.
Print or transmit existing results
as instructed in
Printing/Transmitting
Reproducibility Results in this
chapter.
b.
Delete existing results as
instructed in Deleting
Reproducibility Results in this
chapter.
until the desired panel (CBC or CBC/DIFF) appears
6
Prepare a fresh, normal whole-blood sample as defined by your laboratory guidelines.
7
Mix the sample as required by your lab.
8
PN 624026AE
Before running a Reproducibility
check:
.
11-55
1
DIAGNOSTICS
REPRODUCIBILITY CHECK
9
The following message appears:
Note: Do not
again.
unless you want to cancel; otherwise, you will have to begin
10 Are you using a Vacutainer tube?
r
If yes, go to step 11.
r
If no, carefully remove the cap from the tube then go to step 11.
11 Insert the tube into the correct slot of
the tube holder.
Refer to the Hematology Tube List
available on the BCI website at
www.beckmancoulter.com
11-56
PN 624026AE
DIAGNOSTICS
REPRODUCIBILITY CHECK
12 Close the tube holder door for analysis
to begin. The LED lights will illuminate
when analysis is in progress.
13 When analysis is completed, the results are displayed.
PN 624026AE
11-57
1
DIAGNOSTICS
REPRODUCIBILITY CHECK
14 When analysis is completed and the
tube holder door opens, remove the
tube.
Replace the cap (if necessary.)
15 Repeat step 7 through 14 until 20 aspirations have been analyzed. (Remember to mix the
sample before the next aspiration.)
16 After all runs are done:
a.
b.
11-58
Remove the tube when the tube holder door opens.
.
PN 624026AE
DIAGNOSTICS
REPRODUCIBILITY CHECK
17
the check-box next to the runs to be included in the calculation.
= included
= excluded
18 Review the data.
Compare the results to the CV% limits.
Results that exceed the limits appear
against a red background.
19 Repeat as needed.
Contact a Beckman Coulter representative if results continue to exceed limits.
PN 624026AE
11-59
1
DIAGNOSTICS
REPRODUCIBILITY CHECK
20 To complete the Reproducibility check and exit the Reproducibility Data Grid screen,
.
Running a Reproducibility Check in the Autoloader Mode
Do this procedure to run a Reproducibility check in the Autoloader Mode:
r
as required by your state or regulatory agencies, or
r
for troubleshooting purposes.
For information on running in the Manual (Stat) Mode, see Running a Reproducibility Check
in the Manual (Stat) Mode in this chapter.
Supplies Needed:
r 3 Vacutainer tubes of fresh, normal whole-blood samples (as defined by your lab) that
can be aspirated a maximum of 7 times each.
r
1
11-60
For tubes other than Vacutainer, do Running a Reproducibility Check in the Manual
(Stat) Mode.
From the Main Menu screen,
.
PN 624026AE
DIAGNOSTICS
REPRODUCIBILITY CHECK
2
3
PN 624026AE
.
If there are existing runs, the following message appears:
r
To delete all Reproducibility runs,
.
r
To acknowledge the message and not delete the Reproducibility runs,
.
11-61
1
DIAGNOSTICS
REPRODUCIBILITY CHECK
4
Before running a Reproducibility
check:
a. Print or transmit existing results
as instructed in Deleting
Reproducibility Results in this
chapter.
b. Delete existing results as
instructed in
Printing/Transmitting
Reproducibility Results in this
chapter.
ATTENTION: A total of at least 20 aspirations is required. For example, if using 3 tubes, type 7 as the number
of aspirations.
5
For the new Reproducibility check, type the number of aspirations to be done for each
tube:
a.
b.
6
7
At
, type the desired number of aspirations for
each tube.
Verify that the number is correct. Each tube in the cassette will be aspirated that
number of times.
until the desired panel (CBC or CBC/DIFF) appears.
Prepare and mix fresh, normal whole-blood samples as defined by your laboratory
guidelines.
WARNING Risk of injury/biohazardous conditions if a cassette is not properly handled. Do not use a
cassette for storing or transporting tubes or vials. To ensure tubes/vials remain secured in the
cassettes, always keep cassettes upright and use them only for analysis as described in this manual.
11-62
PN 624026AE
DIAGNOSTICS
REPRODUCIBILITY CHECK
8
Insert the tube(s) into the cassette.
a.
Insert the tube.
b.
Push the tube into the cassette.
b
If you insert more than one tube into
the cassette, each tube will be analyzed
(aspirated) the number of times you
entered in step 5.
a
9
Load the cassette onto the instrument.
!
Be sure your hands are free and clear from the cassette input area before beginning
analysis.
10
PN 624026AE
.
11-63
1
DIAGNOSTICS
REPRODUCIBILITY CHECK
11 After all runs are done, remove the cassette from the Cassette Output Tray.
12
the check-box next to the run to be included in the calculation.
= included
= excluded
13 Review the data.
Compare the results to the CV% limits.
Results that exceed the limits appear
against a red background.
14 Repeat as needed.
Contact a Beckman Coulter representative if results continue to exceed limits.
15 To complete the Reproducibility check and exit the Reproducibility Data Grid screen,
.
11-64
PN 624026AE
DIAGNOSTICS
REPRODUCIBILITY CHECK
Printing/Transmitting Reproducibility Results
This procedure continues from either of the running Reproducibility procedures.
1.
2.
From the Reproducibility Data Grid screen,
To print the results:
a. Select the Print tab.
b. Select the desired print option:
r
r
r
3.
.
Print selected results
Print all results
Print statistics only
c.
.
d. Keep a copy of the printout for your records as required.
To transmit the results to a Host computer:
a. Select the Send tab.
b. Select the desired send option:
r
r
c.
Send selected results
Send all results
.
Deleting Reproducibility Results
This procedure continues from either of the running Reproducibility procedures.
1.
From the Reproducibility Data Grid screen,
want to delete.
the check-box next to the result you
= selected
= not selected
2.
3.
.
Select the delete option:
r
r
r
4.
5.
PN 624026AE
Delete selected results
Delete unselected results
Delete all results
.
If running a new Reproducibility check:
r For Manual Mode, return to step 5 of Running a Reproducibility Check in the
Manual (Stat) Mode.
r For Autoloader Mode, return to step 5 of Running a Reproducibility Check in the
Autoloader Mode.
11-65
1
DIAGNOSTICS
SHUTTING DOWN WINDOWS-NT (RECOMMENDED)
11.8 SHUTTING DOWN WINDOWS-NT (RECOMMENDED)
It is recommended that you shut down Windows-NT at least monthly. When Windows-NT
shuts down, it does an automated system maintenance procedure.
1
Power down the system and log off as instructed in Powering Down the System and
Logging Off in Chapter 5.
2
To resume normal operation, power up the system and log on again as instructed in
Powering Up the System and Logging On in Chapter 5.
11.9 CLEANING THE ANALYZER
WARNING Risk of biohazardous conditions. Utilize appropriate barrier protection when performing these
procedures, as the instrument may contain biohazardous material.
Cleaning the Tube Holder
CAUTION Risk of damage to tube holder if it is exposed to temperatures of 70°C (158°F) or higher. Do not
heat sterilize the tube holder or subject it to temperatures of 70°C (158°F) or higher.
Clean the tube holder with a damp cloth and distilled water. You can also use a 1% to 2%
chlorine solution made from distilled water and high-quality, fragrance-free sodium
hypochlorite.
Cleaning the Outside of the Analyzer
Clean the outside of the Analyzer with a damp cloth and distilled water to prevent the
buildup of corrosive deposits. Pay particular attention to the sampling probe area. Clean up
spills promptly.
11-66
PN 624026AE
DIAGNOSTICS
CLEANING THE ANALYZER
Cleaning the Inside of the Analyzer
If corrosive deposits are evident, clean the inside of the Analyzer with a damp cloth and
distilled water. Be careful not to wipe contaminants into the baths.
Auto-Clean
An auto-clean (automatic cleaning) is performed by the instrument after a specified number
of samples are analyzed. You can set the frequency from 1 to 120. See Auto-Clean Frequency
(Setting) in Appendix A.
Shutdown
At the end of each day, do Shutdown to rinse the instrument and place it in a stand-by mode.
If Automatic Shutdown is enabled, Shutdown is done automatically. However, if Automatic
Shutdown is not enabled, do the following procedure.
1
.
The instrument cycles Rinse reagent for
cleaning and goes into a stand-by
mode.
2
When Shutdown is complete:
r
Allow the instrument to remain in stand-by mode,
OR
r
Do Powering Down the System and Logging Off to turn the system off.
Note: After doing Shutdown, a Startup must be done before operating the instrument
again.
PN 624026AE
11-67
1
DIAGNOSTICS
CLEANING THE ANALYZER
System Cleaning (After Analyzing a Contaminated Sample)
Do this procedure to clean the system after analyzing a contaminated sample according to
your lab procedure.
Supplies Needed:
B 500mL of a 1% to 2% chlorine solution produced from high-quality, fragrance-free
sodium hypochlorite
B Absorbent paper
B Distilled water
B 2 containers (such as beakers or flasks) that can each hold more than 500mL of liquid
and can be placed in front of the reagent compartment when the door is open
Do Extended Cleaning in this chapter.
2
Prepare the 2 containers:
a.
Pour 500mL of distilled water into
the one container.
b.
Pour the chlorine solution into the
other container.
I H 2 0
11-68
1
500mL
PN 624026AE
DIAGNOSTICS
CLEANING THE ANALYZER
3
4
Remove all reagent pickup tube
assemblies from their containers,
including Diluent.
a.
Open the reagent compartment
door.
b.
Remove the pickup tube
assemblies.
Place all reagent pickup tube
assemblies in the chlorine solution.
Cl - 2%
PN 624026AE
11-69
1
DIAGNOSTICS
CLEANING THE ANALYZER
5
Prime All Reagents as instructed in Prime Reagents in this chapter.
Chlorine solution will now be pulled into the instrument through the reagent pickup
tubes.
6
When priming is complete, remove the
reagent pickup tube assemblies from
the chlorine solution, and wrap the
tubes in absorbent paper.
7
Prime all reagents as instructed in Prime Reagents in this chapter.
The chlorine solution will now be drained from the system.
8
Place the container with the distilled water in front of the reagent compartment.
9
Place all pickup tube assemblies into
the distilled water container.
H20
10 Prime all reagents as instructed in Prime Reagents in this chapter.
The distilled water will be pulled in to rinse the system.
11-70
PN 624026AE
DIAGNOSTICS
CLEANING THE ANALYZER
11 Run a blank cycle.
12 Remove all pickup tubes from the container.
13 Repeat step 10.
14 Reconnect the reagent pickup tube assemblies to their respective containers.
15 Be sure each pickup tube cap is
properly tightened.
16 Place the reagent containers in their
respective locations.
PN 624026AE
11-71
1
DIAGNOSTICS
CLEANING THE ANALYZER
17 Prime all reagents as instructed in Prime Reagents in this chapter.
18 Close the reagent compartment door.
a.
Lift the door up.
b.
Lower the door until it is closed.
19 Inspect the reagent lines to ensure
there are no air bubbles present.
If air bubbles are present, repeat step
17.
20 Power down the system as instructed in Powering Down the System and Logging Off in
Chapter 5.
21 Power up the system as instructed in Powering Up the System and Logging On in
Chapter 5.
11-72
PN 624026AE
DIAGNOSTICS
CLEANING THE ANALYZER
Cleaning the Baths
Frequency: As needed
Supplies Needed
B 50mL of a 1% to 2% chlorine solution produced from high-quality, fragrance-free sodium
hypochlorite
t
If using 4% high-quality, fragrance-free sodium hypochlorite, dilute with an equal
part of distilled water.
t
If using 10% to 12% high-quality, fragrance-free sodium hypochlorite, dilute by
adding 10 parts distilled water to 1 part of the sodium hypochlorite
B 5 lint-free wipes or fabric-tipped applicators
Note: Extended Cleaning is required after this procedure.
Do this procedure to clean the baths.
PN 624026AE
1
Power down the system as instructed in Powering Down the System and Logging Off in
Chapter 5.
2
Unplug the Analyzer from its power
source (wall outlet).
11-73
1
DIAGNOSTICS
CLEANING THE ANALYZER
3
Remove the right side panel:
a.
Loosen the screws (b) with the
door key.
b.
Pull the panel up (c) to remove.
b
c
4
Remove the bath shield.
5
Apply a liberal amount of the solution to a lint-free wipe or fabric-tipped applicator.
ATTENTION: Do not wipe contaminants into the
baths.
6
Use the wipe or applicator to clean the
top of a bath:
With an outward motion, slowly and
carefully wipe around the top of the
bath.
11-74
PN 624026AE
DIAGNOSTICS
CLEANING THE ANALYZER
7
Using a new wipe or applicator for each bath, repeat steps 5 and 6 until all baths are
cleaned.
8
Replace the bath shield.
9
Replace the right side panel:
a.
Slide the panel (b) into place.
b.
Tighten the screws (c) with the
door key.
c
b
10 Plug the Analyzer’s power cord into its
power source (electrical outlet).
11 Power up the system as instructed in Powering Up the System and Logging On in
Chapter 5.
PN 624026AE
11-75
1
DIAGNOSTICS
COMPONENT LOCATIONS
12 Drain the Rinse bath as instructed in Drain Baths in this chapter.
13 To remove any debris or contaminants from the baths, do Extended Cleaning in this
chapter.
14 Cycle a sample with known results to verify instrument performance.
11.10 COMPONENT LOCATIONS
See the following figures for component locations:
r
r
Figure 11.10, Inside Left Components
Figure 11.11, Inside Right Components
r
r
Figure 11.12, View of the Pneumatics Area
Figure 11.13, Bath Assembly
r
r
r
r
Figure 11.14, Optical Bench and Pneumatic Assemblies
Figure 11.15, Main Card
Figure 11.16, Computer Workstation: Front View
Figure 11.17, Computer Workstation: Back View
Figure 11.10 Inside Left Components
11-76
PN 624026AE
DIAGNOSTICS
COMPONENT LOCATIONS
1)
b
c
d
j
i
h
g
f
7367440A
PN 624026AE
e
b
Flow cell lamp assembly
g
Valves LV13 to LV19
c
Optical preamplifier card
h
Count syringe assembly
d
Optical bench
i
Valves LV1 to LV12
e
Reagent syringes assembly
j
Waste syringe 2
f
DIFF syringe assembly
1)
Fan
11-77
1
DIAGNOSTICS
COMPONENT LOCATIONS
Figure 11.11 Inside Right Components
d
e
b
f
g
h
c
1* 1(
2) 2!
i
j
2@
1)
1!
1@
1%
1&
7367441A
11-78
1^
1$
b
Main card
1@
Bath assembly
c
Power supply
1#
Valves LV31 to LV35
d
Traverse card
1$
Interlock
e
Horizontal traverse assembly
1%
Counting heads
f
Valves LV20 to LV23
1^
Drain/de-bubble baths
g
Vertical traverse assembly
1&
Hgb photometer
h
Sampling syringe
1*
Rinse bath
i
Waste syringe 1
1(
First Dilution/Hgb bath
j
Valves LV24 to LV29
2)
DIFF bath
1)
Diluent reservoir
2!
RBC bath
1!
Bath shield
2@
WBC/BASO bath
1#
PN 624026AE
DIAGNOSTICS
COMPONENT LOCATIONS
Figure 11.12 View of the Pneumatics Area
b
c
d
e
f
g
PN 624026AE
b
Traverse assembly:
r ensures probe positioning for the sample stages and distribution, and
r supports the sampling syringe.
c
Sampling syringe:
r aspirates sample,
r distributes portions of the specimen into the dilution baths, and
r takes the sample from the first dilution and distributes it into the RBC bath.
d
Waste syringe
r drains the baths,
r bubbles the mixtures, and
r transfers the DIFF specimen to the flow cell.
e
Diluent reservoir:
r holds the necessary diluent for an analysis cycle,
r prevents diluent degassing as it is being aspirated by the syringes, and
r is vacuum filled by the count syringe.
f
Bath assembly: receives the different rinsings and dilutions.
g
Tube holder: holds the tubes/vials.
11-79
1
DIAGNOSTICS
COMPONENT LOCATIONS
Figure 11.13 Bath Assembly
f
b
c
d
e
Figure 11.14 Optical Bench and Pneumatic
Assemblies
b
11-80
c
c
First Dilution/Hgb bath
d
DIFF bath
e
RBC bath
f
WBC/BASO bath
Optical bench: ensures the support and adjustment
of the flow cell, lamp, and optical and electronic
elements.
c
Reagent syringe assembly
r ensures correct reagent delivery:
t Lysing reagent for Hgb (AC•T 5diff Hgb Lyse)
t Rinsing reagent
(AC•T 5diff Rinse)
t Lysing reagent for DIFF
(AC•T 5diff Fix)
t Lysing reagent for WBC/BASO
(AC•T 5diff WBC Lyse)
t Diluent
(AC•T 5diff Diluent)
d
DIFF syringe assembly
r injects the diluted sample into the flow cell, and
r injects the interior and exterior sheath into the
flow cell.
e
Solenoid valves (LV x through LV x)
f
Count syringe
r ensures the vacuum for the WBC and BASO
counts,
r ensures the vacuum for the RBC and Plt
counts, and
r ensures the vacuum for filling the diluent
reservoir with diluent.
g
Waste 2
f
d
Rinse bath
b
g
e
b
PN 624026AE
DIAGNOSTICS
COMPONENT LOCATIONS
Figure 11.15 Main Card
B
Main card:
r amplifies, processes, and counts the
resistive signals and DIFF optical
signals, the RBC signal, the Plt signal,
and the WBC/BASO signal,
b
r measures hemoglobin,
r controls the motorized components,
r processes data and calculates results,
and
r communicates with the Workstation.
ATTENTION: When opening the Main card
support panel, use care not to disconnect or
damage the electric cables.
Figure 11.16 Computer Workstation: Front View
b
B
Monitor
c
Monitor power ON/OFF switch
d
Mouse
E
Workstation power ON/OFF switch
c
e
d
PN 624026AE
Note: Your configuration may vary from
that shown here.
11-81
1
DIAGNOSTICS
REPLACEMENT PROCEDURES
Figure 11.17 Computer Workstation: Back View
I
b
c
B
Host communications connection
c
Power supply connection (PC)
d
Monitor connection
E
Printer connection
f
Analyzer connection
g
Keyboard connection
h
Monitor connection
i
Power supply connection (monitor)
Note: Your configuration may vary from that
shown here.
h
g
f
e d
11.11 REPLACEMENT PROCEDURES
Overview
This section contains the following replacement procedures:
r
Replacing Reagents
r
Replacing the Waste Container
r
Replacing the Flow Cell Lamp
Replacing Reagents
Reagent Location
Figure 11.18 shows the location of the reagent bottles/containers.
11-82
PN 624026AE
DIAGNOSTICS
REPLACEMENT PROCEDURES
Figure 11.18 Reagent Bottle/Container Location
Understanding the Reagent Status Screen
See Figure 11.19.
Figure 11.19 Reagent Status Screen Details
PN 624026AE
b
Reagent level indicators; double-click when replacing a reagent
c
Reagent names
11-83
1
DIAGNOSTICS
REPLACEMENT PROCEDURES
d
Number of CBC cycles that can be analyzed based on current reagent levels
e
Number of CBC/DIFF cycles that can be analyzed based on current reagent levels
Replacing Reagents Procedure
If the instrument determines that there is insufficient reagent to complete the daily workload,
Reagent(s) Low. Insufficient Reagents To Complete Daily Workload appears after Startup. Specific
reagent low messages appear for each reagent when applicable. For details about daily
workload, see Daily Workload (Defining for CBC and CBC/DIFF) in Appendix A.
Replace the reagent as instructed in:
Replacing Reagents: Fix, WBC Lyse, Hgb Lyse, or Rinse Reagents in this chapter, or
Replacing the Diluent Reagent in this chapter.
IMPORTANT Risk of instrument error if reagent is poured from one container to another. Never pour
reagents from one container to another. Particles at the bottom of the old container can contaminate the
new reagent, which will cause unacceptable background results, especially for platelets.
Viewing Reagent Levels
Do this procedure to view a reagent level so you can determine when replacement may be
necessary.
1
From the Main Menu screen,
.
If a reagent level indicates 0%, you
must replace that reagent. Do:
11-84
r
Do Replacing Reagents: Fix, WBC
Lyse, Hgb Lyse, or Rinse Reagents,
or
r
Do Replacing the Diluent Reagent.
PN 624026AE
DIAGNOSTICS
REPLACEMENT PROCEDURES
2
3
View the Cycles Remaining (see
Figure 11.19) to determine how many
CBC and CBC/ DIFF runs can be
processed using the existing reagents.
r
If the Diluent reagent is too low,
do Replacing the Diluent Reagent
in this chapter.
r
If a reagent other than the Diluent
is too low, do Replacing Reagents:
Fix, WBC Lyse, Hgb Lyse, or Rinse
Reagents in this chapter.
to exit this screen.
Replacing the Diluent Reagent
Do this procedure to replace the Diluent reagent.
To replace either Fix, WBC Lyse, Hgb Lyse, or Rinse reagents, do Replacing Reagents: Fix,
WBC Lyse, Hgb Lyse, or Rinse Reagents.
1
PN 624026AE
From the Main Menu screen,
.
11-85
1
DIAGNOSTICS
REPLACEMENT PROCEDURES
2
Double click the level indicator for
Diluent.
3
At the Reagent screen, enter the reagent
information:
a.
Type or scan the lot number from
the reagent container.
b.
Select the expiration date:
1)
at the Expiration Date
field.
2)
to advance a month
or
return to a previous
month.
3)
4
11-86
the correct day.
Remove the stopper assembly from the
container.
PN 624026AE
DIAGNOSTICS
REPLACEMENT PROCEDURES
PN 624026AE
5
Uncap a new diluent container.
6
Put the cap from the new container onto the empty container.
7
Properly dispose of the empty
container.
11-87
1
DIAGNOSTICS
REPLACEMENT PROCEDURES
IMPORTANT Risk of instrument error if the
diluent container is further than 80cm (31.5 in.)
below the instrument. Be sure the diluent
container is no more than 80cm (31.5 in.) below
the instrument.
8
Put the new container no more than
80 cm (31.5 in.) below the instrument.
Note: If the system is installed at an
altitude of 1,000 meters (3,280 feet) or
greater, it is recommended that you
place the Diluent 15 cm to 30 cm
(6 in. to 12 in.) off the floor.
< 80cm
(31.5 in.)
9
Insert the stopper assembly tube into
the new container.
10 Tighten the stopper assembly onto the container to ensure an adequate seal.
11-88
PN 624026AE
DIAGNOSTICS
REPLACEMENT PROCEDURES
IMPORTANT Risk of instrument error if the
reagent tubing is pinched or twisted. Pinched or
twisted tubing prevents a proper flow of the
reagent. To ensure that the reagent flows
properly through the tubing, ensure that the
tubing is not pinched or twisted.
11 Verify that the tubing is not pinched or
twisted.
12
.
The system updates the reagent information, primes the reagent, and updates the level
indicator.
Note: Due to priming, the reagent level may not be displayed as 100%.
ATTENTION: If an instrument error occurs during the reagent replacement procedure, the
reagent(s) may not be fully primed.
If an error occurs:
a.
Acknowledge and resolve the error.
b.
Do Hardware Reset in this chapter.
c.
Do Prime Reagents to manually prime the reagent(s),
Replacing Reagents: Fix, WBC Lyse, Hgb Lyse, or Rinse Reagents
Do this procedure to replace either Fix, WBC Lyse, Hgb Lyse, or Rinse reagents.
To replace only the Diluent, do Replacing the Diluent Reagent in this chapter.
PN 624026AE
11-89
1
DIAGNOSTICS
REPLACEMENT PROCEDURES
1
From the Main Menu screen,
2
Double click the level indicator for
desired reagent.
.
(WBC Lyse is shown.)
3
At the Reagent screen, enter the reagent
information:
a.
Type or scan the lot number from
the reagent container.
b.
Select the expiration date:
1)
at the Expiration Date
field.
2)
to advance a month
or
return to a previous
month.
3)
11-90
the correct day.
PN 624026AE
DIAGNOSTICS
REPLACEMENT PROCEDURES
4
Open the reagent compartment door
then gradually lower it until it stops.
5
Remove the appropriate reagent bottle
from the reagent compartment.
(WBC Lyse is shown.)
6
PN 624026AE
Remove the bottle stopper assembly
from the reagent you are replacing.
11-91
1
DIAGNOSTICS
REPLACEMENT PROCEDURES
7
Place the stopper assembly on a clean surface to prevent contamination.
8
Uncap a new reagent bottle.
9
Put the cap from the new container onto the empty container.
10 Properly dispose of the empty bottle.
. EN
11-92
PN 624026AE
DIAGNOSTICS
REPLACEMENT PROCEDURES
11 Insert the stopper assembly tube into
the new bottle.
12 Tighten the stopper assembly onto the
bottle to ensure an adequate seal.
13 Put the new reagent bottle in the
reagent compartment.
(WBC Lyse is shown.)
PN 624026AE
11-93
1
DIAGNOSTICS
REPLACEMENT PROCEDURES
IMPORTANT Risk of instrument error if the
reagent tubing is pinched or twisted. Pinched or
twisted tubing prevents a proper flow of the
reagent. To ensure that the reagent flows
properly through the tubing, ensure that the
tubing is not pinched or twisted.
14 Verify that the tubing is not pinched or
twisted.
15 Close the reagent compartment door.
a.
Lift the door up.
b.
Lower the door until it is closed.
16
.
The system updates the reagent information, primes the reagent, and updates the level
indicator.
Note: Due to priming, the reagent level may not be displayed as 100%.
ATTENTION: If an instrument error occurs during the reagent replacement procedure, the
reagent(s) may not be fully primed.
If an error occurs:
11-94
a.
Acknowledge and resolve the error.
b.
Do Hardware Reset in this chapter.
c.
Do Prime Reagents to manually prime the reagent(s),
PN 624026AE
DIAGNOSTICS
REPLACEMENT PROCEDURES
Replacing the Waste Container
As the waste container fills, there is a float on the waste sensor in the cap that triggers an
alarm in the software and a Waste Full error message.
Do this procedure to replace the waste container if the Waste Full message appears.
1
Carefully remove the waste container
cap (with waste sensor attached).
2
Replace the waste container according to your laboratory’s guidelines.
WARNING Risk of personal injury if waste is not neutralized before the waste container is capped.
Non-neutralized waste contents may produce gas, which can build up pressure in a capped
container. Neutralize waste contents after removing the waste container and before capping it for
disposal.
3
PN 624026AE
Insert the waste sensor float into the
new waste container and properly
secure the cap.
11-95
1
DIAGNOSTICS
REPLACEMENT PROCEDURES
4
Acknowledge the Waste Full error:
a.
b.
5
.
Review and acknowledge the message.
Do Neutralizing the Waste and Treating for Biohazards in this chapter.
Replacing the Flow Cell Lamp
Do this procedure:
r
when the flow cell lamp fails, or
r
when instructed by a Beckman Coulter representative.
Tools/Supplies needed:
r
Hex keys, 2 mm and 3 mm
r
Flow Cell lamp
Note: For any part that you use from your spare parts kit, be sure to record the part number
for reordering.
11-96
1
Power down the instrument as instructed in Powering Down the System and Logging Off
in Chapter 5.
2
Unplug the Analyzer from its power
source (wall outlet).
PN 624026AE
DIAGNOSTICS
REPLACEMENT PROCEDURES
3
Remove the left side panel:
a.
Open the reagent compartment
door (b).
b.
Loosen the back screws (c).
c.
Remove the two front screws (d),
and slide the panel out.
b
c
d
4
PN 624026AE
Remove the right side panel:
a.
Loosen the screws (b) with the
door key.
b.
Pull the panel up (c) to remove.
b
c
11-97
1
DIAGNOSTICS
REPLACEMENT PROCEDURES
5
Remove the top cover:
a.
b.
c
Loosen the 7 hex screws (b) that
secure the top cover to the
instrument frame.
Carefully remove the top cover
(c) and set it aside.
b
b
b
WARNING Risk of personal injury due to hot
surfaces within the instrument. Use care when
working in this area. Some of the surfaces may
be very hot and can burn you. Allow the lamp to
cool sufficiently before proceeding.
6
11-98
Disconnect the lamp from the Power
Supply:
a.
Locate the lamp and the connector
on the left side of the optical
bench.
b.
Disconnect the lamp from the
Power Supply.
c.
Note how the existing lamp is
seated:
r
The metal bracket holding the
lamp is keyed to ensure
proper positioning.
r
There are two different
notches: – one is a semi-circle
that matches a circular raised
area, and the other is a square
notch that matches a raised
square.
PN 624026AE
DIAGNOSTICS
REPLACEMENT PROCEDURES
7
Remove the lamp:
a.
Use a 2 mm hex key to loosen the
two screws a few turns.
b.
Separate the metal bracket from
the lamp and cable assembly.
c.
Save the metal bracket and screws.
d.
Turn the lamp counterclockwise to
remove it from its housing.
b
d
a
8
PN 624026AE
Discard the old lamp assembly.
11-99
1
DIAGNOSTICS
REPLACEMENT PROCEDURES
IMPORTANT Risk of compromising output of
the new lamp if the surface is smudged.
Fingerprints or other smudges on the lamp can
affect output. Do not touch the surface of the
lamp.
b
a
9
Using care not to touch the surface of
the lamp:
a.
Insert the new lamp assembly
inside the housing.
b.
Place the bracket (with wings up)
on the housing.
c.
Turn the lamp assembly clockwise
until secure.
d.
Reinstall the two screws removed
in step 7.
e.
Reconnect the lamp to the Power
Supply.
d
c
10 Plug the Analyzer’s power cord into its
power source (electrical outlet).
11 Power up the system as instructed in Powering Up the System and Logging On in
Chapter 5.
The power on sequence will do a Startup and background cycle if Auto-Startup is
enabled.
11-100
PN 624026AE
DIAGNOSTICS
REPLACEMENT PROCEDURES
12 Verify correct operation:
a.
If Startup was not automatically done,
b.
Verify that the new lamp is lighted.
.
r
If it is, go to step 13.
r
If it is not, then troubleshoot the system to determine the problem.
13 When the Startup routine is done:
a.
Turn the instrument off.
b.
Unplug it from the power outlet.
14 Replace the top cover.
a.
Place the top cover (b) on the
instrument.
b.
Tighten the 7 hex screws (c) to
secure the cover to the instrument
frame.
b
c
c
c
PN 624026AE
11-101
1
DIAGNOSTICS
REPLACEMENT PROCEDURES
15 Re-attach the left side panel:
a.
Slide the left side panel into
placed.
b.
Tighten the two hex screws (b),
then the other two hex screws (c)
to secure the door to the
instrument frame.
b
c
16 Replace the right side panel:
a.
Slide the panel (b) into place.
b.
Tighten the screws (c) with the
door key.
c
b
17 After closing all doors and replacing all
covers, plug the instrument into the
power source.
18 Verify instrument performance by running a fresh, whole-blood sample.
11-102
PN 624026AE
DIAGNOSTICS
REPLACEMENT PROCEDURES
Replacing the Rinse Bath Drain Filter
Purpose
Do this procedure when instructed by a Beckman Coulter representative.
Supplies Needed
(door key)
r
(filter assembly)
r
Note: For any part that you use from your spare parts kit, be sure to record the part number
for reordering.
Procedure
Do this procedure to replace the Rinse bath drain filer.
PN 624026AE
1
Power down the system as instructed in Powering Down the System and Logging Off in
Chapter 5.
2
Unplug the Analyzer from its power
source (wall outlet).
11-103
1
DIAGNOSTICS
REPLACEMENT PROCEDURES
3
4
11-104
Remove the right side panel:
a.
Loosen the screws (b) with the
door key.
b.
Pull the panel up (c) to remove.
b
c
Locate the filter between the rinse bath
and valve 27.
PN 624026AE
DIAGNOSTICS
REPLACEMENT PROCEDURES
IMPORTANT Risk of leakage from the rinse bath
filter if the gasket is lost. The rinse bath filter has
an upper half and a lower half. When replacing
the filter, keep the new filter together so that the
small gasket inside the filter stays in place.
5
6
PN 624026AE
Remove the rinse bath filter:
a.
Remove the tubing from of the
rear port of valve 27.
b.
Grasp the upper half of the filter
and twist it until it is completely
loosened from the top fitting.
c.
Remove the tubing from the
bottom of the filter.
Properly dispose of the old rinse bath filter.
11-105
1
DIAGNOSTICS
REPLACEMENT PROCEDURES
7
8
Install the new rinse bath filter:
a.
Connect the existing tubing to the
bottom of the new filter.
b.
Grasp the upper half of filter and
insert the end into the fitting.
c.
Secure the filter by turning as
needed.
d.
Connect the tubing on the bottom
of the filter to the rear port of valve
27.
e.
Push the tubing down over the
fitting till it is secure.
Replace the right side panel:
a.
Slide the panel (b) into place.
b.
Tighten the screws (c) with the
door key.
c
b
11-106
PN 624026AE
DIAGNOSTICS
REPLACEMENT PROCEDURES
9
Plug the Analyzer’s power cord into its
power source (electrical outlet).
10 Power up the system as instructed in Powering Up the System and Logging On in
Chapter 5.
11 Cycle a sample with known results to verify instrument performance.
12 After the cycle is complete:
a.
Remove the right side panel (see
Removing the Right Panel in this
chapter).
b.
Confirm there are no leaks and
that the rinse bath is empty.
c.
Replace the right side panel (see
Replacing the Right Panel in this
chapter).
7367382A
13 Resume normal operation.
PN 624026AE
11-107
1
DIAGNOSTICS
OPENING THE TUBE HOLDER DOOR IF JAMMED
11.12 OPENING THE TUBE HOLDER DOOR IF JAMMED
IMPORTANT Risk of instrument damage if this procedure is done prematurely. Do this procedure only
when the system fails to automatically open the tube holder door.
If the system shuts off before the tube holder door opens, do this procedure to manually open
the door.
1
.
If the tube holder door fails to open, go to step 3.
2
Do Hardware Reset in this chapter.
If the tube holder door fails to open, go to step 3.
11-108
3
Power down the System as instructed in Powering Down the System and Logging Off in
Chapter 5.
4
Unplug the Analyzer from its power
source (wall outlet).
PN 624026AE
DIAGNOSTICS
OPENING THE TUBE HOLDER DOOR IF JAMMED
5
Pull the right front door open.
6
Insert the key into the hole on the right
of the instrument, near the tube holder
door, until the door releases.
Note: If the door fails to open or if it
becomes jammed again, contact a
Beckman Coulter representative.
7
PN 624026AE
Close the right front door.
11-109
1
DIAGNOSTICS
INSTALLING THE LIFTING HANDLES INTO THE ANALYZER
8
Plug the Analyzer into its power
source.
9
Power up the system as instructed in Powering Up the System and Logging On in
Chapter 5.
10 Do Hardware Reset in this chapter.
If the tube holder door fails to open, contact a Beckman Coulter representative.
11 If the tube holder door opens, verify system performance and resume normal operation.
11.13 INSTALLING THE LIFTING HANDLES INTO THE ANALYZER
Due to the Analyzer’s weight, four lifting handles are provided to allow at least two people to
safely move the instrument.
Do this procedure before moving the instrument.
Supplies Needed:
B Lifting handles (4)
1
11-110
Power down the System as instructed in Powering Down the System and Logging Off in
Chapter 5.
PN 624026AE
DIAGNOSTICS
INSTALLING THE LIFTING HANDLES INTO THE ANALYZER
PN 624026AE
2
Unplug the Analyzer from its power
source (wall outlet).
3
Locate the openings for the four lifting
handles.
4
Insert the four handles into their
corresponding openings.
a.
Insert the appropriate end of the
handle into the opening and push
in as far as possible.
b.
Rotate the handle clockwise until
it locks in the lifting position.
c.
Ensure that the handle is securely
in place.
d.
Repeat steps a through c until all
four handles are in place.
11-111
1
DIAGNOSTICS
SYSTEM ERRORS
WARNING Risk of operator injury if only one
person lifts the instrument. The instrument has
lifting handles and weighs more than one
person should lift. Therefore, to prevent injury,
at least two people – following appropriate
safety precautions and using the lifting handles
– should lift the instrument together.
5
With at least one person on each side of
the Analyzer, grasp the handles and
safely lift the Analyzer to move it.
11.14 SYSTEM ERRORS
What Error Messages Mean
Table 11.5 lists errors messages that may appear on the instrument.
Table 11.5 Error Messages
Message
Probable Cause
Suggested Action
‘’X” Not Reaching Home
Motor did not reach home
sensor.
1. Do Auto-Clean (Running).
Note: X = name of motor.
“X” value cannot be less than
“Y” value.
Enter a value of at least “Y”.
“X” value out of range [“Y” - “Z”] The value entered is out of
range.
Enter a value within the range [“Y” - “Z’].
A Communication Error
Occurred.
The Analyzer and
Workstation are not
communicating.
1. Verify that the cables are properly
connected.
Another function was
attempted while the cycle
was in progress
1. Allow the cycle to be completed.
Alarm: Diagnostic Menu must be
closed
A function was attempted
while the Diagnostic menu
is ope
1. Exit from the Diagnostic menu.
Alarm: Remote connection
needed
Connection with Host
computer was lost
Do Hardware Reset.
Autoloader Transfer Mechanism
Autoloader transfer
mechanism not reaching
home
1. Do Hardware Reset.
Alarm: Cycle in Progress
11-112
The value entered is less
than “Y”.
2. If the problem persists, contact a
Beckman Coulter representative.
2. If the problem persists, contact a
Beckman Coulter representative.
2. Do Hardware Reset.
2. Do Hardware Reset.
2. Check the motor as instructed in
Motors (Checking).
PN 624026AE
DIAGNOSTICS
SYSTEM ERRORS
Table 11.5 Error Messages (Continued)
Message
Suggested Action
Autoloader transfer motor failure Autoloader transfer motor
failed
1. Do Hardware Reset.
Automatic calibration failed.
Calibration factors out of
range.
Attempt was made to save
calibration factors, but one
or more of the factors are
out of range.
Contact a Beckman Coulter
representative.
Bath enclosure door open
Bath enclosure door (right
side panel) is open
1. Close door.
If a cycle is attempted while
the right side door is open,
this message is generated.
1. Close the door.
The temperature in the
counting bath compartment
is outside of the acceptable
range.
1. Ensure the sure right side door is
closed.
Bath Enclosure Door Opened
Bath enclosure temperature out
of range. Actual %d. Min %d.
Max %d.
2. Check the motor as instructed in
Motors (Checking).
2. Do Auto-Clean (Running)
2. Do Hardware Reset.
2. Wait a few minutes.
3. If the problem persists, contact a
Beckman Coulter representative.
Bath enclosure temperature out Bath enclosure temperature
of range. Actual 0. Min 0. Max. 0 is out of range
Do Hardware Reset.
Bath enclosure temperature
sensor failure
Bath enclosure temperature
sensor failed
Do Hardware Reset.
Bath enclosure temperature
sensor not connected
Bath enclosed temperature
sensor is not connected
Do Hardware Reset.
Calibration factors modified. Run Analyzer and Workstation
calibration.
calibration factors do not
match.
1. Do Edit/Accept Calibration Factors to
accept the calibration values.
Cassette in wrong position
Cassette is not correctly
positioned in the Cassette
Input Tray
1. Place cassette in correct position.
Cassette moving left sensor
error
An error occurred with the
sensor that detects cassette
movement to the left
Do Hardware Reset.
Cassette moving right sensor
error
An error occurred with the
sensor that detects cassette
movement to the right
Do Hardware Reset.
Cassette not identified
System could not read the
barcode label on the
cassette
1. Check the barcode label to ensure it
is legible.
Cassette transfer end sensor
error
PN 624026AE
Probable Cause
2. If the message re-appears, contact a
Beckman Coulter representative.
2. Restart cycle.
2. Restart the cycle.
An error occurred with the Do Hardware Reset.
sensor that detects the end
point of cassette movement
11-113
1
DIAGNOSTICS
SYSTEM ERRORS
Table 11.5 Error Messages (Continued)
Message
Probable Cause
Suggested Action
Check Diluent level and run a
Prime Diluent cycle.
Diluent reservoir is unable
to fill.
Check the diluent level. Do Replacing the
Diluent Reagent if necessary.
Diluent reagent is empty.
CO%
Resistive and analytical
pulses for a cell fail internal
criteria
1. Re-run the sample
COM error on slave 0
Communication error
Do Hardware Reset.
Communication with mechanical
part lost
Communication between
software and hardware was
lost
Do Hardware Reset.
Counting syringe mechanism
not reaching home
Counting syringe
mechanism not reaching
home
1. Do Auto-Clean (Running).
Counting syringe motor failure
Counting syringe motor
failed
1. Do Auto-Clean (Running).
2. If the problem persists, contact your
local Beckman Coulter
representative.
2. Check the motor as instructed in
Motors (Checking).
2. Check the motor as instructed in
Motors (Checking).
Database restore in progress ...
Attempt was made to
restore the database while
the system is busy.
Make sure Analyzer is idle before
attempting to restore the database.
Diff Syringes Mechanism Not
Reaching Home
Diff syringes mechanism
not reaching home
1. Do Auto-Clean (Running).
Diff Syringes Motor Failure
Diff syringes motor failed
2. Check the motor as instructed in
Motors (Checking).
1. Do Auto-Clean (Running).
2. Check the motor as instructed in
Motors (Checking).
DIFF transfer sensor timeout
DIFF transfer sensor timed
out
Do Auto-Clean (Running).
Diluter syringes mechanism not
reaching home
Diluter syringe mechanism
not reaching home
1. Do Auto-Clean (Running).
Diluter syringes motor failure
Diluter syringe motor failed
2. Check the motor as instructed in
Motors (Checking).
1. Do Auto-Clean (Running).
2. Check the motor as instructed in
Motors (Checking).
11-114
Drain 1 sensor timeout
Drain 1 sensor timed out
Do Auto-Clean (Running).
Drain 1 syringe mechanism not
reaching home
Drain 1 syringe mechanism
not reaching home
1. Do Auto-Clean (Running).
2. Check the motor as instructed in
Motors (Checking).
PN 624026AE
DIAGNOSTICS
SYSTEM ERRORS
Table 11.5 Error Messages (Continued)
Message
Probable Cause
Suggested Action
Drain 1 syringe motor
Drain 1 syringe motor failed 1. Do Auto-Clean (Running).
2. Check the motor as instructed in
Motors (Checking).
Drain 2 sensor timeout
Drain 2 sensor timed out
Do Auto-Clean (Running).
Drain 2 syringe mechanism not
reaching home
Drain 2 syringe mechanism
not reaching home
1. Do Auto-Clean (Running).
Drain 2 syringe motor failure
Drain 2 syringe motor failed 1. Do Auto-Clean (Running).
2. Check the motor as instructed in
Motors (Checking).
2. Check the motor as instructed in
Motors (Checking).
Drain 3 sensor timeout
Drain 3 sensor timed out
Do Auto-Clean (Running).
Drain Timeout
Problems with draining.
1. Do Hardware Reset.
Rinse bath filter may be
clogged.
2. Do Replacing the Rinse Bath Drain
Filter.
3. If the problem persists, contact a
Beckman Coulter representative.
Error management failure
Error management failed
Do Hardware Reset.
Error on cycle 0
A cycle error occurred
Do Hardware Reset.
Error on raw results
An error occurred when
transmitting raw results
Do Hardware Reset.
Error on start internal clock
Internal clock start failure
Do Hardware Reset.
Flow cell syringe mechanism
motor failure
Flow cell syringe
mechanism failed
1. Do Auto-Clean (Running).
Flow cell syringe motor not
reaching home
Flow cell syringe
mechanism not reaching
home
1. Do Auto-Clean (Running).
Front cover open
Front cover is open
1. Close front covers.
2. Check motor in Diagnostics.
2. Check the motor as instructed in
Motors (Checking).
2. Do Hardware Reset.
PN 624026AE
Hbg blank error
Hgb reference value was
not within range (2.5 to
4.99 V)
Do Auto-Clean (Running)
Holder sensor 1 incorrect
position
Holder 1 sensor is in the
incorrect position
Do Hardware Reset.
Holder sensor 2 incorrect
position
Holder 2 sensor is in the
incorrect position
Do Hardware Reset.
11-115
1
DIAGNOSTICS
SYSTEM ERRORS
Table 11.5 Error Messages (Continued)
11-116
Message
Probable Cause
Suggested Action
Holder sensor 3 incorrect
position
Holder 3 sensor is in the
incorrect position
Do Hardware Reset.
Holder sensor 4 incorrect
position
Holder 4 sensor is in the
incorrect position
Do Hardware Reset.
Home motor 0 error
Home motor error
Do Hardware Reset.
Host Communication Error
(ACK)
There is a problem with the
communication or
handshaking to the host
computer.
Verify that the protocol set up in the host
transmission screen matches the
protocol expected by the host computer.
Host Communication Error
(Chars)
There is a problem with the
communication or
handshaking to the host
computer.
Verify that the protocol set up in the host
transmission screen matches the
protocol expected by the host computer.
Host Communication Error
(ENQ)
There is a problem with the
communication or
handshaking to the host
computer.
Verify that the protocol set up in the host
transmission screen matches the
protocol expected by the host computer.
Host Communication Error
(Timeout)
There is a problem with the
communication or
handshaking to the host
computer.
Verify that the protocol set up in the host
transmission screen matches the
protocol expected by the host computer.
Host Communication Error
(Timeout)
There is a problem with the
communication or
handshaking to the host
computer.
Verify that the protocol set up in the host
transmission screen matches the
protocol expected by the host computer.
Host Communication Error
(Write)
There is a problem with the
communication or
handshaking to the host
computer.
Verify that the protocol set up in the host
transmission screen matches the
protocol expected by the host computer.
Incorrect cassette transfer
movement (left)
Cassette moved to the left
Do Hardware Reset.
Incorrect cassette transfer
movement (right)
Cassette moved to the right
Do Hardware Reset.
Incorrect pos. motor counting
(0). Min : 0 Max : 0
Counting motor is in the
wrong position
Do Hardware Reset.
Incorrect pos. motor diff (0).
Min : 0 Max : 0
Diff motor is in the wrong
position
Do Hardware Reset.
Incorrect pos. motor diluter (0).
Min : 0 Max : 0
Diluter motor is in the
wrong position
Do Hardware Reset.
Incorrect pos. motor drain 1 (0).
Min : 0 Max : 0
Drain 1 motor is in the
wrong position
Do Hardware Reset.
PN 624026AE
DIAGNOSTICS
SYSTEM ERRORS
Table 11.5 Error Messages (Continued)
Message
Probable Cause
Suggested Action
Incorrect pos. motor drain 2 (0).
Min : 0 Max : 0
Drain 2 motor is in the
wrong position
Do Hardware Reset.
Incorrect pos. motor loader (0).
Min : 0 Max : 0
Loader motor is in the
wrong position
Do Hardware Reset.
Incorrect pos. motor mixer (0).
Min : 0 Max : 0
Mixer motor is in the wrong
position
Do Hardware Reset.
Incorrect pos. motor needle (0).
Min : 0 Max : 0
Needle motor is in the
wrong position
Do Hardware Reset.
Incorrect pos. motor sampling
(0). Min : 0 Max : 0
Sampling motor is in the
wrong position
Do Hardware Reset.
Incorrect pos. motor transfer
(0). Min : 0 Max : 0
Transfer motor is in the
wrong position
Do Hardware Reset.
Incorrect pos. motor traverse
(0). Min : 0 Max : 0
Traverse motor is in the
wrong position
Do Hardware Reset.
Input left sensor error
Input left sensor error
Do Hardware Reset.
Input mechanism motor not
reaching home
Input mechanism not
reaching home
1. Do Hardware Reset.
Input motor failure
Input motor failed
1. Do Hardware Reset.
2. Check the motor as instructed in
Motors (Checking).
2. Check the motor as instructed in
Motors (Checking).
Input right sensor error
Input right sensor error
Do Hardware Reset.
Instrument stopped by user
User immediately stopped
the instrument
Do Hardware Reset.
Instrument stopped by user at
the end of cassette
User selected to stop the
instrument when the
cassette in progress
finished
Do Hardware Reset.
Instrument stopped by user at
the end of cycle
User selected to stop the
instrument when the cycle
in progress finished
Do Hardware Reset.
Insufficient Disk Space
Insufficient disk space to
backup data to the selected
drive.
1. Select a drive (D) with sufficient
space to back up the data.
Internal barcode reader
failed
Do Hardware Reset.
Internal barcode error
PN 624026AE
2. If necessary, delete the old database
backup, then retry.
11-117
1
DIAGNOSTICS
SYSTEM ERRORS
Table 11.5 Error Messages (Continued)
Message
Probable Cause
Suggested Action
Internal synchronization failed
Internal synchronization
failed
Do Auto-Clean (Running)
Invalid date
An invalid date was entered. Enter a valid date.
Invalid Input
Invalid data was entered.
Enter valid data.
Invalid Lot Number Entered.
Enter Correct Lot Number.
An invalid lot number was
entered.
1. Verify that the correct reagent is
selected for replacement.
2. Re-enter the lot number.
Invalid Password Entered. Try
again.
An invalid password was
entered.
Enter a valid password.
Invalid Reagent Lot Number
An invalid lot number was
Entered. Enter Correct Reagent entered.
Lot Number.
1. Verify that the correct reagent is
selected for replacement.
LIS communication module
closed
Communication failed
between system and Host
Do Hardware Reset.
Low diluent in reservoir.
Diluent level low
1. Check the Diluent level as instructed
in Viewing Reagent Levels.
2. Re-enter the lot number.
2. Prime the Diluent as instructed in
Prime Reagents.
Lower piercing sensor incorrect
position
Lower piercing sensor is in
the wrong position
Do Hardware Reset.
Minimum of 5 Selected Results
Required to Calibrate
At least 5 calibration runs
are required to save
calibration factors, and less
than 5 are included.
Include at least 5 calibration runs before
saving the calibration factors.
Mismatch between first and
second barcode readings on
cass. X pos. X
The internal barcode reader
read the same barcode label
differently the first and
second time
Do Hardware Reset.
Mixer incorrect grabber position
Tube mixer arm is in the
wrong position
1. Do Hardware Reset.
Mixer mechanism not reaching
home
Tube mixer mechanism not
reaching home
1. Do Hardware Reset.
Mixer motor failure
Tube mixer motor failed
2. Check the motor as instructed in
Motors (Checking).s
2. Check the motor as instructed in
Motors (Checking).
1. Do Hardware Reset.
2. Check the motor as instructed in
Motors (Checking).
Motor 0 is active
11-118
The specified motor is
active
Do Hardware Reset.
PN 624026AE
DIAGNOSTICS
SYSTEM ERRORS
Table 11.5 Error Messages (Continued)
Message
Probable Cause
Name Already Exists
The name you typed already
exists.
Suggested Action
1.
.
2. Type another name.
No Cassette(s)
There are no cassettes in
the Cassette Input Tray
1. Load cassettes.
2. Restart cycle.
No communication with
hardware
No communication between Do Hardware Reset.
hardware and software
No Tube Holder
Tube holder door was
closed without a tube
holder in place.
1. Insert the tube holder.
Tube holder not in 12
o’clock pierce position.
3. Close the tube holder door.
One or more calibration factors
failed criteria. Save
calibration?
Calibration factors were not
within the limits.
Contact a Beckman Coulter
representative.
Output Area Full
Cassette Output area is full
and additional cassettes
cannot be ejected
1. Unload cassettes.
Output sensor incorrect position
Output sensor is in the
wrong position
Do Hardware Reset.
Patient Demographics
Received/Modified From Host.
Order cannot be saved.
Attempt was made at the
Workstation to modify
patient demographics
received from a host
computer.
None. Patient demographics received
from a host computer cannot be
modified at the Workstation.
Piercing mechanism incorrect
position
Piercing mechanism is in
incorrect position
1. Do Auto-Clean (Running).
Please check printer is
connected, on-line, and has
paper. Continue?
An error indication has been 1. Ensure there is paper in the printer
and that the printer is ready.
sent from the Printer to the
instrument; usually a paper 2. Refer to the Printer user’s manual for
out message.
additional information.
PLT Interpretation Not Possible
Multiple analytical alarms
(e.g. Voteout) occurred
1. Re-run the sample
Printer not ready
1. Check the printer.
Printer error
2. Verify that the tube holder is in the
pierce position for the desired tube.
2. Restart cycle
2. Check the motor as instructed in
Motors (Checking).
2. If the problem persists, contact your
local Beckman Coulter
representative.
2. Retry printing.
Printer module closed
Printer module closed
1. Do Hardware Reset.
2. Retry printing.
PN 624026AE
11-119
1
DIAGNOSTICS
SYSTEM ERRORS
Table 11.5 Error Messages (Continued)
Message
Probable Cause
Suggested Action
RBC Interpretation Not Possible
Multiple analytical alarms
(e.g. Voteout) occurred
1. Re-run the sample
2. If the problem persists, contact your
local Beckman Coulter
representative.
Reagent level low. Insufficient
for daily workload.
This message is given at the
end of Startup following a
new Workday if there is not
enough reagent remaining
to complete the daily
workload that has been set
up.
Do Replacing the Diluent Reagent and/or
Replacing Reagents: Fix, WBC Lyse, Hgb
Lyse, or Rinse Reagents.
Reagent level low. Insufficient to
run analysis.
There is not enough reagent
to continue
1. Change the reagent as instructed in
Replacing Reagents Procedure.
2. Restart the cycle.
Reagent level low. Insufficient to
run cassette.
There is not enough reagent
to continue
1. Change the reagent as instructed in
Replacing Reagents Procedure.
2. Restart cycle.
Reagent temperature out of
range. Actual 0. Min. 0 Max. 0
Reagent temperature is out
of range
Do Hardware Reset.
Reagent temperature sensor
failure
Reagent temperature
sensor failed
Do Hardware Reset.
Reagent temperature sensor not
connected
Reagent temperature
sensor is not connected
Do Hardware Reset.
Result not stored
The result was not stored
Do Auto-Clean (Running)
RS232 error
Communication error with
Host
Check Host connection.
Run new cycle while analyzer
busy
A new cycle was attempted Do Auto-Clean (Running)
while the Analyzer was busy
Sample ID (null) in progress
The specified sample is
being analyzed
Allow cycle to complete.
Sample probe mechanism not
reaching home
Sample probe mechanism
not reaching home
1. Do Auto-Clean (Running).
Sample probe motor failure
Sample probe motor failed
2. Check the motor as instructed in
Motors (Checking).
1. Do Auto-Clean (Running).
2. Check the motor as instructed in
Motors (Checking).
Sampling syringe mechanism
not reaching home
Sampling syringe
mechanism not reaching
home
1. Do Auto-Clean (Running).
2. Check the motor as instructed in
Motors (Checking).
Sampling syringe motor
Sampling motor failed
1. Do Auto-Clean (Running).
2. Check the motor as instructed in
Motors (Checking).
11-120
PN 624026AE
DIAGNOSTICS
SYSTEM ERRORS
Table 11.5 Error Messages (Continued)
Message
Probable Cause
Suggested Action
SIL communication error
A communication error
occurred
View the Host log for details. See
Viewing Logs in this chapter.
Startup Not Done
Startup was not done
Do Startup Procedure in Chapter 6.
Startup Not Effective
All 3 Startup attempts failed 1. Do Startup Procedure in Chapter 6.
2. If the problem persists, contact a
Beckman Coulter representative.
Stop cassette input switch
detected
Stop cassette input switch 1. Do Hardware Reset.
was detected but should not 2. Check the motor as instructed in
have been
Motors (Checking).
Stop cassette input switch not
detected
Stop cassette input switch 1. Do Hardware Reset.
was not detected but should 2. Check motor in Diagnostics
have been
Stop cassette transfer sensor
detected
Stop cassette transfer
sensor was detected but
should not have been
Stop cassette transfer sensor
not detected
Stop cassette transfer
sensor not detected but
should have been
1. Do Hardware Reset.
Traverse mechanism not
reaching home
Traverse mechanism not
reaching home
1. Do Auto-Clean (Running).
Traverse motor failure
Traverse motor failed
1. Do Auto-Clean (Running).
1. Do Hardware Reset.
2. Check the motor as instructed in
Motors (Checking).
2. Check the motor as instructed in
Motors (Checking).
2. Check the motor as instructed in
Motors (Checking).
2. Check the motor as instructed in
Motors (Checking).
Tube detection sensor incorrect
position
Tube detection sensor is in
wrong position
Do Hardware Reset.
Tube holder mechanism failure
Tube holder mechanism
failed
1. Do Hardware Reset.
Tube is too high in the
cassette
1. Open left front cover.
Tube too high in cassette
2. Restart cycle.
2. Move cassette from input area.
3. Close left front cover.
4. Restart cycle.
PN 624026AE
Two casettes with same ID 0 in
transfer mechanism
Two cassettes with the
same ID are in the cassette
transfer mechanism
Verify each cassette’s ID.
Unable to launch LIS
communication module
Communication not made
with Host
Do Hardware Reset.
Unable to launch print module
Printer module could not be
launched
Do Hardware Reset.
Upper piercing sensor incorrect
position
Upper piercing sensor is in
the wrong position
Do Hardware Reset.
11-121
1
DIAGNOSTICS
TROUBLESHOOTING GUIDES
Table 11.5 Error Messages (Continued)
Message
Probable Cause
Suggested Action
Valve already activated
The specified valve is
already activated
Do Hardware Reset.
Waste full
Waste container is full
1. Do Replacing the Waste Container.
2. Restart.
WBC Interpretation Not Possible Multiple analytical alarms
(e.g. Voteout) occurred
1. Re-run the sample
2. If the problem persists, contact your
local Beckman Coulter
representative.
11.15 TROUBLESHOOTING GUIDES
Troubleshoot instrument problems by using Table 11.6.
Table 11.6 Troubleshooting Guide
Problem Area
Situation
Probable Cause
Suggested Action
Power
Power will not
turn on
Power cord loose or not
securely connected.
Ensure that the power cords are
properly connected.
Workstation turned off.
Turn the Workstation on.
No voltage or wrong
voltage at laboratory
power outlet.
Ensure the voltage is on and that
the outlet is the correct Vac.
Defective power switch
or blown fuse.
Contact a Beckman Coulter
representative.
–
1. Click Retry.
Log on
11-122
Software fails to
connect to the
analyzer during
log on
2. If the software fails to connect,
contact a Beckman Coulter
representative.
PN 624026AE
DIAGNOSTICS
TROUBLESHOOTING GUIDES
Table 11.6 Troubleshooting Guide (Continued)
Problem Area
Situation
Probable Cause
Suggested Action
Startup
Startup failed
three times
–
1. Verify the reagents are not
expired. Replace reagent if
necessary. See Replacing
Reagents Procedure in this
chapter.
2. Do Heading 6.3, STARTUP
again.
3. Do Extended Cleaning.
Temperature not
reached
Instrument did not reach
operating temperature.
Wait 5 minutes to allow the
instrument to reach the operating
temperature.
If the problem persists, contact a
Beckman Coulter representative.
Control
verification out of
acceptable limits
–
1. Rerun the control.
2. Run a new vial of control.
3. Do Extended Cleaning.
4. If the problem persists, contact
a Beckman Coulter
representative.
Sampling
Sampling probe
not working
properly.
Motor
Contact a Beckman Coulter
representative.
Dilution
Traverse motion
Motor problem
1. Do the appropriate motor test.
2. If the problem persists, contact
a Beckman Coulter
representative.
Sample
distribution
Pneumatic/syringe
problem
Analyze a sample and check that
specimen is correctly distributed
into the baths. See Aspiration in
Chapter 2.
Drain and rinse
Pneumatic/syringe
problem
1. Drain the baths. See Drain
Baths in this chapter.
2. Rinse the baths. See Backflush
in this chapter.
3. If the problem persists, contact
a Beckman Coulter
representative.
PN 624026AE
11-123
1
DIAGNOSTICS
LOGS
Table 11.6 Troubleshooting Guide (Continued)
Problem Area
Situation
Probable Cause
Suggested Action
Results
Poor
reproducibility
Bent sampling probe
Contact a Beckman Coulter
representative.
No parameter
results
Bent sampling probe
Contact a Beckman Coulter
representative.
No sample aspiration
Reagent problem
Excessive
flagging
Collection and/or mixing
problem with sample
Contact a Beckman Coulter
representative.
Reagent problem
Printer
Reagents
Printer does not
work
Printer may be turned off. Turn the printer on.
Printer may not be setup
or connected properly
Refer to the printer user’s manual.
Level low
Not enough reagent in
the bottle/container.
Do Replacing Reagents Procedure.
Waste sensor
alarm beeps
Waste container is full.
Do Replacing the Waste Container.
Waste sensor battery is
low.
Replace the battery.
Motor alarms are
triggered.
Do Hardware Reset.
Incorrect mechanical Defective stepper
operation
motors
Current cycle stops.
Incorrect pneumatic
operation
Leaks or
blockages
Reagent alarms are
triggered.
1. Do Hardware Reset.
2. Do Prime Reagents.
Current cycle stops.
Incorrect optical
operation
Incorrect electrical
operation
Specific flags.
1. Do Hardware Reset.
2. Do Prime Reagents.
Dirty optical
parts.
Hgb blank cycle
measurements are
outside acceptable limit.
Incorrect main
supply voltage
Instrument would not
initialize.
Ensure correct voltage from power
source.
Defective optical
parts.
– means not applicable.
11.16 LOGS
Overview
Logs contain information regarding specific events performed by the system during
operation. That information in the log is called an “entry”.
Entries to the logs are made automatically by the system except for the Maintenance log,
which requires you to manually add the entry. Logs or log entries cannot be deleted or edited.
However, you can add comments to any of the logs, which include:
11-124
r
Calibration Log
r
Quality Control Log
PN 624026AE
DIAGNOSTICS
LOGS
r
Reagent Log
r
Maintenance Log
r
Patient/Worklist Log
r
Setup Log
r
Host Log
r
Alarms and Errors Log
r
Startup Log
Understanding the Logs Menu Screen
See Figure 11.20 and Table 11.7.
Figure 11.20 Logs Menu Screen
Table 11.7 Logs Screen Icons
Icon
PN 624026AE
Name
Function
Calibration Log
Opens the Calibration log. See Calibration Log in this chapter.
Quality Control Log
Opens the QC log. See Quality Control Log in this chapter.
Reagent Log
Opens the reagents log. See Reagent Log in this chapter.
Maintenance Log
Opens the maintenance log. See Maintenance Log in this chapter.
Patient/Worklist Log
Opens the patient/Worklist log. See Patient/Worklist Log in this
chapter.
Setup Log
Opens the setup log. See Setup Log in this chapter.
11-125
1
DIAGNOSTICS
LOGS
Table 11.7 Logs Screen Icons (Continued)
Icon
Name
Function
Host Log
Opens the host log. See Host Log in this chapter.
Alarms and Errors Log
Opens the alarms and errors log. See Alarms and Errors Log in this
chapter.
Startup Log
Opens the Startup log. See Startup Log in this chapter.
Understanding the Logs
The format of each log is the same regarding the Date/Time, By, Description, and Comment
columns. However, the types of entries differ for each log. See Figure 11.21 for details on
reviewing log entries.
Figure 11.21 Understanding the Logs (Alarms and Errors Log Shown): Details
11-126
b
Shows the entry that is selected and displayed in h.
c
Log name.
d
A log entry.
e
The reason why the log entry was made.
f
The scroll bar which allows you to scroll right and left to see additional information, such as
comments.
PN 624026AE
DIAGNOSTICS
LOGS
g
Allows you to add comments to the log. See Adding Comments to the Logs in this chapter.
h
This area shows the log entry information (d), including information that may not be easily seen
on the screen without scrolling, such as comments (if any).
i
The operator who was logged into the system at the time the entry was made.
j
Date and time the system made the log entry.
When the system makes an entry into a log, the entry is posted to the appropriate log. For
example, entries regarding reagents are made to the Reagents log. See Table 11.8 for details
regarding the various entries made into each log.
Table 11.8 Log Details
Log
Calibration Log
Entries Made into the Log(s)
r when calibration is done
Storage Capacity†
5 years
r when a target value is changed
r when a calibration analysis is rejected
r when analysis is started and the
calibrator is expired
Quality Control Log
r when a QC target value is changed
1 year
r when a QC analysis is rejected
Reagent Log
when a reagent is replaced
5 years
Maintenance Log
ATTENTION: The system does not
automatically make entries into the
Maintenance log.
5 years
When you perform any maintenance
operation, document the maintenance
information in the log as instructed in
Adding Entries to the Maintenance Log.
Patient/Worklist Log
r when a patient file is modified
(manually or by the Host)
1 year
r when there is a mismatch of a
sample’s cassette/position and order
(and the information appears on the
Manual Match screen)
r when you match an order and a result
on the Manual Match screen
Setup Log
when a setting is modified
1 year
Host Log
when a file from the Host is rejected (e.g.
when an order is pending a re-run or
when the cassette on which the tube is
found is in progress of analysis
1 year
Alarms and Errors Log
1 year
when
PN 624026AE
flashes
11-127
1
DIAGNOSTICS
LOGS
Table 11.8 Log Details
Log
Entries Made into the Log(s)
Storage Capacity†
Startup Log
when a Startup is run
1 year
t the entry line is green if Startup
passed
t the entry line is red if Startup failed
or Startup is out of limits
†Prior
entries to the logs are deleted based on “first in, first out” as the capacity is exceeded.
Viewing Logs
Do this procedure to view a log.
1
From the Main Menu screen,
2
the icon for the log you want to
view.
.
.
See Table 11.7 for icon details.
11-128
PN 624026AE
DIAGNOSTICS
LOGS
3
When the log opens, you may need to scroll down to locate the entry you want to view.
Once you locate the desired entry, scroll right to see additional information.
4
To add comments to the log, do Adding Comments to the Logs in this chapter.
5
To print log entries, do Printing Log Entries.
Adding Comments to the Logs
For the Reagents log or Calibration log, you may be prompted to enter a comment at the time
the system makes the entry if that option is selected in Logs (Comments Prompt).
Do this procedure to add comments to any of the logs after the entry is made.
1.
If the log is not already open:
a.
b.
.
.
the icon for the desired log.
2.
.
3.
Type your comment (up to 50 characters) in the comment window.
4.
5.
PN 624026AE
From the Main Menu screen,
to save the comment.
View the log to verify that the comment was added. Remember, you may need to scroll to
the right to see the comment.
11-129
1
DIAGNOSTICS
LOGS
Adding Entries to the Maintenance Log
Except for the Maintenance log, the system automatically makes the entries to the
appropriate log. For the Maintenance log, you must manually add the entry to detail the
maintenance you performed on the system.
Do this procedure to manually add an entry to the Maintenance log.
1.
If the log is not already open:
a.
b.
11-130
From the Main Menu screen,
.
.
to open the log.
PN 624026AE
DIAGNOSTICS
LOGS
2.
.
a.
Type the entry information at the input window:
Action Performed = 35 characters available
Duration of Action = 10 characters available
Comment = 50 characters available
For example, if you cleaned the tube holder door and it took one minute to do, your
input may be something like this:
“Cleaned tube holder door” in Action Performed,
“1 minute” in Duration of Action.
“Cleaned tube holder door as instructed in the Operator’s
Guide.” in the Comment field.
b.
c.
.
View the log to verify the entry was added.
Figure 11.22 shows what the entry would be using the above example.
PN 624026AE
11-131
1
DIAGNOSTICS
LOGS
Figure 11.22 Maintenance Log Entry
Printing Log Entries
Do this procedure to print log entries from any log.
1.
If the log is not already open:
a.
b.
2.
From the Main Menu screen,
.
.
the icon for the log you want to open.
After the desired log opens,
.
ATTENTION: All logs retain at least one year’s worth of entries; some retain five year’s worth.
Keep in mind that a week’s worth of entries on the Startup log will probably be more than a
week’s worth of entries on the Reagents log. Therefore, specify the exact “Start” and “End”
dates you want printed.
11-132
PN 624026AE
DIAGNOSTICS
LOGS
3.
Select the date range for the entries you want to print:
4.
Verify the printer is ready.
5.
PN 624026AE
to print.
11-133
1
DIAGNOSTICS
LOGS
11-134
PN 624026AE
ASETUP A
A.1
INSTALLATION
A Beckman Coulter representative will install your Analyzer, Workstation, software, and
printer.
A.2
DEFAULT CONFIGURATION
Your instrument was configured prior to installation. Table A.1 shows the default
configuration information.
Table A.1 Instrument Default Settings
A.3
Feature
Default Settings
To Change the Setting
Auto-Clean frequency
100
Do Auto-Clean Frequency (Setting).
Automatic Shutdown
On
Do Shutdown (Automatic)
Automatic Startup
Off
Do Startup (Automatic).
Daily workload
CBC: 10
CBC/DIFF: 40
Do Daily Workload (Defining for CBC and
CBC/DIFF).
Language
English
Do Language (Selecting).
Manual Match
OFF
Do Manual Match (Turning ON or Off).
Reporting unit
US
Do Units (Selecting the Reporting Unit).
RUO parameters enabled
Disabled
Do RUO Parameters (Enabling/Disabling)
Worklist Match Option
Barcode
Do Worklist Match and Manual Match
Options.
XB/XM Option
OFF
Do XB/XM Options (Enabling/Disabling).
SETUP OVERVIEW
Password Requirements
Only Supervisors and Service have access to the Setup screen.
Changes to Instrument Setup
Any time you change the instrument setup, print a setup report for your records. See Analyzer
Configuration and Workstation Configuration in Appendix D for details.
PN 624026AE
A-1
SETUP
SETUP OVERVIEW
Understanding the Setup Screen
See Figure A.1.
Figure A.1 Setup Menu Screen
Table A.2 Setup Screen Icons
Icon
Note:
A-2
Name
Function
Miscellaneous
Opens the Miscellaneous setup screens. See Heading A.4,
OPERATIONAL SETUP.
Quality Assurance
Setup
Opens the QA setup screens. See Heading A.5, QUALITY ASSURANCE
SETUP.
Auto Functions
Opens the auto functions (e.g. Auto-Print, Auto-Clean, etc.) setup
screen. See Heading A.7, AUTO-FUNCTIONS SETUP.
System
Opens the System setup screen. See Heading A.8, SYSTEM SETUP.
Save Restore Conf.
Opens the Configuration Save/Restore screen. See Heading D.2,
CONFIGURATION SAVE/RESTORE SETUP.
Operators
Opens the Operators setup screen. See Heading A.9, OPERATOR
(USERS) SETUP.
Flagging Sets
Opens the Flagging Sets setup screen. See Heading A.10, FLAGGING
SETS SETUP.
Prints the Workstation Setup Report.
PN 624026AE
SETUP
OPERATIONAL SETUP
A.4
OPERATIONAL SETUP
Three tabs are available for this option: General, Location/Physician, and Units. For additional
information, see:
r
General
r
Location/Physician (Adding/Editing/Deleting)
r
Units (Selecting the Reporting Unit)
General
Under the General tab (Figure A.2), you can define/edit these settings:
r
Auto-Numbering (Setting the AUTO_SID Starting Number)
r
Default Panel (Selecting CBC or CBC/DIFF)
r
Worklist Match Option (Selecting)
r
Manual Match (Turning ON or Off)
r
Logs (Comments Prompt)
r
RUO Parameters (Enabling/Disabling)
r
Auto-Stop for QA Messages (Selecting)
r
Auto-Stop for Number of Consecutive Results With Selected Characteristics (Selecting)
Figure A.2 General Tab Settings
PN 624026AE
A-3
A
SETUP
OPERATIONAL SETUP
b
Allows you to enter the Auto-Numbering starting number. See Auto-Numbering (Setting the
AUTO_SID Starting Number) in this chapter.
c
Allows you to define the default panel (CBC/DIFF or CBC). See Default Panel (Selecting CBC or
CBC/DIFF) in this chapter.
d
Allows you to enable/disable RUO Parameters. See RUO Parameters (Enabling/Disabling) in this
chapter.
e
Allows you to select the Worklist match options. See Worklist Match and Manual Match Options in
this chapter.
f
Allows you to turn Manual Match ON/OFF. See Manual Match (Turning ON or Off) in this chapter.
g
Allows you to select the sample criteria that, if met, automatically stop the system. See Auto-Stop for
Number of Consecutive Results With Selected Characteristics (Selecting) in this chapter.
h
Allows you to select the QA messages that, if generated, automatically stop the system and allows
you to display/print the QC Failed message. See Auto-Stop for QA Messages (Selecting) in this
chapter.
i
Allows you to select if you want the system to prompt you for comments in the Calibration Log and/or
Reagents Log when an error messages posts to the log(s). See Logs (Comments Prompt) in this
chapter.
Auto-Numbering (Setting the AUTO_SID Starting Number)
Auto-Numbering is always on and cannot be turned off. However, you can set the starting
number where Auto-Numbering will begin. The auto-numbered Sample ID is preceded by
AUTO_SID; for example, an auto-numbered Sample ID of 101 will appear as AUTO_SID 101.
The AUTO_SID is automatically incremented by 1 from the previously assigned number each
time a sample is analyzed. For Auto-Numbering to start on the initial number, the Worklist
from the previous Workday must be erased.
Do this procedure to set the Auto-Numbering starting number. The new starting number
becomes effective when Reset Autonumbering is selected at the Login screen when a New
Workday begins.
A-4
PN 624026AE
SETUP
OPERATIONAL SETUP
1
2
3
4
PN 624026AE
From the Main Menu screen,
.
.
Verify the General tab is selected.
.
A-5
A
SETUP
OPERATIONAL SETUP
5
Click the number in the AUTO_SID
field and type a new number.
6
Type the number where you want the autonumbering to begin.
a.
Click the number in the AUTO_SID field.
b.
Type the new starting number (up to 8 numeric characters).
For example, to begin at 1, type 1. The first Sample ID will automatically be number
1, the next will be number 2, and so forth.
Note: If you type leading zeros, the system removes them (i.e. 001 becomes 1).
c.
7
8
Verify the number is correct.
to save the change.
At the Login screen for a New Workday, select Reset Autonumbering.
Note: Delete Worklist is automatically selected when you select Reset Autonumbering.
9
Log in to the system. The new starting number for AUTO_SID is effective.
Default Panel (Selecting CBC or CBC/DIFF)
The default panel is the default test, CBC or CBC/DIFF, to be performed on a sample. By
selecting a default panel, you are pre-defining the test for each sample. If you want to change
the test for a particular sample, you can do so when entering the sample information. For
details about which parameters are analyzed with each panel, see Heading 1.4,
PARAMETERS.
Do this procedure to select the default test panel for sample analysis.
A-6
PN 624026AE
SETUP
OPERATIONAL SETUP
1
2
3
4
PN 624026AE
From the Main Menu screen,
.
.
Verify the General tab is selected.
.
A-7
A
SETUP
OPERATIONAL SETUP
5
A-8
Select the desired default panel.
6
to save the change.
7
to return to the Setup screen.
PN 624026AE
SETUP
OPERATIONAL SETUP
Worklist Match and Manual Match Options
Worklist
The Worklist provides the ability to match additional patient demographic information to the
sample when it is processed. An identifier has to be defined that will be used to establish a
match between the sample results and the Worklist order. The link is called the positive ID
and can be set to either Barcode or Cass./Position (cassette and position).
• Barcode
If Barcode is selected as the Worklist Match Option (primary ID), when the Sample ID is
identified from the barcoded tube at the time of analysis, the Worklist is searched for an order
that has the same Sample ID. If a matching order is found, the results from the sample
analysis and the demographic information on the Worklist are matched together and
automatically sent to the Results list.
• Cass./Position
If Cass/Position is selected as the Worklist Match Option (primary ID), when the cassette and
position are identified during analysis, the Worklist is searched for an order that has the same
cassette and position. If a matching order is found, the results from the analysis and the
demographic information on the Worklist are matched together and automatically sent to the
Results list.
Manual Match
The system also offers the ability to “trap” results that do not have orders that match the
positive identifier. This ability, which prevents results from being reported without their
required demographic information, is called the Manual Match option.
If Manual Match is ON, any positive ID for a sample that does not have a matching Worklist
order will not be reported; it will be sent to the Manual Match screen for action.
If Manual Match is OFF, the result for any Worklist order that is not found (no match) is
reported as analyzed.
Deciding Which Worklist Match and Manual Match Options to Use
There are two questions to answer:
1.
How are the sample tubes identified?
2.
Will the functionality of the Worklist be used?
If all or most of your sample tubes are barcoded, set the Worklist Match Option to Barcode,
regardless if the Worklist will be used or not. If you want to use the functions of the Worklist
to assign demographics, set Manual Match to ON so that any “no matches” are held prior to
reporting; this allows you to manually assign the appropriate demographics to the results.
If your sample tubes are not barcoded, set the Worklist Match Option to Cass./Position. If you
want to use the functions of the Worklist to assign demographics, set Manual Match to ON so
that any “no matches” are held prior to reporting; this allows you to manually assign the
appropriate demographics to the results.
PN 624026AE
A-9
A
SETUP
OPERATIONAL SETUP
Possible Workflows and Configurations
Sample Tube Barcoded, Worklist to be Used
Worklist Match Option: Barcode
Manual Match: ON
Sample Tubes Barcoded, Worklist Not to be Used
Worklist Match Option: Barcode
Manual Match: OFF
Sample Tubes Not Barcoded, Worklist to be Used
Worklist Match Option: Cass./Position
Manual Match: ON
Sample Tubes Not Barcoded, Worklist Not to be Used
Worklist Match Option: Cass./Position
Manual Match: OFF
Worklist Match Option (Selecting)
Do this procedure to select the Worklist Match Option (primary identifier).
WARNING Risk of sample mis-identification for Manual Match if the Sample ID is not verified at the
Workstation. Always verify the Sample IDs at the Workstation.
1
A-10
From the Main Menu screen,
.
PN 624026AE
SETUP
OPERATIONAL SETUP
2
3
4
5
.
Verify the General tab is selected.
.
Select the desired Worklist Match
Option.
If tubes are to be identified with
barcode labels, select Barcode.
Otherwise, select Cass./Position.
6
PN 624026AE
to save the change.
A-11
A
SETUP
OPERATIONAL SETUP
7
as needed.
Manual Match (Turning ON or Off)
If Manual Match is ON, sample results are posted to the Manual Match screen for any sample
result that does not have a barcode ID but Barcode is the selected Worklist Match Option (see
Worklist Match and Manual Match Options in this chapter). Once a set of results is on the
Manual Match screen, you can match them to the Worklist order. See
r
If Auto-Print is enabled (see Auto-Print (for Patient Results) in this chapter), the sample
report automatically prints.
r
If Auto-Print is disabled, the sample results are placed on the Results list.
If Manual Match is OFF, the sample results do not post to the Manual Match screen. If
Manual Match is OFF and Cass./Position is the Worklist Match Option (primary identifier),
you must positively identify the sample unless a Worklist order exists and does not match the
processed cassette.
Do this procedure to turn Manual Match ON (recommended) or OFF.
1
A-12
From the Main Menu screen,
.
PN 624026AE
SETUP
OPERATIONAL SETUP
2
3
4
PN 624026AE
.
Verify the General tab is selected.
.
5
Select the desired Manual Match option
(ON is recommended).
6
to save the change.
7
as needed.
A-13
A
SETUP
OPERATIONAL SETUP
Logs (Comments Prompt)
When calibration is performed or when reagents are replaced, a Comments window can be
enabled to automatically appear so you can enter comments.
Do this procedure to enable/disable the Comments prompt for the Calibration Log or Reagent
Log.
1
2
A-14
From the Main Menu screen,
.
.
PN 624026AE
SETUP
OPERATIONAL SETUP
3
4
Verify the General tab is selected.
.
5
Select one or both Prompt for Comments
options.
6
to save the change.
7
as needed.
RUO Parameters (Enabling/Disabling)
The RUO parameters for this instrument include: PCT, PDW, ATL, and IMM. When USA is
the selected country, these parameters are defined as “For Research Use Only. Not for use in
diagnostic procedures.”
If you want the results for the RUO parameters displayed, printed, and/or transmitted, you
must enable the RUO parameter feature as described below.
PN 624026AE
A-15
A
SETUP
OPERATIONAL SETUP
Note: Whenever an RUO parameter label (@) is displayed, printed, and/or transmitted, the
following message will be displayed, printed, and/or transmitted: “For Research Use Only. Not
for use in diagnostic procedures (RUO).”
Do this procedure to enable/disable the reporting of the RUO parameters.
1
2
3
A-16
From the Main Menu screen,
.
.
Verify the General tab is selected.
PN 624026AE
SETUP
OPERATIONAL SETUP
4
5
.
Select/deselect the desired RUO
Parameters option.
6
to save the change.
7
If you selected either of the Enabled options,
to report RUO parameters.
8
to print the RUO form.
to confirm that you have selected
ATTENTION: Complete the form only if you selected Enabled - USA. Follow the instructions on
the form.
9
PN 624026AE
as needed.
A-17
A
SETUP
OPERATIONAL SETUP
Auto-Stop for QA Messages (Selecting)
Auto-Stop for QA Messages allows you to select the specific messages that, when generated, stop
the instrument automatically.
1
2
3
A-18
From the Main Menu screen,
.
.
Verify the General tab is selected.
PN 624026AE
SETUP
OPERATIONAL SETUP
4
5
PN 624026AE
.
Select one or more of the desired Auto-Stop for QA Messages options.
6
to save the change.
7
as needed.
A-19
A
SETUP
OPERATIONAL SETUP
Auto-Stop for Number of Consecutive Results With Selected Characteristics (Selecting)
This Auto-Stop feature allows you to select the number of consecutive results with certain
characteristics that, if occur, stop the instrument automatically. See Figure A.3.
Figure A.3 Auto-Stop for Consecutive Results With Selected Characteristics
The above settings are interpreted below.
MCHC >38: no auto-stop conditions are selected.
WBC Voteout: 3 consecutive incidents of WBC Voteouts will automatically stop the instrument.
RBC Voteout: 2 consecutive incidents of RBC Voteouts will automatically stop the instrument.
HGB Voteout: no auto-stop conditions are selected.
HCT Voteout: 2 consecutive incidents of HCT Voteout will automatically stop the instrument.
PLT Voteout: no auto-stop conditions are selected.
DIFF+/DIFF-: 5 consecutive incidents of DIFF+/DIFF- will automatically stop the instrument.
WBC=0: 2 consecutive incidents of WBC results being zero will automatically stop the instrument.
RBC=0: 3 consecutive incidents of RBC results being zero will automatically stop the instrument.
HCT=0: 4 consecutive incidents of HCT results being zero will automatically stop the instrument.
PLT=0: 2 consecutive incidents of PLT results being zero will automatically stop the instrument.
Do this procedure to define your lab’s auto-stop criteria.
1
A-20
From the Main Menu screen,
.
PN 624026AE
SETUP
OPERATIONAL SETUP
2
3
4
5
6
PN 624026AE
.
Verify the General tab is selected.
.
Select the desired Auto-Stop for Consecutive Results with options.
to save the change.
A-21
A
SETUP
OPERATIONAL SETUP
7
as needed.
Location/Physician (Adding/Editing/Deleting)
Using the Location/Physician tab (Figure A.4), you can add/edit/delete the location and
physician lists stored in the database. For details, see:
r
Adding/Editing Physician and/or Location
r
Deleting Physician and/or Location
Figure A.4 Location/Physician Screen Details
A-22
b
Allows you to enter a new location,
or displays the location selected in
g to be edited or deleted.
f
Displays a list of all physicians in the
database.
c
Allows you to enter a new physician,
or displays the physician selected in
f to be edited or deleted.
g
Displays a list of all locations in the
database.
d
Displays the date when the physician
information was modified.
h
Displays the date when the location
information was modified.
e
Displays the name of the operator
who modified the physician
information.
i
Displays the name of the operator who
modified the location information.
PN 624026AE
SETUP
OPERATIONAL SETUP
Adding/Editing Physician and/or Location
Do this procedure to add or edit a physician or location.
1
2
3
PN 624026AE
From the Main Menu screen,
.
.
the Location/Physician tab.
A-23
A
SETUP
OPERATIONAL SETUP
4
To add a physician or location (up to 20 characters each):
a.
b.
c.
5
b.
. The location or physician (e.g. Dr. Villanueva) now appears in the list.
Anchor the cursor in the desired field.
.
c.
Select the physician or location to be edited.
d.
Edit the information.
e.
A-24
Type the physician or location in the proper field.
To edit a physician or location:
a.
6
.
.
as needed.
PN 624026AE
SETUP
OPERATIONAL SETUP
Deleting Physician and/or Location
Do this procedure to delete a physician and/or location.
1
2
3
PN 624026AE
From the Main Menu screen,
.
.
the Location/Physician tab.
A-25
A
SETUP
OPERATIONAL SETUP
4
Highlight the physician or location
from the list.
For example, to delete Dr. Villanueva
from the list of physicians, highlight
Dr. Villanueva in the list.
5
.
If deleting a location, this message
appears:
If deleting a physician, this message
appears:
6
A-26
to delete.
PN 624026AE
SETUP
OPERATIONAL SETUP
7
as needed.
Units (Selecting the Reporting Unit)
Under the Units tab, you can select the reporting units in which results are displayed and
printed.
By selecting a reporting unit, you are selecting the format in which numeric results are
reported. You can choose from these reporting units:
Table A.3 shows the reporting unit formats for each parameter.
Table A.3 Reporting Unit Format
Reporting Unit
PN 624026AE
Parameter
US
SI 1
SI 2
SI 3
SI 4
WBC
103/µL
109/L
109/L
103/µL
109/L
RBC
106/µL
1012/L
1012/L
106/µL
1012/L
Plt
103/µL
109/L
109/L
103/µL
109/L
Hct
%
L/L
L/L
L/L
L/L
Hgb
g/dL
g/L
g/L
g/dL
mmol/L
MCV
fL
fL
fL
fL
fL
MCH
pg
pg
pg
pg
fmol
MCHC
g/dL
g/L
g/L
g/dL
mmol/L
RDW
%
%
%
%
%
MPV
fL
fL
fL
fL
fL
Pct
%
%
%
%
%
PDW
%
%
%
%
%
DIFF
%
%
ratio
%
%
DIFF #
103/µL
109/L
109/L
103/µL
109/L
A-27
A
SETUP
OPERATIONAL SETUP
Changing Reporting Units
Do this procedure to select one of the desired reporting units.
ATTENTION: If you change the reporting unit, the system automatically restarts to implement
the change.
1
A-28
From the Main Menu screen,
2
.
3
the Units tab.
.
PN 624026AE
SETUP
OPERATIONAL SETUP
4
5
.
Select the desired reporting unit
format:
a.
b.
.
the desired reporting unit:
After you select the reporting unit, the
screen displays the reporting unit
format for each parameter. For
example, if you selected
INTERNATIONAL SYSTEM 2, that name is
displayed.
PN 624026AE
6
to save the change.
7
as needed.
A-29
A
SETUP
QUALITY ASSURANCE SETUP
A.5
QUALITY ASSURANCE SETUP
Two tabs are available under this option: Shifts and Units. For details, see:
r
Shifts (Defining)
r
QA Settings (Defining)
Shifts (Defining)
Under the Shifts tab (Figure A.5), you can define/edit your lab’s shifts. See Selecting Shifts in
this chapter.
Figure A.5 Shifts Setup Screen Details
A-30
b
Shift 0 = The 24-hour shift, which is the default.
c
Allows you to define the times for the multiple shifts.
d
Allows you to choose a shift option.
PN 624026AE
SETUP
QUALITY ASSURANCE SETUP
Selecting Shifts
Do this procedure to define your laboratory’s shifts to be either a 24-hour shift or multiple
shifts.
1
2
PN 624026AE
From the Main Menu screen,
.
.
A-31
A
SETUP
QUALITY ASSURANCE SETUP
3
the Shifts tab.
4
.
5
At the Shift Selection field, select the
desired option.
Note: If you select 24 Hour Shift, the
system defaults are applied, which
means no additional shift settings are
required.
A-32
PN 624026AE
SETUP
QUALITY ASSURANCE SETUP
6
For Multiple Shifts option, type the
“From” for each shift.
If you enter an incorrect time, the following
message appears:
The “To” is automatically completed
when the “From” times are entered.
The system automatically prevents the
times from overlapping.
r
r
PN 624026AE
7
to save the change.
8
as needed.
The system automatically adjusts the
time.
A-33
A
SETUP
QUALITY ASSURANCE SETUP
QA Settings (Defining)
Under the QA settings tab (Figure A.6), you can define/edit these settings:.
r
XB/XM Options (Enabling/Disabling)
r
Minimum Runs Required for Auto-Calibration (Defining)
r
IQAP ID (Entering/Editing)
r
CV Limits for Calibration, QC, and/or Reproducibility
Figure A.6 QA Settings Screen
A-34
b
Allows you to enable/disable/select the XB/XM Analysis. See XB/XM Options (Enabling/Disabling) in
this chapter.
c
Displays the Calibration CV Limits, which you can edit. See CV Limits for Calibration, QC, and/or
Reproducibility in this chapter.
d
Displays the QC CV Limits, which you can edit. See CV Limits for Calibration, QC, and/or
Reproducibility in this chapter.
e
Displays the Reproducibility CV Limits, which you can edit. See CV Limits for Calibration, QC, and/or
Reproducibility in this chapter.
f
Displays your lab’s IQAP ID, which you can edit. See IQAP ID (Entering/Editing) in this chapter.
g
Displays the minimum number of runs required for Auto-Calibration. See Minimum Runs Required
for Auto-Calibration (Defining) in this chapter.
PN 624026AE
SETUP
QUALITY ASSURANCE SETUP
XB/XM Options (Enabling/Disabling)
XB analysis is a method of monitoring your automated hematology analyzer. Similar to XB
analysis, XM analysis uses a weighted moving average of patient sample results. You cannot
edit or exclude XM values from the current batch or batch details.
XB analysis can be set to monitor either three parameters or nine parameters. Your laboratory
must establish its own mean values.
For details on setting the XB limits, see • Setting XB/XM Limits in this chapter.
Do this procedure to enable (activate) or disable (deactivate) the XB/XM options:
r
Off (default)
r
XB (3 Parameters) (monitors MCV, MCH, and MCHC)
r
XM (9 Parameters) (monitors WBC, RBC, HGB, HCT, MCV, MCH, MCHC, RDW, and PLT)
1
PN 624026AE
From the Main Menu screen,
.
A-35
A
SETUP
QUALITY ASSURANCE SETUP
2
3
4
5
6
A-36
.
the QA Settings tab.
.
At the XB/XM option field, select the
desired option.
to save the change.
PN 624026AE
SETUP
QUALITY ASSURANCE SETUP
7
as needed.
• Setting XB/XM Limits
Do this procedure to set the limits for XB Analysis.
If any point calculated from the last batch is out of limits, an XB alarm occurs. If Auto-Print is
enabled, the appropriate message is printed. The flag can also be transmitted to the Host if
this option has been enabled during Host setup.
1
PN 624026AE
From the Main Menu screen,
.
A-37
A
SETUP
QUALITY ASSURANCE SETUP
2
.
3
to open the XB/XM Limits
screen.
You can also select this option from the
XB Data Grid screen.
4
A-38
.
PN 624026AE
SETUP
QUALITY ASSURANCE SETUP
5
6
Edit the desired fields:
a.
Click the field you want to edit.
b.
Type the new value.
c.
Press Ù as needed to move to the next field.
d.
Repeat steps b and c until you are finished editing the XB/XM limits.
to accept the new limits.
The XB/XM screen appears.
7
PN 624026AE
as needed to return to the desired window.
A-39
A
SETUP
QUALITY ASSURANCE SETUP
Minimum Runs Required for Auto-Calibration (Defining)
Do this procedure to define the minimum runs required for Auto-Calibration.
1
2
3
A-40
From the Main Menu screen,
.
.
the QA Settings tab.
PN 624026AE
SETUP
QUALITY ASSURANCE SETUP
4
5
PN 624026AE
.
Edit the number:
a.
Double-click the existing number.
b.
Type a new number.
6
to save the change.
7
as needed to return to the desired window.
A-41
A
SETUP
QUALITY ASSURANCE SETUP
IQAP ID (Entering/Editing)
If your laboratory participates in Beckman Coulter’s IQAP, your IQAP ID (which you should
have received with your enrollment confirmation information) must be entered into the
system. You only need to do this once unless your IQAP ID changes or if required after a
software upgrade. For details on what IQAP is, see IQAP (Interlaboratory Quality Assurance
Program) in Chapter 1.
Your IQAP ID should be in the following format: XXXXX-X-XX, where X is the assigned
number from Beckman Coulter.
Do this procedure to enter or edit your lab’s IQAP ID.
1
2
A-42
From the Main Menu screen,
.
.
PN 624026AE
SETUP
QUALITY ASSURANCE SETUP
3
the QA Settings tab.
4
5
PN 624026AE
.
Type your IQAP ID number:
a.
Anchor the cursor in the IQAP ID
field.
b.
Type your IQAP ID number.
6
to save the change.
7
as needed to return to the desired window.
A-43
A
SETUP
QUALITY ASSURANCE SETUP
CV Limits for Calibration, QC, and/or Reproducibility
Do this procedure to edit the CV (coefficient of variation) limits for Calibration, QC, and
Reproducibility.
r
The CV limits for Calibration are what the values calibration results are compared
against.
r
The CV limits for QC are what the values in the control files are compared against.
r
The CV limits for Reproducibility are what the values reproducibility results are
compared against.
1
2
3
A-44
From the Main Menu screen,
.
.
the QA Settings tab.
PN 624026AE
SETUP
QUALITY ASSURANCE SETUP
4
5
PN 624026AE
.
Edit the numbers as desired.
a.
Highlight the number to edit.
b.
Type the new number.
c.
Press Ù to advance to the next
field if necessary.
d.
Repeat steps a through c as
needed.
6
to save the change.
7
as needed to return to the desired window.
A-45
A
SETUP
SETTING UP A CONTROL FILE
A.6
SETTING UP A CONTROL FILE
Before running a new set of controls, you must set up the control file for each lot of controls.
This includes entering the values from the TABLE OF EXPECTED RESULTS, the expiration
date, assay values, etc. for each lot.
You can enter the information:
r
manually by typing the information from the TABLE OF EXPECTED RESULTS in the
assay sheet, or
r
by downloading the information from the assay values floppy disk.
Up to 24 control lots can be set up. Of the 24: 1 through 12 are reserved for CBC controls,
and 13 through 24 are reserved for CBC/DIFF controls.
Do this procedure for each lot of new controls.
1
2
A-46
Before entering new cell control information:
r
Keep a copy of the control data currently in the system. See Printing/Transmitting
Saved Cell Control Results in Chapter 7.
r
Verify that control data currently in the system has been downloaded for IQAP (if
your lab participates in Beckman Coulter’s IQAP). See Heading 7.4,
DOWNLOADING CELL CONTROL RESULTS FOR IQAP.
r
Delete the previous cell control data as instructed in Heading 7.5, DELETING QC
RUNS/FILES.
From the Main Menu screen,
.
PN 624026AE
SETUP
SETTING UP A CONTROL FILE
3
4
.
The QC Levey-Jennings graphs screen
appears.
to open the QC Data Grid
screen.
PN 624026AE
A-47
A
SETUP
SETTING UP A CONTROL FILE
5
Select the desired control file:
a.
b.
6
7
8
A-48
at
or at
.
Select the desired control.
.
the Target tab if necessary.
.
PN 624026AE
SETUP
SETTING UP A CONTROL FILE
9
Enter the control material lot number:
a.
Anchor the cursor in the Lot Number field.
b.
Locate the lot number of the control material vial.
c.
Enter the lot number
r
manually (up to 16 alphanumeric characters with no spaces)
or
r
d.
scan the barcode label with the barcode wand.
Verify the lot number is correct.
If you enter a lot number that already exists in a different control filename, the following
message appears:
10 Beckman Coulter recommends that you select Reserved.
When using a control with a barcode label, select
.
For more information on reserving control lot numbers, see Reserving Control Lot
Numbers in this chapter.
PN 624026AE
A-49
A
SETUP
SETTING UP A CONTROL FILE
11 Select the control’s expiration date:
a.
at the Expiration Date field
to open the calendar that shows
the current date.
b.
Select the expiration date:
1)
2)
to advance to the
correct month.
the correct date.
12 From the TABLE OF EXPECTED RESULTS, enter the assigned values and expected
ranges for the AC•T 5diff Control Plus control for each parameter:
A-50
r
If manually entering the values from the assay sheet, do To manually enter the
assigned values and expected ranges:.
r
If downloading the values from the assay values floppy diskette, do To download the
assay values and ranges from the floppy:
PN 624026AE
SETUP
SETTING UP A CONTROL FILE
To manually enter the assigned values and expected ranges:
This procedure continues from Heading A.6, SETTING UP A CONTROL FILE above.
ATTENTION: Decimals cannot be entered for MCV values. Therefore, round up to the nearest
whole number for a decimal value of .5 or higher, and round down to the nearest whole
number for a decimal value of .4 or lower.
1.
Anchor the cursor in the desired field.
2.
Enter the value.
3.
Press Ù to move to the next field.
4.
Continue until all values and ranges are entered.
5.
to save the control setup.
r
If the value entered is not within the parameter’s range, the following message
appears:
Enter a correct value and
r
(
6.
7.
PN 624026AE
.
If the value entered is not valid, Invalid Input on X (parameter) appears.
= cancel without saving
= undo changes without saving)
Repeat steps 1 through 5 until target values are entered for all control levels and all
parameters.
to print a copy of the control setup information for your records.
A-51
A
SETUP
SETTING UP A CONTROL FILE
To download the assay values and ranges from the floppy:
This procedure continues from Heading A.6, SETTING UP A CONTROL FILE above.
ATTENTION: MCVs with a decimal value of .5 or higher will be rounded up to the nearest whole
number. MCVs with a decimal value of .4 or lower will be rounded down to the nearest whole
number.
1.
Insert the correct assay values diskette into the floppy drive.
2.
.
3.
.
4.
5.
Select the level of control (Low, Normal, or High).
.
If the system cannot detect a diskette, the following error message appears: There is
no disk in the drive. Please insert a disk into drive A:. If this appears, insert the diskette
and select Retry. If you select Abort, QC Target Values. File not found appears; if this
happens,
6.
A-52
.
If the expiration date on the floppy is expired, the following message appears:
PN 624026AE
SETUP
SETTING UP A CONTROL FILE
ATTENTION: Beckman Coulter suggests that you do not use control material past its
expiration date.
a.
r
To cancel the download,
. Set up a current (not expired) control.
r
To download the expired control information,
.
Allow the download to be completed. When the LED on the Workstation PC is no
longer illuminated, remove the disk.
The Expiration Date field displays the date downloaded from the floppy.
7.
8.
Verify the downloaded information on the screen with what is shown on the assay sheet.
to save the control setup and exit the window.
= cancel without saving
9.
= undo changes without saving
Repeat steps 2 through 8 until target values are entered for all control levels and all
parameters.
10. Remove the diskette when all information has been downloaded.
PN 624026AE
A-53
A
SETUP
SETTING UP A CONTROL FILE
Reserving Control Lot Numbers
Do this procedure to reserve a lot number for a specific control material. This allows you to
enter the lot number as the Sample ID at the Run screen. The system will recognize the
Sample ID as being a control and will place the control results in the correct control file.
ATTENTION: The control must be set up before the lot number can be reserved.
1
2
A-54
From the Main screen,
.
.
PN 624026AE
SETUP
SETTING UP A CONTROL FILE
3
The QC Levey-Jennings graphs screen
appears.
4
5
the Target tab.
Select the desired control file:
a.
b.
6
PN 624026AE
at
or at
.
the desired control.
.
A-55
A
SETUP
SETTING UP A CONTROL FILE
7
8
9
.
Select “Reserved” ( ) to reserve the control lot number as the Sample ID for the control
file selected.
.
Editing Control Target Values
Do this procedure to change target values and/or to edit a clerical error.
1
A-56
From the Main screen,
.
PN 624026AE
SETUP
SETTING UP A CONTROL FILE
2
3
4
PN 624026AE
.
The QC Levey-Jennings graphs screen
appears.
the Target tab.
A-57
A
SETUP
SETTING UP A CONTROL FILE
5
Select the desired control file:
a.
b.
at
.
7
.
9
.
the desired control.
6
8
or at
Edit the control information as needed.
.
10 If you modified the target values and there are no results in the control files, the changes
are saved and an entry is made into the QA log.
A-58
PN 624026AE
SETUP
SETTING UP A CONTROL FILE
11 If you modified the target values and the control file contains results, the following
message appears.
a.
b.
c.
PN 624026AE
the desired option.
r
If you select Delete All Results, the changes made to the target values will be
saved and all results stored in the control file will be deleted. All stored control
data for that specific control will be deleted and cannot be recovered.
r
If you select Recalculate Using New Target (recommended), the new target values
are saved and all results in the control file will be recalculated and re-flagged
using the new target values.
to perform the selected option.
An entry is made into the QA log.
A-59
A
SETUP
AUTO-FUNCTIONS SETUP
A.7
AUTO-FUNCTIONS SETUP
Three tabs are available for this option: Rerun, Auto-Print, and Auto-Transmit. For additional
information, see:
r
Rerun (Marking a Sample for Automatic Re-run)
r
Auto-Print (for Patient Results)
r
Auto-Transmit (for Patient Results)
Rerun (Marking a Sample for Automatic Re-run)
Under the Rerun tab (Figure A.7), you can define/edit the requirements that mark a sample
for automatic rerun. You can define the rerun criteria by flag(s) and/or by parameters).
You can also apply the rerun criteria to specific (or all) flagging sets.
Figure A.7 Rerun Setup Screen Details
A-60
b
Allows you to select the flag(s) which, if generated, causes the sample to be automatically re-run by
the instrument. See Defining Automatic Rerun Criteria (By Flags and/or by Parameters) in this
chapter.
c
Allows you to select the parameter characteristics which, if met, causes the sample to be
automatically re-run by the instrument. See Defining Automatic Rerun Criteria (By Flags and/or by
Parameters) in this chapter.
d
Allows you to select the specific flagging set for which you want to define the automatic rerun criteria.
e
Allows you to apply the rerun criteria to all flagging sets, which means that you would not select a
specific set in d. See Defining Automatic Rerun Criteria (By Flags and/or by Parameters) in this
chapter.
f
Headings for the parameter criteria. If selected, all check-boxes related to that specific heading will be
selected/deselected.
PN 624026AE
SETUP
AUTO-FUNCTIONS SETUP
Defining Automatic Rerun Criteria (By Flags and/or by Parameters)
Do this procedure to define the flag(s) and/or parameter(s) to cause the sample to be
automatically re-run by the instrument. Samples meeting the defined criteria will
automatically be placed on the Worklist.
1
2
3
PN 624026AE
From the Main Menu screen,
.
.
the Rerun tab.
A-61
A
SETUP
AUTO-FUNCTIONS SETUP
4
5
.
To define the rerun criteria by flag(s):
a.
the check-box next to the
desired flag(s).
= selected.
= not selected
A-62
b.
If you want to define rerun criteria
by parameter(s), go to step 6.
c.
If you are finished, go to step 7.
PN 624026AE
SETUP
AUTO-FUNCTIONS SETUP
6
To define rerun criteria by
parameter(s):
a.
the check-box next to the
desired parameter(s).
b.
To select all the boxes under a
column heading (e.g. Voteout),
the column heading
(
).
= selected.
= not selected
7
Select the desired flagging set to which
the rerun criteria should be applied.
r
To apply the rerun criteria to only
one flagging set:
1)
at the Flagging Set
field.
2)
r
the desired flagging set.
To apply the rerun criteria to all
Apply to All
flagging sets,
Flagging Sets as needed.
= selected.
= not selected
8
PN 624026AE
to save the change.
A-63
A
SETUP
AUTO-FUNCTIONS SETUP
Auto-Print (for Patient Results)
You can enable the system to automatically print patient results when the run is completed.
Figure A.8 shows the Auto-Print options for patient results.
Note: For information on enabling/disabling Auto-Print for controls, reproducibility, and
calibration, see Auto-Transmit (for Patient Results) in this chapter.
Figure A.8 Auto-Print Setup Screen (for Patient Results): Details
b
Off disables automatic printing of patient sample results upon completion of analysis.
c
All automatically prints all patient results upon completion of analysis.
d
Normals Only automatically prints only normal patient results upon completion of analysis.
e
Selected Abnormals automatically prints patient results that meet the abnormal results criteria.
f
These are the abnormal results criteria for e:
No Parameter Value allows all patient results without a value to be automatically printed upon
completion of analysis.
With Parameter Flags allows all patient results with a parameter flag to be automatically printed upon
completion of analysis.
With Histo & DiffPlot Flags allows all patient results with a histogram flag and a DiffPlot flag to be
automatically printed upon completion of analysis.
Outside Patient Limits allows all patient results outside patient limits (flagged with H or L) to be
automatically printed upon completion of analysis.
Outside Action Limits allows all patient results outside action limits (flagged with HH or LL) to be
automatically printed upon completion of analysis.
A-64
PN 624026AE
SETUP
AUTO-FUNCTIONS SETUP
Setting the Auto-Print Options for Patient Results
Do this procedure to enable or disable the Auto-Print print options for patient results.
1
2
3
PN 624026AE
From the Main Menu screen,
.
.
the Auto-Print tab.
A-65
A
SETUP
AUTO-FUNCTIONS SETUP
4
5
.
Select the desired Auto-Print option for patient results.
For Selected Abnormals, be sure to select the criteria for abnormals:
6
A-66
to save the change.
PN 624026AE
SETUP
AUTO-FUNCTIONS SETUP
Auto-Transmit (for Patient Results)
Automatic transmission (sending) of patient results to the host computer depends upon the
settings defined in Auto-Transmit. (Refer to the Host Transmission Specification manual for
details on configuring the host communication protocol.)
Figure A.9 shows the Auto-Transmit options for patient results.
Figure A.9 Auto-Transmit Setup Screen
b
Off disables automatic transmission so that patient results are not automatically sent to the Host
computer upon completion of analysis.
c
All automatically transmits all patient results to the Host computer upon completion of analysis.
d
Normals Only automatically transmits only normal patient results to the Host computer upon
completion of analysis.
e
Normals and Selected Abnormals automatically transmits to the Host computer all normal patient
results and selected abnormal results that you select from f.
f
These are the abnormal results criteria for e:
No Parameter Value allows all patient results without a value to be automatically sent to the Host
computer upon completion of analysis.
With Parameter Flags allows all patient results with a parameter flag to be automatically sent to the
Host computer upon completion of analysis.
With Histo & DiffPlot Flags allows all patient results with a histogram flag and a DiffPlot flag to be
automatically sent to the Host computer upon completion of analysis.
Outside Patient Limits allows all patient results outside patient limits (flagged with H or L) to be
automatically sent to the Host computer upon completion of analysis.
PN 624026AE
A-67
A
SETUP
AUTO-FUNCTIONS SETUP
Setting the Auto-Transmit Options for Patient Results
Do this procedure to define the auto-transmission settings for transmitting patient results to a
Host computer.
1
2
3
A-68
From the Main Menu screen,
.
.
the Auto-Transmit tab.
PN 624026AE
SETUP
AUTO-FUNCTIONS SETUP
4
5
.
Select the desired Auto-Transmit option for patient results.
For Normals and Selected Abnormals, be sure to select the criteria for abnormals:
6
PN 624026AE
to save the change.
A-69
A
SETUP
SYSTEM SETUP
A.8
SYSTEM SETUP
Four tabs are available for this option:
r
Local Settings
r
Host (Defining Host Communication Settings)
r
Printer
r
Cycle Options
Local Settings
Under the Local Settings tab (Figure A.10), you can define/edit these settings:
r
• Changing the Date/Time
r
• Changing the Date/Time Format
r
Language (Selecting)
r
Changing Input Locales
Figure A.10 Local Settings Setup Screen
A-70
PN 624026AE
SETUP
SYSTEM SETUP
Changing the Current Date/Time and Date/Time Format
Do this procedure to change the current date and time and/or the format for each.
1
2
3
PN 624026AE
From the Main Menu screen,
.
.
the Local Settings tab.
A-71
A
SETUP
SYSTEM SETUP
4
.
5
6
.
To change the date/time, do • Changing the Date/Time.
To change the date/time format, do • Changing the Date/Time Format.
• Changing the Date/Time
1.
2.
To change the date:
a.
Select the month.
b.
Select the year.
c.
Select the day.
d.
Verify the date is correct.
To change the time:
a.
Highlight the hour, minute, or
second.
a.
b.
3.
4.
to change as desired.
Verify the time is correct.
OK.
If you want to change the date/time format, do • Changing the Date/Time Format.
If you are finished,
A-72
to save the change.
PN 624026AE
SETUP
SYSTEM SETUP
• Changing the Date/Time Format
Do this procedure to change the format for how the system time is displayed. The available
formats and how each displays time are shown below:
hh:mm:ss ampm (05:30:12 am or pm)
h:mm:ss ampm (5:30:12 am or pm)
H:mm:ss (5:30:12)
HH:mm:ss (05:30:12)
Do this procedure to change the format for how the system date is displayed. The available
formats and how each displays the date are shown below.
MM/dd/yyyy (04/11/2002)
dd/MM/yyyy (11/04/2002)
yyyy/MM/dd (2002/04/11)
1.
To change the time format:
a.
b.
at the Time format field.
the desired format.
The system updates the format in
the Current time field.
2.
To change the date format:
a.
b.
at the Date format field.
the desired format.
The system updates the format in the Current date field.
3.
PN 624026AE
to save the change.
A-73
A
SETUP
SYSTEM SETUP
Language (Selecting)
Note: Currently, English is the only available
language. The other languages are scheduled for
future release.
Do this procedure to select the language in which you want the instrument’s software to be
displayed. The system will automatically reboot after you change the language.
1
2
A-74
From the Main Menu screen,
.
.
PN 624026AE
SETUP
SYSTEM SETUP
3
4
5
6
PN 624026AE
the Local Settings tab.
.
Select the desired language.
to save the change. The system automatically reboots.
A-75
A
SETUP
SYSTEM SETUP
Changing Input Locales
Note: If you want to change input locales, such as language-specific keyboards, contact a
Beckman Coulter representative before doing this procedure.
1
2
3
A-76
From the Main Menu screen,
.
.
the Local Settings tab.
PN 624026AE
SETUP
SYSTEM SETUP
4
.
5
6
.
Make the desired changes by following
the instructions on the screen.
Note: If you
Properties, you can
select a language-specific keyboard.
7
8
PN 624026AE
Apply.
to save the change.
A-77
A
SETUP
SYSTEM SETUP
Host (Defining Host Communication Settings)
Changing the LIS/HIS communication settings affects what information is sent to and
received from a host computer. Typically, this information is already defined in your system
by a qualified technician using the information in the Host Transmission Specification
manual, PN 4277065.
Printer
Under the Printer tab (Figure A.11), you can define/edit these settings:
r
Report Header (Entering/Editing)
r
Printer
• Add Printer
• Printer Properties
• Set Default Printer
• Delete Printerr
r
Patient Report Setup
• Enable (Define Patient Report Areas)
• Display and Print (Detailed or Suspect Flags)
• Hematology Parameters (Printed), Define for Patient Report
r
Auto-Print (Non-Patient Results)
Figure A.11 Printer Setup Screen
A-78
PN 624026AE
SETUP
SYSTEM SETUP
b
Allows you to define/edit the report header. See Report Header (Entering/Editing) in this chapter.
c
Allows you to select/deselect the parameter results to be printed on the patient sample report. See
Patient Report Setup and • Hematology Parameters (Printed), Define for Patient Report in this
chapter.
d
Allows you to select/deselect certain areas of the patient sample report to be printed. See Patient
Report Setup and • Enable (Define Patient Report Areas) in this chapter.
e
Allows you to enable/disable non-patient sample results to be printed automatically. See Auto-Print
(Non-Patient Results) in this chapter.
f
Allows you to enable/disable Detailed flags on the patient sample report. If this option is not
selected, only Suspect flags will be printed. See Patient Report Setup and • Display and Print
(Detailed or Suspect Flags) in this chapter.
g
Allows you to delete a printer from the list in 1!. See • Delete Printer in this chapter.
h
Allows you to set the default printer from the list in 1!. See • Set Default Printer in this chapter.
i
Allows you to define printer properties for the selected printer. See • Printer Properties in this
chapter.
j
Allows you to add a printer. See • Add Printer in this chapter.
1)
Displays the default printer. • Set Default Printer in this chapter.
1!
Displays the available printers.
1@
Displays the various printer settings.
Report Header (Entering/Editing)
Do this procedure to enter/edit your laboratory’s information, such as lab name, address, and
so forth, that you want printed on the top of each patient sample report.
1
PN 624026AE
From the Main Menu screen,
.
A-79
A
SETUP
SYSTEM SETUP
2
3
4
A-80
.
the Printer tab.
.
PN 624026AE
SETUP
SYSTEM SETUP
5
Type your laboratory’s information:
a.
Type your laboratory’s name in the Header 1 field.
Note: You can type up to 20 alphanumeric characters in each header field.
6
PN 624026AE
b.
Press Ù to advance to the next field.
c.
Type the remainder of your laboratory’s information, pressing Ù as necessary to
advance to the next field.
to save the change.
A-81
A
SETUP
SYSTEM SETUP
Printer
The following options are available:
r
• Add Printer
r
• Printer Properties
r
• Set Default Printer
r
• Delete Printer
• Add Printer
ATTENTION: If you want to add a WindowsNT-compatible printer to your system, contact a
Beckman Coulter representative before doing this procedure.
1
2
A-82
From the Main Menu screen,
.
.
PN 624026AE
SETUP
SYSTEM SETUP
3
4
5
PN 624026AE
the Printer tab.
.
.
6
Follow the instructions on the screen.
7
to save the change.
A-83
A
SETUP
SYSTEM SETUP
• Printer Properties
Do this procedure if you want to:
r
select a paper size (US or A4)
r
select the print quality (300 or 600)
r
select the number of copies to be automatically printed
Actual printer setup information may vary depending on the printer used.
1
2
A-84
From the Main Menu screen,
.
.
PN 624026AE
SETUP
SYSTEM SETUP
3
4
5
6
7
PN 624026AE
the Printer tab.
.
.
Select the paper size, source, orientation, number of copies, and so forth.
to save the change.
A-85
A
SETUP
SYSTEM SETUP
• Set Default Printer
Do this procedure to select a default printer.
1
2
3
A-86
From the Main Menu screen,
.
.
the Printer tab.
PN 624026AE
SETUP
SYSTEM SETUP
4
5
.
Select the desired printer to be the
default:
a.
b.
c.
at the Printer List field.
the desired printer.
If the printer you want does not
appear in the list, you can add the
printer. See • Add Printer in this
chapter for details.
ATTENTION: Use printers available in this field only
because these printers and their drivers have been
validated for use with the AC•T 5diff AL system.
d.
6
7
PN 624026AE
Verify your selection is displayed
in the Default Printer field.
.
to save the change.
A-87
A
SETUP
SYSTEM SETUP
• Delete Printer
Do this procedure to delete a printer from the list of printers available for use with your
system.
1
2
3
A-88
From the Main Menu screen,
.
.
the Printer tab.
PN 624026AE
SETUP
SYSTEM SETUP
4
5
.
Select the desired printer to be deleted:
a.
b.
c.
6
7
PN 624026AE
at the Printer List field.
the desired printer.
Verify the correct printer is
selected.
. The following message appears:
to delete the printer.
A-89
A
SETUP
SYSTEM SETUP
Patient Report Setup
You can define the areas of the patient report to be printed. Figure A.12 shows a CBC/DIFF
report. You can define certain areas of the report (see Figure A.13).
For an overview of the software options required to setup the patient report, see Figure A.14.
Figure A.12 Patient Report (CBC/DIFF)
A-90
PN 624026AE
SETUP
SYSTEM SETUP
Figure A.13 Patient Report: Areas Defined
Note:
When setting up the
patient report, see the
following sections in
this chapter:
r Report Header
(Entering/Editing)
r • Enable (Define
Patient Report
Areas)
r • Hematology
Parameters
(Printed), Define
for Patient Report
For an overview, see
Figure A.14.
PN 624026AE
b
Report header that you can define; see Report Header (Entering/Editing) in this chapter.
c
WBC result; printed if WBC is selected (see • Hematology Parameters (Printed), Define for
Patient Report in this chapter).
d
Ranges: printed if Range is selected.
e
Parameter percentages; printed if selected (see • Hematology Parameters (Printed), Define for
Patient Report in this chapter).
f
Parameters absolute counts; printed if selected (see • Hematology Parameters (Printed), Define
for Patient Report in this chapter).
g
DiffPlot and Histogram Flags; prints Detailed or Suspect flags (see • Display and Print (Detailed
or Suspect Flags) in this chapter) Note: Detailed flags are shown in Figure A.13.
h
Interpretive messages: displayed if Messages is selected.
i
Histograms and DiffPlots: displayed if Histograms and DiffPlots is selected.
j
Microscope examination area: displayed if Microscopic Examination Area is selected.
1)
Raw data: displayed if Raw Data is selected.
A-91
A
SETUP
SYSTEM SETUP
Figure A.14 Patient Report Setup: Software Overview
A-92
PN 624026AE
SETUP
SYSTEM SETUP
• Enable (Define Patient Report Areas)
Do this procedure to define/edit the areas of the patient sample report to be printed.
1
2
PN 624026AE
From the Main Menu screen,
.
.
A-93
A
SETUP
SYSTEM SETUP
3
the Printer tab.
4
5
.
Select the desired Enable options:
(
= selected;
= not selected)
To see the area of the report for each of
the options, see Figure A.14.
6
A-94
to save the change.
PN 624026AE
SETUP
SYSTEM SETUP
• Display and Print (Detailed or Suspect Flags)
Do this procedure to enable/disable the printing of Detailed Flags or Suspect Flags on the
patient sample report.
For details about each of these flag formats, see Heading 9.9, ALTERNATIVE FLAG
REPORTING FORMATS.
1
2
PN 624026AE
From the Main Menu screen,
.
.
A-95
A
SETUP
SYSTEM SETUP
3
the Printer tab.
4
.
5
6
A-96
the check-box as needed to select or deselect the option.
r
To display/print Detailed Flags:
r
To display/print Suspect Flags:
.
.
to save the change.
PN 624026AE
SETUP
SYSTEM SETUP
• Hematology Parameters (Printed), Define for Patient Report
Do this procedure to select/deselect the hematology parameters to be printed.
1
2
PN 624026AE
From the Main Menu screen,
.
.
A-97
A
SETUP
SYSTEM SETUP
3
the Printer tab.
4
5
.
Select the desired Hematology
Parameters Printed.
(
= selected;
= not selected)
To see the area of the report for each of
the options, see Figure A.14.
6
A-98
to save the change.
PN 624026AE
SETUP
SYSTEM SETUP
Auto-Print (Non-Patient Results)
Do this procedure to define/edit the following results to be printed automatically upon
completion:
r
Quality Control Results
r
Reproducibility Results
r
Calibration Results
r
Startup
Do this procedure to enable (activate) or disable (deactivate) the Auto-Print feature that
automatically prints control, reproducibility, calibration, and/or Startup reports upon
completion of analysis.
For information on enabling/disabling Auto-Print for patient sample reports, see Auto-Print
(for Patient Results) in this chapter.
1
2
PN 624026AE
From the Main Menu screen,
.
.
A-99
A
SETUP
SYSTEM SETUP
3
the Printer tab.
4
5
.
Select the desired Auto-Print options.
(
6
A-100
= selected;
= not selected)
to save the change.
PN 624026AE
SETUP
SYSTEM SETUP
Cycle Options
Under the Cycles Options tab (Figure A.15), you can define/edit these settings:
r
Auto-Clean Frequency (Setting)
r
Daily Workload (Defining for CBC and CBC/DIFF)
r
New Workday (Defining)
r
Startup (Automatic)
r
Shutdown (Automatic)
Figure A.15 Cycle Options Setup Screen
PN 624026AE
b
Allows you to define the Auto-Clean Frequency. See Auto-Clean Frequency (Setting) in this chapter.
c
Allows you to enable/disable automatic Startup. See Startup (Automatic) in this chapter.
d
Allows you to enable/disable automatic Shutdown. See Shutdown (Automatic) in this chapter.
e
Allows you to define when a new Workday begins. See New Workday (Defining) in this chapter.
f
Allows you to define the daily workload for CBC runs per day. See Daily Workload (Defining for CBC
and CBC/DIFF) in this chapter.
g
Allows you to define the daily workload for CBC/DIFF runs per day. See Daily Workload (Defining for
CBC and CBC/DIFF) in this chapter.
A-101
A
SETUP
SYSTEM SETUP
Auto-Clean Frequency (Setting)
The instrument automatically performs an Auto-Clean after a specified number of analyses.
The default number of analyses is 100. You can change this number to be any number from 1
to 120. For example, if you want the instrument to run the Auto-Clean after 75 analyses, then
you would change the number to 75.
Do this procedure to change the auto-clean frequency.
1
2
A-102
From the Main Menu screen,
.
.
PN 624026AE
SETUP
SYSTEM SETUP
3
4
PN 624026AE
the Cycle Options tab.
.
A-103
A
SETUP
SYSTEM SETUP
5
Type the number of cycles the system
should run before it does an
Auto-Clean.
The frequency range is 1 to 120, which means you
can enter any number from 1 to 120, such as 75.
If you enter a number outside the range, the
following error message appears:
then edit the number to be any
whole number from 1 to 120.
6
to save the change.
The Auto-Clean frequency is now set to the number you entered. For example, if you
entered 75, then after 75 cycles, the instrument will do an Auto-Clean.
A-104
PN 624026AE
SETUP
SYSTEM SETUP
Daily Workload (Defining for CBC and CBC/DIFF)
You can specify the daily workload, which is the approximate number of CBC and CBC/DIFF
analyses that you expect your laboratory to run each day. The system uses the daily workload
settings to perform a reagent capacity check at the end of Startup. The purpose is to
determine if there is enough of each reagent to last throughout a workday. Table A.4 shows
the default values.
Table A.4 Daily Workload Runs per Panel
Panel
Default
Minimum
Maximum
CBC
10
1
500
CBC/DIFF
40
1
500
If the system determines that there is insufficient reagent to complete the day’s work,
Reagent(s) Low. Insufficient Reagents To Complete Daily Workload appears. You can either
determine which reagent is low and change it, or you can continue working until the specific
Reagent Low message appears, then change the reagent.
Do this procedure to change the daily workload settings.
1
PN 624026AE
From the Main Menu screen,
.
A-105
A
SETUP
SYSTEM SETUP
2
.
3
the Cycle Options tab.
4
5
.
Type the desired Daily Workload for
CBC/DIFF and/or CBC:
a.
Double-click the number you
want to change.
b.
Type the new number.
Note: You can type any whole number
from 1 to 5000. If typing thousands, do
not insert a comma; if you do, the
number will not be accepted.
A-106
PN 624026AE
SETUP
SYSTEM SETUP
6
to save the change.
New Workday (Defining)
A Workday consists of a 24-hour period. The following conditions must be considered during
this period:
r
the time between new Workdays
r
if the date has been changed between two log-ins
r
if the defined time for a New Workday to begin has elapsed
A Shutdown must be done before the New Workday becomes effective.
See Figure A.16.
Figure A.16 Determining If a New Workday is Required
Yes
Is
current time >
New Workday start
time?
Is it
new calendar
day since last New
Workday?
Is
time of
last New Workday >
New Workday start
time?
Yes
No
Has
New Workday
been run in last 24
hours?
Yes
No
Yes
No
Yes
No
New Workday.
Is
current time >
New Workday
start time?
No
Not a
New Workday.
PN 624026AE
A-107
A
SETUP
SYSTEM SETUP
• Procedure for Defining a New Workday
Do this procedure to define when a new workday will begin.
1
2
3
A-108
From the Main Menu screen,
.
.
the Cycle Options tab.
PN 624026AE
SETUP
SYSTEM SETUP
4
5
6
PN 624026AE
.
Type the New Workday start time:
a.
Double-click the existing time.
b.
Type the new start time.
c.
Verify the time is correct.
to save the change.
A-109
A
SETUP
SYSTEM SETUP
Startup (Automatic)
If you want your system to do an automatic startup (default) after you log in, do not disable
the Automatic Startup feature. It is recommended that you leave Automatic Startup
enabled.
If you do not want your system to do an automatic startup after you log in, disable the
Automatic Startup feature. Keep in mind that if you disable this feature, then you will have to
select the Startup option every time you log in.
r
If the option is selected, Startup automatically runs when you power up the system.
r
If the option is deselected, Startup will not automatically run when you power up the
system; you will be required to select
if automatic Startup is not selected.
Do this procedure to enable/disable Automatic Startup.
1
2
A-110
From the Main Menu screen,
.
.
PN 624026AE
SETUP
SYSTEM SETUP
3
the Cycle Options tab.
4
.
5
the check-box next as needed:
(
6
PN 624026AE
= enabled;
= disabled)
to save the change.
A-111
A
SETUP
SYSTEM SETUP
Shutdown (Automatic)
Do this procedure to turn on or off the automatic Shutdown feature. If the option is selected,
Shutdown automatically runs when you power down the system. If the option is deselected,
Shutdown will not automatically run when you power down the system; you will be required
to select
1
2
3
A-112
if automatic Shutdown is not selected.
From the Main Menu screen,
.
.
the Cycle Options tab.
PN 624026AE
SETUP
SYSTEM SETUP
4
5
.
the check-box next to Automatic
for Shutdown as needed:
(
6
7
PN 624026AE
= enabled;
= disabled)
Type the time when Automatic Shutdown should occur:
a.
Double-click the existing time.
b.
Type the new start time.
c.
Verify the time is correct.
to save the change.
A-113
A
SETUP
OPERATOR (USERS) SETUP
A.9
OPERATOR (USERS) SETUP
Under Operators setup (Figure A.17), you can add/edit/delete users. See Operators (Users):
Adding/Editing/Deleting for details on adding/editing/deleting the user’s:
r
Login Name
r
Password
r
Group
r
Operator Code
By assigning each user his/her own user name, there is traceability for actions performed. For
example, when a user named “Jo” logs in under that name, any changes made by that user to
the patient or Worklist information will be noted in the Patient/Worklist log.
Figure A.17 Users Setup Screen
A-114
b
Displays the login information currently set up for your system.
c
Displays the login names of each user under each group.
d
Displays the login name highlighted in c.
e
Allows you to define/edit the password for the selected login name.
f
Allows you to assign the login name to a specific user group.
g
Allows you to define/edit an operator code for the selected login name.
h
Displays the date and operator who last modified the operator setup information.
i
Displays the pre-defined user groups under which you can assign specific login names. Each person
you assign will have the same access rights as the user group to which the login name belongs.
PN 624026AE
SETUP
OPERATOR (USERS) SETUP
Access Rights
Service
Users with “Service” access have unlimited access to the system.
Supervisors
Users with “Supervisor” access can add or edit users in the Operators and Supervisors groups.
However, users in the Supervisors group can only delete a user in the Operators group, not in
the Supervisors or Service group.
Operator
Users with “Operator” access cannot add, edit, or delete other users.
Operators (Users): Adding/Editing/Deleting
Do this procedure to add, edit, or delete a user.
1
2
PN 624026AE
From the Main Menu screen,
.
.
A-115
A
SETUP
OPERATOR (USERS) SETUP
3
4
A-116
For details on adding, editing, or deleting users, see:
r
Adding Users in this chapter.
r
Editing User Information in this chapter.
r
Deleting Users in this chapter.
PN 624026AE
SETUP
OPERATOR (USERS) SETUP
Adding Users
This procedure continues from Operators (Users): Adding/Editing/Deleting.
1.
.
2.
At
, type the Login name (up to 10 alphanumeric characters).
3.
At
, type the password (up to 8 alphanumeric characters).
Note: A password is not required for Operators, only for Service and Supervisors.
4.
at
for the new user.
and select the group (Operators, Service, or Supervisors)
5.
Type the user’s 3-character code. (This can be the user’s initials, a code assigned by you,
or any other 3-character combination that will distinguish this user from other users.)
This code will be used for traceability purposes, meaning that if a user with a code of
TJW runs a Startup cycle, TJW’s Login name will appear in the Startup log as the user
responsible for that action.
6.
to save the change.
To see what an updated screen may look like after a user (e.g. Matthew) was added to the
Supervisors group, see Figure A.18.
PN 624026AE
A-117
A
SETUP
OPERATOR (USERS) SETUP
Figure A.18 Screen Showing a New User to Supervisors Group
The new user’s Login name is now available at the Login screen.
A-118
PN 624026AE
SETUP
OPERATOR (USERS) SETUP
When the user logs into the system, the Login name appears at the bottom of the screen.
Editing User Information
This procedure continues from Operators (Users): Adding/Editing/Deleting.
1.
2.
Edit the information.
to save the change.
Deleting Users
This procedure continues from Operators (Users): Adding/Editing/Deleting.
1.
2.
Highlight the user name to delete.
.
The following message appears.
PN 624026AE
3.
to delete the selected user.
4.
to save the change.
A-119
A
SETUP
FLAGGING SETS SETUP
A.10 FLAGGING SETS SETUP
Two tabs are available under this option: Flags and Messages and Flag Sensitivity and Thresholds.
For additional information, see:
r
Flags and Messages
r
Flag Sensitivity and Thresholds
Flags and Messages
Under the Flags and Messages tab (Figure A.19), you can:
r
create a new flagging set
r
copy settings to another flagging set (except to the Standard Range, which is the default
and cannot be edited)
r
set a default flagging set
r
edit existing flagging sets
Figure A.19 Flags and Messages Setup Screen
A-120
b
Displays the existing flagging sets.
c
Displays the action limits for the selected flagging set. See Action Range Flags in Chapter 9.
d
Displays the patient limits for the selected flagging set. See Patient Range Flags in Chapter 9.
e
Allows you to set the age for the selected flagging set. See Figure A.20.
PN 624026AE
SETUP
FLAGGING SETS SETUP
f
Displays the date and operator who last modified the selected flagging set.
g
Displays the default flagging set. See • Setting a Default Flagging Set in this chapter.
h
Allows you to make the selected flagging set the default. See • Setting a Default Flagging Set in this
chapter.
i
Allows you to restore the default values for the selected flagging set as long as you have not saved
the changes. See • Restoring Default Values in this chapter.
j
Allows you to copy the values from one flagging set to another. See • Copying Settings to Another
Flagging Set in this chapter.
Figure A.20 shows the Age Ranges screen, where you can set the age for the selected flagging
sets.
Figure A.20 Age Ranges Screen for Flagging Set Setup
b
and drag right to increase or left to decrease the age displayed in c.
Note: To increase or decrease the age by one day at a time, press è or é as needed.
c
PN 624026AE
Displays the age selected by the slider box. You cannot type the age in this field; you can only select
the age with the slider box.
A-121
A
SETUP
FLAGGING SETS SETUP
• Adding/Editing a Flagging Set (Range)
You can create up to 12 additional flagging sets, for a total of 20 flagging sets for your system,
or to edit existing flagging sets. (Twelve are already pre-defined and installed.)
Do this procedure to create a new flagging set or to edit an existing flagging set.
ATTENTION:
r
The Standard Range flagging set cannot be edited.
r
The age range can only be edited for Child 1, Child 2, Child 3, Child 4, and Child 5 flagging
sets.
IMPORTANT Due to the system’s calculation methods for determining the age from the date of birth, the
precision of the age calculation is limited to ±1 day. When the age is close to the limit of a flagging range,
the adjoining flagging range may be selected.
1
2
A-122
From the Main Menu screen,
.
.
PN 624026AE
SETUP
FLAGGING SETS SETUP
3
4
the Flags and Messages tab.
To edit an existing flagging set (except Standard Range):
a.
b.
PN 624026AE
Highlight the flagging set (e.g. Man).
.
A-123
A
SETUP
FLAGGING SETS SETUP
5
To add a new flagging set:
a.
b.
.
Type the flagging set name (up to
20 alphanumeric characters). Do
not use an apostrophe or any other
punctuation in the flagging set
name.
If you do not type a name,
“xxxxx” will be the name.
If you type a name that already
exists, the following message
appears:
If this appears:
1)
2)
.
Type a new name.
ATTENTION: The action and patient limits
applied to a new flagging set are those from
the Standard Range flagging set.
6
Define the patient limit ranges:
a.
Highlight the number to be changed.
b.
Type the new number.
c.
Press Ù to move between the fields.
To copy setting from another flagging set, go to step 5 of • Copying Settings to Another
Flagging Set.
A-124
PN 624026AE
SETUP
FLAGGING SETS SETUP
7
Define the action limit ranges:
a.
Highlight the number to be changed.
b.
Type the new number.
c.
Press Ù to move between the fields.
To copy setting from another flagging set, go to step 5 of • Copying Settings to Another
Flagging Set.
8
To edit the patient age for the selected
flagging set (Child 1 through Child 5
only):
a.
the Age Ranges tab if available.
b.
the slider box until the desired
age appears.
To adjust the age by one day, press
è or é.
You cannot make the next flagging set
younger than the former. For example,
Child 2 cannot be younger than Child 1.
See Figure A.20 for details if necessary.
9
PN 624026AE
to save the change(s).
A-125
A
SETUP
FLAGGING SETS SETUP
• Copying Settings to Another Flagging Set
Do this procedure to copy action limits and patient limits from one flagging set to another
existing flagging set. A flagging set must already be created before you can copy to it. See
• Adding/Editing a Flagging Set (Range) in this chapter.
1
2
A-126
From the Main Menu screen,
.
.
PN 624026AE
SETUP
FLAGGING SETS SETUP
3
4
5
the Flags and Messages tab.
.
the flagging set to “Copy From”.
For example, to copy from the Man
flagging set, select Man.
Note: You can Copy From the
Standard flagging set, but you
cannot Copy To it.
6
PN 624026AE
.
A-127
A
SETUP
FLAGGING SETS SETUP
7
Select the flagging set to “Copy To”:
a.
b.
.
Highlight the flagging set.
For example, to copy to the Renal
flagging set, select Renal.
8
9
to copy.
Verify that the limit ranges have been
copied correctly:
a.
Highlight the flagging set you
“copied to”.
b.
Verify the action and patient limits
are the same as those of the
flagging set you “copied from”.
10 If you are creating a new flagging set, return to step 9 of that procedure.
A-128
PN 624026AE
SETUP
FLAGGING SETS SETUP
• Setting a Default Flagging Set
Do this procedure to select a default flagging set.
1
2
3
PN 624026AE
From the Main Menu screen,
.
.
the Flags and Messages tab.
A-129
A
SETUP
FLAGGING SETS SETUP
4
5
.
Highlight the flagging set you want to
set as the default (e.g. Man).
6
7
8
.
to save the change.
Verify that The flagging set you selected is now the default flagging set.
• Restoring Default Values
To restore the default values for a specific flagging set,
the changes. Once you save (
Restore Default Values before saving
), you cannot restore the previous default values.
Flag Sensitivity and Thresholds
The options under the Flag Sensitivity and Thresholds are for Service use only.
IMPORTANT Do not make any adjustments without first consulting a Beckman Coulter representative.
Otherwise, your system may not perform to specifications. Any change to thresholds or sensitivity affect
overall system performance.
A-130
PN 624026AE
BBARCODE SPECIFICATIONS FOR OPTIONAL BARCODE WAND B
B.1
OVERVIEW
Use the information in this appendix to test, troubleshoot, and reprogram the optional
barcode wand.
IMPORTANT Risk of sample mis-identification if your barcode labels do not meet the specifications stated
in this appendix. Use only barcode labels that meet the stated specifications.
Note: These specifications are for the optional barcode wand. During installation and setup of
your system, Barcode Setup should have been done to match these specifications so the
internal barcode reader in the Analyzer can read the barcodes your lab uses.
Definition
A barcode consists of black lines (bars) and white lines (spaces) called elements.
ATTENTION: Beckman Coulter recommends that you verify each barcode reading to ensure
correct sample identification.
B.2
BARCODE LABELS
Symbologies
The AC•T 5diff AL analyzer accepts six barcode symbologies:
r
r
r
r
r
r
Code 128,
Code 39,
Codabar,
Interleaved 2-of-5,
EAN 8, and
EAN 13.
ATTENTION: The scanner uses Code 128 symbology for programming and the $ symbol for
entering the programming mode. Therefore, the following Code 128 characters must not be
used in any combination of the barcodes used to identify the sample: $, +, and –.
B.3
BARCODE SPECIFICATIONS
Barcode labels to be used with the AC•T 5diff AL analyzer must meet the following
specifications.
r
r
r
r
r
r
r
r
r
r
PN 624026AE
Maximum number of usable characters in barcode label: 16.
Minimum % PCS (Print Contrast Signal): 15% at 670 nm.
Maximum resolution of scanner: 0.1 mm (4 mils).
Maximum label length: 66 mm (2.6 inches).
Code 128 barcode labels must meet European Standard EN 799.
Code 39 barcode labels must meet European Standard EN 800.
Codabar barcode must meet European Standard EN 798.
Interleaved 2-of-5 (I 2-of-5) barcode labels must meet European Standard EN 801.
EAN 8 barcode labels must meet EAN (European Article Numbering) Specifications.
EAN 13 barcode labels must meet EAN (European Article Numbering) Specifications.
B-1
BARCODE SPECIFICATIONS FOR OPTIONAL BARCODE WAND
BARCODE SPECIFICATIONS
Table B.1 shows default barcode settings for each symbology.
Table B.1 Default Barcode Settings
Setting
Code 128b
Code 39
Codabar
I 2-of-5
EAN 8
EAN 13
Character Length
1 to 16
1 to 16
3 to 16
11d
7
12
Check Digit (Checksum)c
Always
Enabled
Enabled
Not
Available
Enabled
Always
Enabled
Always
Enabled
Start/Stop Equality Check
Not
Available
Not
Available
Enabled
Not
Available
Not
Available
Not
Available
Start/Stop Equality Output
Not
Available
Not
Available
Disabled
Not
Available
Not
Available
Not
Available
b Code 128 provides excellent density, alphanumeric characters, and good security. Recommend
using this symbology if using barcodes for the first time, and if compatible with other bar code
systems used in your lab.
c For increased sample identification integrity, always use Check Digit (Checksum).
d Number of characters for I 2-of-5 can be programmed for other lengths, including variable
length. However, the variable length is NOT recommended for I 2-of-5 due to the possibility of
capturing a partial read of the bar code label.
B-2
PN 624026AE
BARCODE SPECIFICATIONS FOR OPTIONAL BARCODE WAND
BARCODE LABEL TEST PAGES
B.4
BARCODE LABEL TEST PAGES
See Tables B.2 and B.3.
ATTENTION: Test these barcodes from the printed Instructions for Use manual. If you do not
have a printed copy of the manual, contact your Beckman Coulter representative.
Table B.2 Test Labels With the Check Digit (Checksum)
Code 128
EAN 8
Reads 12345670
Code 39
EAN 13
If this label is read with Check Digit
disabled, the last character "$" is also
displayed
Reads 1234567890128
Interleaved 2-of-5.
Reads 11 characters with Check Digit or
reads 12 characters without Check Digit.
PN 624026AE
B-3
B
BARCODE SPECIFICATIONS FOR OPTIONAL BARCODE WAND
OPTIONAL BARCODE WAND CONFIGURATION
Table B.3 Test Labels Without the Check Digit
Code 39
Label will not read if scanner is programmed to default condition.
Codabar
B.5
OPTIONAL BARCODE WAND CONFIGURATION
To restore the barcode scanner to default settings, read each bar code from top to bottom on
each column of Table B.4 until all bar codes are read.
Bar codes with S+ and $- will sound multiple beeps when read. Other codes will only sound a
single beep.
ATTENTION: Test these barcodes from the printed Instructions for Use manual. If you do not
have a printed copy of the manual, contact your Beckman Coulter representative.
Table B.4 Barcode Scanner Configuration Sheet
B-4
PN 624026AE
BARCODE SPECIFICATIONS FOR OPTIONAL BARCODE WAND
OPTIONAL BARCODE WAND CONFIGURATION
Table B.4 Barcode Scanner Configuration Sheet
PN 624026AE
B-5
B
BARCODE SPECIFICATIONS FOR OPTIONAL BARCODE WAND
CODE 39 AND CODABAR BARCODE SCANNER OPTIONS
B.6
CODE 39 AND CODABAR BARCODE SCANNER OPTIONS
r
For Code 39, see Table B.5, Code 39 Barcode Scanner Options.
r
For Codabar, see Table B.6, Codabar Barcode Scanner Options.
ATTENTION: Test these barcodes from the printed Instructions for Use manual. If you do not
have a printed copy of the manual, contact your Beckman Coulter representative.
Table B.5 Code 39 Barcode Scanner Options
Read ONE of the labels below to set Check Digit control option
Code 39 No Check Digit control
Code 39 Check Digit control
B-6
PN 624026AE
BARCODE SPECIFICATIONS FOR OPTIONAL BARCODE WAND
CODE 39 AND CODABAR BARCODE SCANNER OPTIONS
Table B.6 Codabar Barcode Scanner Options
Read ONE of the labels below to set Start/Stop Equality option check
No Start/Stop equality check nor transmission
No Start/Stop equality check but transmission
Start/Stop equality check but no transmission
Start/Stop equality check and transmission
PN 624026AE
B-7
B
BARCODE SPECIFICATIONS FOR OPTIONAL BARCODE WAND
I 2-OF-5 PROGRAMMING OPTIONS AND TEST LABELS
B.7
I 2-OF-5 PROGRAMMING OPTIONS AND TEST LABELS
See Table B.7.
ATTENTION: Test these barcodes from the printed Instructions for Use manual. If you do not
have a printed copy of the manual, contact your Beckman Coulter representative.
.
Table B.7 Interleaved 2-of-5 Options With Fixed Length Characters Test Labels
Number of
Characters
(Check Digit or
No Check Digit) With Check Digit
Read this label first, then ONE of
the other labels below
No Check Digit
Fixed Digit Test Labels
Read this label first, then ONE of
the other labels below
3 or 4
5 or 6
7 or 8
9 or 10
11 or 12
13 or 14
B-8
PN 624026AE
BARCODE SPECIFICATIONS FOR OPTIONAL BARCODE WAND
CONNECTING THE OPTIONAL BARCODE WAND
Table B.7 Interleaved 2-of-5 Options With Fixed Length Characters Test Labels (Continued)
15 or 16
3 to 15 or 4 to
15
Note: Variable Length Characters are NOT recommended for Interleaved 2-of-5 Barcodes. To
increase sample identification integrity, use fixed length characters with Check Digit. If the
test label fails to read:
B.8
1.
Reset the scanner by doing Powering Down the System and Logging Off then Powering
Up the System and Logging On in Chapter 5.
2.
Repeat the programming sequence.
CONNECTING THE OPTIONAL BARCODE WAND
Do this procedure to connect the barcode wand to the Workstation or to verify the
connection.
PN 624026AE
1
Power down the instrument as instructed in Powering Down the System and Logging Off
in Chapter 5.
2
Disconnect the Workstation’s power
cord.
B-9
B
BARCODE SPECIFICATIONS FOR OPTIONAL BARCODE WAND
CONNECTING THE OPTIONAL BARCODE WAND
B-10
3
Disconnect the keyboard from the
Workstation.
4
Connect the barcode wand to where
the keyboard was previously
connected.
5
Connect the keyboard to the other
barcode wand connector.
6
Reconnect the power cord to the Workstation.
PN 624026AE
BARCODE SPECIFICATIONS FOR OPTIONAL BARCODE WAND
CONNECTING THE OPTIONAL BARCODE WAND
7
Power up the system as instructed in Powering Up the System and Logging On in
Chapter 5.
The power on sequence should now perform a startup and background cycle if
Auto-Startup is selected.
8
PN 624026AE
Program the barcode wand to the default configuration as instructed in Heading B.5,
OPTIONAL BARCODE WAND CONFIGURATION.
B-11
B
BARCODE SPECIFICATIONS FOR OPTIONAL BARCODE WAND
CONNECTING THE OPTIONAL BARCODE WAND
B-12
PN 624026AE
CMANUAL CALIBRATION C
C.1
ANALYSIS PROCEDURE
Do this procedure if you do not know the new calibration factors.
Use a material with known reference values as your calibrator.
1
Be sure you have done Heading 10.2, PRE-CALIBRATION CHECKS.
2
Prepare your material as needed.
3
Insert the tube into the tube holder and close the door for analysis to begin.
4
Record the results on the calibration
worksheet.
CALIBRATION WORKSHEET
Sample Number
WBC
RBC
Hgb
Hct
Plt
1
2
3
4
5
6
7
8
9
10
11
TOTAL
MEAN (A)
ASSIGNED VALUE (B)
ABSOLUTE DIFFERENCE (C)
CALIBRATION REQUIRED
CURRENT CALIBRATION FACTOR (D)
NEW CALIBRATION FACTOR (E)
C=B-A
E = (B / A) x D
PN 624026AE
5
Repeat steps 3 and 4 ten more times, for a total of 11 runs.
6
Do Heading C.2, CALCULATIONS PROCEDURE.
C-1
MANUAL CALIBRATION
CALCULATIONS PROCEDURE
C.2
C.3
C-2
CALCULATIONS PROCEDURE
1
Calculate the mean for each parameter using samples 2 through 11 on the worksheet.
Write this number into row A on the worksheet.
2
Copy your calibrator material’s assigned value to the worksheet. Write this number into
row B on the worksheet.
3
Calculate the absolute difference between the assigned value and the mean value
calculated in step 1. Write this number into row C of the worksheet.
4
Determine if calibration is necessary by comparing the absolute difference from row C to
your material’s calibration criteria table.
r
If the absolute difference is less than the value in your material’s calibration criteria
table, no calibration is required.
r
If the absolute difference is between the values found in your material’s calibration
criteria table, do Heading C.3, CALCULATING NEW CALIBRATION FACTORS.
r
If the absolute difference is greater than the value found in your material’s
calibration criteria table, eliminate possible instrument problems and possible
calibrator deterioration. If you determine calibration may be needed, contact a
Beckman Coulter Representative before calibrating.
CALCULATING NEW CALIBRATION FACTORS
1
Record the new factors into row D on the worksheet (see Calibration Worksheet).
2
After you complete the worksheet, contact a Beckman Coulter representative.
PN 624026AE
MANUAL CALIBRATION
CALCULATING NEW CALIBRATION FACTORS
Calibration Worksheet
Sample Number
WBC
RBC
Hgb
Hct
Plt
1
2
3
4
5
6
7
8
9
10
11
TOTAL
MEAN (A)
ASSIGNED VALUE (B)
ABSOLUTE DIFFERENCE (C)
CALIBRATION REQUIRED
CURRENT CALIBRATION FACTOR (D)
NEW CALIBRATION FACTOR (E)
A = samples 2 through 11
C=B-A
E = (B / A) x D
PN 624026AE
C-3
C
MANUAL CALIBRATION
CALCULATING NEW CALIBRATION FACTORS
C-4
PN 624026AE
DWORKSTATION MANAGEMENT D
D.1
DATABASE MANAGEMENT
A database stores all archives. If the database has been backed up, you can restore patient
information from the backup.
Database Compacting/Cleaning
The database can store 10,000 results. To optimize performance, the system compacts the
database at every 1,000 results. The database compacting process begins when you log out
and log in again after 1,000 results are stored. The following process occurs:
1.
At intervals of 1,000 samples, during the display of the system’s title screen,
Database cleaning appears. You will be prompted to log out and log in again. At this
point, the system compacts/cleans the database.
2.
After 10,000 results have been stored, the system automatically deletes the oldest results
having the oldest activity by Sample ID, leaving a maximum of 9,500 results.
3.
After the results are deleted, the system compacts the database to allow additional results
to be stored.
Every time you logout of the system, it performs a database compact and cleaning procedure.
D.2
CONFIGURATION SAVE/RESTORE SETUP
Two tabs are available under this option: Configuration and Delete Database. For additional
information, see:
PN 624026AE
r
Heading D.3, CONFIGURATION: ANALYZER AND WORKSTATION
r
Heading D.4, DELETE DATABASE
D-1
WORKSTATION MANAGEMENT
CONFIGURATION: ANALYZER AND WORKSTATION
D.3
CONFIGURATION: ANALYZER AND WORKSTATION
Under the Configuration tab (Figure D.1), the following options are available: Analyzer
Configuration and Workstation Configuration.
Figure D.1 Configuration Save/Restore Screen
D-2
PN 624026AE
WORKSTATION MANAGEMENT
CONFIGURATION: ANALYZER AND WORKSTATION
Analyzer Configuration
Under Analyzer Configuration, you can:
r
Save to Hard Disk
r
Restore from Hard Disk
r
Save to Floppy Disk
r
Restore from Floppy Disk
• Analyzer Configuration: Save to Hard Disk/Save to Floppy Disk
This procedure allows you to save the Analyzer’s current configuration settings to the
Workstation’s hard drive or to a floppy disk. Once you save the settings, you can restore them
later, if necessary. See • Analyzer Configuration: Restore from Hard Disk/Restore from Floppy
Disk in this chapter.
Beckman Coulter recommends that you save the information to floppy disks.
The Beckman Coulter representative performs this procedure at installation.
Do this procedure if you change the Analyzer’s configuration.
1
PN 624026AE
From the Main Menu screen,
.
D-3
D
WORKSTATION MANAGEMENT
CONFIGURATION: ANALYZER AND WORKSTATION
2
3
4
D-4
.
the Configuration tab.
.
PN 624026AE
WORKSTATION MANAGEMENT
CONFIGURATION: ANALYZER AND WORKSTATION
5
Indicate where the settings should be saved.
r
To save to the hard drive,
r
To save to a floppy disk:
1)
Insert the disk into drive A.
2)
Save to Floppy Disk.
3)
6
PN 624026AE
Save to Hard Disk.
.
Follow the instructions on the screen.
7
to print the current settings for your records.
8
to save the change.
D-5
D
WORKSTATION MANAGEMENT
CONFIGURATION: ANALYZER AND WORKSTATION
• Analyzer Configuration: Restore from Hard Disk/Restore from Floppy Disk
Do this procedure if you want to restore previously saved Analyzer settings to be the current
settings.
1
2
D-6
From the Main Menu screen,
.
.
PN 624026AE
WORKSTATION MANAGEMENT
CONFIGURATION: ANALYZER AND WORKSTATION
3
the Configuration tab.
4
5
.
Indicate from where the settings should be restored.
r
To restore from the hard drive,
r
To restore from a floppy disk:
1)
2)
3)
6
7
PN 624026AE
Restore from Hard Disk.
Insert the proper disk into drive A.
Restore from Floppy Disk.
.
Follow the instructions on the screen.
to print the current settings for your records.
D-7
D
WORKSTATION MANAGEMENT
CONFIGURATION: ANALYZER AND WORKSTATION
8
to save the change.
Workstation Configuration
Under Workstation Configuration, you can:
r
Save to Hard Disk
r
Restore from Hard Disk
r
Save to Floppy Disk
r
Restore from Floppy Disk
• Workstation Configuration: Save to Hard Disk/Save to Floppy Disk
This procedure allows you to save the Workstation’s current configuration settings to the
Workstation’s hard drive or to a floppy disk. Once you save the settings, you can restore them
later, if necessary. See • Workstation Configuration: Restore from Hard Disk/Restore from
Floppy Disk in this chapter.
Beckman Coulter recommends that you save the information to floppy disks.
The Beckman Coulter representative performs this procedure at installation.
Do this procedure if you change the Workstation’s configuration.
1
D-8
From the Main Menu screen,
.
PN 624026AE
WORKSTATION MANAGEMENT
CONFIGURATION: ANALYZER AND WORKSTATION
2
3
4
PN 624026AE
.
the Configuration tab.
.
D-9
D
WORKSTATION MANAGEMENT
CONFIGURATION: ANALYZER AND WORKSTATION
5
Indicate where the settings should be saved.
r
To save to the hard drive,
r
To save to a floppy disk:
1)
Insert the disk into drive A.
2)
Save to Floppy Disk.
3)
6
D-10
Save to Hard Disk.
.
Follow the instructions on the screen.
7
to print the current settings for your records.
8
to save the change.
PN 624026AE
WORKSTATION MANAGEMENT
CONFIGURATION: ANALYZER AND WORKSTATION
• Workstation Configuration: Restore from Hard Disk/Restore from Floppy Disk
Do this procedure if you want to restore previously saved Workstation settings to be the
current settings.
1
2
PN 624026AE
From the Main Menu screen,
.
.
D-11
D
WORKSTATION MANAGEMENT
CONFIGURATION: ANALYZER AND WORKSTATION
3
the Configuration tab.
4
.
IMPORTANT Workstation configuration restore is not recommended if the database contains patient
results. After a restore, the range values in the Workstation Flagging Sets are replaced by the range
values from the restored Flagging Sets. Existing patient samples remain flagged with the range values as
analyzed. However the Flagging Set ranges reported are changed to the values from the restored
Flagging Sets. Verify Flagging Set range values after restore and prior to reporting patient results.
5
Indicate from where the settings should be restored.
r
To restore from the hard drive,
r
To restore from a floppy disk:
1)
2)
3)
D-12
Restore from Hard Disk.
Insert the proper disk into drive A.
Restore from Floppy Disk.
.
PN 624026AE
WORKSTATION MANAGEMENT
CONFIGURATION: ANALYZER AND WORKSTATION
6
7
to print the current settings for your records.
8
to save the change.
9
PN 624026AE
Follow the instructions on the screen.
Prior to reporting patient results, verify the Flagging Set range values.
D-13
D
WORKSTATION MANAGEMENT
DELETE DATABASE
D.4
DELETE DATABASE
Under the Delete Database tab (Figure D.2), you can delete all or part of the patient database.
Understanding the Delete Database Screen
See Figure D.2.
Figure D.2 Delete Database Screen
D-14
b
Allows you to select the run date for which all patient data prior to then will be deleted.
c
Displays details about the last deletion completed.
d
Displays details about the current database.
e
Displays the date selected in b and the number of results that will be deleted.
f
Deletes all patient data on/prior to the date selected in b. For example, if the selected date is June
26, 2002, all patient data analyzed up to and including June 26, 2002, will be deleted.
PN 624026AE
WORKSTATION MANAGEMENT
DELETE DATABASE
Procedure to Delete Existing Database
Do this procedure if you want to delete the existing database from the Workstation’s hard
drive.
ATTENTION: You cannot recover a deleted database
1
2
PN 624026AE
From the Main Menu screen,
.
.
D-15
D
WORKSTATION MANAGEMENT
DELETE DATABASE
3
the Delete Database tab.
4
5
.
Select the date for which you want all
prior data deleted.
a.
At the calendar, select the date.
b.
Verify the date is correct.
For example, if you want all data prior
to June 26th deleted, then select June
26 on the calendar.
6
7
D-16
.
to delete the data.
PN 624026AE
EWORKLIST SCENARIOS E
E.1
USING WORKLISTS
Overview
By analyzing samples using the Worklist, you will have the ability to enter demographics,
select flagging sets, enter the Sample ID (required), select the panel, and enter the Patient ID.
A Worklist contains sample and patient identification information for samples that are
pending analysis. Before the sample is analyzed, you can enter/edit patient demographics,
which will be saved with the sample. Demographics include patient name, age, date of birth,
gender, clinic location, physician, and comments. Information downloaded from a host
computer cannot be edited.
All patient information is printed on the final report and transmitted to the Host computer, if
applicable.
Multiple Worklist scenarios are possible with this instrument. See Heading E.2, WORKLIST
MATCH OPTION SCENARIOS.
Worklist Processing Conditions for Sample IDs
r
A Sample ID can only appear once on the Worklist.
r
If a Sample ID already exists on the Worklist, an internal order cannot be created for that
Sample ID. The system requires an order be placed on the Worklist for all samples
processed. If a worklist order is not found, the software automatically generates an order,
places it on the Worklist, and removes it when the sample has been processed. This order
is called the internal order.
r
A set of results with a barcoded Sample ID cannot be matched to a Worklist order with a
different Sample ID.
r
When a set of results is matched to a Worklist order, the report will show the Sample ID
from the Worklist order along with the associated Patient ID and demographics, if
applicable.
r
The relationship between the Sample ID and the Patient ID in an order cannot be broken.
The Workstation matches sample results with the additional information entered based on
sample ID. The Worklist order is removed upon analysis when the workstation has matched
the results to the pre-assigned data.
You can add demographic information:
r
by manually entering the information, or
r
by receiving downloaded information from a Host computer.
Once the information is present on the Worklist, it will be added to the sample results when
the system matches the Sample ID of the added information with the Sample ID of the
processed sample.
The Worklist displays a listing of all samples that have had additional information entered
into the system but have not been processed. Once a sample that has matching information
on the Worklist has been processed, the Worklist order is removed. The results are now
available on the Results screen and the Run in Progress screen.
PN 624026AE
E-1
WORKLIST SCENARIOS
WORKLIST MATCH OPTION SCENARIOS
E.2
WORKLIST MATCH OPTION SCENARIOS
Depending upon your lab’s Worklist Match Option setting, various sample analysis scenarios
can occur.
r
If your Worklist Match Option is Barcode, see Barcode Scenarios in this chapter.
r
If your Worklist Match Option is Cass./Position, see Cass./Position Scenarios in this
chapter.
ATTENTION: For all scenarios, Auto-Print for patient sample results was ON. In some scenarios,
actual cassette and positions were entered, as well as specific Sample IDs, This specific
information is provided to help explain the scenarios so you can better understand the
process. Your cassette, position, and Sample ID information will differ from what is included
in these scenarios.
Barcode Scenarios
If your Worklist Match Option is Barcode, see the following scenarios:
r
Scenario #1: Barcode On, Manual Match On, Auto-Print On, No Worklist Order
r
Scenario #2: Barcode On, Manual Match On, Auto-Print On, Worklist Order Exists With
Same Sample ID as on Barcode Label
r
Scenario #3: Barcode On, Manual Match Off, Auto-Print On, Worklist Order Exists with
Same Sample ID as on Barcode Label
r
Scenario #4: Barcode On, Manual Match Off, Auto-Print On, Worklist Order Exists but
Worklist Sample ID Differs from the Sample ID on the Barcode Label
r
Scenario #5: Barcode On, Manual Match On, Auto-Print On, Worklist Order Exists but
Worklist Sample ID Differs From the Sample ID on the Barcode Label
r
Scenario #6: Barcode On, Manual Match On, Auto-Print On, No Worklist Order
r
Scenario #7: Barcode On, Manual Match Off, No Worklist Order
Scenario #1: Barcode On, Manual Match On, Auto-Print On, No Worklist Order
Summary: Report prints with the Sample ID, cassette, and position information entered for the Worklist
order.
1.
Insert tube into cassette.
2.
Place cassette in Cassette Input Tray.
3.
.
4.
Sample is analyzed.
5.
Results are placed on Manual Match screen because there was no Worklist order.
Options:
a.
E-2
Add a Worklist order and manually match to the result. “Manual Match” will appear in the
Miscellaneous Messages section of the Flags and Messages area of the printout.
r
If you print from the Run in Progress screen after matching, “Manual Match” will appear on
the report even though the Run in Progress screen shows “Unmatched.”
r
If you print from the Run in Progress screen before matching, “Unmatched” will appear on
the report.
PN 624026AE
WORKLIST SCENARIOS
WORKLIST MATCH OPTION SCENARIOS
b.
Print results from the Manual Match screen without matching.
“Manual Match” will appear in the Miscellaneous Messages section of the Flags and Messages
area of the report. See Printing from the Manual Match Screen Without Matching in this appendix.
Scenario #2: Barcode On, Manual Match On, Auto-Print On, Worklist Order Exists With Same
Sample ID as on Barcode Label
Summary: Report prints with the barcode Sample ID.
1.
Insert tube into cassette.
2.
Place cassette in Cassette Input Tray.
3.
.
4.
Sample is analyzed.
5.
Report automatically prints with the barcode Sample ID.
Scenario #3: Barcode On, Manual Match Off, Auto-Print On, Worklist Order Exists with Same
Sample ID as on Barcode Label
Summary: Report prints with the barcode Sample ID.
1.
Insert tube into cassette.
2.
Place cassette in Cassette Input Tray.
3.
.
4.
Sample is analyzed.
5.
Report automatically prints with the barcode Sample ID.
Scenario #4: Barcode On, Manual Match Off, Auto-Print On, Worklist Order Exists but Worklist
Sample ID Differs from the Sample ID on the Barcode Label
Summary: Report prints with the barcode Sample ID, but the Worklist order remains until deleted because
the Sample ID for the Worklist order differs from what was read off the barcode label.
1.
Insert tube into cassette.
2.
Place cassette in Cassette Input Tray.
3.
4.
.
Sample is analyzed.
5.
Report automatically prints with the barcode Sample ID.
6.
Since the Sample ID for the Worklist order differs from what the Analyzer read off the sample tube, the
Worklist order remains there until it is deleted or until it is matched with sample results.
Scenario #5: Barcode On, Manual Match On, Auto-Print On, Worklist Order Exists but Worklist
Sample ID Differs From the Sample ID on the Barcode Label
Summary: Results are placed on the Manual Match screen due to the Sample ID conflict.
PN 624026AE
1.
Insert tube into cassette.
2.
Place cassette in Cassette Input Tray.
E-3
E
WORKLIST SCENARIOS
WORKLIST MATCH OPTION SCENARIOS
3.
.
4.
Sample is analyzed.
5.
Results are placed on Manual Match screen due to the Sample ID conflict:
Options:
a.
b.
Add a Worklist order with the correct Sample ID and manually match to the result. The report will
automatically print with the Worklist Sample ID from the order. “Manual Match” will appear in the
Miscellaneous Messages section of the Flags and Messages area of the printout.
r
If you print from the Run in Progress screen after matching, “Manual Match” will appear on
the report even though the Run in Progress screen shows “Unmatched.”
r
If you print from the Run in Progress screen before matching, “Unmatched” will appear on
the report.
Print results from the Manual Match screen without matching.
“Manual Match” will appear in the Miscellaneous Messages section of the Flags and Messages
area of the report. See Printing from the Manual Match Screen Without Matching in this appendix.
Scenario #6: Barcode On, Manual Match On, Auto-Print On, No Worklist Order
Summary: An AUTO_SID is assigned; results are placed on the Manual Match screen with the AUTO_SID.
1.
Insert tube into cassette.
2.
Place cassette in Cassette Input Tray.
3.
.
4.
Sample is analyzed.
5.
An AUTO_SID is assigned.
6.
Results are placed on Manual Match screen with the AUTO_SID if the Sample ID on the label could not
be read or if there is no Worklist order.
Options:
a.
b.
Add a Worklist order and manually match to the result. The report will automatically print.
“Manual Match” will appear in the Miscellaneous Messages section of the Flags and Messages
area of the printout.
r
If you print from the Run in Progress screen after matching, “Manual Match” will appear on
the report even though the Run in Progress screen shows “Unmatched.”
r
If you print from the Run in Progress screen before matching, “Unmatched” will appear on
the report.
Print results from the Manual Match screen without matching. “Manual Match” will appear in the
Miscellaneous Messages section of the Flags and Messages area of the report. See Printing from
the Manual Match Screen Without Matching in this appendix.
Scenario #7: Barcode On, Manual Match Off, No Worklist Order
Summary: An AUTO_SID is assigned; results are placed on the Manual Match screen with the AUTO_SID.
1.
Insert tube into cassette.
2.
Place cassette in Cassette Input Tray.
3.
E-4
.
PN 624026AE
WORKLIST SCENARIOS
WORKLIST MATCH OPTION SCENARIOS
4.
Sample is analyzed.
5.
An AUTO_SID is assigned.
6.
Results are placed on Manual Match screen with the AUTO_SID if the Sample ID on the label could not
be read.
Options:
a.
b.
Add a Worklist order and manually match to the result. The report will automatically print.
“Manual Match” will appear in the Miscellaneous Messages section of the Flags and Messages
area of the printout.
r
If you print from the Run in Progress screen after matching, “Manual Match” will appear on
the report even though the Run in Progress screen shows “Unmatched.”
r
If you print from the Run in Progress screen before matching, “Unmatched” will appear on
the report.
Print the result from the Manual Match screen without matching.
“Manual Match” will appear in the Miscellaneous Messages section of the Flags and Messages
area of the report. See Printing from the Manual Match Screen Without Matching in this appendix.
Cass./Position Scenarios
When using the Cass./Position Worklist Match Option, note that:
r
A cassette and position can only appear once on the Worklist.
r
The cassette and position cannot be received as part of an order from the Host.
r
The cassette and position cannot be added to an order from a Host.
If your Worklist Match Option is Cass./Position, see the following scenarios:
PN 624026AE
r
Scenario #1: Cass./Position On, Manual Match On, Auto-Print On, Worklist Order
(Cassette, Position, and Sample ID), No Barcode Label
r
Scenario #2: Cass./Position On, Manual Match OFF, Auto-Print On, Worklist Order
(Cassette, Position, and Sample ID), No Barcode Label
r
Scenario #3: Cass./Position On, Manual Match On, Auto-Print On, Worklist Order
(Cassette, Position, and Sample ID), Barcode Label
r
Scenario #4: Cass./Position On, Manual Match Off, Auto-Print On, Worklist Order
(Cassette, Position, and Sample ID), Barcode Label
r
Scenario #5: Cass./Position On, Manual Match On, Auto-Print On, Worklist Order
(Cassette and Position only), Barcode Label
r
Scenario #6: Cass./Position On, Manual Match On, Auto-Print On, Worklist Order
(Cassette, Position, and Sample ID), No Barcode Label
r
Scenario #7: Cass./Position On, Manual Match Off, Auto-Print On, Worklist Order
(Cassette, Position, and Sample ID), No Barcode Label
r
Scenario #8: Cass./Position On, Manual Match On, Auto-Print On, Worklist Order
(Cassette, Position, and Sample ID), Barcode Label
r
Scenario #9: Cass./Position On, Manual Match On, Auto-Print On, No Worklist Order,
No Barcode Label
r
Scenario #10: Cass./Position On, Manual Match Off, Auto-Print On, No Worklist Order,
No Barcode Label
E-5
E
WORKLIST SCENARIOS
WORKLIST MATCH OPTION SCENARIOS
r
Scenario #11: Cass./Position On, Manual Match On, Auto-Print On, No Worklist Order,
Barcode Label
r
Scenario #12: Cass./Position On, Manual Match Off, Auto-Print On, No Worklist Order,
No Barcode Label
r
Scenario #13: Cass./Position On, Manual Match On, Auto-Print On, Worklist Order
(Sample ID only), Barcode Label
r
Scenario #14: Cass./Position On, Manual Match Off, Auto-Print On, Worklist Order
(Sample ID only), Barcode Label
r
Scenario #15: Cass./Position On, Manual Match Off, Auto-Print On, Worklist Order
(Cassette, Position, and Sample ID), Barcode Label
r
Scenario #16: Cass./Position On, Manual Match Off, Auto-Print On, Worklist Order
(Sample ID only), No Barcode Label
r
Scenario #17: Cass./Position On, Manual Match Off, Auto-Print On, Worklist Order
(Cassette, Position, and Sample ID), Barcode Label
r
Scenario #18: Cass./Position On, Manual Match On, Auto-Print On, Worklist Order
(Cassette, Position, and Sample ID), Barcode Label
Scenario #1: Cass./Position On, Manual Match On, Auto-Print On, Worklist Order (Cassette,
Position, and Sample ID), No Barcode Label
Summary: Report prints with the Sample ID, cassette, and position information that was entered on the
Worklist order.
1.
E-6
Create a Worklist order:
a.
.
b.
.
c.
Type 06 as cassette number, then pressed Û.
d.
Select the 1st tube position.
e.
Type 123 as the Sample ID.
f.
.
g.
.
2.
Insert tube into position 1 of cassette #6.
3.
Place cassette in Cassette Input Tray.
4.
Select
5.
Sample is analyzed.
6.
Report prints with Sample ID 123, cassette 6, and position 1, which is exactly what was entered for the
Worklist order.
.
PN 624026AE
WORKLIST SCENARIOS
WORKLIST MATCH OPTION SCENARIOS
Scenario #2: Cass./Position On, Manual Match OFF, Auto-Print On, Worklist Order (Cassette,
Position, and Sample ID), No Barcode Label
Summary: Report prints with the Sample ID, cassette, and position information that was entered on the
Worklist order.
1.
Create a Worklist order:
a.
.
b.
.
c.
Type 06 as cassette number, then pressed Û.
d.
Select the 1st tube position.
e.
Typed 123 as the Sample ID.
f.
.
g.
.
2.
Insert tube into position 1 of cassette #6.
3.
Place cassette in Cassette Input Tray.
4.
.
5.
Sample is analyzed.
6.
Report prints with Sample ID 123, cassette 6, and position 1, which is exactly what was entered for the
Worklist order.
Scenario #3: Cass./Position On, Manual Match On, Auto-Print On, Worklist Order (Cassette,
Position, and Sample ID), Barcode Label
Summary: Report prints with the Sample ID, cassette, and position information that was entered on the
Worklist order.
1.
2.
PN 624026AE
Create a Worklist order:
a.
.
b.
.
c.
Type 06 as cassette number, then pressed Û.
d.
Select the 1st tube position.
e.
Type 123456 from the label as the Sample ID.
f.
.
g.
.
Insert tube into position 1 of cassette #6.
E-7
E
WORKLIST SCENARIOS
WORKLIST MATCH OPTION SCENARIOS
3.
Place cassette in Cassette Input Tray.
4.
.
5.
Sample is analyzed.
6.
Report prints with Sample ID 123456, cassette 6, and position 1, which is exactly what was entered for
the Worklist order.
Scenario #4: Cass./Position On, Manual Match Off, Auto-Print On, Worklist Order (Cassette,
Position, and Sample ID), Barcode Label
Summary: Report prints with the Sample ID, cassette, and position information that was entered on the
Worklist order.
1.
Create a Worklist order:
a.
.
b.
.
c.
Type 06 as cassette number, then pressed Û.
d.
Select the 1st tube position.
e.
Type 123456 from the label as the Sample ID.
f.
.
g.
.
2.
Insert tube into position 1 of cassette #6.
3.
Place cassette in Cassette Input Tray.
4.
.
5.
Sample is analyzed.
6.
Report prints with Sample ID 123456, cassette 6, and position 1, which is exactly what was entered for
the Worklist order.
Scenario #5: Cass./Position On, Manual Match On, Auto-Print On, Worklist Order (Cassette and
Position only), Barcode Label
Summary: Results are placed on the Manual Match screen because a Sample ID was not entered on the
Worklist order but a barcode Sample ID was read.
1.
E-8
Create a Worklist order:
a.
.
b.
.
c.
Type 2 as cassette number, then pressed Û.
d.
Select the 1st tube position.
PN 624026AE
WORKLIST SCENARIOS
WORKLIST MATCH OPTION SCENARIOS
e.
Did not enter a Sample ID.
f.
. An AUTO_SID was assigned.
g.
.
2.
Insert tube into position 1 of cassette #2.
3.
Place cassette in Cassette Input Tray.
4.
.
5.
Sample is analyzed.
6.
Run in Progress screen shows: Sample ID 123457, C/P 2/1.
7.
Results are placed on the Manual Match screen:
Order shows AUTO_SID, C/P ?/?.
Results shows123457 with C/P 2/1.
Options:
a.
Manually match the order to the result. The report will automatically print. “Manual Match” will
appear in the Miscellaneous Messages section of the Flags and Messages area of the printout.
The Sample ID on the report will be AUTO_SID. Cass. will be 2 and Pos. will be 1.
b.
r
If you print from the Run in Progress screen after matching, “Manual Match” will appear on
the report even though the Run in Progress screen shows “Unmatched.”
r
If you print from the Run in Progress screen before matching, “Unmatched” will appear on
the report.
Print results from the Manual Match screen without matching.
“Manual Match” will appear in the Miscellaneous Messages section of the Flags and Messages
area of the report. See Printing from the Manual Match Screen Without Matching in this appendix.
Scenario #6: Cass./Position On, Manual Match On, Auto-Print On, Worklist Order (Cassette,
Position, and Sample ID), No Barcode Label
Summary: Report prints with the Sample ID, cassette, and position that was entered on the Worklist order.
1.
2.
PN 624026AE
Create a Worklist order:
a.
.
b.
.
c.
Type 2 as cassette number, then pressed Û.
d.
Select the 1st tube position.
e.
Type 123457 as the Sample ID.
f.
.
g.
.
Insert tube into position 1 of cassette #2.
E-9
E
WORKLIST SCENARIOS
WORKLIST MATCH OPTION SCENARIOS
3.
Place cassette in Cassette Input Tray.
4.
.
5.
Sample is analyzed.
6.
Report prints with Sample ID 123457 and C/P 2/1.
Scenario #7: Cass./Position On, Manual Match Off, Auto-Print On, Worklist Order (Cassette,
Position, and Sample ID), No Barcode Label
Summary: Results print with the Sample ID and cassette/position from the Worklist order because Manual
Match is off.
1.
Create a Worklist order:
a.
.
b.
.
c.
Type 2 as cassette number, then press Û.
d.
Select the 1st tube position.
e.
Type 123457 as the Sample ID.
f.
.
g.
.
2.
Insert tube into position 1 of cassette #2.
3.
Place cassette in Cassette Input Tray.
4.
.
5.
Sample is analyzed.
6.
Report prints with the Sample ID from the Worklist as Manual Match was OFF.
Scenario #8: Cass./Position On, Manual Match On, Auto-Print On, Worklist Order (Cassette,
Position, and Sample ID), Barcode Label
Summary: Results are placed on the Manual Match screen because there was a Sample ID conflict between
what was read off the barcode label and what was entered in the Worklist order.
1.
Create a Worklist order:
a.
E-10
.
b.
.
c.
.
PN 624026AE
WORKLIST SCENARIOS
WORKLIST MATCH OPTION SCENARIOS
d.
Type 06 as cassette number, then press Û.
e.
Select the 1st tube position.
f.
Type 123 as the Sample ID (even though the barcode label was 123456).
g.
.
h.
.
2.
Insert tube into the 1st position of cassette #6.
3.
Place cassette in Cassette Input Tray.
4.
5.
.
Sample is analyzed.
6.
to see the Run in Progress screen, which shows:
Sample ID 123456
C/P 6/1.
7.
, which was flashing to indicate results are on the Manual Match screen.
8.
for the Manual Match screen.
9.
Results are placed on the Manual Match screen:
Order shows Sample ID 123 (because that was the number entered on the Worklist order) and
Cass. ? and Pos. ?.
Results shows the Sample ID 123456 (because that was the number read from the barcode label)
with C/P 6/1.
Options:
a.
Manually match the order to the result. The report will automatically print. “Manual Match” will
appear in the Miscellaneous Messages section of the Flags and Messages area of the printout.
The Sample ID on the report will be the Sample ID entered when the Worklist order was created
(e.g. 123). Cass. will be 6 and Pos. will be 1.
b.
r
If you print from the Run in Progress screen after matching, “Manual Match” will appear on
the report even though the Run in Progress screen shows “Unmatched.”
r
If you print from the Run in Progress screen before matching, “Unmatched” will appear on
the report.
Print results from the Manual Match screen without matching.
“Manual Match” will appear in the Miscellaneous Messages section of the Flags and Messages
area of the report. See Printing from the Manual Match Screen Without Matching in this appendix.
PN 624026AE
E-11
E
WORKLIST SCENARIOS
WORKLIST MATCH OPTION SCENARIOS
Scenario #9: Cass./Position On, Manual Match On, Auto-Print On, No Worklist Order, No
Barcode Label
Summary: Results are placed on the Manual Match screen because an AUTO_SID was assigned and the
results could not be matched to a Worklist order.
1.
Insert tube into the 1st position of cassette #10.
2.
Place cassette in Cassette Input Tray.
3.
4.
.
Sample is analyzed.
5.
to see the Run in Progress screen, which shows:
Sample ID as AUTO_SID
C/P 10/1.
6.
, which was flashing to indicate results are on the Manual Match screen.
7.
for the Manual Match screen.
8.
Results are placed on the Manual Match screen:
Order: None existed for this sample.
Results shows Sample ID as AUTO_SID and C/P 10/1.
Options:
a.
Add a Worklist order and manually match the order to the result.
To add the Worklist order:
1)
.
2)
.
3)
4)
Type a Sample ID.
.
To manually match the order to the results:
b.
E-12
1)
.
2)
.
3)
Highlighted the order.
4)
Highlighted the result.
5)
.
The report automatically printed. “Manual Match” appeared in the Miscellaneous Messages
section of the Flags and Messages area of the printout.
PN 624026AE
WORKLIST SCENARIOS
WORKLIST MATCH OPTION SCENARIOS
The Sample ID on the report will be the Sample ID entered when the Worklist order was created.
Cass. will be 10 and Pos. will be 1.
c.
r
If you print from the Run in Progress screen after matching, “Manual Match” will appear on
the report even though the Run in Progress screen shows “Unmatched.”
r
If you print from the Run in Progress screen before matching, “Unmatched” will appear on
the report.
Print the result from the Manual Match screen without matching.
“Manual Match” will appear in the Miscellaneous Messages section of the Flags and Messages
area of the report. See Printing from the Manual Match Screen Without Matching in this appendix.
Scenario #10: Cass./Position On, Manual Match Off, Auto-Print On, No Worklist Order, No
Barcode Label
Summary: Results are printed with an AUTO_SID and the cassette/position of the tube when analyzed.
1.
Insert tube into the 1st position of cassette #10.
2.
Place cassette in Cassette Input Tray.
3.
.
4.
Sample is analyzed.
5.
Report prints with AUTO_SID and C/P 10/1.
Scenario #11: Cass./Position On, Manual Match On, Auto-Print On, No Worklist Order, Barcode
Label
Summary: Results are placed on the Manual Match screen because a barcode label was read but the system
was trying to match to the cassette and position.
1.
Insert tube into the 1st position of cassette #10.
2.
Place cassette in Cassette Input Tray.
3.
4.
.
Sample is analyzed.
5.
to see the Run in Progress screen, which shows:
Sample ID as 123457 (which was read from the barcode label) and C/P 10/1.
6.
, which was flashing to indicate results are on the Manual Match screen.
7.
for the Manual Match screen.
8.
Results are placed on the Manual Match screen:
Order: None existed for this sample.
Results shows: Sample ID as 123457 and C/P 10/1.
Options:
a.
Add a Worklist order and manually match the order to the result.
To add the Worklist order:
PN 624026AE
E-13
E
WORKLIST SCENARIOS
WORKLIST MATCH OPTION SCENARIOS
1)
.
2)
.
3)
Type 123457 as the Sample ID.
4)
.
Manually match the order to the results:
b.
1)
.
2)
.
3)
Highlighted the order.
4)
Highlighted the result.
5)
.
The report automatically prints. “Manual Match” appeared in the Miscellaneous Messages section
of the Flags and Messages area of the printout.
The Sample ID on the report is 123457. Cass. is 10 and Pos. is 1.
c.
r
If you print from the Run in Progress screen after matching, “Manual Match” will appear on
the report even though the Run in Progress screen shows “Unmatched.”
r
If you print from the Run in Progress screen before matching, “Unmatched” will appear on
the report.
Print the result from the Manual Match screen without matching.
“Manual Match” will appear in the Miscellaneous Messages section of the Flags and Messages
area of the report. See Printing from the Manual Match Screen Without Matching in this appendix.
Scenario #12: Cass./Position On, Manual Match Off, Auto-Print On, No Worklist Order, No
Barcode Label
Summary: Results are printed with an AUTO_SID and with the cassette/position of the tube when analyzed.
Manual Match is off; no match required.
1.
Insert tube into the 1st position of cassette #10.
2.
Place cassette in Cassette Input Tray.
3.
4.
5.
.
Sample is analyzed.
to see the Run in Progress screen, which shows:
Sample ID as AUTO_SID and C/P 10/1.
6.
E-14
Report prints with AUTO_SID and C/P 10/1.
PN 624026AE
WORKLIST SCENARIOS
WORKLIST MATCH OPTION SCENARIOS
Scenario #13: Cass./Position On, Manual Match On, Auto-Print On, Worklist Order (Sample ID
only), Barcode Label
Summary: Results are placed on the Manual Match screen because the Worklist order did not have a
cassette and position with sample results to match.
1.
Create a Worklist order and entered only the Sample ID (123456789).
a.
.
b.
.
c.
.
d.
Type the Sample ID as 123456789.
e.
.
2.
Insert tube into the 1st position of cassette #10.
3.
Place cassette in Cassette Input Tray.
4.
5.
.
Sample is analyzed.
6.
to see the Run in Progress screen, which shows:
Sample ID as AUTO_SID and C/P 10/1.
7.
, which was flashing to indicate results are on the Manual Match screen.
8.
9.
for the Manual Match screen.
Results are placed on the Manual Match screen:
Order shows Sample ID 123456789.
Results shows Sample ID AUTO_SID and barcode Sample ID from the sample tube.
10. Manually match the order to the results:
1)
2)
.
3)
Highlighted the order.
4)
Highlighted the result.
5)
Verified the cassette/position.
6)
PN 624026AE
.
.
E-15
E
WORKLIST SCENARIOS
WORKLIST MATCH OPTION SCENARIOS
a.
The report automatically prints. “Manual Match” appeared in the Miscellaneous Messages section
of the Flags and Messages area of the printout.
The Sample ID on the report is 123456789. Cass. is and Pos. is 10.
b.
r
If you print from the Run in Progress screen after matching, “Manual Match” will appear on
the report even though the Run in Progress screen shows “Unmatched.”
r
If you print from the Run in Progress screen before matching, “Unmatched” will appear on
the report.
Print results from the Manual Match screen without matching.
“Manual Match” will appear in the Miscellaneous Messages section of the Flags and Messages
area of the report. See Printing from the Manual Match Screen Without Matching in this appendix.
Scenario #14: Cass./Position On, Manual Match Off, Auto-Print On, Worklist Order (Sample ID
only), Barcode Label
Summary: Results printed with an AUTO_SID and cassette/position of the tube when analyzed because
Manual Match is off. The Worklist order with the Sample ID was not linked to the cassette/position.
1.
Create a Worklist order and entered only the Sample ID (123456789).
a.
.
b.
.
c.
.
d.
Type the Sample ID as 123456789.
e.
.
2.
Insert tube into the 1st position of cassette #10.
3.
Place cassette in Cassette Input Tray.
4.
5.
.
Sample is analyzed.
6.
to see the Run in Progress screen, which shows:
Sample ID as AUTO_SID and C/P 10/1.
7.
Report prints with AUTO_SID and C/P 10/1.
8.
. The Worklist order is still there for 123456789 because it was not matched to a result.
To delete the order:
a.
E-16
Highlight the order.
b.
.
c.
.
PN 624026AE
WORKLIST SCENARIOS
WORKLIST MATCH OPTION SCENARIOS
d.
to delete.
Scenario #15: Cass./Position On, Manual Match Off, Auto-Print On, Worklist Order (Cassette,
Position, and Sample ID), Barcode Label
Summary: Results are placed on the Manual Match screen because the Sample ID read off the barcode label
was different from the Sample ID in the Worklist order.
1.
Create a Worklist order:
a.
.
b.
.
c.
.
d.
Type 10 as cassette number, then press Û.
e.
Select the 1st tube position.
f.
Type 132 as the Sample ID (even though the barcode label was 123456789).
2.
Insert tube into the 1st position of cassette #10.
3.
Place cassette in Cassette Input Tray.
4.
5.
.
Sample is analyzed.
6.
to see the Run in Progress screen, which shows:
Sample ID as 123456789 and C/P 10/1.
7.
, which was flashing to indicate results are on the Manual Match screen.
8.
for the Manual Match screen.
9.
Results are placed on the Manual Match screen:
Order shows: Sample ID 132. Cass. ?. Pos. ?.
Results shows: Sample ID 123456789. C/P 10/1.
10. Manually matched the order to the results. Prior to matching, you may want to edit the Worklist order
as required. To manually match:
PN 624026AE
1)
.
2)
.
3)
Highlighted the order.
4)
Highlighted the result.
E-17
E
WORKLIST SCENARIOS
WORKLIST MATCH OPTION SCENARIOS
5)
a.
.
The report automatically prints. “Manual Match” appeared in the Miscellaneous Messages section
of the Flags and Messages area of the printout.
The Sample ID on the report was 132, which was the Sample ID entered when the Worklist order
was created. Cass. was 10 and Pos. was 1.
b.
r
If you print from the Run in Progress screen after matching, “Manual Match” will appear on
the report even though the Run in Progress screen shows “Unmatched.”
r
If you print from the Run in Progress screen before matching, “Unmatched” will appear on
the report.
Print the result from the Manual Match screen without matching.
“Manual Match” will appear in the Miscellaneous Messages section of the Flags and Messages
area of the report. See Printing from the Manual Match Screen Without Matching in this appendix.
Scenario #16: Cass./Position On, Manual Match Off, Auto-Print On, Worklist Order (Sample ID
only), No Barcode Label
Summary: Report prints with an AUTO_SID and the cassette/position of the tube when analyzed. There was
a Sample ID conflict because the ID read off the barcode label was different from the Sample ID in the
Worklist order.
1.
Create a Worklist order with Sample ID 123 only:
a.
.
b.
.
c.
d.
.
Type 123 as the Sample ID.
e.
.
2.
Insert tube into the 1st position of cassette #10.
3.
Place cassette in Cassette Input Tray.
4.
5.
6.
.
Sample is analyzed.
to see the Run in Progress screen, which shows:
Sample ID as AUTO_SID and C/P 10/1.
7.
E-18
The report prints.
PN 624026AE
WORKLIST SCENARIOS
WORKLIST MATCH OPTION SCENARIOS
Scenario #17: Cass./Position On, Manual Match Off, Auto-Print On, Worklist Order (Cassette,
Position, and Sample ID), Barcode Label
Summary: Results are placed on the Manual Match screen because the Sample ID was analyzed in a
different position than what was entered on the Worklist.
1.
Create a Worklist order with Sample ID 123456789 and C/P 10/4:
a.
.
b.
.
c.
Type 10 as cassette number, then press Û.
d.
Select the 4th tube position.
e.
Type 123456789 as the Sample ID.
f.
.
g.
.
2.
Insert tube into the 1st position of cassette #10.
3.
Place cassette in Cassette Input Tray.
4.
5.
.
Sample is analyzed.
6.
to see the Run in Progress screen, which shows:
Sample ID as AUTO_SID and C/P ?/?.
7.
, which flashes to indicate results are on the Manual Match screen.
8.
for the Manual Match screen.
9.
Results are placed on the Manual Match screen:
Order shows: Worklist Sample ID 123456789, Cass. ?. Pos. ?.
Results shows: Sample ID AUTO_SID with barcode ID, C/P 10/1
10. Two options are available:
a.
PN 624026AE
Manually match the order to the results. Prior to matching, you may want to edit the Worklist
order as required. To manually match:
1)
.
2)
.
3)
Highlighted the order.
4)
Highlighted the result.
E-19
E
WORKLIST SCENARIOS
WORKLIST MATCH OPTION SCENARIOS
5)
6)
b.
.
The report automatically prints. The Sample ID “Manual Match” appeared in the
Miscellaneous Messages section of the Flags and Messages area of the printout.
r
If you print from the Run in Progress screen after matching, “Manual Match” will
appear on the report even though the Run in Progress screen shows “Unmatched.”
r
If you print from the Run in Progress screen before matching, “Unmatched” will
appear on the report.
Print the results from the Manual Match screen without matching.
“Manual Match” will appear in the Miscellaneous Messages section of the Flags and Messages
area of the report. See Printing from the Manual Match Screen Without Matching in this appendix.
Scenario #18: Cass./Position On, Manual Match On, Auto-Print On, Worklist Order (Cassette,
Position, and Sample ID), Barcode Label
Summary: Results are placed on the Manual Match screen because the Sample ID was analyzed in a
different position than what was entered on the Worklist.
1.
Create a Worklist order with Sample ID 123456789 and C/P 10/4:
a.
.
b.
.
c.
Type 10 as cassette number, then press Û.
d.
Select the 4th tube position.
e.
Type 123456789 as the Sample ID.
f.
.
g.
.
2.
Insert tube into the 1st position of cassette #10.
3.
Place cassette in Cassette Input Tray.
4.
5.
6.
.
Sample is analyzed.
to see the Run in Progress screen, which shows:
Sample ID as AUTO_SID and C/P ?/?.
7.
, which flashes to indicate results are on the Manual Match screen.
8.
for the Manual Match screen.
9.
Results are placed on the Manual Match screen:
Order shows: Worklist Sample ID 123456789, Cass. ?. Pos. ?.
E-20
PN 624026AE
WORKLIST SCENARIOS
WORKLIST MATCH OPTION SCENARIOS
Results shows: Sample ID AUTO_SID with barcode ID, C/P 10/1
10. Two options are available:
a.
Manually match the order to the results. Prior to matching, you may want to edit the Worklist
order as required. To manually match:
1)
.
2)
.
3)
Highlighted the order.
4)
Highlighted the result.
5)
.
6)
b.
The report automatically prints. The Sample ID “Manual Match” appeared in the
Miscellaneous Messages section of the Flags and Messages area of the printout.
r
If you print from the Run in Progress screen after matching, “Manual Match” will
appear on the report even though the Run in Progress screen shows “Unmatched.”
r
If you print from the Run in Progress screen before matching, “Unmatched” will
appear on the report.
Print the results from the Manual Match screen without matching.
“Manual Match” will appear in the Miscellaneous Messages section of the Flags and Messages
area of the report. See Printing from the Manual Match Screen Without Matching in this appendix.
Printing from the Manual Match Screen Without Matching
1.
If the Manual Match screen is not already open:
a.
to open the results list.
b.
2.
3.
.
Highlight the desired result to be printed.
.
The following message appears:
Report selected results using AUTO_SID?
4.
To print the results without matching them to a Worklist order,
with the assigned AUTO_SID.
. The results will be printed
If you are uncertain about printing the unmatched results,
. (This leaves the results on the
Manual Match screen, thus allowing you to match them later to a Worklist order).
PN 624026AE
E-21
E
WORKLIST SCENARIOS
WORKLIST MATCH OPTION SCENARIOS
E-22
PN 624026AE
ABBREVIATIONS
LIST OF ABBREVIATIONS
PN 624026AE
µL
microliter
ACD
acid-citrate-dextrose
ANSI
American National Standards Institute
ASTM
American Society for Testing and Materials
BA
basophil
bps
bits per second
CBC
complete blood count
cm
centimeter
CV
coefficient of variation
DIFF
differential
dL
deciliter
EDTA
ethylenediaminetetraacetic acid
EO
eosinophil
fL
femtoliter
ft
foot or feet
g
gram
gal
gallon
GR
granulocyte
Hct
hematocrit
Hgb
hemoglobin
Hz
hertz
L
liter
LCD
liquid crystal display
LED
light-emitting diode
LIS
laboratory information system
LY
lymphocyte
m
meter
Misc.
miscellaneous
MCH
mean corpuscular hemoglobin
MCHC
mean corpuscular hemoglobin concentration
MCV
mean corpuscular volume
mL
milliliter
mm
millimeter
MO
monocyte
MPV
mean platelet volume
MSDS
material safety data sheet
Abbreviations-1
ABBREVIATIONS
mW
milliwatt
n
number
NCCLS
National Committee for Clinical Laboratory Standards
NE
neutrophil
nm
nanometer
pg
picogram
Plt
platelet
RBC
red blood cell
RDW
red cell distribution width
RUO
Research Use Only
SD
standard deviation
Vac
volts of alternating current
Vdc
volts of direct current
WBC
white blood cell
Abbreviations-2
PN 624026AE
REFERENCES
LIST OF REFERENCES
PN 624026AE
1.
Coulter WH. High speed automatic blood cell counter and cell size analyzer. Paper
presented at National Electronics Conference, Chicago, IL, 1956; October 3.
2.
Webster’s ninth new collegiate dictionary. Merriam-Webster: Springfield, MA, 1989.
3.
Stedman’s medical dictionary, 21st edition. Williams & Wilkins: Baltimore, MD, 1966.
4.
Bull BS, and Elashoff RM et al.: 1974. A study of various estimators for the derivation of
quality control procedures from patient erythrocyte indices. Am J Clin Path 61(4): 475.
References-1
REFERENCES
References-2
PN 624026AE
GLOSSARY
DEFINITIONS
accuracy
Ability of the instrument to agree with a predetermined reference value at any point
within the operating range; closeness of a result to the true (accepted) value.
agglutination
clump
archive
Contains results and runs that can be reviewed by the user based on patient or date.
background count
Measure of the amount of electrical or particle interference.
blank cycle
Runs diluent through the system to clean it out.
calibration
A procedure to standardize the instrument by determining its deviation from
calibration references and applying any necessary correction factors.
calibration factors
These are correction factors that the system uses to fine-tune instrument accuracy.
calibrator
A substance traceable to a reference method for preparation or material used to
calibrate, graduate, or adjust measurement.
carryover
The amount, in percent, of blood cells of Hgb remaining in diluent following the
cycling of a blood sample.
cell control
A preparation made of human blood with stabilized cells and surrogate material
used for daily instrument quality control.
characteristics
See performance characteristics.
coefficient of
variation
An expression in percent of data (SD) spread related to the mean.
CV% = (SD/mean)x100
control
A substance used for monitoring the performance of an analytical process or
instrument.
conventions
A standard style or format used in a manual.
CV
See coefficient of variation.
default
An original, factory-setting.
expiration date
The last day that you can use that specific lot number of reagent, control, or
calibrator.
femtoliter
One quadrillionth (1015) of a liter.
field
An area on a screen for entering data.
flags
On printouts, letters or symbols that appear next to parameter results to indicate
specific conditions. For additional information, see Heading 9.7, REVIEWING
RESULTS.
LIS (laboratory
A laboratory’s computer system that stores patient information and analysis
information system) results.
PN 624026AE
linearity
The ability of an instrument to recover expected results (reference values or
calculated values) for such parameters as WBC, RBC, Hgb, and Plt, at varying levels
of concentration of these parameters within specified limits.
lot number
A manufacturer’s code that identifies when the product, such as a reagent, was
manufactured.
mean
Arithmetic average of a group of data.
mode
The analysis, either CBC or CBC/DIFF, performed by the instrument.
operating range
Range of results over which the instrument displays, prints, and transmits data.
Glossary-1
GLOSSARY
Glossary-2
panel
Specifies the group of tests – CBC or CBC/DIFF – ordered for the patient.
parameter
A component of blood that the instrument measures and reports.
performance
characteristics
Actual performance of the instrument.
performance
specifications
Targeted performance of the instrument based on established ranges and
parameters.
precision
A measure of reproducibility, precision is the ability of the instrument to reproduce
similar results when a sample is repeatedly run. Precision of the instrument is a
CV%, or an SD for DIFF parameters, based on replicate determinations of the same
sample. Precision shows the closeness of test results when repeated analyses of
the same material are performed.
quality control (QC)
A comprehensive set of procedures a laboratory establishes to ensure that the
instrument is working accurately and precisely.
reportable range
The lowest to highest concentration that can be reported without dilution or other
modifications to the sample.
reproducibility
This procedure checks that the system gives similar results (within established
limits) every time it measures the same sample. Also called precision.
results
Numeric values and/or codes/flags derived from analyzing a sample
run
An analysis that provides results for hematology parameters.
SD (standard
deviation)
A measure of variation within a group of samples or within a population.
shutdown cycle
Cleans the instrument’s fluidic lines and apertures to help prevent residue buildup.
specifications
See performance specifications.
startup cycle
Ensures that the instrument is ready to run; includes performing a background test.
stat
See statim.
statim3
At once or immediately. Commonly referred to as “stat”.
TABLE OF
EXPECTED
RESULTS
Assigned values for a control material used for quality control parameters. Usually
reported on package insert shipped with the control material; can be a separate
assay sheet.
verification
Procedure to analyze cell controls or whole blood with known values to determine if
your results are within expected range.
whole blood
Non-diluted blood; blood and anticoagulant only.
Workstation
The personal computer and software used for data analysis and results storage.
XB (X bar B)
A method of quality control based on the stability of the RBC indices in a patient
population.
XM
A group of quality control methods used on a patient population.
PN 624026AE
INDEX
Symbols
*
definition, 9-48
*BASO+
definition, 9-50
*WBC flag, 9-43
replaces WBC/BASO flag, 9-51
++
definition, 9-5
-definition, 9-5
?
definition, 8-42
@
definition, A-16
µL
definition, Abbreviations-1
A
abbreviations
list of, Abbreviations-1
AC•T 5diff Cal Calibrator. See calibrators
AC•T 5diff Control Plus. See cell controls
AC•T 5diff Diluent
See diluent reagent
See reagents
AC•T 5diff Fix
See Fix reagent, 1-12
See reagents
AC•T 5diff Hgb Lyse
See Hgb Lyse reagent
See reagents
C
A •T 5diff Rinse
See reagents
See Rinse reagent
AC•T 5diff WBC Lyse
See reagents
See WBC Lyse reagent
AC•V technology
overview, 2-3
access rights, A-115
accuracy
characteristics, 3-8
definition, Glossary-1
specifications, 3-6
ACD
definition, Abbreviations-1
action range flags, 9-36
PN 624026AE
adding a flagging set, A-122
adding a location, A-22
adding a physician, A-22
adding a printer, A-82
adding a Worklist order, 8-45
at the Worklist Cassette screen, 8-47
at the Worklist Grid screen, 8-45
adding comments to logs, 11-129
adding demographics, E-1
adding entries to the Maintenance
log, 11-130
adding users, 5-1, A-115
agglutination
definition, Glossary-1
altitude range, 3-2
Anemia, triggering condition, 9-46
Anisocytosis, triggering condition, 9-46
ANSI
definition, Abbreviations-1
anticoagulant
recommended, 3-3
aperture
DIFF, diameter, 3-4
RBC, diameter, 3-4
WBC/BASO, diameter, 3-4
See also blocked apertures
aperture sensing system
function, 2-1
archive
definition, Glossary-1
Archive Results option, 5-12
Archive Unmatched Results and Delete
Worklist option, 5-12
assigning different operator IDs, 5-1
ASTM
definition, Abbreviations-1
ATL
display/print setup, A-15
ATL flag, 9-38, 9-42, 9-51
ATTENTION
definition, 4-1
Atypical Lymphocyte, triggering
condition, 9-46
AUTO_PID
definition, 8-38
AUTO_SID
definition, 8-35, A-4
See also Auto-Numbering
auto-calibrating the instrument, 10-15
Index-1
INDEX
Auto-Clean
definition, 11-67
frequency, 11-10
procedure, 11-10
setting the frequency, A-102
Autoloader Test
procedure, 11-24
understanding the screen, 11-26
automatic calibration, 5-3
automatic Shutdown
defining, A-112
automatic Startup
defining, A-110
Auto-Numbering
definition, A-4
setting the starting number, A-4
Auto-Stop
definition, A-18
for QA messages, A-18
for sample analyses with certain
characteristics, A-20
B
BA
interfering substances, 3-13
backflush
function, 11-39
procedure, 11-39
backflushing to remove blockages, 11-39
background count
definition, Glossary-1
background count limits, 6-1
band cells
description, 2-21
barcode
definition, B-1
Barcode as Worklist Match Option, A-9
barcode labels
default settings, B-2
specifications, B-1
symbologies, list of, B-1
barcode wand (optional)
specifications, B-1
using, 5-16
BASO count
calculation overview, 2-18
overview, 2-18
basophil
overview, 2-18
Index-2
percentage, 2-18
See also BA
Basophilia, triggering condition, 9-46
bath assembly
illustrated, 11-38, 11-80
baths
cleaning (bleaching) procedure, 11-34
location illustration, 11-38, 11-80
blank cycle
definition, Glossary-1
blast cells
description, 2-21
Blasts, triggering condition, 9-46
bleaching. See cleaning procedures
blocked apertures
removing blockage, 11-39
bps
definition, Abbreviations-1
C
C flag
next to Plt result, 3-5, 3-7, 3-9
calibration
auto-calibration, 10-11
conditions for fail, 10-16
conditions for pass, 10-15
definition, Glossary-1
frequency, 11-1
manual, C-1
passing requirements, 10-17
pre-calibration checks, 10-5
requirements, 10-1
setup procedures, 10-6
verification out of limit, what to do
if, 11-123
calibration factors
definition, Glossary-1
editing, 11-49
Calibration Log icon, 11-125
Calibration screen
definition, 10-2
Calibration Setup screen
definition, 10-4
calibrator
definition, Glossary-1
recommended, 1-10, 3-2
carryover
definition, Glossary-1
performance characteristics, 3-9
PN 624026AE
INDEX
performance specifications, 3-6
Cass./Position as Worklist Match
Option, A-9
cassettes
back view, 5-17
definition, 5-17
front view, 5-17
illustration, 5-17
inserting tubes into, 5-18
loading onto Analyzer, 5-20
removing tubes from, 5-19
tube position number, 5-17
unloading from Analyzer, 5-21
CAUTION
definition, 4-1
caution labels
on Analyzer, 1-4
CBC
definition, Abbreviations-1
See also test panel
CBC parameters, 1-8
excessive flagging, what to do if, 11-27
CBC/DIFF parameters, 1-9
excessive flagging, what to do if, 11-41
See also test panel, A-6
cell control files
deleting, 7-48
setting up, A-46
cell control results
on Manual Match screen, 7-4, 7-9, 7-15
out of range, 7-21
cell controls
definition, Glossary-1
if Reserved, 7-3
pre-assigning in Worklist, 7-3
recommended, 1-10
saving results to disk for IQAP, 7-39
verifying calibration, 7-3
changing input locales, A-76
changing language-specific keyboards, A-76
changing system setup, who has access, 5-1
changing the date/time, A-72
changing the date/time format, A-73
changing the reporting units, A-27
characteristics
definition, Glossary-1
See also performance characteristics
checking the motors, 11-16
checking the printer, 6-1
checking the sensors, 11-22
PN 624026AE
checking the valves, 11-19
checking the waste container level, 6-1
Cleaning Cycles
options, 11-34
cleaning procedures
after running a contaminated
sample, 11-68
Auto-Clean, 11-67
extended cleaning, 11-34
for inside of instrument, 11-67
for outside of instrument, 11-66
system cleaning, 11-68
cleaning the Analyzer, 11-66
cleaning the baths, 11-73
cleaning the inside of the Analyzer, 11-67
cleaning the outside of the Analyzer, 11-66
cleaning the system after analyzing a
contaminated sample, 11-68
cleaning the tube holder, 11-66
cm
definition, Abbreviations-1
CO flag, 9-49
coefficient of variation (CV)
definition, Glossary-1
Cold agglutinin, triggering condition, 9-46
collecting the specimen, 8-1
columns
no longer visible, 9-3
resizing the widths, 9-3
comments
prompted for logs, A-14
components
resetting to "home" position, 11-13
components, inside right
illustrated, 11-78
components, left inside
illustrated, 11-76
conditions for starting a New
Workday, A-107
Contextual toolbar, 5-46
control
definition, Glossary-1
recommended, 3-2
control flags, 9-36
control values
editing, A-56
controls. See cell controls
conventions
definition, Glossary-1
used in this manual, xxxi
Index-3
INDEX
copying settings to another flagging
sets, A-126
Coulter Principle, 2-2
count syringe
function, 11-79, 11-80
location, 11-79, 11-80
creating a report header, 5-1, A-79
cursor
how to move, 5-52
customizing the patient report, 5-1, A-90
CV
definition, Glossary-1
cycle count
description, 11-44
viewing, 11-44
D
daily routine procedures, 6-1
Database Maintenance option, 5-12
DB flag, 9-49, 9-51
debris
description, 2-20
deciding which Worklist Match Option and
Manual Match Option to use, A-9
default
definition, Glossary-1
default system configuration, A-1
default test panel, 8-35
defining a flagging set, A-120
defining a New Workday, A-107
defining automatic re-run criteria, A-60
defining flagging sets, A-120
defining the daily workload, A-105
defining the Host settings, A-78
defining the minimum runs for
auto-calibration, A-40
defining your lab’s shifts, A-31
deleting a location, A-22
deleting a physician, A-22
deleting a printer, A-88
deleting a Worklist order, 8-51
deleting cell control results, 7-46, 7-48
deleting patient results, 9-27
deleting Reproducibility results, 11-65
deleting users, A-115
demographics
adding to patient information, E-1
Detailed flags
displaying/printing, A-95, A-96
Index-4
format, 9-51
Diagnostics icon, 5-31, 5-57
Diagnostics screen, 11-8
Diagnostics User screen, 11-11
DIFF- flag, 9-48
Diff Reject. See CO flag
DIFF syringe
function, 11-80
location, 11-80
DIFF+ flag, 9-48
DiffPlot
development overview, 2-19
function, 2-19
regions, 2-20
DIFFPLOT flag
what it replaces, 9-51
Diluent reagent
description, 11-6
input connector location, 1-4
replacement procedure, 11-85
diluent reservoir
function, 11-79
location, 11-79
Diluter Systems screen, 11-27
dilution
ratios, 3-3
summary overview, 2-13
displaying cell control results, 7-22
displaying/printing detailed flags, A-95
displaying/printing suspect flags, A-95
dL
definition, Abbreviations-1
doing a Hardware Reset, 11-13
doing an Autoloader Test, 11-24
downloading calibrator values from
disk, 10-9
downloading control values from disk, A-52
downloading IQAP data, 5-3, 7-39
draining the baths, 11-27
E
editing a flagging set, A-122
editing a location, A-22
editing a physician, A-22
editing a Worklist order, 8-49
editing calibration factors, 11-49
editing control target values, A-56
editing CV limits, A-44
editing text, 5-54
PN 624026AE
INDEX
editing users, A-115
EDTA
definition, Abbreviations-1
enabling Auto-Print for non-patient
results, A-99
enabling Auto-Transmit for patient
results, A-67
enabling RUO parameters, A-15
entering a patient ID, 8-38
entering a patient’s age, 8-39
entering a patient’s date of birth, 8-39
entering a patient’s gender, 8-39
entering a patient’s location, 8-37
entering a patient’s name, 8-38
entering a physician’s name, 8-37
entering a report header, A-79
entering a Sample ID, 8-35
entering a sample’s collection date/time, 8-36
entering calibrator information
manually, 10-10
entering patient demographics, 8-36
entering patient information, 8-34
entering patient/sample comments, 8-37
entering sample information, 8-34
entering your IQAP ID, A-42
entering your lab’s IQAP ID, A-42
environmental protection requirements, 3-4
EO
description, 2-20
interfering substances, 3-13
eosinophil. See EO
Eosinophilia, triggering condition, 9-45
Erase Worklist option, 5-12
error messages
definition, 11-112
list of, 11-112
Erythrocytosis, triggering condition, 9-46
expiration date
definition, Glossary-1
extended cleaning
frequency, 11-1
procedure, 11-34
F
Failed
Startup results, 5-7
femtoliter
definition, Glossary-1
field
PN 624026AE
definition, Glossary-1
fields
selecting/deselecting, 5-55
Fix reagent
description, 1-13
flag sensitivity, A-130
flagged sample results, 9-34
flagging sets
how they are selected, 8-36
list of pre-defined, 5-58
overview, 5-58
setting up, A-120
flags
*, 9-48
*WBC, 9-43
action range, 9-36
alternative reporting formats, 9-51
appearing in the Flags and Messages
area, 9-37
ATL, 9-38, 9-42, 9-51
BASO+, 9-50
CO, 9-49
DB, 9-49, 9-51
definition, Glossary-1
detailed flags format, 9-51
Detailed, displaying/printing, A-96
DIFF-, 9-48
DIFF+, 9-48
DIFFPLOT, 9-51
DiffPlot, 9-38
DiffPlot and Histogram flags, 9-34
for controls, 9-36
H, 9-36
HH, 9-36
HISTO, 9-51
IMM, 9-38, 9-42, 9-51
L, 9-36
LL, 9-36
LN, 9-38, 9-40
MACRO, 9-43
Manual Match, 9-17
MB, 9-43
MIC, 9-44
MICRO, 9-43
MN, 9-38, 9-40
NE, 9-38, 9-41
NL, 9-38, 9-39
non-replacement flags, 9-34
patient range, 9-36
R on diff parameters, 9-38
Index-5
INDEX
Recalculated, 9-17
replacement flags, 9-34
S, 7-21, 9-36
SCH, 9-44
SCL, 9-45
SL, 9-38, 9-39
SL1, 9-38, 9-39
Suspect flag format, 9-51
Suspect, displaying/printing, A-96
UM, 9-38, 9-40
UN, 9-38, 9-41
Unmatched, 9-18
WBC/BASO replaced by *WBC flag, 9-51
what triggers them, 9-34
where they appear, 9-37
flashing (illuminated) indicator lights
(LEDs), 1-3
flashing Alarms icon, 7-4
flashing Results icon, 7-4, 7-9, 7-15
flashing Startup icon, 6-2
flashing Worklist icon, 8-2
flow cell lamp
replacement, 11-96
For Research Use Only. Not for use in
diagnostic procedures (RUO)
definition, A-16
G
g
definition, Abbreviations-1
gal
definition, Abbreviations-1
Generic toolbar, 5-45
GR
definition, Abbreviations-1
grounding requirements, 3-1
H
H flag
definition, 9-36
handling expired reagents, 11-7
handling waste, 11-6
Hardware Reset
frequency, 11-1, 11-13
purpose, 11-13
hardware reset
function, 11-13
procedure, 11-13
Index-6
hardware system
troubleshooting, 11-12
Hardware System screen, 11-12
hazards
list of, 4-2
Hct
definition, Abbreviations-1
interfering substances, 3-11
measurement overview, 2-14
Help
using, 5-27
Hgb
definition, Abbreviations-1
interfering substances, 3-11
overview, 2-17
Hgb Lyse reagent
description, 1-13
HH flag
definition, 9-36
HISTO flag
what it replaces, 9-51
Hypochroma, triggering condition, 9-46
Hz
definition, Abbreviations-1
I
icons
Calibration Log, 5-57, 11-125
definition, 5-57
Diagnostics, 5-31, 5-57
grayed out, 5-45, 5-46, 5-53
knowing where you are, 5-29
Logs, 5-31, 5-57
QA, 5-31, 5-57
Reagents, 5-31, 5-57
Run-in-Progress, 5-30, 5-57
Setup, 5-30, 5-57
Shutdown, 5-31, 5-57
software, 5-57
Startup, 5-30, 5-57
identifying rerun results, 5-2, 8-33
IMM
description, 2-21
display/print setup, A-15
IMM flag, 9-38, 9-42, 9-51
immature granulocytes. See IMM
IMPORTANT
definition, 4-1
installing the lifting handles, 11-110
PN 624026AE
INDEX
installing the system, A-1
instrument
component locations, 11-76
dimensions, 3-1
features, 1-9
illustration, 1-1
intended use, 1-1
limitations, 3-9
placement, 3-2
purpose, 1-1
setup changes, what to do after, A-1
weight, 3-1
instrument technology
overview, 2-1
interference
on the Plt distribution curve, 2-16
Interlaboratory Quality Assurance Program.
See IQAP
interpretive messages
definition, 9-45
triggering conditions, 9-45
IQAP
definition, 1-11
downloading to diskette, 7-39
enrollment, 1-11
entering your IQAP ID, A-42
K
keyboards
changing for a specific language, A-76
knowing when to calibrate, 10-1
L
L
definition, Abbreviations-1
L flag
definition, 9-36
laboratory limits
description, A-122
setup procedure, A-122
lamp. See flow cell lamp
Large immature cell, triggering
condition, 9-46
LCD
definition, Abbreviations-1
LED
definition, Abbreviations-1
Left Shift, triggering condition, 9-46
PN 624026AE
Leukocytosis, triggering condition, 9-45
Leukopenia, triggering condition, 9-45
linearity
definition, Glossary-1
specifications, 3-5
LIS
definition, Abbreviations-1, Glossary-1
LL flag
definition, 9-36
LN flag, 9-38, 9-40
locating Startup results, 5-1
location of system components, 11-76
logging off, 5-9
logging on, 5-3
login
access levels, 5-28
name, 5-28
passwords, 5-28
Login screen, 5-29
New Workday options, 5-11, 5-12
logs
adding comments, A-14
being prompted for comments, A-14
overview, 11-126
purpose, 5-3, 11-124
Logs icon, 5-31, 5-57
Logs Menu screen, 11-125
lot number
definition, Glossary-1
LY
description, 2-20
interfering substances, 3-12
lymphocytes. See LY
Lymphocytosis, triggering condition, 9-45
Lymphopenia, triggering condition, 9-45
M
m
definition, Abbreviations-1
MACRO flag
definition, 9-43
Macrocytes, triggering condition, 9-46
Macrocytosis, triggering condition, 9-46
Macroplatelets, triggering condition, 9-47
Main card
function, 11-81
location, 11-81
Main Menu screen, 5-30
maintenance schedule, 11-1
Index-7
INDEX
Manual Match
matching Sample IDs to results, A-12
OFF, A-12
ON, A-12
overview, A-9
Manual Match flag, 9-17
Manual Match message, 9-51
Manual Match option
turning on or off, A-12
turning ON/OFF, A-12
Manual Match screen, 9-14
opening, 9-19
when are results placed there, 5-2, 9-13
manually entering control values, A-51
manually matching cell control results, 9-15
manually matching results, 9-15
marking samples for automatic re-run, A-60
material safety data sheet. See MSDS
MB flag, 9-43
definition, 9-43
MCH
calculation overview, 2-15
interfering substances, 3-11
MCHC
calculation overview, 2-15
interfering substances, 3-11
MCV
calculation overview, 2-15
interfering substances, 3-11
mean
definition, Glossary-1
menu path icon, 5-29
MIC flag, 9-44
MICRO flag, 9-43
Microcytes, triggering condition, 9-46, 9-47
Microcytic RBCs
interference on Plt distribution
curve, 2-16
Microcytosis, triggering condition, 9-46
Mini-Clean
frequency, 11-9
procedure, 11-9
minimum specimen volume, 5-2
Misc.
definition, Abbreviations-1
mixing the specimen, 8-1
mL
definition, Abbreviations-1
mm
Index-8
definition, Abbreviations-1
MN flag, 9-38, 9-40
MO
description, 2-20
interfering substances, 3-12
mode
definition, Glossary-1
monocyte. See MO
Monocytosis, triggering condition, 9-46
motors
function, 11-15
location, 11-15
purpose, 11-14
mouse
moving the cursor, 5-52
using to edit text, 5-54
MPV
interfering substances, 3-12
measurement overview, 2-17
MSDS
definition, Abbreviations-1
ordering, 1-14
mW
definition, Abbreviations-2
Myelemia, triggering condition, 9-46
N
n
definition, Abbreviations-2
NCCLS
definition, Abbreviations-2
NE
description, 2-20
interfering substances, 3-12
NE flag, 9-38, 9-41
neutralizing waste, 11-6
Neutropenia, triggering condition, 9-45
neutrophil. See NE
Neutrophilia, triggering condition, 9-45
New Workday
conditions for starting, A-107
defining, A-107
definition, 5-11
options on Login screen, 5-11, 5-12
routine, 5-11
NL flag, 9-38, 9-39
nm
definition, Abbreviations-2
NRBCs & PLATELET AGGREGATES,
PN 624026AE
INDEX
triggering condition, 9-47
Nucleated RBC, triggering condition, 9-47
number of orders on Worklist, 5-45
number of results in Results list, 5-46
O
opening the Manual Match screen, 9-19
opening the tube holder door if
jammed, 11-108
operating range
definition, Glossary-1
Operator users
their access, A-115
optical bench
function, 11-80
illustrated, 11-80
location, 11-80
order
definition, 2-23
Others Diagnostics screen, 11-43
P
Pancytopenia, triggering condition, 9-47
panel
default test for sample analysis, A-6
definition, Glossary-2
parameter results
from Plt histogram, 2-16
from RBC histogram, 2-15
parameters
definition, Glossary-2
how they are determined, 2-14
parameters analyzed
CBC, 1-8
CBC/DIFF, 1-9
parking the syringes, 11-46
particles
how they are detected, 2-1
Passed
Startup results, 5-7
password
for Supervisor, 5-28
password requirements, 5-1, A-115
Patient Demographics Modified
definition, 9-51
patient range flags, 9-36
patient report setup
software overview, A-92
PN 624026AE
PC. See Workstation
Pct (plateletcrit)
calculation overview, 2-17
PDW
calculation overview, 2-17
performance characteristics
accuracy, 3-8
carryover, 3-9
definition, 3-8, Glossary-2
reproducibility, 3-8
performance specifications
accuracy, 3-6
carryover, 3-6
definition, 3-5, Glossary-2
linearity, 3-5
reproducibility, 3-5
pg
definition, Abbreviations-2
pierce position of tube, 5-24
placing labels on tubes, 5-15
Platelet Concentrate Extended Range flag
defined, 9-37
Plt
count determination, 2-16
interfering substances, 3-12
parameter overview, 2-16
Plt aggregate, triggering condition, 9-47
PLT Concentrate
defined, 3-5, 3-7, 9-51
next to PLT result, 3-9
PLT INTERPRETATION NOT POSSIBLE,
triggering condition, 9-47
pneumatics area
illustrated, 11-79
positioning tubes in the tube holder, 5-22
power consumption, 3-1
power problems, 11-122
power supply, 3-1
cord connector location, 1-4
powering down the system, 5-9
powering up the system, 5-3
precision
definition, Glossary-2
See alsoReproducibility
preparing the system for sample analysis, 8-1
primary ID. See Worklist Match Option
priming reagents
procedure, 11-30
when to do, 11-30
priming the reagents, 11-30
Index-9
INDEX
printer
prints incorrectly, what to do if, 11-124
required model, 1-14
printing calibration results, 10-17
printing cell control results, 7-30
from QC Data Grid screen, 7-33
from QC Graphics screen, 7-36
from QC L-J Graphs screen, 7-30
printing from the Run-in-Progress
screen, 8-2, 9-1
printing log entries, 11-132
printing options
for cell control results, 7-35, 7-38
for patient results, 9-20
printing patient results, 9-21
printing Reproducibility results, 11-65
printing results automatically, A-64
printing the calibration table
(statistics), 10-17
printing the Workstation Setup report, A-2
printing/transmitting results
automatically, 5-1
progress indicator, 5-47
prompting for log comments, A-14
putting the Traverse assembly in "service"
position, 11-48
Q
QA
definition, 7-1
settings, A-34
setup, A-34
QA icon, 5-31, 5-57
QA messages
automatically stopping instrument, A-18
QC
definition, 7-2
running cell controls, 7-3
setting up a control file, A-46
techniques, 7-2
QC Expired
definition, 9-50
QC Failed
definition, 9-50
quality assurance
definition, 1-10
See also QA
quality control
definition, Glossary-2
Index-10
See also QC
R
R flag
description, 9-38
on diff parameters, 9-38
RBC
count determination, 2-14
histogram determination, 2-14
interfering substances, 3-10
RBC INTERPRETATION NOT POSSIBLE,
triggering condition, 9-46
RDW
calculation overview, 2-15
interfering substances, 3-11
Reagent Expired
definition, 9-51
during Startup, 6-4
reagent syringe
function, 11-80
location, 11-80
reagents
consumption by cycle, 3-4
expired, how to handle, 11-7
location, 11-83
priming procedure, 11-30
recommended, 1-12, 3-2
replacement procedures, 11-84
Reagents icon, 5-31, 5-57
Recalculated flag, 9-17
Recalculated message
definition, 9-51
removing panels/covers, 11-2
removing the left panel, 11-3
removing the right panel, 11-4
removing the top cover, 11-5
reordering parts, 11-103
replacing reagents
frequency, 11-1
replacing the flow cell lamp, 11-96
replacing the right panel, 11-4
replacing the Rinse bath drain filter, 11-103
reportable range
definition, Glossary-2
Hct, 3-7
Hgb, 3-7
Plt, 3-7
RBC, 3-7
WBC, 3-7
PN 624026AE
INDEX
reporting units
available formats, A-27
selection procedure, A-27
reporting unmatched results without a
Worklist order, 9-18
Reproducibility
definition, Glossary-2
frequency, 11-1
if poor, 11-124
overview, 11-52
specifications, 3-5
reproducibility characteristics, 3-8
Reproducibility screen, 11-52
rerunning samples, 8-32
automatically, 5-1, 8-33
in a Worklist, 8-32
manually, 8-32
marking for automatic re-run, A-60
reruns of AUTO_SID and
Cass./Position, 8-32
reserving cell control lot numbers, 7-4
reserving control lot numbers, A-54
Reset Autonumbering option, 5-12
restoring default flagging set values, A-130
results
definition, Glossary-2
on the Manual Match screen, 5-2, 9-13
results exceeding instrument capacity, 9-35
Results List screen, 9-19
results reported as 0
Hct, 9-35
Hgb, 9-35
RBC, 9-35
WBC, 9-35
Results screen, 9-11
review flag
description, 9-38
reviewing cell control results, 7-20
reviewing flagged results, 9-34
reviewing platelet counts, 9-34
reviewing XB Batch Details screen, 7-55
Rinse reagent
description, 1-13
rinsing the flow cell, 11-41
run
definition, Glossary-2
Run-in-Progress icon, 5-30, 5-57
running Auto-Clean, 11-10
running calibration
in the Autoloader Mode
PN 624026AE
(recommended), 10-12
in the Manual (Stat) mode, 10-13
running calibration samples, 10-11
running cell controls
in Autoloader Mode with Barcode ID, 7-4
in Autoloader Mode without Barcode
ID, 7-9
in Manual (Stat) Mode, 7-15
when to run, 7-3
running manual (stat) samples
if no order on Worklist and demographics
are required, 8-7
running Mini-Clean, 11-9
running non- Worklist samples
Cass./Position is Worklist Match Option
and Manual Match is Off, 8-29
running non-Worklist samples
Barcode is Worklist Match Option and
Manual Match is Off, 8-18
running Reproducibility
in the Autoloader Mode, 11-60
in the Manual (Stat) Mode, 11-53
running stat samples if already running
Worklist samples, 5-2, 8-2
running Worklist samples
Barcode is Worklist Match Option and
Manual Match is On, 8-12
Cass./Position is Worklist Match Option
and Manual Match is On, 8-22
in Autoloader Mode, 8-12
RUO
definition, Abbreviations-2
RUO parameters
enabling/disabling, A-15
how to display, print, and transmit, A-15
list of, A-15
S
S flag, 7-21, 9-36
printed on QC report, 7-21
safety precautions
biological, 11-37
list of, 4-1
while performing maintenance or
service, 11-37
sample analysis
minimum requirements, 2-23
rerunning samples, 8-32
running manual (stat) samples, 8-2
Index-11
INDEX
running Worklist samples in the
Autoloader mode, 8-12
sample results
flagged or outside range, what to do if, 3-9
importance of verifying flagged
results, 9-34
reviewing, 9-2
selecting results to view, 9-8
sorting, 9-5
samples
entering IDs, 3-3
number processed per hour, 3-3
stability of, 3-3
sampling probe
if not working, 11-123
sampling syringe
function, 11-79
location, 11-79
saving software changes, 5-55
SCH flag, 9-44
Schistocyte, triggering condition, 9-47
SCL flag, 9-45
scrolling
how to scroll, 5-52
through lists, 5-50
to view all information, 5-50
SD (standard deviation)
definition, Glossary-2
searching for sample results, 5-2, 9-1
selecting a default flagging set, A-129
selecting a default printer, A-86
selecting a flagging set, 8-36
selecting a language, A-74
selecting a paper size, A-84
selecting a test panel, 8-35
selecting Auto-Stop messages for QA, A-18
selecting parameters for patient report, A-97
selecting results for auto-calibration, 10-15
selecting the Auto-Stop criteria for patient
results, A-20
selecting the default test panel, A-6
selecting the number of copies to
automatically print, A-84
selecting the print quality, A-84
selecting the Worklist Match Option, A-10
selecting the XB/XM option, A-35
serial number
label location, 1-4
Service users
Index-12
access levels, A-115
setting Auto-Print for patient results, A-64
setting the AUTO_SID starting number, A-4
setting the Auto-Clean frequency, A-102
setting the XB/XM limits, A-37
setting up a cell control file, A-46
setting up a flagging set, A-120
setting up shifts, A-30
setting up the patient report layout, A-90
setting up users, A-114
Setup icon, 5-30, 5-57
Setup Menu screen, A-2
shifts
setting up, A-30
Shift 0 definition, A-30
Shutdown
cycle definition, Glossary-2
frequency, 11-1
procedure, 6-5
Shutdown (automatic)
defining, A-112
Shutdown icon, 5-31, 5-57
shutting down Windows
frequency, 11-2
shutting down Windows-NT, 11-66
SI 1. See reporting units
SI 2. See reporting units
SI 3. See reporting units
SI 4. See reporting units
SL flag, 9-38, 9-39
SL1 flag, 9-38, 9-39
Small cell, triggering condition, 9-47
software
access, 5-28
check-boxes, 5-49
fields, 5-49
icons, 5-57
knowing where you are, 5-29
menu path, 5-30
options, selecting/deselecting, 5-55
overview, 5-28
scrollable lists, 5-50
toolbars, 5-45
software buttons, 5-47
software cursor. See cursor
software fields. See fields
software icons
list of, 5-57
software screens
PN 624026AE
INDEX
overview, 5-28
software tabs, 5-47
sorting sample results, 9-5
specifications
See performance specifications
specimen
limitations, 3-9
specimen collection requirements, 8-1
specimen mixing requirements, 8-1
starting a New Workday, 5-11
Startup
failure, 11-123
frequency, 6-2, 11-1
if "Failed", 6-2
overview, 6-1
viewing results and status, 5-1
Startup (automatic)
defining, A-110
startup cycle
definition, Glossary-2
Startup Failed, 5-7
Startup icon, 5-30, 5-57
what to do if flashing, 5-30
Startup Not Effective, 5-7
stat
definition, Glossary-2
stat samples
procedure for running, 8-2
Supervisor users
access level, A-115
SUSPECT
definition, 9-51
Suspect flag
format, 9-51
Suspect flags
displaying/printing, A-95, A-96
symbols
safety, xxxii
tab, xxxii
system cleaning
procedure, 11-68
when to do, 11-68
System International unit
See reporting units
T
TABLE OF EXPECTED RESULTS
definition, Glossary-2
temperature
PN 624026AE
ambient operating range, 3-2
instrument, not achieved, 11-123
thresholds, A-130
description, 2-4
Thrombocytopenia, triggering condition, 9-47
Thrombocytosis, triggering condition, 9-47
toolbars
Contextual, 5-46
Generic, 5-45
transmitting cell control results, 7-30
from QC Data Grid screen, 7-33
transmitting options
for patient results, 9-22
transmitting patient results, 9-23
transmitting Reproducibility results, 11-65
transmitting results automatically, A-67
traverse assembly
function, 11-79
location, 11-79
treating waste for biohazards, 11-6
troubleshooting, 11-122
dilution problems, 11-123
electrical problems, 11-124
guide, 11-122
mechanical problems, 11-124
optical problems, 11-124
pneumatic problems, 11-124
power problems, 11-122
printer problems, 11-124
reagent problems, 11-124
results problems, 11-124
sampling problems, 11-123
software could not connect to
analyzer, 11-122
Startup problems, 11-123
tube holder
pierce position of tube, 5-24
placing tubes in holder, 5-22
tube holder door
closed, 5-26
during analysis, 5-26
open, 5-26
tubes
inserting into tube holder, 5-23
placing in the piercing position, 5-24
removing from cassette, 5-19
See also tube holder
turning Manual Match ON/OFF, A-12
Index-13
INDEX
U
U.S. See reporting units
UM flag, 9-38, 9-40
UN flag, 9-38, 9-41
units
See reporting units
unmatched
defined, 9-18
Unmatched flag, 9-18
Unmatched message
definition, 9-51
unpriming the reservoirs, 11-32
Users Setup screen, A-114
using Help, 5-27
V
Vac
definition, Abbreviations-2
valve locations, 11-19
Vds
definition, Abbreviations-2
verification
definition, Glossary-2
verifying calibration, 10-1
viewing additional information, 5-50
viewing histograms on the screen, 5-2
viewing Startup results, 5-7
viewing the cycle counters, 11-44
viewing the logs, 11-128
viewing the patient results screen, 9-6
W
WARNING
definition, 4-1
warning labels
on Analyzer, 1-4
waste container
replacement, 11-95
waste sensor, 11-95
waste detector sensor
location, 1-4
Waste full message, 11-95
waste output connector
location, 1-4
waste sensor
function, 11-95
location, 11-95
waste syringe
Index-14
function, 11-79
location, 11-79
WBC
definition, Abbreviations-2
interfering substances, 3-10
WBC count
overview, 2-18
WBC INTERPRETATION NOT POSSIBLE,
triggering condition, 9-46
WBC Lyse reagent
description, 1-13
whole blood
definition, Glossary-2
workflow
definition, 2-22
workflow and configuration
possibilities, A-10
Worklist
definition, 2-23
match options, A-9
purpose, A-9
Worklist Cassette screen, 8-43
Worklist Grid screen, 8-41
Worklist Match Option
Barcode, A-9
Cass./Position, A-9
overview, A-9
selecting, A-10
Worklist orders, 8-45
Worklist scenarios
Barcode scenarios, E-2
Cass./Position scenarios, E-5
Worklist screens
definition, 8-40
right side of each, 8-40
Workstation
definition, Glossary-2
illustrated, 11-81
Workstation connector
location, 1-4
X
XB
definition, 7-51, A-35, Glossary-2
selecting the option, A-35
XB/XM
Off, A-35
XM
defined, A-35
PN 624026AE
INDEX
definition, Glossary-2
selecting the option, A-35
XM analysis
definition, 7-51
PN 624026AE
Index-15
INDEX
Index-16
PN 624026AE
BECKMAN COULTER, INC. CUSTOMER END USER LICENSE AGREEMENT
This Product contains software that is owned by Beckman Coulter, Inc. or its suppliers and is protected by
United States and international copyright laws and international trade provisions. You must treat the
software contained in this Product like any other copyrighted material. This license and your right to use
the Product terminate automatically if you violate any part of this agreement.
This is a license agreement and not an agreement for sale. Beckman Coulter hereby licenses this Software
to you under the following terms and conditions:
You May:
1.
Use this software in the computer supplied to you by Beckman Coulter;
2.
Maintain one copy of this software for backup purposes (the backup copy shall be supplied by
Beckman Coulter);
3.
After written notification to Beckman Coulter, transfer the entire Product to another person or entity,
provided you retain no copies of the Product software and the transferee agrees to the terms of this
license agreement.
You May Not:
1.
Use, copy or transfer copies of this Software except as provided in this license agreement;
2.
Alter, merge, modify or adapt this Software in any way including disassembling or decompiling;
3.
Loan, rent, lease, or sublicense this Software or any copy.
Limited Warranty
Beckman Coulter warrants that the software will substantially conform to the published specifications for
the Product in which it is contained, provided that it is used on the computer hardware and in the
operating system environment for which it was designed. Should the media on which your software
arrives prove defective, Beckman Coulter will replace said media free of charge within 90 days of delivery
of the Product. This is your sole remedy for any breech of warranty for this software.
Except as specifically noted above, Beckman Coulter makes no warranty or representation, either
expressed or implied, with respect to this software or its documentation including quality, performance,
merchantability, or fitness for a particular purpose.
No Liability for Consequential Damages
In no event shall Beckman Coulter or its suppliers be liable for any damages whatsoever (including,
without limitation, damages for loss of profits, business interruption, loss of information, or other
pecuniary loss) arising out of the use of or inability to use the Beckman Coulter Product software. Because
some states do not allow the exclusion or limitation of liability for consequential damages, the above
limitation might not apply to you.
General
This agreement constitutes the entire agreement between you and Beckman Coulter and supersedes any
prior agreement concerning this Product software. It shall not be modified except by written agreement
dated subsequent to the date of this agreement signed by an authorized Beckman Coulter representative.
Beckman Coulter is not bound by any provision of any purchase order, receipt, acceptance, confirmation,
correspondence, or otherwise, unless Beckman Coulter specifically agrees to the provision in writing. This
agreement is governed by the laws of the State of California.
TRADEMARKS
Beckman Coulter, the stylized logo, and COULTER are trademarks of Beckman Coulter, Inc.
and are registered with the USPTO.
All other trademarks, service marks, products, or services are trademarks or registered
trademarks of their respective holders.
Find us on the World Wide Web at: www.beckmancoulter.com
Made in USA
PN 624026AE
Documentation
r Instructions for Use
PN 624026A
Use and Function • Operation Principles • Specifications/Characteristics •
Precautions/Hazards • Running Samples • Reviewing Results • Calibration •
Diagnostics • Instrument Setup • Barcode Specifications • Log Sheets • Manual
Calibration • Workstation Management • Worklist Scenarios • References •
Glossary • Abbreviations • Index
r Host Transmission Specification
PN 4277065
Requirements for interfacing the system with a host computer.
r Training Guide
PN 177196
Training information for using the AL system.
r Hematology Tube List
PN A70017
Tube List information
Come visit us at www.beckmancoulter.com
Beckman Coulter Ireland, Inc.
Mervue Business Park,
Mervue Galway, Ireland 353 91 774068
Copyright © Beckman Coulter, Inc. 2003 - 2013
All Rights Reserved