1
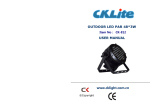
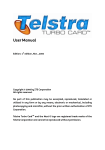
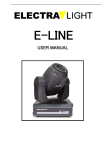
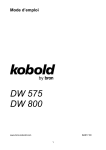
12CH MOVING HEAD LIGHT
Item No: CK-403
USER MANUAL
www.cklight.com.cn
©Copyright
Note: This instructions include the important information how to safely install
and use. After reading carefully, please operate it as required. At the same
time, please keep a proper record of this specification in case of necessary.
Firstly, thanks for buying our professional light products!
This moving head light is just the perfect combinations of excellent human
nature and industrial design, beautiful and elegant. By using aluminum alloy
and high temperature engineering plastics design, the Light body has a good
cooling effect especially with the ultra-quiet cooling fan. This machine used
electronic positioning technology . All the products are according with CE
standards, adopting international standards DMX512 signal control . It’s
widely used in television, disco, song and dance halls, nightclubs and other
indoor places.
The product has perfect performance and intergrity packing. All users
should be strictly comply with the warning and operating instructions as stated.
Or we aren’t in charge of any result by misusing. Any damage resulting by
misuse is not within the Company’s warranty. Any fault or problem caused by
neglecting the manual is also not in the charge of dealers .
If the manual has technology changes, forgive to have no notice.
Appurtenance
The following attachment has been packaged together with the lamp.
Please Check:
XLR 3-core signal lines (1PCS)
Power cord (1PCS)
The instruction (1PCS)
Auxiliary metal gobos (Option 4PCS)
Hanging hook (Option 2PCS)
Warning
Before your first using, please check whether it has any damages caused
by the transportation. If occuring, Please don’t use and contact with the dealer
or manufacturer as soon as possible.
This product only apply to indoor places and the defend level is IP20. Keep
it dry, avoiding moisture, overheating or dusty environment. Prevent the light
from water and other liquids..
Please don’t directly install lamps on the surface of the nomal
combustible material.
The qualified professionals are allowed to carry out the lamp installation,
operation and maintenance, but they must guarantee to operate in strict
accordance with the instructions referred to.
Lamps should be installed in a well-ventilated place, at a distance of 50
centimeters or more with the walls. At the same time, please check if the fan
and ventilation holes are unobstructed
Please don’t directly project the lamps on combustible objects . Keep more
than 3 meters between the lighting and exposured objections.
3m
Please don't look directly at the lamp light source (especially for the
epilepsy patients), in order to avoid damages to the eyes!
Please do not open it to repair by yourself.
The person having the appropriate qualifications, are allowed to carry out
the operation.
Before installing, make sure the using supplied voltage is in line with the
lamp voltage.
Each lamp should be properly grounded and installed in accordance with
the relevant standards.
Please don’t connecte the lamp to any other dimming device.
Please don’t use the power cord , which has injuried insulating layer. At
the same time, don’t conect the power cord to other wires. When not using or
cleaning the lamps, please take the power cord plug and then unplug the
power cord, not forcing to drag or directly dropping the power cord.
Keep bulbs clean, do not directly contact with the glass bulb by hands.
There is a insurance rope connecting hole at the bottom of the lamps.
Based on the safety reason, please connecte the insurance rope through the
hole to have a auxiliary intallment.
This product use discharge lamp, based on the characteristics of the
discharge lamp, please restart it after turning off lamps for 15 minutes untill
full-cooling. Frequent switching will reduce the life span of lamps and bulbs;
intermittent useing will improve the life of bulbs and lamps.
Please do not run the lights before installing the bulb.
There are no any parts users can repair inside the lamps. Before operating
Please check if all of the cover plate (or shell) is well installed, the screw has
been reliable on tight. Prohibit the plate (or shell) to open the case of the use
of lamps.
If you have any questions or suggestions, please timely contact the
Company or distributor.
Key: Before having any installation, repair and cleaning, make sure that
power has been cut off!
Structure and installation of lighting
With 4 attached hanging hooks quick knobbing, Have 2 hanging hooks
installed at the bottom of the lamp, and then hanging lamps on the stable
bracket, Tighten up the hanging hook bolt and fix the entire lamp. Please
confirm that it has a solid and reliable installation, and ensure that the
hoisting position has sufficient strength to bear the weight of the lamp. For
security reasons, please connecte the insurance rope through the hole to
have a auxiliary intallment.
Warning: hanging hook is only used in lifting the lamps. Prohibited
taking the hanging hook as handle carrying the lamps. Be sure to use
the handle.
Install / replace light bulbs
As it’s shown, release the the screws on the cover of the lamp body and
open it.
Opened two light bulbs screw nut, remove out the old bulb.When removing,
it is recommended to remove one side at first.
Fitted with new light bulbs, tighten two bulbs nut. Note: When loading a
new light bulb, the hands can not directly contact the spherical body of the
lamp so as not to affect luminous efficiency; there is a protuberance on the
buble, when installed, we must let the protuberance is vertical to the rear
cover with a fan. After re-installing, equip with the cover and tighten screws
.
Key: The lamps used high-pressure discharge lamp with external triggers ().
When using the light bulbs, Please read the "Guide."
Power Connection
Connect Power cord as following methods:
L (FireWire) = brown line
E (GND) = yellow / green two-color line
N (midline) = Blue Line
Please note that power supply voltage and frequency comply with the
ones marked on thelogos of lamps. When more than one lamp are used,
propose that each lamp’s power is connected separately, so that we can have
a separate on / off control.
Key: Ground wire must be (yellow / green two-color lines) safely connected to
the ground, electrical installation shall comply with all relevant standards.
Control signal connection
Controller, as well as lamps and lamps with the lamps must be used
between the link is not less than 0.5 mm in diameter two-core wire with
shielding. Please use 3-core (random incidental) or 5-core XLR plug / Block
DMX512 output connected to the lamp / entrance. XLR plug / Block and wire
connection between the list such as shown in the figure above. It should be
noted that, when connected to XLR Plug / Block 3 of the core or core-5 should
not in contact with the inner shell and core and between cores can not touch.
In addition to the list as shown in the figure above connection methods, XLR
plug / XLR Line of Control Block, and should not in any other way connected.
Lighting 1200W receive international standard DMX512 (1990) control signal
XLR-XLR to use the line of control from the controller's DMX output to
connect to the first machine from the DMX input and from the first DMX output
from the machine I connect to the second machine from the DMX input, and
so and so on, until all the connections from the machine completed, and then
loop connecting plug at the last output signal lamps to complete the
connection controller mode.
In the "Controller mode", the last DMX output lamps have to connect DMX
loop inserted. This loop inserted "Canon (XLR)" 2-pin plugs with a 3-pin
connection between a 120Ω (OHM) about the resistance (as in the figure
below). Play Play this loop at the last output on the lamp, which can effectively
avoid the DMX512 signal during transmission noise and reflection
phenomena.
(Connect map)
DMX
DMX channel for controlling the content
575 W moving head lights have 12 chanels, receiving the international
standard DMX512 signal. As follows
Channel
1
Colour Wheel
2 Rotating Gobo
3 Gobo Rotation
4
Dimmer /Strobe
5 Pan
6 16Bit
Pan Fine
7 Tilt
8 16Bit Tilt Fine
9
Pan & Tilt Speed
10
Prism
prism Rotatom
11 Focus
12
Control
DMX
Features
0-25
26-51
52-76
77-103
104-129
130-154
155-181
182-199
200-255
0-25
26-51
52-76
77-103
104-129
130-154
155-181
182-199
200-255
0-126
127-255
000-005
006-070
071-130
131-253
254-255
White
Purple
Yellow
Cyan
Orange
Blue
Green
Red
Fast to slow
white
Gobo1
Gobo 2
Gobo 3
Gobo 4
Gobo 5
Gobo 6
Gobo 7
Slow to fast
Clockwise rotation, fast to slow
Reverse rotation, slow to fast
Cover
Lineary dimmer(0-100%)
white
Strobe speed slow to fast
white
000-255
Pan rotation
000-255
Pan 16Bit fine
000-255
000-255
Tilt rotation
Tilt 16Bit fine
000-255
Pan, tilt speed
051-101
102-152
prism
Prism rotation
204-255
prism
000-255
Lineary focus
fast to slow
fast to slow
0-254
255
All the machine reset, Restart
after stopping 10 seconds
Control Panel LED Display Signal Description
Green: light - DMX signal OK or from the machine;
Out - no DMX signal;
Flashover - DMX signal error;
Red lights: Medium-speed flash - menu setting mode;
Express flash - software, cpu failure;
Traffic lights at the same time-liang: Address setting mode;
Traffic lights flash alternately: the host.
Control Panel LED Display Signal Description
Maintenance
When the camera has broken and other damage should be promptly
replaced. When the light bulb when there is deformation of the damage
should be immediately replaced. When the lights brightness decreased, the
bulbs may have to use the time limit should be the timely replacement of
aging light bulb has burst danger. When the lamp will not boot, check whether
the lamp power supply fuse blown, such as blown, fuse fitted on the
corresponding specifications can 6.35X32 T15A/250V. Lamps inside the
motherboard has three fuses, specifications, respectively: X-axis and Y-axis
circuit boards circuit boards one each 6.3A/250V (speed melting, 5mmx20mm)
and the motor drive circuit board and a 4A/250V (fast melt, 5mmx20mm).
Attention to the need to use the same specifications of the fuse. Lamps
equipped with overheating protection device, when the overheating protection
device will automatically cut off power supply, when this happens, check
whether the normal operation of the fan, fan, fans and whether or not there is
dust plug the Net to find out after the start troubleshooting lamps.
But take note that qualified technical personnel are allowed to carry out
maintenance work.
Lubrication
Chip design in order to maintain smooth rotation and smooth exercise
focusing lens, it is recommended to rotate every two months to design a small
bearings and focusing lens first two rail lubrication. Should be used for good
and high temperature grease.
Lamp cleaning
In order to ensure reliable use of lamps to maintain clean the lamp is very
necessary. Cooling fan should be clean once every 15 days. Internal and
external optical lenses, reflectors and filter cleaning coating must be carried
out periodically to optimize light output efficiency. Do not use any solvent
containing the chemical constituents of cleaning filter coating.
Cleaning operation of the lamp, as the frequency and use the surrounding
environment. With a soft cloth when cleaning and general cleaning products
for cleaning glass, it is recommended at least every 20 days once clean
external optical system, at least every 30/60 days of a clean internal optical
system.
Do not use alcohol and other organic solvents to clean lamp shell, so as to
avoid causing damage.
General Troubleshooting
Failure description
Fail to start
the normal lamp isn’t
controlled by the controller
Intermittent working
Dim light,
the brightness decrease
Beam impurities (halo)
Serious beam distortion
measure
power fuse
intact bulb
1. Inspect DMX start address setting
2. check XLR signal lines
Inspect the dust and oil of the fans, whether the dust
plug fans and Nets fans
1.buble’s expiry
2.check whether the optical system is clean
Clean the dust and oil of the light bulbs, lenses and
other components
1 Check whether the lens is ruptureing
2.Cleaning dust or oil
Main technical parameters
According to your first product model, you only need to refer
to the " " sign project.
CM575
Input Voltage: 220V AC,50Hz
Consume Power: 750W
Lamp: HMI575 discharge
Color: Basic color 7 color + white, adjustable speed rainbow effect
Gobo / rotation: rotating gobo wheel: 7 gobos + white, bi-directional rotary
at variable speed
Prism: prism, Variable speed rotation.
Dimmer / strobe: dimmer, 1-7 times / second
Focus Electronics: linear zoom
Rotating angle: horizontal 540 °, vertical 270
Control way: DMX512,12 chanels
Operation modes: stand-alone mode, the controller mode, Master / Slave
synchronization mode
Other functions: adjustable horizontal, vertical speed
Housing: aluminum alloy + high temperature engineering plastics
Net Weight : 27 kg
Packing Size: 560*470*610mm