1
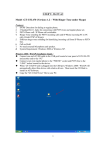
Table of Contents Document Objectives 1 Document Organization 1 Preparation before beginning administration on VIP-160/VIP-260 1 Log in 2 Internet Access Setup 3 LAN/WAN Interface quick configurations 3 DHCP server settings 4 WAN IP address configurations 5 PPPoE connection 6 MAC Address Cloning 7 Windows clients Internet Access Setup 7 For Windows 9x/ME/2000 8 For Windows XP 8 SIP configuration via web configuration interface 8 Voice communication samples 10 Peer-To-Peer voice communication 11 Voice communication via SIP proxy 14 Quick reference in CD-ROM guide 17 This page is intentionally left blank Document Objectives This guide provides physical installation, LAN/WAN IP configurations, and Internet access establishment information for the PLANET VIP-160/VIP-260 voice gateway. Document Organization This guide is organized as follows: · Preparation before beginning administration on VIP-160/VIP-260 · Administration interface · LAN/WAN Interface quick configurations · Internet access setup guide Preparation before beginning administration on VIP-160/VIP260 Physical Installation Front Panel of VIP-160 Front Panel of VIP-260 Rear Panel of VIP-160 Rear Panel of VIP-260 · Ensure VIP-160/VIP-260 is power OFF before commencing, and check the power supply status. 1 · Use standard LAN cables to connect PCs to the LAN ports on VIP-160/VIP260. · Connect the supplied Power Adapter and power on. · Check the LEDs -- The CPU LED should flash, the PWR LED should be ON. -- For each active LAN (PC) connection, the LAN LNK/ACT LED should be ON. -- If the WAN interface is properly connected with xDSL modem or switch, the WAN LED should be ON Administration Interface PLANET VIP-160/VIP-260 provides GUI (Web based, Graphical User Interface) for machine status monitoring and administration. Web configuration access: VIP-160/260 provides web-based machine administrations. Before starting VIP-160/VIP-260 web configurations, you must have one of these web browsers installed on computer for management · Netscape Communicator 4.03 or higher · Microsoft Internet Explorer 4.01 or higher with Java support Default LAN interface IP address of VIP-160/VIP-260 is 192.168.0.1. You may now open your web browser, and insert 192.168.0.1 in the address bar of your web browser to logon VIP-160/VIP-260 web configuration page. Log in VIP-160/VIP-260 will prompt for logon password, please enter: user to start user mode machine administration. 2 Please locate your PC in the same network segment (192.168.0.x) of VIP-160/VIP-260. If you’re not familiar NOTE: with TCP/IP settings, please refer to related chapter on user’s manual CD, consult experienced personnel or network administrator for proper network configurations. Internet Access Setup After logging in, the user administration interface will be shown. Main control items are available in the left control panel. LAN/WAN Interface quick configurations Nature of PLANET VIP-160/VIP-260 is an IP Sharing (NAT) device, it comes with two default IP addresses, and default LAN side IP address is “192.168.0.1”, default WAN side IP address is “172.16.0.1”. You may use any TCP/IP compliant PC to connect to the LAN port of VIP-160/VIP-260 to start machine administration., In general cases, the LAN IP address is the default gateway Hint: of LAN side workstations for Internet access, and the WAN IP of VIP-160/VIP-260 is the IP address for remote calling party to connect to. LAN IP address configuration via web configuration interface Make sure the LAN connection is established from your workstation, execute your web browser, and insert the IP address (default: 192.168.0.1) of VIP in the adddress bar. After logging on machine with password (default: user), browse to “Internet Access Setup” --> “LAN” configuration menu: 3 Parameter Description IP address LAN IP address of VIP Default: 192.168.0.1 Subnet Mask, LAN mask of VIP-160/VIP-260 Default: 255.255.255.0 The LAN port IP address can be modified to meet the field Hint: application. Please be reminded: the new IP address will be effective when clicking the “DONE” button. DHCP server settings By default, VIP-160-VIP-260 will act as a DHCP Server, which automatically provides a suitable IP Address (and related information) to each PC for network IP allocation and Internet access. VIP-160-VIP-260 utilizes the TCP/IP network protocol for all functions, so it is essential that the TCP/IP protocol be installed and configured on each PC. Parameter Description DHCP server setting Enable or disable PPPoE service Default: Enabled DHCP client IP Range The values used by the DHCP server when allocating IP Addresses to DHCP clients. This range also determines the number of DHCP clients supported. Default: 192.168.0.100 – 192.168.0.131 DHCP Client Network information 4 DHCP related settings Domain name Domain name of the DHCP network Default: null DNS setting DNS server IP address to be assigned to DHCP clients Default: null Static IP address Select this if you’d like to reserve a Fixed (Static) IP address for a specific Assignment computer(s) Enter the IP address allocated to the computer. Default: null If you are already using a DHCP Server, this setting must be Hint: disabled, and the existing DHCP server must be re-configured to treat VIP-160/VIP260 as the default Gateway. WAN IP address configurations Execute your web browser, and browse to “Internet Access Setup” --> “WAN” configuration menu, you will see the configuration screen below: 5 Connection Type Data required. Obtain WAN If this mode is selected, machine will act as a DHCP client configuration to obtain IP address information from DHCP server for dynamically Internet access. Usually, no special data required for this mode. However, some ISP may require a particular Hostname, Domain name, or MAC (physical) address. Specify fixed IP Address information are assigned by your ISP, please WAN configura- refer to the provided information to complete the set- tion tings. PPPoE connection If your ISP provides PPPoE type Internet access, please login machine and browse to “Internet Access Setup” --> “PPPoE” configuration menu, the configuration menu will be display as below: Parameter Description Enable PPPoE Enable or disable PPPoE service Default: Disabled Authentication Insert the username/password in this field to establish Internet access Default: null Connection Settings PPPoE related settings 6 Idle timeout When the timeout value is reached, machine will disconnect the current PPPoE Session Default: null Echo Timeout The duration between PPP echo requests being sent to the server. Default: null Echo Count The number of unanswered PPP echo requests before the PPP connection is closed. Default: null Service name PPPoE service name Default: null AC name PPPoE AC name Default: null Please consult your ISP personnel to obtain proper PPPoE/IP address related information, and input carefully. Hint: If Internet connection cannot be established, please check the physical connection or contact the ISP service staff for support information. MAC Address Cloning Some ISP demands the MAC address of the PC for Internet access. The Host Name and MAC address section is optional and you can skip this section if your ISP does not require these settings for you to connect to the Internet. Windows clients Internet Access Setup · When WAN interface of VIP-160/VIP-260 is properly configured, with default Windows TCP/IP settings, no changes need to be made on LAN side PC for Internet access. · If using a specified (fixed) IP address on your PC, refer to the user manual for details of the required changes: 7 · The Gateway must be set to the LAN port IP address of VIP-160/VIP-260 · The DNS should be set to the address provided by your ISP. For Windows 9x/ME/2000 · Select Start Menu - Settings - Control Panel - Internet Options. · Select the Connection tab, and click the Setup button. · Select “I want to set up my Internet connection manually, or I want to connect through a local area network (LAN)” and click Next. · Select “I connect through a local area network (LAN)” and click Next. · Ensure all of the boxes on the following Local area network Internet Configuration screen are unchecked. · Check the “No” option when prompted “Do you want to set up an Internet mail account now?”. · Click Finish to close the Internet Connection Wizard. Setup is now completed. For Windows XP · Select Start Menu - Control Panel - Network and Internet Connections. · Select Set up or change your Internet Connection. · Select the Connection tab, and click the Setup button. · Cancel the pop-up “Location Information” screen. · Click Next on the “New Connection Wizard” screen. · Select “Connect to the Internet” and click Next. · Select “Set up my connection manually” and click Next. · Check “Connect using a broadband connection that is always on” and click Next. · Click Finish to close the New Connection Wizard. Setup is now completed. SIP configuration via web configuration interface Planet VIP-160/VIP-260 provides two levels of SIP configurations to meet various application demands and offers more functionality. To start SIP configurations, please login machine and browse to SIP Configuration menu. 8 Parameter Description Proxy Server Settings Server Address IP address or URL of the SIP proxy server Default: 172.16.0.254 <NOTE> In most cases, this information is provided by your ITSP Port number SIP communication port number Default: 5060 Domain name Domain name of SIP proxy server Default: null <NOTE> In most cases, this information is provided by your ITSP Outbound Proxy IP IP address of the SIP outbound proxy server Default: null Outbound Proxy Communication port number of the SIP outbound proxy Port server Default: null Outbound Proxy Domain name of the SIP outbound proxy server Host Default: null Voice Gateway Settings 9 Dialplan MAX. length of dialing string Default: 2xx # use as a quick Check this item to enable the “#” key dial function Default: uncheck To enable # to be In some circumstances, the symbol “#” needs to be sent recognized as dial as dialing number. Please enable this if your ITSP ask for number this. Default: uncheck To enable # to be In some circumstances, the symbol “*” needs to be sent recognized as dial as dialing number. Please enable this if your ITSP ask for number this. Default: uncheck Please consult your ITSP personnel to obtain proper SIP related information, and input carefully. Hint: If voice session cannot be established, please double check the SIP server settings, dialplan, configurations or contact the service staff for support information. Voice communication samples In the following section, we’ll introduce how to establish the voice communication via a pair of VIP-160/260 (Peer-to-Peer) and the SIP proxy enabled application. Before starting: a. Check machine default configurations Without any configuration, your VIP comes with following basic information. Network: WAN IP: 172.16.0.1, Mask: 255.255.255.0, Gateway: 172.16.0.254 LAN IP: 192.168.0.1, Mask: 255.255.255.0 DHCP server: ON Dial Plan: Phone Number Caller ID name Port AEC LINE1 201 5060 ON LINE2 202 5061 ON Username Password b. Check machine physical connections If you have one VIP-260 with two telephones, say port 1 and port 2, you may connect either port 1 or port 2 to the telephone set 10 If you have a VIP-160, the connection can b shown below: You can also check LED indicators on VIP for telephony port Hint: status. When an incoming call reaches VIP, the LED should flash. And after picking up the handset, it will turn solid and goes off after the phone is onhook. Peer-To-Peer voice communication The previous section shows you how to test your VIP without modify any settings. This section we will shows you how to connect two VIP together and make the call. Assume that we have a second ITG, called VIP B, which is a VIP-160 with default setting as well. Now, let’s setup its WAN IP address to another, e.g. ‘172.16.0.2’ and connect it together to VIP A with the following steps. Step 1. On VIP B: Log on machine via web browser, and browse to Internet access Setup -- > WAN configuration 11 Enter IP address “172.16.0.2” Mask “255.255.255.0”, “172.16.0.254” and DNS information “168.95.192.1”. gateway After these, please click “DONE”, and browse to “Tool” menu to reboot machine and activate the settings. Step 2. Connect WAN port of VIP A and VIP B to the same switch or hub; please make sure the physical connection is ready. Step 3. Now let’s setup the SIP settings to establish voice communications to each other. SIP configurations and dialplan setting on VIP A: 12 Configured Parameter SIP setting Server Address IP address of VIP B: 172.16.0.2 Port number SIP communication port number on VIP B: 5060 Voice Gateway Settings Dialplan 2xx Line: Number of local telephony interface: 301 and 302 Check the “ # use as a quick dial function” item to enable the “#” key as terminal digit. Note: when this item is checked, dialing digits will be sent when pressing the # key. In Peer-to-Peer mode, please UNCHECK the “Send RegisHint: tration Request with Expire Time” while calling to remote party. The dialing number length can be modified to meet the field Hint: application. For example, the dialplan is “2xxxxx”, which indicates there is Max. 6 digits in the dialing string, and should be started with “2”. SIP configurations and dialplan setting on VIP B: 13 Configured Parameter SIP setting Server Address IP address of VIP A 172.16.0.1 Port number SIP communication port number on VIP A: 5060 Voice Gateway Settings Dialplan 3xx Line: Number of local telephony interface: 201 Check the “ # use as a quick dial function” item to enable the “#” key as terminal digit. Note: when this item is checked, dialing digits will be sent when pressing the # key. The dialing number length can be modified to meet the field Hint: application. For example, the dialplan is “2xxxxx”, which indicates the length of dialed numbers 6 digits Max. and should be started with “2”. In the example, we assign the telephony interface on VIP Hint: with a unique number. It is easier for users to think of it is as like regular PSTN number. To make calls between the units are not breaking the rules of PSTN dialing. If you cannot hear the ring, please do make sure: 1) Network settings on both VIP are properly configured. 2) Check if the correct number is sent to calling party. Hint: In this example, the correct phone number should be “30x” on VIP A, and “20x” on VIP B. where X follows the port. Please make sure the numbers are correct in configurations After all the configurations above, you may establish the voice communications between site A and site B. Voice communication via SIP proxy PLANET VIP-160/VIP-260 are able to establish voice communications via SIP proxy server. Users need to apply voice account information while making calls.. Following steps will describe how to make calls via Internet Telephony Service Provider (www.addavoice.com) 14 a) Go to www.addavoice.com to register an account for voice calls. b) After signing up, browse to SIP configuration page of VIP-160/260. Insert the Proxy server, server communication port, username, and password field. Configured Parameter SIP setting Domain name of SIP Proxy server name. Proxy Server <NOTE> this information is provided by your ITSP Port number SIP communication port number. <NOTE> this information is provided by your ITSP. In most cases, the port number is 5060. Voice Gateway Settings Dialplan Length xxxxxx Line: LINE1 registered number: 248364 15 Username Username used to register with SIP proxy <NOTE> this information is provided by your ITSP Password Password used to register with SIP proxy <NOTE> this information is provided by your ITSP Check the “ # use as a quick dial function” item to enable the “#” key as terminal digit. Note: when this item is checked, dialing digits will be sent when pressing the # key. The required parameters (proxy server, username, passHint: word.) will be provided by service provider. Please be sure to check and input the parameters to register and make calls on your side. c) After these parameters are inserted, click “DONE”, and browse to “Tools” menu to reboot the VIP-160/260and make the configuration effective. d) Apply the registration information on another VIP-160 or VIP-260. The configurations can be shown below: e) After these settings, voice communication between the units shall be established. 16 The actual inserted parameters may vary to reflect different Hint: ITSP demands. Please be sure to obtain proper information. (proxy server, username, password ... etc.)from the service provider for proper machine operations. Quick reference in CD-ROM guide This guide is used to help you startup your VIP settings. It is also recommended to check the user manual CD-ROM for more details information, and how to set the device back to default value. 17 This page is intentionally left blank 18