1
Installing Version 4
5.
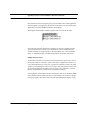
Beginning at the opening Search window, navigate through the application by
clicking the following buttons: Tools > Configuration > Database management > Edit Field Definitions > Generate from text.
NOTE: Only someone with “System Administration” permission may access the
Database Management area of our program. Please refer to the User Manual
for information about the System Administrator.
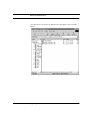
You are now in the Edit Field Definitions window. Clicking Generate from
text presents an Open Dialog to navigate to your previously exported database
in ASCII text format. The Version 4 ITC Application will read the first line of
your exported database and generate an identical set of database fields which
will immediately display in the Edit Field Definitions window.
Following the instructions in the Version 4 User Manual, edit the individual
database field properties (label, size, field type, visible status, etc.) as desired.
(If your database used pick lists in the Persons Found window, recreate them by
adding the values you wrote down in Step 2b to the Text List property of the
appropriate field(s). When done, click the Back button to return to the Database
Management window.)
6.
Click the Modify the current database and forms according to the
current field definitions button. This builds new tables and windows
required to display your original data that you will soon import.
7.
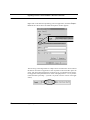
Click the Back button until you return to the Tools window. Click the
Advanced Import button. Click the Import text button and follow the
Advanced Import Wizard’s prompts.
• Select Compatible IFW text file and navigate to the ASCII text file of your
old database.
• Select “Add only” as the import-type.
• Select IDNumber as the key field.
• Answer NO at the prompt to import ImageID and ImageDate
8.
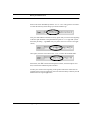
Click the Merge images button in the Advanced Import window.
• Select Compatible IFW text file and navigate to the ASCII text file of your
old database.
• Select “Add only” as the import-type.
• Select IDNumber as the key field.
9.
From within Windows Explorer, copy all of your badge layout files (files with a
“.bdg” file extension), plus any associated image files used in the badge layouts
(e.g., logos, graphics, etc.) into the Server Data Path of the Version 4 Application. (The Server Data Path, set in IDServer Setup, is a path statement instruct-
Upgrading to Version 4
3