1
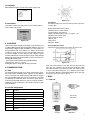
3. KEY FUNCTIONS
From the home screen, touch “MENU” to enter the main menu.
(Figure 4-1)
All keys are capacitive touch.
ON/OFF: Push for 2 seconds to power On or Off
During Measurement: Print the current force value or store data, depending on the key setting. (See 4.5.8 for key setting)
In Menus: Back or quit.
During Measurement: Enter the menus.
In Menus: Select or Enter
During Measurement: Track mode, tares weight of
attachment. In Peak & Auto Peak modes, resets the
peak value.
In Menus: Moves selection up or increases the value.
Figure 4-1a
Figure 4-1b
4.2 Measurement
The Measurement menu contains six selectable items: Unit,
Group, Test Mode, Alarm and Calibration. (Figure 4-2a)
During Measurement: Changes the measure mode from Track, Peak, Auto Peak, First Peak
In Menus: Moves selection down or decreases the
value.
Figure 4-2a
4.2.1 Unit
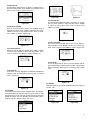
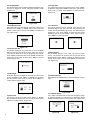
The measuring unit can be selected under this menu. Different range models may have different unit selection capabilities. Touch “ZERO” or “MENU” keys to shift to the next selection. Press “LOG” to cancel or touch “MENU” to confirm and
exit. (Figure 4-2c)
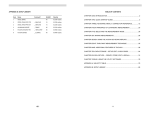
4. ADVANCED MENU OPTIONS
4.1 Menu Structure
Unit
Group
Measurement
Test Mode
Alarm
Figure 4-2c
Calibration
Storage Mode
Browse All
Memory
Browse Selected
Delete Selected
Delete All
Print Recent
Printing
Print Selected
4.2.2 Group
When several test samples need to be measured, the samples can be coded into groups. The range is 01-99. When set
to “00”, become, “01” automatically. Press “ZERO” to adjust
the value, touch “MODE” to shift to the next position. Touch
“LOG” to cancel; press “MENU” to confirm and exit. (Figure
4-2d)
Print All
Menu
Display Mode
Display Direction
Auto Power Off
Backlight
System
Key Tone
Figure 4-2d
Date/Time
Password
Key Setting
RS-232 Baud Rate
Default Setting
Language
Information
3