1
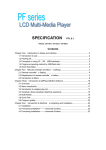
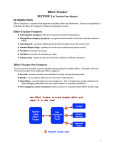
USER MANUAL
Navigator
Version 1.8.1.0
Navigator – User Manual
Table of Contents
Introduction ...................................................................................................................................... 2
Life Cycle View............................................................................................................................. 2
Status Grouping View .................................................................................................................. 2
Projects View ............................................................................................................................... 2
Templates..................................................................................................................................... 3
Login ................................................................................................................................................. 3
Icons on the navigator..................................................................................................................... 4
Customize a view filter .................................................................................................................... 5
Show Delegates .............................................................................................................................. 6
Search for an item............................................................................................................................ 6
Show / hide tree view legend .......................................................................................................... 6
Open another navigator window .................................................................................................. 7
To view a tender in the tender life cycle;......................................................................................... 7
Navigator: Notes ............................................................................................................................. 9
To add a note, follow the steps below............................................................................................. 9
View a note ................................................................................................................................... 11
Edit a note ..................................................................................................................................... 11
Remove a note.............................................................................................................................. 12
Printing notes................................................................................................................................. 13
Attachments ................................................................................................................................... 16
Add attachment to a specific note .............................................................................................. 16
Add an attachment ..................................................................................................................... 17
Navigator: Tasks ........................................................................................................................... 17
Task reminder ............................................................................................................................ 17
Edit a task................................................................................................................................... 19
Remove a task ........................................................................................................................... 20
Activating and deactivating a task.............................................................................................. 20
Print selected task...................................................................................................................... 22
Print all tasks .............................................................................................................................. 22
Lookup functionalities on the task form ..................................................................................... 23
The task lookup message .......................................................................................................... 24
The lookup owner....................................................................................................................... 24
The notification selection............................................................................................................ 24
Projects ........................................................................................................................................... 25
Page 1 of 25
Navigator – User Manual
Introduction
The navigator is an add-on application for RFx to enable the user to view and follow tenders as
they are processed in the system. Tenders, contracts, and amendments can be viewed or selected
from the following different views as set out in the introduction. No amendments or changes can
be made to any of the displayed information from this application.
The navigator is a management tool that enables the user to view and follow tenders without
having to physically log into the RFx module to do so.
All tenders and contracts available within the RFx module are listed in the Navigator module in the
following views:
Life Cycle View
•
•
•
All tenders are listed under their current status (created, issued, closed, pending, awarded,
closed), which in turn are listed under their corresponding transaction type (Contract Tender, Ad
hoc Tender, Redundant Stock Tender, Pre-Tender Enquiry).
All contracts are listed one hierarchical level lower than the tenders/amendments that they are
linked to.
All amendments are listed one hierarchical level lower than the contracts that they are linked to.
Status Grouping View
•
•
•
When loading a tender - All tenders are listed under their current status (created, issued, closed,
pending, awarded, and closed).
When loading a contract – All contracts are listed under their current status (approved, finalized,
terminated, amended, effective).
When loading an amendment – All amendments are listed under their current status (created,
issued, closed, pending, awarded, and closed).
Projects View
•
•
•
All tenders are listed on one lower hierarchical level than the project(s) that they are linked to.
All contracts are listed on one lower hierarchical level than the tenders that they belong to.
All amendments are listed on one lower hierarchical level than the contracts that they are linked
to.
Page 2 of 25
Navigator – User Manual
Templates
All tenders that act as Quotations templates are listed under this heading.
•
•
•
•
•
The tenders could be filtered according to the following available criteria:
Tender type
Tender status
Buyer
Header description
Or they can be searched for according to their tender number or reference.
Login
To log on to Navigator successfully you will need to use the same username and password as you
would for RFx.
As illustrated in the figure below Navigator is accessed via the Intenda Solution Suite (ISS) icon
displayed on your desktop. By selecting this icon you will be allowed access to the Intenda Solution
Suite Dashboard.
The Intenda Solution Suite logon screen will be displayed.
Figure: Log into ISS
To log into the ISS dashboard, simply select the Organisation that you belong to, and complete your
username and password in the relevant field. Once you are satisfied, select the
button. You
will then be redirected to the ISS dashboard.
Page 3 of 25
Navigator – User Manual
Navigator
icon
Figure: ISS Dashboard
To access the Navigator Module, simply select the Navigator icon on the dashboard.
Once you have accessed the RFS system, the RFS main form will be displayed.
Icons on the navigator
Search for an item
Create a view filter
Open another
Navigator window
Show/hide tree
view legend
Figure: Navigator Icons
Page 4 of 25
Navigator – User Manual
The following icons are displayed on the
navigator bar
Create a view filter
Search for an item
Open another navigator window
Show / hide tree view legend
Customize a view filter
The filter facility can separate tenders according to selected tender types, selected tender statuses and
selected buyers. The navigator filter can be customized by the user to suit personal requirements and
flavour. The settings changed are saved to the system database and applied again when logging into the
system with the same login details on any other PC. The settings are therefore not limited per PC.
PLEASE NOTE The header description doesn’t form part of the customized
filter, even when provided and saved.
Page 5 of 25
Navigator – User Manual
Method: Set filter up and apply it;
•
•
•
•
Select the tender type(s), the tender status(es) and the buyer(s) by clicking on the relevant
option boxes.
The filter is done according to the header description and a dropdown box lists the manner
in which the header descriptions are filtered. Select one of the 3 options as displayed in
the image above.
Select the SAVE FILTER SETTINGS button and then to apply the filter settings, select the
APPLY FILTER SETTINGS.
The tree built on the left side, should only display the filtered tenders according to your set-up.
Show Delegates
The tenders / contracts that selected buyers created as well as all the tenders / contracts which
have the specific buyers assigned as delegates to them can be viewed by preference. Upon
selecting the Show Delegates option box, the tenders / contracts with the selected buyers
assigned as delegates will also be displayed in the tenders or contracts list on the left hand side of
the screen in the tree view.
Search for an item
The search facility provides for searches according to the tender number or according to the tender
reference.
•
•
•
Select the manner in which you prefer to search according to the options displayed in the list
box.
Provide the tender number, tender reference or contract number (depending on what you’ve
selected to search according to) in the text box.
Select the search option.
Figure: Search
Show / hide tree view legend
Description of icons for tasks and notes, and colours indicating the closing time range of a tender could
be displayed under the tree structure with the show / tree view legend facility.
Page 6 of 25
Navigator – User Manual
•
Select the
(Show / hide tree view legend) icon.
Figure: Life Cycle View
•
A section describing the manner in which the icons and colours are used is displayed.
Open another navigator window
•
To open another RFx navigator window, select the
(Open another Navigator window) icon.
To view a tender in the tender life cycle;
A tender’s life cycle could be followed via the navigator according to its status, from issue to award.
Figure: Life Cycle View
Page 7 of 25
Navigator – User Manual
•
Select the status of the tender you wish to view.
Figure: Life Cycle View
•
•
Select the tender as listed in the tree.
The details appear on the form next to the tree list.
Figure: Tender details
•
To view the consumers, select the consumers tab.
Figure: Consumers tab
•
•
The consumers are listed.
To view the specific tender’s commodities, select the commodities tab.
Page 8 of 25
Navigator – User Manual
Figure: Commodities Tab
•
•
The commodities with their descriptions are listed.
Select the potential suppliers tab, to view them.
Figure: Potential Suppliers Tab
Navigator: Notes
The user can add any notes relating to a specific tender in the tender lifecycle, the status group view,
project view and templates for Quotations.
To add a note, follow the steps below
•
•
•
Right click on the tender, project or Quotations template.
Select view notes.
A form called Notes is displayed. Right click on the form and select Add Note on the pop-up
menu.
Page 9 of 25
Navigator – User Manual
Figure: Adding a Note
•
Enter a description and the content of the note.
Figure: Notes
•
To attach the note to the tender, Quotations template, etc, select the Add button.
Page 10 of 25
Navigator – User Manual
View a note
•
Right click on the item, to which the note is attached.
Figure: View Notes
•
Select View Notes on the pop-up menu.
Edit a note
Changes can be made when a note has been selected, as all the current content is displayed in readwrite format.
•
Right click on the listed note you wish to edit.
Page 11 of 25
Navigator – User Manual
Figure: Editing a Note
•
•
•
Select Edit Notes on the pop-up menu.
The selected notes content will become active. Make your amendments
Select the Update button, to add the changes made to the system.
Remove a note
Only administrator users can permanently delete notes. For all other users, when Delete is selected the
item should be marked as inactive.
•
Right click on the note you want to delete.
Page 12 of 25
Navigator – User Manual
Figure: Deleting a Note
•
•
Select Delete Note on the pop-up menu.
Select Yes, when asked whether you want to remove the note.
Printing notes
Method: Print selected note
This functionality provides a hard copy of the selected note content.
•
•
Right click on the note you wish to print.
Select Print Selected Note from the pop-up menu.
Page 13 of 25
Navigator – User Manual
Figure: Print Selected Note
•
Select OK on the print dialogue box to start printing.
Method: Print all notes
This option provides a functionality to print all the notes linked to a specified item.
•
•
Right click on the form.
Select Print All Notes from the pop-up menu.
Figure: Print all Notes
Page 14 of 25
Navigator – User Manual
•
Select OK on the print dialogue box to start printing.
Method: Deactivating and activating notes
The administrator can deactivate notes. Other users are then not able to view the note when accessing
the Notes form.
•
Select the note you wish to deactivate.
Figure: Deactivating Notes
•
Select Deactivate Note
•
•
•
•
The status icon is changed to
(Inactive).
Right click the deactivated note.
Select Activate Note.
(Active).
The status icon changes back to
Page 15 of 25
Navigator – User Manual
Attachments
Adding attachments to a note is a facility whereby a file on the user’s file system can be selected and
saved on the database. An attachment could be added to the note form or to a specific note.
Add attachment to a specific note
•
•
Right click on the note you wish to add an attachment.
Select Add Attachment to note on the pop-up menu.
Figure: Add Attachment to Note
•
•
Select a file from the select an attachment dialogue box that opens.
Select the Open option.
Page 16 of 25
Navigator – User Manual
Add an attachment
•
Right click on the note you wish to add an attachment.
Figure: Add an Attachment
•
•
•
Select Add Attachment on the pop-up menu.
Select a file from the select an attachment dialogue box that opens.
Select the Open option.
Navigator: Tasks
A task is a personal or work-related errand you want to track through to completion. The functionality
includes a reminder via email.
Task reminder
•
•
Right click on the tender, Quotations template etc,
Select View Tasks
Page 17 of 25
Navigator – User Manual
Figure: View Tasks
•
Right click on the Task form.
Figure: Task Reminder
•
•
Select Add Task on the pop-up menu.
Provide a description of the task.
Page 18 of 25
Navigator – User Manual
Add reminder
Figure: Task Reminder
•
•
•
•
•
Activate the reminder as displayed above, if you prefer to be notified via email.
Select the start date and the due date.
Select a date and time to be reminded, if the reminder has been activated.
Provide your email address.
Select the Add option.
Edit a task
Tasks listed on the Task form, can be edited.
•
Right click on the task you wish to edit.
Figure: Edit a Task
Page 19 of 25
Navigator – User Manual
•
•
•
Select Edit Task on the pop-up menu.
Make the changes you wish to do.
Select the Update option.
Remove a task
Only administrator users can permanently delete tasks. For all other users when delete is selected the
task must be marked as inactive.
•
Right click on the task you wish to remove.
Figure: Deleting a Task
•
•
Select Delete Task.
Select the Yes option when asked whether you wish to remove the task.
Activating and deactivating a task
The administrator can activate or deactivate a task. Users won’t be able to view those tasks, as it would
seem to have been removed from the task list. When a task is deactivated, the reminder functionality
would also be disabled until the task has been activated.
•
Right click on the listed task you wish to deactivate / activate.
Page 20 of 25
Navigator – User Manual
Figure: Deactivating a Task
•
Select Deactivate Task on the pop-up menu.
•
The deactivated task’s icon should change to
“deactivated”.
Right click on the deactivated task.
•
(Inactive), indicating the status as
Figure: Activate a Task
•
•
Select Activate Task on the pop-up menu.
(Active).
The status icon changes back to
Page 21 of 25
Navigator – User Manual
Printing Tasks
Print selected task
This functionality provides a hard copy of the selected task content.
•
•
Right click on the task you wish to print.
Select Print Selected Note from the pop-up menu.
Figure: Print Selected Task
•
Select OK on the print dialogue box to start printing.
Print all tasks
This option provides a functionality to print all the tasks linked to a specified item.
•
•
Right click on the form.
Select Print All Tasks from the pop-up menu.
Page 22 of 25
Navigator – User Manual
Figure: Print all Tasks
Lookup functionalities on the task form
The lookup functionality consists out of 3 sections;
•
•
•
The lookup message
The lookup owner
The notification selection.
Lookup message
Lookup owner
Notification
selection
Figure: Tasks
Page 23 of 25
Navigator – User Manual
The task lookup message
This lookup facility enables the user to look for a specific task according to the description or subject
displayed in a grid, which could be selected.
•
•
•
•
button as displayed above.
Select the Lookup message ellipse
Select the item you wish to be displayed and edited.
To proceed, click the Select option.
The selected task is displayed in the tasks form.
The lookup owner
The owner lookup lists the name and surname of all the buyers in the database.
•
•
•
•
button as displayed above.
Select the Lookup owner ellipse
Select the owner you wish to be displayed and edited.
To proceed, click the Select option.
The selected task is displayed in the tasks form.
The notification selection
This section displays all the email addresses of buyers listed in the database. You can search for and
add them to the notification list.
•
•
button as displayed above.
Select the Notification selection ellipse
The notification selection form displays as in figure (1).
Figure: Notification Selection
Page 24 of 25
Navigator – User Manual
•
•
•
The names and email addresses of the buyers should be listed on the left hand side.
Select a buyer listed on the left hand side and then select the arrow in the middle of the page to
move the buyer to the notification list on the right hand side of the form.
Click the Select option to add the selected buyer(s) to the notification list.
Projects
To view the projects setup, select the Project View in the tree as displayed below.
Figure: Projects
One can select the main item and the linked attributes are displayed on the panel on the right as
displayed below.
Figure: Projects
Project items lower down in the hierarchy can be accessed in the same manner. The attributes linked to
it are also displayed on the panel on the right.
To view and add tasks, please refer to the section discussing it in this module.
Page 25 of 25