Download TradCom ScannerApp Manual
Transcript
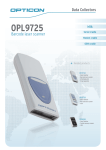
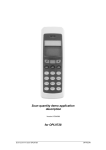
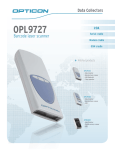
User Manual TradCom ScannerApp 1 Table of content 1 Table of content ......................................................................................................................................................................................2 2 Introduction..............................................................................................................................................................................................3 3 PC software installation ........................................................................................................................................................................4 3.1 Operating system ....................................................................................................................................................................... 4 3.2 Software requirements ............................................................................................................................................................. 4 3.3 PC software installation ............................................................................................................................................................ 4 3.4 OPL9728 cradle installation .................................................................................................................................................... 5 4 TradCom ScannerApp User Manual ..................................................................................................................................................6 4.1 Start-up ......................................................................................................................................................................................... 6 4.2 Menu .............................................................................................................................................................................................. 6 4.3 Settings .......................................................................................................................................................................................... 6 4.4 Process data................................................................................................................................................................................. 7 4.5 History .......................................................................................................................................................................................... 7 4.6 Update OPL9728........................................................................................................................................................................ 7 4.7 Closing .......................................................................................................................................................................................... 7 5 OPN2001 user manual ..........................................................................................................................................................................8 5.1 Scanning barcodes ...................................................................................................................................................................... 8 5.2 Connecting the scanner............................................................................................................................................................ 8 5.3 Logging on to TradCom ........................................................................................................................................................... 8 6 OPL9728 user manual............................................................................................................................................................................9 6.1 First use ........................................................................................................................................................................................ 9 6.2 Scanner main menu.................................................................................................................................................................... 9 6.3 Scan procedures ...................................................................................................................................................................... 10 6.3.1 Basic principles ................................................................................................................................................................... 10 6.3.2 STOCK RCEIPT ................................................................................................................................................................. 11 6.3.3 STOCK ISSUE .................................................................................................................................................................... 11 6.3.4 ORDERING ........................................................................................................................................................................ 11 6.3.5 INVENTORY ...................................................................................................................................................................... 11 6.4 Scan data .................................................................................................................................................................................... 11 6.5 Settings ....................................................................................................................................................................................... 11 6.5.1 SCENARIOS ....................................................................................................................................................................... 12 6.5.2 PARAMETERS .................................................................................................................................................................... 12 6.5.3 PIN......................................................................................................................................................................................... 12 6.5.4 BARCODES ........................................................................................................................................................................ 12 6.5.5 LANGUAGE ....................................................................................................................................................................... 13 6.5.6 SYSTEM INFO .................................................................................................................................................................... 13 6.5.7 CONTRAST ....................................................................................................................................................................... 13 6.5.8 DATE TIME ......................................................................................................................................................................... 14 6.5.9 LOAD UPDATE ................................................................................................................................................................ 14 6.5.10 FACT.DEF. .......................................................................................................................................................................... 15 6.6 Scanner reading ....................................................................................................................................................................... 15 7 Frequently asked questions ............................................................................................................................................................... 16 7.1.1 How to avoid the TradCom ScannerApp from starting up automatically? ........................................................ 16 7.1.2 Scanner is not read ........................................................................................................................................................... 16 7.1.3 How can I select the right COM port manually? ...................................................................................................... 16 7.1.4 Can I read 3D barcodes? ................................................................................................................................................. 16 7.1.5 Error message when loading the OPL9728 update. ................................................................................................. 16 7.1.6 How can I completely remove the TradCom ScannerApp from my PC? .......................................................... 17 7.1.7 I have lost my PIN code. What’s next? ........................................................................................................................ 17 2 / 17 2 Introduction The TradCom ScannerApp is the application par excellence for easy ordering or stock management on TradCom. This software ensures efficiency gains in the ordering process and when managing your own stocks. The application consists of software to run on your PC in combination with two Opticon scanners, i.e. the small OPN2001 and the smart OPL9728. Below you will find a matrix to select the scanner that meets your functional requirements. floor stock management OPN2001 OPL9728 stock management by several people highly frequent use ordering in – out – inventory registration The OPN2001 is the scanner you need to order items from a catalogue or to replenish floor stocks. You can also use the OPL9728 for ordering, but it is especially useful for online stock management (in – out – inventories). The only requirements to use this application are: 1. You need a PC with an internet connection. 2. You have to be registered on TradCom (www.tradcom.com) and have a valid user name/password combination. Then, all you have to do is install the PC software to get started. This manual describes the installation and configuration of the PC software, as well as the operational use of both scanners. Do not hesitate to contact us in case of problems during the installation or when using the TradCom ScannerApp. TradCom Helpdesk phone : +32 (0)14 336 236 fax : +32 (0)14 336 235 [email protected] 3 / 17 3 PC software installation The TradCom ScannerApp software can be downloaded from http://www.tradcom.com, provided a valid serial number is entered. Please first check the requirements under paragraph 3.1 and paragraph 3.2 before installing the TradCom ScannerApp. IMPORTANT : Please contact your network administrator if you are unable to complete the installation. You may not have the required rights to install the software yourself. Operating system1 3.1 The TradCom ScannerApp can only be used on Windows-based operating systems (32-bit). The following versions of the operating system will do: Windows XP with service pack 2 or higher Windows Vista Software requirements2 3.2 Two software components are required before the TradCom ScannerApp can be installed. Both components can be downloaded in advance from http://www.tradcom.com. .NET Framework This component may already be installed on your PC. The minimum version is 2.0. IMPORTANT : If Windows XP with service pack 2 is installed on your PC, Windows Installer 3.1 should be installed before .NET Framework. Visual Basic Powerpacks 1.2 The component requires version 1.2. A higher Powerpacks version (e.g. 3.0) is not enough. 3.3 PC software installation Below you will find concise instructions on how to install the TradCom ScannerApp. Please note: Administration rights are needed to perform the installation. [Welcome] Press NEXT to start the installation. The TradCom ScannerApp does not take up a lot of space on the PC, only a few megabytes. [Install drivers] Select the component if you do not wish to install all, press INSTALL. The installation progress will be displayed. For both drivers a new window will be opened, for each press OK. [Install NetO32] Press NEXT to execute the installation. Accept the terms. Select ALL USERS if the application has to be installed for every PC user. Select CURRENT USER ONLY to install the application exclusively for the user who logged on. Press NEXT to go to the next step. Select the component if you do not wish to install all, press NEXT. Select the folder where NETO32 should be installed, press NEXT. Press INSTALL Press YES if a shortcut on the desktop should be created. 1 If you want to know which Windows version is installed, click START. Then right-click on MY COMPUTER and select PROPERTIES in the option menu. 2 Go to START > CONTROL PANEL > ADD/REMOVE PROGRAMS to check which programs and which versions are installed. 4 / 17 [Installation Complete] Press CLOSE to complete the installation. The PC does not have to be restarted. After the installation the following checks need to be carried out, depending on the operating system: [Control rights] For all WINDOWS screens Open THIS COMPUTER or WINDOWS EXPLORER and go to the folder selected during the installation step SELECT INSTALLATION FOLDER. Right click on the folder OPTICON and select PROPERTIES. 1. Tab General: Verify that READ ONLY is unchecked 2. Tab Security: Verify that the end user of the TradcomScanner Application has the following permissions: [Controle compatibility] Only by WINDOWS 7 Open THIS COMPUTER or WINDOWS EXPLORER and go to the folder selected during the installation step SELECT INSTALLATION FOLDER. Open the folder OPTICON. Right click on the file TRADCOMOPTICOSANNERS.EXE and select PROPERTIES. Go to the tab COMPATIBILITY and verify if the Privilege Level is unchecked. If not, uncheck this and press CHANGE SETTINGS FOR ALL USERS. 3.4 OPL9728 cradle installation The first time the USB cradle for the OPL9728 is connected, Windows will automatically open the new hardware installation screen. In case the hardware wizard opens, please follow the below steps. [New Hardware Wizard] Select NO, NOT NOW, because the search via Windows Update will not give any results. [USB Serial Controller] Select I WANT TO CHOOSE (ADVANCED). The files required for this new hardware were installed on the PC during the installation of the TradCom ScannerApp. [Search and installation options] Only select ALSO SEARCH ON THIS LOCATION. The BROWSE button allows you to select the driver folder which was created during the installation. They will standard be located on: C:\Program Files\TradCom ScannerApp\Opticon\Driver. [Continue Installation] Press CONTINUE ANYWAY to execute the installation. 5 / 17 4 4.1 TradCom ScannerApp User Manual Start-up After installation the application starts up automatically each time you login to your PC. 3 On the other hand, the application can also be started up manually via START > PROGRAMS > TRADCOM SCANNERAPP. The active application is only visible as an icon in the system bar (next to the clock). 4.2 Menu When you right-click on the icon in the system bar the TradCom ScannerApp menu will be displayed. [full menu screenshot] Process data reading the scanner and uploading to the TradCom website Settings application settings History option to resend old data Information version information and helpdesk contact data Update OPL9728 loading new scan procedures on OPL9728 scanner Closing close the application completely 4.3 Settings Language The language to be used for the PC application. Communication manual Data are read and uploaded after double-clicking the icon in the system bar or when the PROCESS DATA option is selected. 3 This can be deactivated if required. See paragraph 7.1.1 in this respect. 6 / 17 automatic When the scanner is connected to the PC the processing of data will be started up immediately. Scanners Defines which types of scanners the TradCom ScannerApp has to work with. A COM port is assigned to every scanner. It can be detected automatically or selected manually (cf. paragraph 7.1.3). Automatic login A user name/password combination can be configured. It makes sure that the user is automatically logged on when the data are uploaded to the TradCom website. Factory settings When pressing this button the settings are reset to the initial configuration as immediately after the installation. Language: English Communication: Automatic Scanners: [none] Automatic login: [empty] Cancel No changes are applied. The screen will be closed. OK All settings will be saved. The screen will be closed. 4.4 Process data When this option is selected, it will be verified whether a scanner with scanner data is connected. If that is the case, the data will be read and saved to the PC. The scanner will then be emptied. If data are read, a browser window opens automatically which will lead to the TradCom website. If no user name/password is entered in the settings, the user will have to enter those on TradCom. 4.5 History All the scan data which have been read are saved to the PC. Via the HISTORY option the user may choose to resend old data. This may happen when the initial sending failed due to a faulty internet connection. [history screenshot] By pressing EMPTY HISTORY all saved scan data will be removed. 4.6 Update OPL9728 This menu option allows the user to upload an update of the scan procedures on the OPL9728. See paragraph 6.5.9 for more information. 4.7 Closing If the entire application has to be closed, the user will select CLOSE. 7 / 17 5 OPN2001 user manual Using the OPN2001 scanner is easy as one two three. scan the barcodes of the items to be ordered connect the scanner to the PC logon to TradCom in the browser window which opens automatically [drawing TC + PC + USB + scanner] This scanner is also very suitable to place orders on the basis of barcodes, because the user does not have to search for the right items on the basis of product number or description. The lines on the order request will certainly correspond one on one to what is being scanned. The user will receive an online message if the items do no longer exist or are end of series. 5.1 Scanning barcodes The small OPN2001 supports the most common barcode types. If an exceptional barcode type is to be used, please consult TradCom to see if this can be handled. 5.2 Connecting the scanner Connecting and disconnecting the scanner should preferably be done by means of the mini USB port on the scanner itself. Connecting and disconnecting the USB cable to the PC may lead, in certain cases, to the rearrangement of the COM port numbers. In that case the settings have to be reset correctly (see paragraph 4.3). If the TradCom ScannerApp is configured to read the scanner automatically, a browser window will open immediately upon connection to send the scan data to TradCom (see paragraph 6.6). If it is configured to start the reading manually, double-click on the TradCom ScannerApp icon in the system bar. If the scanner reading goes well, all scan data will be removed from the scanner. The scanner will immediately be ready for the next scan action. 5.3 Logging on to TradCom You are only required to log on to TradCom if no user name/password combination has been entered in the settings. Upon logging on one or more order requests will be created depending on whether items of one or several TradCom suppliers were scanned. Preparing the order requests may take a few seconds, because the prices have to be retrieved from the supplier’s ERP system. 8 / 17 6 OPL9728 user manual The OPL9728 has a display and keyboard and is programmed to go over the specific procedures for the registration of stock receipts, stock output and stock inventory. In addition, the scanner can also be used for simple additional orders. [drawing TC + PC + USB + cradle/scanner] The multilingual scan procedures installed on the scanner will assist the user when performing certain actions. The configuration of the scan procedures will eventually define which steps have to be completed. 6.1 First use The first time the cradle/scanner is connected to the PC, the PC will ask for the installation of additional drivers for the cradle. See paragraph 3.4 for the installation hereof. 6.2 Scanner main menu The main menu allows the user to start the required scan procedure, to browse the scan data or change the settings. Which scan procedures are shown in the main menu depends on the settings (see paragraph 6.5.1). ▲ MENU ▼ 1 STOCK RCEIPT registration of goods in the stock 2 STOCK ISSUE registration of goods out of the stock 3 ORDERING list of items to be ordered on TradCom 4 INVENTORY inventory of the current stock 5 SCAN DATA browse the available scan data (is not shown when no scan data are available) 6 SETTINGS configuration of the scan procedures 9 / 17 6.3 Scan procedures 6.3.1 Basic principles keyboard The TR key is used to scan and confirm the choice in the scan procedures. This key will be referred to as the TRIGGER key in the manual. The ENT key is also called the ENTER key and will be used to confirm quantities or save choices in the configuration of the scan procedures. The BS or BACKSPACE key is used to remove manual input character per character. The CLR or CLEAR key undoes changes or reverts the scan procedure to a previous step. The SHIFT key is intended for the manual input of letters or punctuation marks. key blocking By simultaneously pressing the [SHIFT] and [.* …] key the keyboard will be blocked. The first line of the display will change into a series of asterisks. ************* 1 STOCK RCEIPT 2 STOCK ISSUE 3 ORDERING The key blocking can be released by pressing the same key combination [SHIFT] and [.* …]. menu navigation Can take place in two ways: 1. by using the [UP] and [DWN] keys 2. by pressing the corresponding serial number of the menu option (also possible for letters!) active options When the scan procedures are configured, active options are always indicated by an asterisk between the serial number of the menu option and the name. scanning When items are scanned, the user can always enter a quantity. If the user wants to order e.g. 100 pieces of a product, the item has to be scanned only once and 100 has to be entered as the quantity. manual input Every scan can be replaced by a manual input of the corresponding code. This makes it possible to register the scan even though the barcode is illegible. Numbers are entered by pressing the required keys. 10 / 17 Letters are entered by pressing [SHIFT] and the required key once or several times. Lower case is automatically converted into upper case. double scanning If a certain item is scanned for the second time during the same scanning procedure, the scanner will emit a beep. The display will show the data that have already been saved for that item. The user can then change the quantity, if required. cancel item The only way to delete an item scan from a certain scan procedure is by entering 0 as the quantity. 6.3.2 STOCK RCEIPT This scan procedure is followed when goods are received which have to be added to the stock. [figure with flow for registration of receipt] In the configuration you can specify whether a staff code has to be scanned. This staff code corresponds to a TradCom user and will be linked to the receipts in question. This will allow you to verify later, by means of the history of stock movements, who performed which actions. 6.3.3 STOCK ISSUE This is the scan procedure to take items out of stock. [figure with flow for out registration] Just like for stock receipts settings may specify that the staff code must be scanned. This staff code corresponds to a TradCom user, to make it possible to verify who took how many items from the stock at a later stage. Scanning the cost centre code can also be made compulsory. This makes it possible to link the items consumed to the cost centre, e.g. a machine or location. The cost centre codes are created in TradCom, where barcodes can be generated. 6.3.4 ORDERING This scan procedure is followed to replenish floor stocks. If the supplier manages the floor stock, a customer code may be entered to this end. This is referred to as VMI or Vendor Managed Inventory. [figure with flow for ordering] In addition, you may choose to make it compulsory to scan a delivery address code. This delivery address code corresponds to a stock location – a warehouse – and may not be confused with a stock position (e.g. rack 38, shelf C). The list with delivery address codes is managed by the customer in TradCom. The items scanned for one stock location, are grouped on TradCom into one order for that delivery address. 6.3.5 INVENTORY Stock quantities which are physically available will be compared with the supposed quantities in the stock management system at regular times. [figure with flow for inventory] If the customer manages several stock locations (warehouses), a delivery address code needs to be scanned. This will make it possible to scan the quantities of all stock locations in one go. 6.4 Scan data All available scan data can be browsed. If data were scanned with a staff code, a delivery address code or a customer code, these can only be viewed if the corresponding code is scanned again. 6.5 Settings Settings can only be changed after entering a PIN. If the PIN has been forgotten, a PIN reset may take place by means of the PUK code, see paragraph 7.1.7. ▲ SETTINGS ▼ 11 / 17 6.5.1 1 SCENARIOS select the allowed scan procedure 2 PARAMETERS define the required scan parameters 3 PIN change the PIN 4 BARCODES the barcode types that need to be recognised 5 LANGUAGE select the language for the scan procedure 6 SYSTEM INFO view software and hardware details 7 CONTRAST adjust the screen contrast 8 DATE TIME set date and time 9 LOAD UPDATE load a new version of the scan procedures A FACT.DEF. restore factory settings SCENARIOS In some situations certain scan procedures need to be blocked. SCENARIOS ▼ 1*STOCK RCEIPT 2*STOCK ISSUE 3 ORDERING 4 INVENTORY A typical example is the daily stock management with receipts and outgoings. In that case the scan procedure for ordering and inventory could be deactivated to restrict any risks of mistakes. When, exceptionally, an order has to be placed or for the half-yearly inventory, the required scan procedure can be activated. 6.5.2 PARAMETERS Allows you to configure which additional barcodes have to be scanned to go through a scan procedure. PARAMETERS ▼ 1*IDENTFCATION 2 COST CENTRE 3*LOCATION 6.5.3 PIN This is the only place where the PIN can be changed. PIN _ _ _ _ First, the current PIN needs to be confirmed, then the new PIN has to be entered twice. 6.5.4 BARCODES The OPL9728 is capable of scanning different barcode types, but the time the scanner needs to recognise a barcode increases as more barcode types are activated. Please find below an overview of the barcode types which can be read by the OPL9728. BARCODES 1 Codabar 12 / 17 2*Code 39 3*Code 93 4*Code 128 5*EAN-8 6*EAN-13 7*EAN-128 8*UPC 9 Ind. 2of5 A Interl. 2of5 B IATA C Ital. Pharma D MSI/Plessey E UK/Plessey F Telepen G TriOptic 6.5.5 LANGUAGE Allows you to change the language of the scan procedure. This does not affect the language choice in TradCom ScannerApp on the PC. LANGUAGE 1 NEDERLANDS 2*ENGLISH 3 DEUTSCH 4 FRANCAIS When the language choice is changed, the scan procedure will be loaded again with the new texts. This may take a few seconds. No scan data will be lost when the language is changed. 6.5.6 SYSTEM INFO Displays information about the software (scan procedures) and hardware (scanner). SOFTWARE Versie 1.00 major release version of the scan procedures Build minor version 0001 Hardware HARDWARE OS: LBDV0309 Mem: 455144 scanner operating system version free memory in bytes Software 6.5.7 CONTRAST The readability of the screen can be adjusted by changing the contrast. CONTRAST 13 / 17 Value 16 more less The setting will be saved when pressing ENT. 6.5.8 DATE TIME The scan data do not only contain the scanned barcode, but also the time when it was scanned. Therefore, it is important to make sure date and time are set correctly on the scanner. DATE/TIME 06/02/2009 15:13:45 change 6.5.9 LOAD UPDATE The end user can load the updates of the scan procedures. The steps to be undertaken are described below. IMPORTANT: The order in which these steps are executed is essential. If not, loading will fail which may lead to faulty scan procedures. 1. Put the new scan procedure (file ending on extension .s32) in the DATA folder under the folder where the TradCom ScannerApp is installed. The default location is C:\Program Files\TradCom ScannerApp\Opticon\. 2. Prepare the scanner by going to the settings and set the scanner on 9 LOAD UPDATE. Do not yet confirm this choice! 3. Click right on the TradCom ScannerApp icon in the system bar and select UPDATE OPL9728. 4. Now press the scanner’s TRIGGER key. The following will be displayed on the scanner. Place the scanner in the cradle. COMMUNICATION Rcv basics 5. The new scan procedures will be copied to the scanner. When the copying is done, the screen will look as follows. LOAD UPDATE New version. Press key for install. 6. Now take the scanner out of the cradle and press on a random key to install the new scan procedures. The installation progress will be displayed shortly after that. 23% ready 7. Finally, the new version of the scan procedures is shown. After pressing a random key the display will return to the main menu. TradCom ScannerApp 14 / 17 Version 1.04 12-08-2009 6.5.10 FACT.DEF. With this choice – and after confirmation – a large number of settings will be reset to the default value. scan procedures All scan procedures are on as default. parameters Only identification and cost centre will be reactivated. barcodes Only these barcode types will be scanned after resetting the factory settings: code 39 code 93 code 128 EAN-8 EAN-13 EAN-128 UPC language The standard language is English. contrast The default value for the contrast is 8. 6.6 Scanner reading To read the scanner it should be placed in the cradle with the scan head pointing down and the display to the front. If the TradCom ScannerApp is configured to read the scanner automatically, a browser window will open immediately upon placing the scanner to send the scan data to TradCom. If it is configured to start the reading manually, double-click the TradCom ScannerApp icon in the system bar. If the scanner reading goes well, all scan data will be removed from the scanner. 15 / 17 7 Frequently asked questions 7.1.1 How to avoid the TradCom ScannerApp from starting up automatically? Can be simply adjusted by removing the TradCom ScannerApp from the Startup folder. To do so click on START > PROGRAMS > STARTUP and then right-click on TRADCOM SCANNERAPP. Then select DELETE in the option menu that appears. 7.1.2 Scanner is not read Check the settings of the TradCom ScannerApp. If it is on MANUAL for the communication, you have to double-click on the icon in the system bar before the scanner can be read. If that does not help, the scanner may have been connected to another port than the port indicated under settings. Click on the AUTODETECT button next to the right scanner type or configure the COM port manually (see paragraph 7.1.3). 7.1.3 How can I select the right COM port manually? You can do so by looking in the system administration of your PC to see which ports the scanner is connected to. To do so click on START and right-click on MY COMPUTER. Then select MANAGE in the option list. The click the structure under SYSTEM TOOLS > DEVICE MANAGEMENT > PORTS. Both scanners will be mentioned under the ports as follows: OPTICON USB CODE READER (COMX) for the OPN2001 USB SERIAL PORT (COMX) for the OPL9728 7.1.4 Can I read 3D barcodes? No, you cannot read 3D barcodes with the OPL9728 and OPN2001. 7.1.5 Error message when loading the OPL9728 update. If the error message below is displayed, the file with the new scan procedures was not saved to the right place. 16 / 17 The file with extension .s32 should be added to the DATA folder under the installation folder of the TradCom ScannerApp. The default installation folder is C:\Program Files\TradCom ScannerApp\Opticon, unless another folder was selected during the installation. 7.1.6 How can I completely remove the TradCom ScannerApp from my PC? For a normal uninstall procedure of the TradCom ScannerApp the drivers for the OPN2001 and OPL9728 remain on your PC. The only way to remove them is in the Windows configuration screen. To do so click on START > CONTROL PANEL > ADD/REMOVE PROGRAMS. The following items have to be additionally removed from the list of installed programs: NetO32 2.04 Windows Driver Package – OPTO ELECTRONICS CO.,LTD (optousb) Ports 7.1.7 I have lost my PIN code. What’s next? The only way to reset the PIN code is to enter a faulty PIN once. Then choose PUK on the error screen. PIN Wrong PIN! Retry PUK There is a PUK code mentioned within the shipping document of the OPL9728. The code consists of 14 alphanumeric characters. Enter this code and confirm with [ENT]. PUK _ Press ENT This enables for the PIN code to be changed. 17 / 17


