1
Installation of mPulse
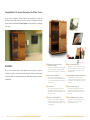
Pre-Installation Information
aSPIRE, bELIEVE, cONQUER, dISCOVER, eMPOWER
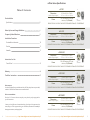
Parts List
1. Be sure a certified electrician installs a dedicated outlet for your sauna.
Quantity
Part
2. Remember your sauna should be assembled by 2 or more people.
1
Front panel
3. Do not place plumbing or plumbing fixtures in the sauna.
1
Back panel
1
Left side panel
1
Right side panel
1
Roof panel
1
Floor panel (base)
1
Glass door w/side glass panel (2 doors for dISCOVER)
1
Bench panel (2 for dISCOVER, 3 for eMPOWER)
1
Door handle w/2 screws & 1 hex tool (2 for dISCOVER)
5
C clips
4. Keep all liquids away from the heating panels and electronics.
5. Install sauna on a level surface.
6. Install sauna in an area that is dry and protected from the weather.
7. Keep flammable objects and corrosive chemicals away from the sauna.
8. Installation of the sauna in an area below room temperature can
increase warm up time
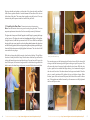
Unpack Your Sauna & Write Down Serial Number
Refer to the parts list as you unpack your sauna to confirm all pieces arrived
undamaged in transit. We make every effort to ensure that your sauna arrives
safely. If damaged, please call Sunlighten Customer Care within 2 business
days at 877.292.0020 Option 7 or your local Sunlighten representative.
Photos of any damaged panels and the shipping boxes are required to
process a replacement request. Please do not discard loose parts, fabric, or
original boxes and packaging before contacting us.
Unpack your sauna in a large area free of obstructions. Lay boxes flat on the
ground and undo any bands or tape. Once unpacking is complete, proceed
to installation instructions.
Back Panel
(The following pictures are for your reference. The dISCOVER and eMPOWER
models have additional steps. Note: dISCOVER has 2 glass doors. Please review
before assembling your sauna.)
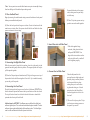
1. Installing the Feet (optional)
Install screw through wooden feet into designated holes on the bottom of
the floor panel.
1A. Placing the Floor Panel
Place floor panel on a smooth flat surface. Floor heater indicates front side
of sauna base. Before proceeding, double check that the base location is in
its final position. Make sure the base is level to avoid any parts becoming
misaligned. Leave enough room around your sauna to plug in the power
cord and for any maintenance once it is assembled.
Warning!
Left Panel
Right Panel
Heater grate must be installed prior to
stepping on the floor.
Front Panel
Floor Panel (base)
10
For the most recent manual go to http://www.sunlighten.com/manuals/mpulsemanual.pdf
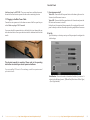
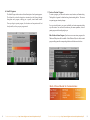
*Make a note of the serial number
for keypad setup and future use
For the most recent manual go to http://www.sunlighten.com/manuals/mpulsemanual.pdf
11