1
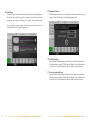
*Note - You may want to remove the fabric heater covers prior to assembly to keep
them from falling out of the walls as they are being moved
Pay careful attention to the power
cords, making sure they are safely
out of the way.
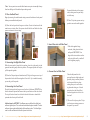
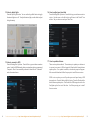
2. Place the Back Panel
Begin by removing the small wooden wiring covers at the bottom of each panel
before you assemble the wall panels.
(A) Place the back panel into the groove in base. Center its location with the
raised area on interior floor. One person should hold the wall while the other
person continues to the next step.
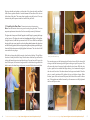
(D) Place C clips into grooves on top
panels to secure the walls together.
D
A
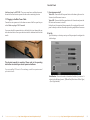
5. Insert Glass into Left Side Panel
With rubber gasket facing
outwards, slide glass into slot in
wall panel. IMPORTANT - the
larger of the two notches must be
at the top of the wall, or walls will
not fit together properly.
B
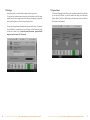
3. Connecting the Right Side Panel
While the rear panel is being held in position, place the right panel into the
grooved base and gently raise into position. The magnet system will help to
pull the panels together.
(B) Place the C shaped piece of stainless steel (C clip) into the groove on top of
the panels to further hold them together. Once the C clip is installed correctly,
you can let go of the panels.
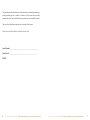
4. Connecting the Front Panel
Place the front panel into the groove on the front of the base. DO NOT lift by
the thin horizontal pieces that become the top and bottom of the door frame.
The top of the door frame has a hole that should slide onto a dowel which
protrudes from the top of the left wall.
Additional steps for eMPOWER - The eMpower uses a small block to hold the front
wall accent glass in place. This must be removed before the glass is installed. The front
wall accent glass can be installed after the all the walls are in place. The left wall glass
must be in the wall before the left wall is placed on the base.
12
For the most recent manual go to http://www.sunlighten.com/manuals/mpulsemanual.pdf
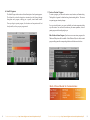
6. Connect the Left Side Panel
Place the left panel into the
grooved base at a slight angle and
gradually bring to vertical position
until magnets click into place making sure you do not hold on
to glass when doing so. A dowel
protrudes from the left wall that
must be slipped into a hole in the
front wall.
(F) Once wall is in place, place C clips
into the two remaining grooves on
the panels’ top corners.
For the most recent manual go to http://www.sunlighten.com/manuals/mpulsemanual.pdf
13