1
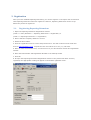
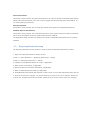
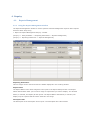
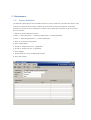
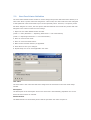
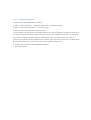
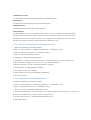
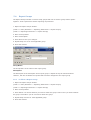
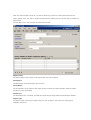
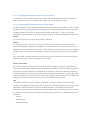
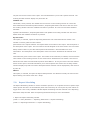
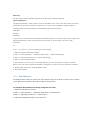
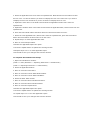
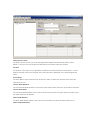
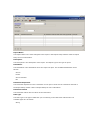
Reporting Extensions User Manual
Introduction
Welcome to Parity Software’s Reporting Extensions!
In this manual you will find instructions and guidelines on how to register, setup and use
Reporting Extensions. It will include screen dumps of each related screens as well as instructions
on the process of completing each window.
Symbols and Conventions
This manual was written using U.S. English. Please consult the glossary in this manual for
definitions of unfamiliar terms.
The following symbols are used in the manual to make certain types of information stand out:
This symbol indicates helpful hints, suggestions or shortcuts
This is a warning symbol. Extra care should be taken when
performing processes where this symbol is displayed.
The following convention is used in this manual to refer to navigation and other information:
•
File >> Save
This symbol (>>) indicates the path or sequence of steps to follow, in order to complete a
particular process. This example directs you to go to the File menu and choose Save.
Copyright
Copyright Manual copyright © 2010 Parity Software. All rights reserved.
Your right to copy this documentation is limited by copyright law and the terms of the software
license agreement. As the software licensee, you may make a reasonable number of copies or
printouts for your own use. Making unauthorized copies, adaptations, compilations, or derivative
works for commercial distribution is prohibited and constitutes a punishable violation of the law.
Warranty:
Parity Software disclaims any warranty regarding the sample code contained in this
documentation, including the warranties of merchantability and fitness for a particular purpose.
Limitation of liability:
The content of this manual is furnished for informational use only, is subject to change without
notice, and should not be construed as a commitment by Parity Software. Parity Software
assumes no responsibility of liability for any errors or inaccuracies that may appear in this manual.
Neither Parity Software nor anyone else who is involved in the creation, production or delivery of
this documentation shall be liable for any indirect, incidental, special, exemplary or consequential
damages, including but not limited to any loss of anticipated profit or benefits, resulting from the
use of this documentation or sample code.
License Agreement
Parity Software (PTY) LTD Software License Agreement
Carefully read all the terms and conditions of this Agreement prior to installing software. Do not
register and activate this software until you have read this entire Agreement. Installing this
software indicates your acceptance of these terms and conditions.
If you do not agree to these terms and conditions, then return the software and other components
of the software package of this product to the place of purchase and your money will be refunded.
If you downloaded this software in its demonstration form and you do not agree to the terms of
the license, you may retain the software only in its demonstration form solely for the purpose of
passing on the demonstration software to another prospective buyer.
No refunds will be given for products downloaded off of the Internet that have been registered and
activated.
Use of this product is covered by a license agreement provided by Parity Software, with the
software product. If you have any questions, please call Parity Software on (011) 728 2999.
Publication Date: 2010
1. LICENSE:
You are granted a personal, nontransferable, and nonexclusive, license to use the enclosed
software, under the terms stated in this Agreement. Title, copyright and ownership of the software
and any and all related documentation remains with Parity Software (Pty) Ltd (Parity Software).
This software and related programs may be used only on a single site licensed for use of Microsoft
Business Solutions-Great Plains® Standard or Professional Edition, for the number of concurrent
users as provided for in the original Microsoft Business Solutions-Great Plains® Software
registration and purchase. Registration keys can be obtained directly from Parity Software. You
may not distribute copies of the registered and activated software or any of the associated
documentation to others. The demonstration version of the software may be distributed freely.
You may not modify, reverse engineer, de-compile, disassemble or translate the software or
related documentation without the prior written consent of Parity Software (Pty) Ltd.
2. BACKUP:
You may make backup copies of this software solely for your own use. You must reproduce and
include the copyright notice on the backup copies. If all or any portion of this software is included
in other software packages, then the copyright notice must appear on these other materials.
3. TRANSFER:
You may not transfer this software to any other party. There are no provisions whatsoever for any
other transfer, operation, or use of the software by any other party whatsoever except for the
original buyer of the product that has been registered with the Parity Software at the time of
original purchase and software activation.
4. LIMITED WARRANTY: Parity Software warrants for a period of thirty days (30 days) from the
date of receipt that the software covered by this agreement will perform substantially in
accordance with the accompanying written documentation. You assume the entire risk as to the
results and performance of the software. This warranty gives you specific legal rights and you may
also have other rights that vary from country to county. Parity Software makes no claim in regard
to the merchantability or suitability for any specific purpose of this or any other software product.
5. ACKNOWLEDGMENT: By registering, activating, and using this product you acknowledge that
you have read this agreement, understand it, and agree to be bound by its terms and conditions.
You also agree that this agreement is the complete and exclusive statement of agreement
between the parties and supersedes all proposals or prior agreements, verbal or written, and any
other communications between the parties relating to the subject matter of this agreement
6. REMEDIES:
Parity Software's entire liability and your exclusive remedy shall be at the option of Parity
Software, either (a) return of price paid or (b) repair or replacement of the software that does not
meet the limited warranty and is returned to Parity Software. If you have need of service or help
regarding this software, you should contact the dealer through which the software was originally
purchased. There is no obligation to render assistance to you if you are not the owner under which
the software is registered, or if the registered user has not purchased a recognized support plan
from the vendor of this product. This Agreement will be governed by the laws of the Country of
South Africa.
Contents
1.
Installation ............................................................................................................ 7
1.2.
Installation Package ................................................................................................ 7
1.3.
Minimum Requirements ........................................................................................... 7
1.4.
Installation Process ................................................................................................. 7
2.
Registration ........................................................................................................... 9
2.1.
Registering Reporting Extensions .............................................................................. 9
3.
Setup .................................................................................................................. 10
3.1.
Application Setup .................................................................................................. 10
3.2.
Reporting Extensions Setup ..................................................................................... 11
4.
Enquiry ................................................................................................................ 14
4.1.
Reports Management ............................................................................................. 14
5.
Maintenance ......................................................................................................... 15
5.1.
Printer Definition ................................................................................................... 15
5.2.
User Class Printer Definition .................................................................................... 17
5.3.
User Printer Definition ............................................................................................ 18
5.4.
Recipient Setup ..................................................................................................... 20
5.5.
Distribution Lists ................................................................................................... 22
5.6.
Report Groups ...................................................................................................... 24
5.7.
Report Setup ........................................................................................................ 25
5.8.
Report Scheduling ................................................................................................. 35
5.9.
Field Browser ........................................................................................................ 38
6.
REPORTS ............................................................................................................. 43
6.1.
Report Launcher .................................................................................................... 43
6.2.
Reports Palette ..................................................................................................... 45
1. Installation
1.2.
Installation Package
Reporting Extensions may be obtained from the Internet. A number of files can be downloaded
from our Internet site www.parity.co.za. These files are regularly updated on our web site
together with any updates.
These files include:
the chunk file
the manual and supporting documents
These files are usually available as a zipped file. Take the zip file and unzip into its own directory.
1.3.
Minimum Requirements
In order to gain access to Reporting Extensions, the chunk file needs to be loaded. Once the
Reporting Extensions chunk file has been successfully loaded, an installation wizard will appear
once you have logged into Microsoft Business Solutions-Great Plains™. The Installation Wizard will
create the Reporting Extensions tables, grant access to these tables and create the Reporting
Extensions Palettes in the chosen destination.
When the Reporting Extensions Installation Wizard is running, you will have the option of selecting
the destination for your Reporting Extensions palettes.
Please note that the path chosen will be determined by the destination selected for your Reporting
Extensions palettes. The palettes can be created on either the toolbar or on the Parity Software
palettes.
The palettes can be removed from their current destination and recreated by using the Reporting
Extensions Application Setup window.
1.4.
Installation Process
1.4.1. Installing the Chunk File
In order to gain access to Reporting Extensions, the chunk file needs to be loaded. The procedure
for loading the new chunk file depends on whether this is a first time installation or if you are
upgrading to a newer version of Reporting Extensions. If you are upgrading to a newer version
and changes have been made to the Table Structures, the Reporting Extensions Upgrade
procedure needs to be followed.
1. Copy the Reporting Extensions chunk file.
2. Open the Microsoft Dynamis G P folder.
3. Paste the copied Reporting Extensions chunk file in to the Microsoft Dynamis G P folder Right
click on the chunk file and select Properties from the list. Unmark the Read Only box. Click Apply
and then
click OK.
4. Start Microsoft Dynamis G P folder
5. Click Yes when asked if you wish to include new code in your Dynamics.set file.
6. Log into Microsoft Dynamis G P folder as ‘sa’.
7. The Reporting Extensions Step 1 window opens.
8. Press Next to continue with the Reporting Extensions installation. Press Cancel to cancel the
Reporting Extensions installation. If Next is selected, the Reporting Extensions Step 2 window
opens.
9. Select the components that you wish to install and where you wish to create the Palettes for
Reporting Extensions. Press Finish to complete the installation process. Press Cancel to cancel the
installation
2. Registration
Once you have installed Reporting Extensions, you need to register it. No reports can be launched
until Reporting Extensions has been registered. However, Reporting Extensions can be set up
before the product is registered.
2.1.
Registering Reporting Extensions
1. Open the Reporting Extensions Registration window.
(Cards >> Parity Software >> Reporting Extensions>> Registration) or
(Cards >> Reporting Extensions >> Registration)
2. Ensure that the Company details are correct.
3. Select the Print button.
4. Print the registration form to screen and press Send To. This will create an email. Email this
form to [email protected]. Or print the form out and fax it to +27 (11) 728 1001.
5. Once we have received this form, we will return it to you with the disk number and registration
number.
6. Enter the Disk Number and Registration Number in the fields provided.
7. Click OK.
8. Re-open the Reporting Extensions Registration window. If the product has been correctly
registered, the appropriate wording will appear in the bottom righthand corner.
3. Setup
3.1.
Application Setup
The Application Setup window is used to perform Reporting Extensions application related tasks.
This window is usually used
1. Open the Application Setup window.
(Cards >> Parity Software >> Reporting Extensions>> Application Setup)
(Cards >> Reporting Extensions >> Application Setup)
2. Click Recreate Tables, if applicable.
3. Click Grant Permissions, if applicable.
4. Click Recreate Palettes, if applicable.
5. If Recreate Palettes was chosen in step 4, select the destination for the palettes from the
dropdown menu.
6. Click Clear Toolbar, if applicable.
7. If Clear Toolbar was chosen in step 6, mark whether to Remove Parity Palettes, if applicable.
8. Click Recreate Defaults, if applicable.
9. Click Validate Reports Permissions, if applicable.
10.Click OK to save your changes and close the window. when installing or upgrading Reporting
Extensions.
The window can be used for tasks such as the following:
Recreate Tables
This button, when pressed, will re-create the Reporting Extensions tables. The user must be
logged into Microsoft Dynamics Great Plains™ as ‘sa’ when recreating the tables.
Grant Permissions
This button, when pressed, will grant permissions for all users to access the Reporting Extensions
tables and stored procedures. The user must be logged into Microsoft Dynamics Great Plains as
‘sa’ when granting permissions.
Recreate Defaults
This button, when pressed, will re-create the default setup options for Reporting Extensions.
Validate Reports Permissions
This button, when pressed, will create permissions for those reports that do not have permissions
and remove permissions for those reports that have been deleted.
The Application Setup window also displays the version of Reporting Extensions that is currently
installed.
3.2.
Reporting Extensions Setup
The Reporting Extensions Setup window is used to setup the Reporting Extensions module.
1. Open the Reporting Extensions Setup window.
(Cards >> Parity Software >> Reporting Extensions>> Setup)
(Cards >> Reporting Extensions >> Setup)
2. Unmark to Load defined Reports on Login, if applicable.
3. Mark Printer Confirmation, if applicable.
4. Select the Print to File Folder destination, if applicable.
5. Mark to enable Report Scheduling, if applicable.
6. If Enable Report Scheduling was marked in step 5,enter or select the Report Execution User ID.
7. Click OK to save your changes. You will be asked if you wish to save your changes. Select Yes
to save your changes and close the window. Select No if you do not wish to save your changes
Load defined Reports on Login
The Load defined Reports on Login box, when marked, will load all the reports that have been
defined using Reporting Extensions, when the User logs into Microsoft Dynamics Great Plains™. If
this box is unmarked, the reports that have been defined using reporting Extensions will not
automatically print where they are set to print, although these reports can still be printed from the
Reporting Extensions Report Launcher window. Refer to Using the Report Launcher for more
information. This box is marked, by default.
Report Scheduling section
The Report Scheduling section is used to enable Report Scheduling. The Enable Report Scheduling
box, if marked, will enable the Report Scheduling process to be performed. The Report Execution
User ID is the ID assigned to the User, in the User Setup window, who will execute the scheduled
reports. Refer to your Microsoft Dynamics Great Plains™ documentation for more information. The
User Name is the name of the user. This will be automatically populated once a User ID has been
entered or selected. Refer to your Microsoft Dynamics Great Plains™ documentation for more
information.
Print to File Folder
The Print to File Folder allows the User to select a specific folder where the printed reports will be
saved. This is only applicable to reports that have been defined within Reporting Extensions and
only if File has been selected as the destination for the report in the Report Destination window.
Refer to your Microsoft Dynamics Great Plains™ documentation for more information.
Printer Confirmation
The Printer Confirmation box, if marked, will prompt the User confirm the printer to which the
report is being printed. This is applicable to all Users. However, if Report Scheduling has been
enabled, it is best that the Printer Confirmation box is unmarked, as the reports will not print until
the printer has been confirmed. Refer to Report Scheduling for more information.
4. Enquiry
4.1.
Reports Management
4.1.1. Using the Reports Management window
The Reports Management window is used to perform General Management inquiries about reports
that have been setup using
1. Open the Reports Management Enquiry window.
(Enquiry >> Parity Software >> Reporting Extensions>> Reports Management)
(Enquiry >> Reporting Extensions >> Reports Management)
Reporting Extensions.
Various ranges can be entered to filter the details displayed in the scrolling window.
Report Name
The Report Name is the name assigned to the report in the Report Setup window. The Report
Name radio buttons allow you to enter a range of reports that you wish to display. The All radio
button, if selected, will display all the reports. The Report Name radio button, if selected, will
display only the reports that have been entered in the range.
Description like
The Description is the description of the report. The Description like radio buttons
5. Maintenance
5.1.
Printer Definition
The Reporting Extensions Printer Definition window is used to define the printers that will be used
to print the reports that have been created. Once the printers have been defined, these then
become the printers that are available for selection when defining the printers for the Users and
the User Classes.
1. Open the Printer Definition window.
(Cards >> Parity Software >> Reporting Extensions>> Printer Definition)
(Cards >> Reporting Extensions >> Printer Definition)
2. Enter or select the Printer Name.
3. Enter a Description.
4. Accept or change the Driver, if applicable.
5. Accept or change the Port, if applicable.
6. Press Update.
7. Repeat steps 2 to 6 for all applicable printers.
8. Close the window
Printer Name
The Printer Name is the name that was assigned to the printer when it was installed.
Description
The Description is the description of the printer.
Driver
The Driver is the operating system printer driver. Microsoft Windows uses “winspool” and this
driver is automatically defaulted.
Port
The Port is the operating system printer port that the printer is installed to. The port is
automatically defaulted to “LPT1”.
Scrolling window
The scrolling window displays the details of all the printers that have been defined.
Update button
The Update button, when pressed will update the scrolling window with the printer that has been
defined. A printer can also be removed from the list of defined printers.
Clear
Clears out all the fields in the window.
Redisplay
Refreshes the window.
5.1.1. To remove a printer:
1. Open the Printer Definition window.
(Cards >> Parity Software >> Reporting Extensions>> Printer Definition)
(Cards >> Reporting Extensions >> Printer Definition)
2. Highlight the applicable printer in the scrolling window.
3. Select Delete Line from the Show / Hide Details dropdown list or Edit >> Delete Row from the
tool bar.
(Show / Hide Details >> Delete Line)
(Edit >> Delete Row)
4. You will receive a message asking if you wish to delete the record. Select Yes if you wish to
delete the record. Select No if you do not wish to delete the record.
5. Repeat steps 2 to 4 for all applicable printers.
6. Close the window.
5.2.
User Class Printer Definition
The User Class Default Printer window is used to assign the printers that have been defined, to a
User Class. Once a printer has been assigned to a User Class, the Users that have been assigned
to that particular class will be able to print to the specified printer. However, if a specific printer
has been assigned to a User, the User printer that was defined will override the printer that was
assigned to the class to which the user belongs.
1. Open the User Class Default Printer window.
(Cards >> Parity Software >> Reporting Extensions>> User Class Printer)
(Cards >> Reporting Extensions >> User Class Printer)
2. Enter or select a User Class.
3. Enter or select a Default Printer.
4. Mark Printer Selection Allowed, if applicable.
5. Press Save to save your changes.
6. Repeat steps 2 to 5 for each applicable user class.
User Class
The User Class is the name that has been assigned to the UserClass in the User Class Setup
window.
Description
The Description is the description of the user class.This is automatically populated once a user
class has been entered or selected.
Default Printer
The Default Printer is the default printer that the specified user class will print to.
Description
The Description is the description of the default printer. This is automatically populated once a
default
printer has been entered or selected.
Printer Selection Allowed
The Printer Selection Allowed (Crystal Reports Only) box, when marked, allows the user to select
another printer to print the reports on, only if the report that is being printed has been designed
using
Crystal Reports. If this box is unmarked, the user will only be able to print to the printer that was
specified as the default printer.
A printer can also be removed from the user class. However, this will not remove the printer from
the list of defined printers
5.2.1. To remove a User Class Printer:
1. Open the User Class Default Printer window.
(Cards >> Parity Software >> Reporting Extensions>> User Class Printer)
(Cards >> Reporting Extensions >> User Class Printer)
2. Enter or select a User Class.
3. Press Delete. You will be asked if you wish to delete the User’s printer details. Select Yes if you
wish to delete the printer. Select No if you do not wish to delete the printer.
4. Repeat steps 2 and 3 for each applicable user class.
5. Close the window.
5.3.
User Printer Definition
The User Default Printer window is used to assign the printers that have been defined, to a User.
Once a printer has been assigned to a User, the user will be able to print to the specified printer.
However, if a specific printer has been assigned to a User, the user printer that was defined will
override the printer that was assigned to the class to which the User belongs.
1. Open the User Default Printer window.
(Cards >> Parity Software >> Reporting Extensions>> User Printer)
(Cards >> Reporting Extensions >> User Printer)
2. Enter or select a User ID.
3. Enter or select a Default Printer.
4. Mark Printer Selection Allowed, if applicable.
5. Press Save to save your changes.
6. Repeat steps 2 to 5 for each applicable user.
7. Close the window.
User ID
The User ID is the ID assigned to the User in the User Setup window
User Name
The User Name is the name of the user. This is automatically populated once a User ID has been
entered or selected.
Default Printer
The Default Printer is the default printer that the specified user will print to.
Description
The Description is the description of the default printer. This is automatically populated once a
default printer has been entered or selected.
Printer Selection Allowed
The Printer Selection Allowed (Crystal Reports Only) box, when marked, allows the user to select
another printer to print the reports on. If this box is unmarked, the user will only be able to print
to the
printer that was specified as the default printer. A printer can also be removed from the user.
However, this will not remove the printer from the defined list of printers
5.3.1. To remove a User Printer:
1. Open the User Default Printer window.
(Cards >> Parity Software >> Reporting Extensions>> User Printer)
(Cards >> Reporting Extensions >> User Printer)
2. Enter or select a User ID.
3. Press Delete. You will be asked if you wish to delete the User’s printer details. Select Yes if you
wish to delete the printer. Select No if you do not wish to delete the printer.
4. Repeat steps 2 and 3 for each applicable user.
5. Close the window.
5.4.
Recipient Setup
The Recipient Maintenance window is used to setup the recipients for the Distribution Lists. Refer
to Distribution Lists for more information.
1. Open the Recipient Maintenance window.
(Cards >> Parity Software >> Reporting Extensions>> Recipient Setup)
(Cards >> Reporting Extensions >> Recipient Setup)
2. Enter the Recipient Name.
3. Enter the Email Address.
4. Press Save to save your changes.
5. Repeat steps 2 to 4 for each recipient.
6. Close the window.
Recipient Name
The Recipient Name is the name of the recipient.
Email Address
The Email Address is the email address of the recipient. Once Recipients have been defined, they
will be available for selection on the Distribution Lists. A Recipient can be deleted from the system.
However, if the recipient has been assigned to a Distribution List, a message will be received
stating this and asking if you would also like to remove the Recipient from the Distribution List.
5.4.1. To delete a Recipient:
1. Open the Recipient Maintenance window.
(Cards >> Parity Software >> Reporting Extensions >> Recipient Setup)
(Cards >> Reporting Extensions >> Recipient Setup)
2. Enter or select the applicable Recipient Name.
3. Press Delete. You will receive a message asking if you wish to delete the recipient. Select Yes if
you wish to delete the recipient. Select No if you do not wish to delete the recipient. If you select
Yes, and the recipient has been linked to a Distribution List, you will be asked if you wish to
remove the recipient from the Distribution List. Select Yes if you wish to remove the recipient from
the list. Select No if you do not wish to remove the recipient from the list.
4. Repeat steps 2 and 3 for each applicable Recipient.
5. Close the window.
5.5.
Distribution Lists
The Distribution List Setup window is used to setup the distribution lists. The Distribution Lists are
used to distribute defined reports to specific recipients. This list is used when File is selected as
the
Printing Destination in the Report Setup window. Once the specified report has been printed to the
specified folder, it will automatically be emailed to the recipients on the Distribution List.
1. Open the Distribution List Setup window.
(Cards >> Parity Software >> Reporting Extensions>>Distribution Lists)
(Cards >> Reporting Extensions >> Distribution Lists)
2. Enter a Distribution List ID.
3. Enter a Description.
4. Enter or select the Recipient Name.
5. Repeat step 4 for each applicable Recipient.
6. Press Save to save your changes.
7. Repeat steps 2 to 6 for each applicable Distribution List.
8. Close the window.
Distribution List ID
The Distribution List ID is the ID assigned to the Distribution List.
Description
The Description is the description of the distribution list.
Recipient Name
The Recipient Name is the name of the recipient.
Email Address
The Email Address is the email address of the recipient. This is automatically populated once a
Recipient Name has been entered or selected. Refer to Recipient Setup for more information.
A Distribution List can be deleted. However, the recipients on the Distribution List will not be
deleted. A Recipient can also be removed from the Distribution List.
5.5.1. To remove a Recipient from the Distribution List:
1. Open the Distribution List Setup window.
(Cards >> Parity Software >> Reporting Extensions >>Distribution Lists)
(Cards >> Reporting Extensions >> Distribution Lists)
2. Enter or select a Distribution List ID.
3. Highlight the applicable Recipient Name.
4. Select Edit >> Delete Row from the tool bar. You will be asked if you wish to delete the
recipient from the distribution list. Select Yes if you wish to delete the
recipient. Select No if you do not wish to delete the recipient.
5. Repeat step 4 for each applicable recipient.
6. Press Save to save your changes.
7. Repeat steps 2 to 6 for each applicable Distribution
8. Close the window.
5.5.2. To delete the entire Distribution List:
1. Open the Distribution List Setup window.
(Cards >> Parity Software >> Reporting Extensions >> Distribution Lists)
(Cards >> Reporting Extensions >> Distribution Lists)
2. Enter or select the applicable Distribution List ID.
3. Press the Delete button. You will be asked if you wish to delete the list. Select Yes if you wish to
delete the list. Select No if you do not wish to delete the list.
4. Repeat steps 2 and 3 for each applicable distribution list.
5. Close the window.
5.6.
Report Groups
The Report Groups window is used to setup groups that can be used to group similar reports
together. These reports have similar reporting requirements.
1. Open the Report Groups window.
(Cards >> Parity Software >> Reporting Extensions>> Report Groups)
(Cards >> Reporting Extensions >> Report Groups)
2. Enter a Group Name.
3. Enter a Description.
4. Press Save to save your changes.
5. Repeat steps 2 to 4 for each applicable group.
6. Close the window.
Group Name
The Group Name is the name of the report group.
Description
The Description is the description of the report group. A Report Group can also be deleted.
However, this will not delete the reports that have been assigned to the report group.
5.6.1. To delete a Report Group:
1. Open the Report Groups window.
(Cards >> Parity Software >> Reporting Extensions>> Report Groups)
(Cards >> Reporting Extensions >> Report Groups)
2. Enter a Group Name.
3. Press Delete. You will be asked if you wish to delete the group. Select Yes if you wish to delete
the group. Select No if you do not wish to delete the group.
4. Repeat steps 2 and 3 for each applicable group.
5. Close the window.
5.7.
Report Setup
The Report Setup window is used to define the reports that you wish to print. This window can be
launched as either a standard window or as a wizard. Various fields will become available
depending on the options selected. Please refer to the Report Setup for each applicable Report
Type for more information.
1. Open the Report Setup window.
(Cards >> Parity Software >> Reporting Extensions>> Report Setup)
(Cards >> Reporting Extensions >> Report Setup)
2. Click the Wizard button to open the Report Setup Wizard window.
3. Enter a Name for the report.
4. Enter a Description for the report.
5. Enter or select a Report Group, if applicable.
6. Click Next to open the next wizard window.
7. Select the applicable Report Type.
8. Click Next to open the next wizard window.
9. If Great Plains was selected in step 7, select the Report Product.
10.Depending on the selection made in step 7, enter or select the File Path / URL Path / Report
Name.
11.Click Next to open the next wizard window.
12.Select a Printing Destination.
13.If Printer was selected in step 12, enter or select a Printer Name.
14.If Screen & Printer was selected in step 12, enter or select a Printer Name.
15.If File was selected in step 12, accept or change the output file name.
16.If File was selected in step 12, select a file format.
17.If File was selected in step 12, mark to Increment the file name if applicable.
18.If File was selected in step 12, enter or select a Distribution List, if applicable.
19.Click Next to open the next wizard window.
20.Enter the appropriate restriction expressions.
21.Click Next to open the next wizard window.
22.Select the appropriate Script option and edit, if applicable.
23.Click Next to open the next wizard window.
24.Click the Permissions button and select the appropriate option from the dropdown list.
25.Click Finish. You will be asked if you wish to create the report with the selected options. Select
Yes if you wish to create the report. Select No if you do not wish
to create the report.
26.If Yes was selected in step 25, you will be asked if you wish to create permissions for the
report. Select Yes if you wish to create the permissions. Select No if you do not wish to create the
permissions.
27.Click OK to save your changes and close the window.
Report Name
The Report Name is the name of the report that you wish to define.
Description
The Description is the description of the report.
Group Name
The Group Name is the name of the report group to which the report belongs. Refer to Report
Groups for more information.
Palette box
The On Palette box, if marked, will add the report that is being defined to the Reports Palette.
Report Type
The Report Type is the type of report that you wish to define. There are four report types
available. These are:
Crystal Report
Internet Page
Great Plains
MS Reporting Services
The Printing Destination is the destination where the report will print. The destinations available
will depend on the Report Type selected. Please refer to the Report Setup for each applicable
Report Type. The available destinations are as follows:
Screen
Printer
Screen and Printer
File
To Copy a report:
1. Open the Report Setup window.
(Cards >> Parity Software >> Reporting Extensions >> Report Setup)
(Cards >> Reporting Extensions >> Report Setup)
2. Enter or select a Report Name.
3. Click the Action button and select Copy Report from the list to open the Report Setup Copier
window.
4. Enter a New Report Name.
5. Enter a Description.
6. Click Copy. You will receive a message asking if you wish to copy the report. Select Yes if you
wish to copy the report. Select No if you do not wish to copy the report.
7. If Yes was selected in step 6, you will receive a message asking if you wish to copy the report’s
permissions to the new report. Select Yes if you wish to copy the permissions. Select No if you do
not wish to copy the permissions.
8. In the Report Setup window, edit the report options as applicable.
9. Press Save to save your changes.
10.Repeat steps 2 to 9 for each applicable report.
11.Close the window.
To Import a report:
1. Open the Report Setup window.
(Cards >> Parity Software >> Reporting Extensions >> Report Setup)
(Cards >> Reporting Extensions >> Report Setup)
2. Click the Action button and select Import Report from the list.
3. Browse to the location of the text file to be imported. Click Open.
4. During the import of the report you will be asked if you wish to create User permissions for the
report. Select By User ID to create the permissions for each applicable User. Select By User Class
to create the permissions for each applicable User Class. Select None if you do not wish to create
User permissions.
5. Press Save to save your changes.
6. Repeat steps 2 to 5 for each applicable report.
7. Close the window.
To Import Code:
1. Open the Report Setup window.
(Cards >> Parity Software >> Reporting Extensions >> Report Setup)
(Cards >> Reporting Extensions >> Report Setup)
2. Enter or select a Report Name.
3. Click the Action button and select Import Code from the list.
4. You will receive a message asking if you wish to import over the current code. Select Yes if you
wish to import over the code. Select No if you do not wish to import over the code.
5. If Yes was selected in step 4, browse to the location of the file to be imported. Click Open.
6. Open the Report Setup Scripting window if you wish to see the code that was imported.
(Action button >> Report Scripting)
7. Test the code that was imported. Refer to Test Code for more information.
8. Press Save to save your changes. You will receive a message asking if you wish to save your
changes. Select Yes if you wish to save your changes. Select No if you do not wish to save your
changes.
9. Repeat steps 2 to 8 for each applicable report.
10.Close the window.
To Test Code:
1. Open the Report Setup window.
(Cards >> Parity Software >> Reporting Extensions >> Report Setup)
(Cards >> Reporting Extensions >> Report Setup)
2. Enter or select a Report Name.
3. Click the Action button and select Test Code from the list. You will receive a message stating
that to test the code it has to be executed. Select Yes if you wish to test the code. Select No if you
do not wish to test the code.
4. If Yes was selected in step 3, specify the Dictionary ID in which to test the code.
5. Verify the results from the code test.
6. Repeat steps 2 to 5 for all applicable code.
7. Close the window.
To Delete a Report:
1. Open the Report Setup window.
(Cards >> Parity Software >> Reporting Extensions >> Report Setup)
(Cards >> Reporting Extensions >> Report Setup)
2. Enter or select a Report Name.
3. Press Delete. You will receive a message asking if you wish to delete the report. Select Yes if
you wish to delete the report. Select No if you do not wish to delete the report.
4. Repeat steps 2 and 3 for each applicable report.
5. Close the window.
To grant permissions By User ID:
1. Open the Report Setup window.
(Cards >> Parity Software >> Reporting Extensions >> Report Setup)
(Cards >> Reporting Extensions >> Report Setup)
2. Enter or select a Report Name.
3. Click the Permissions button and select By User ID from the list to open the Reporting
Extensions Report User ID Permissions window.
4. You will receive a message stating that user permissions have not been created for the report.
Select Yes if you wish to create permissions for the report. Select No if you do not wish to create
permissions for the report.
5. If Yes was selected in step 4, validate the results.
6. Click the Validate List button. You will receive a message asking if you wish to build all nonexisting User ID’s. Select Yes if you wish to build all the nonexisting User ID’s. Select No if you do
not wish to build all the non-existing User ID’s.
7. Close the window.
To remove access By User ID:
1. Open the Report Setup window.
(Cards >> Parity Software >> Reporting Extensions >> Report Setup)
(Cards >> Reporting Extensions >> Report Setup)
2. Enter or select a Report Name.
3. Click the Permissions button and select By User ID from the list to open the Reporting
Extensions Report User ID Permissions window.
4. Unmark the applicable User ID’s.
5. Close the window.
To grant permissions By User Class:
1. Open the Report Setup window.
(Cards >> Parity Software >> Reporting Extensions >> Report Setup)
(Cards >> Reporting Extensions >> Report Setup)
2. Enter or select a Report Name.
3. Click the Permissions button and select By User Class from the list to open the Reporting
Extensions Report User Class Permissions window.
4. You will receive a message stating that user permissions have not been created for the report.
Select Yes if you wish to create permissions for the report. Select No if you do not wish to create
permissions for the report.
5. If Yes was selected in step 4, validate the results.
6. Click the Validate List button. You will receive a message asking if you wish to build all nonexisting
User Classes. Select Yes if you wish to build all the non-existing User Classes. Select No if you do
not wish to build all the non-existing User Classes.
7. Close the window.
To remove access By User Class:
1. Open the Report Setup window.
(Cards >> Parity Software >> Reporting Extensions >> Report Setup)
(Cards >> Reporting Extensions >> Report Setup)
2. Enter or select a Report Name.
3. Click the Permissions button and select By User Class from the list to open the Reporting
Extensions Report User ID Permissions window.
4. Unmark the applicable User Classes.
5. Close the window.
5.7.1. Completing the Crystal Report Type Setup
The File Path is the specified path where the Crystal Reports have been saved. The Printing
Destination is the destination where the report will print. The available destinations are as follows:
Screen
The report will print to the screen if this option is selected.
Printer
The report will print to a printer if this option is selected. If this option is selected, the Printer
Name and Description fields become available. The Printer Name is the name of the printer. The
Description is the description of the printer. The printers that were defined in the Printer Definition
window are the printers that are available for selection in this window. Refer to printer Definition
for more information. Please note that the printers selected in this window will override the
printers assigned to the Users in the User Default Printer window.
Screen and Printer
The report will print to both the screen and the printer if this option is selected. If this option is
selected, the Printer Name and Description fields become available. The Printer Name is the name
of the printer. The Description is the description of the printer. The printers that were defined in
the Printer Definition window are the printers that are available for selection in this window. Refer
to printer Definition for more information. Please note that the printers selected in this window will
override the printers assigned to the Users in the User Default Printer window.
File
The report will print to a file if this option is selected. The report will print to the File Folder
specified in the Reporting Extensions Setup window. Refer to Reporting Extensions Setup for more
information. When this option is selected, the Next File Name, File Format, Increment and
Distribution List fields become available. The Next File Name will be the name of the next file that
is created. The File Format is the format that the file will be created in. The available formats are
as follows:
PDF File
Comma Delimited
Crystal Report
Excel File
HTML File
Lotus 1-2-3
Word Document
Rich Text Format
Tab Separated Text
Tab Separated Values
Text File
5.7.2. Completing the Internet Page Report Type Setup
The URL Path is the Internet Address of the report. The Printing Destination is the destination
where the report will print. An Internet Page report can only be printed to screen.
5.7.3. Completing the Great Plains Report Type Setup
The Report Product is any application installed in Microsoft Dynamic Great Plains™. Once a product
has been selected, the Product ID will be displayed in the field alongside the Report Product field.
The Report Name is the name of the Microsoft Dynamic Great Plains™. report. The Printing
Destination is the destination where the report will print. The available destinations are as follows:
Screen
The report will print to the screen if this option is selected.
Printer
The report will print to a printer if this option is selected. If this option is selected, the Printer
Name and Description fields become available. The Printer Name is the name of the printer. The
Description is the description of the printer. The printers that were defined in the Printer Definition
window are the printers that are available for selection in this window. Refer to printer Definition
for
more information. Please note that the printers selected in this window will override the printers
assigned to the Users in the User Default Printer window.
Screen and Printer
The report will print to both the screen and the printer if this option is selected. If this option is
selected, the Printer Name and Description fields become available. The Printer Name is the name
of the printer. The Description is the description of the printer. The printers that were defined in
the Printer Definition window are the printers that are available for selection in this window. Refer
to printer Definition for more information. Please note that the printers selected in this window will
override the printers assigned to the Users in the User Default Printer window.
File
The report will print to a file if this option is selected. The report will print to the File Folder
specified in the Reporting Extensions Setup window. Refer to Reporting Extensions Setup for more
information. When this option is selected, the Next File Name, File Format, Increment and
Distribution List fields become available. The Next File Name will be the name of the next file that
is created. The File Format is the format that the file will be created in. The available formats are
as follows:
Text File
Tab Delimited
Comma Delimited
HTML File
PDF File
5.7.4. Completing the MS Reporting Services Report Type Setup
The URL Path is the Internet Address of the report. The Printing Destination is the destination
where the report will print. A MS Reporting Services report can only be printed to screen. The
Restriction Expressions section is used to add restrictions to the report. These restrictions are used
to limit the number of records that are displayed in the report. These restrictions are written using
the syntax of the Report Type that has been chosen. Please refer to your Report Type
documentation for more information on the syntax that is used to restrict records. Start as Wizard
If this option is marked in the Report Setup window, the Report Setup window will open as a
wizard whenever the window is opened. However, this option will only be applied the next time
that the User opens the Report Setup window. The Report Setup Wizard windows are the same as
the Report Setup window, except that it is broken down into steps.
Action button
The Action button, when pressed, opens a dropdown menu. This menu lists various functions that
can be performed. Report Scripting If this option is selected, the Report Setup Scripting window.
This
window is used to add code that will be executed either before or after the report is run. There are
two Scripts options available:
Pre Script
The code that is added to this script will be executed before the report is run. The default script
that is loaded will, when executed, ask the User if they wish to print the report. This script can be
edited to suit your needs. Please refer to the Reporting Extensions Software Developers Kit for
more information.
Post Script
The code that is added to this script will be executed after the report is run. The default script that
is loaded will, when executed, suppress the normal functionality of the launch field to which the
report is linked. This works in conjunction with the Field Browser window. Refer to Field Browser
for more information. Please refer to the Reporting Extensions Software Developers Kit for more
information. The Code Inserts button allows the User to add more complex code to the Pre and
Post Scripts. Please refer to the Reporting Extensions Software Developers Kit for more
information.
Copy Report
This option, if selected, will copy the specified report and will save it using the name that you have
specified. This allows the User to use the same report but for different parameters. For example,
one Item Number report could print to screen and the other could print to file. When this option is
selected, the Report Setup Copier window opens. The Source Report Name is the name of the
report that you
wish to copy. This is automatically populated when you select Copy Report from the Action button
dropdown menu. The Description is the description of the report. This is automatically populated
when you select Copy Report from the Action button dropdown menu. The New Report Name is
the name of the new report that you are defining. The Description is the description of the new
report you are defining. You can drill down on the Source Report Name. This will take you to the
Report Setup Inquiry window. Refer to Report Setup Inquiry for more information. Import Report
This option, if selected, will allow you to select a text file containing report definition values and
import these values. This will create the report automatically. This enables the report to be
defined offsite
and then imported into Microsoft Dynamics Great Plains™. The values in the text file will populate
the appropriate fields in the Report Setup window according to the Report Type.
Import Code
If this option is selected, will allow you to select a text file containing code and import this code.
This code will then be inserted into the selected report’s pre or post script. This enables the code
to be defined offsite and then imported into Microsoft Dynamics Plains™. The appropriate script
will be automatically populated with the imported code.
Test Code
This option, if selected, will enable the User to test the code that has been imported, using the
Import Code function. This option will execute either the pre or post script, depending on where
the code was imported to. Caution should be taken when performing this function, as data
corruption could occur.
Permissions Button
The Permissions button, when pressed, opens a dropdown menu. This menu lists the options for
granting permissions to reports.
By User ID
This option, if selected, opens the Reporting Extensions User ID Permissions window. This window
is used to grant the Users permissions to the report selected. The Report Name is the name of the
report. The Description is the description of the report. The User ID is the ID assigned to the User
in the User Setup window. Refer to your Microsoft Dynamics Great Plains™ documentation for
more information. The User Name is the name of the user. By Class will be marked if the User has
been assigned to a User Class. The tickbox next to By Class, if marked, will mark all the Users in
the scrolling window. Allowed will be marked if the User has been given access to the report. The
tickbox next to Allowed, if marked, will mark all the Users in the scrolling window. A User can be
deleted from the window. This will not delete the User from Microsoft Dynamics Great Plains™. It
will just remove his access to the report. The Find field allows you to find a specific User ID. The
scrolling window will then display only that User ID.
Validate List
This button, when pressed, will validate the list of Users in the scrolling window. If a User has
been deleted from Microsoft Dynamics Plains™, Reporting Extensions will remove the User from
the scrolling window when the Validate List button is pressed. If a new User has been added to
Microsoft
Dynamics Great Plains™, Reporting Extensions will update the scrolling window with the User’s
details when the Validate List button is pressed.
By User Class
This option, if selected, opens the Reporting Extensions User Class Permissions window. This
window is used to grant the User Classes
permissions to the report selected. The Report Name is the name of the report. The Description is
the description of the report. The User Class is the ID assigned to the User Class in the User Class
Setup window. Refer to your Microsoft Dynamics Great Plains™ documentation for more
information. The Description is the description of the User Class. Allowed will be marked if the
User
Class has been given access to the report. The tickbox next to Allowed, if marked, will mark all the
User Classes in the scrolling window. A User Class can be deleted from the window. This will not
delete the User Class from Microsoft Dynamics Great Plains™. It will just remove the User Classes
access to the report. The Find field allows you to find a specific User Class. The scrolling window
will then display only that User Class. Both permissions windows can be displayed by User Class or
by User ID.
Wizard
This option, if selected, will open the Report Setup Wizard. The Wizard is exactly the same as the
Report Setup, but broken down into 7 steps.
5.8.
Report Scheduling
The Report Scheduling window is used to schedule reports to run at specific times on specific days.
These reports will then run automatically when set to and they do not require any User actions to
trigger them. This is only available if Enable Report Scheduling has been marked in the Reporting
Extensions Setup window. Refer to Reporting Extensions Setup for more information.
1. Open the Report Scheduling window.
(Cards >> Parity Software >> Reporting Extensions>> Report Scheduling)
(Cards >> Reporting Extensions >> Report Scheduling)
2. Enter or select the Report Name.
3. Select the applicable Recurrence Pattern.
4. Enter the Start Date.
5. Enter the End Date.
6. Enter the Run Time.
7. If Selected Dates was selected in step 3, select the appropriate Month and Year.
8. If Selected Dates was selected in step 3, click the Quick Pick button and select the appropriate
option, if applicable.
9. If Weekly was selected in step 3, mark the applicable days.
10.If Monthly was selected in step 3, mark the applicable dates.
11.Press Save. You will be asked if you wish to save your changes. Select Yes if you wish to save
your changes. Select No if you do not wish to save your changes.
12.Repeat steps 2 to 11 for each applicable report.
13.Close the window.
Report Name
The Report Name is the name of the report. This is the name assigned to the report in the Report
Setup window.
Description
The Description is the description of the report.
Recurrence Pattern
The Recurrence Pattern dropdown list allows you to select how often the report will print. The
available options are as follows:
Selected Dates
This option, if selected, enables you to select specific Months and Years on which to run the
report.
Daily
If this option is selected, the selected report will run daily.
Weekly
This option, if selected, will enable you to select specific days, during the week, on which the
report will run.
Monthly
This option, if selected, allows you select specific days during the month on which to run the
report.
Biannually
If this option is selected, the report will run every six months, based on the Start and End
Dates. The report will run six months after the Start Date.
Annually
If this option is selected, the report will run once a year, based on the Start and End Dates.
The report will once a year on the date selected as the Start Date.
Start Date
The Start Date is the start date of the period for which the report will print automatically. This is
the first date on which the report will print.
End Date
The End Date is the end date of the period for which the report will print automatically. This is the
last date on which the report will print.
Run Time
The Run Time is the time at which the scheduled report will print. The Run Days are the days on
which the scheduled report will run.
Run Days
The Run Days that are available depend on the Recurrence Pattern selected.
Quick Pick button
The Quick Pick button, when pressed, opens a dropdown menu. This menu lists options to quickly
select days on which the scheduled reports will run. This is only available if Selected Dates is
selected as the Recurrence Pattern. The available options are as follows:
Saturdays
Sundays
Weekdays
A report can be removed from the Report Scheduling window. This will not remove the report from
Reporting Extensions. Once a report has been removed, it will no longer run when it was
scheduled
to.
5.8.1. To remove a report from Report Scheduling:
1. Open the Report Scheduling window.
(Cards >> Parity Software >> Reporting Extensions >> Report Scheduling)
(Cards >> Reporting Extensions >> Report Scheduling)
2. Enter or select a Report Name.
3. Press Delete. You will receive a message asking if you wish to delete the report’s schedule.
Select Yes if you wish to delete the schedule. Select No if you do not wish to delete the schedule.
4. Repeat steps 2 and 3 for each applicable report.
5. Close the window.
5.9.
Field Browser
The Field Browser window is used to link a pre-defined report to any field or button on any window
of any application installed in Microsoft Dynamics Great Plains™.
To complete the Field Browser Setup using the tree view:
1. Open the Field Browser window.
(Cards >> Parity Software >> Reporting Extensions>> Field Browser)
(Cards >> Reporting Extensions >> Field Browser)
2. Expand the applicable product in the Field List.
3. Select the applicable form name from the expanded list. Mark Filtered for Form Name to filter
the tree view. You will be asked if you wish to redisplay the tree view. Select Yes if you wish to
redisplay the tree view. Select No if you do not wish to redisplay the tree view.
4. Expand the form name in the Field List and select the applicable window name from the
expanded list.
5. Expand the window name in the Field List and select the applicable field / button name from the
expanded list.
6. Press the Select Field button and select Select as Launch Field from the menu.
7. Select the next applicable field / button name from the expanded list, press the Select Field
button and select Select as Filter Field 1 from the menu.
8. Repeat step 7 for each applicable filter field.
9. Enter or select a Report Name.
10.Select the applicable Report Run option.
11.Press the Update button to update the scrolling window.
12.Repeat steps 2 to 11 for each applicable report.
13.Press OK to save your changes and close the window.
To complete the Field Browser Setup:
1, Open the Field Browser window.
(Cards >> Parity Software >> Reporting Extensions>> Field Browser)
(Cards >> Reporting Extensions >> Field Browser)
2. Select the applicable Product.
3. Enter or select the Form Name.
4. Enter or select the Launch Field Window Name.
5. Enter or select the Launch Field Field Name.
6. Select the Filter Field number.
7. Enter or select the Filter Field Window Name.
8. Enter or select the Filter Field Field Name.
9. Enter or select the Report Name.
10.Select the applicable Report Run option.
11.Press the Update button to update the scrolling window.
12. Repeat steps 2 to 11 for each applicable report.
13.Press OK to save your changes and close the window.
Field List tree view
The Field List tree view is a list of all the applications installed in Microsoft Dynamics Great
Plains™. The tree view can be filtered if Filtered for Form Name has been marked.
Product
The Product is the name of any application installed in Microsoft Dynamics Great Plains™. Once a
Product has been entered or selected, the product ID will be displayed in the field alongside the
name.
Form Name
The Form Name is the technical name of the form which contains the windows from which the
reports will be run.
Launch Field Window
The Launch Field Window Name is the name of the window from which the report will be launched.
Launch Field Field
The Launch Field Field Name is the name of the field from which the report will be launched. Up to
five Filter Fields can be defined.
Filter Field Window
The Filter Field Window Name is the name of the window from which the filter fields will run.
Filter Field Field Name
The Filter Field Field Name is the name of the field from which the report will run. Each of the
Filter Fields tie up to the Restriction Expressions entered in the Report Setup window. The Filter
Field Field Name will attach itself to the Restriction Expression. Please note that the
number of Filter Fields is determined by the number of Restriction Expressions.
Report Name
The Report Name is the name of the report. The Description is the description of the report.
Report Destination
The Report Destination is the destination where the report will print. It can print to screen, printer,
screen and printer or file.
Report Run
Report Run is used to select when the report will run. It can be run either Before Original or After
Original. The scrolling window displays the details of the reports that you have
linked to a button or a field on a window.
Product ID
The Product ID is the ID of the product for which the report has been defined. The Form Name
is the name of the form from which the report will run.
Launch Window Name
The Launch Window Name is the name of the window from which the report will print.
Launch Field Name
The Launch Field Name is the name of the field from which the report will print.
Select Field button
The Select Field button is used to add the Launch Field Window and Field Names to the report.
This button can then be used to add up to five Filter Fields to the report. The number of Filter
Fields selected will depend on the number of Restriction Expressions entered in the Report Setup
window. Refer to Report Setup for more information.
Update button
The Update button, when pressed, will update the scrolling window with the selections made for
the report.
Import button
The Import button can be used to import a report link from a text file that contains the required
information. It works on the same principle as the Import function in the Report Setup window
and will update the scrolling window automatically with the applicable report. Refer to Report
Setup for
more information. A report can also be deleted from the Field Browser window. This will only
delete the report’s links and not the actual report.
5.9.1. To Import a Report:
1. Open the Field Browser window.
(Cards >> Parity Software >> Reporting Extensions >> Field Browser)
(Cards >> Reporting Extensions >> Field Browser)
2. Press the Import button.
3. Browse to the location of the text file containing the report values.
4. Press Open. You will receive a message stating that the report was imported successfully. Click
OK.
5. Repeat steps 2 to 4 for each applicable report.
6. Press OK to save your changes and close the window.
5.9.2. To Delete a Report:
1. Open the Field Browser window.
(Cards >> Parity Software >> Reporting Extensions >> Field Browser)
(Cards >> Reporting Extensions >> Field Browser)
2. Highlight the applicable report in the scrolling window.
3. Press Delete. You will be asked if you wish to delete the report’s links. Select Yes if you wish to
delete the links. Select No if you do not wish to delete the links.
4. Repeat steps 2 and 3 for each applicable report.
5. Close the window.
6. Reports
6.1.
Report Launcher
The Report Launcher window is used to launch reports that have been setup, regardless of their
links. This enables the User to print the required report without having to open the window that
launches the report and selecting the field or button that will launch the report.
To use the Report Launcher:
1. Open the Report Launcher window.
(Reports >> Parity Software >> Reporting Extensions >> Report Launcher)
(Reports >> Reporting Extensions >> Report Launcher)
2. Enter or select a Report Name.
3. Select a Destination.
4. Enter a Restriction Value.
5. Select a Data Type.
6. Repeat steps 4 and 5 for each applicable Restriction Expression.
7. Press Print. You will receive a message asking if you wish to print the report. Select Yes if you
wish to print the report. Select No if you do not wish to print the report.
8. Repeat steps 2 to 7 for each applicable report.
9. Close the window.
To drill down to the Report Setup Inquiry window:
1. Open the Report Launcher window.
(Reports >> Parity Software >> Reporting Extensions >> Report Launcher)
(Reports >> Reporting Extensions >> Report Launcher)
2. Enter or select the Report Name.
3. Click on the blue Report Name.
4. View the information.
5. Close the Report Setup Inquiry window.
6. Repeat steps 2 to 5 for each applicable report.
7. Close the window.
Report Name
The Report Name is the name assigned to the report in the Report Setup window. Refer to Report
Setup for more information.
Description
The Description is the description of the report. The Report Type is the type of report.
Destination
The Destination is the destination where the report will print. The available destinations are as
follows:
Screen
Printer
Screen & Printer
File
Restriction Expression
The Restriction Expression is the restrictions on the report. These are the restrictions entered in
the Report Setup window. Refer to Report Setup for more information.
Restriction Values
The Restriction Values are the values of the restrictions.
Data Type
The Data Type is the type of data that you are entering in the Restriction Values field. The
available types are as follows:
String
Numeric
Date
Expression
You can drill down to the Report Setup Inquiry window from the Report Name. This allows the
User to see the setup of the report, without being able to edit the details.
6.2.
Reports Palette
The Reports Palette is used to create a shortcut to the defined reports. When a report is setup in
the Report Setup window, you have the option of adding the report to the palette. Refer to Report
Setup for more information. If this option has been marked, and the User has been granted the
appropriate permissions, the applicable report will be on the Extended Reports palette when the
Reports Palette is opened. There is, however, a limit of twenty reports that can be displayed on
the Extended Reports palette. If the palette’s pushpin is down, the palette will be automatically
displayed when the User logs into Microsoft Dynamics Great Plains™. If the reports have been
setup with restrictions, the Report Launcher window will open when the User attempts to run the
report. This will then allow the user to enter restriction Values in order to run the report. Refer to
Report Launcher for more information. If the reports have been setup without restrictions, the
report will run immediately when the User attempts to run the report
To use the Reports Palette where the report has restrictions:
1. Open the Extended Reports palette.
(Reports >> Parity Software >> Reporting Extensions >> Reports Palette)
(Reports >> Reporting Extensions >> Reports Palette)
2. Select the applicable report from the Extended Reports palette.
3. Select the applicable Destination in the Reports Launcher window.
4. Enter a Restriction Value.
5. Select a Data Type.
6. Repeat steps 4 and 5 for each applicable Restriction Expression.
7. Press Print. You will receive a message asking if you wish to print the report. Select Yes if you
wish to print the report. Select No if you do not wish to print the
report.
8. Repeat steps 2 to 7 for each applicable report.
To use the Reports Palette where the report has no restrictions:
1. Open the Extended Reports palette.
(Reports >> Parity Software >> Reporting Extensions >> Reports Palette)
(Reports >> Reporting Extensions >> Reports Palette)
2. Select the applicable report from the Extended Reports palette.
3. You will receive a message asking if you wish to print the report. Select Yes if you wish to print
the report. Select No if you do not wish to print the report.
4. Repeat steps 2 and 3 for each applicable report.