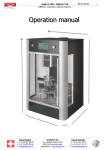
Download QUICK START GUIDE
Transcript
INCOTEX GROUP
ELECTRONIC SIGNATURE DEVICE (ESD)
INCOTEX 500F
QUICK START GUIDE
2011
2
QUICK START GUIDE
INCOTEX 500F
3
QUICK START GUIDE
INCOTEX 500F
PROPRIETARY INFORMATION
This document contains proprietary information of INCOTEX GROUP. This document and the
information it contains may only be used in the design, production, or manufacture of products
for INCOTEX GROUP.
This is an Unpublished Work which contains Confidential and secret Information which is
protected under the copyright laws. The existence of the copyright notice is not to be construed as
an admission or presumption that publication has occurred. Unauthorized copying is strictly
prohibited.
INCOTEX GROUP
4
QUICK START GUIDE
INCOTEX 500F
TABLE OF CONTENTS
PURPOSE....................................................................................................................................6
SECTION 1: TECHNICAL SPECIFICATIONS.........................................................................6
SECTION 2: OPRETION START...............................................................................................7
2.1. ESD initialization..................................................................................................................8
2.2. Command mode....................................................................................................................8
2.2.1. Data entering......................................................................................................................8
2.2.2. Entering ESD serial number..............................................................................................9
2.2.3. Memory card activation.....................................................................................................9
2.2.4. Fiscalization.......................................................................................................................9
2.2.5. Changes of user’s data.....................................................................................................10
2.2.6. Date and time setting.......................................................................................................10
2.2.7. Tests.................................................................................................................................10
2.2.8. Changing the VAT rates...................................................................................................12
2.2.9. Daily reports.....................................................................................................................12
2.2.10. Fiscal memory reports....................................................................................................12
2.2.11. Printing information for a specific invoice....................................................................15
SECTION 3: USING A SERVICE PROGRAM........................................................................16
3.1. Set Date and Time...............................................................................................................16
3.2. Header programming..........................................................................................................16
3.3. Set tax rates.........................................................................................................................16
3.4. Daily Z Report....................................................................................................................16
3.5. Set connectivity parameters................................................................................................17
3.6. Set SN.................................................................................................................................17
3.7. Fiscal Start..........................................................................................................................17
3.8. Paper Feed...........................................................................................................................17
3.9. Exit......................................................................................................................................17
SECTION 4: INSTALLING A PRINTER ................................................................................17
SECTION 5: INSTALLING THE ESD.....................................................................................25
5.1. Contents of E.S.I. application.............................................................................................25
5.2. Installing the program driver..............................................................................................25
5.3. Installing the Client.............................................................................................................28
5.4. Installing a Server...............................................................................................................32
SECTION 6: STARTING AND TRAINING THE APPLICATION.........................................38
6.1. E.S.I. activation...................................................................................................................38
6.1.1. “Settings” window...........................................................................................................39
6.2. ESD list...............................................................................................................................40
6.3. Properties............................................................................................................................41
6.3.1. Printer properties..............................................................................................................41
6.3.2. E.S.I. Settings...................................................................................................................42
5
QUICK START GUIDE
INCOTEX 500F
6.3.3. Connection settings..........................................................................................................52
6.3.4. Using batch files.............................................................................................................53
6.4. Verification button...............................................................................................................54
6.5. Signing invoices from multiple PCs with one ESD............................................................57
6
QUICK START GUIDE
INCOTEX 500F
PURPOSE
The present document is a quick start guide of INCOTEX 500F - Electronic Signature Device. This
device gives opportunity to companies that issue receipts or invoices to be performed via special
accounting software. It is designed to authenticate PC – produced financial documents, applying unique
electronic signatures to each of them.
The ESD can be trained to recognize and sign up to four different types of financial documents (up to
four templates). When a document from the user’s PC is sent to the text printer it is automatically
captured by the ESD which determines whether the document matches any of the trained templates. If
it does, the document is recognized as a valid financial one. In this case the ESD gives the document an
electronic signature and then returns it to the printer. If the document does not match any of the trained
templates, it is not recognized as a valid financial document and is returned to the printer without an
electronic signature.
When training the templates the user sets specific parameters of the financial document and their values
on particular places in the template. During the recognition the ESD searches for these parameters in
the registry. If the values and places of all the parameters match the recognition rules set in any of the
templates, the document is recognized to be a valid financial one.
The parameters that can be set in the template as recognition rules are:
• Type of the document
• Number of the document
• Date of issuing
• Amount to be paid (in four rate groups)
• VAT (in four rate groups)
This guide gives directions how to start the system – installing the ESD and training to recognize
valid financial documents.
SECTION 1: TECHNICAL SPECIFICATIONS
•
•
•
•
Quick and noiseless thermal printer
13-digit 7-segment LCD display
Connection to a PC via USB
Fiscal memory with the capacity of 2400 records of daily Z reports.
7
QUICK START GUIDE
•
•
•
•
•
•
•
•
•
•
•
•
•
•
•
•
INCOTEX 500F
Thermal printer - easy paper loading:
- type TPM 021L;
- printing rate - 40 mm/sec;
- thermochemical paper, one-layer, width - 57 mm, external diameter – max. 42 mm;
- characters per line – 32;
Keyboard:
- 12 digit keys
- 13 functional keys
Built-in tests
Dimensions (mm) – 191 x 96 х 61
Weight (kg) – 0,370
External adapter (9V, 3,5 A) 220V (-15%,+10%) 50Hz;
Operating temperature interval - 15° to 60° С
Relative air humidity - 20% to 85%
Lithium battery supporting the real time clock when the fiscal printer is switched off.
Automatic Z report issuing
Up to 2GB SD card for storage of signed invoices
At least 1 200 000 invoices per single SD card
Invoice amount recognition by VAT groups
Built-in GPRS modem for sending the data to the administration server
Built-in verification functionality
Built-in real time clock
Please read this manual carefully before operating your ESD in order to gain a full
understanding of its function and performance.
Please keep this manual for future reference. It will help you, if you encounter any operational
problems.
SECTION 2: OPRETION START
2.1. ESD initialization
First switch on and off the ESD using the key at the right side its box.
Before starting operating with the EDS it has to be initialized. The initialization should follow the
given sequence:
2.1.1. Switch on the ESD, using the button at the right side of the ESD box. The message ' FOR
CORRECT WORK ENTER DATE AND TIME' is printed.
2.1.2. Press the
button to start the GSM initialization.
Note: At this time Err 70 or Err 71 can occur, due to SIM card absence or weak GSM signal. To exit
the error message and continue with the initialization, press .
8
QUICK START GUIDE
INCOTEX 500F
2.1.3. When the GSM initialization is complete on the display appears the message 'dAtE'. Enter the
date in format DDMMYY. Press
for confirmation.
2.1.4. The ESD displays message 't'. Enter the time HH:MM and press
for confirmation.
2.1.5. The ESD displays 'SP
_ _ _ _ _ _ _' requiring the service password. The default service
password is 2104204134. Press
for confirmation.
2.1.6. A message for 'service intervention' is printed.
2.1.7. The ESD displays the date. To view the time, press
and repeat the procedure. To confirm the date/time press
.
. To correct the date/time press
2.1.8. A message for successful initialization 'RAM IS RESET' is printed.
2.1.9. The ESD displays 'ESd rdY'.
2.2. Command mode
After the ESD is initialized every time it is switched on the displays shows 'ESd rdY'. To enter
command mode enter the service password and press
. The ESD enters command mode and
displays 'ESd EntEr'. To exit command mode press .
2.2.1. Data entering
• Data entering in a digital field
When a digital field is selected, the item number is displayed on the left, followed by the contents of
the field. If the display positions are not enough, only the content is displayed.
New content can be entered using the digit keys. In case of an error, press key
as many times as
necessary – each pressing clears one digit from the right to the left. If the key
is pressed and held
down, all the entered digits will be cleared.
• Data entering in a character field
When a character field is selected, the item number is displayed on the left, followed by the number of
the first character and the ASCII code of the character.
To enter the characters ASCII codes use the digit keys. If an ASCII code includes a leading zero, it
must be entered. After entering 3 digits an automatic transition to the next character will be performed
(the displayed character number increases by 1).
Pressing the key , when a character field is entered, prints the current text.
Pressing the key combination
when a character field is entered prints a table of the ASCII
codes. A character code can be calculated by adding the column number to the number printed at the
end of the row, where the character is printed.
ATTENTION! Pressing the key
in a character field clears its contents and performs positioning
for entering the first character in the field.
9
QUICK START GUIDE
INCOTEX 500F
Character codes:
Space - 032
! – 033
“ – 034
# – 035
$ – 036
% –037
& – 038
‘– 039
( – 040
) – 041
* – 042
+ – 043
, – 044
- – 045
. – 046
/ – 047
0 – 048
1 – 049
2 – 050
3 – 051
4 – 052
5 – 053
6 – 054
7 – 055
8 – 056
9 – 057
: – 058
; – 059
< – 060
= – 061
> – 062
? – 063
@ – 064
A – 065
B – 066
C – 067
D – 068
E – 069
F – 070
G – 071
H – 072
I – 073
J – 074
K – 075
L – 076
M – 077
N– 078
O – 079
P – 080
Q – 081
R – 082
S – 083
T – 084
U – 085
V – 086
W – 087
X– 088
Y – 089
Z – 090
[– 091
\ – 092
] – 093
^ – 094
_ – 095
` – 096
a – 097
b – 098
c – 099
d – 100
e – 101
f – 102
g – 103
h – 104
i – 105
j – 106
k – 107
l – 108
m – 109
n – 110
o – 111
p – 112
q – 113
r – 114
s – 115
t – 116
u – 117
v – 118
w – 119
x – 120
y – 121
z – 122
{ – 123
| – 124
}– 125
~ – 126
2.2.2. Entering ESD serial number
In command mode, when the display shows message 'ESd rdY', the operation is started by pressing the
key . The number 01 (1-st character) and its code are displayed, for instance 01.048 0. The default
characters (letters of the approval) are 03TZ. They are confirmed by pressing
. If you need to add
more characters enter their codes and press
. If some other characters have to be entered instead of
03TZ, their codes are entered first and then
is pressed. The prompt 'rEG' is displayed next. Up to
9 digits (ESD serial number) can be e entered and press
at the end. The ESD prints its serial
number and additional confirmation is required by pressing
. If an error occurs, quit the
operation by pressing
(instead of
). If confirmed, the EFD serial number is recorded in the
FM and cannot be changed. Pressing the key
prints a short receipt including the serial number.
2.2.3. Memory card activation
To activate the memory card in command mode press
. 'Set Sd' is displayed. To quit the operation
pres
or proceeded by pressing key
. An additional confirmation is required and
has to
be pressed. 'Frt' is displayed and the process of initialization takes a few minutes. At the end 'Frt rdY'
is displayed, the active card SN and the activation date is printed.
Fiscalization of the ESD is not possible, if there is no activated memory card in the ESD. After
fiscalization, all receipts and reports, printed by the ESD are automatically stored in an electronic
journal. The electronic journal is stored in the memory card with every daily Z report.
2.2.4. Fiscalization
To start the operation press
(in command mode). 't no' is displayed and the user's TIN has to be
entered first (using the characters' codes – page 3). Press
to finish the operation. The TIN is
printed, press
for confirmation. After 'dt no' is displayed, enter the TIN of approved ESD
distributor/supplier (using the characters' codes – page 3). Press
at the end. The TIN is printed,
press
for confirmation.
'U no' is displayed, enter VRN of the approved ESD supplier (using the codes' characters – page 16).
10
QUICK START GUIDE
INCOTEX 500F
Press
at the end. The VRN is printed and press
for confirmation.
'SEt' is displayed. If an error is occurs, the operation must be canceled with . For confirmation press
and
. A receipt about the event is printed after recording all the necessary data on the FM.
2.2.5. Changing user’s data
To start this operation press the key . The message 'SP' is displayed. Enter the service password and
press
. The ESD prints a message about the service intervention and records the event in the fiscal
memory.
The digit '1' is displayed, that corresponds to the first text line of the header message. To enter the field
press
. Number 01 (1st character) and its code are displayed, /ex. 01.214 0/.
To clear the previous contents of the text line press
. Up to 32 characters can be entered using their
3-digit codes shown in the table above . Press
to confirm the text line. The message 'rdY' is
displayed for a while.
By using keys
or
different text lines can be reached in ascending or descending order. Each text
line can be changed as described, as first press
to enter the field.
Note: The texts are automatically centered when printed.
Note: If an empty line is left, neither it, nor the following header lines will be printed, except the last
one (containing the TAX OFFICE ADDRESS).
When all the necessary data is entered in the header, press
. The newly entered data is printed and
with a corresponding message additional confirmation is required to be executed by pressing
When confirmed, the new data is recorded in the fiscal memory (if the EFD is fiscalized) and a
message about the event is printed, including the number of header changes left.
2.2.6. Date and time setting
To start first press . The current date is displayed. Next press
. The message dAtE' is displayed.
Enter the date in format DDMMYY and press
. The message 't' is displayed. Enter the time in
format HHMM and press
. If the EFD prints a message about additional confirmation, press
. Thee message '5P' is displayed. Enter the service password and press
. The EFD prints a
message about the service intervention and records the event in the fiscal memory. The newly entered
date and time are also printed in the receipt. Press
to end the operation.
2.2.7. Tests
To perform tests press
in command mode.
The following tests are available by pressing the corresponding digit key:
0 – Display test
No
Description
0 Visual examination of all segments
1 – Check sum of the EFD firmware.
No
Description
1 The EFD calculates and displays the check sum.
Display
8.8.8.8.8.8.8.8.8.8.
Exit
Exit
11
QUICK START GUIDE
INCOTEX 500F
2 – RAM test.
No
Description
2 RAM test is performed
3 – Keyboard test.
No
Description
3 All the keys have to be pressed one by one in the
following sequence (by columns) :
, 7, 4 , 1, 0, , 8, 5 , 2,
, + ,
,9,6,
3, . ,
,
,
,
,
,
, ,
,
If the sequence is observed and no error is detected,
the display remains 't
3' until all the keys are
pressed. In case of an error, the test is automatically
canceled, regardless the fact if the sequence is
finished
Display
FrA rdY
Exit
Automatic
Display
Exit
t
4 – Printer error test
No
Description
Display
4 The EFD tests the paper end sensor and the printing no Error
head sensor
5 – Printer test
No
Description
5 The EFD prints a printout with characters and codes
every 3 seconds.
6 – FLASH test
No
Description
6 It is an overall FLASH test. If no error is detected,
*FLASH OK* is printed.
7 – Barcode scanner test.
No
Description
7 A barcode scanner is connected to the corresponding
interface input. When a barcode is scanned, the EFD
prints its numeric equivalent.
9 –FM test
No
Description
9 “FLASH OK” is printed if no error is encountered.
3
Exit
Display
t
5
Exit
Display
6
Exit
Display
t
7
Exit
Display
Exit
t
12
QUICK START GUIDE
INCOTEX 500F
2.2.8. Changing the VAT rates
Start the operation by pressing . The first VAT group is displayed: 1.X.XX. Use keys
and
for
cyclic going through the VAT rates.
When a VAT rate number is reached and displayed, enter the new value pressing the digit keys. To
confirm press
.
After entering all the new rates, press
to finish the operation. The new VAT rates are printed and
recorded in the FM (if the EFD operates in fiscal mode). A message about the number of tax changes
left is also printed.
2.2.9. Daily reports
To print a daily Z report press key
To print a daily X report press “200
.
”.
2.2.10. Fiscal memory reports
Generally there are two types of FM reports – FM reports by record numbers (detailed and short
reports) and FM reports by dates (detailed and short reports).
Note: Pressing the key
cancels currently printed FM report. A corresponding message for a canceled
report is printed.
• FM reports by record numbers
This kind of report is specified for detailed report- '2
' or a short one '12
'. The prompting
message 'n_bGn' is displayed. Enter the number of a selected initial record (up to 4 digits) and press
. The prompting message 'n_End.' is displayed. Enter the number of a selected final record (up to 4
digits) and press
.
If the number of the initial record is not entered in the above-described sequence, the default initial
number is 1. If the number of the final record is not entered, the default number is the one of the latest
FM record.
It is admissible that the initial and the final numbers are the same, but if the final number is less than
the initial one, a corresponding error message is displayed (Err 25).
13
QUICK START GUIDE
Example: A short FM report from record 1 to record 2
12
1 2
Requested initial and final record numbers
Date (ddmmyy) and time (hh:mm) of fiscalization
(fiscal start)
VAT rates, date (ddmmyy) and time (hh:mm) of
recording in the FM
Summary data, referring to the selected FM records
INCOTEX 500F
14
QUICK START GUIDE
Example: Detailed FM report from record 1 to record 2:
INCOTEX 500F
1
2
Record number
Date and time of daily Z report
Turnover, calculated VAT and net amounts in tax
groups
Serial number of memory card, in which the electronic
journal was recorded
Events, registered during the corresponding daily
period
Next record in the selected range
Summary data, referring to the selected FM records
15
QUICK START GUIDE
INCOTEX 500F
• FM reports by dates
This kind of report is specified for a detailed report- '1
' or a short one '11
' .The
prompting message 'd_bGn' is displayed. Enter the selected initial date (ddmmyy) and press
. The
prompting message 'd_End' is displayed. Enter the selected final date (ddmmyy) and press
.
If the initial date is not entered in the above-described sequence, the default initial date is the date of ESD
fiscalization. If the final date is not entered, the default final date is the date of the latest FM record.
It is admissible that the initial and the final dates are the same, but if the final date precedes the initial
one, a corresponding error message is displayed (Err 25).
The FM reports by dates resemble those by record numbers; only the reported period in the report
beginning is printed in a different way:
• FM monthly reports
This kind of report is specified for a detailed report '1
' or a short one '11
'. The
prompting message 'd_bGn' is displayed. Enter the selected month (mmyy) and press . The monthly
FM reports are similar to those by dates; only the reported period at the top of the record is printed
differently
07-10 stands for July 2010
The digit 1 is displayed, which corresponds to the first text line of the header message. Press
to enter the field. The number 01 (1-st character) and its code are displayed, for instance “01.214 0”.
Key
can be pressed to clear previous contents of the text line. Up to 32 characters can be entered
using their 3-digit codes shown in the table above. To confirm text line press
. The message
'rdY' is displayed for a while. By using keys
or
different text lines can be reached in ascending
or descending order. Each text line can be changed as described, as first press
to enter the field.
Note: The texts are automatically centered when printed.
Note: If an empty line is left, neither it, nor the following header lines will be printed, except the last
one (containing the TAX OFFICE ADDRESS).
When all the necessary data is entered in the header, press
. The newly entered data is printed and
with a corresponding message additional confirmation is required to be executed by pressing
When confirmed, the new data is recorded in the fiscal memory (if the EFD is fiscalized) and a
message about the event is printed, including the number of header changes left.
2.2.11. Printing information for a specific invoice
To print an information for a specific invoice enter the individual number of the invoice and then press
.
This function is especially useful when there is a printed invoice and has to check if the invoice has
been printed by the certain ESD as well as if the information in it hasn’t been deleted.
16
QUICK START GUIDE
INCOTEX 500F
SECTION 3: USING A SERVICE PROGRAM
To set a certain settings of the ESD instead a button combination a service program could be used. To
perform this setting copy files 'ICLtest.exe' and 'msg.txt' from the provided CD and past them in a
folder to the PC. When starting the 'ICLtest.exe' file a main window of the service program appears.
The actions available from the service program are:
3.1.
Set Date and Time
Pressing this button gives opportunity for setting the date and time of the ESD. Make sure the date and
time are the same format as they are on the PC the ESD is being connected. For setting the date and
time the program will ask you first to enter the service password.
3.2.
Header programming
Pressing this button gives you opportunity to program the header lines of the invoice. It allows up to 8
header lines to be filled.
3.3.
Set tax rates
The ESD has three VAT groups set by default – A, B and E. A group is set with VAT rate 18%, B group
is set with VAT rate 0%, and E group is exempt from VAT. If one wants to change the VAT rates of
these groups this could be executed by pressing the button “Set tax rates”.
3.4. Daily Z Report
Pressing this button will print the Daily Z report from the ESD and sending it to Revenue Agency. By
default the Daily Z reports are automatically sent to Revenue Agency. This button forces a manual
transmission of all unsent Z reports up to date.
17
QUICK START GUIDE
INCOTEX 500F
3.5. Set connectivity parameters
Pressing this button gives opportunity to set the GPRS, Server and Dial number parameters.
GPRS:
• APN
• GPRS USER
• GGPRS PASSWORD
Server:
• IP
• PORT
• FTP USER
• FTP PASSWORD
• FTP PAT
Dial number
3.6.
Set SN
After pressing this button a window appears where the Serial number of the ESD can be entered.
3.7. Fiscal Start
Pressing this button will start the fiscalization of the ESD.
3.8.
Paper Feed
3.9.
Exit
Pressing this button will exit the main window saving all the changes made by the operator.
SECTION 4: INSTALLING A PRINTER
To use the ESD first a “Generic / Text Only” printer should be installed on the PC. To do these follow
the steps as described.
From the “Start” menu select “Settings” and then “Control panel”.
18
QUICK START GUIDE
In “Control Panel” find and select “Printers and Faxes”.
INCOTEX 500F
19
QUICK START GUIDE
INCOTEX 500F
From the “Printer Tasks” menu in the upper left corner in “Printers and Faxes” select “Add a printer”.
The “Add Printer Wizard” appears. Click “Next” to add a new printer.
20
QUICK START GUIDE
INCOTEX 500F
Two options for adding a printer are available. Choose “Local printer attached to this computer” and
then click “Next”.
The wizard will ask you to select a port for the communication between your PC and the new printer.
For this communication you should use a TCP/IP port. In the Wizard window choose “Create new
port”, and then for the “Type of port” select “Standard TCP/IP Port”. Click “Next” to continue.
21
QUICK START GUIDE
INCOTEX 500F
The “Add Standard TCP/IP Port Wizard” appears. Before continuing with the installation, make sure
that the ESD is connected to the PC. Click “Next” to continue.
Enter the printer name and a port name for the device. In “Printer Name or IP Address” you can either
set the IP address of your PC, or name the printer “localhost”, which automatically gets the needed IP
address. For the port name any desirable name can be chosen.
22
QUICK START GUIDE
INCOTEX 500F
The Wizard will ask you for the device type. Choose “Standard: Generic Network Card” and click
“Next”.
The Wizard now shows the characteristics you have set for the new port. To complete the installation
select “Finish”.
23
QUICK START GUIDE
INCOTEX 500F
The Wizard will ask you for the manufacturer and model of our printer. Select “Generic” for
manufacturer and “Generic / Text Only” for the printer. Click “Next”.
Then the Wizard asks whether to use the existing driver with the new printer, or to replace it. Select
“Replace the existing driver” and click “Next”.
24
QUICK START GUIDE
INCOTEX 500F
Then give a name of the printer you installed and set it to be the default printer. Click “Next”.
The Wizard asks whether to print a test page on the new printer, or not. Select “No” and click “Next”.
25
QUICK START GUIDE
INCOTEX 500F
The Wizard now shows the settings you have specified for the newly installed printer. To complete the
installation select “Finish”.
Now you can continue with the ESD installation.
SECTION 5: INSTALLING THE ESD
5.1. Contents of the ESI Application
• Client
• Server
• USB Driver
5.2. Installing the program driver
Connect the ESD to the PC using the USB cable provided and switch the ESD on.
The welcome window of the Installation Wizard appears. Click Next to continue.
26
QUICK START GUIDE
INCOTEX 500F
Click install to proceed with the installation or click Back to review or change settings.
Copy the “redist.rar” file from the CD provided to your PC. Extract the “redist.rar” file in a directory
on your PC, open this directory and start the file “install.bat”. The following window appears:
27
QUICK START GUIDE
INCOTEX 500F
Press any key to continue the setup of the ESD.
Click Finish to complete installation
To check if the driver is properly installed right-click on the icon “My Computer” and select
“Properties”. The System Properties window appears. Select “Hardware” and press “Device Manager”.
If the driver installation is successful a device called “Incotex” should have appeared with two objects
in it: “idrvUSB” and “ESDEVICE”.
If the device “Incotex” or any of the objects is missing make sure the ESD is connected to the PC and
switched on. Then run the “install.bat” file again.
28
QUICK START GUIDE
INCOTEX 500F
5.3. Installing a Client
To install the Client click on ESIx86-Client.exe or ESIx64-Client.exe
The welcome window of the Installation Wizard appears. Click Next to continue.
Then you will be asked to select a location where Incotex to be installed. By default it will be installed
in C:\Incotex\ESIx86-Client. To confirm the installation in this directory, click Next. If prefer another
directory, use the Browse button. Click Next to proceed with the Installation
29
QUICK START GUIDE
INCOTEX 500F
Select where the program‟s shortcuts to be placed. By default the folder for this purpose is in the Start
Then the program automatically starts the installation of the virtual printer “Incotex”. First select a
language for the installation from the falling menu and then follow the steps in the installation wizard
as follows:
The welcome window of the Installation Wizard appears. Click Next to continue
30
QUICK START GUIDE
INCOTEX 500F
Then you will be asked to select a location where Incotex to be installed. By default it will be installed
in C:\Incotex\ESIx86-Client. To confirm the installation in this directory, click Next. If prefer another
directory, use the Browse button. Click Next to proceed with the Installation
Select where the program’s shortcuts to be placed. By default the folder for this purpose is in the Start
Menu named as “Incotex”. To confirm click Next. It can be changed if necessary.
Click Next to proceed with the Installation
31
QUICK START GUIDE
INCOTEX 500F
Set the “Incotex” printer to be default printer and click Next.
Now the Setup is ready to start the installation of “Incotex” on your computer. Click Install to proceed
with the installation, click Back to review or change settings, or click Cancel to terminate the
installation.
32
QUICK START GUIDE
INCOTEX 500F
Wait until the process of installation is completed.
When the Setup has completed the installation of “Incotex”, click Finish.
After finishing the installation the computer will restart.
5.4. Installing a Server
If the ESD will be used in a network the 'setup_server.bat' has to be run on the host server. This is not
necessary if only one PC will be used.
Caution: If the 'setup_server.bat' has already been run but isn't going to be used (this is not your
server PC, or you will use only one PC) it has to be uninstalled. To do this follow the steps below:
33
QUICK START GUIDE
INCOTEX 500F
Program Files->Incotex->ESI Server, and run the 'uninstall.bat' file.
Installing the setup
The welcome window of the Installation Wizard appears. Click Next to continue.
Then you will be asked to select a location where Incotex to be installed. By default it will be installed
in C:\Incotex\ESIx86-Client. To confirm the installation in this directory, click Next. If prefer another
directory, use the Browse button. Click Next to proceed with the Installation
34
QUICK START GUIDE
INCOTEX 500F
Select where the program’s shortcuts to be placed. By default the folder for this purpose is in the Start
Menu named as “Incotex”. To confirm click Next. It can be changed if necessary.
Click Next to proceed with the Installation
Now the Setup is ready to start the installation of “Incotex” on your computer. Click Install to proceed
with the installation, click Back to review or change settings, or click Cancel to cancel the installation.
35
QUICK START GUIDE
When the Setup has completed the installation of “Incotex”, click Finish.
This window contains user and license keys.
INCOTEX 500F
36
QUICK START GUIDE
INCOTEX 500F
This window contains IP addresses. (4 by default)
Click on Edit to change the IP. Click Apply to set new IP.
Shows the unique user key and license key of the product.
Depending on the keys below (user and license) the number of the clients using the server vary
between 0- 255.
This application tests the communication between the devices- local and remote.
Ticking the box Using Net Service the following window appears and the IP has to be entered. If there
is a connection it remains on the window , if the IP doesn't comply with the server there isn't
connection.
Command- a certain command applies by using a number. Each number has its specific meaning. For
example 62 is date- as shown in the window row below.
Data frame contains command parameters.
37
QUICK START GUIDE
INCOTEX 500F
Enter the IP address here
This window shows that two remote devices have been connected.
letter L is for local.
Letter R is for remote devices;
By clicking on Send Request button the fields below are being filled with response by the default
device
38
QUICK START GUIDE
INCOTEX 500F
SECTION 6: STARTING AND TRAINING THE APPLICATION
Start the ESI application. The first time you want to start the application after its installation you will
need to do it manually. For this purpose go to Start Menu -> Incotex ESIx86-Client-->. The application
will be installed in the default application which is: C:\Incotex\ESIx86-Client\Electronic Signature
Interface). If prefer different location press 'Browse' and select where to save. The “Incotex” logo is
displayed on the desktop and an icon “ESI” appears on the system tray. If the ESD is properly
connected and switched on, and the driver and application are properly installed, the icon “ESI” should
be colored green. If there is a problem it will be red.
Application state:
ESI icon will be shown on
The system tray
6.1. E.S.I. Activation
Right-click on the icon will lead to the following menu:
1
2
3
4
5
1. ESD list- right click on it opens a window with a list of all available devices.
2. Properties- right click on it opens a window where all the required changes can be performed.
3. Verification – right click opens two windows.
4. About- right click opens a window showing the current version of the product.
5. Exit- right click exits the program
39
QUICK START GUIDE
INCOTEX 500F
6.1.1. “Settings” window
After entering the menu, in the “ESI Settings” you can change the password. For this purpose type the
new password in the field “Password” and retype it in the field “Retype Password”. The new password
will be in force after closing the window
1
2
3
4
5
6
7
8
9
10
11
12
13
14
After installing the E.S.I. this window appears only once.
1. Target printer - This field identifies the printer that will print the invoice.
2. Button to select the printer (don't select 'Incotex' virtual printer as target printer)
3. Output directory - Directory for temporary files of the virtual printer
4. Button to select the folder for saving temporary files
40
QUICK START GUIDE
INCOTEX 500F
Signature format, position and size: depend on the model of the certain printer.
7
signature
5
timestamp
ESD serial
number
amount
number
active
filename
Use buttons 5 to 8 to select the position and the size of signature.
5. Signature offset at end of page – shows offset from the bottom of page
6. Signature font size.
7. Offset from the left border of the page
8. Offset from the right border of the page
9. IP address of the device that runs server-side software from the ESD.
Although correct address entered, communicating with the server is not allowed at this time.
10. Pressing this button tests the connection
11. This field shows the path to the archive directory of ESI with structure described below in this
document (the default is C:\Incotex\ESIx64-Client\Archive).
12. Button to select the folder to archive the documents
13. Enter the password (the default password is: 2104204134)
14.
Retype the password
When you have entered all the settings in the “ESI Settings” window, press the “OK” button.
6.2. ESD list
8
41
QUICK START GUIDE
INCOTEX 500F
This window shows two unnamed ESD devices /up to 32 devices can be connected to one PC/
Devices without serial number are labeled as „Unknown‟ followed by a number of this type of device
in the system.
To sign a document the device should be marked as 'favorite' /tick the box/
If none of the available devices is marked, the documents will be signed by the first device from the
list.
The arrangement of the devices depends on the order of their attachment to the computer.
6.3. Properties
6.3.1. Printer properties
This window shows the settings of virtual printer. All fields in this dialog are described above, except
„Enable Redirection‟
1
1. Enable Redirection- The devise uses a virtual printer . Ticking this box allows the virtual printer to
forward requests to the real printer that can be selected from browse button of 'Target Printer' field.
Redirecting is automatically switched off , when the system is in training mode.
42
QUICK START GUIDE
INCOTEX 500F
6.3.2. E.S.I. Settings
1
2
3
4
1. Training Templates:
Each of these four buttons will open a corresponding template.
The templates configuration helps the system to recognize certain types of invoices.
More details for the configuration templates (Training) can be found further in this document.
2. Enable or Disable confirmation dialog:
Confirmation is used for user's convenience and protection against errors that can be made during
training the system.
Confirmation is the last step before signing the document and storing the information in the fiscal
memory of ESD device.
3. Enable or Disable PDF storage:
Storing documents in PDF format is performed automatically by the system.
(see 'Description of archive directory' above).
4. Path to archive Folder: (see 'Description of archive directory' above).
Training mode:
It is important to know that the "training" of this system must be performed by qualified users
with accounting experience and being familiar with the ruling legislation in the country.
Mistakes made during 'training' the system can cause financial losses to the company that uses
43
QUICK START GUIDE
INCOTEX 500F
the ESD device.
The software is designed to recognize up to four different types of documents (invoices).
The software is designed to recognize up to four different types of documents (invoices).
Recognition of the documents is performed by so called 'templates'.
During the 'training' REAL SIGNATURES ARE NOT BEING GENERATED as well as amounts are
not being accumulated in the ESD device.
To make the 'learning mode' easy to understand by the user, we would like to introduce you a simple
invoice:
From the “Settings” window select one of the templates to be trained. The following window appears:
Load the invoice in the template. There are two ways of doing it. First is to open the template click on
File or the icon /File/. A window will be opened to choose the required invoice to be signed. The
second way to load the invoice is to open the invoice itself, click print and choose Incotex printer. Then
open a test invoice and print it on the “Incotex” printer as follows:
44
QUICK START GUIDE
INCOTEX 500F
The display is captured and displayed on the screen.
After loading the invoice, the system is ready to be trained by setting the recognition rules according to
which a document to be recognized as an “Invoice”.
To train the system recognizing this type of documents the following steps have to be completed:
1. Set the recognition rules according to which a document to be recognized as an “Invoice”.
Some of the recognition parameters are optional and others are not. Optional means if there are same
“keys” in the different invoices, but written in different ways, tick optional so the system will be able to
recognize them / for example: VAT (18%) ; 18% V.A.T. or 18% VAT/.
During signing the invoices the system will search one of set options. If none of the set options do not
match the ones in the invoice, this means that we did not set the 'keys' correctly and have to be
changed.
Through the recognition section of 'Properties / ESI Settings', open any of four possible templates.
2. Mark the text from the sample invoice and print the selection in virtual printer 'Incotex'. The aim is
the printed text to be cashed by the opened template window.
45
QUICK START GUIDE
INCOTEX 500F
To recognize the document, the system must be able to find pre-marked words in it.
These words are so called 'keys'.
Select the parameter you want to set from the captured document in the grid by highlighting it.
To set the key highlight the word by using the mouse or keyboard
To save your selection press the “
” button or select “Set Record” from the “Configuration” menu. If
you want to clear your selection press the “ ” button or select “Clear Record” from the
“Configuration” menu. The program displays the text which has to be detected for a valid recognition
of the “INVOICE” parameter (in the “KEY” field). When this KEY word has a value connected to it,
use the “control” button to select both the texts and then press “
”.
Then select its type from the falling menu in the “TYPE” field.
The name of the 'key' and its position in the document are recorded in the second lattice window.
Caution: Do not select the fields marked with 'CR' and 'LF'.
These are symbols for end of line (DOS convention), and appear in the document, but
should not be used as part of a 'key'.
1
1. Keyword
2. Key type
3. Key position and value offset
4. Marker for optional keys
5. Key value
2
3
4
5
46
QUICK START GUIDE
INCOTEX 500F
To make this 'key' usable, it should be assigned type.
When selected only words, without a value the type is 'Identifier' as the example.
Amounts are obligatory to be set. There must be clear indication of the total amounts of the goods sold in the
invoice, separated according to the VAT groups they belong to. In the device the VAT groups are set and
automatically read when selling items. The VAT groups are as follows:
VAT group A – > VA = 18%
VAT group B -> V2 = 0%
VAT group 3 -> V3 =exempt
It is very important when setting the fields corresponding to each of the AMOUNTS to set:
AMOUNT VA points the field where the goods value is with VAT rate 18%;
AMOUNT VB points the field where the goods value is with VAT rate 0%;
and AMOUNT V3 points the field where the goods value is with VAT exempt
The program automatically calculates the taxes over each amount.
The program gives opportunity to select whether to set as key fields the NET AMOUNTS, the GROSS
AMOUNTS, or the VAT for the different VAT groups. One must make this choice according to the information
they have in their invoice.
Key
Value
In some cases, due to the format of the text in the invoice some of the lines may appear shifted in the
grid of the program. In these cases the 'TEXT' of the 'KEY' word may go on an upper line than its key.
In such cases select the “KEY” word and the 'TEXT' holding the 'Ctrl' button. Then, instead
to save the selection.
, press
47
QUICK START GUIDE
INCOTEX 500F
During selection of a certain key the invoice content must be correctly revised. If there are same text
sequences in the invoice a UNIQUE text sequence must be chosen as a 'key'. For example VAT is found
twice in the invoice text:
'VAT 18%
18000.00' and 'Payable VAT 18% is....'
the client must choose as a 'key' VAT 18% that have TWO SPACES before the 'key' ie. any
combination of text, spaces and characters is allowed.
When marking the 'key' horizontally the empty field next to it must not be selected.
After you finish the training close the 'ESI Configuration' window and click SAVE. Signed document
has to be printed again on Incotex printer. A window with the set 'keys' will be shown, click OK and
the signed document will be saved in required directory.
You can train the four templates for four different types of invoices. All the trained templates will be
active and each time a valid invoice is sent to the printer it will be recognized from the ESD and given
an electronic signature.
Types of 'keys'
The system detects specific number of types of 'keys'.
"Identifier'"– used uniquely to identify the document. The program enables more keywords of this
type to be defined.
"Serial Number" - Keyword of this type are used to determine the serial number of the invoice
(Invoice Number).
It is not recommended to define more than one keyword of this type, except when they are marked as
optional.
Using data from this keyword, the program allows to print more than one copy of the invoice, without
leading to re-accumulation of amounts in the fiscal memory.
48
QUICK START GUIDE
INCOTEX 500F
Warning: This applies only to consistently printed invoices.
"Date/Time" – This type is used to define the date and time of invoice.
Interpretation of its value depends on regional settings of the system.
ESD device does not allow signing the invoice with the date and hour earlier than the present.
When not defined keyword of this type, the program takes the system time to time and date of
invoice.
"GROSS Amount EXEMPT" – The total amount of the invoice is marked by this field when it have to
be accumulated in EXEMPT VAT group.
"GROSS Amount A" – total turnover VAT group A
"GROSS Amount B" - total turnover VAT group B
"GROSS Amount 3" - reserved
"NET Amount EXEMPT" – this field selects the invoice net accumulated in tax group EXEMPT
"NET Amount A" – net turnover VAT group A
"NET Amount B" - net turnover VAT group B
"NET Amount 3" - reserved
"VAT A" – this field sets general taxes in the invoice run up in tax group A(18%)
"VAT B" - set with VAT rate 0%,
"VAT 3" - reserved
"Calculated EXEMPT from Grand Total" – from Grand Total to be calculated the amount attached
with tax group EXEMPT. Example: If we have an invoice with sales summary. Grand
Total group A in this invoice is 700 units and Grand Total group B is 200. The total
amount is 1000 units. In this case EXEMPT can be calculated as from the total
amount 1000 the sum of A and B is being deducted. The result is 100. After selecting
the amount 1000 from the invoice select the type of this amount from the drop down
menu - “Calculated EXEMPT from Grand Total”. The result will be shown further
in the application.
With the rest of options it works with the same method the only difference is the
amount to be calculated.
"Calculated A from Grand Total"
"Calculated B from Grand Total"
"Calculated 3 from Grand Total" - reserved
"Calculated EXEMPT from Grand Net" "Calculated A from Grand Net" "Calculated B from Grand Net" "Calculated 3 from Grand Net" - reserved
"Net TOTAL” - FOR CONTROL ONLY!!!"
"Grand TOTAL” - FOR CONTROL ONLY!!!"
49
QUICK START GUIDE
INCOTEX 500F
Note the last section of the third window template.
It changes with each modification of the template, which affects calculations of amounts.
Caution: To train the system properly, with the help of this section of the window template,
the system must be connected with at least one ESD device to enable the program to be
informed of available rates.
If for any reason, require disabling some of the templates, this is achieved by deleting all of its 'keys'
by clicking on button
(one by one).
When you select the value of the date and time in the template make sure that the format they are in is
the same as the date and time format of your PC.
In this example the date and time are: 16/08/10, 11:34:50.
50
QUICK START GUIDE
INCOTEX 500F
The format of the data is dd/M/yyyy and the format of the time is HH::mm:ss.
They should be the same as the ones set in your PC‟s settings. To check them go to Start menu ->
Settings -> Control panel -> Regional and Language Options.
51
QUICK START GUIDE
INCOTEX 500F
In Regional and Language Options select “Regional options” and press the “Customize…” button.
Then check the “Time” and “Date” formats.
After you finish the training close the 'ESI Configuration' window and click SAVE. Signed document
has to be printed again on Incotex printer. A window with the set 'keys' will be shown; click OK and the
52
QUICK START GUIDE
INCOTEX 500F
signed document will be saved in required directory.
You can train the four templates for four different types of invoices. All the trained templates will be
active and each time a valid invoice is sent to the printer it will be recognized from the ESD and given
an electronic signature.
6.3.3. Connection settings
1
2
3
4
5
6
1. 'ESD List' - Displays available ESD devices (local and remote)
2. 'Manual Z report' - Manually start the 'Z report' of the device selected from the list. By pressing the
“Z report” button a daily Z report is printed on the ESD. Then on the display of the ESD a message
“SEnd” appears and the antenna sign on the display starts blinking, which means the Z report is being
sent to TRA. When the Z report has been sent, the antenna sign stops blinking.
3. Check- box for favorite ESD- only device marked as 'favorite' is used for signing documents.
If none of the available devices is marked, documents are signed by the first device from the list.
The arrangement of devices depends on the order of their attachment to the computer.
4. 'Device alias' - User chooses any name of ESD device.
5. 'Enable/Disable remote ESD' - This check-box enables or disables the connection to the server part
of software that allows the use of remote devices.
6. 'IP address of ESD server' - IP address of the machine which has installed the server package.
53
QUICK START GUIDE
INCOTEX 500F
6.3.4. Using batch files
1
2
3
1. Task list
2. Task management areas
3. Set state- Set state button changes the task status: if it is stopped /as shown/ clicking it will change
status into start and respective it is started, clicking on button will change status into stopped.
Click on new task and the following window will appear. Input folder is the folder the files will be extracted
from. To select the input file click on browse button
54
QUICK START GUIDE
INCOTEX 500F
1
2
3
4
1. Batch input location
2. Input mask (filter)
3. Batch output location
4. Errors location (optional)
6.4. Verification button
The official way to verify a signed invoice is using a verification dialogue, which is the “Verification”
button in the start menu. The verification works as follows:
For each signed invoice four files are created and saved in the Archive folder, situated in
C:\Incotex\ESIx86-Client. This Archive folder contains four more folders each of them containing
different information.
55
QUICK START GUIDE
INCOTEX 500F
This window shows the daily archive to be analyzed. To open the file click on the required day and
then OK.
Any sub-folder in the archive directory has the following structure:
name- formed by <ESD serial number><date>Z<z report number>
A – contains a text file with text information about the signed invoice, but without the electronic
signature itself
B – contains text information about the electronic signature
C – contains text information about the signature of all electronic signatures for the day named 'Z
signature'
D – contains signed documents in PDF format with name like 'A' and 'B'
Verification starts and on the other window /shown below/ the counter starts counting the invoices and
errors. If there is no error the row remains blank.
Actually in a day in folder A are created files for all the invoices signed, in folder B are created files for
the electronic signatures of each of these invoices, in folder C is created one file only – with the
signature of all the electronic signatures of the day and in folder D are saved all the signed invoices in
PDF format.
All this information is saved on the PC where the driver of the ESD is installed. The owner of the
device should make a back-up of the information in the Output folder.
The verification of the invoices is made over the information in these three folders – A, B and C. The
verification procedure is in the driver of the ESD. For correct verification the ESD device is also used.
To verify the information about a certain invoice one should open the Archive folder and choose the
directory named with the number of the invoice. Then all the information saved about the invoice in
folder A is sent to the ESD for calculating its electronic signature. The result from this calculation is
compared to the electronic signature saved in folder B. Meanwhile the signature of the day is also
calculated and compared to the one saved in folder C. If an invoice has been changed or deleted, a
mismatch between the calculated and saved information will occur and the verification will fail. This
will reflect in a message in an ERROR LOG, created in the current testing directory. A
VERIFICATION LOG is also created in this directory to follow the procedure of verification.
56
QUICK START GUIDE
This is a view of Archive folder and its content.
INCOTEX 500F
57
QUICK START GUIDE
INCOTEX 500F
6.5. Signing invoices from multiple PCs with one ESD
One ESD can work with a few PCs in a network, each of which will be able to send invoices to it. The
ESD will sign the invoices and print them on the target printer selected in the Settings of the “esi.exe”
application.
For this purpose one should:
•
connect the ESD to one of the PCs in the network and install the ESD driver and esi.exe, the
way described above.
•
install and configure Generic/Text only printers on all the other computers in the network,
which will send invoices to the ESD and set these printers as default. Then right click on each of them
and select “Properties”. In the Properties window choose “Ports” and click “Configure port” button.
The “Configure Standard TCP/IP port Monitor” appears. In the field “Printer Name and IP Address”
enter the IP Address of the PC, where the ESD is connected and the esi.exe application is working. To
confirm click “OK”.


