1
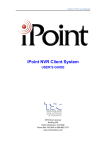
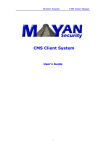
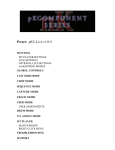
KEYBPTZ3DLV
DVR/NVR/Lanvision Control Keyboard User Manual
1 Connection
Our keyboard support both USB and COM port connection. The ports are at the back of the
keyboard.
1.1. USB Connection
User can use the USB cable to get connected to the computer directly. After USB connection
user must install driver to make it works, so we always recommend user to use COM port
connection.
1.2. COM port Connection
User can use COM port cable to connect PC with the COM port at the back of the keyboard.
Connected with the COM port needn’t install driver. But in the keyboard set in DVR/NVR
software, if the COM port that you choose conflicts with alarm input port, or PTZ control port, the
both settings will exchange with each other.
2 Functions
From the appearance, there are 4 functional areas, including Information display area,
Functional buttons area, Number buttons area and PTZ Control area.
Note: If there is no special mark, the following functional instructions are
both for Mammoth Technologies DVR System and NVR System.
2.1. Information display area
Figure 2 Information display LCD
The LCD at the top-middle of keyboard will display all the information user input or the status
of current settings and so forth. The contents displayed here are changed according to user’s
operations; user can view it to check the settings and operations.
2.2. Functional buttons area
Figure 3 Functional buttons of keyboard
Functional buttons are on the left part of the keyboard, user use it to use the main function of
DVR or NVR:
(1). 【Lock/Unlock】
This button is used to lock the keyboard when you don’t want others to change your settings. The
keyboard will be locked when user presses this button or the keyboard is restarted. If so, user
must press this key and input password to unlock it. The default password is 0000.
(2). 【Page】
This button allow user to shift the cameras on your screen from one page to another circularly
when the total cameras is bigger than the current view divisions. For example, the current view
division is 4 while the total cameras are 8 channels. When user press 【Page】button, the
cameras on the screen will be shifted between the first 4 cameras (channel 1 to 4 ) and the last 4
cameras (channel 5 to 8)
(3). 【F11】
This button is used to show the window or camera that user chooses in single widow mode.
When user presses it again, system will restore to original setting.
(4). 【F12】
User can press this button to display the video image area on the screen in full screen mode.
And press it again to exit full screen mode.
(5). 【4 view/9 view/16 view/24 view/36 view】
User can press these buttons to switch to corresponding view divisions directly.
(6). 【Views】
User can use this button together with the number buttons on the【Number buttons area】
to switch to the view division that user want.
Press 【Views】button first, then select a number button and type 【OK】key on 【Number
buttons area】. After that system will switch to the corresponding correct view divisions. For
example, if user pressed the key 【Views】, then input 8, it means you want the screen to be
divided into 8 pieces. But there is no 8 view in our software, so the screen will be divided into
9 pieces. 9 is the number bigger than 8 and the closest to the number 8.
(7). 【Window】
This button is used together with the number buttons on the 【Number buttons area】to
select the window user want immediately.
Press 【Window】button first, then select a number button and type 【OK】key on 【Number
buttons area】. After that system will switch to the corresponding window and show it in single
window mode; user can exit single window mode by selecting views.
(8). 【Camera】
Note: this button has different function when the keyboard is used with Mammoth
Technologies DVR System or NVR System.
When user uses this keyboard with Mammoth DVR System; this button is used together with
the number buttons on the 【Number buttons area】to switch to the camera that user want to
view immediately.
Press 【Camera】button first, then select a number button and type 【OK】on 【Number
buttons area】. After that system will switch to the corresponding camera immediately and show
it in single window mode; user can exit single window mode by selecting views.
When user uses this keyboard with NVR software; this button is used together with the
number buttons on the 【Number buttons area】to connect the camera automatically (whatever
it is connected or not right now) and display it in current window. The camera serial number is
according to the order in the connection list.
Note:
Above two buttons are quite useful when user breaks the default relation between windows
and cameras (the window and the camera have the same serial number) in DVR System by
setting a custom-built display group in local setup. For example, if you changed window 1 to
display camera 4, then window 4 will shift to display camera 1 automatically. And when you
choose window 1 use the keyboard, it will display window 1, which displays camera 4. When you
choose camera 1 use keyboard, it will display window 4, which displays camera 1.
(9). 【Switch】
This button is used to select the windows one by one, when it reaches the end, user can
press this button to begin from window 1 again. It is same to the TAB shortcut key in software
after user enables it.
(10). 【Talk】
User can use this button to create voice talk connection with the server which includes the
current camera user selected.
(11). 【30’s Record】
User can press this button to do emergent 30 seconds recording for all cameras at the same
time.
(12). 【Inst. Play】--Instant Playback
User can use this button together with the number buttons on the 【Number buttons area】
to play back the recording data (if have recording data) of current selected camera (active
camera) instantly for a period that user selected. The time length can be set from 10 to 127
seconds in DVR system, and the time can be set from 10 to 127 seconds in NVR system.
If user presses this button in a window without active camera, there will be no response.
Note:
You must set the “Instant Playback max time” enable by choose time
in the drop-down menu in setup of NVR system.
(13). 【Grab】
User can press this button to capture and save the picture of current selected camera after
setting save path for captured pictures in system setup. If no save path is set at first, there will be
no response to this button.
(14). 【Stop】
This button is used to cancel operation as below:
Instant Playback;
Voice Talk.
(15). 【Armed/UnArmed】
Note: This button is only used when user enable E-Map function in NVR
software.
These two buttons are used to arm and unarm the alarms from all devices you add on the
E-map in NVR software.
2.3. Number buttons area
The number buttons area is on the button-middle of the keyboard, it is usually used with
buttons of other areas to implement specific functions.
Figure 4 Number buttons of keyboard
(1). 【OK】
This button is always used to confirm the selection of the number buttons.
(2). 【Cancel】
This button is always used to cancel the selection of the number buttons before confirming
the selection.
2.4. PTZ Control area
Figure 5 PTZ control buttons and joystick
PTZ control buttons and joystick is on the right part of keyboard, user can use it to control all
PTZ functions.
User can use the buttons and joystick to control the local analog PTZ cameras and PTZ
cameras from remote DVS and EMDVR in Mammoth DVR System for full PTZ operation, and do
zoom in/out operation for mega pixels IP comers in DVR.
For NVR System, user can use them to control the PTZ cameras from DVR System and DVS
as well as EMDVR remotely for full PTZ operation.
For mega pixels IP camera, user can just use them to control the digital zoom in/out remotely
from DVR or NVR System.
For joystick, user can not only control the PTZ direction, but also control Zoom in/Zoom out.
And the joystick will detect the speed of user’s operation; it will determine the speed of the PTZ
control. That is to say, if user operates the joystick quickly, the speed of the PTZ will also move
quickly.
(1). 【Focus+】,【Focus-】
These two keys are used to govern the foci in order to get the image more clearly.
(2). 【Zoom In】, 【Zoom Out】
These two keys are used to zoom in/out the image of target camera.
(3). 【Iris+】, 【Iris-】
These two keys are used to adjust the iris.
(4). 【Auto Pan】
This button is used to invoke auto pan function of PTZ camera, now it is reserved.
(5). 【Wiper】,【Relay】
These two keys are reserved.
(6). 【Set Preset】
This button is used to set preset positions for selected PTZ camera. It has the same function
as the PTZ control in our software. Turn the camera to target area and press this key, after then
input a number and press 【OK】button on 【Number buttons area】to confirm the setting.
(7). 【Clear Preset】
This button is used to clear the preset positions when you don’t want to keep them.
(8). 【Call Preset】
When you press this key and input a number, the camera will turn to corresponding preset if it
has been set yet, or there will be no response.