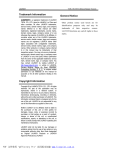
1
MOTORHOMES | CAMPERVANS | CARAVANS O w ners M an u a l Congratulations on becoming a Talvor owner Congratulations on becoming a Talvor owner, and thank you for choosing to become part of the Talvor family. Using the finest materials available, this product has been carefully designed, engineered and manufactured for your enjoyment. Talvor enjoys a reputation for great value and quality; this is why we stand behind all our products with our warranty program. We wish you many happy years of enjoyment with your new Talvor and look forward to a long and happy relationship. 2 | TALVOR Contents Introduction. . . . . . . . . . . . . . . . . . . . . . . . . . . . . . . . . . . . . . . . . . . . . . . . . . . . . . . . . . . . 4 Limited Warranty . . . . . . . . . . . . . . . . . . . . . . . . . . . . . . . . . . . . . . . . . . . . . . . . . . . . . . . . 5 Getting Started. . . . . . . . . . . . . . . . . . . . . . . . . . . . . . . . . . . . . . . . . . . . . . . . . . . . . . . . . . 8 Caravan Towing Tips. . . . . . . . . . . . . . . . . . . . . . . . . . . . . . . . . . . . . . . . . . . . . . . . . . . . . . 9 Set Up . . . . . . . . . . . . . . . . . . . . . . . . . . . . . . . . . . . . . . . . . . . . . . . . . . . . . . . . . . . . . . . 11 Appliances & General Equipment . . . . . . . . . . . . . . . . . . . . . . . . . . . . . . . . . . . . . . . . . . . 12 Caravan Equipment . . . . . . . . . . . . . . . . . . . . . . . . . . . . . . . . . . . . . . . . . . . . . . . . . . . . . 17 General Care and Maintenance. . . . . . . . . . . . . . . . . . . . . . . . . . . . . . . . . . . . . . . . . . . . . 20 Electrical System 12V . . . . . . . . . . . . . . . . . . . . . . . . . . . . . . . . . . . . . . . . . . . . . . . . . . . . 23 Electrical System 240V . . . . . . . . . . . . . . . . . . . . . . . . . . . . . . . . . . . . . . . . . . . . . . . . . . . 25 Electrical Diagram Motorhomes & Campervans . . . . . . . . . . . . . . . . . . . . . . . . . . . . . . . . 26 Electrical Diagram Caravans . . . . . . . . . . . . . . . . . . . . . . . . . . . . . . . . . . . . . . . . . . . . . . . 27 General Plumbing Diagram. . . . . . . . . . . . . . . . . . . . . . . . . . . . . . . . . . . . . . . . . . . . . . . . 28 Service Log. . . . . . . . . . . . . . . . . . . . . . . . . . . . . . . . . . . . . . . . . . . . . . . . . . . . . . . . . . . . 29 Owners Manual | 3 Introduction This Owner’s Manual was prepared to help you understand the safe, proper use and operation of your Recreational Vehicle (RV), the servicing and maintenance of component parts, and includes an explanation of your warranty protection. The information provided is intended to help you derive the most enjoyment from your Talvor Product. To enjoy trouble free touring with your motorhome, campervan or caravan, we recommend an annual inspection and service by an authorised Talvor dealer. This manual contains the most accurate information available at the time of publication. Talvor Products are constantly being improved and we seek to upgrade our components and parts accordingly. If the equipment in your unit differs from some descriptions contained within this manual please refer to the separate Manufacturer’s Instructions contained in your Owner’s Pack. Please also carefully read and understand the Owner’s Manuals supplied by manufacturers of separately warranted products. We recommend you keep this Manual in your unit for handy reference. It will help you get to know your Talvor Product and how it operates. DISCLAIMER Customer service Talvor is committed to delivering excellent customer service. Your complete confidence and satisfaction in our product and services assures our continued success. Our commitment to technical excellence is one aspect of our strategy for fostering an ongoing, mutually rewarding relationship with all Talvor customers through our network of dealers. Your authorised dealer will assist you by providing service, maintenance, a selection of options and instructions concerning the operation of your Talvor Product. Most issues that arise from misunderstandings concerning warranty and service manuals are usually solved by dealers. Please understand that in most instances we refer you to the local dealer with our recommendations. Insurance As with your car, it is important that you protect yourself and others with insurance coverage for personal liability, theft, collision, property damage, etc. Your dealer will assist you in obtaining specialised insurance for your RV. Please note that exceeding the load limit of your Talvor Product, and/or tow vehicle in the case of caravans, above the manufacturer’s recommended maximum weight may invalidate your insurance cover. Please see warranty information contained within this manual. The contents of this manual (including but not limited to information about Talvor’s Products and services and operating recommendations) is provided for general information purposes and is a guideline only. Every effort has been made in the production of this manual to provide accurate information and to encourage Talvor’s customers to use safe working practices in relation to the operation for Talvor’s Products. However, you must make and rely on your own assessment of your particular situation to determine the suitability and usefulness of this information. Accordingly, Talvor makes no representations, warranties or guarantees, either expressed or implied, regarding the suitability of usefulness of this information. Talvor accepts no liability for any loss, damage, claim or expense suffered by you arising from your use of or reliance on the information provided in this manual. 4 | TALVOR Limited Warranty Talvor (referred to in this document as we, our, us) offers a limited 24 month warranty in relation to motorhomes and campervans we manufacture and a limited 12 month warranty in relation to caravans we manufacture (Talvor Products). The warranty is set out in this document. In the case of products, workmanship and materials provided by our subcontractors or suppliers, the warranty we provide will be the warranty provided by the subcontractor or supplier current at the time of delivery of the product to us or the provision of the workmanship and materials. Subject to the use instructions and exclusions section below and you complying with your obligations set out in this document, we warrant that Talvor Products we deliver will be free from defects (excluding fair wear and tear) due to faulty workmanship for the periods set out below, from the date you take possession of the relevant Talvor Product from our authorised dealer: 1. Motorhomes: 24 months 2. Campervans: 24 months 3. Caravans: 12 months We are not responsible for any damage which may occur to a Talvor Product, including without limitation through your use or misuse of the Talvor Product. The warranty does not cover items routinely replaced in the course of vehicle servicing, including without limitation tyres, batteries, light bulbs, hoses, seals, consumables, routine maintenance items and wheel alignments. specifically provided herein, we make no representations or warranties, express or implied, including without limitation, to the extent permitted by applicable law, any implied warranty of merchantability or fitness for a particular purpose, about any Talvor Product. Repair or replacement of Talvor Products The warranty is limited to, in our sole discretion, the repair or replacement of the faulty or defective part of the Talvor Product. Subject to the paragraph below, it does not extend to labour or shipping costs associated with repairing or replacing the faulty or defective part of the Talvor Product, or any other loss or damage associated with the Talvor Product. Subject to the Australian Consumer Law section below, we will not be liable for any other cost, expense or damage incurred by anyone in connection with a warranty claim or generally. You are responsible for bearing the expenses of claiming the warranty. Warranty repairs will only be carried out at our workshop or a workshop approved by us prior to such warranty repairs being undertaken, and if made at such a workshop you will not be charged for labour costs. In all cases, any warranty repair work must be authorised by us prior to being undertaken. A service call fee will apply to any onsite repairs. The limited warranty covers the original purchaser of a Talvor Product, but is not transferable. This means that a subsequent purchaser of Talvor Products cannot make a claim under the warranty. Subject to the Australian Consumer Law section below, except as otherwise Owners Manual | 5 Product registration To protect and preserve your warranty rights, you must register your Talvor Product with us, unless applicable law specifies otherwise. Failure to register your Talvor Product voids the warranty. You must report any fault or defect to a registered Talvor Product to us within 14 days of becoming aware of the fault or defect. You must follow the preventative steps guidelines set out in the Talvor Owner’s Manual immediately upon becoming aware of such fault or defect. The warranty does not apply if you fail to follow the specified guidelines. You will bear any costs associated with claiming the warranty, including without limitation, freight, handling and investigation costs. f. the installation of any item or equipment or any modification or after treatment not authorised by Talvor; g. any use of the Talvor Product outside Australia; or h. the owner of the Talvor Product failing to comply strictly with the requirements of the warranties. Except as contemplated by the above warranty and the Australian Consumer Law section below, we are not liable for any loss or damage suffered or incurred by you (however caused, including by our negligence) in connection with this document or any Talvor Product. Use instructions and exclusions Nothing above limits any statutory rights of any person that cannot be limited or excluded by law, and exists in addition to other rights and remedies under relevant law in relation to the goods to which the warranty relates. The warranty does not apply to Talvor Products which have faults or defects caused or contributed to by: Australian Consumer Law a. defects drawn to the customer’s attention before purchase; b. failure to maintain or use the Talvor Product in accordance with the Talvor Owner’s Manual; c. accident, theft, fire, stone strike, hail, windstorm, lightning, external fire or unusual environmental conditions; d. any abnormal, unlawful or unintended use, accident, contamination, tampering, misuse, abuse, improper storage or negligence by any person; e. any use other than recreational use, including without limitation commercial, rental or permanent residency use; 6 | TALVOR Except as contemplated by the next paragraph, nothing in this document is intended to limit any of your rights under the Competition and Consumer Act 2010 (Cth) (Competition and Consumer Act). If the Competition and Consumer Act or any other legislation states that there is a guarantee in relation to any good or service supplied by us in connection with this document, and our liability for failing to comply with that guarantee cannot be excluded but may be limited, the exclusion of liability provision set out above will not apply to that liability and instead our liability for such failure is limited (at our election) to, in the case of a supply of goods, us replacing the goods or supplying equivalent goods or repairing the goods, or in the case of a supply of services, us supplying the services again or paying the cost of having the services supplied again. Our goods come with guarantees that cannot be excluded under the Australian Consumer Law. You are entitled to a replacement or refund for a major failure and compensation for any other reasonably foreseeable loss or damage. You are also entitled to have the goods repaired or replaced if the goods fail to be of acceptable quality and the failure does not amount to a major failure. Customer service If you wish to make a claim under the warranty, please contact our Customer Service: Mailing address: 698 Nudgee Road, Northgate, Queensland, 4013 Contact number: 1-800-TALVOR Facsimile number: 07-3265-9201 Email address: [email protected] Website: www.talvor.com All entitlements referred to in the prior paragraph are to be claimed against us to the extent and in the manner contemplated by the Competition and Consumer Act. GST and taxes Our fees for goods and services do not include GST under A New Tax System (Goods and Services Tax) Act 1999 (Cth). You must also pay to us an amount equal to the GST for the supply of those goods and services. You are also responsible for all other taxes payable in connection with this document. Governing law The laws of Queensland, Australia govern this document. Each of us irrevocably submits to the non-exclusive jurisdiction of the courts of Queensland, Australia and courts competent to hear appeals from those courts. Owners Manual | 7 Getting Started Before you leave We recommend you develop your own routine for checking your vehicle, but listed below are some of the areas we suggest you pay attention to. Inside: • All 12V lights and appliances switched off. • Awnings closed and stowed securely, winder handle stowed. • Secure and stow antennas (where a fixed type antenna is not installed). • Slide-outs retracted and locked securely (selected models). • Ensure roof lockdown clamps are in the locked position (selected models). • TV’s stowed in transit positions. • Check tyre pressure (refer to tyre placard). • All loose items secured. • Retract entry step. • All windows, catches, drawers, cupboard doors, roof hatches closed and locked • Ensure all entry doors are properly closed and secure. • Fridge door closed and locked. • 3 way refrigerators set to electrical source setting (never use on gas during transit). • All doors secured with locks or straps provided. • Raise rear bed to upper position (selected models) • Gas shutoff valve turned off. • Remove and stow microwave cooking plate. Outside: • Gas bottle(s) turned off and secured. • Fully raise stabiliser legs (where fitted). • 240V Electrical lead disconnected and stowed. • Mains pressure hose disconnected and stowed. • Remove water from drain hose and stow. • Close and lock all storage and locker doors. • Annex, poles, ropes and pegs stowed. 8 | TALVOR • Check vehicles external lights and indicators are all working. • Check all mirrors. Some additional steps if your RV is a caravan: • Check wheel nuts. Refer to “Wheel Mounting”. • Hitch van to car ensuring coupling catch is in the locked position. • Connect safety chain to car. Shackles must be the same gauge as the safety chain. • Release caravan park brake. • Remove and secure jockey wheel. • Connect 7 or 12 pin plug to car socket and check road lights. • Check brakes are working in the first 50 meters of travel. In transit seating positions on all Talvor motorhomes and campervans are displayed on the relevant seating placards found in your RV’s manual and within the vehicle. These must be strictly adhered to by law. No passengers may travel in towed vehicles whilst in transit. Caravan Towing Tips Weight distribution The performance of your vehicle and weight of your caravan are very important for towing purposes. Check your vehicles Owner’s Manual for the information on your vehicles towing capacity or consult your authorised Talvor Sales Centre. To ensure safe towing and reduce possible swaying, both caravan and the tow vehicle should be level. The reason one or both are not level could be: 1. Incorrect ball height. 2. Uneven loading of gear in the caravan. 3. Lack of proper towing equipment. 4. Incompatibility between the caravan and the towing vehicle. To check for the correct ball height, measure from the ground to the centre of the coupling. Then compare this measurement with the height of the tow ball on the towing vehicle. These two measurements should be the same, plus or minus 20mm, if this is not the case, the ball mount or tongue may need to be adjusted or altered. Industry guidelines for ball weight recommend it be between 8 to 15% of the loaded weight of the unit. This may vary based on tow vehicle type, van type, road conditions and personal preferences, we recommend you pay attention to this issue and establish a comfortable safe tow ball loading to suit your vehicle combination. Some packed items may need to be moved to achieve the ideal weight. Uneven weight distribution on the tow vehicle can affect performance and safety. Even when the rear of the tow vehicle drops very little, weight is taken off the front wheels. Whenever weight is taken off the front wheels, the braking and steering (and on front drive vehicles, the traction) can be affected. To overcome this, load levellers may need to be fitted. Correctly fitted levellers will assist the tow vehicle and caravans to be level and towed safely. Mass definitions Tare: Un-laden weight of the caravan (not connected to the tow vehicle) without water or gas. Gross Trailer Mass (GTM): Maximum loaded weight on the tyres (connected to tow vehicle). Aggregate Trailer Mass (ATM): Maximum loaded total weight (not connected to tow vehicle) Tow ball Weight: Un-laden down weight at the coupling. Before you tow Make sure you do not exceed the A.T.M. weight of your unit which is stated on your VIN plate. Refer to your VIN plate and subtract the tare weight from the A.T.M. to arrive at the maximum authorised payload. i.e. A.T.M. 2500kg – Tare 2100kg = Payload 400kg. Ensure your tyres are in good condition and are inflated to the correct pressure. Refer to the vehicle’s tyre placard for correct pressures. Check wheel nut torque; refer to the “wheel mounting” section in this manual. Before towing your vehicle, ensure that the coupling is correctly fitted and the electrical plug and safety chains are connected and that all external lights are working. Owners Manual | 9 On the road The first time you tow, spend an hour or so driving gently around quiet roads. Build your confidence by getting the feel of your combined vehicles. Take each gear shift gently and allow the revs to build up before shifting. When driving downhill, use the gears in conjunction with your brakes. Extra consideration is required when driving in wet conditions involving longer braking distances and slower cornering speeds. Remember that the caravan wheels don’t exactly follow the car wheels; they slightly cut corners, so make allowances for this. Your caravan is wider than your car, allow for this when overtaking or pulling to the side of the road or entering gateways. When turning corners, travel further forward in a straight line before you turn, in order to give your van plenty of room to negotiate the corner. Reversing the caravan is actually quite simple. The basic principal is to turn the car wheels in the opposite direction you would if the car was on its own. This will push the unit in the desired direction. 10 | TALVOR Set Up Motorhomes & Campervans • Check site is level, free of ant nests, dangerous branches or other overhead obstructions. • Position RV on selected site. • Lower stabiliser legs (selected models). • Turn on gas bottles and check for leaks. • Fill water tank if necessary or connect hose for town water pressure (selected models). • Connect grey water hose. • Connect electric power lead. • Turn on power to refrigerator. • Open roof hatches and windows. Additional steps for caravans • Apply hand brake to caravan and/ or place chocks under caravan wheels. • Unplug power lead between car and caravan. • Undo safety chains • Clamp jockey wheel firmly into position. • Raise draw bar to clear tow ball by using jockey wheel. Owners Manual | 11 Appliances & General Equipment Depending on the model of your Talvor Product some items listed may not be fitted to your RV. Most of the appliances fitted have instructional information issued by the manufacturer which you will find either affixed to the appliance or in your Owner’s Pack. All appliances are fitted in accordance with the manufacturer’s specifications. You should read the operating instructions before using the appliance. Most of the appliances carry their own warranty and after sales support. Follow the manufacturer’s directions for assistance. We recommend you complete and return your warranty Card/Certificate as this will assist you should a problem occur at a later date. Refrigerator Please refer to the refrigerator user’s manual provided with the RV before operating your refrigerator. Your Talvor Product is equipped with either a two way or a three way refrigerator. Two way refrigerators operate on 12V or 240V while three way refrigerators operate on 12V, 240V or Gas. Some refrigerators are equipped with an Automatic Energy Selector (AES) that selects the available energy source automatically. The selection sequence is 240V, 12V LPG. On some models energy selection must be done manually. 12 | TALVOR Important: • Do not use gas when the RV is in motion. Switch your refrigerator to 12V and turn off the gas bottle at the bottle valve, on selected models turn the AES function on. • When you store the RV or switch off the refrigerator, keep the refrigerator door opened slightly to prevent mould and odour building up inside. • Ensure that all ventilation to the refrigerator is maintained in a clear and unblocked condition. Do not tape over or block the vents for any reason. Overheating of the refrigerator components can lead to poor refrigeration in the cabinet. Air conditioner The air-conditioning units operate on 240V only. The RV must be connected to Mains power or, in selected models, generator must be running. For details regarding operating the airconditioning unit refer to the Manufacturer’s Manual supplied with the RV. Stove, grill and oven To use the gas stove and oven, ensure the gas bottles are opened and ensure sure the separate gas shut off valve is switched on. For models fitted with electric stoves connect the RV to 240V before use. Turn the stove and range hood master switch to the on position at the main switchboard. For further instruction on how to use the stove and oven consult the Manufacturer’s Manual supplied with the RV. Important: Stoves and cookers fitted with glass covers can become very hot do not touch after use to avoid injury. Battery charger The RV is equipped with an automatic battery charger. The charger starts working when the vehicle is connected to 240V supply, or when the vehicle engine is running and the start battery reaches its charge requirement. Please refer to the Manufacturer’s Manual provided with the RV for operation and setting preferred charging programs. Microwave The microwave will only function on 240V in most models. Please refer to Manufacturer’s Manual for operation. Please remember to remove and secure cooking plate before transit. TV, DVD player and entertainment unit Please refer to Manufacturer’s Manual for operation. Antennas Some models are equipped with a fixed antenna, others with a wind up antenna. Wind up antennas should always be securely stowed away while travelling. In the case of high winds, antennas should be removed and stored away as the structures are not designed to withstand strong wind conditions. Refer to Manufacturer’s Manual for further details and trouble shooting. Hot water system Most models are equipped with a hot water system which is electrically ignited, and fuelled by LPG. Some models are heated by 240V also. To operate: • Ensure gas has been turned on, at the bottle(s) and shut off valve. • Switch on the water pump at the main switchboard. • Ensure the fresh water tank has sufficient water. • Switch on the water heater itself. This is very important to avoid causing damage to the heater when running without water. • Turn on hot water tap to clear the lines of air. For further information on use, setting, troubleshooting or specifications, refer to the Manufacturer’s Manual supplied with the RV. Important: Please make sure that the water pump is also in use whenever you switch on the water heater, even when the system is pressurised by town water system’s pressure. Failure to follow manufacturer’s instructions could greatly reduce the service life of the HWS. Owners Manual | 13 Gas cylinders and regulator The main valve on the LPG container should be tightened by hand only, using caution not to over tighten. Handle your LPG bottles with care. When connecting or disconnecting your gas bottle, the connections are left-hand threads. Always have your gas cylinder valve closed when travelling or not in use. Your gas regulator is factory preset and you should never attempt to reset the gas regulator yourself. Only allow licensed gas fitters to make any adjustments to your regulator or the RV’s gas system. Important: Never refill your RV gas cylinder with any gas other than LIQUID PROPANE GAS (LPG) from an authorised distributor. If you smell gas: 1. Extinguish all open flames, pilot lights and smoking materials. possible, in exposed salty conditions, they should be covered to avoid the build up of rust and you should always ensure that the valve on the gas cylinder is turned off before travelling and when storing your RV for any length of time. Gas legislation may vary from state to state, so it is the owner’s responsibility to comply with relevant laws. BBQ Some Talvor models are equipped with a BBQ. Please make sure it is securely stowed by locking it in place before travel. Please refer to the Manufacturer’s Manual for operation. Electric bed lift systems The bed is moved up and down by an electric motor and controlled by an electric switch, the location of the switch may vary dependant on model. Refer to Manufacturer’s Manual for operation. 2. Keep bystanders away. 3. Do not touch electrical switches 4. Shut off the gas supply at the cylinder valve. 5. Open doors and other ventilating openings. 6. Leave the area until the odour clears. 7. Have the gas system checked and leakage source corrected by a licensed gas fitter before using the system again. Gas cylinders generally have a life of ten years after which time they have to be restamped and certified by an authorised company to ensure that your gas cylinders are in safe working condition. Where 14 | TALVOR Important: • Do not operate the bed lift with heavy load on it (max. 10 kg). Make sure to take all bulky and heavy goods off the bed before using the bed lift. • Ensure bedding is not on moving parts or other stationary items in the vehicle to avoid jamming. • Make sure that the bed is raised when you depart. • Do not put any goods on the bed during transit. Electrical bed slide Hatches The bed is moved in and out by an electric motor and controlled by an electric switch, the location of the switch may vary dependant on model. Ensure that your hatch is completely closed at all times prior to travelling as this could not only let in excess dust and water but could also cause damage to the hatch due to excessive vibration when the hatch is open. Important: • Please make sure no objects are obstructing the path of the bed slide before operating switch. • Ensure cushions are not on moving parts or other stationary items in the vehicle to avoid jamming. Slide-out unit The slide-out unit is controlled by an electric switch located in the vehicle’s main switchboard. It also has a manual override accessible from the outside of the vehicle (winder handle required). Before operating the slide out lounge please familiarise yourself with the unit and refer to the Manufacturer’s Manual provided with the RV. Please be aware that the slide-out unit is equipped with a safety switch that will not allow the vehicle to start until the unit has been fully retracted. Awning There are different types of awnings throughout the Talvor Product range. Please refer to Manufacturer’s Manual for operation and maintenance. Please do not use the awning during rain or windy conditions and please make sure it is closed and secured before travel. Windows Condensation may occur where there is insufficient ventilation or in extreme weather conditions. It is important to leave the windows partially opened to maintain adequate air circulation, particularly in the bed ends of campers when in use. Secure in closed position before travelling. Water pump The on/off switch for the water pump is located at the main switchboard. It is recommended that the pump switch remains in the on position even when connected to town water. It is common that pumps will “cycle” when stationary. This can be caused by uneven vehicle levels or air in the lines. If this cycling causes concern simply turn off pump when not in use. When travelling, make sure that the pump switch is turned off. Please refer to Manufacturer’s Manual for further information on its operation. Toilet The toilet has a separate cassette waste tank. Before you use the toilet please switch on the water pump at the main switchboard and refer to the Manufacturer’s Manual for operation. Owners Manual | 15 It is only possible to dispose of the contents of the toilet in approved dumping stations or through a normal household sewerage system. This can often be done at caravan parks with the permission of the park owner. However it is advisable to check with the park owner before discharging any toilet material into sewerage lines as the chemical deodorant contained in the toilet can sometimes have effects on the sewerage or septic system of the caravan park. You should refer to the brochure supplied with all chemical toilets for further information on their care and maintenance. Smoke detectors Ensure the battery is correctly fitted and the smoke detector is checked regularly. (Batteries are disconnected at time of delivery to the dealer. Please check to ensure it has been reconnected.) Pop-top roof When raising the roof of a Pop-Top you must leave the main door open. If the main door is closed during this raising operation it can cause a vacuum inside the RV and make the roof a little difficult to raise. Generator Some Talvor vehicles are equipped with either a portable or fixed generator and they can be run on fuel or LPG. When equipped with a fixed generator, the on/ off switch will be located in the main switchboard. If your vehicle is equipped with a portable unit it will be stowed in a locker equipped with a slide-out for easy access. Please refer to the Manufacturer’s Manual for operation. 16 | TALVOR Caravan Equipment Brakes Talvor caravans are fitted with electric brakes. These brakes may, from time to time need adjusting. It is suggested that all caravans be returned to the dealer after approximately 2000km to check the brake adjustment. If brake adjustment is required during or prior to this time you should contact the nearest dealer or your original caravan manufacturer, to ensure that this brake adjustment is carried out by an authorised person. This is a service function not a warranty item. Please refer to the electric brake handbook supplied with the caravan at the initial time of delivery to learn more about the operation and maintenance of your electric brakes. The warranty card on the brakes should be filled out and returned to the brake supplier so that your warranty is registered. Breakaway system If your unit is fitted with a breakaway system, please refer to the supplied operating instructions. A breakaway system is standard equipment when GTM exceeds 2000 kg. The breakaway system is equipped with a 12V sealed rechargeable 5 amp battery and an in line charger. Please refer to Manufacturer’s Manual for further information on the operation and maintenance. Park brake cable adjustment independent suspension and beam axle with leaf springs, cause the brake shoes to be partially actuated and excessive heating of the brake and drums to occur. Prolonged use, if incorrectly adjusted, will initially cause the back (secondary shoe) to overheat causing disintegration of the brake lining and will result in deterioration of brake performance until eventual brake failure. It is essential that the release of this hand brake be carried out prior to travelling. Please refer to the Manufacturer’s Manual provided for more information. Changing wheels When changing wheels, only use the jack mounting positions that are located directly behind the axle on the main chassis member or outrigger. Important: • Do not get under a vehicle that is only supported by a jack - always use vehicle support stands. • Use jack only with correct engagement fittings. • Never change a wheel on soft, uneven or sloping ground. • Do not remove wheel nuts until wheel is off the ground. • Do not allow passengers in your vehicle while it is on the jack. • Before use - read the label attached to the jack. • After use - ensure the flat tyre and jack are properly secured. In the laden condition it is imperative that the park brake lever engages and secures the brakes in the 5th or 6th notch of the coupling, from the tow ball end. Failure to adjust the cable tension in this manner will through suspension movement, on both Owners Manual | 17 Wheel mounting Bumper bars It is important to maintain proper torque specifications to provide safe and secure attachment of the wheel to the hub drum. Some bumper bars (where fitted) have been designed to carry a spare wheel. The maximum carrying capacity of these bumper bars is 30Kg. Please note a spare wheel weighs approx. 27Kg. All other bumper bars have not been designed to carry a spare wheel. Any modifications or adding extra load will affect the towing abilities of your RV and could cause structural damage which will void your warranty! • Start all nuts by hand to prevent cross threading. • Tighten nuts in three stages using a cross star pattern. 1 6 3 4 5 2 • Whenever wheels are removed and refitted the wheel nut torque should be checked. Wheel nuts should be tightened to a torque of 115 Nm (80 ft Ib) for 1/2” diameter wheel stud threads on steel rims and 122Nm (90 ft Ib) for 112” diameter wheel stud threads on alloy rims. It is recommended that the wheel nut tension be checked every 100 km for the first 400 km of your initial caravan use and then after every wheel change, every 1000km or every six months whichever comes first. 18 | TALVOR • Do not carry full fuel containers on rear bumper bars. • Do not add additional weight to rear bumper bars. Corner stabilisers Corner stabilisers are designed so that they stop the RV from tipping towards one end as you walk inside it. They should be lowered to the point where they touch the ground in a firm manner without taking any weight of the van. Remember they are not jacks and should never be used to take even partial weight of the van. As you move inside the van from end to end you cause more weight to be applied to the stabiliser. You should therefore never use force on the stabiliser handle to force the stabiliser to the ground thereby taking the weight off the van. Stabilisers that are bent due to excess weight being applied to them are not covered under warranty. Coupling Chassis galvanising Couplings should be regularly checked for any sign of loose bolts connecting the coupling to the chassis as the two leading bolts on the coupling are always under a lot of strain. It is important that these bolts be regularly checked to ensure that they are tight. It is not advisable to grease the ball of the coupling as this can lead to a build-up of dust and thereby create a significant wear due to abrasion. A silicone spray will be sufficient lubrication for the ball. Light machine oil will also be effective without accumulating dust which could cause excessive wear. Please refer to the manufacturer’s manual provided for more information. The chassis on your unit has been galvanised to provide a thick tough metallic zinc coating which is bonded metallurgically to the steel base. It completely covers the steel and protects it from corrosion in normal environments. The metallic zinc used in the galvanising process provides long-term protection; however, owners should regularly maintain the chassis which involves promptly washing off any potential contaminants with clean water. Obvious contaminants are chloride and sulphur compounds, including salts from sea, air and soil. Such contaminants can cause permanent staining of the galvanised finish, for which Talvor cannot be held accountable. Natural ageing of the galvanised coating will turn the chassis to a grey colour. Jockey wheel It is possible to grease the internal thread of the jockey wheel. This can be done by removing the jockey wheel so that the top section of the jockey wheel comes away from the bottom tubular section and you can grease the internal thread of the jockey wheel. Chassis It is advisable to have a thorough annual check of the chassis on your caravan. This includes the running gear, suspension, tyres, wheels, and brakes and coupling. The chassis is such an important part of your caravan you cannot afford to overlook its general maintenance and service. Owners Manual | 19 General Care and Maintenance 240V electrical system Exterior care The 240V electrical system has been fitted according to ASINZS 3000:2000. Under no circumstances should any changes be made to the electrical system or should any fixed appliances be added. Failure to comply with this could render the electrical system unsafe which could result in injury or death. The exterior of your RV should be regularly cleaned with soapy water. Extra care should be taken, when cleaning windows, that a harsh brush is not used on these surfaces as the acrylic in the windows may permanently scratch. In the case of rollout awnings, these should also be occasionally washed with warm soapy water and rinsed clean. External sealants must be checked annually, and repaired as they degrade over time. All repairs, alterations or service are to be carried out by a licensed electrical contractor. Keeping equipment clean and dry is important, particularly the 15 amp power lead. Earth leakage circuit breakers have been installed as standard equipment. A 15 amp extension lead including an earth circuit is also required. Fire safety All models are equipped with Fire Extinguishers. These should always be full and at the correct pressure. Annual checking by an authorised agent is recommended. Smoke detectors are fitted as standard equipment. Their operation should be checked frequently and batteries replaced regularly. Make sure all cooking appliances are switched off when not in use. Safety during an emergency stop Please carry a warning device, i.e. Reflective Triangle, to be displayed when necessary. Pull off the road as far as possible when changing a tyre, or in other emergency situations, remembering your unit is larger than the tow vehicle. It is advisable that everyone leaves the car and stays well clear when it is parked on the edge of a road or highway. 20 | TALVOR Fibreglass finish The fibreglass mouldings and side frames are finished in a high gloss hard gel coated finish and will provide many years of trouble free use. To clean we recommend an automotive type cleaner in warm water. To protect the finish against long term UV damage a good quality fibreglass or marine polish is recommended at least four times per year. Do not use automotive polish as this can have ammonia in it which can discolour the fibreglass. Pop-top vinyl section Use only spray cleaners on the Pop-Top Vinyl section. Do not use abrasive cleaners. Do not let mould build up on vinyl, as it can stain. Roof gas struts Dust, grime and surface rust should be removed regularly from the steel shaft of the gas struts. Interior plywood Care should be taken when cleaning internal plywood lining. Excessive moisture and vigorous rubbing can easily rub through the plywood’s decorative paper lining. A soft damp cloth gently wiped over surfaces should be all that is required. Fabric care Curtains Vacuum regularly using low suction with appropriate attachment. Always test cleaning on non-exposed surface. Avoid excessive rubbing and abrasion. Remove hooks, rings and trims before cleaning. Dry cleaning: Care is to be exercised in the dry cleaning of this article. Reduce load to minimise abrasion. Dry clean in white spirit using P. Cool to maximum 18°C - 5 minute run. Normal extraction. Tumble dry carefully at 25°C-30°C maximum. Hang curtains immediately after they are removed from machine. Do not iron/press coated side. Warm iron/press on fabric side only, spiral roll when completely dry. Possible shrinkage 3%. Do not wash in domestic washing machines. Hand wash: Hand wash in cool to warm water. Mild detergents such as wool mixes are recommended. Do not bleach, soak, rub or wring. Drip dry in shade away from direct heat. Do not tumble dry. Hang curtains by their hooks to avoid coated sides touching. Do not use pegs. Do not fold curtains over clothes lines. Do not iron/press on coated side. Warm iron/press on fabric side only. Possible shrinkage 3%. Allow to dry thoroughly before re-use. Scrims Remove hooks, rings and trims before cleaning, Vacuum regularly using low suction with appropriate attachment. Warm hand wash. Do not bleach. Do not rub or wring. Drip dry in shade away from direct heat. For best results hang curtains by their hooks to damp dry immediately. Use warm iron. Dry cleanable P30. Possible shrinkage 3%. Allow to dry thoroughly before re-use. Cushions Do not remove any parts for separate cleaning. Regular care: Protect from direct sunlight. Rotate reversible cushions regularly. Vacuum regularly using low suction and soft brush accessory. Gently vacuum to restore pile. Professional cleaning only: Do not wet filling with solvent. Extract solvent thoroughly after application; do not scrub with stiff brush. Important: Exhaust solvent vapour outside building. Provide adequate ventilation during cleaning and drying. Allow to dry thoroughly before re-use. Avoid use of room during drying period. Do not clean with hot water extraction machine. Maybe shampoo cleaned using upholstery shampoo. Spot cleaning: Treat spills and stains as soon as possible. Gently scrape any soil or mop any liquid from the surface of the fabric. Do not scrub with a stiff brush; apply proprietary cleaning agents strictly according to instructions. Test on non-conspicuous area before use. Do not saturate the fabric or filling with water or other cleaning fluids. May be spot cleaned Owners Manual | 21 with dry cleaning solvent. Dry away from direct heat. Allow to dry thoroughly before re-use. Persistent stains my require treatment by a professional cleaner. Vinyl (bottom of cushions): Do not dry clean. Wipe with a clean cloth dampened with a mild detergent solution. Mattresses Mattresses should only be cleaned with warm soapy water to remove any stains and in the case of foam mattresses, a considerable amount of time needs to be allowed for the drying of the foam in the sun prior to storing away in the RV if they have been wet or after cleaning. The foam inside the mattress can deteriorate if it is stored away wet and it can also cause a damp smell to continually come from the mattress. Floor coverings, carpets and vinyls Floor coverings, carpets and vinyls should be maintained in a similar way to maintaining these items in a domestic household situation. They should be regularly cleaned and vacuumed and in the case of vinyl it should only be washed with lukewarm soapy water. Use only a damp sponge or mop. Excess water could damage furniture and walls. Important: Do not use rubber mats or place spare wheels on floor, as rubber permanently marks linoleum. 22 | TALVOR Electrical System 12V The electrical system in your RV should be tested annually by a qualified electrical contractor to ensure it is safe and operating effectively. In the case of any 12V problem, this can be easily diagnosed by an auto electrician and again it should only be carried out by an authorised electrician. Main switchboard gauges and fuses Your main switchboard, gauges and fuses will be located inside a cabinet. The location of this cabinet may vary from model to model but is usually over the entry door or in a cabinet over the stove. Main switchboard All appliances are switched on and off at the main switchboard, the main switchboard also contains the fuses for the appliances fitted to your RV. Note if a fuse is blown please replace with a fuse of the same amperage. Battery voltage display The battery gauge indicates the current charge of the ancillary battery or batteries. At full charge the reading should be 13.9V. Tank level display This gauge indicates the level of fresh water and grey water. To check the level of the tanks press the test button. The position of the LED display indicates the fill level. The only maintenance required is to occasionally check the terminals for corrosion and tightness. Do not fit any other type of battery. Batteries will be damaged by overcharging or excessive discharging. The upper voltage limit for the deep cycle battery is 13.9 volts. The standard Talvor charge system is limited to 13.9 volts and will not overcharge the battery. If for any reason another type of charger is used, ensure the voltage does not exceed 13.9 volts. Your ancillary battery will charge from: • 240V connection. • Vehicle engine running. Note the vehicle battery will charge first and when fully charged the alternator will charge the ancillary battery or batteries. If the battery is being overcharged it will emit a smell similar to rotten eggs, if this happens stop the charging processes immediately and consult your dealer, as some damage has occurred to your charge system. The battery should not be discharged below 10 volts. Talvor Products have a low voltage cut out, which is set at 10.5 volts. Batteries If your RV is left unused for a period of time, it is recommended to charge the battery periodically (by connecting to 240 Volt power). Talvor recommends it be plugged into power every 4 to 6 weeks for 24 hours to maintain the charge in the battery. It is always a good idea to charge the battery before each trip. The standard ancillary battery fitted by Talvor is a deep cycle type which is fully sealed. The location of the battery or batteries will vary depending on model and layout of your RV, if you should have trouble locating them please contact your local Talvor dealer. 12 V AUTOMATIC CIRCUIT BREAKER The 12 V electrical system is equipped with an automatic circuit breaker, this will break the connection if the system overheats generally caused by too much energy being off the 12 V circuit. Once it cools down it will reconnect automatically. Owners Manual | 23 7 & 12 PIN PLUG (Caravans) Talvor caravans are equipped with a 7 pin flat plug and it is wired according to the following code: Circuit Conductor Circuit conductor colour 1 Left-hand turn Yellow 2 Reversing signal Black 3 Earth return White 4 Right-hand turn Green 5 Service brakes Blue 6 Stop lamps Red 7 Rear lamps, clearance & side marker lamps Brown ANDERSON PLUG (Caravans) Talvor caravans are equipped with a 50 amp Anderson plug which allows the tow vehicle to charge the ancillary batteries in your van. Note the vehicle battery will charge first and when fully charged the alternator will charge the ancillary battery or batteries. 24 | TALVOR Electrical System 240V 240V electrical wiring can only be altered or changed in any way by a certified licensed electrical contractor. Do not attempt any 240V wiring changes without consultation with an electrician. 15 AMP main inlet & power lead Your 15 AMP main inlet is located on the exterior of your RV. Ensure you use a 15 AMP heavy duty power lead with a minimum of 10 metres. This lead must be kept in good condition. A damaged cord should be replaced without delay with three core thermoplastic or elastomeric sheathed general purpose cord. Circuit breaker (RCD) The circuit breaker is a safety device designed to disconnect the power if an overload in the 240V circuit occurs. If the circuit breaker trips, simply reset. If it continues to trip, switch off major appliances and check individually as there may be a fault in an appliance or you may be using too many appliances at once. Electric kettles, fry pans etc have a very high current draw. If a problem still exists, have the circuit tested by an electrical contractor. Owners Manual | 25 Electrical Diagram Motorhomes & Campervans NOTE: This diagram is a general representation of how the 12V system in your RV has been installed. Actual location of components and layout will vary from one model to another. 26 | TALVOR Electrical Diagram Caravans NOTE: This diagram is a general representation of how the 12V system in your RV has been installed, actual location of components and layout will vary from one model to another. Owners Manual | 27 General Plumbing Diagram NOTE: This diagram is a general representation of how the plumbing system in your RV has been installed, actual location of components and layout will vary from one model to another. 28 | TALVOR Service Log In the case of motorhomes and campervans please undertake mechanical services to these vehicles as per the original manufacturer’s recommendations. Refer to the original vehicle Owner’s Manual for further information. For caravans we recommend your first service to be carried out after the first 1,000km or 6 Months, then every 12 months, 10,000km or prior to a major trip. SERVICE CHECKLIST 1. WHEELS AND TYRES € Tread wear € Inspect rims for dents € Tyre pressure € Tighten wheel nuts, please refer to page 20 “wheel mounting” 2. BRAKES € Handbrake travel € Adjust brakes € Inspect magnets € Inspect lining and adjust € Inspect magnets for uneven wear € Inspect and re-grease bearings 3. BODY € Tighten window screws € Test exterior lights € Test for water leaks 4. GAS SYSTEMS (where applicable, licensed gas plumber fee additional cost) € Leak test € Correct operation of Appliances 5. INTERIOR € 240V test € 12V test € Security of appliances € Adjust cupboard catches & gas struts 6. CHASSIS € Check all bolts € Lubricate corner stabilisers & jockey wheel € Check suspension mounts Owners Manual | 29 DATE 1000kms / 6 months 10,000kms / 12 months 20,000kms 30,000kms 40,000kms 50,000kms 60,000kms 70,000kms 80,000kms 30 | TALVOR DEALER STAMP / SIGNATURE 1653274 MOTORHOMES | CAMPERVANS | CARAVANS WWW . T A L V O R . C O M