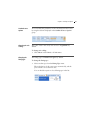
1
FCAP Array™ Software Version 3.0 User’s Guide For Research Use Only bdbiosciences.com 23-11472-00 Rev. 01 7/2011 Becton, Dickinson and Company BD Biosciences BD Biosciences European Customer Support San Jose, CA 95131 Tel 877.232.8995 Fax 408.954.2347 [email protected] Tel 32.2.400.98.95 Fax 32.2.401.70.94 [email protected] Copyrights © 2011, Becton, Dickinson and Company. All rights reserved. No part of this publication may be reproduced, transmitted, transcribed, stored in retrieval systems, or translated into any language or computer language, in any form or by any means: electronic, mechanical, magnetic, optical, chemical, manual, or otherwise, without prior written permission from BD Biosciences. The information in this guide is subject to change without notice. BD Biosciences reserves the right to change its products and services at any time to incorporate the latest technological developments. Although this guide has been prepared with every precaution to ensure accuracy, BD Biosciences assumes no liability for any errors or omissions, nor for any damages resulting from the application or use of this information. BD Biosciences welcomes customer input on corrections and suggestions for improvement. Trademarks Microsoft®, Excel®, and Windows® are registered trademarks of Microsoft Corporation. FCAP Array™ is a trademark of Soft Flow Hungary Ltd. Pentium® is a registered trademark of Intel Corporation. BD, BD Logo and all other trademarks are property of Becton, Dickinson and Company. © 2011 BD Regulatory information For Research Use Only. Not for use in diagnostic or therapeutic procedures. History Revision Date Change made 23-11472-00 Rev. 01 7/2011 New document Contents Chapter 1: Introduction 7 About the documentation . . . . . . . . . . . . . . . . . . . . . . . . . . . . . . . . . . . . . . . . . . . 8 Technical assistance . . . . . . . . . . . . . . . . . . . . . . . . . . . . . . . . . . . . . . . . . . . . . . . 9 Limitations . . . . . . . . . . . . . . . . . . . . . . . . . . . . . . . . . . . . . . . . . . . . . . . . . . . . . 10 System requirements . . . . . . . . . . . . . . . . . . . . . . . . . . . . . . . . . . . . . . . . . . . . . . 11 Basic terms . . . . . . . . . . . . . . . . . . . . . . . . . . . . . . . . . . . . . . . . . . . . . . . . . . . . . 12 Chapter 2: Installing and starting the software 15 Installing FCAP Array software . . . . . . . . . . . . . . . . . . . . . . . . . . . . . . . . . . . . . 16 Starting the software . . . . . . . . . . . . . . . . . . . . . . . . . . . . . . . . . . . . . . . . . . . . . . 17 Obtaining the bead library file . . . . . . . . . . . . . . . . . . . . . . . . . . . . . . . . . . . . . . 19 Uninstalling FCAP Array software . . . . . . . . . . . . . . . . . . . . . . . . . . . . . . . . . . . 20 Chapter 3: Overview 21 Software overview . . . . . . . . . . . . . . . . . . . . . . . . . . . . . . . . . . . . . . . . . . . . . . . 22 Workflow overview . . . . . . . . . . . . . . . . . . . . . . . . . . . . . . . . . . . . . . . . . . . . . . 24 Chapter 4: Creating a new experiment 27 New experiment overview . . . . . . . . . . . . . . . . . . . . . . . . . . . . . . . . . . . . . . . . . 28 Creating a new experiment . . . . . . . . . . . . . . . . . . . . . . . . . . . . . . . . . . . . . . . . . 29 Adding plexes . . . . . . . . . . . . . . . . . . . . . . . . . . . . . . . . . . . . . . . . . . . . . . . . . . . 31 Setting the sample layout . . . . . . . . . . . . . . . . . . . . . . . . . . . . . . . . . . . . . . . . . . 33 Adding samples . . . . . . . . . . . . . . . . . . . . . . . . . . . . . . . . . . . . . . . . . . . . . . . . . . 35 Modifying samples in the layout view . . . . . . . . . . . . . . . . . . . . . . . . . . . . . . . . . 40 iv FCAP Array Software User’s Guide Working with experiment information . . . . . . . . . . . . . . . . . . . . . . . . . . . . . . . . 43 Chapter 5: Working with plexes 47 Plex overview . . . . . . . . . . . . . . . . . . . . . . . . . . . . . . . . . . . . . . . . . . . . . . . . . . . 48 Selecting beads and analysis model . . . . . . . . . . . . . . . . . . . . . . . . . . . . . . . . . . . 51 Selecting instrument settings . . . . . . . . . . . . . . . . . . . . . . . . . . . . . . . . . . . . . . . . 53 Assigning beads to clusters . . . . . . . . . . . . . . . . . . . . . . . . . . . . . . . . . . . . . . . . . 55 Using debris filtering . . . . . . . . . . . . . . . . . . . . . . . . . . . . . . . . . . . . . . . . . . . . . 57 Using manual clustering . . . . . . . . . . . . . . . . . . . . . . . . . . . . . . . . . . . . . . . . . . . 59 Defining standards and QC . . . . . . . . . . . . . . . . . . . . . . . . . . . . . . . . . . . . . . . . . 64 Defining controls . . . . . . . . . . . . . . . . . . . . . . . . . . . . . . . . . . . . . . . . . . . . . . . . . 72 Viewing standard curves . . . . . . . . . . . . . . . . . . . . . . . . . . . . . . . . . . . . . . . . . . . 74 Chapter 6: Results and reports management 79 Overview of results and reports . . . . . . . . . . . . . . . . . . . . . . . . . . . . . . . . . . . . . . 80 Viewing analysis results . . . . . . . . . . . . . . . . . . . . . . . . . . . . . . . . . . . . . . . . . . . . 81 Customizing charts . . . . . . . . . . . . . . . . . . . . . . . . . . . . . . . . . . . . . . . . . . . . . . . 87 Viewing reports . . . . . . . . . . . . . . . . . . . . . . . . . . . . . . . . . . . . . . . . . . . . . . . . . . 89 Completing an experiment . . . . . . . . . . . . . . . . . . . . . . . . . . . . . . . . . . . . . . . . . 91 Chapter 7: Using the BD FACSuite workflow 93 BD FACSuite workflow overview . . . . . . . . . . . . . . . . . . . . . . . . . . . . . . . . . . . . 94 Creating a new experiment from BD FACSuite files . . . . . . . . . . . . . . . . . . . . . . 96 Evaluating the experiment . . . . . . . . . . . . . . . . . . . . . . . . . . . . . . . . . . . . . . . . . . 98 Chapter 8: Data management 99 Working with libraries . . . . . . . . . . . . . . . . . . . . . . . . . . . . . . . . . . . . . . . . . . . 100 Using the experiment library . . . . . . . . . . . . . . . . . . . . . . . . . . . . . . . . . . . . . . . 102 Using the bead library . . . . . . . . . . . . . . . . . . . . . . . . . . . . . . . . . . . . . . . . . . . . 104 Using the plex template library . . . . . . . . . . . . . . . . . . . . . . . . . . . . . . . . . . . . . 108 Using the user management library . . . . . . . . . . . . . . . . . . . . . . . . . . . . . . . . . . 111 Using the units library . . . . . . . . . . . . . . . . . . . . . . . . . . . . . . . . . . . . . . . . . . . . 113 Contents Chapter 9: Troubleshooting 115 Troubleshooting . . . . . . . . . . . . . . . . . . . . . . . . . . . . . . . . . . . . . . . . . . . . . . . . 116 Chapter 10: Reference information 121 Using settings functions . . . . . . . . . . . . . . . . . . . . . . . . . . . . . . . . . . . . . . . . . . 122 Index 127 v Introduction This chapter includes the following topics: • About the documentation (page 8) • Technical assistance (page 9) • Limitations (page 10) • System requirements (page 11) • Basic terms (page 12) 8 FCAP Array Software User’s Guide About the documentation Introduction This topic describes the contents of the guide. Documentation contents The FCAP Array Software User’s Guide describes how to install and operate Flow Cytometric Analysis Program (FCAP) Array software. The software facilitates data analysis for multiplex bead assays. This guide assumes you have a working knowledge of the basic Microsoft® Windows® operating system. If you are not familiar with the operating system of your computer, see the documentation provided with your system. ReadMe file Before using FCAP Array™ software, review the ReadMe file by clicking the link in the Start menu. The ReadMe file contains important information not covered in this user’s guide. More information • Technical assistance (page 9) • Limitations (page 10) Chapter : Introduction Technical assistance Introduction This topic describes how to obtain technical assistance. If you require technical assistance, contact your local BD Biosciences technical support representative or supplier. Contact information When contacting BD Biosciences, have the following information available: • Version of FCAP Array software you are using. • Name and version of the acquisition software you are using. • Any error messages. • Details of recent cytometer system performance. For FCAP Array software support from within the US and Canada, call 877.232.8995. Customers outside the US and Canada, contact your local BD representative or distributor. More information • Troubleshooting (page 116) 9 10 FCAP Array Software User’s Guide Limitations Introduction This topic describes the limitations for use of the software. Limitations For Research Use Only. Not for use in diagnostic or therapeutic procedures. Compatibility with previous versions FCAP Array version 3.0 cannot use experiment, plex, or bead files from FCAP Array version 1.0. The security key for version 1.0 does not work with version 3.0. Therefore, if you want to run both versions on the same computer, you must insert both security keys in the computer. The gating and curve fitting algorithms for previous versions of FCAP Array software are different. The user can expect bead clusters and standard curves to vary slightly if comparing version 3.0 to a previous version. More information • Technical assistance (page 9) • System requirements (page 11) Chapter : Introduction System requirements Introduction This topic specifies the system requirements for using FCAP Array software. Minimum PC configuration FCAP Array software requires a computer with the following minimum configuration: Software requirements Item Specification CPU Intel Pentium® 4 (2 GHz or equivalent) RAM 512 MB or higher Video RAM 16 MB or higher Hard drive space 50 MB for installation Monitor resolution XGA, 1024 x 768 pixels or higher (1280 x 1024 recommended) Monitor color 16-bit color or higher DVD-ROM drive Required for software installation USB port Required for security key FCAP Array software requires the following: • Microsoft Windows XP or Windows 7 (32-bit and 64-bit versions) • Microsoft .NET 3.5 framework • Microsoft SQL Server Compact Edition 3.5 The installer will install .NET framework and SQL Server if they are not already on the computer. 11 12 FCAP Array Software User’s Guide More information • Technical assistance (page 9) • Limitations (page 10) Basic terms Introduction This topic describes the basic terms used throughout the manual to indicate specific constructs, procedures, or concepts as they apply to FCAP Array software. Terms The basic terms used throughout this user guide are defined in the following table. Term Definition bead An analyte-specific capture particle with distinctive, discrete fluorescence characteristics. All instances of an individual bead bind to the same analyte and have the same fluorescence characteristics. An FCAP Array software construct that specifies the analyte binding and fluorescence characteristics of a bead. bead assay A method of using beads and reporter antibodies to detect or measure the concentration of analytes in a sample. cluster A population of events in a bead assay data file. Each cluster corresponds to a bead population. Therefore, the events in a cluster have distinctive, discrete fluorescence characteristics. experiment A bead assay. An FCAP Array software construct that defines the plex(es), standards, controls, and test samples for a bead assay. Chapter : Introduction Term Definition plex One or more beads used in a bead assay. An FCAP Array software construct that specifies a set of standards, beads, analysis models, instrument settings, and standard curves. replicate(s) One or more copies of a sample. When more than one replicate of a sample is used, the replicate results are averaged to determine the result reported for the sample. sample A solution containing analytes to be measured by a bead assay. A sample can be a test, a standard, or a control. 13 This page intentionally left blank 2 Installing and starting the software This chapter covers the following topics: • Installing FCAP Array software (page 16) • Starting the software (page 17) • Obtaining the bead library file (page 19) • Uninstalling FCAP Array software (page 20) 16 FCAP Array Software User’s Guide Installing FCAP Array software Introduction Caution This topic provides instructions for installing FCAP Array software version 3.0. Caution! Do not install the FCAP Array version 3.0 security key until after step 6 in the procedure. The software and drivers must be installed first. FCAP Array version 3.0 can exist concurrently with FCAP Array version 1.0 on the same PC. See Limitations (page 10) for more information. Procedure To install FCAP Array software: 1. Ensure that no other programs are running. 2. Insert the FCAP Array software installation disc into the DVDROM drive. If the installer does not start up automatically, use Windows Explorer to view the disc contents, then double-click the Setup.exe icon. 3. Click Next on the installer Welcome screen. 4. Read the license information, then select I Agree and click Next. 5. Note the destination folder for FCAP Array software and click Install. We recommend that you accept the default location. 6. Click Finish to exit the installer. 7. Install the FCAP Array security key in a USB port. Next step Proceed to Starting the software (page 17). Chapter 2: Installing and starting the software More information • System requirements (page 11) • Starting the software (page 17) • Uninstalling FCAP Array software (page 20) Starting the software Introduction This topic describes how to start the software. Procedure To start the software: 1. Double-click the FCAP Array V3.0 desktop icon. As the software starts, the FCAP Array Login dialog opens. 2. Type your user name and password. User names and passwords are case-sensitive. The password can be blank. When FCAP Array software is installed there is a default user with the user name Administrator, password welcome, and administrative rights. The Administrator password should be changed immediately, and accounts created as needed. 17 18 FCAP Array Software User’s Guide 3. Click Login. As the software starts, the main window opens with the experiments library displayed. Starting from BD FACSuite software When FCAP Array and BD FACSuite™ software are installed on the same computer, you can start FCAP Array from the menu bar in BD FACSuite software. See the BD FACSVerse™ System Reference for setup instructions. Next step Proceed to Obtaining the bead library file (page 19). More information • New experiment overview (page 28) • BD FACSuite workflow overview (page 94) Chapter 2: Installing and starting the software Obtaining the bead library file Introduction This topic describes how to obtain the bead library file for FCAP Array software. This file is used to populate the bead library with information about BD CBA reagents. Note that the bead file for FCAP Array software version 3.0 has a different format than for version 1.0. Procedure To download and import the bead library file: 1. Navigate to bdbiosciences.com/cbasetup. 2. Download the bead library file for FCAP Array software version 3.0. 3. After the download is complete, unzip the file. 4. Click the Bead Library icon. 5. Click the Import icon. The Import dialog opens. 6. Select the downloaded XML file. 7. Click Open. More information • Working with libraries (page 100) 19 20 FCAP Array Software User’s Guide Uninstalling FCAP Array software Introduction This topic describes how to uninstall FCAP Array software. Procedure To uninstall FCAP Array software: 1. Select Start > Programs > FCAP Array V3 > Uninstall. More information • System requirements (page 11) • Limitations (page 10) • Installing FCAP Array software (page 16) 3 Overview This chapter covers the following topics: • Software overview (page 22) • Workflow overview (page 24) 22 FCAP Array Software User’s Guide Software overview Introduction This topic gives an overview of FCAP Array software version 3.0 and describes the quantitative, qualitative, and quality control analysis methods. Overview FCAP Array software facilitates data analysis of bead assays. These assays can detect the presence of, or determine concentrations for, multiple analytes (for example, proteins and peptides) in a sample. Samples are acquired with a flow cytometer and acquisition software capable of saving data in flow cytometry standard (FCS) 2.0 or 3.0 file format. FCAP Array software analyzes the FCS files to find bead populations by clustering. Reporter antibody fluorescence within a population measures analyte-specific binding. Quantitative analysis Quantitative analysis determines analyte concentrations based on the known concentration values of a set of standards. FCAP Array software can determine analyte concentration for many analytes (beads) per sample. The number of concentration levels used to calibrate the standard curve and the number of sample and standard replicates are easily adjusted. FCAP Array software reads the FCS data files, locates clusters (to which analytes have been assigned), and then determines the MFI of the detector antibody for each analyte. From the MFI of the standards, the software calculates a curve that describes the relationship between MFI and concentration. The curve used to fit the data is selected from several mathematical models. A standard curve is used to calculate the concentration values for each of the measured analytes in a sample. Chapter 3: Overview Qualitative analysis Qualitative analysis determines whether a specific type of analyte exists in a sample based on known controls. FCAP Array software can determine analyte existence for many analytes (beads) per sample. Experiments can include positive controls, negative controls, or both. FCAP Array software reads the FCS data files from an experiment, locates clusters (to which analytes have been assigned), and then determines the MFI of the detector antibody for each analyte. The control data is used to determine MFI cutoff values for each analyte. Test sample results are based on the cutoff values. Quality control analysis For beads that have two reporter parameters, the quality control analysis model is used. FCAP Array software compares the MFI of a sample to a user-defined range or a threshold determined from a control. Values that are out of range are flagged in the results and reports. Quality control analysis can be customized to calculate the MFI for a negative standard by multiplying that MFI by a user-defined multiplier. This calculated cut-off value is used to determine whether a specific analyte or analytes exist in a sample. What’s new in version 3.0 More information FCAP Array version 3.0 has the following new features. • Support of FCS 3.0 files • The ability to utilize CBA keywords from BD FACSuite software to simplify your workflow • A standard dilution calculator • Debris filtering and manual clustering tools • Graphical reporting of results • Exporting of reports in multiple formats, including PDF • Limitations (page 10) • System requirements (page 11) 23 24 FCAP Array Software User’s Guide Workflow overview Introduction This topic describes the two workflows for using FCAP Array software. • Standard workflow. Analyzing FCS files from standard cytometry software, including BD CellQuest™ Pro software, BD FACSArray™ software, and BD FACSDiva™ software. • BD FACSuite workflow. Analyzing FCS files from BD FACSuite software for an optimized workflow. Standard workflow The standard workflow is used when analyzing FCS files from description most cytometry software applications. You design an experiment in FCAP Array software that reflects the data contained in the FCS files that you are importing. The process of designing this experiment can be greatly simplified if you first design a plex, which defines beads, standards, analysis models, and instrument settings that are common to multiple experiments. After designing the experiment, you proceed to analyze the FCS files. The results are calculated and displayed in the same manner for both the standard workflow and BD FACSuite workflow. Standard workflow The standard workflow includes these stages. stages Stage Description 1 Starting the software (page 17) 2 Creating a new experiment (page 27) 3 Working with plexes (page 47) 4 Results and reports management (page 79) Chapter 3: Overview BD FACSuite workflow description The BD FACSuite workflow is optimized for BD FACSuite software, but you can use the standard workflow as well. When you use BD FACSuite software to set up an experiment and run an acquisition, you add CBA-specific keywords which will be included in the exported FCS files. FCAP Array software reads the FCS files and creates a new experiment based on the keywords.The workflow is streamlined and you are able to view analysis results quickly. BD FACSuite workflow stages The BD FACSuite workflow includes these stages. Stage Description 1 Starting the software (page 17) 2 Creating a new experiment from BD FACSuite files (page 96) 3 Evaluating the experiment (page 98) 4 Results and reports management (page 79) 25 This page intentionally left blank 4 Creating a new experiment This chapter covers the following topics: • New experiment overview (page 28) • Creating a new experiment (page 29) • Adding plexes (page 31) • Setting the sample layout (page 33) • Adding samples (page 35) • Modifying samples in the layout view (page 40) • Working with experiment information (page 43) 28 FCAP Array Software User’s Guide New experiment overview Introduction This topic describes the workflow for creating a new experiment. You can use this workflow for analyzing data from multiple flow cytometry systems. If you use BD FACSuite software, you can use either this workflow or the BD FACSuite workflow, which provides better optimization. New experiment workflow The following table shows the stages in a typical new experiment workflow. More information Stage Description 1 Creating a new experiment (page 29) 2 Adding plexes (page 31) 3 Setting the sample layout (page 33) 4 Adding samples (page 35) 5 Working with experiment information (page 43) • Workflow overview (page 24) • Basic terms (page 12) • Working with plexes (page 47) • Modifying samples in the layout view (page 40) Chapter 4: Creating a new experiment Creating a new experiment Introduction This topic describes how to create a new experiment. Procedure To create a new experiment: 1. Click the lower half of the New Experiment button on the application toolbar and select one of the following: • Empty Experiment. Select this option to create a new experiment. • From Existing Experiment. Select this option to use a saved experiment. • From FACSuite Files. Select this option only if you want to use the BD FACSuite workflow. See Using the BD FACSuite workflow (page 93). • If you have plex template files in the plex template library, you can create a new experiment from that location. Select a template, then click the New Experiment from Template icon. 2. Enter a name and an optional comment in the New Experiment dialog. 3. Select a size for the sample layout. 29 30 FCAP Array Software User’s Guide The default is a 96-well plate. Also, use this layout if samples are acquired manually in tubes. 4. Click OK. The design view opens. Next step Proceed to Adding plexes (page 31). Chapter 4: Creating a new experiment More information • Workflow overview (page 24) • New experiment overview (page 28) Adding plexes Introduction This topic describes how to add plexes. About new and saved plexes An experiment always contains one plex as the default setting, but you can have multiple plexes in an experiment. By default, a plex named New Plex is added to a new experiment. Saving a plex as a template streamlines your workflow by creating a flexible template which does not have restrictions on required content. Using a saved template reduces manual data entry in subsequent experiments. See Plex overview (page 48). The plex functions are accessed from the groups of buttons on the ribbon as shown in the following figure. Adding a new plex To add a new plex: 1. Click Add New in the Plex group. The Add New Plex dialog opens. 2. Enter a name for the plex and click OK. The new plex will be the active one in the experiment. 31 32 FCAP Array Software User’s Guide Adding a new plex from a template To add a new plex from a template: 1. Click Add New from Template in the Plex group. The Add New Plex from Template dialog opens. 2. From the Plex Template menu, select a template from the library. 3. In the New Plex Name field, enter a name, then click OK. The new plex will be the active one in the experiment. Changing the active plex To change the active plex: 1. Click a plex from the Active Plex list. The selected plex becomes the active one in the experiment. New samples are added to the active plex. Samples belonging to other plexes appear in a pale shade. Options for the active plex are shown in the navigation panel on the left. Deleting the active plex To delete the active plex: 1. Click Delete in the Plex group. The Confirm plex deletion dialog opens. 2. Click Yes to confirm. Saving the active plex as a template To save the active plex as a template: 1. Click Save Plex as Template in the Experiment group. The Save Plex Template dialog opens. 2. Enter a name for the plex template in the Plex Template Name field and click OK. Next step Proceed to Setting the sample layout (page 33). Chapter 4: Creating a new experiment More information • Workflow overview (page 24) • New experiment overview (page 28) • Creating a new experiment (page 29) • Working with plexes (page 47) Setting the sample layout Introduction This topic describes how to set up the sample layout in an experiment. Note that when samples have been acquired manually in tubes, they still need to be arranged on a plate for use in the software. Working with plates An experiment always contains one plate as the default setting, but you can have multiple plates in an experiment. The controls for working with plates are located in the Plate group on the ribbon. You can also right-click in a plate to open a menu to perform some of the functions. Adding a plate To add a plate: 1. Click Add Plate in the Plate group. The new plate is added below the current plate. If you cannot see the plate, scroll down and make sure the new plate was added. 33 34 FCAP Array Software User’s Guide Changing the plate alignment The alignment direction for the samples on a plate is set to horizontal by default. When selecting a direction, make sure it matches your acquisition order. The selected direction determines the order when adding multiple samples or assigning multiple files in one motion. File assignment should match the order and the direction of added samples. The selected direction also influences the order of samples in the following screens: debris filtering, manual clustering, standards and QC, results per analyte, results per sample, and report. To change the plate alignment: 1. Click the Vertical Alignment or Horizontal Alignment icons in the Plate group. Removing a plate To remove a plate: 1. Right-click a plate and select Remove Plate. The selected plate and all samples within the selected plate are removed from the experiment. Clearing a plate To clear a plate: 1. Right-click a plate and select Clear Plate. All samples are removed from the selected plate in the experiment. Clearing all plates To clear all plates: 1. Right-click a plate and select Clear All Plates. All samples are removed from all plates in the experiment. Next step Proceed to Adding samples (page 35). Chapter 4: Creating a new experiment More information • Workflow overview (page 24) • New experiment overview (page 28) • Adding plexes (page 31) Adding samples Introduction This topic describes how to add samples to a plate. About sample types There are five different sample types: Standard, Test, Control, Background, and Undefined. The control and background sample types are not used in BD CBA assays. Note that a sample type is always selected and that clicking the sample layout creates the highlighted sample type. Each type has a different color and icon in the ribbon. Methods for adding There are three methods for adding samples. samples • Adding samples by designing the layout. With this method you add samples first and then assign FCS files to the selected samples. Use this method when adding samples with replicates. • Adding files with sample types. With this method you select the sample type and the corresponding FCS files from the File Explorer window and add them to the plate. When the files are in the correct order in the File Explorer, the assignment of files to the plate can be done in one step. • Adding undefined samples. With this method you add all files to the experiment and then define the sample types one by one. 35 36 FCAP Array Software User’s Guide Standards are arranged for the standard curve in alphabetical order by sample name (Std001, Std002, Std003, etc). Confirm that names are assigned in such a way that standards will be plotted in the correct order. Wells containing assigned sample files have a floppy disc icon. Adding samples by designing the layout To add samples by designing the layout: 1. Select one of the four sample types (Undefined is not applicable with this method) from the New Sample group by clicking the icon. 2. Define the number of samples, number of replicates, and the dilution factor. 3. Select the first well you want to start with and click it. According to your settings, the sample type icon and the number of replicates appear on the plate (number of replicates multiplied by number of samples). If the number of replicates exceeds the available wells, then a new plate is automatically added to the experiment. 4. Select FCS files from the File Assignment panel and drag and drop them onto the plate. For more detailed instructions on selecting FCS files, see Selecting FCS files (page 39). Chapter 4: Creating a new experiment Adding files with sample types To add files with sample types: 1. Click one of the four sample type icons (except Undefined). 2. If test samples were diluted, define the Dilution Factor. It is not necessary to define dilution factors for standards. 3. Select FCS files from the File Assignment panel and drag and drop them onto the plate. When your files are in the correct order in the File Explorer, you can assign your files in one motion. For more detailed instructions on selecting FCS files, see Selecting FCS files (page 39). The following figure shows a typical plate layout at this stage. 37 38 FCAP Array Software User’s Guide Adding undefined samples To add undefined samples: 1. Click the Undefined sample type icon in the New Sample group. 2. Define the Dilution Factor, if necessary. 3. Select FCS files from the File Assignment panel and drag and drop them onto the plate. For more detailed instructions on selecting FCS files, see Selecting FCS files (page 39). 4. Define the sample types. a. Select one of the four colored circles in the well. Chapter 4: Creating a new experiment Selecting FCS files To select FCS files: 1. Navigate to your FCS files from the File Explorer tab on the File Assignment panel. The FCS files are listed in the lower window. 2. Filter by file type in the File types list. If you do not see your files listed, change the File types to All Files. This displays files that do not have a .fcs or .lmd file extension. 3. Files are displayed in ascending order by acquisition date and time in the default settings. You can change the order for both name and date from ascending to descending by clicking the column header. 4. You can select multiple files by Ctrl + clicking the files. You can also select by Shift + clicking the first file while clicking the last file. Next step Proceed to Working with experiment information (page 43). 39 40 FCAP Array Software User’s Guide More information • Modifying samples in the layout view (page 40) • Setting the sample layout (page 33) • Workflow overview (page 24) • New experiment overview (page 28) Modifying samples in the layout view Introduction This topic describes how to modify and move samples once they have been added to a plate. Note that the well counters for the numbering of the sample name do not reset unless you delete all samples of a given type. Selecting samples To select a sample: 1. Click on its well. You can select multiple samples by Ctrl + clicking the desired wells or by drawing a rectangle around the desired wells. The background color of the wells indicates the selection. When removing samples, all selected wells become empty. Moving samples To move samples: 1. Select one or more samples, then drag the samples to the new position. Samples cannot be moved to a position on a different plate. Changing the sample type To change the sample type: 1. Right-click the sample you want to change and select Change Sample Type. The changed sample is now undefined. Chapter 4: Creating a new experiment 2. Redefine the sample type by clicking the icon (shown in the selected well) of the sample type you wish to assign. To change the sample type, the sample must have a file associated with it. Removing a sample To remove a sample, do one of the following: Clearing the file assignment Viewing sample properties • Right-click the sample you want to remove and select Remove Sample. • Click the well, then press the Delete key. When removing multiple samples, all selected wells become empty. To clear the file association from a sample, do one of the following: • Right-click a well and select Remove file association. • Click the Clear All File Associations icon in the Plate group. • Right-click a well and select Clear all file associations. To view sample properties, do one of the following: • Click the Properties tab to view data about a selected sample. • Click the File Header tab to see FCS file header keywords for a selected sample. The File Header table is empty when no well is selected. 41 42 FCAP Array Software User’s Guide Modifying the sample name and dilution factor Samples are named automatically with a default setting when they are imported. When using the standard workflow, the prefix for standards is Std, for test samples it is Test, for controls it is Control and for background it is Background. You can modify the name of the sample and its dilution factor. To modify sample information using the Sample List tab: 1. Click the Sample List tab on the File Assignment panel. Using the Sample List tab enables you to view all the samples at once and to enter data more rapidly. 2. Select a sample by clicking in the Sample List. 3. Edit the name and press Enter. 4. Select a sample by clicking in the Dilution field. 5. Edit the value and press Enter. Next step Proceed to Working with experiment information (page 43). Chapter 4: Creating a new experiment More information • Adding samples (page 35) • Workflow overview (page 24) • New experiment overview (page 28) Working with experiment information Introduction This topic describes how to enter information about an experiment in the data sheet. You can also add or remove users from the list of experiment owners to change access rights to the experiment. You can also change the security rights for the experiment. Entering information To enter information in the experiment data sheet: 1. Click the Data Sheet icon in the Experiment panel. 2. Click in the fields next to each field type and enter information about the experiment. 43 44 FCAP Array Software User’s Guide Changing users in an experiment You can add or remove users from an experiment in the Experiment Owners table. Users added to the Experiment Owners list can open, read, and modify the shared experiment. To add a user: 1. Select a user name from the All Users list. 2. Click Add Selected User in the Security group on the ribbon. The selected user is added to the Experiment Owners list. To remove a user: 1. Select the name from the Experiment Owners list. 2. Click the Remove Selected User icon in the Security group on the ribbon. The selected user is removed from the Experiment Owners list. Chapter 4: Creating a new experiment Changing user Note that a user with administrator rights can view and edit all security rights in an experiments. experiment To change user security rights in an experiment, select one of the following: • Click the Public icon in the Security group. This enables editing of the experiment by all users. • Click the Owners Only icon in the Security group. This enables editing of the experiment only by the respective owner(s) and administrators. • Click the Locked icon in the Security group. This locks the experiment from any editing. Click the Locked icon again to allow editing. Adding notes to an experiment To add notes to an experiment: 1. Click the Notes icon in the Experiment panel. The Notes dialog opens. 2. Type in your notes and click OK. Your notes are shown when you select an experiment in the experiment library. Next step Proceed to Working with plexes (page 47). More information • Workflow overview (page 24) • New experiment overview (page 28) • Modifying samples in the layout view (page 40) 45 This page intentionally left blank 5 Working with plexes This chapter covers the following topics: • Plex overview (page 48) • Selecting beads and analysis model (page 51) • Selecting instrument settings (page 53) • Assigning beads to clusters (page 55) • Using debris filtering (page 57) • Using manual clustering (page 59) • Defining standards and QC (page 64) • Defining controls (page 72) • Viewing standard curves (page 74) 48 FCAP Array Software User’s Guide Plex overview Introduction This topic describes plexes, plex templates, and the stages in the workflow for creating a plex. About plexes An FCAP Array experiment contains one or more plexes. A plex is created or modified within an experiment. Plexes can be saved to the plex templates library to be reused or exported to other users. Plex navigation panel Creating a plex is typically done in the order shown in the Plex navigation panel as shown in the following figure. Chapter 5: Working with plexes Plex template The plex template stores the following information. Parameter Content Standard Samples Number, name, concentration, number of replicates Beads and Model Selected beads, lot numbers, analysis models Instrument Settings Scatter and clustering parameters, cluster positions, bead-cluster assignment Debris Filtering Defined debris filtering gates, status of the filtering (active or not) Standards and QC Uniformity, concentrations, measurement units (quantitative model), positive/negative standard selection (qualitative model), MFI threshold values (QC model) Standard Curves Axis types (linear/logarithmic), force through zero, weighting type, fitting type, fitting accuracy (%) The plex template is flexible. There are no restrictions regarding the information required to save a plex as a template. 49 50 FCAP Array Software User’s Guide Plex creation workflow More information The workflow of creating a plex includes these stages. Stage Description 1 Selecting beads and analysis model (page 51) 2 Selecting instrument settings (page 53) 3 Assigning beads to clusters (page 55) 4 Using debris filtering (page 57) 5 Using manual clustering (page 59) 6 Defining standards and QC (page 64) 7 Defining controls (page 72) 8 Viewing standard curves (page 74) • Workflow overview (page 24) • Adding plexes (page 31) Chapter 5: Working with plexes Selecting beads and analysis model Introduction This topic describes the process of adding beads to a plex and selecting the analysis model. Before you begin If necessary, add beads to the bead library. When you first install FCAP Array, the bead library is empty. For BD CBA reagents, we recommend adding beads to the bead library by importing an XML file. See Importing a bead group (page 107). Selecting beads for To select beads for a plex: a plex 1. Click Beads and Model in the Plex navigation panel to define the beads needed for your plex. The Selected Beads panel opens. 51 52 FCAP Array Software User’s Guide 2. Select one or more beads from the Library list and do one of the following: • Drag and drop them onto the Selected Beads window. • Click Add to Plex in the Bead and Model Selection group on the ribbon. • If you have a bead group defined in the bead library, you can add all beads of the selected group in one step by adding the group to the plex. Select the group by clicking its name, then drag and drop onto the Selected Beads window. Selecting the analysis model There are three analysis models: • Quantitative • Qualitative • Quality Each bead has one analyte and optionally a second reporter parameter. The analysis model for an analyte is set to Quantitative by default. To select the analysis model, do one of the following: • Select the analysis model from the menu in the Model column. This changes the analysis model for the selected bead only. • Select the analysis model from the menu in the Select Model For All on the ribbon. Chapter 5: Working with plexes This changes the analysis model for all beads. Next step Proceed to Selecting instrument settings (page 53). More information • Workflow overview (page 24) • Using the bead library (page 104) • Plex creation workflow (page 50) Selecting instrument settings Introduction This topic describes how to apply instrument settings. This process includes selecting a sample data file based on the defined plex, and specifying the scatter, clustering, and reporter parameters. Requirements To complete the instrument settings and cluster assignment process, you must have a FCS file that was acquired for the experiment and assigned to a sample in your plex. About instrument settings For common instruments, parameter options (scatter, clustering, reporter) are loaded into the menus automatically based on the selected file. Parameters can also be selected manually. When you have selected the parameters and change the FCS file, the scatter histogram and the clustering plot refresh according to the selected file. 53 54 FCAP Array Software User’s Guide Selecting To select instrument settings: instrument settings 1. Click Instrument Settings in the Plex navigation panel. 2. Select any of the assigned files from the Selected File menu. The scatter peak is set to one by default. You can change the value according to the number of different bead sizes used in your assay. The applied algorithm searches for the number of scatter peaks you defined. All BD CBA assays use one scatter peak. If the algorithm fails to find the defined number of peaks, FCAP Array notifies you about the problem. The clustering parameters are used to locate the beads, and the recommended clustering parameters can be found in the reagent manual. The clustering algorithm finds the defined clusters. In case of failure, FCAP Array notifies you about the problem. 3. Select a parameter from the Scatter Parameter menu. The scatter diagram shows the data. 4. Select a number from the Scatter Peaks menu. 5. Select the first and optionally the second clustering parameter from the Clustering Parameters menus according to the fluorescence of the beads. For kits that use only one clustering parameter, you can clear the second clustering parameter selection by clicking the red X icon next to the menu. Chapter 5: Working with plexes 6. Select a parameter from the Reporter Parameter 1 menu for the bead analyte. 7. If your plex contains a second reporter parameter, select a parameter from the Reporter Parameter 2 menu. You can clear the second reporter parameter selection by clicking the red X icon next to the menu. Next step Proceed to Assigning beads to clusters (page 55). More information • Plex creation workflow (page 50) • Defining controls (page 72) Assigning beads to clusters Introduction This topic describes how to assign the plex beads to clusters. About assigning beads to clusters You have to assign plex beads to the corresponding clusters in the clustering plot. To simplify assignment, first click the Bead column header in the Select Beads table to sort by bead ID. Note that BD CBA kits are clustered left to right, in one dimension. Bead 1 on the left-most position is the dimmest bead. You can assign only one bead to one cluster at a time. Assigning beads to clusters To assign beads to clusters: 1. Select the bead you want to assign from the Selected Beads table. Sort by bead location and assign from the top left cluster. Assign beads going left to right and top to bottom. 55 56 FCAP Array Software User’s Guide 2. Select the cluster by doing one of the following: • Double-click the cluster that you want to assign the bead to. The label of the analyte is displayed on the cluster. • Drag and drop the selected bead onto a cluster. 3. Repeat this process for all of the clusters. The following figure shows the clustering plot after beads have been assigned. Removing bead assignments To clear the bead cluster assignments, do one of the following: • Click the Clear Cluster Assignment icon on the ribbon to clear all bead cluster assignments. • To remove individual bead cluster assignments, right-click the individual cluster and select Remove Bead Assignment. Chapter 5: Working with plexes Next step If the automatic clustering is satisfactory, then go to Defining standards and QC (page 64). If you wish to adjust your gates, then go to one of the following: More information • Using debris filtering (page 57) • Using manual clustering (page 59) • Plex creation workflow (page 50) • Viewing standard curves (page 74) Using debris filtering Introduction This topic describes how to use debris filtering. You can use this function to filter out debris that could affect the automatic clustering algorithm and lead to incorrect clustering results. Procedure To filter out debris from a plot, you draw a gate in the left plot (Before Filtering plot) around the area that you want to keep in the plot. The right plot (After Filtering plot) displays the results of the gate in the left plot. The drawn gate(s) applies to all samples and is saved with the plex. The Apply Filter icon in the Debris Filtering group toggles the filter on and off in the plot on the right side. To use debris filtering: 1. Click Debris Filtering in the Plex navigation panel. 57 58 FCAP Array Software User’s Guide A list of samples and two plots are displayed. 2. Select a sample from the list. The histograms are displayed according to the selected parameter of the selected sample file. 3. If needed, change the selected parameters by selecting from the menus above the histograms. You can use different parameters in the two plots. 4. On the left histogram, hold down the mouse button and move the mouse left or right to draw your gate. You can draw multiple gates. The histogram on the right shows the filter results. 5. (Optional) Gates can be moved, resized, and deleted. • Move a gate by selecting it and dragging it to another position. • Resize a gate by grabbing one of the sides. • Delete a gate by selecting it and clicking the Remove Selected Gate icon. You can also press the Delete key. Chapter 5: Working with plexes 6. The debris filter removes your assignment of beads to populations, so you need to re-assign them in the Instrument Settings or Manual Clustering views. Next step Proceed to Assigning beads to clusters (page 55). More information • Plex creation workflow (page 50) • Using manual clustering (page 59) Using manual clustering Introduction This topic describes how to use manual clustering. You can use this function to resolve problems caused when the automatic clustering process fails to locate your bead clusters. Automatic bead clusters can also be modified with this method. 59 60 FCAP Array Software User’s Guide The functions located in the Manual Clustering group can be used to navigate up or down the sample list and to perform actions on multiple samples at once. Applying manual clustering to selected samples To apply manual clustering to selected samples: 1. Click Manual Clustering in the Plex navigation panel. The list of samples opens on the left, and two plots open on the right. 2. Review the Clusters column in the sample list table, where you can find out if manual clustering is needed for any of the samples. The text turns red for any tube that fails auto clustering. 3. Select a sample from the list. Data according to the scatter parameter selected in the Instrument Settings view is shown in the histogram. Data corresponding to the clustering parameters is shown in the dot plot. In the dot plot, you can check which cluster was not found by the algorithm. 4. Change the auto cluster to manual cluster by selecting the Use Manual Clustering checkbox in the row of the selected sample. 5. On the histogram, hold down the mouse button and move the mouse left or right to draw your gate. You can draw multiple gates. 6. (Optional) Gates can be moved, resized, and deleted. • Move a gate by selecting it and dragging it to another position. • Resize a gate by grabbing one of the sides. • Delete a gate by selecting it and pressing the Delete key. Chapter 5: Working with plexes 7. Use the mouse to draw a new gate around the cluster in the dot plot. Do one of the following: • Hold the mouse button while drawing your freehand gate. • Sequentially click to draw the sides of a polygon gate. 8. (Optional) To resize a dot plot gate, hold Ctrl + drag one of its sides. 9. After defining all the clusters, assign beads to them. a. Select the bead you want to assign from the Selected Beads table. b. Double-click the cluster that you want to assign the bead to. Clearing manual clustering from selected samples To change back to auto clustering for selected samples: 1. Clear the Use Manual Clustering checkboxes for your selected samples in the list. 61 62 FCAP Array Software User’s Guide Navigating the sample list To navigate the sample list, do one of the following: • Click a row in the sample list to show the file’s sample data. • Click the Next File icon to move down the sample list and show the next file’s sample data. • Click the Previous File icon to move up the sample list and show the previous file’s sample data. Selecting failed files for manual clustering To select failed files for manual clustering: 1. Click the Use Manual Clustering for Failed Files icon. You can now edit the failed files indicated by red colored text. Adjust scatter parameters, adjust clustering gates, and assign beads. Selecting all files for manual clustering To select all files for manual clustering: 1. Click the Use Manual Clustering for All Files icon. You can now edit all files. Adjust scatter parameters, adjust clustering gates, and assign beads. Reverting to auto clustering for all files To revert back to automatic clustering for all files: 1. Click the Use Auto Clustering for All Files icon. All parameters are restored to automatic clustering. Applying manual clustering to selected files To apply manual clustering to selected files: 1. Select one or more files from the sample list by clicking the corresponding checkboxes. 2. Draw a clustering gate(s), adjust scatter parameter(s), or assign beads. 3. Click the Apply to All Manual Clustering Files icon. All your parameter changes are applied to all selected files. Chapter 5: Working with plexes Clearing the bead assignments To clear the bead assignments: 1. Select a file from the sample list by clicking the corresponding checkbox. 2. Click the Clear Cluster Assignment icon. All the bead assignments for the selected file are removed. The scatter parameter and clustering gates remain unchanged. Note that if you select multiple checkboxes in the sample list, only the sample in the highlighted row is affected when you click the Clear Cluster Assignment icon. Clearing all bead To clear all bead assignments and all clustering gates: assignments and all 1. Select a file from the sample list by clicking the corresponding clustering gates checkbox. 2. Click the Clear All Bead Clusters icon. All bead assignments and all clustering gates are removed. The scatter parameter remains unchanged. Note that if you select multiple checkboxes in the sample list, only the sample in the highlighted row is affected when you click the Clear All Bead Clusters icon. Next step Proceed to Defining standards and QC (page 64). More information • Plex creation workflow (page 50) • Using debris filtering (page 57) 63 64 FCAP Array Software User’s Guide Defining standards and QC Introduction This topic describes how to define standards for quantitative, qualitative, and quality analysis. It also describes how to use the sample based QC method for the BD CBA Mouse Immunoglobulin Isotyping kit. Viewing standards To view standards: 1. Click Standards and QC in the Plex navigation panel. The content appears corresponding to the selected beads and their analytes’ analysis models. When your plex contains a second reporter parameter, the window is divided into two panels. About quantitative analysis Specifying the standard concentration When defining standards for quantitative analysis, you specify these items: • Concentration values • Measurement unit You can use uniform concentrations for all analytes (default) or specify different concentrations for each analyte. To specify the standard concentration: 1. Click Ascending or Descending in the Concentration Settings group to define the order for standard concentrations. The typical choice here is ascending, since most reagent instructions recommend running from lowest to highest concentration. 2. Enter a value in the Highest Concentration field. Chapter 5: Working with plexes 3. Enter a value in the Dilution Factor field. 4. Click Use Blank if you need a zero concentration point. 5. Click Apply. If the icon is not available, click the column header. The program calculates the standard dilution series and fills in the concentration values. You can also type in the values manually. Adding concentration settings for an individual analyte You can modify individual concentrations manually by editing or using the following procedure. To add concentration settings for an individual analyte: 1. Select the Show Individual Analytes checkbox. 2. Click in the column header for an individual analyte. 3. Enter a value in the Highest Concentration field. 4. Enter a value in the Dilution Factor field. 5. Click Use Blank if you need a zero concentration point. 6. Click Apply. Only the selected analyte's concentration column is calculated. 65 66 FCAP Array Software User’s Guide 7. Repeat this process to define the concentrations for each analyte. Chapter 5: Working with plexes Specifying the measurement unit When defining concentrations, the active measurement unit will be valid for your analysis. To change the measurement unit: 1. Select a Measurement Unit in the Concentration Settings group. 2. Click the Concentration column header to highlight it. 3. Click Apply. The selected measurement unit is displayed in the results and report documents. Note that using different measurement units gives slightly different results for your standard curves. We recommend not using units that will lead to a concentration of <1. About qualitative analysis When using qualitative analysis, you can select positive and negative standards. You can use positive and negative standards for all analytes (default) or specify standards for each analyte. All analytes should have a positive or negative standard. Specifying positive and negative standards To specify positive and negative standards: 1. Select negative standards in the negative row of the qualitative table by selecting a standard sample name from the Standard Sample menu. 2. Use the same method for positive standards. 67 68 FCAP Array Software User’s Guide About quality control analysis With quality control analysis, you have the option to check if MFI values are within the specified range. Values that are out of range are indicated in the results and reports. The quality control range is uniform for all analytes by default. In addition to using the following procedures, you can manually edit each value. Specifying MFI values for quality control To specify quality control MFI threshold values for all analytes: 1. Click a column header. 2. Type values into the Negative Standard’s MFI and Positive Standard’s MFI fields. 3. Click Apply. The columns are filled with the minimum and maximum values for all samples. Chapter 5: Working with plexes 4. If you have a second reporter parameter, click the Reporter 2 icon and repeat steps 1 to 3. Specifying MFI values for an individual analyte To specify quality control MFI threshold values for individual analytes: 1. Select the Show Individual Analytes checkbox. 2. Click the column header for an individual analyte. 3. Type values into the Negative Standard’s MFI and Positive Standard’s MFI fields. 4. Click Apply. 5. Repeat this process to specify the MFI threshold values for each analyte. 6. If you have a second reporter parameter, click the Reporter 2 icon and repeat steps 1 to 5. 69 70 FCAP Array Software User’s Guide About sample based QC Using the sample based QC definition enables the minimum MFI values to be derived from the MFI values of the negative standard. You can define your standard as negative, positive, or both a negative and a positive standard by clicking the corresponding tab in the Sample Based QC Definition dialog. The results for your analysis can be found in the QC Result column of the statistics table in the report view. Defining sample based QC for all samples Use the following method for the analysis of the BD CBA Mouse Immunoglobulin Isotyping kit. To define sample based QC Definition: 1. Click the Customize Settings icon in the Quality Control Settings group. The Sample Based QC Definition dialog opens. 2. Select your negative standard from the Negative=MFI of Selected Sample menu. 3. Specify the multiplier for your negative standard in the Positive=MFI of Negative x field. We recommend a value of 3 for the multiplier. 4. Click Apply to All. Chapter 5: Working with plexes 5. Click the Reporter 2 icon and repeat steps 1 to 4. Verify that you have the correct Reporter icon highlighted on the ribbon while performing this procedure. Toggling between the Reporter icons will toggle between the two Quality Control Definition tables. The software provides results for each analyte and reporter. Defining sample based QC for an individual analyte Result Definition Positive The MFI of the sample is greater than the (userdefined multiplier) times the MFI of the negative standard. Negative The MFI of the sample is less than or equal to the MFI of the negative standard. Indeterminate The MFI of the sample is greater than the MFI of the negative standard, but less than the (user-defined multiplier) times the negative standard. Error Calculation error. Verify that you have the correct file(s) selected when performing this procedure. Calculations are based on the selected negative standard. To define sample based QC for an individual analyte: 1. Select the Show Individual Analytes checkbox. 2. Click a column header of an individual analyte. 3. Click the Customize Settings icon in the Quality Control Settings group. The Sample Based QC Definition dialog opens. 4. Select your negative standard from the Negative=MFI of Selected Sample menu. 5. Specify the multiplier for your negative standard in the Positive=MFI of Negative x field. 71 72 FCAP Array Software User’s Guide 6. Click Apply to Selected. Next step Proceed to Defining controls (page 72). More information • Plex creation workflow (page 50) • Selecting beads and analysis model (page 51) Defining controls Introduction This topic describes how to add control samples to a plex for quantitative and qualitative analysis. About defining controls You can specify the parameters of the control samples and then use them in a plex to verify the accuracy of the measurement and the calculations. Controls added to the plex are displayed in the quantitative or qualitative analysis table, corresponding to the selected analyte model. Defining controls in To define controls in a quantitative analysis: a quantitative 1. Click Control Definition in the Plex navigation panel. analysis 2. Specify the concentration of your control samples by clicking in the Nominal CC field and entering the value. The measurement unit matches the one defined in Standards and QC. 3. If needed, change the Acceptance Range value. It is set to 20% by default (Final CC +/- 20%). Enter a value between zero and one to change it. Chapter 5: Working with plexes Values that are out of range are indicated in the results and reports. Defining controls in To define controls in a qualitative analysis: a qualitative 1. Click Control Definition in the Plex navigation panel. analysis 2. Define the control samples as negative or positive by clicking the appropriate sign in the Negative/Positive column. Values that are out of range are indicated in the report and the results. Next step Proceed to Viewing standard curves (page 74). More information • Plex creation workflow (page 50) • Defining standards and QC (page 64) 73 74 FCAP Array Software User’s Guide Viewing standard curves Introduction This topic describes how to view the standard curves and how to modify the display to optimize the views for an experiment. Viewing the standard curves To view the standard curves: 1. Click Standard Curves in the Plex navigation panel. The window is separated into two panels: curves on the left and the analytes table on the right. The following figure shows a portion of a set of standard curves. 2. If needed, zoom in on the standard curve and statistics for a specific analyte either by selecting an analyte from the Analytes list or by double-clicking a plot. The fitted results statistics are displayed below the plot. Note that in an experiment with multiple replicates of a standard sample, the results table shows the average values first, and the values for the replicates in the rows below. Chapter 5: Working with plexes Standard curve options You can modify the parameters of the calculated standard curves by using the features displayed in the Standard Curves Options group. Changing the axis scaling The scales of the x-axis and y-axis are set to Logarithmic by default. To change axis scaling: 1. Click Linear in the X Axis or Y Axis menu. Changing the fitting type The fitting type is 5 Parameter Logistic by default. To change the fitting type: 1. Select another type from the Fitting Type menu. The recalculation of the curves runs automatically, and the plots refresh to show the new data. You can find the equation of each fitting type in the list. 75 76 FCAP Array Software User’s Guide Changing the weighting type FCAP Array calculates standard curves without weighting by default. There are two weighting models available: based on event numbers and on event numbers/CV values. To change weighting: 1. Select a weighting model from the Weighting menu. After you select one of the models, the recalculation runs automatically and the plots refresh the data. Changing the fitting accuracy percentage If the R square of the fitting algorithm result is lower than the value of the fitting accuracy, you receive an error message regarding the related analyte. Fitting accuracy is set to 98% by default. To change the fitting accuracy percentage: 1. Change the Fitting Accuracy (%) value in the Standard Curve Options group either by entering a new number or using the spin button and then pressing Enter. Changing the force through zero option If you have a blank standard sample (0 pg/mL) in the plex, you have an option to ignore the data in the fitting calculation. The Force Zero option in the Standard Curve Options group is enabled by default. To change the force through zero option: 1. Click the Force Zero button on the Standard Curve Options group. Hiding the blank standard To hide the blank standard on the standard curves: 1. Click the Hide Blank Standard icon. The blank standard is hidden on all curves, but the corresponding file is still present in the analysis. Chapter 5: Working with plexes Changing the recovery threshold percentage To change the recovery threshold percentage: Saving the chart When displaying a single curve, the Save Chart icon is active. 1. Change the Recovery Threshold (%) value in the Standard Curve Options group either by entering a new number or using the spin button and then pressing Enter. You can adjust the image size to change the proportions of the saved chart. The saved chart image will appear the same way it does on the screen. To save the chart: 1. Click the Save Chart icon to save the active chart to an image file. 2. Select a file format from the menu. The choices are JPEG, PNG, and BMP. The Save As dialog opens. 3. Designate a file location and name. 4. Click Save. Changing the chart color To change the chart color: 1. Select a chart color from the menu on the Standard Curve Options group. When saving a curve, the image file corresponds to the selected color. Changing the chart labels option To change the chart labels option: 1. Click the Chart Labels icon on the Standard Curve Options group to toggle the display of standard point descriptors (standard point name and respective MFI value) on the chart. 77 78 FCAP Array Software User’s Guide Ignoring standard points You can view the standard curves and ignore one or more standard points in case they do not correctly fit the curves. Clearing the checkbox of a standard point ignores the standard point from all curves, not just the one being viewed. To ignore standard points on the standard curve: 1. Go to the detailed view. 2. Clear the checkbox in the results table of the standard point you want to ignore. The recalculation runs automatically and the results and the plots reload with the new data. Next step • Proceed to Overview of results and reports (page 80). More information • Plex creation workflow (page 50) 6 Results and reports management This chapter covers the following topics: • Overview of results and reports (page 80) • Viewing analysis results (page 81) • Customizing charts (page 87) • Viewing reports (page 89) • Completing an experiment (page 91) 80 FCAP Array Software User’s Guide Overview of results and reports Introduction This topic describes the stages in the workflow for viewing analysis results and creating reports. Results and reports The workflow for viewing results, creating reports, and completing workflow an experiment includes these stages. More information Stage Description 1 Viewing analysis results (page 81) 2 Customizing charts (page 87) 3 Viewing reports (page 89) 4 Completing an experiment (page 91) • New experiment overview (page 28) • Workflow overview (page 24) Chapter 6: Results and reports management Viewing analysis results Introduction This topic describes how to review the results of an analysis by inspecting the analysis statistics and histograms. Two types of results views are available: Viewing results • Results per analyte • Results per sample To view results: 1. Click one of the views in the Plex navigation panel. The results data is displayed in two tables at the top and in charts and plots below. For replicate samples, the black lines that are shown on the bar chart depict a range bar. It extends from the highest point to the lowest point. 81 82 FCAP Array Software User’s Guide Results per analyte This view shows the list of analytes in the left table and the statistics for the selected analyte in the right table. Use the horizontal scroll bar in the right table to see all of the statistics columns. In the following figure, the plot shows results for the analyte selected from the left table. Chapter 6: Results and reports management Results per sample This view shows the list of samples in the left table and the statistics for the selected sample in the right table. Use the horizontal scroll bar in the right table to see all of the statistics columns. In the following figure, the plot shows results for the analyte selected from the left table. 83 84 FCAP Array Software User’s Guide Column headers The statistics table has columns for each of the categories of data. The following table describes the meaning for each column. Column Description Position The location of the sample on the plate in the experiment design view Results file Assigned FCS data file Clustering Type of clustering used (manual or auto) Event # The number of events in the gated cluster MFI The median fluorescence intensity SD The standard deviation of the reporter MFI for the bead cluster CV Coefficient of variation as a percentage of the reporter MFI of a cluster Nominal CC Nominal concentration of the standard or control samples Fitted CC Sample concentration calculated from the fitting curves Final CC Sample concentration calculated from the fitting curve with a dilution factor applied Recovery % Applicable to standard sample only. It represents the comparison of the nominal CC to the fitted or final CC Dilution Dilution factor QC Quality Control analysis result message Qualitative Qualitative analysis result message Message Shows error message for the sample in the corresponding row Chapter 6: Results and reports management Organizing the data You can organize the order of the data in the columns in the in the statistics statistics table to decreasing or increasing. table To organize data: 1. Click the column header. 2. Click the arrow in the header to change the order of the data. Setting up custom filtering in the statistics table You can set the criteria for data that is displayed and hide rows that you do not want to show by using the custom filter. You can then export this filtered data. To set up custom filtering: 1. Click the filter icon in the right corner of the column header to open the menu. 2. Select Custom. The Custom Auto Filter dialog opens. 3. Complete the fields to filter the data. 85 86 FCAP Array Software User’s Guide 4. Click OK. The filter is displayed at the bottom of the table where you can modify, inactivate, or delete the filter. Exporting results The data from results tables can be exported as different file formats, including Microsoft Excel® (XLS), PDF, RTF, HTML, and CSV. The file format is set to XLS by default. Click the arrow on the Export icon to change it. To export results: 1. Click the Export icon in the Results group. The Save As dialog opens. 2. Select a destination to save the file. 3. Click Save. Printing To print the results tables: 1. Click the Print icon in the Results group. 2. If necessary, edit the printer and page setup in the Print Preview dialog. 3. Click the Print icon. Next step Proceed to Customizing charts (page 87). More information • Overview of results and reports (page 80) • Workflow overview (page 24) Chapter 6: Results and reports management Customizing charts Introduction This topic describes how to customize the display of results data in the graphical charts. You can select a row in the left table to display the data in the chart. When the view is set to Results per Analyte, the chart displays the data for each sample for a given analyte. When the view is set to Results per Sample, the chart displays the data for each analyte for a given sample. Displaying different To change the sample type view on the chart: sample types in the 1. Click the corresponding icons (Standard, Test, or Control) in results per analyte the Results group. view Displaying the different data types The data type displayed in the chart is set to Final CC by default. To change the data type: 1. Select a data type from the Data Type menu in the Chart group. The menu contains all the listed data types from the results table. 87 88 FCAP Array Software User’s Guide Changing the chart type To change the chart type: 1. Click the Chart Type icon in the Chart group. 2. Select one of the following: Bar Chart, 3D Bar Chart, or Polar Chart. When you select 3D Bar Chart, after clicking the chart, you can rotate it with your mouse and zoom in or out with your mouse wheel. Changing the chart labels option Saving a chart To change the chart labels option: 1. Click the Chart Labels icon on the Chart group to toggle the display of descriptors on the chart. To save a chart: 1. Click the Save Chart icon in the Chart group. The Save As dialog opens. You can adjust the image size to change the proportions of the saved chart. The saved chart image will appear the same way it does on the screen. The format is set to JPEG by default. BMP and PNG formats are available as well. 2. Select a destination to save the file. 3. Click Save. Next step Proceed to Viewing reports (page 89). More information • Overview of results and reports (page 80) • Workflow overview (page 24) Chapter 6: Results and reports management Viewing reports Introduction This topic describes how to work with reports. Two types of report documents are available in FCAP Array: plex reports and experiment reports. You can view and print both types. Report documents contain all the defined data for analysis and results. The plex report contains all the details of the selected plex such as sample layout, beads and model selection, standard and quality control definition, control definition, instrument settings, standard curves, and results. The experiment report contains all the plex reports merged into a single document. Viewing plex reports To view a plex report: 1. Click Report in the Plex navigation panel. Viewing To view an experiment report: experiment reports 1. Click Report in the Experiment navigation panel. Report layout and format The options for working with reports are shown on the ribbon. The groups include: • Print • Page Setup • Navigation • Zoom • Page background • Export You can modify the layout and the format of the report by clicking one of the icons. To see a description of the icon, hover the pointer over it to see a tooltip dialog. 89 90 FCAP Array Software User’s Guide Using report content options You can show or hide specific parts of a report. To toggle report content options: 1. Click the Options icon in the Page Setup group. The Report Options dialog opens. 2. Select or clear the options as necessary. Any options that are selected are included in the report. You can turn options on or off at any time. Note that the selected options will be applied to the current and future reports. 3. Click OK. Next step Proceed to Completing an experiment (page 91). More information • Overview of results and reports (page 80) • Workflow overview (page 24) Chapter 6: Results and reports management Completing an experiment Introduction This topic describes the process of completing an experiment. You can finish your work during any phase of the analysis. There are several options for completing an experiment. These functions are available from any window or view of the experiment. If you are working with a locked experiment, saving is not active and modifications are also disabled. Saving an experiment To save an experiment: 1. Click the Save icon in the Experiment group on the ribbon. FCAP Array saves all changes to the experiment. Saving an experiment as When working with a locked experiment, use this option to save a copy of it. The new copy of the locked experiment is now editable and your modifications can be saved. Using the Save As function, FCAP Array keeps the original experiment unmodified and saves your copy with the completed changes as well. To use save experiment as: 1. Click the Save As icon in the Experiment group. The Save As dialog opens. 2. Enter a name for the experiment. 3. Click Save. 91 92 FCAP Array Software User’s Guide Saving a plex as a template You can reuse the saved template for your next experiment and streamline your workflow. To save a plex as a template: 1. Click the Save Plex as Template icon in the Experiment group. The Save As dialog opens. 2. Enter a name for the plex. 3. Click Save. Closing an experiment To close an experiment: 1. Click the Close icon in the Experiment group. The experiment is closed automatically. The program returns to the main window showing the experiment library. More information • Overview of results and reports (page 80) • Workflow overview (page 24) 7 Using the BD FACSuite workflow This chapter covers the following topics: • BD FACSuite workflow overview (page 94) • Creating a new experiment from BD FACSuite files (page 96) • Evaluating the experiment (page 98) 94 FCAP Array Software User’s Guide BD FACSuite workflow overview Introduction This topic describes the workflow for creating an experiment from BD FACSuite FCS files. Workflow stages The following table shows the stages in a typical workflow when using FCS files from BD FACSuite software. Stage Description 1 Starting the software (page 17) 2 Creating a new experiment from BD FACSuite files (page 96) 3 Evaluating the experiment (page 98) 4 Viewing analysis results (page 81) 5 Viewing reports (page 89) Chapter 7: Using the BD FACSuite workflow To use the BD FACSuite workflow most efficiently, it is important that CBA-specific keywords be added to the experiment while it is being run in BD FACSuite software. See the Guide to Using BD FACSuite Software with BD Cytometric Bead Array Products to learn how to perform this setup. About CBA-specific keywords Go to bdbiosciences.com/cbasetup for more BD CBA information. Keyword Description CBA Plex Name Identifies the specific plex from the FCAP Array software plex library. If a match is found in the plex library, the FCS files are automatically associated with that plex. CBA Type Identifies whether the tube or well contains a standard, sample, or control. FCAP Array software lists analysis results in the following order: standards, samples, controls. CBA Standard ID ID of the standard contained in the tube or well. The value can also be Pos or Neg to identify positive and negative for qualitative BD CBA assays. Standards will be arranged for the standard curve in alphabetical order by the value of the CBA Standard ID keyword. Assign this keyword appropriately to ensure that standards are plotted in the correct order on the standard curve. Use leading zeros in the CBA Standard ID and CBA Control ID keywords. This ensures that your files can always be sorted in order (01, 02, 03 as opposed to 1, 2, 3). ID of the control contained in the tube or well. The value can also be Pos or Neg. Controls will be arranged in alphabetical order by the value of the CBA Control ID keyword. Used to specify the dilution of the sample. The default dilution value is 1.00. Note that the dilution factor can be entered as a keyword or it can also be entered into FCAP Array software. CBA Control ID CBA Dilution More information • Workflow overview (page 24) 95 96 FCAP Array Software User’s Guide Creating a new experiment from BD FACSuite files Introduction This topic describes how to create a new experiment using FCS files created in BD FACSuite software. Note that you cannot create a plex using the standard workflow and then try to use that plex in the BD FACSuite workflow. The keywords in the BD FACSuite FCS files are used to generate the plex(es) for the BD FACSuite workflow. Procedure To create a new experiment from FCS files created in BD FACSuite software: 1. Click the New Experiment button in the Home tab and select New Experiment > From FACSuite Files. The New Experiment from FACSuite files dialog opens. 2. Navigate to the directory containing the appropriate FCS files. The FACSuite Experiment folder defined in Preferences is selected as the default in the FACSuite Experiment Selection browser. The list of experiments in the right panel is the list of all unique $PROJ keyword values extracted from all FCS files contained in the folder. The new experiment will be populated with all the FCS files that share the selected $PROJ value. 3. Select the experiment name in the Experiments field to use the same name for the FCAP Array experiment. Chapter 7: Using the BD FACSuite workflow A custom name can also be entered into the Experiment Name field. You can also enter a comment. 4. Click OK. The new experiment opens with the layout as defined by the keywords in the BD FACSuite FCS files. Next step Proceed to Evaluating the experiment (page 98). More information • BD FACSuite workflow overview (page 94) • Workflow overview (page 24) 97 98 FCAP Array Software User’s Guide Evaluating the experiment Introduction This topic describes the process of evaluating the experiment that is created after opening the BD FACSuite FCS files. About generating experiment results FCAP Array automatically generates plexes, samples, plates, and their layout, based on the information contained in the keywords in the BD FACSuite FCS files. FCAP Array creates a number of plexes to match those defined in the keywords. If the automatic analysis runs successfully based on the information, the experiment results are generated without defining any additional settings. Verifying and To verify or add information: adding information 1. Check the positions and types of samples in the experiment design view by clicking a well to see if it matches your corresponding BD FACSuite FCS file (Sample Properties panel). While evaluating the created experiment, FCAP Array provides the option to select and add more samples, files, or plexes to it. You can also modify the properties of the previously added files. For further information, see Working with plexes (page 47). Solving problems For cases where there is missing or an undefined plex name, you must define additional information. To learn more about how to solve this issue, see Working with plexes (page 47) or Troubleshooting (page 115). More information • BD FACSuite workflow overview (page 94) • Workflow overview (page 24) 8 Data management This chapter covers the following topics: • Working with libraries (page 100) • Using the experiment library (page 102) • Using the bead library (page 104) • Using the plex template library (page 108) • Using the user management library (page 111) • Using the units library (page 113) 100 FCAP Array Software User’s Guide Working with libraries Introduction This topic describes how to work with the libraries. About libraries The available data from different parts of the application are organized in libraries. The default library in the main window is the experiment library. Use the Libraries panel to view the different libraries. In each library, the data is displayed in tables, and the corresponding management icons display on the ribbon. Some of these functions are also available by right-clicking a table. Editing data To edit data: 1. Click a cell in the library table. 2. Edit the data. 3. Press Enter. Sorting data To sort data: 1. Click the column header. 2. Click the arrow in the header to change the order of the data. Chapter 8: Data management Filtering data To filter data: 1. Click the filter icon in the right corner of the column header to open the menu. 2. Do one of the following: • Select one of the options from the menu. • Specify your own parameters by clicking Custom, completing the fields, and clicking OK. The filter is displayed at the bottom of the table, where you can modify, inactivate, or delete the filter. 101 102 FCAP Array Software User’s Guide Using the experiment library Introduction This topic describes how to work with experiment files in the experiment library. About experiment functions The available experiments are organized in the experiment library. The functions are located in the Experiment group on the ribbon. Creating an experiment To create an experiment: 1. Click the lower half of the New Experiment icon. 2. Select an experiment type. A dialog opens. 3. Enter any experiment details and click OK. For more detailed instructions, see Creating a new experiment (page 29). Opening an experiment To open an experiment: 1. Select an experiment from the experiment table. 2. Click the Open Experiment icon. Alternatively, you can double-click the selected experiment to open it. Chapter 8: Data management Viewing experiment properties To view experiment properties: 1. Select an experiment from the experiment table. The properties table displays the details for the selected experiment. Deleting an experiment To delete an experiment: 1. Select an experiment from the experiment table. 2. Click the Delete Experiment icon. The Confirm experiment deletion dialog opens. 3. Click Yes. Importing an experiment Experiments can be shared between different computers using the experiment import and export functions. To import an experiment: 1. Click the Import icon. The Import Experiment dialog opens. 2. Navigate to your experiment file and click Open. 103 104 FCAP Array Software User’s Guide Exporting an experiment To export an experiment: 1. Select an experiment from the experiment table. 2. Click the Export icon. The Export Experiment dialog opens. 3. Name your experiment file and click Save. More information • Creating a new experiment (page 29) Using the bead library Introduction This topic describes how to work with beads and bead groups in the bead library. Bead files from FCAP Array Version 1.0 cannot be used with Version 3.0. The converse is true also. Bead files from version 3.0 cannot be used with version 1.0. The bead files for BD CBA reagents can be found at bdbiosciences.com/cbasetup. Bead functions All the available beads and bead groups are organized in the bead library. The functions are located in the Bead Library group on the ribbon. Chapter 8: Data management Adding beads To add beads: 1. Click the New Bead icon. The New Bead dialog opens. 2. For each bead, specify the Bead Name, Analyte, Second Reporter Parameter (if applicable), and Catalog Number (optional). 3. Click OK. Modifying beads To modify beads: 1. Select a bead from the library. 2. Click the Modify Bead icon. 3. Change the details in the Modify Bead dialog. 4. Click OK. Deleting beads To delete a bead: 1. Select a bead from the list in the left panel. 2. Click the Delete Bead icon. The Confirm bead deletion dialog opens. 3. Click OK. Bead group functions Creating bead groups allow you to manage a set of beads that can be used for specific purposes and makes it more efficient to handle them as a block, rather than individually. 105 106 FCAP Array Software User’s Guide Creating a bead group To create a bead group: 1. Click the New Bead Group icon. The New Bead Group dialog opens. 2. Enter group name and description. 3. Click OK. Modifying a bead group To modify a bead group: 1. Select a bead group. 2. Click the Modify Bead Group icon. The Modify Bead Group dialog opens. 3. Edit the group name and description. 4. Click OK. Deleting a bead group To delete a bead group: 1. Select a bead group. 2. Click the Delete Bead Group icon. The Confirm bead group deletion dialog opens. 3. Click OK. Adding a bead group To add bead to a group: 1. Select one or more beads from the bead list. 2. Drag and drop them onto the bead group. Removing a bead from a group To remove a bead from a group: 1. Select one or more beads from the bead group. 2. Click the Remove Bead from Group icon. Chapter 8: Data management Importing a bead group To import a bead group: 1. Click the Import icon. The Import dialog opens. 2. Select the XML file you want to import. 3. Click Open. Exporting a bead group You can export either one single bead group or all groups (including all beads) from the library. To export a bead group: 1. Select the bead group. 2. Click the Export icon and select an export option. The Export Bead Data dialog opens. 3. Enter a file name. 4. Click Save. More information • Selecting beads and analysis model (page 51) 107 108 FCAP Array Software User’s Guide Using the plex template library Introduction This topic describes how to work with plex template files in the library. All saved plex templates are stored in the library. Plex template functions You can select a plex template to be used in an experiment. The functions are located in the Plex Template Library group on the ribbon. Creating a new experiment from a plex template To create a new experiment from a plex template: 1. Select a plex template from the plex template table. 2. Click the New Experiment from Template icon. The New Experiment From Template dialog opens. 3. Enter an experiment name. 4. Click OK. Chapter 8: Data management Viewing plex template properties To view plex template properties: 1. Select a plex from the plex template table. The properties table displays the details for the selected plex. Renaming a plex template To rename a plex template: 1. Click in the name field for a template. 2. Edit the name. 3. Press Enter. Importing a plex template To import a plex template: 1. Click the Import icon. The Open dialog opens. 2. Navigate to your plex template file. 3. Click Open. 109 110 FCAP Array Software User’s Guide Exporting a plex template To export a plex template: 1. Click the Export icon. The Save As dialog opens. 2. Enter a name for the plex template. 3. Click Save. Deleting a plex template To delete a plex template: 1. Select a plex template from the plex template table. 2. Click the Delete icon. The Confirm template deletion dialog opens. 3. Click Yes. More information • Plex overview (page 48) Chapter 8: Data management Using the user management library Introduction This topic describes how to manage users and user privileges. User management functions Only a user with administrator rights can modify the users list and the rights of users. If the administrator name and password are successfully entered in the Login dialog, the user management function is available. The functions are located in the User Management group in the ribbon. Note that a user with administrator rights can view and edit all experiments. Adding a new user To add a new user: 1. Click the New User icon. The New User dialog opens. 2. Enter details into the fields. Fields include: User Name, Full Name, Department, E-mail, Contact Info, Password, and Administrator checkbox. Only the User Name and Full Name are mandatory fields. 3. Click OK. 111 112 FCAP Array Software User’s Guide Modifying a user To modify a user: 1. Select a user from the user table. 2. Click the Modify User icon. The Modify User dialog opens. You can also double-click the user from the user table to open the Modify User dialog. 3. Edit user details in the fields. Fields include: User Name, Full Name, Department, E-mail, Contact Info, Password, and Administrator checkbox. 4. Click OK. Deleting a user Note that you cannot delete your own user account and a minimum of one administrator account is required by the software. To delete a user: 1. Select a user from the user table. 2. Click the Delete User icon. The Confirm user deletion dialog opens. 3. Click Yes. Chapter 8: Data management Using the units library Introduction This topic describes how to manage the measurement units that are used in experiment analysis when selecting the concentration unit for standard and control samples. Measurement unit functions The measurement functions are located in the Units group on the ribbon. Adding a unit To add a unit: 1. Click the New Unit icon. The New Unit dialog opens. 2. Enter the unit name and unit description. 3. Click OK. Modifying a unit To to modify a unit: 1. Select a unit in the unit table. 2. Click the Modify Unit icon. The Modify Unit dialog opens. 3. Edit the unit name and unit description. 4. Click OK. 113 114 FCAP Array Software User’s Guide Deleting a unit To delete a unit: 1. Select a unit in the unit table. 2. Click the Delete Unit icon. The Confirm unit deletion dialog opens. 3. Click Yes. 9 Troubleshooting This chapter covers the following topic: • Troubleshooting (page 116) 116 FCAP Array Software User’s Guide Troubleshooting Introduction This section describes tips to help you troubleshoot problems with FCAP Array software. If you have problems with using FCAP Array, you can find help included in the software. The Help menu is located on the right side of the ribbon. Calculation error messages FCAP Array does not start The following table lists calculation error messages in the statistics table. Message Description NaN Acronym for not a number. Can be the result of zero divided by zero or no calculation done. negative infinity Negative number divided by zero. positive infinity Positive number divided by zero. Possible causes Recommended solutions Too many software instances are running on the PC Close unnecessary applications. The security key is not connected Connect the FCAP Array security key to an available USB port on the computer. Missing program files Reinstall the software. Chapter 9: Troubleshooting User cannot log in User unable to open or edit data User manual does not open from Help menu Experiment cannot be edited New bead cannot be added to the bead library Possible causes Recommended solutions User name is incorrect Check the caps lock key. Re-type your user name. Forgot user name Contact your software administrator. Password is incorrect Check the caps lock key. Re-type your password. Forgot password Your software administrator can reset your password. Possible causes Recommended solutions Database is corrupted Restore a database backup or delete the database file and FCAP Array will regenerate the database at the next run. Possible causes Recommended solutions User manual file was not installed with the software Re-run the FCAP Array installer and select Repair. Possible causes Recommended solutions Experiment is locked Make a copy of the experiment by click the Save As icon in the Experiment group. Possible causes Recommended solutions Bead name and analyte already exist in the bead library Make corrections to the bead identifiers. 117 118 FCAP Array Software User’s Guide Unexpected analysis results Possible causes Recommended solutions Re-using saved fitting curves Calculate new standard curves for every experiment. Software extrapolation leads to inaccurate values Calculate new standard curves for every experiment. Single-color and dual-color beads are in the same experiment Single-color and dual-color beads require different instrument setups. Experiment sample layout does not match actual sample layout Correct the experiment layout, redo the file assignment, and re-analyze. Incorrect bead information in the bead library Correct the information. Import the bead list from an XML file to avoid entry errors. Incorrect file assignment Review the acquisition sample order. Correct the file assignment and re-analyze. Too much debris in one or more samples Use Debris Filtering to define gated data that excludes debris. Chapter 9: Troubleshooting Unable to fit standard curves Cannot analyze data file Possible causes Recommended solutions One or more standard samples failed Remove bad data points in the Standard Curves window and re-analyze. Standards are fitted out of sequence Correct the file assignment in the Experiment Design view. Choice of fitting curve does not model the standard sample data Choose another fitting curve. 4 Parameter and 5 Parameter Logistic curves are recommended for most beads. Fitting accuracy is too high Lower the fitting accuracy value in the Standard Curves window. Sample preparation error Prepare and acquire a new standard sample set. Experiment design does not match the actual layout Correct the experiment layout, redo the file assignment, and re-analyze. Possible causes Recommended solutions Corrupt or incorrect FCS file format Use FCS 2.0 or 3.0 list-mode data files only. Reexport list mode data files from the instrument system in FCS 2.0 or 3.0 format. Acquire another standard sample series. 119 120 FCAP Array Software User’s Guide During plex definition, clustering fails or incorrect number of clusters are found More information • Possible causes Recommended solutions Data file from the wrong experiment was loaded Load a data file from the correct experiment. Wrong scatter or clustering parameters specified Specify the correct parameters. Incorrect instrument settings Correct the instrument settings so that clusters are in the expected locations. Cluster overlap in data files Use manual clustering. Technical assistance (page 9) 10 Reference information This chapter covers the following topic: • Using settings functions (page 122) 122 FCAP Array Software User’s Guide Using settings functions Introduction This topic describes the functions of the Settings tab in the main menu. Click the Settings tab to display the settings functions. Logging out To log out from FCAP Array: 1. Click the Logout icon. The application closes and the Login window opens. Changing your password When using FCAP Array for the first time, the initial password is created by an administrator. After logging in you can change it at any time. To change your password: 1. Click the Change Password icon. The Change Password dialog opens. 2. Type in your old password and new password. 3. Click OK. Chapter 10: Reference information Resetting a If you forget your password, an administrator can reset your forgotten password password. To reset a user password: 1. Log in as an administrator. 2. Click the User Management icon. 3. Double-click a user in the user table. The Modify User dialog opens. 4. Enter a new password for the user. 5. Click OK. Changing user preferences To change user preferences: 1. Click the Preferences icon. The User Preferences dialog opens. 2. Change the Default Measurement Unit, Default Fitting Accuracy, or the default FACSuite Directory for your BD FACSuite FCS files. 3. Click OK. Viewing the user tracking log To view the user tracking log: 1. Click the User Tracking Log icon. The user tracking log shows the following events: software startup, software close, user login, user logout, experiment open, experiment close, experiment create, experiment save, experiment delete, experiment export, and experiment import. 123 124 FCAP Array Software User’s Guide Using the Use this tool to check for correct clustering without needing to go Clustering Test Tool through the plex creation workflow. To use the Clustering Test Tool: 1. Click the Clustering Tool icon. The Clustering Test Tool window opens. 2. Navigate to your FCS files in the File Explorer. 3. Select your scatter parameter, number of peaks, and cluster parameters. The autoclustering is shown in the plots. Chapter 10: Reference information Backing up the database To back up the database: 1. Click the Backup Database icon. The Save As dialog opens. 2. Designate a path and filename for your backup file. 3. Click Save. The backup database function does not save your settings. The settings include: last used instrument settings parameters, report header logo images, and FCS data files. To back up your database and settings, go to one of the following folders in Windows and manually make a copy of the FCAP.sdf file. Windows XP folder: C:\Documents and Settings\All Users\Application Data\Soft Flow\FCAP Array v3 Windows 7 folder: C:\ProgramData\Soft Flow\FCAP Array v3 Restoring the database To restore the database from a saved database file: 1. Click the Restore Database icon. The Open dialog is displayed. 2. Navigate to the location of your database file. 3. Click Open. Closing FCAP Array To close FCAP Array software: 1. Click the exit icon (X) in the top right corner of the application. If you have an experiment open, you will need to click the exit icon twice. 125 This page intentionally left blank Index Numerics 3D bar chart 88 4 parameter logistic 5 parameter logistic 96-well plate 30 119 75, 119 A access rights 43, 44, 45 active plex 31–33 adding, plex 31–32 algorithm 10, 54, 57, 60, 76 alignment direction, plate 34 analysis models 51, 52 qualitative 23, 52, 67, 73, 84 quality control 23, 52, 68–71, 84, 89 quantitative 22, 52, 64, 72 results 81–88 statistics 81–86 analyte 12, 22, 65–71, 74, 82 antibody 12, 22 assigning clusters 53–56 assistance, technical 9 automatic clustering 53–59 B backup database bar chart 88 range 81 125 BD CBA keyword 23, 25, 95 BD CBA Mouse Immunoglobulin Isotyping kit 70 BD CellQuest Pro software 24 BD FACSArray software 24 BD FACSDiva software 24 BD FACSuite software 18 workflow 24, 25, 94–98 bead about 12, 51, 55, 104 assay 8, 12, 22 group 105, 106, 107 ID 55, 117 library 51, 104–107 beads and analysis models 51, 52 BMP 77, 88 C CBA keyword 23, 25, 95 CellQuest Pro software 24 chart bar 88 data type 87 label 77, 88 Polar 88 saving 77, 88 type 87, 88 clustering about 12, 22 assigning 55 128 FCAP Array Software User’s Guide automatic 53–59 manual 59–63, 120 clustering tool 124 coefficient of variation (CV) 76, 84 completing, experiment 91, 92 computer 11 concentration 64 quantitative analysis 22 specifying 64, 65, 72 unit 113 contact information 9 control data 23 definition 72, 73, 89 creating plex 48, 49, 50 reports 89–90 customizing, charts 77, 87, 88 cutoff value 23, 67–71 CV 76, 84 cytometer, flow 22 experiment about 12 completing 91, 92 data sheet 43–45 group 44, 91, 102 library 102–104 locked 45, 91, 117 new 29, 31 owners 44 public 45 security 45 F data sheet 43–45 type 87 database 125 debris filtering 57, 118 defining controls 72, 73, 89 standards 64–72 design window 30 dilution 37, 42, 65 dongle 11, 16, 116 FACSArray software 24 FACSDiva software 24 FACSuite See BD FACSuite FCAP Array software installing 16 starting 17 uninstalling 20 version 10, 16, 23, 104 FCS file 22–25, 53, 96, 119 File Explorer 35, 39 filtering 57, 85, 101, 118 final CC 72, 84 fitted CC 84 fitting accuracy 76, 119, 123 type 75 flow cytometer 22 Flow Cytometry Standard (FCS) file 25, 53, 96, 119 fluorescence 12 force zero 76 E G error messages 116 event number 84 gate 53–63 graphs See chart D 22– Index H help 116, 117 histogram 53, 58, 60, 81 I installer 16, 117 instrument settings clustering 53, 54, 120 reporter 53, 55 scatter 53, 54 J JPEG median fluorescence intensity (MFI) 23, 68, 84 messages, error 116 MFI 22, 23, 68, 84 Microsoft Windows 8 model selection 51, 52 Mouse Immunoglobulin Isotyping kit 70 22, N negative standard 67–71 nominal CC 72, 84 notes 45 77, 88 P K layout, sample 33–35 library about 100 bead 105–107 experiment 102–104 plex template 108–110 units 113, 114 user management 111, 112 limitations 10 linear scaling 75 locked experiment 45, 91, 117 log, user tracking 123 logarithmic 75 login 17, 111, 117, 122 password 17, 111, 117, 122, 123 PDF 23, 86 plate, 96-well 30 plex about 13, 24, 48, 49 adding 31–32 assigning bead to clusters 55, 56 beads and analysis models 51, 52 controls 72, 73 defining standards 64–70 instrument settings 53 template 108, 110 workflow 50 plots See chart PNG 77, 88 polar chart 88 positive standard 67–71 public experiment 45 M Q manual clustering 59–63, 120 measurement unit 64, 67 QC 23, 52, 68–72, 84, 89 qualitative analysis 23, 52, 67, 73 quality control (QC) 23, 52, 68–71, 84, 89 keyword 23, 25, 95 L 129 130 FCAP Array Software User’s Guide quantitative analysis 22, 52, 64, 72 R R square 76 range bar 81 ReadMe file 8 recovery 77, 84 replicate 13, 35, 36, 74 reporter antibody 22 parameter 52, 53, 55, 64 second 52, 55, 64, 69, 71 reports about 80 creating 89–90 restoring database 125 results analysis 81–86 S sample about 13 adding 35–39 layout 33–35 list tab 42 modifying 40–42 scaling, linear 75 scatter parameter 53 peak 54 SD 84 second reporter 52, 55, 64, 69, 71 security key 11, 16, 116 rights 45 settings functions 122–125 software, BD CellQuest Pro 24 software, BD FACSArray 24 software, BD FACSDiva 24 software, BD FACSuite See BD FACSuite software, FCAP Array See FCAP Array software solution 13 standard curve 22, 74–78, 89, 118–119 defining 64–70 negative 67–71 positive 67–71 qualitative analysis 23, 52, 67, 73 quality control 23, 52, 68–72, 84, 89 quantitative analysis 22, 52, 64, 72 workflow 24, 28 standard deviation (SD) 84 statistics 81, 83, 85 system requirements 11 T technical assistance 9 template 32, 108, 110 threshold 68 troubleshooting 115 U units 64, 67, 113, 114 user management 111, 112 tracking log 123 username 17, 44, 117 W weighting 76 workflow BD FACSuite 25, 94–98 new experiment 28 overview 24 plex 50 standard 24 Index X XML 19, 51, 107, 118 131 THIS PAGE INTENTIONALLY LEFT BLANK