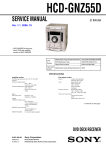
1
TPPC64 Hardware Manual
Version 1.1—January 2007
Themis Computer—Americas and Pacific Rim
47200 Bayside Parkway
Fremont, CA 94538
Phone (510) 252-0870
Fax (510) 490-5529
World Wide Web http://www.themis.com
Themis Computer—Rest of World
5 Rue Irene Joliot-Curie
38320 Eybens, France
Phone +33 476 14 77 80
Fax +33 476 14 77 89
Copyright © 2007 Themis Computer, Inc.
ALL RIGHTS RESERVED. No part of this publication may be reproduced in any form, by
photocopy, microfilm, retrieval system, or by any other means now known or hereafter invented without
the prior written permission of Themis Computer.
The information in this publication has been carefully checked and is believed to be accurate. However,
Themis Computer assumes no responsibility for inaccuracies. Themis Computer retains the right to
make changes to this publication at any time without prior notice. Themis Computer does not assume
any liability arising from the application or use of this publication or the product(s) described herein.
RESTRICTED RIGHTS LEGEND: Use, duplication, or disclosure by the United States Government
is subject to the restrictions set forth in DFARS 252.227-7013 (c)(1)(ii) and FAR 52.227-19.
TRADEMARKS
Themis® is a registered trademark of Themis Computer, Inc.
PPC64® and PowerPC® are registered trademarks of IBM Corporation
Yellow Dog Linux™ is a trademark of Terra Soft Solutions
LSI Logic is a registered trademark of LSI Logic Corporation
All other trademarks or registered trademarks used in this publication are the property of their
respective owners.
Themis Customer Support
North America, South America, and Pacific Rim
Telephone:
Fax:
E-mail:
Web Site:
TPPC64 Hardware Manual, Version 1.1
January 2007
Part Number: 112106-022
510-252-0870
510-490-5529
[email protected]
http://www.themis.com
TPPC64 Hardware Manual
Version Revision History
Version 1.1.......................................................................................January 2007
• Revised Figure A-7, page A-1 (Appendix A), to clarify relative positioning of USB ports C, D,
E, and F on the CPU-0 P2 Paddle Board. Ports C/D are below ports E/F; port C is to the right of
port D; port E is to the right of port F.
• Corrected Section A.1.5.7, “USB Ports C/D and E/F” (Appendix A), including Figure A-15, to
indicate that USB ports C/D are below ports E/F on the CPU-0 P2 Paddle Board, and that port
C is to the right of port D and port E is to the right of port F.
Version 1.0................................................................................... December 2006
Themis Computer
iii
TPPC64 Hardware Manual
iv
Themis Computer
Table of Contents
How to Use This Manual ......................................................................................................xv
1. Installation and Operation ........................................................................................... 1-1
1.1 Determine Board Type ........................................................................................... 1-1
1.2 Check Configurations ............................................................................................ 1-2
1.3 Install the TPPC64 CPU-0 Paddle Board ............................................................. 1-3
1.4 Install the TPPC64 CPU-1 Power Board .............................................................. 1-6
1.5 Terminate SCSI Devices ........................................................................................ 1-7
1.6 Attach Peripheral Cables ....................................................................................... 1-9
1.6.1 Serial Port A and Port B (TTYA and TTYB) .......................................... 1-10
1.6.1.1 Front-Panel Connection ............................................................ 1-10
1.6.1.2 VME P2 Connection ................................................................. 1-10
1.6.2 Ethernet Networks ................................................................................... 1-10
1.6.2.1 10/100/1000Base-T (Gigabit) ................................................... 1-10
1.6.2.2 10/100Base-T ............................................................................ 1-11
1.6.3 Ultra320 SCSI Port A and Port B ............................................................ 1-11
1.6.4 USB-A (0) and USB-B (1) ....................................................................... 1-11
1.6.5 USB-C (2), USB-D (3), USB-E (4), and USB-F (5) ............................... 1-11
1.6.6 Stereo Audio In/Out Jacks ....................................................................... 1-11
1.6.7 GPIO Header Connector .......................................................................... 1-12
1.6.8 I2C Header Connector ............................................................................. 1-12
1.6.9 12-volt Auxiliary Power Connector ......................................................... 1-12
1.7 Configure the VME Interface .............................................................................. 1-13
1.8 TOD/NVRAM Battery Replacement ................................................................... 1-14
2. System Overview and Specifications ........................................................................... 2-1
2.1 CPU-0 and CPU-1 Baseboards .............................................................................. 2-1
2.1.1 SPU/CPU Duality ...................................................................................... 2-3
2.2 PMC/XMC Carrier Boards .................................................................................... 2-4
2.3
Themis Computer
Graphics Board ...................................................................................................... 2-4
v
TPPC64 Hardware Manual
2.4 Paddle and Power Boards ...................................................................................... 2-4
2.5 Backplane Jumper Settings .................................................................................... 2-4
2.6
System Specification .............................................................................................. 2-5
2.6.1 Processor & Memory Subsystems ............................................................. 2-5
2.6.2 Auxiliary Functions ................................................................................... 2-6
2.7
Environmental Specification ................................................................................ 2-7
2.8 Estimated Power Requirements ............................................................................. 2-8
3. Hardware Overview ...................................................................................................... 3-1
3.1 CPU-0 and CPU-1 Baseboards .............................................................................. 3-1
3.1.1 IBM 970FX Processor and Cache ............................................................. 3-1
3.1.2 System I/O Bridge and Memory Controller .............................................. 3-2
3.1.3 HyperTransport Technology ...................................................................... 3-2
3.1.3.1 AMD 8131 HyperTransport PCI-X Tunnel ................................ 3-2
3.1.3.2 AMD 8111 HyperTransport I/O Hub ......................................... 3-3
3.1.4 Universe II PCI-to-VME Bridge ................................................................ 3-4
3.1.5 Dual Ultra320 SCSI Controller .................................................................. 3-5
3.1.6 LPC Super I/O Controller .......................................................................... 3-6
3.1.7 Dual Gigabit Ethernet Controller ............................................................... 3-6
3.2 Memory Subsystem ............................................................................................... 3-7
4. Universe II Description ................................................................................................ 4-1
4.1 Features .................................................................................................................. 4-1
vi
4.2
VMEbus Interface .................................................................................................. 4-2
4.2.1 VMEbus Configuration .............................................................................. 4-2
4.2.2 Universe II as the VMEbus Slave .............................................................. 4-2
4.2.3 Universe II as the VMEbus Master ............................................................ 4-3
4.2.4 VMEbus First Slot Detector ...................................................................... 4-5
4.2.4.1 Automatic Slot Identification ...................................................... 4-6
4.2.4.2 Register Access at Power Up ...................................................... 4-6
4.2.5 Universe II’s Hardware Power-Up Options ............................................... 4-7
4.3
Slave Image Programming ..................................................................................... 4-9
4.3.1 VME Slave Images .................................................................................... 4-9
4.3.1.1 VMEbus Fields ........................................................................... 4-9
4.3.1.2 PCI Bus Fields .......................................................................... 4-10
Themis Computer
Table of Contents
4.3.1.3 Control Fields ........................................................................... 4-11
4.3.2 PCI Bus Target Images ............................................................................ 4-12
4.3.2.1 PCI Bus Fields .......................................................................... 4-12
4.3.2.2 VMEbus Fields ......................................................................... 4-12
4.3.2.3 Control Fields ........................................................................... 4-13
4.3.2.4 Special PCI Target Image ......................................................... 4-14
4.4 Universe II’s Interrupt and Interrupt Handler ...................................................... 4-17
4.4.1 VME and PCI Interrupters ....................................................................... 4-17
4.4.2 VMEbus Interrupt Handling .................................................................... 4-17
4.4.3 Universe II’s Mailbox Registers .............................................................. 4-17
4.4.4 Universe II’s Semaphores ........................................................................ 4-17
4.4.5 Programmable Slave Images on the VME & PCI bus ............................. 4-18
4.4.6 DMA Controller ....................................................................................... 4-18
Appendix A. Connector Pinouts and LED Indicators .................................................. A-1
A.1 CPU-0 Baseboard ................................................................................................. A-1
A.1.1 CPU-0 Front-Panel Connectors ................................................................ A-1
A.1.1.1 Serial Port A (RS232) and Port B (RS232) ............................... A-1
A.1.1.2 USB Port A and Port B .............................................................. A-3
A.1.1.3 Gigabit Ethernet (TPE) Port A1 and Port A2 ............................ A-4
A.1.1.4 Ultra320 SCSI Port A ................................................................ A-5
A.1.2 CPU-0 VME Backplane Connectors ........................................................ A-7
A.1.2.1 VME64 P1 Connector ................................................................ A-7
A.1.2.2 VME64 P2 Connector ................................................................ A-9
A.1.3 Push-Button RESET ............................................................................... A-11
A.1.4 Status LEDs ............................................................................................ A-11
A.1.5 CPU-0 P2 Paddle Board ......................................................................... A-12
A.1.5.1 Ultra320 SCSI Port B Connector ............................................. A-13
A.1.5.2 GPIO Header Connector .......................................................... A-13
A.1.5.3 I2C Header Connector (5-row P2 only) ................................... A-15
A.1.5.4 Stereo Audio In/Out Connectors (5-row P2 only) ................... A-15
A.1.5.5 Ethernet 10/100Base-T Connector (5-row P2 only) ................ A-16
A.1.5.6 Serial Port A (RS232) and Port B (RS232) ............................. A-17
A.1.5.7 USB Ports C/D and E/F ........................................................... A-18
A.2 CPU-1 Baseboard ............................................................................................... A-19
A.2.1 CPU-1 Front-Panel Connectors .............................................................. A-19
A.2.2 CPU-1 VME Backplane Connectors ...................................................... A-19
Themis Computer
vii
TPPC64 Hardware Manual
A.2.2.1 VME64 P1 Connector .............................................................. A-19
A.2.2.2 VME64 P2 Connector .............................................................. A-19
A.2.3 CPU-1 PMC Card Slot Connectors ........................................................ A-22
A.2.4 CPU-1 P2 Power Board .......................................................................... A-26
A.3 PMC/XMC Carrier Boards ................................................................................. A-27
A.3.1 2P2 PMC/XMC Carrier Board .............................................................. A-27
A.3.2 2P3 PMC Carrier Board .......................................................................... A-27
A.4 Memory Module Connector ................................................................................ A-29
Appendix B. Jumper-Pin and Solder-Bead Configurations ..........................................B-1
B.1 Overview ................................................................................................................B-1
B.2 Field-Configurable Jumper Pins ............................................................................B-1
B.2.1 CPU-0 Baseboard Jumper Pins ..................................................................B-1
B.2.2 CPU-1 Baseboard Jumper Pins ..................................................................B-4
B.2.3 PMC/XMC Carrier Board Jumper Pins .....................................................B-5
B.3 Factory-Configurable Solder Beads .......................................................................B-7
B.3.1 CPU-0 Baseboard Solder Beads ................................................................B-7
B.3.2 CPU-1 Baseboard Solder Beads ..............................................................B-10
B.3.3 PMC/XMC Carrier Board Solder Beads .................................................B-10
Appendix C. Front-Panel I/O Connections and LEDs ...................................................C-1
C.1 Introduction ............................................................................................................C-1
C.1.1 Front-Panel Dimensions ............................................................................C-1
C.1.2 Injector/Ejector Handles ............................................................................C-1
C.1.2.1 VME64-type Handles .................................................................C-2
C.1.2.2 Triple-E-type Handles .................................................................C-2
C.2 TPPC64 Front Panels .............................................................................................C-3
C.2.1 TPPC64/1-1—CPU-0 Baseboard Only ....................................................C-4
C.2.2 TPPC64/2P2-1—CPU-0 & 2-PMC Carrier Board ...................................C-5
C.2.3 TPPC64/2P3-1—CPU-0 & 3-PMC Carrier Board ...................................C-6
C.2.4 TPPC64/1-2—CPU-0 & CPU-1 Baseboards ............................................C-7
C.2.5 TPPC64/2P2-2—CPU-0, CPU-1, & 2-PMC Carrier Board .....................C-8
C.2.6 TPPC64/2P3-2—CPU-0, CPU-1, & 3-PMC Carrier Board .....................C-9
C.3 LEDs ....................................................................................................................C-10
viii
Themis Computer
Table of Contents
Appendix D. Board Diagrams ......................................................................................... D-1
D.1 CPU-0 and CPU-1 Baseboards ............................................................................. D-1
D.2 2P2 PMC/XMC & 2P3 PMC Carrier Boards ....................................................... D-1
Appendix E. Glossary .......................................................................................................E-1
Appendix F. VME Slot Configurations ........................................................................... F-1
Index............................................................................................................................... Index-1
Reader Comment Card
Themis Computer
ix
TPPC64 Hardware Manual
x
Themis Computer
Table of Contents
List of Figures
Figure 1-1
TPPC64 CPU-0 Paddle Board ......................................................................... 1-3
Figure 1-2
TPPC64 Paddle Board Connectors .................................................................. 1-4
Figure 1-3
TPPC64 CPU-0, Carrier Board, and Paddle Board Installed .......................... 1-5
Figure 1-4
TPPC64 CPU-0, CPU-1, Carrier Board, and Paddle/Power Boards ............... 1-5
Figure 1-5
TPPC64 CPU-1 Power Board.......................................................................... 1-6
Figure 1-6
SCSI Termination Configurations ................................................................... 1-7
Figure 1-7
Location of the TOD/NVRAM Battery ......................................................... 1-14
Figure 1-8
TOD/NVRAM Battery Replacement............................................................. 1-15
Figure 2-1
TPPC64 CPU-0/CPU-1 Baseboard Block Diagram ........................................ 2-2
Figure 3-1
AMD 8131 HyperTransport PCI-X Tunnel..................................................... 3-2
Figure 3-2
AMD 8111 HyperTransport I/O Hub .............................................................. 3-3
Figure 3-3
Custom Memory Module Topology (Side View)............................................ 3-7
Figure 4-1
Universe II Architectural Diagram .................................................................. 4-4
Figure 4-2
Address Translation for VMEbus to PCI Bus Transfers ............................... 4-11
Figure 4-3
Address Translation for PCI Bus to VMEbus Transfers ............................... 4-13
Figure 4-4
Memory Mapping in the Special PCI Target Image...................................... 4-16
Figure A-1
Dual Serial Ports A and B Connector Pinout.................................................. A-2
Figure A-2
Dual USB Ports A and B Connector Pinout ................................................... A-3
Figure A-3
Ethernet Connector Pinout.............................................................................. A-4
Figure A-4
SCSI A Connector Pinout ............................................................................... A-5
Figure A-5
CPU-0 Baseboard VME64 P1 Connector Pinout ........................................... A-7
Figure A-6
CPU-0 Baseboard VME64 P2 Connector Pinout ........................................... A-9
Figure A-7
TPPC64 CPU-0 P2 Paddle Board I/O Connections (Top-Side View) ......... A-12
Figure A-8
+12V Power Connector Pinout ..................................................................... A-12
Figure A-9
Paddle Board Ultra320 SCSI Port B Connector Pinout................................ A-13
Figure A-10 GPIO Connector Pinout ................................................................................ A-13
Themis Computer
xi
TPPC64 Hardware Manual
Figure A-11 I2C Connector Pinout ................................................................................... A-15
Figure A-12 Dual Stereo Audio Connector....................................................................... A-15
Figure A-13 Ethernet 10/100Base-T Connector Pinout .................................................... A-16
Figure A-14 Paddle Board Serial A and B Connector Pinouts ......................................... A-17
Figure A-15 USB Ports C, D, E, and F Connector Pinouts............................................... A-18
Figure A-16 CPU-1 P1/P2 VME Connector Pinouts ........................................................ A-19
Figure A-17 PMC Card Slot Connector Pinout................................................................. A-22
Figure A-18 TPPC64 CPU-1 Power Board....................................................................... A-26
Figure A-19 +12V Power Connector Pinout ..................................................................... A-26
Figure A-20 The 2P2 PMC/XMC Carrier Board (Top and Bottom Views) ..................... A-28
Figure A-21 Memory Module Baseboard Connectors (Socket/Receptacle & Plug) ........ A-29
Figure B-1
TPPC64 CPU-0 Baseboard Jumper-Pin Locations (Top Side) ....................... B-3
Figure B-2
TPPC64 CPU-1 Baseboard Jumper-Pin Locations (Top Side) ....................... B-6
Figure B-3
TPPC64 CPU-0 Baseboard Solder-Bead Locations (Bottom Side) ................ B-9
Figure C-1
TPPC64 VME64 (A) and Triple-E (B) Handles.............................................. C-2
Figure C-2
Placement of Mating Pins on VME64-type Handles....................................... C-3
Figure C-3
TPPC64 CPU-0 Baseboard .............................................................................. C-4
Figure C-4
TPPC64 CPU-0 and 2P2 PMC/XMC Carrier Board ....................................... C-5
Figure C-5
TPPC64 CPU-0 and 2P3 PMC Carrier Board ................................................. C-6
Figure C-6
TPPC64 CPU-0 and CPU-1 ............................................................................. C-7
Figure C-7
CPU-0/CPU-1 Baseboards and 2P2 PMC/XMC Carrier Board ...................... C-8
Figure C-8
CPU-0/CPU-1 Baseboards and 3-PMC Carrier Board .................................... C-9
Figure C-9
TPPC64 Front-Panel LEDs............................................................................ C-10
Figure D-1
CPU-0 Baseboard Front-Panel, Component, and Connector Diagram .......... D-2
Figure D-2
CPU-1 Baseboard Front-Panel, Component, and Connector Diagram .......... D-3
Figure D-3
2P2 PMC/XMC Carrier Board Component/Connector Diagram ................... D-4
Figure D-4
2P3 PMC Carrier Board Component/Connector Diagram ............................. D-5
Figure F-1
TPPC64 VME Slot Configurations.................................................................. F-3
xii
Themis Computer
Table of Contents
List of Tables
Table 1-1
TPPC64 Model Configurations ....................................................................... 1-1
Table 1-2
TPPC64 Peripheral Devices............................................................................. 1-9
Table 2-1
Memory Configurations................................................................................... 2-1
Table 2-2
Processor Specifications .................................................................................. 2-5
Table 2-3
Memory Specifications .................................................................................... 2-5
Table 2-4
Auxiliary Functions Specifications.................................................................. 2-6
Table 2-5
TPPC64 Operating Environmental Specifications .......................................... 2-7
Table 2-6
TPPC64 Airflow Requirements ....................................................................... 2-7
Table 2-7
TPPC64 Non-operating Environmental Specifications ................................... 2-7
Table 2-8
Estimated Power Requirements ....................................................................... 2-8
Table 4-1
Universe II Miscellaneous Control Register (MISC_CTL)............................. 4-5
Table 4-2
Universe II Power Up Options......................................................................... 4-7
Table 4-3
PCI Configuration Base Address 0 Register (PCI_BS0)................................. 4-8
Table 4-4
PCI Configuration Base Address 1 Register (PCI_BS1)................................. 4-8
Table 4-5
VMEbus Fields for VMEbus Slave Image ...................................................... 4-9
Table 4-6
PCI Bus Fields for VMEbus Slave Image ..................................................... 4-10
Table 4-7
Control Fields for VMEbus Slave Image ...................................................... 4-11
Table 4-8
PCI Bus Fields for PCI Bus Target Image..................................................... 4-12
Table 4-9
PCI Bus Fields for PCI Bus Target Image..................................................... 4-13
Table 4-10
Control Fields for PCI Bus Target Image ...................................................... 4-14
Table 4-11
PCI Bus Fields for Special PCI Bus Target Image ........................................ 4-14
Table 4-12
Control Fields for Special PCI Bus Target Image ......................................... 4-15
Table 4-13
Special PCI Target Image Register (Offset 188) ........................................... 4-15
Table A-1
Serial Ports A and B Connector-Pin Signals .................................................. A-2
Table A-2
USB Ports A and B Connector-Pin Signals ................................................... A-3
Table A-3
Gigabit Ethernet Connector-Pin Signals and LED Interpretation .................. A-4
Themis Computer
xiii
TPPC64 Hardware Manual
Table A-4
SCSI Port A Connector-Pin Signals ............................................................... A-6
Table A-5
CPU-0 Baseboard VME64 P1 Connector-Pin Signals ................................... A-8
Table A-6
CPU-0 Baseboard VME64 P2 Connector-Pin Signals ................................. A-10
Table A-7
Color Interpretation of Front-Panel LEDs .................................................... A-11
Table A-8
+12V Power Connector-Pin Signals ............................................................. A-13
Table A-9
GPIO Connector-Pin Signals ........................................................................ A-13
Table A-10
Paddle Board Ultra320 SCSI Port B Connector-Pin Signals........................ A-14
Table A-11
I2C Connector-Pin Signals ........................................................................... A-15
Table A-12
Ethernet 10/100Base-T Connector-Pin Signals ............................................ A-16
Table A-13
Paddle Board Serial A and B Connector-Pin Signals ................................... A-17
Table A-14
USB Ports C, D, E, and F Connector-Pin Signals ....................................... A-18
Table A-15
CPU-1 VME64 P1 Connector Pin Signals ................................................... A-20
Table A-16
CPU-1 VME64 P2 Connector Pin Signals ................................................... A-21
Table A-17
PMC Slot Connector J1002 Signals (32 bit)................................................. A-23
Table A-18
PMC Slot Connector J1003 Signals (32 bit)................................................. A-24
Table A-19
PMC Slot Connector J1004 Signals (64 bit)................................................. A-25
Table A-20
+12V Power Connector-Pin Signals ............................................................. A-26
Table B-1
CPU-0 Baseboard Jumper-Pin Settings (Top Side) ......................................... B-2
Table B-2
SCSI B Access Through VME P2 Connector ................................................. B-2
Table B-3
CPU-1 Baseboard Jumper-Pin Settings (Top Side) ......................................... B-4
Table B-4
Setting CPU-1 PMC Module PCI-X Mode Clock Speed ................................ B-5
Table B-5
Setting CPU-1 PMC Module PCI Mode Clock Speed .................................... B-5
Table B-6
CPU-0 Baseboard Solder-Bead Settings (Bottom Side).................................. B-7
Table B-7
CPU-1 Baseboard Solder-Bead Settings (Top and Bottom Sides) ................ B-10
Table C-1
TPPC64 Front-Panel LED Interpretation ...................................................... C-11
Table F-1
TPPC64 Model Configurations ....................................................................... F-1
xiv
Themis Computer
How to Use This Manual
This TPPC64 Hardware Manual© describes all of the models (see Table 1, page xvi)
of the Themis® TPPC64 board-level computer (see following photo), a high-performance system with a VME64bus backplane interface and up to two IBM 970FX
PowerPC® (PPC64®) processors operating at 1.8 GHz.
Before you begin installation, carefully read each of the procedures in this
manual and the associated Software Manual. Serious damage can be caused by improper handling of this product.
Caution:
Themis Computer
xv
TPPC64 Hardware Manual
Themis Computer values its customer comments and opinions; therefore, a “Reader
Comment Card” is located at the end of this manual for your use. Please take the
time to fill out this card with any comments concerning Themis products and services, and return it to Themis Computer. Your comments may also be forwarded to
Themis by sending email to [email protected].
TPPC64 Models
The TPPC64 has a total of six (6) models presently available (see Table 1). All models are based on a combination of the CPU-0 Baseboard, the CPU-1 Baseboard, and
two types of Carrier Boards—one with two PMC/XMC module slots (see following
Caution) and one with three PMC module slots.
TGA3D/3D+ Graphics Boards are not supported by the TPPC64 at this time.
A new 2P2 PMC/XMC Carrier Board (P/N 112794-002) has been designed to operate with the TPPC64 system, replacing the original 2P2 PMC Carrier
Board. DO NOT ATTEMPT to operate the older 2P2 PMC Carrier Board with the
TPPC64.
Caution:
Table 1. TPPC64 Model Configurations
Baseboard
2P2 PMC/XMC
Carrier Boardb
2P3 PMC
Carrier Boardc
VME Slot 2 or 3
VME Slot 2 or 3
Modela
CPU-0
Slot 1
CPU-1
Slot 2
TPPC64 / 1-1
Yes
TPPC64 / 2P2-1
Yes
TPPC64 / 2P3-1
Yes
TPPC64 / 1-2
Yes
Yes
TPPC64 / 2P2-2
Yes
Yes
TPPC64 / 2P3-2
Yes
Yes
Slot 2
Slot 2
Slot 3
Slot 3
a—The TPPC64 does not support PCI Express; hence XMC Modules are not supported.
b—New 2P2 PMC/XMC Carrier Board (P/N 112794-002) only; the standard-version 2P2 PMC Carrier
Board is not compatible.
c—The standard-version 2P3 PMC Carrier Board is supported.
xvi
Themis Computer
—How to Use This Manual
Intended Audience
This manual is written for system integrators and programmers. It contains all necessary information for installation and configuration of the TPPC64 and assumes the
Service Processor and PIBS program code is installed in the system Flash memory.
If you intend to operate the TPPC64 with an operating system other than Yellow
Dog Linux 4.0, such as VxWorks or some other real-time kernel, please consult the
appropriate documentation supplements accompanying your OS or kernel software.
Although all specific hardware and software features are described in the Hardware
and Software manuals, programmers wishing to write code for the TPPC64 without
the benefit of an operating system or real-time kernel will require additional data
sheets. Please refer to the section “Related References” on page xix for information
concerning this documentation.
The reader should have a working knowledge of VME64 bus and PCI local bus
specifications, 64-bit processor architecture, and gigabit Ethernet and Ultra320 SCSI
specifications.
Unpacking
The TPPC64 contains statically sensitive components. Industry-standard
antistatic measures must be observed when removing the TPPC64 from its shipping
container and during any subsequent handling. A wrist strap provides grounding for
static electricity between your body and the chassis of the system unit.
Caution:
Remove the TPPC64 and accessories from the shipping container and check the contents against the packing list. Be certain to observe industry-standard ESD protection
procedures when handling static-sensitive components. The package should include
all elements of your order.
Remove all TPPC64 boards from their antistatic wrapping and verify the ordered
configuration.
Please report any shipping discrepancies to the Themis Computer Customer Support
group immediately: [email protected] or 1-510-252-0870.
Themis Computer
xvii
TPPC64 Hardware Manual
How to Start Quickly
To start making the TPPC64 operational quickly, Themis Computer recommends
that you read the following sections:
• Chapter 1, "Installation and Operation". This chapter contains vital information
on configuring the TPPC64 and the design and setup of VMEbus-based systems.
• Appendix B, "Jumper-Pin and Solder-Bead Configurations". This appendix
contains a complete listing of all jumper pins and solder beads, along with all
default settings. Verify that the jumpers and beads on your system are set to
meet your application requirements.
In addition to information contained in this TPPC64 Hardware Manual (P/N
112106-022), the TPPC64 Software Manual (P/N 112106-023) contains information
on Service Processor and PIBS commands, as well as a description of the Themis
Computer VME software package for Yellow Dog Linux 4.0.
Chapter Overview
The chapters and appendices of this manual are briefly outlined as follows:
• Chapter 1, "Installation and Operation", gives instructions on the installation
and configuration of the TPPC64 for your particular environment and application. The information contained in this chapter is mandatory for the correct
operation of the TPPC64. This chapter should be read in its entirety.
• Chapter 2, "System Overview and Specifications", provides a brief overview
of the TPPC64, along with its System, Environmental, and Power specifications.
• Chapter 3, "Hardware Overview", describes the major IC chip components on
the TPPC64.
• Chapter 4, "Universe II Description", provides detailed information concerning
the PCI-to-VMEbus interface for the TPPC64, the Tundra Universe II. For a
more detailed description of the Universe II, refer to the Universe II User’s
Manual, available on the Tundra website at http://www.tundra.com.
• Appendix A, “Connector Pinouts and LED Indicators”, gives connector part
numbers and pinouts for all user I/O on the TPPC64.
xviii
Themis Computer
—How to Use This Manual
• Appendix B, "Jumper-Pin and Solder-Bead Configurations", provides a
detailed description of each of the jumper pins and solder beads on the
TPPC64, as well as diagrams illustrating their location.
• Appendix C, “Front-Panel I/O Connections and LEDs”, illustrates front panels
for all configurations of the TPPC64.
• Appendix D, “Board Diagrams”, provides board diagrams of the TPPC64.
• Appendix E, “Glossary”, lists the general definition of terms and abbreviations
used in this manual.
• Appendix F, “VME Slot Configurations”, illustrates the slot configurations of
all models of the TPPC64.
Related References
The following is a list of related references
• TPPC64 Software Manual (P/N 112106-023)
• PMC/XMC Carrier Board Manual (P/N 112826-020)
• PCI Local Bus Specification, Revision 3.0, PCI Special Interest Group, Portland
• American National Standard for VME64, ANSI/VITA, 1-1994; also VME64x,
ANSI/VITA, 1.1-1997
• PCI System Architecture, by Shanley and Anderson, MindShare Press
Integrated Circuit Specifications:
• IBM PowerPC 970FX RISC Microprocessor User’s Manual, Version 1.6,
December 19, 2005
• IBM PowerPC 970FX RISC Microprocessor Data Sheet, Preliminary Electrical Information, SA14-2760-07, Version 2.3, June 4, 2006 (Preliminary)
• Universe II User VME-to-PCI Bus Bridge User Manual, Tundra, November
2002, Part No. 80A3010_MA001_03
Other documents regarding specific products are available from their respective vendors.
Themis Computer
xix
TPPC64 Hardware Manual
Notes, Cautions, Warnings, and Sidebars
The following icons and formatted text are included in this document for the reasons
described:
A note provides additional information concerning the procedure or action
being described that may be helpful in carrying out the procedure or action.
Note:
A caution describes a procedure or action that may result in injury to the
operator or equipment damage. This may involve—but is not restricted to—heavy
equipment or sharp objects. To reduce the risk, follow the instructions accompanying this symbol.
Caution:
A warning describes a procedure or action that may cause injury to the
operator or equipment as a result of hazardous voltages. To reduce the risk of electrical shock and danger, follow the instructions accompanying this symbol.
Warning:
A “sidebar” adds detail to the section within which it is placed,
but is not absolutely vital to the description or procedure of the section.
Sidebar:
Website Information
Themis Computer corporate and product information may be accessed on the World
Wide Web by browsing the website http://www.themis.com.
The Sales & Marketing Department may be reached at [email protected].
xx
Themis Computer
—How to Use This Manual
Product Warranty and Registration
Please review the Themis Computer warranty and complete the product registration
card delivered with your TPPC64 board(s). Return of the registration card is not
required to activate your product warranty but, by registering your TPPC64, Themis
Computer will be better able to provide you with timely information updates and
product-enhancement notifications.
Our Customer Support department is committed to providing the best product support in the computer industry. Customer support is available 8am—5pm (PST),
Monday through Friday, via telephone, fax, e-mail, and our website.
Themis Customer Support:
Telephone: +1 510-252-0870
Fax: +1 510-490-5529
E-mail: [email protected]
Website: http://www.themis.com
In Case Of Difficulties
If the TPPC64 does not behave as described or if you encounter difficulties installing
or configuring the board, please call Themis Computer technical support at +1 (510)
252-0870, fax your questions to +1 (510) 490-5529, or e-mail to [email protected]. You can also contact us via our web site: http://www.themis.com.
Your Comments are Welcome
We are interested in improving our documentation and welcome your comments and
suggestions. You can email your comments to us at [email protected].
Please include the document part number (112106-022) in the subject line of your
email.
Themis Computer
xxi
TPPC64 Hardware Manual
xxii
Themis Computer
1
Installation
Section
Chapter
Installation and Operation
1.1
Determine Board Type
The Themis TPPC64 computer is available in six (6) models, as defined in
Table 1-1. All models are based on a combination of four different VME boards: the
TPPC64 CPU-0 and CPU-1 Baseboards and two types of PMC Carrier Boards, one
with two PMC module slots (2P2) and one with three PMC module slots (2P3).
Table 1-1. TPPC64 Model Configurations
Baseboard
Modela
CPU-0
Slot 1
CPU-1
Slot 2
TPPC64 / 1-1
Yes
TPPC64 / 2P2-1
Yes
TPPC64 / 2P3-1
Yes
TPPC64 / 1-2
Yes
Yes
TPPC64 / 2P2-2
Yes
Yes
TPPC64 / 2P3-2
Yes
Yes
2P2 PMC/XMC
Carrier Boardb
2P3 PMC
Carrier Boardc
VME Slot 2 or 3
VME Slot 2 or 3
Slot 2
Slot 2
Slot 3
Slot 3
a—The TPPC64 does not support PCI Express; hence XMC Modules are not supported.
b—New 2P2 PMC/XMC Carrier Board (P/N 112794-002) only; the standard-version 2P2 PMC Carrier Board
is not compatible.
c—The standard-version 2P3 PMC Carrier Board is supported.
Themis Computer
1-1
TPPC64 Hardware Manual
Caution: A new 2P2 PMC/XMC Carrier Board (P/N 112794-002) has been designed to operate with the TPPC64, which does not support the original 2P2 PMC
Carrier Board. DO NOT ATTEMPT to operate the original 2P2 PMC Carrier Board
with the TPPC64.
To determine your board type, check the white sticker located near your Baseboard’s
VME P2 connector. It contains such vital information as board type and revision,
serial number, CPU frequency, memory size, and L2 cache size.
To install the TPPC64, a standard P1/P2 (J1/J2) VME64 bus backplane (3-row or 5row connectors) is required. If the TPPC64 is to be used in a workstation configuration instead of an embedded controller, a hard disk and graphics frame buffer or
serial terminal will also be required.
Caution: Not all VME64 chassis racks provide a +12-volt power supply that is sufficient to power the dual-board TPPC64 system. Before installing the TPPC64 into
a VME64 backplane, make sure that the power supply on your VME rack can provide sufficient power output to support your maximum board configuration layout
for all voltages.
1.2
Check Configurations
When you first receive your TPPC64, confirm that the jumper-pin and solder-bead
configurations are appropriate for your application. Appendix B, "Jumper-Pin and
Solder-Bead Configurations", gives a complete listing of jumper-pin and solderbead definitions, including default settings.
Solder-bead settings are set by Themis at the factory before shipment and should be
changed by Themis at the factory only. Therefore, it is recommended that you advise
your Themis sales representative of your application needs at the time of purchase so
the proper solder-bead settings can be configured.
Warning: Attempting to alter a solder-bead configuration could seriously damage
the TPPC64 system. DO NOT ATTEMPT TO ALTER SOLDER-BEAD CONFIGURATIONS. Instead, contact Themis to change any settings.
1-2
Themis Computer
1—Installation and Operation
Install the TPPC64 CPU-0 Paddle Board
1.3
Install the TPPC64 CPU-0 Paddle Board
Note: It is important that the TPPC64 Paddle Board be installed onto the VME64
backplane directly behind the P2 connector of the CPU-0 Baseboard to provide
necessary voltage to CPU-0 circuitry.
Important: If a TPPC64 Paddle Board properly connected to a +12-volt auxiliary
power source is not attached to the CPU-0 P2 connector of the VME64 backplane,
the CPU-0 will not receive adequate current for proper operation.
The TPPC64 Paddle Board (see Figure 1-1) is attached to the CPU-0 Baseboard
through the VME P2 backplane—see Figure 1-2, page 1-4, and Figure 1-3 on page
1-5—allowing access to essential backplane voltage sources, as well as I/O signals
(see Table A-6, page A-10, in Appendix A, “Connector Pinouts and LED Indicators”) that may not be available through the front panel of the Baseboard.
Note: If you need to access VME P2 signals differently from the CPU-0 Paddle
Board, a design can be built to suit your needs. Address all questions concerning
Paddle Boards for the TPPC64 to Themis Computer Customer Service.
Figure 1-1. TPPC64 CPU-0 Paddle Board
Themis Computer
1-3
TPPC64 Hardware Manual
I 2C Test
Connector
+12V Power
Connector
Stereo Audio
In (Jack)
To VME64
Backplane
Stereo Audio
Out (Jack)
P2 Connector
10/100
Ethernet
(RJ45)
Grounding
Connector Block
(2 x 28)
3-row VME only
4.860”
USB Ports E/F
(Stacked USB)
4.175”
LVD (5-row) or
Single-Ended (3-row)
Ultra320 SCSI Port B
USB Ports C/D
(Stacked USB)
GPIO Test
Connector
Serial Ports A/B
(Dual DB9)
Top Side
3.585”
Figure 1-2. TPPC64 Paddle Board Connectors
Warning: Do not install the CPU-0 Paddle Board behind the P1 connector of the
VME64 backplane. To do so may result in damage to both the Paddle Board and the
CPU-0 Baseboard. Install only behind the P2 connector.
1. After unpacking the Paddle Board, attach it directly behind the CPU-0 P2
connector of the VME64 backplane.
2. Attach the 6-pin male Molex connector end of the +12-volt auxiliary power
cable (P/N 111230-001) to the J9 connector of the Paddle Board (see Figure
1-2) and the two #6 spade lugs as follows (also see "CPU-0 P2 Paddle Board"
on page A-12, Appendix A, "Connector Pinouts and LED Indicators"):
• Lug from pins 1/2/3 to a +12-volt source on the VME chassis power supply
• Lug from pins 4/5/6 to a ground source on the VME chassis power supply
3. Connect desired I/O cables to the Paddle Board.
1-4
Themis Computer
1—Installation and Operation
Install the TPPC64 CPU-0 Paddle Board
VME64
Backplane
VME J2 Connector
Top View
Memory Board
TPPC64 CPU-0
Paddle Board
To +12V
2P2 PMC/XMC Carrier Board
0.8"
PMC Module
Interboard Separation Line
Figure 1-3. TPPC64 CPU-0, Carrier Board, and Paddle Board Installed
VME64
Backplane
VME J2 Connector
Top View
Memory Board
TPPC64 CPU-0
Paddle Board
To +12V
TPPC64 CPU-1
PMC Module
Power Board
Auxiliary
Power
To +12V
Cable
2P2 PMC/XMC Carrier Board
0.8"
PMC Module
Interboard Separation Line
Figure 1-4. TPPC64 CPU-0, CPU-1, Carrier Board, and Paddle/Power Boards
Themis Computer
1-5
TPPC64 Hardware Manual
1.4
Install the TPPC64 CPU-1 Power Board
Note: It is important that the TPPC64 Power Board be installed onto the VME64
backplane directly behind the P2 connector of the CPU-1 Baseboard to provide
necessary voltage to CPU-1 circuitry. If a Power Board properly connected to a
+12-volt auxiliary source is not attached to the CPU-1 P2 connector of the backplane, the CPU-1 will not receive adequate power for successful operation.
Warning: Do not install the CPU-1 Power Board behind the P1 connector of the
VME64 backplane. To do so may result in damage to both the Power Board and the
CPU-1 Baseboard. Install only behind the P2 connector.
1. As shown in Figure 1-4 on page 1-5, attach the TPPC64 Power Board to the
VME P2 backplane connector behind the TPPC64 CPU-1 Baseboard.
2. Attach the 6-pin Molex connector of a +12-volt power cable to the P1 connector of the Power Board, and the lug ends according to Step 2 (page 1-4).
To VME64
Backplane
+12 V Power Connector (P1)
VME P2 Connector
4.175”
Top Side
4.640”
3.585”
Figure 1-5. TPPC64 CPU-1 Power Board
1-6
Themis Computer
1—Installation and Operation
Terminate SCSI Devices
1.5
Terminate SCSI Devices
All SCSI buses must be properly terminated. The TPPC64 contains two SCSI buses,
SCSI Port A on the Front Panel of the Baseboard (see Figure 1-6 and Appendix C,
“Front-Panel I/O Connections and LEDs”) and SCSI bus B, which is accessed
through the VME P2 connector from an available connection such as the Multiple
I/O Paddle Board (see Figure 1-1 on page 1-3) that is attached behind the VME64
backplane (see Figure 1-3 on page 1-5). Since both the SCSI A bus and the SCSI B
bus end at the TPPC64, the SCSI Controller is always at one end of the bus, hence
the on-board terminator is always enabled.
Front Panel
P1 Connector
SCSI Controller
State = On
State = On
Terminator
Terminator
Terminator
Terminator
Last
SCSI A
Device
P2 Connector
SCSI A Bus
Last
SCSI B
Device
SCSI B Bus
Paddle
Board
Figure 1-6. SCSI Termination Configurations
Themis Computer
1-7
TPPC64 Hardware Manual
1. If you are installing a SCSI device on SCSI A or SCSI B, you must install a
terminator on the last device in the SCSI bus chain. If you do not terminate the
last device on the SCSI bus, SCSI devices attached to that bus may not operate
properly (see following Caution).
Caution: SCSI busses must be properly terminated in order for attached SCSI devices to operate correctly.
Only the last device (including the SCSI Controller) at each end of a SCSI bus chain
should be terminated. Since both SCSI A and SCSI B buses end at the TPPC64
SCSI controller (see Figure 1-6, page 1-7), an on-board terminator is automatically
enabled (turned On) for each bus. This means that the user may install up to 15
SCSI devices on either bus (A or B), install a terminator on the end of the SCSI bus,
and be assured that both ends of the SCSI bus are properly terminated.
Note: Address all questions concerning available Paddle Boards for the TPPC64
to Themis Computer Customer Service.
1-8
Themis Computer
1—Installation and Operation
Attach Peripheral Cables
1.6
Attach Peripheral Cables
1. Attach peripheral cables to Front Panel and VME P2 Paddle/Power Board
connectors as needed. A list of peripheral I/O devices and voltage sources that
can be connected to a TPPC64 system (CPU-0, Paddle Board, and Power
Board; CPU-1 has no Front-Panel connectors) appears in Table 1-2. The following sections provide information on specific I/O devices. Also refer to Appendix A, “Connector Pinouts and LED Indicators” and Appendix C, “FrontPanel I/O Connections and LEDs”.
Table 1-2. TPPC64 Peripheral Devices
Peripheral Access
CPU-0
Front Panel
CPU-0
VME P2 Paddle Board
5 Row
3 Row
USB A, USB B (USB0, USB1)
Yes
No
USB C, USB D, USB E
(USB2, USB3, USB4)
No
Yes
USB F (USB5)
No
Serial Port A (RS232) ,
Serial Port B (RS232)
a
SCSI Port A (Ultra320); 68-pin
Yes (SB02 shorted)
● If no Front Panel connection
Yes
No
● LVD
No
Gigabit Ethernet Port A1 and Port A2;
dual RJ45
Yes
Ethernet (10/100Base-T); RJ45
Yes
Stereo Audio In, Stereo Audio Out
No
● Total of four I/O signals
I2C Header; 6 pins in-line
12-volt Auxiliary Connector; 6 pins
● Installed on both CPU-0 Paddle
Board and CPU-1 Power Board
Yes (SB02 open)
● If no VME P2 connection
SCSI Port B (Ultra320); 68 pins Sub-D
GPIO Header, 6 pins in-line
No
Yes
No
No
No
Yes
Yes
● LVD or SE
● SE only
No
Yes
No
Yes
No
● AC97
Yes
Yes
● GPIO0, 1, 2, 3
● GPIO0 & 1 only
Yes
No
Yes
● Required for CPU-0 operation
[For CPU-1, use Power Board instead]
a—Serial Port A is used for the PIBS/Linux console, and serial Port B for the SPU (Service Processor Unit) console.
Themis Computer
1-9
TPPC64 Hardware Manual
1.6.1
Serial Port A and Port B (TTYA and TTYB)
Depending on the setting of CPU-0 solder bead SB02 (see Appendix B, "Jumper-Pin
and Solder-Bead Configurations"), TTYA (RS232) and TTYB (RS232) are available from the Front Panel or from the Baseboard VME P2 connector, and are supported by the serial controller.
Note: Depending on the setting of solder bead SB02, TTYA and TTYB are enabled for access from the Front Panel or from the VME P2 backplane. When one
access is enabled, the alternate access is disabled.
1.6.1.1 Front-Panel Connection
When enabled through solder-bead SB02 (shorted), TTYA and TTYB are available
through the Front Panel. Use cable P/N 108113 of the integration kit (9-pin male
Micro-DB9 to 25-pin male SubD25) to access these ports from the Front Panel.
Two software control mechanisms are used to operate the TPPC64 system—PIBS
(PowerPC Initialization and Boot Software) commands and SPU (Service Processor
Unit) commands. When connecting a console to the system, it is important to
remember that TTYA must be used to access PIBS, followed by the OS (Operating
System; Linux, for example), and TTYB must be used to access the SPU—see the
TPPC64 Software Manual (P/N 112106-023) for more detail.
1.6.1.2 VME P2 Connection
When enabled through solder-bead SB02 (open), TTYA and TTYB are available
only through a paddle board connected to the VME P2 bus.
1.6.2
Ethernet Networks
1.6.2.1 10/100/1000Base-T (Gigabit)
The TPPC64 features dual RJ45 connectors on the Front Panel (Ethernet A1 and A2)
for 10/100/1000Base-T Ethernet interface connections. Attach the TPPC64 to a network through one of these Ethernet ports and verify that there is a proper physical
connection.
If a 2P2 PMC/XMC Carrier Board is added to the system, a 10/100/1000Base-T network (Ethernet B) is available through the Front Panel of the 2P2 PMC/XMC Carrier Board. Ethernet A1, A2, and B may be active simultaneously.
1-10
Themis Computer
1—Installation and Operation
Attach Peripheral Cables
1.6.2.2 10/100Base-T
A 10/100Base-T Ethernet interface is also available through row Z of the VME P2
backplane by using the RJ45 connector of a TPPC64 5-row CPU-0 Paddle Board
(see “Install the TPPC64 CPU-0 Paddle Board” on page 1-3).
1.6.3
Ultra320 SCSI Port A and Port B
The TPPC64 CPU-0 supports two Ultra320 SCSI ports:
• SCSI Port A (LVD) is accessed from the CPU-0 Front Panel through a 68-pin
connector. Attach SCSI cable P/N 108712 to SCSI A.
• SCSI Port B is accessed through a CPU-0 Paddle Board attached to the VME
P2 connector (LVD if using a 5-row Paddle Board; SE if using a 3-row Paddle
Board). Attach SCSI cable P/N 108432 to SCSI B.
It is possible to use both SCSI A and SCSI B connections simultaneously (see Figure 1-6 on page 1-7).
1.6.4
USB-A (0) and USB-B (1)
USB Ports A (USB0) and B (USB1)—both of which are version 1.1—are located on
the Front Panel of TPPC64 CPU-0 (see Appendix C, “Front-Panel I/O Connections
and LEDs”). Pin signal descriptions are in Table A-2 on page A-3, Appendix A.
1.6.5
USB-C (2), USB-D (3), USB-E (4), and USB-F (5)
Signals (version 1.1) for USB Ports C (USB2), D (USB3), E (USB4), and F (USB5)
are accessible only through the P2 connector of the TPPC64 VME backplane (see
Table A-6, page A-10, in Appendix A, "Connector Pinouts and LED Indicators").
As indicated in Table 1-2, page 1-9, although USB Ports C, D, E, and F are all accessible through a 5-row CPU-0 Paddle Board, since the signals for USB Port F reside
within row Z, only USB Ports C, D, and E can be accessed through a 3-row CPU-0
Paddle Board.
1.6.6
Stereo Audio In/Out Jacks
Stereo Audio In and Out are accessed separately through standard mini-plugs
attached to each of the stereo 3.5-mm mini-jacks on the CPU-0 Paddle Board.
Themis Computer
1-11
TPPC64 Hardware Manual
1.6.7
GPIO Header Connector
The 6-pin GPIO (general-purpose input/output) header—used for test purposes—is
on the top of the CPU-0 Paddle Board PCB, and provides four GPIO signal pins, an
alarm pin, and a ground pin (see Table A-9, page A-13). Only two GPIO signals are
accessible through a 3-row CPU-0 Paddle Board; two more are accessible through a
5-row CPU-0 Paddle Board, for a total of four.
1.6.8
I2C Header Connector
The 6-pin I2C header—used for test purposes—is on the top of the CPU-0 Paddle
Board PCB, and provides separate data, clock, and interrupt pins, along with three
separate ground pins (see Table A-11, page A-15).
1.6.9
12-volt Auxiliary Power Connector
The 6-pin Molex auxiliary power connector—located on the top of both the CPU-0
Paddle Board PCB and the CPU-1 Power Board PCB—provides +12 volts directly
from the VME chassis power supply.
CPU-0 details have already been given in Step 2 of the section “Install the TPPC64
CPU-0 Paddle Board”, page 1-3. CPU-1 details have already been given in Step 1 of
the section “Install the TPPC64 CPU-1 Power Board”, page 1-6
Caution: The CPU-0 Paddle Board must be used to provide +12 volts to CPU-0 for
adequate power. If CPU-1 is installed, the CPU-1 Power Board must be used to provide +12 volts to CPU-1 for adequate power. DO NOT ATTEMPT to operate either
CPU-0 or CPU-1 without providing an adequate +12-volt auxiliary supply.
1-12
Themis Computer
1—Installation and Operation
Configure the VME Interface
1.7
Configure the VME Interface
Themis has implemented a variable and flexible VMEbus interface using onboard
jumper pins and solder beads. The TPPC64 is typically re-configured when VMEbus
boards are added, removed, or changed in the chassis. Board configuration normally
involves allocation of the VMEbus master access address, interrupts, and slave base
addresses.
Consult Appendix B, "Jumper-Pin and Solder-Bead Configurations".
Details on configuring the VME interface are described in the TPPC64 Software
Manual, Themis P/N 112106-023, which also contains details on custom software
(the Service Processor and PIBS, for example) that enable software programmers to
effectively use the powerful features of the VMEbus 64-bit interface.
Service Processor commands are necessary to initialize, configure, and control the
TPPC64 system, PIBS (PowerPC Initialization and Boot Software) initializes the
processor, memory subsystem and other components found on the board and is
responsible for loading the primary operating system.
Themis Computer
1-13
TPPC64 Hardware Manual
1.8
TOD/NVRAM Battery Replacement
The Time-of-Day (TOD) clock and Non-Volatile RAM (NVRAM) are supplied by a
lithium battery to operate the TOD clock and maintain the contents of the NVRAM
during a power shutdown. Located directly on the top-side of the PCB and accessible through a hole in the heat sink (see Figure 1-7), the battery provides power
backup for up to 10 years.
In the event the battery must be replaced, follow these steps:
1. Locate the lithium battery on the top side of the TPPC64 CPU-0 Baseboard
(see Figure 1-7).
Battery holder
Pin 1 indicator key (dot)
4-pin keyed TOD/NVRAM Lithium Battery
Figure 1-7. Location of the TOD/NVRAM Battery
2. Remove the phillips-head screw securing the battery holder to the board (see
A in Figure 1-8 on page 1-15).
3. With a special lift tool or long-nose pliers, carefully pry the long sides of the
battery back and forth and upward until the four battery pins are free of the
battery socket (see B in Figure 1-8).
Discard the old battery in a suitable manner.
1-14
Themis Computer
1—Installation and Operation
TOD/NVRAM Battery Replacement
Caution: When prying the lithium battery from its socket, be careful not to score
or break traces on the PCB surface.
Battery holder screw
Pin-1 indicator
(square-pad pin socket)
Pry upward
from sides
A
Remove phillips-head screw
securing the battery holder
B
Carefully pry battery (long sides)
upward with special lift tool or
long-nose pliers, . . .
C
. . . exposing the 4-pin battery
socket
Figure 1-8. TOD/NVRAM Battery Replacement
4. Position the new replacement battery over the empty socket so that the pin-1
indicator key on the battery is aligned with the pin-1 indicator on the PCB (see
C in Figure 1-8). Carefully push the battery into the socket when the four battery pins have engaged the socket holes until the battery is fully seated.
5. Replace the battery holder and the phillips-head screw previously removed
and secure it to the TPPC64 CPU-0 Baseboard.
Themis Computer
1-15
TPPC64 Hardware Manual
1-16
Themis Computer
2
General
Section
Chapter
System Overview and Specifications
This chapter gives an overview of the major board components of the TPPC64,
along with a block diagram of the system. Also included are system and environmental specifications, as well as estimated power requirements.
2.1
CPU-0 and CPU-1 Baseboards
The TPPC64 CPU-0 and CPU-1 Baseboards were designed to provide an IBM
970FX PowerPC® platform in an industry-standard 6RU VME64 bus form factor.
Both CPU-0 and CPU-1 are available at processor speeds up to 1.8 GHz (512-KB L2cache)—see Figure 2-1, page 2-2.
The Memory subsystem utilizes a custom high-capacity Themis Memory Module
that supports several memory configurations up to 4 GigaBytes (see Table 2-1).
Table 2-1. Memory Configurations
Themis Computer
Total
Memory
Capacity
Custom Themis
Memory Module
1 GB
YES
2 GB
YES
4 GB
YES (Special Order)
Supported
2-1
TPPC64 Hardware Manual
CPU-0 Baseboard
CPU-1 Baseboard
CPU 1
IBM ® 970FX
PowerPC ®
2
I C Bus A
CPU 0
IBM ® 970FX
PowerPC ®
2
I C Bus A
Micro Controller
Status
LEDs
Elastic I/F
450 MHz / 36 bit
Elastic I/F
450 MHz (36 bit)
2
Memory Module (1 GB, 2 GB, or 4 GB)
I C Bus A
PMC Slot
2
PCI-X Bridge
I C Bus C
System
I/O Bridge
(Northbridge)
IBM CPC925
PCI Extension
DDR400
= 3.2 GB/sec
Bank 1
Bank 2
Bank 3
Bank 4
2-Channel ECC
DDR333/400 SDRAM
2
I C Bus B
HyperTransport
400 MHz / 16 bit
Dual
10/100/1000
Base-T
Ethernet
Intel 82546
66/133 MHz / 64 bit
PCI-X Bus A
66 MHz / 64 bit
PCI Extension
HyperTransport
Tunnel
AMD 8131
PCI-X Bus B
133 MHz / 64 bit
HyperTransport
200 MHz / 8 bit
Mictor Connector
Ultra320
SCSI
LSI Logic
53C1030
Gigabit
Ethernet
Ultra320 SCSI
Ultra320 SCSI
USB0
USB1
Tundra
CA91C142
Universe II
PCI-VME
Bridge
PCI Bus C
33 MHz / 32 bit
HyperTransport
I/O Bridge
(Southbridge)
AMD 8111
A1
A2
A
B
A
B
USB C/D/E/F (USB2/3/4/5)
MII*
10/100 Ethernet
PHY Chip
AC97
B
Audio In/Out
VME64 Bus
Backplane
Mictor Connector
LPC Bus
PCI Extension
To 2P2 PMC/XMC Carrier Board
Boot Flash
8 MBytes
TTY A**
LPC
Super I/O
PC87417
A
TTY B**
B
DC-to-DC
Converters
Legend
Front Panel Connector
VME P2 Paddle Board
Solder-bead switched
between VME P2
and PCI extension
Solder-bead switched
between Front-Panel and
VME P2 Paddle Board
* MII = Media-Independent Interface
** TTY A and B are switched simultaneously
Figure 2-1. TPPC64 CPU-0/CPU-1 Baseboard Block Diagram
2-2
Themis Computer
2—System Overview and Specifications
CPU-0 and CPU-1 Baseboards
The local I/O subsystem is based on PCI and PCI-X busses, with separate channels
provided for I/O functions and external VME64bus P2 backplane access. A list of
peripheral devices and voltage sources that are supported by the TPPC64 system is
given in Table 1-2, page 1-9, Chapter 1, "Installation and Operation".
2.1.1
SPU/CPU Duality
A remarkable feature of the TPPC64 is the duality that exists between the SPU (Service Processor Unit) and the CPU (Central Processor Unit).
The SPU is an 8-bit microcontroller that runs its own code with shell commands that
access low-level hardware on the TPPC64, unavailable by any other means. The
SPU console is attached to TTYB on the front panel; the CPU (through PIBS) console is attached to TTYA on the front panel.
• The SPU is responsible for initializing the TPPC64 chipset, then passing control over to the CPU.
• The SPU performs environmental monitoring of I2C sensors and passes the
information to the CPU over the AMD8111 HyperTransport I/O Bridge shared
NVRAM, which is accessed by both the SPU and CPU. In this way, the SPU
can shut down the CPU if it detects excessively high temperatures.
• If the CPU crashes, the SPU can serve as a debug tool to diagnose the system
(which must still be turned on), even though it is essentially “dead”.
Consult the TPPC64 Software Manual (P/N 112106-023) for more detail on SPU
and PIBS commands.
Themis Computer
2-3
TPPC64 Hardware Manual
2.2
PMC/XMC Carrier Boards
There are two types of Carrier Boards that will operate with the TPPC64: the 2P2
PMC/XMC Carrier Board and the 2P3 PMC Carrier Board. For detailed information, refer to the PMC/XMC Carrier Board Manual, Themis P/N 112826-020.
2.3
Graphics Board
For graphics support, Themis recommends the TGA-7000 PMC Graphics Card,
which can be installed in a vacant PMC Module slot of an installed PMC/XMC Carrier Board.
For more information on the TGA-7000 (which is a BIOS-driven version of the Themis TGA-100 PMC Graphics Card), consult the TGA-7000 PMC Graphics Card
Installation Guide, Themis P/N 112874-021.
2.4
Paddle and Power Boards
Themis Computer provides a Paddle Board (P/N 112115-001=5 row/005=3 row) for
TPPC64 CPU-0, and a Power Board (P/N 112876-001=5 row/005=3 row) for CPU1; both boards attach to the rear of the VME P2 slot occupied by CPU-0 and CPU-1,
respectively. A description of all I/O connectors and their signals for both the Paddle
and Power Board is given in Appendix A, “Connector Pinouts and LED Indicators”.
2.5
Backplane Jumper Settings
In compliance with the VME Specification, the PMC Carrier Board assures the continuity between bus grants BG[0..3]IN to BG[0..3]OUT, and the interrupt acknowledge daisy-chain IACKIN to IACKOUT.
2-4
Themis Computer
2—System Overview and Specifications
System Specification
2.6
2.6.1
System Specification
Processor & Memory Subsystems
Table 2-2 and Table 2-3 contain processor and memory specifications.
Table 2-2. Processor Specifications
Feature/Function
Specifications
Processor
IBM 970FX
Processor Speed
1.8 GHz
Performance
937 SPECint2000 @ 1.8 GHz (estimate)
1051 SPECfp2000 @ 1.8 GHz (estimate)
Internal L2 Cache
512 KB
CPU Bus Interface
Elastic I/F (450 MHz, 36 bit)
Table 2-3. Memory Specifications
Feature/Function
Main Memory
Memory Bus Interface
Themis Computer
Specifications
Custom Memory Modules for 1 GB (gigabyte),
2 GB, and 4 GB
128-bit Data Path from CPU; 3.2 GB/sec
2-Channel ECC
Memory Modules
Custom Memory Module only
(see Table 2-1, page 2-1)
Total Memory Configurations
1 GB, 2 GB, and 4 GB
2-5
TPPC64 Hardware Manual
2.6.2
Auxiliary Functions
Table 2-4 summarizes the functional specifications of the auxiliary functions. These
specifications apply to all product configurations.
Table 2-4. Auxiliary Functions Specifications
Feature/Function
Specifications
Flash Memory
8-MB boot flash
NVRAM/TOD
8-KB, battery-backed UPI Static RAM plus timekeeper
System Status LEDs
Four LEDs located on Front Panel of the CPU-0 Baseboard
[See Appendix C, ”Front-Panel I/O Connections and LEDs”]
VME Status LEDs
Four LEDs located on Front Panel of the CPU-0 Baseboard
[See Appendix C, ”Front-Panel I/O Connections and LEDs”]
Reset Switch
Momentary Push-button - Generates POR
Watchdog Timers
2-Level Watchdog:
Located on Front Panel
Level One: Interrupt
Level Two: XIR
Voltage Sensors
Monitors, 12V, 5V, 3.3V, 1.8V, 1.5V, 1.2V, 1.15V (CPU Core)
POR reset signal is generated when voltage drops below a
specified threshold
POR voltage
Temperature Sensor
Monitors whether the CPU temperature stays within a specified range
Range can be changed by software
2-6
Themis Computer
2—System Overview and Specifications
Environmental Specification
2.7
Environmental Specification
Table 2-5. TPPC64 Operating Environmental Specifications
Description
Minimum Value
Maximum Value
Temperature Range
-5°C
50°C
Humidity Range a
relative non-condensing at 104°F (40°C)
0%
95%
Altitude Range
0 feet (Sea Level)
10,000 feet (3,048 meters)
a—A non-condensing environment must be maintained at all times. Themis recommends that the board be operational (powered on) and temperature stabilized before and during humidity testing.
Table 2-6. TPPC64 Airflow Requirements
Airflow Required (slot)
Maximum Inlet Temperature
Altitude
15.93 CFM
50°C
Sea Level
23.13 CFM
50°C
10,000 feet
11.14 CFM
40°C
Sea Level
16.18 CFM
40°C
10,000 feet
Table 2-7. TPPC64 Non-operating Environmental Specifications
Description
Temperature Range
Minimum Value
Maximum Value
-40°C
85°C
Humidity Range
relative non-condensing at 104°F (40°C)
0%
95%
Altitude Range
0 feet (0 meters)
38,370 feet (12,000 meters)
a
a—Board must be non-operational until such time as the environment can be assured to be non-condensing, and
any or all condensation has been evaporated.
Themis Computer
2-7
TPPC64 Hardware Manual
2.8
Estimated Power Requirements
Table 2-8. Estimated Power Requirements
2-8
Watts Dissipation, typical
(Single processor)
Watts Dissipation, typical
(Dual processors)
95 Watts (110 Watts, max)
138 Watts (160 Watts, max)
Themis Computer
Overview
Section
Chapter
3
Hardware Overview
The following sections provide a description of the major IC chip components of the
TPPC64.
3.1
CPU-0 and CPU-1 Baseboards
A block diagram of the major CPU-0 and CPU-1 IC components is provided in Figure 2-1 on page 2-2 of Chapter 2, "System Overview and Specifications".
3.1.1
IBM 970FX Processor and Cache
The IBM PowerPC® 970FX processor—a superscalar design with multiple, pipelined execution units—is used on both TPPC64 Baseboards (CPU-0 and CPU-1).
Each CPU can be configured through the Service Processor to speeds up to 1.8 GHz.
For details on the IBM 970FX Service Processor, refer to the Themis TPPC64 Software Manual (P/N 112106-023).
With a design that optimizes high performance, as well as a scalable instruction-set
architecture, the IBM 970FX is ideal for a wide range of applications. The 970FX is
capable of executing in a 32-bit, mixed 32-bit and 64-bit, or 64-bit-only environment. At the present, the TPPC64 is implemented under Linux (Yellow Dog) and
operates with a software interface for the VME64bus and other on-board peripheral
devices (again refer to the Themis TPPC64 Software Manual).
Themis Computer
3-1
TPPC64 Hardware Manual
3.1.2
System I/O Bridge and Memory Controller
The TPPC64 connects both CPU-0 and CPU-1 processors through the IBM CPC925
System I/O Bridge (Northbridge), which also controls access to the on-board
TPPC64 Memory Module as well as system I/O access through the AMD 8131
HyperTransport Tunnel.
3.1.3
HyperTransport Technology
The AMD 8000 HyperTransport core-logic chipset series was designed to enhance
high-speed processors—such as the IBM 970FX—and includes the AMD 8131
HyperTransport PCI-X Tunnel and the AMD 8111 HyperTransport I/O Hub.
3.1.3.1 AMD 8131 HyperTransport PCI-X Tunnel
The AMD 8131 HyperTransport PCI-X Tunnel is a high-speed device that provides
two independent, high-performance PCI-X bus bridges that are integrated with a
high-speed HyperTransport technology tunnel. Tunnelling provides the capability to
connect with other HyperTransport technology devices that are downstream (see
Figure 3-1); namely, the AMD 8111 (see next section) in the TPPC64.
TM
IBM CPC925
Upstream
Device
TM
AMD 8131 HyperTransport
PCI-X Tunnel
400 MHz
Side A
Side B
200 MHz
HyperTransport Link
Tunnel
HyperTransport Link
AMD 8111
16-bits Upstream
16-bits Downstream
8-bits Upstream
8-bits Downstream
PCI-X
Bridge A
PCI-X
Bridge B
PCI-X Bus A
PCI-X Bus B
Downstream
Device
Figure 3-1. AMD 8131 HyperTransport PCI-X Tunnel
3-2
Themis Computer
3—Hardware Overview
CPU-0 and CPU-1 Baseboards
Major features of the AMD 8131 include the following:
• 16-bit HyperTransport interface (Side A).
• 8-bit HyperTransport interface (Side B).
• Two PCI-X bridges (Bridge A, Bridge B) that support the following features:
—PCI-X modes and legacy PCI revision 2.2 modes
—133-MHz, 100-MHz, 66-MHz, and 33-MHz transfer rates in PCI-X mode
—66-MHz and 33-MHz PCI 2.2 modes
—Independent transfer rates and operational modes for each bridge
—Support for up to five PCI masters on each bridge
—An IOAPIC (I/O APIC) with four redirection registers for each bridge,
including a legacy interrupt controller and IOAPIC mode support
—SHPC-compliant controller and support
—829-pin OBGA package
3.1.3.2 AMD 8111 HyperTransport I/O Hub
The AMD 8111 HyperTransport I/O Hub is a direct replacement for the traditional
Southbridge chip, integrating the functions of storage, connectivity, audio, I/O
expansion, security, and system management into a single device (see Figure 3-2).
AC97
USB A/B
200 MHz
Toward Host
HyperTransport Link
8-bits Upstream
8-bits Downstream
USB C/D/E/F
TM
TM
AMD 8111 HyperTransport
I/O Hub
IDE (Unused)
10/100 Ethernet
SM Bus 0
GPIO (32 pins)
SM Bus 1
33 MHz
Up to 8 PCI devices
32 Bit
PCI Bus C
LPC Bus
Figure 3-2. AMD 8111 HyperTransport I/O Hub
Themis Computer
3-3
TPPC64 Hardware Manual
Major features of the AMD 8111 include the following:
• An 8-bit HyperTransport interface
• A 33-MHz, 32-bit PCI 2.2-compliant PCI bus with support for up to eight PCI
devices
• An AC97 interface supporting soft modem and six-channel soft audio
• An integrated 10/100 Ethernet MAC with MII interface (not used)
• Two USB OHCI controllers and one USB EHCI controller supporting six ports
(USB version 1.1)
• An LPC bus
• A high-precision event timer
• A serial IRQ interface
• An IOAPIC controller
• A real-time clock (RTC)
• ACPI-compliant power management logic
• 32 GPIO pins (multiplexed with other functions)
• Privacy security logic
• 492-pin PBGA package
3.1.4
Universe II PCI-to-VME Bridge
The Tundra CA91C142 Universe II controller ASIC interfaces the local 32-bit PCI
bus to the 64-bit VMEbus. The Universe II includes a 33-MHz, 32-bit PCI bus interface, a fully compliant, high-performance, 64-bit VMEbus interface, as well as a
broad range of VMEbus address and data transfer modes of:
• A32/A24/A16 master and slave transfer, except for A64 and A40
• D64/D32/D16 master and slave transfer, except for MD32
• MBLT, BLT, ADOH, RMW, LOCK, and location monitors
The Universe II also includes support for full VMEbus System Controller, eight
user-programmable slave images, and seven interrupt lines. For more information on
the Universe II, refer to Chapter 4, "Universe II Description" and the Tundra Universe II User Manual (Tundra 8091142.MD300.01).
3-4
Themis Computer
3—Hardware Overview
CPU-0 and CPU-1 Baseboards
3.1.5
Dual Ultra320 SCSI Controller
The LSI Logic 53C1030 dual Ultra320 SCSI controller is an extremely high-performance and intelligent PCI-X to dual-channel Ultra320 SCSI controller with a
Fusion-MPT (Message-Passing Technology) based architecture that provides the
highest performance and unparalleled flexibility, reliability, and binary software
compatibility.
The LSI53C1030 is pin-compatible with the LCI53C1010R Ultra160 SCSI controller and has a 133-MHz, 64-bit PCI-X interface (PCI-X Bus B) that is compliant with
PCI 2.2 and PCI-X Addendum Rev 1.0 and PCI Power Management Interface.
Other features include:
• Double transition clocking for 320 MB/s throughput on each channel
• Packetized protocol
• Quick Arbitrate and Select (QAS)
• Skew compensation
• InterSymbol Interference (ISI) compensation
• Domain validation, including margining
• Performance-optimized architecture
• SCSI Interrupt Steering Logic (SISL) to provide alternate interrupt routing for
RAID applications
• IEEE 1149.1 JTAG boundary scan
• Proven integrated LVDlink transceivers for direct attach to either LVD (lowvoltage differential) or SE (single-ended) SCSI buses with precision-controlled
slew rates
• Comprehensive SureLINK domain validation
• Flash and local memory interface
• Integrated Mirroring support
• Fusion-MPT architecture with drivers supporting Windows NT/2000, Linux,
Solaris, UnixWare, and Novell netware operating systems
• 456-pin EPBGA package
Themis Computer
3-5
TPPC64 Hardware Manual
3.1.6
LPC Super I/O Controller
The National Semiconductor PC87417 LPC (Low Pin Count) Super-I/O Controller
is connected to the Southbridge HyperTransport I/O bridge over the LPC bus. It controls the 8-MB boot flash as well as both TTYA and TTYB serial ports.
3.1.7
Dual Gigabit Ethernet Controller
The dual-gigabit (Gbit) Ethernet interface uses one Intel FW82546 controller device
to control both RJ45 Ethernet ports (A1 and A2) and will auto-sense the port speed
to be either 10/100 Mbit/sec or 1-Gbit/sec rates. The Ethernet controller is connected
to the 133-Mhz/64-bit PCI-X Bus B.
Each Ethernet connector contains two LEDs imbedded in the connector shell, one
for link speed (yellow) and the other for link activity (green). See Section A.1.1.3,
"Gigabit Ethernet (TPE) Port A1 and Port A2," on page A-4 for more details.
3-6
Themis Computer
3—Hardware Overview
Memory Subsystem
3.2
Memory Subsystem
The TPPC64 supports a single custom Themis SDRAM Memory Module, plugged
directly into the Baseboard through a 2-row, 240-pin connector (see Figure 3-3) and
secured to the PCB by five screws. The memory data path is 72 bits with 8 bits
assigned to ECC. Memory complies to PC-133 timing.
Custom Memory Module
Baseboard
Figure 3-3. Custom Memory Module Topology (Side View)
Memory capacities are offered in 1 GB, 2 GB, and 4 GB capacities (see Table 2-1,
page 2-1). TPPC64 memory design includes Error Correction Code (ECC). A single
bit error in a 64-bit word is corrected without loss of a cycle.
In designing the memory subsystem, considerable attention was paid to minimizing
overall power consumption. The typical active power consumption of a TPPC64
with a 2-GB memory module is 95 watts (CPU-0 only at 1.8 GHz running Linux),
and 137 watts (both CPU-0 and CPU-1 at 1.8 GHz running Linux).
Caution: Because of the VME Specification requiring a 0.8-inch interboard separation (see Figure 1-3 on page 1-5) between VME slots, only one Memory Module
can be installed onto a TPPC64 Baseboard (stacking is not supported).
Themis Computer
3-7
TPPC64 Hardware Manual
3-8
Themis Computer
Operation
Section
Chapter
4
Universe II Description
4.1
Features
Tundra’s Universe II (CA91C142) interfaces the local 32-bit PCI bus to the VMEbus. The following lists some of the Universe II’s features on the TPPC64:
• 33 MHz, 32-bit PCI bus interface
• Fully compliant, high performance 64-bit VMEbus interface
• Integral FIFOs buffer with multiple transactions from the PCI bus to the VMEbus and from the VMEbus to the PCI (both directions)
• Programmable DMA controller with linked list support
• A broad range of VMEbus address and data transfer modes:
— A32/A24/A16 master and slave transfer, except for A64 and A40
— D64/D32/D16 master and slave transfer, except for MD32
— MBLT, BLT, ADOH, RMW, LOCK, and location monitors
• Support for full VMEbus System Controller
• Nine user programmable slave images on the VMEbus and the PCI bus ports
• Seven interrupt lines
• Auto initialization for the slave-only applications
• Programmable registers from both the VMEbus and the PCI bus
Themis Computer
4-1
TPPC64 Hardware Manual
• Support for four mailbox registers
• Support for four location monitors
• Support for eight semaphores
• Support for RMW (Read, Modify, Write) cycles and lock cycles
This chapter is intended to outline the VMEbus to PCI Bus interface on the TPPC64.
If more detailed information is need, please refer to the Tundra Universe II User’s
Manual, Spring 1998.
Note: All registers on the Universe II are little-endian.
4.2
4.2.1
VMEbus Interface
VMEbus Configuration
The following lists the initial configuration of the VMEbus system:
• VMEbus First Slot Detector
• Two methods of Auto Slot ID
• Register Access at the power up
4.2.2
Universe II as the VMEbus Slave
The Universe II’s VMEbus Slave Channel supports all of the addressing and data
transfer modes which are documented in the VME64 specification. The Universe II
does not support the A64 mode and the modes intended to augment the 3U applications, i.e. A40 and MD32. The Universe II becomes a slave when one of its eight
programmed slave images or register images are accessed by a VMEbus master. It is
not implied that the Universe II cannot reflect a cycle on the VMEbus and access
itself, as it is capable of doing so. Depending on the programmed values of the
VMEbus slave images, the incoming write transaction from the VMEbus may be
treated as either posted or coupled (refer to Section 4.3, “Slave Image Programming,” on page 4-9). If the post write operation is selected, the data is written to a
Posted Write Receive FIFO (RXFIFO) and the VMEbus master receives the data
acknowledgment from the Universe II. The Universe II transfers the write data from
4-2
Themis Computer
4—Universe II Description
VMEbus Interface
the RXFIFO without the involvement of the initiating VMEbus master (refer to
“Posted Writes” on page 2-15 of the Universe II manual for a complete explanation
of this operation). If the coupled cycle operation is selected, the transaction is completed on the PCI bus first, and the data acknowledgment is sent to the VMEbus
master. With the coupled cycle, the VMEbus is not available to other masters while
the PCI bus is executing the transaction.
Read transactions may either be pre-fetched or coupled. A pre-fetched read is initiated when enabled by the user and a VMEbus master requests for a block read transaction (BLT or MBLT). When the Universe II receives a request for the block
transfer, it begins to fill its Read Data FIFO (RDFIFO) using burst transactions from
the PCI bus resource. The initiating VMEbus master then obtains its block read data
from the RDFIFO of the Universe II rather than the PCI resources directly.
A RMW cycle allows a VMEbus master to read from a VMEbus slave and then
write to the same resource without releasing the bus between the two operations.
Each one of the Universe II slave images can be programmed to map RMW cycles to
the PCI Locked cycles. RWM cycles are not supported with the unaligned or D24
Cycles.
In order to support the VMEbus broadcast capability, Universe II has four Location
Monitors. The location monitor’s image consist of a 4Kbyte image in A32, A24, or
A16 space on the VMEbus. If the Location Monitor is enabled, an access to a Location Monitor would cause the PCI Master Interface to issue an interrupt.
The Universe II supports the VMEbus lock commands as they are described in the
VME64 Specification. The ADOH cycles are used to execute the lock command
with a special AM code. A locked resource can not be accessed by any other
resource as long as the VMEbus master has the bus ownership. If Target-Abort or
Master-Abort occurs during a locked transaction on the PCI bus, the Universe II will
relinquish its lock on the bus, in accordance with the PCI Specification.
4.2.3
Universe II as the VMEbus Master
The Universe II becomes the VMEbus master when the VMEbus Master Interface is
internally requested by the Interrupt Channel, the PCI Bus Target Channel, or the
DMA channels. The Interrupt Channel always has the highest priority over the other
two channels and will request the VMEbus Master Interface when it receives an
enabled VMEbus interrupt request.
The PCI Bus Target Channel and the DMA Channel compete for the VMEbus Master Interface and are awarded it in a fair manner. There are several methods available
for user to configure the relative priority that the DMA channel and the PCI Bus Target Channel have over the VMEbus Master Interface. The PCI Target Channel
requests the VMEbus Master Interface when:
Themis Computer
4-3
TPPC64 Hardware Manual
• the TXFIFO contains a completed transaction
• if there is a coupled cycle request.
The DMA Channel requests the VMEbus Master Interface when:
• the DMAFIFO has 64 bytes available when reading from the VMEbus
• the DMAFIFO has 64 bytes in its FIFO when writing to the VMEbus
• the DMA block is complete.
Bi-Directional DMA FIFO
VMEbus Slave Channel
PCI Bus
PCI
Master
posted writes
pre-fetch reads
coupled read
VME
Slave
PCI
Slave
PCI Bus Slave Channel
posted writes with FIFO
coupled read logic
VME
Master
PCI
Interrupts
Interrupt Channel
Interrupt Handler
Interrupter
VME
Interrupts
VMEbus
Bi-Directional DMA FIFO
Figure 4-1. Universe II Architectural Diagram
The Universe II’s VMEbus Master Interface supports all of the addressing and data
transfer modes as specified by the VME64 specification. The Universe II does not
support the A64 mode and modes intended to augment the 3U applications, i.e. A40
and MD32. The Universe II is compatible with all the VMEbus modules that conform to pre-VME64 specification. The Universe II as the VMEbus Master supports
RMW, and ADOH. The Universe II accepts BERR* (active low) and DTACK* as
cycle terminations from the VMEbus. The Universe II does not accept the RETRY*
as a termination from the VMEbus Slave. DTACK* indicates the successful completion of a transaction. The Universe II utilizes the ADOH cycle to implement the
VMEbus Lock command allowing a PCI bus master to lock the VMEbus resources.
4-4
Themis Computer
4—Universe II Description
VMEbus Interface
4.2.4
VMEbus First Slot Detector
As defined by the VME64 specification, the Universe II samples the BG3IN* right
after the reset to determine if the TPPC64 resides in slot 1. If the BG3IN* is sampled
low right after the reset, the TPPC64 becomes the SYSCON. Otherwise the
SYSCON Module of the Universe II is disabled. The software can set or clear the
SYSCON bit the MISC_CTL register of the Universe II. The definition of the
MISC_CTL register is provided in Table 4-1. The offset of this register is 0x404.
Table 4-1. Universe II Miscellaneous Control Register (MISC_CTL)a
BIts
Name
Reset
State
Description
VMEbus Time-out:
[31:28]
VBTO
0000 = Disable; 0001 = 16 μs; 0010 = 32 μs; 0011 =
64 μs;
0100 = 128 μs; 0101 = 256 μs; 0110 = 512 μs;
Access
R/W
0011
0111 = 1024 μs; Others = RESERVED
26
VARB
VMEbus Arbitration Mode: 0 = Round Robin; 1 = Priority
0
VMEbus Arbitration Time-out
[25:24]
VARBTO
00 = Disable Timer; 01 = 16 μs (minimum value of 8
μs, due to the 8 μs clock granularity); 10 = 256 μs;
R/W
R/W
01
others - RESERVED
23
SW_LST
PCI Reset: 0 = no effect; 1 = initiate PCI bus LRST*
0
22
SW_SYSRST
Software VMEbus SYSRESET:
0 = no effect; 1 = Initiate VMEbus SYSRST
0
20
BI
19
ENGBI
18
RESCIND
BI- Mode: 0 = Universe II is in BI-mode;
1 = Universe II is not in BI mode
Enable Global BI-mode Initiator:
SYSCON
0
Unused on the Universe II
1
0 = Universe II is not a VMEbus System Controller;
1 = Universe II is a VMEbus System Contoller
Themis Computer
W
R/W
R/W
0 = Assertion of VIRQ1 ignored; 1 = Assertion of
VIRQ1 puts the Universe II in BI-mode
SYSCON:
17
Power-up
Option
W
Power-up
Option
R/W
R/W
4-5
TPPC64 Hardware Manual
Table 4-1. Universe II Miscellaneous Control Register (MISC_CTL)a (Continued)
BIts
Name
Reset
State
Description
VME64 Auto ID:
16
V64AUTO
Write: 0 = no effect; 1 = Initiate sequence
This bit initiates the Universe II VME64 Auto ID Slave
participation.
Access
R/W
Power-up
Option
a—All unspecified bits in this table are RESERVED for the Universe II. Reading the bits results in an undefined state; writing to
these bits should be 0.
When the Universe II is configured as the System Controller, it provides the following functions on the VMEbus:
— A 16MHz Clock Driver
— An Arbitration Module
— A bus timer
— An IACK Daisy Chain Driver (DCD).
The TPPC64 supports Round-Robin arbitration. The VMEbus arbitrator time out is
also controlled by the MISC_CTL register described above. The timer may be set to
either 16 μs, 256 μs, or disabled. The default setting is 16 μs. The arbitration timer
has a granularity of 8 μs; setting the timer to 16 μs means the timer may expire in as
little as 8 μs or as much as 24 μs. It should also be noted that disabling the arbitration
timer implies that the Universe II will not recover from an access error. Disabling
the arbitration timer is not recommended.
4.2.4.1 Automatic Slot Identification
The Universe II supports two types of Auto ID functionality:
• Auto Slot ID as described by the VME64 specification
• Proprietary Method which is developed by Tundra
Refer to “Auto Slot ID: VME64 Specified”, page 2-24, and “Auto-ID: A Proprietary
Tundra Method”, on page 2-25 of the Universe II Manual for more information.
4.2.4.2 Register Access at Power Up
Register access at power up is used in a system where either the Universe II is independent of the local CPU or a CPU is not present. Since the Universe II and the IBM
PPC970FX are present on the TPPC64, register access at power up is not supported.
4-6
Themis Computer
4—Universe II Description
VMEbus Interface
4.2.5
Universe II’s Hardware Power-Up Options
The Universe II power up options are determined right after the PWRRST* based on
the level of VMEbus Address VA[31..1] and VMEbus Data VD[31..27]. See Table
4-2, for the Universe II’s power up options on the TPPC64.
The Universe II is automatically configured at power up to operate in the default
configuration listed in Table 4-2. It should be noted that all power up options are
latched only at the positive edge of PWRRST*; they are loaded when SYSRST*,
PWRRST*, and RST* are negated.
Table 4-2. Universe II Power Up Options
Option
Register
Field
Default
Pins
EN
Disabled
VA[31]
VAS
A16
VA[30..29]
VRAI_BS
BS
0x00
VA[28..21]
VCSR_CTL
LAS[0]a
Memory
VA[20]
VCSR_TO
TO
0x00
VA[19..15]
MISC_STAT
DY4AUTO
Disabled
VD[30]
MISC_CTL
V64AUTO
Disabled
VINT_EN
SW_INT
0
VINT_STAT
SW_INT
0
VINT_MAP1
SW_INT
000
BI-Mod
MISC_CTL
BI
Disabled
VD[28]
AUTO_SYSCON Detect
MISC_CTL
SYSCON
Enabled
VBG3IN*
VCSR_SET
SYSFAIL
Asserted
VD[27]
VCSR_CLR
SYSFAIL
--
--
EN
Disabled
VA[13]
LAS[0]
Memory
VA[12]
VAS
A16
VA[11..10]
LSI0_BS
BS
0x0
VA[9..6]
LSI0_BD
BD
0x0
VA[5..2]
VMEbus Register Access
Slave Image
VMEbus CR/CSR Slave
Image
Auto-ID
SYSFAIL* Assertion
VRAI_CTL
LSI0_CTL
PCI Target IMAGE
Themis Computer
VD[29]
4-7
TPPC64 Hardware Manual
Table 4-2. Universe II Power Up Options (Continued)
Option
Register
Field
Default
Pins
PCI Bus Sizeb
MISC_STAT
LCLSIZE
32-bit
REQ64*
PCI CSR Image Space
PCI_CSR
BM
Disabled
VA[14]
PCI Register Access
PCI_BS0
PCI_BS1
Refer to:
SPACE
Table 4-3 and
VA[1]
Table 4-4.
PCI Bus Sizec
MISC_STAT
LCLSIZE
32-bit
REQ64*
PCI CSR Image Size
PCI_CSR
BM
disabled
VA[14]
a—The LAS field will enable the PCI_CSR registers IOS or MS field if the EN FIELD of the LSIO_CTL register is set.
b—As per PCI 2.1 Specification, the PCI Bus Size is loaded on any RST* event.
c—Following the PCI 2.1 Specification, the PCI Bus Size is loaded on any RST* event.
The PCI Configuration Base Address 0 and Base Address 1 Registers offsets are
0x010 and 0x014, respectively. The registers specify the 4KB aligned base address
of the 4 KB Universe II register space on PCI. The power-up options determine if
the registers are mapped into Memory or I/O space.
Table 4-3. PCI Configuration Base Address 0 Register (PCI_BS0)a
BIts
Name
Reset
State
Description
[31:12]
BS
Base Address
0
00
SPACE
PCI Bus Address Space: 0 = Memory; 1 = I/O
Access
R/W
Power-up
R
Options
a—All other bits are Read 0.
Table 4-4. PCI Configuration Base Address 1 Register (PCI_BS1)a
BIts
Name
Reset
State
Description
[31:12]
BS
Base Address
00
SPACE
PCI Bus Address Space: 0 = Memory; 1 = I/O
0
Power-up
Access
R/W
R
Options
a—All other bits are Read 0.
4-8
Themis Computer
4—Universe II Description
Slave Image Programming
4.3
Slave Image Programming
The Universe II recognizes two types of accesses on its bus interfaces: accesses destined for the other bus and accesses decoded for its own register space.
4.3.1
VME Slave Images
A VMEbus slave image is used to access the resources of the PCI bus when the Universe II is not the VMEbus master. The user may control the type of accesses by programming specific attributes of the VMEbus slave image. The Universe II will only
accept accesses to the VMEbus from within the programmed limits of the VMEbus
slave image.
Note: The Bus Master Enable (BM) bit of the PCI_CS register must be set in order for the image to accept posted writes from an external VMEbus master. If this
bit is cleared while there is data in the VMEbus Slave Posted Write FIFO, the data
will be written to the PCI bus. No further data is accepted into this FIFO until the
bit is set.
4.3.1.1 VMEbus Fields
Before the Universe II responds to a VMEbus Master (other than itself), the address
must lie between the base and bound addresses. Also, the address modified must
match modifier specified by the address space, access mode, and type fields. A
description of the VMEbus fields for VMEbus Slave Images in presented in
Table 4-5, page 4-9.
The Universe II’s eight VMEbus slave images (0-7) are bounded by A32 space.
Slave images 0 and 4 have a 4-KB resolution. Typically, these images would be used
as an A16 image since they provided the finest granularity. Slave images 1 to 3 and 5
to 7 have a 64-KB resolution. The maximum image size is 4 GB.
Table 4-5. VMEbus Fields for VMEbus Slave Image
Field
Register Bits
Description
base
BS[31:12] or BS[31:16] in VSIx_BS
bound
BD[31:12] or BD[31:16] in VSIx_BD
Multiples of 4 or 64 KBytes
(base to bound: maximum of 4
GB)
Themis Computer
4-9
TPPC64 Hardware Manual
Table 4-5. VMEbus Fields for VMEbus Slave Image (Continued)
Field
Register Bits
Description
address space
VAS in VSIx_CTL
A16, A24, A32, User 1, User 2
mode
SUPER in VSIx_CTL
Supervisor and /or non-privileged
type
PGm in VSIx_CTL
Program and/or data
Warning: The address space of a VMEbus slave image must not overlap with the
address space for the Universe II’s control and status registers, and must not overlap
with any other VMEbus slave image.
4.3.1.2 PCI Bus Fields
The PCI bus fields specifies the mapping of a VMEbus transaction to the appropriate
PCI bus transaction and allows users to translate a VMEbus address to a different
address on the PCI bus. The translation of VMEbus transactions beyond 4 GB
results in a wrap-around to the low portion of the address range.
Table 4-6. PCI Bus Fields for VMEbus Slave Image
Field
4-10
Register Bits
Description
Translation Offset
TO[31:12] or TO[31:16] in
VSIx_TO
Offsets VMEbus slave address to a selected PCI address
Address space
LAS in VSIx_CTL
Memory, I/O, Configuration
RMW
LLRMW in VSIx_CTL
RMW enable bit
Themis Computer
4—Universe II Description
Slave Image Programming
A32 Image
Offset [31..12]
VME [31..12]
VME[11..0]
+
PCI [31..12]
PCI [11..0]
Figure 4-2. Address Translation for VMEbus to PCI Bus Transfers
4.3.1.3 Control Fields
A VMEbus slave image is enabled using the EN bit of the control field. The control
field also specifies how reads and writes are processed: either as a coupled transfer
or a posted write. At power up, all images are disabled and configured for coupled
reads and writes.
Table 4-7. Control Fields for VMEbus Slave Image
Field
Register Bits
Description
image enable
EN in VSIx_CTL
enable bit
posted write
PWEN in VSIx_CTL
posted write enable bit
prefetched read
PREN in VSIx_CTL
prefetched read enable bit
enable PCI64
LD64EN in VSIx_CTL
enables 64-bit PIC bus transactions
Note: For a VMEbus slave image to respond to an incoming cycle, the PCI Master Interface must be enabled (bit BM in the PCI_CSR register).
Themis Computer
4-11
TPPC64 Hardware Manual
4.3.2
PCI Bus Target Images
The Universe II accepts accesses from the PCI bus with specific programmed PCI
target images that open windows to the VMEbus and control to the type of access to
the VMEbus. There are eight (0-7) standard PCI target images and one special PCI
target image. The special PCI target image may be used for A16 and A24 transaction, freeing the other 8 images for standard A32 transactions.
4.3.2.1 PCI Bus Fields
Decoding for VMEbus accesses is based on the address and command information
produced by a PCI bus master. The PCI Target Interface claims a cycle if there is an
address match and if the command matches certain criteria.
The PCI target images are A32-capable only. For accesses other than A32 the Special PCI Target Image may be used (refer to Section 4.3.2.4, “Special PCI Target
Image,” on page 4-14). Of the eight standard PCI target images, the first and fifth
(PCI target images 0 and 4) have a 4 KB resolution. PCI target images 1 to 3 and 5 to
7 have a 64 KB resolution.
Table 4-8. PCI Bus Fields for PCI Bus Target Image
Field
Register Bits
Description
base
BS[31:12] or BS[31:16] in LSIx_BS
bound
BD[31:12] or BD[31:16] in LSIx_BD
Multiples of 4 or 64 KBytes
(base to bound: maximum of 4
GB)
address space
LAS in LSIx_CTL
Memory or I/O
Warning: The address space of a PCI bus slave image must not overlap with the
address space for the Universe II’s control and status registers, and must not overlap
with any other PCI bus slave image.
4.3.2.2 VMEbus Fields
The VMEbus fields cause the Universe II to generate the appropriate VMEbus
address, AM code, and cycle type, allowing PCI transactions to be mapped to a
VMEbus transaction. It is possible to use invalid combinations, such as block transfers in A16 space. This may cause illegal transactions on the VMEbus. All accesses
beyond the 4 GB limit will wrap around to the low address range.
4-12
Themis Computer
4—Universe II Description
Slave Image Programming
.
A32 Image
Offset [31..12]
PCI [31..12]
PCI [11..0]
+
VME [31..12]
VME [11..0]
Figure 4-3. Address Translation for PCI Bus to VMEbus Transfers
Table 4-9. PCI Bus Fields for PCI Bus Target Image
Field
Register Bits
Description
base
BS[31:12] or BS[31:16] in LSIx_BS
Translates PCI Bus Address to
VMEbus Address
bound
BD[31:12] or BD[31:16] in LSIx_BD
8, 16, 32, or 64 bits
address space
LAS in LSIx_CTL
A16, A24, A32, User 1, User 2
mode
SUPER in LSIx_CTL
Supervisor or non-privileged
type
PGM in LSIx_CTL
Program or data
cycle
VCT in LSIx_CTL
Single or Block
4.3.2.3 Control Fields
Through the control fields, the user specifies how writes are processed and enables a
PCI target image. The PCI target image is enabled by setting the EN bit.
Posted writes are performed when the PWEN bit is set and the particular PCI target
image is accessed. Posted writes are only decoded within PCI Memory space.
Access from other memory spaces are performed with coupled cycles, regardless of
the setting of the PWEN bit.
Themis Computer
4-13
TPPC64 Hardware Manual
Table 4-10. Control Fields for PCI Bus Target Image
Field
Register Bits
Description
image enable
EN in LSIx_CTL
enable bit
posted write
PWEN in LSIx_CTL
posted write enable bit
Note: For a VMEbus slave image to respond to an incoming cycle, the PCI Master Interface must be enabled (bit BM in the PCI_CSR register).
4.3.2.4 Special PCI Target Image
A special PCI target image is provided to expedite A16 and A24 transactions. The
other eight, standard, PCI target images are typically programmed to access A32
space. The special PCI target image is a 64 MB space, located either within memory
or I/O space, that is decoded using PCI address lines [31:26]. Its base address is
aligned on 64 MB boundaries and no offsets are provided. Therefore, PCI address
information is mapped directly to the VMEbus. The special PCI target image has a
lower priority than any other PCI target image.
The 64 MB space is divided into four (4), 16 MB spaces that are selected using
AD[25:16]. For each region, the upper 64 KB map to VMEbus A16 space, while the
remaining portion map to VMEbus A24 space. The addressing of this slave image is
depicted in Figure 4-2 on page 4-11.
Table 4-11. PCI Bus Fields for Special PCI Bus Target Image
Field
4-14
Register Bits
Description
base
BS[05]
64 MB aligned base address
for the image
address space
LAS
Places Image in Memory or I/O
maximum data width
VDW
separately set each region for
16 or 32 bits
mode
SUPER
separately set each region for
supervisor or non-privileged
type
PGM
Program or data
cycle
VCT
Separately sets each region as
program or data
Themis Computer
4—Universe II Description
Slave Image Programming
Table 4-12. Control Fields for Special PCI Bus Target Image
Field
Register Bits
Description
image enable
EN
enable bit
posted write
PWEN
posted write enable bit
The special PCI target image register is described Table 4-13.
Table 4-13. Special PCI Target Image Register (Offset 188)
Bits
31
Name
Type
Reset
State
EN
R/W
0
Description
Image Enable
0 = Disable, 1 = Enable
PWEN
30
R/W
0
Posted Write Enable
0 = Disable, 1 = Enable
29:24
Reserved
VDW [3..0]
R/W
0
23:20
VMEbus Maximum Datawidth. Each of the four bits specifies a
data width for the corresponding 16 MB regions. The lower order bits correspond to the lower order address regions.
0 = 16 bit, 1 = 32 bit
19:16
Reserved
PGM [3..0]
R/W
0
Program/Data AM Code
Each of the four bits specifies Program/Data AM code for the
corresponding 16 mB region. The lower order bits correspond to
the lower order address regions.
15:12
0 = Data, 1 = Program
SUPER
[3..0]
R/W
0
Supervisor/User AM Code
Each of the four bits specifies Supervisor/User AM code for the
corresponding 16 MB region. Lower order bits correspond to the
lower address regions.
11:8
0 = Non-Privileged, 1 = Supervisor
07-02
01
Themis Computer
BS [5..0]
R/W
0
Base Address
Specifies a 64 MB aligned base address for this 64 MB image
Reserved
4-15
TPPC64 Hardware Manual
Table 4-13. Special PCI Target Image Register (Offset 188) (Continued)
Bits
00
64 KB
Name
Type
Reset
State
LAS
R/W
0
Description
PCI Bus Address Space
0 = PCI Bus Memory Space, 1 = PCI Bus I/O Space
BASE+0x400.0000
A16
BASE+0x3FF.0000
3
A24
16 MB
BASE+0x300.0000
A16
BASE+0x2FF.0000
2
A24
BASE+0x200.0000
64 MB
A16
BASE+0x1FF.0000
1
A24
BASE+0x100.0000
A16
BASE+0x0FF.0000
0
A24
BASE+0x000.0000
Figure 4-4. Memory Mapping in the Special PCI Target Image
4-16
Themis Computer
4—Universe II Description
Universe II’s Interrupt and Interrupt Handler
4.4
4.4.1
Universe II’s Interrupt and Interrupt Handler
VME and PCI Interrupters
For the VMEbus, the interrupt source can be mapped to any of the VMEbus interrupt
output pins such as VIRQ*[7..0]. If a hardware and software source are assigned to
the same VMEbus VIRQ*n pin, the software source always has higher priority.
Interrupt sources mapped to the PCI bus interrupts are generated via the PCI Interrupt pin, INT*0.
For the VMEbus interrupt outputs, the Universe II interrupter provides an 8-bit
STATUS/ID to a VMEbus interrupt handler. Optionally, the Universe II generates
an internal interrupt to signal that the interrupt vector has been provided.
Interrupts mapped to the PCI bus interrupt output pin (INT*0) are serviced by the
PCI Interrupt Controller. The IBM PPC970FX determines which interrupt sources
are active by reading the interrupt status register in the Universe II. The interrupt is
negated after being serviced by the IBM PPC970FX.
4.4.2
VMEbus Interrupt Handling
A VMEbus interrupt causes the Universe II to issue a normal VMEbus IACK cycle
and to generate the specified interrupt output. When the IACK cycle is completed,
the Universe II relinquishes the VMEbus. The interrupt vector is read by the PCI
resource servicing the interrupt output. Hardware and internal interrupts are RORA.
Software interrupts are ROAK.
4.4.3
Universe II’s Mailbox Registers
Universe II contains four 32-bit mailbox registers that provide an additional communication path between the PCI bus and the VMEbus. The mailboxes support read and
write accesses from either bus. The mailboxes may be enabled to generate interrupts
on either bus whenever written to. The mailboxes are accessed from the same
address spaces and in the same method as other Universe II registers.
4.4.4
Universe II’s Semaphores
The Universe II contains two general purpose semaphore registers such as SEMA0
and SEMA1; each register contains four semaphores. To obtain the ownership of a
Themis Computer
4-17
TPPC64 Hardware Manual
semaphore, a processor writes a logic one to the semaphore bit and an unique pattern
to the associated tag field; if a subsequent read of the tag field returns the same pattern, then the processor has gained the ownership of the semaphore. In order to
release the semaphore, the processor writes a value of 0 to it.
4.4.5
Programmable Slave Images on the VME & PCI bus
There are two types of accesses that the Universe II recognizes on its bus interfaces:
accesses for its own register space and accesses destined elsewhere.
For the VME Slave Images, the Universe II accepts accesses from the VMEbus
within specific programmed slave images. Each one of the VMEbus slave images
opens a window to the resources on the PCI bus, and through the specific attributes,
the VMEbus slave images allow the user to control the type of access to the PCI
resources. The VMEbus slave images are divided into VMEbus, PCI bus, and Control fields (refer to Section 4.3, “Slave Image Programming,” on page 4-9).
For the PCI Slave Images, the Universe II accepts accesses from the PCI bus with
the specific programmed PCI target images. Each one of the PCI bus slave images
opens a window to the resources on the VMEbus, and it allows the user to control
the type of access to the VMEbus resources. The PCI bus slave images are divided
into VMEbus, PCI bus, and control fields. There is one special PCI target image
which is separate from the VMEbus, PCI bus, and the control fields (refer to Section
4.3, “Slave Image Programming,” on page 4-9).
4.4.6
DMA Controller
The Universe II utilizes an internal DMA controller for high performance data transfer between the VMEbus and the PCI bus. Universe II’s parameters for the DMA
transfer are software configurable. DMA operations between the source and destination bus are decoupled via the use of a single bidirectional FIFO (DMAFIFO).
There are two modes of operation for the DMA: Linked List Mode and Direct Mode.
In Linked List Mode, the Universe II loads the DMA registers from PCI memory
and executes the transfers described by these registers. In the direct mode, the PCI
master directly programs the DMA registers.
The DMA controller also utilizes the command packet. A command packet is a
block of DMA registers stored in PCI memory. A command packet may be linked to
another command packet so that when the DMA has finished the operations
described by one command packet, the DMA controller can automatically move on
to the next command packet in the linked-list of command packets (refer to “DMA
Controller” on page 2-77 of the Universe II User’s Manual).
4-18
Themis Computer
A
Appendix
Connector Pinouts and LED Indicators
This appendix describes connector pinouts and their signals, as well as LED status
indicators, for the TPPC64 and its associated boards. The TPPC64 front-panel connectors and LEDs, PMC/XMC Carrier Boards (2P2 and 2P3), Paddle Board, and
Memory Module are each presented as individual sections.
A.1
CPU-0 Baseboard
A.1.1
CPU-0 Front-Panel Connectors
A.1.1.1 Serial Port A (RS232) and Port B (RS232)
z
Connector Type: 2 stacked D-Subminiature, Micro D (DB9 plug)
z
Manufacturer; Part: ITT Cannon; MDSM-18PE-Z10
z
Themis Cable P/N: 106878
Serial Port A (TTYA) and Port B (TTYB) are installed on the front faceplate of the
CPU-0 Baseboard (see Appendix C, “Front-Panel I/O Connections and LEDs”). A
connector pinout for both Serial Port A and Port B is given in Figure A-1 on page A2, and connector-pin signals are described in Table A-1, page A-2.
As can be seen from Table A-1, both Port A and Port B follow RS232 protocol and
provide full modem support.
Themis Computer
A-1
TPPC64 Hardware Manual
Serial Ports
A
B
Symbol
1
6
9
CPU-0 Board
5
J2
Figure A-1. Dual Serial Ports A and B Connector Pinout
Table A-1. Serial Ports A and B Connector-Pin Signals
Signal Name
PC board
is marked:
Port A
Pina
TTY A
Signal
Description
TTY B
Signal
Port B
Pina
PC board
is marked:
1
DCD
Carrier Detect
DCD
1
2
RXD
Receive Data
RXD
2
3
TXD
Transmit Data
TXD
3
4
DTR
Data Terminal Ready
DTR
4
B5
5
GND
Signal Ground
GND
5
A5
B6
6
DSR
Data Set Ready
DSR
6
A6
7
RTS
Request to send
RTS
7
8
CTS
Clear to send
CTS
8
9
RI
Ring indicator
RI
9
B1
B9
A1
A9
a—Important: The A and B associated with Serial Port connector pins on PC boards are interpreted as follows. Port
A pins are marked with a B. Port B pins are marked with an A.
A-2
Themis Computer
A—Connector Pinouts and LED Indicators
CPU-0 Baseboard
A.1.1.2 USB Port A and Port B
z
Connector Type: Type A, Dual Stacked (USB 1.1 standard)
z
Manufacturer; Part: AMP; 787617-4
Dual USB Ports A (USB0) and B (USB1) are installed on the front faceplate of the
CPU-0 Baseboard (see Appendix C, “Front-Panel I/O Connections and LEDs”). A
connector pinout for this stacked connector is given in Figure A-2; connector-pin
signals are described in Table A-2. USB Ports A and B support the USB 1.1 standard.
Symbol
USB Ports
A
B
CPU-0 Board
1
1
2
2
3
3
4
4
J6
Figure A-2. Dual USB Ports A and B Connector Pinout
Table A-2. USB Ports A and B Connector-Pin Signals
Pin
Themis Computer
USB Signal
Description
A1
USB0_PWR
Port A Power
A2
USB0_D_N
Port A Data - Negative
A3
USB0_D_P
Port A Data - Positive
A4
USB0_GND
Port A Ground
B1
USB1_PWR
Port B Power
B2
USB1_D_N
Port B Data - Negative
B3
USB1_D_P
Port B Data - Positive
B4
USB1_GND
Port B Ground
A-3
TPPC64 Hardware Manual
A.1.1.3 Gigabit Ethernet (TPE) Port A1 and Port A2
z
Connector Type: Dual RJ45 GBE Connector, 8 Pin per RJ45 (16-pin total)
z
Manufacturer; Part: Transpower/Tyco; 1610005-4
Ethernet (TPE) Port A1 and Port A2 on the front faceplate are each supported by an
RJ45 connector with two embedded LEDs (see Figure A-3) that supports 10/100/
1000Base-T transmission rates and is installed directly on the CPU-0 Baseboard.
Connector-pin signals as well as LED interpretation are described in Table A-3.
Symbol
Gigabit Ethernet Ports
A1
A2
Speed LED
1
8
Activity LED
1
8
J3
CPU-0 Board
Figure A-3. Ethernet Connector Pinout
Table A-3. Gigabit Ethernet Connector-Pin Signals and LED Interpretation
Pin
Signal
Description
1
TRD0+
Transmit/Receive D0+
2
TRD0-
Transmit/Receive D0-
3
TRD1+
Transmit/Receive D1+
4
TRD2+
Transmit/Receive D2+
5
TRD2-
Transmit/Receive D2-
6
TRD1-
Transmit/Receive D1-
7
TRD3+
Transmit/Receive D3+
8
TRD3-
Transmit/Receive D3-
A-4
LED
LED On/Off State
Interpretation
Yellow
(Top)
= Link
Speed
ON (Steady)
10 Mb/s
OFFa
100 Mb/s
OFFa
1000 Mb/s
Green
(Bottom)
= Link
Activity
Flashing rate is 30 ms for
each transmission/receive
activity.
a. Both 100 Mb/s and 1000 Mb/s transmission rates are determined by LEDs placed below the dual Gigabit Ethernet RJ45
connectors at the bottom of the TPPC64 faceplate.
Each Ethernet port, A1 and A2, is assigned a 100 Mb/s LED
and a 1000 Mb/s LED, which turn “ON” to indicate the speed of
the port.
Themis Computer
A—Connector Pinouts and LED Indicators
CPU-0 Baseboard
A.1.1.4 Ultra320 SCSI Port A
z
Connector Type: Single SCSI Connector, 68 Pin, 0.8mm pitch
z
Manufacturer; Part: Honda Tsushin; HDRA-E68LFDT-SLA
z
Themis Cable P/N: 108712
SCSI A is an Ultra320-protocol (320 MB/sec) port that is mounted directly to the
faceplate of the CPU-0 Baseboard. Figure A-4 shows the pinout of this connector,
with connector-pin signals described in Table A-4 on page A-6.
Note: SCSI Port B signals are accessed through the VME P2 backplane connector (see Figure A-17, page A-22).
SCSI Port
A
Symbol
68
34
35
1
CPU-0 Board
J4
Figure A-4. SCSI A Connector Pinout
Themis Computer
A-5
TPPC64 Hardware Manual
Table A-4. SCSI Port A Connector-Pin Signals
A-6
Pin
Signal
1
+DB(12)
2
Description
Pin
Signal
Description
+ Data 12
35
–DB(12)
–Data 12
+DB(13)
+ Data 13
36
–DB(13)
–Data 13
3
+DB(14)
+ Data 14
37
–DB(14)
–Data 14
4
+DB(15)
+ Data 15
38
–DB(15)
–Data 15
5
+DB(P1)
+ Parity 1
39
–DB(P1)
–Parity 1
6
+DB(0)
+ Data 0
40
–DB(0)
–Data 0
7
+DB(1)
+ Data 1
41
–DB(1)
–Data 1
8
+DB(2)
+ Data 2
42
–DB(2)
–Data 2
9
+DB(3)
+ Data 3
43
–DB(3)
–Data 3
10
+DB(4)
+ Data 4
44
–DB(4)
–Data 4
11
+DB(5)
+ Data 5
45
–DB(5)
–Data 5
12
+DB(6)
+ Data 6
46
–DB(6)
–Data 6
13
+DB(7)
+ Data 7
47
–DB(7)
–Data 7
14
+DB(P0)
+ Parity 0
48
–DB(P0)
–Parity 0
15
GND
Ground
49
GND
Ground
16
DiffSens
Sense Differential
50
GND
Ground
17
TermPwr
Termination Power
51
TermPwr
Termination Power
18
TermPwr
Termination Power
52
TermPwr
Termination Power
19
Open
Not Connected
53
Open
Not Connected
20
SCSI Sense
Sense Cable
54
GND
Ground
21
+ATN
+ Attention
55
–ATN
–Attention
22
GND
Ground
56
GND
Ground
23
+BSY
+ Busy
57
–BSY
–Busy
24
+ACK
+ Acknowledge
58
–ACK
–Acknowledge
25
+RST
+ Reset
59
–RST
–Reset
26
+MSG
+ Message
60
–MSG
–Message
27
+SEL
+ Select
61
–SEL
–Select
28
+CD
+ Command
62
–CD
–Command
29
+REQ
+ Request
63
–REQ
30
+I/O
+ Input/Output
64
–I/O
31
+DB(8)
+ Data 8
65
–DB(8)
–Data 8
32
+DB(9)
+ Data 9
66
–DB(9)
–Data 9
33
+DB(10)
+ Data 10
67
–DB(10)
–Data 10
34
+DB(11)
+ Data 11
68
–DB(11)
–Data 11
–Request
–Input/Output
Themis Computer
A—Connector Pinouts and LED Indicators
CPU-0 Baseboard
A.1.2
CPU-0 VME Backplane Connectors
The CPU-0 Baseboard is connected to the J1/J2 VME64 bus backplane through 3row P1 and 5-row P2 VME64 connectors. These are described in the following sections.
A.1.2.1 VME64 P1 Connector
z
Connector Type: 3-row x 32-pin (96-pin, male) VME64
z
Manufacturer; Part: Harting; 09031966921
A pinout of the VME64 P1 connector is shown in Figure A-5; connector-pin signals
are described in Table A-5 on page A-8.
32
Bottom Edge of Board
P1
1
Row C
B
A
P1701
Figure A-5. CPU-0 Baseboard VME64 P1 Connector Pinout
Note: In Table A-5:
• “NC” means No Connection
• “_L” indicates an active Low
Themis Computer
A-7
TPPC64 Hardware Manual
Table A-5. CPU-0 Baseboard VME64 P1 Connector-Pin Signals
Pin
A-8
Row A Signal
Row B Signal
Row C Signal
1
VME_<D00>
VME_BBSY_L
VME_<D08>
2
VME_<D01>
VME_BCLR_L
VME_<D09>
3
VME_<D02>
VME_ACFAIL_L
VME_<D10>
4
VME_<D03>
VME_BGIN_L<0>
VME_<D11>
5
VME_<D04>
VME_BGOUT_L<0>
VME_<D12>
6
VME_<D05>
VME_BGIN_L<1>
VME_<D13>
7
VME_<D06>
VME_BGOUT_L<1>
VME_<D14>
8
VME_<D07>
VME_BGIN_L<2>
VME_<D15>
9
GND
VME_BGOUT_L<2>
GND
10
VME_SYSCLK
VME_BGIN_L<3>
VME_SYSFAIL_L
11
GND
VME_BGOUT_L<3>
VME_BERR_L
12
VME_DS_L<1>
VME_BR_L<0>
VME_SYSRESET_L
13
VME_DS_L<0>
VME_BR_L<1>
VME_WORD_L
14
VME_WRITE_L
VME_BR_L<2>
VME_AM<5>
15
GND
VME_BR_L<3>
VME_A<23>
16
VME_DTACK_L
VME_AM<0>
VME_A<22>
17
GND
VME_AM<1>
VME_A<21>
18
VME_AS_L
VME_AM<2>
VME_A<20>
19
GND
VME_AM<3>
VME_A<19>
20
VME_IACK_L
GND
VME_A<18>
21
VME_IACKIN_L
NC
VME_A<17>
22
VME_IACKOUT_L
NC
VME_A<16>
23
VME_AM<04
GND
VME_A<15>
24
VME_A<07>
VME_IRQ_L<7>
VME_A<14>
25
VME_A<06>
VME_IRQ_L<6>
VME_A<13>
26
VME_A<05>
VME_IRQ_L<5>
VME_A<12>
27
VME_A<04>
VME_IRQ_L<4>
VME_A<11>
28
VME_A<03>
VME_IRQ_L<3>
VME_A<10>
29
VME_A<02>
VME_IRQ_L<2>
VME_A<09>
30
VME_A<01>
VME_IRQ_L<1>
VME_A<08>
31
-12V (Not Used)
NC
+12V
32
VCC
VCC
VCC
Themis Computer
A—Connector Pinouts and LED Indicators
CPU-0 Baseboard
A.1.2.2 VME64 P2 Connector
z
Connector Type: 5-row x 32-pin (160-pin, male) VME64
z
Manufacturer; Part: Harting; 02-01-160-2101
A pinout of the VME64 P2 connector is shown in Figure A-6; connector-pin signals
are described in Table A-6 on page A-10.
32
Bottom Edge of Board
P2
1
Row D
C
B
A
P1802
Row Z
Figure A-6. CPU-0 Baseboard VME64 P2 Connector Pinout
Note: In Table A-6:
• “NC” means No Connection.
• “_L” indicates an active Low.
• (–) and (+) indicate one member of a signal pair.
• A thick border is used to group signals that are associated.
Themis Computer
A-9
TPPC64 Hardware Manual
Table A-6. CPU-0 Baseboard VME64 P2 Connector-Pin Signals
Pin
Row Z Signal
Row A Signal
Row B Signal
Row C Signal
Row D Signal
1
TP1_RXD_P
+12V AUX
+5V
+5V
I2C_VME_DATA
2
GND
GND
GND
I2C_VME_INT_L
I2C_VME_CLK
3
TP1_RXD_N
+12V AUX
NC
SCSI_B_TERMPWR
SCSI_B_-DIFFSENS
4
GND
GND
VME_A[24]
SCSI_B_ATN(–)
SCSI_B_ATN(+)
5
TP1_TXD_P
+12V AUX
VME_A[25]
SCSI_B_BSY(–)
SCSI_B_BSY(+)
6
GND
GND
VME_A[26]
SCSI_B_ACK(–)
SCSI_B_ACK(+)
7
TP1_TXD_N
+12V AUX
VME_A[27]
SCSI_B_RST(–)
SCSI_B_RST(+)
8
GND
GND
VME_A[28]
SCSI_B_MSG(–)
SCSI_B_MSG(+)
9
TP1_REF
GPIO0
VME_A[29]
SCSI_B_SEL(–)
SCSI_B_SEL(+)
10
GND
GND
VME_A[30]
SCSI_B_CD(–)
SCSI_B_CD(+)
11
USB5_P (F+)
USB2_P (C+)
VME_A[31]
SCSI_B_REQ(–)
SCSI_B_REQ(+)
12
GND
USB2_N (C–)
GND
SCSI_B_IO(–)
SCSI_B_IO(+)
13
USB5_N (F–)
GND
+5V
SCSI_B_DAT[0](–)
SCSI_B_DAT[0](+)
14
GND
USB3_P (D+)
VME_D[16]
SCSI_B_DAT[1](–)
SCSI_B_DAT[1](+)
15
PHY_LED1
USB3_N (D–)
VME_D[17]
SCSI_B_DAT[2](–)
SCSI_B_DAT[2](+)
16
GND
GND
VME_D[18]
SCSI_B_DAT[3](–)
SCSI_B_DAT[3](+)
17
PHY_LED2
WD_ALARM
VME_D[19]
SCSI_B_DAT[4](–)
SCSI_B_DAT[4](+)
18
GND
TTYA_TXD
VME_D[20]
SCSI_B_DAT[5](–)
SCSI_B_DAT[5](+)
19
GPIO2
TTYA_RXD
VME_D[21]
SCSI_B_DAT[6](–)
SCSI_B_DAT[6](+)
20
GND
TTYB_TXD
VME_D[22]
SCSI_B_DAT[7](–)
SCSI_B_DAT[7](+)
21
GPIO3
TTYB_RXD
VME_D[23]
SCSI_B_PAR[0](–)
SCSI_B_PAR[0](+)
22
GND
USB4_P (E+)
SCSI_B_DAT[8](–)
SCSI_B_DAT[8](+)
23
AC97_BCLK
USB4_N (E–)
VME_D[24]
SCSI_B_DAT[9](–)
SCSI_B_DAT[9](+)
24
GND
GPIO1
VME_D[25]
SCSI_B_DAT[10](–)
SCSI_B_DAT[10](+)
25
AC97_DOUT
+12V AUX
VME_D[26]
SCSI_B_DAT[11](–)
SCSI_B_DAT[11](+)
26
GND
GND
VME_D[27]
SCSI_B_DAT[12](–)
SCSI_B_DAT[12](+)
27
AC97_DIN
+12V AUX
VME_D[28]
SCSI_B_DAT[13](–)
SCSI_B_DAT[13](+)
28
GND
GND
VME_D[29]
SCSI_B_DAT[14](–)
SCSI_B_DAT[14](+)
29
AC97_SYNC
+12V AUX
VME_D[30]
SCSI_B_DAT[15](–)
SCSI_B_DAT[15](+)
30
GND
GND
VME_D[31]
SCSI_B_PAR[1](–)
SCSI_B_PAR[1](+)
31
AC97_RST
+12V AUX
GND
+5V
GND
32
GND
GND
+5V
+5V
+5V
A-10
GND
Themis Computer
A—Connector Pinouts and LED Indicators
CPU-0 Baseboard
A.1.3
Push-Button RESET
A push-button RESET switch is located on the Front Panel of the CPU-0 Baseboard,
and is accessible by inserting an object the size of a wooden toothpick or similar
non-conducting pointed object. The RESET switch will initiate a POR Reset to the
IBM PPC970FX, which is propagated throughout the TPPC64.
A.1.4
Status LEDs
The following LEDs are located on the Front Panel of the CPU-0 Baseboard (see
Appendix C, “Front-Panel I/O Connections and LEDs”):
• System Status LEDs: User, Shutdown, Power OK, and Enable
• VME Status LEDs: Reset, System Fail, VME Master, and VME Slave
Table A-7. Color Interpretation of Front-Panel LEDs
Type
System Status
VME Status
LED
Color
Type
Interpretation
User
Red
Static
• Defined by user
Shutdown
Orange
Static
• TPPC64 system is shutting down
Power OK
Yellow
Static
• System power is operational
Enable
Green
Static
• System is up
Reset
Red
Static
• VME system reset
System Fail
Orange
Static
• VME system failure
Mastera
Yellow
Static
• Master VME access
Slave
Green
Static
• Slave VME access
a—If the VME Master LED is ON, the TPPC64 currently owns the VME bus. This does not mean that the TPPC64 is accessing
the VME bus, however. If the TPPC64 is set to VME RWD (Release When Done) mode, it releases VME ownership after each
VME cycle. This is accomplished by de-asserting the BBSY signal. If the LED is ON, setting the TPPC64 to VME ROR
(Release On Request) mode can also mean that the TPPC64 owns the VME bus, but is not accessing it.
Setting the TPPC64 in VME RWD mode increases VME performance, since an arbitration phase is not needed for each VME
cycle. But it can also have a deep impact on others boards in the VME chassis. Setting the system to ROR or RWD mode is
done through an environment variable.
Themis Computer
A-11
TPPC64 Hardware Manual
A.1.5
CPU-0 P2 Paddle Board
Figure A-7 shows the I/O connectors, described in the following sections, that are
mounted on the TPPC64 CPU-0 P2 Paddle Board (P/N 112115-001 for 5-row; 005
for 3-row). The pinout for the +12-volt auxiliary power connector is shown in Figure
A-8; connector-pin signals are described in Table A-8, page A-13. Power cable P/N
111230-001 is used to connect to a +12-volt power source on the VME rack.
To VME 3-Row VME P2 Connector
(a 5-Row Paddle Board is also available)
I2C
Connector
+12V Auxiliary
Power Connector
Stereo Audio In
Stereo Audio Out
10/100Base-T
Ethernet (RJ45)
F
E
D
C
USB F (USB5)
USB E (USB4)
Grounding Block
● 3-row VME only
USB D (USB3)
USB C (USB2)
Ultra320 SCSI B
Connector
● 5-row = LVD
● 3-row = SE only
Front View
Serial A
A B
Serial B
GPIO Connector
Front View
Figure A-7. TPPC64 CPU-0 P2 Paddle Board I/O Connections (Top-Side View)
VME P2 Connector
1
6
Top Surface View
J9
Top Edge View
+12V Power Connector
Figure A-8. +12V Power Connector Pinout
A-12
Themis Computer
A—Connector Pinouts and LED Indicators
CPU-0 Baseboard
Table A-8. +12V Power Connector-Pin Signals
Pin 1
Pin 2
Pin 3
Pin 4
Pin 5
Pin 6
+12V
+12V
+12V
Ground
Ground
Ground
A.1.5.1 Ultra320 SCSI Port B Connector
z
Connector Type: High-density, 68 Pin (Female), Shielded Subminiature-D
z
Manufacturer; Part: AMP; 749069-7
The 68-pin (female) Ultra320 SCSI Port B is single-ended (SE) for 3-row P2 connectors, and low-voltage differential (LVD) for 5-row P2 connectors. Figure A-9
shows the connector pinout; Table A-10, page A-14, describes connector-pin signals.
SCSI Symbol
1
34
VME P2 Connector
J05
Paddle Board
Component Side
35
68
Figure A-9. Paddle Board Ultra320 SCSI Port B Connector Pinout
A.1.5.2 GPIO Header Connector
z
Connector Type: In-line 6-pin Header (Male)
z
Manufacturer; Part Number: Molex; 22-11-2062
The GPIO header is a straight, 1x6 male connector with the pinout shown in Figure
A-10, and the connector-pin signals described in Table A-9.
J11
VME P2 Connector
1
Paddle Board
Component Side
6
Figure A-10. GPIO Connector Pinout
Table A-9. GPIO Connector-Pin Signals
Pin 1
Pin 2
Pin 3
Pin 4
Pin 5
Pin 6
Ground
GPIO0
GPIO1
GPIO2a
GPIO3a
WD-ALARM_L
a—Signal is accessible through a 5-row P2 connector only.
Themis Computer
A-13
TPPC64 Hardware Manual
Table A-10. Paddle Board Ultra320 SCSI Port B Connector-Pin Signals
Pin
Signal Name
a
(H = High)
Pin
Signal Name
35
DAT_L12a
1
DAT_H12
2
DAT_H13
36
DAT_L13
3
DAT_H14
37
DAT_L14
4
DAT_H15
38
DAT_L15
5
PAR_H1
39
PAR_L1
6
DAT_H0
40
DAT_L0
7
DAT_H1
41
DAT_L1
8
DAT_H2
42
DAT_L2
9
DAT_H3
43
DAT_L3
10
DAT_H4
44
DAT_L4
11
DAT_H5
45
DAT_L5
12
DAT_H6
46
DAT_L6
13
DAT_H7
47
DAT_L7
14
PAR_H0
48
PAR_L0
15
GND
49
GND
16
DIFFSENSE
50
No Connection
17
TERMPWR
51
TERMPWR
18
TERMPWR
52
TERMPWR
19
No Connection
53
No Connection
20
SENSE_P2_L
54
GND
21
ATN_H
55
ATN_L
22
GND
56
GND
23
BUSY_H
57
BUSY_L
24
ACK_H
58
ACK_L
25
RST_H
59
RST_L
26
MSG_H
60
MSG_L
27
SEL_H
61
SEL_L
28
CD_H
62
CD_L
29
REQ_H
63
REQ_L
30
IO_H
64
IO_L
31
DAT_H8
65
DAT_L8
32
DAT_H9
66
DAT_L9
33
DAT_H10
67
DAT_L10
34
DAT_H11
68
DAT_L11
(L = Low)
a—“H” indicates an active high signal, and “L” indicates an active low signal.
A-14
Themis Computer
A—Connector Pinouts and LED Indicators
CPU-0 Baseboard
A.1.5.3 I2C Header Connector (5-row P2 only)
z
Connector Type: In-line 6-pin Header (Male)
z
Manufacturer; Part Number: Molex; 22-11-2062
A pinout of the I2C male 1x6 header connector is shown in Figure A-11, with connector-pin signals described in Table A-11.
J10
6
VME P2 Connector
11
Paddle Board
Component Side
Figure A-11. I2C Connector Pinout
Table A-11. I2C Connector-Pin Signals
Pin 1
Pin 2
Pin 3
Pin 4
Pin 5
Pin 6
Ground
VME_DATA
Ground
VME_CLK
Ground
VME_INT_L
A.1.5.4 Stereo Audio In/Out Connectors (5-row P2 only)
z
Connector Type: Dual Stereo mini-Jack (3.5 mm)
z
Manufacturer; Part: Connect-Tech; CTP-354W-S1
The dual stereo (L/R) audio connectors on the front edge of the P2 Paddle Board are
shown in Figure A-12.
Stereo
In Jack
Front View
J7
Stereo
Out Jack
J8
Paddle Board Edge
Figure A-12. Dual Stereo Audio Connector
Themis Computer
A-15
TPPC64 Hardware Manual
A.1.5.5 Ethernet 10/100Base-T Connector (5-row P2 only)
z
Connector Type: RJ45 TPE
z
Manufacturer; Part: Pulse; J0011D01B
The TPPC64 P2 Paddle Board contains a single Ethernet 10/100Base-T integratedmagnetics port (RJ45) on its front edge (see Figure A-13 for a connector pinout, and
Table A-13 for pin signals). The RJ45 connector housing also contains two embedded LEDs, one (yellow) to indicate the ethernet link speed, the second (green) to display network activity (see Figure A-13).
10/100Base-T
Ethernet
Symbol
Speed
On = 100 Mbit/sec
8
Link LED
(Yellow)
1
Network Activity LED
(Green)
J4
Off = 10 Mbit/sec
Paddle Board Edge
Front View
Figure A-13. Ethernet 10/100Base-T Connector Pinout
Table A-12. Ethernet 10/100Base-T Connector-Pin Signals
Pin
Signal Name
Description
1
TXD+
Transmit data (positive)
2
TXD–
Transmit data (negative)
3
RXD+
Receive data (positive)
6
RXD–
Receive data (negative)
7
NC
No connection
8
GND
Chassis ground
4
5
A-16
Themis Computer
A—Connector Pinouts and LED Indicators
CPU-0 Baseboard
A.1.5.6 Serial Port A (RS232) and Port B (RS232)
z
Connector Type: 2 stacked D-Subminiature, Micro D (DB9 plug)
z
Manufacturer; Part: ITT Cannon; MDSM-18PE-Z10
z
Themis Cable P/N: 106878
The TPPC64 P2 Paddle Board contains two RS232 serial ports (A and B) on its front
edge (see Figure A-14 for a connector pinout, and Table A-13 for pin signals). Note
that serial ports A and B have full modem support when accessed from the front
panel, but only minimal signalling (Tx, Rx, and GND) from the Paddle Board.
Symbol
Serial Ports
A
B
J6
5
Important Note
SB02 must be configured
before serial Ports A and B can be
accessed from the P2 Paddle Board.
9
6
1
Paddle Board Edge
Front View
Figure A-14. Paddle Board Serial A and B Connector Pinouts
Table A-13. Paddle Board Serial A and B Connector-Pin Signals
Serial Port A and Port B
Themis Computer
Pin
Signal Name
Pin
Signal Name
1
NC
6
NC
2
RXD
7
NC
3
TXD
8
NC
4
NC
9
NC
5
GND
Note: NC = No Connect
A-17
TPPC64 Hardware Manual
A.1.5.7 USB Ports C/D and E/F
z
Connector Type: Type A, Dual Stacked (USB 1.1 standard), two required
z
Manufacturer; Part: AMP; 787617-4
USB Ports C (USB2), D (USB3), E (USB4), and F (USB5) are installed on the front
edge of the TPPC64 Paddle Board, with dual-stacked Ports C and D below dualstacked Ports E and F (see Figure A-7 on page A-12). A pinout for these stacked
connectors is given in Figure A-15, and connector-pin signals are described in
Table A-14. All USB Ports support the USB 1.1 standard.
Note that USB Port F (USB5) is accessible only through a 5-row VME P2 connector.
Symbol
USB Ports
D / F*
C/E
J2 / J3
Front View
4
4
3
3
2
2
1
1
* USB Port F is accessible only
Paddle Board Edge
through a 5-row VME P2 Connector.
Figure A-15. USB Ports C, D, E, and F Connector Pinouts
Table A-14. USB Ports C, D, E, and F Connector-Pin Signals
A-18
Pin
USB Signal
C1
USB2_PWR
C2
Description
Pin
USB Signal
Description
Port C Power
E1
USB4_PWR
Port E Power
USB2_D_N
Port C Data - Negative
E2
USB4_D_N
Port E Data - Negative
C3
USB2_D_P
Port C Data - Positive
E3
USB4_D_P
Port E Data - Positive
C4
USB2_GND
Port C Ground
E4
USB4_GND
Port E Ground
D1
USB3_PWR
Port D Power
F1
USB5_PWR
Port F Power
D2
USB3_D_N
Port D Data - Negative
F2
USB5_D_N
Port F Data - Negative
D3
USB3_D_P
Port D Data - Positive
F3
USB5_D_P
Port F Data - Positive
D4
USB3_GND
Port D Ground
F4
USB5_GND
Port F Ground
Themis Computer
A—Connector Pinouts and LED Indicators
CPU-1 Baseboard
A.2
CPU-1 Baseboard
A.2.1
CPU-1 Front-Panel Connectors
All front-panel connectors for the TPPC64 are installed on the CPU-0 Baseboard.
CPU-1 cannot be used by itself; if used, a CPU-1 Baseboard must always be
attached to a CPU-0 Baseboard.
A.2.2
CPU-1 VME Backplane Connectors
The CPU-1 Baseboard is connected to the J1 and J2 VME64 bus backplane through
3-row P1 and 3-row P2 VME64 connectors. These are described in Figure A-16 and
the following two sections.
32
P1/P2
1
Row C
B
A
Bottom Edge of Board
Figure A-16. CPU-1 P1/P2 VME Connector Pinouts
A.2.2.1 VME64 P1 Connector
z
Connector Type: 3-row x 32-pin (96-pin, male) VME64
z
Manufacturer; Part: Harting; 09031966921
The pinout and connector-pin signals of the VME64 P1 connector for the CPU-1
Baseboard are shown in Table A-15 on page A-20.
A.2.2.2 VME64 P2 Connector
z
Connector Type: 3-row x 32-pin (96-pin, male) VME64
z
Manufacturer; Part: Harting; 09031966921
The pinout and connector-pin signals of the VME64 P2 connector for the CPU-1
Baseboard are shown in Table A-16 on page A-21.
Themis Computer
A-19
TPPC64 Hardware Manual
Table A-15. CPU-1 VME64 P1 Connector Pin Signals
Pin
Row A Signal
1
NC
2
a
Row B Signal
Row C Signal
NC
NC
NC
NC
NC
3
NC
NC
NC
4
NC
VME_BGIN_L<0>
NC
5
NC
VME_BGOUT_L<0>
NC
6
NC
VME_BGIN_L<1>
NC
7
NC
VME_BGOUT_L<1>
NC
8
NC
VME_BGIN_L<2>
NC
9
GND
VME_BGOUT_L<2>
GND
10
NC
VME_BGIN_L<3>
NC
11
GND
VME_BGOUT_L<3>
NC
12
NC
NC
NC
13
NC
NC
NC
14
NC
NC
NC
15
GND
NC
NC
16
NC
NC
NC
17
GND
NC
NC
18
NC
NC
NC
19
GND
NC
NC
20
NC
GND
NC
21
VME_IACKIN_L
NC
NC
22
VME_IACKOUT_L
NC
NC
23
NC
GND
NC
24
NC
NC
NC
25
NC
NC
NC
26
NC
NC
NC
27
NC
NC
NC
28
NC
NC
NC
29
NC
NC
NC
30
NC
NC
NC
31
-12V
NC
+12V
32
VCC
VCC
VCC
a—NC = No Connection
A-20
Themis Computer
A—Connector Pinouts and LED Indicators
CPU-1 Baseboard
Table A-16. CPU-1 VME64 P2 Connector Pin Signals
Pin
Row A Signal
Row B Signal
Row C Signal
1
+12V
+5V
NC
2
GND
GND
NC
3
+12V
NC
NC
4
GND
NC
NC
5
+12V
NC
NC
6
GND
NC
NC
7
+12V
NC
NC
8
GND
NC
NC
9
NC
NC
NC
10
GND
NC
NC
11
NC
NC
NC
12
GND
GND
NC
13
NC
+5V
NC
14
GND
NC
NC
15
NC
NC
NC
16
GND
NC
NC
17
NC
NC
NC
18
GND
NC
NC
19
NC
NC
NC
20
GND
NC
NC
21
NC
NC
NC
22
GND
GND
NC
23
NC
NC
NC
24
GND
NC
NC
25
+12V
NC
NC
26
GND
NC
NC
27
+12V
NC
NC
28
GND
NC
NC
29
+12V
NC
NC
30
GND
NC
NC
31
+12V
GND
NC
32
GND
+5V
NC
a
a—NC = No Connection
Themis Computer
A-21
TPPC64 Hardware Manual
A.2.3
CPU-1 PMC Card Slot Connectors
An optional PMC card can be connected to the CPU-1 Baseboard through three (3)
64-pin slot connectors: J1002, J1003, and J1004. This interface supports 3.3V, 32 or
64 bits, at 33 MHz or 66 MHz.
If an external PMC Carrier Board is not attached to CPU-1, the installed optional
PMC card can operate through the PCI-X Bus A at up to 133 MHz, 64 bits.
z
Connector Type: 2-row x 32-pin (64-pin) 1-mm pin (3 required)
z
Manufacturer; Part: Amp; 120521-1
2
J1002, J1003, J1004
1
64
63
Figure A-17. PMC Card Slot Connector Pinout
PMC Card slot connector signals are described in the following sections.
Slot Connector J1002 (3.3V, 32 bit)
The PMC slot signals (32 bit) for connector J1002 are described in Table A-17 on
page A-23.
Slot Connector J1003 (3.3V, 32 bit)
The PMC slot signals (32 bit) for connector J1003 are described in Table A-18 on
page A-24.
Slot Connector J1004 (3.3V, 64 bit)
The PMC slot signals (64 bit) for connector J1004 are described in Table A-19 on
page A-25.
A-22
Themis Computer
A—Connector Pinouts and LED Indicators
CPU-1 Baseboard
Table A-17. PMC Slot Connector J1002 Signals (32 bit)
Pin
Themis Computer
Signal
Pin
Signal
1
No Connection
2
-12V
3
Ground
4
INTB#
5
INTC#
6
INTD#
7
BUSMODE1#
8
+5V
9
INTA#
10
PCI-RSVD
11
Ground
12
PCI-RSVD
13
CLK
14
Ground
15
Ground
16
GNT#
17
REQ#
18
+5V
19
V(I/0)
20
AD[31]
21
AD[28]
22
AD[27]
23
AD[25]
24
Ground
25
Ground
26
C/BE[3]#
27
AD[22]
28
AD[21]
29
AD[19]
30
+5V
31
V(I/O)
32
AD[17]
33
FRAME#
34
Ground
35
Ground
36
IRDY#
37
DEVSEL#
38
+5V
39
Ground
40
LOCK#
41
SDONE#
42
SBO#
43
PAR
44
Ground
45
V(I/0)
46
AD[15]
47
AD[12]
48
AD[11]
49
AD[09]
50
+5V
51
Ground
52
C/BE[0]#
53
AD[06]
54
AD[05]
55
AD[04]
56
Ground
57
V(I/O)
58
AD[03]
59
AD[02]
60
AD[01]
61
AD[0]
62
+5V
63
Ground
64
REQ64#
A-23
TPPC64 Hardware Manual
Table A-18. PMC Slot Connector J1003 Signals (32 bit)
Pin
A-24
Signal
Pin
Signal
1
+12V
2
TRST#
3
TMS
4
TDO
5
TDI
6
Ground
7
Ground
8
PCI-RSVD
9
PCI-RSVD
10
PCI-RSVD
11
BUSMODE2#
12
+3.3V
13
RST#
14
BUSMODE3#
15
+3.3V
16
BUSMODE4#
17
PCI-RSVD
18
Ground
19
AD[30]
20
AD[29]
21
Ground
22
AD[26]
23
AD[24]
24
+3.3V
25
IDSEL
26
AD[23]
27
+3.3V
28
AD[20]
29
AD[18]
30
Ground
31
AD[16]
32
C/BE[2]#
33
Ground
34
PCI-RSVD
35
TRDY#
36
+3.3V
37
Ground
38
STOP#
39
PERR#
40
Ground
41
+3.3V
42
SERR#
43
C/BE[1]#
44
Ground
45
AD[14]
46
AD[13]
47
Ground
48
AD[10]
49
AD[08]
50
+3.3V
51
AD[07]
52
PCI-RSVD
53
+3.3V
54
PCI-RSVD
55
PMC-RSVD
56
Ground
57
PMC-RSVD
58
PCI-RSVD
59
Ground
60
PCI-RSVD
61
ACK64#
62
+3.3V
63
Ground
64
PCI-RSVD
Themis Computer
A—Connector Pinouts and LED Indicators
CPU-1 Baseboard
Table A-19. PMC Slot Connector J1004 Signals (64 bit)
Pin
Themis Computer
Signal
Pin
Signal
1
PCI-RSVD
2
Ground
3
Ground
4
C/BE[7]#
5
C/BE[6]#
6
C/BE[5]#
7
C/BE[4]#
8
Ground
9
V(I/O)
10
PAR64
11
AD[63]
12
AD[62]
13
AD[61]
14
Ground
15
Ground
16
AD[60]
17
AD[59]
18
AD[58]
19
AD[57]
20
Ground
21
V(I/O)
22
AD[56]
23
AD[55]
24
AD[54]
25
AD[53]
26
Ground
27
Ground
28
AD[52]
29
AD[51]
30
AD[50]
31
AD[49]
32
Ground
33
Ground
34
AD[48]
35
AD[47]
36
AD[46]
37
AD[45]
38
Ground
39
V(I/O)
40
AD[44]
41
AD[43]
42
AD[42]
43
AD[41]
44
Ground
45
Ground
46
AD[40]
47
AD[39]
48
AD[38]
49
AD[37]
50
Ground
51
Ground
52
AD[36]
53
AD[35]
54
AD[34]
55
AD[33]
56
Ground
57
V(I/O)
58
AD[32]
59
PCI-RSVD
60
PCI-RSVD
61
PCI-RSVD
62
Ground
63
Ground
64
PCI-RSVD
A-25
TPPC64 Hardware Manual
A.2.4
CPU-1 P2 Power Board
The TPPC64 CPU-1 P2 Power Board (P/N 112876-001=5 row/005=3 row), shown
in Figure A-18, is used only to provide +12 volts through a multi-wire cable connected to a +12-volt auxiliary power source on the VME chassis power supply. Specifically, attach the 6-pin male Molex connector end of a +12-volt power cable (P/N
111230-001) to the P1 connector of the Power Board; the two #6 spade lugs at the
other end of the cable are then connected as follows:
• Secure the lug from pins 1/2/3 to a +12-volt auxiliary source on the VME chassis power supply
• Secure the lug from pins 4/5/6 to a ground source on the VME chassis power
supply
To VME64
Backplane
+12 V Power Connector (P1)
4.175”
VME P2 Connector
Top Side
4.640”
3.585”
Figure A-18. TPPC64 CPU-1 Power Board
VME P2 Connector
1
6
Top Surface View
P1
Top Edge View
+12V Power Connector
Figure A-19. +12V Power Connector Pinout
Table A-20. +12V Power Connector-Pin Signals
A-26
Pin 1
Pin 2
Pin 3
Pin 4
Pin 5
Pin 6
+12V
+12V
+12V
Ground
Ground
Ground
Themis Computer
A—Connector Pinouts and LED Indicators
PMC/XMC Carrier Boards
A.3
PMC/XMC Carrier Boards
There are two types of Carrier Boards that will operate with the TPPC64: the 2P2
PMC/XMC Carrier Board and the 2P3 PMC Carrier Board.
Note: For more detailed information on Themis PMC/XMC Carrier Boards, refer
to the PMC/XMC Carrier Board Manual, Themis P/N 112826-020.
A.3.1
2P2 PMC/XMC Carrier Board
Caution: A new 2P2 PMC/XMC Carrier Board (P/N 112794-002) is designed to
operate with the TPPC64 (the original 2P2 PMC Carrier Board is not supported).
DO NOT ATTEMPT to operate the TPPC64 with the original 2P2 PMC Carrier Board.
I/O components on the TPPC64/2P2 PMC/XMC Carrier Board include:
• Gigabit Ethernet Port B with embedded transformer and dual LEDs (RJ45)
• Stereo Audio Line-in/Mic-in and Line-out or Headphones-out
• User-defined 16-position rotary switch
• Serial (TTY) Port A and Port B [System Serial Port E and Port F] (RS232)
• PMC/XMC Module slot 1 and slot 2 (see following Note)
• I2C signals available as P2 option
Note: The 2P2 PMC/XMC Carrier Board has been designed to support a variety
of CPU baseboards offered by Themis Computer. Some of these baseboards have
PCI-Express ports that support the XMC capability of the 2P2 PMC/XMC Carrier
Board. The TPPC64, however, does not have PCI Express. When mated with a
TPPC64, the 2P2 PMC/XMC Carrier Board will function as a PMC-only carrier
since the XMC capability is not supported. Note that Figure A-20, page A-28,
shows both PMC and XMC Module connectors.
A.3.2
2P3 PMC Carrier Board
I/O components on the TPPC64/2P3 PMC Carrier Board include:
• PMC Module slot 1, slot 2, and slot 3
There are no I/O connectors installed directly on the front panel of the 2P3 PMC
Carrier Board. Any of the three PMC Modules installed into slots 1, 2, or 3 may contain I/O connectors, however.
Themis Computer
A-27
TPPC64 Hardware Manual
Note: Consult the manual shipped with each PMC/XMC Module installed on the
Carrier Board for a description of I/O functionality and connectivity.
2P2 PMC/XMC Carrier Board
To XMC Module
XMC Connector (J15)
PCI Express (x4)
XMC Connector (J16)
PMC/XMC Module Slot 2
User I/O
To PMC Module
Jn1 Connector (J11)
32-bit pins
Jn2 Connector (J12)
32-bit pins
Jn3 Connector (J13)
PMC/XMC Module Slot 1
64-bit pins
Jn4 Connector (J14)
User I/O
Top View
3.3-volt Key
5-volt Key
To Baseboard (TPPC64)
114-pin Plug Connector (Mictor)
PCI
Not installed for TA64
PCI Express
Note: Refer to the checkbox note in
Section A.3.1 for important
information on XMC connections.
3.3-volt Key
5-volt Key
Bottom View
Figure A-20. The 2P2 PMC/XMC Carrier Board (Top and Bottom Views)
A-28
Themis Computer
A—Connector Pinouts and LED Indicators
Memory Module Connector
A.4
Memory Module Connector
• Connector Type: 2-Part (Socket/Plug), 2-row, 240-pin, Board-to-Board
(Socket is mounted on Baseboard)
• Manufacturer; Part: Samtec; QSH-120-01-L-D-A (Hi-Speed Socket)
A single custom Memory Module is installed onto the TPPC64 CPU-0 Baseboard
with a 2-row, 240-pin plug that connects to a socket directly mounted onto the top
surface of the CPU-0 PCB (see Figure A-21).
Caution: Because of the VME Specification requiring a 0.8-inch interboard separation (see Figure 1-3 on page 1-5) between VME slots, only one Memory Module
can be installed onto a TPPC64 Baseboard (stacking not supported).
240
2
P11401 (Plug)
Side View
Mounted on Bottom side of Memory Module
Memory Module
P11401
J11401
239
1
239
1
Baseboard
J11401 (Socket/Receptacle)
J11401
Mounted on Baseboard Top side
240
2
Figure A-21. Memory Module Baseboard Connectors (Socket/Receptacle & Plug)
Themis Computer
A-29
TPPC64 Hardware Manual
A-30
Themis Computer
B
Appendix
Jumper-Pin and Solder-Bead Configurations
B.1
Overview
This appendix provides a summary of jumper-pin and solder-bead configurations for
all boards on the TPPC64. Jumper pins are considered “field-configurable” and
may be altered by a user on site. Solder beads are considered “factory-configurable”
and must not be altered by the user. If a solder bead requires reconfiguration, contact
Themis Customer Service.
Warning: Attempting to alter a solder-bead configuration could seriously damage
the TPPC64.
DO NOT ATTEMPT TO ALTER SOLDER-BEAD CONFIGURATIONS.
B.2
B.2.1
Field-Configurable Jumper Pins
CPU-0 Baseboard Jumper Pins
Jumper pins are found only on the top side (component side) of the TPPC64 CPU-0
Baseboard and are described in Table B-1 on page B-2.
Caution: If a jumper has NOT been installed, the setting of any Table B-1 jumper
pins can be “virtually” changed by a command through the Service Processor (see
chapter on “Service Processor Commands” in the TPPC64 Software Manual).
Themis Computer
B-1
TPPC64 Hardware Manual
In Table B-1, an ON jumper position means the jumper is installed, shorting the pins
and completing the circuit. OFF means there is no jumper installed, hence the path
between the pins is open, breaking the circuit. Figure B-1 on page B-3 provides the
location of the various jumpers on the TPPC64 CPU-0 Baseboard. In Figure B-1,
jumper pin 1 is identified with a square and a triangle.
Table B-1. CPU-0 Baseboard Jumper-Pin Settings (Top Side)
Jumper Pins
Jumper
Positiona
Description
ONb
Force SCSI B into single-ended (SE) mode when a 3-row VME backplane is
used, and connect SCSI B to VME P2.
OFF
Allow autosense mode to determine if SCSI B bus is SE or LVD mode.
ON
The TPPC64 CPU-0 board can be affected by a reset (SYSRST) on the
VMEbus.
OFF
The TPPC64 CPU-0 board cannot be affected by a reset (SYSRST) on the
VMEbus.
ON
The TPPC64 CPU-0 board cannot assert a reset (SYSRST) on the VMEbus.
OFF
The TPPC64 CPU-0 board may assert a reset (SYSRST) on the VMEbus.
ON
The TPPC64 board is forced to be the system controller (SYSCON) on the
VMEbus.
OFF
Autosensing is enabled to determine the VMEbus system controller.c
JP2
(see Table B-2)
JP3
JP4
JP5
a—Boldface = the default jumper position.
b—When the TPPC64 is accessed through a 3-row VME backplane, only SE mode is supported, and a jumper must be installed on JP2.
If there are one or more SE-mode SCSI devices present on the SCSI bus, the entire bus will run in SE mode.
c—The Universe-II operating mode (VME system controller vs. non-VME system controller) is determined by autosensing VME bus
grant #3 during power-up.
Table B-2. SCSI B Access Through VME P2 Connector
CPU-0 Baseboard SCSI B Port Access
VME P2 Connector
Mode?
Auto-Sensed?
Install JP2
Jumper?
3-row VME backplane
SE only
NO
YES
5-row VME backplanea
LVD or SE
YES
NO
a—5-row access requires custom Paddle Board
B-2
Themis Computer
B—Jumper-Pin and Solder-Bead Configurations
Field-Configurable Jumper Pins
JP2
VME P1
JP3
JP4
Legend
JP5
Jumper
OFF
Jumper
ON
Pin 1
VME P2
Top Side
Figure B-1. TPPC64 CPU-0 Baseboard Jumper-Pin Locations (Top Side)
Themis Computer
B-3
TPPC64 Hardware Manual
B.2.2
CPU-1 Baseboard Jumper Pins
The jumper pins on the TPPC64 CPU-1 Baseboard are all on the top side (component side) of the PCB. Jumper-pin default settings are given in Table B-3, with their
locations shown in Figure B-2 on page B-6.
Table B-3. CPU-1 Baseboard Jumper-Pin Settings (Top Side)
Jumper Pins
JP1
JP2
JP3
JP4
JP5
JP6
JP7
JP8
Jumper Positiona
Description
Short 1-2
VIO of CPU-1 PMC Module and attached PMC Carrier Board is 3.3V.
Short 2-3
VIO of CPU-1 PMC Module and attached PMC Carrier Board is 5V.
PCI-X Mode only. JP2 and JP3 are set together (see Table B-4 on page B-5) to define the
PCI-X speed of the PMC Module installed in CPU-1, and an attached PMC Carrier Board.
ON
Enable the “elastic” bus interface of the PPC970FX CPU-1.
OFF
Disable the “elastic” bus interface of the PPC970FX CPU-1.
ON
Enable CPU-1 “halt” when CPC925 CHKSTOP is asserted.
OFF
Disable CPU-1 “halt” when CPC925 CHKSTOP is asserted.
ON
Disable the POR debug mode of the IBM PPC970FX CPU-1.
OFF
Enable the POR debug mode of the IBM PPC970FX CPU-1.
PCI Mode only. JP7 and JP8 are set together (see Table B-5 on page B-5) to regulate the
PCI speed of the PMC Module installed in CPU-1, and an attached PMC Carrier Board.
Short 1-2
CPU-1 JTAG scan data input is from the CPU-0 board.
Short 2-3
CPU-1 JTAG scan data input is from the RISCwatch connector on the
CPU-1 board.
ON
Driver impedance of the CPU-1 PCI bridge for the secondary PCI bus
(PMC Module slot and PMC Carrier Board) is 20 ohms
OFF
Driver impedance of the CPU-1 PCI bridge for the secondary PCI bus
(PMC Module slot and PMC Carrier Board) is 40 ohms
ON
Driver impedance of the CPU-1 PCI bridge for the primary PCI bus
(CPU-0 board interface) is 20 ohms
OFF
Driver impedance of the CPU-1 PCI bridge for the primary PCI bus
(CPU-0 board interface) is 40 ohms
JP9
JP10
JP11
a—Boldface = the default jumper position.
B-4
Themis Computer
B—Jumper-Pin and Solder-Bead Configurations
Field-Configurable Jumper Pins
Table B-4. Setting CPU-1 PMC Module PCI-X Mode Clock Speed
JP2
JP3
PCI-X Clock Speed
ON
ON
66 MHz
OFF
OFF
100 MHz
OFF
ON
133 MHz
ON
OFF
Not Defined
Table B-5. Setting CPU-1 PMC Module PCI Mode Clock Speed
B.2.3
JP7
JP8
PCI Clock Speed
OFF
OFF
33 MHz
ON
OFF
66 MHz
OFF
ON
100 MHz
ON
ON
133 MHz
PMC/XMC Carrier Board Jumper Pins
There are no jumper pins on either the 2P2 PMC/XMC Carrier Board or the 2P3
PMC Carrier Board. Instead, the 2P2 PMC/XMC Carrier Board has jumper pads that
are either unshorted (“open”) or shorted by a resistor soldered directly to the pads
(see the PMC/XMC Carrier Board Manual, P/N 112826-020 for details).
Themis Computer
B-5
TPPC64 Hardware Manual
JP9
JP5
JP3
JP4
VME P1
U4
JP6
JP2
JP7
Legend
JP8
Jumper
OFF
Jumper
ON
U18
JP10
Pin 1
JP11
VME P2
JP1
Top Side
Figure B-2. TPPC64 CPU-1 Baseboard Jumper-Pin Locations (Top Side)
B-6
Themis Computer
B—Jumper-Pin and Solder-Bead Configurations
Factory-Configurable Solder Beads
B.3
B.3.1
Factory-Configurable Solder Beads
CPU-0 Baseboard Solder Beads
Solder beads are found only on the bottom side (solder side) of the TPPC64 CPU-0
Baseboard and are described in Table B-6.
In Table B-6, if no pad number is given, only 2 solder pads exist. If there are 3 solder
pads, the two pads listed are shorted together. Short means a solder bead is installed,
creating an electrical path between two contacts. Open means no solder bead is
installed, hence the path between the contacts is open.
Figure B-1 on page B-3 provides the location of the CPU-0 Baseboard solder beads.
Remember that pad 1 is indicated on the board by a thick bar line.
Caution: When dealing with a 3-pad solder-bead switch, a solder bead will short
only one set of pads, either 1–2 or 2–3.
If a solder bead shorts more than 2 pads, call Themis Customer Support.
Table B-6. CPU-0 Baseboard Solder-Bead Settings (Bottom Side)
Solder
Bead
SB01
SB02b
SB03
SB04
Settinga
Description
Short 1–2
The AMD8111 RTC Vdd is connected to the onboard battery.
Short 2–3
The AMD8111 RTC Vdd is connected to 3.3-volt power.
Short
Serial Ports A and B are connected to the Front Panel (not connected to VME P2).
Open
Serial Ports A and B are connected to VME P2 (not connected to the Front Panel).
Short
The system clock is 112.34 MHz.
Open
The system clock is 224.68 MHz.
Short 1–2
Audio Codec 97 (AC97) signals are connected to the PCI extension connector.
Short 2–3
Audio Codec 97 (AC97) signals are connected to the VME P2 connector.
Note: Footnotes are described at the end of Table B-6 on page B-8.
Themis Computer
B-7
TPPC64 Hardware Manual
Table B-6. CPU-0 Baseboard Solder-Bead Settings (Bottom Side) (Continued)
Solder
Bead
Settinga
Description
Short
The SCSI termination devices mounted on the TPPC64 CPU-0 Baseboard are from
Unitrode.
Open
The SCSI termination devices installed on the TPPC64 CPU-0 Baseboard are from
Dallas.
Short
Manufacturing use only.
Open
Normal operation: The AVP_RESET pad of the PPC970FX CPU is set for pull-up.
Short
Internal clock termination of the PPC970FX CPU is enabled.
Open
Internal clock termination of the PPC970FX CPU is disabled (external termination).
Short
Serial Port B is connected to the LPC I/O chip.
Open
Serial Port B is connected to the Service Processor’s serial port.
Short
The JTAG scan test of the system is not performed.
Open
Perform the JTAG scan test of the system.
Short
Enable the “elastic” bus interface of the PPC970FX CPU-0.
Open
Disable the “elastic” bus interface of the PPC970FX CPU-0.
SB05c
SB06
SB08
SB09
SB10
SB11
SB12
SB14
SB15
SB16
SB17
Short 1–2
The reset button (Front Panel) is connected as the system reset.
Short 2–3
The reset button (Front Panel) is connected as the Service Processor reset only.
Short
CPU-1 board is connected to the JTAG scan test of the system.
Open
CPU-1 board is disconnected from the JTAG scan test of the system.
Short 1–2
CPU-0 JTAG scan data input is from the Northbridge CPC925 JTAG data output.
Short 2–3
CPU-0 JTAG scan data input is from the RISCwatch connector.
Short
Enable CPU-0 “halt” when Northbridge CPC925 CHKSTOP is asserted.
Open
Disable CPU-0 “halt” when Northbridge CPC925 CHKSTOP is asserted.
Short
Disable the POR debug mode of the TPPC64 IBM PPC970FX CPU-0.
Open
Enable the POR debug mode of the TPPC64 IBM PPC970FX CPU-0.
a—Boldface = the default solder-bead position.
b—Note that serial ports A and B have full modem support when accessed from the front panel, but only minimal signalling (Tx, Rx, and
GND) from the P2 Paddle Board.
c—No default setting.
B-8
Themis Computer
B—Jumper-Pin and Solder-Bead Configurations
Factory-Configurable Solder Beads
Legend
Thick bar = Pad 1
SB1
SB14
Solder short,
pads 2 & 3
= Actual location
of solder beads
SB9
= Description
of solder beads
VME P1
= May be set open
or short as per
manufacturing
SB2
SB17
SB12
SB16
SB10
SB3
SB4
SB8
SB11
SB6
VME P2
SB15
SB5
Bottom Side
Figure B-3. TPPC64 CPU-0 Baseboard Solder-Bead Locations (Bottom Side)
Themis Computer
B-9
TPPC64 Hardware Manual
B.3.2
CPU-1 Baseboard Solder Beads
The solder beads on the TPPC64 CPU-1 Baseboard are located on both sides of the
PCB (six on the top and two on the bottom) and are used for manufacturing purposes
only. Solder-bead default settings are given in Table B-7.
Table B-7. CPU-1 Baseboard Solder-Bead Settings (Top and Bottom Sides)
Solder
Beada
SB06
SB08
SB10
SB11
SB12
SB13
SB14
SB15
Settingb
Description
Short
Open
Short
Open
Short
Open
Short
Open
Short
Manufacturing use only.
Open
Short
Open
Short
Open
Short
Open
a—Shaded listings indicate that the solder-bead set is located on the bottom side of the PCB.
b—Boldface = the default solder-bead position.
B.3.3
PMC/XMC Carrier Board Solder Beads
For more detailed information on Themis PMC/XMC Carrier Boards, including solder beads, refer to the PMC/XMC Carrier Board Manual, Themis P/N 112826-020.
B-10
Themis Computer
C
Appendix
Front-Panel I/O Connections and LEDs
C.1
Introduction
This appendix contains diagrams of all front panels (faceplates) for each possible
model configuration of the TPPC64. It is intended as a reference to the I/O and monitoring functions of the model being described. See Table 1-1, page 1-1, in Chapter
1, "Installation and Operation", for a list of TPPC64 models.
Caution: The PCI address of a PMC Module is not necessarily the same as the
PMC Module slot number. To avoid confusion, each front-panel illustration in Appendix C has a table correlating PCI address with PMC Module slot.
C.1.1
Front-Panel Dimensions
All single-slot front panels measure 264-mm (10.4”) high by 20.32-mm (0.8”) wide.
Double-slot front panels are 264-mm (10.4”) high by 40.64-mm (1.6”) wide.
C.1.2
Injector/Ejector Handles
Two types of injector/ejector handles can be ordered (see Figure C-1, page C-2):
• VME64-type handles (Elma, for example), which aid in both the insertion and
the extraction of the PC board into and out of the VME backplane connectors
• Triple-E-type handles, which aid only in the extraction of the PC board from
the VME backplane connectors
Themis Computer
C-1
TPPC64 Hardware Manual
When a PCB board product such as the TPPC64 is shipped from Themis, VME64type handles will be installed unless the customer specifies a different handle such as
the Triple E.
C.1.2.1 VME64-type Handles
When ordered, all Themis board products are shipped with VME64-type handles
unless otherwise specified. A multiple-slot system will be shipped with all handles
secured together by a mating pin inserted through two adjacent handles (see Figure
C-2 on page C-3). This assures that all boards will lock onto and release from the
VME rack frame at the same time.
On those occasions when the customer is upgrading and must add or replace a board
in the system, it is important to make sure that a mating pin is used to secure two
adjacent handles.
C.1.2.2 Triple-E-type Handles
When extracting a multiple-board system from the VME rack frame, it is important
to remember that—since there is no mating pin to hold handles together—each handle works independently from all other handles, hence the operator must extract the
system from the rack frame by carefully manipulating each handle in the same direction until the system is totally removed from the rack.
Caution: Removal of the EMI shield and insertion of a spine between mating front
panels is a factory procedure and not recommended in the field.
A
VME64 Injector/Ejector Handle
B
Triple-E Ejector Handle
Figure C-1. TPPC64 VME64 (A) and Triple-E (B) Handles
C-2
Themis Computer
C—Front-Panel I/O Connections and LEDs
TPPC64 Front Panels
2P2 PMC/XMC Carrier Board (2 PMC)
EMI Shield
Spine inserted
Ejector Handle
Mating Pin
A
2
1
A
A
OVER TEMP
Ejector Handle
RESET
EMI Shield removed
Mating Pin
(installed)
TPPC64 Baseboard
Figure C-2. Placement of Mating Pins on VME64-type Handles
C.2
TPPC64 Front Panels
This section contains descriptive graphics of the front panels for each TPPC64
model configuration listed in Table 1-1, page 1-1, in Chapter 1 (see Figure C-3,
page C-4, through Figure C-8, page C-9).
Note: The front panels described on the following pages of this appendix are all
shown with VME64-type handles.
Themis Computer
C-3
TPPC64 Hardware Manual
C.2.1
TPPC64/1-1—CPU-0 Baseboard Only
A
Dual USB Ports A and B
(version 1.1)
B
SYSTEM STATUS
USER
System Status LEDs
ENBL
USER
ENABLE
SHUT DOWN
POWER OK
PWR OK
SH DN
SYS STATUS
Serial Port TTY-B
Serial Port TTY-A
A
RST
VME STATUS
SLAVE
SYS FAIL
Over-temperature warning LED
VME STATUS
RESET
B
VME Status LEDs
SLAVE
SYSTEM FAIL
MASTER
MSTR
OVER TEMP
Reset Switch
RESET
Ultra320 SCSI Port A
(Note: Port B is routed through
the rear VME64 P2 connector)
A
Gigabit Ethernet Port A1
L
N
K
A
1
A
C
T
L
N
K
Gigabit Ethernet Port A2
A
C
T
A
2
A
1
100 / 1000
A
2
LNK (Link speed)
(Yellow ON = 10 Mbit/sec;
OFF = see dual LEDs below)
ACT (Activity)
(Green ON = Signal detected)
Link speed is 100 Mbit/sec or
1000 Mbit/sec (when turned ON)
TPPC64
CPU-0
Figure C-3. TPPC64 CPU-0 Baseboard
C-4
Themis Computer
C—Front-Panel I/O Connections and LEDs
TPPC64 Front Panels
C.2.2
TPPC64/2P2-1—CPU-0 & 2-PMC Carrier Board
A
PMC Module 2
B
ENBL
USER
PWR OK
SH DN
SYS STATUS
A
RST
P
M
C
B
VME STATUS
SLAVE
SYS FAIL
MSTR
Ethernet B
OVER TEMP
S
P
D
L
N
K
B
See Figure C-1 for description
RESET
of Front-Panel
I
N
A
U
D
I
O
O
U
T
0
C
Line-In / Mic-In *
Line-Out / Headphones-Out *
User-defined Rotary Switch
Serial Port TTY-E
4
8
Serial Port TTY-F
E
A
F
PMC Module 1
L
N
K
A
1
A
C
T
L
N
K
P
M
C
A
C
T
A
2
A
1
100 / 1000
A
2
TPPC64
CPU-0
2P2
* Line In/Out and Mic/Headphones
are switchable through
on-board solder beads.
See Table B-9, page B-13.
2P2 PMC/XMC Carrier Board
Figure C-4. TPPC64 CPU-0 and 2P2 PMC/XMC Carrier Board
Themis Computer
C-5
TPPC64 Hardware Manual
C.2.3
TPPC64/2P3-1—CPU-0 & 3-PMC Carrier Board
PMC Module 3
A
B
ENBL
USER
P
M
C
PWR OK
SH DN
SYS STATUS
A
RST
B
VME STATUS
SLAVE
SYS FAIL
MSTR
OVER TEMP
PMC Module 2
RESET
See Figure C-1 for description
of Front-Panel
P
M
C
A
L
N
K
A
1
PMC Module 1
A
C
T
L
N
K
P
M
C
A
C
T
A
2
A
1
100 / 1000
A
2
TPPC64
CPU-0
B
b
d
2P3
2P3 PMC Carrier Board
PMC C
i
B
d (PMC 3)
Figure C-5. TPPC64 CPU-0 and 2P3 PMC Carrier Board
C-6
Themis Computer
C—Front-Panel I/O Connections and LEDs
TPPC64 Front Panels
C.2.4
TPPC64/1-2—CPU-0 & CPU-1 Baseboards
A
B
ENBL
USER
PWR OK
SH DN
SYS STATUS
A
B
RST
VME STATUS
SYS FAIL
SLAVE
MSTR
Over-temperature warning LED
OVER TEMP
OVER TEMP
Power OK LED
CPU 1
PWR OK
See Figure C-1 for description
RESET
of CPU-0 Front-Panel
A
PMC Module 0
L
N
K
A
1
A
C
T
L
N
K
P
M
C
A
C
T
A
2
A
1
100 / 1000
A
2
TPPC64 TPPC64
CPU-0
CPU-1
Figure C-6. TPPC64 CPU-0 and CPU-1
Themis Computer
C-7
TPPC64 Hardware Manual
C.2.5
TPPC64/2P2-2—CPU-0, CPU-1, & 2-PMC Carrier
Board
A
B
PMC Module 2
ENBL
USER
PWR OK
SH DN
SYS STATUS
A
RST
P
M
C
B
VME STATUS
SLAVE
SYS FAIL
MSTR
OVER TEMP
S
P
D
OVER TEMP
CPU 1
L
N
K
B
PWR OK
RESET
See Figure C-1 for description
I
N
A
U
D
I
O
of CPU-0 Front-Panel
O
U
T
0
C
4
8
E
A
F
PMC Module 1
L
N
K
A
1
A
C
T
L
N
K
P
M
C
P
M
C
A
C
T
A
2
PMC Module 0
A
1
100 / 1000
A
2
TPPC64 TPPC64
2P2
CPU-1
CPU-0
2P2 PMC/XMC Carrier Board
Figure C-7. CPU-0/CPU-1 Baseboards and 2P2 PMC/XMC Carrier Board
C-8
Themis Computer
C—Front-Panel I/O Connections and LEDs
TPPC64 Front Panels
C.2.6
TPPC64/2P3-2—CPU-0, CPU-1, & 3-PMC Carrier
Board
PMC Module 3
A
B
ENBL
USER
P
M
C
PWR OK
SH DN
SYS STATUS
A
RST
B
VME STATUS
SLAVE
SYS FAIL
MSTR
OVER TEMP
OVER TEMP
PMC Module 2
CPU 1
PWR OK
RESET
See Figure C-1 for description
of CPU-0 Front-Panel
P
M
C
A
L
N
K
A
1
A
C
T
L
N
K
PMC Module 1
P
M
C
P
M
C
A
C
T
A
2
A
1
100 / 1000
A
2
TPPC64 TPPC64
2P3
CPU-1
CPU-0
2P3 PMC Carrier Board
Figure C-8. CPU-0/CPU-1 Baseboards and 3-PMC Carrier Board
Themis Computer
C-9
TPPC64 Hardware Manual
C.3
LEDs
Callouts describing TPPC64 front-panel LEDs are shown in Figure C-9 below. A
description and interpretation of front-panel LEDs is given Table C-1 on page C-11.
OVER TEMP
OVER TEMP
CPU 1
PWR OK
RESET
A
B
ENBL
USER
PWR OK
SH DN
SYS STATUS
A
A/B/C/D
A
(left to right)
B
RST
VME STATUS
SYS FAIL
SLAVE
OVER TEMP
OVER TEMP
A
C
T
L
N
K
E / F /G / H
(left to right)
CPU 1
I
L
N
K
A
1
MSTR
PWR OK
A
C
T
A
2
J
P
M
C
L
M
A
1
RESET
100 / 1000
A
2
K
N
O
TPPC64 TPPC64
A
Top Half
Bottom Half
Figure C-9. TPPC64 Front-Panel LEDs
C-10
Themis Computer
C—Front-Panel I/O Connections and LEDs
LEDs
Table C-1. TPPC64 Front-Panel LED Interpretation
Item
System
Status
VME
Status
Over
Temp
Status
Callout
Function
A
User (USER)
B
Shutdown (SH DN)
C
Power OK (PWR OK)
D
Enable (ENBL)
E
System Reset (RST)
F
Gigabit
Ethernet
Ports
A1 and A2
Ethernet
Link
Speed
Red
●
Defined by the user
Orange
●
TPPC64 system is shutting down
●
Power on TPPC64 is operational
Power on TPPC64 board is not operational
Green
●
TPPC64 system is up
Red
●
VME sysreset status
System Fail (SYS FAIL)
Orange
●
VME sysfail status
G
Master (MSTR)
Yellow
●
TPPC64 is the VME master
H
Slave (SLAVE)
Green
●
TPPC64 is the VME slave
I
Over Temperatureb
(OVER TEMP)
J
Power OK
Status
Frequencya and/or Interpretation
Color
Yellow
Off
Green
Orange
Red
Green
Orange
Red
K
Power is OK (PWR OK)
Green
L
Link Connection (LNK)
Yellow
M
Network Activity (ACT)
Green
N
100 Mbps / 1000 Mbps
(100 / 1000)
O
●
CPU-0 temperature is OK
CPU-0 exceeds warning threshold
● CPU-0 exceeds overtemp threshold
●
●
CPU-1 temperature is OK
CPU-1 exceeds warning threshold
● CPU-1 exceeds overtemp threshold
●
●
●
CPU-1 power is OK
●
An Ethernet link has been established
(Link is 10 Mbps if N and O are off–see below)
Flashing rate is 300 ms for each transmission or receive activity
●
Green
●
Ethernet A1 connection speed
Green
●
Ethernet A2 connection speed
a. “ON” or “OFF” means the LED is ON or OFF for 300 ms.
b. CPU-0 and CPU-1 board temperatures—including junction temperatures—are polled every 15 seconds. There is a counter that
is incremented whenever the CPU-0 or CPU-1 junction temperature exceeds the preset OVER TEMP threshold. If the CPU-0 or
CPU-1 junction temperature exceeds the preset threshold three consecutive polling times, then the red OVER TEMP LED is
turned on, indicating the OVER TEMP status.
Themis Computer
C-11
TPPC64 Hardware Manual
C-12
Themis Computer
D
Appendix
Board Diagrams
The following sections of this appendix contain diagrams of the various boards of
the TPPC64. It is intended as a quick reference to component and connector identification. TPPC64 boards included are:
• CPU-0 and CPU-1 Baseboards
• 2P2 PMC/XMC Carrier Board
• 2P3 PMC Carrier Board
See Appendix B, ”Jumper-Pin and Solder-Bead Configurations”, for a description of
jumper-pin and solder-bead configurations.
D.1
CPU-0 and CPU-1 Baseboards
Figure D-1, page D-2, and Figure D-2, page D-3, identify major board components
and connectors as seen from the top (component) side of the CPU-0 and CPU-1
Baseboards, respectively.
D.2
2P2 PMC/XMC & 2P3 PMC Carrier Boards
Figure D-3, page D-4, and Figure D-4, page D-5, identify major components and
connectors of the 2P2 PMC/XMC and 2P3 PMC Carrier Boards, respectively.
Note: Refer to the PMC/XMC Carrier Board Manual (P/N 112826-020) for information on the 2P2 PMC/XMC and 2P3 PMC Carrier Boards.
Themis Computer
D-1
TPPC64 Hardware Manual
CPU-1 Riser
Connector
LPC
I/O
USB Port A
USB Port B
Universe-II
PCI-to-VME
Bridge
(PC87417)
VME Status
LEDs (4)
HyperTransport
I/O Bridge
(Southbridge)
TTY Port A
TTY Port B
(Tundra CA91C142)
VME P1
(AMD 8111)
Battery
System Status
LEDs (4)
Service
Processor
and PLD
Over Temp LED
Reset Button
System
I/O Bridge
(Northbridge)
HyperTransport
Tunnel
(CPC925)
PMC Carrier
Board or
TGA3D/3D+
Riser
Connector
(AMD 8131)
CPU Heat Sink
Mounting Hole
(1 of 10)
Ultra320
SCSI Port A*
SDRAM Memory
Module Outline**
Ethernet 10/100
Controller***
Gigabit
Ethernet A1
IBM 970FX
PowerPC
CPU (0)
Gigabit
Ethernet A2
A1 Status
LEDs (2)
Dual
Gigabit
Ethernet
Controller
Dual Ultra160
SCSI Controller
(LSI Logic
SYM53C1030)
Mounting Hole**
(1 of 5)
VME P2
A2 Status
LEDs (2)
(Intel 82546GB)
Top Side
* SCSI Port B is accessed through the VME P2 backplane connector.
** The Memory Module mounts directly onto the CPU heat sink.
*** Ethernet 10/100 is accessed through the VME P2 backplane connector.
Figure D-1. CPU-0 Baseboard Front-Panel, Component, and Connector Diagram
D-2
Themis Computer
D—Board Diagrams
2P2 PMC/XMC & 2P3 PMC Carrier Boards
CPU Debugger (RISCwatch) Connector
CPU Heat Sink
IBM 970FX
PowerPC
CPU 1
VME P1
U4
LEDs
OVER TEMP
PMC Carrier
Board Riser
Connector
PCI-X
Bridge
POWER OK
Pericom
PI7C21P100NH
CPU Heat Sink
Mounting Hole
(1 of 6)
U18
PMC Module
Mounting Hole
(1 of 4)
PMC Module
PMC Module Voltage Key
3.3V key
5V key
VME P2
PCB-to-Module
Connector
(1 of 3)
Top Side
Figure D-2. CPU-1 Baseboard Front-Panel, Component, and Connector Diagram
Themis Computer
D-3
TPPC64 Hardware Manual
Note: Refer to the checkbox note in
Section A.3.1 for important
information on XMC connections.
Flash Memory
(Intel JS28F640J3D75)
U27
PMC/XMC Module
CPLD
(Xilinx
XCR3256XL)
U28
Ethernet B
Audio Out
10/100/1000
Ethernet
(Broadcom
BCM5703CKHB)
U38
Audio In
Rotary Switch
PCI to Local
Bus Bridge
VME P1
(PLX Technology
PCI9656)
U23
Baseboard &
Graphics Card
Mictor Connectors
(underneath
on bottom side)*
PCI-to-PCI
Bridge
(Intel FW21154BE)
U40
Dual UART Controller
(EXAR XR16L2551IM
U25
Serial Ports
E&F
J_GC1
P_BB1
JTAG
Audio Codec
(Samtec TSW-105-07-G-D)
P_JTAG1
(AD1881A)
U31
5V PMC
Module Lockout Key
PCI Express
Switch
(PLX Technology
PEX8516AA-25BI)
PMC/XMC Module
U19
VME P2
3.3V PMC
Module Lockout Key
* P_BB1 connects to the
Top Side
PMC/XMC Module Outline
Baseboard; J_GC1
connects to a Graphics card.
Figure D-3. 2P2 PMC/XMC Carrier Board Component/Connector Diagram
D-4
Themis Computer
D—Board Diagrams
2P2 PMC/XMC & 2P3 PMC Carrier Boards
3.3V key
5V key
P2601
PMC Module
VME P1
PMC Carrier
Board Riser
Connectors
(underneath
on bottom
side)
PMC Module
5V key only
P0602
P0501
P2702
Secondary
PCI-to-PCI
Brid ge
(Intel 2 1154)
U0901
PMC Module
VME P2
3.3V key
Component Side
5V key
PMC Module Voltage Key
PMC Module Outline
Figure D-4. 2P3 PMC Carrier Board Component/Connector Diagram
Themis Computer
D-5
TPPC64 Hardware Manual
D-6
Themis Computer
E
Appendix
Glossary
The terminology used in this manual generally follows industry conventions. The
following list defines the specific meanings of words and terms that may be used in
this manual.
APB: Advanced PCI Bridge
Arbitration: The process of assigning a resource to one of several requestors.
ASI: An acronym for “Address Space Identifier.”
BIOS: Basic Input/Output System or Basic Integrated Operating System. BIOS is
the software code first invoked by a computer when powered on. It enables the
computer to “boot” by running other programs to assume control of the computer.
Boot: The process of initializing the hardware to execute and run an Operating System such as Solaris, Linux, or Windows.
cPCI: Compact PCI. An adaptation of the PCI Specification for industrial and/or
embedded applications requiring a more robust mechanical form factor than
desktop PCI applications.
CPI: Cycles per Instruction. The number of clock cycles required to execute one
instruction.
CTS: Clear to send (DCE to DTE).
DCD (or CD): Data carrier detected (tone from a modem; DCE to DTE).
DCE: Data circuit-terminating/communications equipment (a modem, for exam-
Themis Computer
E-1
TPPC64 Hardware Manual
ple).
DDR SDRAM: Double-Data-Rate Synchronous Dynamic Random Access Memory obtains greater bandwidth than regular SDRAM by transferring data on
both the rising and falling edges of the clock signal (called double pumped). As
a result, the transfer rate nearly doubles without an increase in the frontside bus
frequency.
DMA: Direct Memory Access. A facility of some architectures that allows a peripheral to read and write memory without intervention by the CPU. DMA is a limited form or bus mastering.
DSR: Data set ready (DCE to DTE).
DTE: Data terminal equipment (a computer, terminal, or printer, for example).
DTR: Data terminal ready (DTE to DCE).
DUART: Dual Universal Asynchronous Receiver/Transmitter. See UART
Firmware: This is software that stays with the hardware, usually in a PROM or
similar device.
FPGA: Field-Programmable Gate Array. A gate array where the logic network
can be programmed into the device after its manufacture. An FPGA consists of
an array of logic elements, either gates or lookup table RAMs, flip-flops, and
programmable interconnect wiring.
GBIC: GigaBit Interface Converter. A hardware module used to attach network
devices to fiber-based transmission systems such as Fibre Channel and Gigabit
Ethernet. The GBIC converts serial electrical signals to serial optical signals
and vice versa.
GHz: Gigahertz (billions of cycles per second, 109 cps); unit of frequency.
GUI: The use of pictures rather than words to represent both the input and the output of a program. A program with a GUI runs under some windowing system.
HVD: High-Voltage Differential; usually shortened to Differential (see LVD).
Hardware: In a system, the CPU module, cables, and peripheral devices are typical
examples of hardware.
I2C: Inter-Integrated Circuit
IOM: I/O Module.
E-2
Themis Computer
E—
ISR: In-Service Reprogramming; also Interrupt Service Routine.
JTAG: Joint Test Action Group. IEEE Standard 1149.1 for standard test access port
protocol and boundary-scan architecture.
LED: Light-Emitting Diode.
LVD: Low-Voltage Differential (Device).
may: A keyword indicating flexibility of choice with no implied preference.
MHz: Megahertz (millions of cycles per second, 106 cps); unit of frequency.
MII: Media-Independent Interface.
NA or N/A: Not Applicable.
NC or N/C: No Connection.
PCB: Printed Circuit Board.
PCI: Peripheral Component Interconnect (bus). A 32- or 64-bit bus with multiplexed address and data lines, as specified in the PCI Local Bus Specification,
Revision 2.1, June 1, 1995.
PHY: Physical transceiver or sublayer.
Physical Address: An address that maps to real physical memory or I/O device
space.
PIBS: PowerPC Initialization and Boot Software. PIBS (similar to BIOS) initializes
the TPPC64 system and provides the functions to manage it.
PLD: Programmable Logic Device.
PLL: Phase-Locked Loop. A feedback control system that automatically adjusts the
phase of a locally generated signal to match the phase of an input signal.
PMC: PCI Mezzanine Card.
POR: Power-On Reset.
Probing: A process implemented in the firmware and software to identify onboard
hardware devices and add-on cards on the PCI bus. The probing process creates the device-tree.
R0: An abbreviation used to indicate “Read Zero.” When software attempts to read
an R0 area, zero will be returned. Writes to R0 are not permitted.
Themis Computer
E-3
TPPC64 Hardware Manual
RC (RCK): Receiver clock input (external).
Read Cycle: A VMEbus cycle used to transfer 1, 2, 3, 4, or 8 bytes from a Slave to
a master.
Read-Modify-Write Cycle: A VMEbus cycle used to read from, and then write to,
a Slave location without permitting any other Master to access that location
during that cycle.
RI: Ring indicator (ring tone detected; DCE to DTE)).
RIC: Reset, Interrupt, Clock.
RMW: Read, Modify, Write.
RTS: Ready/request to send (DTE to DCE).
RXD (or RD): Receive data (DCE to DTE).
SCSI: Small Computer System Interface.
SCTS: Secondary clear to send (DCE to DTE).
SDCD: Secondary data carrier detected (tone from a modem; DCE to DTE).
SDRAM: Synchronous-Dynamic Random-Access Memory.
SE: Single-Ended (as in Single-Ended Differential SCSI).
SG: Signal ground.
SO-DIMM: Small-Outline Dual-Inline Memory Module.
Software: A collection of machine-readable information, instructions, data, and
procedures that enable the computer to perform specific functions. Typically
stored on electronic media.
SRTS: Secondary ready to send (DTE to DCE).
SRXD: Secondary receive data (DCE to DTE).
STXD: Secondary transmit data (DTE to DCE).
TSOP: Thin Small-Outline Package. A very thin surface-mount chip package with
gull-wing pins on the short sides. TSOPs are approximately a third of the thickness of SOJ chips.
TXD (or TD): Transmit data (DTE to DCE).
UART: Universal Asynchronous Receiver/Transmitter. An integrated circuit used
E-4
Themis Computer
E—
for serial communications that contains a transmitter (parallel-to-serial converter) and a receiver (serial-to-parallel converter), each clocked separately.
Virtual Address: An address produced by a processor that maps all system-wide,
program-visible memory. Virtual addresses usually are translated by a combination of hardware and software to physical addresses, which can be used to
access physical memory.
VME: Versa Module Europe. VME is a standard for chassis (rack) based industrial
computer systems based on 32- or 64- bit system architectures.
Write Cycle: A VMEbus cycle used to transfer 1, 2, 3, 4 or 8 bytes from a Master to
a Slave.
XMC: Switched Mezzanine Card.
Themis Computer
E-5
TPPC64 Hardware Manual
E-6
Themis Computer
F
Appendix
VME Slot Configurations
The following foldout (see Figure F-1 on page F-3) illustrates the slot configurations
of all available models of the TPPC64 (see Table F-1), including the 2P2 PMC/
XMC Carrier Board and the 2P3 PMC Carrier Board.
Table F-1. TPPC64 Model Configurations
Baseboard
Model1
CPU-0
Slot 1
CPU-1
Slot 2
TPPC64 / 1-1
Yes
TPPC64 / 2P2-1
Yes
TPPC64 / 2P3-1
Yes
TPPC64 / 1-2
Yes
Yes
TPPC64 / 2P2-2
Yes
Yes
TPPC64 / 2P3-2
Yes
Yes
2P2 PMC/XMC
Carrier Board2
2P3 PMC
Carrier Board3
VME Slot 2 or 3
VME Slot 2 or 3
Slot 2
Slot 2
Slot 3
Slot 3
1—The TPPC64 does not support PCI Express; hence XMC Modules are not supported.
2—New 2P2 PMC/XMC Carrier Board (P/N 112794-002) only; the standard-version 2P2 PMC Carrier
Board is not compatible.
3—The standard-version 2P3 PMC Carrier Board is supported.
Themis Computer
F-1
TPPC64 Hardware Manual
Note: All models include the TPPC64 CPU-0 Baseboard.
Caution: A new 2P2 PMC/XMC Carrier Board (P/N 112794-002) has been designed to operate with the TPPC64 system, which does not support the original 2P2
PMC Carrier Board. DO NOT ATTEMPT to operate the original version of the 2P2
Carrier Board with the TPPC64.
F-2
Themis Computer
F
F–VME Slot Configurations
.
A
TPPC64
D
Model TPPC64 / 1-1
Front Panel
P3B
3 PMC slots
Slot-3 Type
P3A
CPU-0
B
Model TPPC64 / 2P2-1
3 PMC slots
2 PMC Cards
P2A
Slot-2 Type
E
Model TPPC64 / 2P2-2
Top View
1 PMC Card
CPU-1
C
CPU-0
Model TPPC64 / 2P3-1
2P2 PMC/XMC Carrier Board**
3 PMC Cards
P3A
Front Panel
F
CPU-0
P2B
Model TPPC64 / 2P3-2
Audio / 2 PMC/XMC slots
P2A
3 PMC Cards
P3B
Slot-3 Type
1 PMC Card
CPU-1
Audio / 2 PMC/XMC slots
CPU-0
Slot-2 Type
VME Slot 2 or 3
2 PMC Cards
P2B
CPU-0
VME Slot 2 or 3
1 PMC Card
CPU-1
No PMC Card
CPU-0
2P3 PMC Carrier Board*
Model TPPC64 / 1-2
Top View
VME Slots
1
VME Slots
2
VME Slots
2
VME Slots
2
VME Slots
3
VME Slots
3
PMC Cards
0
PMC Cards
2
PMC Cards
3
PMC Cards
1
PMC Cards
3
PMC Cards
4
Graphics I/O
0
Graphics I/O
0
Graphics I/O
0
Graphics I/O
0
Graphics I/O
0
Graphics I/O
0
Audio I/O
0
Audio I/O
1
Audio I/O
0
Audio I/O
0
Audio I/O
1
Audio I/O
0
VME Slot 1 and 2
-1
-0
PU
PU
P2B
C
P3A
C
P2A
C
PU
-0
C
PU
-1
CPU-0
CPU-0
C
PU
-0
C
PU
-1
CPU-1
C
PU
-0
Front Panel
C
PU
-0
Baseboard
P3B
Top View
A
B
C
D
E
F
* Approved PMC Cards supported: 1
2
3
4
** The TPPC64 does not support PCI Express, therefore an
XMC Module should not be installed in the 2P2 PMC/XMC
Carrier Board.
5/2006
VME Slot:
1
1
2
1
2
1
2
1
2
3
1
2
3
Figure F-1. TPPC64 VME Slot Configurations
Themis Computer
F-3
TPPC64 Hardware Manual
F-4
Themis Computer
Index
Symbols
+12V power connector 1-12
battery replacement 1-14
Board Diagrams D-1
Numerics
bus grants BG 2-4
IN to BG 2-4
10/100/1000Base-T A-4
10/100/1000Base-T Ethernet 1-10
10/100Base-T Connector Pinout A-16
10/100Base-T Connector-Pin Signals A-16
10/100Base-T Ethernet 1-11
2P2 PMC/XMC Carrier Board 2-4, A-27, A-28
2P3 PMC Carrier Board 2-4, A-27
64-bit/133-Mhz PCI-X bus 3-6
C
cables
attaching 1-9
cache 3-1
Comments are Welcome xxi
Configurations 1-2
connector pinouts A-1
connector signals A-1
Console Port (TTYA & TTYB) 1-10
Control Fields
PCI Bus Target Image 4-14
Special PCI Bus Target Image 4-15
CPU-0 P2 Paddle Board A-12
CPU-1 P1/P2 VME Connector Pinouts A-19
CPU-1 P2 Power Board A-26
CPU-1 VME64 P1 Connector Pin Signals A-20
CPU-1 VME64 P2 Connector Pin Signals A-21
A
Address Translation
PCI Bus to VMEbus Transfers 4-13
AMD 8000 HyperTransport Technology 3-2
AMD 8111 HyperTransport I/O Hub 3-3
AMD 8131 HyperTransport PCI-X Tunnel 3-2
Amp 120521-1 A-22
AMP 787617-4 A-3, A-18
audio I/O 1-11
Auxiliary Functions 2-6
B
Backplane Jumper Settings 2-4
Baseboard D-1
Baseboard Front-Panel, Component, and Connector Diagram D-2, D-3
Baseboard Jumper Locations B-3, B-6, B-9
Baseboard Jumper-Pin Settings B-2, B-4
Baseboard Solder Beads B-7
Baseboard Solder-Bead Settings B-7, B-10
Baseboards
CPU-0 and CPU-1 3-1
Themis Computer
D
Daisy Chain Driver (DCD) 4-6
DMA Channel 4-3
DMA Controller 4-18
DMAFIFO 4-4
Dual Gigabit Ethernet Controller 3-6
Dual Ultra320 SCSI Controller 3-5
E
ECC. See Error Correction Code
Environmental Specification 2-7
Error Correction Code (ECC) 3-7
Ethernet
10/100Base-T 1-10
Gigabit 1-10
link activity (green) 3-6
Index-1
TPPC64 Hardware Manual
link speed (yellow) 3-6
Ethernet 10/100Base-T Connector A-16
ethernet, gigabit 3-6
F
Front Panel
LED Interpretation C-11
LEDs C-10
Front Panel Diagrams C-1
Front-Panel Connectors, CPU-0 A-1
Front-Panel Dimensions C-1
G
Gigabit Ethernet (TPE) Ports A1/A2 A-4
Gigabit Ethernet Connector Pin Signals and
LEDs A-4
Gigabit Ethernet Port B A-27
Glossary E-1
GPIO Connector Pinout A-13
GPIO Connector-Pin Signals A-13
GPIO header 1-12
GPIO Header Connector A-13
H
Harting 02-01-160-2101 A-9
Harting 09031966921 A-7, A-19
Headphones-out (AC97 format) A-27
Honda HDRA-E68LFDT-SLA A-5
HyperTransport technology 3-2
I
I2C Connector Pinout A-15
I2C Connector-Pin Signals A-15
I2C header 1-12
I2C Header Connector A-15
I2C signals A-27
IACK Daisy Chain Driver (DCD) 4-6
IACKIN 2-4
IACKOUT 2-4
IBM 970FX Processor 3-1
In Case Of Difficulties xxi
Index-2
Injection/Ejector Handles C-1
Intel FW82546 Ethernet controller 3-6
Intended Audience xvii
ITT Cannon MDSM-18PE-Z10 A-1, A-17
J
Jumper pins B-1
L
LED Interpretation C-11
LED status indicators A-1
LEDs C-10
LEDs, Front Panel
interpretation A-11
lithium battery 1-14
local 32-bit PCI bus 3-4
LPC Super-I/O Controller 3-6
M
Mating Pins C-3
Memory Mapping
Special PCI Target Image 4-16
Memory Module 2-1
Memory Module Connector A-29
Memory Subsystem 3-7
MISC_CTL register 4-5
N
Non-Volatile RAM (NVRAM) 1-14
NVRAM 1-14
O
OUT 2-4
P
Paddle Board 2-4
10/100Base-T Connector Pinout A-16
10/100Base-T Connector-Pin Signals A-16
Connectors A-12
Ethernet 10/100Base-T Connector A-16
GPIO Header Connector A-13
Themis Computer
Index
I2C Connector Pinout A-15
I2C Connector-Pin Signals A-15
I2C Header Connector A-15
installation 1-3
SCSI Port B Connector Pinouts A-14
Serial A/B Connector Pinout A-17
Serial A/B Connector-Pin Signals A-17
Serial Ports A/B Connectors A-17
Stereo Audio In/Out Connectors A-15
USB Port, Dual A-18
USB Ports C/D/E/F A-18
USB Ports C/D/E/F Connector Pinouts A-18
USB
Ports
C/D/E/F
Connector-Pin
Signals A-18
PC-133 timing 3-7
PCI Bus Fields
Special PCI Bus Target Image 4-14
PCI Bus Fields for PCI Bus Target Image 4-13
PCI Bus Target Channel 4-3
PCI Bus Target Images 4-12
Control Fields 4-13
PCI Bus Fields 4-12
Special PCI Target Image 4-14
VMEbus Fields 4-12
PCI Configuration Base Address 0 Register
(PCI_BS0) 4-8
PCI Configuration Base Address 1 Register
(PCI_BS1) 4-8
PIBS 1-13
Placement of Mating Pins on VME64-type
Handles C-3
PMC Card Slot Connectors
CPU-1 A-22
PMC Carrier Board 2-4, D-1
PMC Carrier Board Solder Beads B-10
PMC Module slot 1 A-27
PMC Module slot 2 A-27
PMC Module slot 3 A-27
PMC Slot Connector J1002 (3.3V, 32 bit) A-22
PMC Slot Connector J1002 Signals (32 bit)
A-23
PMC Slot Connector J1003 (3.3V, 32 bit) A-22
Themis Computer
PMC Slot Connector J1003 Signals (32 bit)
A-24
PMC Slot Connector J1004 (3.3V, 64 bit) A-22
PMC Slot Connector J1004 Signals (64 bit)
A-25
PMC/XMC Carrier Board A-27
PMC/XMC Carrier Board Manual, Themis P/N
112826-020 2-4
PMC/XMC Module slot 1 A-27
PMC/XMC Module slot 2 A-27
Power Board
installation 1-6
Power Board, CPU-1 A-26
Power Requirements 2-8
Processor & Memory Subsystems 2-5
Programmable Slave Images
VMEbus and PCI bus 4-18
Pulse J0011D01B A-16
push-button RESET switch A-11
R
Registering the TPPC64 xxi
RJ45 1-10
rotary switch A-27
Round-Robin arbitration 4-6
S
Samtec QSH-120-01-L-D-A A-29
SCSI
controller 1-7
termination 1-7, 1-8
SCSI A Access Definition B-2, B-5
SCSI A Connector Pinout A-5
SCSI Controller 3-5
SCSI Port A Connector Pin Signals A-6
SCSI Port B Connector
Paddle Board A-13
SCSI Port B Connector Pinouts
Paddle Board A-14
Serial (TTY) Ports E and F A-27
Serial A/B Connector Pinout A-17
Serial A/B Connector-Pin Signals A-17
Index-3
TPPC64 Hardware Manual
Serial Port A (RS232) A-1
Serial Port B (RS232) A-1
Serial Ports A/B Connector Pinouts A-2
Serial Ports A/B Connector-Pin Signals A-2
Serial Ports A/B Connectors A-17
Service Processor 1-13
Special PCI Target Image Register (Offset
188) 4-15
SPU/CPU Duality 2-3
Status LEDs
System A-11
VME A-11
Stereo Audio 1-11
Stereo Audio In/Out Connectors A-15
Stereo Audio Line-in/Mic-in and Line-out A-27
SYSCON B-2
SYSCON Module 4-5
System Board
VME J1/P1 connector pin signals A-20
System Board VME J1/P1 Pin Signals A-8
System Board VME J1/P1 Pinout A-7
System Board VME J2/P2 Pin Signals A-10
System Board VME J2/P2 Pinout A-9
System Specification 2-5
System Status LEDs A-11
T
TGA-100 PMC Graphics Card 2-4
TGA3D
model configurations F-1
TGA-7000 PMC Graphics Card 2-4
Time-of-Day (TOD) clock 1-14
TOD 1-14
TOD/NVRAM battery 1-14
TPPC64
configurations 1-2
Memory Controller 3-2
model configurations xvi, 1-1
System I/O Bridge 3-2
System Specification 2-5
TPPC64 Baseboard Block Diagram 2-2
TPPC64 Front Panels C-3
Index-4
Transpower/Tyco 1610005-4 A-4
Tundra Universe II 3-4, 4-1
TXFIFO 4-4
U
Ultra320 SCSI A and B 1-11
Ultra320 SCSI A port A-5
Ultra320 SCSI Controller 3-5
Ultra320 SCSI Port B A-13
Universe II 4-1
Architectural Diagram 4-4
Automatic Slot Identification 4-6
Hardware Power-Up Options 4-7
Interrupt and Interrupt Handler 4-17
Mailbox Registers 4-17
Miscellaneous Control Register 4-5
Power Up Options 4-7
Register Access at Power Up 4-6
Semaphores 4-17
Slave Image Programming 4-9
SYSCON Module 4-5
System Controller 4-6
VME and PCI Interrupters 4-17
VMEbus Interrupt Handling 4-17
VMEbus Master 4-3
Universe II PCI-to-VME Bridge 3-4
Unpacking the TPPC64 xvii
USB Port A 1-11
USB Port B 1-11
USB Port C 1-11
USB Port D 1-11
USB Port E 1-11
USB Port F 1-11
USB Port, Dual A-3, A-18
USB Ports A/B Connector Pinouts A-3
USB Ports A/B Connector-Pin Signals A-3
USB Ports C/D/E/F A-18
USB Ports C/D/E/F Connector Pinouts A-18
USB Ports C/D/E/F Connector-Pin Signals A-18
User-defined 16-position rotary switch A-27
Themis Computer
Index
V
Vdd-core B-8
VME Backplane Connectors
CPU-0 A-7
CPU-1 A-19
VME J1/P1 Pin Signals, System board A-8
VME J1/P1 Pinout, System board A-7
VME J2/P2 Pin Signals, System board A-10
VME J2/P2 Pinout, System board A-9
VME Slave Images 4-9
Control Fields 4-11
PCI Bus Fields 4-10
VMEbus Fields 4-9
VME Status LEDs A-11
VME system controller. See SYSCON
VME64
P1 Connector A-7, A-19
P2 Connector A-9, A-19
VME64 specification 4-6
VMEbus
32 bit 3-4
64 bit 3-4
Address Translation 4-11
Configuration 4-2
Fields for VMEbus Slave Image 4-9
First Slot Detector 4-5
Interface 4-2
interface configuration 1-13
Slave 4-2
Slave Image
PCI Bus Fields 4-10
System Controller 3-4
VMEbus arbitrator 4-6
VMEbus Master 4-9
W
Warranty xxi
Themis Computer
Index-5
TPPC64 Hardware Manual
Index-6
Themis Computer
Place
Stamp
Here
Themis Computer
47200 Bayside Parkway
Fremont, CA 94538
Attn: Publications Department
Fold here; tape at top to seal
Reader Comment Card
We welcome your comments and suggestions to help improve the TPPC64 User Manual. Please
take time to let us know what you think about this manual.
•
Information provided in the manual was complete.
Agree___
•
Not Applicable___
Disagree___
Not Applicable___
Disagree___
Not Applicable___
The manual was useful.
Agree___
•
Disagree___
Information was easily accessible.
Agree___
•
Not Applicable___
Information was well documented and easy to follow.
Agree___
•
Disagree___
Please write down any comments you may have about this manual, including how it can be
improved:
___________________________________________________________
___________________________________________________________
___________________________________________________________
___________________________________________________________
___________________________________________________________
___________________________________________________________
___________________________________________________________
___________________________________________________________
___________________________________________________________
Name:
_____________________________________________________
Title:
_____________________________________________________
Company:
_____________________________________________________
Address:
_____________________________________________________