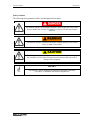
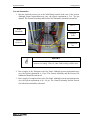
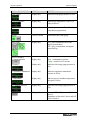
1
Operation Manual
Preface
Warranty ................................................................................................................................ iii
Trademarks ..............................................................................................................................v
1 - Introduction.................................................................................................................... 1-1
PVD Thin Film Deposition System Overview .......................................................... 1-2
Service Information ................................................................................................... 1-3
Safety ......................................................................................................................... 1-4
Operator Responsibilities .............................................................................................................. 1-4
Safety Notation.............................................................................................................................. 1-5
Safety Features .............................................................................................................................. 1-6
Safety Guidelines .......................................................................................................................... 1-8
2 - Getting Started ............................................................................................................... 2-1
Receipt Inspection...................................................................................................... 2-2
Unpacking .................................................................................................................. 2-3
Utility Connections .................................................................................................... 2-4
Power Distribution ........................................................................................................................ 2-5
Dedicated Earth Ground................................................................................................................ 2-5
Cooling Water ............................................................................................................................... 2-6
Gas and Pneumatics ...................................................................................................................... 2-7
Start-Up...................................................................................................................... 2-9
3 - Operation ........................................................................................................................ 3-1
Manual Operation ...................................................................................................... 3-3
Sample Rotation Setup and Operation .......................................................................................... 3-3
Sample Heating Setup and Operation ........................................................................................... 3-3
Gas Flow Setup and Operation...................................................................................................... 3-4
Manual Pressure Control (Needle Valve) .............................................................................. 3-4
Torus® Sputtering Source Setup and Operation ........................................................................... 3-5
Source Shutter Setup ..................................................................................................................... 3-5
E-Beam Source Setup and Operation............................................................................................ 3-6
LTE/HTE Furnace Operation........................................................................................................ 3-6
Thermal Evaporation Source Operation........................................................................................ 3-8
Film Thickness Monitor/Controller............................................................................................... 3-9
Emergency Off Recovery Procedure............................................................................................. 3-9
Shut Down..................................................................................................................................... 3-9
Software Operation .................................................................................................. 3-11
Overview..................................................................................................................................... 3-11
General Guidelines............................................................................................................... 3-12
Security ................................................................................................................................ 3-13
Adding a New User....................................................................................................... 3-13
Deleting a User ............................................................................................................. 3-14
Modifying a User’s Access........................................................................................... 3-14
Resetting a Password .................................................................................................... 3-14
Software File Structure & Maintenance............................................................................... 3-15
Backing up your system data ........................................................................................ 3-15
Restoring your system data ........................................................................................... 3-15
Software Upgrades............................................................................................................... 3-16
Terminology and Definitions ............................................................................................... 3-17
Common Icons ..................................................................................................................... 3-19
Operation – Vacuum Screen ................................................................................................ 3-21
Operation – Deposition Screen ............................................................................................ 3-23
Operation – Gas Screen........................................................................................................ 3-25
i
Preface
Operation Manual
Gas Control Overview .................................................................................................. 3-28
Master/Slave Operation................................................................................................. 3-28
Pressure Control............................................................................................................ 3-28
Operation – Motion Screen .................................................................................................. 3-29
Substrate X/Source Y Example:.................................................................................... 3-32
Operation – Heating Screen ................................................................................................. 3-33
Operation – Cooling Screen ................................................................................................. 3-36
Operation – Sigma Screen.................................................................................................... 3-37
System – Discrete Screen..................................................................................................... 3-40
System – Analog Screen ...................................................................................................... 3-42
System – Strings Screen....................................................................................................... 3-44
System – Ethernet I/O Screen .............................................................................................. 3-46
Help – Help Screen .............................................................................................................. 3-47
Recipe Database ................................................................................................................... 3-48
Reorder Items ....................................................................................................................... 3-50
Recorded Data...................................................................................................................... 3-52
Action Log ........................................................................................................................... 3-54
Interlocks.............................................................................................................................. 3-56
Sigma Data Sets ................................................................................................................... 3-58
Configuration ....................................................................................................................... 3-60
System Users........................................................................................................................ 3-61
CWare Operation......................................................................................................................... 3-64
CWare Startup...................................................................................................................... 3-64
Standard Recipes.................................................................................................................. 3-65
Running Recipes .................................................................................................................. 3-65
Writing Recipes.................................................................................................................... 3-66
Modifying Recipes ............................................................................................................... 3-67
Importing Recipes ................................................................................................................ 3-68
Recording Data..................................................................................................................... 3-68
Data Logging Signals........................................................................................................... 3-68
CWare Shutdown ................................................................................................................. 3-69
4 - Maintenance ................................................................................................................... 4-1
Maintenance Personnel Qualifications ...................................................................... 4-2
Maintenance Materials and Accessories.................................................................... 4-3
General Recommendations ........................................................................................ 4-4
System Component Repair/Replacement .................................................................. 4-5
Preventative Maintenance.......................................................................................... 4-5
Process Chamber Cleaning ........................................................................................ 4-5
5 - Appendix......................................................................................................................... 5-1
ii
Operation Manual
Preface
Warranty
1.
Equipment Warranty and Remedy
COMPANY warrants that the Equipment fabricated and furnished by COMPANY hereunder
shall be free from material defects in workmanship and materials. If any of the Equipment
fabricated and furnished by COMPANY materially fails to conform to the warranty set forth
in the preceding sentence, CUSTOMER's remedy shall be limited, at COMPANY's option, to
either (i) repair or replacement of the non-conforming Equipment, F.O.B. point of repair or
replacement, with shipping charges prepaid by CUSTOMER; or (ii) repayment of the portion
of the contract price paid by CUSTOMER attributable to such non-conforming Equipment.
Dismantling and reinstalling work is excluded from this Equipment Warranty and Remedy.
2.
Services Warranty and Remedy
COMPANY warrants that any engineering, design or software development and
programming services furnished under COMPANY's proposal or quotation will conform to
standards of practice generally accepted in the profession and/or industry for services of a
similar nature. If the services provided by COMPANY materially fail to conform to the
warranty set forth in the preceding sentence, CUSTOMER's remedy shall be limited to
revision, replacement or reperformance, at COMPANY's expense, of those services which
COMPANY reasonably determines fails to so conform.
3.
Software Warranty and Remedy
COMPANY warrants that any Equipment furnished hereunder which is comprised of
software, when used with COMPANY-specified hardware, shall conform with the
specifications set forth in COMPANY's proposal or quotation or, in the case of standard
software, with published specifications prepared, approved and issued by COMPANY's
headquarters in Clairton, Pennsylvania. If any software furnished by COMPANY hereunder
materially fails to conform to the warranty set forth in section 3, CUSTOMER's remedy shall
be limited to correction of the non-conformance by COMPANY, without charge to
CUSTOMER. COMPANY makes no representation or warranty, express or implied, that the
operation of the software will be uninterrupted or error free, or that the functions contained
therein will meet or satisfy CUSTOMER's intended use or requirements.
4.
Warranty Period
The warranties set forth in sections 1 and 3 above shall be effective for a period of twelve
(12) months from the date of shipment of the Equipment from COMPANY's plant. The
warranty set forth in section 2 above shall be effective for a period ending twelve (12)
months from the date of performance of the services.
5.
Warranty Conditions and Limitations
1.
CUSTOMER's right to enforce the foregoing warranties is expressly conditioned
upon CUSTOMER notifying COMPANY in writing during the Warranty Period of any
alleged non-conformity or defect, stating specifically the nature of the alleged nonconformity or defect. COMPANY shall have the right, upon such notification, to review,
iii
Preface
Operation Manual
inspect and/or examine the Equipment indicated by CUSTOMER, and CUSTOMER shall
make the Equipment available to COMPANY for such purposes.
2.
The foregoing warranties shall not apply if COMPANY's review, inspection or
examination discloses that the Equipment (i) has not been installed, maintained or operated in
accordance with COMPANY's instructions; (ii) has been used by CUSTOMER in a manner
or for applications not recommended by COMPANY; (iii) has been repaired, altered or
modified by CUSTOMER; (iv) has been subjected to other than normal use, storage,
handling, installation, operation or maintenance; or (v) has been damaged by fire, act of God,
any cause covered by CUSTOMER's insurance or any other event or occurrence not caused
by COMPANY.
3.
The foregoing warranties shall not apply to Equipment, or parts or components
thereof, which are not manufactured or processed by COMPANY, or which are purchased by
COMPANY from another party or partied. The manufacturer's warranty for such Equipment,
parts or components, if any, shall be assigned to CUSTOMER without recourse to
COMPANY.
4.
The foregoing warranties shall not apply to designs, materials or specifications
furnished or specified by CUSTOMER and incorporated into the Equipment.
6.
THE EXPRESS WARRANTIES AND REMEDIES SET FORTH IN THIS
SECTION ARE EXCLUSIVE AND ARE CONDITIONED UPON TIMELY
NOTIFICATION BY CUSTOMER. THEY ARE GIVEN BY COMPANY AND
ACCEPTED BY CUSTOMER IN LIEU OF ANY AND ALL OTHER REMEDIES,
WARRANTIES, AND GUARANTEES, EXTOUCHED OR IMPLIED, AND IN LIEU OF
ANY IMPLIED WARRANTIES OF MERCHANTABILITY AND FITNESS FOR A
PARTICULAR PURPOSE, ALL OF WHICH ARE HEREBY SPECIFICALLY
EXCLUDED AND DISCLAIMED.
7.
COMPANY neither assumes, nor authorizes any representative or other person to
assume for it, any obligation or liability other than such as is expressly set forth in this
section. Any change, modification, extension or addition to the foregoing warranties,
remedies or limitations shall not be binding upon COMPANY unless in writing and duly
executed by an authorized officer of COMPANY.
iv
Operation Manual
Preface
Trademarks
Every attempt has been made to identify the owner of product trademarks and registered
trademarks that appear in this manual. Changes of company ownership affecting the named
trademark holder may not be identified.
ATX
Baratron
Conflat
Convectron
Cryo-Torr
XTC/XTM
Delrin
EcoDry
Fomblin
Inconel
KF
Lexan
Magidrive
MagiGear
MDX
Micromaze
OFHC
On-Board
PBR260
Pinnacle
Pyrex
Radak
RFX
SID-242
SmartMotor
Teflon
TMH261
Torus
VCO
VCR
Viton
Advanced Energy
MKS Instruments, Inc.
Varian Vacuum Products
Granville Phillips
CTI-CRYOGENICS – Helix Technology Corp.
Leybold Inficon
E.I. DuPont de Nemours & Co., Inc.
Leybold Vacuum Products Inc.
Ausimont
Inco Alloys International Inc.
Leybold Vacuum Products Inc.
General Electric Co.
UHV Designs Ltd.
UHV Designs Ltd.
Advanced Energy
Kurt J. Lesker Co.
American Metals Climax Inc.
CTI-CRYOGENICS – Helix Technology Corp.
Pfeiffer
Advanced Energy
Corning Glass Works
Luxel Corp.
Advanced Energy
Sigma Instruments
Animatics Corporation
E.I. DuPont de Nemours & Co., Inc.
Pfeiffer
Kurt J. Lesker Co.
Cajon Co.
Cajon Co.
E.I. DuPont de Nemours & Co., Inc.
v
Preface
vi
Operation Manual
Operation Manual
Introduction
1-
Introduction
This chapter presents an overview of the Kurt J. Lesker Company PVD Thin Film Deposition
System.
CHAPTER CONTENTS:
PVD Thin Film Deposition System Overview ............................................ 1-2
Service Information ...................................................................................... 1-3
Safety .............................................................................................................. 1-4
Operator Responsibilities...............................................................................................1-4
Safety Notation ..............................................................................................................1-5
Safety Features...............................................................................................................1-6
Safety Guidelines ...........................................................................................................1-8
1-1
Introduction
Operation Manual
PVD Thin Film Deposition System Overview
The PVD System is a versatile, value engineered, R&D vacuum system, which can be
configured to suit a variety of thin film deposition applications.
Standard features include a front-loading box chamber, Turbomolecular pump package,
integrated touch-screen control, and a fully enclosed "zero" cleanroom footprint when flush
wall mounted.
Source flange options include magnetron sputtering, electron beam evaporation, thermal
evaporation and low temperature evaporation furnaces. To ensure product reliability, the
PVD System is built using proven process modules from other standard Kurt J. Lesker
Company thin film deposition systems.
All information, illustrations, and specifications in this manual are
based on the latest product information available at the time of
printing.
KJLC reserves the right to make changes at any time without notice.
Any duplication of this manual, in whole or in part, without express
written approval from Kurt J. Lesker Company is strictly prohibited.
1-2
Operation Manual
Introduction
Service Information
SERVICE
Prior to contacting KJLC Systems Support for assistance, utilize the
Troubleshooting procedures provided in the individual system component
manuals and this Operator’s Manual.
For Service and support within and after the warranty period, contact
KJLC System Support:
Phone: (412) 387-7200, ext. 7311 or 7210
Fax: (412) 384-2745
E-mail: [email protected]
In addition to the specific problem area and application, the following
information is required when contacting KJLC Systems Support:
Platform
Part Number
Serial Number
Date of Manufacture
This information can be found on the identification tag located on the
system frame. Record this information in the box provided above for easy
reference.
A Return Material Authorization (RMA) number must accompany any
equipment being returned to KJLC. The RMA number will be issued by
KJLC Systems Support. This will expedite handling and ensure proper
service of your equipment.
1-3
Introduction
Operation Manual
Safety
Safe use of the system requires familiarity with the individual system components and
adherence to the safety precautions presented in this section. Each operator must have
appropriate training and all supplemental component manuals should be reviewed prior to the
use of the equipment.
Operator Responsibilities
Safe operation is the responsibility of the system user.
1. The operator must adhere to all safety notes, cautions, warnings, and dangers
presented in this manual.
2. All system component manuals are included. The operator must adhere to all safety
recommendations presented in each of these manuals.
3. Failure to comply with these and all precautions violates the safety standards of
intended use of this system and may impair the protection provided by the system.
4. The Kurt J. Lesker Company assumes no liability for failure to comply with these
requirements.
5. Please contact KJLC Systems Support prior to attempting any modifications. Only
qualified personnel should perform component substitutions, modifications to, or
service on the system.
NOTE !
G
1-4
KJLC assumes no responsibility for equipment additions or
modifications without KJLC’s written consent.
In-house performance of component repair or replacement during the
warranty period without direction or approval from KJLC Systems
Support can result in termination of the warranty.
Operation Manual
Introduction
Safety Notation
The following safety notations will be used throughout this manual.
This notation indicates an imminently hazardous situation that may cause serious
injury or death if not avoided. This notation is only used for the most extreme
situations.
This notation indicates a potentially hazardous situation that may cause serious
injury or death if not avoided.
This notation indicates a potentially hazardous situation that may result in injury if
not avoided. It is also used to alert against unsafe practices that may result in
damage to the equipment.
G
NOTE !
This notation is used to highlight any technical requirements, operations,
procedures, or conditions that should be emphasized.
1-5
Introduction
Operation Manual
Safety Features
1. A Power Distribution Box is included for safe installation and maintenance. The box
is located in the instrument rack.
Power Distribution Box
2. At least one Emergency Off (EMO) button is located on the system.
EMO Button
NOTE !
G
If at any time a potentially dangerous situation arises, use the EMO
button to turn off the system, or switch the main disconnect to the OFF
position.
Either of these actions turns off ALL system power. All motion stops;
power supplies, pumps and compressors are shut off.
Resetting the EMO restores the system power. See the Emergency Off
Recovery procedure for further information.
1-6
Operation Manual
Introduction
3. A Dedicated Earth Ground is provided for the system. (See Utility Connections in
the Getting Started chapter for further details.)
Grounding
Strap
PVD Dedicated Earth Ground
4. Typical System Hardware Interlocks
A.) Deposition Power Supplies
• Source cooling flow conditions must be satisfied for the respective source
• Chamber vacuum switch must be satisfied
B.) Heater Power Supply
• Chamber vacuum switch must be satisfied
1-7
Introduction
Operation Manual
Safety Guidelines
1. High voltage and electrical energy hazards exist for the power distribution cabinet
and all power supplies.
High voltage and electrical energy hazards can cause serious injury or
death through electrical shock. Avoid contact with power supplies and
all power distribution hardware.
All personnel involved with power supply service or maintenance must
have appropriate electrical training. Service and maintenance personnel
must read each component part manual before working on the
equipment to determine the potential present on each circuit.
Power must be disconnected and the equipment must be grounded
before service or maintenance work is performed.
Never work alone on live electrical circuits. You must be within sight
or calling distance of another employee who has the proper
qualifications.
Do not wear rings, wristwatches, or other jewelry on your person while
working on live electrical circuits.
Wear eye protection while working on live electrical circuitry where a
flash might occur. DO NOT WEAR CONTACT LENSES.
2. High frequency hazards exist at the RF power supplies.
High frequency fields may cause irregular performance of pacemakers,
which can cause abnormal heartbeat or death.
Persons with pacemakers should avoid exposure to all processes
involving the high frequency hazards.
1-8
Operation Manual
Introduction
3. The permanent magnets create magnetic field hazards.
Magnetic fields may cause irregular performance of pacemakers, which
can cause abnormal heartbeat or death.
Persons with pacemakers should avoid exposure to all processes
involving the magnetic field hazards.
Strong magnetic fields can destroy watches or magnetic cards. Keep
watches, magnetic cards, and other metal objects away from magnetic
field hazards.
Do not use magnetic tools when performing service or maintenance
work on the system.
4. Chemical hazards exist when potentially harmful chemicals are introduced or emitted
from the system.
Exhaust gas may be poisonous and may require special measures of
elimination.
Ensure adequate ventilation and appropriate exhaust regulation when
working with potentially poisonous exhaust gases.
Deposition sources may emit poisonous gases if not maintained
properly. Read all safety data sheets and follow the documented
maintenance procedures.
G
NOTE !
Some cleaning fluids may leave a flammable or toxic residue. Observe
all instructions provided with cleaning fluids.
1-9
Introduction
Operation Manual
5. Mechanical hazards exist because moving parts can cause personal injury or
instrument damage.
Before actuating the hoists or slit valves, all personnel must be clear of
moving parts.
Use extreme caution when working around moving parts.
6. Compressed gas used for processes can create high-pressure hazards throughout the
gas plumbing lines and process chamber.
High pressure can cause personal injury and property damage.
The compressor unit and associated hoses contain compressed helium
and must not be mechanically or thermally stressed. Before accessing a
cryogenic pump, read the operator’s manual and follow all safety
guidelines.
Process gas tanks must be kept according to manufacturers’
specifications and local codes.
7. Heating elements (quartz lamps, composite, etc.) used for sample heating can create
high temperature hazards on chamber walls, viewport surfaces and chamber
internals.
High temperatures can cause harm to personnel and equipment.
Do not vent chamber until temperature is low enough to facilitate safe
handling of parts. High temperatures can also cause damage to
materials if the system is vented prematurely.
1-10
Operation Manual
Getting Started
2-
Getting Started
This chapter presents an overview of getting started with the PVD Thin Film Deposition
System.
CHAPTER CONTENTS:
Receipt Inspection......................................................................................... 2-2
Unpacking ...................................................................................................... 2-3
Utility Connections........................................................................................ 2-4
Power Distribution .........................................................................................................2-5
Dedicated Earth Ground ................................................................................................2-5
Cooling Water................................................................................................................2-6
Gas and Pneumatics .......................................................................................................2-7
Start-Up.......................................................................................................... 2-9
2-1
Getting Started
Operation Manual
Receipt Inspection
1. Visually inspect all packages for signs of shipping damage.
G
NOTE !
Record any signs of shipping damage on the Bill of Lading prior to signing
off on delivery and inform the driver of any concerns.
2. Inspect all tip and impact indicators attached to the system.
a. Prior to shipment, tip indicators are placed on each system.
b. Prior to shipment, impact indicators are placed on the system.
c. If any indicator has been set off, KJLC Systems Support should be notified
immediately at 412-387-9200 x7311 or x7210
3. Assure that the content of each package matches the supplied Packing List. (Refer to
Packing List included with shipment). If any discrepancies occur between the received
parts and the Packing List, KJLC Systems Support should be notified immediately at
412-387-9200 x7311 or 7210.
2-2
Operation Manual
Getting Started
Unpacking
G
NOTE !
DO NOT discard any packing materials until receipt inspection bas been
completed. If any damage is found during unpacking, notify the carrier and KJLC
immediately.
Caution should be exercised during unpacking to assure no injuries occur from
sharp edges or splitting wood.
Due to the weight of the system and mode of travel, contents may shift. Extreme
caution should be exercised when removing all supports
1. Remove the straps or all-thread that holds the system to the pallet.
2. Use a fork-truck to lift the deposition system off of the shipping base (if applicable). Fork
lift / pallet jack tubes are built into the system framework.
Only a properly trained forklift operator should remove the deposition
system from the shipping base. Improper removal of the components can
result in equipment damage.
Be cautious of electrical cables, gas lines, etc. when placing forks under the
System framework.
2-3
Getting Started
Operation Manual
3. Lift the system up far enough to allow the shipping base to be pulled out from underneath
the system.
DO NOT put any part of your body under the lifted system or serious
injuries could occur.
4. Gently place the system on the ground.
5. Any damage to the system or its components incurred during un-crating should be
reported to KJLC Systems Support at 412-387-9200, extension 7311 or 7210.
System may be shipped under vacuum. Therefore, extreme care should be
exercised while moving and installing the system.
Utility Connections
Refer to the General Assembly Schematic included in the Appendices for utility
requirements.
If required, contact the KJLC Assembly and Test Manager at 412-233-4200 x7311 or x7210
for further assistance.
G
2-4
NOTE !
If a KJLC Installation Technician will be installing your system, connect the
utilities but do not turn them on.
Operation Manual
Getting Started
Power Distribution
Ensure facility power feed is off and locked out prior to installation.
Follow the National Electric Code (or appropriate code) for proper wire size, power
feed and grounding requirements.
All affected employees should be notified that the equipment is being turned on.
Reference Schematics: Power Distribution
1. Install a power cord (SO type) or use a hardwire setup (conduit with individual wires)
from an appropriately sized and protected distribution panel to the power distribution
unit.
2. If separate drops are required, the General Assembly Schematic should be referenced.
Dedicated Earth Ground
Reference Schematics: Power Distribution
1. Run a copper connection from the chamber to a dedicated earth ground. (Also see
Safety Features in the Introduction Chapter.)
Braided wire has a high impedance to radio frequency. Do not use braided
wire for grounding connection. Use the copper conductors indicated below:
DISTANCE
CONDUCTOR
0-20 feet (0 to 6 meters)
#4 AWG wire
20-60 feet (6 to 28 meters)
0.035 x 2-inch (1mm x 5cm) strap
over 60 feet (over 28 meters)
Consult KJLC personnel
2-5
Getting Started
Operation Manual
Cooling Water
1. Run system cooling water to the BLUE water supply manifold (see photo below).
Although system requirements may vary, typical requirements are 25°C water with a
50 psi maximum. The General Assembly Schematic should be referenced.
Supply
Manifold
Return
Manifold
Shut-off
Valves
System Cooling Water Supply/Return
2. Connect the RED return manifold to an appropriate drain or chiller.
G
NOTE !
50 Micron water filtration and/or deionization of the water supply is
required to reduce particulate contamination in the cooling lines and
associated components.
The system vacuum integrity should be verified prior to the flowing of
cooling water (pump on the chamber prior to opening the water
manifold valves).
Introducing water prior to verifying vacuum integrity may cause system
flooding or difficulty locating vacuum leaks in water lines.
All water connections should be verified prior to the flowing of any
water. This includes targets in place and any required sealant to be
completely cured.
2-6
Operation Manual
Getting Started
Gas and Pneumatics
1. Run the required process gas to the bulk fitting located in the rear of the system.
Although system requirements may vary, the typical requirement is 5 to 7 psi per
channel. The General Assembly and Process Gas Schematics should be referenced.
MFC’s
Water
Manifolds
Nitrogen
Vent
Process
Gases (2)
Compressed
Air
G
NOTE !
It is recommended to plumb process gases with electro-polished
stainless steel tubing. However, other suitable tubing could be used.
2. Run a supply of dry Nitrogen to the Gas Panel. Although system requirements may
vary, the typical requirement is 15 psi. The General Assembly and the Process Gas
Schematics should be referenced.
3. Run a supply of compressed air to the Gas Panel. Although system requirements may
vary, the typical requirement is 80 - 90 psi. The General Assembly and the Process
Gas Schematics should be referenced.
2-7
Getting Started
Operation Manual
Nitrogen
Vent
Compressed
Air
Air and Nitrogen Supply Panel
G
NOTE !
It is recommended to set the vent pressure to 10 psi maximum.
NOTE !
G
Drain bowl daily to remove water, oil and solid particulates that may have
accumulated in the bowl reservoir.
Filter element should be replaced when the pressure drop across the unit
exceeds 10 psi.
See component service instructions for details.
2-8
Operation Manual
Getting Started
Start-Up
G
NOTE !
When starting up the system for the first time, all utilities should be connected but
not turned on. A KJLC representative will confirm connections prior to start-up.
Prior to the start-up and operation of any system equipment, the intended operator should
review the individual equipment manuals and this Operation Manual.
1. Before the system is powered up, verify that the power input to the system is correct and
matches the power distribution schematic.
2. With all of the power distribution unit’s secondary circuit breakers off, turn on the main
circuit breaker.
3. Verify that the start/stop circuit is on and that all EMO buttons are not triggered (reset by
pulling out and rotating). Leave the system in a stopped state when this test is complete.
4. Verify that all instrumentation and all devices requiring line power are labeled/configured
appropriately for the system line voltage (120 or 208, etc.). Turn off the power switches
on all instrumentation and plug strips. Start the system power and turn on the breaker(s)
for the instrumentation outlet strip(s) ONLY.
5. Power up and verify (per the Power Distribution Schematic) that all devices are plugged
into appropriate outlets on the power distribution unit or plug strip(s) in order to satisfy
circuit breaker assignments.
6. Momentarily engage the rough pump contactors (or power strip) to verify operation of
the motors (verify that plumbing into and out of pump is correct and that the pump has
been filled with oil, if applicable).
7. Verify that the chamber motors and shutters are not obstructed and move freely.
8. Verify that all required communication and power connections to the system computer
are connected and working properly.
9. Start-up the system control software (refer to the Software Operation section).
10. Verify all setpoints (heaters, power supplies, etc.) before starting the pumpdown
sequence.
2-9
Getting Started
2-10
Operation Manual
Operation Manual
Operation
3-
Operation
This chapter is intended to provide general instructions for operating the PVD System. Please
read through and become familiar with all instructions and schematics prior to operating the
system.
Once the system has been successfully installed, the required utility connections have been
made, and the start-up procedure completed, the PVD System is ready for operation.
CHAPTER CONTENTS:
Manual Operation......................................................................................... 3-3
Sample Rotation Setup and Operation...........................................................................3-3
Sample Heating Setup and Operation ............................................................................3-3
Gas Flow Setup and Operation...................................................................................3-4
Manual Pressure Control (Needle Valve) ................................................................................3-4
Torus® Sputtering Source Setup and Operation............................................................3-5
Source Shutter Setup......................................................................................................3-5
E-Beam Source Setup and Operation ............................................................................3-6
LTE/HTE Furnace Operation ........................................................................................3-6
Thermal Evaporation Source Operation ........................................................................3-8
Film Thickness Monitor/Controller ...............................................................................3-9
Emergency Off Recovery Procedure .............................................................................3-9
Shut Down .....................................................................................................................3-9
Software Operation....................................................................................... 3-11
Overview........................................................................................................................3-11
General Guidelines ....................................................................................................................3-12
Security.......................................................................................................................................3-13
Adding a New User .............................................................................................................3-13
Deleting a User ...................................................................................................................3-14
Modifying a User’s Access..................................................................................................3-14
Resetting a Password ..........................................................................................................3-14
Software File Structure & Maintenance ....................................................................................3-15
Backing up your system data...............................................................................................3-15
Restoring your system data .................................................................................................3-15
Software Upgrades.....................................................................................................................3-16
Terminology and Definitions......................................................................................................3-17
Common Icons............................................................................................................................3-19
Operation – Vacuum Screen ......................................................................................................3-21
Operation – Deposition Screen ..................................................................................................3-23
Operation – Gas Screen .............................................................................................................3-25
Operation – Motion Screen ........................................................................................................3-29
Operation – Heating Screen.......................................................................................................3-33
Operation – Cooling Screen.......................................................................................................3-36
Operation – Sigma Screen..........................................................................................................3-37
System – Discrete Screen ...........................................................................................................3-40
System – Analog Screen .............................................................................................................3-42
3-1
Operation
Operation Manual
System – Strings Screen............................................................................................................. 3-44
System – Ethernet I/O Screen.................................................................................................... 3-46
Help – Help Screen ................................................................................................................... 3-47
Recipe Database........................................................................................................................ 3-48
Reorder Items ............................................................................................................................ 3-50
Recorded Data........................................................................................................................... 3-52
Action Log ................................................................................................................................. 3-54
Interlocks................................................................................................................................... 3-56
Sigma Data Sets ........................................................................................................................ 3-58
Configuration ............................................................................................................................ 3-60
System Users..................................................................................................................3-61
CWare Operation ...........................................................................................................3-64
CWare Startup........................................................................................................................... 3-64
Standard Recipes....................................................................................................................... 3-65
Running Recipes........................................................................................................................ 3-65
Writing Recipes ......................................................................................................................... 3-66
Modifying Recipes ..................................................................................................................... 3-67
Importing Recipes ..................................................................................................................... 3-68
Recording Data ......................................................................................................................... 3-68
Data Logging Signals................................................................................................................ 3-68
CWare Shutdown....................................................................................................................... 3-69
3-2
Operation Manual
Manual Operation
Manual Operation
The procedures described on the following pages are for manual operation of the PVD
System and its components.
G
NOTE !
There may be sections of this manual that describe optional features that are not
included in your system configuration. Please disregard these sections.
Sample Rotation Setup and Operation
1. Locate the platen rotation control panel on the front of the system.
2. Set the rotation speed to 0 by rotating the speed control knob to the full counter
clockwise position.
3. Turn the power switch to the ON position.
4. Slowly rotate the speed control knob clockwise until desired speed is reached.
5. Stop the rotation by turning the speed control knob to the full counter clockwise
position and turning the power switch OFF.
Use caution when jogging the platen rotation to avoid serious
equipment damage.
Do not rotate while the system is open to avoid injury and/or equipment
damage.
Sample Heating Setup and Operation
1. Verify the presence of a substrate on the platen and that the system is under vacuum.
2. The temperature will be controlled with a heater controller.
3. Refer to heater controller manual for further details on operation.
3-3
Manual Operation
Operation Manual
Do not vent while heater temperature is >80ºC to avoid injury or
equipment damage.
Use caution when removing the substrate from the chamber, it may be
extremely hot.
Gas Flow Setup and Operation
Manual Pressure Control (Needle Valve)
1. If hooking up the system for the first time or changing to a new tank, proceed
to step 2. If using a previously used set up go to step 6.
2. Use only clean lines to connect gas to the system. (Purge the gas lines while
connecting.)
3. Pump down the system.
4. Pump out the gas supply lines. (Close the tank or wall supply valve, put the
throttle valve in the throttle position, open system gas valve(s) and fully open
needle valves.)
5. When finished, close all system gas valves, open the tank or wall supply valve
and adjust line pressure to >5psig and <15psig.
6. Verify that the system is under high vacuum.
7. Verify that required gas is hooked to the system.
8. Open the gas inlet valve and the appropriate gas channel valve(s) and set the
gas flow/chamber pressure to the desired setting. This setting usually lies
between 1.5 and 15 mTorr for typical depositions or 100 and 400 mTorr for
glow discharge.
9. When finished, close the gas inlet valve and the gas channel valve(s) and set
gas flow/chamber pressure to 0.
10. Turn off throttle valve (full open).
Use appropriate safety measures for gas type(s) selected to prevent
personal injury or equipment damage.
3-4
Operation Manual
Manual Operation
Torus® Sputtering Source Setup and Operation
Please refer to the KJLC Torus® manual for detailed information on operating this device.
This manual can be found in the supplemental documentation binder.
Source Shutter Setup
1. Install the shutter blade onto the shaft end. Adjust insertion depth of the assembly to
achieve a minimum gap between the blade and source of 1/8”.
2. Determine the best operating direction. Rotate the complete assembly to achieve a
shutter “closed” position. Tighten the split collar clamp.
3. Adjust open/close position stops. Remove the plastic cover on the end of the shutter
assembly. Adjust the stop positions by loosening them with a metric socket screw,
sliding the stop block, and tightening the screw.
3-5
Manual Operation
Operation Manual
E-Beam Source Setup and Operation
DO NOT operate or service the e-beam before reading and understanding
the e-beam operation manual.
1. Verify the presence of a wafer in the platen and that the system is under high vacuum.
2. Verify that the crucible liners and material have been properly loaded in the e-beam
pocket(s) for deposition.
3. The deposition will be controlled with the e-beam controller. (Refer to the E-beam
Controller manual for details of operation.)
G
NOTE !
Although the e-beam will work under any high vacuum condition, it is
recommended to start at a pressure of < 5.0e-06 Torr.
Use caution when removing the substrate from the chamber, it may be
hot.
LTE/HTE Furnace Operation
DO NOT operate the LTE/HTE Furnace before reading and understanding all
pertinent component manuals.
1. Inspect all electrical connections between the LTE/HTE Furnace power supply and
LTE/HTE Furnace source and all in-vacuum electrical and vacuum connections to the
LTE/HTE Furnace source.
2. Place a loaded crucible into the pocket of the source, and ensure that the cover is
installed properly into the source base. Ensure that the loaded crucible is centralized
in the source cover.
3-6
Operation Manual
Manual Operation
Some low temperature evaporation materials are known carcinogens.
Refer to all MSDS sheets for safe handling and appropriate breathing
equipment and ventilation.
3. Check to see that LTE/HTE Furnace source is positioned correctly to deposit on the
substrate.
4. Evacuate chamber to < 5.0e-06 Torr.
G
NOTE !
Although the LTE/HTE Furnace will work under any high vacuum
condition, it is recommended to start at a pressure of < 5.0e-06 Torr.
5. Precondition the material in the crucible by raising the temperature of the source to a
temperature or power level just below the appearance of rate on the deposition
monitor.
6. Let source stabilize at precondition temperature for at least 5 minutes.
7. Heat source to desired deposition rate by raising the temperature or power level on
the supply.
8. Open the substrate / source shutter and 0 the thickness monitor.
G
NOTE !
Refer to film thickness control / monitor’s operating manual for
detailed instructions.
9. When the desired thickness is achieved on the monitor, close the shutter and reduce
heat in the source.
10. Allow source to cool prior to venting system.
Use caution when removing the substrate from the chamber, it may be
hot.
3-7
Manual Operation
Operation Manual
Thermal Evaporation Source Operation
DO NOT operate the Thermal Evaporation Source before reading and
understanding all pertinent component manuals.
1. Inspect all electrical connections between the evaporation power supply and
transformer and the transformer to feedthrough connections.
2. Establish that all safety covers and switches (if applicable) are in place and satisfied.
3. Install the desired evaporation boat and deposition material.
4. Evacuate chamber to < 5.0e-06 Torr.
G
NOTE !
Although the source will work under any high vacuum condition, it is
recommended to start at a pressure of < 5.0e-06 Torr.
5. Precondition the material in the crucible by raising the temperature of the source to a
temperature or power level just below the appearance of rate on the deposition
monitor.
6. Let source stabilize at precondition temperature for at least 5 minutes.
7. Heat source to desired deposition rate by raising the temperature or power level on
the supply.
8. Open the substrate / source shutter and zero the thickness monitor.
9. When the desired thickness is achieved on the monitor, close the shutter and reduce
heat in the source.
10. Allow source to cool prior to venting system.
Use caution when removing the substrate from the chamber, it may be
hot.
3-8
Operation Manual
Manual Operation
Film Thickness Monitor/Controller
Please refer to the Film Thickness Monitor/Controller manual for detailed information on
operating this device. This manual can be found in the supplemental documentation binder.
G
NOTE !
Operator is responsible for setting density and z-ratio based on material. Operator
is also responsible for calibrating tooling factor based on characterization runs.
Emergency Off Recovery Procedure
1. Verify that the alarm or emergency condition has been corrected or is no longer a
problem.
2. Begin with step 1 of the Start Up procedure.
Shut Down
1. Verify that all gas valves are closed, the source and heater supplies are tuned off, and
that the temperature is below 80°C.
2. Close High vacuum valve if applicable
3. Turn off the high vacuum pump and vent the chamber. If equipped with a turbo
pump, vent the turbo and chamber to prevent migration of oil into the chamber.
4. Turn off the individual component power switches as required (power supplies,
controllers, etc.)
5. Turn off the individual branch circuit breakers on the main power distribution box.
At this point the system is at shut down. Power can now be removed from the whole system
or any of the system components. Refer to the manufacturers’ manuals to make sure that all
equipment is in a safe mode.
3-9
Manual Operation
10
Operation Manual
Operation Manual
Software Operation
Software Operation
Overview
The Kurt J. Lesker Company CWare HMI (Human Machine Interface) consists of two
components:
•
•
System Database
Runtime Software
Together, these two components give the system operator an interface that provides
capabilities such as:
•
•
•
•
•
•
•
•
•
Process automation
Process (recipe) creation
System status
Manual control of the system
Datalogging
Alarms
Password protection
Interlocks
Offline process editing
The software operates on a Windows based computer with a mouse, keyboard, and standard
CRT flat screen monitor (or optional touchscreen monitor).
3-11
Software Operation
Operation Manual
General Guidelines
CWare enables the user to run the tool manually or in an automated fashion, as well as
provides system and process feedback.
•
•
•
•
•
•
3-12
All actions and selections are done with a single mouse click (or single push of the
finger, in the event of a touchscreen monitor). There are NO double-click actions on
any Runtime screen.
All buttons are typically two state radio buttons that can be either up or down.
When a button is visible it indicates either the state of a request to turn on a device,
the state of a sequence, or the active navigation screens. Typically, a button that is
“pressed” or down indicates that the user (or a process) is requesting the respective
device to turn on. A button that is not pressed or up signifies a device that is being
requested to turn off.
Devices that can be turned on or off typically have an indicator or icon inside their
respective control buttons. While the state of the button indicates whether or not a
device is requested to turn on or off, the color of the indicator or icon inside the
button notifies the user of the actual state of the device. Color definitions for each
button or indicator can be found in the section of the manual that corresponds to the
screen on which it appears.
All alphanumeric fields will appear
as green text with a black background
when not accessible by the logged-in
user and white text when the field is
accessible. The alphanumeric interface
shown here will appear when an
available data entry field is clicked.
The maximum and minimum values
for each numeric variable are
displayed at the upper right within the
pop-up screen while the signal name
appears at the left of the titlebar.
The availability of the Runtime
Software Screens is based upon the
parameters set for the logged in user
(See the Security Section for further details). This manual is intended to provide
information regarding the operation of ALL features currently available in CWare.
Not all features/screens are available on every system. Disregard the manual sections
for the features/screens not included in your system configuration.
Tool Tip Text is displayed for all controls and indicators on all screens. Without
clicking, place the mouse cursor over the control or indicator to see the Tool Tip
Text.
Operation Manual
Software Operation
Security
KJLC CWare security is managed with a user name and password approach. Ideally,
one or two people should be assigned to manage the system security. This/These
System Administrator(s) will need to assign a login name for each person that will
operate the system using the computer interface. Each login name will be assigned
parameters that dictate that user’s access to the software. The System Users Screen is
used to administer this information and is accessed through the System Database:
1. On the Operation – Vacuum Screen, click the Recipe Database button.
2. Click the Systems Users button on the topmost toolbar of the System Database
Screen.
3. The following screen should appear:
Adding a New User
1. Click the New User button.
2. Choose a unique Log-in Name for the new user and type it in the User Log-in Name box.
This is the field that will get captured during datalogging.
3. Complete the SurName (last name), FirstName, and Initials boxes with the person’s
actual name and initials.
4. Using the drop-down menu, choose which software screen should appear first when this
user logs onto the system.
3-13
Software Operation
Operation Manual
5. The password is chosen by the user when they log in for the first time and must consist of
at least one character.
6. In the set of checkboxes labeled Recipe Database Access, choose the database screens
that this user should be allowed access to.
Access to the Interlock Screen should only be granted to the Super User
level (System Administrator). No Operators or Process Engineers should
be allowed access to the Interlocks Screen.
7. In the set of checkboxes labeled VB Mainform Access, choose the screens that this user
should be allowed access to.
8. In the set of checkboxes labeled VB Other Access, choose the appropriate boxes:
•
Operate if Running Recipe = allows the user to operate heaters/shutters on the
runtime software screens while a recipe is running
•
Can change ANY recipe = Can amend any recipe, even if the user does not own
the recipe.
9. Also in the VB Other Access box, choose a level of security for the new user:
•
Operator = can only run recipes that have been assigned to Operators.
•
Process Engineer = can only run recipes that have been assigned to Process
Engineers.
•
Super User = can run, modify and delete any recipe. This is the highest level of
security.
Deleting a User
To delete a user, simply select that user from the Find Existing System User box, and then
click the Delete User box. The deleted user’s recipes and any other associated data will still
be available.
Modifying a User’s Access
At anytime, the access parameters for a user can be changed. Simply select that user from the
Find Existing System User box, and then modify the parameters as required.
Resetting a Password
To change the access parameters for a user, simply select that user from the Find Existing
System User box, and then check the Clear Password button. The password will be re-chosen
by the user when they log in the next time and must consist of at least one character.
3-14
Operation Manual
Software Operation
Software File Structure & Maintenance
KJLC CWare consists of two components: Runtime Software and Microsoft Access database
files. The .exe and supporting files are located in this folder: C:\Program Files\Lesker\Your
Company Name. The data directory in the path mentioned above is where supporting
database files and the datalog.mdb file is stored. To access the datalog.mdb file double click
it. Or if the software is running, open MS Access from the Start menu and browse to this file
then open it.
G
G
NOTE !
It is the responsibility of the customer to periodically backup the system software
and database, as well as remove or archive the datalog information.
NOTE !
KJLC does not recommend using CDRW discs or storing multiple backups on a
single CD.
Backing up your system data
1. Stop the system software from running.
2. Launch Nero CD burning software.
3. Add the C:\Program Files\Lesker directory of data to be saved to CD.
4. Burn the disk.
Restoring your system data
1. Stop the system software.
2. Copy the Lesker directory from the backup disk to C:\Program Files.
3. Right click on the restored Lesker folder and un-check the Read Only attribute box.
4. Apply this to the current folder, sub folders and files.
3-15
Software Operation
Operation Manual
Software Upgrades
Periodically, KJLC will address performance issues with the Runtime Software or add
features to the Runtime Software as well as the database. Depending on the nature of the
changes, KJLC may request that the customer send KJLC a recent backup of their software to
facilitate creating a software revision that may be installed by the customer. Some revisions
pertaining to software performance and existing features will be available to the customer at
no charge; other revisions will be available for purchase as an option.
Typically, upgrading the Runtime software involves copying a new “Customer Name” folder
from a CD provided by KJLC to the computer’s C:\ drive (refer to Software File Structure
and Maintenance section). Follow the instructions included with the revision CD for loading
software upgrades
3-16
Operation Manual
Software Operation
Terminology and Definitions
Access Forms - the portion of the HMI associated with the system database. These forms
(or screens) are used when developing processes, recipes, and configuring the Runtime
software.
Analog Inputs (AI) – system Input that can have many different numerical values (positive
or negative), both integer and decimal. Analog Inputs include motor speeds, gas flows,
pressure, temperatures, power supply feedback signals, etc.
Analog Outputs (AO) – system Output that can have many different numerical values
(positive or negative), both integer and decimal. Analog Outputs include motor speed
setpoints, gas flow setpoints, heater temperature and ramp setpoints, power supply setpoints,
etc.
Discrete Input (DI) – system Input that can have only one of two values (i.e. on/off, 1/0,
opened/closed). Discrete Inputs include vacuum switches, flow switches, gate valve
positions, etc.
Discrete Outputs (DO) – system Output that can have only one of two values (i.e. on/off,
1/0, open close). Discrete Outputs include valves, pumps, power supply enable signals,
heater enable signals, shutter open/close signals, etc.
String Inputs – Can be Discrete or Analog and are used primarily for communication with
serial devices.
String Outputs – Can be Discrete or Analog and are used primarily for communication with
serial devices.
Downstream Pressure Control Mode – method of pressure control mode whereby effective
pumping speed is varied and gas flow is held constant to achieve a desired pressure. The
point of pumping is referred to as being downstream relative to the means of gas
introduction.
HMI – Human Machine Interface. This refers to the computer control screens utilized by the
operator to run the tool and monitor system status.
MFC – Mass Flow Controller. This refers to a device for introducing process gas at a
controlled (variable) rate, typically in units of sccm (standard cubic centimeter per minute).
PID Control – Proportional Integral Derivative Control. A type of control used in closed
loop feedback systems. See Operation – Gas section for more information.
Recipe – an automated sequence that consists of one or more steps or recipes. The steps
specified in a given recipe are executed in a pre-defined (increasing numerical) order.
Runtime Screens – the portion of the HMI associated with the Runtime software (as
opposed to the system database forms). These are the screens most often used when
operating the tool.
Runtime Software – the control software responsible for I/O system interface, control logic,
recipe execution and a majority of the HMI.
Step – the part of a recipe that sets and checks system I/O. Steps can be thought of as the
building blocks for recipes.
System Abort – in case of a dangerous situation, when the System Abort button is pressed on
the HMI (or the system is aborted as the result of a Red Alarm or device communications
error) all processes are stopped and all Discrete and Analog Outputs are set to their default
(startup) state as configured by the system database. Typically most Discrete Outputs are
turned off and most Analog Output setpoints are set to zero.
3-17
Software Operation
Operation Manual
System Database – a Microsoft Access database that contains recipes, user information, and
system configuration details.
System I/O – system Inputs/Outputs. I/O refers to the electronic hardware controls for a
system. Inputs are typically device signals that provide system status or feedback. Examples
of Inputs include flow switches, vacuum switches, valve positions, pressures and motor
speeds. Outputs are typically device signals that provide system control or manipulation.
Examples of Outputs include pumps, valves, flow setpoints and power supply setpoints.
Upstream Pressure Control Mode – method of pressure control whereby effective pumping
speed is held constant (i.e. fixed position throttle valve) and gas flow is varied to achieve a
desired pressure. The point of gas introduction is referred to as being “Upstream” relative to
the means of pumping.
3-18
Operation Manual
Software Operation
Common Icons
These common icons appear throughout the Runtime software screens. Some icons appear on
every screen, others only where specified.
Time and Date Banner
The Time and Date Banner appears at the top left of all runtime screens. The current
Windows time and date is displayed.
Running Time Indicator
The Running Time Indicator appears at the top left of all runtime screens. The time displayed
here is the elapsed time that the software has been up and running since the last shut down.
Legend Indicators
The Legend Indicators appear at the top left of all runtime screens. The status of a
corresponding active or inactive signal is indicated here.
Exit Button
The Exit Button appears at the top right of all runtime screens. Pressing this button closes
both the runtime engine and the system database.
Login / Logout Button
The Login/Logout Button appears at the top right of all runtime screens. This button allows
the user to login or logout of the software. This icon also displays the login name and
security level of the current user.
Abort Button
The Abort Button appears at the top right corner of all runtime screens. Pressing it activates
an abort condition.
3-19
Software Operation
Operation Manual
Light Tower
The Light Tower appears in the top right corner of all screens. When the topmost bar is
illuminated RED, a red alarm condition is present. The second bar will light YELLOW to
indicate a yellow alarm. The third bar will light GREEN to indicate that a recipe is running.
The bottom bar will light BLUE to indicate a “normal” status, no alarms are present and no
recipes are running.
Navigation Buttons – Runtime Software
This set of Navigation Buttons appears on the Runtime Software screens. They are used to
navigate the major screen groups. Each button opens a new screen with a different set of
information or data.
Navigation Buttons – System Database
This set of Navigation Buttons appears at the top of the System Database and is used to
navigate throughout the database. Each button opens a new screen with a different set of
information or data.
Command Buttons
Command Buttons appear on all Runtime Software screens and are used to run preprogrammed processes as well as user-selected processes. In addition to standard Command
Buttons, additional custom buttons are available to be configured by KJLC upon customer
request. The number of custom buttons available depends upon system configuration.
3-20
Operation Manual
Software Operation
Operation – Vacuum Screen
G
NOTE !
The chamber representations appear white while at atmosphere and get
darker as the pressure in the chamber decreases. The Process Chamber
above is at high vacuum (black), while the Load Lock chamber above is at
atmosphere (white).
ICON or DATA FIELD
Valve Icons
ACTION
Click to activate
RESULT
Green / Pressed = open or active
Gray / Unpressed = closed or inactive
Valve Indicators
Display only
Fault
Display only
Speed
Display only
Indicates position of valves with real
feedback, such as the isolation and high
vacuum valves
This icon will only appear during a fault
condition
Indicates the current speed of the LL
turbo pump
3-21
Software Operation
Operation Manual
ICON or DATA FIELD
Pirani Gauge
ACTION
Display only
RESULT
Indicates Pirani gauge pressure in Torr
Cryo Temperature
Display only
Indicates the temperature of the Cryo
pump in Kelvin
Regeneration Pressure
Display only
Indicates pressure in mTorr of the Cryo
pump during regeneration
On/Off
Click to activate
Turns on/off the Pirani gauge.
Pump Icons
Display only
On = green, animated motion, and
appear pressed/down
Off = gray, no animation, and appear
un-pressed/up
Process Chamber:
Vacuum Indicator
Display only
Gray = atmospheric pressure
Green = some level of vacuum
Display only
Indicates wide range gauge pressure in
Torr
Pressure
Capacitance Manometer Display only
Indicates capacitance monometer
pressure in mTorr
Temperature
Display only
Indicates process chamber temperature
in degrees Celsius
LL Chamber Pressure
Display only
Indicates wide range gauge pressure in
Torr
LRP End of Travel
Display only
Green = LRP is fully retracted (End of
Travel)
Illuminates to On color if active and Off
color if inactive
3-22
Operation Manual
Software Operation
Operation – Deposition Screen
ICON or DATA FIELD
ACTION
Display only
RESULT
Green = Open
Gray = Closed
Source Material
Click to enter
current target
material
Target material is displayed on the
Operation – Deposition screen and recorded
in process and manual datalogs
Source Power Supply
Mapping
Click text to map
source to a
particular power
supply and
switch position
(if applicable)
The mapped source kilowatt-hours counter
will increment accordingly when the
respective power supply is on and has
positive output power
Shutter Indicators
3-23
Software Operation
ICON or DATA FIELD
Source Kilowatt Hours
Operation Manual
ACTION
Displays current
kilowatt-hours
for a particular
target.
RESULT
The kilowatt-hours counter increments
accordingly based on the output state of the
corresponding power supply.
Click to zero or
preset the
kilowatt-hours
counter.
Click to activate
The counter is set accordingly and
increments from the preset value.
PS Output Setpoint
Click to enter
value
Enter the desired power supply output
setpoint in Watts (also see Ramp Rate
below)
PS Ramp Rate
Click to enter
value
Enter the desired power supply ramp rate in
units per second
Display only
NOTE: Set Ramp Rate PRIOR to setting the
output setpoint.
Displays current power supply status
Power Supply On/Off
Power Supply Feedback
Turns respective power supply on/off
Refer to the Operation - Heating section for descriptions of heater control icons included on
the Deposition screen.
Refer to the Operation - Gas section for descriptions of gas and pressure control icons
included on the Deposition screen.
Refer to the Operation - Motion section for descriptions of platen control icons included on
the Deposition screen.
3-24
Operation Manual
Software Operation
Operation – Gas Screen
ICON or DATA FIELD
MFC Setpoint
ACTION
Click to enter
value
RESULT
Sets MFC flow in sccm.
NOTE: Applies to Independent Mode only
MFC Flow
Display only
Indicates gas flow from corresponding MFC
MFC Mode
Click to enter
value
Sets mode of operation for corresponding
MFC.
Mode 0 = Independent (Flow) Mode
Mode 1X = Slave Mode (X = master)
Mode 4 = Upstream Pressure Control Mode
3-25
Software Operation
ICON or DATA FIELD
MFC Ratio %
Operation Manual
ACTION
Click to enter
value
RESULT
Sets MFC flow as a percent ratio of master
channel (Slave Mode).
Click to enter
value
Sets MFC contribution as a percent of full
range (PID/Pressure Control Mode).
Sets gas correction factor for corresponding
MFC (as a function of nitrogen calibration).
MFC Range
Click to enter
value
Refer to gas controller manual(s) or web
site(s) for gas correction factor tables.
Sets flow range of corresponding MFC in
sccm (max nitrogen flow)
Capman Pressure
Display only
Indicates Capman pressure in mTorr
Capman Pressure
Setpoint
Click to enter
value
Sets desired chamber pressure in mTorr.
MFC Correction Factor
NOTE: Requires one MFC in Mode 4 and
corresponding gas valve open
Capman Range
Wide Range Gauge
Click to enter text Sets the range of the capacitance manometer
in mTorr.
Display only
NOTE: Maximum value is typically 1000
mTorr.
Indicates wide range gauge pressure in Torr
NOTE: DO NOT adjust PID values for pressure control loop while in Pressure Control Mode.
3-26
Operation Manual
ICON or DATA FIELD
Capman Pressure –
Proportional Term
Software Operation
ACTION
Click to enter
value
Capman Pressure –
Integral Term
Click to enter
value
Capman Pressure –
Derivative Term
Click to enter
value
RESULT
Sets proportional term for pressure control
loop. The proportional term determines the
amount of change in gas flow to compensate
for the difference between desired pressure
and actual pressure – the greater the
proportional term, the quicker the flow will
change to adjust for pressure differences
(large P terms can lead to instability).
This is the most critical term for tuning the
pressure control loop. Typically, as the
throttle position increases (greater
conductance = higher effective pumping
speed), the P term must be increased to
achieve the desired pressure (greater change
in gas flow is required to affect a pressure
change).
Sets integral term for pressure control loop.
This term typically does not need to be
changed from its factory default value.
Sets derivative term for pressure control
loop. This term typically does not need to be
changed from its factory default value.
Refer to the Operation – Vacuum section for descriptions of heater control icons included on
the Gas screen.
3-27
Software Operation
Operation Manual
Gas Control Overview
The software supports control of up to 4 MFCs in flow or pressure control modes. Only one
MFC can be designated as the “master” for upstream pressure control, but any of the
remaining MFCs can be “slaved” to the master. Any MFC can be set for independent or slave
flow mode at any time. The ranges for the gas flow and pressure hardware can be changed (in
appropriate maintenance levels) to accommodate modifications by the customer.
Additionally, pressure control PID values can be changed manually (on the Operation – Gas
screen) or in a recipe to accommodate various throttle valve positions.
Master/Slave Operation
Master/Slave relationships are ratiometric based on flow. Multiple levels of this relationship
are supported so that an MFC slaved to one channel could also be master to another. The
flow of a given slave channel is based on the actual flow of the corresponding master
channel, not the setpoint of the master. In this way, if the master channel is not flowing
correctly or is otherwise limited, the gas composition remains correct. Additionally, if a
given slave flow is limited based on that MFC’s range, the flow setpoint for the
corresponding master is limited to maintain the desired gas ratio.
Pressure Control
The software uses closed loop PID control to accomplish upstream pressure control. When a
given MFC is assigned to pressure control mode, the software adjusts that MFC’s flow rate
setpoint accordingly based on the desired pressure setpoint and the actual pressure reading
supplied by the capacitance manometer. If any additional channels are slaved to the pressure
control channel, then their flows will also be adjusted respectively.
EXAMPLE: SLAVE MODE
Mode 11 for MFC 2 slaves MFC 2 to MFC 1. The flow setpoint for MFC 2 = (actual
flow of MFC1) x (the ratio of MFC2).
So if MFC1 actual flow = 100 sccm and MFC 2 ratio is 50%, MFC2 flow setpoint = 50 sccm.
SLAVE MODE NOTES
A channel cannot be slaved to itself. If this is requested, the channel will be set to
Independent Mode with a flow setpoint of zero.
A circular slave relationship is not allowed. If two channels are slaved to each other, the
highest number MFC is set to Independent Mode with a flow setpoint of zero.
If the setpoint for a slave channel is greater than its range, the setpoint for the slave is limited
to its maximum and the corresponding setpoint for the master channel is set such that the
desired gas composition is maintained.
3-28
Operation Manual
Software Operation
Operation – Motion Screen
G
NOTE !
Additional icons appear on the Operation - Motion screens for systems equipped
with automatic transfer. Please disregard descriptions for icons not included with
your particular system configuration.
ICON or DATA FIELD
Platen Motor On
ACTION
Click to activate
RESULT
Click to turn the Platen motor on
Platen Motor Velocity
Display only
Indicates the current motor velocity in
RPM or IPS depending on motor
Platen Motor Errors
Display only
Indicates if an error occurs with the platen
motor
3-29
Software Operation
ICON or DATA FIELD
Platen Home
Platen Home Offset
Home Velocity Setpoint
Operation Manual
ACTION
Click to activate
RESULT
Click to send the motor home. The button
will stay pressed while the platen is
homing. Once the platen is
homed/referenced, the button changes to
un-pressed.
Click to enter value Enter the desired offset from home that you
want the motor to consider it’s new home.
When you home with an offset, the motor
will go home, then move to the offset and
consider this location to be 0.
Click to enter value Enter the desired home velocity in RPM or
IPS depending on motor
Referenced Indicator
Display only
Platen Jog Forward
Click to activate
Platen Jog Reverse
Click to activate
Jog/Continuous Velocity
Moving Indicator
Go To Position
Position Velocity
Currrent Position
Indicator
3-30
Indicates when the motor is referenced.
Green / 1 = referenced
Gray / 0 = not referenced
Click and hold to move the motor in the
forward direction. The motor will stop
when the button is released.
Click and hold to move the motor in the
reverse direction. The motor will stop
when the button is released.
NOTE: Some motors are restricted to
forward motion only. In this case, the Jog
Rev button is not visible
Click to enter value Set the jog and continuous velocity for the
motor in RPM or IPS. Jog and Continuous
motion share the same velocity setpoint
Display only
Indicates when the motor is moving.
Green / 1 = moving
Gray / 0 = not moving
Click to activate
Sends the motor to the position indicated in
the position setpoint box at the velocity
shown in the position velocity setpoint box.
This button stays pressed until the motor
reaches the position setpoint
Click to enter value Set the velocity at which the motor should
move to the desired position
Display only
Indicates the current position of the motor
Operation Manual
ICON or DATA FIELD
Motor Position Setpoint
Software Operation
Motor Error Reset
ACTION
RESULT
Click to enter value Enter the setpoint for the motor to move to
when the Go To Position button is
activated
Click to activate
Initiates the motor to move in a forward
motion at the Jog/Cont velocity. The motor
will move continuously until the button is
clicked again
Click to activate
Initiates the motor to move in a reverse
motion at the Jog/Cont velocity. The motor
will move continuously until the button is
clicked again
Click to activate
Resets motor error conditions
Stop Motion Button
Click to activate
Motor Forward
Motor Reverse
Click to stop all motor motion
NOTE: The following icons and fields are available for adjustment, however it is highly
recommended that the SMI User’s Guide be read prior to adjusting these parameters. Changing
motor tuning parameters can seriously degrade the performance of your motors.
Click to enter value Set or change the motor acceleration (Refer
to the SMI User’s Manual)
Maximum Motor Current Click to enter value Set the maximum motor current (Refer to
the SMI User’s Manual)
Motor PID Filter P Term Click to enter value Refer to the SMI User’s Manual
Motor Acceleration
Motor PID Filter I Term
Click to enter value Refer to the SMI User’s Manual
Motor PID Filter D Term Click to enter value Refer to the SMI User’s Manual
Substrate X/ Source Y
(Substrate Position Key)
(See example below)
Click text to enter The platen will move to the desired
the desired station position when the station setpoint is used in
setpoint in degrees. conjunction with the enable position
button.
3-31
Software Operation
Operation Manual
Substrate X/Source Y Example:
This station setpoint is intended for systems with single or multiple platens. For example, a
station setpoint of 14 on a system with one platen signifies that platen 1 (the only platen)
should move to deposition source (or position) 4. A station setpoint of 25 on a system with 4
platens signifies that platen 2 should move to deposition source (or position) 5.
G
3-32
NOTE !
Setting a new station setpoint places a value in the motor position setpoint (in
inches or degrees, depending on the type of axis), but the Move to Position button
must be pressed before the motor will actually move.
Operation Manual
Software Operation
Operation – Heating Screen
ICON or DATA FIELD
Overtemperature
ACTION
Display only
RESULT
This icon is only visible when the
heater is over temperature
Temperature Setpoint
Click to enter
value
Enter the desired temperature setpoint
3-33
Software Operation
ICON or DATA FIELD
Auto Mode Setpoint
Heater Setpoint
Ramp Rate
Operation Manual
ACTION
Click to enter
value
Click to enter
value
Click to enter
value
RESULT
Enter the desired temperature setpoint
for Auto Mode. When Auto Mode is
enabled, this value is used in
conjunction with the Ramp Rate box to
achieve the desired temperature.
NOTE: If a ramp rate is desired, it must
be entered PRIOR to entering the
desired temperature.
Enter the desired heater output as a
percentage of full scale.
When Auto Mode is disabled, the heater
can be controlled by power setpoint
Enter the desired ramp rate to be used
during Auto Mode in degrees C per
minute.
Once a ramp rate is entered followed by
a new Temperature Setpoint, the heater
will ramp to the desired value.
Over Temperature
Indicator
Display only
Temperature Indicator
Display only
3-34
NOTE: The ramp rate starting point is
the CURRENT Temperature Setpoint,
NOT the current actual temperature. To
avoid delays in achieving the desired
ramp temperature, be sure to set the
Temperature Setpoint close to the actual
temperature, then set the desired ramp
parameters, and finally the target
temperature.
Monitors for an over temperature
condition.
When Auto Mode is enabled, this field
displays the current temperature control
setpoint. If a ramp rate has been
specified, this field displays the
temperature setpoint as it ramps up
rather than the final target temperature.
Operation Manual
ICON or DATA FIELD
Proportional Coefficient
Software Operation
ACTION
Click to enter
value
RESULT
Enter the Proportional coefficient for
the Auto Mode temperature control
loop. The control loop is immediately
changed.
The P term determines the change in
heater output power applied to
compensate for differences between
actual and desired temperature.
Typically, larger P terms are required
for greater thermal mass.
Integral Coefficient
D Request
Heater On Manual Button
Heater On Auto Button
Click to enter
value
Click to enter
value
CAUTION: Disable Auto Mode while
adjusting PID parameters.
Enter the Integral coefficient for the
Auto Mode temperature control loop.
The control loop is immediately
changed.
CAUTION: This term does not
typically need to be adjusted from its
factory default value. Disable Auto
Mode while adjusting PID parameters.
Enter the Derivative coefficient for the
Auto Mode temperature control loop.
The control loop is immediately
changed.
CAUTION: Disable Auto Mode while
adjusting PID parameters.
Click to activate Green = Heater On
Gray = Heater Off
Click to activate Green = Auto Mode Enabled
Gray = Auto Mode Disabled
When Auto Mode is enabled, the heater
is controlled by the temperature setpoint
rather than % power.
Refer to the Operation – Heating section for descriptions of heater control icons included on
the Heating screen.
3-35
Software Operation
Operation Manual
Operation – Cooling Screen
ICON or DATA FIELD
Flow Switch(es)
3-36
ACTION
Display only
RESULT
Green = On
Gray = Off
Operation Manual
Software Operation
Operation – Sigma Screen
G
NOTE !
CWare provides a basic interface for the Sigma controller. Refer to the Sigma
manual for details regarding function and data set parameters.
ICON or DATA FIELD
Sigma Launch 242
ACTION
Click to activate
RESULT
Initiates the Sigma deposition
control software.
Sigma Simulation Mode
Click to activate
Simulates Sigma processes in the
absence of Sigma hardware.
Sigma Start/Stop Process
Click to activate
Initiates the currently loaded Sigma
process.
3-37
Software Operation
Operation Manual
ICON or DATA FIELD
Sigma Zero All
Thicknesses
ACTION
Click to activate
RESULT
Zeros the Sigma thickness.
OK Indicator
Display only
Power Supply Mapping
Click to enter value
Lights green when Sigma
acknowledges communication with
CWare
Map the power supply to the
corresponding Sigma deposition
source number.
Data Shutter Mapping
Click to enter value
Deposit Shutter Mapping
Click to enter value
Sigma Data Set Number
Click to enter value
Sigma Control Request
Click to enter value
Sigma Last Message
Display only
3-38
Example: If a “1” is entered, The
Sigma process output Power setpoint
will be transferred to the outpoint
setpoint for KJLC deposition power
supply #1.
Map the desired shutter to the Sigma
delay shutter control signal. Controls
the opening and closing of the
corresponding shutter. Shutter will
open for the Shutter Delay and
Deposit phases of the Sigma process
only. This is typically used to map a
source shutter.
Map the desired shutter to Sigma
deposit control signal. Controls the
opening and closing of the
corresponding shutter. Shutter will
open for the Deposit phase of the
Sigma process only. This is typically
used to map a substrate shutter.
Transfers the Sigma process setup
associated with this number from the
Recipe database to the Sigma
software
Loads the target process. Type the
name of the process you want to run
then Enter. If there is an associated
process name in the Sigma software,
this is the process that will run when
you click on Sigma Start Process.
Displays the last message sent to
Cware from the Sigma software.
Operation Manual
Software Operation
ICON or DATA FIELD
Sigma Process Name
ACTION
Display only
RESULT
The current process is displayed.
Sigma Film Name
Display only
The Sigma specific name of the
current file is displayed.
Refer to the Sigma Data Sets section and the Sigma manual for descriptions of additional
icons included on the Operation – Sigma screen.
3-39
Software Operation
Operation Manual
System – Discrete Screen
G
NOTE !
This screen is primarily used for troubleshooting and selecting datalog items. It is
recommended that operators other than the system administrator do not have access
to this screen. Users can be denied access to this screen based upon their login
parameters – see the System Users Screen and the Security section of this manual.
Forcing discrete inputs can override interlocks. When system troubleshooting is
complete, you must remember to reset (un-force) signals.
ICON or DATA FIELD
Signal
3-40
ACTION
Click to select or
deselect
RESULT
All Discrete Outputs and Inputs are listed in
alphabetical order
Operation Manual
ICON or DATA FIELD
Software Operation
Initial Value
ACTION
Display only
RESULT
Displays the initial condition of the
corresponding discrete output at system
startup.
Signal Value
Click to activate
Displays the actual current state of the
corresponding discrete output.
Signal State
Is Forced
Click to force
signal
Display only
Generate Data Log
Click to activate
Suspend Screen
Updates
Click to activate
Clicking on the signal value will toggle its
state and will also change the state of the
corresponding equipment. For example
clicking on the Gun2 shutter Signal Value is
the same as clicking on the actual shutter
indicator on the Operation – Deposition
screen.
Displays the current state of the
corresponding discrete input at system
startup.
Discrete inputs can be forced by clicking on
the corresponding Signal State.
Indicates whether or not the current signal is
forced.
False = unforced signal
True = forced signal
Generates a table in the folder C:\Program
Files\Lesker\Company Name\Data\
Datalog.mdb. The table name is the date and
time the table was created.
Stops the constant screen update to allow the
user to easily select signals to be forced.
3-41
Software Operation
Operation Manual
System – Analog Screen
G
NOTE !
This screen is primarily used for troubleshooting datalogging. It is recommended
that operators other than the system administrator do not have access to this screen.
Users can be denied access to this screen based upon their login parameters – see
the System Users Screen and the Security section of this manual.
Forcing analog inputs can override interlocks. When system troubleshooting is
complete, you must remember to reset (un-force) signals.
ICON or DATA FIELD
Signal
3-42
ACTION
Click to select or
deselect
RESULT
All Analog Outputs and Inputs are listed in
alphabetical order
Operation Manual
ICON or DATA FIELD
Outputs – Initial
Value
Outputs – Signal
Value
Software Operation
ACTION
Display only
RESULT
Displays the initial condition of the
corresponding analog output at system startup
or shutdown.
Click to activate
Displays the actual current value of the
corresponding analog output.
Units
Display only
Inputs – Value
Click to activate
Inputs – Status
Display only
Generate Data Log
Click to activate
Suspend Screen
Updates
Click to activate
Clicking on the signal value will display an
alphanumeric keypad that allows the signal
value to be changed. This will also change
the value of the corresponding equipment.
For example changing the value of the MFC1
SP is the same as changing the set point on
the Operation – Gas Screen.
Displays the corresponding signal’s unit of
measurement.
Displays the current value of the
corresponding analog inputs.
Analog inputs can be forced by clicking on
the associated Value for the corresponding
signal. A pop up alphanumeric keypad is
displayed for data entry.
Displays whether or not the current signal is
forced.
Forced = corresponding signal is forced
Normal = corresponding signal is forced
Generates a table in the folder C:\Program
Files\Lesker\Company Name\Data\
Datalog.mdb. The table name is the date and
time the table was created.
Stops the constant screen update to allow the
user to easily select signals to be forced.
3-43
Software Operation
Operation Manual
System – Strings Screen
G
NOTE !
This screen is primarily used for troubleshooting. It is recommended that operators
other than the system administrator do not have access to this screen. Users can be
denied access to this screen based upon their login parameters – see the System
Users Screen and the Security section of this manual.
Forcing string inputs can override interlocks. When system troubleshooting is
complete, you must remember to reset (un-force) signals.
ICON or DATA FIELD
Signal
3-44
ACTION
Click to select or
deselect
RESULT
All String Outputs and Inputs are listed in
alphabetical order
Operation Manual
ICON or DATA FIELD
Outputs – Initial
Value
Signal Value
Software Operation
ACTION
Display only
RESULT
Displays the initial condition of the
corresponding string output at system startup
or shutdown.
Click to activate
Displays the actual current value of the
corresponding string output/input.
Units
Display only
Inputs – Status
Display only
Generate Data Log
Click to activate
Suspend Screen
Updates
Click to activate
Clicking on the signal value will display an
alphanumeric keypad that allows the signal
value to be changed. This will also change
the value of the corresponding equipment.
For example changing the value of the Platen
Motor Home Offset is the same as changing
the set point on the Operation – Motion
Screen.
Displays the corresponding signal’s unit of
measurement.
Displays whether or not the current signal is
forced.
Forced = corresponding signal is forced
Normal = corresponding signal is forced
Generates a table in the folder C:\Program
Files\Lesker\Company Name\Data\
Datalog.mdb. The table name is the date and
time the table was created.
Stops the constant screen update to allow the
user to easily select signals to be forced.
3-45
Software Operation
Operation Manual
System – Ethernet I/O Screen
G
3-46
NOTE !
This screen contains information useful only to KJLC engineers and System
Administrators. It is used in troubleshooting issues with Ethernet connections and
modules.
Operation Manual
Software Operation
Help – Help Screen
This screen displays KJLC contact information and provides a link to an electronic copy of
this Operation Manual.
ICON or DATA FIELD
System Manual
ACTION
Click to activate
RESULT
The System’s Operation
Manual will be automatically
opened using Adobe Acrobat.
3-47
Software Operation
Operation Manual
Recipe Database
This screen provides the user with an interface for running and maintaining recipes. See the
CWare Operation section for further instructions.
ICON or DATA FIELD
New Recipe
ACTION
RESULT
Click to activate Starts a new, blank recipe.
Click to activate Use these buttons to select the first,
previous, last, or next recipe in the recipe
list.
Drop Down Recipe List Click to activate Click the arrow to display a list of
programmed recipes. You can then select
one from the list by clicking on it.
Click to activate Toggles between Show All and Show
Show All
Main and dictates what list of recipes will
be shown in the Drop Down Recipe List
box.
Click
to
activate
Checking this box will allow the chosen
Sub Recipe
recipe to be used as a step in other recipes.
Navigation Button
3-48
Operation Manual
ICON or DATA FIELD
Delete Recipe
Export Recipes
Update VB
Reorder Items
Copy Recipe
Software Operation
ACTION
RESULT
Click to activate Deletes the currently selected/displayed
recipe.
Click to activate Copies all recipes to C:\Program
Files\Lesker\Customer Name\Excel
Files\Recipe Sets.xls
Click to activate Updates the list of available recipes that
will be seen in the Runtime Software and
updates changes to recipes in the Runtime
Software.
Click to activate Opens a new screen that allows the user to
change the order of programmed
commands.
Click to activate Copies the selected recipe and prompts for
a new name.
Include in VB List
Click to activate Check this box to include the selected
recipe in the “Run a Recipe” menu.
Operator Can Use
Click to activate Check this box to allow “Operators” to run
the selected recipe.
Process Engineer Can
Use
Click to activate Check this box to allow “Process
Engineers” to run the selected recipe.
User
Display only
Current logged in user of recipe
Owner
Display only
Original writer of selected recipe.
GRST
Click to enter
value
G = Goto sequence number
R = Ramp rate
S = Skip
T = Timeout
3-49
Software Operation
Operation Manual
Reorder Items
Use this screen to correct the order of steps in a saved recipe. To access this screen, click on
Reorder Items on the Recipe Screen. See the CWare Operation section for further
instructions.
ICON or DATA FIELD
Chose Item to Move
ACTION
RESULT
Click to activate Click the step in the column on the left that
needs to be moved.
Chose Item to Insert
Above
Click to activate Click the step in the column on the right
that the chosen step from the left table
needs to be placed before.
Move
Click to activate Moves the location of the step selected on
the left.
Re-Number
Click to activate Clicking this button corrects the numerical
order of each command.
3-50
Operation Manual
ICON or DATA FIELD
Return to Recipe
Software Operation
ACTION
RESULT
Click to activate Click to return to the recipe screen.
3-51
Software Operation
Operation Manual
Recorded Data
This screen displays recorded system data and provides the user with a means to maintain the
data. See the CWare Operation section for further instructions.
ICON or DATA FIELD
Delete
ACTION
RESULT
Click to activate Deletes the selected data set.
Export
Click to activate Exports the selected data set to Excel.
Start Time
Display only
Shows the start time of the corresponding
data set.
Stop Time
Display only
Shows the stop time of the corresponding
data set.
Description
Display only
Shows the unique system-generated name
for a data set. This name can be edited by
the user.
3-52
Operation Manual
ICON or DATA FIELD
View
Software Operation
ACTION
RESULT
Click to activate Views the selected data set in the table
format of an Access database.
Delete Sigma Log Files Click to activate Deletes Sigma Log Files
3-53
Software Operation
Operation Manual
Action Log
All user actions that have occurred since the last shut down can be viewed and maintained
using this screen. See the CWare Operation section for further instructions.
ICON or DATA FIELD
Delete
Export
Person
Logged In
Logged Out
3-54
ACTION
RESULT
Click to activate Click to remove all entries in the Action
Log
Click to activate Click to export a copy of all entries in the
Action Log to
C:\ProgramFiles\Lesker\Customer
Name\Excelfiles
Display only
Displays the login name of the person
using the system for the corresponding
login entry.
Display only
Shows the date and time that the user
logged into the system.
Display only
Shows the date and time that the user
logged out of the system.
Operation Manual
ICON or DATA FIELD
Software Operation
Time Logged In
ACTION
Display only
Number of Recipes
Display only
Recipes Used
Display only
RESULT
Shows the elapsed time that the
corresponding user was logged into the
system.
Shows a count of the number of recipes
that were used by the corresponding user
login name.
Lists the recipes that were used by the
corresponding user login name.
3-55
Software Operation
Operation Manual
Interlocks
This screen provides detailed information regarding interlocks. Only KJLC Engineers, or
System Administrators under the direction of a KJLC Engineer, should change these
interlocks. See CWare Operation for further instructions.
Changes to this screen can damage equipment or cause injury to system users.
ICON or DATA FIELD
Show All
ACTION
RESULT
Click to activate Shows all interlocks.
Hide Skips
None
Drop Down List
Click to activate Choose a piece of equipment to see only
the interlocks associated with that
equipment.
3-56
Reserved for future use.
Operation Manual
ICON or DATA FIELD
Software Operation
Export
ACTION
RESULT
Click to activate Exports the interlock data to an Excel
spreadsheet.
Update VB
Click to activate Updates Visual Basic with any changes
that have been made.
Reorder Items
Click to activate Renumbers the steps after changes have
been made
3-57
Software Operation
Operation Manual
Sigma Data Sets
All Sigma Data settings can be viewed and maintained using this screen.
G
NOTE !
Refer to the Sigma manual for further details regarding data set parameters.
ICON or DATA FIELD
New
ACTION
RESULT
Click to activate Creates a new data set.
Navigation Buttons
Click to activate Use these buttons to select the first,
previous, last, or next data set.
Delete
Click to activate Deletes the selected data set.
3-58
Operation Manual
ICON or DATA FIELD
Software Operation
Export to Excel
ACTION
RESULT
Click to activate Exports the selected data set to Excel.
Copy Dataset
Click to activate Creates a copy of the selected data set.
Update VB
Click to activate Updates Visual Basic with any changes
that have been made.
3-59
Software Operation
Operation Manual
Configuration
This screen contains important setup information that affects and enables computer control of
the system. The only field that customers should change is the RecordingRateDefault.
Changes to any other data on this screen should only be made by KJLC Engineers or under
the guidance of a KJLC Engineer.
ICON or DATA FIELD
Recording Rate
Default
3-60
ACTION
Click to enter
value
RESULT
Enter the rate (in seconds) at which the
computer should record system data.
Operation Manual
Software Operation
System Users
This chart defines icons and buttons found on the System Users Screen.
ICON or DATA FIELD
ACTION
RESULT
Click to activate
This field displays a list of all users with
Find
access to the system software in dropdown menu format.
Click to activate
Click this button to create a new
New User
software user using the appropriate
boxes below.
Click to activate
Enter a user’s log-in name to log in.
Log-in
SurName (Last
Name)
Click to activate
Enter the user’s last name in this field.
First Name
Click to activate
Enter the user’s first name in this field.
Initials
Click to activate
Enter the user’s initials in this field.
3-61
Software Operation
ICON or DATA FIELD
Operation Manual
Start Form
ACTION
Click to activate
Password
Click to activate
Clear Password
Click to activate
Removes the existing password for the
selected user.
Delete User
Click to activate
Deletes the selected username.
Recipe Database
Access
Click to activate
Use this list of checkboxes to assign
availability of the System Database
screens to the selected user.
VB Mainform Access
Click to activate
Use this list of checkboxes to assign
availability of the Runtime Software
screens to the selected user.
3-62
RESULT
Use this drop down list to choose which
screen / form should be the opening
screen for the selected user.
Enter the password for the selected user.
Operation Manual
ICON or DATA FIELD
VB Other Access
Software Operation
ACTION
Click to activate
RESULT
Use this list of checkboxes to assign
availability of software screens to the
selected user.
Operate if Running Recipe = allows the
user to operate heaters/shutters on the
runtime software screens while a recipe
is running
Can change ANY recipe = Can amend
any recipe, even if the user does not
own it.
Operator = the user can only run recipes
assigned to Operators
Process Engineer = the user can only
run recipes assigned to Process
Engineers
Super User = The user can run/amend
any recipe
3-63
Software Operation
Operation Manual
CWare Operation
This section provides general information on how to operate the system using the computer
interface. Please modify these procedures as necessary to conform to your specific needs.
G
NOTE !
Please review the General Information & Definitions Sections thoroughly prior to
operating the system via CWare.
CWare Startup
The system computer is configured to automatically start KJLC software every time
it boots up. Additionally, if the Runtime software has been stopped for maintenance
purposes, it can be restarted by double-clicking the software icon on the Windows
desktop.
Before starting the software or booting the computer, it is generally a good idea to verify the
appropriate system components are on and in the correct state (i.e. power supplies on, cryo
compressors/turbo controllers on, gauge controller on, etc.). Additionally, all gauges should
be turned off manually on the system’s vacuum gauge controller (if applicable) prior to
starting system software (this is to prevent priority conflicts and communication errors
between the gauge controller and the system control software).
The Operation – Vacuum Screen is typically the first screen to appear.
3-64
Operation Manual
Software Operation
At system startup, the Login/Logout Button is in a “Login Here”
state. Clicking on this button will display the dialog box shown
here.
1. Type your user name in the upper window. Then use the
mouse to set the cursor in the password window. Type your
password and press the enter key on the keyboard. The OK
button will then appear.
2. Click OK or press the enter key on the keyboard. The dialog
box will disappear and the Login/Logout button will now
display the “username” and the security access level of the
logged in user.
3. At this point, basic system operation is available to the user –
pumping, venting, sample loading/unloading, process
selection, and process execution. It is usually a good idea to
pumpdown the system upon startup (unless the system has a cryo pump that requires
regeneration, in which case pumpdown initiation must wait until the pump is ready).
Running the standard PC Pumpdown process puts the system into a known state that is
typically desirable before selecting and running a deposition process.
G
NOTE !
Prior to running any process, assure that all system connections have been
properly made and all related documentation has been reviewed.
Refer to the Overview & Definitions section of Software Operation for details regarding the
function of Icons and Command Button processes.
Standard Recipes
A recipe is a collection of commands that can be used to perform
a set routine. Many recipes are pre-programmed for customers.
These programmed recipes can be modified, or copied then
modified to suit your specific application. The standard recipes
involve basic functions such as abort routines, pumping, venting,
testing, wafer transfer, etc. Use the Recipe Database screen to
view or modify the steps in a recipe.
Running Recipes
A list of available recipes is displayed by pressing the Run
Recipe button from any Runtime Engine screen. Recipe details
can also be viewed from the Recipe screen of the System
3-65
Software Operation
Operation Manual
Database. The list of available recipes is limited by the access level of the logged in user and
if the Include in VB List box is checked. See System Users and Recipes screens in the
Overview & Definitions section for further details.
To run a recipe from the Runtime Software screens:
1. Click the Run Recipe command button found on the right
side of any Runtime Software screen.
2. Select the desired recipe from the list with a single leftclick of the mouse. A red box appears below the list just
above the Cancel button.
3. Click the green box to start running the recipe. Clicking
Cancel will close the Run Recipe pop up box.
4. When the recipe starts, a dialog box will appear. The top
half displays the recipe name and step number. The bottom
half displays the current action of the running recipe.
5. The recipe can be aborted at anytime by right-clicking the top
half (dark red) and selecting abort. This will run the Abort
Default recipe or the Abort recipe assigned to the recipe. (See
Standard Recipes).
G
NOTE !
Skipping certain steps may cause
damage to equipment and is done so
at the operator’s own risk.
Writing Recipes
1. On the Recipe screen, click New in the upper left corner.
2. Type a name in the white box next to Name.
3. Check the Include in VB List box so that the recipe will be available from the Runtime
Software.
4. Click on row 0 in the Equipment column, and then select an equipment option from the
drop down menu.
5. Tab to, or click on the EquipmentItem column and select an option from the drop down
menu. The contents of this drop down menu are dependent upon the chosen equipment
from step 4 above.
6. Tab to, or click on the EquipmentItemOperation column and choose the desired action.
3-66
Operation Manual
Software Operation
7. In the last column, Equipment/Test Value, enter the time or pressure relevant to the
chosen action.
8. The column labeled GRST allows for Goto sequence number, Ramp rate, Skip, or
Timeout steps
9. Repeat steps 1 through 8 for each recipe step. You cannot move to the next recipe step
until the current one is complete.
10. When all steps of the recipe are complete, click on the Update VB button to save the
recipe. This will make the recipe appear on the Run Recipe list from the Runtime
Software screens.
Modifying Recipes
Any saved recipe can be modified. It is strongly suggested that you copy a recipe and modify
the copy using a new recipe name. If you need the original recipe, it will still be saved as it
was before you started.
G
NOTE !
When modifications are complete, you must click Update VB for the changes to be
applied in the Runtime Software.
To change the order of the steps in a recipe:
1. Use the navigation buttons on the Recipe Database screen to choose the recipe to edit.
2. On the Recipe Database screen, click the Reorder Items button.
3. On the left side of the screen, click the recipe step that needs to be moved.
4. On the right side of the screen, click the recipe step that the chosen step on the left needs
to be placed BEFORE.
5. Click the Move button. Both lists display the changed order and the steps have
renumbered automatically.
6. Click the Return to Recipe button to return to the main Recipe Database screen.
To delete a step in a recipe:
1. Use the navigation buttons on the Recipe Database screen to choose the recipe to edit.
2. Left-click in the leftmost block next to the step number of the recipe step you wish to
delete – the entire row should be highlighted black.
3. Press the Delete Key on the keyboard.
4. The sequence number for the deleted step is now missing. If you wish to renumber the
remaining steps, use the Reorder Items button, then press the Re-Number button.
3-67
Software Operation
Operation Manual
To add a step to a recipe:
1. Use the navigation buttons on the Recipe Database screen to choose the recipe to edit.
2. You must first add the step AFTER all of the other steps in the recipe.
3. When the required step is complete, follow the steps above labeled “change the order of
the steps in the recipe” to place the new step in its proper position.
Importing Recipes
1. Copy the RecipeD.mdb file from the source system to your C:\Program Files\Lesker
directory.
2. Start the system and access the recipe database.
3. Select configuration.
4. Click on the Import Recipe drop down box.
5. Select the recipe to import by clicking on it.
6. You will be prompted to accept the import.
7. Click on OK.
8. The new recipe is imported to your system.
9. Click the Update VB button.
Recording Data
1. Click on the Recording Start button near the lower right corner of any Runtime Engine
screen. The caption of this button will change to Recording Stop and it will illuminate
green each time data is written. Clicking it again will stop recording data.
2. Recorded data is saved in a Microsoft Database format. The file path is: C:\Program
Files\Lesker\Customer Name\Data\RecordingD.mdb
3. The data is saved in a table named tblRecordingData.
4. Data can be access by opening the database using Microsoft Access and then double
clicking the table file.
5. The first two fields in this table are generated by the software for system use. The
remaining fields are the recorded system signals including a Date/Time stamp.
6. Data can be exported or extracted using Microsoft Access Tools.
Data Logging Signals
1. First, navigate to the System Screen.
2. You can select any or all signals on the Discrete, Analog, or Strings screens. Navigate to
the appropriate screen.
3-68
Operation Manual
Software Operation
3. Click the Suspend Screen Updates to eliminate any focus jumping that will cause signals
to “think” that they are being forced.
4. Click on the signal names that you would like to data log. The signal name is highlighted
green when selected. Deselect a signal by clicking it, and then it will return to the
standard background color.
5. Click the Suspend Screen Updates button to deactivate.
6. Click on the Generate Data Log button from any of the signal screens.
7. When you click on the Generate Data Log button a table is generated in the folder
C:\Program Files\Lesker\Company Name\Data\ Datalog.mdb. The table name is the date
and time the table was created.
8. When data logging is initiated from the main program screen, the data items selected are
appended to this table. If a new table is generated, data items will be appended to the
new table. The data items appear in the table in alphabetical order with a date/time stamp
on each new record.
CWare Shutdown
Pressing the Exit button at the top right of any Runtime Software screen will close
both the Runtime Software and the System Database.
3-69
Software Operation
3-70
Operation Manual
Operation Manual
Maintenance
4-
Maintenance
This chapter describes maintenance required on the system.
CHAPTER CONTENTS:
Maintenance Personnel Qualifications ....................................................... 4-2
Maintenance Materials and Accessories..................................................... 4-3
General Recommendations .......................................................................... 4-4
System Component Repair/Replacement ................................................... 4-5
Preventative Maintenance............................................................................ 4-5
Process Chamber Cleaning .......................................................................... 4-5
4-1
Maintenance
Operation Manual
Maintenance Personnel Qualifications
All personnel performing maintenance procedures must have appropriate training.
Vendor supplied instructions and operator manuals should be reviewed prior to maintenance
or operation of any equipment or hardware.
4-2
Operation Manual
Maintenance
Maintenance Materials and Accessories
Task
Item
Description
Electrical
Assembly
Wire Stripper
Wire Cutters
Terminal Crimper
Precision Screwdrivers
Sizes: 8 – 22 AWG
Precision and heavy duty
Sizes: 22 - 10 AWG
Standard
SAE Socket Set
Metric Socket Set
Ratchets
Ratchet Extensions
SAE Wrench Set
Metric Wrench Set
Adjustable Wrench
Phillips Head Screwdriver
Slotted Screwdriver
SAE Hex Key Set
Metric Hex Key Set
Slip-Joint Pliers
Tube Cutter (Metal & Plastic)
Sizes: 1/4 inch – 3/4 inch
Sizes: 6 mm – 17 mm
1/4 inch & 3/8 inch
1/4 inch & 3/8 inch
Sizes: 1/4 inch – 3/4 inch
Sizes: 6 mm – 17 mm
Small & Large
#1 & #2
#1 & #2
1/16 inch – 3/8 inch
1.5 mm – 10 mm
Standard
1/4 inch – 3/8 inch
Isopropyl Alcohol
Acetone
Alconox
Alpha Wipes
Molybdenum Disulfide
Vacuum Grease
Boron Nitride
Used for final cleaning
Used for initial degreasing
Vacuum cleaning solution
Lint free wipes
Used for lubrication of hardware
Used on o-rings to ensure proper seal
High temperature lubricant
Mechanical
Assembly
Recommended
Supplies
Please contact the Kurt J. Lesker Company for ordering information.
4-3
Maintenance
Operation Manual
General Recommendations
ü Prior to the installation of any assembly, it is good practice to review the list of parts and
ensure all parts are on hand.
ü Prior to installation of any copper gasket or o-ring, ensure the gasket, o-ring and sealing
surface are free from defects and debris.
ü Wipe all gaskets and flanges clean with isopropyl alcohol prior to installation to assure
cleanliness.
ü When applying vacuum grease to an o-ring, be cautious not to apply too liberally. A thin
even film is sufficient.
ü Prior to tightening any QF or Conflat type flanges, ensure that the o-ring or metal gasket
is centered and seated properly.
ü When assembling, be sure to use proper vacuum cleanliness techniques (i.e. wearing
clean gloves, hair nets and beard masks and using lint free wipes).
ü Use a non-stick lubricant (such as Molybdenum mixed with isopropyl alcohol) on all
stainless steel to stainless steel hardware mounting. For internal mounting, only a
vacuum compatible lubricant (such as Boron Nitride) should be used.
ü Supplemental Manuals and Information should be reviewed prior to installation or
operation of any equipment or hardware.
4-4
Operation Manual
Maintenance
System Component Repair/Replacement
For repair or replacement of specific components, see appropriate schematics and operation
manuals. These procedures are associated with features critical to proper system function. Inhouse performance of component repair or replacement during the warranty period without
direction or approval from KJLC Systems Support can result in termination of the warranty.
If an authorized KJLC service representative suggests that a system component be returned
to KJLC, a Return Material Authorization (RMA) number must be issued. The RMA number
expedites handling and ensures proper service of the equipment.
Many of the referenced maintenance procedures have safety dangers, warnings,
cautions, and notes associated with them. Read all procedure references and
observe all safety measures.
Preventative Maintenance
The individual component manufacturer’s recommended preventative maintenance schedules
should be reviewed and followed.
Failure to follow the proper preventative maintenance procedures could result in
premature failure of the system or components.
Process Chamber Cleaning
The chamber and internal shielding should be cleaned regularly to remove deposition
contaminants and particulates which can affect vacuum integrity and process performance.
The interval required for cleaning is based upon the amount of deposition processes
performed on each system. The user should review the system periodically and perform
duties as required to set up a scheduled preventative maintenance procedure.
If required, a recommended cleaning procedure can be supplied by an authorized KJLC
representative.
4-5
Maintenance
G
Operation Manual
NOTE !
As part of the preventative maintenance of the system, all heater bulbs should be
reviewed for excessive deposition covering and be replaced as required.
Care should be taken to assure that cleaning agents and cleaning procedures do not
form a negative reaction with the materials used in the deposition chamber.
Refer to MSDS for handling instructions.
Run-off from deposition component cleaning may be poisonous and requires
appropriate disposal.
4-6
Operation Manual
Appendix
5-
Appendix
This section provides reference materials for the system.
5-1