Transcript
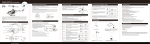
Instruction Manual for
with
Gyro RC Helicopter
Preparing for Flight:
Assembling the Remote Control:
AGES
14 +
1. Install antenna: screw antenna into the adapter (Fig. 1)
2. Open battery case cover on the back using a small Phillips screwdriver.
3. Install batteries (size 1.5V AA, not included) according to polarity symbols (+) and (-) in battery compartment
(Fig. 2).
4. Replace the battery cover.
5. When the power light remains on after the remote is turned on, the batteries are working. When the power light
begins blinking, the batteries are dying and need to be replaced.
Fine Tuning Your Helicopter's Flight:
1. Do not fly in temperatures below 50°F/10°C. Doing so may damage the helicopter
and/or adversely affect your ability to control it.
2. Do not fly in strong wind. Windy conditions will limit or completely
interfere with flight control, resulting in your helicopter becoming
Ove
r9
feet
damaged or lost.
3. Choose a flight area that is free of obstacles such as animals,
people, electrical lines, trees, or other obstructions.
Battery Notes: Do not mix old and new batteries. Do not mix different types of batteries. Only use ‘AA’ alkaline
batteries for this product. Remove batteries if this product not going to be used for a long time. Always remove
exhausted batteries from the product and dispose of safely.
Over 8 feet
Skyline
If your helicopter rotates in flight even when you are not using the remote control to make it do so, then you can
adjust the fine-tuning knob to correct it.
Ove
r9
r
ve
9
et
feet
fe
O
Flight Radius
If your helicopter is rotating left, turn the trim dial to the
right (see diagram). Continue to adjust this dial until the
helicopter flies straight.
Right turn
If your helicopter is rotating right, turn the trim dial to the
left (see diagram). Continue to adjust this dial until the
helicopter flies straight.
Left turn
Turning On The Helicopter:
ON
Thank you for your purchase of Protocol’s Skyline with Gyro RC Helicopter. You are about to experience
the best of what remote control flight has to offer. We strongly recommend that you take the time to read this
manual thoroughly. It contains many tips and instructions on how to get the most of this aircraft, and maintain
it for long life.
As with any aircraft, this is a precision flying machine. Treat it well and enjoy all the fun it has to offer, flight
after flight.
Helicopter and Remote Control Parts:
Connector
Balance bar
*There is a small, thin wire wrapped
around the landing gear. This is
the receiver for the radio signal.
Do not touch.
Main rotor blades
Main shaft
Tail pipe
Tail rotor blades
Horizontal tail
Support pipe
Cover
Landing gear
Host rack
Main rotor gears
Tail motor
Vertical Tail
Fig.1
Fig.2
Charging the Helicopter:
The helicopter is equipped with a high-performance Lithium-Poly battery.
1. Always turn the helicopter power switch off when charging the battery.
2. Connect the charge plug of the battery charger to the charge slot on the helicopter (see diagram).
3. Plug the charger into the power outlet.
4. While charging, the LED light on the charger is off.
5. When the charge is complete, the LED light brightens.
6. The battery requires 120-150 minutes of charging for
approximately 7-9 minutes of flight.
7. DO NOT CHARGE BATTERY LONGER THAN
160-180 MINUTES.
1. Once the helicopter is charged, disconnect the AC charging cord from the charge slot of the helicopter.
2. Plug the charge slot into the second wire on your helicopter. This closes the power circuit.
3. Turn on the helicopter.
4. Place the helicopter onto the ground and stand at least 9 feet behind it.
5. Pull the remote control antenna to its full extension.
6. Make sure the throttle on the remote control is at its lowest position.
7. Turn on the remote control. Control your helicopter as described in the following section.
Controlling Your Helicopter:
Ascend
Descend
IMPORTANT!
Do not immerse the helicopter in water. Keep it in a cool
dry environment.
Do not use a battery charger other than the one provided.
After charging the battery, disconnect the AC adapter from the wall outlet.
Trim dial
ON
POWER
ON/OFF
Rudder
(Forward/backward,
Ieft/right)
Charger
Flying Practice:
With enough practice, you can attempt the following maneuvers (see diagrams):
Forward
Push up the steering rudder (see diagram)
and the helicopter's nose tilts down and it
flies forward.
Backward
Push down on the steering rudder (see
diagram) and the helicopter's nose tilts up
and it flies backward.
*Do not crash the helicopter from a high altitude. Damage can occur to the helicopter due to its size.
The remote control doesn’t work:
1. Make sure the remote control’s power switch is on.
2. Make sure the batteries in the remote control are inserted properly, according to polarity symbols
(+) and (-) in the battery compartment.
3. Replace the batteries.
Unable to control the helicopter:
1. Make sure the helicopter’s power switch is on.
2. Make sure the helicopter’s wires are plugged into each other once the helicopter is charged.
3. Make sure the remote control’s antenna is fully extended.
4. Do not fly the helicopter in wind, which can interfere with control.
The helicopter will not ascend:
1. Make sure you are pulling up on the throttle stick.
2. Make sure the helicopter battery is fully charged.
The helicopter lands too fast/crashes:
1. Slowly pull down the throttle until the helicopter lands smoothly.
2. Make sure the helicopter battery is fully charged.
Caution:
1. Remote control range is reduced when the batteries are low.
2. When the helicopter’s battery is low, it will not fly as high.
3. Do not fly the helicopter if the rotor is damaged or broken. Injury can result.
4. Landing the helicopter too fast or crash landing will result in a shorter lifespan for the helicopter.
5. Keep hands, fingers, eyes, hair, and loose clothing away from rotors and moving parts.
Replacement Parts:
Thank you for your purchase of Protocol’s Skyline with Gyro RC Helicopter! We know that accidents can
sometimes happen which is why we offer a spare parts kit including the below available on our website
ProtocolNY.com.
Pull down on the throttle stick (see diagram) to
lower the helicopter.
Steering
(Adjusts the balance of helicopter)
Throttle
control stick
Note: The tail blade may not always spin as you are flying. Please note that this is normal as long as you are able
to control the helicopter.
Push up on the throttle stick (see diagram) to
raise the helicopter.
Move the rudder stick (see diagram) left to turn
the helicopter left.
Move the rudder stick (see diagram) right to
turn the helicopter right.
Make sure that the battery charger power adapter fits your electrical outlet.
Turn the helicopter and remote control power off when not in use.
Note: If the helicopter is less than 1 foot from the ground, the vortex from the spinning blades can create flying
issues. Please make sure to fly the helicopter above this height.
Revolving descents
Never leave the helicopter battery unattended when charging.
Antenna
Indicator light
POWER
Troubleshooting:
Practice flying your helicopter in a rectangular pattern by
flying it forward and then executing a series of left-hand
turns. Gradually round off the turns so that you can fly
your helicopter in a circle.
•
•
•
•
•
•
•
•
•
•
•
Main Propeller Blade Set A (2 pcs/set)
Main Propeller Set B (2 pcs/set)
2 X Tail Blade
Stabilizer/Balance Bar
Tail (vertical)
Tail (horizontal)
4 X Connectors
Main Rotor Gear A
Main Rotor Gear B
Screwdriver
Screws
Limited Waranty:
Practice landings until you can land gently and
accurately.
Once you have mastered the above, try flying your
helicopter in a figure 8 pattern.
At Protocol, we’re dedicated to bringing you innovative and well-designed products that make living fun and easy.
We stand behind all of our products and warrant this to be free from defects in workmanship and materials for 90
days from the date of purchase. The warranty does not cover transportation damage, misuse, crashes, accident,
or similar events. Specific legal rights pertaining to this warranty may vary by state.
For service claims or questions please consult our website ProtocolNY.com.