1
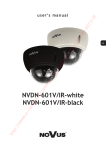
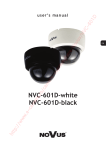
AHD HD Camera (OSD、Day/Night Optional) USER’S MANUAL Apply to:Box Camera IR Waterproof Camera Dome Camera Thank you for purchasing our products, please read the manual carefully before operating Version:YX-ZXIMX23814V01 54# Safety Precaution This symbol means that there might exist uninsulated dangerous voltage inside the case, be careful of electric shock. This symbol reminds you to pay attention to important operation and maintenance instructions in the accompanied information. Warning In order to prevent damage caused by fire or electric shock, please do not put cameras exposed in the moist environment or rainwater. Please make sure the adapter is consistent with product specifications, otherwise it might cause fire, electric shock or damage. Pay attention to polarity of the adapter, it might cause some accidents like fires. Please don’t connect multiple cameras with the same adapter at the same time ,overloading of adapter capacity may cause fires. Power supply must be firmly fixed so as not to loose to cause fires. If the device gets abnormal smell or smoke”, please stop it immediately and contact with our customer service center. Please contact our local distributor or our maintenance office authorized by our company, otherwise we won’t promise warranty. Please do not splash water on the product components when cleaning. Notes Do not make the products under great impact or stay away from strong electromagnetic interference and vibration. There are some sophisticated parts inside the camera, therefore, during transportation and installation, please avoid the damage cause by stress or severe vibration. For the sake of safety, please do not switch on power before accomplishing all installation. Please comply with all electrical safety standards during operation, camera or signal transmission cable should maintain a sufficient distance (50 meters) with high-voltage equipment or cables, if necessary, lighting and thunder protective measures must be taken. Please install the camera in well-ventilated environment. Please do not make the camera face sunshine or other strong light directly in case of any damage to the lens and the sensor. The temperature and humidity range for cameras work are -10 ~ 50 ℃ , less than 95% separately, please do not start cameras beyond this range. To avoid lightning strikes, please make sure the installation of power supply ground line in a good condition. To prevent the equipment from damage by shower or splash of water, please do not place the device substances such as liquid. Contents I Features..............................................................................................................5 II Interface.. .........................................................................................................7 2.1 Interface ............................................................................................7 III OSD.................................................................................... ............................8 3.1 Lens mode...........................................................................................8 3.2 Exposure..............................................................................................8 3.3 Backlight...........................................................................................10 3.4 White BAL........................................................................................11 3.5 Day/Night..........................................................................................12 3.6 DNR..................................................................................................15 3.7 Special...............................................................................................15 3.8 Adjust................................................................................................20 3.9 Exit....................................................................................................21 IV Specification........................ ........................................................................23 V FAQ........................................................... ....................................................25 I、Features This products use SONY progressive CMOS image sensor, with Nextchip NVP2431H DSP, 720P, high definition, natural and smooth image quality. With standard AHD connector, no compression, no delay; with ICR filter to get Day and Night vision; OSD menu and RS-485 are optional; Camera is wildly used in places like Financial Places, Telecom, Supermarket, Hotel, Government, School, Airport, Factory, Police, Judicature places which demand high definition image quality. 1、 New generation AHD 720P program SONY progressive Exmor CMOS image sensor, with Nextchip NVP2431H DSP, 720P, high definition, with standard AHD connector. 2、 High-definition resolution Maximum color resolution output: 1280( H) x720(V). 3、 Day/Night D/N cameras work just like color cameras during the day and switch to a black and white mode at night, using a removable IR cut filter. 4、 WDR WDR could resolve the image problem when there's dramatic light difference between outdoor and indoor areas so that all the details both in the light zone and dark zone could be seen clearly. 5、 3D DNR Digital noise reduction technology Digital Noise Reduction Technology enhances the ability to handle with signal noise ratio, this technology allows camera to receive more clear and vivid images even under low-light conditions. 6、 BLC BLC function can adjust the surroundings with too weak and strong brightness, to get the clear optimization picture. 7、 MD Motion detection function can trigger alarm or recording when sensing moving objects, users can set the sensitivity and multiple detection zones. 8、 PRIVACY The Privacy Mask can block out sensitive areas from view, covering the areas with a solid block of color, you can adjust the mask position and size. 9、 RS-485 All the OSD Menu can be set through RS-485. 10、 Smart IR Page5of25 When getting a picture of nearby object, the reflected IR light is too strong to cause the exposure. However, Smart IR Control could sense the IR light and intelligently control it in order to eliminate the exposure and get a perfect image. 11、 OSD On Screen Display Menu. Page6of25 II Interface Function Introduction 2.1 Interface Function Description ENTER Use this button to display the main menu, to confirm and to enter the submenus when they 1 are available. UP/DOWN Use this button to move the cursor upwards/downwards to the desired item LEFT/RIGHT Use this button to move the cursor to the left/right to select or to adjust the parameters of the selected item. 2 3 VIDEO TEST/VIDEO OUT LED LEVEL No function For the customer to customize the IR brightness Page7of25 III OSD in Press the "Enter" button; the camera will pop up the main menu(as shown picture 1): 3.1 Lens mode 2 different modes of LNES, DC and Manual, users can choose the mode according to the using lens. 3.1.1 Manual lens When using fixed iris or manual iris lens, please choose Manual mode. 3.1.2 DC lens When using Auto Iris Lens, please choose DC mode. 3.2 Exposure Move the cursor to the main menu "EXPOSURE", press the " Enter " button to enter the sub-menu. Page8of25 (1) >Shutter Speed Select to set the camera shutter speed. The shutter speed can be fast or slow, the value is AUTO,1/25~1/10000,2X~30X, users can select the shutter speed value according to the condition. When using Auto Iris Lens, the shutter speed default is “1/25”; When using Manual Iris Lens, the shutter speed default is “AUTO”. (Suggest X2-X4. if the circumstance with high brightness or the object moving quickly, the shutter speed value can be lower, suggest 1/250). (2) > AGC Control AGC: 1~15 adjustable, this function can enhance the camera image brightness, also can enhance the camera image noise, can be adjusted by the user according to the real condition. (3) >SENS-UP SENS-UP can enhance the brightness of night vision, “OFF/AUTO” adjustable, the value of SENS-UP cannot too big, or the image will be leaving streaks at night. (4) >Brightness Select to set the camera image brightness, 1-100 adjustable. Users can set the brightness according to the condition. The default value is 48. (5) >DWDR DWDR is digital wide dynamic range, or software DWDR function, when there is difference between weak and strong light in the surroundings, the strong part will overexposure and the image is white; meanwhile, the weak part will be dark due to the effect of strong light. Turn on DWDR, it can fix this situation. DWDR will reduce the exposure of strong part, and enhance the exposure of weak part; therefore, it can get a clear whole picture. The DWDR with “Auto/off”, in the “Auto” mode, 0-8 is optional, users Page9of25 can select to set the value DWDR according to the light in the surroundings, to get the best picture. (6) >Through-frog function. “Through-frog function” means when camera works outdoor with bad fog and low visibility. It improves image definition to improve visibility through the adjustment of camera internal software. “Through-frog function” has two select--Auto/ Off. When it is AUTO, you can set area, size and level. Users can set to reach best result according to the actual situation. (7) >Return After finished setting, press ‘up’ ‘down’ key to move cursor to ‘Return’, then use ‘Left’ and ‘Right’ key to select ‘Return’ (Means return to previous menu). Or ‘Save& Exit’ (Means exit menu setting), then press ‘Enter’ to perform the function of return. 3.3 Back light Compensation (1) >BLC Press ‘Left’ ‘Right’ at ‘Back Light’ mode menu to select ‘BLC’ and press ‘Enter’ into ‘BLC’ submenu. (a) >Level. Set the level of BLC. High, middle, low for choose. (b) >Area. Set the area, size etc. (c) >Default. Press ‘Enter’, BLC related setting restore factory settings. (d) >Return After finished setting, press ‘up’ ‘down’ key to move cursor to ‘Return’, then use ‘Left’ and ‘Right’ key to select ‘Return’ (Means return to previous menu). Or ‘Save& Exit’ (Means exit menu setting), then press ‘Enter’ to perform the function of return. Page10of25 (2) >HSBLC (a) >Select. There are 4 HSBLC areas for user to choose. (b) >Display. Set location, size etc. for selected area. (c) >Black Mask. Set whether black mask for HSBLC area. ON/ OFF (d) >Level. Set HSBLC level, 0~100 optional. (e) >Mode. Set HSBLC mode. ‘ All day’ and ‘Night’ optional (f) >Return After finished setting, press ‘up’ ‘down’ key to move cursor to ‘Return’, then use ‘Left’ and ‘Right’ key to select ‘Return’ (Means return to previous menu). Or ‘Save& Exit’ (Means exit menu setting), then press ‘Enter’ to perform the function of return. 3. 4 White Balance (1) >Used to restore the authenticity of color when it’s affected by the change of color temperature, user can select different WB mode according to actual needs. AWB/ATW/AWCSET/Indoor mode/Outdoor mode/Manual mode. Remark: Normally user only needs to use ATW. (2) >Manual mode Page11of25 (a) >Red, Blue. User can adjust red/ blue gain according to actual need to reach best image effect. (b) >Return After finished setting, press ‘up’ ‘down’ key to move cursor to ‘Return’, then use ‘Left’ and ‘Right’ key to select ‘Return’ (Means return to previous menu). Or ‘Save& Exit’ (Means exit menu setting), then press ‘Enter’ to perform the function of return. 3.5 Day/Night There are 4 modes of day/night: color mode, black and white mode, Ext mode, and auto mode. (1) >Color mode In the ‘Day&Night’ menu, press ‘Left’ ‘Right’ key to select ‘Color Mode’. At the moment image will be enforced to color mode. User can set according to actual need. (2) >Black and white mode In the ‘Day&Night’ menu, press ‘Left’ ‘Right’ key to select ‘Black and white Mode’. At the moment image will be enforced to black and white mode. Then press ‘Enter’ key into ‘black and white mode’ submenu, you can set the corresponding parameters. (a) >Burst Whether turn off burst signal after setting to B/W. ‘On’/ ‘Off’ for choose. (b) >Smart IR When getting a picture of nearby object, the reflected IR light is too strong to cause the exposure. However, Smart IR Control could sense the IR light and intelligently control it in order to eliminate the exposure and get a perfect Page12of25 image. (c) >IR PWM (d) >Return After finished setting, press ‘up’ ‘down’ key to move cursor to ‘Return’, then use ‘Left’ and ‘Right’ key to select ‘Return’ (Means return to previous menu). Or ‘Save& Exit’ (Means exit menu setting), then press ‘Enter’ to perform the function of return. (3) >D&N EXT D&N EXT mainly control color switch by EXT TRIG. Through ‘D&N EXT’ can realize the main board, light board, ICR synchronous switch. (a) >DN (delay) It can set the delay time from D to N, 0~60s for choose. (b) >ND (delay) It can set the delay time from N to D, 0~60s for choose. (c) >Return After finished setting, press ‘up’ ‘down’ key to move cursor to ‘Return’, Page13of25 then use ‘Left’ and ‘Right’ key to select ‘Return’ (Means return to previous menu). Or ‘Save& Exit’ (Means exit menu setting), then press ‘Enter’ to perform the function of return. (4) >Automatic (a) >day to night(AGC) Setting the AGC threshold value of the camera when convert day to night, the greater the threshold value is, the later it converts. Make sure: the day to night (AGC) > night to day (AGC). (b) >day to night delay Set the time of day to night. (c) >night to day(AGC) Setting the AGC threshold value of the camera when convert night to day, the smaller the threshold value is, the earlier it converts. Make sure: the day to night (AGC) > night to day (AGC). (d) >night to day delay Set the time of night to day. (e) >return After finished setting, press ‘up’ ‘down’ key to move cursor to ‘Return’, then use ‘Left’ and ‘Right’ key to select ‘Return’ (Means return to previous menu). Or ‘Save& Exit’ (Means exit menu setting), then press ‘Enter’ to perform the function of return. Page14of25 3.6 Noise deduction (a) >2DNR The user can select high/medium/low/off. (b) >3DNR The user can select high/medium/low/off. (c) >return After finished setting, press ‘up’ ‘down’ key to move cursor to ‘Return’, then use ‘Left’ and ‘Right’ key to select ‘Return’ (Means return to previous menu). Or ‘Save& Exit’ (Means exit menu setting), then press ‘Enter’ to perform the function of return. 3.7 Function (1) >camera title Press “left” and “right” key to choose “on” in the menu of “function CAM TITLE”, the image will perform the function of showing the camera title. Then Page15of25 press “OK” to enter “CAM TITLE” to set the submenu, which can set the camera title. (a) >the camera title can be set Numbers, uppercase letters and corresponding symbols, the length is 15 characters. (b) >“← →”are the cursors to set title when move left and right. (c) >“CLR”is clear the camera title. (d) >“POS”is the drop location of setting title. Move the location of the title through “up, down, left ,right”, press “OK” to return name edit menu when confirm the location. (e) >“END”means back to previous menu when finishing name edit. (2) >DIGITAL EFFECT User can set image freeze, mirror and negative image function in the submenu of DIGITAL EFFECT. (3) >motion detection Press “left” and “right” key to choose “ON” in motion detection menu, the image will open the motion detecting function. Then press “OK” to enter “image detection” to set the submenu, which can be set on detection range, Page16of25 sensitivity,etc. (a) >Area selection Choose the motion detecting area and do set the corresponding area, there are four areas and only one area can be set at a time. (b) >Display Setting the related area whether to participate in the motion detection, which is the function button. When it closed, this area doesn’t participate in the motion detection. Vice versa. (c) >Sensitivity User can set the motion detecting sensitivity of corresponding area through “left” and “right” key. The value is 0~10. (d) >color mode Press “left” and “right” key to set the color of the motion detecting area, optional color for white, red green and blue. (e) >transparency User can set the transparency of motion detecting area through “left” and “right” key. (f) >alarm Setting the corresponding set of alarm output in motion detection. (g) >default Press “OK” button. Restore the factory settings of motion detection. (h) >return When setting is completed, press the “up” and “down” key to move the cursor to “back”, then use the “left” and “right” key to choose “back”(meaning return to previous menu) or “save&quit”(meaning exit menu settings), and last click “OK” to perform corresponding back function. (4) >privacy block Page17of25 Press “left” and “right” key to choose “ON” in “privacy block” menu, the image will open the privacy masking function. Then press “OK” to enter “image block” to set the submenu, which can be set on masking range, sensitivity,etc. (a) >SELECT Select privacy mask and set related parameters, 4 masks are available for setup. (b) >DISPLAY Set the display color of privacy mask, optional modes: color mode, mosaic, negative film, turn off. (c) >COLOR When display mode setting is color mode, through this mode you can change the color of privacy mask, optional colors: white, black, red, blue, yellow and green. (d) >TRANS Set the transparency of related privacy mask. (e) >DEFAULT Press “CONFIRM” button to restore to factory settings. (f) >RETURN When the settings are complete, press “UP” or “DOWN” to move the cursor to “RETURN”, then press “LEFT” or “RIGHT” to choose “RETURN”( go back to the previous menu) or “SAVE& END”(exit the menu settings) , finally press “CONFIRM” to perform return function. (5) >Language Press “LEFT” or “RIGHT” in “FUNCTION-LANGUAGE” menu to choose the menu language. Optional languages: English, Chinese, German, Page18of25 French, Italian, Spanish, Polish, Russian, Portuguese and Turkish. (6) >The dead pixel compensation The dead pixel compensation is used for compensation the dead CMOS ,including dynamic point compensation ,static point compensation ,static black point compensation. Users can carry out the corresponding compensation according to the needs. You can select the font color menu in 0-15. (7) >RS485 RS485 is a form of communication. A camera has RS485 function means user can control this camera by RS485. PELCO D/P protocol is supported. Specific settings would be as follows: (a) >CAM ID Set camera ID in order to distinguish different cameras, also ID is the only corresponding number to control. Setting range: 0-255. (b) >ID DISPLAY It is a function switch to set that whether the ID would be displayed or not when camera starts. When the option is on, “CAMXXX” (xxx represents Page19of25 camera ID) will be displayed in the upper left corner. “Off” is the default. (c) > BAUD RATE Set communication speed, optional: 2400, 4800, 9600, 19200, 38400. (d) >RETURN When the settings are complete, press “UP” or “DOWN” to move the cursor to “RETURN”, then press “LEFT” or “RIGHT” to choose “RETURN”( go back to the previous menu) or “SAVE& END”(exit the menu settings) , finally press “CONFIRM” to perform return function. (8) >RETURN When the settings are complete, press “UP” or “DOWN” to move the cursor to “RETURN”, then press “LEFT” or “RIGHT” to choose “RETURN”( go back to the previous menu) or “SAVE& END”(exit the menu settings) , finally press “CONFIRM” to perform return function. 3.8 ADJUST (1) >Sharpness Press “LEFT” or “RIGHT” in “ADJUST-SHARPNESS” menu to choose “AUTO”. User can adjust the image sharpness based on the class of 1 to 10. (2) >MONITOR Press “LEFT” or “RIGHT” in “ADJUST-MONITOR” menu to choose “CRT” or “LCD” mode, once a mode is chosen, user can set as following: Page20of25 (a) >Black level Adjust the black level of image. (b) > Blue gain Adjust the blue gain of color saturation in overall image, the value is from 0 to 100, 53 is the default. (c) >Red gain Adjust the red gain of color saturation in overall image, the value is from 0 to 100, 53 is the default. (d) >RETURN When the settings are complete, press “UP” or “DOWN” to move the cursor to “RETURN”, then press “LEFT” or “RIGHT” to choose “RETURN”(go back to the previous menu) or “SAVE& END”(exit the menu settings), finally press “CONFIRM” to perform return function. (3) >LSC Press “LEFT” or “RIGHT” in “ADJUST-LSC” to choose “ON/OFF”, so to turn on or turn off the LSC function. (4) >NTSC/PAL Press “LEFT” or “RIGHT” in “ADJUST-NTSC/PAL” menu to choose “NTSC/PAL”, user can choose PAL (25 FPS) or NTSC (30 FPS) output format. (5) >RETURN When the settings are complete, press “UP” or “DOWN” to move the cursor to “RETURN”, then press “LEFT” or “RIGHT” to choose “RETURN”(go back to the previous menu) or “SAVE& END”(exit the menu settings), finally press “CONFIRM” to perform return function. 3.9 EXIT In the “MAIN MENU “of setting, press “UP” or “DOWN” to move the cursor to “EXIT”, then press “LEFT” or “RIGHT” button to choose “ NOT Page21of25 SAVE” or “SAVE&END” or “RESET”, finally press the “CONFIRM” button to perform the related function. (1) >NOT SAVE Means the current menu settings will not be saved when exiting, it will restore to the previous settings. (2) >SAVE & END Means the current menu will be saved to EEPROM, even if the camera is in power outage, the related menu settings will not be changed. (3) >RESET Restore to the factory settings. Page22of25 IV. Specification Image sensor 1/3 inch Sony CMOS Sensor IMX238 Effective pixel 1280(H) * 1024(V) Resolution 720P Minimum 0.05LUX (F1.2 AGC ON) / 0LUX IR ON Illumination S/N Ratio More than 60 DB (AGC Off) Video Out Follow the AHD output level FPS 25Fps/30Fps OSD Adjustable YES AWB/Auto track white White Balance balance/AWC-SET/indoor/outdoor/manual adjustable BLC BLC/HLC/OFF adjustable Shutter 1/25s~1/50000s support slow shutter 2X--30X WDR On/Off adjustable Day/Night Day/B&W/COLOR/external control adjustable Switch Noise reduction 2D&3D Noise reduction level menu can be adjusted D-effect Freeze/Neg image/Mirror adjustable Privacy zone Four privacy zone can be set up respectively RS485 function Support PELCO D/P English/Chinese/Germany/French/Italian/Spanish/Poland/ OSD language Russian/Portuguree/Turkey Page23of25 Support the white dots (1024) (128) and black spots DEFECT compensation function, adjustable Transmission 75-5 Transmission distance up to 500m by Coaxial cable, distance 200m by Cat 5 cable Operating Humidity -20℃~50℃ less than 95% Power DC12V +-10% Consumption 1W(70MA) Main board size 38mm * 38mm Page24of25 V. FAQ 1. No image after installation? a. Check to connect the power supply correctly, whether the indicating led is always on or not; b. Check the video cable, make sure it is workable; c. Check if the monitor has been open. 2. Image interference after installation a. Check the power quality, if the adapter can’t work, please replace another one; b. Check if electromagnetic interference exists in the surroundings, please use some anti-interference devices. 3. RS485 can’t control menu? a. Please check the controller issued code is correct; b. Please check if the control circuit is smooth; c. Please verify the communication address, baud rate well-matched; d. Please check if the connection interface is loose. 4. Camera image can’t switch into B/W at night? Please open the camera menu to see if "Day/Night Switch" is set as AUTO, if not, please change into AUTO. 5. Noise is very obvious at night with low illumination. please make sure AGC ON. 6. The image color is abnormal. a. please make sure if the white balance is correctly set as Auto White Balance; b. Please enter the menu to restore factory settings. 7. Image appears to be whiter than usual after installation? a. Please check whether the lens aperture was adjusted too large, so that the image appears whiter; b. Please verify the camera rear panel, if the regulator potentiometer is adjusted too large; c. Check if the brightness of the monitor is too large. 8. When installation, image is not clear or exist dark corners? a. Please adjust focus and zoom of the lens. Make sure the focus should be adjusted in a proper way; b. check if the lens is clean. Page25of25