1
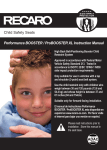
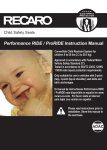
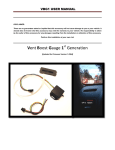
Child Safety Seats Performance SPORT / ProSPORT Instruction Manual Forward-facing Combination Child Restraint System Approved in accordance with Federal Motor Vehicle Safety Standard 213. Tested in accordance to ISO/TC 22/SC 12/WG 1 N538 side impact protection requirements. When using as a child restraint system with integrated harness system: Suitable for use in vehicles with a 2-point (lap), 3-point (lap and shoulder) seat belts and LATCH anchorages. Only use with children who weigh between 20 and 90 pounds (9.1 and 40.8 kg), whose height is between 27 and 50 inches (69 and 127 cm), and who are over 12 months old. When using as a high back belt-positioning booster child restraint system: Suitable for use in vehicles with a lap and shoulder (3-point) seat belt system. Only use with children who weigh between 30 and 120 pounds (13.6 and 54.4 kg) and whose height is between 37 and 59 inches (94 and 150 cm). El manual de instructiones Performance SPORT / ProSPORT esta disponible en español en www.recaro-cs.com. Por favor visite el internet para bajar una versión en español. Please read instructions prior to installation. Store this manual in the pocket on the trim cover. Contents Section 1: Section 2: Section 3: Section 4: Section 5: Section 6: Section 7: Section 8: Safety Warnings...............................................p. 4-5 General Information............................................ p. 6 Register your New Child Restraint...................... p. 7 Certification......................................................... p. 8 Use in an Aircraft................................................. p. 8 Learning about Your Vehicle..........................p. 9-13 Getting to Know Your Child Restraint...........p. 14-18 Adjusting the Harness System to Fit Your Child in the Harness Mode..............p. 19-21 Section 9: Positioning Your Child in the Harness Mode....................................p. 22-23 Section 10: Adjusting the Buckle to Fit Your Child in the Harness Mode..............p. 24-25 Section 11: Installing the Child Restraint in Your Vehicle in the Harness Mode...........p. 26-32 Section 12: Converting Between Usage Mode...............p. 33-41 Section 13: Positioning Your Child in the Booster Mode.....................................p. 42-45 Section 14: Belt Routing and Positioning Around Your Child in the Booster Mode.......p. 46-48 Section 15: Special Needs Supports.................................... p. 49 Section 16: Care and Maintenance...................................... p. 57 Section 17: Trim Cover Removal / Installation................p. 58-63 Section 18: Trouble Shooting............................................... p. 64 Section 19: Warranty............................................................ p. 65 Section 20: Replacement Parts............................................ p. 66 Section 21: Additional Contact Information.......................... p. 66 Section 22: Glossary.......................................................p. 67-68 1 Dear Parents, Welcome to the RECARO family of high quality child safety products and thank you for purchasing your new RECARO child restraint system. RECARO has over 100 years experience in the design and manufacture of premium automotive products. To assure all products RECARO manufactures are worthy of the name, we’ve subjected them to a comprehensive development program complying with American FMVSS 213 safety standards. RECARO is also ISO 9001 certified, which helps assure the most comprehensive product development system available. and comfortable place for your child to sit when traveling in your car. However, before you use it, you need to adjust it to your child’s size and then install it carefully so that the child restraint will perform as required. These instructions will help you do this, so please read them carefully. Remember, parents are a child’s best examples. Be sure to ALWAYS buckle your seat belt and your children will be much more likely to do the same. Thank you again for choosing RECARO and enjoy your child restraint! If you have any questions or need assistance of any kind, please contact us at: Although each RECARO child restraint system is equipped with state-of-the-art safety features such as Side Impact Protection (SIP), it is NOT a guarantee that this child restraint will prevent injury or death. However, if you stress careful driving and proper use of your child restraint, it can lower the risk of injury or death. Therefore, please make sure to carefully review all information in this instruction manual to properly restrain your child. Also, before using your new child restraint for the first time, please review all components carefully to make sure nothing has been damaged during shipping. Failure to follow these instructions and the labels on the seat can result in serious injury or even death. The RECARO child restraint you have purchased is a high quality product. Its different settings and its stable ergonomic design ensures that the RECARO child restraint is a safe 2 3 Section 1: Safety Warnings or SERIOUS INJURY WARNING! DEATH can occur • Do NOT place a child in the restraint in the front seat of a vehicle with a passenger airbag. The back seat is the safest place for children under 12 years of age. • According to accident statistics, children are safer when properly restrained in the rear seating positions than in the front seating positions. • Use the child restraint ONLY with children who weigh between 20 and 120 pounds (9.1 and 54.4 Kg) and whose standing height is between 27 and 59 inches (69 and 150 cm). For use with the integrated harness system, children who weigh between 20 and 90 pounds (9.1 and 40.8 Kg) and who are over 1 year old. For high back belt-positioning booster seat, children who weigh between 30 and 120 pounds (13.6 and 54.4 kg). • Discontinue use of your child restraint that is older than six (6) years or has been in a severe crash to prevent injury due to deterioration or hidden damage. See manufactured in date located on the restraint. • Restraint systems should be securely belted to the vehicle, even when they are not occupied, since in a crash an unsecured child restraint system may injure other occupants. • Before each use, inspect the child restraint. Make sure nothing on the child restraint is damaged, loose or broken. If anything on the restraint appears damaged, loose or broken, do NOT use the restraint. • Do NOT use this child restraint system until you have read and understood the instructions in this manual and in your vehicle owner’s manual. Do NOT let others install or use this child restraint system unless they understand how to use it. • The owner’s manual should be stored in the manual pocket sewn on the trim side bolster. • Do NOT make any technical modifications to the child restraint system and use it only as outlined in these instructions. Otherwise, the safety function of the seat will be reduced or completely voided. • When using the integrated Harness Mode on this seat, snugly adjust the belts provided with this child restraint around your child. 4 WARNING! DEATH or SERIOUS INJURY can occur • A snug strap should NOT allow any slack. It lies in a relatively straight line without sagging. It does NOT press on the child’s flesh or push the child’s body into an unnatural position. • When using the integrated Harness Mode on this seat, secure this child seat with the vehicle’s child restraint (LATCH) anchorage system, if available, or with the vehicle’s seat belt system. • When using the integrated Harness Mode on this seat, secure the top anchorage strap provided with this child restraint. • When using the high back belt-positioning Booster Seat Mode, secure this child seat with the vehicle’s lap and shoulder (3 point) seat belt system only. • This child restraint is certified for use in motor vehicles and aircraft when used with the integrated harness. This child restraint is NOT certified for use in aircraft when used as a high back belt-positioning booster seat without the harness. This is because a booster seat requires the use of a lap and shoulder belt. Aircraft generally provide a lap belt only. • This child restraint must NOT be used in the home, boats or other non-certified applications. • Do NOT add accessories, toys, padding or other items to this child restraint unless provided by RECARO. • NEVER allow a child to play with this child restraint, it is NOT a toy. • NEVER leave a child unattended even when sleeping. • Do NOT lubricate any part of this child restraint. • If the child restraint was occupied during a crash or vehicle accident, it must be replaced. Do NOT use the child restraint again. A crash can cause unseen damage and using it again can cause serious injury or death. • If the child restraint was in the vehicle unoccupied as a high back beltpositioning booster seat during a crash and no airbags were deployed, it does NOT need to be replaced. • Failure to follow warnings on the child restraint labels could cause serious injury or death. • There is no guarantee that this child restraint will prevent injury or death in a particular crash. However, if you stress careful driving and proper use of your child restraint, it can lower the risk of injury or death in most crashes. 5 Section 1: Safety Warnings Section 1: Safety Warnings or SERIOUS INJURY WARNING! DEATH can occur Section 2: General Information Extreme Weather When it is hot, RECARO recommends the following tips to reduce possible injury or discomfort to your child: • Park your vehicle in the shade to help keep the restraint cooler. • Cover the child restraint with a sheet or blanket when NOT in use. • ALWAYS check surface temperatures of the child restraint before placing a child in it. When it is cold and you are using the child restraint in the Harness Mode, RECARO recommends the following tips to reduce possible injury or discomfort to your child: Section 3: Register Your New Child Restraint Child restraints could be recalled for safety reasons. You must register this restraint to be reached in a recall. Send your name, address, email address if available, and the restraint’s model number, serial number and manufacturing date to: Address: ExoMotion, LLC dba Thomashilfen 309 South Cloverdale Street, Unit B 12 Seattle WA 98108 • Remove the child’s bulky clothing before restraining the child in the seat. This will help belts and other safety features function properly. • After restraining the child in the seat, cover the child and the restraint system with a blanket or their jacket to maintain warmth and comfort of the child. NOTE: NEVER, EVER leave your child unattended in your vehicle, no matter how long or even if the windows are left open. NHTSA studies show that heat stroke is the leading cause of non-crash vehicle deaths for children. or call toll free: 866-870-2122 Locking Clip All information provided to Thomashilfen North America on the registration card or on the online registry will NOT be sold, distributed or used for any purposes other than to contact you in the event of a recall. Following Section 11: Installing the child restraint in the Harness Mode in Your Vehicle, pg. 32, Non-Locking ELR Lap and Shoulder Belt installation, you may find that you cannot install without a universal locking clip. Please call 1-888-9RECARO and RECARO will ship you a locking clip and instructions. 6 or register online at: http://www.thomashilfen.us/registry For recall information, call the U.S. Government’s Vehicle Safety Hotline at 1-888-327-4236 (TTY:1-800-424-9153), or go to http://www.NHTSA.gov. 7 Section 3: Register Your New Child Restraint Section 2: General Information Section 4 / 5: Certification / Use in an Aircraft Section 6: Learning about Your Vehicle This child restraint conforms to all applicable Federal Motor Vehicle Safety Standards. It is important to become familiar with the features of your vehicle so that your child rides as safely as possible. Read the owner’s manual to learn about the safety features and adjustments available for safe travel. Below is a diagram that helps you to identify key features. Not ALL vehicles will have all features described here. Section 5: Use in an Aircraft This child restraint is certified for use in motor vehicles and aircraft when used with the harness. Secure the child restraint in the Harness Mode as shown on pages 29 - 30, “Locking Lap Belt Installation”. Place in the window seat to avoid blocking the aisle. This child restraint is NOT certified for use in aircraft when used as a belt-positioning booster without the harness. The use of a booster seat requires the use of a shoulder belt and lap belt. Aircraft generally only provide a lap belt. Following accessories are NOT certified for use in aircraft: footrest with adapter seat wedge below 8 Air Bags Top Tether Anchorage Lower Latch Anchorage Seat Belts Some vehicles may have inflatable seat belts. As this is new technology, please refer to www.recaro-cs.com for updates. 9 Section 6: Learning about Your Vehicle Section 4: Certification Section 6: Learning about Your Vehicle • • Do NOT use motorized passive restraint shoulder belt mounted systems. Do NOT use passive restraints lap or shoulder belt mounted on a door. Vehicle Seat Belt Systems Important! Check to be sure which type of seat belt system you have in the chart below. Some vehicles have more than one type of belt system depending on the seating position. The center rear position may have a lap only belt while the side seating locations may have a lap and shoulder belt system. If you are not sure which system you have, check your vehicle owner’s manual or contact your vehicle dealer or manufacturer. Types of Seat Belt Systems • Do NOT use vehicle lap and shoulder belt systems that have independent retractors for the lap and shoulder portion of the vehicle seat belt system. LOCKING LAP BELT HARNESS MODE-Page 29-30 LOCKING LAP BELT & SHOULDER BELT HARNESS MODE-Page 30-32 BOOSTER MODE-Page 46-48 NON-LOCKING ELR LAP & SHOULDER BELTS HARNESS MODE-Page 32 BOOSTER MODE-Page 46-48 NOTE: If you have a seat belt system described above, check your vehicle owner’s manual for advice on where and how to install a child restraint. Your vehicle dealer may have a replacement lap belt that when installed will hold the child restraint tightly in the Harness Mode. 10 11 Section 6: Learning about Your Vehicle Because the design and operation of vehicle belts vary, make sure to observe the following guidelines: When used in the belt-positioning Booster Mode: • Warning! Use only the vehicle’s lap Do NOT install this child restraint into any of the following types of seating positions: • NEVER install on a rear-facing vehicle seat. and shoulder belt system to restrain the child. Section 6: Learning about Your Vehicle • NEVER install in the rear seat of small • Do NOT use a lap belt only. The center rear seating position can be used ONLY if there is a lap and shoulder belt system in that seating position. extended cab pickups if the base is NOT fully supported. • NEVER install on a side-facing vehicle seat. • Do NOT place a child restraint in the front seat of a vehicle with a passenger side air bag. The back seat is the safest place for children under 12 years old. Forward-facing vehicle seats must ALWAYS be used with this child restraint. If your vehicle does NOT have rear seats, consult your vehicle owner’s manual to help identify safety features in your vehicle or contact the vehicle manufacturer. 12 If the vehicle backrest angle is adjustable, adjust vehicle’s backrest into the upright position. Be sure this area is flat and clear of objects that might get in the way of installing the child restraint. Restraint systems should be securely belted to the vehicle, even when they are NOT occupied, since in a crash an unsecured child restraint system may injure other occupants. Or store it somewhere outside the passenger cabin so that it cannot injure anyone while the vehicle is in motion. RECARO recommends storing the child restraint in a cool and dry location. 13 Section 6: Learning about Your Vehicle or SERIOUS INJURY WARNING! DEATH can occur 1. HARNESS MODE: Child restraint system with integrated harness system. Section 6: Learning about Your Vehicle 2. BOOSTER MODE: Child restraint system for use as a high back belt-positioning booster seat. It is important to know the difference between these two use modes, be able to choose which mode is appropriate for your child, and be able to choose which sections of this instruction manual apply to the mode that you require. To help choose the right set of instructions for the mode that you require, look for color codes on the sides of the pages in this instruction manual. Specific Harness Mode instructions are indicated in pink and specific Booster Mode instructions are indicated in blue. General information and information applying to both user modes are not color-coded. NEVER use the child restraint system for a child who is NOT the recommended height, weight, or age described in this instruction manual. The American Academy of Pediatrics and NHTSA recommend keeping children rearward facing up to age 2. RECARO offers convertible child restraints that accommodates children up to 40 lbs. rearward facing. 14 or SERIOUS INJURY WARNING! DEATH can occur The information below shows the size of the child suitable for each child restraint user mode. If your child does NOT meet the height and weight requirements, please see the other fine child restraint systems that are offered by RECARO. HARNESS MODE: The child restraint can be used with the integrated harness ONLY if the child falls within ALL of the following height, weight and age range information. • The child is at least 1 year of age. • The child’s weight is between 20 and 90 pounds (9.1 and 40.8 kg.) • The child’s standing height is between 27 and 50 inches (69 and 127 cm). BOOSTER MODE: The child restraint can be used as a high back belt-positioning booster ONLY if the child falls within ALL of the following height and weight range information. • The child’s weight is between 30 and 120 pounds (13.6 and 54.4 kg.) • The child’s standing height is between 37 and 59 inches (94 and 150 cm). A child is ALWAYS safest in a child restraint system that has a 5-point harness system built in. RECARO cannot recommend what age your child has to be in order to ride in this seat as a belt-positioning booster, please refer to your state’s law, as each state’s law is different. Even though your child’s standing height may meet the requirements, your child’s head should NEVER be below the head restraint in the lowest position or their ear should NEVER be above the top of the head restraint in the highest position. 15 Section 7: Getting to Know Your Child Restraint Section 7: Getting to Know Your Child Restraint ProSPORT Standard Harness System with Shoulder Pads (2) 3-Point Shoulder Belt Guides (2) (BOOSTER MODE) Head Restraint Carry Handle Trim Cover Backrest Side Impact Protection Section 7: Getting to Know Your Child Restraint It is important to become familiar with the features of your child restraint system. These diagrams help you identify key features. Chest Clip Integrated 5-Point Harness Cushion Insert Buckle HERO Harness System LATCH Strap Seat Cushion Adjuster Lever Cover Latch Plates (2) Performance SPORT Armrests (2) Storage Pockets (2) 16 Belt Routings (2) (HARNESS MODE) Vehicle Seat Belt Routes (2) (BOOSTER MODE) 17 Section 7: Getting to Know Your Child Restraint Child Restraint Features: Section 7: Getting to Know Your Child Restraint It is important to become familiar with the features of your child restraint system. These diagrams help you identify key features. Section 8: Adjusting the Harness System to Fit Your Child in the Harness Mode Top Tether HARNESS MODE: The child restraint can be used with the integrated harness ONLY if the child falls within ALL of the following height, weight, and age range information. • The child’s weight is between 20 and 90 pounds (9.1 and 40.8 kg). • The child’s standing height is between 27 and 50 inches (69 and 127 cm). • The child is 1 year of age or older. LATCH Storage (2) Place your child in the child restraint prior to installing it in your vehicle and determine if the shoulder strap height needs to be adjusted. When using the child restraint in the Harness Mode, the shoulder straps must be located at or above the child’s shoulders. There are four (4) height positions available for adjustment. Head Restraint Adjustment Lever LATCH Connectors (2) 1 Booster Mode Harness Mode 2 18 1. Loosen the harness system. Pull up on the adjuster lever located under the adjuster flap under the trim cover and pull the shoulder straps forward. 2. Locate the handle mechanism on the back of the child restraint. 19 Section 8: HARNESS MODE Adjusting the Harness Child Restraint Features: Section 8: HARNESS MODE Adjusting the Harness The child restraint is designed to fit a wide range of children and depending on the size of your child, you may need to adjust the harness strap length. or SERIOUS INJURY WARNING! DEATH can occur The integrated harness straps MUST ALWAYS be located at or above your child’s shoulders. 1.If the harness straps are too loose for your child, you will need to rethread the harness yoke. There are 3 available yoke positions on the harness. 2.Loop 1 – this is for larger/taller children, this is 1 how the child restraint is shipped. 2 3.Loop 2 – this if for average size children. 4.Loop 3 – this is for small children. 5.Loosen the harness straps while pulling up on the adjuster and pulling the harness straps out. Thread the harness loop out of the yoke. 6.Rethread the harness through the desired harness loop. Be certain to use the same loop position on both the left and right strap. *Check that the straps are secure by tightening the harness completely and pulling on the harness straps. 3 20 21 Section 8: HARNESS MODE Adjusting the Harness 3. Pull the handle away from the seat back and move the head restraint up or down. The harnesses will move up and down with the head restraint. 3 Section 9: HARNESS MODE Positioning Your Child 1 2 3 4 5 1. Loosen the harness system. Pull up on the adjuster lever located under the trim cover adjuster flap and pull the shoulder straps forward. 2. Open the chest clip by squeezing in the center and separating. 3. Open the 5-point integrated harness buckle by pressing the red button in the center of the buckle. Place harness straps to the side. 4. Place the child in the child restraint with their bottom fully into the seat. Position the harness straps around the child and fasten both latch plates into the buckle. 5. Fasten chest clip. 6. Pull up on each shoulder strap to tighten the lower section of the harness. 22 7 8 9 7. Tighten harness by pulling the adjuster strap straight out through the adjuster flap. The harness webbing should be snug around the child in both the lap and shoulder sections. 8. Slide the chest clip so it is at the child’s armpit level. 9. The harness is tight enough when you cannot pinch a loop of webbing between two fingers at the child’s collarbone. or SERIOUS INJURY WARNING! DEATH can occur Do NOT use the child restraint in the Harness Mode: • If the harness straps are BELOW the child’s shoulders when the head restraint is adjusted to its uppermost position. • If the child’s ears are ABOVE the top edge of the head restraint when the head restraint is in its highest position. It is important if any portion of the child’s head exceeds the top of the child restraint, there must be a vehicle headrest support. 23 Section 9: HARNESS MODE Positioning Your Child Section 9: Positioning Your Child in the Harness Mode Section 10: HARNESS MODE Adjusting the Buckle As your child grows, you may need to adjust the position of the buckle to accommodate your child’s size. There are three (3) locations that the buckle can be positioned. Use the buckle slot that is closest to your child, but NOT under their body. 1 2 3 1. Loosen and unbuckle the harnesses. Set the shoulder straps to the side. 2. Locate the metal bracket on the bottom of the seat base. You may have to move the webbing strap out of the way. 4 5 4. Turn the bracket sideways and thread it up through the seat base. Pull all the way through the seat trim cover. 5. Find the correct slot in the seat base and trim cover to appropriately fit your child. 6 6. Turn the bracket sideways and thread it back down through the seat base. 7 7. Pull the bracket through the seat and slide it into place under the seat clips on the seat base. NOTE: You MUST ensure that the bracket is securely locked into place. 3. Slide the bracket out of the seat clips. 24 25 Section 10: HARNESS MODE Adjusting the Buckle Section 10: Adjusting the Buckle to Fit Your Child in the Harness Mode 2 2. Locate the LATCH connectors in the storage holders on each side of the seat. LATCH Installation – Harness Mode Section 11: HARNESS MODE Installation or SERIOUS INJURY WARNING! DEATH can occur If your vehicle has both lower anchors (located in between the seat back and seat cushion of the rear seats) and a top tether anchorage (located behind the vehicle seat), the child restraint LATCH and top tether attachment can be used. The LATCH and top tether MUST be used at the same time. Refer to your vehicle owner’s manual to determine if lower anchors and top tether attachments are available and for which seating positions. If either lower anchors or top tether attachments are NOT available, the lap and shoulder (3 point) vehicle belt system MUST be used. Additionally, LATCH anchors and top tether attachments are designed to a maximum weight limit which varies by vehicle. You MUST use a lap and shoulder (3 point) vehicle belt system to secure the child restraint for any child weighing more than 52 pounds (23.6 kg). NOTE: Do NOT use a cargo tie down for the top tether attachment. 1 1. Place the child restraint on the vehicle seat. If the vehicle’s backrest is adjustable, adjust the backrest into the upright position. Be sure this area is flat and clear from objects that might get in the way of installing the child restraint. If NOT, choose another seating position. 26 3 4 5a 5b 3. Lengthen the LATCH strap by pressing the adjuster release button and pull it out to its full length. Do NOT attach the lower anchors yet. Make sure that the LATCH strap is located behind the head restraint trim cover and that the strap is NOT twisted. 4. Locate the top tether anchor behind the seating position. Connect the tether hook to the vehicle anchorage. If your vehicle is NOT equipped with top tether anchorages, make certain the top tether is securely behind or under the restraint so it is NOT loose in the vehicle. 5. Connect each LATCH connector to the anchor in the vehicle. Make sure the arrows molded on the LATCH connectors are facing up. Make sure the LATCH strap is routed securely above the large black hooks and across red plastic shields. 27 Section 11: HARNESS MODE Installation Section 11: Installing the Child Restraint in Your Vehicle in the Harness Mode Section 11: HARNESS MODE Installation 7 8 9a 9b 6. While pressing down in the center of the child restraint, pull the loop of the LATCH strap and tighten the strap. Repeat as needed until the child restraint cannot be moved more than one inch (2.5 cm) in either direction at the belt path. 7. Snugly tighten the top tether by pulling the free end of the tether strap while pressing the top of the child restraint back into the vehicle seat. 8. Check the tightness of the LATCH straps and retighten if necessary. The straps may become loose when the top tether strap is tightened. Ensure that the LATCH strap remains in the correct location over the large black hooks after tightening. 9. To remove the LATCH connectors from the vehicle, first loosen the adjuster by pressing the silver adjuster buttons and lengthening the straps. Press the red buttons on the LATCH connectors and remove from the vehicle’s lower anchors. 28 10. To remove the top tether, first loosen the strap by pressing the release button and lengthening the strap. Unhook the tether hook from the vehicle anchor by squeezing the 2 metal pieces together and sliding off of the vehicle anchor. 10a 10b Locking Lap Belt (2 point) Installation – Harness Mode 1. Place the child restraint on the vehicle seat. If the vehicle’s backrest is adjustable, adjust the backrest into the upright position. Be sure this area is flat and clear from objects that might get in the way of installing the child restraint. If NOT, choose another seating position. 1 2 3a 2. Slide the latch plate to the end of the seat belt webbing. 3b 3. Route the lap belt behind the head restraint trim cover. Make sure that the webbing is NOT twisted. Make sure the seat belt webbing is routed securely above the large black hooks and across red plastic shields. 29 Section 11: HARNESS MODE Installation 6 4 Section 11: HARNESS MODE Installation 5 6 4. Buckle the seat belt. 5. While pressing down in the center of the child restraint, tighten the seat belt to remove any slack. Repeat as needed until the child seat cannot be moved more than one inch (2.5 cm) in either direction at the belt path. 6. The top tether anchorage MUST be used with your lap belt (2 point) system for children weighing less than 52 pounds (23.6 kg). If you do not have a top tether anchorage, a lap and shoulder (3 point) vehicle belt system must be used. To attach and tighten follow the instructions on pages 27-28 of this manual. 1 2a 2b 3a Locking Lap and Shoulder Belt (3 point) Installation – Harness Mode Many vehicles have lap and shoulder belt systems which remain loose for adult use and can be locked for use with a child restraint. Check your vehicle owner’s manual to determine which type of seat belt system is in each seating location. There may be a label located on the door side of the seat belt with instructions for use with a child restraint. 3b 4 1. Place the child restraint on the vehicle seat. If the vehicle’s backrest is adjustable, adjust the backrest into the upright position. Be sure this area is flat and clear from objects that might get in the way of installing the child restraint. If NOT, choose another seating position. 2. Fully extend the seat belt webbing and route the shoulder belt portion across the top corner of the child restraint. Look for this label to ensure correct routing: 3-POINT SHOULDER BELT ROUTING. 3. Pass the shoulder belt portion behind the head restraint trim cover. Make sure that the lap belt portion of the vehicle seat belt is routed over the large black hooks and across the red plastic shield. Ensure that both portions of the seat belt are routed over the large black hook and red plastic shield on the buckle side of the child restraint. 4. Buckle the seat belt. Follow locking lap and shoulder vehicle belt (3 point) installation to secure the child restraint for children weighing more than 52 pounds (23.6 kg). 30 31 Section 11: HARNESS MODE Installation Locking Lap Belt (2 point) Installation – Harness Mode Section 11: HARNESS MODE Installation 6 7 5. While pressing down in the center of the child restraint, pull the seat belt to remove any slack. Repeat as needed until the child restraint cannot be moved more than one inch (2.5 cm) in either direction at the belt path. 6. If you have a top tether anchorage in your vehicle, it can ONLY be used for children weighing less than 52 pounds (23.6 kg) or vehicle maximum. To attach and tighten follow the instructions on pages 27 – 28 of this manual. 7. Ensure that the lap belt portion of the seat belt remains in the correct location over the large black hooks after tightening. Non – Locking Lap and Shoulder Belt (3 point) Installation – Harness Mode Some older vehicles (typically pre-1996 model year) have lapshoulder belt systems which remain loose and cannot be locked for use with a child restraint unless a separate locking clip is used. These systems use emergency locking retractors which lock only during a sudden stop or crash. Check your vehicle owner’s manual to determine which type of seat belt system is in each seating location. or SERIOUS INJURY WARNING! DEATH can occur If you have this seat belt configuration you will require a locking clip. Please contact 1-888-9RECARO and Recaro will ship you a locking clip and instructions. 32 Section 12: Converting Between Usage Modes From Harness Mode to Booster Mode If you would like to use the Booster Mode, you MUST completely configure your child restraint in Booster Mode before installing it in a vehicle. If the child restraint is NOT configured in Booster Mode, you will need to physically convert it over. 1a 2 3 1b 1. Loosen the harness straps by pulling up on the adjuster lever while pulling the harness. Unbuckle the chest clip and the harness buckle so the harness is free. 2. Slide the buckle pad off of the buckle and remove the buckle pad from the unit. 3. Push the buckle through the center slot on the cushion inlay and remove the cushion inlay from the unit. Note that the cushion inlay is designed to provide optimum comfort for your child and is optional when using either Harness Mode or Booster Mode. 33 Section 12: Converting between usage modes 5 Section 12: Converting between usage modes 5 6a 6b 4. On the rear side of the unit, remove the shoulder straps by sliding the loops (one at a time) to one side so that the edge can be guided out of the slot in the harness connector bracket (or yoke). 5. Snap the yoke into its storage position on the rear side of the child restraint because the yoke is NOT used in Booster Mode. *The harness adjuster strap is not removable. 6a. ProSPORT with Standard Harness System – Pull the straps out of the child restraint from the front pulling above the harness pads. 6b. Performance SPORT with HERO Harness System – Pull the straps out of the child restraint from the front pulling below the HERO. 34 7 7a 7. Flip the head restraint trim cover upward so you have access to the understructure of the child restraint. 7a. Performance SPORT with HERO Harness System – Pull the HERO harness system out from behind the head restraint trim cover. NOTE: Do NOT misplace the HERO Harness System. Store with the Harness Mode items for the ability to switch back to Harness Mode. 8 9 8. Remove the trim from the seat cushion to be able to view the harness threading location. 9. On the seat cushion, locate the metal bracket for the lap portion of the harness. Turn the bracket sideways and thread it down through the seat base. 35 Section 12: Converting between usage modes 4 Section 12: Converting between usage modes 10b 11 12 10. From the underside of the seat, pull the metal belt anchor through the slot. Turn the bracket sideways again and thread it up toward the top of the seat. The harness is now removed. NOTE: NEVER, under any circumstances, remove the LATCH strap or the top tether from the child restraint system! • LATCH strap – may be used while in Booster Mode to secure the seat. • Top tether – If your vehicle is equipped with top tether anchorages, ALWAYS use the top tether properly (see the section “Installing Booster Mode in Vehicles“). If your vehicle is NOT equipped with top tether anchorages, make certain the top tether is securely behind or under the restraint so it is NOT loose in the vehicle. 11. Locate the metal bracket for the buckle on the bottom of the seat base. You may have to move the webbing strap out of the way. Slide the bracket out of the seat clips. 12. Turn the bracket sideways and thread it up through the seat base. Remove the buckle assembly from the child restraint. 13. Reinstall the trim cover. or SERIOUS INJURY WARNING! DEATH can occur NOTE: Do NOT misplace Harness Mode items while using the Booster Mode. Store the extra items in a safe place because you will need them again later if/when you switch back to Harness Mode. 36 37 Section 12: Converting between usage modes 10a Section 12: Converting between usage modes If you would like to use the Harness Mode, you MUST completely configure your child restraint in Harness Mode before installing it in a vehicle. If the child restraint is NOT configured in Harness Mode, you will need to physically convert it over. 1 1a 1. Flip the head restraint trim cover upward so you have access to the under structure of the child restraint. 1a. Performance SPORT with HERO Harness System – Insert the HERO harness system into the head restraint trim cover slots 3b 4. Next, locate the appropriate buckle slot to fit your child, as described on page 25. Turn the bracket sideways and thread it back down through the seat base. Pull the bracket through the seat and slide it under the clips on the seat base. 4a 4b 5. On both sides of the unit, you MUST ensure that the shoulder belt anchor plates are fully seated for both shoulder belts and center buckle. 2. Remove the trim from the seat cushion to be able to view the harness threading location. 2 3a 3. Begin installing the harnesses at the lap belt portion in the seat base. Turn the metal bracket at the end of the webbing sideways and thread it down through the outer hole in the seat base. From under the seat, route the bracket back up in the seat base through the inner hole. Pull the strap snug. Do this for both right and left shoulder belts. The sewn label should be facing out. 38 6a 6b 6. Fasten the chest clip and center buckle as they would be with a child in the restraint. Lay them flat on the seating surface. This will help keep the belts organized while you finish the conversion. You MUST ensure that the belts are NOT twisted. If the shoulder belt pads were removed during the conversion, rethread the pads onto the webbing above the chest clip. 39 Section 12: Converting between usage modes From Booster Mode to Harness Mode Section 12: Converting between usage modes 7b 8 9 10 7a. ProSPORT with standard Harness System – Reinstall the backrest and head restraint trim covers. Route the harness straps through the head restraint and seat shell. Make sure the harness straps are not twisted. 7b. Performance SPORT with HERO Harness System – Reinstall the backrest and head restraint trim covers. Route the harness straps through the HERO, head restraint, and seat shell. Make sure the harness straps are not twisted. 8. Reach around the back side of the unit and make sure that you feed both left and right shoulder belts through the trim cover slots, through the head restraint housing slots, through the backrest frame, and over the tube on the back, but under the plastic guide. 9. Unsnap the yoke from its storage receptacle. 10. Loop the ends of both left and right shoulder belts securely onto the yoke. 40 11 11. After you have secured the shoulder belts onto the yoke, pull the center adjustment strap on the front side of the unit to remove excess slack in the belts. This will allow you to inspect the belts to ensure no belt is twisted and that the harness system has been correctly installed. Note: that the cushion inlay is designed to provide optimum comfort for your child and is optional when using either Harness Mode or Booster Mode. The shoulder belt pads are optional when using the Harness Mode. NOTE: NEVER, under any circumstances, remove the LATCH strap or the top tether from the child restraint system! Safety Stripe System TM (Select Models) Your child restraint is equipped with the easy-to-use RECARO Safety Stripe SystemTM. You will notice that your harness has a white stripe on the outside edges. This added safety feature will allow you to ensure that your harness is not twisted. The white stripe should always remain at the outside edge of the harness above the lower buckle. If it is not, please loosen your harness system and remove any twist prior to use. 41 Section 12: Converting between usage modes 7a Section 13: BOOSTER MODE Positioning Your Child BOOSTER MODE: The child restraint can be used as a high back belt-positioning booster ONLY if the child falls within ALL of the following height and weight range information. To properly fit your child, the head restraint should be positioned as follows: • The red shoulder belt guide on the child restraint system must be above the child’s shoulder to allow for correct vehicle belt positioning. -AND- • The child’s weight is between 30 and 120 pounds (13.6 and 54.4 kg). • The child’s standing height is between 37 and 59 inches (94 and 150 cm). A child is ALWAYS safest in a child restraint system that has a 5-point harness system built in. RECARO cannot recommend what age your child has to be in order to ride in this seat as a belt-positioning booster. Please refer to your state’s law as each law is different. • Your child’s head must be centered vertically between the top and bottom of the head restraint. To adjust the head restraint: 1 Head Restraint Adjustment The purpose of the head restraint adjustment is to maximize the side impact protection for the child’s head and properly position the vehicle shoulder belt across the child’s body. There are four (4) height adjustment positions of the head restraint that will allow the child restraint to grow with your child. Prior to placing and fitting your child restraint system to the vehicle seat, the head restraint should be adjusted to properly fit your child. 42 2 3 1. First have your child sit in the child restraint before it is placed in the vehicle. 2. Adjust the head restraint by lifting up on the head restraint adjustment handle located on the back. 3. Once the head restraint adjustment handle is lifted either pull up or slide the head restraint down until the head restraint is in the proper positions detailed in step 1 and 2 of this section. 43 Section 13: BOOSTER MODE Positioning Your Child Section 13: Positioning Your Child in the Booster Mode Section 13: BOOSTER MODE Positioning Your Child Your child is too TALL for the child restraint when: Installing Your Child Restraint in Booster Mode If your vehicle has LATCH anchors available, you may use them to secure in booster mode. See pages 26 – 28 for LATCH installation. • The child’s shoulders are ABOVE the red shoulder belt guides when the head restraint is adjusted to its highest position. • The child’s ears are ABOVE the top edge of the head restraint when the head restraint is adjusted to its highest position. Your child is too SHORT for the child restraint when: • The child’s ears are BELOW the bottom edge of the head restraint when the head restraint is adjusted to its lowest position. 44 45 Section 13: BOOSTER MODE Positioning Your Child It is important to ALWAYS check that the position of the head restraint height is correct for your child as your child continues to grow. 6 Section 14: BOOSTER MODE Belt Routing You must ALWAYS secure your child in the child restraint using your lap and shoulder (3-point) vehicle belt system in the Booster Mode. You must ALWAYS repeat the following steps each time you secure your child in the child restraint using the lap and shoulder belt system in your vehicle. 2 Place your child in the child restraint and confirm the correct head restraint location (see Section 13: Positioning Your Child in the Booster Mode, pages 42 – 45). 3 2. Pull the vehicle’s lap and shoulder belt out and around your child and the child restraint. Be certain that the vehicle seat belt is NOT twisted. 1 4 1. 5 Fasten the vehicle seat belt to the vehicle buckle. Ensure the buckle is engaged by gently pulling on the seat belt. 5. The vehicle buckle should be below the red lap belt guide. 46 8 9 10 3. Position the lap portion of the vehicle seat belt system through the red lower lap belt guides. 4. 7 11 6. Position the lower portion of the vehicle shoulder belt by routing the lower portion of the vehicle belt closest to the vehicle buckle under the arm rest. 7. Position the top portion of the shoulder belt into the red shoulder belt routing guide near the child’s ear. 8. Remove the slack from the seat belt system but do NOT lock the seat belt; it should be free to move. First remove the slack from the lap portion of the vehicle seat belt and then the shoulder portion for the most comfortable fit. 9. The lap belt should be positioned flat across the child’s lap or thigh area. It should NOT be lying against the child’s abdomen or ‘belly’. 10. The shoulder belt should be flat against the child’s chest and collarbone. The shoulder portion of the vehicle seat belt system should NEVER be located across the child’s neck. 11. Double check the seat to make certain that it is squarely positioned on the vehicle seat and that the child is NOT pinched, squeezed or experiencing discomfort. 47 Section 14: BOOSTER MODE Belt Routing Section 14: Belt Routing and Positioning Around Your Child These steps must be followed every time a child is using the child seat in the Booster Mode. NEVER allow your child to ‘slide’ in and out of the seat belt. Section 14: BOOSTER MODE Belt Routing WARNING! DEATH or SERIOUS INJURY can occur • The vehicle’s lap and shoulder seat belt system must ALWAYS be adjusted snugly (but NOT LOCKED) around the child. • A snug seat belt system does NOT press on the child or position them unnaturally. • The vehicle’s lap and shoulder belt should NOT have any excess webbing or it is too loose. • The vehicle’s lap and shoulder seat belt system must NOT be twisted. • NEVER place the shoulder belt under the child’s arm. • NEVER secure a child with a lap only vehicle seat belt. Your child could be seriously injured in a vehicle crash. • Do NOT use anything to raise the booster seat off of the vehicle seat. • Use caution when adjusting the head restraint or backrest as fingers may become pinched during the adjustment. • You many need to adjust or remove the vehicle’s head restraint to fit properly against the vehicle’s seat back. Refer to your vehicle owner’s manual for information on how to operate this feature. 48 Instructions for assembly and use of the Special Needs Supports Dear RECARO Performance SPORT Reha user, To make handling of your new children car seat safe, practical, and comfortable for both you and your child, please read these instructions and the instructions enclosed to the seat before use. Should you have further questions or problems, please contact your specialist dealer or us directly. Our address: Thomas Hilfen für Körperbehinderte GmbH & Co. Medico KG Walkmühlenstraße 1 D - 27432 Bremervörde / Germany Phone: +49 (0)4761 / 886-63 or -68 E-Mail: [email protected] www.thomashilfen.com Our address for customers in the USA: ExoMotion LLC dba Thomashilfen 309 South Cloverdale Street, Unit B 12 Seattle WA 98108 / USA Phone: 866 870 2122 (toll free) Fax: 866 870 0801 (toll free) E-Mail: [email protected] www.thomashilfen.us 49 Section 15: Special Needs Supports 12.If you have a top tether anchorage in your vehicle, attach and tighten as shown on page 27-28. The children’s car seat RECARO Performance SPORT Reha is designed for the transport of children with special needs in vehicles. The clinical pictures are amongst others: 1a • cerebral palsy • hypotony syndrome of unspecific genesis • muscular dystrophy Section 15: Special Needs Supports • different syndrome diseases This car seat is characterized by its shell design and pad system, which provide for additional seating safety, stabilization of head and pelvis, and support / control of the feet. 1b Head support The rehab version features a head support, providing additional lateral support for the head. Due to the addition support in the neck region, it provides child increased stability. If not needed, the head support can be removed by opening the Velcro at the rear of the seat and taking the head support off forwards. Fig.1a: Opening Velcro Fig.1b: Removing head support Thus the RECARO Performance SPORT Reha meets the needs of disabled children very well. Application risks / contraindications No application risks / contraindications are known. 2 Lateral trunk support The lateral trunk support is placed behind the backrest upholstery. It can be removed easily, if not needed. The cover is machine washable up to 30°C / 86°F. Fig. 2: Positioning on the seat 50 51 Section 15: Special Needs Supports Purpose / indication Footrest adapter (accessory) item code: 821 Make sure that the seat has been pre-assembled with a metal-base plate. The footrest adapter can only be attached to the metal base plate! If your seat does not have a metal plate, it still can be installed as an accessory later. Section 15: Special Needs Supports 3b After having connected base plate and adapter for the first time, loosen the connection of the velcro (Hook / Fleece) again. Then press the Velcro strips firmly to the surfaces of the base plate and the adapter for a second time to make sure that they are stuck down safely. 4a Note: The use of the reclineposition is not possible if the seat is fitted with a metal plate. The Velcro strips (hooks) remain on the footrest adapter. Carefully remove the plastic film from the backside of the Velcro strip (fleece), while the strip remains velcroed to the adapter. Place the footrest adapter on an even surface. The velcro must be on the top side. Take the seat with the metal plate and position the base plate as follows: a) Adapter and base plate should lie flush at the front! b) The seat with its metal plate is to be positioned in the center of the adapter! Position the seat flush in a 90° angle at the front of the adapter (handle of the adapter facing forwards) and tilt the seat over to velcro it to the adapter. Footrest: The footrest is attached to the adapter. Fig. 3a: Attaching Velcro straps to the base plate Fig. 3b: Attaching seat to adapter 52 Footrest, short 12 cm / 4.7" (accessory) item code: 806 Footrest, long 18 cm / 7.1" (accessory) item code: 805 Press the catch springs in at the rear ends of the sliding rods and push the tubes into the holes as far as they will go. 4b To stabilize the footrest on the vehicle floor adjust the height of the support bars by screwing them in or out until they have contact with the vehicle. Then lock the support bars with the hand knobs to prevent them unscrewing accidentally. Screw the hand knobs upwards as far as possible and tighten them fast. Lower leg length: The lower leg length is adjusted by changing the height of the footrest. Loosen both outer screws. Retighten them after each adjustment. 53 Section 15: Special Needs Supports 3a 6a Section 15: Special Needs Supports Fig. 4a: Inserting the support Fig. 4b: Adjusting height to vehicle Seat wedge, below (accessory) item code: 810 The seat wedge is positioned in the center below the car seat. The high edge is at the front to achieve an optimum rest position of the child. The cover can be removed (zipper) and washed in the machine at up to 30°C / 86°F. 5b (accessory) 6b The cover (zipper) is removable and machine washable up to 30° C / 86° F. Please open the zipper of bottom crotch pad, as well, in order to facilitate removing it. Fig. 6a: Removing small standard crotch pad Fig. 6b: Attaching big crotch pad Note: Foot rest and seat wedge cannot be used in combination. Fig. 5a: Positioning seat on seat wedge Fig. 5b: Final position 54 item code: 914 Remove the small standard crotch pad first, by pulling it off the belt strap. Attach the crotch pad just like the small one, pulling the whole crotch pad through the belt strap, coming from below. Note: Always secure the footrest against falling off with the hand knob provided with the user manual. The receiver for the hand knob (metal block with thread) is situated on the left tube of the footrest adapter. 5a Crotch pad 55 Section 15: Special Needs Supports Foot angle: Loosen the four screws left and right on the underside of the footrest to adjust the desired foot angle with the rails. Then retighten the screws. Table (accessory) item code: 912 Section 15: Special Needs Supports Mount the side parts of the table first, by pulling them right and left over the side elements of the seat – from rear to front. The side with the larger fabric must point outwards. Pull the fabric over the side parts and tuck downwards overlaying fabric below the seat cover. 7b Carefully remove the plastic film from the back side of the Velcro strip (fleece) and attach the lower end of the side parts to the underpart of the seat shell. Now, guide the long belt around the rear side of the seat and attach it to the table. A small triangle Velcro on the left side part serves for attaching the belt, when putting the table down at the right. 7c The cover can be removed and is machine washable up to 30°C / 86°F. Fig. 7a: Fig. 7b: Fig. 7b: 56 Attaching side parts Attaching side parts to Velcro strips Applying table Section 16: Care and Maintenance Your child restraint has been engineered for long life and troublefree usage. The fabric has been designed to resist stains and soiling and with proper care and maintenance, this premium fabric will retain its beauty for years to come. To clean the trim cover “on the go”, follow these easy steps: • Remove excess soiling immediately. • Blot area with dry cloth. • To remove remaining stain, spray a light mist of soap solution and rub gently in a circular motion with a clean cloth or toothbrush so NOT to damage the fabric. • Pat dry with cloth. • When dry, use a soft brush to regain fabric's smooth feel. To clean the trim cover in the home, follow these steps: • Remove the trim cover as explained in the section “Trim Cover Removal.” • Hand wash using cold water and mild soap. • Line dry to avoid shrinkage of the trim cover. • Do NOT bleach, machine wash or machine dry. To clean the child restraint’s plastic housing, follow these tips: • Clean by hand with a sponge or soft rag using warm water and mild soap. • Dry the housing off thoroughly with a soft towel. • Heavily soiled areas can be spot-treated using non-solvent commercial cleaners. Use only water soluble cleaning agents. NEVER use solutions that contain a petroleum or alcohol base. 57 Section 16: Care and Maintenance 7a 5a Trim Cover Removal Section 17: Trim Cover Removal / Installation 1 2 3 4 1. Press the adjuster level, located under the adjuster flap, and pull the shoulder straps forward to loosen the harness. 5b 2. Open the chest clip by squeezing the tabs and separating. 3. Release the harness straps from the buckle by pressing the red button and remove the buckle pad and seat cushion insert. 4. On the rear side of the unit, remove the shoulder straps by sliding the loops (one at a time) to one side so that the edge can be guided out of the slot in the harness connector bracket (or yoke). 58 6a 6b 5a. ProSPORT with Standard Harness System – Pull the straps out of the child restraint from the front pulling above the harness pads. 5b. Performance SPORT with HERO Harness System – Pull the straps out of the child restraint from the front pulling below the HERO. 6. Reach behind the top of the head restraint and unfasten the two snaps on the trim cover. Unfasten the Velcro™ from the red fabric on the outer side of the head restraint and pull the red fabric carefully through the red plastic guides. 59 Section 17: Trim Cover Removal / Installation Section 17: Trim Cover Removal /Installation Section 17: Trim Cover Removal / Installation 7. Loosen the main seat cover by locating and unfastening the 3 cover snaps on one side of the seat and slide the cover out from behind the latch strap guides. Repeat from the other side of the seat. Trim Cover Installation 1. Carefully slide the buckle and harness straps through the 3 slots of the trim cover. 1 2. Feed the cover down into the 2-point belt guide areas of the side and then pull the cover tight down around the frame in the guide area. 7b 2 8a 8. Carefully slide the buckle and harness straps down through their respective slots in the trim cover to separate the cover from the seat. 3 4a 8b 60 3. Pull the front of the edge of the cover (elastic trim) down over the front of the seat frame. 4b 4. Cover one side of the seat by placing the cover over the side bolster and then attaching the 3 snaps to the mating snaps in the seat. Route the cover behind the outer edge of the red plastic guide. Repeat for the other side. Route the LATCH strap over the trim cover and secure the LATCH connectors in the LATCH storage housing on each side of the seat. 61 Section 17: Trim Cover Removal / Installation 7a Section 17: Trim Cover Removal / Installation 5b 5c 6 7 5. Pull the head restraint trim cover over each side of the head restraint and then attach the two snaps to the mating snaps on the top and back of the head restraint. Route the large piece of red fabric carefully through the red plastic guide on the each side of the head restraint. Route the small piece of red fabric behind the red plastic guide. Secure both pieces of red fabric to the Velcro™ on the under side of the trim cover. 8a 8b 9 5c. Performance SPORT with HERO Harness System – Insert the HERO harness system into the head restraint trim cover slots. 6. Re-install the cushion insert and buckle pad over at the buckle. 7. Click the harness straps into the buckle making sure they are not twisted. 62 10 8a. ProSPORT with Standard Harness System – Route the harness straps through the head restraint and seat shell. Make sure the harness straps are not twisted. 8b. Performance SPORT with HERO Harness System – Route the harness straps through the HERO, head restraint, and seat shell. Make sure the harness straps are not twisted. 9. Reach around the back side of the unit and make sure that you feed both left and right shoulder belts through the trim cover slots, through the head restraint housing slots, through the backrest frame, and over the tube on the back, but under the plastic guide. 10. Connect the straps to the harness connector located in the back of the seat by sliding the loop edges into the slots of the harness connector bracket. 63 Section 17: Trim Cover Removal / Installation 5a Section 18: Trouble Shooting In certain vehicle applications, you may encounter challenges to safely install and position a child in the restraint system. If you do NOT find an adequate solution below call us at 1-888-9RECARO for help. Problem: The head restraint will NOT rise. Solution: WARNING! DO NOT FORCE the head restraint handle! Severe damage to the child restraint could result! The harness must be loosened before the head restraint can be moved upwards. Press the harness adjuster lever and pull the shoulder straps out to loosen then raise the head restraint with the adjustment handle. Problem: The vehicle seat belt is NOT tight fitting to the child restraint. Solution: Press downward on the child restraint in the center of the seat and firmly pull the slack out of the seat belt. Continue pressing down while pulling seat belt tight until less than 1 inch of movement is possible at the belt path. This will allow the child restraint to compress the vehicle’s seat and allow the seat belt to be further tightened. If seat belt is NOT locking and you require a locking clip, call 1-888-9RECARO for help. Refer to installation instructions, pages 26 - 32. Problem: The seat belt is twisted. Solution: Unbuckle the seat belt, pull the seat belt away from the child restraint, remove it from the child restraint routings, allow it to retract into the vehicle (it might help to slowly guide it back into the vehicle’s seat belt retractor to prevent binding), and then route the entire seat belt around the restraint and child once again. Problem: The child restraint is NOT stable when driving. Solution: Check to see if there are items under the base and that the seat belts are tightly secured. Remove anything found. Some vehicle seats are deeply contoured making it difficult to safely install a child restraint. If the child restraint is NOT stable due to the vehicle seat cushions, move it to another seating location. Section 19: Warranty Thomashilfen warranties this product against defects in materials or workmanship to the original purchaser for a period of 24 months. The upholstery fabric is subject to a certain degree of wear even from normal use. This kind of normal wear is NOT covered under warranty. Exclusions: A Product will NOT be considered “defective” and this Warranty will NOT apply, where the claimed defect is attributable to: a. Improper installation; b. Modification or alteration of the Product; c. Failure to comply with RECARO’s and Thomashilfen’s instructions for service and maintenance; d. Accident, unauthorized repairs, or unauthorized use; e. Any attachment or replacement part that was manufactured, supplied or added by others and was NOT part of the Product; f. Exposure to corrosive materials, the elements (including, but NOT limited to, cold or freezing temperatures, excessive heat, fire, humidity, and sunlight), or other acts of God; or g. Ordinary wear and tear (including fading and discoloration); or h. Improper loads (including passenger weight in excess of design limits); or i. Removal of the Product from the original application or reinstallation of the Product in the original or another application; or j. Any other neglect, abuse or misuse. 64 65 Section 19: Warranty Section 18: Trouble Shooting Section 20 / 21: Replacement Parts / Additional Contact Section 22: Glossary Thomashilfen offers a variety of replacement parts for your child restraint system. Please call us at 1-866-870-2122 and speak to one of our customer service representatives for more information on what’s available for purchase. 2-Point Seat Belt: A restraint system with two contact points. (Also called a “lap belt.”) Section 21: Additional Contact Airbag: A passive (idle) restraint system that automatically deploys during a crash to act as a cushion for the occupant. It creates a broad surface on which to spread the forces of the crash, to reduce head and chest injury. It is considered “supplementary” to the lap/ shoulder belts because it enhances the protection the belt system offers in frontal crashes. Also known as SRS - Supplemental Restraint System; SIR - Supplemental Inflatable Restraint; IC - Inflatable Curtain; SIAB - Side Impact AirBag. If you need help with installation or usage, please use the following contact information: ExoMotion, LLC dba Thomashilfen North America 309 South Cloverdale Street, Unit B 12 Seattle WA 98108 3-Point Seat Belt: A seat belt with both a lap and a shoulder portion, having three contact points (one shoulder, two hips.) Belt-Positioning Booster: (also called a “Booster Seat”) A platform that raises the child (provides a taller sitting height) so adult lap and shoulder belts fit better; some have high backs as well. NEVER use with a lap belt only across the child. Contact a Child Passenger Safety (CPS) technician. You can find a CPS technician in your area at http://www.NHTSA.gov. Click on “Child Passenger Safety” and select “Certified Child Passenger Safety Technician Locator.” Attend a car seat checkup in your area. More information about car seat check-ups is available at http://www.NHTSA.gov under “Child Seat Inspections” or at www.seatcheck.org. Belt Routings: The manufacturers required place where the safety belt passes around or through the child restraint. Belt routings are indicated in red on this child restraint. You can also call 1-866-SEAT-CHECK to find the next and closest seat check event. Federal Motor Vehicle Safety Standard (FMVSS) 213: Federal Motor Vehicle Safety Standard that pertains to all restraint systems intended for use as crash protection in vehicles for children. FMVSS 213 is required for child restraints sold in the USA. 66 Child Restraint System: Common term for a specially designed device that secures a child in a motor vehicle, meets federal safety standards and increases child safety in a crash. (Also called a Car Seat.) 67 Section 22: Glossary Section 20: Replacement Parts Head Restraint: Structure at the top of the backrest which is designed to keep the child’s head in the proper position and provide protection for the child’s head during a crash. HERO Harness System: Ensures the highest level of protection and comfort by positioning the shoulder pads to appropriately fit the child’s neck, head, and shoulders. ISO 9001: Is focused on meeting customer expectations and delivering customer satisfaction. Through the continuous improvement process and review of our quality systems, we identify and implement product improvements through the entire product life cycle. LATCH: Lower Anchors and Tethers for Children. New acronym for standardized vehicle anchorage system. Method to affix child restraint systems to vehicles independent of the vehicle seat belts. The LATCH system includes both lower LATCH and top tether. Section 22: Glossary Safety Stripe System: A white stripe on the outside edges of the 5-point harness. The white stripe should always remain at the outside edge of the harness above the lower buckle. Side Impact Protection (SIP): Extra safety feature of Recaro child restraints having energy absorbing foam and structure design strategically placed in areas on the child restraint where it is especially important to protect the child in a crash. Top Tether Anchorage: Attachment point in vehicle for child safety seat tether strap. Refer to vehicle owner's manual regarding anchor location. A tether strap is an additional belt that anchors the child restraint system top to the vehicle frame; keeps the restraint from tipping forward on impact; can provide an extra margin of protection. A tether strap is typically available on most child restraints manufactured after September 1,1999. 68