1
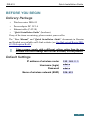
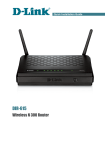
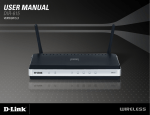
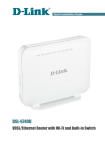
Quick Installation Guide
DIR-615
Wireless N300 Router
DIR-615
Quick Installation Guide
BEFORE YOU BEGIN
Delivery Package
•
Wireless router DIR-615
•
Power adapter DC 5V/1A
•
Ethernet cable (CAT 5E)
• “Quick Installation Guide” (brochure).
If any of the items are missing, please contact your reseller.
The “User Manual” and “Quick Installation Guide” documents in Russian
and English are available on D-Link website (see ftp.dlink.ru/pub/Router/DIR615/Description/RevR/).
!
Using a power supply with a different voltage rating than the one
included will cause damage and void the warranty for this product.
Default Settings
IP address of wireless router
192.168.0.1
Username (login)
admin
Password
admin
Name of wireless network (SSID)
DIR-615
2
DIR-615
Quick Installation Guide
System Requirements and Equipment
•
A computer with any operating system that supports a web browser.
•
A web browser to access the web-based interface of the router:
◦ Apple Safari 5 and later
◦ Google Chrome 5 and later
◦ Microsoft Internet Explorer 7 and later
◦ Mozilla Firefox 5 and later
◦ Opera 10 and later.
•
A NIC (Ethernet or Wi-Fi adapter) to connect to the router.
•
An 802.11b, g, or n Wi-Fi adapter to create a wireless network.
3
DIR-615
Quick Installation Guide
CONNECTING TO PC
PC with Ethernet Adapter
1. Make sure that your PC is powered off.
2. Connect an Ethernet cable between any of LAN ports located on the back
panel of the router and the Ethernet port of your PC.
3. Connect the power cord to the power connector port on the back panel of
the router, then plug the power adapter into an electrical outlet or power
strip.
4. Turn on the router by pressing the ON/OFF button on its back panel.
5. Turn on your PC and wait until your operating system is completely
loaded.
Now you should configure your PC to obtain an IP address automatically (as
DHCP client).
4
DIR-615
Obtaining
IP
Address
in OS Windows XP
Quick Installation Guide
Automatically
1. Click the Start button and proceed to the Control Panel > Network
and Internet Connections > Network Connections window.
2. In the Network Connections window, right-click the relevant Local
Area Connection icon and select the Properties line in the menu
displayed.
3. In the Local Area Connection Properties window, on the General
tab, select the Internet Protocol (TCP/IP) line. Click the Properties
button.
5
DIR-615
Quick Installation Guide
4. Select the Obtain an IP address automatically and Obtain DNS
server address automatically radio buttons. Click the OK button.
5. Click the ОК button in the connection properties window.
Now your computer is configured to obtain an IP address automatically.
6
DIR-615
Obtaining
IP
in OS Windows 7
Quick Installation Guide
Address
Automatically
1. Click the Start button and proceed to the Control Panel window.
2. Select the Network and Sharing Center section. (If the Control Panel
has the category view (the Category value is selected from the View by
drop-down list in the top right corner of the window), choose the View
network status and tasks line under the Network and Internet
section.)
3. In the menu located on the left part of the window, select the Change
adapter settings line.
4. In the opened window, right-click the relevant Local Area Connection
icon and select the Properties line in the menu displayed.
5. In the Local Area Connection Properties window, on the
Networking tab, select the Internet Protocol Version 4 (TCP/IPv4)
line. Click the Properties button.
7
DIR-615
Quick Installation Guide
6. Select the Obtain an IP address automatically and Obtain DNS
server address automatically radio buttons. Click the OK button.
7. Click the OK button in the connection properties window.
Now your computer is configured to obtain an IP address automatically.
8
DIR-615
Quick Installation Guide
PC with Wi-Fi Adapter
1. Connect the power cord to the power connector port on the back panel of
the router, then plug the power adapter into an electrical outlet or power
strip.
2. Turn on the router by pressing the ON/OFF button on its back panel.
3. Turn on your PC and wait until your operating system is completely
loaded.
4. Turn on your Wi-Fi adapter. As a rule, modern notebooks with built-in
wireless NICs are equipped with a button or switch that turns on/off the
wireless adapter (refer to your PC documents). If your PC is equipped
with a pluggable wireless NIC, install the software provided with your
Wi-Fi adapter.
Now you should configure your Wi-Fi adapter.
9
DIR-615
Quick Installation Guide
Configuring Wi-Fi Adapter in OS Windows XP
1. Click the Start button and proceed to the Control Panel > Network
and Internet Connections > Network Connections window.
2. Select the icon of the wireless network connection and make sure that
your Wi-Fi adapter is on.
3. Search for available wireless networks.
4. In the opened Wireless Network Connection window, select the
wireless network DIR-615 and click the Connect button.
After that the Wireless Network Connection Status window appears.
!
If you perform initial configuration of the router via Wi-Fi connection,
note that immediately after changing the wireless default settings of the
router you will need to reconfigure the wireless connection using the
newly specified settings.
10
DIR-615
Quick Installation Guide
Configuring Wi-Fi Adapter in OS Windows 7
1. Click the Start button and proceed to the Control Panel window.
2. Select the Network and Sharing Center section. (If the Control Panel
has the category view (the Category value is selected from the View by
drop-down list in the top right corner of the window), choose the View
network status and tasks line under the Network and Internet
section.)
3. In the menu located on the left part of the window, select the Change
adapter settings line.
4. In the opened window, select the icon of the wireless network connection
and make sure that your Wi-Fi adapter is on.
5. To open the list of available wireless networks, select the icon of the
wireless network connection and click the Connect To button or leftclick the network icon in the notification area located on the right side of
the taskbar.
11
DIR-615
Quick Installation Guide
6. In the opened window, in the list of available wireless networks, select the
wireless network DIR-615 and click the Connect button.
7. Wait for about 20-30 seconds. After the connection is established, the
network icon will be displayed as the signal level scale.
!
If you perform initial configuration of the router via Wi-Fi connection,
note that immediately after changing the wireless default settings of the
router you will need to reconfigure the wireless connection using the
newly specified settings.
12
DIR-615
Quick Installation Guide
CONFIGURING ROUTER
Connecting to Web-based Interface
1. Start a web browser.
2. In the address bar of the web browser, enter the IP address of the router
(by default, the following IP address is specified: 192.168.0.1). Press
the Enter key.
3. On the opened page, enter the username and password for the
administrator account in the Login and Password fields
correspondingly (by default, the following username and password are
specified: admin, admin). Then click the Enter link.
!
If the error “The page cannot be displayed” (or “Unable to display the
page”/“Could not connect to remote server”) occurs upon connecting to
the web-based interface of the router, make sure that you have properly
connected the router to your computer.
13
DIR-615
Quick Installation Guide
Right after the first access to the web-based interface you are forwarded to the
page for changing the administrator password specified by default.
Enter the new password in the Password and Confirmation fields (you
may use digits, Latin letters (uppercase and/or lowercase), and characters
available on the keyboard), then click the Apply link.
!
Remember or write down the new password for the administrator
account. In case of losing the new password, you can access the settings
of the router only after restoring the factory default settings via the
hardware RESET button. This procedure wipes out all settings that you
have configured for your router.
14
DIR-615
Quick Installation Guide
After successful registration the router's quick settings page opens.
The web-based interface of the router is multilingual. Select a needed language
from the menu displayed when the mouse pointer is over the Language
caption. You can change the language of the web-based interface in any menu
item.
After selecting the language, the notification on unsaved changes will be
displayed. Click the Save icon (
) to save the current language of the
web-based interface as the default language.
15
DIR-615
Quick Installation Guide
The quick settings page displays general information on the router and its
software (the version and the date of the firmware, the IP address of the
device, the name of the WLAN, etc.).
On the quick settings page, you can quickly get to some pages of the webbased interface or run a needed Wizard (use the links on the left side of the
page).
From the quick settings page you can switch to the advanced settings section.
To do this, click the Advanced settings link in the bottom right corner of
the page.
Also you can find a specific page via search. To do this, enter the name of the
page, wholly or partly, in the search bar in the top part of the web-based
interface page, and then select a needed link in the search results.
16
DIR-615
Quick Installation Guide
Configuring Connection to the Internet
!
You should configure your WAN connection in accordance with data
provided by your Internet service provider (ISP). Make sure that you
have obtained all necessary information prior to configuring your
connection. Otherwise contact your ISP.
Configuring WAN Connection
1. Go to the Net / WAN page, select the WAN connection and click the
Delete button.
2. Click the Add button.
3. In the General settings section, select a needed value from the
Connection Type drop-down list.
4. From the Interface drop-down list, select the Internet value.
5. Specify a name for your connection (any name for easier identification) in
the Name field.
17
DIR-615
Quick Installation Guide
6. If your ISP uses MAC address binding, in the Ethernet section, in the
MAC field, enter the MAC address registered by your ISP upon
concluding the agreement. To set the MAC address of the network
interface card (of the computer that is being used to configure the router
at the moment) as the MAC address of the WAN interface, click the
Clone MAC Address button (
). To set the address of a device
connected to the router's LAN at the moment, select the relevant value
from the drop-down list (the field will be filled in automatically).
7. For connection of PPPoE type: in the PPP section, enter authorization
data provided by your ISP (the username (login) in the Username field
and the password in the Password and Password confirmation
fields), or select the Without authorization checkbox if authorization
is not required.
18
DIR-615
Quick Installation Guide
8. For connection of Static IP type: in the IP section, fill in the IP
Address, Netmask, Gateway IP address, and Primary DNS
server fields.
9. For connection of Dynamic IP type: if your ISP has provided the address
of the DNS server, in the IP section, deselect the Obtain DNS server
addresses automatically checkbox and fill in the Primary DNS
server field.
19
DIR-615
Quick Installation Guide
10. For connection of PPTP + Static IP or L2TP + Static IP type: in the IP
section, fill in the IP Address, Netmask, Gateway IP address, and
Primary DNS server fields. Then in the VPN section, enter
authorization data provided by your ISP (the username (login) in the
Username field and the password in the Password and Password
confirmation fields), or select the Without authorization checkbox if
authorization is not required. In the VPN server address field, enter
the IP or URL address of the PPTP or L2TP authentication server. If your
ISP applies encryption, select a needed value from the Encryption dropdown list.
20
DIR-615
Quick Installation Guide
11. For connection of PPTP + Dynamic IP or L2TP + Dynamic IP type: if
your ISP has provided the address of the DNS server, in the IP section,
deselect the Obtain DNS server addresses automatically
checkbox and fill in the Primary DNS server field. Then in the VPN
section, enter authorization data provided by your ISP (the username
(login) in the Username field and the password in the Password and
Password confirmation fields), or select the Without authorization
checkbox if authorization is not required. In the VPN server address
field, enter the IP or URL address of the PPTP or L2TP authentication
server. If your ISP applies encryption, select a needed value from the
Encryption drop-down list.
12. If needed, fill in other fields on the page in accordance with data provided
by the ISP.
13. Click the Apply button.
21
DIR-615
Quick Installation Guide
Example of Connection via VLANs
If your ISP provides:
•
access to the Internet via the VLAN with the tag (VLAN ID) 2, the
PPPoE connection type, the login user, and the password
user_password,
•
access to IPTV service via the VLAN with the tag (VLAN ID) 10,
•
access to IP telephony via the VLAN with the tag (VLAN ID) 20,
and your set-top box is connected to the LAN port 3, your VoIP phone is
connected to the LAN port 4 of the router, then follow the next steps to
configure the router.
1. Go to the Net / WAN page, select the WAN connection and click the
Delete button on the opened page.
2. Go to the Advanced / VLAN page.
3. Select the lan group.
4. Select the line port3 in the table at the bottom of the page and click the
Delete port button.
5. Select the line port4 and click the Delete port button.
6. Click the Apply button.
7. Select the wan group.
8. In the Name field, enter a name for the group (INTERNET).
9. From the Type drop-down list, select the NAT value.
10. From the Port drop-down list, select the value internet (corresponds to
the INTERNET port of the router).
11. From the Tag drop-down list, select the tagged value.
12. In the VLAN ID field, enter 2.
13. Click the Apply button.
You have created the group of ports for connection to the Internet.
22
DIR-615
Quick Installation Guide
14. Click the Add button.
15. In the Name field, enter a name for the new group (IPTV).
16. From the Type drop-down list, select the Transparent value.
17. From the Port drop-down list, select the value port3.
18. From the Tag drop-down list, select the untagged value.
19. From the Port drop-down list, select the value internet.
20. From the Tag drop-down list, select the tagged value.
21. In the VLAN ID field, enter 10.
22. Click the Apply button.
You have created the group of ports for IPTV service.
23. Click the Add button.
24. In the Name field, enter a name for the new group (VOIP).
25. From the Type drop-down list, select the Transparent value.
26. From the Port drop-down list, select the value port4.
27. From the Tag drop-down list, select the untagged value.
28. From the Port drop-down list, select the value internet.
29. From the Tag drop-down list, select the tagged value.
30. In the VLAN ID field, enter 20.
31. Click the Apply button.
You have created the group of ports for access to IP telephony.
32. Click the Save&Reboot line in the top-page menu displayed when the
mouse pointer is over the System caption.
23
DIR-615
Quick Installation Guide
33. Log into the web-based interface and go to the Net / WAN page.
34. Click the Add button.
35. On the opened page, select the PPPoE value from the Connection
Type drop-down list.
36. From the Interface drop-down list, select the value Internet.2.
37. In the Username field, enter user.
38. Deselect the Without authorization checkbox.
39. In the Password and Password confirmation fields, enter
user_password.
40. Click the Apply button.
24
DIR-615
Quick Installation Guide
Configuring Local Area Network
1. Go to the Net / LAN page. If needed, change the IP address of the
router's LAN interface and the mask of the local subnet in the IP
Address and Netmask fields. Then click the Apply button.
2. By default, the DHCP server of the router is enabled. In the DHCP
server section, you can change the parameters of the DHCP server. If
you want to manually assign IP addresses to devices of your LAN, disable
the DHCP server (select the Disable value from the Mode drop-down
list).
3. After specifying the DHCP server settings, click the Apply button.
25
DIR-615
Quick Installation Guide
Configuring Wireless Network
By default, the wireless network of the router is open (it requires no password
to access it). To avoid unauthorized access to your wireless local area network,
change the default settings of the router.
Example of Wireless Settings
1. Go to the Wi-Fi / Security settings page.
2. Select the WPA2-PSK value from the Network Authentication dropdown list.
3. Enter a key (a password that will be used to access your wireless
network) in the Encryption Key PSK field. Use digits and Latin
characters.
4. Select the AES value from the WPA Encryption drop-down list.
5. Click the Apply button.
!
If you perform initial configuration of the router via Wi-Fi connection,
note that immediately after changing the wireless default settings you
will need to reconfigure the wireless connection using the newly
specified settings.
26
DIR-615
Quick Installation Guide
Saving Settings to Non-volatile Memory
In order to avoid losing the new settings upon hardware reboot (accidental or
intentional power-off of the device), it is recommended to save the settings to
the non-volatile memory of the router.
Click the Save&Reboot line in the top-page menu displayed when the mouse
pointer is over the System caption.
Wait until the router is rebooted. Now you can use it to access the Internet or
access the web-based interface of the router to configure additional
parameters. For detailed description of every page of the web-based interface,
see the “User Manual” document (ftp.dlink.ru/pub/Router/DIR615/Description/RevR/).
27
DIR-615
Quick Installation Guide
TECHNICAL SUPPORT
You can find software updates and user documentation on our website.
D-Link provides its customers with free support within the product's
warranty period.
Customers can contact the technical support group by phone or by email/Internet.
FOR TELEPHONE NUMBERS AND ADDRESSES OF D-LINK
OFFICES WORLDWIDE VISIT
http://www.dlink.com/corporate/worldwideoffices/
28