1
5.2 Start Window
The menu bar of the application software contains five
menus. These are: Setup, Option, Application, Exit, Info.
5.2.1 Setup
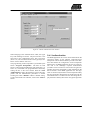
When selecting the submenu “Transponder” in the
“setup” menu, the different types of Atmel Wireless &
Microcontrollers’ transponders can be seen (figure 6).
Depending on the transponder chosen, the user interface
will be adjusted.
Figure 6. Transponder menu
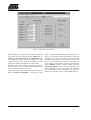
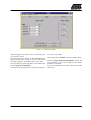
In the submenu “COM-Port”, select the used RS232 serial
port to communicate with the RFID application kit
(figure 7). (To check the communication between the PC
and the application board, press function key F12 and all
LEDs will flash, otherwise change COM-Port)
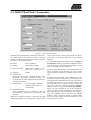
Figure 8. Tuning menu
In manual tuning mode, the user can select one out of four
frequency stages from 122 kHz to 128 kHz in steps of
2 kHz (low, semi low, semi high and high). This requires
that the on-chip oscillator of the U2270B is tuned to
125 kHz (these values are nominal values, the actual
values may slightly differ due to component tolerances).
In autotuning mode, the software switches between the
four frequencies until the transponder is can be read out.
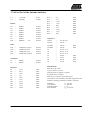
The currently selected frequency stage is indicated on the
application board by the Tune 1/2 LEDs binary encoded
(figure 9).
Tune2
0
0
1
1
Tune1
0
1
0
1
Frequency
High
Semi high
Semi low (default)
Low
Figure 9. Binary Tuning LED code
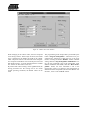
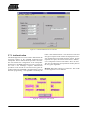
Use the submenu item “RF-Field” to switch the RF field
on the RFID application kit ON or OFF (figure 10). The
status is indicated by the yellow “RF on” LED on the application board. “RF on” is the default value.
Figure 7. COM–Port menu
5.2.2 Option
The submenu “Tuning” enables two different tuning
modes: manual tuning (“High” to “Low Frequency”) and
autotuning (figure 8).
10
Figure 10. RF-Field menu
The submenu item “Demoboard Reset” resets the application board and all changes in the option menu to
default values. The reset can also be carried out by pressing key “F12”.
03.01