1
Starflight™
Command Summary Card
For the Amiga
Getting Started
To play Starflight, you need a computer with at least one floppy drive and
512K of free memory. Your machine must be operating with Kickstart 1.2 or
1.3.
Loading Starflight
Before you begin play, MAKE A COPY OF THE PROGRAM DISK. The
program isn't copy protected, so if you play on the original disk, you'll alter
it forever. Make a copy now and put the original away in a safe place. You'll
need a blank, initialized floppy disk. Note: You cannot install Starflight
onto a hard drive.
To
1.
2.
3.
make a copy of the Program Disk:
Tum on your computer. (Amiga 1000 owners, insert Kickstart 1.2 or 1.3.)
Insert Workbench into DFO:.
If you have a single drive system, remove Workbench and insert the
Starflight Disk. If you have two drives, simply insert the Starflight
Disk into the other drive.
4. Place the mouse pointer on the Starflight disk icon and click to highlight
it.
5. Pull down the Workbench menu from the menu bar. Drag the highlighted
bar down to Duplicate and release.
6. Follow the onscreen instructions. You'll need to swap disks from time to
time. After copying, you don't need to rename the disk.
To start playing:
1. Tum on your computer. (Amiga 1000 owners, insert Kicks tart 1.2 or 1.3.)
2. When the computer asks for Workbench, insert your copy of the
Starflight Disk instead. Press the spacebar to get past the splash screen
and lnterstel Police Warning.
3. The Load Game screen will appear. Select the game you want to play (if
you're playing Starflight for the first time, select Game 1). Select Load.
4. If you 're starting a new game, the Starport screen will appear. Sec
Additions to the Manual on this Command Summary Card .
Selecting Commands
~
'<;;;;;t:f
You run your starship and command your crew by selecting options
from the screen. Point the mouse cursor to the option you want (the
pointing hand icon indicates that your mouse is over an option). To
select an option, click (quickly press and release) a mouse button.
Selecting Options Using the Keyboard
To move the cursor using the keyboard, hold down the Amiga key and press a
cursor key(~-+ i .1). Holding down Shift-Amiga and ?ressing a cursor key
moves the cursor in large increments. Pressing Amiga-Al t is equivalent to
clicking the mouse.
Almost every option on a screen aiso has a key assigned to it - pressing that
key automatically selects that option. The key is usually the first letter of the
option . For example, pressing S while in Starport automatically selects Ship
Construction. Note: The same key may haYe a different function in different
places. For instance, pressing S from the Bridge of your starship selects Science
Officer. See Keyboard Comma.nds on this Command Summary Card.
2
Scrolling
A
Occasionally, you 're presented with lists of items (in Cargo, the Trade
~
Depot, etc.). You can scroll through lists by pressing the up/down cursor
.!J. keys (i.!.) to move the highlighted bar to the item you want. You can
also scroll by clicking on the the arrow icons to the right of the list.
Press Amiga-Alt or click a mouse button to select the highlighted item.
Continuing Messages
:g
The hourglass informs you that the game is pausing to do something
(for example, Launch). The hourglass also appears when the game
pauses to let you read a message. Click a mouse button or press any
key to continue the message.
--
Confirming Commands
ftjjt
OD
Occasionally questions appear in the Text Window asking you to
confirm commands. You can move the mouse until the appropriate
answer appears on the screen. Click once to answer. You can also
confirm commands from the keyboard by pressing Y to answer Yes or N
to answer No.
Game Options
Gil\)
~
The Game Options menu lets you save, begin, load, or quit a game. You
can also turn music and sound effects on and off here. Game Options
can be selected anytime except inside a Starport Module or when
selec:ting a landing _site. To bring up the Game Options, press Esc or
click the Interstel icon anywhere it appears on the screen (usually
somewhere on the left side of the screen). When the menu appears,
select one of the following:
Pausing the Game
You can pause the game by bringing up the Game Options (see above).
in the window above Uhlek on the inner wheel. The correct answer in this
case is 22917.
Security Access Code \'\'heel
Movement
YOU MUST ENTER A SECURlTY ACCESS CODE when requested by
Interstel Security at launch. The access code consists of three variables: a
location, an artifact, and a race. Locations are on the rim of the outer wheel;
artifacts are on the rim of the inner wheel. Races appear below the cut-out
windows on the inner wheel. Use the wheel like this:
In the Amiga version, there is no Maneuver option under Navigator. Use the
mouse to move your starship in hyperspace and your terrain vehicle while on
planets. Move the mouse cursor to the Main View Screen - the pointer turns
into an arrow. Point the arrow in the direction you want to travel and click or
hold down a mouse button. You can also use the numeric keypad on your
keyboard to move your terrain vehicle and starship.
1) \'\'hen the request appears on the screen, find the location on the outer
. wheel. Line it up with the artifact on the inner wheel.
2) Without changing the alignment, find the race on the inner wheel.
The correct access code is visible in the window above the race name.
Type the access code and press Return.
Example: Suppose lnterstel Security requests the code for Akteron, Black Box,
Uhlek. To find the correct access code, line up Akleron with Black Box. Look
Resume Game - Returns you to the game without saving.
Save Game - Saves your current progress in the game. You can save up to
five games, identified by the numbers 1-5. Select the number you want
to designate your current game and select Save. When you save, you
permanently erase any game you previously saved under that number.
Note: You can't save while on planets.
Load Game - Loads a previously saved game. Select the game you want to
continue (Game 1-5) and select Load.
New Game - Begins a new game. Select the game you want lo start over
(Game 1-5) and select New. This erases any game you may have saved
under that number.
Quit - Quits the game. When you select quit, you're given a choice of
saving before exiting.
Sound On - Click on the button to turn the sound on and off.. When the
button to the left is filled, the sound is on.
·
4
WARNING: Starflighl has a large keyboard buffer that temporarily stores
keyboard commands that the computer can't readily execute. Because of this,
your starship or terrain \'chicle may continue movins after you've released the
movement key. Instead, use cruise control.
Cruise Control
DJ
Cruise control lets you travel in a direction without holding down the
mouse button or a movement kev. You can activate cruise control while
traveling in hyperspace, through a system, or on a planet. Select the
cruise control icon or press O on the numeric keypad to set your ship or
terrain vehicle on cruise control; use the mouse or numeric keypad to set
the direction of travel. To deactivate cruise control, select the icon again
or press 0.
Additions to the Manual
PART 3: Interstel Superphotonic Starship
PART 2: Starport
2.1 Overview
Your character follows the mouse cursor around the amphitheater. Move the
mouse cursor to a module and wait for the character to walk to it. The module's
name appears on the screen when the character is at the entrance - click the
mouse button or press Amiga-Alt to enter.
2.2.1 Operations: In the Amiga version, there isn 't an Evaluations option.
You 'll automatically receive an evaluation in Operations after you 've
recommended a planet. You only receive the evaluation once.
2.2.3 Personnel: Jn the Amiga version, you select Add to create a crewmember.
Type the crewmember's name and press Return. Select the crewmember's species
and press Return. Select Add again to add another crewmember.
To train a crewmember, select Next or Previous until the crewmembcr's file
appears. Select the skill you want to train the crewmember in, and then select
Once to give the crewmember one training session or Fully to train the
crewmember to his or her species's maximum (provided you have enough
money). When a skill appears grey, the crewmember has been trained to his or
her maximum in that skill. When you 've put together a crew, select Exit.
2.2.4 Crew Assignment Select the crew position you're filling. Select Next or
Previous until the file of the crewmember you want for the position appears,
and then select Assign. You must assign a crewmember to each position before
you can leave Starport. There are no limits to how many positions one
crewmembcr can fill . When all crew positions have been filled, select Quit.
2.2.7 Docking Bay:
a mphitheater .
6
The Docking Bay is located in the center of the
3.2.1 Captain: When you Select Site, use the mouse or the cursor keys to move
the crosshairs to the targeted landing site. Once you 've selected Descend,
yo u're asked if you want the viewport opened. Select Yes to watch the landing
sequence; select No to keep the viewport closed (which reduces the time it
takes to land).
3.2.3 Navigator: Select Fire Weapons to fire your weapons. In combat, try
setting your ship on cruise control so you can maneuver ~nd pressing the space bar
to fire your weapons.
PART 4: Space
4.1.3 Planet Approach: To orbit a planet, mancuver your starship until it's
somewhere over the planet. Select Yes to confirm your order to orbit. Select No
to continue system travel.
PART 5: Planetside
5.2.1 Maps: In the Amiga version, there are three map levels. You can
mo\'e vour terrain vehicle in all but the most expanded \'icw (the third
level).'Select the up arrow to expand your m~p \'iew; select the down
~rrow to reduce map magnification.
5.2.2 Move: See Movement on this Command Summary Card for details on
moving your terrain vehicle. To re-enter your starship, stop the terrain
vehicle when it's over your starship and select Embark.
Selecting this option presents a key of all the icons used by the terrain
vehicle computer for lifeforms, minerals, ruins, etc. It also provides a
topographical key for the planet.
Starport
Select this option to engage the Auto-Pickup device. Auto-Pickup
automatically picks up any minerals your terrain \'Chicle moves over.
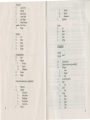
Keyboard Commands
r
Universal Keys
Dank
Crew Assignment
Docking Bay
Operations
Personnel
Ship Configuration
Trade Depot
Crew Assignment
Universal keys have the same function throughout the game.
Amiga-+--> i .J.
Shift-Amiga-+--> i .J.
Amiga-Alt
i
Scroll up
.!.
Scroll dovrn
B
C
D
0
P
S
T
<--
->
Aor
Return
Q
Move mouse cursor
Move mouse cursor (large increments)
Activate a designated option
QptiQD:i
R
R
N
E
L
N
Q
8
Resume
Save
1-5
Game 1-5
Save
Return
Cancel
Fsc
Load
1-5
Gamel-5
Return
Load
Fsc
Cancel
New
1-5
Gamel-5
New
N
Esc
Cancel
Quit
1-5
Save as Game 1-5
Don 't Save
D
Q
Quit
Assign Crewmember
Quit
Operations
p
s
Previous file
Next file
Previous message
Repeat message
Next message
Exit
Personnel
<-orN
->orP
A
H
'r
\~
Next file
Previous file
Add crewmcmber
Hwnan
v
Velox
T
Thrynn
E
A
Return
T
s
N
E
c
Elowan
Android
OK
Train crewmember
Science
Navigation
Engineering
Communications
9
1'
M
0
F
D
D
y
N
E
Medicine
Once
Fully
D:>ne
Delete crewmember
Yes
No
Exit
Ship Configuration
B
Buy
1-5
D
R
N
E
Class 1-5
D:>ne
Repair
Name
Exit
Exit
Ship's Console
I'
Numeric
Keypad
Move
Cruise Control
"'
Bridge
c
Captain
Science
Navigator
Engineer
Communications
Doctor
s
N
E
0
D
Captain
The following keyboard commands apply after y0u selec t Duy, Sell, or
Repair:
L
s
D
Cargo Pods
Engines
Shielding
Armor
Missile Launchers
Laser Cannons
C
E
S
A
M
L
A
D
c
p
s
E
p
s.
Trade Depot
B
B
Buy
Exit
E
s
Sell
Exit
E
A
s
E
B
Science
Sell
s
10
F.sc
Buy
Launch/Land
Select Site
Descend
Abort
Disembark
Cargo
Drop
Scan
Exit
Log Planet
Ship's Log
Exit Log
Bridge
N
A
s
Scan
Scan
Exit
B
Sensors
Analysis
Status
Bridge
11
Navigator
0
s
R
L
A
D
spacebar
B
Leave Orbit
Starmap
Raise Shield
Lower Shield
Arm Weapon
Disarm Weapon
Fire Wea pon
Bridge
0
T
Friendly
Hostile
Obse:juious
Terminate
Doctor
u
Up
D
Down
Select
Treat
Bridge
s
Engineer
u
Up
D
Down
T
B
R
B
Select
Repair
Bridge
Planetside
s
Communications
H
R
F
H
0
D
B
Hail
Respond
Friendly
Hostile
Obsequious
Distress
Bridge
Once communications are established:
s
Q
T
R
E
A
G
12
F
H
p
Statement
Question
Themselves
Other Races
Old Empire
The Ancients
General Info
Postw-e
Numeric
Keypad
0
E
w
L
s
E
A
s
E
L
c
E
D
s
R
T
E
Move
Cruise Control
Embark (when over your starship)
Weapons
Laser
Stunner
Exit
Auto-Pickup device
Scan
Exit
Look
Exit
Cargo
Drop
Scan
Read
Take
Exit
13
Technical Support
If you have questions about the program, our Technical Support Department
can help. If your q·uestion isn't urgent, please write to us at:
Electronic Arts Technical Support
P.O. Box 7578
San Mateo, CA .94403-7578
Media - EA warrants that, under normal use, the magnetic media and the
packaging provided with it are free from defects in materials and
workmanship.
Software - EA warrants that the software, as originally purchased, will
perform substantially in conformance with the specifications set forth in the
packaging and in the user manual.
Warranty Claims
Please be sure to include the following information in your letter:
•
Product name
Type of c:umputer you own
Any additional system information (like type and make of monitor, video
card, printer, modem etc.)
Type of operating system or 005 version number
Description of the problem you're having
If you need to talk to someone immediatelv, call us at (415) 572-ARTS
Monday thou gh Friday between 8:30 am a~d 4:30 p~, Pacific Time. Please
have the above information ready when you call. This will hr:l p us answer
your question in the shortest possible time.
If you live outside of the United States, you can contact one of our other
offices.
In the United Kingdom, contact: Electronic Arts Limited, P.O. Box 835, Slough
SL3 8XU, UK. Phone (044) 753 46465
In Australia, contact: ECP /EA, 4/18 Lawrence Drive, Nerang, Gold Coast,
QLD 4211. Phone: (75) 963-488.
Limited Warranty
Electronic Arts ("EA") provides to the original purchaser of the computer
software product, for ·a period of ninety (90) days from the date of original
pu rchase (the "Warranty Period"), the following limited warranties:
14
•
To make a warranty claim under this limited warranty, please return the
product to the point of purchase, accompanied by proof of purchase, your
name, your return address, and a statement of the defect. OR send the disk(s)
to us at the above address within 90 days of purchase. Include a copy of the
dated purchase receipt;. your name, your return address, and a statement of
the defect. EA or its authorized dealer will, at our option, repair or replace
the product and return it to you (postage prepaid) or issue you with a credit
equal to the purchase price .
To replace d efective media after the 90-day warra!1ty period ha s expired,
send the original d isk(s) to the above address. Enclose a statement of the
defect, your name, your return address, and a check or money order for $7.50.
THE FOREGOING STATES THE PURCHASER'S SOLE AND EXCLUSIVE
REMEDY FOR ANY BREACH OF WARRANTY WITH RESPECT TO THE
SOFTWARE PRODUCT.
Warranty Exclusions: EA EXPRESSLY DISCLAIMS ANY IMPLIED
WARRANTIES WITH RESPECT TO THE MEDIA AND THE SOFTWARE,
INCLUDING WARRANTIES OF MERCHANTABILITY OR FITNESS FOR
A PARTICULAR PURPOSE. ANY WARRANTIES IMPLIED BY LAW ARE
LIMITED IN DURATION TO THE WARRANTY PERIOD. SOME STATES
DO NOT ALLOW LIMITATIONS ON THE DURATION OF AN IMPLIED
WARRANTY, SO THE ABOVE LIMITATIONS MAY NOT APPLY TO YOU.
15
THIS W ARRANfY GIVES YOU SPECIFIC LEGAL RIGHTS. YOU MAY
ALSO HA VE OTHER RIGHTS WHICH VARY FROM STATE TO ST ATE.
Limitation on Damages
EA' SHALL NOT IN ANY CASE BE LIABLE FOR INCIDENTAL,
CONSEQUENTIAL, OR OTHER INDIRECT DAMAGES ARISING FROM
ANY CLAIM UNDER THIS AGREEMENT, EVEN IF EA OR ITS AGENTS
HA VE BEEN ADVISED OF THE POSSIBILITY OF SUCH DAMAGES.
SOME STATES DO NOT ALLOW THE EXCLUSION OR LIMITATION OF
INCIDENTAL OR CONSEQUENTIAL DAMAGES, SO THE ABOVE
LIMITATION OR EXCLUSION MAY NOT APPLY TO YOU.
Amiga is a registered trademark of Commodore-Amiga, Inc.
Unless indicated otherwise, all software and documentation is © 1986, 1989
Electronic Arts. All Rights Reserved.
16