1
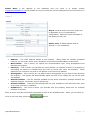
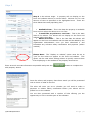
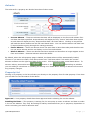
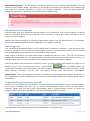
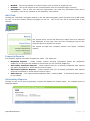
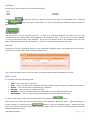
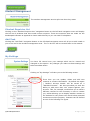
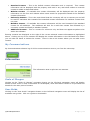
Studentpad Landlord User Guide A guide to using the Studentpad software for Landlords. Steve Borman 11/15/2011 Studentpad User Manual Contents Introduction ............................................................................................................................. 2 Logging In ................................................................................................................................ 2 The Layout ............................................................................................................................... 2 Home ...................................................................................................................................... 3 Property Management ................................................................................................................ 3 Home ................................................................................................................................... 4 Add Property ......................................................................................................................... 4 Property List .......................................................................................................................... 7 Re-advertise A Property .......................................................................................................... 8 Edit Property ......................................................................................................................... 8 Property Communication Journal .............................................................................................. 8 Add Task ............................................................................................................................... 9 Reports .................................................................................................................................... 9 Property Reports .................................................................................................................... 9 Generating Reports ................................................................................................................ 9 Actions ............................................................................................................................... 10 To do List ............................................................................................................................... 10 Statistics ................................................................................................................................ 11 Property Viewing Statistics .................................................................................................... 11 Student Management............................................................................................................... 12 Student Enquiries List ........................................................................................................... 12 Add Task ............................................................................................................................. 12 Account .............................................................................................................................. 12 My Settings ......................................................................................................................... 12 Scale of Charges .................................................................................................................. 13 User Guide .......................................................................................................................... 13 ©Studentpad 2011 Page |1 Introduction The aim of this document is to provide guidance on the use of the Studentpad software from the Landlord’s point of view. The manual is separated into the key areas of the software and will have screen shots wherever possible. Please Note: These instructions are based on a standard configuration of the Studentpad software. Your feature set may be different to the features described in this manual based on a standard configuration. However this manual should provide a good guide to using the software for most organisations. Please Note: Throughout the software, where there is a grid, you can use the column headers to sort the data. Clicking the first time on a column header will sort the data ascending. Clicking a second time will sort the data descending. Logging In In order to log into the system you are required to enter your email address and password. You must also accept the terms and conditions which can be viewed online by clicking on the text [View Terms and Conditions]. The Layout The screen is divided into three main areas. Top Navigation (Red) – This is the top navigation area consisting of a tab strip. Clicking any of these will take you to the chosen area of the software. This area remains the same throughout the software. Left Navigation (Blue) – This is the left hand navigation menu. This menu changes to reflect the area of the software chosen from the top navigation area. Main Content (Green) – This area will display the detail depending on which of the navigation buttons you clicked on. ©Studentpad 2011 Page |2 Home Once you are logged in you will be presented with one of two home pages depending on your user preferences. Dashboard View Classic View The home pages are a link to the key areas of the software. Both the “classic view” and “dashboard view” have exactly the same headers such as “Property Management”. Clicking these headers will take you to the chosen area of the software which we will cover later in the manual. The dashboard view has quick links which will take you to a specific area of the software such as direct to adding an agent / landlord. You can easily switch between the two home pages by clicking the link at the bottom right of the page (highlighted above) and the system will remember your choice the next time you log in even from a different computer/device. Both home pages show the “To Do List”. The “to do list” is your personal notepad and its workings is covered later on in the manual. Property Management The property management area allows you to create and manage what we have termed properties and adverts. The information that is added against each property is split into two; a/ Property – this is the main bulk of the information that relates to a property including its address and facilities. It rarely changes. The data for this part is added in two stages in the three stage wizard. b/ adverts – this is the information that often needs changing on a regular basis such as how many rooms are available and the rent. This part allows you to determine for which period the property and advert information is displayed on the front end to the students. This information is added in the third stage of the three stage wizard. You only need to add the property to the system once no matter how many times it requires advertising on the front end website. Each property can then have multiple adverts. For example you may want to add one advert for each term / year or multiple adverts running parallel but for different details such as a rent which includes utilities such as gas or a rent where the tenant pays for these on top of the rent. Properties cannot be deleted by a landlord, please contact your university accommodation office to remove a property from the database. ©Studentpad 2011 Page |3 Please Note: that some of the information that has been added to the property section is displayed on the front end of the website. The advert part in essence allows you to determine when the property is available and when you would like the advert to run from. Home From the home view there are four key areas showing the address of the properties, Actions Needed – This panel will show any property adverts that are awaiting approval, such as adverts that require the University administrator to enter an end, as well as a link to a report that shows which properties have adverts that have recently expired. Clicking the “Click Here” button will take you directly to the relevant page. Edit Property – This panel is a simple property search to allow you to select a property to edit. Enter any information you have about the property such as the street name and the system will attempt to locate the property for you. Alternatively you can click the “View Property List” link that will show you all the properties in the system in alphabetical order. Recently Added Properties – This panel shows the ten most recently added properties, the current status and whether they have a current live advert displayed on the website. You can click the “View All” link to show all properties and revert to the top ten by clicking the “View Top 10” link when viewing all properties. There are many customisable reasons a property will not be live such as not having an advert with the current dates or missing a gas safety certificate. Having the system remove adverts from the website based on safety certificate rules etc. are definable by your organisation. To do List. – See Below. Add Property Clicking the “Add Property” navigation button on the left hand navigation menu will launch the add property wizard which will guide you through the adding of a new property. Step 1 Step 1 You must first enter the postcode of the property and press the button. You will then be presented with a list of properties where you must select the correct address. Selecting the address will then populate the address fields for you. Once you have selected the correct address press the step 2 of the wizard. ©Studentpad 2011 button to move on to Page |4 Please Note: if the address is not displayed how you want it to please contact [email protected] with details of how you would like it to be displayed and we will amend it on your behalf. Step 2 Step 2 is broken down into many areas and is dependent on your organisations configuration. Below are some examples of the areas you may see. Please note: all fields marked with an asterisk (*) are mandatory. Address – The main address details of the property. Many fields are already populated however you can make some minor alterations to the House Number/Name at this point. Main Details – This is where you specify the accommodation type, living arrangement and describe the property. Owner(s) – This is where you can add any owner details. An example of this is if an agency is advertising on behalf of a landlord and you want to record who owns the property. These details are for reference only and do not appear on the front end website. Photographs – This is where you can add as many photographs as you wish to help advertise the property. The system will automatically adjust the size of the images for use on the front end website. Shared Facilities – Are the facilities available to the whole household. Example facilities are washing machine, microwave, bicycle storage etc. Private Facilities – These are the facilities that are only available to the individual room such as en-suite, television, telephone. Suitable For – This area is where you describe who the property would suit for example smokers or families. Enter as much accurate information as possible in each of the available areas. When you are ready to move to the next step, press the ©Studentpad 2011 button. Page |5 Step 3 Step 3 is the advert stage. A property will not display on the front end website without a current advert. Adverts run for a set amount of time as specified in the highlighted area. There are three dates that need populating here. Available From – This is the date the property is available from and not when the advert is to run from. I would like my advert to run from – This is the start date of the advert. The advert will not display on the front end website before this date. Advert End Date – This is the last date the advert will appear on the front end website and this date will be added by the organisation administrator once you have submitted it and forwarded any relevant safety certification and payment (where needed). Please Note: The “display on website” option must be set to “yes” for the advert to appear on the front end website. This option can be used when editing adverts to quickly remove them from displaying on the website if the property becomes let. Enter as much accurate information as possible and press the add property wizard. button to complete the Once the advert and property have been saved you will be presented with a choice of what to do next The alert will warn you as to whether you will need to make a payment or submit safety certification before your advert will be placed live on the website. You are then presented with a number of links offering you the opportunity to link to another part of the software. ©Studentpad 2011 Page |6 Adverts The adverts for a property are divided into three further areas. Current Adverts – These are adverts that that will be displayed on the front end website if an end date has been specified. Active adverts will display the key “Active” and those that require an end date will display the key “Requires End Date” as shown above. Clicking on any advert will load the advert details into the left hand detail block. You can add the advert end date here if required without going through the vetting processes. Future Adverts – These are adverts where the start date is later than today and therefore are not yet active adverts and do not display on the front end website. Historic Adverts – These are adverts that have expired and therefore no longer appear on the front end website. Historical adverts cannot be edited. By default, when the edit property page is loaded, the latest advert will be automatically loaded, however if you want to create a new advert there is an “Add new advert” link within the current adverts container on the right hand side of the screen. Click this link to start a new blank advert. To save an advert, press either the button or the depending on whether you are adding a new advert or updating an existing one. Please Note: Saving an advert will not save any property changes. Property List Clicking on a property in the list will take you directly to the property form for that property. From here you are able to view the status of the advert. Approved – Your property details have been approved and is showing live on the website. Awaiting End Date – This property is waiting for the university to enter an advert end date to make it live on the website. They may be waiting for safety certificates from you or payment, dependent on which university you wish to advertise with. ©Studentpad 2011 Page |7 Rejected Properties – If your property has been rejected by the university administrators you will see this in the property status. By clicking on the property you will see the rejection notes (below) and can make the necessary alterations to have your property accepted. Once you have made the alterations the property will return to the New Property Approval list. Re-advertise A Property The list shows all of your properties that are eligible for re-advertising. Click on the property you would like to re-advertise. Then click on an advert to use as a base or click on the "Add a new advert" link to begin a brand new advert. Adverts will need verifying by a university administrator before they will be made live on the website. Please don’t expect to them see them displayed on the website instantly. Edit Property The edit property navigation button is only enabled when a property is selected. There are many ways to select a property such as using the “find property” facility on the properties “home” screen or using the recently added properties grid on the properties “home screen”. When editing a property the main screen area is divided into two key areas. The top of the screen displays the advert block with the advert detail on the left hand side and the other adverts (if any) on the right hand side whereas the bottom of the screen displays the full property details. There are multiple save buttons for simplicity to save you from scrolling the whole page down to the bottom just to save something at the top. Pressing the button anywhere within the property area will save the while property not just the section where the save button is located. Please Note: Saving a property will not save any advert changes only the property information. Please Note: - Any new properties, adverts or changes to existing information that are made by you as a Landlord will require approval by the university administrators before the changes appear live on the website. Property Communication Journal Clicking on the “Property Communication Journal” navigation button form the left hand navigation menu (when available) will allow you to view a communication record relevant to the selected property. Please note that the system automatically adds a “communication journal” to record the email or letter sent by the organisation using the Studentpad mailshot software. The information here will show the following information for reference only. ©Studentpad 2011 Page |8 Method – This is the method of communication such as email or telephone call. Content – This is the subject of the communication such as certificate expiry warning. Description – This is free text that the organisation can enter any information they feel is necessary, such as the contents of the telephone conversation. Add Task Clicking the “Add Task” navigation button on the left hand navigation menu will allow you to add a task to your “to do list” without leaving the page you are on. The “to do list” will be covered later in the manual. Reports The reports menu on the left allows the report lists to be selected and displayed on the right. Once the list is displayed click on the required report to display the results. The reports are split into “property reports” and “agent / landlord reports”. Property Reports The property reports are further divided into areas. The areas are: Displayed Reports – These contain reports showing information about the properties displaying on the front end website or those that are not currently displaying. Gas Safety Certificate Reports – These reports help you to identify properties with expired gas safety certificates or those that are due to expire. Electrical Certificate Reports – These reports help you to identify properties with expired electrical certificates or those that are due to expire. HMO Reports – This report shows properties with / without HMO - 3 stories and above and 5 or more beds. Generating Reports Clicking on any of the links to generate a report will display the chosen report. An example report is displayed below. ©Studentpad 2011 Page |9 Actions At the foot of every report there is an actions panel. Pressing the the Microsoft Excel. button will direct you back to report menu page you originated from. Pressing button will open a drop down list. This will generate a download that will open in To do List The “to do list” is your personal task list. It acts as a personal organiser and allows you to add “reminders” to the system which are displayed in chronological order. The “to do list” is also available in many of the other areas of the software. If you are in a specific area of the software then only the tasks relating to that area will be displayed. The To Do List area has just two sections. Home Clicking the “Home” navigation button on the left hand navigation menu will display the full to do list. It shows the current tasks with completed tasks below. The To Do List Home View is the only to do list that will show all tasks regardless of area. Add Task To do items have the following fields. Title – This is the title of the item. Area – This is the area of the software the item relates to such as Agent / Landlord or Property. Status – This can be either outstanding or complete. Priority – This can be low, medium or high. Deadline – This is a required field and is the date the item should be dealt with. Description – This is a required field and should be used to describe the task. To save a task enter all the relevant information and press the button. If there are any criteria that can be altered they will be displayed above the report. After changing any of the criteria you must press the button to view the updated report. Please note that you do not have to filter the report date. You can simply move on to the actions page should the initial unfiltered data be correct. ©Studentpad 2011 P a g e | 10 You can sort the report data by clicking on any of the column headers. Pressing a column header once will sort the data by the selected column ascending. Pressing the same column header a second time will descending. Statistics The statistics area gives you access to search and property viewing statistics. Property Viewing Statistics Clicking the “Property Viewing Statistics” navigation button on the left hand navigation menu will display a report of all properties that have appeared on the front end website and the area they appeared. The report has filters available at the top where you can choose what to group by and the date range the report covers. After changing any information press the the data. button to refresh The following columns of information are available: Agent / Landlord - Showing company name or Agent/Landlord name if no company name present. Property Address Search Results View – The number of times the property has appeared in the search results. Map Results View – The number of times the property has appeared in the search results using the map view. Details View – The number of times the property details have been viewed in full. Total - This is the total number of searches and not the total of the previous columns. For example a search that filters on Accommodation Type and Living Arrangements is still only one search so will increment the total by one. It will also increment the Accommodation Type and Living Arrangements columns by one each. ©Studentpad 2011 P a g e | 11 Student Management The student management area is split into three key areas. Student Enquiries List Clicking on the “Student Enquiries List” navigation button on the left hand navigation menu will display the full list of students that have made online enquiries. These are enquiries that are made via the Studentpad software as opposed to those made directly to you via email or telephone. Add Task Clicking the “Add Task” navigation button on the left hand navigation menu will all you to add a task to your to do list for the student management area. The “to do list” will be covered later in the manual. Account My Settings You have full control over your settings which can be viewed and changed in this section. Any changes you make to these settings will take immediate effect. Clicking on “My Settings” will take you to the following screen. From here you can update, delete and add new contacts or contact information. By default the agent / landlord account details will be saved as a “Standard Contact”. We have provided you with the ability to add more than one contact against your account. This, for example, would allow you to show a different contact for the university to use to contact you, whilst allowing you to display another contact on the website for the person who would show potential tenants around the property. Contacts can be defined as one of the following five types. ©Studentpad 2011 P a g e | 12 Standard Contact – This is the default contact information and is required. This contact information will be displayed with the property and used in any mail shots unless an override contact is added as described below. Website Contact – If available this contact information will be displayed with the property information on the front end website where users search for properties instead of the standard contact information. University Contact – This is the main detail that the university will use to contact you and will be used for mailshots also instead of the standard contact information if a mailshot contact does not exist. Mailshot Contact – If available this contact information will be used instead of the standard contact for all mailshots. The mailshots will look for a mail shot contact first followed by a university contact and finally a standard contact. Additional Contact – This is a contact for reference only and does not appear anywhere else within the software. Existing contacts are displayed to the right of the current selected contact information as highlighted above. Clicking on any of the contacts will display the contact information in the left hand form where you can edit the detail or delete the contact. There is also a link button where you can add a new contact. My Communications My Communications shows a log of all the communications sent to you from the university. Information The information area is split into two sections. Scale of Charges Clicking on the “Scale of Charges” navigation button on the left hand navigation menu will display details of how much it costs to advertise on Studentpad, what information needs to be provided and details for the main point of contact. User Guide Clicking on the “User Guide” navigation button on the left hand navigation menu will display the list of available user guides. Click on a guide to download it. ©Studentpad 2011 P a g e | 13