1
QUICK START GUIDE
Ax49-50-51-series Network Dome Camera
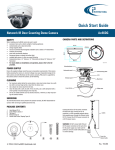
2. Rotate the dome counter clockwise to unlock and pull free of the housing.
CONNECT CAMERA TO i3 SRX-PRO SERVER
Connection type: 1
Crossover direct connection
iP-Pro Server
i3i³SRX-Pro
Server
Connection type: 2
LAN
VIA a Gigabit Switch
i3i³ SRX-Pro
Server
iP-Pro Server
3. Remove the inner liner by gently pulling it free of the two notches in the housing.
4. Adjust the tilt of the camera as necessary.
5. Adjust the pan of the camera as necessary.
Note: Maintain tilt at 75 degrees or less to avoid distortion. See the image below to
locate the distortion angle of the camera.
Note: The diagram above does not apply to Ax51-series cameras
i3 INTERNATIONAL INC.
1.866.840.0004
www.i3international.com
Camera’s default IP: 192.0.0.16.
Firmware Version: AP_01-00-60-33_i02 | Login: admin / Password: 1234
Firmware Version: AP_01-00-60-35_i02, or higher
Login: i3admin / Password: i3admin
1. Close SRX-Pro Server software by pressing Alt+Shift+Ctrl+F4.
2. Change the IP address on the onboard NIC (LAN) (or on NIC1 if your SRX-Pro
Server has two onboard NIC cards) of your SRX-Pro Server to 192.0.0.XXX to
match the default IP range of your Annexxus IP camera.
3. Connect your camera to i3 SRX-Pro Server (see diagram above).
4. Turn on your Annexxus camera.
5. Launch the CD that came with your Annexxus camera and double-click
“AnnexxusFinder.exe” file to install Annexxus Finder application. Annexxus
Finder application discovers all Annexxus cameras connected to your network.
6. Select desired camera in the Annexxus Finder software by double-clicking it in
the list and click Edit.
7. Enter the new IP address and Subnet Mask of the camera in the Change IP
Address area. The new camera IP address must match the original range of your
SRX-Pro LAN or NIC1 card.
E.g. If your original SRX-Pro Server’s IP address was 192.138.10.122, change
your Annexxus camera’s IP address to 192.138.10.XXX.
8. Follow the Annexxus Finder installation instructions until the application has been
successfully installed on your SRX-Pro Server.
9. Double-click Annexxus Finder icon on the Desktop to launch the application.
The application window will appear displaying a list of active network cameras.
Remember: Annexxus Cameras cannot share an IP address, each camera
requires its own unique IP address.
10. Enter the default camera password in the Input Password field and click Save.
11. Wait a few moments for a successful confirmation window. Click OK to close it.
12. Repeat Steps 1-12 for all detected Annexxus cameras in the Annexxus Finder.
13. Make sure you can connect to the camera through Internet Explorer:
a. Launch Internet Explorer and enter the IP Address you have just assigned to
your Annexxus camera. The password window should be displayed.
b. Enter the default camera User Name and default Password.
c. Annexxus camera interface will be displayed in the Internet Explorer
window. You should be able to see the camera image on the screen.
If you do not see the camera image on the screen, call i3 International tech
support for troubleshooting tips: 1.877.877.7241
14. Make sure that the latest version of GiPi updater is installed on your SRX-Pro
Server. You can download the updates from ftp://files.123ip.com/drivers/gipi.
Please contact i3 Technical Support team for access information.
15. Once the latest GiPi updater has been installed, restart i3 SRX-Pro Server
software.
16. Log In and go to the Setup -> IP Camera tab.
17. Click the Search button to display connected Annexxus cameras.
18. Select the detected camera in the list and click Select.
19. In the Select IP Camera window, enter the default camera User Name and the
default Password, then click Add.
20. The selected camera will be added to the IP Camera list.
Don’t forget to assign the IP camera to the SRX-Pro video channel in the
corresponding column.
21. Your Annexxus camera is now connected to SRX-Pro Server and is ready to
record. You may change resolution and frame rate for the Annexxus camera in
the IP Camera tab menu or you may choose to configure the camera’s settings.
U.S.A 1967 Wehrle Drive, Suite 1,
PMB# 034 Buffalo NY, 14221
Canada 780 Birchmount Road, Unit 16,
Scarborough, ON, M1K 5H4