1
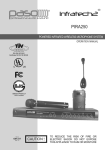
Pro Series 3250CL
Features:
11” Punching Edge
25 Sheet Capacity**
Book Former
Easy to Use Coiler
3-Year Limited
Warranty
Features
On-Off Switch
Roller Start
Roller Button
Built-in Edge Guide
Punch Button
Book Former
Carrying Grips
Accessory Tray
Waste Tray
2
Capabilities & Specifications
Important Safety Notice
•Always replace fuses or circuit breakers with the correct amperage and type.
•Never bypass safety devices.
•Hazardous voltages inside of machine.
•No user serviceable parts inside of machine. Machine should only
be opened by qualified repair personnel.
Punch Capacity
20lb Copy Paper
25 Sheets
8mil Acetate Cover
2 Sheets
Binding Capacity
Max Coil Size Recommended
15mm
Max Sheets Recommended
110 Sheets
Technical Data
Punch Die Pattern
4:1 .2475" spacing [.172" dia.]
81/2" x 11" & 51/2" x 81/2"
Paper Size
Voltage
120V AC 60Hz
Current
4A
Punch Duty Cycle
2 Min. Run / 1 Min Rest
Shipping weight / Machine weight
Dimension (LxDxH)
45lbs / 42lbs
14" x 17" x 7"
3
Setup
Back of
Machine
Power
Cord
•Position machine on
solid surface
•Plug power cord into
wall outlet
Unpackage
machine
On-Off
Switch
Fuse
Turn power
switch on
Punch
1
2
3
•Insert paper, slide left,
press punch button
•Punch no more than
25 sheets of paper at
one time
•Punch no more than
2 sheets of plastic
at one time
Prepare book to be
coiled by placing the
Front Cover on top and
the Back Cover on the
bottom of the Book Body
4
Coil
Determine the coil size needed by
mm s
15 heet
measuring the book thickness
s
110
with guide on right side of the
mm s
12 heet
s
accessory tray.
80
mm s
Move book from larger to smaller
10 heet
s
65
sizes until book just fits between
m
8mheets
s
guides.
40
m
6m eets
The number associated with the
h
s
25
slot (i.e. 8mm) signifies what size of
coil to use.
mm s
15 heet
s
110
mm s
12 heet
s
80
mm s
10 heet
s
65
m
8mheets
s
40
m
6m eets
h
s
25
Identify the size of coil by sliding coils over
the circular pegs starting from small to large.
Use the coil that fits on the peg found by
measuring the book thickness in previous step.
5
Coil
•Manually start Coil into the first 3-4 holes on right hand
side of book
•Press Coil Button to start roller spinning
•Gently bring the coil into contact with the front side of the
spinning roller while holding the book in a horizontal plane
as shown above
•Allow coil to spin into the book
Crimping
•Position pliers with the RED dot facing up, to the ceiling as shown
•Holding pliers horizontally, insert the plier tips around
the last coil of the book on the right hand side of the book
•Close pliers completely; this will cut and crimp the coil
6
Crimping
Flip the entire book over so that the
back cover is now on top
•Position pliers with the RED dot facing up, to the ceiling as shown
•Holding pliers horizontally, insert the plier tips around
the last coil of the book on the right hand side of the book
•Close pliers completely; this will cut and crimp the coil
7
Troubleshooting
Symptom
Solution
Machine will not punch
holes in paper
•Plug power cord into wall outlet
•Check wall outlet has power
•Switch machine power switch to
the “on” position
Holes punch on
the edge of paper
•Clear paper chips from the throat
of the punch die
•Seat paper completely into the
bottom of the punch die
Holes punch off center
of page
•Move paper to the left, against the
paper stop, prior to pressing the
punch button
Punch will not punch
through completely
•Remove a couple of sheets from the
back side of the lift of paper and press
the punch button again
•Only punch 25 sheets of 20lb copy
paper at one time and only 2
sheets of plastic at one time
Punch has stopped
with punch pins still in
the paper and will
not retract on its own
•Turn machine power switch to the “off”
position and unplug power cord from
the wall.
Remove the black cap from the right
side plate of the machine.
Use a flat blade, standard screwdriver
to rotate the shaft counter-clockwise.
This will manually retract the punch pins
from the paper, continue until all pins
have retracted completely.
8
Troubleshooting
Symptom
Solution
Coil will not spin
into book
•Align pages of book such that the holes
in the pages are all evenly aligned
•Use book former to shape book to the
contour of the coil
Pliers will not crimp
coil
•Make sure that the RED dot is pointing
up, to the ceiling and the right hand side
of the book is being cut/crimped
•Hold pliers horizontally
•Grasp coil being cut firmly between
thumb and forefinger will operating pliers
Warranty
The 3250CL coil binding system is covered by a 3 Year Limited Warranty against defects in materials
and workmanship, and is limited to the replacement of the defective system or the repair of the defective
system at the manufacturing facility. Modifications or intentional abuse of the system will not be covered
under this warranty. The punching die assembly will be covered for 1 year to be free of manufacture defects.
To obtain warranty repair of 3250CL coil binding system:
1. Obtain serial number of machine from decal on back of machine as shown below.
2. Call 1-800-390-5782 to arrange for a Return Merchandise Authorization number. Please have the symptom(s)
of the machine failure, the machine serial number, as well as shipping and contact information at the time of the call.
Performance Design LLC
Boise, ID.
Web: www.rhin-o-tuff.com
E-mail: [email protected]
**25 sheet punching capacity is based upon 25 sheets of 20lb copy paper, punching 44 holes on an 11” paper edge.
9
9/9/2008 3250CL Rev. 3
STRONG • SIMPLE • HONEST • CAPABLE
TUFF AND BUILT TO LAST
EASY TO USE & MAINTAIN
TRUSTWORTHY & SOUND
NEVER LETS YOU DOWN