1
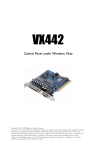
VX442
Control Panel for Windows 2000 and XP,
and Mac OS 9 & 10
Copyright 2002 --- 2008 Digigram. All rights reserved.
No portion of this manual may be reproduced without prior written consent from Digigram. The copyright protection
claimed here includes photocopying, translation and/or reformatting of the information contained in this manual.
While every effort has been made to ensure accuracy, Digigram is not responsible for typos, errors or omissions, and
reserves the right to make improvements or changes in the products and programs described without notice.
Digigram and VX442 are registered trademarks or trademarks of Digigram S.A. Other trademarks are property of their
respective holders.
Table of Contents
VX442 CONTROL PANEL............................................................................................ 3
Level Faders ........................................................................................................... 4
Peak Meters........................................................................................................... 4
Master Volume...................................................................................................... 4
Mixer Inputs .......................................................................................................... 5
Pan ........................................................................................................................... 5
Solo........................................................................................................................... 6
Mute ........................................................................................................................ 6
Stereo Gang ........................................................................................................... 6
PATCHBAY ROUTER........................................................................................... 6
Hardware settings...................................................................................................... 9
Master Clock .......................................................................................................10
Codec Sample Rate ...........................................................................................10
AES/EBU Sample Rate......................................................................................11
Multitrack Driver Devices.................................................................................11
DMA Buffer Sizes...............................................................................................12
Variable Signal Levels ........................................................................................12
AES/EBU.....................................................................................................................13
Digital Input .........................................................................................................13
Digital Output Format.......................................................................................13
Save, Delete, Load..............................................................................................14
H/W Installed......................................................................................................15
VX442
Manuel utilisateur
VX442 CONTROL PANEL
The VX442 control panel allows to set the parameters of your VX442 card:
sampling frequency, levels, latency, digital data format, SCMS management…
On Mac, the VX442 panel can be found in <Apple menu> <Control panels>.
On PC, open <Start> <Settings> <Control panel> <Digigram VX442 H/W>.
Monitor mixer
The Monitor Mixer is the first page that appears when the VX442 Control
Panel is opened, and controls the digital mixer embedded in the VX442’s PCI
controller chip. The output of this mixer may be assigned to the OUT1/OUT2
analog outputs and/or the AES/EBU Out digital output. At the same time, the
mixer outputs may be recorded in stereo as software files, just as if they were
additional inputs of the card.
The Monitor Mixer page is essentially a collection of volume level faders,
audio level (or ‘peak’) meters, and solo/mute controls. For each mixer output
and input channel there is one of each: a volume fader, a peak meter, a solo
control, and a mute control.
Level Faders
Each volume fader may be controlled by dragging its fader ‘handle’ vertically
with the mouse, or by clicking on the ‘handle’ to make it active and then
adjusting it with the up/down cursor keys of your computer keyboard. As the
mixer has no gain, these faders only attenuate the signal levels. The highest
setting is 0 dB, or ‘Unity Gain’. The default fader setting is the quietest setting,
–144dB, which mutes the audio. A pair of level faders may be “ganged” so that
both channels may be adjusted together as a stereo pair.
Note: This is not a genuine mixer, it is a Monitor Mixer. It does not change the level
of the signal you are sending to your hard drive - only your monitoring levels.
If you are sending a hot signal to your hard drive and you're getting clipping
(sharp distortion), you cannot change that by pulling the faders on this mixer
down. You must adjust the signal at the source (your keyboard, preamp, etc.).
Also, at the top of each fader and meter is a fader level “fine adjustment”
control. Clicking on the small “up” and “down” arrows will adjust the
corresponding fader setting in 0.5dB increments. Next to each fine adjustment
control is a numerical fader readout that is always current and active.
Peak Meters
Each peak meter indicates an audio signal level in “dB relative to full-scale.”
This means that a full-scale signal is referred to as “0 dB” and a signal that is
12 dB ‘quieter’ than full-scale is referred to as “-12 dB”. The meters are
vertically color-coded into three sections: green, yellow and red. The green
section represents a safe zone, ranging from approximately –48 dB to –12 dB.
Most audio signals should appropriately fill this section of the meter. The
yellow section ranges from –12 dB to –3 dB as the signal approaches a ‘hotter’
level. For best capture resolution, it is recommended to adjust the output gain
of the source or the input gain of the board so as to visualize the level in this
area. The red section of the meter ranges from –3 dB to 0 dB. On the input
level meters, a 0 dB condition indicates overload and audio clipping may
occur. Therefore make sure to adjust the incoming audio levels so that they do
not peak in the red section too long. On all output level meters, 0 dB indicates
full-scale output. Unlike the inputs, hardware clipping is impossible on the
outputs because of the 36-bit resolution built into the mixer hardware.
However, note that it is possible to mix multiple tracks within your software
application and cause clipping to occur in the output stream before it reaches
the VX442 output hardware or monitor mixer.
Master Volume
At the left side of the Monitor Mixer page, you will see the ‘Master Volume’
faders and peak meters. These faders have the longest ‘throw’ and highest
meter resolution of any level controls in the mixer page. They control the
VX442
Manuel utilisateur
overall stereo level of the mixer output. The peak meters indicate the output
signal levels with respect to full-scale and are directly affected by the settings
of the master volume faders.
Mixer Inputs
These inputs accept hardware audio streams (directly from the VX442’s
analog and digital input ports) and software audio streams (digital audio
generated by software to be output). This combination of streams makes the
monitor mixer extremely flexible. Each mixer input channel has its own level
fader and may be panned anywhere in the left/right stereo field. Each input
also has its own peak meter. The peak meters indicate the incoming “prefader” levels of the incoming audio and are therefore not affected by the fader
settings. However, the input faders do affect the levels of the signals exiting
the mixer and you will see the effect of the input faders on the output “Master
Volume” peak meters.
By reason of the large number of mixer inputs, not all inputs are displayed
simultaneously. Use the scroll bar at the bottom of the VX442 Control Panel
to scroll the view left or right. From far left to right, the inputs are labeled
“WavOut 1/2,” “WavOut 3/4,” then “WavOut AES/EBU”. These inputs accept
the digital audio streams being sent from your software application (or
Windows) to the driver devices with those same names. Each name begins
with “WavOut” to remind you that these are software streams and may not
necessarily be routed to any physical outputs (see Patchbay/Router). Further
to the right are more channels, labeled “H/W In AES/EBU,” “H/W In 1/2,” and
“H/W In 3/4”. These mixer inputs are audio streams from the physical VX442
hardware inputs, hence the “H/W” at the front of each label. On the Mac,
these inputs are labeled “SM/ASIO”, as these software streams will be receiving
their digital audio either from the Sound Manager or the ASIO driver,
depending on your selection.
Pan
Each mixer input may be individually panned anywhere in the stereo output
mix. A pan control is positioned directly under each input channel peak meter
and has the appearance of a small vertical pointer. To make a coarse
adjustment, click on the pan control with your mouse and drag it to the
desired position. For finer adjustment (in 1% increments), you may click on
the pan control to activate it, and then use the left/right or up/down cursor
keys on your computer keyboard. Either way, while the pan setting is being
adjusted, its value will appear numerically in the Master Volume’s status box
(below the Master Volume Stereo Gang control) as a percentage from left pan
to right pan: -100% represents far left, +100% represents far right, and 0%
represents the center.
Solo
Each mixer input channel has a “Solo” checkbox associated with it. Clicking
on and activating a solo box will solo the selected channel by essentially
muting all other signals. When more than one channel has Solo selected, all
solo channels will be summed to the solo bus, which is what one might
consider an ‘in place’ solo as opposed to a PFL, or pre-fader listen (levels and
pans still apply). Deactivating all solo boxes will return all input channels to
their previous mute/unmute states.
Mute
Every mixer input channel has a “Mute” checkbox associated with it. Clicking
on and activating the Mute box will remove that signal from the stereo bus.
Deactivating the Mute box will add the signal back into the stereo bus.
Stereo Gang
All input channel pairs have a “Stereo Gang” capability. Clicking on and
activating the Stereo Gang checkbox will link (or “gang”) the left/right faders
so that both channels may be adjusted together as a stereo pair.
PATCHBAY ROUTER
The Patchbay/Router page allows you to connect each of the VX442’s
hardware outputs (2 pairs of analog outputs and 1 pair of digital output
channels) to specific audio sources within the VX442 board. To display this
page, click the “Patchbay/Router” tab of the VX442 Control Panel.
Note: on the Mac, please substitute the name “SM/ASIO” where references are made
to “WavOut.” SM/ASIO are the software outputs on the Mac, while WavOut
are the software outputs on the PC. Substitute “Windows multimedia applet”
with “Sound Manager applet”.
VX442
Manuel utilisateur
The leftmost vertical column of Patchbay/Router page, “H/W Out 1/2”
connects this hardware analog stereo pair to one of six stereo sources:
1. The default setting, “WavOut 1/2” connects ports OUT1 and OUT2 to
your music software or Windows multimedia applet. In other words,
when music software plays audio to the device named
“WavOut 1/2 VX442” it will be routed directly to the “hardware” analog
outputs 1 & 2 of your VX442.
2. The second option, “Monitor Mixer”, connects ports OUT1 and OUT2 to
the outputs of the VX442 monitor mixer. For more information on the
capabilities of the monitor mixer, please see the section “Monitor Mixer”.
3. The third option, “AES/EBU In,” connects ports OUT1 and OUT2 directly
to the hardware AES/EBU input on the VX442. The left channel of the
AES/EBU In is routed to OUT1 and the right channel of the AES/EBU In is
routed to OUT2.
4. The fourth option, “AES/EBU In (L/R Rev.)”, functions identically to the
third option, except that the left and right channels are swapped.
Therefore in this mode, the left channel of the AES/EBU In is routed to
OUT2 and the right channel of the AES/EBU In is routed to OUT1. Note
that this option is exclusively for monitoring/mixing purposes - the
AES/EBU In will not record in reverse when this option is checked.
5. Selections five and six connect the hardware analog inputs 1 & 2 or 3 & 4
(respectively) directly to the VX442’s hardware analog outputs 1 & 2. For
example, when “H/W In 1/2” is selected, any signal present at the IN1 port
will be copied to OUT1, and any signal present at the IN2 port is copied
to OUT2. This same behavior applies to “H/W In 3/4” when selected.
The next vertical column of the Patchbay/Router page “H/W Out 3/4,”
connects this hardware analog stereo pair to one of the five stereo sources:
1. The default setting, “WavOut 3/4”, connects ports OUT3 and OUT4 to
your music software or Windows multimedia applet. In other words,
when music software plays audio to the device named
“WavOut 3/4 VX442” it will be routed directly to the “hardware” analog
outputs 3 and 4 of your VX442.
2. The second option, “AES/EBU In”, connects ports OUT3 and OUT4
directly to the hardware AES/EBU input on the VX442. The left channel of
the AES/EBU In is routed to OUT3 and the right channel of the
AES/EBU In is routed to OUT4.
3. The third option, “AES/EBU In (L/R Rev.)”, functions identically to the
second option, except that the left and right channels are swapped.
Therefore in this mode, the left channel of the AES/EBU In is routed to
OUT4 and the right channel of the AES/EBU In is routed to OUT3.
4. Options four and five connect the hardware analog inputs 1 & 2 or 3 & 4
(respectively) directly to the VX442’s hardware analog outputs 3 & 4. For
example, when “H/W In 1/2” is selected, any signal present at the IN1 port
is copied to OUT3, and any signal present at the IN2 port is copied to
OUT4. This same behavior applies to “H/W In 3/4” when selected.
The rightmost vertical column of Patchbay/Router page, “H/W Out AES/EBU,”
connects the VX442’s hardware AES/EBU output to one of six stereo sources:
1. The default setting, “WavOut AES/EBU” connects the AES/EBU Out port to
your music software or Windows multimedia applet. In other words,
when music software plays audio to the device named
“WavOut AES/EBU VX442” it will be routed directly to the hardware
AES/EBU output on your VX442.
2. The second option, “Monitor Mixer,” connects the AES/EBU Out port to
the outputs of the VX442 monitor mixer. For more information on the
capabilities of the monitor mixer, please see the section
“Monitor Mixer Page.”
3. The third option, “AES/EBU In,” connects the AES/EBU Out port directly
to the hardware AES/EBU input on the VX442. The left channel of the
VX442
Manuel utilisateur
AES/EBU In is routed to the left channel of AES/EBU Out and the right
channel of the AES/EBU In is routed to the right channel of AES/EBU Out.
4. The fourth option, “AES/EBU In (L/R Rev.),” functions identically to the
third option, except that the left and right channels are swapped.
Therefore in this mode, the left channel of the AES/EBU In is routed to the
right channel of AES/EBU Out and the right channel of the AES/EBU In is
routed to the left channel of AES/EBU Out.
5. Selections five and six connect the hardware analog inputs 1 & 2 or 3 & 4
(respectively) directly to the VX442’s AES/EBU Out port. For example,
when “H/W In 1/2” is selected, any signal present at the IN1 port is sent to
the left channel of the AES/EBU Out, and any signal present at the IN2
port is sent to the right channel of the AES/EBU Out. This same behavior
applies to “H/W In 3/4” when selected.
At this point, you may begin to realize the versatility of the Monitor Mixer and
the Patchbay/Router, and the relationship between the two. You may want to
re-read this section and practice making some adjustments within the VX442
Control Panel software to become proficient in routing and mixing. You can
restore the default settings to use the card as a straight 6-in 6-out device at
any time - just choose the topmost option in each of the Patchbay/Router
columns.
Hardware settings
The Hardware Settings page of the VX442 Control Panel gives you control
over miscellaneous features of the VX442. To display this page, click the
“Hardware Settings” tab of the VX442 Control Panel.
Master Clock
This section allows you to select the source of the board’s master clock:
Internal Xtal (crystal) or AES/EBU In. Internal Xtal is the default setting. Be
sure to select “AES/EBU In” if you want to record or monitor an AES/EBU
stream.
Note: If “AES/EBU In” is selected as the master clock source, be sure to supply a
valid AES/EBU signal to the board’s AES/EBU input. Otherwise, erratic
timing and/or improper sample rates will be the outcome.
Once a master clock source has been selected, its synchronization status is
continually monitored and displayed beneath the master clock radio buttons.
If internal crystal is selected, the status display will always show “Locked”. On
the other hand, if AES/EBU In is selected as the master clock source, the
control panel will display “Locked” only when a valid AES/EBU signal is
detected. It will display “Unlocked” when there is no signal at the AES/EBU
input, or when the signal is corrupt or invalid for any reason.
Codec Sample Rate
This section indicates the present board sample rate, as set by your application
software. The sample rate displayed here is used to drive the digital mixer and
all outputs. The “Rate Locked” checkbox is used to force a sample rate upon
the system. By default, it is disabled to allow software access to all supported
sample rates. When checked, it causes the driver to only operate at the
selected sample rate. This means that any application attempting to open the
VX442 driver at a sample rate other than the one selected here will fail to do
VX442
Manuel utilisateur
so and will send an error message. “Reset Rate When Idle” is to be selected to
reset the sample rate to a particular setting when a software application is not
actively using the board. This is particularly helpful for keeping the digital
mixer running at a specific sample rate.
Note: Since the digital monitor mixer runs at the sample rate of the rest of the
board, and as sample rate directly affects frequency response, it may
sometimes be advantageous to keep the sample rate at or above 44.1 kHz
while using the monitor mixer. This is accomplished by enabling “Reset Rate
When Idle” and selecting a sample rate of 44.1 kHz or greater.
AES/EBU Sample Rate
When using AES/EBU In as your master clock, this section tells the driver
what the expected AES/EBU input sample rate is. The section is only
displayed when the board is configured to use AES/EBU In as the master clock
source. From the list, select the sample rate closest to that of the AES/EBU
input data. The sample rate selected here will be the only sample rate available
to the software applications. Therefore, you must set your audio software
application to this same sample rate or else the application will display an
error message.
Note: When AES/EBU In is the master clock source, the digital monitor mixer will
run at the sample rate received at the AES/EBU input. Since frequency
response and sample rate are directly related, the mixer frequency response
will be directly related to the sample rate of the AES/EBU input data.
Multitrack Driver Devices
The VX442 drivers may intelligently synchronize the beginning of recording
and playback across all audio devices on the board. When using application
software that is capable of using multiple channels simultaneously, select
“Single and In-Sync” to ensure that all audio channels will begin playback
and/or recording at the same time. Otherwise select “Independent” to allow the
audio channels to play independently - this setting may be looked-for if more
than one application need to access the VX442 simultaneously.
DMA Buffer Sizes
This section specifies the amount of system memory dedicated to digital audio
buffering. Setting a buffer size that is too small may result in clicks or pops in
the audio stream as some data may be lost. Larger buffers cause slightly more
latency but prevent the pops and clicks that might occur with smaller buffer
sizes - the default settings are recommended but you may want to adapt these
default settings to suit your tastes.
On the Mac: The Hardware Settings Page in the Macintosh version of the VX442
Control Panel also contains pull-down menus that allow you to select which VX442
input and output stereo pair will be used by the Sound Manager, if you choose the
VX442 as the Sound Manager input and output device. If you go to the <Apple
menu> <Control panels> <Sound> and highlight the VX442 icon for Sound In and
Sound Out, then your Apple system sounds will be routed to the VX442 hardware
output that you have selected here, and Alert Sounds, if you choose to record, will
receive their input from the VX442 hardware input that you select here.
You will want to choose the VX442 for input and output in the Sound control panel if
your music program does not use ASIO and the VX442 ASIO drivers. If you are
using the ASIO drivers (see Mac Software Installation), then leave the Sound control
panel selection to “built-in”. With the Sound control panel set to “built-in”, these
Sound Manager settings in the VX442 Control Panel will have no effect.
The Sound Manager driver limits you to using only one of the VX442 stereo input
pairs for audio input and only one of the stereo output pairs for output. These do not
need to be matched pairs - you can use inputs 1&2 for Sound In and AES/EBU for
Sound Out, for example, or any combination that you choose.
Variable Signal Levels
The software switches in this section allow the user to match individual input
levels and global (as in ‘all’ or ‘across the board’) output levels to the operating
signal levels of the external audio equipment. Three level selections are
available: +4 dBu, ‘Consumer,’ and –10 dBV. The ‘+4 dBu’ setting is the least
‘sensitive’ of the three settings, and ‘–10 dBV’ the most sensitive. Therefore,
the ‘+4 dBu’ setting has the most headroom and can accept the hottest signals
of the three settings.
Consult the user guide of your external audio equipment regarding your
equipment’s line level. If for instance your audio equipment is consumer or
semi-pro, and you find that its input level is a little too hot for the VX442’s
-10 dBV’ setting, try switching to the ‘Consumer’ setting. On the other hand, if
your –10 dBV gear is receiving a signal from the VX442 that is too hot, try
switching the VX442’s output levels from ‘Consumer’ to the ‘–10 dBV’ setting.
VX442
Manuel utilisateur
AES/EBU
The AES/EBU page of the VX442 Control Panel configures the AES/EBU
output format and displays the status of the AES/EBU input. To display this
page, click the “AES/EBU” tab of the VX442 Control Panel software.
Digital Input
This group box displays the current AES/EBU input status. The VX442’s
AES/EBU receiver is capable of recognizing a valid input signal versus an
invalid, corrupt or non-present one. When a valid signal is detected at
AES/EBU In, this group box displays “Valid Input Detected”. When an invalid
signal is detected or no signal is present, the group box displays “Invalid or Not
Present”.
Digital Output Format
Within the “Digital Output Format” group, you choose the digital audio format
of the AES/EBU output. The setting “Professional” is a true AES/EBU format
and is recognized by all professional devices. The alternate “Consumer” setting
is an S/PDIF type data stream, but electrically AES/EBU. This is a workaround that is recognized by most of S/PDIF devices.
For both consumer and professional output formats, the “Advanced” checkbox
will allow you to force a few particular status bits in the outgoing AES/EBU
signal. The advanced option is for expert users only; however, if you decide to
go exploring, change a few bit settings and get lost, you can always select the
“Restore Defaults” button to restore the outgoing status bits to their factory
settings. When both “Consumer” and “Advanced” are selected, the group
“Consumer Format Advanced Settings” will appear. When “Professional” and
“Advanced” are both selected, the group “Professional Format Advanced Settings”
will appear. These groups are described below:
Consumer Format Advanced Settings (Copy Mode): Copy protection, also
known as Serial Copy Management System (SCMS), is written into the
AES/EBU sub-code, a reserved part of the AES/EBU digital stream that is
independent of the actual audio data being transmitted. It can be used to
inhibit the amount of copies that can be made, or allow for unlimited copying.
Three SCMS modes are available. “Original (Copy Permitted)” indicates that the
source material may be copied by a receiving device. “1st Generation” indicates
that the source material is a first generation copy. Most devices that are
capable of recording will reject material with this SCMS mode set. The final
option is “No SCMS”, which may be used to override the other two modes and
allow a recording device to successfully record the audio data. Different
manufacturers’ products may interpret these codes differently and require you
to set these bits by “trial-and-error” until proper operation is achieved.
Consumer Format Advanced Settings (Emphasis): This status bit is used to
indicate if pre-emphasis has been applied to the outgoing digital audio signal.
The default is “None” and rarely will any user want to set the value to
“50/15 µs” unless the audio to be transmitted has been encoded with 50/15 µs
pre-emphasis.
Professional Format Advanced Settings (Data Type): The user may assign
the outgoing data as audio or non-audio data. Many devices ignore this
setting. The obvious default is “audio".
Professional Format Advanced Settings (Emphasis): The user may choose
to indicate or not if pre-emphasis has been applied to the outgoing digital
audio signal. The default is “None”, and rarely will any user want to set the
value to “CCITT” or “50/15 µs” unless the transmitted audio has been encoded
with one of those types of pre-emphasis.
Save, Delete, Load Buttons; H/W Installed
On the PC, at the rightmost side of the VX442 Control Panel are the Save,
Load and Delete buttons as well as an “H/W installed” set of radio buttons.
These controls appear regardless of which VX442 Control Panel page is being
displayed.
Save, Delete, Load
The VX442 Control Panel always retains the last settings entered. However,
the Save, Delete, and Load functions expand this capability to store different
sets of control panel settings using different configuration file names. These
configurations are then available for recall at a later date and time.
Clicking the ‘Save’ button brings up a dialog box prompting you to name the
current configuration. Once you have done this, click ‘OK’, and your current
configuration has been saved to disk. If you decide that you do no longer need
a particular configuration, click the ‘Delete’ button. Highlight the name of the
configuration file that you wish to delete, and click the ‘OK’ button. To recall
or reload a saved configuration, click the ‘Load’ button. Highlight the name of
the configuration file that you wish to recall, and click ‘OK’. Those settings
will now appear in the VX442 Control Panel and the driver will automatically
update the hardware.
VX442
Manuel utilisateur
H/W Installed
Up to four VX442 cards may be installed in a PC system at a time. This
section displays all installed VX442 cards, and allows you to select which
particular card is under the control of the control panel software. To select a
card for configuration, click the radio button to the left of that particular card
in the “H/W Installed” list.
On the Mac: To save your VX442 control Panel settings, go to the File menu and
select “Save” or “Save as”. A dialog box will appear, prompting you to name the
current configuration. Once you have done so, click the “Save” button. To save the
current settings as your default, go to the File menu and choose “Save as
Preferences”.
In the upper right-hand corner of the control panel is a “H/W Installed” drop-down
list. At the time of this writing, the VX442 Mac ASIO drivers will support only a
single VX442 device, and of course the Sound Manager will support only one stereo
pair regardless of how many audio cards are installed in your system. The H/W
Installed list will display “VX442” as the active device in the control panel.