1
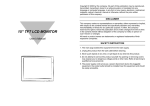
Table of Content CHAPTER 1 Introduction ___________________________ 1 Specification CHAPTER 2 Installing The Monitor ___________________ 7 Control Function CHAPTER 3 Adjusting The Monitor ___________________ 12 OSD Screen Adjustment Icon _____________________________________ 15.1” LCD monitor CHAPTER 1 INTRODUCTION BEFORE INSTALLING YOUR MONITOR Read this manual cover to cover. PAY ATTENTION to all WARNING and CAUTIONS DO NOT use computer components not recommend by the manufacturer. Do not attempt to service the monitor your self. If a problem occurs, contact the manufacture's authorized service center ABOUT YOUR MONITOR This monitor is a microprocessor-controlled, color monitor which uses a TFT LCD panel. The monitor conforms to EPA Energy Star and VESA DPMS ( Display Power Management Signaling) power management standards. Our monitor also provide one option to accept the video input(like NTSC or PAL signal), you can switch these input signal through OSD and the video OSD setting please refer to the Chapter 4. RGB MODE This monitor is equipped with a microprocessor that identifies your computer 's video mode and allows user to adjust the setting. 2 15.1” LCD monitor ____________________________________ FACTORY-PRESET MODES Table 1 shows standard video mode setting that have been preadjusted at the factory for accurate video display. These setting are stored in the monitor's memory Table 1. Factory-Preset Modes Mode NEC VGA Resolution 640x400 640x350 720x400 640x480 640x480 640x480 H-Freq.(KHz) 24.83 31.47 31.47 31.47 37.86 37.5 V-Freq(Hz) 56.4 70 70 60 72 75 SVGA 800x600 800x600 800x600 800x600 35.16 37.88 48.08 46.87 56.3 60.3 72.2 75 XGA 1024x768 1024x768 1024x768 640x480 832x624 1024x768 1024x768 48.36 56.47 60 35 49.7 48.78 60.241 60 70 75 66.7 74.55 60 74.927 Macintosh 3 _____________________________________ 15.1” LCD monitor SPECIFICATIONS 15” LCD Monitor Overall Dimension(HxWxD): Shipping Weight(G/W): Effective Display area(H/V): Display colors: Scan Frequencies: Horizontal Vertical Number of Pixels: Pixel pitch: Picture Tube: Power: Input Consumption Video Connector: Audio connector (optional) Speaker (optional) Optional MSR RGB Signals: Video Sync Display Data Channel: Compatibility 435.3 x 372 x 235 mm 8.5 Kg 304.1 x 228.1 mm 16.7M (dithering) colors 31.47K to 60KHz 60Hz to 75Hz 1024x768 pixels 0.297x0.297 mm 15" TFT LCD panel 110-240VAC(auto-sensing) Frequency: 48-62Hz 30 Watts maximum (on) 1 Watt (Power saving off mode) Special signal cable 1 x stereo input 1 x earphone output 2W x 2 Touch Screen ISO Track 1&2 Analog RGB 0.7Vp-p/75Ω Separate VESA DDC 1/2B 4 15.1” LCD monitor ____________________________________ Operations: User Controls On/Off Power Button Select, Auto-adjustment VR Volume control (optional) On Screen Display Contrast, Brightness Adjustment H-position, V-position Color temperature Auto Adjustment Control Type: Digital Compatibility: IBM and compatible, Apple Macintosh, NEC Environmental Limits: Operating Temp 32° to 113°F ( 0° to 45°C ) Storage Temp. -4° to 140°F ( -20° to 60°C ) Operating Humidity 10 to 85% without condensation Storage Humidity 10 to 95% without condensation Agency Approval EMI Emissions Energy Saving Safety FCC-B and CE MPR-II EPA energy star, VESA DPMS UL 5 _____________________________________ 15.1” LCD monitor PRECAUTIONS HANDLING The monitor must be treated with caution and not be exposed to impact and shock. The monitor is made of fragile glass panel. Do not expose to sharp shock. Never touch the display area or rub on it with a hard, stiff object or tools because the panel is easily scratched, even your monitor is protected with one glass filter. Every effort has been made to protect the panel, however the monitor is an extremely fragile product. CLEANING The display area is highly prone to scratching. Do not use ketone type material (ex. Acetone), Ethyl alcohol, toluene, ethyl acid or Methyl chloride to clear the panel. It might permanently damage the panel. The desirable cleaners are water, IPA ( Iso Prophyl Alcohol ) or Hexane. Don’t let water or oil penetrate the monitor. If the droplets are kept for a long time, Staining and discoloration may occur. Keep food particles and fingerprints away from the display area. 6 15.1” LCD monitor ____________________________________ STORAGE Do not store the monitor in temperature higher than 35 degree Celsius or humidity higher than 70% and no condensation. Store in dark places away from sunlight and ultra violet (UV) radiation. Air bubble may develop within the glass panel, if this is not observed. 7 _____________________________________ 15.1” LCD monitor CHAPTER 2 PRODUCT PACKAGE Open the shipping carton and check the contents. If any items are missing or damaged, contact your dealer immediately. The package should include the following items Analog Color TFT LCD Monitor Accessory Box: 1. 2. 3. 4. 5. Special signal cable x 1 AC to DC adapter x 1 Audio cable (optional) Power Cord x 1 User’s manual x 1 INSTALLING THE MONITOR The monitor is equipped with an auto sensing power supply for voltage ranges from 110~240VAC, 60/50Hz. Confirm the line voltage designation on the rear panel of the monitor. 8 15.1” LCD monitor ____________________________________ FOLLOW THESE STEPS TO INSTALL THE MONITOR 1. Before you connect the cables, make sure that the monitor and the system unit power switches are OFF. 2. Follow the drawing 1 to pull off the back cover in order to plug the special cable into. 3. Second, look the drawing 2 to connect each plug carefully, and then pull back the back cover. 4. Connect the power cord on the AC outlet 5. Plug the D-sub 9 pin connector on the RS-232 connector in the PC. 1 2 3 4 5 6 9 _____________________________________ 15.1” LCD monitor 6. Plug the MINI DIN connector on the PS/2 keyboard port in the PC. 7. Connector the PS/2 keyboard connector on the left back side of the front cover. Connect to the VGA port Connect to the PS/2 keyboard connector on Connect to the the PC RS232 9 pin connector 10 15.1” LCD monitor ____________________________________ C ONTROL F UNCTIONS The Monitor control functions are located on the lower center of the front view side. They are shown in the figure below and described in the following paragraphs. Auto Menu Auto menu ∇∆ Power S/W Volume control (VR) The control key description 1. Power Switch : Power Switch 2. ∇/∆ : Cursor Up/Down or Brightness control 3. MENU : Activate the on screen display function 4. Auto : Auto adjustment 11 _____________________________________ 15.1” LCD monitor Descriptions 1. Power S/W: Power switch Use the power switch to turn ON or OFF power. We recommend turning your system power on first, then the LCD monitor 2. ∇ & ∆ : Select key / Brightness Control keys The two keys have two functions, controlled by the MENU key. When activating OSD screen, the two keys are used to select the wanted adjustment items. When deactivating OSD screen, these two keys are used to change the Brightness value. 3. Menu / Enter Key Press the Menu key to activate the on screen display screen. When OSD is enabled, then the key is reassigned as Enter Key. After 30 sec idle time, the OSD screen will automatically turn off. 4. Auto adjustment Pressing this key to get the better visual performance. 12 15.1” LCD monitor ____________________________________ CHAPTER 3 A DJUSTING THE MONITOR The LCD monitor is designed to work with a range of compatible video adapters on the market. Due to the possible deviations between these video adapters, you may make some adjustment to fit the monitor for adapter used. ADJUSTMENT PROCEDURE 1. First, you must activate the OSD screen through pressing the MENU key, the screen will show in the center of screen as below: Note: In the last paragraph, we will assume that you had already done this procedure and only explain how to change the setting. OSD SCREEN 1024X768 75HZ / 60KHZ AUTO ADJUSTMENT ‧‧‧‧‧‧‧‧‧‧‧‧‧‧‧‧‧‧‧‧‧‧ menu menu ‧‧‧‧‧‧‧‧‧‧‧‧‧‧‧‧‧‧‧‧‧‧ DOS TXT / GFX EXIT VERSION: off user XGA-A9A82-4111 13 _____________________________________ 15.1” LCD monitor 2. Use the ∇ & ∆ key to move to the desired item, then press Menu to select the change item. 3. Use the ∇ & ∆ key to change the value. AUTO-ADJUSTMENT WE STRONGLY RECOMMEND THAT YOU USE THIS ITEM TO GET THE OPTIMIZED VISUAL QUALITY. Use the ∇ & ∆ key to select auto-adjustment, then press Menu to get the optimized quality. RGB ADJUSTMENT Use the ∇ & ∆ key to select the icon, then press Menu key, the screen will display as below 1024x768 75Hz/60KHZ Auto-Balance CONTRAST RED GREEN BLUE BALANCE RED GREEN BLUE VERSION 20 18 19 49 50 26 XGA-A9A82-4111 Adjust the contrast value 14 15.1” LCD monitor ____________________________________ Use the ∇ & ∆ key to select the CONTRAST item, then press Menu key. Now use ∇ & ∆ to change the value in order to get the best contrast optimization. You can adjust R,G,B simultaneous or separate R,G,B value. (you can use this item to change the RGB purity.) Color Balance Use the ∇ & ∆ key to select the balance item, then press Menu key. Now use ∇ & ∆ to change the value in order to get the best color balance effect or separate set the RGB color value. (You can use this items to change the RGB intensity) The easy way to adjust the contrast and color balance setting is to use the auto-balance item. GEOMETRY ADJUSTMENT Use the ∇ & ∆ key to select the icon, then press Menu key, then the screen will display as below 1024x768 75Hz/60KHZ 223 PHASE EXIT VERSION : 24 1056 25 XGA-A9A82-4111 If you want to go back to the previous OSD menu screen, pressing MENU key then you will see the OSD screen as previous page 12. 15 _____________________________________ 15.1” LCD monitor VERTICAL & HORIZONTAL POSITION ADJUSTMENT 1. Use the ∇ & ∆ key to move to the ICON, then press Menu key to select. Now use ∇ & ∆ to move the whole screen left or right to the center position. 2. Use the ∇ & ∆ key to move to the ICON, then press Menu key. Now use ∇ & ∆ to move the whole screen down or up to the center position. ADJUST THE VIEWING SCREEN SIZE Use the ∇ & ∆ key to move to the icon , then press Menu key. Now use ∇ & ∆ to get the larger viewing size. PHASE ADJUSTMENT Adjust phase tracking of display signal to reduce the display flicker. The invalid phase tracking will cause unstable and flicking display. Use the ∇ & ∆ key to move to the Phase item, then press Menu Key. Now use ∇ & ∆ to get better image quality. DOS TXT/GFX Now, you can select the display mode as 640x400 (called graphic mode), or 720x400 (called text mode). Color Temperature We provide three modes, one is user mode, one is 6500 and the other is 9300. Use the ∇ & ∆ key to move the color temperature, and then press Menu Key. Now use ∇ & ∆ to change the color temperature setting. When user set at 6500 or 9300, the user can’t change the value. 16 15.1” LCD monitor ____________________________________ BRIGHTNESS Adjustment Use the ∇ & ∆ key to select the item, press Menu Key. Now use ∇ & ∆ to change the brightness value. UNDERSTAND THE DISPLAY RESOLUTION SETTING To understand your display mode setting. In the OSD screen, you will see the Horizontal frequency (HF), Vertical frequency (VF), display resolution (MODE) and the monitor Firmware version (ROM LEVEL). It is automatically detected by the monitor, the user can not change this setting. Audio volume control (Optional ) Please use the knob to change the speaker volume . The Knob is located on the right lower side of the front cover. 17 _____________________________________ 15.1” LCD monitor MSR function Our MSR can accept the ISO track 1 or 2 format from up to down or reverse, it will automatically display in the screen, like you use the keyboard to key-in the number. Touch Panel Please see the attached CD ROM to install the driver and application, If you had any question, please see the on-line help. 18