1
Explorer® 727
TT-98-126880-B 04.08 Brandhouse
Getting started
17865-TT Getting started.indd 2
03/04/08 13:16:39
17865-TT Getting started.indd 3
03/04/08 13:16:57
GETTING STARTED
Congratulations on the purchase of your EXPLORER 727 system.
Before you start, please check that the following items are present:
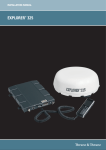
• EXPLORER terminal with EXPLORER 727 antenna
• Antenna cables for connecting the terminal with the antenna
• Roof Rail Mount kit
• Cable Support
• LAN cable
• DC Power cable
• Installation manual
• Getting Started kit including Quick Guide, electronic manual, etc.
1
Mount the antenna
The antenna is designed to be mounted on the roof of a vehicle.
There are three methods for mounting the antenna:
Using the roof rails:
Mount the roof rail brackets on the 3 “legs” of the antenna. Drill holes in the roof
rails that will fit the roof rail brackets. Then fasten the brackets to the roof rails.
See the installation manual for details.
Directly on the roof:
Drill three 5 mm holes in the roof of the vehicle and mount the antenna using
M5 bolts and spacers. See the installation manual for details.
Using magnetic mounts:
NOTE: Before using the magnetic mounts, first make sure the roof of the vehicle
is made of a magnetizable material! Also wipe the surface clean before mounting
the antenna, to improve the contact between the roof and the magnets and to
avoid scratches in the surface of the roof.
Mount the magnetic mounts on the 3 “legs” of the antenna according the installation
manual. Then place the antenna on the roof of your vehicle.
Important! Thrane & Thrane assumes no liability for any damage caused by the
antenna falling off the vehicle or stressing the mounting surface.
17865-TT Getting started.indd 4
03/04/08 13:17:02
2
Insert the SIM card (provided by your Airtime Provider)
The SIM slot is located in the connector panel.
a. Open the SIM cover.
b. Insert the SIM card into the SIM slot with the
chip side facing up. Press gently until it clicks.
c. Slide the lock to secure the SIM card.
d. Close the SIM cover.
3
Mount the EXPLORER® 727 terminal
Mount the terminal with or without cable support in your vehicle.
If you need support for your cables, mount the Basic cable support on the terminal before installing the terminal in the vehicle.
To mount the Basic cable support, first remove the two rubber feet under the
terminal at the connector end. Then mount the cable support using the screws
from the Basic cable support kit.
For further information, see the Installation manual for the EXPLORER 727.
4
Connect the cables
a. Connect the cable(s), including the antenna cable, to the relevant connector(s) on the EXPLORER terminal.
b. Fasten the cables to the cable support if necessary.
Phone/Fax 1 Phone/Fax 2
The Phone/Fax connectors are not numbered on the terminal. For configuration, use
the numbering indicated on the drawing above.
17865-TT Getting started.indd 5
03/04/08 13:17:04
5
Switch on the EXPLORER 727 terminal
Tip the power switch in the connector panel.
The green power indicator in the LED
panel on top of the terminal lights up.
6
Enter the PIN
Note: The below procedure is only needed if the SIM card for your terminal
requires a PIN.
You can enter the PIN from the IP handset or from a computer with a browser
accessing the built-in web interface.
To enter the PIN from the IP handset, do as follows:
a. Connect the IP handset to the terminal.
The IP handset automatically starts up.
b. Select the BGAN menu.
If the PIN has not yet been entered in the terminal, select ENTER PIN.
Note that this menu item is not available if the PIN has already been
entered nor if the use of PIN is disabled. If you are not sure, select
Status > PIN status from the BGAN menu to see if the PIN has been
accepted.
c. Type in the Administrator name and password for the terminal, followed
by the PIN. Confirm with the center key. The default Administrator name
is admin and the default password is 1234.
To enter the PIN from the web interface, do as follows:
a. Connect a PC to the terminal using the LAN interface.
b. Start your Internet browser.
c. Enter the IP address of the web interface in the address field.
The default IP address is 192.168.0.1. If the PIN has not yet been entered
in the terminal, the web interface will now prompt you for a PIN.
d. Type in the PIN and click OK.
The EXPLORER terminal now starts to establish a connection to the BGAN
network.
17865-TT Getting started.indd 6
03/04/08 13:17:05
7
Connect to the BGAN network
After connecting the antenna to the terminal and starting up the EXPLORER
terminal, the antenna starts searching for a BGAN satellite signal. When the PIN
is entered, the EXPLORER terminal attempts to register on the BGAN network.
The Antenna indicator shows the status as follows:
• Flashing green: The antenna is booting or performing a sky scan.
• Steady green: The antenna is tracking and is ready for use.
• Orange: Temporary malfunction – user action required.
• Red: Antenna error.
By default, the terminal automatically searches for the satellite with the best
signal. However, you can select a specific satellite to use when connecting to
the BGAN network. Do as follows:
a. Connect a computer and open your browser.
b. Enter the web interface and select SETTINGS > Satellite connection.
c. Select the satellite you want to use and click Apply.
Note that if you select a specific satellite the EXPLORER terminal will only
search for the selected satellite. If you are outside coverage of that satellite, the
terminal will not be able to register on the BGAN network.
When the EXPLORER terminal is registered on the BGAN network and ready
for use, the Antenna indicator and the Terminal indicator in the LED panel on
top of the EXPLORER terminal both show steady green light.
NOTE: When the terminal is ready, it automatically activates the LAN interface.
Be aware that if your computer uses automatic updates, it may be transmitting
on the BGAN network without your knowledge. You can change the behavior of
the LAN interface from the web interface, so that you have to activate the connection manually next time you start up the terminal. For further information,
see the User Manual.
You are now ready to make phone or fax calls, browse the Internet or check
your e-mails, send files, run a video conference and much more.
17865-TT Getting started.indd 7
03/04/08 13:17:05
MAKING AN INTERNET CONNECTION
To make an Internet connection, simply connect the LAN cable between your computer
and one of the LAN connectors on the terminal, and start up the EXPLORER terminal as
described in the beginning of this document.
When the EXPLORER terminal is ready, the Antenna indicator and the Terminal
indicator in the LED panel on top of the terminal light steady green. The LAN connection
is then established automatically. You are now ready to browse the Internet, check
e-mails, send files etc.
NOTE: For information on configuration, refer to the User Manual.
MAKING A VOICE CALL
To make a call from a phone connected to the EXPLORER terminal, dial
00 <country code> <phone number> followed by # .
Example: To call Thrane & Thrane in Denmark: (+45 39558800), dial 00 45 39558800 #
NOTE: There are two audio qualities: Standard voice and 3.1 kHz Audio. To force the call
to use Standard voice, dial 1* before the number. To force the call to use 3.1 kHz Audio,
dial 2* before the number.
To make a call to a phone connected to the EXPLORER terminal, dial +870 <mobile number>
(+ is the international prefix to call out of the country you are located in).
NOTE: There are two voice numbers, one for 3.1 kHz Audio and one for Standard voice.
MAKING AN IP HANDSET CONNECTION
To connect an IP handset, do as follows:
1. Start up the EXPLORER terminal.
2. Connect the LAN cable between the IP handset cradle and one of the LAN/PoE
connectors on the terminal. The handset starts up automatically.
3. If a PIN is required in order to access the terminal, enter the PIN as described in the
previous section 6. Enter the PIN. To see if a PIN is required, select BGAN > PIN Status
in the IP handset menu system.
The handset should now be ready for use. You can now make calls or access the
EXPLORER terminal status from the handset.
17865-TT Getting started.indd 8
03/04/08 13:17:05
TT-98-126880-B 04.08 Brandhouse
Thrane & Thrane A/S • [email protected] • www.thrane.com
17865-TT Getting started.indd 1
03/04/08 13:16:39