1
USER MANUAL
ARTURIA SOLINA V User Manual
-1-
1 INTRODUCTION
Project management
Theo Niessink
Pierre-Lin Laneyrie
Product management
Glen Darcey
Programming
Adrien Courdavault
Pierre-Lin Laneyrie
Theo Niessink
Shaun Ellwood
(decoderdesign.com)
Morgan Perrier
Randy Lee
Theo Niessink
Erik Norlander
Pierce Warnecke
Design
Glen Darcey
Sound design
Glen Darcey
Boele Gerkes
Manual
Randy Lee
1st edition, October 2014
© ARTURIA S.A. – 1999-2014 – All rights reserved.
30, chemin du Vieux Chêne
38240 Meylan
FRANCE
http://www.arturia.com
ARTURIA SOLINA V User Manual
-2-
1 INTRODUCTION
Table of contents
Table of Contents
Project management........................................................................................................................................ 2
Table of contents ............................................................................................................................................... 3
1
INTRODUCTION ............................................................................................................................................. 5
1.1 String theories ............................................................................................................................................... 5
1.1.1
Chamberlin and Mellotron ................................................................................................................ 5
1.1.2
Ken Freeman: string synthesist .......................................................................................................... 6
1.1.3
Eminent.................................................................................................................................................. 6
1.2 The ARP String Ensemble ............................................................................................................................ 6
1.2.1
Arrival of the fittest .............................................................................................................................. 7
1.2.2
Form factor ........................................................................................................................................... 7
1.2.3
A string of spinoffs ................................................................................................................................ 8
1.2.4
String songs: a selected discography ............................................................................................. 8
1.3 Physical modeling synthesis ....................................................................................................................... 9
1.3.1
Music and math: forever linked ........................................................................................................ 9
1.3.2
Complex calculations ........................................................................................................................ 9
1.3.3
No end in sight ................................................................................................................................... 10
2
ACTIVATION & FIRST START ...................................................................................................................... 11
2.1 Register & Activate ................................................................................................................................... 11
2.2 Initial setup .................................................................................................................................................. 11
2.2.1
Audio and MIDI settings: Windows ................................................................................................. 11
2.2.2
Audio and MIDI settings: Mac OS X ............................................................................................... 12
3
USER INTERFACE ......................................................................................................................................... 14
3.1 Virtual keyboard ........................................................................................................................................ 14
3.2 The tool bar ................................................................................................................................................. 14
3.2.1
Selecting Presets ................................................................................................................................ 14
3.2.2
Open .................................................................................................................................................... 15
3.2.3
Poly ....................................................................................................................................................... 16
3.2.4
Panic .................................................................................................................................................... 17
3.2.5
CPU meter........................................................................................................................................... 17
3.2.6
Global MIDI channel......................................................................................................................... 17
3.2.7
MIDI controller configurations ......................................................................................................... 18
3.2.8
PREF (MIDI preferences) ................................................................................................................... 19
3.3 Managing presets ..................................................................................................................................... 20
3.3.1
Select a bank, type, or preset ........................................................................................................ 21
3.3.2
Saving an edited preset................................................................................................................... 22
3.3.3
Import / Export a bank of presets ................................................................................................... 23
ARTURIA SOLINA V User Manual
-3-
1 INTRODUCTION
3.4 Assigning MIDI controls ............................................................................................................................. 23
3.4.1
Minimum / maximum controller ranges ........................................................................................ 24
3.5 Front panel .................................................................................................................................................. 25
3.5.1
Basic controls ..................................................................................................................................... 25
3.5.2
Bonus controls .................................................................................................................................... 26
3.5.3
Coarse vs. Fine adjustments ............................................................................................................ 28
3.6 Open mode ................................................................................................................................................ 29
3.6.1
Master section.................................................................................................................................... 29
3.6.2
LFO ....................................................................................................................................................... 30
3.6.3
Bass section: Filter, FENV and Sustain ............................................................................................ 31
3.6.4
Bass section: Arpeggiator ................................................................................................................ 32
3.6.5
Upper Resonator ............................................................................................................................... 33
3.6.6
Effects .................................................................................................................................................. 35
3.6.7
Amount controls ................................................................................................................................ 35
3.6.8
Effect sends ........................................................................................................................................ 36
3.7 The effects................................................................................................................................................... 36
3.7.1
FX 1: Phaser ......................................................................................................................................... 37
3.7.2
FX 1: Analog Chorus .......................................................................................................................... 38
3.7.3
FX 2: Analog Delay ............................................................................................................................ 38
3.7.4
FX 2: Digital Delay .............................................................................................................................. 39
3.7.5
Convolution Reverb .......................................................................................................................... 39
3.7.6
Ensemble ............................................................................................................................................. 41
4
END USER LICENSE AGREEMENT .............................................................................................................. 42
ARTURIA SOLINA V User Manual
-4-
1 INTRODUCTION
1 INTRODUCTION
Arturia would like to thank you for purchasing our latest modeling synthesizer, Solina V. We are
confident it will become a valuable addition to your music production studio.
If you’ve purchased our products before, you know we take great pride in recreating the sound
and feel of the original instruments. And then we top it off with 21st century features the products
might have had if the technology had been available at the time!
And if this is the first Arturia product you have owned, it is an excellent way to become
acquainted with our stuff.
The instrument upon which this virtual model is based played an important part in many hit songs
of the 1970s and early 1980s. And naturally it was a perfect fit for the various forms of symphonic
rock that flourished in those days, filling the spot that had previously been held by the mercurial
Mellotron.
Since you obviously appreciate the Solina sound, we thought you might enjoy a brief look
backward at what it took to bring this marvelous instrument to life.
1.1 String theories
In the early days of rock music there were very few options available to the keyboard player in a
band. The nicer clubs would have a grand piano or a Hammond, the not-so-nice ones might
have an upright piano (tuning optional), and the vast majority had nothing at all; if you wanted
to play, you needed to bring something with you.
Unfortunately, the options were limited to electric pianos and portable organs (some more
portable than others). And while those instruments were certainly capable of producing some
great sounds, there was a hole they couldn’t fill: the irreplaceable lushness of a room full of
violins, violas, cellos and contrabasses. There’s something about the sound of these instruments
that can take a sweet love song and turn it into a heart-rending expression of the human
condition.
And it was impractical for studios to hire a small orchestra except for the most important artists.
The average musician could only dream that he might one day hear his music with something
more than basic instrumentation.
So the stage was set for an instrument that would help fill these needs. Thankfully, certain
technological innovations were just around the corner.
1.1.1 Chamberlin and Mellotron
One of the first attempts to solve this problem was a keyboard which traces its roots to the late
1940s, when a gentleman named Harry Chamberlin began experimenting with ways to trigger
strips of magnetic recording tape from an organ-style keyboard. His first device played back prerecorded drum loops, and he followed this with a series of keyboards that would play tapes of
various orchestral instruments. The age of samplers began with analog tapes!
ARTURIA SOLINA V User Manual
-5-
1 INTRODUCTION
A bit of industrial drama led to an overlap between the Chamberlin products and their younger,
more famous cousins, the Mellotrons. Suffice it to say that these products were used extensively
by major artists such as the Beatles, the Moody Blues, King Crimson, Genesis, Led Zeppelin and
Yes.
However, their size, unreliability and price tag made them unsuitable for many people. The need
for another solution was building.
1.1.2 Ken Freeman: string synthesist
As a keyboard player in the mid-1960s, Ken Freeman saw first-hand the need for an instrument to
help him reproduce the string arrangements of popular music when his band played live shows.
But a Mellotron was out of the question for most of the reasons already cited.
He discovered through experiments with a Selmer Clavioline and a triple-head delay unit that a
single voice with vibrato could be made to sound like an ensemble with the proper application
of the delay unit’s three LFOs. This discovery fueled his imagination and set in motion the
development of the very first string synthesizer: the Freeman String Symphonizer.
Unfortunately for Mr. Freeman, the alternate skittishness and sluggishness of the companies he
courted for mass-production of his invention actually prevented the Symphonizer from being the
first string synthesizer to make it to marketplace. But he deserves our grateful thanks for his
pioneering work in this area, which spurred the development of dozens of similar products.
1.1.3 Eminent
In 1972 a Dutch company by the name of Eminent Orgelbouw B.V. broadened their product line
with the introduction of the Eminent 310 series of console organs. Their targets at the time were
the home and theater organ markets, which had certainly been kind to them.
But perhaps unexpected was the impact the model 310 home organ would have on the
worldwide music scene within a few years. Their novel approach to the string ensemble issue
caught the attention of an artist by the name of Jean Michel Jarre, who used the Eminent 310
strings for his seminal albums Oxygène and Équinoxe, released in 1976 and 1978, respectively.
Prior to that Eminent must have recognized they had something special on their hands,
something that could stand on its own as a product and also fill a need that had been
simmering in an untapped marketplace for many years. And so in 1974, two years after the initial
introduction of the 310 series organs, the Eminent Solina was born.
The Solina had a 4-octave keyboard and only offered a handful of sounds. But they were
important sounds, ones that had been missing in the minds of many musicians: warm, ensemble
strings that could fill out the sound while the guitarist took a solo; high string lines that could soar
above the song and make it sparkle. And perhaps most importantly, these sounds could be
carried from gig to gig by one person, even though at nearly 50 pounds the Solina was quite
heavy by today’s standards.
But there was still one more step to be taken before the world would be introduced to perhaps
one of the most sought-after vintage keyboards of all time: the ARP String Ensemble.
1.2 The ARP String Ensemble
ARTURIA SOLINA V User Manual
-6-
1 INTRODUCTION
It’s no mistake that the Eminent Solina and ARP String Ensemble sound alike: they are the same
keyboard with different labels. ARP had actually been in pursuit of an ensemble synthesizer of
their own design for some time, and for various reasons discontinued their efforts and struck an
agreement with Eminent to “rebadge” their Solina as an ARP product.
ARP was no “new kid on the block,” though, which is probably why the much larger Eminent
agreed to the deal; ARP had already established itself solidly within the synthesizer marketplace
with several impressive products, including the now-legendary Odyssey. And so an unusual
partnership was forged that proved to be a very wise move for both parties.
Note: the first production version of the ARP String Ensemble was actually named the “ARP Model
2100 String Ensemble SE-IV”. But that’s a bit unwieldy, so this manual will gradually transition from
the name “ARP String Ensemble” to “Solina” to give credit where credit is due.
1.2.1 Arrival of the fittest
As mentioned previously, the ARP String Ensemble was not the first ensemble keyboard to reach
the ready hands of keyboard players around the world. But at some point after its release in 1974
it became the standard-bearer for all that followed.
In fact, the String Ensemble has proven not only to be the most popular product ARP ever made,
but also the one with the most identifiable sound. The average person might hear a synth lead
and not know whether it was an ARP, a Bob Moog's creation or an Oberheim, but the ARP String
Ensemble has always benefited from a strong sound identity, easily recognizable. Some other
synths were even sometimes mistaken for a String Ensemble so much it was a sound reference.
Case in point: Jean Michel Jarre’s Oxygène and Équinoxe albums, which were released years
after the ARP String Ensemble hit the streets, used the Eminent 310, not an ARP.
And even though its sound was obviously synthesized, as opposed to the “real” strings provided
by the Mellotron tapes, it had certain advantages that made it the natural selection for
keyboard players around the world: smaller size and weight, no tapes to tune or break, and it
didn’t cost as much as a house.
ARP drove the point home in their marketing materials with statements like “You can hold a
chord until you drop from exhaustion. That certainly beats the eight-second limit found on other
systems.” This was true: the Mellotron tapes were not loops; when a key was pressed they played
for about 8 seconds before reaching the end, and after that they needed to reset their position.
To put things in perspective, that’s 2 bars of 4/4 time at 60 bpm. This forced the keyboard player
to be mindful when voicing chords, so as not to have a crucial note drop out at a bad time. But
the String Ensemble imposed no such limitation.
1.2.2 Form factor
Another great thing the Solina had in its favor were its dimensions, especially the width (38”) and
depth (14.5”). It stacked well on top of other “foundational” keyboards like the Rhodes, Wurlitzer
and Hammond. It also had a sturdy, flat top, so it in turn could be used as a stackable surface for
a smaller synth such as the Odyssey.
So by the time the Solina was packed into its flight case, it took up less room in the tour bus cargo
bay than almost anything else in the keyboard player’s rig. All things taken together, ARP and
Eminent had produced a best-seller.
ARTURIA SOLINA V User Manual
-7-
1 INTRODUCTION
1.2.3 A string of spinoffs
It is said that imitation is the most sincere form of flattery. In the business world, though, it is an
attempt to eat the other guy’s lunch. The Solina and its siblings held their own for quite a few
years against a slew of competitors, and it is amazing they did as well as they did. Take a look at
just a small sample of what they were up against:
Year
ARP model
1973
Competition
Logan String Melody I
1974
Solina/SE-IV
Crumar Stringman, EKO Stradivarius
1975
Omni
Roland RS-101
1976
Godwin String Concert S249, Jen SM2007 String Machine, Roland RS-202
Korg PE-2000
1977
Omni 2
Crumar Orchestrator, Hohner K4 / Stringer (USA) / String Performer (Europe)
Elgam String Ensemble, Logan String Melody II, Multivox MX202
Oberheim Eight-voice
1978
Quadra
Farfisa Soundmaker, Roland RS-505
Oberheim OB-1
Sequential Circuits Prophet 5
1979
Quartet*
Crumar Performer, Korg Lambda, Roland VP-330, Yamaha SK-10/20/30/50D
Siel Orchestra (*rebadged for ARP as the Quartet)
Oberheim OB-X
1980
Godwin Model 749 String Concert, Korg Trident
Oberheim OB-Xa
1981
Roland Jupiter 8
Note the appearance of the first 8-voice programmable synthesizer in 1977, followed rapidly by
others of varying polyphony but increasing popularity. By 1981 the competition was too fierce,
the research and development costs were too high, and the public interest in ensemble
synthesizers had waned. Sadly, ARP Instruments, Inc. was forced to close its doors.
But its legacy lives on in the 21st century, as synthesizer enthusiasts are once again paying top
dollar for ARP synthesizers, including the Solina String Ensemble. And it is with the utmost respect
for the history of the technology and the music it inspired that we offer to you the Arturia Solina V.
1.2.4 String songs: a selected discography
The Solina string sound has been used to great effect on many albums through the years. Here is
a
brief
overview:
Dream Weaver – Gary Wright
I’m In You – Peter Frampton
The Grand Illusion – Styx
Captain Fantastic – Elton John
Come Get It! – Rick James
Rumours – Fleetwood Mac
Thrust – Herbie Hancock
The Age of Plastic – The Buggles
Wish You Were Here – Pink Floyd
Premiers
ARTURIA SOLINA V User Manual
-8-
Symptômes
–
Air
1 INTRODUCTION
We could go on and on; there are literally thousands of recordings where the Solina sound
played a major role. And now with Solina V we hope to see many thousands more!
1.3 Physical modeling synthesis
The process of building a sound usually involves at least one of the following synthesis methods:
Additive, which creates a timbre by adding various waveforms together
Subtractive, in which partials of an audio signal are attenuated by a filter to reduce the
original harmonic content of the sound
Frequency Modulation (FM), where waveforms are used in carrier/modulator relationships
and tuned according to the harmonic series to produce overtones in the carrier waves
Wavetable, which offers a wide selection of digital waveforms and then allows them to
be layered, filtered, and/or used as the crossfade targets of an X/Y controller or a looping
envelope
Sample Playback, where recordings of a sound are triggered by a playback device, and
can be transposed by increasing the playback speed when different pitches are required
Granular, which splits samples into very short “grains” and allows them to be manipulated
through a myriad of playback options, and
Physical modeling. In this method the output waveform is calculated according to a set
of equations and algorithms derived through extensive analysis of a physical sound
source.
1.3.1 Music and math: forever linked
A physical model attempts to codify the laws of physics that govern a particular form of sound
generation. A model typically will have multiple parameters, some of which are constants that
describe the physical materials and dimensions of the instrument, while others are timedependent components representing the player´s interaction with the instrument, such as
plucking a string, pressing a valve, or reducing the pressure of his embouchure, etc.
This idea has been around for a long time, but development has been hindered until recently
because processors that were powerful enough to handle the computational complexity of the
physical models either didn’t exist or were too expensive.
But if you’ve been watching the technological trajectories, you know those days are in the past.
And we’re just as happy about that as you are.
1.3.2 Complex calculations
Here’s an example of what must be taken into account while developing a physical model. To
recreate the sound of a drum, for instance, a formula must be in place to represent all of the
ways the collision between a drum stick and a drum head sends shockwaves through a twodimensional membrane. Among other things, the formula must incorporate:
The properties of the striker: its rigidity, the velocity of the hit, the material, and how/where
the strike happens
The membrane: its mass density, elasticity, woven fabric vs. plastic vs. skin, etc.
The sympathetic resonances of the membrane and the body of the drum
The conditions at the membrane boundaries: is there a rigid termination to the drum´s
body, or are there multiple, independently adjustable pressure points?
ARTURIA SOLINA V User Manual
-9-
1 INTRODUCTION
The ancillary and perhaps lingering response of additional components, such as the
snares under a snare drum.
Similar complexities can be found in instruments such as an acoustic guitar. A few years ago, a
French scientist finally completed a comprehensive modeling of all acoustic guitar parameters.
The calculations to produce the sound took three days!
The second-biggest challenge of physical modeling synthesis is to simplify the algorithms
wherever possible without sacrificing the essential nature of the instrument being modeled. The
goal is to achieve an efficient model which can be used interactively, in real time, without
limiting the spontaneous paths a musician may take during a rush of creativity.
1.3.3 No end in sight
There are several methods of physical modeling synthesis, including Karplus-Strong algorithms,
digital waveguide synthesis, and formant synthesis. Each one uses a different paradigm to bring
a modeled sound to its musical fruition.
The main point here is that physical modeling synthesis is capable of recreating the character of
a “real” instrument during performance, including its subtle nuances of expression, while using a
thousand times less hard drive space than the “sampling” method would take to produce an
inferior result.
If that were not amazing enough, it should be mentioned that physical modeling algorithms
have the ability to combine parameters into instruments that have never existed. There is no limit
to the types of sounds that can be produced!
And when you bring together a bunch of music lovers who also have a tremendous grasp of the
applicable laws of physics and the characteristics of electronic circuits, you wind up with Arturia.
And Arturia now offers you our latest marriage of math and music, the Solina V.
May it help you weave the music of your dreams!
ARTURIA SOLINA V User Manual
-10-
1 INTRODUCTION
2 ACTIVATION & FIRST START
Solina V works on computers equipped with Windows 7 or 8 and Mac OS X 10.7 or later. You can
use the stand-alone version or use Solina V as an Audio Units, AAX, VST2 or VST3 instrument.
2.1 Register & Activate
Once the Solina V has been installed, the next step is to register the software.
The registration process will require you to enter the serial number and the unlock code you
received with the product.
In order to proceed, go to this web page and follow the instructions:
http://www.arturia.com/register
Note: If you don’t have an Arturia account yet, you will need to create one. The process is quick,
but it does require that you can access your e-mail address during the registration process.
Once you have acquired an Arturia account you will be able to register the product.
2.2 Initial setup
At the top of the Solina V application is a pull-down menu. It houses the MIDI settings and various
sound selection and output options, among other things.
The location of this menu is slightly different for Windows and Macintosh computers, so we’ll
address them separately.
2.2.1 Audio and MIDI settings: Windows
Click on the Setup > Audio MIDI Settings menu:
The next window you’ll see is the same one that appears when the software starts for the first time:
ARTURIA SOLINA V User Manual
-11-
2 INSTALLATION & ACTIVATION
Here the pull-down menus and boxes allow you to:
•
•
•
•
•
•
Select the audio interface
Set the audio output port
Set the buffer size
Set the sample rate
Play a test tone to check your audio configuration
Select which MIDI input port(s) will be recognized
2.2.2 Audio and MIDI settings: Mac OS X
The process is similar for Mac OS X. Select Preferences from the Solina V pull-down menu:
Another window will open with options for connecting audio and MIDI interfaces:
ARTURIA SOLINA V User Manual
-12-
2 INSTALLATION & ACTIVATION
Mac OS X Audio MIDI Settings window
The above window shows one of several configuration options. The settings indicate the selection
of an Arturia controller as one of the MIDI sources, while the setting “Built-in Output” means the
user will hear the sound of the Solina V through the computer’s speakers as opposed to the
external USB audio interface. If a different configuration is desired, all you need to do is select a
different audio device in the drop-down menu and then check and uncheck the various MIDI
Devices until you have exactly what you need.
Other options enable you to:
choose the memory buffer size (a smaller size will increase the CPU load but will reduce
latency, and vice versa)
choose a sample rate between 44,100 Hz and 192,000 Hz.
You can also play a test tone to make sure the audio interface responds properly. Just click the
“Play Test Tone” button and a simple, clear tone will play. It shuts itself off after one second, so if
you need to hear it again just click the button a second time.
ARTURIA SOLINA V User Manual
-13-
2 INSTALLATION & ACTIVATION
3 USER INTERFACE
Solina V has a lot of great features, and in this chapter we’ll make sure you know what each one
does. We think you’ll be amazed at how quickly Solina V provides you with sounds that are
inspiring and perfect for all sorts of projects.
It’s also really easy to work with; just a few tweaks here and there and suddenly you’re in a new
world. That will always be the main focus of every Arturia product: unleashing your creativity.
3.1 Virtual keyboard
The virtual keyboard allows you to play a sound without the need for an external MIDI device; just
click on a virtual key to hear the selected sound. You can also drag the cursor across the keys to
hear a glissando.
The virtual keyboard and basic controls of Solina V
There’s another important feature to mention: if a preset is velocity-sensitive, you can even play
different velocities on the virtual keyboard with your cursor. When you click further back on the
key it will be triggered with a lower velocity, and a forward click will generate a higher velocity.
3.2 The tool bar
Across the top of the Solina V window is a narrow strip known as the tool bar. It houses the
preferences and MIDI settings, various sound selection options, and gives access to advanced
editing functions, among other things.
The Solina V tool bar
We’ll go through each of these functions in the following sections.
3.2.1 Selecting Presets
Naturally one of the first things you’ll want to do is listen to a handful or two of the great presets
Arturia included with Solina V. This is really easy to do.
ARTURIA SOLINA V User Manual
-14-
3 USER INTERFACE
By default the first two buttons in the tool bar read “All Banks” and “All Types”. (If they don’t, just
click them one at a time and select those options.) This means no preset filters have been applied,
which also means all the presets are available in a single list. So all you’ll need to do is use the blue
arrows to select one preset after another.
Or you could click on the third button to open a window and see the entire preset list at once:
An example of the preset list
Just click on a name that looks interesting and it will be loaded immediately into Solina V.
That was just a basic overview to get you going. There’s a lot more information about presets and
banks in section 3.3.
3.2.2 Open
That beautiful wood top panel is more than just a place to put a virtual tip jar. If you click the
OPEN button or click on the lid itself, the lid will open to reveal a host of sliders, buttons and knobs.
These controls allow you to process the Solina V sound in ways that were almost unimaginable to
musicians back in the day.
The front panel when Open
ARTURIA SOLINA V User Manual
-15-
3 USER INTERFACE
As you can see there are lots of tone-shaping capabilities such as filter controls, effects processors
and a resonator, plus a number of ways to customize the responsiveness of each preset. There’s
an overview of all controls in section 3.5 and full coverage of the Open mode parameters in
section 3.6.
3.2.3 Poly
Without even trying it you probably knew the Poly button adds polyphonic capability to Solina V.
(Actually, it only affects the upper instrument; the bass instrument is always monophonic.)
But the opposite of “poly” is not “mono” in this case. When the Poly button is disabled the upper
instrument actually becomes paraphonic, which is a strange word that means “has lots of voices
that share one filter and amplitude generator.” In practical terms, it means the first note you play
will open the filter and amplitude envelopes, and as long as you keep holding the first note, every
other note will enter at whatever stage in those envelopes the first note happens to be.
To see this in action, select the Viola SOL preset (this may be easiest to find when the tool bar
buttons read “All Banks” and “All Types”). Make sure Solina V is not in Poly mode (i.e., the Poly
button is off), and then follow these steps:
Play a note and hold it
Play other notes one after the other for a few seconds.
At this point each additional note should have the same attack; they will all come in right away.
Move the Crescendo slider on the front panel all the way to the right. (We’ll explain what
that does in section 3.5.1.)
Play one note and notice that it takes a couple of seconds to fade in.
Release that note
Play other notes one after the other, releasing each one before playing the next.
You should be hearing each note you play fade in like the first one did. Now release all keys.
Play another note and hold it until it fades in completely
Play other notes one after the other for a few seconds.
Aside from the fade-in of the first note, this is the same thing that happened the first time: every
other note had a quick attack. The Crescendo slider has no effect on any of the notes except the
very first one when Solina V is not in Poly mode.
Now click the Poly button in the tool bar and repeat all of the experiments in this section. When
you get to the final stage you will notice that all of the notes fade in, regardless of whether the first
note is held or not.
From this point forward we will refer to the two conditions as “Poly mode” and “non-poly mode”
wherever they appear in the manual.
Note that the Poly button has no effect on the bass instrument; it is always monophonic.
ARTURIA SOLINA V User Manual
-16-
3 USER INTERFACE
3.2.4 Panic
If there is an interruption to the MIDI data being received by your computer, you can end up with
notes that won’t shut off. This means they are expecting to receive a Note Off message.
Fortunately the Solina V software has a button that will solve this problem: just click the PANIC
button the notes should become unstuck.
3.2.5 CPU meter
The CPU meter gives real-time feedback about the amount of processing power being used by
Solina V at any given moment. In addition to the numerical value there is a level meter that lights
up as the load increases.
Note: The CPU meter only reports the processing load related to Solina V, not the combined
system load of all programs and plug-ins that may running at the same time.
3.2.6 Global MIDI channel
You can choose which MIDI channel will be used to access Solina V. If you select ALL the software
can respond to data from any of the 16 MIDI channels (you can specify which ones with the MIDI
preference settings).
If you select a channel here, only data arriving on that MIDI channel will be received. So when the
Global channel matches the MIDI channel of one of the two instruments (Upper or Bass) that
sound will respond.
But when the Global channel is set to a value outside of those assignments you won’t hear
anything, because the Solina V instruments are expecting data to arrive on the other MIDI
channels. So you may want to leave the Global MIDI channel set to ALL unless you have a specific
reason not to.
ARTURIA SOLINA V User Manual
-17-
3 USER INTERFACE
There’s a window under the PREF button where you can specify the MIDI channels for each
instrument. See section 3.2.8 for a description.
3.2.7 MIDI controller configurations
All knobs, sliders and switches on the Solina V can be assigned to external MIDI controllers, which is
demonstrated in section 3.4. This is great, but what makes it even better is the ability to save
groups of these assignments so you can set up Solina V to work perfectly in every context. These
“groups” are called MIDI Controller Configurations, or “configs” for short.
3.2.7.1
MIDI menu
The MIDI menu on the right side of the tool bar provides the tools for config management. To
access them, click on the arrow to the right of the word “MIDI” and a drop-down menu will
appear.
This menu is composed of two main areas:
The MIDI Controller Configuration menu
The first section of the menu (MIDI controller configs) is split in two, and provides four features:
•
•
•
•
Copy Current Config…: This duplicates the current config, allows you to give it a new
name, and places it at the bottom of the config list. Changes made to this config can be
exported to your computer or a memory stick for transfer to another computer.
Delete Current Config: The current config is indicated by a check mark in the bottom
portion of the MIDI menu. If you select “Delete Current Config” a confirmation box will
open in the middle of the Solina V main window. Either click “Cancel” to abort the process
or click “OK” to proceed. The deleted config will be removed from the list in the MIDI
menu, but it will still exist in the folder to which it was exported previously. It can be
imported later if needed.
Import Config: A config which has been exported can be loaded into Solina V through this
process. You can import configs from another user who has already mapped the controls
for a particular MIDI controller, for example.
Export Current Config: Use this feature to export your configs one by one to a folder on
your computer or to an external memory device (USB stick, hard drive, etc.). This can serve
ARTURIA SOLINA V User Manual
-18-
3 USER INTERFACE
two purposes: as a backup in case a config is accidentally deleted, and as a way to share
your configs with other users.
The second and lowest section of the MIDI menu contains the list of existing configurations. The
one with the check mark to the left of its name is the current config. To select a new one, click on
its name and it will become the current config.
3.2.8 PREF (MIDI preferences)
The original Solina allowed you to play two parts on its keyboard at the same time: the upper
instrument and the bass instrument. Not to be outdone, Arturia enabled the Solina V software to
do this too.
But we also allowed for other possibilities, such as those times when you just want to plug a
keyboard controller into your computer and jam. So it’s also possible to access both instruments
(Upper and Bass) from a single incoming MIDI channel, shift their octave ranges to spread them
across the controller’s keys, and then specify the split point between them.
To access these great features, press the PREF button in the tool bar:
The MIDI Preferences menu will appear in the middle of the Solina V window. From here you can
set all of the parameters we’ve discussed in this section so far and then some.
The MIDI Preferences window
To change any of the parameters you see in this window, click in the value field next to its name
and make a selection from the drop-down menu that appears.
Here’s a description of what these parameters do:
MIDI Channels: Set the upper and bass instruments to independent channels, or set one or
both to “All”.
ARTURIA SOLINA V User Manual
-19-
3 USER INTERFACE
Split Mode: The “Layer” setting spreads the upper instrument across the full keyboard range
regardless of the bass instrument or Split Point settings, and the “Split” setting keeps the two
instruments separated at the split point.
Split Point: Determines the boundaries between each instrument when the Split mode =
Split. When set to “Layer” it sets the upper key limit for the bass instrument.
Octave Shift: Transposes the selected instrument in octave increments.
To close the MIDI Preferences window, click on the small ‘x’ in the upper right-hand corner. These
settings are saved with each preset so each one will respond the way you want.
3.2.8.1
Omni mode vs. “MIDI Channel = All”
Technically, Omni mode means “listens to all 16 MIDI channels.” So in the interest of accuracy we
gave our “most inclusive” MIDI Channel setting the label “All”. This reflects the hierarchy of MIDI
channel assignments in Solina V, starting with the Global MIDI channel and ending with the
individual MIDI channel assignment of each instrument.
Here’s how it works:
The Global MIDI channel setting acts as a filter, either passing all channels to the
instruments or allowing only one specific channel to pass.
Next come the Upper and Bass MIDI channels. If the Global channel is set to All and one of
the instruments is also set to All, that instrument will respond to any data Solina V receives.
Both instruments will receive all MIDI notes on their channels regardless of the Split settings.
If both instruments are set to the same MIDI channel or to All, the Split Mode/Split Point
settings take effect.
As mentioned earlier, if the Global MIDI channel value is something other than All and that
value matches one of the two instruments, that instrument will play across the full note
range. If that value matches neither instrument, neither will receive MIDI data.
Here’s an example using some actual MIDI channel numbers. We’ll assume the Global MIDI
channel is set to “All”:
When Upper is set to 1 and Bass is set to All, the two instruments play together on MIDI
channel 1 across the full range. On MIDI channels 2-16, though, only the Bass instrument will
play.
When Upper is set to All and Bass is set to 1, the two instruments play together on MIDI
channel 1 across the full range. On MIDI channels 2-16, though, only the Upper instrument
will play.
Between the various Global and Instrument channel settings Solina V should be able to handle
any MIDI scenario you encounter.
3.3 Managing presets
Presets can remember the settings for any sounds you create with Solina V. When saving a preset
you can decide the “bank” and “type” to which it belongs, so make as many banks as you need
and fill each one with as many types and presets as you like. Use the “type” designation to
categorize your presets into groups such as “Strings”, “Pads”, etc. There’s no limit on the number of
presets within a type, so use these features in the way that helps you the most.
ARTURIA SOLINA V User Manual
-20-
3 USER INTERFACE
Solina V ships with several banks of factory presets, each containing a number of types and
presets. These cannot be overwritten, but they are great starting points for creating new presets.
Then you can use the SAVE AS feature to save the changes as your own presets.
3.3.1 Select a bank, type, or preset
The bank, type and preset selections are permanently displayed in the plug-in tool bar.
To choose a new preset in the current Bank and Type, click on the Preset Name field. A dropdown menu will appear with a list of the available presets in that category. Or if you know which
preset you want inside that category and don’t need to look at the list, simply use the blue arrows
to move up and down through the choices. Either way, as soon as the preset has been chosen
the new sound will be available for your MIDI controller or your sequencer.
Selecting a new preset
To choose a different type of preset in the same bank, click on the Preset Type button (the middle
one of the three). A drop-down menu will appear with a list of the types of presets contained in
the same bank (Classic, Distorted, etc.). Each type listed in the menu contains a sub-menu with its
own list of preset names. Follow the arrows to choose the desired preset from within these submenus.
Selecting a new preset inside the Preset Type menu
ARTURIA SOLINA V User Manual
-21-
3 USER INTERFACE
To choose a preset in another bank, click on the Preset Bank button (the left-most of the three). A
drop-down menu will appear with a list of the available banks, within which sub-menus exist for
the preset type and preset name. Navigate to the preset name level to choose a new preset.
Selecting a new preset inside the Preset Bank menu
In the Preset Bank menu the “All Banks” option allows you to navigate directly to any preset type
or any preset in any bank. This gives you direct access to all of the presets of a given type, such as
the FX presets, no matter which bank they are in.
Selecting a new preset through the All Banks > All Types menus
One more important thing to know: When a preset has been modified, an asterisk appears next to
its name in the tool bar. This means you need to save it before selecting another preset or else
your changes will be lost.
3.3.2
Saving an edited preset
To save the changes you’ve made to the current preset, click on the “Save” button in the tool
bar. It has the icon of a single floppy disk:
If you want to keep the original program you’ll need to give the edited one a new name. So click
on the “Save as” button in the tool bar, which looks like two floppy disks on top of each other. A
drop-down menu will appear and let you choose a new name and location for the edited preset.
ARTURIA SOLINA V User Manual
-22-
3 USER INTERFACE
Note: Factory presets can’t be overwritten. So If that’s what you started with, clicking the “Save”
button will automatically open the “Save as” menu so you can save the edited preset as a user
preset.
3.3.3 Import / Export a bank of presets
It is possible to import or export entire banks of Solina V presets. To import a bank, click on the
bank import button on the tool bar:
After clicking this button a window will appear so you can choose the bank to import (look for the
“.solx” extension). Choose the desired bank and click “Open”. The new bank of presets will
automatically appear among the available banks.
And while you can only import an entire bank at once, it’s possible to export a single preset or an
entire bank as a single file. You can use this as a means of backing up your own sounds, using
them on another computer, or sharing them with other users.
To do this, click on the preset bank export button in the tool bar of the program, which looks like
this:
Select the type of export you want to perform (bank or preset) and a window will appear,
allowing you to choose a destination folder and name for the item(s) you are exporting.
3.4 Assigning MIDI controls
Almost every control in Solina V can be linked to an external MIDI controller: the Mod wheel,
sliders, switches, buttons and knobs. This includes each effect parameter, and you can even
assign MIDI controllers to switch between the effect and reverb types. Even the POLY button is
assignable!
When you’re ready to give this a try, click the MIDI button in the tool bar (not the arrow to its right;
the actual button). It will remain lit to indicate that the Solina V software has entered “assign
mode”.
At this point all of the assignable controls will be highlighted in purple. Solina V has quite a few:
ARTURIA SOLINA V User Manual
-23-
3 USER INTERFACE
MIDI-assignable controls of the Solina V
In the picture below one of the controls has been selected (the Upper Sustain Length slider). A
MIDI Control Setup window for that switch now shows the parameter name, its Min/Max range,
and whether the control has already been assigned to a MIDI Continuous Controller number
(CC#).
In this case the control has not yet been assigned; it is waiting for a controller on an external
device to be activated so it can “learn” the MIDI CC# and establish a relationship between the
two. You’ll notice that as soon as a new assignment is made, the control being edited will turn red.
A controller assignment can be removed by clicking the UNASSIGN button. The word
“UNASSIGNED” will then be shown in the MIDI Control Setup window for that control.
Once you have finished linking the controls to your controller, you have completed making a new
config. Be sure to use the Export function described in section 3.3.3 to back it up.
To close the MIDI Control Setup window and exit learn mode, click the MIDI button again.
3.4.1 Minimum / maximum controller ranges
Values for minimum and maximum operational range can be set for each assignable control.
After this the control will still receive the full range of its assigned MIDI CC#, but will scale its
response so these values are spread out within the min / max range of the control.
In other words, if the Min value is set to 50 and the Max value is set to 100:
ARTURIA SOLINA V User Manual
-24-
3 USER INTERFACE
a MIDI CC value of 0 will result in a value of 50 for the selected Solina V parameter
a MIDI CC value of 127 will result in a value of 100 for the Solina V parameter
a MIDI CC value that falls between 1 and 126 will result in a value somewhere between 50
and 100 on the Solina V parameter.
Note that a “squashed” range such as in the example above means there won’t be a 1:1
correlation between the motion of the MIDI controller and the response of the Solina V parameter;
it may take two or more adjacent values of the controller before the Solina V parameter will
change.
It is also possible to invert the Min and Max values so the parameter responds “backward,” as in
the picture below.
This comes in handy when dealing with sustain pedals, for example, if the external MIDI controller
doesn’t allow you to switch the pedal polarity.
3.5 Front panel
Solina V has two editing modes, Open and Closed, which are selected by clicking the OPEN
button. Let´s take a look at each.
3.5.1 Basic controls
First we’ll talk about the controls that are common to both editing modes. The easiest way to do
this is to be in Closed mode, so if it isn’t already, close the lid by clicking the OPEN button. You
should see only the row of controls closest to the keys:
The basic Solina V controls
There is a difference in the number of controls in this area between Open and Closed modes. So if
you see knobs to the left of the Pitch Bend wheel, you are in Open mode and need to close the
lid. We will discuss those controls in section 3.5.2.
Operating the basic controls is fairly simple: if it’s a button, click it to change it from on to off (or
vice versa); if it’s a wheel or slider, click and drag the control to edit the value.
ARTURIA SOLINA V User Manual
-25-
3 USER INTERFACE
Here’s a description of each control, moving from left to right:
Pitch bend
This spring-loaded wheel will snap back to center after being released. It is
dedicated to pitch bend purposes and is the only control that is not
assignable to another MIDI controller number.
Mod wheel
Used to introduce programmable amounts of vibrato and/or tremolo to the
sound. This wheel responds to MIDI CC #1 by default, but can be reassigned
to any MIDI controller.
Volume Master
Controls the entire Solina V output, tapering or boosting the upper and bass
instrument levels at the same time.
Bass sounds
The Contrabass and Cello buttons enable and disable these sounds for the
Bass instrument. The Contrabass is an octave lower than the Cello. Both may
be enabled at the same time. If they’re both off and you want them on (or
vice versa), click and drag across both buttons.
Volume Bass
This slider will adjust the Bass instrument level independently of the Upper
instrument.
Crescendo
Controls whether notes fade in when played. The response is different for the
Bass and Upper instruments, and is also affected by whether the preset is in
Poly mode or non-poly mode. See section 3.2.3 for additional information.
Sustain Length
Adjusts the amount of time it takes the Upper instrument to fade out after a
key is released, with a maximum time of 4 seconds. The Bass instrument has a
separate Sustain control; we’ll cover that when we go through the Open
mode parameters.
Volume Upper
This slider will adjust the Upper instrument level independently of the Bass
instrument.
Upper sounds
The Viola and Violin buttons toggle their sounds for the Upper instrument, as
do the Trumpet and Horn buttons. The Violin is an octave higher than the
other three sounds. All four buttons may be lit at once, but the Horn and
Trumpet can’t be heard at the same time; the Horn will override the Trumpet.
In this case, whether the Trumpet is lit or not will have no impact on the
sound; but having it lit means it will appear when the Horn sound is disabled.
If you want to enable or disable more than one adjacent sound, click and
drag across those buttons.
Ensemble effect
Toggles the Ensemble effect on and off.
Those are the controls you will always see whether the lid is open or closed. Now we’ll take a look
at the other controls that exist in Open mode.
3.5.2 Bonus controls
While checking out the factory presets you may have reached the conclusion that there are
things happening that aren’t represented by the basic controls (arpeggios, for one).
And you’d be right! Click the OPEN button or the lid and the simple Solina will transform into a
sound-sculpting powerhouse. As the lid folds upward a host of new parameter controls emerge,
not the least of which are some really great effects modules.
ARTURIA SOLINA V User Manual
-26-
3 USER INTERFACE
The “bonus” control panel in Open mode
There are other changes, too: three knobs appear to the right of the keyboard and two more
appear to the left. The two on the left set the ranges for the pitch bend and mod wheels…
Amount controls
…while the three on the right are the effect sends:
Effect sends
That’s not all! A new sound button has materialized for the Upper instrument: Humana. It adds the
complex texture of a Vox Humana preset that some paraphonic synthesizers offered in the 1970s.
The Humana button in Open mode
The Humana sound can be active at the same time as the others, with the previously noted
exception of the Horn overriding the Trumpet.
There’s one more tiny control that makes a huge difference, and it would be easy to miss: a switch
appears that changes the Ensemble effect from a great mono effect into a glorious stereo effect:
ARTURIA SOLINA V User Manual
-27-
3 USER INTERFACE
Mono and stereo Ensemble effect settings
As you can see, Open mode unveils a lot of what’s been making Solina V sound so great. And the
settings of each of these previously hidden parameters will continue to affect the sound of the
preset even when the lid is closed.
There’s so much here, in fact, that we’re only going to give a brief overview of the various sections
of the Open mode controls, and then cover them completely in section 3.6.
We’ll start at the top and work our way down, moving left to right as before, and skipping the
basic controls (see section 3.5.1 for those):
Master section
These set the amount of velocity and aftertouch response for the volume
and the filter.
LFO
“LFO” means “Low Frequency Oscillator”, a common term in synthesis.
Tweak the vibrato, tremolo, and bass filter mod settings here.
Bass section
Two sub-sections: Filter/level envelope settings and arpeggiator controls.
Upper Resonator
Provides a highly configurable filter section for the Upper instrument.
Effects
Five essential FX modules, with up to three active at once. The convolution
reverb is not to be missed, but you might if you don’t look closely.
Amount controls
To the left of the pitch bend and mod wheels are two knobs that govern
their range.
Humana
Toggles the Humana sound in and out for the Upper instrument. It has a bit of
motion even without effects, and sounds even nicer when effects are
added.
Ensemble width
Toggles the Ensemble effect between stereo and mono operation.
Effect sends
One knob each for FX1, FX2 and the Reverb. The combined output of the
Bass and Upper instruments can be sent to any or all of the effects.
Those are the controls you will see only when the lid is open. For more in-depth descriptions of
each parameter, see section 3.6.
3.5.3 Coarse vs. Fine adjustments
Normally controls will make coarse adjustments to parameter values. However, they can also
make fine adjustments, allowing for greater precision. This is possible by dragging the cursor while
holding the Control key, or by using the right click first and then dragging the cursor.
To reset a parameter to its default value, double-click that control.
ARTURIA SOLINA V User Manual
-28-
3 USER INTERFACE
3.6 Open mode
Open mode uncovers a bunch of hidden parameters that enhance the power of Solina V. Here
you will find a selection of effects, velocity and aftertouch controls, a resonator, and even an
arpeggiator for the bass section.
Solina V controls in Open mode
But that’s not all: it also adds another voice selector button on the front panel (Humana) and a
handful of effect controls near the endcaps. You might become so accustomed to having those
extra controls available that you’ll want to leave the top panel open all of the time!
We gave a brief overview of the various Open mode parameter groups in section 3.5.2. Now it’s
time to take a look at each parameter in greater detail.
3.6.1 Master section
In the days of the Solina it was very rare for the keys on an electronic keyboard to do anything
other than turn a sound on and off. In that regard they were basically switches. Velocity sensitivity
and aftertouch were many years off into the future.
However, Solina V has been endowed by Arturia with the ability to respond to both velocity and
aftertouch. The implementation is simple but very effective:
ARTURIA SOLINA V User Manual
-29-
3 USER INTERFACE
The Master section of Open mode
There are four controls, two routed to the overall volume (level) and two routed to the filter
(brightness). So for example, you could configure a preset so that velocity affects both the level
and the filter while aftertouch only affects the filter frequency, or vice versa.
The way this works for both filter and level is to reduce their “base level”, or starting point, so
there’s some headroom.
For example, with Vel Brightness set to zero the filter will be wide open and unaffected by velocity.
But with this parameter set to a non-zero value such as 30.0%, the notes played at the softest
velocities will be that much less bright. The brilliance will increase along with the velocity values.
The same holds true for aftertouch, and also for the Level parameters.
Pro tip: if you want a darker overall sound, a quick way to do it is to increase the Vel Brightness
parameter and set your controller keyboard to a fixed velocity curve. Note that this will affect the
Bass and Upper instruments equally.
If you only want to darken the Upper instrument, though, there’s another way that offers even
more control: the Upper Resonator. We’ll unveil the secrets of this powerful processing tool in
section 3.6.5.
3.6.2 LFO
The Mod wheel can bring in several types of modulation, most of which affect the Upper and Bass
instruments simultaneously. There’s also an independent routing that affects only the Bass
instrument. Vibrato and Tremolo are the global modulation types, and the LFO also can be routed
to the filter frequency of the Bass instrument.
Another thing you can do is program in a certain amount of constant modulation, which can then
be increased by the Mod wheel as needed.
Whatever form of modulation control you’re after, the LFO section is where these decisions are
made.
The LFO section of Open mode
We’re going to jump around with these parameters a bit, since you might simply want to know
how to introduce vibrato to the sound. We’ll ignore the Mod wheel settings for now and cover
them in section 3.6.7.
ARTURIA SOLINA V User Manual
-30-
3 USER INTERFACE
Rate
Controls the mod speed. The values shown when you click and drag the
slider will be different depending on the status of the Sync switch: they will be
displayed either as a Rate when Sync = Off (range: 0.010 - 13.0 Hz) or as a
Ratio when Sync = On (range: 1/32 to 16x).
Waveform
Five options: Random, Square, Saw Down, Saw Up, or Triangle.
Vibrato
This will add or remove pitch modulation. If the Mod wheel is not configured
to control the modulation, the vibrato will remain constant.
Tremolo
This will add or remove amplitude modulation. If the Mod wheel is not
configured to control the modulation, the tremolo will remain constant.
Bass Cut
This will add or remove filter modulation for the Bass instrument. If the Mod
wheel is not configured to control the modulation, the filter will remain
constant. Also a factor is whether the Bass Section Cutoff frequency is low
enough to make sufficient headroom for the filter modulation to happen.
Delay
If you don’t want the LFO to affect the sound immediately after the note is
played, the delay parameter will keep the LFO at bay for up to 3 full
seconds. However, when the modulation comes in it will jump immediately
to the amounts specified by the Vibrato, Tremolo and Bass Cut parameters.
So the Delay parameter is most effective when used in conjunction with the
Fade parameter, described below.
Fade
Allows the LFO amount to increase gradually over time, rather than coming
in all at once. Range: 0-3000 milliseconds.
Retrig
When disabled the LFO is a “free-run” state; when enabled the LFO will
always start at the beginning of its cycle. The “Random” waveform is not
affected by this parameter.
Sync
Locks the LFO to the master MIDI clock, which puts it in sync with any other
Solina V effects that also have their Sync parameters enabled.
As you can see, for all its simple appearance the LFO section of Solina V is really quite powerful. In
that regard it’s sort of a microcosm of Solina V itself, which looks like a happy little piece of
furniture until you open the lid and see its inner workings!
3.6.3 Bass section: Filter, FENV and Sustain
The Bass section has so many interesting features we’ll need to discuss it in two parts. Here we will
look at the parameters related to the filter envelope (i.e., FENV), the filter settings themselves, and
the Bass Sustain parameter. We’ll cover the Bass section arpeggiator features in section 3.6.4.
As you’ve seen from some of the presets, the Bass instrument has a fair amount of independence
from the Upper instrument. The parameters we’re about to describe are a major reason why.
ARTURIA SOLINA V User Manual
-31-
3 USER INTERFACE
The Bass filter section of Open mode
Attack
Controls the FENV attack time, working in conjunction with the Env Amt and
Cutoff parameters. Range: 0-3000 milliseconds.
Release
Controls the FENV release time, and also interacts with the Env Amt and
Cutoff parameters. Range: 0-3000 milliseconds.
Bass Sustain
This is the only parameter dedicated to the Bass instrument’s amplitude
envelope (Crescendo affects the Upper instrument as well.) With higher
values the Bass instrument will take longer to fade out after its note is
released. The maximum value is 4000 milliseconds.
Cutoff
Controls the filter cutoff frequency, and when set to a low value allows the
cutoff frequency to be swept through the FENV stages. Range: 20 - 20kHz.
Resonance
Will emphasize certain frequencies as the filter is swept from minimum to
maximum and back down. It can cause the filter to self-oscillate, so be
careful when setting the value.
Env Amount
Enables the Attack and Release parameters to affect the filter. Lower Cutoff
values tend to make the overall FENV settings more effective.
Those six parameters offer quite a bit of sound designing flexibility for the Bass instrument.
3.6.4 Bass section: Arpeggiator
It is not an overstatement to say that arpeggios have become a mainstay of modern music. Of
course the original string machines didn’t have them, but the blending of the old and the new has
become a mainstay of Arturia! So we’ve included an arpeggiator as an enhancement of the Bass
instrument, and we think you’ll be glad we did.
ARTURIA SOLINA V User Manual
-32-
3 USER INTERFACE
The Bass arpeggiator section of Open mode
Beautiful in its simplicity, here’s what the arpeggiator offers:
Bass Arp mode
“On” and “Off” are obvious; “Hold” will latch the arpeggiator and
incorporate every note you play until all keys are released, at which point
the arpeggio you have defined will continue on its own. The next note you
play will clear the arpeggiator and it will begin to capture notes again,
starting with the new note.
Mode
Determines the playback order for the notes in the arpeggio. Up, Down and
Random are self-explanatory. “Excl” stands for “Exclusive,” which is a
combination of the Up and Down modes that plays the notes in a circle
without repeating the highest and lowest notes (i.e. it “excludes” them from
being counted twice).
Rate
Controls the speed of the arpeggio. The values shown when you click and
drag the knob will be different depending on the status of the Sync switch:
they will be displayed either as a Rate when Sync = Off (range: 0.010 - 50.0
Hz) or as a Ratio when Sync = On (range: 1/256 to 2x).
Sync
Locks the arpeggiator to the master MIDI clock, which also puts it in sync with
any other parameters that also have their Sync parameters enabled (the
LFO and some of the Effects).
While experimenting, don’t forget: the Bass and Upper instruments can be transposed +/- 2
octaves and the split point can be moved quite a bit; so it’s possible to have a high arpeggio in
the left hand and a medium-range pad in the right, for example. Also an option: set each
instrument to a different MIDI channel for independent control.
And as many of the presets demonstrate, the Bass section arpeggiator can remain active even
when Solina V is not in Open mode. It can still “pull strings” from behind the scenes (or in this case,
push them).
3.6.5 Upper Resonator
If you have used a three-band parametric EQ you will recognize its similarity to this area of the
Bonus control panel. The terms are familiar: Cutoff represents the frequency, Resonance is similar
to Q, and Gain will boost or cut the level of the selected band.
However, most EQs do not also behave like the filters on a synthesizer, with Low Pass, High Pass,
and Band Pass options. All told, the Upper Resonator is really what you would call a three-band
ARTURIA SOLINA V User Manual
-33-
3 USER INTERFACE
formant filter, capable of superimposing fixed peaks and valleys that maintain their characteristics
regardless of the input frequency. These qualities make the Upper Resonator a unique tool for
sculpting the sound of a preset into your own.
The Upper Resonator section of Open mode
We’ll define controls with similar functions only once, keeping in mind that what they do between
60-300 Hz is the same thing they do between 300-1.5 kHz, etc.
Mode
Four settings which affect all three bands:
Bypass, which of course makes the other controls do nothing (sometimes
“nothing” is OK!). You can use an external MIDI controller to switch to/from
the other modes, which can be a great effect.
Low (Low Pass), which attenuates the higher frequencies in each band and
favors the lower ones.
Band (Band Pass), which affects the high and low frequencies in each band
and allows the ones in the middle to pass.
High (High Pass), which attenuates the lower frequencies in each band and
favors the higher ones.
Cutoff
Sets the value for the corner frequency of the filter. The range varies
depending on the selected band: 60 - 300 Hz, 300 - 1.5 kHz, or 1.5k - 7.5 kHz.
Resonance
Will focus the impact of the Gain amount on selected filter frequency with a
variable width ranging from 0.5 (broad) to 10 (narrow).
Gain
This will cut or boost the frequencies encompassed by the Cutoff and Reso
parameters. Range: +6 to -72 decibels (dB).
Don’t forget: each of those parameters is MIDI-assignable, which opens up a lot of possibilities. For
example, with three adjacent sliders on your controller assigned to your choice of the Upper
Resonator’s Cutoff frequencies, the on-the-spot edits could be loads of fun.
The Upper Resonator can turn the Solina V into a dark, brooding ambient pad generator: add a
dash of LFO, a hint of chorus, wash it out with your favorite convolution reverb, and just about any
chord you play will make people listen. We trust you never to use this superpower for evil purposes.
ARTURIA SOLINA V User Manual
-34-
3 USER INTERFACE
3.6.6 Effects
There are three independent signal processors in this section of the Bonus control panel: FX 1, FX 2,
and Convolution Reverb. FX 1 gives you a choice of two “pitch-based” effects (Phaser and
Analog Chorus), FX 2 contains two “time-based” effects (Analog Delay and Digital Delay), and
the Convolution Reverb offers over 20 different presets modeled after reverb units of all sorts
(spring, plate, and digital).
The selections are made through pull-down menus, which are circled in this picture:
Selection pull-down menus
In each case, all you have to do is click the arrow next to the label and a list of available effects
will appear. In the case of FX 1 and FX, it looks like this:
The FX 1 menu options
The FX 2 menu options
There’s nothing complicated about using the various effects, but for a description of each one
and its parameters, please refer to section 3.7.
3.6.7 Amount controls
When Open mode is engaged two new knobs appear to the left of the wheels: Bend Amount and
Mod Amount. Their function is to set the operational limits for their respective wheels. So when one
of the wheels is moved from zero to 100%, for example, that wheel can only respond within the
range allocated to it by its Amount control.
ARTURIA SOLINA V User Manual
-35-
3 USER INTERFACE
The Amount controls
In the case of the Pitch Bend wheel, the range can be anything from 0 cents to 1200 cents, which
is an entire octave of pitch bend in either direction. The default range is 200 cents, or +/- two
whole steps.
The function of the Mod wheel is not as simple. It is tied to the LFO section, which in turn may be
controlling up to three different types of modulation for the Upper and/or Bass instruments. The
Mod Amount puts a limit on how much of those modulations the Mod wheel can add. Its range is
from 0-100%.
3.6.8 Effect sends
Open mode also adds three knobs to the right of the virtual keyboard: FX1, FX2, and REV. They
control the amount of the Solina V output that will be sent to each of the effects. The range of
each control is 0-100%.
The Effect sends
The resultant sound also depends on the active effects, of course.
3.7 The effects
Solina V is equipped with a set of highly useful effect units, and you will have no problem creating
new sounds with them or recreating the sounds of yesteryear.
To edit the effects in a preset, first make sure Solina V is in Open mode. The simplest way to do this
is to click on the lid, which will open to reveal the hidden parameters. If you don’t see the lid,
you’re already there.
Among those hidden parameters, way over on the right side of the Bonus control panel, are the
three effects we’ll cover first. These include a phase shifter and a chorus (FX 1), two different styles
of delay effects (FX 2), and a convolution reverb with over 20 different presets.
ARTURIA SOLINA V User Manual
-36-
3 USER INTERFACE
The Solina V Effects section
There’s a fourth effect too: the Ensemble effect, which is excellent. A string machine wouldn’t be
complete without it. But there’s no editing involved with that effect; it’s either on or it’s off. We’ll
cover it in section 3.7.6.
Right now we’re going to take each of the other effect units one at a time, starting from the top.
And as we do, keep this in mind: All FX parameters are MIDI-assignable, which means they can be
linked to the controllers on your external USB MIDI device. For information about this process, refer
to section 3.2.7.
3.7.1 FX 1: Phaser
The phase shifter effect in Solina V is actually a dual-stage phaser. If you look closely you can see
that on either side of the big red button the controls are the same: those on the left adjust Stage 1
and those on the right adjust Stage 2.
The following parameters are independent for Stage 1 and Stage 2:
Rate
Sets the speed of the phase shifting effect
Feedback
Controls the amount of phaser resonance
Depth
Sets the depth of the phaser activity
Stages 1 and 2 share these parameters:
Sync
Locks both phaser stages to the current tempo and to the rate of
other Sync-equipped Solina V features, such as the LFO.
Dual Mode
When disabled, Stage 1 is on the left side and Stage 2 is on the right.
When enabled (i.e., the button is lit), both stages process both sides.
The phaser output is mono in this case.
Phase shifting has been one of the most popular effects to use with electric instruments since the
1970s. It works by splitting the incoming signal, changing the phase of one side, and recombining
ARTURIA SOLINA V User Manual
-37-
3 USER INTERFACE
it with the unaffected signal. This creates a notch-comb filter that sweeps through the frequency
spectrum.
You can then modulate the phase of the affected half with an oscillator, with the frequency
determined by the Rate control. The Depth knob sets the amplitude for the action of the filtering,
while Feedback amplifies certain harmonics. Phase shifting is easily identified by a characteristic
“whooshing” sound that sweeps through the frequency spectrum.
3.7.2 FX 1: Analog Chorus
Type
Select one of three chorus types
Stereo Width
Controls the width of the stereo effect
Stereo Rate
Sets the speed of the stereo effect
Chorus Rate
Adjusts the speed of the chorus
Chorus Amount
Controls the depth of the chorus
Chorus Delay
Sets the amount of delay applied to the input signal
A chorus module recreates the sound of multiple takes of an instrument being combined in a mix.
Even with the best of performances there are always differences in tuning or timing, and when
taken to either extreme the results can range from slow and lush to a warbling, frenetic vibrato.
The speed of the effect is set by the Rate knob, while its depth and width are controlled by the
Amount and Delay knobs, respectively. The resulting “frequency blur” is different for the left and
right halves of the signal, which allows us to derive a stereo signal from a mono signal. The
difference between the two halves then can be set with the Stereo width, with the speed of the
left-right rotation under the control of the Stereo rate knob.
The Type switch selects between three different chorus models: simple, medium, and complex.
3.7.3 FX 2: Analog Delay
Time
Sets the delay time. (The delay is mono for authenticity.)
Feedback Tone
Changes feedback filtering
Feedback Amount
Adjusts feedback level
LFO Rate
Controls modulation of the delay time through use of a sine wave
LFO Depth
Sets the amount of delay time modulation
ARTURIA SOLINA V User Manual
-38-
3 USER INTERFACE
A delay repeats a sound, like an echo, giving it more space and depth. This analog delay
reproduces the sound of the old solid state units that used analog bucket brigade circuits. The
Delay knob allows you to select a time between 12ms and 1000ms for the delay. The Feedback
knob sets the feedback level. The FB Tone knob controls a feedback filtering effect: low-pass to
the left, high-pass to the right. You can set the delay modulation by changing the LFO rate and
LFO depth values.
3.7.4 FX 2: Digital Delay
The Digital Delay also takes the input signal and repeats it, but has a slightly different set of
parameters than the Analog Delay:
MIDI Sync
Locks the delay to MIDI clock and also to the Phaser and the LFO, if
their Sync buttons are enabled.
Time
A clockwise turn increases the delay time for the left side; a turn in the
opposite direction shortens it. Range: 9.07 ms - 1000ms
Feedback
Adjusts the Feedback amount of the left delay. Larger values cause
the delay to be heard longer.
Link
Makes the delay mono, after which the first set of Time and
Feedback controls are used to adjust the effect.
Time
A clockwise turn increases the delay time for the right side; a turn in
the opposite direction shortens it. Range: 9.07 ms - 1000ms
Feedback
Adjusts the Feedback amount of the right delay. Larger values cause
the delay to fade out more slowly.
PiPo
Short for “Ping Pong”. Hard-pans the effected signals so they
“bounce” from left to right.
Damping
Higher settings will roll off the high-frequency content of the delayed
signal more quickly.
3.7.5 Convolution Reverb
The creation of a convolution reverb is a fascinating process. The idea is to recreate the
characteristics of a particular physical space or electronic device by means of a computer
model. An extremely brief burst of noise called an impulse is fed into the device or concert hall, for
example, while recording the response to the impulse. Then an extensive computer analysis of the
recording is made to determine an algorithm that will react to any input signal in the same
manner that the original space or device would react.
Solina V provides almost 25 different convolution reverbs modeled after the presets of a halfdozen devices. Some are the actual reverb units that were paired with string machines of the
time.
ARTURIA SOLINA V User Manual
-39-
3 USER INTERFACE
To select one of the convolution reverbs, look at the lower right corner of the Effects area of the
Bonus control panel. There’s a narrow strip that looks like this:
Solina V Reverb location
When you click on the pull-down menu arrow a lengthy list of options will unfold.
Solina V Reverb presets
There are no parameters within the reverb presets for you to adjust, but you can set the balance
between the dry signal and the effected signal by using the Rev knob on the right side of the
keyboard in Open mode.
The REV knob
ARTURIA SOLINA V User Manual
-40-
3 USER INTERFACE
3.7.6 Ensemble
There’s an inauspicious button nestled among the Basic controls in both Open and Closed modes.
It’s sort of like the MSG of the string machine world: it makes everything sound really tasty. You’ll
find it to the right of the Upper instrument buttons:
The Ensemble effect in Open mode
As the name implies, the concept behind the Ensemble effect was to take a single string
instrument and make it sound like dozens of performers, each with a slightly different idea of what
“in tune” means. It is the difference between the sound of one person playing, however
beautifully, and the impossibly huge sound of fundamentals and harmonics moving slightly in and
out of tune and phase with one another in a gloriously hopeless attempt at conformity.
This is achieved in electronic terms through the use of a “bucket brigade” circuit. It splits the
original signal, passing one half through a series of capacitors, each timed to delay the signal a bit
and then release it to the next capacitor, etc. There is a slight degradation of the signal at each
stage, sort of like the classic game of “telephone” where what the first person says and what the
last person hears has undergone more than a bit of revision.
LFOs are used to vary the delay times, adding to the diversity of the output. Finally the delayed,
degraded signal is recombined with the original, resulting in a very lush combination of harmonic
discrepancies. In that sense it is somewhat like the magic unleashed by an instrumental ensemble,
if you will.
Note also that there is a tiny switch next to the Ensemble button which is only visible when Solina V
is in Open mode. It will toggle the Ensemble effect between mono and stereo operation, with the
“overlapping circles” icon representing the stereo position.
Mono mode
ARTURIA SOLINA V User Manual
Stereo mode
-41-
3 USER INTERFACE
4 END USER LICENSE AGREEMENT
1. General
1.1 In consideration of payment of the Licensee fee, which is a portion of the price you
paid, Arturia, as Licensor, grants to you (hereinafter termed “Licensee”) a nonexclusive
right for the use of software including related media, documentation (for example
program descriptions, manuals) and other documents and materials manufactured by
Arturia SA ("Product(s)").
All intellectual property rights in the software belong to Arturia SA (hereinafter:
“Arturia”).
1.2 The following editions of the Product are available: “Demo”, “Standard”, “EDU” and
“NFR”. Whilst each edition equips the User with the same software, the editions vary as
regards both the scope of functions activated in the Product, and the rights of use
granted under this EULA.
1.3 By installing the software on your computer you agree to these terms and conditions.
If you do not approve these terms and conditions, you must not install this software.
1.4 If you do not approve these terms and conditions, please return the complete
Product (including all written matter, packaging and similar material) to the dealer from
whom it was originally bought within 14 (fourteen) days after the day of purchase. For
purchases from the Arturia Online Store, please contact Arturia on the internet website:
www.arturia.com/support/askforhelp/purchase.
1.4 Arturia reserves all rights not expressly granted in the EULA.
2. Right of use
2.1 The Product is protected by copyright. The Licensee may not lease, loan or sub-license
the software. The Licensee is not authorized to modify the software.
2.2 Owning any product provided to the Licensee as “Standard” version grants the Licensee a
non-exclusive right to use the Product in perpetuity including commercial purposes. The
Licensee can activate the Product on up to five computers, as long as only one
installation is used at any given time. The Licensee must register the Product to Arturia
to get access to client support, and to activate his Product. (An internet connection is
required to register and activate the Product, either on the computer on which the
Product is installed, either on another device able to exchange files with the computer on
which the Product is installed). Owning a license of the Products entitles the Licensee to
get access to the future updates of this Product.
2.3 Any Products provided to you as "NFR" (Not For Resale) version grants the Licensee a
non-exclusive right to use the Product for a limited period of time. The Product shall only
be used for demonstration, testing and evaluation purposes. NFR Products must not be
used for commercial purposes, and must not be resold or transferred. The Licensee can
activate the Product on up to five computers, as long as only one installation is used at
any given time. The Licensee must register the Product to Arturia to get access to client
support, and to activate his Product. (An internet connection is required to register and
activate the Product, either on the computer on which the Product is installed, either on
ARTURIA SOLINA V User Manual
-42-
4 END USER LICENSE AGREEMENT
another device able to exchange files with the computer on which the Product is
installed). NFR Products are exempt from update, upgrade or crossgrade offers, and
cannot be purchased with or exchanged for vouchers or coupons. Furthermore, as an
owner of a NFR Product, you are not entitled to any vouchers that ship with the standard
version of the Product.
2.4 Any Products labelled or otherwise provided to you as an “Educational” version
grants the Licensee a non-exclusive right to use the Product in perpetuity. The Product
shall only be used by students or those working in educational institutions. This definition
includes students, faculty, staff and administration attending and / or working at an
educational institutional facility: private / public schools, colleges, universities and similar.
These Products must not be used for commercial purposes, and must not be resold or
transferred. The Licensee can activate the Product on up to five computers, as long as
only one installation is used at any given time. The Licensee must register the Product to
Arturia to get access to client support, and to activate his Product. (An internet
connection is required to register and activate the Product, either on the computer on
which the Product is installed, either on another device able to exchange files with the
computer on which the Product is installed). These Products are exempt from upgrade or
crossgrade offers, and cannot be purchased with or exchanged for vouchers or coupons.
Furthermore, as an owner of an educational Product, you are not entitled to any
vouchers that ship with the standard version of the Product.
2.5 Any Products labelled or otherwise provided to you as a “Demo” version grants the
Licensee a right to use the Product only for demonstration and evaluation purposes.
These Products must not be used for commercial purposes, and must not be resold or
transferred. These Products are exempt from upgrade or crossgrade offers, and cannot
be exchanged for vouchers or coupons.
3. No Unbundling
Bundles (product bundles are an association of software and hardware or software-only
products) can only be resold / transferred as a whole. The individual components of a
bundle must not be resold / transferred separately.
4. Resell
4.1 Renting or lending the licensed Software to a third party is expressly forbidden. Apart
from that and if not provided otherwise within this EULA.
4.2 Except if otherwise stated within this EULA, Licensee may resell the software to a
third party or transfer the software permanently free of charge, provided the third party
agrees in writing with this EULA and Licensee ceases all use of the software, completely
removes all installed copies of the software from his computers and – if the software was
not purchased via download – deletes or transfers the original media delivered with the
software to the third party. In addition, Licensee is required to de-register the purchased
software with Arturia (more information available on www.arturia.com).
5. In case a sound library is part of the purchased Product the following
shall apply in addition to the EULA
The provided samples, instruments and presets can be used for commercial or noncommercial music and audio Productions without the prior permission from Arturia under
the terms of this Agreement. The usage of this Product (in particular samples,
instruments and presets) for the creation of a sound library or as a sound library for any
ARTURIA SOLINA V User Manual
-43-
4 END USER LICENSE AGREEMENT
kind of synthesizer, virtual instrument, sample library, sample-based Product or other
musical instrument is strictly prohibited. Individual samples, sound sets or audio loops
may not be distributed (commercially or otherwise) standalone. Furthermore these
samples, sound sets or audio may not be repackaged in whole or in part as audio
samples, sound libraries or sound effects.
6. Data Protection
Arturia attaches great importance to compliance with legislation on data protection. The
User data collected are used exclusively for performing its contractual obligations. No
data is passed on to third parties. Further information can be obtained from our Privacy
Policy at www.arturia.com/privacy.
7. Limited Warranty
Arturia warrants that the physical media on which the software is provided is free from
defects in materials and workmanship under normal use for a period of thirty (30) days
from the date of purchase. The Licensee’s invoice shall be evidence of the date of
purchase. Any implied warranties on the software are limited to thirty (30) days from the
date of purchase. Some states do not allow limitations on duration of an implied
warranty, so the above limitation may not apply to the Licensee in this case. All
programs and accompanying materials are provided “as is”.
8. No Liability for Consequential Damages
Neither Arturia nor anyone else involved in the creation, production, or delivery of this
Product shall be liable for any direct, indirect, consequential, or incidental damages
arising out of the use of, or inability to use this Product (including without limitation,
damages for loss of business profits, business interruption, loss of business information
and the like) even if Arturia was previously advised of the possibility of such damages.
Some states do not allow limitations on the length of an implied warranty or the
exclusion or limitation of incidental or consequential damages, so the above limitation or
exclusions may not apply to the Licensee in this case. This warranty gives the Licensee
specific legal rights, and the Licensee may also have other rights which vary from state
to state.
Sample rate converter designed by Aleksey Vaneev of Voxengo
ARTURIA SOLINA V User Manual
-44-
4 END USER LICENSE AGREEMENT
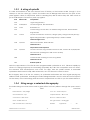
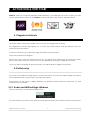
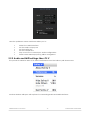
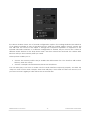
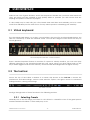
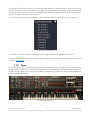

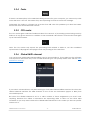
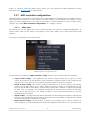
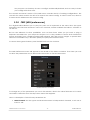
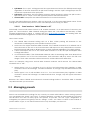
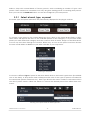
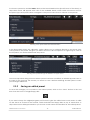

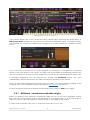
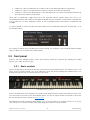
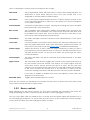

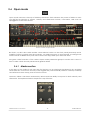
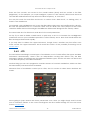
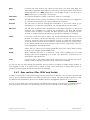
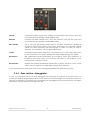
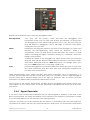
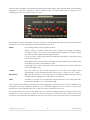
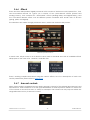

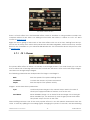
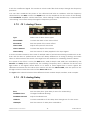
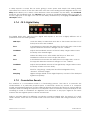
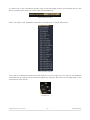
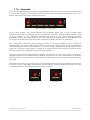


![[EN] SPARK Manual April2011](http://vs1.manualzilla.com/store/data/005899229_1-00bdd099054b23c9b74e57dfb72b875f-150x150.png)