1
Proudly Designed in Australia
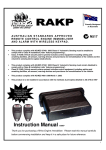
Narrow Band Wireless Receiver with 2 x Code Hopping Remote Controls For Most Alarm Control Panels.
F:\Current_Instructions\Standard Home Alarm\kissrx.doc
N517
Description
Product Description & Features
Remote Control Function
Master Default Setting
Programming Remote Controls
Programming Wireless Detectors
Wireless Detector Supervision
Wireless Detector Low Battery & Tamper Warning
Memory Recall Function
Page
1
2
3
4
5
6
7
7
Your KISS-RX is a state- of- the-art narrow band wireless receiver, designed to operate with
most alarm control panels.
Main Features include:
Simple Installation.
Code Hopping Remote Control Technology (remotes can not be copied by scanning or
code grabbing).
Remote Functions include Arm/Disarm & Panic.
Ability to quickly add or erase detectors from your system.
4 Wireless Detector Zones Available.
Wireless Detector Supervision Output.
Low Battery Warning Output (Intelligent 1 trigger only until batteries replaced)
Detector Tamper Warning Output
Intelligent Detector Learning Program to prevent accidental code duplication.
Memory Recall Function to identify individual detectors sending low battery or tamper
codes.
Wireless Detectors available include PIR's, Internal or External Reed Switches, Smoke
Sensors & Wireless Emergency Pendants.
1
ARM/DISARM: Pressing button one once. As
soon as you release, the alarm will respond.
PANIC: Activate by pressing & holding down
button 1 for 3 seconds. This sets off the siren. To
cancel “panic”, press button one once.
NOTE: Button 2 not used
LED'S
Receive
Red
Valid
Red
Program
Yellow
Run
Green
Receive: On when any data packets are received - even
if codes are not programmed.
Valid: On while valid data is decoded e.g. while Tx is
pressed or PIR transmitting. Flashes 6 times when in
program mode and valid data is received for storage.
Program: On when any switch is in the “on” position,
flashes when more than one switch is in the on position.
Run: Normally flashing at 0.5 Hz - indicates
microprocessor is running.
Antenna
Wire
Add
Delete
User Code
ON
1 2 3 4 5 6 7 8
OFF
Bank 1
+12VDC
Ground
Zone 1 Detector Output
Zone 2 Detector Output
Zone 3 Detector Output
Zone 4 Detector Output
Supervision Output
Low Battery Output
Panic Output
On/Off Output
Keep the antenna vertical &
straight, and away from
metal. Mount the receiver
inside the top of your panel
box, with the maximum
possible length of antenna
extending from the top.
All outputs are open – collector. This means the outputs will be open circuit
normally and will output ground/earth for 1 second when triggered.
2
After connecting your KISS-RX to your panel as per the connection diagram on
page 2,
Carry out the default procedure outlined below.
You can default your KISS-RX in case you make a mistake, or are unsure of your
receiver setup. "Defaulting" your receiver will cause all detector & remote codes to
be erased.
To default your receiver, follow these steps:
1. Set all dipswitches on Bank 1 to ON.
ON
1
2
3
4
5
6
7 8
OFF
Bank 1
2. Press & Hold the delete button for 5 seconds.
Delete
5 seconds press
3. All LED's on the receiver will flash once together to confirm that the receiver has
been defaulted.
4. Return all dip switches back to the OFF position.
IF YOU ENCOUNTER ANY PROBLEMS WITH YOUR KISS-RX, OR REQUIRE
ADDITIONAL TECHNICAL INFORMATION NOT CONTAINED IN THIS MANUAL,
PLEASE CONTACT YOUR RHINO DEALER.
3
TO ADD A REMOTE CONTROL
1. On Bank 1, set dipswitch Number 8 only to ON. The yellow Program LED will come on. (If theLED
flashes, check that, you don't have more than one dipswitch set to on).
ON
1
2
3
4
5
6
7 8
NOTE WHEN
PROGRAMMING REMOTES
& WIRELESS DETECTORS:
OFF
Bank 1
2. Press & Hold button 1 on your remote.
3. Press the Add Button. The red Valid LED will start flashing at 0.5Hz.
Add
…
Due
to
the
excellent
performance of the receiver,
you are likely to "swamp" the
receiver with too much RF
signal if you transmit within 5
metres of the receiver. To
prevent this from occurring,
simply remove the antenna from
your
receiver
whilst
programming. You will now
have to be within approx 1m of
the
receiver
whilst
programming.
4. Now release button 1 on the remote. The red valid light will turn off.
ACOM
5. Repeat steps 2 - 4 for any extra remotes that you wish to add. Maximum of 5 can be used.
6. Return dipswitch 8 to the OFF position. The yellow program light will turn off.
TO DELETE ALL REMOTE CONTROLS
1. On Bank 1, set dipswitch Number 8 to ON. The yellow Program LED will come on. (If the LED
flashes, check that, you don't have more than one dipswitch set to on).
ON
1
2
3
4
5
6
7 8
Bank 1
2. Press the Delete Button.
Delete
OFF
!
IMPORTANT
When programming,
make sure that no
detectors are
transmitting, as they
will interfere with your
programming
procedure.
3. All remote controls will now have been erased from the memory of the receiver.
4. Return dipswitch 8 to the OFF position. The yellow Program light will turn off.
IMPORTANT NOTE: When installing any wireless device,
make sure that it is at least 5 METRES AWAY from the receiver.
4
(Wireless PIR, Wireless Reed Switch, Wireless Smoke Sensor, or Wireless Emergency Button)
TO ADD A DETECTOR
1. On Bank 1, select the Zone (1-4) that you wish to program a detector into. The yellow Program
LED will come on. (If the LED flashes, check that, you don't have more than one dipswitch set to
on).
ON
E.g. programming a detector into Zone 1
1
2
3
4
5
6
7 8
OFF
Bank 1
Note: Learning a new detector into a zone which already had a detector learnt into that zone, will
erase the original detector's code & replace it with the new detector's code. Furthermore, if that
detector code has previously been learnt into another zone, the receiver will determine this as being
an error, and will automatically delete the code duplication by erasing the code from the other zone.
2. Press the Add Button. The red Valid LED will start flashing at 0.5Hz.
Add
…
3. Now trigger the sensor. The valid light will stop flashing once the detector has been successfully
programmed.
4. Return all dip switches back to the OFF position. The yellow program light will turn off.
!
TO DELETE A DETECTOR
1. On Bank 1, select the Zone (1-4) that you wish to delete a sensor from. The yellow Program LED
will come on. (If the LED flashes, check that, you don't have more than one dipswitch set to on).
ON
E.g. deleting a detector from Zone 1
1
2
3
4
5
6
7 8
OFF
Bank 1
2. Press the Delete Button.
Delete
3. The detector will now have been erased from the receiver's memory. You can test this by
triggering the detector, and watching that the Valid LED no longer illuminates on your receiver
when the detector transmits, and also by watching that the Zone LED no longer illuminates on
your RHINO Keypad.
4. Return all dip switches back to the OFF position. The yellow program light will turn off.
5
All of your individual wireless detectors (i.e. Wireless PIR, Wireless Reed, or Wireless Smoke
Detectors) can send a supervision report to your receiver to confirm that they are fully functional.
If supervision mode is enabled, the receiver will be expecting to receive the individual supervision
code from each detector approximately every 2.4 hours i.e. at least 10 reports per day, per detector.
The KISS-RX only requires one report from each detector during the 24 hour period to satisfy the
supervision criteria. An extra 9 reports are still given to ensure that the supervision report is received.
If all 10 supervision reports are missed from one detector during the 24 hour time frame, then the
supervision output will be activated (it will switch low for 2 seconds).
TURNING SUPERVISION ON OR OFF (Default setting is OFF)
To turn on supervision:
1. Disconnect power from the receiver.
2. On Bank 1, set dip switches 1 & 8 to ON.
ON
1
2
3
4
5
6
7 8
OFF
Bank 1
3. Reconnect power. The yellow program LED will begin to flash at 0.5Hz.
Within 60 seconds, press the Add Button. The green run light will turn on.
Add
4. Supervision Reporting has now been activated for all zones.
5. Return all dip switches back to the OFF position. The yellow program LED will turn off.
To turn off supervision:
1. Disconnect power from the receiver.
2. On Bank 1, set dip switches 1 & 8 to ON.
ON
1
2
3
4
5
6
7 8
OFF
Bank 1
3. Reconnect power. The yellow program LED will begin to flash at 0.5Hz.
Within 60 seconds, press the Delete Button. The green run LED will turn off.
Delete
4. Supervision Reporting has now been de-activated for all zones.
5. Return all dip switches back to the OFF position. The yellow program LED will turn off & the green
run LED will begin to flash at 0.5Hz.
6
Your detectors will automatically transmit a low battery report to your KISS - RX receiver when the
batteries are nearly flat.
The low battery report code is also transmitted after the alarm code, every time a detector is
triggered.
After the individual detector has sent five low battery codes in a row, the KISS-RX will activate
the low battery output once (it will switch low for 1 second) to tell your panel that a detector has a
nearly flat battery. The service person can then determine which sensor has the nearly flat battery
via the memory recall function described below.
Please note: Your KISS-RX identifies a different low battery code for each individual detector.
When you replace the batteries, your receiver will automatically see that the low battery code is
no longer being sent from that detector. The receiver will then reset that zone, ready to activate
the low battery output only if five low battery codes are sent in a row again.
The tamper output will switch low for 1 second whenever the front case is removed and the
tamper switch is released on a Wireless PIR Detector or Wireless Reed Switch.
Your KISS-RX has the ability to indicate individually which zone/s are reporting either a low battery,
supervision, or tamper report to your panel. You will require a Keypad to be connected to your panel.
1. Make sure your alarm is disarmed, & all dipswitches are in the off position.
1
2
3
4
5
6
7
8
2. Select the report you require:
a) For Low Battery press the Add button, or
Add
b) For Supervision press the Delete button, (to see if there are any detectors that have
not transmitted for a period of 24hours) or
Delete
c) For Tamper press the User Code button.
User Code
3. The zones that are sending the respective signal to your receiver will be illuminated on your alarm
panel keypad for only 20 seconds. The memory is then automatically erased, so make sure you
make careful note of the zones, as you will not get a second chance!
7
8