1
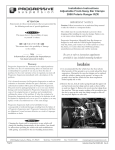
THE Guide
The contents of THE Guide is copyrighted © by JQ Products. No part of THE Guide
may be reproduced or distributed in any medium or media without the express,
written permission of JQ Products.
Words: Joseph Quagraine
Pictures: Mikko Meriluoto
1. Introduction
A car that is set-up well, and to suit the driver, will make driving and racing more
enjoyable, and will lead to better results. How to set a car up, or how to become a
faster driver can’t really be learned by this, or any other guide, it has to be done at
the track. But guides like this one can provide guidance and give ideas as to what to
try and what the expected result could be. One thing to remember, when setting
up a car, is that usually, everything affects everything else, meaning that if you
change one thing, it may affect something else too. Sometimes shortening the rear
upper link may be bad, but if you shorten the front one too, it might work.
Furthermore, the effect of a set-up change can also differ depending on the driver,
and his or her driving style. Depending on how the driver uses the throttle, where
in the corners, or in the bumps, and how much and how aggressively, the preferred
set-up will be different. Different track surfaces and conditions may also affect how
a set-up change is perceived by the driver, sometimes a change may seem
insignificant, and sometimes it might make a big difference. But at the end of the
day, the laws of physics are the same for everyone, and for all cars and tracks, so it
is possible to come up with a guide like this, highlighting what changes can be
made to cars, and what the change will do to the driveability.
Normally the hardest part of testing setups is done by the manufacturer. Check
out all those parts. -Image Tomi Jermalainen
2. Back To Basics
For a car to work well, it is extremely important that it is built and maintained
right. If a car is built wrong, wrong screws or shims in the wrong places, if there are
bent or worn out parts on the car, or if moving parts bind, and don’t move freely, it
doesn’t matter how you set the car up, because it won’t work. So before changing
set ups, make sure to check all the basic stuff, to see that it is right and everything
works as it should, arms move, and the drivetrain spins freely, tyres are glued
properly and the foam in them is in one piece, etc
2.1 Electronics and Linkages
Another important point to consider is the servos used in the car. An RTR is good
for beginners, and can even be raced, but usually not with the stock servos. The
servos need to be fast and strong enough so they respond fast enough to driver
input. Slow weak servos will make a car impossible to drive fast. In my opinion the
absolute minimum requirement for servos is, all metal gears, 10kg, 0.16sec/60deg
at 6V.
One very common problem in nitro cars is badly built throttle/brake linkages. It is
vital, that as the throttle servo returns to neutral, after being on the gas, and that
the throttle linkage return spring has the power to return the engine to idle
immediately without delay. If the spring doesn’t return the engine to idle, it is very
likely that the engine will stop when braking. You test it even without a
transmitter, just pull on the throttle linkage and see if it returns easily when you
let go. It’s good to try it at races, specially if the car is new. So, a quick checklist
for anyone installing radio equipment:
Fill the receiver box with foam padding to protect the receiver, and use the
rubber grommets for the servos, let the servos move a bit.
Set the steering and throttle end points so the servo isn’t trying to force more
throttle or steering than what is possible. Make sure the throttle linkage returns the
engine to idle without delay, at all times when the servo is at neutral. Make sure
the brakes don’t drag when throttle servo is at neutral.
The throttle/brake linkage should be set up simply and precisely. Make sure the
carb returns to idle, and brakes don't drag.
2.2 Clutch
Ok, so the car is built right, the electronics are installed correctly, the engine is
running well (a whole other guide), there is one more critical, and often overlooked
point. The clutch. Usually when an engine that has worked well, starts bogging, it's
because of the clutch. A worn out clutch, will either start slipping, or bogging, and
neither is good. Clutchsprings and clutchshoes are parts that need changing, and
there's nothing you can do to avoid that. Same goes for the clutchbell bearings.
For anyone seriously racing, I suggest you put new clutchbell bearings on for each
race, and preferably also the clutchshoes and springs. The clutchbell lasts longer,
but keep an eye on the grooves that wear into the bell. When it is all grooved up,
it's time to change. I am personally quite picky about my clutch. I put a new clutch
and bearings on for the race, and again a new ones on for the finals.
2.3 Making Changes and Finding THE SetUp
In order to improve your car, and your results you really need to try everything for
yourself. Make a plan. Don't just drive for the sake of driving. Figure out what you
want to do. Try different upper link settings, or different shock pistons, or springs,
or whatever, and focus on what each change does. Make one change at a time, and
write down what changes on the car in a notebook, and after every change take lap
times and mark them down too. Write what the changes did to the handling, what
did you feel? Do this for a couple of days, and then go and do the exact same thing
on another track. Another important thing to remember is, that if you change one
thing, for example the rear link, or rear shocks, and it is worse, it may actually be
better than what you use to have if you also chage the front link or shocks. So one
change might be worse, but 2 changes could be better! So it really is a never ending
challenge, with infinite combinations of set ups to try. One month of testing like
this is endlessly more valuable than just going to the local track to drive, or copying
a set up off the internet.
Make notes. Really, it helps! -Image Tomi Jermalainen
3. Shock Absorbers
The shocks on a 1:8 buggy are together with the tyres, the most important part of
the car set up in my opinion. I base my opinion on the fact that all other set up
issues are possible to drive around by changing your driving, by adapting. Of course
a well set up car will be better, but I think all other set up features are of less
importance, diffs are close, but shocks and tyres, if you got them wrong, it doesn’t
matter what batman cereal you had for breakfast, you won't win! You can’t make
bad tyres fast by driving better, and you can’t make a car land, or go fast in bumps
if the shocks are bad. Someone else will have their car dialled and will blow past
you. So, in order to win races, you really need to understand how your shocks work,
and how to set them up.
Shock absorbers. Simple stuff until you try making them work better than
anyone elses.
3.1 Basic Stuff
The shocks on 1:8 buggies are quite honestly primitive. The shocks we have are prematches and lighters, or pre-cheese slicer. Old technology! Basically they are oil
filled cylinders, with a piston with holes, attached to a shaft, that moves up and
down inside them. As the shaft moves into the body (=cylinder), it takes up more
and more volume inside the body, and pushes oil aside. This is why there is a
rubber bladder in the cap of the shocks. Behind the bladder there is trapped air. As
the shaft moves in, and displaces the oil, the oil compresses the bladder, to
compensate for the reduced free volume in the body, and increases the pressure of
the air. Then as the shaft moves out the bladder is pushed back out.
The suspension, or damping, is tuned by changing the viscosity of the silicon shock
oil, by changing the size, or amount of holes in the piston, by changing the spring,
or by changing the shock position on the arms or shock towers. Normally the
damping has to be tested a lot on many different tracks and under different
conditions in order to find a good set up. And most of the time a “pro” driver does
all the hard work and then his mates just ask him “Dude, what do I put in these!”
Someone has to do THE Testing.
The process I go through to find a good set up that works everywhere for me, goes
as follows:
I start off with something that I assume will work ok. Some sort of basic set up, in
this case for example 1.4mm piston holes, 45wt oil, silver springs, and shocks in std
positions, whatever is the norm. The first thing I do is find the right spring. Next I
test as many different pistons as I can be bothered to test. There is an unlimited
amount of pistons, or rather you can drill an unlimited amount of different pistons,
so it is wise to figure out a system, and decide what you want to achieve, in order
not to get lost. When changing pistons, if the car becomes better, one has to try
and figure out the reason, and then continue heading in the same direction until it
starts getting worse again. You can’t decide beforehand what pistons to try because
you won’t know what works and what direction to head in. After I have selected the
right piston, I fine tune the oil. Throughout the process I always try to run an oil
that will make the car feel the same on the pit table. When I have my spring and
oil, I then try 5wt thicker and thinner oils, and different combinations front and
back, in order to find the best balance. It’s hard to put into words what the right
oil feels like. I would say, feel top drivers’ cars to get an idea. But as for an
explanation, when you move the chassis up and down on the pit table, you should
feel that the oil is slowing down the movement slightly. When you drop the car
from 30cm above the table, it should just land without much movement. Finally I
also try some different shock positions. But one thing to remember is, that shock
positions should be treated as a minor tuning aid. If you did all your testing with
your shocks stood up, if you then lay them all the way down you will have to do it
all over again. Most likely you will end up with a stiffer spring and smaller holes in
the piston
When you find a good set up, you will know it's good when you don’t have to change
it from track to track. No matter what the track is like, the car will be good. The
springs, pistons and shock positions are nearly always going to be the same. The oils
are basically only tuned to suit the temperature. Cold weather will call for thinner
oils, and hot weather for thicker oils, normally just 5wt. Sometimes a thicker oil
can be used on high traction tracks, or a thinner oil for very slippery tracks.
Sometimes the set up can be close, but it’s great on some tracks, and not so good
on others. It can be a case, where the car is great over bumps, specially the small
bumps on the surface, but it bottoms out over the jumps, and flips over if you don’t
land perfectly. Smaller piston holes (by 0.1mm) will help this, however, then you
might face the problem that the car will not go over the bumps smoothly. In a case
like this, the solution could be to just change the piston 0.05mm, but an even
better way is to, if the piston is 6 hole, make just 3 of the holes smaller, or 3
bigger, try both. Then the car will be good in the bumps, and still land well. I will
explain the reason for this later on.
Next I will attempt to explain separately, in more detail about the spring, piston,
oil, and shock positions, how they work, and what changing them does.
3.2 Springs
Springs aren’t really changed very often. A stiffer spring reduces traction, and
makes the car more responsive. The car will also jump better. Softer springs do the
opposite. Short springs feel more progressive, and make the car responsive and
jump well. Putting shorter springs on the front will help the car accelerate straight
when exiting corners on a loose track. After finding a good spring, the piston and oil
are tuned to work with the spring, so just changing the spring to get the car to
handle differently doesn’t usually work very well.
There are an unlimited amount of springs. Nice.
3.3 Pistons
First the very basics of what happens inside the shock and why different pistons
change how the car goes round the track.
The basic idea is that the car always feels the same when feeling it on the pit
table, but then when changing the pistons it somehow magically changes on the
track. The reason is that when moving the shocks slowly on the table small holes
and thin oil, or big holes and thick oil will feel close to the same, but on the track,
when the piston moves fast, there is a big difference. To understand this one has to
understand some basic points of fluid dynamics. Simply put, a fluid flows in two
ways, laminar or turbulent. When the flow is laminar the particles flow parallel to
each other, in the same direction. Think of a river with water flowing calmly down
it. When the flow is turbulent, the particles move randomly which creates eddies,
and the friction between the particles increases. Think that the previous river hits
some rocks and becomes a rapid. Flow in a shock is laminar when speeds are low,
and when the speed increases enough, it becomes turbulent. When the car hits a
bump at speed, the piston will move up in the shock, and oil will pass through the
piston holes. Some will flow past the piston but let’s think of that as constant. If
the piston moves fast enough, the oil flowing through the piston will cause
turbulence, which increases the friction, and it will seem like the shock locks up.
This is called “pack”. With small holes this happens more often, at lower piston
speeds, so the car will bounce a lot in bumps, and with larger holes it will happen
less often, at higher piston speeds, so the damping will absorb more of the bumps,
and not bounce so much. If we think that the same amount of oil passes the piston
in both cases, in the case of larger holes, the speed of the oil will be lower, than
when compared to a piston with small holes. Furthermore, with thin oil (used with
small holes) turbulence occurs earlier, and with thick oil, it occurs later, which
makes the difference more pronounced. This is the basics, and all you need to know
in order to understand how the pistons work in the shocks.
As far as how pistons affect the car’s handling, I will try to explain:
Larger holes gives the car more traction, it goes through bumps smoother, specially
through ones you hit fast, and the small bumps in the surface of the track, the
wheel follows the surface better. The downside is that the car doesn’t jump as
well, and specially doesn’t land as well. When the holes are too big, the car
bottoms out when landing off jumps, and will want to flip over. It will also feel
unresponsive and slow.
Smaller holes reduces traction, it jumps and lands better, but it is generally worse
in bumps. When the holes are too small, the car will feel like it gets unsettled by
even the smallest bumps and it “stutters” over an uneven track surface, even with
thin oil.
Increasing the amount of holes has an interesting effect. If you compare a 2x1.5mm
piston, and a 4x1.4mm, assuming that the 2x1.5mm is good, you would be excused
to think that the 4x1.4mm piston would have too many holes and the car would
bottom out all over the place. However, this is not the case. When increasing the
amount of holes, it’s possible to have more overall hole-area, than with 2 holes,
before the negative points like bottoming out become a problem. This way, with
many holes, it’s possible to set up the suspension to be soft, and plush, so it soaks
up the bumps, yet it won’t bottom out too much on the jumps. Apparently the oil
flow becomes turbulent more violently with more holes in the piston.
By using different size holes, for example 2x1.3 and 2x1.5 on the same piston, a
similar result can be achieved. The car will have traction and be good in bumps,
but will still land well, due to the flow becoming turbulent more aggressively than
with all holes being the same size.
3.4 Shock Positions
Usually the basic set up from the manual is a good starting point. Shock positions
are rarely changed. When a good set up is found that’s pretty much it.
Shock positions are rarely changed a lot, as pistons, springs and oils need to
matched to each position.
When standing the shocks up more, the car is more responsive, jumps better,
doesn’t bottom out as easily, but can feel unstable in bumps. The rear of the car
will slide in a controllable way, as it loses traction smoothly. Larger piston holes
and softer springs are used when shocks are stood up a lot.
Leaning the shocks over, makes the car more stable, it will be easier to drive on
bumpy tracks most of the time. It increases sidebite, but for example the rear end
loses traction suddenly, and not as controllably as with the shocks stood up. You
can’t slide the car as well. If you need to make the car more stable, and easier to
drive, the first thing to do is to move the shock out on the front arm. It reduces
steering and makes the car a lot easier to drive, and less prone to flipping over.
When leaning just the front shocks over, the car is less responsive, but turns more
while cornering, and when accelerating out of the corner. Leaning just the rear
shocks over increases rear traction and reduces overall steering, although
depending on the set up, you may get more steering into the corner.
3.5 Rebound
Rebound is the amount the shaft moves out, after you have pushed it in. It’s
possible to build a shock so it is “dead”. The shaft doesn’t move out at all, or then
full rebound, where as the shaft moves in the damping starts feeling harder, and
the shaft moves back out all the way when released. I usually build my shocks to
where the shaft moves about halfway out, slowly. More rebound will give more
traction, and the car will jump and land a bit better. As for bump handling, some
people feel that more rebound is better for bumps, and some people think a
“dead” shock is best for bumps.
Rebound is a set up parameter which is often overlooked, but actually has a
surprisingly large effect on the handling of a car.
3.6 Last Words
The shocks are definitely something everyone should take a look at. With a great
shock set up a lesser driver can definitely kick a better drivers ass, if he happens to
have a crappy shock set up. People easily overlook how important the shocks are!
With a good set up, the shocks give the car more traction, the wheels spend more
time on the ground, cornerspeed is increased, it jumps and lands better, and you
can drive faster in bumps, and it’s all a lot easier. This is why I’m constantly trying
new things. At the races I always use the same set up, but when I go testing, I try
all kinds of different things. When I find something good, I try it on different tracks,
take laptimes, see if I make less mistakes with it, and only then do I also use it in
races.
One thing to remember is that driving style does affect the shock set up that will
suit you. The way you use the throttle, how much, how aggressively, in what
sections of the corners and bumps all effect the outcome. So just because
someone’s car is great in their hands, doesn’t mean you will like it.
4. Differentials
1:8 buggies have three differentials, front, centre and rear. They can be fine tuned
by filling them with different viscosity silicon oils. They affect the way the car
handles drastically. The diffs affect the way the car turns, handles the bumps on
and off power, and how it accelerates. All cars come with what has become known
as standard diffs, gear diffs with 4 small gears, and 2 larger gears. They are sure to
work well on all tracks. There are a number of special diffs on the market which
are designed to lock, more than the standard diffs. They are normally used to
increase steering.
A basic differential. Gears shims and pins. Pretty simple.
4.1 Building a Differential
Most diffs nowadays are durable, and the oils don’t usually leak out. However it is a
good idea to put grease on the outdrive shaft. It reduces wear as well as helps to
keep the oil in the diff. When filling a diff it’s important to remember 2 things:
1 Do not put too much oil in. The pressure in the diff will increase too much and
the oil will leak out.
2 Fill it in a way that you can always put the same amount of oil in. This way your
set up will be consistent.
One way to fill the diff a suitable amount, is to fill it so that the diff cross-pins are
covered by about 1mm of oil at the centre. It’s a good idea to rotate the outdrive
so trapped air gets out, and if needed, more oil can be added.
Another good way to fill the diff, is to fill the diff a bit more than in the previous
example, and then place the last big gear in the diff, and turn the outdrive a few
times. Then when the oil has settled, simply wipe the excess oil away. This is a
good way to do it so you can repeat the process consistently.
One good way to avoid overfilling, and to be consistent, insert the last gear
and wipe excess oil off.
4.2 Set Up
A good starting point that will work for all cars is, front-centre-rear, 5000-70003000. This is a popular basic set up and if your car is terrible, and you have this diff
set up, you can be sure that it’s not the diffs. It will be decent everywhere.
However, on THE Car, I tend to like to run a thicker diff in the front, to smooth out
the aggressive steering, and a thinner in the middle, to smooth out the acceleration
and punch, so 7000-5000-3000.
Diffs can make you fast or slow. Everyone has their own driving style, and it is good
to try different diff combinations for oneself, to see what feels best, and what is
the fastest combination. Normally thinner oils will make the car easier to drive. On
slippery, bumpy tracks thinner oils are better. On smooth high traction tracks
thicker diffs will be better. Thicker diffs give more acceleration, more
cornerspeed, and help to make the car more stable on a high traction surface. On
special tracks, that are really smooth and high traction, asphalt like, the car will be
a lot more stable and fast in the corners if all diff oils are made thicker. Front and
centre by about 10000 compared to the normal set up, and rear maybe 5000.
Because the track is so smooth you can get away with it.
The front diff mainly affects steering on and off power, and acceleration, the
centre diff affects the way the car handles bumps, and acceleration, and the rear
diff affects rear traction and steering. Next I will try to explain what each diff does
when tuned separately.
4.3 Front Differential
Using thicker oil will make the car turn more on power, out of the corner, and
accelerate faster. The car will turn less into the corner, as off power steering is
reduced. It will feel more stable, and can be easier to drive in bumps. If the car is
twitchy and feels inconsistent on a rough track, a good idea is to try a thicker front
diff. A thinner front oil will have the opposite effect, less on power steering, more
off power steering, less stability. Usually the oils used in the front diff range from
3000-15000. 5000-7000 is a safe bet on all tracks, and that’s what I use most of the
time when I’m using a standard front diff. With THE Car it is also possible to use
thicker oils as it has so much offpower steering, so 10-15k will work on most tracks.
4.4 Centre Differential
Using thicker oil in the centre diff makes the car accelerate a lot faster, but it can
be harder to drive in bumps and on slippery tracks. It gets a bit confusing though,
because if the track is soft, and it gets really bumpy, a thicker centre diff can
actually make the car skip over the tops of the bumps, and thus it will actually be
better and faster. But most of the time, thinner centre diffs are used for blown out
tracks. A thick centre diff oil will also make it easier to get on power steering, as
the rear of the car can be made to slide out when on power. The centre diff usually
has the thickest oil of the three diffs, or the same as the front. The oils used
normally range from 3000-20000. A safe bet is 5000-7000. I normally never go below
this, because I feel that I loose too much acceleration, specially the first ”snap”
when I get on the gas. And I don’t either use thicker oils than 10000 because I’m so
aggressive on the throttle, I would fly off the track. Normally, if a thicker centre
diff oil is used, the front diff also needs to have thicker oil, so the car still remains
stable under acceleration.
4.5 Rear Differential
The rear diff set up is the one that varies the most between different drivers. This
is because the rear diff has a big effect on rear traction, and each driver’s driving
style determines what oil should be used. It is vital to get the right rear diff oil that
suits your driving style, otherwise you will only be fighting your car. Some years ago
it seemed like everyone always used the thinnest possible rear diff oils. I think it
was because people were used to electric offroad. A thin rear diff oil will make the
car have a lot of steering into corners, the car is easy to control when accelerating,
even if it’s bumpy. So it seems like the way to go right? Yes and no. One drawback
is that the rear can lose its traction suddenly. It will have traction, and then lose it
all at once when entering a corner. A thin rear diff suits drivers that brake before a
corner, keep a tight line around it, then accelerate hard after the corner, towards
the next obstacle. This is not how I drive. I like to control the car a lot with the
throttle. A thicker rear diff oil will make this possible, it will be possible to steer
the car with the throttle. You can enter the corner aggressively because the rear is
very stable, and won’t suddenly lose its traction, it will start sliding in a
controllable way. After braking, it is possible to drift on throttle, like a rally car
through the corner and onto the next straight. I’m on the gas before the corner,
and halfway in the corner, or sometimes even before halfway I’m already on the
gas hard.
The thick oil makes the rear tires pull more evenly. On a slippery or bumpy track
the car can be too hard to drive. The rear diff oil is normally the thinnest of the
three diffs, or the same as the others. The oils used range from 1000-7000. 3000 is
a safe bet, no matter what your driving style, or what the track conditions. I nearly
always use 4000-5000.
4.6 Last Words
Diffs are a major tuning aid. Anyone that wants to become a better driver or just
wants to understand their car better should start trying different set ups and
writing down each change and its effect in a notebook. As for the special diffs, they
are expensive, and good, but definitely not something you HAVE to have to do well.
You can become a World Champion by running normal diffs, 5000-7000-3000 or
something similar, there’s no doubt about that!
5. Geometry
Most cars have numerous locations for upper links/arms, some have plastic inserts
for the arms so they can be positioned differently, wheel angles can be changed,
rideheight, downtravel adjusted etc. There are a whole host of tuning possibilities
that can be done quickly and simply, without the need for disassembly, or the
changing of oils. These set-up changes, are minor changes on their own (within
reason, a couple of holes or a few degrees), but when a number of set-up
parameters are changed together, they can have a profound impact on the handling
of the car. To find what combination suits you best, the only way to move forward
is to try everything yourself, and write down the results. Then after many test
sessions you will figure out which things need to always stay the same, and which
you like to change in certain situations, in order to fine tune the car.
A lot going on there. Many things to adjust, many things to think about.
5.1 Toe
The front wheels’ toe-angle is normally set to 0, so the wheels are parallell, or a
few degrees toe-out. Toe-in on the front is never used. Personally I feel that the
front toe-angle makes a very small difference in the handling of the car. More toe
out should actually make the car more stable, contrary to what most people think.
But I think the difference is small unless you go crazy with it and ad many degrees.
Toe-in on the rear however, makes a big difference to the cars handling. Normally
people run between 2-4 degrees toe-in on the rear. More toe-in increases rear
traction, and makes the car more stable and easy to drive. It reduces overall
steering, although some people claim it increases initial steering into the corner.
However I always feel more rear-toe = less steering. More rear toe-in can also make
the car want to flip over more easily, specially on high traction bumpy tracks. The
right amount of toe-in to run, depends very much on your personal driving style. I
like to run the least amount of toe-in I can get away with, which usually means 1.52.5 degrees on most cars, and 3 on THE Car.
5.2 Camber
Camber angles are always negative, in an effort to get the smoothest traction
when cornering. The more the wheels are leaned over, the less sidebite the tyres
have, and this means it is less prone to flipping over. The reason for not running
very large amounts of camber is that forward traction is reduced as camber is
added. Camber isn’t really something people change very often, as it doesn’t have
a big impact on the handling. I don’t even measure the degrees I run, I go by feel,
and then measure the upper link, to make sure it’s the same on both sides, and
then I always set my camber by the measurement. In degrees camber normally
varies between 2-6 degrees. Front and rear the same, or rear slightly more.
It is a good idea to measure the upper links to make sure they are the same on
both sides. I dont even measure the angle.
5.3 Caster
Caster is set by changing the casterblock on a c-hub car, or moving the upper arm
back on a pillow-ball front end car. Caster changes how much the front is raised up
when the wheels are turned, and also the size of the contact patch between the
tyre and the track, and how much the tyres lean over when turned. This changes
the forces that act on the tyre as the wheels turn, and the traction they can
provide. But what is important is how caster effects handling.
Overall Caster angle is 24 degrees in this picture. This includes Kickup of 8
degrees and the angle of the hub, 16 degrees.
Some set up guides state the effect of caster as the opposite of what can be found
if one tests it on a 1:8th scale buggy. This is a good example of how vehicle
dynamics theory that can be found in books and the reality at the track differs. I
think that theory is good in order to get an idea of how stuff works, and in order to
get ideas for what to try. But it doesn’t always get the effect on the handling right,
as in 1:8 buggies, compared to real cars, the wheels are turned a lot more, and the
size of the obstacles, and the speed carried, and the weight – power ratios are so
different. Anyway that’s my theory.
Here is how I think Caster effects handling:
A smaller amount of caster will make the car twitchy, and more precise and hard to
drive. The steering is very responsive and the car turns a lot into the corner, but
not as much in the corner and when accelerating out of it. Increasing caster will
calm the car down, it won’t turn as much into corners, but will have more steering
in the corner, and when accelerating out. The car will specially have more, and
more consistent smoother steering in long sweeping corners, that are driven onpower. Large amounts of caster also make the car more stable in bumps. Large
amounts of caster require the driver to be on-power a lot, in order to get the most
steering out of the car.
Generally less caster is best for small technical tracks, and for low traction, and
larger amounts is good for more wide open, flowing tracks, and high traction. But in
reality caster isn’t really changed much by the top drivers. I don’t change it
because I find what I feel works best, and then I stick to it, because I am
comfortable with it. Whatever the situation is, I have a feel for how the car will
turn, and it won’t surprise me.
5.4 Kick Up and Anti Squat
Kick-up for the front-end, and anti-squat at the rear. The front of the chassis is
bent up, normally about 8 degrees. On most cars the front arms can also be set, so
the angle they are at, when viewed from the side, is the same, less or more than
the chassis 8 degrees of kick-up.
Kickup angle, hingepin compared to horisontal.
More kick-up on the front makes the car go better through bumps, and makes it
jump better, specially on jumps with rough uneven faces. More kick-up also reduces
steering, specially steering response, as it calms the car down, and makes it
smoother. The car will transfer more weight, as the front will rise when
accelerating and lower under braking. This can have the effect of making it easier
to brake around hairpins as the weight is transferred to the front, and the rear
slides round.
Less kick-up makes the car more responsive, and better for smooth and for high
traction tracks. The car will be more stable on high traction tracks due to less
weight transfer.
The rear arms, are angled in a similar way to the front arms, but alot less, normally
between 2-4 degrees, and this is called antisquat. Sometimes some drivers like to
use very little 0-1 degrees, and some like a lot, up to 6 degrees, but 2-4 is normal.
Different brand cars react slightly differently to the amount of anti-squat, so if 3
degrees feels good with one car, it may not be so great with another.
Hingepin compared to horisontal.
Anti-squat does exactly what the term implies, it reduces the amount, the rear of
the car squats under acceleration, and rises under braking. Anti-squat only affects
the handling of the car when accelerating or braking. When the car is just coasting
it wont significantly change the handling.
More anti-squat is good for high traction tracks, and it increases on-power steering,
and also steering into corners, specially directly following jumps. Drivers with
aggressive driving styles tend to prefer a lot of anti-squat also on bumpy tracks,
while smooth drivers may prefer less. Less anti-squat will be smoother when
accelerating in bumps, if your driving style is smooth enough. Less anti-squat also
increases traction. Personally I like to run a lot of anti-squat, 3 – 3.5 degrees on all
tracks.
5.5 Ackermann Angle
The Ackermann angle is simply put the difference between the turning angle of the
inside and outside wheels when the wheels are turned. When a car drives in a
circle, the inner wheel will be following a smaller circle than the outer, so in order
for there to be less slip, the inner wheel should turn more to compensate.
Ackermann sounds simple at first, but in-fact, the Ackermann angle, and the
steering geometry as a whole is hard to figure out as it is affected by the
suspensions movement, caster and camber, and wheels aren’t always either
straight or at full lock, there is an infinite amount of points between those positions
as well.
There are currently two main types of steering systems in use in 1:8th scale buggies.
The old-school type, which is found on most, for example, Kyosho, Xray and Mugen,
where two steering bellcranks are connected by a plate, and the steering links are
attached to this plate. With this system the steering will always feel non-linear,
meaning that at some point in the corner, and at some speed, the car will turn
more than at others. By moving the link back on the rack, Ackermann is reduced,
and by moving it forward, it is increased. These changes decide where the most
steering occurs. With the link towards the back, the steering is more responsive,
and the car will turn more into corners. With the link moved forward, the car will
steer more in the corner and out of it, and it will be less responsive, with less
steering into the corner. The more the link is moved forward, the later in the
corner the most steering will occur.
The second steering system type is the one found on for example the Losi and THE
Car. The steering bellcranks are still connected by a plate, but the steering links
are connected directly to the bellcranks. With this system the steering is more
linear, and it doesn’t seem to have a point where it steers most. Ackermann is
changed by changing the length of the connecting plate, and there are multiple
sets of holes in the bellcranks, so they stay parallel to each other regardless of
which plate is used. With this steering system it seems like the different plates
change the overall amount of steering, instead of the point at which the most
steering occurs. I feel this is a better system as the steering is linear, and overall
steering can be adjusted. The short plate has the most aggressive steering, but
interestingly has most Ackermann, which seems like the opposite the effect of more
Ackermann with the other steering system. This is best for tight tracks. The long
plate has the less Ackermann, and has less overall steering, and makes the car
smoother and better on more open flowing tracks.
5.6 Upper Links
The upper links are really valuable tuning aids. Most cars respond well to changes
to the upper links. I think it is important to remember that the upper links,
eventhough they are at different ends of the car, actually need to be set up so they
work together. If the links, front vs. back, are set up very differently, long/short,
small angle/large angle, chances are that the cars front and rear ends will roll, and
act so differently, that the car feels like it is fighting itself. I try to always keep the
links similar, as this makes the car work in the most controllable fashion.
In general, longer links make the car more calm, and gives it more traction, and
actually even improves forward bite. Having the links as far in on the shock towers
as possible, makes for the most stable car. Raising the link on the tower, has a
similar effect of lengthening it, in that it gives more traction.
Short links make a car more responsive, and make it square up better and faster
when exiting a corner. It can feel like it has more traction, and ultimately it does,
but it is more uneven. The car will have a lot of traction up to a point, and then it
will suddenly loose it, spin out or similar, so it won't be as easy to drive. Lowering
the link on the tower will have a similar effect, as a shorter link, and will make the
car be more responsive, and have less traction.
5.7 Front Upper Link
The front upper link is a good tuning option on most cars. I will discuss a front
upper link, not arm, but all of this applies to the cars with front upper arms also.
Changing the front upper link changes how the car turns, responds to driver input,
and how much traction the front end has.
In general, a long front link will make the car more calm, it will have more
traction. A shorter link will make it react and change direction faster.
Lowering the front link on the tower will increase steering into the corner, but can
also make the car flip over easier, specially while cornering. Raising the front link
on the tower will make the car more stable, less steering into the corner. Going too
high, may make it hook suddenly as the car slows down as the car is negotiating the
corner.
Lengthening and shortening the link on the tower, or on the hub, has a similar
effect. This is a bit of a hard nut to crack, but I feel, that the further in the link is
on the tower, the more stable and consistent the car is. The further out the link is
on the tower, the more non-linear, and inconsisten the car is, even if the length
and angle of the link is kept the same. By nonlinear I mean, that it acts different at
different speeds, or if traction changes, pushes, then turns, or similar. It will also
roll less and have less traction. On the hub, it seems different, on the hub, it seems
like it stays consistent, and the effect is more evident. A long link on the tower or
hub is more stable, gives more traction, more steering mid to exit of the corner,
and a short link is more responsive and gives more steering into the corner, and less
overall traction.
5.8 Rear Upper Link
The rear link I find, is more critical to get right than the front. When trying
different rear link locations, and you get it spot on, it feels like the car does
everything better. The rear link will mainly determine the amount of traction the
car has, and how it slides when cornering.
Lowering the link on the tower, will give the car more steering, as the rear will
start sliding more in corners as you turn. It will also square up better when
accelerating out of corners. Raising the link on the tower will add traction and
reduce steering.
Lowering the complete link gives more traction, but the car seems to maintain
more steering, than when lengthening the link.
In general, a long rear link makes the car more stable, have less steering, and be
more predictable and easy to drive. A short link gives more steering, and initially
the car can feel like it has more traction, but it will lose traction suddenly, instead
of a predictable way.
Again, the further in the link is on the tower, the more stable and consistent the
car feels, the further out it is, the more non-liner and and inconsistent it feels. The
car will roll less and have less overall traction.
A longer link on the hub or tower will give more traction, and less steering, the car
will be more stable. A shorter link will give more steering, specially into and mid
corner, and the car will square up and accelerate straight better.
6. Rideheight
Rideheight is another set up parameter which is often overlooked. Normally 1:8th
buggies are set to have a rideheight between 25-30mm. Generally speaking, a lower
rideheight will have less traction, and will be less prone to flipping over, and a
higher rideheight will have more traction, but the car may flip over easier. A low
car is better on smooth, fast tracks, and a higher one better on tracks with many
jumps, or a bumpy track.
The difference between the front and rear rideheight is also something to consider.
Having a lower front, and higher rear, can give the car more steering, and this is
how I usually run my car. Also, the car will run more level, as normally the front is
raised abit due to being on power, or from having been on power.
A higher front and lower rear will make the car even more stable, as it smooths out
the steering. It may also make the car handle bumps and jumps better and more
consistently.
The Front rideheight is measured right behind where the chassis kickup ends.
The rear rideheight is measured from the very rear of the car.
7. Downtravel
Downtravel is in my opinion a more critical set up parameter than rideheight. It
makes a larger difference to the handling I think. By downtravel I mean the
difference between ridegheight, and the maximum height the car can be lifted,
with the tyres still touching the ground. One important thing to talk about is how
downtravel is measured. Many drivers like to measure the shock length to state
downtravel. This is however a misleading way to do it. It is good if you only want to
keep the information for yourself, but to other people the information doesn't
mean anything. This is because to figure out the actual downtravel, from shock
length, one needs to know which shock positions, and rear hub positions were used,
and often this is not possible. Normally only one set up parameter is discussed at a
time. So I never measure the shock length, I always measure as I would measure
rideheight, but measure up to the point where the wheels just touch the ground.
This way it can be compared to other cars whatever their set up is, and even other
brands. I like to measure without wheels as it is more precise, and when I want to
compare, I measure with wheels. Of course to compare, one has to use the same
tyres, as tyre diameters vary.
The more downtravel, the higher you can lift the car. On the track, more
downtravel basically means, that the tyres can stay on the ground longer, when
going over a bump the wheel can fall into the hole further, and when landing off a
jump the wheels will hit sooner.
More downtravel will make the car jump and land better, give more traction, and
most of the time it will go better in bumps. Too much downtravel can make the car
roll too much, and make it respond slowly, which could make it spin out and be
hard to control. This can also depend on the car. For example Mugens are known
for being good with a lot of downtravel, and Losi is bad with a lot of downtravel.
I like to measure downtravel like this.Shock length doesn't actually tell you the
amount of downtravel, unless you use the exact same shock and hub positions.
When measuring downtravel with wheels on, the measurement can be
compared to the downtravel of cars with a different set up, or other brands
also.
Less downtravel will make the car jump worse, and most of the time handle bumps
worse, but the car will be more stable at high speed, and specially on high traction.
It will be more respnosive also, and less prone to flipping over.
As for bump handling, it gets slightly complicated, as depending on the track, and
driving style, the amount of downtravel for the best handling, can vary, a lot of
downtravel may be the best, but it may also make the car go into all the bumps,
and thus slow it down, and make it more unstable. Less downtravel may be worse,
or it may actually help keep the car on top of the bumps, and actually make it
faster and more stable. There really is no magic set up for downtravel as far as
bumps are concerned, each racer really needs to test this themselves. In general,
less downtravel for smooth high grip tracks, and more for loose, or bumpy tracks,
or tracks with many jumps. Downtravel, along with rideheight has a tendency to
change, so it is good to check it before each run.
8. Driving
N/A, We need to drive more first.
9. Racing
N/A, We need to race more first.
10. Quick Reference - What to do if...
This guide was made just to give you ideas as to what to try in the following
scenarios. To fully understand this guide, it is worthwhile reading the complete
guide. If you just follow this sections advice, you may not achieve the results you
are looking for, as some of the set up changes only have the desired result in
certain conditions, or only to a certain extent. For example softer front shock
springs might not give more steering, if you are already running soft enough springs.
Everything is a matter of balance, and this chapter is just a source for ideas, of
what you could try, if you are stuck, and cant think what to do.
What to do, if you want your car to have:
More Overall Steering:
Lower shock mounting in on arm.
Thinner oil in front shocks.
Softer front springs
Stiffer rear springs
Short rear upper link
Longer front upper link
Thinner or no front swaybar
Less rear toe in
Short Ackermann plate
More Steering Into the Corner:
Thinner oil in front diff
Less caster
Stand up front shocks on tower
Front upper link down on tower
Short ackermann plate
Steering link back on Ackermann plate
Thinner rear swaybar
Lean rear shocks down on tower
More Steering Mid-to-Exit of the Corner and On-Power:
Thicker oil in Front diff
More caster
Lean front shocks down on tower
Thicker rear swaybar
Stand up rear shocks on tower
Less Overall Steering:
Front shock out on arm
Thicker front shock oil
Stiffer front spring
Thicker oil in front diff
Thicker front swaybar
More rear toe-in
Long rear ipper link
Raise front upper link on tower
Better Jumping Ability:
Stand up shocks
Stiffer shock springs
Thicker shock oil
Smaller piston holes
More anti-sqat
More downtravel (specially front)
More kickup
More Rear Traction:
Long rear upper link
Raise upper link on tower compared to hub
Lower complete lower link
More rear toe-in
Thinner diff oils
Lean rear shocks over on tower
Larger holes, or more holes in piston
Better Bump Handling:
Adjust shock oil (usually thinner, check shock absorbers advice)
Lean shocks over on tower
thinner diffs
More rideheight
More downtravel
Cut tyres inside and outside
More acceleration and forward bite:
Thicker oil in diffs
Long upper links
Smaller clutchbell, larger main gear
Thicker clutchsprings
More stability in long sweeping corners:
Stiffer front springs
Stiffer swaybars
Thicker oils in diffs
What to do first on a high traction track:
Front shock out on arm
Stiffer swaybars
Less rideheight
Smaller piston holes or thicker shockoil
What to do first on a low traction track:
Lean shocks over
Larger piston holes, or thinner oil
Long upper links
More rideheight