1
GB
OPERATING MANUAL
ELECTRONIC WHEELCHAIR,
MODEL 9.506
AVANTAGE 2 / COMPACT 905
We move people.
Contents
Foreword ....................................................................................................... 7
Acceptance .................................................................................................... 8
Adjustment ................................................................................................... 8
Specifications................................................................................................ 8
Use ................................................................................................................. 8
Overview ....................................................................................................... 9
Model: 9.506 .........................................................................................................9
Driving ......................................................................................................... 10
Functional checks ...............................................................................................10
Brakes .......................................................................................................... 11
Service brake .......................................................................................................11
Braking the wheelchair ................................................................................11
Parking brake .....................................................................................................11
Selection lever ....................................................................................................12
Locking the brake .........................................................................................12
Releasing the brake ......................................................................................12
Drive-/push mode ...............................................................................................13
Selecting the push mode ..............................................................................13
Selecting the motor mode ...........................................................................13
Selecting the operation ............................................................................. 14
Pre-operation checks ..........................................................................................16
Charging procedure ......................................................................................17
Positioning the operating module....................................................................18
Function description .....................................................................................18
Horizontal adjustment..................................................................................18
Vertical adjustment .......................................................................................18
Remove the operating module....................................................................18
Fitting of the operating module..................................................................18
Turning the operating module to the side .................................................19
Arm supports .............................................................................................. 20
Adjusting the height of the arm supports ..................................................20
2
Remove the arm support..............................................................................21
Height stopper (Memory effect) ..................................................................21
Adapting the arm cushion to the seat depth .............................................21
Back support ............................................................................................... 22
Standard back support .................................................................................22
Standard back support cover .......................................................................22
Adjusting the back support height .............................................................23
Adjustable back .............................................................................................24
Adjusting the angle of the back support ....................................................25
ERGOpor-back support element ..................................................................27
Seat .............................................................................................................. 28
Adjusting the seat depth ..............................................................................28
ERGOpor seat element .................................................................................29
Seat angle ......................................................................................................30
Mechanically adjusting the seat angle ........................................................31
Electrically adjusting the seat angle ............................................................32
Adjusting the seat height .............................................................................33
Adjustment of seat width ............................................................................34
Adjusting the entry width ............................................................................34
Suspension of the chassis..............................................................................35
Leg supports ............................................................................................... 36
Calf strap ........................................................................................................36
Folding up the footplates ............................................................................37
Turning the leg supports to the side ..........................................................37
Remove the leg supports ..............................................................................38
Attaching the leg supports ..........................................................................38
Adjusting the height of the footplate ........................................................39
Angle adjustable footplates.........................................................................39
Continuous leg support .....................................................................................40
Folding up the foot board ...........................................................................40
Folding down the foot board ......................................................................40
Height adjustment of the footboard ..........................................................40
Angle adjustment of the footboard............................................................41
Depth adjustment of the footboard ...........................................................42
Height-adjustable leg supports .........................................................................43
Removing the height adjustable leg supports ...........................................43
3
Attaching the height adjustable leg supports............................................43
Adjusting the height of the footplate ........................................................43
Adjusting the height of the leg supports ...................................................44
Adjusting the depth of the calf pads ..........................................................45
Adjusting the height of the calf pads .........................................................45
Electrically height-adjustable leg support ........................................................46
Height adjustment ........................................................................................46
Adjusting the height of the footplate ........................................................46
Adjusting the depth of the calf pads ..........................................................46
Removing the electrically height adjustable leg supports ........................47
Attaching the electrically height adjustable leg supports.........................47
Stump support ....................................................................................................48
Removal .........................................................................................................48
Hanging-in .....................................................................................................48
Height adjustment ........................................................................................48
Angle adjustment .........................................................................................48
Repositioning the leg stump support..........................................................49
Repositioning the leg stump support..........................................................49
Repositioning the leg stump cushion ..........................................................49
Support wheels .......................................................................................... 50
Lap belt........................................................................................................ 51
Strapping on the lap belt with lock ............................................................52
Putting on the lap seatbelt with velcro fastener .......................................52
Adjustment of belt length ...........................................................................52
Torso supports ............................................................................................ 53
Adjusting the torso supports .......................................................................53
Head support .............................................................................................. 54
Adjustment of the head support .................................................................54
Attendant control with priority switch ................................................... 55
Positioning the controller.............................................................................55
Lighting ....................................................................................................... 56
Rear-view mirror......................................................................................... 56
Removing the rear-view mirror ...................................................................56
4
Attaching the rear-view mirror....................................................................56
Adjusting the rear-view mirror ....................................................................56
Specialities of the Junior version ............................................................. 57
Seat depth ...........................................................................................................57
Width adjustment of the leg support receptacles .....................................58
Continuous leg support .....................................................................................59
Folding up the foot board ...........................................................................59
Folding down the foot board ......................................................................59
Height-/ and angle adjustment of the footboard ......................................59
Depth adjustment of the footboard ...........................................................60
Adjusting the length of the leg supports ...................................................61
Arm supports ......................................................................................................62
Adjusting the height of the arm supports ..................................................62
Remove the arm support..............................................................................63
Inserting the arm support ............................................................................63
Clothes guard ................................................................................................63
Adjustment of seat width ............................................................................63
Loading and transportation ...................................................................... 64
Transport in vehicles...........................................................................................64
Transport security ...............................................................................................64
Passenger transportation acc. to ISO 7176/19 ..................................................65
Using the wheelchair as a passenger seat ..................................................65
Safety information ........................................................................................65
Product liability instructions.........................................................................65
Securing the wheelchair ...............................................................................66
Securing the user in the wheelchair ............................................................67
Service ......................................................................................................... 68
Maintenance .......................................................................................................68
Inspection ............................................................................................................68
Maintenance instructions .............................................................................69
List of annual maintenance work ................................................................71
Fault correction .............................................................................................72
Battery charger ...................................................................................................73
Wheel change .....................................................................................................74
5
Disassembly of the drive wheels ..................................................................74
Assembly of the drive wheels ......................................................................74
Disassembly of the steering wheels.............................................................75
Assembly of the steering wheels .................................................................75
Changing the tyres........................................................................................75
Fuses ....................................................................................................................76
Replacing the fuses .......................................................................................76
Lighting ...............................................................................................................77
Adjusting the headlights ..............................................................................77
Headlights......................................................................................................78
Front indicator...............................................................................................79
Rear indicator ................................................................................................80
Back light .......................................................................................................81
Information for the dealer ................................................................................82
Programming the driving behaviour...........................................................82
Driving parameter.........................................................................................83
Standard programming ................................................................................83
Standard settings ..........................................................................................83
Technical data ............................................................................................. 84
Kilometric performance .....................................................................................84
Hill climbing ability .......................................................................................84
Fuses ....................................................................................................................85
Lighting ...............................................................................................................85
Tools.....................................................................................................................86
Tightening torque for screwed connections ....................................................86
Model 9.506 / 9.506 -603....................................................................................87
Meaning of the labels on the wheelchair ........................................................91
Inspection certificate ..........................................................................................92
Guarantee ................................................................................................... 94
6
FOREWORD
We thank you for the confidence you
have placed in our company by choosing an electric wheelchair from this
series.
This manual is to help you get accustomed to the handling of the Electronic wheelchair as well as to prevent
accidents.
☞ Note:
Please note that the illustrated
equipment variants can deviate
from your model.
The electric wheelchair can be adapted to your individual needs by way of
the equipment variants and the accessories.
Like any other vehicle, an electric
wheelchair is a technical aid. It is subject to explanations, requires regular
care and can cause danger when used
improperly. The correct handling must
therefore be learned.
– Therefore chapters with options
are also listed that might not be
applicable to your vehicle.
!
Attention:
Read and observe the following
documentation belonging to the
electronic wheelchair before first
use:
– this operating manual,
– the operating manual < operating
module >.
– the safety and general handling instructions < Electronic vehicles >.
☞ Note:
Children should read the documentation belonging to the electronic
wheelchair together with their
parents respectively a supervisor or
attendant before first use.
7
ACCEPTANCE
SPECIFICATIONS
All products are checked for faults
in the factory and packed in special
boxes.
The electronic wheelchair is an environment-friendly electric vehicle. It
was developed to extend the mobility
of persons with health-related or agerelated restrictions.
☞ Note:
However, we request that you
check the vehicle for possible
transport damage immediately on
receipt – preferably in the presence
of the carrier.
☞ Note:
The packaging of the Electronic
wheelchair should be stored for a
further transport that might become necessary.
ADJUSTMENT
The specialist workshop will hand out
the electronic wheelchair to you under consideration of all relevant safety
instructions, ready for operation and
adjusted to your needs.
☞ Note:
The electrical adjustments are to
be set for drive mode so that a
safe operation of the vehicle is ensured.
☞ The tools required for adjustments
and maintenance is listed under
chapter < Technical Data >.
8
☞ The model has been assigned the
'Use Class B' as per the EN12184
standard.
USE
The electronic wheelchair, with attached leg supports and arm supports,
serves exclusively for the conveyance
of one sitting person. Other pulling or
transporting uses do not comply with
its intended purpose.
This model is an electric wheelchair
especially for indoor and outdoor use
on firm, level surfaces.
OVERVIEW
Model: 9.506
The overview shows the most important components and operating devices of
the wheelchair.
1
2
Pos. Description
1
2
3
4
5
6
7
8
9
10
11
12
Back support
Arm support
Seat cushion (option)
Leg support
Calf strap
Footrest
Selection lever drive-/push mode
Operating module
Steering wheel
Drive wheel
Support castor
Luggage rack with transport
safety
13 Push bar
3
4
7
6
5
8
13
9
Drive mode
Push mode
12
11
10
9
DRIVING
Optimising the driving behaviour of
the electronic wheelchair with the
personal circumstances is to be co-ordinated by our service technician and
your specialist dealer or therapist.
The adaptability offers sufficient driving comfort as well as a high operating safety.
You define the speed and direction
yourself with the joystick movements
(driving and steering lever) while driving as well as the pre-adjusted maximum final speed of your electronic
wheelchair.
10
Functional checks
The functions and safety of the electric wheelchair must be checked before the start of each journey.
☞ For this observe chapter < Inspections before starting to drive > in
the Operating manual of the Operating module.
BRAKES
Service brake
The motors work electrically as operating brake and carefully brake the
electronic wheelchair down without
jerks to stillstand.
Braking the wheelchair
For allotted braking of the wheelchair
slowly guide the joystick back to the
centre position (zero-setting).
☞ The wheelchair stops in shortest
distance after releasing the joysticks.
Parking brake
The parking brakes only work when
the selection lever is in the drive
mode position. They disengage automatically when the wheelchair starts
off. They are disengaged manually by
moving the selection lever to the push
mode position.
☞ Therefore observe chapter < Drive/
push mode >.
11
Selection lever
Locking the brake
2
Swivel the selection lever forward as
far as possible (1).
!
Attention:
It is impossible to push the electric
wheelchair when in drive mode.
• The brake performance reduces
1
with
the brake pads are worn.
If the electric wheelchair demonstrates
an uneven or impaired braking effect,
take it immediately to your specialist
workshop for repair.
Releasing the brake
Activate the locking sleeve (2) on the
selection lever and swivel the selection lever back as far as possible (3).
!
Attention:
Only transfer to and from the electric wheelchair when the wheelchair is switched off and the selection lever has been placed into the
"drive" position!
• Inadvertently knocking the joystick
will set the electric wheelchair in
motion without control! – Danger
of accidents!
12
3
Drive-/push mode
1
The lever (1) for switching the drive
motors between the drive mode and
push mode is located on the right side
of the wheelchair.
!
Attention:
Push the wheelchair only for manoeuvring or in emergency cases
but never on gradients.
2
The electric magnetic brakes are
switched off in the push mode. A
braking of the wheelchair is then
only possible by switching to the
drive mode. Therefore do not
switch to the push mode on gradients.
Selecting the push mode
1. Switch off the operating module
because the pushing will otherwise
be made difficult by the electric
system.
3
2. Pull the locking sleeve (2) up and
then push the selection lever (1)
the rear (3).
☞ The wheelchair can now be
pushed.
Selecting the motor mode
1. Push the selection lever to the front
(1) until it audibly latches.
2. Switching the operating module
on. The vehicle is now ready for
driving again.
13
SELECTING THE OPERATION
In order to obtain operational readiness of the electronic wheelchair the
following directions are to be carried
out in the indicated order.
☞ Note:
1
Charge the drive batteries via the
operating module before the first
journey.
1. Shift to drive mode
Move the drive motors to the drive
mode position. Push the selection
lever to the front (1) until it audibly
latches.
2. Check the tight seat of the battery fuse
Blade-type fuse:
The blade fuse (2) for the battery current has to sit tightly in the fuse holder.
14
2
3. Checking the position of the
operating module
The operating module should be positioned in such a way that you can
comfortably and safely steer the electric wheelchair.
3
Horizontal adjustment:
After loosening the clamping screw
(3) the operating module can be adjusted horizontally.
!
Attention:
Tighten the
again.
adjusting
screws
4
Vertical adjustment:
☞ Therefore observe chapter < Positioning the operating module >.
4. Switching the operating module on
Press the ON/OFF-key on the key field
of the control panel.
☞ Note:
Only actuate the joystick (4) after
the self-test of the electronics has
been completed!
☞ Key-lock function:
☞ The key-lock function enables you
to secure the wheelchair against
unauthorised use.
☞ Observe user manual < Operating
module >, chapter < Key function
>.
15
Pre-operation checks
Before starting to drive, the following
should be checked:
☞ the battery charge level,
☞ the pre-selected top speed setting.
– Therefore observe operation manual < Operating module >.
☞ Note:
– Only transfer to and from the electric wheelchair when the wheelchair is switched off and the brake
release lever has been placed into
the forward position!
Inadvertently knocking the joystick
will set the electric wheelchair in
motion without control! – Danger
of accidents!
16
Charging procedure
The charging process for sealed drive
batteries takes longer than that for
open batteries with liquid electrolyte
due to physical reasons.
1
1. Switch the operating module off.
The selection lever should be in the
drive mode position.
2. Insert the battery charger plug into
the operating module (1).
!
Attention:
Do not insert any objects other
than the battery charger plug into
the battery charging socket. – Danger of short circuit!
2
3. Switch on the battery charger, respectively, plug the mains plug of
the battery charger into a convenient mains socket. The battery is
now charging.
The charging process only runs with
an intact battery fuse (2)!
A full charging of the drive batteries
takes approximately 8 hours.
4. Disconnect the battery charger
from the mains socket at the end
of the charging process and then
pull the charging plug out of the
operating module.
17
Positioning the operating
module
Function description
You will find a detailed description of
the keys and symbols in the operating
manual for < Operating module >.
The position of the operating module
can be adjusted to suit the individual
size of the user. The control unit can
also be detached for transportation or
storage and can be laid on the seat or
stored separately.
!
Attention:
Switch off the operating module
before adjusting/removing it.
1
2
Remove the operating module
To remove the control unit, slacken
the clamping screw (1). Pull the operating module to the front.
☞ Carefully route the cable when doing this.
Horizontal adjustment
Fitting of the operating module
Slacken the clamping screw for depth
adjustment (1). Move the operating
module into the desired position. In
doing so carefully guide the cable and
retighten the clamping screw securely.
Insert the operating module into its
clamping device. Tighten the clamping screw (1).
Vertical adjustment
With the optional height adjustable
operating module adapter the operating module can be adjusted in
height.
Slacken the clamping lever (2) whilst
holding the control unit, move the operating module into the desired position and then retighten the clamping
lever.
18
☞ Carefully route the cable when doing this.
Turning the operating module to
the side
With the optional swivel away operating module adapter (1) the operating
module can be swivelled back to the
side (2) so that it is located parallel to
the arm support. This makes it possible, for example:
– to drive closer to a table,
1
– Remove the operating module
more easily.
For regular drive mode the operating
module can be swivelled back toward
the front (1) until it engages back into
the magnetic lock.
☞ Note:
☞ The power of the magnets (3) can
be reduced, for example with tape
on top of the magnets, for easier
swivelling of the operating module.
2
☞ Should the operating module be
positioned too close to the arm
support, move it forward before
swivelling.
!
3
3
Attention:
Do not grab into the area of the
cross brace. – Danger of squashing!
19
ARM SUPPORTS
The arm supports can be adjusted in
height to suit the needs of the user.
!
•
1
Attention:
Do not use the arm supports to lift
or carry the wheelchair.
Do not drive without the arm supports!
Adjusting the height of the arm
supports
Slacken the clamping screw (1), slide
the end stop fully up and lightly tighten the clamping screw (1).
!
Attention:
Before loosening the clamping
screws (1) secure the arm support against falling down with
your hand. – Danger of jamming
with disassembled or too loosely
screwed clamping screw (1)!
•
During the adjustment the maximum arm support height is reached
when a mark (2) becomes visible
above the receptacle tube.
•
Ensure the tight fit of the clamping
screw (1) in order to prevent the
arm support from sliding down.
☞ Note:
Danger of jamming when adjusting the height of the arm supports
if the cushions are in a deep setting!
20
2
Remove the arm support
Slacken the clamping screw (3) and
pull off the arm support upwards.
3
5
☞ Note:
The operating module must be removed first if the arm support on
the control side is to be detached.
To remove the control unit, slacken
the clamping screw (4).
☞ Note:
Carefully route the cable when doing this.
Height stopper (Memory effect)
The firm stopper (2) of the insert tube
(5) serves as a height marker.
4
Adapting the arm cushion to the
seat depth
By displacing the arm supports the
resting position can be adapted for
example to a changed seat depth.
!
Attention:
Retrospective refitting should be
carried out by a specialist workshop!
– After removing the countersunk
screws (6) the arm support can be
displaced.
2
6
21
BACK SUPPORT
Standard back support
1
The standard back support (1) is steplessly angle adjustable from about 0°
to 30°.
Standard back support cover
The standard-back strap is spanned
through the backrest tubes.
The extended part of the back (2) is
attached with velcro to the seat surface.
Folding over the back support
2
Screw far out the clamping screw (3)
at both sides. Pull up the back support
and then fold it forwards (4).
Folding up the back support
After erecting press the back support
fully downward.
!
5
Attention:
Do not grab into the back tube
bracket (6) with the fingers. – Danger of squashing!
3
☞ Note:
It is to be ensured that the contour
of the bolt (5) grabs securely into
the recess.
Then fasten the clamping screws (3).
6
4
22
Adjusting
height
the
back
support
The standard and adjustable back cover can be adjusted in height.
For this unscrew the respective screws
(1) of the cover and reinsert in the
other height position.
1
23
Adjustable back
(Option)
The adjustable back is adjustable
through a velcro strap, the so called
spanning straps (2).
The cushion (1) is placed over it and
attached with the velcro strap.
2
1
Adjusting the adjustable back
☞ Note:
☞ The fitting of the adjustable back
(2) is best carried out with the user
sitting in the wheelchair and the
seat angle is set at 0°.
☞ Adjustment is carried out from the
bottom to the top.
☞ The lower part of the adjustable
back should remain slightly loose
so that it adapts to the buttocks
when bending forward.
Place the back cushion
The back cushion (1) is to be folded
over in the centre between the two
horizontal seams 180° around the upper spanning straps (2). – This creates
a soft upper edge.
☞ Note:
When the user leans against the
front cushion again, pay attention
that:
Attention:
The overlapping of the Velcro fastener has to be at least 10 cm!
☞ The pressure of the back must be
1. Pull off the rear part of the cushion.
☞ A complete hand should fit in be-
!
2. Span the spanning straps tightly
over the small of the back and
lumbar spine in order to give maximum support.
3. Adjust the remaining straps to the
form of the back.
4. Afterwards loosen the front part
of the cushion and align it with the
spanning straps.
☞ In doing so the user should lean
forward. If necessary ask an aid to
help out!
24
spread evenly throughout the back
cover.
tween the cover and back at the
upper edge of the back cover.
☞ The head of the user must be held
at balance by the back cover.
Adjusting the angle of the back
support
2
Mechanical back support adjustment
1
– Loosen clamping screw (3).
– Loosen counter nut (2) and screw it
back.
3
– Set the adjustment screw (1) according to the desired back support angle.
– Tighten the counter nut (2) to secure the adjustment screw (1).
– Tighten the clamping screw (3).
☞ Note:
4
For a level back support surface set
the adjustment screws (1) on both
sides evenly.
Manual back angle adjustment
with gas pressure spring
(Option)
The continuous angle adjustment of
the back support is achieved through
two pneumatic springs.
☞ Note:
Before activating the release lever
(4) hold on to the back support
grip in order to prevent the back
support from unintentionally snapping up.
– Activate both release levers (4) simultaneously and adjust the back
tubes parallel.
– Let go of both release levers (4) simultaneously.
– The back support is set again.
25
Electrical back support adjustment
(Option)
The back support (1) is electrically adjustable.
☞ Note:
Herefore view the operating manual < Operating module >.
!
1
Attention:
Only adjust the back support when
the wheelchair is standing on a
level surface. A danger of tipping
over exists on gradients!
Folding down the electrically adjustable back support
To fold the electrically adjustable back
support (2) down, first press the release button (3), then remove the pin
(4).
2
☞ Keep the back support in position
with one hand at the pushing handle.
Afterwards fold the back support
down (2).
☞ Reinsert the pin (4) in order to prevent loss.
Check the locking device after folding
the back support up and reinserting
the pin.
☞ Keep the pin clean at all times for
flawless function.
26
4
3
ERGOpor-back support element
(Option)
Remove the ERGOpor-back support unit
Loosen the attachment screws (1) and
push the clamping tins inward.
Then push the backrest element forwards out of the backrest frame (2)
and remove it.
1
☞ It is impossible to remove the back
element with mounted side cushions.
Attaching the ERGOpor back support element
Press the back support element, left
and right, onto the back support
frame (3).
2
Push the securing screws (1) of the
clamps outwards and then tighten
them.
ERGOpor back support cushion
The ERGOpor back support cushion
(4) is secured to the back support
shell with Velcro fasteners and can be
pulled off.
3
2
3
4
27
SEAT
Adjusting the seat depth
1
The seat depth can be changed by
moving the back support to a different position.
☞ Note:
The adjustment must be carried
out by a workshop.
For this the attachment screws (1) are
to be removed on both sides. Then attach the back support holders again
at the desired position with the securing screws.
☞ Note:
Hereto observe subchapter < repositioning the arm support cushion
>.
Afterwards reattach the seat flap to
the seat plate/-cover (3). – Velcro fastener.
3
28
ERGOpor seat element
(Option)
ERGOpor seat cushion
The ERGOpor seat cushion is secured
to the seat shell with Velcro fasteners
and can be pulled off.
ERGOpor seat element
For cleaning- or maintenance work the
ERGOpor seat unit can be removed.
☞ Note:
The adjustment must be carried
out by a workshop.
1. Remove the seat cushion and the
ERGOpor back support.
☞ Note:
1
Therefore observe subchapter <
Removing the ERGOpor back support >.
2. Disassemble the four attachment
screws (1) of the seat shell.
Reassemble the components in the
same position after cleaning and
maintenance.
Afterwards place the ERGOpor seat
cushion back into the seat shell and
fasten it. – Velcro fastener.
29
Seat angle
The seat angle (1) can be adjusted
through the telescopic rod in steps.
☞ See < Technical data >.
Observe chapter < Adjusting the
headlights >.
!
Attention:
Adjust the seat angle only when
the wheelchair is standing on a
level surface. A danger of tipping
over exists on gradients!
•
The seat-angle adjustment is not
linked with an automatic speed reduction function.
•
An increased danger of tipping
over exists with a reclined back
support.
•
Before starting to drive make sure
that no negative seat angle has
been adjusted, respectively that a
safe seating position is ensured.
30
1
Mechanically adjusting the seat
angle
Before mechanically adjusting the seat
angle lift the seat slightly. Screw the
clamping screw (2) on both sides far
outward. Lift or lower the seat up to
the marker, according to the desired
seat inclination. Reinsert the clamping
screw on both sides and tighten.
!
•
2
Attention:
In doing so make sure that the
point of the clamping screw presses into the respective indentation.
Lift the seat maximum to the lowest mark (3).
3
☞ Note:
Further seat angles can be adjusted through the combination of the
rear seat frame receptacles for the
seat heights 45, 48 and 50 cm and
the two screwing positions of the
front telescopic rods.
– Only have this adjustment carried
out in a specialist workshop.
31
Electrically adjusting the seat angle
(Option)
The seat angle can be adjusted electrically.
The adjustment is carried out with the
adjustment module.
☞ Note:
Herefore view the operating manual < Operating module >.
!
Attention:
Adjust the seat angle only when
the wheelchair is standing on a
level surface. A danger of tipping
over exists on gradients!
Rising aid
The seat is angled forward for the
stand-up aid (negative seat angle).
☞ The negative seat angle adjustment serves the stand-up aid while
the vehicle is standing.
☞ The steering wheels must face towards the rear when tilting the
seat surface forward.
!
32
Attention:
Switch off the operating module
and fold up the footplates.
Adjusting the seat height
The seat frame receptacle (1) enables
setting of two further seat heights.
2
☞ View < Technical data >.
1
For this the screws (2+3) are to be disassembled.
☞ The self securing nuts are to be replaced after several implementations.
!
Attention:
The seat height 45 cm is not permitted in combination with the
electric seat angle due to a danger of jamming between the seat
frame and chassis at the back of
the vehicle!
3
33
Adjustment of seat width
The seat width can be adjusted by a
lateral displacement of the arm supports. Displace both arm supports by
an equal distance after slackening the
clamping screw (1) on both sides.
☞ Note:
A reduction of the seat width to less
than 43 cm is possible by switching
the two arm supports.
1
Retrospective refitting should be
carried out by a specialist workshop!
!
Attention:
The maximum seat width has been
reached when a marking (2) is visible on the square tube.
2
Adjusting the entry width
The footplate distance is adjustable
by sliding the leg support bracket (3).
Displace both leg support bracket by
an equal distance after slackening the
clamping screw (4) on both sides.
!
34
Attention:
The maximum entry width is
reached when a hole becomes visible.
3
4
Suspension of the chassis
For optimal sitting comfort the suspension (1) can be adjusted according
to the desire of the user.
!
Attention:
Make sure that the adjustment
ring sits securely before starting to
drive.
1
– Screw a loose adjustment ring
tight enough, until the pressure of
the spring prevents further loosening.
2
Adjusting the seat suspension
For adjustment of the suspension the
adjustment ring (2) is screwed forward
or backward accordingly.
In doing so the following indications
are valid:
Adjustment ring slightly screwed
a – up to 80 kg
☞ Soft suspension/low user weight.
Adjustment ring medium pre-attached
b – up to 100 kg
☞ Medium suspension/ medium user
weight.
Adjustment ring extremely screwed
c – up to 130 kg
☞ Hard suspension/high user weight.
!
Attention:
The adjustment of the suspension
may only be done by a specialist
workshop. – The spring might be
under extreme pressure.
• In Position "a" and "c" at least
three screw threads must be visible!
35
LEG SUPPORTS
!
Attention:
Do not use the leg supports to lift
or carry the wheelchair.
•
Lift the feet, respectively place
them on the footplates before
each movement of the wheelchair.
•
The operating module is to be
switched off:
– before placing the feet on the
floor,
– to remove the calf belt and the
leg support,
– before folding up the footplates.
Calf strap
The calf strap (1) prevents the feet
from sliding off of the footplates.
It is guided around special ligament
(2) and adjusted in length with a velcro fastener.
Removal of the calf belt is achieved by
opening the velcro straps.
!
36
Attention:
Do not drive without the calf
belt. – The leg strap is omitted for
height adjustable leg supports and
is replaced by the leg padding.
1
2
Folding up the footplates
The footplates are to be folded up
for entering or exiting the wheelchair
(1).
Turning the leg supports to the
side
For easy transfer out of/into the
wheelchair as well as driving closer to
a closet, bed or bathtub the leg supports can be swivelled away toward
the in-/outside (2) + (3).
1
Therefore pull or press the respective
locking lever (4) and swivel the corresponding leg support inward/outward.
☞ Note:
Before swivelling the leg support
outward/inward loosen or remove
the calf belt on one side.
!
2
Attention:
Swivelled-away leg stump supports
are automatically unlocked and
can easily fall off. Note this when
handling (e.g. transport).
• When swivelling them back make
sure that the leg support audibly
locks into place.
☞ Note:
3
After swivelling the leg support inward again do not forget to check
the corresponding locking device.
Afterwards replace the calf strap.
4
37
Remove the leg supports
For easy transfer into and out of the
wheelchair as well as a reduced wheelchair length (important for transport)
the leg support can be removed (1).
☞ Note:
Before swivelling the leg support
loosen or remove the calf belt on
one side.
1
– Remove both feet from the footplates.
– Pull or press the locking lever backward (2).
– Swivel the leg support sideways
and take them off toward the top
(1).
Attaching the leg supports
With the leg support in a swivelledaside position, hang it in and then
swivel it to the front until the locking
device audibly latches.
☞ Note:
After swivelling the leg support inward again do not forget to check
the corresponding locking device.
Afterwards replace the calf strap.
38
2
Adjusting the height of the footplate
Loosen the clamping screw (1) to adjust the height.
1
Telescope the foot plate to the desired
height and then retighten the screw.
☞ Note:
2
The maximum extension is indicated by a marking (6) on the tube
(2).
Angle adjustable footplates
(Option)
After loosening the clamping screw
(5) pull out the dovetail connection
and adjust the angle of the footplates.
Afterwards retighten the clamping
screw (5)
!
5
Attention:
Ensure that the footplate has sufficient ground clearance.
6
39
Continuous leg support
The footboard of the continuous leg
support (1) can be folded up to the
side.
Folding up the foot board
1
For an unobstructed foot area, fold
up the left side of the foot board to
the right as far as it will go (2).
Folding down the foot board
Fold down the left side of the foot
board until it rests on the foot board
holder (3).
Height adjustment of the footboard
2
Loosen the clamping screw (4) to adjust the height.
Telescope the foot plate to the desired
height and then retighten the screw.
☞ Note:
The maximum extension is indicated by a marking (6) on the tube
(5).
3
4
6
5
40
Angle adjustment of the footboard
– Switch the wheelchair off and shift
the brake release lever into the
drive position. – This prevents the
wheelchair from rolling away accidentally.
5
– Loosen the screwed connection (5)
and adjust the footboard to the
desired angle. Afterwards retighten the screwed connection (5).
– In doing so the teeth of the angle
adjustment must join again
41
Depth adjustment of the footboard
The depth adjustment of the footboard is done by repositioning the removable distancer pieces (6).
– Light the footboard slightly on the
left side.
6
– Reposition the desired amount of
distancer pieces on the left side.
– Pull/press the distancers that are to
be repositioned on the right side
of the footboard outward from
the retaining rod (7).
7
☞ Note:
In certain angle settings of the
footboard it is possible that a removal or placing of certain distancer pieces is not possible. In this case
loosen the clamping screws for the
angle adjustment (5) and change
the position of the footboard so
that a removal or placing of the
distancer pieces is possible.
Afterwards retighten the clamping
screws.
– Repositioning the footboard.
– Insert the distancer pieces as far as
possible onto the right retaining
rod again.
– Swivel the footboard down and
hang it into place.
42
5
Height-adjustable leg supports
(Option)
2
Removing the height adjustable
leg supports
For this pull back or press the locking
lever (1).
1
Afterwards swivel the leg support to
the side and then pull it off in an upward direction.
Attaching the height adjustable
leg supports
2
With the leg support in a swivelledaside position, hang it in and then
swivel it to the front until the locking
device audibly latches.
☞ Note:
After swivelling the leg support inward again do not forget to check
the corresponding locking device.
Adjusting the height of the footplate
Disassemble the screw (2) to adjust
the height of the foot plate.
Telescope the foot plate to the desired height and then secure it with
the clamping screw (2).
43
Adjusting the height of the leg
supports
When seated in the wheelchair, ask a
carer to raise the leg support to the
desired level. The length adjustment
is given through the turning point at
the height of the knee joint.
1. First secure the leg support with
one hand against folding down,
and then loosen the clamping lever (1).
!
Attention:
Do not let the leg support drop
on its own weight. – Danger of
squashing!
2. Have the leg support lifted to the
desired level by an attendant and
retighten the clamping lever (1).
To lower the leg support, remove the
load momentarily from the support
by raising the lower thigh (ask an attendant if necessary), and loosen the
clamping lever (1).
The leg support can now be moved
slowly downwards.
!
44
Attention:
Never put the free hand into the
adjustment mechanism while adjusting the height adjustable leg
support.
1
Adjusting the depth of the calf
pads
The calf cushion (1) can be swivelled
to the side and adjusted steplessly in
depth.
Loosen the screws (2) to adjust the
depth of the calf cushion.
1
2
3
Adjusting the height of the calf
pads
Loosen the clamping screw (3) to adjust the height of the calf cushion.
45
Electrically height-adjustable leg support
Electric contact is automatically established when attaching the electrically
height adjustable leg support.
!
1
Attention:
Do not reach into the adjustment
mechanism. – Danger of crushing!
Height adjustment
For the height adjustment of the leg
supports view the users manual < Operating module >.
– Whilst sitting in the wheelchair,
raise or lower the leg support fig.
to the desired height via the operating module.
!
Attention:
Observe the safety and general
handling instructions < Electronic
vehicles >!
1
2
Adjusting the height of the footplate
To adjust the height, hold on to the
footplate and depending on version
loosen or remove the attachment
screw (1).
Telescope the foot plate to the desired height and then secure it with
the clamping screw (1).
Adjusting the depth of the calf
pads
The calf cushion (2) can be swivelled
to the side and adjusted steplessly in
depth.
Loosen the screws (3) to adjust the
depth of the calf cushion.
46
3
Removing the electrically height
adjustable leg supports
4
Depending on version, pull the locking device (4) back, press it in or fold
it up or down.
Afterwards swivel the leg support to
the side and then pull it off in an upward direction.
!
Attention:
With the electrically adjustable
leg support removed the electric
contact (5) is to be protected from
dampness, wetness as well as dust
and dirt! – Function error of the
electrical adjustment.
4
Attaching the electrically height
adjustable leg supports
With the leg support in a swivelledaside position, hang it in and then
swivel it to the front until the locking
device audibly locks into place.
☞ Note:
☞ After swivelling the leg support inward again do not forget to check
the corresponding locking device.
☞ Conduct a function test of the electrical adjustment!
5
5
47
Stump support
Removal
First pull back or press the locking lever (1). Then swivel out the leg stump
support and pull it off in an upward
direction.
1
Hanging-in
With the leg stump support in a
swivelled-aside position, hang it in
and then swivel it to the front until
the locking device audibly locks into
place.
☞ Check for a correct locking of the
2
locking device!
Height adjustment
☞ Secure the leg stump support
against unintentional lowering.
Loosen the clamping screw (2) and
adjust the desired height. Afterwards
retighten the clamping screw (2)
Angle adjustment
☞ Secure the leg stump support
against unintentional lowering.
Loosen the clamping lever (3) and set
the desired angle. Afterwards retighten the clamping lever (3).
48
3
Repositioning the leg stump support
The leg stump support can be used on
the left and right side by repositioning the bracket.
Repositioning the leg stump support
1
First unscrew the attachment screws
(1) to reposition the leg stump support. The reposition the bracket to
the other side and attach it.
3
Repositioning the leg stump cushion
First unscrew the screws (2) to reposition the leg stump cushion. Then position the bracket turned by 180° on the
other side aligned with the holes (3)
and retighten with the screws.
2
49
SUPPORT WHEELS
The anti-tip castors increase the stability against tipping over to the rear
when crossing an obstacle or driving
on a rising gradient.
!
Attention:
Support castors do not provide sufficient protection against tipping
over in certain situations.
Therefore, do not:
▲ Leaning the upper body far back.
▲ Start off abruptly, especially when
driving uphill.
!
50
Attention:
Observe the safety and general
handling instructions < Electronic
vehicles >!
LAP BELT
The lap belt is used for securing a person sitting in the wheelchair.
– Additional stabilisation of the sitting position.
– Prevents the user from falling forwards out of the wheelchair.
– Continuous adjustment to suit the
user’s needs.
The lap belt is screwed on, from the
outer side, at the respective back support holder.
☞ Note:
The subsequent assembly of a lap
seatbelt must be carried out by an
authorised workshop!
!
Attention:
The lap belt is not a part of the securing system for the wheelchair,
or the person sitting in the wheelchair, during the transport in a disabled person transport vehicle.
51
Strapping on the lap belt with
lock
▲ Pull both belt halves to the front
1
and slide the catch halves together
so that they latch together. Then
carry out a pull test.
You open the lap seatbelt by pressing
in the red unlocking button (1).
3
Putting on the lap seatbelt with
velcro fastener
▲ Guide the end of the strap through
the buckle (4), place the over each
other in the desired length and
press them together. Then carry
out a pull test.
!
Attention:
Make sure that no objects are
trapped between belt and the
body! – Thus you avoid painful
pressure points
Adjustment of belt length
☞ Note:
The lap seatbelt should not be too
tight.
By shifting the catch (2) and / or pulling
on the end of the belt (3) the length
of the lap belt can be changed.
52
2
4
TORSO SUPPORTS
The torso supports (1) are height,
width and depth adjustable as well as
removable.
2
Adjusting the torso supports
2
Height:
After loosening the clamping screws
(2) the respective torso support can be
adjusted to the desired height.
Afterwards retighten the clamping
screws (2).
1
Width:
After loosening the clamping screws
(3) the respective torso support can be
adjusted to the desired width.
Afterwards retighten the clamping
screw (3).
3
Depth:
After loosening the clamping screws
(4) the respective torso support can be
adjusted to the desired depth.
Afterwards retighten the clamping
screws (4).
4
53
HEAD SUPPORT
The head support is swivel/proof,
height- and depth adjustable and removable.
!
Attention:
We recommend the fitting of two
rear-view mirrors for driving with a
headrest.
1
Adjustment of the head support
The head support can be detached or
adjusted in height after the clamping
lever (1) has been slackened.
Slacken the clamping screws (2) and
position the head support at the desired height. Tighten screw connections (2).
!
54
Attention:
The maximum height adjustment
is indicated by the marking!
2
ATTENDANT CONTROL
WITH PRIORITY SWITCH
The control unit for accompanying
person enables the accompanying person an easy control of the wheelchair
with auxiliary operating module.
1
Positioning the controller
☞ Note:
Switch off the operating module
before position adjustment! – This
prevents an unwanted movement
of the wheelchair.
Height adjustment
Hold the operating module and then
slacken the clamping screw (1).
Move the operating module into the
desired position and retighten the
clamping screw.
2
Angle adjustment
Hold the operating module and then
slacken the clamping screw (2).
Swivel the operating module into the
desired position and retighten the
clamping screw.
55
LIGHTING
For driving outdoors and on public
roads the wheelchair can be fit with
lighting.
The lighting is activated over the operating module for the driver.
☞ Note:
Observe the operating manual <
Operating module > as well as the
safety and general handling instructions < Electronic vehicles >!
REAR-VIEW MIRROR
Removing the rear-view mirror
To remove the rear-view mirror loosen
the clamping screw (2) and pull the
rear-view mirror forward.
☞ Note:
Carefully place the rear-view mirror down and protect the mirror
glass from strain or other objects.
☞ The rear-view mirror is to be kept
clean at all times.
– Use common glass cleanser to
clean the mirror. For this the users
instructions of the manufacturer
are to be observed.
Attaching the rear-view mirror
Reinsert the rear-view mirror for drive
mode. Tighten the clamping screw
(2).
Adjusting the rear-view mirror
1. Preadjust the rear-view mirror by
turning the clasp.
2. Turn the mirror on the attachment
rod and ball joint until you reach
the desired angle.
56
1
SPECIALITIES OF THE
JUNIOR VERSION
Seat depth
The seat depth can be changed by
moving the back support to a different position.
☞ Note:
Hereto observe chapter < Seat >.
☞ The adjustment must be carried
out by an authorised workshop.
Attention:
The maximum user weight is decreased in combination with the
seat depth adjustment (1), (2) or
(3)!
☞ Therefore observe the respective
details in chapter < Technical data
>!
!
1
2
3
57
Width adjustment of the leg support receptacles
1
☞ The adjustment must be carried
out by an authorised workshop.
The width adjustment of the leg support receptacle (1) may be required
for example to adjust the width of the
footboard width (X).
X
2
– Therefore first remove the seat
plate, resp. seat cover.
– In order to reposition the leg support brackets (2) loosen the respective screws (3).
– After the required width adjustment retighten the respective
screws (3).
– Afterwards reassemble the seat
plate, resp. seat cover.
58
1
3
2
Continuous leg support
The footboard of the continuous leg
support (1) can be folded up to the
side.
Folding up the foot board
For an unobstructed foot area, fold
up the left side of the foot board to
the right as far as it will go (2).
1
Folding down the foot board
Fold down the left side of the foot
board until it rests on the foot board
holder (3).
2
Height-/ and angle adjustment of
the footboard
– Switch the wheelchair off and shift
the brake release lever into the
drive position. – This prevents the
wheelchair from rolling away accidentally.
3
– Loosen clamping screws (4).
– Adjust the footboard to the desired position and angle.
– Tighten the clamping screws (4).
4
59
Depth adjustment of the footboard
The depth adjustment of the footboard is done by repositioning the removable distancer pieces (1).
1
– Lift the footboard slightly on the
side that can be swivelled upward.
– Reposition the desired amount of
distancers accordingly.
– Pull of the distancer pieces that are
to be repositioned from the outside off of the retaining rod on the
firmly attached side of the footboard (2).
☞ Note:
In certain angle settings of the
footboard it is possible that a removal or placing of certain distancer pieces is not possible. In this case
loosen the clamping screws for the
angle adjustment (3) and change
the position of the footboard so
that a removal or placing of the
distancer pieces is possible.
Afterwards retighten the clamping
screws.
– Repositioning the footboard.
– Reinsert the distancer pieces as far
as possible onto the retaining rod.
– Swivel the footboard down and
hang it into place.
60
2
3
Adjusting the length of the leg
supports
The leg supports can be adjusted via a
telescopic tube.
1
– Switch the wheelchair off and shift
the brake release lever into the
drive position. – This prevents the
wheelchair from rolling away accidentally.
– Loosen clamping screw (1).
– Extend the lower part of the leg
support with footrest to the desired length.
– Tighten the clamping screw (1).
61
Arm supports
The arm supports can be adjusted in
height to suit the needs of the user.
!
•
Attention:
Do not use the arm supports to lift
or carry the wheelchair.
Do not drive without the arm supports!
Adjusting the height of the arm
supports
Slacken the clamping screw (1), slide
the end stop fully up and lightly tighten the clamping screw (1).
!
•
62
Attention:
Before loosening the clamping
screws (1) secure the arm support
against falling down with your
hand. – Danger of crushing!
The maximum arm support height
has been reached when the marking on the square tube is visible.
1
Remove the arm support
The arm supports must be removed
before folding over the back support
(1).
– For this loosen the respective
clamping screw (2) and pull the
arm supports off toward the top
(3).
1
☞ Note:
The operating module can be removed first if the arm support on
the control side is to be detached.
To remove the control unit, slacken
the clamping screw (4).
4
☞ Note:
2
Carefully route the cable when doing this.
Inserting the arm support
After inserting the arm support
retighten the respective clamping
screw (2).
Clothes guard
After loosening the screws of the
clothes guard (5) and (6) the clothes
guard can be repositioned in height.
☞ After disassembly of the screws of
3
the clothes guard (5) the clothes
guard bracket (7) can be reassembled in a different position.
7
Adjustment of seat width
☞ Therefore observe chapter < Arm
6
supports >, paragraph < Adjusting
the seat width >!
5
63
LOADING AND TRANSPORTATION
Transport in vehicles
The following items may be necessary
due to lack of space for the transport
in vehicles (1).
▲ Remove the leg supports.
1
▲ Remove the operating module.
▲ Remove the arm supports.
▲ Fold over the back support.
The parts detached for the transport
must be carefully stowed and carefully attached again before the next
journey!
!
Attention:
Do not use the wheelchair without
attached leg supports and arm support units!
2
Transport security
Only affix the spanning belts to parts
of the car envisaged for this purpose
and to the wheelchair!
To secure the wheelchair, use the front
cross brace as well as the loops at the
side of the baggage rack (2)+(3).
☞ For this observe the labels on the
wheelchair.
64
3
Passenger transportation
acc. to ISO 7176/19
Using the wheelchair as a passenger seat
This wheelchair fulfils the requirements of ISO 7176/19 and may be used
as a passenger seat inside a vehicle in
combination with a 4-way suspension
system tested and permitted according to ISO 10542.
!
Attention:
The steering wheels of the wheelchair must be fit with a steel fork
(Code 4332 for 9"-air tyres as well
as Code 4333 for 9" puncture
proof).
☞ The wheelchair underwent a crash
test during which it was secured in
driving direction of the transporting vehicle.
– Other configurations were not
tested.
☞ The dummy was secured with a lap
seatbelt and torso straps.
– Both types of safety belts should
be used in order to minimise the
risk of injuries to the head or upper body.
!
Attention:
After a crash the wheelchair must
be checked by an authorised workshop before further operation.
Safety information
☞ For transport the wheelchair must
be equipped with maintenance
free batteries.
☞ Only 4-way suspension systems
tested and permitted according to
ISO 10542 may be used.
☞ The wheelchair is to be secured according to the operating manual
of the manufacturer of the 4-way
suspension system.
☞ Only transport the wheelchair in
driving direction.
☞ The driver, resp. the attendant is
responsible for the professional
securing of the wheelchair in the
vehicle.
☞ Before transport it is to be made
certain that the drive in engaged
and the wheelchair switched off.
Product liability instructions
☞ Transport in a wheelchair inside a
vehicle is carried out at own risk!
☞ We do not accept liability for damages or other possessions that occurred through the transport in a
vehicle.
• Changes to the securing points of
the wheelchair may only be carried out with the manufacturers
permission.
65
Securing the wheelchair
The wheelchair may only be secured
through the four securing points (1)
and (2).
The securing points are marked according to the pictures and the symbol (3).
!
1
Attention:
Angle adjustable back supports are
to be set vertically.
• Tipped seats are to be set horizontal.
2
• Height adjustable seats are to be
2
put into the basic position.
☞ If necessary establish the electrical
safety with the key function.
–Therefore observe operation
manual < Operating modules >.
• Only hooks of the suspension system according to the norm ISO
10542 are to be applied.
3
66
Securing the user in the wheelchair
The seatbelt that may be available
on the wheelchair does not replace a
seatbelt that is attached to the vehicle.
!
Attention:
A seatbelt tested according to
7176/19 is to be applied.
☞ Remove and safely store parts
mounted to the wheelchair and
other removable parts, for example special operating units or a
therapy table.
1
☞ When transporting a person, make
sure that there are no objects
jammed underneath the straps!
– Thus you avoid painful pressure
points
☞ Seatbelts must lie close to the body
of the user. They may not lead over
arm supports or drive wheels (1).
☞ Seatbelts should be tightened as
much as possible, without the user
feeling uncomfortable.
2
☞ Seatbelts may not be twisted.
☞ The lap and shoulder strap should
lie unencumbered and not too
loosely between the hip and thigh
of the user (2).
☞ The straps of the suspension system
must be assembled at an angle of
about 45° to the floor of the vehicle (3).
3
67
SERVICE
Maintenance
The following list of annual maintenance work gives you a guide for carrying out the maintenance work. It
does not outline the actual scope of
the necessary work which can only be
ascertained by an inspection of the
vehicle.
!
Attention:
The vehicle driver is responsible for
the correct functioning and safe
condition of the vehicle when driving on public highways.
An incorrect or neglected cleaning
and maintenance results in a limitation of the product liability.
!
Attention:
Always switch off the operating
module and switch the drive motors into the drive mode before
carrying out maintenance work,
modification and adjustments on
the wheelchair!
– Danger of accident resulting
from inadvertent movement of the
wheelchair.
• The main fuse must additionally
be removed when working on the
electrical system!
68
Inspection
For safety reasons and to prevent accidents which can result from wear
not detected in good time, an annual
inspection is necessary in the case of
normal operating conditions. This is
to be carried out in accordance with
the service manual.
Have this work carried out by a specialist workshop in order to ensure
that the ELECTRIC WHEELCHAIR offers the highest level of safety and reliability. The employees of the workshop are familiar with the technology
of the vehicle and have suitable tools.
They can identify the start of wear in
good time and use only original spare
parts.
☞ Note:
Shorter intervals for brakes and
chassis checks are recommended in
the case of severe operating conditions, e.g. daily driving on uphill/downhill gradients or use by a
nursing service – with frequently
changing wheelchair users.
Maintenance instructions
WHEN
WHAT
Remark
Before starting out
General
Test for faultless operation.
Carry out test yourself or
with a helper. It should
now be impossible to
push the electric wheelchair. If this is not the
case, have the brake
repaired by a specialist
workshop.
Checking the magnetic brake
Switch the selection lever drive- / push mode to
drive mode.
Especially before driving
in the dark
Lighting
Replacing defective filament bulbs view chapter
< Lighting >.
Every 2 weeks
(depending on distance
covered)
Check air pressure of
the tyres
Full tyre pressure – steering wheel
2.5 bar = 35 psi
Full tyre pressure – drive
wheel
2.5 bar = 35 psi
Do it yourself or with the
aid of a helper. Use a tyre
gauge.
Lighting and direction indicating system
Test for faultless operation.
Observe the safety instructions chapter < Driving in public traffic >.
69
Every 2 weeks
(depending on distance
covered)
Wheel attachments/
Adjustment screws
Screws and nuts are to
be checked for tight fit.
Do it yourself or with the
aid of a helper.
Tighten loose wheel nuts
or
-screws/adjustment
screws.
Every 2 months
(or more frequently depending on charging
frequency and ambient
temperature)
Maintenance the batteries
sealed batteries:
– No maintenance
Observe the contents of
the < Battery maintenance > section!
(depending on distance
covered)
Check tyre profile
Minimum tread = 1 mm
Carry out visual check
yourself.
If the tyre profile is worn
down or if the tyre is
damaged, consult a specialist workshop for repairs.
Every 6 months
(depending on frequency of use)
Check:
Cleanness
General condition
See Care
See Repairs.
Do it yourself or with the
aid of a helper.
Manufacturer
recommendation:
Every 12 months
(depending on frequency of use)
Safety inspection
– Vehicle
– Battery charger
To be carried out by the
specialist dealer.
70
List of annual maintenance work
Preparation for visual check
Remove the seat and back support elements, leg supports, arm support units. If
necessary, clean the vehicle or the modules before the visual check.
Visual check
❑ Check the frame, add-on components and accessories for damage, corrosion
and damaged paintwork.
❑ Check the condition and fastening of electric cables and connections.
General checks
❑
❑
❑
❑
Check the securing screws for tightness.
Check the securing of all add-on elements.
Check the securing of the chassis parts, add-on parts and accessories.
Check the bowden cables for damages.
Chassis
❑
❑
❑
❑
Check the suspension for safe condition
Check the fastening of the steering and drive wheels.
Check the tyre condition and tyre pressure.
Check the condition, functioning and smooth-operation of the steering
wheel suspension.
Brakes
❑ Check the automatic brake system for correct functioning.
Max. braking distance at 6 km/h = 1 m, at 8 km/h = 1.5 m, at 10 km/h = 2.1
m.
Electrical system
❑ Clean and service drive batteries, connections and battery box.
Oil/Grease
❑ Rotating points and bearing points of control levers and moving parts.
Final check
❑
❑
❑
❑
❑
Check the lighting and signalling devices.
Check the motor and steering unlocking devices (push mode).
Brake-/steering-/driving test additionally on inclinations and slopes.
General function test of the mechanical/electric adjustment units.
Drive test.
71
Fault correction
Fault
Cause
Remedy
Battery indicator on the
operating module does
not light up after the
switch-on.
Battery fuse is defective
or not correctly inserted.
Replace defective fuse or
clean contacts and insert
correctly.
Plug connection of the
power supply without
contact.
Check the plug connections.
Power
motors
are
switched to push mode.
Move the selection lever
for the drive motors into
the drive mode position
and make sure it clicks
into place.
Plug connection at one
of the drives without
contact.
Check the plug connections.
Malfunction in the electronics.
Have the fault corrected
by an authorised workshop. (Push mode)
Selection lever in driving
mode position.
Not listed faults.
View < fault diagnosis >
in the operating manual
for the operating module.
Filament bulb defective.
Replace defective filament bulb.
Lighting fuse or drive
electronics defective.
Let it be repaired or replaced by a specialist
workshop.
The battery indicator
blinks after the switchon.
Lighting not active.
72
Battery charger
The electronic wheelchair requires a
special charger.
☞ Only chargers suitable for the electronic wheelchair may me used
(A)!
☞ Observe the operating manual of
the charger!
A
Technical requirements:
3
for the following drive batteries,
– max. charging voltage: 28.5 V
2
1
For sealed batteries:
– up to 40 Ah – 5 h / 50 Ah – 20 h
– Charging current: 6 A
For open/sealed drive batteries:
– from 40 Ah – 5 h / 50 Ah – 20 h
– Charging current: 8 A
B
– from 65 Ah – 5 h / 82 Ah – 20 h
– Charging current: 12 A
2
1
Pin assignment of the charging plug
(B):
Pin 1: +24V (Conduit red)
Pin 2: minus (Conduit black)
Pin 3: minus (Bridge on Pin 2 – view
arrow)
3
C
☞ Therefore observe the operating
manual of the charger!
Pin assignment of the charging socket
(C):
Pin 1: +24V (Conduit red)
Pin 2: minus (Conduit blue)
Pin 3: Lock (Conduit black)
73
Wheel change
1
☞ Note:
A wheel/tyre change requires technical knowledge. You should therefore have this work carried out by
a specialist workshop.
Sitting in the wheelchair during a
wheel change is not permitted. The
wheelchair must stand on a level and
firm surface. Before starting the disassembly work, support the frame to
prevent the wheelchair from tipping
over and secure it to prevent an unwanted movement or tipping over.
Always change tyres in pairs. Because:
differently worn tyres can impair the
straight-on travel of the wheelchair.
Disassembly of the drive wheels
For this remove the hubcap (1) first.
Then remove the wheel attachment
screws and take off the wheel.
Assembly of the drive wheels
After replacing the drive wheel
retighten the wheel attachment nut
securely. Afterwards press the hub cap
(1) back on.
☞ Note:
☞ The torque in Nm can be found in
the < Technical data >.
☞ The valve points outwards.
74
Changing the tyres
The tyre is to be levered off of the rim
with suitable tooling (assembly lever).
!
Attention:
Fully de-inflate the tyres for a tyre
change.
☞ Note:
The air pressure for the tyres is
shown on both sides of the tyre
and in the < Technical data > section.
Disassembly
wheels
of
the
steering
The steering wheel is to be disassembled before replacement or repair.
For this disassemble the wheel axle
(2).
!
Attention:
Never loosen the rim half connection screws in order to disassemble
the tyre before previously completely deflating the tyre!
– Danger of injury!
☞ Note:
Take note of the arrangement of
all sleeves and washers used.
2
Disassembly of a tyre with divided rim
1. Completely deflate the respective
tyre.
Assembly of the steering wheels
2. Dismantle the steering wheel.
After inserting the steering wheel the
wheel axle (2) is to be reassembled.
3. Unscrew the rim-half connection
screws.
☞ Note:
The torque in Nm can be found in
the < Technical data >.
Changing the tyres
Fully de-inflate the tyres for a tyre
change.
☞ Note:
The air pressure for the tyres is
shown on both sides of the tyre
and in the < Technical data > section.
Assembly of a tyre with divided
rim
1. Place the tyre with crease free tube
between the rim-halves. If necessary observe the running direction
of the tyre (view arrow).
2. Tighten the rim-half connection
screws evenly.
☞ For this new safety nuts are to be
used as well as the torque observed
(view technical data).
3. Reassemble the steering wheel.
75
Fuses
Replacing the fuses
Before replacing fuses, park the electronic wheelchair on a level surface
and move the selection lever to the
drive mode position to prevent the
wheelchair from moving. Switch off
the operating module.
Always replace fuses with one of the
same type! New fuses can be obtained
for example at petrol stations.
☞ Note:
If the safety fuse blows again, take
the battery to a specialist dealer
for repair.
Fuse
Mains-/battery fuse (1)
☞ Note:
Please observe the < Technical data
>!
76
1
Lighting
(Option)
1
☞ Note:
If a turn-signal bulb is defective,
the remaining one blinks at double
frequency.
Adjusting the headlights
Vertical alignment
The headlights should be set in such
a way that the light cone is visible on
the road. – The lower edge of the light
cone should be set at distance of 3 meters to the front of the wheelchair.
☞ Note:
The headlights might need to be
readjusted after adjustment of the
seat angle.
2
Loosen the attachment screws (1) on
the angle plate in order to adjust the
headlights.
Adjust the headlights accordingly and
retighten the attachment screws (1).
Horizontal alignment
Slacken the attachment screw (2) to
adjust the headlights.
Adjust the headlights accordingly and
retighten the attachment screw (2).
77
Headlights
Filament bulb:
12V/3W E10
☞ Note:
Use a dry cloth to hold the glass
body of the new filament bulb.
Removal
1
– Switch off the operating module.
– Pull out the main fuse.
– Undo the securing screw and remove the lens (1).
– Pull the bulb holder (with filament
bulb) out of the lens (2).
– Screw the defective filament bulb
out of the bulb holder.
Mounting
2
– Screw the new filament bulb in the
socket (2). – The earth wire lies over
the thread of the bulb holder.
– Insert the filament bulb holder
(with bulb) into the lens (1).
– Mount the lens. – First insert the
top pin, then press in the lens at
the bottom and fasten it with the
securing screw.
3
78
Front indicator
Spherical bulb:
12V/P21W BA15s
☞ Note:
Use a dry cloth to hold the glass
body of the new filament bulb.
Removal
1
– Switch off the operating module.
– Pull out the main fuse.
– Undo the securing screw and remove the lens (1).
– Press the faulty spherical bulb
slightly inwards, turn and remove
from the socket.
Mounting
– Insert a new spherical bulb. – Push
the side pins (bayonet catch) into
the frame, exert slight pressure
against the spring and turn until
the bayonet catch clicks into place
(1).
2
– Mount the lens. – First insert the
side pin, then press in the lens and
fasten it with the securing screw
(2).
79
Rear indicator
Spherical bulb:
12V/P21W BA15s
☞ Note:
Use a dry cloth to hold the glass
body of the new filament bulb.
2
Removal
1
– Switch off the operating module.
– Pull out the main fuse.
– Undo the securing screw (2) and
remove the lens (3).
4
– Press the defective spherical bulb
(4) lightly into the holder against
the spring and then turn the bulb
and pull it out of the bulb holder.
Mounting
– Insert a new spherical bulb. – Push
the side pins (bayonet catch) into
the recesses of the bulb holder,
press lightly against the spring and
then turn the bulb until the bayonet catch clicks into place (4).
– Mount the lens. – Press in the lens
and fasten it with the securing
screws (1).
80
3
Back light
Festoon bulb:
12V/C5W S8.5
☞ Note:
Use a dry cloth to hold the glass
body of the new filament bulb.
Removal
2
1
– Switch off the operating module.
– Pull out the main fuse.
– Undo the securing screw (2) and
remove the lens (3).
– Press the defective festoon bulb (4)
against the holding pin and then
pull it out of the holder.
Mounting
– Insert the new festoon bulb (4).
– Press one tip into the hole in the
holding pin and then press the
other tip into the hole of the other
holding pin (4).
3
4
– Mount the lens. – Press in the lens
and fasten it with the securing
screws (1).
81
Information for the dealer
A service manual containing a check
list for the annual inspection is available on request.
The functional tests necessary for the
inspection are listed in the check list.
They are a guide for the performance
of the inspection work.
☞ Note:
It does not outline the actual scope
of the necessary work which can
only be ascertained by an inspection of the vehicle.
After the successful completion of
an annual inspection the inspection
should be recorded in the operating
manual.
Programming the driving behaviour
The driving behaviour of the wheelchair can be adjusted through the
programming device.
☞ Therefore observe the respective <
Service manual >.
The driving features of the wheelchair
should be adjusted to the individual
requirements and the learning process of the respective user at regular
intervals.
In doing so the driving experience,
the physical limits of the user and the
main field of operation must be considered:
▲ When programming the delay value observe that on the one hand
extreme braking may endanger
the driver but on the other hand
the braking distance may not exceed 1.0 m at 6 km/h,
1.5 m with 8 km/h,
2.1 m with 10 km/h,
2.9 m with 12 km/h and
4.5 m at 15 km/h (acc. to EN
12184).
▲ The programming must be specially tailored to the user. The capacity
of reaction, the constitution as well
as physical and psychical abilities
are to be considered. A talk with
the doctor or therapist can be very
helpful.
82
Driving parameter
Standard settings
The driving features of the wheelchair
are defined by setting the single parameters.
The parameter values in the following
table are selected so that the inspection requirements of the CE certification are fulfilled. Programming that
differs from these requirements might
not fulfil the regulations.
☞ Therefore observe the respective <
Service manual >.
Independent of this the safety of the
wheelchair and especially the driver
must be guaranteed after a change of
the parameters.
☞ Note:
☞ All changes to the parameters underlie solely the responsibility of
the person making the modifications.
☞ It is possible to set dangerous parameters.
☞ Possible danger of tilting in curves.
Standard programming
Adjustment in % for 6 / 8 km/h
maximum
minimum
Acceleration
35 / 35
30 / 30
Deceleration
70 / 70
65 / 65
Turn Acceleration
40 / 40
30 / 30
Turn Deceleration)
40 / 40
30 / 30
Forward Speed
69 / 87
20 / 20
Reverse Speed
40 / 40
20 / 20
Turn Speed
30 / 30
20 / 20
5
1
Number of Drive Profiles
83
TECHNICAL DATA
The kilometric performance is greatly
reduced by:
Kilometric performance
– frequent uphill driving,
Kilometric performance depends to a
large extent on the following factors:
– poor drive battery charge condition.
– battery condition,
– low ambient temperature
(e.g. in winter),
– weight of the driver,
– driving speed,
– frequent starting and stopping
(e.g. in town traffic),
– driving style,
– aged, sulphated drive batteries,
– road surface condition,
– frequently necessary steering manoeuvres,
– driving conditions,
– ambient temperature.
The nominal values given by us are realistic under the following conditions:
– Ambient temperature of 20°C.
– 100% rated drive battery capacity
as per the DIN standard.
– new condition of the drive batteries with more than 5 charging cycles.
– Nominal load of 75 kg.
– Without repeated acceleration.
– Level, firm driving surface.
– reduced driving speed (especially
at walking speed).
In practical use, the kilometric performance under 'normal conditions' is
then reduced to approx. 80% – 40%
of the nominal value.
Hill climbing ability
We have specified that the vehicle
may be driven on gradients of up to
15% but point out that the systemrelated hill-climbing ability is much
higher because this ability must be
made available for the safe crossing
of obstacles.
– User weight of 75 kg.
– Normal road surface.
Rising/falling gradients of more than
15% must be driven without driver
for safety reasons (e.g. on ramps)!
84
Fuses
Underneath the seat plate in front of the drive batteries
Hereto observe chapter < Fuses >.
Mains-/battery fuse: .................................................................. 60 A
Lighting
Headlight bulb: .................................... Filament bulb 12V/3W E10
Rear light: ........................................... Festoon bulb 12V/C5W S8.5
Rear indicator: ............................ Spherical bulb 12V/P21W BA 15s
Front indicator: ........................... Spherical bulb 12V/P21W BA 15s
85
Tools
The following tools are required for adjustments and maintenance:
Open-end or ring spanner ............................ Wrench width (WW) 10 / 13 / 17 mm
Socket wrench .............................................................. Wrench width (WW) 19 mm
Hexagonal stud wrench ............................................ Wrench width 3 / 4 / 5 / 6 mm
Phillips screwdriver .............................................................. Size PH resp. PZ 0 / 1 / 2
Slot screw drivers ........................................................................................ Size small
Tightening torque for screwed connections
If not noted otherwise the screwed connections are to be tightened with the
corresponding torque.
Thread diameter M 4..........................................................................................3 Nm
Thread diameter M 5..........................................................................................5 Nm
Thread diameter M 6........................................................................................10 Nm
Thread diameter M 8........................................................................................25 Nm
Thread diameter M 10 .....................................................................................50 Nm
Thread diameter M 12 .....................................................................................85 Nm
86
TECHNICAL DATA
Model 9.506 / 9.506 -603
All data within the following table relates to the standard version of the stated
model.
Dimensional tolerance ± 1.5 cm, ± 2 °.
Short form of wheelchair dimensions:
SH = Seat height
SW = Seat width
SD = Seat depth
BH = Backrest height
Model: ......................................................Electric wheelchair 9.506 / 9.506-603
Type plate: .................................................... at the front right on the crossbrace
Class of use as per DIN EN 12184:................................................................Class B
Electrical system:
Drive control 6 / 8 km/h: .................................................. 24 Volt / 50 (70) A max.
Main fuse ......................................................................................................... 60 A
Lighting (option): ........................................................................................ 12 Volt
87
Dimensions:
Length (incl. footplates): ........................................................................max. 103 cm
Length of the Junior version (incl. footplates): ......................................max. 98 cm
Width (seat-width dependent): .......................60 cm (SW 43) up to 65 cm (SW 48)
Height (with adjustable ERGOpor back support): .... 95 cm (SH 45), 98 cm (SH 48)
Height (with adjustable ERGOpor back support): ...........................100 cm (SH 50)
Back support height sliding back: .............................................................45 / 50 cm
Back support height ERGOpor: ........................................................................55 cm
Seat height (SH) seat cover (seat plate +1 cm): .................................45 / 48 / 50 cm
Seat height with ERGOpor seat cushion: ...........................................48 / 51 / 53 cm
Seat width (SW) Model 9.506:
Standard (stepless adjustment over the arm support): ...................44 up to 53 cm
Arm support displaced inward: .............................................................. 38 to 47 cm
Seat width (SW) Model 9.506-603:
Standard (stepless adjustment): ............................................................. 29 to 36 cm
Seat depth (SD) Model 9.506:
with adj. back support, 3x adjustable by assembly in 3.5 cm steps: .....40 up to 47
cm
ERGOpor, 3x adjustable in 3.5 cm steps: ................................................ 40 to 48 cm
Seat depth (SD) Model 9.506-603:
with adj. back support, 3x adjustable by assembly in 3.5 cm steps: 30 / 33 / 37 cm
☞ Seat depth 30 to 37 cm only with user weight up to 100 kg
Seat angle mech. SH45 (in steps of 1.5°):.................................................... 4° to 16°
Seat angle mech. SH48 / 50 (in steps of 1.5°): ........................................... -2° to 17°
Seat camber, electric
(in several seat heights and lifting motor positions)
on SH 48, Actuator in upper position: ....................................................... -2° to 25°
on SH 48, Actuator in lower position:........................................................ -8° to 21°
on SH 50, Actuator in upper position: ....................................................... -1° to 22°
Drive wheel (pneumatic tyres, 2.5 bar max.):...............12½“ x 2¼“ (320 x 60 mm)
Steering wheel (pneumatic tyres, 2.5 bar max.): .................8“ x 2“ (190 x 50 mm)
Steering wheel (pneumatic tyres, 2.5 bar max.): ...... 9“ 280/2.60-4 (210 x 60 mm)
88
Transport dimensions:
Length (incl. support castors, without leg supports): .....................................73 cm
Width (without arm supports):.........................................................................60 cm
Height (without arm supports):.......................... SH45: 64 / SH48: 67 / SH50: 69 cm
(Back support upholstery removed, back support folded onto seat)
Ambient temperature: ...................................................................... -25°C to +50°C
Storage temperature with drive batteries: ...................................... -25°C to +50°C
Storage temperature without drive batteries:................................. -40°C to +65°C
Drive batteries:
Sealed batteries: ................................................. 2 x 12 V 34 Ah (5 h) / 40 Ah (20 h)
Sealed batteries: ................................................. 2 x 12 V 51 Ah (5 h) / 56 Ah (20 h)
Max. battery dimensions (LxWxH): .......................................... 350 x 278 x 190 mm
Permitted battery tilting angle of open drive batteries: ................................... 55°
Range (see Kilometric performance):
Drive batteries (gel) 40 Ah (20 h) at 6 km/h / 8 km/h:...................... approx. 30 km
Drive batteries (gel) 56 Ah (20 h) at 6 km/h / 8 km/h:...................... approx. 40 km
89
Performance (see Kilometric performance):
Max. forward top speed: ............................................................. approx. 6 / 8 km/h
Obstacle crossing upwards:............................................................... approx. 60 mm
Obstacle crossing upwards with step climber: .............................. approx. 110 mm
Obstacle crossing downwards: ....................................................... approx. 110 mm
Turning radius: ................................................................................... approx. 0.83 m
Max. permissible rising gradient: ...................................................................... 15 %
Max. permissible falling gradient:..................................................................... 15 %
Max. permissible transverse gradient: .............................................................. 15 %
Max. continuous hill-climbing ability: ............................................................... 12 %
Stability against tipping over: ........................................................................... 15 %
Max. safe camber (erect sitting position) ................................................... 8° (14%)
Weights (basic equipment):
Max. permissible total weight: ....................................................................... 240 kg
Permitted axle load front: .............................................................................. 100 kg
Permitted axle load rear: ................................................................................ 150 kg
max. user weight (including additional load): .............................................. 130 kg
Max. additional loading: ................................................................................... 10 kg
Empty weight (with 40 Ah sealed drive batteries of 14.6 kg): ........ approx. 79 kg
Empty weight (with 56 Ah sealed drive batteries of 21.8 kg): ........ approx. 93 kg
Empty weight without drive batteries:.............................................. approx. 50 kg
90
Meaning of the labels on
the wheelchair
Attention!
Read the operating manuals and other provided documentation.
Do not lift the wheelchair at the arm
supports or leg supports.
Detachable parts are not suitable for
carrying.
Drive mode
Switching to push mode with the selection lever right.
Push mode
Push only on level surfaces.
Indication for charging socket
Attachment possibility of the transport securing system.
91
Inspection certificate
Vehicle data:
Model:
Delivery note no.:
Vehicle identification No.
Pre-delivery inspection
Recommended safety inspection
(at least every 12 months)
Stamp of specialist dealer:
Stamp of specialist dealer:
Signature:
Signature:
Place, date:
Place, date:
Next safety inspection in 12 months
Next safety inspection in 12 months
Date:
Date:
Recommended safety inspection
(at least every 12 months)
Recommended safety inspection
(at least every 12 months)
Stamp of specialist dealer:
Stamp of specialist dealer:
Signature:
Signature:
Place, date:
Place, date:
Next safety inspection in 12 months
Next safety inspection in 12 months
Date:
Date:
92
Recommended safety inspection
(at least every 12 months)
Recommended safety inspection
(at least every 12 months)
Stamp of specialist dealer:
Stamp of specialist dealer:
Signature:
Signature:
Place, date:
Place, date:
Next safety inspection in 12 months
Next safety inspection in 12 months
Date:
Date:
Recommended safety inspection
(at least every 12 months)
Recommended safety inspection
(at least every 12 months)
Stamp of specialist dealer:
Stamp of specialist dealer:
Signature:
Signature:
Place, date:
Place, date:
Next safety inspection in 12 months
Next safety inspection in 12 months
Date:
Date:
Recommended safety inspection
(at least every 12 months)
Recommended safety inspection
(at least every 12 months)
Stamp of specialist dealer:
Stamp of specialist dealer:
Signature:
Signature:
Place, date:
Place, date:
Next safety inspection in 12 months
Next safety inspection in 12 months
Date:
Date:
93
GUARANTEE
We accept a guaranty for this product according to the legal regulations.
Apart from this we warrant:
– 4 years for frame.
– 2 years on the electronic and vehicle parts.
– 1 year on drive batteries.
We reserve the right to make technical improvements.
In case you find fault in this product
or parts thereof, send in the following
guarantee-segment with your description of the fault.
Do not forget to include the requested information regarding model description, delivery note number with
date of delivery, vehicle identification
number (Fz-I-Nr.) and your retailer.
The vehicle identification number (FzI-Nr.) is indicated on the type plate.
Pre-condition in any case is the intended use of the product, the use
of original spare parts by authorised
dealers as well as maintenance and inspections in regular intervals.
Guaranty is not granted for surface
damages, tyres of the wheels, damages due to loosened screws or nuts
as well as worn out attachment holes
due to frequent assembly work.
Furthermore, damage to the drive
and electronics caused by improper
cleaning using steam cleaning equipment or the deliberate or accidental
flooding of the components are also
excluded.
Malfunctions due to sources of interference, such as mobile phones with
high transmission power and other
sources of radiation outside the standard specifications are not covered by
the guarantee.
!
Attention:
Failure to observe the instructions
in the operating manual, improperly carried out maintenance work
and, especially, technical changes
and additions (add-ons) carried
out without our prior consent will
lead to a general loss of guarantee
and product liability.
☞ Note:
This operating manual as a part of
the product is to be handed out in
case of a change of owner.
The product conforms with the EC Directive 93/42/EEC (MDD) for medical products
94
GUARANTEE COUPON
Fill in the details! If necessary, copy and return.
Guarantee
Model designation:
Delivery note no.:
Vehicle ID No. (Fz-I-Nr.) (view type
plate):
Date of delivery:
Stamp of the dealer:
95
Your specialist dealer:
MEYRA-ORTOPEDIA
Vertriebsgesellschaft mbH
Meyra-Ring 2 · D-32689 Kalletal-Kalldorf
P.O. Box 1 703 • D-32591 Vlotho
Fon 05733 922-355
Fax 05733 922-9355
[email protected]
www.meyra-ortopedia.de
We move people.
205 315 001 • (Status: 2007-07) All technical modifications reserved!
96


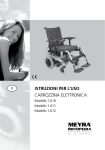

![e-track User`s Manual [FW1.00]](http://vs1.manualzilla.com/store/data/005696177_1-79f2a7130a6208690505d356432cfe5f-150x150.png)