1
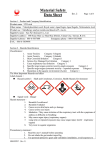
4. INVENTORY MAINTENANCE Intended Audience This section explains use and maintenance requirements for site-specific tables used in day-today management of your scientific materials inventory. The functions and procedures described in this section apply to the general, chemical, and biological modules. Each module, however, will have fields specific to the items being included in the inventory, and will have some functions that are module specific. This section focuses on the chemical module. Module Menus Module menus for chemicals, equipment, biological and supplies provide the means to maintain the shared catalog and to add, update, dispose, and restore your site-specific inventory items. You will use the Download/Reconcile menu to update your inventory records if you collect data with mobile computers utilizing barcode readers. You will use the Physical Inventory menu to compare expected-to-actual results when you audit inventory records. The menu choices reflect the current module. In the following example, the user is logged into the Site = University of Ottawa and the Module = Chemical. Menu options in the Biological module are similar. Site and Module Menu The Fixed Asset module includes options for ageing and depreciating your equipment records. The General module excludes ageing and depreciation. Review Section 2 for Instructions on using the Setup menu. Shared Tables The Catalog, Categories, Vendors, and State/Country tables are shared among all sites. All users who are authorized to modify these tables should use extra caution to ensure data integrity. For detailed directions on use of the shared tables, see Section 3 of this Guide. Enterprise User‘s Guide (v1.2) 4.1 2/2009 Add Inventory Site-Specific Tables - Inventory Use the Add option to enter new inventory item records. This function is used only to add; use the Update option to modify or delete inventory items. To add a new item, complete the following steps: Step Action 1 Select the Add menu option. 2 Search for the correct product using the Inventory Catalog Search – Chemical: Add or the Query Tool. a. Enter either a product, stock or CAS number for the most direct results. A product number will generally return the best results although it may return several records representing one or more sizes from one or more suppliers. Chemical Add with Search for a Specific Product Number A stock number will normally return only one record unless by chance two vendors use the same catalog and size designator. A CAS number will return all the records that share that value. The Chem Name may return multiple items. Search Results from Catalog with Active=All b. If the correct product does not display and you cannot locate it using either the Search or Query Tool, go to step 4 below. c. If the product is displayed, complete the following steps: Enterprise User‘s Guide (v1.2) 4.2 2/2009 Add Inventory (continued) Step Your Action i. Choose the correct vendor and size from the results grid by clicking the checkmark. You can click the pencil icon to edit the catalog record if desired before proceeding to step ii. below. ii. iii. The item Add screen will display. Enter all data elements required (marked with an asterisk) for your site records. Use your mouse or tab through the fields to complete data entry. At a minimum, If tag numbers are auto generated, the number will display when you click on Barcode #. To search the Location tree, click in the location field; to add a new location, click the Location icon. If the icon is not displayed, you do not have the necessary rights to modify the location tree. To search the User Group tree, click in the user field; to add a new user or group, click the User icon. If the icon is not displayed, you do not have the necessary rights to modify the user/group tree. The Quantity field (number of containers associated with this tag) will default to 1. The Unit and Amount Remaining values will be displayed as stored in the catalog record. You can modify the amount remaining by updating the field labeled ‗unit‘. Modify the Receive Date field if the default current date is incorrect. If shelf life is defined (in days) for the catalog record, the Expiration Date will be populated with the Receive Date plus the number of days. iv. Click Save; the Copy Last Data, Add Many, Delete and Print Tag buttons will enable. Chemical Module Add Form 3 Enterprise User‘s Guide (v1.2) Print Tag to print the barcode; apply it to the item. 4.3 2/2009 Add Inventory (continued) Step 4 Your Action If your exact product does not display when you search or query the catalog, you can select a similar record from the grid and click on the edit icon (the pencil) or click the Catalog Add button at the top right of the query form to add an entirely new record. The catalog maintenance form will display. Depending on your starting choice, you can Update an existing catalog record (for example, update with the correct unit and unit of measure) and click Save and click Return to return to the Add Inventory form. Copy the displayed catalog record to add a new record to the table: place a check mark in the Use Last Entered box, click New and modify the displayed information. Click Save and click Return to return to the Add Inventory form. Add a new catalog record: click New and enter the information about your item. Click Save and click Return to return to the Add Inventory form. Add Many If multiple items with exactly the same data are being added, click Add Many and enter the number of additional items when prompted. If you are using pre-printed tags, click Show and enter the tag values into the Item Tag column and click in the Item Tag field of the next row or use your Tab key to navigate to the next row until all barcode numbers have been entered. Click OK; apply tags to items If you are auto-generating barcode numbers, Click Print Tags for New Items Click OK; apply tags to items Click Chemical Add in the history line to return without adding additional records. Copy Last Data If multiple like items with different locations or user details are being added, click Copy Last Data. Update the fields that are being modified including the barcode number, and click Save. Print and apply the tags. Carry-Over To retain key values in the inventory record and select a different chemical from the catalog, click Clear in the Search area at the top of the screen. Type in new search criteria and click Search in the area at the top of the screen. The system will display the catalog results window. Select the chemical of your choice. If no record matches your new search criteria, click Catalog Add. In the Catalog Add screen, complete the site-required values for a new catalog record and click Save. When the record has been saved, click Return at the bottom left corner of the catalog window. IMPORTANT: Only the Location, User and Group, and PO number are carried over in the current version. Enterprise User‘s Guide (v1.2) 4.4 2/2009 Add Inventory (continued) Delete If you add a new record that is a mistake, you can delete it from the system without its being recorded in the inventory tables. You can use this delete function only from the Add window, and only while the record is still in focus in the Add window. If you discover the error at a later time, use the Update / Dispose option and identify the disposal method as an ‗Entry error.‘ [Hint: you will want to include ‗Entry error‘ as one of your Disposal system codes.] Chemical Linking Linking is used to create a parent-child relationship between records when a chemical container is split into smaller containers. You may link multiple items to a parent record. Step 1 Your Action To enable this feature, select the ChIM Access tab on the Settings page, click the checkbox next to Links-Split Containers and click Save. This operation enables the Parent Tag button in the Add screen. ChIM Access Tab 2 On the Item Add screen, click Parent Tag to view all active inventory records and select one as the Parent record, or (preferred) enter the tag number of the parent container and press [Tab] to display details of the parent record. Linking - Parent Tag Field on the Add Form Enterprise User‘s Guide (v1.2) 4.5 2/2009 Add (continued) Add Calculating Tare Weight Values Step 3 Your Action Complete information for the child record (e.g. Barcode, Location, Amount, etc.) and click Save. The amount remaining in the parent record will be decremented by the amount you have defined in the new child record. The Tare Calculation supported in the Vertere Inventory Manager allows users to report the following values in grams or kilograms. Tare Weight (the weight of the lid, container, or container + lid) Net Weight (the weight of the contents of the container) Gross Weight (the sum of the tare and net weight values) The Tare Calc buttons in Add, Update (Dispose), and Restore will be enabled only if your site administrator has enabled Tare Weight in Setup / Settings / ChIM Access Options. In this system, tare values can be specific: Lid Weight Container Weight If lid weight is not significant in your records, you can combine the lid and container weight into one value and enter it into the Container field. VIM will calculate the following values (Gross, Net, Tare) that are dependent upon the 3 parts of the equation you enter: Tare + Net = Gross Gross – Tare = Net Gross – Net = Tare IMPORTANT: To use the Tare Calc option you must have density and physical state values for all records with volume units of measure. You can add those values to the system by completing the fields at the bottom of the ADD form. For Net weight calculations from volume to mass, VIM calculates as: Native unit * conversion factor * density to arrive at the net amount in grams or kilograms. Enterprise User‘s Guide (v1.2) 4.6 2/2009 Add Calculating Tare Weight Values (continued) For example, if the item is 500 mL with density of 0.87, the conversion to kilograms would be 500 * 0.001 * 0.87 = .435 Kg Normally, you will calculate tare when you add the inventory item, so the tare weight would be based on the original amount. If you have used some amount of the inventory item before you measure the tare weight, you can calculate the values in UPDATE and base it on the amount remaining. Follow the table below to measure tare weight: Step 1 Action Ensure that the system operator has defined the correct measure for tare weight using the Setup / Settings / ChIM Access Options. WARNING: 2 If you already have inventory items with defined tare weights and you change the measure (e.g., from grams to kilograms), the new measure (e.g., kilograms) displays for these chemical items. Because all values are stored in kilograms and displayed in your measure of choice, this change will affect only records that require microgram calculations. When you add a container to your inventory using the Add function, you may define tare values by clicking Amt.Rem. (Tare) as shown below. Tare Weight Calculations The button will enable only if you have the correct values for the selected catalog item: Amount, Unit of Measure (U-O-M) and for liquid and gas records, the physical State and Density. If these values are missing, you can enter them in the Add window. Enterprise User‘s Guide (v1.2) 4.7 2/2009 Add Step Calculating Tare Weight Values (continued) 3 Action To record the tare values complete the fields as follows: Do you have a balance connected to your computer and software installed to capture data from input devices? If yes, the value from the balance will populate the highlighted field. Step through the fields as appropriate entering the lid, container (or container with lid) weights. If no, key in the values and press Tab. 4 5 The system prompts you: If VIM The Prompt Displays Action Calculates the tare weight Tare weight recorded as: _____ pounds or kilograms. Click OK. Does not calculate the tare weight (e.g., no density) ChIM is unable to calculate tare because the density is zero. Enter the tare weight if known. Click OK. Measure the container only. Type the tare weight and press [Tab]. At the prompt, ―Tare weight recorded as:_____ pounds or kilograms,‖ click OK. Click OK PLEASE NOTE: You cannot view or edit the tare weight values in the Add screen. You need to use the View/Update function in order to get into already existing tare values for a particular inventory item. Enterprise User‘s Guide (v1.2) 4.8 2/2009 View/Update Use the View/Update menu option to view inventory records, update a single record, transfer, dispose, or update one or more values in a select record group. Search and Query Inventory Records in View/Update Search, Query and ScanTag options are displayed at the top of the View/Update window in all modules. 1. To search, enter one or more selection parameters, (e.g., item barcode #, CAS, user or location, chemical name) or click Search to view all records. You can use more than one of the displayed fields in your search. Search Results in View / Update Enterprise User‘s Guide (v1.2) 4.9 2/2009 View/Update (continued) 2. To query, click on the Query Tool tab for more options such as lot number or expiration date. Define your criterion and click Add; enter one or more criteria, then click Search. Query Tools Common to All Modules Scan Tag Use Scan Tag to view a group of records that may not share a common value that can be used in the Search or Query tools. For example, if you have a list of tags that have been pulled from containers before their disposal, Scan Tag provides a quick way to enter all the tag numbers and process the entire batch of records in one transaction. 1. Click the Scan Tag button to enter a tag number. 2. Enter the tag number and press <Enter> or click Add. The cursor will return to the entry field ready for the next item. 3. If you scan/enter a barcode in error, highlight the record by clicking Select and then click Delete to remove it from the list. The Delete button does NOT remove records from active inventory. See Dispose below for the procedure to move items out of active inventory. 4. Click Process to display the records on the Results Grid. Scan Tags with 3 Items Added The Results Grid Whether you use the Search, Query Tool, or Scan Tag option to select records for updating or reporting, the selected records will display in the Results Grid as shown below. These records are immediately available for editing, or for printing, e-mailing, or storing as spreadsheets or other data formats. For more detailed reports or to include calculations, use the Inventory Manager‘s built-in Crystal Reports by Seagate. 1. Click Print to print the results to a PDF file or to save them to a spreadsheet. Enterprise User‘s Guide (v1.2) 4.10 2/2009 View/Update (continued) 2. Click in the Select column to check one or more items from the same page for editing. 3. Click the Select All box to check all items on a page for further processing. 4. Click the Show All button and then Select All to check all items if the results are shown on multiple pages. 5. Select one record and click ChemWatch MSDS to view the CG-II version of the data sheet. 6. If tare weight is enabled, select one record and click Calculate Tare to update the amount remaining in a container by placing the container on a balance for automatic recalculation or for manual data entry of the new gross weight. The system will calculate the amount used or refilled and create the appropriate consumption or refill record. 7. If linking is enabled, select one record and click View Link to view the parent or child record(s) as appropriate. Query Results with Update Options for Selected Records Use the following buttons to select records for editing. Select All – Click Select All to place a checkmark in all rows displayed in the results grid. Check the Select All box again to remove the check mark. Clear All – To remove the checkmark when the Select All option has been used, click in the Select All box to remove the checkmark from all rows previously selected. To select a single record, click the edit icon ( ) in to view details for that record, to print the barcode tag, or to update a record. (Locations and users can be updated only through the Transfer function.) Each tab page contains information about the item. Details on using these options are provided in the section VIEW/UPDATE – Details sections that follow. Enterprise User‘s Guide (v1.2) 4.11 2/2009 View/Update (continued) Multi-Edit Use the Multi-edit option to change several values within one or more inventory records. Use Transfer to change location or user information. 1. Mark one or more records displayed in the Search Results grid by clicking in the Select field. A check mark displays in the Select box. 2. Click the Multi-Edit button to update information such as lot number, expiration date, or status for the entire set. You can edit more than one value at a time. 3. Select the field to be edited from the drop-down box, enter the new value, and click Add. 4. When all fields have been defined, click Process to update all selected records with the new values. Multiple Edit Note: If you change values that have been used in your search or query process, all of the records you modify may be removed from the search results grid because they no longer meet the search/query criteria. Transfer Use the transfer option to change the location, the user / group, or the alternate user associated with one or more records in a select record group. 1. Mark one or more records displayed in the Search Results grid by clicking in the Select field. A check mark displays in the Select box. 2. Click Transfer to update the location, user, or group. 3. If the item is being transferred to a new location, click in the Location field to view the Location tree and select the new location. If you have associated a user and group with the location, they will display when you select the location. In the example below, only a group has been associated with the location; you can change the user and group. 4. If the item is being transferred to a new user or group, click in the user (PI in the following example) field to view the User/Group tree and select the new user, group, or user and group. Enterprise User‘s Guide (v1.2) 4.12 2/2009 View/Update (continued) 5. If the item is being transferred to a new alternate user, select the user from the dropdown (‗Alternate User‘ in the following example). When all fields have been defined, click OK. Transfer Inventory Dispose Use the Dispose option to remove one or more records from the active inventory records. Note: Only select a group of records for disposal if all of the containers will be marked as Empty. To record the amount disposed as greater than zero, select only one record for disposal processing. 1. Mark one or more records displayed in the Search Results grid by clicking in the Select field. A check mark appears in the Select box. 2. Click Dispose to display the Dispose Inventory form. Dispose Inventory 3. Complete the fields required at your site: disposal date, user who approved or processed the disposal, the disposal method from the drop down list, the disposal approval date (if any). You cannot enter a future disposal date. 4. If you are disposing of more than one container, the ‗Empty Container‘ field will be checked automatically. If you are disposing of a single container that is empty, be sure to mark the item an ‗Empty Container‘. 5. The ‗Approved On‘ date cannot be greater than the ‗Dispose Date‘. 6. Click OK. Enterprise User‘s Guide (v1.2) 4.13 2/2009 View/Update (continued) Change Tag Use the Change Tag option to replace a barcode tag number with a new number. This procedure will be helpful if you are using pre-printed barcodes and a tag is damaged. If you are printing barcodes for your inventory, reprinting the tag is the preferred option. Step Action 1 Mark one record displayed in the Search Results grid by clicking in the Select field. A check mark displays in the Select box 2 Click Change Tag to view the Change Tag detail form. 3 Enter the New Tag value and click OK. You cannot reuse a tag number. Change Item Tag Update Tare Weight To update Tare Weight values, use View/Update. Step Action 1 In View/Update, locate and select the record of choice using Search or Query tools. You must click in the Select column to enable the Tare Calc button. 2 Click Tare Calc to display and update the stored values. The cursor defaults to the Gross Weight field to enable you to use a balance. The system will update the amount remaining based on the new gross weight. Update Tare Weight 3 Enterprise User‘s Guide (v1.2) Or you can double click on the row to display the detail screen, and then select the Consumption / Refill tab. Any change in either consume or refill will cause the system to update the tare values. 4.14 2/2009 View/Update (continued) View Linked Records To view linked records, select the Parent or Child record in the Results Grid and click View Link. You can have multiple children under a single parent. Linked Items The above image shows the parent-child relationship tree. It also displays the linked amount. UPDATING DETAILS To view or update details of a single record, double click on the row to display the Inventory Item tab pages. Purchasing Tab The Purchasing tab page includes information about the product, the original amount and unit of measure, as well as information about the purchase itself. Purchasing Detail for Inventory Item Chemical Information Gateway Tab Use the Chemical Information Gateway tab page to view or update information about the substance. The information in the Gateway pertains to all substances that share the CAS or if no CAS is available, all substances that share the product number and vendor. Chemical Information Gateway in Inventory Item Detail Enterprise User‘s Guide (v1.2) 4.15 2/2009 View/Update (continued) Consumption / Refill Tab Use the Consumption / Refill tab page to view or update information about the amount remaining in the container. To use the Consumption or Refill options, these functions must be enabled by the System Administrator in Setup / Settings / ChIM Access. Consumption / Refill for Inventory Item Consumption - To record consumption complete the following steps: Required field: Amount Consumed Step 1 2 3 4 5 Your Action Click Consumption/Refill tab. In the Amount Consumed field, enter the amount you have used. The amount must be recorded in the original unit of measure. The system will warn you, but allow you to report consumption of an amount that exceeds the original amount recorded. This is so because the exact amount in a container may vary slightly. Edit Date Consumed field as required BY your site procedures. It will default to the current date. Enter any comments about the use of the substances, for example, the purpose of the use, the project, lab prep, etc. Click Save. The amount remaining will decrement. Refill - To refill a container, the container must be identified as ‗refillable‘ when the record is created. To record a refill operation complete the following steps: Required field: Amount Added Step 1 2 3 4 5 6 Enterprise User‘s Guide (v1.2) Your Action Click Consumption/Refill tab. In the Amount Added field, enter the amount you have added to the container. The amount must be recorded in the original unit of measure. The system will warn you, but allow you to report a refill of an amount that exceeds the original recorded capacity of the container. This is so because the exact container may hold an amount that exceeds the amount delivered in the container. Enter the refill cost as appropriate. Edit the Date Refilled field as required by your site procedures. It will default to the current date. Enter any comments about the refill process, for example, the source of the substance. Click Save. The amount remaining will increment. 4.16 2/2009 Module Menus –View/Update (continued) Status Tab Use the Status tab page to view or update information about the status or use of the substance. Status for Inventory Item Custom Data Tab Use the Custom Data tab page to view or update the custom text, custom date, and custom lookup values associated with the container record. Custom Data for Inventory Item Notes Tab Use the Notes tab to view or update notes associated with the container record and to view catalog notes (if any) about the substance. The tab label changes to ‗View Notes‘ if notes have been recorded either with the catalog or the container. If other notes have been recorded for the item, click View Previous Notes to review those entries. Notes for Inventory Item Enterprise User‘s Guide (v1.2) 4.17 2/2009 RESTORE Use the RESTORE option to return one or more records in a select record group from the inactive inventory record set to the active inventory. Usually, restore is required because items are disposed in error. To restore an item, 1. Go to the Chemical (or Biological) Inventory / Restore. 2. Enter the item barcode number to restore, or enter search criteria to display one or more records. 3. Mark one or more records displayed in the Search Results grid by clicking in the Select field or by using the Mark All or Mark Selected Items option. Chemical Restore with Selected Items Highlighted 4. Click Restore in the bottom right corner to return the item(s) to the active inventory. Note: The records you restore will be removed from the search results grid because they no longer meet the search criteria. If items were disposed as ‗empty‘ containers, they will be restored with the amount remaining equal to zero. To update the amount remaining, use the View/Update option, select the individual item, double click and user the Refill option to correct the amount remaining in the container. Audit Log Use the Audit Log to review Add, Edit and Dispose transactions. Access to the Audit Log is a right that can be associated with Roles you define in the system. All changes to inventory records are stored in the audit log. Each record includes the date and time of the transactions, the identity of the user who completed the transaction, the type of transaction, and the 'change from; and 'change to' values. Audit Log Search Options Search the database by user name, tag number, or date range options. Enterprise User‘s Guide (v1.2) 4.18 2/2009 Use the Query Tool to search for specific transactions such as Audit Date shown below. Query Tool in Audit Log Enterprise User‘s Guide (v1.2) 4.19 2/2009 Table Relationships: INV_CATALOG and C_MASTER MASTER ID The IM tables are linked to ensure data integrity and to minimize the data entry required to maintain complete inventory, physical, safety, and regulatory information. As shown in the following diagram, the INV_CATALOG table is the main repository for the chemical data provided by vendors. It is a listing of vendor-product-size specific records. From the Catalog, you retrieve a record that defines the nature of an inventory item— its description, vendor, product number, amount and unit of measure. The catalog record in turn is used to define your INV_ITEMS records. The Catalog is also used to create the C_MASTER table. This table is a link to all of the physical, safety, and regulatory details about your chemicals. Master records are created based on one of the following criteria and all catalog records that meet these criteria share a single master record. CAS CAS + (State and Purity) Vendor + Product Number (no CAS) This means that all catalog records that share CAS=50-00-0 (with or without state of liquid) but that do not have state and purity values share one master ID number All catalog records that share CAS=50-00-0 and are defined as Liquid with Purity of 37% share another master ID number. When no CAS is available, the vendor identification and the vendor‘s product number identify a specific product. The item can be only one state and purity. Take care with mixtures that may be delivered to you with a CAS associated with a pure substance. If you are creating a mixture record for a chemical with a CAS number, be sure to create a separate master ID by defining the purity of the substance. If, for example, it is only 25% of the substance with a CAS number, be sure to specify the state and purity of the mixture record. Mixtures are linked to the master ID—so all substances of the same type should be linked to the same master ID. Benefits Why do we use this method? To simplify data management. The Inventory Manager has tables for many characteristics of your chemicals: Fire Codes, Physical Properties, Regulatory Data, Canadian Regulatory Data, Synonyms, Health Hazards, NFPA and HMIS values, Risk and Safety Phrases, and Material Safety Data Sheets. Enterprise User‘s Guide (v1.2) 4.20 2/2009 TABLE RELATIONSHIPS: Benefits (continued) A strategy is required to limit repetitious data entry. The C_Master table allows us to maintain one (or perhaps two or three) records for each of the standard reagents. You maintain one set of records for CAS 50-00-0, but two for substances such as nickel which may be in solid or powder form, and may, in addition to their different physical data, have different safety and regulatory requirements. Another example is oxygen. You may have one record for gaseous oxygen and another for liquid oxygen. The storage, shipping, and BOCA requirements will differ significantly with these two items. The Inventory Manager is delivered with over 240,000 catalog records representing over 85,000 unique products. Each comes with an associated Master record. As you add new items to the catalog, the program will check the Master table, determine if a record exists and if it exists, prompt you to define if you are modifying an existing record or creating a new record. If no record exists, it will create a new Master record. Only after a Master record is identified will you be able to view or update the associated records in the linked tables. The following pages identify the screens for physical, safety, and regulatory data. Enterprise User‘s Guide (v1.2) 4.21 2/2009 Vertere Inventory Manager Table Relationship Enterprise User‘s Guide (v1.2) 4.22 2/2009 TABLE The Chemical Information Gateway allows quick access to a full range of chemical data, RELATIONSHIPSC including the ChemWatch Chemical Database. hemical Information Gateway Users can access the Gateway from the Catalog, the Add inventory, or the Update menus. The Chemical Information Gateway Option Biological Information Getaway The Biological Information Gateway allows quick access to the various Biological information screens. Physical/ Chemical Data The following fields are available for physical properties. Data as provided by the vendors and by ChemWatch will be included as available and as appropriate. Populating the shelf life value will cause the system to calculate the expiration or reevaluation date (custom_date_2) for new inventory items as they are added to your Inventory records. The calculation is acquisition date + shelf life. Density is required for conversion of your unit and unit of measure values into kilograms—a consistent value for use in reports and total calculations. Physical Properties Enterprise User‘s Guide (v1.2) 4.23 2/2009 TABLE RELATIONSHIPS Chemical Data NFPA values for all items in the NFPA704 list are provided with IM. This list includes only chemicals with a valid CAS number. For any record that does not already have the NFPA values, you can add them. HMIS values are not provided and cannot be stored in version 1 of the Inventory Manager. NFPA and HMIS Values Enterprise User‘s Guide (v1.2) 4.24 2/2009 TABLE RELATIONSHIPS Health Hazards Place a checkmark in the box to the right of the hazard(s) associated with the chemical named in the Description field. Four optional, user-definable values are provided and can be customized by using Setup / Settings / System Tables menu. Health Hazards Risk and Safety Codes The European Risk and Safety Phrases help you identify the hazards associated with your chemicals. You can modify the delivered values by clicking on the Add or Delete button and adding or removing new phrases for your chemical master. Risk and Safety Phrase Windows Enterprise User‘s Guide (v1.2) 4.25 2/2009 TABLE RELATIONSHIPS The regulatory data provided with the IM will help you comply with Federal, state, and local regulatory guidelines. Regulatory Data Can Regulatory Data Canadian Regulatory Tabs Enterprise User‘s Guide (v1.2) 4.26 2/2009 TABLE RELATIONSHIPS: IBC Users who must comply with International Building Code (IBC) guidelines that limit the quantity of flammable and other hazardous substances within an area can define the hazard class for each of the hazard types identified in the IBC guidelines. Locations can be divided into Control Areas to allow the IM to monitor the quantity of hazardous materials stored within each area, comparing on-site quantities with the exempt amounts. Exempt amounts for each named hazard type are defined for each Control Area using the Exempt Amount button in the Location Tree. The following fields and their respective options are drawn from the BOCA 2004 guide. All values can be edited or deleted by using the Setup / Settings / System Tables menu and other values can be added. Three optional, user-definable fields are provided. IBC Hazard Types for Control Area Management Enterprise User‘s Guide (v1.2) 4.27 2/2009 TABLE RELATIONSHIP Synonyms The IM includes a set of more than 60,000 synonyms. You can delete, modify, or add new synonyms. These values are used in defining mixtures so that you can pick a generic name like ‗acetone‘ rather than a product specific name like ‗acetone, A.C.S. Reagent Grade.‘ Synonym Maintenance Window MSDS Link The link to Material Safety Data Sheets supports several options. Define the path to CG-II, ChemWatch and MSDS Resources in Setup / Vendors. Both CG-II and ChemWatch should be defined on the ChemWatch vendor record. Any path you define for other vendors will be displayed under the MSDS Resources option. MSDS Link Maintenance Window Enterprise User‘s Guide (v1.2) Click CG-II to link to ChemWatch Gold2 on the web. Click MSDS Resources to link to other MSDS resources such as the Sigma-Aldrich or JT Baker CD or web sites. Click Scanned MSDS to define the path to a scanned or copied MSDS or to view a previously defined MSDS resource on a local server. 4.28 2/2009 Scanned MSDS TABLE RELATIONSHIPS To define the path to a scanned or copied MSDS, complete the following steps: MSDS Links Use the System / Administration / Scanned MSDS menu option to define the preferred storage location for your documents. (See Section 6, Administration.) Your MSDS documents may be scanned or copied and pasted into your preferred location. They may be in .pdf, .doc, .txt or .xls format. When you view the scanned MSDS page, you will see immediately if a data sheet has already been associated with this catalog item. In the example below, no MSDS has been stored. Scanned MSDS Path and Options To associate a data sheet with this catalog record, complete the following steps. 1. Click Select MSDS to browse and locate the MSDS. The MSDS may be in .pdf, .doc, .txt or .xls 2. Define the MSDS date; this can be the date on the data sheet, the date you create the file, or your site can define the date as the expiration date for this data sheet. 3. After you locate the MSDS and insert the date, determine which of the three options apply. a. The MSDS is for this catalog record only. b. The MSDS applies to all catalog records that share the item‘s CAS value. c. The MSDS applies to all catalog records that share the vendor and product number; it covers all sizes of the defined product. 4. Click Save. Enterprise User‘s Guide (v1.2) 4.29 2/2009 TABLE RELATIONSHIPS: Link directly to ChemWatch, to ChemWatch Gold2 (CG-II), or to the ChemWatch Collection—over 1 million vendor-specific data sheets. ChemWatch Data ChemWatch ‗Red Screen‘ – Access point to complete data Enterprise User‘s Guide (v1.2) 4.30 2/2009