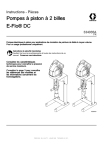
1
Users Manual FOR MODELS SHOWN (VERSION 3.05 DATED May 2007) HI-Q123 HI-Q124 HI-QTBS 4016 E.Tennessee St. Tucson, AZ. 85714 U.S.A. Tel: 520-748-7900 Fax: 520-790-2808 HI-Q126 E-MAIL:[email protected] Web:http://www.otekcorp.com SINCE 1974 OVER 29 YEARS OF INNOVATION Printed in the USA, Copyright 1996 All Rights Reserved HOW TO USE THIS MANUAL This manual details the operation of all HI-Q programmable intelligent controllers pictured on the front cover. These include the HIQTBS, HI-Q123, HI-Q124, and HI-Q126 models. Due to the variety of options and displays that can be ordered with a HI-Q controller, portions of this manual that do not apply to your specific unit may be skipped. Material is presented in five sections: Introduction, Hardware Options, General Operation, Additional Functions, and Reference. Introduction - This section covers the basics of using a HI-Q controller. All information necessary to unpack the unit and establish communications can be found here. Also covered is the basic command format and operating mode characteristics. Hardware Options - Connection diagrams for all HI-Q hardware options are located here. The easy to read diagrams show how to connect inputs, outputs, communication lines, and power supplies. General Operation - All HI-Q data handling operations are covered in this section. From analog (A/D) inputs to analog (DAC) outputs, linearization to tare, bang-bang control to PID, this section covers the bulk of HI-Q functions and operating methods. Additional Functions - This section contains miscellaneous HI-Q functions that may be used to aid and enhance HI-Q operation. Included here are emergency and manual control commands, digital input functions, and SHOW commands. Reference - Connection/wiring diagrams, a troubleshooting guide, command list, ASCII codes, application notes, and technical data can be found in this section. Should any problems arise while setting up the controller, refer to the Troubleshooting section on page 53 for helpful hints and Error! Reference source not found. Error! Reference source not found. for information on how to return the unit to a known operating state. The information provided in this manual is copyrighted by OTEK Corporation. This documentation is licensed and not sold. OTEK Corporation reserves the right to make changes to any product without further notice to improve reliability, function, or design. OTEK Corporation devices are not authorized for use as components in life support devices. WARNING In the process of improving these instruments, the typical connections have changed as of October 30, 1999. Please refer to the typical connection diagrams located in section 5, page 17 and the master connection diagram on page 73 Copyright © OTEK Corporation, July 1999. All rights reserved. Printed in the United States of America. 1 Contents INTRODUCTION.............................................................................................................................................................. 5 1. HI-Q PROGRAMMABLE INTELLIGENT CONTROLLERS..................................................................................................... 5 1.1 HI-Q Features ............................................................................................................................................................ 5 1.2 Functional Overview .................................................................................................................................................. 6 1.3 Common Questions..................................................................................................................................................... 6 1.4 Revision History ............................................................................................................ Error! Bookmark not defined. 2. Q UICK START GUIDE ....................................................................................................................................................... 8 2.1 Unpacking the Unit..................................................................................................................................................... 8 2.2 Power Requirements................................................................................................................................................... 8 2.3 Applying Power to the Unit ......................................................................................................................................... 8 2.4 A Quick Demo ............................................................................................................................................................ 8 2.5 Installation ............................................................................................................................................................... 10 3. COMMUNICATING WITH THE HI-Q ................................................................................................................................. 9 3.1 Serial Communications............................................................................................................................................... 9 3.1.1 Sending Serial Commands ....................................................................................................................................................... 9 3.1.2 Command Format ................................................................................................................................................................. 10 3.1.3 Changing Communications Parameters .................................................................................................................................. 11 3.1.4 Communications on a Network .............................................................................................................................................. 11 3.1.5 Other Commands .................................................................................................................................................................. 11 3.2 Keypad Communications .......................................................................................................................................... 11 3.2.1 Navigating Keypad Menus .................................................................................................................................................... 12 3.2.2 Selecting and Changing Parameters ....................................................................................................................................... 12 3.2.2.1 Numerical Parameters .................................................................................................................................................... 12 3.2.2.2 Commands and Parameters ............................................................................................................................................. 12 3.2.3 Locking Menu Items ............................................................................................................................................................. 12 3.2.4 Programming the keys for special functions ........................................................................................................................... 13 3.2.4.1 Keypad assignments ........................................................................................................................................................... 14 4. OPERATING MODES ....................................................................................................................................................... 13 4.1 USER Mode.............................................................................................................................................................. 13 4.2 Saving USER Parameters ......................................................................................................................................... 14 4.3 Turning HI-Q Operation On/Off ............................................................................................................................... 14 4.3.1 Run/Stop Commands............................................................................................................................................................. 14 4.3.2 TTL3 Control........................................................................................................................................................................ 14 4.3.3 SEND Command .................................................................................................................................................................. 14 4.3.4 Initial RUN Delay ................................................................................................................................................................. 14 HARDWARE OPTIONS ................................................................................................................................................. 15 5. INPUT OPTIONS .............................................................................................................................................................. 15 5.1 Voltage Inputs .......................................................................................................................................................... 15 5.2 Current Inputs ............................................................................................................... Error! Bookmark not defined. 5.4 Strain Gage/RTD/Resistance Inputs .......................................................................................................................... 16 5.5 Thermocouple Inputs ................................................................................................................................................ 17 5.7 Discrete Inputs ......................................................................................................................................................... 17 6. OUTPUT OPTIONS .......................................................................................................................................................... 18 6.1 Voltage Outputs........................................................................................................................................................ 18 6.2 Current Outputs ....................................................................................................................................................... 18 6.3 Discrete Outputs....................................................................................................................................................... 22 7. COMMUNICATION OPTIONS ........................................................................................................................................... 19 8. POWER SUPPLY OPTIONS .............................................................................................................................................. 21 GENERAL OPERATION ............................................................................................................................................... 22 2 9. INPUT PROCESSING ........................................................................................................................................................ 23 9.1 Input Channels ......................................................................................................................................................... 23 9.2 Input Channel Operations......................................................................................................................................... 23 9.2.1 Channel Inputs ...................................................................................................................................................................... 23 9.2.1.1 Analog Inputs ................................................................................................................................................................ 24 9.2.1.2 Digital Input Measurements ............................................................................................................................................ 24 9.2.1.3 Serial Inputs ................................................................................................................................................................... 24 9.2.2 Linearization ......................................................................................................................................................................... 24 9.2.2.1 Defining Polynomials ..................................................................................................................................................... 25 9.2.2.2 Defining Tables.............................................................................................................................................................. 25 9.2.3 Running Average .................................................................................................................................................................. 26 9.2.4 Scaling to Engineering Units ................................................................................................................................................. 27 9.2.5 Using Tare Values ................................................................................................................................................................. 27 10. CALCULATIONS AND CONTROL ALGORITHMS……………………………………………………………………………28 10.1 Performing Calculations on Channel Data.............................................................................................................. 28 10.2 Using Control Algorithms with Channel Data ......................................................................................................... 29 10.2.1 PID Control Algorithm ........................................................................................................................................................ 29 10.2.1.1 Turning PID Control On/Off ......................................................................................................................................... 29 10.2.1.2 Setting PID Constants................................................................................................................................................... 29 10.2.1.3 PID Results .................................................................................................................................................................. 29 10.2.2 Ramp + Soak Algorithm ...................................................................................................................................................... 30 10.2.2.1 Setting Ramp and Soak Points ...................................................................................................................................... 30 10.2.2.2 Adjusting Ramp Rates .................................................................................................................................................. 30 10.2.2.3 Setting Hold Times....................................................................................................................................................... 30 10.2.2.4 Repeating a Ramp + Soak Process ................................................................................................................................ 31 11. STREAMS AND OUTPUTS .............................................................................................................................................. 32 11.1 Stream Operation ................................................................................................................................................... 32 11.2 Stream Values......................................................................................................................................................... 32 11.3 Max/Min Stream Values.......................................................................................................................................... 33 11.4 Stream Limits ......................................................................................................................................................... 33 11.4.1 Setting Limits...................................................................................................................................................................... 33 11.4.2 Limit Hysteresis .................................................................................................................................................................. 34 11.5 Output Options ....................................................................................................................................................... 34 11.5.1 Serial Output ....................................................................................................................................................................... 35 11.5.1.1 Unit Messages .............................................................................................................................................................. 35 11.5.1.2 Limit Messages ............................................................................................................................................................ 35 11.5.1.3 Numeric Notation ......................................................................................................................................................... 36 11.5.1.4 Serial Output Rate ........................................................................................................................................................ 36 11.5.2 Display Outputs .................................................................................................................................................................. 36 11.5.2.1 Numerical Displays ...................................................................................................................................................... 36 11.5.2.2 Bargraph Displays ........................................................................................................................................................ 37 11.5.3 DAC outputs ....................................................................................................................................................................... 37 11.5.3.1 Output Scaling ............................................................................................................................................................. 37 11.5.3.2 Output Limits ............................................................................................................................................................... 37 12. ALARMS AND ACTIONS ................................................................................................................................................ 38 12.1 Alarm Uses............................................................................................................................................................. 38 12.1.1 Smart alarming.................................................................................................................................................................... 39 12.1.2 On/Off control..................................................................................................................................................................... 39 12.2 Trigger delays ........................................................................................................................................................ 39 12.3 Actions ................................................................................................................................................................... 40 12.3.1 Action Conflicts .................................................................................................................................................................. 40 12.3.2 Relays and BiMOS outputs .................................................................................................................................................. 40 12.3.3 Digital Outputs .................................................................................................................................................................... 40 12.3.4 DAC outputs ....................................................................................................................................................................... 40 12.3.5 Command execution ............................................................................................................................................................ 41 12.3.6 Run/stop control .................................................................................................................................................................. 41 ADDITIONAL FUNCTIONS .......................................................................................................................................... 42 13. DIGITAL I/O................................................................................................................................................................. 42 13.1 Digital I/O Commands ............................................................................................................................................ 42 3 13.2 Digital measurements ............................................................................................................................................. 42 13.2.1 Period ................................................................................................................................................................................. 43 13.2.2 Frequency ........................................................................................................................................................................... 43 13.2.3 Pulse Width......................................................................................................................................................................... 44 13.2.4 Event Counting ................................................................................................................................................................... 44 13.2.5 Timing ................................................................................................................................................................................ 45 13.2.6 Disabling Digital Functions ................................................................................................................................................. 45 14. MANUAL CONTROL OF OUTPUTS ................................................................................................................................. 46 14.1 Emergency Shutdown.............................................................................................................................................. 46 14.2 Relays and Discrete Outputs ................................................................................................................................... 46 14.3 Digital Outputs ....................................................................................................................................................... 46 14.4 Analog outputs ....................................................................................................................................................... 47 15. COMPUTER OPERATING PROPERLY TIMER ................................................................................................................. 47 15.1 Enabling the COP Timer......................................................................................................................................... 47 15.2 Testing the COP Timer ........................................................................................................................................... 47 16. SHOWING SYSTEM STATUS .......................................................................................................................................... 47 16.1 Input Parameters .................................................................................................................................................... 48 16.2 Output Parameters ................................................................................................................................................. 48 16.3 Other Parameters ................................................................................................................................................... 48 16.4 System Diagnostics ................................................................................................................................................. 48 17. DISPLAY CONFIGURATION ........................................................................................................................................... 48 17.1 General Setup......................................................................................................................................................... 48 17.2 Bargraph Displays.................................................................................................................................................. 49 17.2.1 Bargraph Mode ................................................................................................................................................................... 49 17.2.2 Bargraph Scale .................................................................................................................................................................... 49 17.2.3 Bargraph Color.................................................................................................................................................................... 49 17.2.4 Bargraph Limits .................................................................................................................................................................. 50 17.3 Numerical Displays ................................................................................................................................................ 50 18. HI-Q APPLICATIONS .................................................................................................................................................... 51 18.1 Temperature Control Using a Thermocouple........................................................................................................... 51 18.1.1 Control Specifications ......................................................................................................................................................... 51 18.1.2 Connections ........................................................................................................................................................................ 51 18.1.3 Configuration ...................................................................................................................................................................... 51 18.1.4 Alternate Relay Control ....................................................................................................................................................... 55 TROUBLESHOOTING………………………………………………………………………………………………………53 DEFAULT PARAMETERS ............................................................................................................................................ 54 POWER SUPPLY NOTES .............................................................................................................................................. 55 ASCII CODES ................................................................................................................................................................. 56 THE HI-Q COMMAND SET .......................................................................................................................................... 57 MASTER CONNECTION DIAGRAM ........................................................................................................................... 73 DISPLAY MENU ............................................................................................................................................................. 74 DISPLAY OVERLAY ..................................................................................................................................................... 75 MECHANICAL DRAWINGS ......................................................................................................................................... 76 ORDERING INFORMATION ........................................................................................................................................ 77 BENEFITS AND COMMON SPECIFICATIONS OF THE HI-Q SERIES…………………………………………….A-D 4 Introduction This section begins with an overview of HI-Q features and options. It continues with a quick start guide for unpacking the HI-Q and verifying its operation with a short demo. Communications setup and command format are then discussed, along with commands for changing communication parameters. Finally, operating mode commands, which determine how and when the HI-Q performs any functions, is presented. 1.HI-Q Programmable Intelligent Controllers The HI-Q series of programmable intelligent controllers are rugged and reliable process controllers and displays. With multiple analog input and signal conditioning options, the HI-Q series can interface with most sensors on the market. Digital and discrete I/O is also standard, resulting in a remarkably flexible design that is adaptable to almost any use. Serial communication and push button controls make the HI-Q remarkably simple to set up and use without programming! Simply install the unit, set the process variables and/or limits, and the HI-Q will do the rest. 1.1 HI-Q Features All HI-Q controllers are available with the following: • Analog or digital inputs • Non-volatile memory for important parameter storage • Digital outputs • Built-in thermocouple & RTD linearization • 500V input isolation (10-34VDC & 90-265VAC Power) • User definable lookup X-Y tables/polynomials • • Full PID control algorithms RS232C, RS485, or RS422 serial communications • • Lifetime Warranty (Ltd.) Keypad controls with security/lockout feature Optional features include: • Concurrent RS232C/RS485 communications • Digital input signal conditioners • Dry contact inputs • Universal power supply • High voltage inputs • Explosion proof housing • Analog input signal conditioners 5 1.2 Functional Overview A block diagram of the HI-Q is shown in Figure 1. Analog, discrete, and high voltage inputs are measured, conditioned, isolated, and sent to the CPU for processing. Serial communications, 4-20mA outputs and 0-5Vdc outputs are all isolated.1 The CPU handles all data processing, engineering conversions, linearization, and alarms. The display and keypad inputs are handled by a second microprocessor. Figure 1: A simplified internal structure of the HI-Q series controllers 1.3 Common Questions How can a HI-Q controller be used? The HI-Q line is extremely versatile. Use it for: • Bang-Bang (ON-OFF) control • Temperature Control • PID control • Smart Display • Event Counting • part of a DCS/SCADA What’s the difference between a smart and intelligent controller? 1 TTL inputs are tied directly to the CPU without isolation. Only TTL level signals may be connected to these lines. 6 As a smart controller, the HI-Q series can receive serial data, display it, perform complex calculations on it, use it to set off alarms, and control external equipment. As an intelligent controller, the HI-Q can take measurements with its own A/D converter to operate independently of other systems or in concert with other computers/controllers. Do I have to learn a programming language to use a HI-Q controller? No. The controlling functions of the HI-Q series are pre-programmed. Only process parameters need to be specified for the controller to function properly. Plus, all of the HI-Q commands are shared among ALL models. Once you know the commands for one model, changing to a different one is a snap. Do I need a computer to configure and communicate with a HI-Q controller? Yes. All basic functions can be accessed through the keypad on the front of the display. Only more advanced functions, like entering user-defined tables and equations, require the use of a computer or hand-held terminal. G.U.I. (Graphical User Interface): OTEK’s Free GUI is available at www.otekcorp.com/software.htm What if I need a function not found on the HI-Q? OTEK offers FREE SOFTWARE DEVELOPMENT for controllers purchased in quantity. Plus, our software library is being continuously expanded. For specialized applications, CUSTOM SOFTWARE can be ordered. Email to [email protected], dial (520) 748-7900 to speak to a representative, or FAX your software needs to OTEK Corporation at (520) 790-2808. Edition Description Software Revision September, 1996 September, 1996 February, 1997 1st. New Publication 2.2 2nd. New/Updated commands (rate limits, SA, DELAY) Updated command syntax for SA (A1HH ->HH1) 2.3 April, 1999 June, 2001 4th. 5th 2.75 2.75 Sept. 2002 6th November, 2004 7th Updated drawings Corrected typographical errors Incorporated addendum version 3.00 into manual. Added RETRANS command to command listing. Updated delay section Sept. 2005 October 2006 3rd. 8 th Input & Output Options 9 th Add: CPU Fail Mode 2.5 3.01 3.03 / 019 3.04 7 2. Quick Start Guide This section explains how to remove the HI-Q controller from its box and put it into operation. Its goal is to familiarize the user with the HI-Q. 2.1 Unpacking the Unit While unpacking the HI-Q unit, inspect it carefully for damage or missing items. If an item is missing or broken, contact your place of purchase immediately. The HI-Q shipping package contains: (1) HI-Q programmable intelligent controller (1) User’s Manual (this manual) Mounting hardware (self locking nuts (4), flat washers (4), spacers (8) Note: All matting connectors are included 2.2 Power Requirements The standard HI-Q requires 5Vdc ±5% across its terminals and draws a nominal of 1.5A current. Other power supply options available are: 10-32Vdc (24Vac) & 90-265Vac (100-360Vdc) With either of these options, an isolated 5V, 50mA power source is provided at the rear of the unit on terminals TS3-1 and TS3-2. It may be used to power external devices if care is taken not to exceed its maximum power rating. See the Power Supply Notes on page 55 for information regarding power supply wiring and voltage requirements when using long cable runs. 2.3 Applying Power to the Unit Refer to Power Supply Options on page 21 to determine which HI-Q terminals are for power. To reduce the risk of electric shock, make all connections while power is disconnected. 2.4 A Quick Demo To verify proper HI-Q operation, run the display demo. Pressing any keypad key will halt the demo. 1. Disconnect power from the unit. 2. Hold down any one (1) keypad key. 3. Reconnect power. 8 2.5 Installation The HI-Q is a modular two piece design consisting of the front and rear modules. The front module is the display portion of the device and the rear module is the user interface portion of the device. These two modules are connected to each other via the gold plated 26 pin IDC connector. Installation of the HI-Q switchboard series instruments is easily accomplished by the following sequence. 1. Carefully separate the two modules by pulling them straight apart. Do not twist or bend the modules since this may cause damage to the connector. 2. Insert the front module with the rubber gasket into the panel cutout and slide the supplied spacers onto the brass studs. One spacer on each stud should be adequate for most installations however we supply enough for two per stud for very thin panels. 3. Carefully slide the rear module over the studs and plug the connectors. 4. Place the flat washers over the studs and push up to the rear module. 5. Install the self locking nuts and torque to 5-6 in-lbs. 3. Communicating With the HI-Q There are many ways to communicate with a HI-Q. This chapter describes how to communicate using keypad and serial communications, including RS-232C, RS-485, and RS-422. 3.1 Serial Communications The HI-Q series of controllers support the use of RS-232C, RS-485, and RS-422 protocol. Refer to 0 Communication Options on page 19 for wiring a HI-Q to a communications network, PC, or terminal. The factory preset communications settings are: 9600 baud, 1 start bit, 8 data bits, no parity, 1 stop bit, no flow control With the serial communication lines properly connected, apply power to the unit. The following power-on message will be transmitted: HI-Q by OTEK Version 2.75 Address: ‘01’ Warming-Up... * Where nnn is the name of the HI-Q (TEK, DIN, TBS, 123, or MEG). If this message does not appear, check to make sure the proper connections have been made to the unit. Also make sure the proper baud rate, flow control, and COM port settings are selected in any communications software being used. If necessary, hardware flow control may be used with serial communications. The serial port connections shown in 0 Communication Options, simulate a hardware handshake from the HI-Q. While true handshake signals are not being generated, a PC will send and receive serial data as if the HI-Q is generating the proper signals. 3.1.1 Sending Serial Commands All commands sent to a HI-Q must be preceded by the letter ‘S’ and the unit’s address. Since each controller can be assigned a unique address or “name”, multiple units may be connected to the same line without interference. The current address for the HI-Q controller is shown in its power-on message and defaults to ‘01’. Commands may be entered using upper or lowercase characters. Serial input is 9 automatically converted to uppercase. Commands received without a proper address will be ignored. For example, to see the current scale stored in the unit, send the showin command: S01 showin <CR> Where 01 is the address shown in the power-on message and <CR> is the carriage return or ENTER key. The unit will respond by displaying the current settings for the input channels. The asterisk (*) indicates the command was successfully interpreted and executed. An incorrect command will result in a question mark (?) being displayed: ? * 3.1.2 Command Format In this manual, the commands listed for the HI-Q will be given in the following format: COMMAND<arg1, arg2> [arg3: opt1 opt2] [opt3, opt4, opt5] <arg1> = [opt1] = The name of the command is shown in BOLD type. Required arguments are placed in <triangle> brackets and optional arguments are in [square] brackets. A colon (:) after an argument means one of the options after it must also be specified. For arguments separated by commas (,) pick only one of the listed choices. For arguments separated by spaces, any number of the arguments may be specified. The <arg1>= and [opt1]= boxes show the allowed parameter values. Empty brackets [] indicate no parameter is specified. Commands will be executed after the HI-Q receives a carriage return or ENTER key. For example: STREAM<n>= [off serial disp1 disp2 disp3 dac1] STREAM<n> [+,-: serial disp1 disp2 disp3 disp4 dac1 dac2 pc] Determines which outputs are affected by stream <n>. []= Shows current outputs affected by stream <n> <n>= 1,2,3,4,5,6,7 [off]= [serial]= [disp1]= [disp2]= Removes all outputs from stream <n> Sends stream <n> data to serial output Sends stream <n> data to display #1 Sends stream <n> data to display #2 [disp3]= [disp4]= [dac1]= [dac2]= Sends stream <n> data to display #3 Sends stream <n> data to display #4 Sends stream <n> data to DAC #1 Sends stream <n> data to DAC #2 A ‘+’ before an argument adds that argument to the existing output list for stream <n>. A ‘-’ before an argument removes that argument from the existing output list for stream <n>. This command has one required argument (<n>) and two types of optional arguments. For the first option, STREAM<n>= is followed by OFF or a combination of the other arguments: STREAM1= serial, disp1, dac1 STREAM2= STREAM3= off (Sends stream 1 data to the serial port, dac1) (Shows current stream 2 values) (Removes all outputs from stream 3) For the second option, a (+) or (-) precedes each option: Stream1 -serial Stream1 +dac2 -dac1 (Removes serial output from previous stream 1 list) (Removes dac1 output from stream1 and adds dac2 output) 10 3.1.3 Changing Communications Parameters The address and baud rate of the HI-Q controller can be changed to suit most communications needs. To change the address, use the ADDR command: ADDR<new address> <new address>= New address to give the HI-Q (6 chars. max) If the current HI-Q address is ‘01’, the following command would change it to ‘TANK1’:2 *S01 ADDRTANK1 ‘TANK1’ * The unit will now ignore the ‘01’ address and respond only to commands that begin with ‘S’ plus ‘TANK1’. To change the communication baud rate, use the BAUD command:3 BAUD [nn] []= Show current baud rate [nn]= 1200, 2400, 4800, 9600, 19.2K When changing baud rates, the unit immediately switches to the new communications setting. After using the baud command, be sure to change any communication software or terminal baud settings to match the new HI-Q baud rate. 3.1.4 Communications on a Network If more than one HI-Q is connected to the same serial communications network, such as on an RS-485 system, it becomes necessary to limit the amount of serial output from each HI-Q. This can be accomplished by sending the NET command to each unit on the network. After receiving the NET command, the HI-Q will process data and commands as usual, but will only send serial output in response to the SEND command. Effectively, the HI-Q becomes a listener or remote device (polling). On a typical network, all listeners or remotes are controlled by a single computer. When a response is desired from a particular HI-Q, it is ordered to transmit its most recent readings over the network with the SEND command. In this manner, each unit on the network can be “polled” for data when it is needed without having a single unit clog the network. To enable normal serial responses from the HI-Q, use the LOC command. This command allows the HI-Q to continuously transmit serial data. 3.1.5 Other Commands Commands relating to specific functions of the HI-Q controller are covered in detail throughout this manual and are listed alphabetically in The HI-Q Command Set on page 57. 3.2 Keypad Communications Many HI-Q commands may be accessed via the four (4) keypad buttons. The keys work on a menu driven system, providing access to command groups in related sections. In addition, each key can be assigned a command that will execute immediately when pressed. To enter the keypad menu, press and hold the menu(g) key until the bargraph elements cycle. If the keypad is password protected, the HI-Q will request a password before entering the menu mode. The proper password must be entered to use the keypad commands. 2 The new setting is used until the HI-Q is reset or loses power. See section 0: Operating Modes to make permanent changes to HI-Q parameters. 11 3.2.1 Navigating Keypad Menus When in the keypad menu, use the select ( g ) key to find the desired sub-menu. Pressing the enter (n) key “drops” into the selected sub-menu. The up/modify ( t ) key will return to the previous menu. The new menu name will appear on the display. To return to the top of the menu tree at any time, press the menu (g) key. Pressing the menu (g) key while at the top of the tree exits the menu mode. The display will flash briefly at the “end” of a menu branch if there are no sub-menus to select from. A complete menu tree is listed in Display Menu, on page 71. 3.2.2 Selecting and Changing Parameters At the end of a menu branch, the select ( 4 ) key will cycle through a list of commands and/or parameters for that sub-menu. Press the enter (n) key to execute the command or change the parameter. 3.2.2.1 Numerical Parameters To change a numerical value such as a limit, use the select ( 4 ) key to cycle through the digits in the number. The up/modify (t) key will change the value of the blinking digit. When the entire number has been entered correctly, press the enter (n) key. The HI-Q will ask for confirmation of the change. Press enter (n) again if the new value is correct, or press the up/modify (t) key to abort the change. 3.2.2.2 Commands and Parameters Commands and parameters in a sub-menu blink to distinguish them from other sub-menus. To add or remove a parameter from a submenu (such as a stream output), or execute a command, find the proper item with the select (4) key and press the enter (n) key. As with numerical parameters, the HI-Q will ask for confirmation of the change. 3.2.3 Locking Menu Items Menu items and sub-menus can be ‘locked out’ to prevent inadvertent access. To lock or unlock a menu item, enter the lockout mode by holding down the up/modify (t) key then pressing and holding the menu (g) key until A1 flashes on the display. Enter the required password. Use the select (4) and enter (n) keys to find the appropriate menu item, then press and hold the menu (g) key until the decimal points in the item name turn on/off. Lit decimal points indicate a locked menu item while unlit decimal points indicate unlocked items. Momentarily pressing the menu (g) key will exit the lockout mode. 3.2.4 Programming the keys for special functions The four keys on the front can be specially programmed through the serial port to perform a special function or series of functions. The functions can be as easy as displaying the max value with one key then clearing and returning to the current value with another key. A more complex function would be a complete reprogramming of the unit on the press of a key. This is useful in testing multiple devices with a single HI-Q meter. An example would be in the testing of motors. Different size motors require different settings for testing. The keys can be set so that each key represents a different size motor. Since these keys are also used for the main menu, the key presses required for the special functions are momentary presses. 12 3.2.4.1 Keypad assignment The four keys are assigned special names for set up. g=MENU t=TOP 4=Right n=Enter To assign special functions you must first establish a serial connection from the HI-Q to a PC or Laptop computer. Once the connection has been verified send the command S01 TOP. The HI-Q will respond with the message “Enter keypad commands – press ESC to quit”. At this time you can enter the command or group of commands that you would like to execute when the (t) key is pressed. The above would apply to all keys on the HI-Q. Simple example: Setting up the unit so that the (t) key displays the max value and the (n) key clears that value and returns to the main loop. Send the following commands: S01 enter<CR> S01 newmaxmin <CR> S01 eqn1s1=c1<CR> ESC (press the escape key when finished) The N send the commands: S01 top<CR> S01 eqn1s1=max1<CR> ESC (press the escape key when finished) The unit is now set up to display the max reading of channel #1 when the (t) key is pressed and will return to the normal operating mode and clear the max value when the (n) key is pressed. To view the current keypad assignments send the SHOWKEY command (S01 showkey). Each key, along with its associated commands will be listed. If no commands are listed for a particular key, nothing will happen when pressed momentarily. 4. Operating Modes The HI-Q can be powered-up in one of two distinct operating modes. USER mode is the normal operating mode, and can be used to make the HI-Q take readings and update its outputs automatically on power-up. DEFAULT mode is a special mode used for troubleshooting. In each of these modes, HI-Q operation can be turned on and off under both hardware and software control. 4.1 USER Mode If the TTL3 input is unconnected during power-up or if the USER command is given, the HI-Q enters USER mode. All operating parameters are read from non-volatile memory (eeprom) and HI-Q operations continue according to these values. 13 4.2 Saving USER Parameters After the HI-Q has been configured and is operating as desired, the WRITE (S01 write) command can be used to save the current operating status. Entering USER mode will recall the saved parameters and resume the operating status present when the last WRITE command was given. 4.3 Turning HI-Q Operation On/Off Unless instructed to do otherwise, the HI-Q patiently waits for commands to execute. It will perform its normal operation of continuously reading inputs and updating outputs only when instructed to RUN. 4.3.1 Run/Stop Commands The simplest way to enable HI-Q operation is with the RUN (S01 run) command. This command instructs the HI-Q to read its inputs and update its outputs until given the STOP (S01 stop) command. While running, the HI-Q will still accept commands from the serial input and keypad. 4.3.2 TTL3 Control Another way to enable HI-Q operation is with the TTL3 input. Issuing the TTL3ON (S01 ttl3on) command instructs the HI-Q to RUN when TTL3 is high or unconnected and STOP when TTL3 is low. The TTL3OFF (S01 ttl3off) command disables TTL3 control of HI-Q operation. Do not use TTL3 control with the LAP or COUNT functions. These functions use the TTL3 input as a reset line and will not work reliably with TTL3 run/stop control on. 4.3.3 SEND Command The HI-Q can be instructed to RUN/STOP with the SEND command: SEND[n] S01 send <cr> = HI-Q reads inputs and updates outputs once. S01 send5 <cr>= HI-Q reads inputs and updates outputs 5 times Note: maximum number of consecutive sends is 255 when not in the RUN mode. This command instructs the HI-Q to RUN for 5 readings. After 5 readings, the HI-Q will automatically return to its previous operating state. While operating under the SEND command, the HI-Q will accept serial input, but will not execute serial commands or execute some keypad functions until all [n] readings have been taken. 4.3.4 Initial RUN Delay After being told to RUN, the HI-Q begins taking readings after executing a programmable delay of up to 255 seconds. This delay can allow a process to warm up after a power-on before the HI-Q takes control. Set this delay with the IDELAY (S01 idelay)command: IDELAY 10 = 10 seconds of initial delay after entering RUN mode Note: maximum initial delay time is limited to 255 seconds (4.25 minutes) 14 Hardware Options This section covers the different hardware options available with the HI-Q. The types of signals each option uses and its external connections are presented. This information should be used when connecting signals to the HI-Q to verify that all connections are made properly and that the appropriate signal levels are being used. Because each HI-Q controller has a unique set of input/output options, refer only to the options specified for the particular unit being connected. Use the Ordering Information on page 77 & 78 to determine which external terminals are used for each input/output function. 5. Input Options HI-Q inputs are determined by its part number. This number is located externally on the unit and should be used for reference. See ordering information on page 73 to determine the input option for a specific unit. 5.1 Voltage and Current Inputs (DC or AC) Voltage and Current inputs (DCV, DCA, ACV, ACA, DcmA and ACmA should be connected per the following diagram using terminals 7 and 8 for channel#1, 9 and 10 for channel#2, 11 and 12 for channel#3. Depending on the model number ordered, the input will be either DC or AC. Jumpers inside the front module allow for easy range selection of 500mV, 5V, 50V, 300V, 5mA, 20mA and 500mA. 1 12 7 HOW TO CHANGE THE RANGES FOR V & mADC: 1. Remove rear module. 2. Remove the rear cover and save the screws. 3. Identify the bank of jumpers on the lower right hand corner of the P.C.B. and their number. 4. Use the following table for range change. NOTE: If not specified at time of ordering, the unit is shipped with 0.5V F. S. or 5mA F.S. Note: Any other input type (RMS, Hz, etc.) must be changed at the factory. RANGE (F.S.) JP1 JP7 JP13 JP2 JP8 JP14 JP3 JP9 JP15 JP4 JP10 JP16 JP5 JP11 JP17 JP6 JP12 JP17 JP26 JP27 JP28 0.5V OFF OFF OFF OFF OFF OFF ON 5V OFF OFF OFF OFF OFF ON OFF 50V OFF OFF OFF OFF ON OFF OFF 300V OFF OFF OFF ON OFF OFF ON 4-20Ma OFF OFF ON OFF OFF OFF ON 5mA OFF ON OFF OFF OFF OFF ON 50mA ON OFF OFF OFF OFF OFF ON CH. 1 CH. 2 CH.3 5.Test for proper range by plugging in the rear assembly and if not ok, verify Step #4. If ok replace back cover and screws. Mount in panel. 6. Apply power and signal and recalibrate for proper ZERO and SPAN (see Command Set on pg. 60). 15 5.4 Strain Gage/RTD/Resistance Inputs Strain gage, RTD, and resistance inputs should be wired as per the following drawings. When using 3 or 4 wire RTD’s, connect the reds and whites together for each channel. RTD, Resistance 1 12 7 Strain-gage (load cells) 1 7 16 12 5.5 Thermocouple Inputs Thermocouples can be connected using the following drawing. The terminals are marked + and – since different thermocouple manufacturers use different colors. In most cases however, the RED wire is the negative or (-) and the other wire is the positive or (+). Diode D5 is used for the junction compensation to obtain extremely accurate temperature measurements. For best results, the thermocouple wire should be connected directly to the HI-Q’s terminals. In cases which this is not possible, the use of thermocouple extension wire is acceptable. Notes: 1. No isolation exists between channels. 2. Do not use grounded thermocouples. 1 5.7 7 12 Discrete Inputs The discrete inputs are standard on the HI-Q and allow the HI-Q to be re-configured on the fly. By programming TTL1 or TTL2 to act as actions, the HI-Q can serve multiple applications from within one unit. The inputs TTL1 and TTL2 are internally pulled up to +5V and when pulled down externally, must be pulled down to the 5VRET terminal (#2). These inputs are also used for counting pulses, measuring frequency, period and time interval. The inputs are protected internally from overvoltage however, TTL levels should always be observed when using the HI-Q. 1 12 7 17 6. Output Options HI-Q outputs are determined by its part number. This number is located on the back side of the front module on the unit and should be used for reference. See 6.1 Voltage Outputs Output option 2 is the 0-5VDC ISOLATED output. The above diagram shows how to connect voltage outputs. The minimum load allowed for this voltage output is 100K ohms. Most electronic voltmeters, chart recorders, valves and other devices have input impeadances greater than 1 Megohm. 1 2 6.2 Current & Power Outputs The analog output, when used in the current mode, can be adjusted for 0-24mADC, 0-20mADC, 4-20mADC or 4-24mADC depending on the configuration and the dscale / doffset settings. This output option has a maximum allowable load of 1K ohm. The current output is of the source type and does not require and external power supply for operation. The source voltage is 30V maximum and 24V typical. The Transducer power output option provides isolated +/-15VDC or +30VDC power for your 4-20mADC transmitters. The maximum available current is 30mADC. 4-20mADC output Transducer power output. 1 2 6.3 +15V 1 +30V -15V 3 Relay Outputs Relay output connections are shown on the right. The relays can be Connected as either Normally Open (N.O.) or Normally Closed (N.C.) And the software can also be configured as Normally energized or Normally De-energized. This allows for total system flexibility and Fail safe operation. 18 O.C.T. #1 O.C.T. #2 O.C.T. #3 O.C.T. #4 O.C.T. #5 O.C.T. #6 O.C.T. #7 O.C.T. #8 +5VDC OUT (50mA max) GND (common emmitters) 7. COMM ON 1 1 N.C. RELAY #1 N.O. COMM ON RELAY #2 N.C. 6 N. O. 6 COMM ON RELAY #3 N.C. N. O. COMM ON N.C. 12 12 N. O. RELAY #4 OPEN COLLECTOR OUTPUTS ARE RATED AT 250mA EACH (0.25A) AT 5VDC. Relay cont ac ts are rat ed at 5 amps /120V AC res ist ive load. For larger l oads, us e these relays t o trip ext ernal relays . 87HQ_OCT 87HQ_RLY Communication Options The HI-Q can be ordered with RS232, RS422 or RS485 serial communications. All the serial connections are made through the standard DB9 connector. When using RS232, any standard DB9 cable will work without modifications. The DB9 on the HI-Q is a Female type. When using RS422 or RS485, a special cable must be made in order to achieve communications. DB9 1. NO CONNECTION 2. TXD (RS232) 3. RXD (RS232) 6 1 9 5 4. NO CONNECTION 5. GROUND 6. TXB (RS422) 7. TXA (RS422/RS485) 8. RXB (RS422) 9. RXA (RS422/RS485) 87HQ_DB9 7. Communication Options (continued) 19 20 8. Power Supply Options The HI-Q power supply input range is determined by its part number. This number is located externally on the unit and should be used for reference. See ordering information on page 73 to determine the power supply option for a particular unit. The following diagrams show the different power supply connections to the HI-Q. 1 12 7 1 -VDC or AC LOW 2 EA RTH GROUND 3 +VDC or AC HOT 90-265VAC OR 10-32VDC POWER INPUT. 21 General Operation All data gathered by the HI-Q must follow a path of operations before it can be displayed or used as an output. Like a product on an assembly line, the operations along the path refine the data and convert it to a more useful form. Understanding how this data path works makes using the HI-Q a snap. There are three major portions of the HI-Q data path: input channels, calculations, and stream outputs. All three sections can be seen in Figure 2. Each section takes the data it is given, modifies it if required, and passes it to the next section. The input channels (analog and digital) read data from external inputs and sensors then perform the scale, offset, averaging, linearization, and tare functions. Inputs to this section can come from the serial port, analog inputs, or from a digital input function. The results of these operations are saved for use in the calculations section. E quation F e e d back S E R I A L C ha n n el 1 S tre am 2 A /D In p u ts C ha n n el 2 C ha n n el 3 I N P U T S tre am 1 L in ea riz a tion A ve ra g in g S c a le /O ffse t T a re M a th E qu a tio n s and C on tro l A lgo rith m s S tre am 3 S tre am 4 S tre am 5 M ax/M in L im its A ctio ns O utpu ts S tre am 6 C ha n n el 4 D igita l F u nc tio n s S tre am 7 Figure 2: HI-Q data flow organization The calculations section combines data from the input channels with mathematical formulas and equations. It can also perform control algorithms, including PID and ramp + soak. The results of these operations can be routed to seven different output areas known as streams. The stream outputs take data from the calculations section and send it to the appropriate hardware. Data can be sent to the analog output, the serial output, or to the display. The stream outputs also take max/min readings, perform limit calculations, and execute any actions specified by alarm conditions. The next four chapters explain in detail the operation of the HI-Q data path. This knowledge is a crucial part of understanding how the HI-Q operates. The concepts and terminology presented in these chapters will be used throughout the rest of this manual. 22 9. Input Processing All data gathered by a HI-Q controller is placed into an input channel where it may be easily manipulated and processed. This chapter describes how the HI-Q uses its four input channels to read and process data. 9.1 Input Channels A channel is a path or sequence of operations data is passed through before it can be used in calculations or control algorithms. Data in a channel is processed to make it more suitable for display and manipulation. Figure 3 shows a block diagram of how the four input channels in a HI-Q controller are arranged. Equation Feedback I N P U T D A T A Channel 1 Linearization Running Average Scale/Offset Tare Channel 2 Linearization Running Average Scale/Offset Tare Channel 3 Linearization Running Average Scale/Offset Tare Channel 4 Linearization Running Average Scale/Offset Tare Figure 3: Input channel organization. 9.2 Input Channel Operations Each input value is placed into its own channel for processing. The data in the channel is then linearized, averaged, scaled, offset, and tared as desired. If an operation is not needed for a specific input, it may be bypassed. The resulting data is then ready for use in calculations and control algorithms. 9.2.1 Channel Inputs Data for input channels comes from analog, digital, and serial sources. Up to four serial, three analog, and one digital input can be manipulated by the HI-Q. 23 9.2.1.1 Analog Inputs Analog measurements are placed into input channels with the CH<n>ON command: CH<n>ON <n>= 1,2,3 Example: S01 ch1on<cr> turns on channel #1. Currently, the HI-Q allows for up to 3 analog input channels and 1 digital input channel (channel #4) This command takes data from the corresponding A/D input and places it in the channel where it may be manipulated by input channel operations. A/D inputs can be turned off with the CH<n>OFF command: CH<n>OFF <n>= 1,2,3 Example: S01 ch1off <cr> turns off channel #1. 9.2.1.2 Digital Input Measurements Digital measurements are made by specifying a digital input function. Details for each of these functions can be found in 0 13.2 Digital measurements. The HI-Q places the results of these measurements in input channel 4. 9.2.1.3 Serial Inputs Data for input channels can be obtained from the serial port with the CHN command. This command takes data from the serial input and places it in the specified input channel. CHN<n> [ffff] [ffff]= Value to place in channel <n> <n>= 1, 2, 3, 4 Example: S01 chn1 5000 places the value 5000 on channel #1, which is then processed and sent to the display, dac and relays if desired. 9.2.2 Linearization The first operation that can be performed on an input channel is linearization. Inputs from non-linear sources such as thermocouples, RTDs and horizontal cylindrical tanks can be manipulated to provide linear output values. HI-Q controllers have two methods of providing linearization: lookup tables and polynomials. Lookup tables compare input values to sets of desired input/output results and determine the output value through interpolation. Polynomials linearize data by passing each input value through the ninth order equation: Y = A9X9 + A8X8 + A7X7 + A6X6 + A5X5 + A4X4 + A3X3 + A2X2 + A1X + A0 The coefficients A0-A9 are chosen to counteract the non-linear output characteristics of the sensor being used. The linearization method used by the HI-Q is determined with the LIN command: LIN<n> [OFF, PZ, TZ, sensor type] []=Show current linearization for channel <n> [OFF]= Turns linearization for channel <n> off [PZ]= Sets linearization to user polynomial [TZ]= Sets linearization to user table [sensor type]= Enables built-in linearization for [sensor type] <n>= 1,2,3,4 Example: S01 LIN1TZ<cr> sets linearization of channel #1 to the user created table. S01LIN1J turns on linearization for type J thermocouple. Use the TEMPUNITS command to select the units in degrees C, F or K. 24 J B N K R S J type thermocouple B type thermocouple N type thermocouple K type thermocouple R type thermocouple S type thermocouple T E RTD RTD T type thermocouple E type thermocouple European α=0.00385Ω/Ω/°C ANSI α=0.00392Ω/Ω/°C Use the TEMPUNITS command to set the desired output to °C, °F or °K. Example S01TEMPUNITS1F sets channel #1 to °F. 9.2.2.1 Defining Polynomials The user-defined polynomial (PZ) is a single segment, 9th order polynomial defined by its coefficients. The current values of these coefficients can be viewed with the SHOWPOLY (S01 showpoly)command. To change an individual coefficient, use the SETA command: SETA<n> [ffff] Sets a single polynomial coefficient []= Shows current value of A<n> [ffff]= Sets A<n> value to [ffff] 0≤n≤9 Example: S01 seta1<cr> will show the value of coefficient A1. S01 seta1 10-3 12+4 will change the A1 coefficient to 10-3 12+4. To enter or modify the entire polynomial, use the SETP (S01 setp) command. This command will display each polynomial coefficient (starting with A0 ) and prompt for a new value. To keep the current value, simply press ENTER. To use a different value, type the new value and press ENTER. The HI-Q will record any changes and move on to the next coefficient. After all coefficients have been viewed/modified, the HI-Q will display the asterisk (*) prompt. Editing can be stopped at any point in the polynomial by pressing the ESCAPE (Esc)key. 9.2.2.2 Defining Tables The user-defined table (TZ) is a set of 25 (X,Y) points which are used to interpolate input data for linearization. The current user table can be seen with the SHOWTABLE (S01 showtable) command. The X coordinates correspond to input values for the table, while the Y coordinates represent the HI-Q output for each corresponding X input. To enter or modify a single table point, use the SETX and SETY commands. SETX<n> [ffff] Sets a single user table X coordinate []= Shows current value of X<n> [ffff]= Sets X<n> value to [ffff] 0 ≤ n ≤ 24 Example: S01 setx1 10 sets the input value of X1 to 10. SETY<n> [ffff] Sets a single user table Y coordinate []= Shows current value of Y<n>[ffff]= Sets Y<n> value to [ffff] 0 ≤ n ≤ 24Example: S01 sety1 15 sets the output value of Y1 to 15. Setting X1 to 10 anf Y1 to 15 will change the channels value to 15 when 10 is reached. In order to process inputs quickly, the HI-Q requires the X coordinates to be in ascending order. The first X coordinate that is smaller than the previous X coordinate will mark the end of the table. This is useful for defining tables less than 25 points. For example, to use a 3 point table, the following coordinates could be entered: Coordinate Number 0 1 2 3 X -25 -10 50 0 Y 0 10 100 0 A SHOWTABLE command will display only the first three points. Since X3 is less than X2, the table ends at X2. To increase the length of the table by one point, enter a value for X3 that is larger than X2 and make sure X4 is less than X3. 25 To view and modify the entire table, use the SETT command. The HI-Q will show each X and Y coordinate and prompt for a new value. To keep the current value, press ENTER. To use a different value, type the new value and press ENTER. After all table points have been viewed/modified, the HI-Q will show the asterisk (*) prompt. To stop editing at any time, press the ESCAPE key. 9.2.3 Running Average If an input signal is noisy or fluctuates between values rapidly, it can be smoothed out with averaging. The averaging prevents abrupt output changes during large input jumps or fluctuations. HI-Q controllers use a weighted arithmetic running average to filter input signals. Figure 4 shows the effect averaging has on a square wave input. The effect of averaging can be adjusted by changing the weight of the average. The larger the weighting factor, the quieter the output and the slower the output response to input variations. The weighting factor is specified with the AVG command: AVG<n> [dddd] []= Shows current average weight for channel <n> [dddd]= Sets channel <n> average weight to [dddd] dddd = 0,1 disables channel <n> averaging <n>= 1,2,3,4 0 ≤ [dddd] ≤ 255 Example: S01 avg1 8 sets the averaging of channel #1 to 8. Since the HI-Q’s standard read rate is 16/second with one channel on, the average of 8 will take approximately ½ second to settle to the actual value. 1 0.9 0.8 0.7 Output 0.6 0.5 0.4 0.3 0.2 0.1 0 1 7 13 19 25 31 37 43 49 55 61 67 73 79 85 91 97 103 109 115 121 127 133 139 145 # of Samples Figure 4: The effect of averaging a square wave 26 9.2.4 Scaling to Engineering Units After averaging, each channel undergoes a scale and offset. These operations are used to transform the filtered input data to the desired units for display. Data is scaled according to the linear equation: y=mx+b with “y” the output and “x” the input. Example for 4-20mADC: The 4-20mADc is by far the most common input signals used. Converting the 4-20mADc signal to engineering units would be per the following. X=Required reading at 4mA; Y= Required reading at 20mA; Then SCALE = (Y-X) / (20mA-4mA) OFFSET = X – (4mA x SCALE) With a desired reading of 5000 at 20mA and 0 at 4mA then; Scale = (5000 - 0) / 16 = 312.5 Offset = 0 – (4 x 312.5) = -1250 Then enter the scale value of 312.5 and the offset value of –1250.0. The HI-Q will read 5000 at 20mADC and 0 at 4mADC. SCALE<n> [ffff] []= Shows current scale for channel <n> [ffff]= Sets channel <n> scale to [ffff] <n>= 1, 2, 3, 4 Example: S01 scale1 6.25<cr> OFFSET<n> [ffff] []= Shows current offset for channel <n> [ffff]= Sets channel <n> offset to [ffff] <n>= 1, 2, 3, 4 Example: S01 offset1 -25 9.2.5 Using Tare Values Subtraction of a tare value is the last operation performed on each input channel. The tare function subtracts a previously recorded input value from all subsequent readings. TARE<n> [ON, OFF, NEW, ffff] []= Shows current tare value for channel <n> [ON]= Turns channel <n> tare on [OFF]= Turns channel <n> tare off [NEW]= Reads a new tare value from channel <n> [ffff]= Set channel <n> tare to [ffff] <n>= 1,2,3,4 Tare is most often used to take measurements relative to a base reading. For example, if a weight reading of 350Lbs. is recorded as a tare value, a 15000Lb. input will be displayed as 14650Lb. after the tare is subtracted. 27 10. Calculations and Control Algorithms Once data gathered by a HI-Q controller has passed through an input channel, it can be used in mathematical equations and control algorithms. These functions are used to generate values for the output streams, which update the display, serial output, digital outputs, and analog outputs. 10.1 Performing Calculations on Channel Data After all inputs are measured and conditioned, the resulting data goes through a series of calculations. Here, output values are generated by using the data in up to seven separate equations. These equations can include the addition (+), subtraction (-), multiplication (*), and division (/) operators as well as the square root (SQRT) function. The HI-Q evaluates equations from left to right with no operator precedence. Parentheses must be used to change the order of evaluation. Numerical constants, previous controller outputs, tare values, Max/Min values and limit values can also be used in equations, allowing calculation of almost any desired output parameter. The HI-Q evaluates equation 1 first, followed by equations 2, 3, etc. EQN<n>[equation] []= Erases equation <n> [equation]= Equation to use in calculations <n>= 1, 2, 3, 4, 5, 6, 7 Example: S01 eqn1 s1=c1 places the channel #1 data into stream 1. S01 eqn1 s1=max1 places the max recorded value into stream 1. S01 eqn1 s1=c2-c1 places the result of channel #2 minus channel #1 into stream 1. S01 eqn1 s1=sqrtc1 Extract square root of channel #1 Valid equation format: RESULT= OPERATOR(s) and OPERAND(s) RESULT= can be: S<n>= Stream <n> OPERATOR(s) can be C<m>= Channel<m> * Multiplication SP<m>= PID setpoint <m> / Division HH<m>= HH limit <m> + Addition H<m>= H limit <m> Subtraction L<m>= L limit <m> ( Opening parenthesis LL<m>= LL limit <m> ) Closing parenthesis RI<m>= RI limit <m> RD<m>= RD limit <m> SQRT Square root function HYST<m>=Hysteresis <m> A<m>= Scale <m> B<m>= Offset <m> DH<p>= DAC H limit <p> DL<p>= DAC L limit <p> OPERAND(s) can be: T<m> Tare <m> S<n> Current value of stream <n> SP<m> PID setpoint <m> R<n> Rate of change of stream <n> KP<m> PID P constant <m> MAX<n> Max. value of stream <n> KI<m> PID I constant <m> MIN<n> Min. value of stream <n> KD<m> PID D constant <m> C<m> Current value of channel <m> 1 ≤n ≤ 7 O<m> Last value of channel <m> 1 ≤m ≤ 4 A<m> Scale <m> 1≤p≤2 B<m> Offset <m> A maximum of 4 nested parenthesis can be used. Equations with invalid expressions will be evaluated until an error is reached, with an undefined result and a warning on the serial output. The following are examples of valid equations: All examples below must be preceeded by the equation number (EQNn). 28 S1= C1*12 - C2 C2= S1+S2*(C1-C2) HH3= SQRT(C3-MAX1)*A1-O4 A4= C4*(MIN2-(MAX1+C1-(S3*S1)))+1.8 S5= S1+T1*KP2-B2 C1= (SP3-C2)/21.9 - (C2-SP2)*3.14159E-3 10.2 Using Control Algorithms with Channel Data In addition to the use of equations, control algorithms can be used with channel data. Control algorithms are hard coded into the HI-Q for speed and ease of use. PID and ramp + soak control algorithms are currently available with the HI-Q. 10.2.1 PID Control Algorithm PID control uses sampled input data to provide a second order, feedback driven control system. The PID algorithm compares each input value to a desired input called the setpoint. The resulting value is an error signal, which is used to compute an output value. Error signal = Input - Setpoint Output = P*(Error signal) + I*(Integral of error signal) + D*(Derivative of error signal) Where P, I, and D are numerical constants used to adjust or “tune” the PID algorithm. Tuning is used to control properties such as setpoint overshoot, process delay adjustment, and rise time to setpoint. 10.2.1.1 Turning PID Control On/Off PID control for each input channel can be turned on and off independently. PID<n> <ON, OFF> <ON>= Turns channel <n> PID on <OFF>= Turns channel <n> PID off <n>= 1,2,3,4 Example: S01 pid1on turns the PID control function of channel #1 on. 10.2.1.2 Setting PID Constants The desired setpoint, proportional, integral, and derivative constants (SP, P, I, and D) for the PID algorithm are also independent for each channel. SP<n> [ffff] []= Shows current setpoint for channel <n> [ffff]= Sets channel <n> setpoint to [ffff] KI<n> [ffff] []= Shows current I value for channel <n> [ffff]= Sets channel <n> I value to [ffff] KP<n> [ffff] []= Shows current P value for channel <n> [ffff]= Sets channel <n> P value to [ffff] KD<n> [ffff] []= Shows current D value for channel <n> [ffff]= Sets channel <n> D value to [ffff] 10.2.1.3 PID Results After the PID algorithm finishes its calculations, the results replace the original channel value. This allows the results of a PID algorithm to be used in equations before being sent to output streams. 29 10.2.2 Ramp + Soak Algorithm The ramp + soak algorithm allows the HI-Q to ramp the channel 1 setpoint (SP1) to a specified value, hold it there for a time, then move on to another point. The HI-Q can store up to 8 points and can repeat the ramp + soak process up to 255 times. After the process is complete, the setpoint can be ramped to a final value before the algorithm ends. The RSON command turns the ramp + soak algorithm on and starts the ramp + soak process moving towards point 1. The RSOFF command stops the algorithm. Current ramp + soak values can be viewed with the SHOWRAMP command. RS <ON, OFF> <ON>= Turns ramp + soak ON and resets to beginning of process <OFF>= Turns ramp + soak algorithm OFF 10.2.2.1 Setting Ramp and Soak Points The values to ramp to are specified by the RSLIMIT command. Up to eight (8) separate points can be defined. Point values are specified in current engineering units (the units shown on the serial output) for ease of use. A ninth ramp to point defines a final value for the setpoint. This point is also set with the RSLIMIT command and is shown as the ‘Final Value’ with the SHOWRAMP command. RSLIMIT<n> [ffff] []= Show current limit for point <n> [ffff]= Set point <n> limit to [ffff] 1≤n≤9 Point 9 is the final value to ramp to before the algorithm ends 10.2.2.2 Adjusting Ramp Rates The ramp rate for each point is set with the RSRATE command. Every second, the channel 1 setpoint will be moved closer to the next ramp + soak point by the value specified with the RSRATE command. A rate of zero will cause the setpoint to change immediately to the new point value. A ninth rate is used to determine how fast the HI-Q should move to the final output value. RSRATE<n> [ffff] []= Show current ramp rate for point <n> [ffff]= Set point <n> ramp rate to [ffff] 1≤n≤9 Point 9 is the rate to ramp to the final value before the algorithm ends 10.2.2.3 Setting Hold Times Once the channel 1 setpoint reaches a ramp + soak point, it is held there for the number of seconds specified with the RSTIME command. A time of zero causes the point to be ignored. RSTIME<n> [dddd] []= Show current hold time for point <n> [dddd]= Set point <n> hold time to [dddd] seconds. A time of 0 disables the point. 0 ≤ [dddd] ≤ 65535 1≤n≤8 30 10.2.2.4 Repeating a Ramp + Soak Process The RSREPEAT command sets how many times the ramp + soak algorithm will repeat before moving to the final value. A value of zero will cause the algorithm to repeat forever. RSREPEAT [dddd] []= Shows current value of RSREPEAT [dddd]= Set repeat value to [dddd]. A value of 0 will repeat indefinitely 0 ≤ [dddd] ≤ 255 31 11. Streams and Outputs Data from calculations and control algorithms is sent to output hardware via the streams. The streams provide the flexibility of allowing any calculated value to be sent to any combination of outputs, including the serial output, analog output and display. 11.1 Stream Operation A stream is a list that indicates to which outputs a piece of data should be sent. Figure 5 shows how the streams in the HI-Q are organized. Placing data in a stream routes that data to every output on the stream list. The analog and display outputs can receive data from only one stream at a time, while the serial output can process data simultaneously from all seven HI-Q streams. Stream Computations Stream Outputs Stream 1 Max/Min Limits Serial PCMCIA Stream 2 Max/Min Limits Serial PCMCIA Stream 3 Max/Min Limits Serial PCMCIA Stream 4 Max/Min Limits Serial PCMCIA Serial PCMCIA A C T I O N S Stream 5 Max/Min Stream 6 Max/Min Serial PCMCIA Stream 7 Max/Min Serial PCMCIA D i s p l a y D i s p l a y D i s p l a y D i s p l a y # 1 # 2 # 3 # 4 D A C D A C # 1 # 2 Figure 5: Stream organization 11.2 Stream Values Individual stream values can be set manually with the STREAM command: STREAM<n> [ffff] [ffff]= Value to place in stream <n> <n>= 1,2,3,4,5,6,7 Example: S01 stream1=disp1 disp2 dac1 serial will send the data in stream #1 to both displays 1 and 2 as well as the analog output and the serial port. This command places the value [ffff] in stream <n>. If the HI-Q is in the RUN mode, this value will be sent to all outputs associated with stream <n>. Any limits and actions resulting from a stream value of [ffff] will also be executed. Refer to Section 12. Alarms and Actions for information on defining actions. 32 11.3 Max/Min Stream Values The HI-Q controller automatically records the maximum and minimum input values from each stream. The SHOWMAX command recalls these values and can be used to determine the range of input values encountered since the Max/Min values were last cleared. Max/Min values are also available for use in mathematical equations as described in section 10 (page 31) The NEWMAX and NEWMIN commands reset the Max and Min values for all seven streams. The NEWMAXMIN command resets both the Max and Min stream values for all seven streams. A Max value that is reset becomes the smallest number the HI-Q can represent (-1.7014*10-38) while a Min value resets to the largest number the HI-Q can represent (1.7014*1038). 11.4 Stream Limits Limits allow the HI-Q controller to take actions such as turning relays on and off, disabling analog outputs, and executing commands if a stream value exceeds or drops below a specified value. Streams 1-4 have High-High, High, Low, Low-Low, and Rate limits associated with them. Limits are enabled with the LIMON command and can be disabled with the LIMOFF command. High-High and High limits are activated when a stream value is larger than the limit value. Low-Low and Low limits are activated when a stream value is smaller than the limit value.4 There are two Rate limits, the Rate Increasing (RI) and Rate Decreasing (RD) limits. The RI limit is activated when a stream value is increasing at a rate higher than the RI limit for that stream. The RD limit is activated when a stream value is decreasing at a rate higher than the RD limit for that stream. 11.4.1 Setting Limits Limits for streams 1-4 can be set with the following commands: []= Show current limit value [ffff]= New stream <n> Low Low limit <n>= 1,2,3,4 Example: S01 ll1 10 sets the low-low limit of channel #1 to 10. HH<n> [ffff] []= Show current limit value [ffff]= New stream<n> High High limit <n>= 1,2,3,4 Example: S01 hh1 90 sets the high-high limit of channel #1 to 90. RI<n> [ffff] []= Show current limit value [ffff]= New stream <n> RI limit <n>= 1,2,3,4 Example: S01 ri1 5 sets the rate of increase value of channel #1 to 5 per second. H<n> [ffff] []= Show current limit value [ffff]= New stream <n> High limit <n>= 1,2,3,4 Example: S01 h2 75 sets the high limit of channel #2 to 75. L<n> [ffff] []= Show current limit value [ff.]= New stream <n> Low limit <n>= 1,2,3,4 Example: S01 l3 300 sets the low limit of channel #3 to 300 RD<n> [ffff] []= Show current limit value [ffff]= New stream <n> RD limit <n>= 1,2,3,4 Example: S01 rd1 10 sets the rate of decrease value of channel #1 to 10 per sec. LL<n> [ffff] 4 Due to the way limits are processed, a channel’s High-High limit must be larger than its High limit, which must be larger than its Low limit, which must be larger than its Low-Low limit. If this order is not followed, the limits for that channel will not operate properly. 33 11.4.2 Limit Hysteresis The limits for each stream are calculated relative to a hysteresis value. Hysteresis creates a “dead band” around a limit, preventing it from activating and deactivating rapidly if the stream value fluctuates slightly above and below the limit value. This can be important if the limit controls a pump, motor, or other piece of equipment that will wear out quickly if turned on and off several times a second. Figure 6 demonstrates how hysteresis affects limit activation. HYST<n> [ffff] []= Show current hysteresis value for stream <n> limits [ffff]= Set stream <n> hysteresis to [ffff] <n>= 1,2,3,4 Example: S01hyst1 0.2 places a dead band of 0.2 around all the relays on stream1. VARIABLE lim it is activated DEADBAND HYSTERESIS Hior HiHi Lim it lim it is deactivated INPUT lim it is deactivated Lo or Lo Lo Lim it lim it is activated TIME OPERATION OF LIMITS WITH HYSTERESIS Figure 6: How hysteresis affects limit activation/deactivation 11.5 Output Options There are five outputs that may be associated with a stream. These are the serial, display1, display2, display3, and DAC1. Each output receives data from the appropriate stream(s) and processes it according to the particular hardware shipped with the HI-Q. STREAM<n>= [off, +,-: serial disp1 disp2 disp3 dac1] []= Shows current stream <n> outputs <n>= 1,2,3,4,5,6,7 [off]= Removes all stream <n> outputs [serial]= Stream <n> data to serial output [disp1]= [disp2]= [disp3]= [dac1]= 34 Stream <n> data to display #1 Stream <n> data to display #2 Stream <n> data to display #3 Stream <n> data to DAC #1 11.5.1 Serial Output The serial output is the most versatile of all outputs. It can display all seven stream values, stream units, and limit messages. Because all seven streams can send data to the serial output simultaneously, data from each stream is preceded by the stream number generating the data (STR1: 25.0567) Hardware and software problems will also send messages to the serial output. An A/D failure, non-volatile memory failure, divide by zero error, bad equation, or other problem detected by the HI-Q will send an error message to the serial output. 11.5.1.1 Unit Messages If desired, a message describing the units of each stream can be added to the serial output. Each message will be displayed after the appropriate stream data and can be up to 15 characters long. UNITS<n><message> <message>= Any ASCII message up to 15 characters long <n>= 1,2,3,4,5,6,7 Example: S01 units1 PSIG attaches the units PSIG to stream 1. When sent through the serial port the data displayed on the CRT would look like this STR1 25.3056 PSIG. 11.5.1.2 Limit Messages Messages describing the status of stream limits, up to 15 characters long, can be added to stream outputs. For example, if stream1 receives data outside of its assigned limits, the appropriate limit message can be added to the serial output of stream1. MHH<n><msg> <msg>= Channel <n> High High limit message <n>= 1, 2, 3, 4 Example: S01 mhh1 overflow MLL<n><msg> <msg>= Channel <n> Low Low limit message <n>= 1, 2, 3, 4 Example: S01 mll1 tank 1 empty MH<n><msg> <msg>= Channel <n> High limit message <n>= 1, 2, 3, 4 Example: S01 mh1 warning MRI<n><msg> <msg>= Channel <n> RI limit message <n>= 1, 2, 3, 4 Example: S01 mri1 change coolant ML<n><msg> <msg>= Channel <n> Low limit message <n>= 1, 2, 3, 4 Example: S01 ml1 tank 3 low MRD<n><msg> <msg>= Channel <n> RD limit message <n>= 1, 2, 3, 4 Example: S01 mrd1 pump 3 bad 35 11.5.1.3 Numeric Notation The serial output values can be displayed in a scientific or fixed decimal format. Scientific notation is selected with the SCI (S01 sci) command and displays numbers like this: 1.234567E3 4.567890E-3 -1.200000E4 -1.001423E-4 The fixed decimal format displays the integer portion of a number with a fixed number of digits after the decimal point. FIX[n] [n]= # digits after the decimal point. (Serial port use) N = 0 to 6 After a FIX3 command (S01 fix3), the above numbers would be shown as: 1234.567 11.5.1.4 0.005 -12000.000 -0.000 Serial Output Rate The rate at which the serial output is updated can be controlled through the use of timer T1. T1[n] []= Shows current value of T1 [n]= # of seconds between serial transmissions. 0 ≤ n ≤ 16,777,215 n = 0 allows continuous serial transmission. Example: S01 t1 5 will send the serial data out once every five seconds. When the HI-Q is running, T1 updates the serial output once every [n] seconds. All other outputs are updated normally. If [n] = 0, the serial output is updated continuously. 11.5.2 Display Outputs Assigning display1, display2 or display3 to a stream will send the stream data to the corresponding display. Refer to the Display Overlay on page 72 to determine how display outputs correspond to the physical display. On the HI-QTBS, HI-Q123 and HI-Q124 the digital readout is disp2 and the bargraph is disp1. The HI-Q125 and HI-Q126 have three digital displays numbered in descending order. Disp1 is the top most digital, disp2 is the center digital and disp3 is the lower most digital. 11.5.2.1 Numeric Displays Numeric displays show stream data in a fixed notation according to their setup parameters. Each numeric display can be configured individually using the Dfix command. Refer to section 17.3 Numerical Displays Page 53. 36 11.5.2.2 Bargraph Displays Bargraph displays use stream data to light up a number of display elements. The number of elements lit is determined by the full scale and zero parameters assigned to each bargraph. Bargraphs can also operate in one of several modes. Refer to 0 17.2 Bargraph Display for more information. 11.5.3 DAC output DAC1 output converts stream data into a 0-5Vdc or 4-20mA analog output. In addition, the DAC output has its own set of limits, scale, and offset. The limits allow the user to set clamps around the output so that it will not exceed the clamped range. 11.5.3.1 Output Scaling DAC outputs scale the engineering units used by the serial and display outputs to a range appropriate for the analog output signal: Analog output = (Stream value * DAC scale) + DAC offset For instance, stream values representing 15-25°C may be scaled to get an analog output of 4-20mA. Scale and offset values are calculated from simple mathematical relations: scale value = (20mA-4mA)/(25°C -15°C) = 1.6 offset value = 4mA - (scale value) * 15°C = -20 Then, a 15°C stream value will generate an analog output of 15*1.6-20= 4mA and a 25°C stream value will generate a 25*1.6-20= 20mA output. DSCALE1 [ffff] []= Show current DAC scale [ffff]= Set DAC scale to [ffff] Example: S01 dscale1 1.6 11.5.3.2 DOFFSET1 [ffff] []= Show current DAC offset [ffff]= Set DAC offset to [ffff] Example: S01 doffset1 -20 Output Limits The DAC output has a DAC-High and DAC-Low limit. Like stream limits, DAC limits allow the HI-Q to perform actions when a limit value is reached. In addition, a DAC output cannot exceed its DAC-High limit or fall below its DAC-Low limit. DH1 [ffff] []= Show current DAC1 High limit [ffff]= Set DAC High limit to [ffff] Example: S01 dh1 22 will not allow the analog output to exceed 22mADC. DL1 [ffff] []= Show current DAC1 Low limit [ffff]= Set DAC Low limit to [ffff] Example: S01 dl1 3 will not allow the analog output to fall below 3mADC. 37 12. Alarms and Actions The HI-Q can be programmed to perform specific actions when it encounters an alarm. Alarms include activated limits and digital input values. Actions that may take place when an alarm occurs include setting relays, changing digital outputs, resetting analog outputs, and executing commands. 12.1 Alarm Uses Alarms are a way of telling the HI-Q that something needs to be done. If a pressure sensor input reaches a High limit because a tank is full, the High limit alarm can be used to turn off a pump or close the fill valve on the tank. Later, when the tank pressure falls below the Low limit, the Low limit alarm can refill the tank by turning on the pump or opening the fill valve again. If the valve or pump do not respond properly, the High High and Low Low limits can be used to alert an operator and shut the system down. SA <alarm> [actions] [D1H]= Set DAC1 to its high limit [D1L]= Set DAC1 to its low limit [D1Z]= Set DAC1 output to zero [CMD<m>]= Execute CMD<m> command [STOP]= Open the execution loop [RUN]= Keep the execution loop closed [NONE]= Remove all [actions] from <alarm> []= Shows current [actions] assigned to <alarm> [R<p>H]= Turn relay/BiMOS output <p> on [R<p>L]= Turn relay/BiMOS output <p> off [R<p>T]= Toggle state of relay/BiMOS output <n> [TTL<n>H]= Make TTL<n> high [TTL<n>L]= Make TTL<n> low [TTL<n>T]= Toggle current state of TTL<n> <alarm> is one of: NORM HH<p> H<p> L<p> LL<p> RI<p> RD<p> DH1 DL1 TTL1H TTL1L TTL2H TTL2L Normal operating status Stream <p> HiHi limit Stream <p> Hi limit Stream <p> Lo limit Stream <p> LoLo limit Stream <p> RI limit Stream <p> RD limit Dac1 Hi limit Dac1 Lo limit TTL1 Hi TTL1 Lo TTL2 Hi TTL2 Lo 1≤n≤2 1≤m≤3 1≤p≤4 SA+ [alarm] [actions] SA- [alarm] [actions] Same as SA, but adds [actions] to [alarm]. Same as SA, but removes [actions] from [alarm]. The tank example above could be implemented with: Relay 1 = High limit bell/buzzer Relay 2 = Operator alert switch Relay 3 = Power to fill valve (Should normally be ON) Relay 4 = Fill valve (ON fills tank, OFF closes valve) using the following commands: SA NORM R1L R2L R3H SA H1 R1H R4L Relay positions for normal operation At high limit, turn Relay 1 ON to sound bell, Relay 4 OFF to stop fill valve SA L1 R4H SA HH1 R2H R3L At low limit, turn Relay 4 ON to activate fill valve At high high limit, turn Relay 2 ON to alert operator and Relay 3 OFF to cut power SA LL1 R2H R3L At low low limit, turn Relay 2 ON to alert operator and Relay 3 OFF to cut power 38 12.1.1 Smart alarming When alarms are used to indicate an input, output, or process parameter that is out of range, the HI-Q is performing what is known as smart alarming. With its mathematical capabilities the HI-Q can detect many complex alarm conditions. For example, an alarm can be set off if the difference between two inputs exceeds a specified limit for more than ten seconds. S01 S01 S01 S01 EQN1 S3=S1-S2 (Stream 3 = difference between streams 1 and 2) HH3 25 (Alarm when stream 3 exceeds 25) DELAY HH3 100(Limit must be exceed for 100*100 milliseconds before taking action) SA HH3 R1H (Turn relay1 ON when alarm is activated) 12.1.2 On/Off control When alarms are used to turn relays and devices on and off, the HI-Q is performing on/off or “bang-bang” control. This is the type of control commonly used in refrigerators. When the temperature inside the refrigerator reaches an upper limit, the cooling unit turns off. When the temperature falls below the lower limit, the cooling unit turns back on. S01 S01 S01 S01 H1 L1 SA SA 50 25 H1 R1H L1 R1L (Start cooling when temperature is 50 degrees) (Turn cooling off when temperature is below 25 degrees) (At High limit #1, relay 1 turns ON) (At Low limit #1, relay 1 turns OFF) 12.2 Trigger delays Most alarms may be assigned a delay time that must elapse before an action is taken. This is beneficial for actions that are needed only if an alarm lasts longer than a specified time. For instance, a motor might be allowed to run at high speed for short periods of time. The HI-Q can monitor motor speed, and shut the motor down if it is operated for too long at high speed. DELAY <alarm> [time] []= Shows time <alarm> must be on before actions are taken [time]= Sets time in 100ms increments <alarm> must be on before actions can be taken 0 ≤ time ≤ 255 <alarm>= HH<n> Stream <n> HH limit DH1 H<n> Stream <n> H limit DL1 L<n> Stream <n> L limit TTL1H TTL1L LL<n> Stream <n> LL limit RI<n> Stream <n> RI limit TTL2H RD<n> Stream <n> RD limit TTL2L DAC 1 H limit DAC 1 L limit TTL1 input H TTL1 input L TTL2 input H TTL2 input L For example, the command DELAY HH2 10 would require the Stream 2 High High limit to be active for 1 second (10 * 100ms) before any actions associated with it could be taken. Note: The accuracy of the delay function is proportional to the number of A/D channels turned on. If the unit is receiving data through the serial port its accuracy is +/- 1 second. If the unit is receiving analog signals to the A/D converter use one of the following formulas. Single channel unit Programmed Delay = ((desired delay) / (1.255)) * (10) Two channel unit Programmed Delay = ((desired delay) / (1.9294)) * (10) Three channel unit Programmed Delay = ((desired delay) / (2.705)) * (10) Hint, if a delay of more than 25.5 seconds is desired, turn on the additional channels that are not being used. 39 12.3 Actions After an alarm occurs, the HI-Q performs all of the actions assigned to that alarm. If more than one alarm occurs, the actions associated with all activated alarms will be performed. 12.3.1 Action Conflicts Because it is possible for actions from two alarms to conflict, alarms are assigned a priority. If an action conflict occurs, the alarm with highest priority will control the action. Alarm priority is listed in Table 1. Alarm Stream 1 limits Stream 2 limits Stream 3 limits Stream 4 limits DAC 1 limits TTL1 input TTL2 input Priority Highest Lowest Table 1: Alarm priorities In addition, the High High, High, Low, and Low Low limits have priority over the RI and RD limits. For example, if the High limits for streams 1 and 3 are activated and both try to control the same relay, the stream1 High limit action will operate the relay since it has the higher priority. 12.3.2 Relays and BiMOS outputs All four (4) relays and eight (8) BiMOS outputs can be turned on, off, toggled, or left alone by an alarm. If left alone, a relay or BiMOS output may be controlled by an alarm with lower priority. 12.3.3 Digital Outputs Just like the relay and BiMOS outputs, the digital outputs can be turned on, off, toggled, or left alone by an alarm.5 However, the voltage at a digital I/O pin will change only if the pin has been configured as an output with the TTL1 OUT or TTL2 OUT commands. 12.3.4 DAC output The DAC output can be set to its High limit, Low limit, zero, or can be left alone by an alarm. Alarms that set the DAC to zero cause the analog output to become 0Vdc or 0mA. 5 When using digital I/O lines, make sure all lines configured as outputs are properly connected. Connecting a digital output line directly to ground or to other outputs may damage the HI-Q! 40 12.3.5 Command execution Actions can also be used to execute one of three user selected commands. Any valid command can be selected with the CMD command. The commands are executed as if they had been sent directly to the serial input. If more than one alarm tries to execute a command, only the highest priority alarm will have its command executed. CMD<n> [command] Defines command <n> <command>= Any valid command (without ‘S’ + the device address) <n>= 1,2,3 Example: S01 cmd1 stream1-disp1 causes stream1 data to be removed from disp1 after cmd1 is activated by an alarm. 12.3.6 Run/stop control The last action that an alarm can perform is to stop the HI-Q from running. This action is equivalent to entering the STOP command from the serial port. All streams and analog outputs will remain at their current values and the HI-Q will stop reading and processing inputs. 41 Additional Functions This section describes the remaining functions available on the HI-Q. These include digital I/O, emergency shutdown, and manual control of outputs. Commands that show current HI-Q parameters and variables are also presented. 13. Digital I/O Digital I/O can be accomplished with HI-Q commands, alarms and actions, or with digital input functions. Digital I/O using alarms and actions was covered in 0 12. Alarms and Actions. 13.1 Digital I/O Commands The TTL command is used to control the digital I/O pins on the HI-Q. The IN and OUT options of the command determine if a pin will be an input or output. The state of a digital input can be read by issuing the TTL (S01 ttl1) or (S01 ttl2) command with no optional arguments. Digital outputs can be set high, low, or toggled by including a H, L, or T after the command. TTL<n> [IN, OUT, H, L, T] []= Shows current state of TTL<n> IN = Makes TTL<n> an input OUT = Makes TTL<n> an output H = Makes TTL<n> output 'high' L = Makes TTL<n> output 'low' T = Toggles TTL<n> output <n>= 1,2 13.2 Digital measurements In addition to high/low detection, digital inputs can be used to make frequency, period, and pulse width measurements. They can also be used to control a lap/elapsed timer and a general purpose counter. These functions are utilized through software commands which return values in channel 4. This allows the HI-Q to perform the same linearization, averaging, scaling, and tare, etc. on digital inputs as it does on analog inputs. NOTE: Because digital measurements take a significant amount of processing power, serial input to the HI-Q must be slowed to 20ms/character to avoid loss of data. While this is not a problem for manual input via the key board, serial strings sent via computer may be severely affected. To avoid this problem, make sure there is a space of at least 20ms between characters on the serial input when using digital functions. 42 13.2.1 Period The PERIOD command determines the period of a digital input by measuring the time between rising edges on TTL1. Improved accuracy for short periods is obtained by averaging several consecutive measurements. The resulting number of seconds is placed in channel 4. Periods from 10µs to 18 hours can be measured. TTL1 Measured Time MEASURE HOLD MEASURE TTL2 Figure 7: Period Measurement 13.2.2 Frequency The FREQ command is used to tell the HI-Q to measure a frequency input. Frequency is measured by doing a period measurement on TTL1 and computing 1/period. Frequency inputs can range from 0.001Hz to 50KHz. TTL1 MEASURE HOLD TTL2 Figure 8: Frequency Measurement 43 MEASURE 13.2.3 Pulse Width There are two separate pulse width measurements the HI-Q can make. The PWP command measures the length of time an input signal is high, while the PWN command measures how long an input signal is low. Because averaging pulse width measurements does not increase accuracy, measurement accuracy starts to drop with pulse widths shorter than 1ms. PWN time TTL1 PWP time MEASURE HOLD MEASURE TTL2 Figure 9: Measuring Pulse Width 13.2.4 Event Counting The COUNT subroutine measures the number of times TTL2 changes from low to high. TTL1 and TTL3 must be high (floating) while counting. Bringing TTL1 low suspends counting and keeps the current count in channel 4 available for use in calculations. Making TTL3 low resets the current count to zero. If the maximum count of 16,777,215 is reached, the count resets to zero and a warning message is sent to the serial output. COUNT HOLD COUNT TTL1 TTL2 RESET TTL3 COUNT 0 1 2 3 3 3 3 4 Figure 10: Event Counting 44 0 0 13.2.5 Timing The LAP routine is a lap/elapsed timer similar to the timers used on digital watches. The HI-Q measures the length of time TTL2 is held high. TTL1 controls the lap/elapsed function. When high, TTL1 causes the elapsed time (time since the start of the measurement) to be displayed. Bringing TTL1 low ‘freezes’ the current time (called the lap time) without halting the measurement. TTL3 resets the timer to zero when brought low. The resolution of timing measurements starts at 16 microseconds. This resolution drops to 4 milliseconds after 268 seconds (4min. 28 seconds). This change in resolution allows the HI-Q to make timing measurements in excess of 19 hours while keeping measurement error below 0.001%. ELAPSED TIME HOLD (LAP TIME) ELAPSED TIME TTL1 Start of measurement End of measurement TTL2 T1 T2 RESET TTL3 TIME 0 0.5 T1 T1 T1 T1+T2 0 Figure 11: Lap/Elapsed Time Measurements 13.2.6 Disabling Digital Functions All digital functions can be disabled with the NODIG (S01 nodig) command. This command will instruct the HI-Q to stop measuring frequency, period, and pulse width. It will also stop event counting and lap/elapsed timing. Turning digital functions off when they are not being used frees up system resources, allowing the HI-Q to run faster 45 14. Manual Control of Outputs All relay/BiMOS outputs, digital outputs, analog outputs, streams, and channels can be set manually with commands from the serial port or with the keypad. To control an output that is currently being updated by the HI-Q, the STOP command must first be issued. Otherwise, any manually assigned output values will be overwritten the next time the HI-Q updates its outputs. 14.1 Emergency Shutdown In the event of an emergency, all HI-Q outputs can be quickly set to a predetermined value with the PANIC command. The outputs will remain at the predetermined values until a RUN command is given or the outputs are changed manually. The SETPANIC command is used to set emergency output conditions. Current emergency output conditions can be seen with the SHOWPANIC command. SETPANIC [TTL1<H, L, T>, TTL2<H, L, T>, DAC1<ffff>, R<n> <H, L>] []= Show current emergency shutdown outputs [TTL1<H, L, T>]= Set TTL1 output High, Low, or Toggle TTL1 output [TTL2<H, L, T>]= Set TTL2 output High, Low, or Toggle TTL2 output [DAC1<ffff>]= Set DAC1 output to <ffff> [R<n><H, L>]= Set relay/BiMOS output <n> High or Low 1≤n≤8 14.2 Relays and Discrete Outputs All relays and BiMOS outputs can be set with the R command: R<n>[H, L, T] []= Shows current state of relay/BiMOS output <n> [H]= Turn relay/BiMOS output <n> on [L]= Turn relay/BiMOS output <n> off [T]= Toggle relay/BiMOS output <n> <n>= Relay/BiMOS output to control 1≤n≤8 The state of the selected relay/BiMOS output will change as soon as the command is entered and will remain in that state until changed with another R command, updated by the HI-Q, or until power is disconnected. 14.3 Digital Outputs Digital outputs are controlled in the same manner as relays with the TTL<n> command. TTL<n>[IN, OUT, H, L, T] []= Shows current state of TTL<n> IN = Makes TTL<n> an input pin OUT = Makes TTL<n> an output pin H = Makes TTL<n> output 'high' L = Makes TTL<n> output 'low' T = Toggles TTL<n> output <n>= 1,2 The TTL line being controlled must be configured as an output to see the effect of the TTL<n> command. If the TTL line is configured as an input, the results of a TTL<n> command will take effect only after the TTL line is reconfigured as an output. 46 14.4 Analog output Manual control of the analog output is accomplished with the DAC1 command: DAC1 [ffff] []= Show most recent DAC1 output [ffff]= Valid output value The output value used with the DAC1 command should be in the same engineering units as the display and serial output. This value will then be scaled to the appropriate value of mA or Vdc with the DAC scale and offset values. See section 11.5.3.1 for information on scaling DAC outputs. The DAC High and Low limits also affect manually specified output values. Attempting to set a DAC output to a value outside its Low and High limits will result in the output being set to the High or Low limit value. See 11.5.3.2 Output Limits for more information on DAC limits. 15. Computer Operating Properly Timer In addition to software operational checks, the HI-Q contains a Computer Operating Properly (COP) or watchdog timer. This timer can determine if the HI-Q has stopped operating properly due to software problems or hardware failure. If a failure is detected, the COP timer resets the HI-Q, which will try to recover from the error. 15.1 Enabling the COP Timer The WDON (S01 wdon) command enables the COP timer, while the WDOFF (S01 wdoff) command disables it. Once the state of the COP timer is changed, the HI-Q must be turned off and back on for the change to take effect. The SHOWSTAT command will display the current state of the COP timer, and the state it will be in after a hardware reset. 15.2 Testing the COP Timer The WDTEST (S01 wdtest) command tests the COP timer. It places the HI-Q in an infinite software loop, which the COP timer will detect. When the COP detects the software loop, it causes the HI-Q to reset. 16. Showing System Status Often it is desired to see the current value of many HI-Q parameters. While most commands will show the current value of a parameter if a new value is not specified, it can be time consuming to check multiple parameters. Therefore, several SHOW commands are available that will display related groups of HI-Q parameters in an easy-to-read format. Issuing the SHOW or HELP commands will send a list of available SHOW commands to the serial port along with a short description of what they display. 47 16.1 Input Parameters Input parameters such as scale, offset, linearization method, tare, and limits can be viewed with the SHOWIN command. Information regarding all four channel inputs and stream limits is displayed. 16.2 Output Parameters The SHOWOUT command will display the analog output scale, offset, and limit values. These values determine the values of analog outputs for a given input. This command will also show the current state of all relay/BiMOS outputs. 16.3 Other Parameters For a list of all SHOW commands and what they display, refer to the SHOW section of The HI-Q Command Set. 16.4 System Diagnostics The DIAG command can be used to test basic HI-Q hardware operation. After the command is given, the HI-Q will perform various internal diagnostics and report any problems. Due to the complexity of the system, not all hardware problems can be detected by this command. 17. Display Configuration There are several commands which alter the way a HI-Q display looks. Display colors, flashing, bargraph mode, limit colors, and numeric notation can all be customized to suit a particular application. This chapter discusses the various commands that affect how each display operates. 17.1 General Setup Some commands affect all displays on the HI-Q. These are the DEMO, SETD, CLRD, LAMP, INT, DLFLASH, and DLNFLASH commands. DEMO Places the display in a demo mode SETD<n> Causes all segments/bars of display <n> to turn on CLRD<n> Causes all segments/bars of display<n> to turn off LAMP Initiates a lamp test to ensure all display elements are working properly 48 DINT [0, 1, 2, 3] [0-3]= Sets the display intensity from 0 (off) to 3 (brightest) DLFLASH<n> Causes entire display to flash when display <n> reaches a limit. Hi and Lo limits flash at a slow speed, while Hi Hi and Lo Lo limits flash at a faster speed. DLNFLASH<n> Turns off flashing when display <n> reaches a limit. 17.2 Bargraph Display A bargraph display can be set to a specific mode, scale, and color. It can also display limit marks in various colors and change color when a limit is reached. (Color changing is only available on the HI-QTBS series) 17.2.1 Bargraph Mode A bargraph display can be configured to operate clockwise, counter clockwise or bi-directionally from the center or specified starting point. The DMODE command is used to select how a bargraph operates: DMODE1 [top, bot, bi] [bot]= Fill bargraph in a clockwise direction [top]= Fill bargraph in a counter clockwise direction [bi]= Bargraph operates bi-directionally from the center Example: S01 dmode1 bi places the bargraph in bi-directional mode. Sending the command S01 dmode2 bot will return it to a clockwise mode of operation. 17.2.2 Bargraph Scale The range of values displayed on a bargraph is determined by its ‘bars full scale’ (BFS) and ‘bars zero’ (BZ) parameters. BFS determines the maximum number a bargraph can display before it tops out by having all its bars lit. BZ sets the value at which bars start to light. For example, having BFS=200 and BZ=100 would cause the displayed reading to start at 100 and top off at 200. An input of 150 would light half of the bargraph’s bars. BFS1 [n] BZ1 [n] [n]= Set BFS to [n] [n]= Set BZ to [n] 17.2.3 Bargraph Color (Used on the HI-QTBS series only) The colors on a bargraph can be changed with the DCOLOR1 command. This command has no effect on displays without color capability. DCOLOR1 [R, G, A] [R]= Set the normal operating color of the bargraph to RED [G]= Set the normal operating color of the bargraph to GREEN [A]= Set the normal operating color of the bargraph to AMBER Example: S01 dcolor1 G. 49 17.2.4 Bargraph Limits (used on the HI-QTBS series only) Limit marks for all bargraph displays are turned off with the DLIMOFF command. The display will still change colors and flash, but no limit marks will show. The DLIMON command turns limit marks back on. If stream limits are not enabled (limoff), no limit marks will show. The color of the limit marks on the bargraph can be set with the following commands: HHD1 [R, G, A] Set High High limit color HD1 [R, G, A] Set High limit color LD1 [R, G, A] Set Low limit color LLD1 [R, G, A] Set Low Low limit color [R]= Set limit color to RED [G]= Set limit color to GREEN [A]= Set limit color to AMBER Example: S01 hhd1r Sets the high high limit color to red. S01 hd1a set the high limit color to amber. S01 ld1a sets the low limit color to amber S01 lld1a sets the low low limit color to red. With the above settings and the dcolor command set to G (green) the bargraph will be normally green with low and high limits being amber and low low and high high limits being red. When the bargraph reaches a limit, all bars can change to the limit color or only the bars beyond the limit can change color. The DSYMOFF command causes only the bars beyond a limit to change colors while the DSYMON command causes all bars to change to the color of the activated limit. 17.3 Numerical Displays The values shown in a numerical display can be modified with the DFIX2 command: DFIX <p> <n> (p=1, 2 or 3) (n= 0, 1, 2, 3, 4, 5, or 6) [0-6]= Number of digits to display after the decimal point [AUTO]= Automatic setting of the decimal point Example: S01 dfix2 3 will display 45.001. 3 digits to the right of the decimal point on display #2. On the HI-QTBS, HI-Q123 and HI-Q124 display #2 is the only digital display available. On the HI-Q125 and HI-Q126 the top digital is display#1, center is display#2 and lower is display#3. Numerical displays will also display any alpha-numerical message sent with the DISP<n> command: DISP<n> <message> Displays alpha-numerical <message> on display <n> Example: S01 disp2 alarm <cr> will show the word alarm on display#2 50 18. HI-Q Applications This chapter presents some typical applications of the HI-Q programmable intelligent controllers. Its purpose is to demonstrate how to set up and configure the HI-Q for use. The applications presented can be used as shown or can be modified to fit your particular requirements. 18.1 Temperature Control Using a Thermocouple This example shows how to control temperature using the HI-QTBS, HI-Q123 or HI-Q124 using simple on/off or bang-bang control. A thermocouple input will be measured, linearized, scaled to appropriate display values. To demonstrate the flexibility of the HI-Q, an example of relay operation will be presented. This example will turn a relay ON when the temperature exceeds a high limit and will turn a second relay ON when the temperature drops below a low limit. Both relays will be OFF when the temperature is between the high and low limits. The other two relays will be set as an operator warning to sound an external alarm at over / under temperature limits. 18.1.1 Control Specifications Thermocouple input type: J High temperature limit: 350 °C Low temperature limit: 300 °C Display1 (Bargraph): Current temperature with 1% resolution Display2 (numeric): Current temperature with 0.1 degree resolution Bargraph display should read 0 bars @ 0°C and 100 bars @ 400°C 18.1.2 Connections The thermocouple is connected to the channel 1 analog input. Relay 1 is the control relay. 18.1.3 Configuration To begin configuration apply power to the HI-Q meter. It will start up in USER MODE as discussed in 0 Operating Modes. HI-QTEK by OTEK Version 2.75 1996 Address: ‘01’ Warming-Up.. * Start configuration by setting the channel input parameters. Since no tare is needed, the factory values (tare off) will be used. First, the type of linearization needed is used. For a J-type thermocouple, the JC linearization is needed. Example: S01 LIN1 JC The linearization converts the thermocouple millivolt output into a temperature, eliminating the need for setting the scale1 or offset1 values. The next values to set are the limits. *S01 *S01 *S01 *S01 HH1 400 H1 350 L1 300 LL1 250 Sets high high limit of channel #1 to 400 Sets the high limit of channel#1 to 350 (control temp.) Sets the low limit of channel#1 to 300 (control temp.) Sets the low low limit of channel#1 to 250 51 At this point, the input parameters should be verified with the SHOWIN (S01 showin) command. Once verified, set the stream outputs to update the display, and set the scale on the Bargraph to show the correct number of bars. *S01 STREAM1= DISP1 DISP2 *S01 BFS1 400 (Turn on all 100 bars (bargraph elements) at a reading of 400) Now the HI-Q will correctly display its input values. Next we will use the limit alarms to make the relay operate properly. *S01 *S01 *S01 *S01 *S01 *S01 *S01 SA NORM R1LR2LR3LR4L (Sets normal status of relays 1-4 to low) SA HH1 R1H (Relay 1 turns ON at High High limit) SA H1 R2H (Relay 2 turns ON at High limit) SA L1 R3H (Relay 3 turns ON at Low limit) SA LL1 R4H (Relay 4 turns ON at Low Low limit) HYST1 1.2 (sets the hysterisis around all relays of channel#1 to 1.2 degrees) limon (turns the limit control on) Finally save all parameters in non-volatile memory. *S01 WRITE Writing EEPROM...............Done! The HI-Q is now configured for use as a simple temperature controller. Disconnect power and re apply to verify all data was saved. When power is reapplied, the HI-Q will start in USER mode with the newly programmed parameters. It will automatically start taking temperature measurements and control the relays. 18.1.4 Alternate Relay Control Since the HI-Q’s relays can be configured as normally open (n.o.) or normally closed (n.c.) and the relays have both poles available at the screw terminal connector, it can be configured so that the relays are normally energized and they turn off at the limits. This is also know as a fail safe configuration so that in the event of a power failure, the relays will deactivate and the temperature will not increase First we need to reset the relay logic for fail safe operation. *S01 SA NORM R1HR2HR3HR4H (set relays 1-4 to an activated state while within normal operating conditions) Once the unit receives this command, all relays will change their current state of logic. Your connections can then be made to the N.C. contact. When the limit is reached or power is removed, the relays will inherently deactivate and these contacts will be closed. 52 Troubleshooting The following table lists solutions to typical problems associated with setting up a HI-Q controller. The most probable solution for each symptom is listed. If a problem persists or is not listed, contact OTEK technical support at (520) 748-7900. Normal business hours are M-F, 8AM-4PM MST. Be sure to have the HI-Q model number, a detailed description of the problem, and an explanation of the intended application. This information is necessary to ensure fast and efficient technical support. SYMPTOM SOLUTION No startup message on serial port Check power connections. Make sure the TXD, RXD, DO, and DI lines are wired properly. Verify communications protocol for baud rate, parity, number of start/data/stop bits. Garbage appears instead of a startup message Check communications protocol for proper baud rate, parity, number of start/data/stop bits Characters sent to the unit appear twice on the terminal Set communication software to FULL DUPLEX communications, or turn off LOCAL ECHO. After the startup message, the unit does not respond to commands Make sure the RXD or DI line is properly connected. Check communications software for proper settings. Be sure to use ‘S’ + the unit’s address when sending commands. This situation can occur if the unit is in NET mode or has a long T0 setting. Use the LOC command to place the unit into local mode. The HI-Q will not enter the RUN mode Turn TTL3 RUN/STOP control off with the TTL3OFF command or make sure TTL3 is HIGH (floating). Analog input always reads zero Turn the analog input channel on. Make sure the scale for that channel is not zero. Check all equations for proper operation. DAC1 output does not work Check the wiring connections to the HI-Q. Be sure the DAC1 output is listed in an output stream. Make sure the dscale1 value is not zero. Relays/BiMOS outputs do not work Use the SHOWACT1 and SHOWACT2 commands to make sure the relay/BiMOS output is listed in an action. When in the STOP mode, use the R<n> [H, L, T] command to manually switch a relay/BiMOS output. Limits do not work properly Make sure the limit values are in the proper order. The HI-Q requires High-High ≥ High ≥ Low ≥ Low-Low limit. Make sure limits are enabled with the LIMON command. The actions turn relay/BiMOS outputs on and then off. Check the SA NORM actions. It can override relay control from a CMD or TTL action. 53 DEFAULT Parameters COMMUNICATIONS Parameters: 9600 baud, 1 start bit, 8 data bits, 1 stop bit, no parity, no flow control (hardware flow control is simulated by the wiring connections) Address: ‘01’ CHANNELS Value: 0.0000 Scale: 1.0000 Offset: 0.0000 Lin: Average: Tare: none 0 OFF EQUATIONS S1=C1 S2=C2 S3=C3 S4=C4 STREAMS Unit messages: <none> Limit messages: <none> DISPLAYS Notation: DFIX2=Auto (automatically shift decimal point as required to display MSD) Bargraph color: DCOLOR1=Grn (green) Bargraph mode: DMODE1=BOT (illuminate in a clockwise direction) Bargraph full scale: BFS1=1 Bar zero: BZ1=0 (the starting point of the bargraph) LIMITS Disabled HH: H: L: 0.0000 0.0000 0.0000 LL: RI: RD: ACTIONS All actions OFF. GENERAL Notation: IDELAY: T0: T1: LOCAL mode STOP mode COP timer: SCI 0 0 0 OFF 54 0.0000 0.0000 0.0000 Power Supply Notes When powered from 5V, the HI-Q requires 5Vdc ±3% at its screw terminals. If using long power cables, voltage drops due to cable resistance may cause the voltage at the HI-Q terminals to be below that of the power supply. If this voltage drop reduces the voltage at the HI-Q to <4.85V, the unit will not turn on. For cable runs longer than 10 feet , use the following formula to determine the required power supply voltage: Vrequired = 5V + 3 * D * R V = required power supply voltage D = distance from power supply to HI-Q (feet) R = resistance of wire (ohms/ft) The following chart lists wire resistance for several wire gauges. Gauge 12 14 16 20 Resistance (Ohms/foot) .0016 .0026 .0041 .0065 Table 2: Wire Resistance @ 25°C If the HI-Q is to be powered from 10-32VDC or 90-265VAC, the power supply considerations described above can be disregarded except for excessively long cable runs. 55 ASCII Codes Decimal Hexa- ASCII decimal Decimal Hexa- ASCII decimal Decimal Hexa- ASCII decimal Decimal Hexa- ASCII decimal 0 0 NUL 32 20 SP 64 40 @ 96 60 ‘ 1 1 SOH 33 21 ! 65 41 A 97 61 a 2 2 STX 34 22 “ 66 42 B 98 62 b 3 3 ETX 35 23 # 67 43 C 99 63 c 4 4 EOT 36 24 $ 68 44 D 100 64 d 5 5 ENQ 37 25 % 69 45 E 101 65 e 6 6 ACK 38 26 & 70 46 F 102 66 f 7 7 BEL 39 27 ’ 71 47 G 103 67 g 8 8 BS 40 28 ( 72 48 H 104 68 h 9 9 HT 41 29 ) 73 49 I 105 69 i 10 A NL 42 2A * 74 4A J 106 6A j 11 B VT 43 2B + 75 4B K 107 6B k 12 C NP 44 2C , 76 4C L 108 6C l 13 D CR 45 2D - 77 4D M 109 6D m 14 E SO 46 2E . 78 4E N 110 6E n 15 F SI 47 2F / 79 4F O 111 6F o 16 10 DLE 48 30 0 80 50 P 112 70 p 17 11 DC 1 49 31 1 81 51 Q 113 71 q 18 12 DC 2 50 32 2 82 52 R 114 72 r 19 13 DC 3 51 33 3 83 53 S 115 73 s 20 14 DC 4 52 34 4 84 54 T 116 74 t 21 15 NAK 53 35 5 85 55 U 117 75 u 22 16 SYN 54 36 6 86 56 V 118 76 v 23 17 ETB 55 37 7 87 57 W 119 77 w 24 18 CAN 56 38 8 88 58 X 120 78 x 25 19 EM 57 39 9 89 59 Y 121 79 y 26 1A SUB 58 3A : 90 5A Z 122 7A z 27 1B ESC 59 3B ; 91 5B [ 123 7B { 28 1C FS 60 3C < 92 5C \ 124 7C | 29 1D GS 61 3D = 93 5D ] 125 7D } 30 1E RS 62 3E > 94 5E ^ 126 7E ~ 31 1F US 63 3F ? 95 5F _ 127 7F DEL 56 The HI-Q Command Set Note: commands which apply to specific display types are denoted in parenthesis ( ) for that particular model. Example (TBS, 123, 124) means the command only applies to the HI-QTBS, HI-Q123 and HI-Q124 series. The following is an alphabetical list of all HI-Q commands. Examples are included for the more complex commands. Details of how each command works can be found in the appropriate chapter. ADBAND<n> <value> <n> = channel # (1, 2 or 3) <value> = number of counts to set band at This command places an intelligent moving band around the signal input. If the next incoming reading is within this band, the unit continues the current averaging. If the reading is outside of the band, the unit will disable the averaging and then enable it again once the signal stabilizes within the band value. This is useful when noise may be present on the signal lines and a steady reading is desired while still maintaining a quick step response to an actual signal change. Example: S01ADBAND1 .005 set the band for channel 1 to 0.005 counts. To disable set the band to 0. ADDR [address] Changes the device address. If no new address is specified, only an 'S' must precede commands [address] = ASCII address of up to 6 characters Example: S01addr02 changes the address of unit 01 to 02. The unit will only respond to commands starting with S02 from this point on. AVG<n> [dddd] []= Shows current number of samples being averaged for channel <n> [dddd]= Sets # of samples to [dddd] <n>= 1,2,3,4 0 ≤ [dddd] ≤ 255 Example: S01avg1 4 sets the number of samples to be averaged on channel 1 to 4. AZON Turns on the internal autozero function of the A/D converter. Shipped ON unless otherwise noted on PO Example: S01AZON turns on the autozero function Use the SHOWSTATUS command to verify the current setting. AZOFF Turns off the internal autozero function of the A/D converter. Warning, turning off the autozero function will require a complete re-calibration of the device. Example: S01 AZOFF BAUD [baudrate] []= Shows current baud rate [baudrate]= 19.2K, 9600, 4800, 2400, 1200 Example: S01baud4800 sets the meter’s serial baud rate to 4800bps BFS1 [ffff] (TBS, 123 and 124 series) [ffff]= Set BFS1 value to [ffff] Example: S01BFS1 20 sets the bargraph#1 full scale value to 20. On the HI-QTBS, 123, 124 series the bargraph is always #1. BZ1 [ffff] (TBS, 123 and 124 series) [ffff]= Set display <n> BZ value to [ffff] Example: S01BZ1 20 sets the starting value of the bargraph to 20. The bargraph will begin illuminating with a value of 20 on the appropriate stream. If the BFS is set to 100 then the bargraph will illuminate from 20 to 100. CH<n> <ON, OFF> <ON>= Turn channel <n> A/D inputs ON <OFF>= Turn channel <n> A/D inputs OFF <n>= 1,2,3 Example: S01CH1on initializes the A/D converter for channel #1. 57 CHN<n> [ffff] [ffff]= Value to place in channel <n> <n>= 1,2,3,4 Example: S01CHN1 20 will display the number 20 on the digital display and turn on the appropriate number of bargraph segments. CLRD<n> Turn all display <n> elements OFF <n>= 1,2,3,4 CMD<n> [command] Defines the command to be executed when CMD<n> is found in an action list <command>= Any valid command (without the device address) <n>= 1,2,3 Example: S01cmd1 bfs1 250 will automatically change the bargraph full scale value to 250 when cmd1 is activated. Cmd1 can be activated from an alarm using the set action command. S01sahh1cmd1 sets the action so that when the hh1 value is reached cmd1 is executed. COUNT Counts the number of rising edges on TTL2. Results are placed in Channel 4. TTL1 low stops counting TTL3 low resets count to 0 DCOLOR1 [R, G, A] (HI-QTBS series only) [R]= Set bargraph to RED [G]= Set bargraph to GREEN [A]= Set bargraph to AMBER Example: S01dcolor1R changes the bargraph normal color from green to red. This command is only used on the HI-QTBS . The other HI-Q instruments will accept the command without changing the display color. DELAY <action list> [time] [time]= Time to delay in 100ms increments before <action list> can occur on an alarm condition 0 ≤ time ≤ 255 <action list>= HH<n> H<n> L<n> LL<n> RI<n> RD<n> Stream <n> HH limit Stream <n> H limit Stream <n> L limit Stream <n> LL limit Stream <n> RI limit Stream <n> RD limit DH1 DL1 TTL1H TTL1L TTL2H TTL2L DAC 1 H limit DAC 1 L limit TTL1 H limit TTL1 L limit TTL2 H limit TTL2 L limit DFIX<n> [ddddd] [ddddd]= Set numerical display <n> to [ddddd] fixed decimal places n=1, 2, 3, or 4 depending on the unit. For the HI-QTBS, 123, 124 the numeric display is #2. Example: S01dfix2 3 will show a maximum reading of 999.999 on the display and a minimum reading of 0.001 DH1 [ffff] Set DACHi limit []= Shows current DAC1 Hi limit [ffff]= Sets DAC1 Hi limit to [ffff] Example: S01dh1 22 sets the analog output high limit to 22mADC when the 4-20out is ordered. DIAG Performs internal diagnostics Example: S01diag will start the individual segment test of the display and main microprocessor. DINT [0, 1, 9] (TBS and 126 series) Set display intensity 58 [0]= Display OFF [1]= Lowest intensity [4]= Highest intensity Example: S01dint1 changes the display intensity to low brightness. Mainly used for night time use onboard ocean going ships. DL1 [ffff] []= Shows current DAC1 Lolimit [ffff]= Sets DAC1 Lo limit to [ffff] Example: S01dl1 3 sets the analog output low limit to 3mADC when the 4-20out is ordered. DLFLASH Causes entire bargraph to flash when display reaches a limit. Hi and Lo limits flash at a slow speed, while Hi Hi and Lo Lo limits flash at a faster speed. Example: S01dlflash DLIMOFF (TBS, 123 and 124 series) Turns off limit marks for all bargraph displays. Bargraphs will still change color and/or flash when reaching a limit, but the limit marks will not show. Example: S01dlimoff DLIMON (TBS, 123 and 124 series) Turns limit marks on for all bargraph displays Example: S01dlimon DLNFLASH Turns off flashing when display reaches a limit DMODE1 [BOT, BI] (TBS, 123 and 124 series) [BOT]= Set bargraph to illuminate in a clockwise direction. [BI]= Set bargraph to illuminate in a bi-direction mode. Used mainly to display positive and negative values such as charge / discharge rate of batteries in power plants. DOFFSET1 [ffff] []= Show current DAC1 output offset [ffff]= Set DAC1 output offset to [ffff] DSCALE1 [ffff] []= Show current DAC1 output scale [ffff]= Set DAC1 output scale to [ffff] DSYM (TBS only) Causes all bargraph bars to change to the limit color when a limit is reached DSYMOFF (TBS only) Allows only the bargraph bars beyond a limit to change to the limit color 59 EQN<n>[equation] []= Changes equation <n> to its original factory setting [equation]= Defines an equation to use in calculations. Valid equation format: RESULT= OPERATOR(s) and OPERAND(s) RESULT= can be: S<n>= Stream <n> C<m>= Channel<m> SP<m>= PID setpoint <m> HH<m>= HH limit <m> H<m>= H limit <m> L<m>= L limit <m> LL<m>= LL limit <m> RI<m>=RI limit <m> RD<m>=RD limit <m> HYST<m>= Hysteresis <m> A<m>= Scale <m> B<m>= Offset <m> DH1= DAC1 High limit DL1= DAC1 Low limit OPERATOR(s) can be: * / + - Multiplication Division Addition Subtraction ( ) SQRT Opening parenthesis Closing parenthesis Square root function B<m> T<m> SP<m> KP<m> KI<m> KD<m> Offset <m> Tare <m> PID setpoint <m> PID P constant <m> PID I constant <m> PID D constant <m> OPERAND(s) can be: S<n> Current stream <n> value R<n> Rate of change of stream <n> MAX<n> Max. value of stream <n> MIN<n> Min. value of stream <n> C<m> Current channel <m> value O<m> Last value of channel <m> A<m> Scale <m> 1 ≤n ≤ 7 1 ≤m ≤ 4 A maximum of 4 nested parenthesis can be used. Equations with invalid expressions will be evaluated until an error is reached, with an undefined result. The following are examples of valid equations: S1= C1*12 - C2 C2= S1+S2*(C1-C2) HH3= SQRT(C3-MAX1)*A1-O4 A4= C4*(MIN2-(MAX1+C1-(S3*S1)))+1.8 S5= S1+T1*KP2-B2 C1= (SP3-C2)/21.9 - (C2-SP2)*3.14159E-3 FIX[n] Formats numbers on the serial port to have a fixed number of digits to the right of the decimal point [n]= # digits after the decimal point n=0 to 6 Numbers too big to be printed without E+nn will have the exponential portion truncated. Example: S01fix3 will allow serial transmission of data to 3 decimal places (125.592) FREQ Measures the frequency of rising edges on TTL1. Results are placed in channel 4. H<n> [ffff] []= Show current stream <n> Hi limit [ffff]= Set stream <n> Hi limit to [ffff] <n>= 1,2,3,4 Example: S01h1 15 sets the high limit for channel#1 to 15 60 HD1 [R, G, A] (TBS only) [R]= Set bargraph Hi limit color to RED [G]= Set bargraph Hi limit color to GREEN [A]= Set bargraph Hi limit color to AMBER Example: S01hd1a sets the high limit color to amber on the bargraph. HELP Shows a list of all available SHOW commands. HH<n> [ffff] []= Show current stream <n> Hi Hi limit [ffff]= Set stream <n> Hi Hi limit to [ffff] <n>= 1,2,3,4 Example: S01hh1 35 sets the high high limit on channel #1 to 35. HHD1 [R, G, A] (TBS only) [R]= Set bargraph Hi Hi limit color to RED [G]= Set bargraph Hi Hi limit color to GREEN [A]= Set bargraph Hi Hi limit color to AMBER Example: S01hhd1r sets the high high limit to red on the bargraph. HYST<n> [ffff] []= Shows current stream <n> limit hysteresis [ffff]= Set stream <n> limit hysteresis to [ffff] <n>= 1,2,3,4 Example: S01hyst1 .25 sets the hysteresis for channel #1 to +/- 0.25. Mainly used with the relay output option on noisy signals or fluctuating processes. IDELAY [n] Sets an initial delay to take place after every RUN command. []= Shows current value of idelay [n]= # of seconds to delay 0 ≤ n ≤ 255 Example: S01idelay 5 will cause the unit to not take any analog input readings for 5 seconds after power up or receiving the run command. KD<n> [ffff] Set channel <n> PID D value []= Show current PID D for channel <n> [ffff]= Set channel <n> PID D to [ffff] <n>= 1,2,3,4 KI<n> [ffff] Set channel <n> PID I value []= Show current PID I for channel <n> [ffff]= Set channel <n> PID I to [ffff] <n>= 1,2,3,4 KP<n> [ffff] Set channel <n> PID P value []= Show current PID P for channel <n> [ffff]= Set channel <n> PID P to [ffff] <n>= 1,2,3,4 L<n> [ffff] Set stream <n> Lo limit []= Show current stream <n> Lo limit [ffff]= Set stream <n> Lo limit to [ffff] <n>= 1,2,3,4 Example: S01L1 5 sets the low limit for channel #1 to 5. 61 LAMP Perform a display lamp test Example: S01lamp LAP Measures the time TTL2 is held 'high'. Current result is placed in channel 4. TTL1 low 'holds' current display value (timer still runs). TTL3 low resets time to 0. LD1 [R, G, A] (TBS only) [R]= Set bargraph Lo limit color to RED [G]= Set bargraph Lo limit color to GREEN [A]= Set bargraph Lo limit color to AMBER Example: S01LD1a sets the low limit color to amber on the bargraph. LIMOFF Turns limit checking for all streams off and turns off limit marks on all bargraph displays Example: S01limoff LIMON Turns limit checking for all streams on and turns on limit marks for all bargraph displays Example: S01limon LIN<n> [OFF, sensor type] [OFF]= Turns linearization for channel <n> off. <n>= 1,2,3,4 [sensor type]= user polynomial, user table, or type of thermocouple/RTD RTD ANSI J B N K R S T E TZ PZ European RTD ANSI RTD J type B type N type K type R type S type T type E type User table User polynomial Example: S01LIN1J turns on the linearization for channel #1 for type J thermocouple. To select the units (F, C or K) use the TEMPUNIT command LL<n> [ffff] []= Show current stream <n> Lo Lo limit [ffff]= Set stream <n> Lo Lo limit to [ffff] <n>= 1,2,3,4 Example: S01ll1 3 sets the low low limit for channel #1 to 3 LLD1 [R, G, A] (TBS only) [R]= Set bargraph Lo Lo limit color to RED [G]= Set bargraph Lo Lo limit color to GREEN [A]= Set bargraph Lo Lo limit color to AMBER Example: S01lld1r sets the low low limit to red on the bargraph. LOC Enables serial output from the HI-Q Example: S01loc 62 MHH<n><message> Assigns a message to channel <n> HH limit <message>= Any ASCII message up to 15 characters long <n>= 1,2,3,4 Example: S01mhh1 pump failure. Sending this command will cause the HI-Q to transmit the message “pump failure” through the serial after the data is sent when the value is greater than the high high limit setting. (STR1: 165.3 pump failure) MH<n><message> Assigns a message to channel <n> H limit <message>= Any ASCII message up to 15 characters long <n>= 1,2,3,4 Example: S01mh1 pump failure. Sending this command will cause the HI-Q to transmit the message “pump failure” through the serial after the data is sent when the value is greater than the high limit setting. (STR1: 165.3 pump failure) ML<n><message> Assigns a message to channel <n> L limit <message>= Any ASCII message up to 15 characters long <n>= 1,2,3,4 Example: S01ml1 pump failure. Sending this command will cause the HI-Q to transmit the message “pump failure” through the serial after the data is sent when the value is less than the low limit setting. (STR1: 165.3 pump failure) MLL<n><message> Assigns a message to channel <n> LL limit <message>= Any ASCII message up to 15 characters long <n>= 1,2,3,4 Example: S01mll1 pump failure. Sending this command will cause the HI-Q to transmit the message “pump failure” through the serial after the data is sent when the value is less than the low low limit setting. (STR1: 165.3 pump failure) MRD<n><message> Assigns a message to channel <n> RD limit <message>= Any ASCII message up to 15 characters long <n>= 1,2,3,4 Example: S01MRD1 coolant level The message coolant level will be transmitted through the serial port whenever the rate of decrease value of stream #1 is exceeded. MRI<n><message> Assigns a message to channel <n> RI limit <message>= Any ASCII message up to 15 characters long <n>= 1,2,3,4 Example: S01MRI1 coolant level The message “coolant level” will be transmitted through the serial port whenever the rate of increase value of stream #1 is exceeded. NET Disables all serial output from the HI-Q unless a SEND command or the T1 timer is used NEWMAX Resets all maximum stream readings to –1.701413 E+38 NEWMAXMIN Resets all maximum and minimum stream readings. NEWMIN Resets all minimum stream readings to 1.701413 E+38 NODIG Turns PERIOD, FREQ, PWP, PWN, COUNT, LAP and LOG functions off. OFFSET<n> [ffff] []= Show current channel <n> offset [ffff]= Set channel <n> offset to [ffff] <n>= 1,2,3,4 63 PANIC Enters emergency shutdown mode and set HI-Q outputs to the values specified by the SETPANIC command Example: The keys on the front of the HI-Q can be programmed so that when pressed the HI-Q executes the panic settings for a safe recovery of the process. This is essential in critical processes that can cause catastrophic failure or death when not properly controlled. PERIOD Measures input period between rising edges on TTL1. Results are placed in channel 4. PID<n> <ON, OFF> <ON>= Turns PID for channel <n> on <OFF>= Turns PID for channel <n> off <n>= 1,2,3,4 PWN Measures the 'low' time of pulses on TTL1. Results are placed in channel 4. PWP Measures the 'high' time of pulses on TTL1. Results are placed in channel 4. R<n> [H, L, T] []= Show current state of relay/BiMOS output <n> [H]= Turns relay/BiMOS output <n> on. [L]= Turns relay/BiMOS output <n> off. [T]= Toggles the state of relay/BiMOS output <n>. 1≤n≤8 Example: S01r3h sets relay or bimos #3 to its high state. If in the run mode, the relay / bimos will be toggled momentarily. If in the stop mode the relay / bimos will remain in the high state until commanded to change. RD<n> [ffff] []= Show current stream <n> RD limit [ffff]= Set stream <n> RD limit to [ffff] <n>= 1,2,3,4 RESET Performs a software reset of the HI-Q. Startup mode will be determined by the current state of TTL3. RETRANS<on, off> Enables retransmission of serial data from one HI-Q to another similar HI-Q. This command automatically picks up the channel data and send it to another HI-Q of the same address. In order to successfully use this command, both units must be of similar type and similar configuration with the exception of the A/D converter. The master device will pick up the channel number and transmit it with its data to the second device. The stream assignment for each channel must include serial transmission. Example: S01RETRANSON enables serial transmission to another HI-Q device. RI<n> [ffff] []= Show current stream <n> RI limit [ffff]= Set stream <n> RI limit to [ffff] <n>= 1,2,3,4 RS <ON, OFF> <ON>= Turns ramp + soak ON and resets to beginning of process <OFF>= Turns ramp + soak algorithm OFF RSLIMIT<n> [ffff] []= Show current limit for point <n> [ffff]= Set point <n> limit to [ffff] <n>= 1,2,3,4,5,6,7,8,9 Point 9 is the final value to ramp to before the algorithm ends 64 RSRATE<n> [ffff] []= Show current ramp rate for point <n> [ffff]= Set point <n> ramp rate to [ffff] <n>= 1,2,3,4,5,6,7,8,9 Point 9 is the rate to ramp to the final value before the algorithm ends RSREPEAT [dddd] []= Shows current value of RSREPEAT [dddd]= Set repeat value to [dddd]. A value of 0 will repeat indefinitely 0 ≤ [dddd] ≤ 255 RSTIME<n> [dddd] []= Show current hold time for point <n> [dddd]= Set point <n> hold time to [dddd] seconds. A time of 0 disables the point 0 ≤ [dddd] ≤ 65535 <n>= 1,2,3,4,5,6,7,8 RUN Makes the HI-Q read its inputs, perform calculations, and update its outputs continuously SA <action list> [actions] []= Shows current [actions] [actions]= [actions] to assign to <action list> [actions] include: [R<n>H]= Turns relay/BiMOS <n> on. [R<n>L]= Turns relay/BiMOS <n> off. [R<n>T]= Toggles state of relay/BiMOS <n>. [TTL<n>H]= Makes TTL<n> high. [TTL<n>L]= Makes TTL<n> low. [TTL<n>T]= Toggles TTL<n>. [D1H]= Sets DAC1 to its high limit. [D1L]= Sets DAC1 to its low limit. [D1Z]= Sets DAC1 to zero. [CMD<m>]= Execute CMD<m> command. [STOP]= Open the execution loop. [RUN]= Keep the execution loop closed. [NONE]=Remove all[actions]from<action list>. <action list> is one of: NORM HH<n> H<n> L<n> LL<n> RI<n> RD<n> DH1 DL1 TTL1H TTL1 Hi TTL1L TTL1 Lo TTL2H TTL2 Hi TTL2L TTL2 Lo ALARM1 RTC alarm 1 ALARM2 RTC alarm 2 ALARM3 RTC alarm 3 ALARM4 RTC alarm 4 Normal operating status Stream <n> HiHi limit Stream <n> Hi limit Stream <n> Lo limit Stream <n> LoLo limit Stream <n> RI limit Stream <n> RD limit Dac1 Hi limit Dac1 Lo limit 1≤n≤2 1≤m≤4 Example: S01sanorm R1LR2LR3LR4L sets the normal state of relays 1-4 to low. S01sahh1r4h causes relay#4 to change state when the high high #1 limit is reached. S01sah1r3h Causes relay#3 to change state when the high#1 limit is reached SA+ Same as SA, but adds [actions] to an existing list SASame as SA, but removes [actions] from an existing list SCALE<n> [ffff] []= Shows current channel <n> scale value [ffff]= Sets channel <n> scale to [ffff] <n>= 1,2,3,4 65 SCI Formats numbers on the serial port to have scientific notation SEND[n] Makes the HI-Q read its inputs and update its outputs. HI-Q must be put on stop. S01STOP<R> S01SEND(N)<R> []= Reads and updates once [n]= Read and updates [n] times 1 ≤ n ≤ 255 SETA<n> [ffff] Sets user polynomial coefficients []= Shows current value of A<n> [ffff]= Sets A<n> value to [ffff] 0 ≤ n ≤ 24 SETD<n> Turn all elements of display <n> ON SETP[n] Prompts for user polynomial entries starting from A[n]. The current value of each table point is displayed and a prompt for a new value appears. Pressing ENTER at the prompt keeps the old value. Entering a new value replaces the old value. Pressing ESCAPE exits the command and keeps any changed values. 0 ≤ n ≤ 24 SETPANIC [TTL1<H, L, T>, TTL2<H, L, T>, DAC1<ffff>, R<n> <H, L>] Set the output values for an emergency shutdown []= Show current emergency shutdown outputs [TTL1<H, L, T>]= Set TTL1 output High, Low, or Toggle TTL1 output [TTL2<H, L, T>]= Set TTL2 output High, Low, or Toggle TTL2 output [DAC1<ffff>]= Set DAC1 output to <ffff> [R<n><H, L>]= Set relay/BiMOS output <n> High or Low 1≤n≤8 SETT[n] Prompts for user table entries starting from X[n]. The current value of each table point is displayed and a prompt for a new value appears. Pressing ENTER at the prompt keeps the old value. Entering a new value replaces the old value. Pressing ESCAPE exits the command and keeps any changed values. 0 ≤ n ≤ 24 SETX<n> [ffff] Sets user table X coordinates []= Shows current value of X<n> [ffff]= Sets X<n> value to [ffff] 0 ≤ n ≤ 24 SETY<n> [ffff] Sets user table Y coordinates []= Shows current value of Y<n> [ffff]= Sets Y<n> value to [ffff] 0 ≤ n ≤ 24 SHOW Shows a list of all available SHOW commands SHOWACT1 Shows the action lists for channel inputs 66 SHOWACT2 Shows the action lists for all other alarm conditions SHOWCAL Shows calibration scale and offset values SHOWCMD Shows the current commands saved with the CMD<n> command SHOWDELAY Shows the delays associated with alarms and actions SHOWEQN Shows current equations being used SHOWIN Shows scale, offset, averaging, linearization, tare and limits for input channels SHOWLIM Shows the limit messages for the three analog input channels and one digital input channel SHOWMAX Shows the max/min values for all streams SHOWMIN Shows the max/min values for all streams SHOWOUT Shows scale and offset values for DAC outputs SHOWPANIC Shows the current emergency shutdown output values SHOWPID Shows all current PID constants and variables SHOWPOLY Shows user-defined polynomial SHOWRAMP Shows the current ramp + soak parameters SHOWREL Shows the current state of all relay/BiMOS outputs SHOWSTAT Shows the status of the COP, FIX/SCI, etc SHOWSTR Shows output assignments for all streams SHOWTABLE Shows user-defined linearization table SHOWUNIT Shows the units assigned to all streams SP<n> [ffff] (used with PID function only) []= Show current setpoint for channel <n> [ffff]= Set channel <n> setpoint to [ffff] <n>= 1,2,3 67 STOP Stops the HI-Q from reading inputs and updating outputs. Stops all functions except Serial I/O Bargraph display will full scale orange, digital display will retain last reading. STR<n> [ffff] []= Show the current value of stream <n> <n>= 1,2,3,4,5,6,7 STREAM<n>= [off, + , - serial disp1 disp2 disp3 dac1 ] Determines which outputs are affected by stream <n> []= Shows current outputs affected by stream <n> <n>= 1,2,3,4,5,6,7 [off]= Removes all outputs from stream <n> [serial]= Sends stream <n> data to serial output [disp1]= Sends stream <n> data to display #1 [disp2]= Sends stream <n> data to display #2 [disp3]= Sends stream <n> data to display #3 [dac1]= Sends stream <n> data to DAC #1 A ‘+’ before an argument adds that argument to the existing output list for stream <n>. A ‘-’ before an argument removes that argument from the existing output list for stream <n>. Example:S01Stream1= serial disp1 disp2 dac1 (Sends stream 1 data to serial port, display#1, display#2 and analog output 1) Spaces are required between serial and disp1 and disp2 etc… Stream1 -serial (Removes serial output from previous list) Stream1 +dac1 (Adds analog output 1 from the output list) TARE<n> [ON, OFF, NEW, ffff] []= Shows current tare value for channel <n> [ON]= Turns the tare for channel <n> on [OFF]= Turns the tare for channel <n> off [NEW]= Takes a new tare reading from channel <n> [ffff]= Sets channel <n> tare to [ffff] <n>= 1,2,3,4 Example: S01tare1on turns on the tare feature for channel #1 S01tare1new tares the current reading on the display to zero. Can be activated with the keypad if so desired by setting the alternate keypad functions. TEMPUNIT<n><degrees> <n>=channel # (1, 2 or 3) <degrees>=desired temperature units in degrees C, F or K Example: S01 TEMPUNIT1F sets channel 1 to read in degrees F. Must have the Linearization enabled for proper operation. TTL1[IN, OUT, H, L, T] []= Shows current state of TTL1 [IN]= Makes TTL1 an input [OUT]= Makes TTL1 an output [H]= Makes TTL1 output 'high' [L]= Makes TTL1 output 'low' [T]= Toggles TTL1 output TTL2[IN, OUT, H, L, T] []= Shows current state of TTL2 [IN]= Makes TTL2 an input [OUT]= Makes TTL2 an output [H]= Makes TTL2 output 'high' [L]= Makes TTL2 output 'low' [T]= Toggles TTL2 output TTL3 [ON, OFF] []= Shows current TTL3 function 68 [ON]= Allows TTL3 to control the RUN/STOP modes [OFF]= Disables RUN/STOP control from TTL3 UNITS<n><message> Assigns a unit message to stream <n> <message>= Any ASCII message up to 15 characters long <n>= 1,2,3,4 send UNITS<n> too disable units transmission from channel n Example: S01units1 RPM will send the text RPM with the channel 1 data through the serial port. USER Performs a software reset and loads USER parameters into memory WDON Turns the internal watchdog/Computer Operating Properly timer on. The timer will be enabled only after a hardware or power-on reset. WDOFF Turns the internal watchdog/Computer Operating Properly timer off. The timer will be disabled only after a hardware or power-on reset. WDTEST If the watchdog/Computer Operating Properly timer is enabled, this command will place the internal processor into an infinite loop. If working properly, the watchdog/COP will reset the HI-Q and normal device operation will resume. WRITE Saves current HI-Q configuration to non-volatile memory. Send this command only when you are certain the unit is configured properly. Additional writes can be made at a later time if changes are required. 69 MASTER CONNECTION DIAGRAM This differs from previous versions dated 11/1/99 and before. (REAR VIEW) A NALOG OUT A NALOG OUT + -15 VDC OUT N.C. 6 DB9 2 . TXD (RS23 2) 3. RXD (RS23 2) 7 RELA Y #1 RELA Y #2 N.O. COMMON N.C. RELA Y #3 N.O. 6 1 COMMON N.C. 9 5 12 4. NO CONNE CTION 1 5 . GROUND 3 7. TXA (RS4 22/RS48 5) 8. RXB (RS42 2) A NALOG INPUT A NALOG INPUT A NALOG INPUT A NALOG INPUT TTL #1 A NALOG INPUT TT L#2 DEFA UL T + 5VDC BACK LIGHT 12 A NALOG INPUT 10 5 +5 VDC RET URN +5V DC I / O 1 NOTES: 1. RE FER TO SECTIO N 5 "INPUT OPT IONS" FOR ALL ANALOG S IGNAL CONNECT IONS. 2. UNIT S ARE S UPP LIE D WIT H EIT HER 5VDC, 10-32 VDC OR 90-26 5VA C POW ER INP UT. IF INP UT POWE R IS NOT K NOW N, CHECK THE MODEL NUMBER ON T HE BACK SIDE OF T HE F RONT DISPLA Y MODULE . FOR 5 VDC POW ERE D UNIT S, 5 V + /-5% M US T B E PRE SENT A T T HE S CREW TE RMINAL BLOCK . UNDER VOLTA GE WILL RE SUL T IN A NON-OPE RA TIONAL UNIT. 3. T TL#1 AND TT L#2 A RE CONFIGURABLE AS I NP UTS OR OUT PUT S. A LL LEVE LS MUST BE W ITHIN TT L SPE CI FIED VA LUES (0V=LOGIC 0, 5V= LOGIC 1) 4. DEF AULT PIN S HOULD NOT BE USED UNLESS INSTRUCTED BY AN AUTHORIZED OT EK ENGINE ER. 5. FOR 30 VDC TRA NSDUCER POWE R, USE -1 5VDC OUT AS GROUND AND +15V DC OUT AS P OSIT IVE . 6 . ANA LOG OUTP UT IS EI THER 0- 5VDC OR 4-20 mADC. 7.S EE PAGE 22 F OR OPE N COL LECT OR T RANSIST OR CONNECT IONS IF ORDERED. 70 RELA Y #4 N.O. - SUPPLY E ART H GND 6. TXB (RS42 2) 9. RXA (RS4 22/RS48 5) N.C. N.O. 1 2 3 RET URN 1. NO CONNECTION COMMON COMMON +15 VDC OUT 5 1 1 2 + SUP PLY 90- 265V AC OR 10-32VDC POWER INP UT. Display Menu The following flow chart is a true representation of the embedded display menu system. In order to enter into the display menu, follow this sequence of events. Press and hold the menu (g) key, after 2 seconds the display will show “PASS” prompting for the password. Release the menu (g) key and momentarily press the enter (n) key, the display will now show ‘0000’ with the left most zero flashing. Use the up (t) key to increase the number and the right (4) key to select the next number for entering the password. By default, all units shipped from OTEK use the password ‘0000’. With ‘0000’ shown on the display, press the enter key (n) and press the enter (n) key one more time. The display reverts to ‘PASS’. This was intended to fool any unauthorized persons from accidentally discovering the password. Now you are in the menu system. Press the right (4) key and the display will show ‘STR1’ for stream #1. Follow the flow chart below, to gain access to the different sections of the menu as required. Pressing the MENU (g) key twice at any time exits the menu system without saving changes to eeprom. While following the menu flow diagram, keep in mind that the right (4) key is used to select the different menu options at all levels including sub-menus. The up (t) key is used to go up one level or increase the selected digit. The enter (n) key is used to enter into the next sub-menu or accept the changes. Once all changes have been made, they must be stored in eeprom with the ‘stor’ menu (‘conf’>>’main’>>’stor’) 71 Display Overlay’s HI-QTBS HI-Q123 HI-Q124 HI-Q126 HI-Q125 72 Mechanical Drawings MOUNTING STUDS ON 3.375" OR 90mm CENTERS Explosion Proof Housing shown with ¾” NPT gland entry. 73 74 10/19/10 BENEFITS D ESCRIPTION: The HI-Q Controllers consist of several products with sub-products. All the products share similar hardware and software with the main difference being their package and display. Once you have familiarized yourself with one, you will know them all! By using common software and hardware, we realize R&D and production savings that we pass on to you. BENEFITS * SV & V: The HI-Q Series software has been verified & validated as trouble/glitch free per IEEE Std. The Hardware has passed several Mil-Std's, such as 461, 462, 617, EPRI 102323 & others. If we don't have it, we'll make it! * Low Cost-High Performance: When you buy the HI-Q, you buy a "Computing Controller," not just an instrument. Its performance to price ratio is unsurpassed in the industry. Only the specific functions that you will need are selected and included, no need for unnecessary extras. INTERFACE OPERATOR: * Bargraphs are used for quick trend indication. The operator can, at a glance, tell where the process is. * Digital Display(s) are used to give accurate process indication and set point control or calculate values in engineering units. They are also used to display the menu driven prompts. PROCESS: All HI-Q intelligent controllers offer five methods of controlling your process: a) Current: 4-20mA, 1-5mA, 0-20mA (including PID), directly or inversely proportional. b) Voltage: 0-5VDC & 1-5VDC (or 5-0 & 5-1VDC) or any other ranges in between. c) Four (4) or six (6) SPDT 10Amp relays. d) Open collector Bi MOS outputs. e) The serial port (USB, RS232, 422 & 485 Applications: See Technical Brief on Page 27 OF THE SYSTEM: * Use the Isolated RS Translator to interface with other industry standard USB, RS-232C/RS-422 or RS-485 devices with open or proprietary protocols. If they are "RS" and "ASCII" compatible, the HI-Q can communicate with them. * Stand Alone: as Single or Multi Loop Controller Whether under the protection of a factory environment or in the open field, the HI-Q will meet and exceed your expectations. CONFIGURATION: Just Upload OTEK's FREE Windows Navigator™ and configure or re-configure your HI-Q without an Instruction Manual, in minutes! ™ HI-Q (High I.Q.) COMMON FEATURES * Ready to Use: Just apply power, select the commands, set your limits and start controlling. * Automatic Tricolor: Changes colors (Red, Blue, Purple,Green, Amber) upon reaching a limit. Flashing & dimming of the displays are under your control. (Some Models) * Password Security: You can enable or disable the front panel keypad (Optional Keypad) on some models. * Emergency Shut Down: Any three keys held down simultaneously will shut down the controller sending all outputs to a "Fail Safe"(Off) state. * Power on Test (POT): Will test every major section of its hardware, software and firmware and flag any malfunctions. * C.O.P. (Computer Operating Properly): Checks the operation of its internal algorithms. You can disable it. * R.T.C (Real-time Clock): Indispensable for time keeping functions, such as time, event alarms, etc... (only on some models). * Mathematical Functions: Insert the math function. Transmit and/or control with the result. * Polynomials and Look Up Tables: Make your own or use the preprogrammed polynomials to 9th order. * Self Diagnostics: The HI-Q will detect major software/ hardwware failure & warn you via its display/serial port. * Modular Design For Long Life Expectancy * Lifetime Warranted Some Commands You Can Enter Via the Keypad (More Via the Serial Port) or GUI +,-,x,÷, √ , Σ Security Code-Restricted Access Zero Offset-Tare Full Scale-Range 1 → 3 Assign any Channel to any 4 → 2 Display & Relays to Channels or Colors (LED or LCD backlight) Α/Μ Intensity-None to Max. Blinking None, Slow, Fast Filtering (averaging) Danger Alarms(Warning-Stop) Relays (4 or 6) Bi Mos (8) On-Off External Commands Fixed or Variables Alarm w/or w/out Delay Watchdog Timer * Auto/Manual Process Control K Δt P I D Assign any Constant to any Channel Assign any Delay to any Output Proportional Integral Derivative Your Own Custom Commands oops! Reset to Default Parameters Poly Ours or Your Polynomials/Tables ...!! * Process Predictablity (Signal(s) vs Time COP-Computer Operating Properly Store any Fix Value or Command in Memory Any Address Alphanumeric or Either Any speed 1.2 to 19.2 KBPs Current Loops 4-20mA(0-5V out) Any Resolution (1 to 50,000) A THE BENEFITS OF THE "HI-Q" Now you can monitor and control your process from the comfort of your control room or at the site with an inexpensive PC & OTEK's complete line of Programmable Intelligent Controllers. Use them either as Stand-Alone or as part of your DCS or SCADA system. CONFIGURATION with OTEK's New Windows NavigatorTM (PC G.U.I.) is so fast & easy that no instruction manual (other than connections) is required! Just Plug in your PC Terminal, upload our FREE Program and start selecting your configuration. Within minutes you will be done and you can even email it to remote locations! For a FREE copy of the Windows NavigatorTM visit our website at www.otekcorp.com then click on Windows Navigator TM. OTEK's "HI-Q" line of Programmable Intelligent Controllers with their built-in and isolated signal conditioners will connect directly to your sensor and/ or transducer and it will even power it. All you have to do is to connect & power up. We will even preprogram the "HI-Q" for you if so desired for "Plug-N-Play". Common Features of the "HI-Q™" Series: • Math Functions: +, -, x, ÷, √ and More • Isolated 18-bit A/D w/Signal Conditioners • Isolated Analog Outputs (4-20mA & 0-5VDC) • (4 or 6 each) 10A SPDT Relays for On-Off Control • O.C.T. (250mADC) for Fast On-Off Control • Isolated 10-32VDC (24VAC Also) Power Input • Isolated 100-240VAC or (100-350VDC on Request) Power Input • 5 VDC Power for Low Voltage Applications • Look Up Tables for Thermocouples/RTDs • Polynomials to the 9th Order • Customer's X-Y (25X25)Tables • ZERO • TARE • SPAN • AVERAGE • All ASCII Characters for Open Protocol • Programmable Baud Rate & Address • Isolated RS-232C/422/485 Translator & USB • Automatic Tricolor LED Displays with Dimming, Blinking & Pointers • P.I.D. or Just Plain Proportional Control • SV & V, Mil-Stds with Self-Diagnostic Capabilities • Modular Design for Long Life Expectancy • Lifetime Warranted What Can the "HI-Q" Series Do for You? It can accurately and reliably monitor and/or control your process as stand alone or as part of a DCS/SCADA for complete factory automation. From the most basic form as a serial input remote display to the most complex as stand alone Programmable Intelligent Controller, the "HI-Q" Series will perform to specifications in the oceans, on earth or in outer space, in the Alaskan tundras or in the Tucson deserts. MILITARY, NUCLEAR, SEISMIC & EPRI TR-102323R3 Models Are (Or Being) Approved. Contact OTEKTM Where Are the "HI-Qs" Being Used? Only OTEK's HI-Q Series are in Outerspace (Mir & I.S.S.), Military Aircraft (Night Vision), Naval Warships (Mil-Spec), Nuclear Power Plants, Offshore Exploration/Drilling, Mass Transit (Metro), Biomedical (Non-Life Support), Pharmaceutical, Agricultural, Waste & Water Treatment, etc. IS YOUR APPLICATION MORE CRITICAL? IF YOU DON'T SEE IF, ASK FOR IT! Our customers THINK of the products, we just design them! B COMMON SPECIFICATIONS for: HI-Q SERIES For: •DIN-BAR •TEK •TBS •114 •116 •117 •118 •119 •120 •121 •123 •124 •126 •127 •2K and 2000 (All at 25°C) Also See Individual Specifications SERIAL COMMUNICATIONS • Isolation to 5V or Other Power Inputs: 500VDC • Baud Rate: to 19.2K Baud • Protocol: Full ASCII • Concurrent Use (Translator) of USB or RS-232C & 422 or RS-232C & RS-485 I/O & USB NOTE: As a translator, you can use the com. port to translate from one protocol to another, so long as you only "talk" on anyone and listen on the others, ie., talk on USB, listen on 485, or 422, talk on 232, listen on 485. Can NOT have 232&USB. BiMOS OPEN COLLECTOR • Type: Sink Driver (Transistor) • Isolation to 5V Power: None • Max. Current Sink: 250mA • Vsat @250mA: .8V • Standard VC: 5VDC • External VC: <35VDC • Switching Speed: 1μS Multilevel (Option 01): (Low Speed) • Dry Contact to 24VDC • Isolation to 5V Power: None • Response: DC to 100Hz • Input Impedance: 1MΩ/27pF TTL Level (Option 02):(High Speed) • 0<.8V; 1=>2.4V • Response: DC-50KHz • Isolation to 5V Power: None ANALOG CONTROL OUTPUTS POWER INPUTS • 5VDC±5% Non-Isolated • Or 10-32VDC (24VAC) Isolated • Or 100-240VAC or (100-300VDC on request) Isolated • Power Consumption varies from model to model and number of options selected. See Specific Models. • Accuracy & Linearity: ± 0.01% F.S. ANALOG INPUT SIGNALS • Resolution: 16 Bits (All Isolated to 500VDC & After 30min, Warm Up) • Outputs: 0-5VDC(>100KΩ), 4-20mA Note: Worst case accuracy & linearity are the (<1KΩ) sum of A/D and selected signal conditioner • Custom Output: 0-20mADC errors. • Compliance Output: 30VDC • Isolation: 500VDC A/D CONVERTER ON-OFF CONTROL OUTPUTS RELAYS • Type: S.P.D.T. (1C) • Max. Switching Current: 10A Res. • Max. Switching Voltage: 30VDC/240VAC@Rated Current • Contact Protection:Included • Contact Isolation: 1000VRMS • Initial Contact Resistance: 0.1Ω • Life Expectancy: 10,000,000 Cycles MEASURING INPUTS DIGITAL DISCRETE INPUTS Functions Selectable: Event, Timer, Period, Frequency, RPM and SPH C • 16-Bit Plus Sign A/D(50K Counts)* • Display Resolution:±0.002% of F.S.* • Accuracy: ±0.01% of Full Scale • Linearity: ±0.01% of Full Scale • Drift: +50PPM/0C • Zero: Automatic/Programmable • SPAN: Programmable • F.S.Input Voltage Range: ±0.5VDC • Max.Current Range: ±1/2 AmpDC • Sampling Rate:16/sec. ÷ by Channels • Input Type: Single Ended/Diff. • Input Bias: 50pA • C.M.V.: ±2VDC • CMR: >90dB • Averaging (Weighted): None to 40 • Input Impedance: See Ord. Info. * Note: Limited by display of model selected (# of digits) COMMON SPECIFICATIONS HI-Q SERIES (Cont'd) For: •DINBAR •TEK •TBS •114 •116 •117 •118 •119 •120 •121 •123 •124 •126 •127 •2K and 2000 NOTE: All V/mA Input Models (Options 10, 11, 14, 15, 30, 31, 33, 34, 35, 36, 50, 51, 53 & 54) Have Internal Jumper Selected Input Ranges of .5, 5, 50 & 500V and .5, 5, 50, 500mA. OPTIONS: (See Ord. Information) 10, 11,12, 30, 31, 32, 50, 51 & 52 * Same Specifications As A/D ANALOG SIGNAL CONDITIONERS (All outputs set for ±500mVDC F.S.) STRAIN-GAGE: ( Options 17, 18, 37 & 38) • Accuracy and Lin.: ±0.1% of F.S. • V Excitation(1): ±2.5VDC ±0.5% • I Excitation(2): 1mADC ±0.5% • Stability of Excitation: ±0.05%/ºC • Maximum Current of VE: 30mA • Maximum Voltage of IE: 5VDC (1) Typical for S-G of 200-400Ω (2) Typical for Monolithic S-G to 5KΩ (3) Tare, Range, Zero Span Are User Programmable VDC (Options 25 & 47) • Accuracy & Lin.: ±0.1% of F.S. • Full Scale Input:±10mVDC • Typical Gain: 50(see A/D Sec.) • Common Mode Voltage: ±2VDC RESISTANCE (Options 20 & 40) • Accuracy & Lin.: ±0.1% of F.S. • Full Scale Input: 50KΩ • Excitation Current: 0.01mA • Stability of Excitation: ±0.05%/ºC TRUE RMS VOLTS, AMPS & WATTS (Options 14, 15, 34, 35, 36, 53, 54 55 60 & 61) Notes: 1. No isolation exists beween channels. 2. Do not use grounded thermo-couple. • Accy. & Lin.: ±1.0% of F.S. DC-50KHz Sine Wave • Accy. & Lin.: ±0.5% of F.S. DC-10KHz ENVIRONMENTAL (To Specs) Sine Wave INDUSTRIAL & NUCLEAR: •Accy. & Lin.: ±2.0% of F.S.10KHz- 50KHz Sine Wave • Operating Temperature:-10-55°C •Resolution: ±0.01% of F.S. • Storage Temperature: -20-65°C •Common Mode Voltage: 2Vrms • Humidity: 10-90%RH, N.C. •Overvoltage Protection: 500VAC • MTBF: >100,000HRS (Calculated) •Overcurrent Protection: 200% •Input Impedance: See Ord.Info. •Drift vs Temperature: ±50 PPM/°C MILITARY: TO SPECIFIC MIL-STD •Input Bias Current: 10pA (I.E. 461, 462, 901, 167, ETC.) CUSTOMS: OTEK CUSTOMIZES ANY OF ITS PRODUCTS TO YOUR EXACT SPECIFICATIONS. POWER CONSUMPTION (WORST CASE) RTD (Options 21 & 41) • Din (α=0.00385):-200° to+800°C • ANSI (α=0.003923):-200 to+600°C • Accuracy: ±0.1°C • Resolution: ±0.1°C • Scale: User Selectable °F, 0C or °K • Linearization: Polynomial to 9th • Open Sensor:+Overange/Flash • Connections: 2 Wire (3 or 4 Wire On Request) • Excitation: 0.1mA or 1mA (Cu) • Open RTD: Burn-up THERMOCOUPLE (Opt. 22,42 & 56) • Thermocouple Type: User Select able but Specify When Ordering ( J, K, T, R, S, B, C, E) • Accuracy of HI-Q: ±0.1% of F.S. • Resolution: 0.1° • Full Scale: Same as Thermocouple • Open TC:(Burn Up) • Input Impedance: >100MΩ • Scale: User Selectable °F, 0C or °K • Lead Resistance Effect:<0.001°/100Ω • Linearization: Polynomial to 9th D DIN-BAR HI-QTBS: HI-QTEK: HI-Q114: HI-Q116: HI-Q117: HI-Q118: HI-Q119: HI-Q120: HI-Q121: HI-Q123: HI-Q124: HI-Q126: HI-Q127: HI-Q2000: HI-Q2K: 5W 10W 15W 10W 10W 15W 15W 15W 15W 15W 5W 5W 10W 5W 15W 15W