1
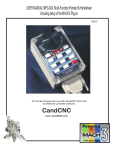
USER MANUAL MPG-02A Multi-Function Pendant & Handwheel
REV1
20 Function Pendant for use with CandCNC Port2 card
and MACH3 Controller Software.
CandCNC
www. CandCNC.com
MPG-02A Button Functions
ACTIVE AXIS FLASH IN MPG JOG MODE
MPG
SHIFT
KEY
MPG
D1
7
SW11
FLASH
ON SHIFT
SOLID
ON RUN
AXIS
SELECT
Mach Output #
6
5
4
D2
D3
D4
SW10
RUN
STOP
MPG JOG
RUN
FEEDHOLD
SHUTTLE
SW9
SW8
SW7
ZERO X
ZERO Y
ZERO Z
FR +
FR -
FR RESET
SW6
SW5
SW4
REF Z
REF ALL
RESET
SPINDLE
OUT 2
RESET
SW1
SW2
SW3
MPG-02A Rev1
MPG LED
FLASHES WHEN
CHANNEL A IS ACTIVE
MPG LED
FLASHES WHEN
CHANNEL B IS ACTIVE
MPG
MPG
FLASH ON
1. Off when in Lower Shift
Mode and RUN is not
active
2. On Solid when in Lower
Shift Mode and RUN is
ACTIVE
3. Flashes when in Upper
Shift Mode
X
Y
Z
FR Active
OUT1 OUT2
On Steady When
in Lower Shift Mode
and Output1 is active
H
SHIFT KEY
TOGGLE
On Steady When
in Lower Shift Mode
and Output2 is active
an
dw
he
MPG
XYZ LED’s Flash when in
Upper Shift Mode and
MPG Jog is active
(Selected Axis flashes with
Shift Mode LED
Flashes when in
Lower Shift Mode and
Feedrate Override
is Active
le
t
t
huAxis Select
S
/
g
e l Jo
MPG
FLASH ON
FUNCTION 1
FUNCTION 2
X
FLASH ON
SHIFT
Y
Z
OUT1 OUT2
STOP
MPG JOG
FEEDHOLD
ZERO Y
SHUTTLE
ZERO Z
FR REF Z
FR +
REF ALL
FR RESET
OUT1
OUT2
RESET
RUN
SOLID
ON RUN
RUN
ZERO X
MPG-02A 20 FUNCTION
CandCNC
RESET
MPG-02 A Switch Assignments
Pendant
Switch
NA
NA
SW3
SW9
SW4
SW10
SW11
SW2
SW5
SW1
SW6
SW8
SW7
MACH
OEM #
Mapped Function
MPG
MPG
39
RESET
38
RUN
30
FR Reset
37
Axis Toggle
29
SHIFT
33 Flood (Out 2)
31
FR 32 Spindle/OUT 1
34
35
36
MACH
CODE
FR +
FEEDHOLD
Shuttle Mode
Indicators
Out 1 Active
(Solid)
Out 2 Active
(Solid)
FR OverRide
(Flash)
D4
61
D3
60
D2
59
D1
81 Run LED (Solid)
1021
1000
1014
175
113
108
110
Shifted
Function
MPG
MPG
RESET
RUN
Zero Z
Axis Toggle
SHIFT
REF ALL
Zero Y
REF Z
109 Zero X
1001 STOP
284 MPG JOG
MACH
CODE
1021
1000
1010
175
246
1009
1022
1008
1003
174
MPG Z axis
(Flash)
MPG Y axis
(Flash)
MPG X Axis
(Flash)
SHIFTED
(flash)
Note: Use of this product requires MACH3 and a custom program from
CandCNC running in MACH3. Other functions can be mapped to the pins.
Contact us at [email protected] if you would like to have other functions
and which keys you want to use.
How to define functions in the code.
1.
2.
3,
4.
Find the OEM Button (function) you want to do in the MACH3 list
Look at the ref number (MACH OEM #) for the key on the pendant (i.e. 30 thru 39)
Decide if you want the function to be in the Normal (unshifted) or the Shifted section
Open the Macropump.m1s file with a text editor (Notepad) and change the number for
the corresponding button that is in the () to the desired OEM Button Code.
5. Save the new code with a different name from macropump.m1s
6. Rename the old macropump.m1s to macropump.old
7. Make sure your new file is in the Mini-IO-SC-Dual folder under macro’s
8. Rename it to macropump.m1s
9. Restart MACH3.
NOTE: This is sample code and is not the correct syntax. DO not use this to run!
If you make a typo or get the code wrong you will get an error message when you start MACH3
IF keyno > 29 AND Shift = 0 Then 'unshifted
Select Case Keyno
Case = 30
DoOEMButton(1014)
Innerloop = 1
looptrigger = 0
Case = 31
DoOEMButton(108)
Innerloop = 1
looptrigger = 0
Case = 32
DoOEMButton(110)
Innerloop = 1
looptrigger = 0
Case = 33
DoOEMButton(113)
Innerloop = 1
looptrigger = 0
Case = 34
DoOEMButton(109)
Innerloop = 1
looptrigger = 0
Case = 35
DoOEMButton(1001)
Innerloop = 1
looptrigger = 0
Case = 36
DoOEMButton(284)
Innerloop = 1
looptrigger = 0
Case = 37
DoOEMButton(175)
Innerloop = 1
looptrigger = 0
Case = 38
DoOEMButton(1000)
Innerloopt = 1
looptrigger = 0
Case = 39
DoOEMButton(1021)
Innerloop = 1
looptrigger = 0
Sample Code for SHIFTED Functions
NOTE: This is sample code and is not the correct syntax. DO not use this to run!
If Keyno > 29 AND Shift = 1 then
Select Case Keyno
Case = 30
DoOEMButton(1010)
Innerloop = 1
looptrigger = 0
Case = 31
DoOEMButton(1009)
Innerloop = 1
looptrigger = 0
Case = 32
DoOEMButton(1022)
Innerloop = 1
looptrigger = 0
Case = 33
DoOEMButton(246)
Innerloop = 1
looptrigger = 0
Case = 34
DoOEMButton(1008)
Innerloop = 1
looptrigger = 0
Case = 35
DoOEMButton(1003)
Innerloop = 1
looptrigger = 0
Case = 36
DoOEMButton(174)
Innerloop = 1
looptrigger = 0
Case = 37
DoOEMButton(175)
Innerloop= 1
looptrigger = 0
Case = 38
DoOEMButton(1000)
Innerloop = 1
looptrigger = 0
Case = 39
DoOEMButton(1021)
Innerloop = 1
looptrigger = 0
Case Else
End Select
Ha
SHIFT KEY nd
w he
TOGGLE
MPG
t t le
u
Sh Axis Select
el Jog/MPG
Ha
SHIFT KEY nd
w he
TOGGLE
MPG
t t le
u
h
el Jog/S Axis Select
FLASH ON
FLASH ON
SHIFT
Y
X
Z
OUT1 OUT2
STOP
RUN
MPG JOG
SOLID
ON RUN
RUN
FUNCTION 1
FUNCTION 2
FUNCTION 1
FUNCTION 2
X
MPG
FLASH ON
FLASH ON
SHIFT
Y
Z
OUT1 OUT2
RUN
STOP
MPG JOG
FEEDHOLD
ZERO Y
SHUTTLE
ZERO Z
SOLID
ON RUN
RUN
FEEDHOLD
ZERO Y
SHUTTLE
ZERO Z
FR REF Z
FR +
REF ALL
FR RESET
FR REF Z
FR +
REF ALL
FR RESET
RESET
OUT1
OUT2
RESET
OUT1
OUT2
RESET
ZERO X
ZERO X
MPG-02A 20 FUNCTION
MPG-02A 20 FUNCTION
CandCNC
CandCNC
Faceplates for new MPG-02A 20 function pendant
RESET
SPINNER KNOB
Changing the MPG-02 Replaceable Faceplate
Allen Head Setscrews (2)
Case Cover Screws (4)
To Change out the Faceplate:
Encoder Mounting Screws(2)
Keypad Screws (4)
Clear Cover
REPLACEABLE
FACEPLATE
1.
2.
3.
4.
5.
6.
Loosen Set Screws on Spinner Knob
Remove Spinner Knob by carefully prying from both sides at once.
Loosen 4 screws holding Clear Cover and remove Clear Cover from Base.
Remove 2 Flat head screws holding Rotary Encoder onto Clear Cover.
Remove the 4 Screws holding the Keypad to the front.
Separate the Front Panel and replace with new one. Make sure the LED’s
all line up properly and are in the holes.
7. Reassemble in reverse order.
There is no need to remove the lower Connector Interface card or disconnect
the Encoder wires. If you do make sure the encoder is plugged back in the
same way since the connector is not “keyed”.
ROTARY ENCODER
Keypad
Sub-Plate
Connector Interface
Card
Base
MPG-02A Dimensions
1 . 75
5.0"
0”
2.187"
3.375"
3.375”