1
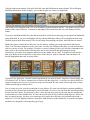
As you are moving you might want to use the “Highlight organization” feature. I like this as it helps me keep
my command control in order. Brigades should stay together at all times, as should higher levels of organization
as much as possible. Command and control is imperative in this game. Your units are heavily impacted based
on whether they are in their commanding officers sphere of influence. This can be determined by using the
“Highlight Command Range” function found on the tool bar or under the “View” menu. Select a leader and
then use this feature to see his radius. Used in conjunction with the highlight organization and you will be able
to keep a tight reign on things…and its dynamic, so it will update as you move around the map and select
different organizations and leaders.
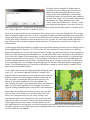
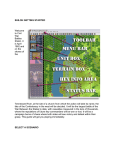
As you position your troops, your movement may trigger
enemy opportunity fire. When it does, any losses you take
will be displayed on the map.
Now let’s take a moment and consider our reinforcements.
They have arrived a decent ways from the front line, and we
need them to come up as quickly as possible. We could
move them through the woods along the Po River and then
overland coming up our left flank, or we can take advantage
of road movement which will bring them up directly behind
our line. Lets choose the road. As mentioned we can move
units singly or as a stack, but there’s another method that is
exceptionally helpful when moving units over long
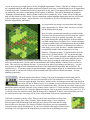
distances. Column movement. To do this double-click the
stack at hex 0,22 then hold the “Alt” key down and rightclick hex 10,27, which is down the road right near the block
house. The entire formation will move along the road in a
large column. This allows you to quickly move units across the map, using the road bonus (because if units
move in a stack they won’t get the road movement bonus) and limit the number of mouse clicks you have to
make. This works for any amount of troops…I have moved an entire Corps along a road this way – you just
need to have the highest level commander on the top of the stack and all troops under him will follow. Be
careful however – if you have troops in mixed formations, supply wagons mixed in, or related troops stacked
along the road as you pass all of them will have an undesired effect on this efficient movement – so some
planning is necessary.
The next action to learn about is Firing. You begin by figuring out which units can fire.
Some should be obvious based on fields of fire, but sometimes it is not clear. There’s a
button to toggle through “Next stack” and this works for both movement and firing based on
the mode you are in. Mode you say? Yes, whether you are in Movement or Fire mode. So far
we have been in movement mode, but now we need to switch to the other. Click on the cross hairs in the top left
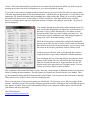
hand corner which will shift our mode. In my scenario I have a unit at 15,11 that can shoot, so I double-click on
the unit to select the unit to fire. Using the right-mouse button, click in an enemy location (in my case 12,9). If it
is valid for you to fire on that location, then the firing will be conducted. If there is some reason that you can’t
fire on the location, then a message will be shown at the bottom of the screen explaining why.
I inflicted 4 casualties with my volley. There are three basic restrictions on firing. One,
you must be in range of the enemy location. Notice that the range of your weapons is
shown as part of the information in the Hex Info Area. Second, the units that are firing
must be able to see the target (The feature of Indirect Fire allows you to get around this
restriction under certain circumstances). If your Line-of-Sight to the target is blocked, then
an aiming circle will appear on the map showing you what terrain is blocking your view.