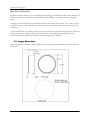
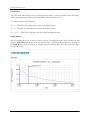
1
1415 Research Park Drive Beavercreek OH 45432 Phone: (937) 426-2703 Fax: (937) 426-1125 E-Mail: [email protected] Visit us on the web at http://www.NexSens.com micro-T Software Operations Manual and Reference Guide Revision 09.02.16 micro-T Software Operations Manual NexSens Technology, Inc. This page intentionally left blank. micro-T Software Operations Manual 2 NexSens Technology, Inc. TABLE OF CONTENTS 1 Introduction......................................................................................................................... 7 1.1 1.2 1.3 2 Principles of Operation........................................................................................................ 9 2.1 2.2 2.3 2.4 2.5 2.6 3 Adding Loggers to the Database ................................................................................. 26 Disabling Loggers Devices in the Database................................................................. 26 Enable Loggers in the Database .................................................................................. 27 Removing Loggers from the Database ........................................................................ 27 Working With Data............................................................................................................ 28 5.1 5.2 5.3 6 System Requirements ................................................................................................. 16 Software Installation ................................................................................................... 16 Registering microT Software ...................................................................................... 19 Uninstalling Software ................................................................................................. 19 USB and Serial Adapter Connection ........................................................................... 20 Creating a Database .................................................................................................... 21 Adding New Sensors .................................................................................................. 22 Setting up a Deployment............................................................................................. 23 Retrieve Data From Loggers ....................................................................................... 24 Creating Reports......................................................................................................... 24 Working with micro-T Loggers.......................................................................................... 26 4.1 4.2 4.3 4.4 5 Micro-T Devices........................................................................................................... 9 Logger Dimensions..................................................................................................... 10 Deployment Options ................................................................................................... 11 Deployment Overciew ................................................................................................ 14 Number of Samples .................................................................................................... 14 Battery Life ................................................................................................................ 15 Getting Started................................................................................................................... 16 3.1 3.2 3.3 3.4 3.5 3.6 3.7 3.8 3.9 3.10 4 About NexSens Technology, Inc................................................................................... 7 How to Use This Manual .............................................................................................. 7 About Software............................................................................................................. 8 Display the Current Day’s Data .................................................................................. 28 Historical Data Report Creation and Sharing............................................................... 29 Copying the Database to Another Computer ............................................................... 30 Software Reference Guide ................................................................................................. 32 6.1 6.1.1 6.1.2 6.1.3 6.1.4 6.1.5 Main Project Window ................................................................................................. 32 Title Bar ..........................................................................................................................................32 Menu Bar ........................................................................................................................................32 Main Toolbar...................................................................................................................................33 Navigation Panel .............................................................................................................................34 Instrument Control Screen ...............................................................................................................34 micro-T Software Operations Manual 3 NexSens Technology, Inc. 6.1.6 6.1.7 6.2 6.2.1 6.2.2 6.2.3 6.2.4 6.3 6.3.1 6.3.2 6.3.3 6.4 6.4.1 6.4.2 6.4.3 6.4.4 6.5 6.5.1 6.5.2 6.5.3 6.5.4 6.5.5 6.5.6 6.5.7 6.5.8 6.5.9 6.6 6.6.1 6.6.2 6.6.3 6.6.4 6.6.5 Device Properties – Status ...............................................................................................................35 Device Properties – Deploy..............................................................................................................36 Instrument Control Tools ............................................................................................ 37 Instrument Control Tools – Device Mode.........................................................................................37 Instrument Control Tools – Data Mode ............................................................................................38 Instrument Control Tools – Statistics Mode......................................................................................38 Instrument Control Tools – Graph Mode ..........................................................................................39 Report Tools ............................................................................................................... 40 General Tab.....................................................................................................................................41 Graph Property Tab .........................................................................................................................43 Advanced Tab .................................................................................................................................44 Basemap Toolbar ........................................................................................................ 46 Drawing Components ......................................................................................................................46 Display Components........................................................................................................................47 Control Components........................................................................................................................48 Basemap and Component Property...................................................................................................48 Menu Commands........................................................................................................ 49 File Menu........................................................................................................................................49 Edit Menu .......................................................................................................................................50 View Menu......................................................................................................................................50 Basemap Menu................................................................................................................................51 Instrument Menu ............................................................................................................................51 Report Menu ...................................................................................................................................51 Advanced Menu ..............................................................................................................................52 Window Menu.................................................................................................................................52 Help Menu ......................................................................................................................................52 Advanced Dialog Boxes and Menus............................................................................ 53 Backup ............................................................................................................................................53 Restore ............................................................................................................................................54 Setup Site ........................................................................................................................................54 Page Property ..................................................................................................................................55 Field Note .......................................................................................................................................56 Appendix ................................................................................................................................... 57 Specifications......................................................................................................................... 57 Installation for Windows 2000 ............................................................................................... 59 Installation for Windows XP .................................................................................................. 62 Troubleshooting Connecting with micro-T Devices................................................................ 68 micro-T Software Operations Manual 4 NexSens Technology, Inc. END USER LICENSE AGREEMENT ("EULA") NOTICE: Please CAREFULLY read this EULA. If you install or use this software product(s) (the "SOFTWARE"), you will be legally bound by this EULA. If you do not want to be bound by this EULA, you must promptly return the SOFTWARE and all accompanying documentations in the original packaging to the place where you obtained them for a full refund. If you do not accept this EULA, you may not copy, retain or use the SOFTWARE. 1. LICENSE GRANT. (a) NexSens Technology, Incorporated ("NEXSENS"), grants you a non-exclusive license to use the SOFTWARE, subject to the following: Except as stated below, you may install the SOFTWARE on only one computer. If the SOFTWARE can be used from any computer other than the computer on which it is installed (whether because the computer on which it is installed is part of a network or for any other reason), you must license a copy of the SOFTWARE for each computer from which the SOFTWARE may be used. If you are the primary user of more than one computer, you may install the SOFTWARE on each of them so long as the SOFTWARE is never used on more than one of the computers at the same time. If you want to allow the SOFTWARE to be used on more than one of the computers at the same time, then you must license a copy of the SOFTWARE for each computer. You may make a reasonable number of back-up copies of the SOFTWARE. The back-up copies may be used only to replace an unusable copy of the SOFTWARE. You must destroy any copies of the SOFTWARE that are replaced by a back-up copy. Back-up copies must include all proprietary rights and notices appearing on the original and must remain in your possession or control. You may, after written notification to NEXSENS, transfer the SOFTWARE on a permanent basis to another person or entity, provided you retain no copies of the SOFTWARE and the recipient agrees to the terms of this EULA. If you have received an update to the SOFTWARE, any transfer must include the update and all prior versions of the SOFTWARE. Except as specifically permitted in this EULA, you may not (i) copy the SOFTWARE, (ii) modify the SOFTWARE or extract any of its components for use with other software (iii) decompile, disassemble, reverse engineer, or make any attempt to discover the source code of the SOFTWARE (iv) sublicense, rent, or lease any portion of the SOFTWARE. You may not allow anyone to do anything that this EULA prohibits you from doing. (b) You understand that the SOFTWARE is licensed to you and not sold. NEXSENS retains title to all copies of the SOFTWARE. 2. LIMITED WARRANTIES AND DISCLAIMER OF IMPLIED WARRANTIES. (a) NEXSENS warrants that, for thirty (30) days after you obtain the SOFTWARE (the "Warranty Period"), (i) the SOFTWARE will perform substantially in accordance with the enclosed user documentation, and (ii) the disks or other media on which the SOFTWARE is distributed will be free of defects in material and workmanship. This limited warranty does not cover anything caused by accident or abuse or by use of the SOFTWARE other than for its reasonably intended purposes and as recommended in the accompanying user documentation. Also, NEXSENS does not warrant that the operation of the SOFTWARE will be uninterrupted or error free. Furthermore, any written or oral information or advice given by NEXSENS distributors, agents, or employees will in no way increase the scope of this limited warranty. This warranty gives you specific legal rights, and you may also have other rights, which vary from state to state. (b) Except as stated in Section 2(a), NEXSENS does not make any warranties. In particular, NEXSENS disclaims all implied warranties, including the implied warranties of merchantability, fitness for a particular purpose, and non-infringement. The duration of any implied warranty that is not effectively disclaimed will be limited to the 30 day Warranty Period. Some states do not apply limitations on how long an implied warranty lasts, so the above limitation may not apply to you. 3. EXCLUSIVE REMEDIES. (a) If, during the Warranty Period, you report any breach of warranty to NEXSENS and NEXSENS is reasonably able to verify that breach, NEXSENS or its agent will, at its option, either (i) correct the SOFTWARE or replace any defective media, (ii) help you work around or avoid the problem, or (iii) allow you to return the SOFTWARE and all accompanying documentation in the original packaging for a full refund. If you return the SOFTWARE for a refund, you may not retain or use the SOFTWARE, and you must immediately destroy all back-up copies and any other copies of the SOFTWARE in your possession or control. (b) During the Warranty Period, you may report breaches of warranty by contacting NEXSENS Customer Service. You must describe the breach in detail and include a phone number or address at which you can be reached during normal business hours. NEXSENS will respond within a reasonable time to any reported breach. You must pay all costs of shipping any SOFTWARE or other materials. Any corrected or replaced software that you obtain under this EULA will be considered part of the SOFTWARE licensed under this EULA and will be covered by warranty only for any time remaining in the original Warranty Period. (c) The remedies stated in this Section 3 are your only rights or remedies, and will be NEXSENS's only liability or obligation, for any breach by NEXSENS of any warranty. 4. PROPRIETARY RIGHTS. Subject to this EULA, NEXSENS and its licensors retain all copyrights, trade secret rights, patents, trademarks, and any other proprietary rights covering or relating to the SOFTWARE. You acknowledge that the SOFTWARE includes or incorporates proprietary and confidential information belonging to NEXSENS and/or its licensors. All rights not expressly granted by NEXSENS in this EULA are reserved. 5. EXCLUSION OF CONSEQUENTIAL DAMAGES; LIMITATION OF LIABILITY. Neither NEXSENS nor its affiliates nor its licensors will be liable for any special, incidental, consequential or exemplary damages, including without limitation damages for loss of use, lost profits or loss of data or information of any kind, arising out of or in connection with the SOFTWARE or its use or this EULA, even if NEXSENS or its affiliates or its licensor have been advised of the possibility of such damages. In no event will NEXSENS’s or its affiliates’ or its licensors’ liability for any claim relating to the SOFTWARE or its use or this EULA, whether in contract, tort or any other theory of liability, exceed the license fee paid by you. Some states do not allow the exclusion or limitation of incidental or consequential damages, so the above limitation or exclusion may not apply to you. 6. CAUTIONS REGARDING DATA. The SOFTWARE contains tools to be used in transmitting, searching, and retrieving data in various forms as described in the documentation. You assume the entire responsibility for determining the legality of any transmission or copying you may engage in and for protecting yourself, your business, and associates from any offensive or inaccurate data, information, or material you may choose to receive or allow to be transmitted to you. NEXSENS does not grant any warranty with respect to, or assume any responsibility for any consequences whatsoever suffered by any person as a result of, your access or use of the Internet including, without limitation, access to or resulting in false, incomplete or unreliable data, computer viruses, or corrupted data. 7. EXPORT. You acknowledge that the SOFTWARE is subject to United States export control laws, including the export administration regulations. You will not export, re-export or divert the SOFTWARE in contravention of those laws. 8. TERMINATION. NEXSENS may terminate this EULA if you violate it. You must destroy all copies of the SOFTWARE in your possession or control promptly upon termination. Upon NEXSENS’s request, you must certify in writing that you have complied with your obligations under this Section 8 and otherwise under this EULA. Termination by NEXSENS will not limit any of its other rights or remedies under this EULA or at law or in equity. Any provision of this EULA that by its sense and context is intended to survive termination of this EULA will survive termination. 9. SEVERABILITY. If any provision of this EULA is illegal or unenforceable under applicable law, the remaining provisions of this EULA will remain valid and fully enforceable. If any provision is in part enforceable and in part unenforceable, it will be enforced to the extent permitted under applicable law. 10. U.S. GOVERNMENT RESTRICTED RIGHTS. The SOFTWARE and documentation are provided with RESTRICTED RIGHTS. If this product is licensed by any agency or instrumentality of the United States of America, use, duplication and disclosure are subject to restriction as set forth in subparagraphs (a) - (d) of the rights in Technical Data and Computer Software clause at FAR 52.227-19 or any successor regulation, or in subdivisions (c)(1) and (2) of the Commercial Computer Software Restricted Rights clause at 48 FAR 52.227-7013 or any successor regulation, or as set forth in the particular department or agency regulations or rules which provide NEXSENS or its licensors protection equivalent to or greater than that clause. The contractor/manufacturer is NexSens Technology, Incorporated, 1328 Parkway Ct Dayton, Ohio 45432. 11. ENTIRE AGREEMENT. This EULA, together with any special rights or promotions provided in writing with your copy of the SOFTWARE, is the entire agreement between you and NEXSENS relating to the SOFTWARE. It supersedes any prior or contemporaneous oral or written communication relating to the SOFTWARE. If you have any questions concerning this EULA, please contact in writing: NexSens Technology, Incorporated, 1328 Parkway Ct Dayton, Ohio 45432 micro-T Software Operations Manual 5 NexSens Technology, Inc. This page intentionally left blank. micro-T Software Operations Manual 6 NexSens Technology, Inc. 1 Introduction 1.1 About NexSens Technology, Inc. NexSens Technology, Inc. was started in 1990s with a mission to advance the capabilities and simplify the development of environmental monitoring systems. Our main focus is on the creation of easy-to-use computer software and powerful communications equipment to provide advanced remote data acquisition and datalogging services. micro-T software is an easy-to-learn, easy-to-use Windows based software program designed to work with the popular micro-T temperature devices. micro-T software automates all of the tedious programming, data collection and manual data processing common with other environmental data collection systems. micro-T software allows you to spend more time on your studies and less time on data processing and collection. 1.2 How to Use This Manual This manual is designed to provide you with instructions for getting started and contains detailed reference information on the operation of micro-T software. As with any new software package, it is a good idea to read the documentation thoroughly before attempting to setup and operate the program. This manual should provide you with the information needed to use the micro-T software. If you experience difficulty, we suggest you follow the procedure below: · Review the subject in the manual. · Check for software updates using the Check For Updates from the Help Menu in the micro-T software. · · Review the Frequently Asked Questions (F.A.Q.) on the NexSens web page: http://www.nexsens.com/micro-t/support/faq.htm If you are still having difficulty, email your technical support question to: [email protected] micro-T Software Operations Manual 7 NexSens Technology, Inc. 1.3 About Software NexSens micro-T software is a data collection and analysis tool designed to maximize the use of micro temperature loggers. This user-friendly software package simplifies the task of deploying micro-T temperature loggers and managing their data. Deployment options such as log intervals, sampling time, and units of measurement are set up through easy-to-navigate dialog boxes and graphical menus. All data and device configuration settings are stored in a single database, which simplifies data analysis and data sharing. micro-T software enables you to easily manage extensive databases containing information for hundreds of loggers. After connecting a logging device to your computer via the PC adapter, the software automatically recognizes the unique ID of each logger. With one touch of a button, data is transferred to that device's unique folder. micro-T software includes a unique historical report creation tool that can generate customized reports with data from all loggers in a single database. While creating a report, users can include specific information about the monitoring site, location, sensors, and project along with the recorded measurements from instruments. After creation, reports can be converted to PDF, exported to Microsoft Excel, sent to colleagues via e-mail, uploaded to a web server, and more. micro-T Software Operations Manual 8 NexSens Technology, Inc. 2 Principles of Operation 2.1 Micro-T Device Specifications With half a dozen micro temperature loggers to choose from, it may be difficult to decide which one best fits your application. The following information will help you with that decision by listing a few of the most important features as well as technical information for each micro temperature logger. There are six micro temperature loggers to choose from. Each micro temperature logger has a unique 64bit electronic serial number to ensure traceability. The durable stainless steel package is highly resistant to environmental hazards such as dirt, moisture and shock. A full line of accessories are available for mounting and deploying the micro temperature loggers. DS1921G DS1921Z DS1921H DS1922T DS1922L DS1923 Typical 5-10 year life Typical 3-8 year life Typical 3-8 year life Typical 2-8 or 1-4 year life Typical 2-8 or 1-4 year life Typical 1-5 or 1-3 year life 2,048 samples 2,048 samples 2,048 samples 4,096 samples 4,096 samples ± 1°C Accuracy ± 1°C Accuracy ± 1°C Accuracy ± 0.5°C Accuracy ± 0.5°C Accuracy -40 to 85°C -5 to 26°C 15 to 46°C 0 to 125°C -40 to 85°C Low resolution: 4,096 temperature and relative humidity samples High resolution: 2,048 each. 0.5°C resolution 0.125°C resolution 0.125°C resolution 0.5°C or 0.0625°C resolution 0.5°C or 0.0625°C resolution -20 to 85°C 0-100% RH ±0.5°C, ± 5% accuracy 0.0625°C , 0.04%RH resolution All micro-T devices have a: Unique ID Durable stainless steel package Resistance to dirt, moisture, shock The DS1921 (DS1921G, DS1921H, DS1921Z) and the DS1922 (DS1922T, DS1922L) loggers are water resistant. micro-T Software Operations Manual 9 NexSens Technology, Inc. What does all of this mean? Resolution is like sensitivity. It is the smallest possible change of temperature that can be detected. In this way you can see trends such as temperature rising or falling at very high numbers of decimal places. Accuracy on the other hand is a deviation between the measured value and the "true" value. In other words the accuracy can be described as a maximum error that can be expected under the worst case conditions. So for the DS1922L, the reading, whatever it may be is always at least half a degree Celsius within the exact temperature (no sensor in the world measures the exact temperature some are just more accurate than others), BUT can measure trends and changes up to 0.0625 C. 2.2 Logger Dimensions Micro-T loggers are housed in a durable stainless steel package that measures 0.683 inches wide and 0.232 inches tall. micro-T Software Operations Manual 10 NexSens Technology, Inc. 2.3 Deployment Options Micro temperature loggers are extremely versatile and can be used in a variety of applications. Because each application has special requirements, NexSens offers numerous accessories to facilitate deployment for your particular application. The following sections describe deployment options, readers, carriers, and other accessories. See Appendix XXX for ordering information. If you have special requirements or would like more information on a specific way to use micro temperature loggers in your application, please contact a NexSens support representative. Micro Temperature Logger Each micro temperature logger has a durable stainless steel package that is highly resistant to environmental hazards such as dirt, moisture and shock. Keychain FOB Keychain Holders offer a simple way to carry micro temperature loggers. Simple snap the temperature logger into the keychain hole and it is ready to go. This is a low cost and effective way to mount the microT logger. The holder can then be attached to your car keys, a wall hook, or even a rope. It can also be used as a convenient way to transport temperature loggers on person. Adhesive Pads micro-T Software Operations Manual 11 NexSens Technology, Inc. Adhesive pads offer a simple way to permanently mount micro temperature loggers to smooth surfaces. Simply peal the covers off the pads and attach the micro-T logger. This seal makes a great semi-permanent attachment to a variety of surfaces. This is a low cost and effective way to mount the micro-T logger. Attach the adhesive pads to aquariums, walls, or other flat surfaces. Ideal applications would include surface temperature monitoring, locations with limited environmental exposure, and semi-permanent logging sites. Wall Mounts Wall mounts offer a micro temperature logger deployment where the logger is permanently attached to an object with one screw or rivet. The plastic plate is designed with an inset that accommodates the flange of the logger package and allows for flush mounting. A protective wall is provided along the sides of the plate to reduce incidental damage to the logger. Wall mounts can be used with any micro temperature and are the ideal deployment option for the DS1923 temperature and relative humidity loggers. The logger can easily be attached to wooden posts, or walls to allow for easy collection of data, as well as a permanent mounting location in an open atmosphere. Each wall mount kit contains 5 wall mounts. Underwater Housings Underwater housings are the ideal micro temperature logger deployment option for harsh weather environments and submersible studies, such as temperature profiling related to thermocline monitoring or thermal discharge. Each housing holds one temperature logger and is supplied with an Allen Wrench to allow for easy assembly onto a 3/16" cable or rope. Standard color options include Blue, Black, or Yellow. Typical applications include using multiple housings in a mooring system for temperature profiling, ground burial for soil quality measurements, and any outdoor deployment where harsh environmental conditions are expected to occur. micro-T Software Operations Manual 12 NexSens Technology, Inc. The housings are designed for use in water or direct ground burial for temperatures between -30°C to 70°C, which is the same temperature range for the accuracy specifications of the DS1921G micro Temperature logger. The waterproof housing units have also been tested for pressure depths up to 100 meters, but are likely to go much deeper. A clear screw-on cap allows you to view the top of each temperature logger, allowing you to immediately read the type and serial number with a simple glance. A lubricated o-ring seal creates a complete water-tight assembly. Contact a NexSens Applications Specialist for information regarding special micro temperature housing pricing, availability, and minimum quantity. Standard colors are yellow, blue, and black, but other housing colors are available as well with a minimum quantity purchase. Abrasive Chemicals For applications that require submerging micro temperature loggers in abrasive chemicals, underwater housings made from durable Teflon material are available. Just like the standard underwater housing, each housing holds one temperature logger and is supplied with an Allen Wrench to allow for easy assembly onto a 3/16" cable or rope. Teflon housings have also been tested for pressure depths up to 100 meters, but are likely to go much deeper. A clear screw-on cap allows you to view the top of each temperature logger, allowing you to immediately read the type and serial number with a simple glance. A lubricated oring seal creates a complete water-tight assembly. Contact a NexSens Applications Specialist for information regarding special micro temperature housing pricing, availability, and minimum quantity. Speciality housing colors are available as well with a minimum quantity purchase. Extreme Temperatures For applications that require submerging micro temperature loggers into extreme temperatures, underwater housings made from resistant Ultem material is available. These housings are temperature rated from -30°C to 180°C; larger than any micro temperature logger temperature range. Just like the standard underwater housing, each housing holds one temperature logger and is supplied with an Allen Wrench to allow for easy assembly onto a 3/16" cable or rope. They have also been tested for pressure depths up to 100 meters, but are likely to go much deeper. A clear screw-on cap allows you to view the top of each temperature logger, allowing you to immediately read the type and serial number with a simple glance. A lubricated o-ring seal creates a complete water-tight assembly. Contact a NexSens Applications Specialist for information regarding special micro temperature housings pricing, availability, and minimum quantity. Other housing colors are available as well with a minimum quantity purchase. micro-T Software Operations Manual 13 NexSens Technology, Inc. 2.4 Deployment Overview micro-T loggers need to be set up for deployment before they will begin logging data. micro-T Software allows for easy deployment through a single dialog box. Simply add the logger to your database and hit the Deploy button. You will then be able to control the log start time, log interval, and roll over option. You are also able to select whether or not you want to sync the logger clock to the PC clock. The first reading will appear at the next sample interval. For example, if the sample interval is set to 5 minutes at 12:01PM the first sample will happen at 12:05PM. The roll over option is a unique feature that allows the device to keep logging after it has reached the maximum amount of samples. This, however, comes at a cost of losing the first data points the device logged. See Section 2.4: Number of Samples for more details. 2.5 Number of Samples micro-T loggers can log 2048 (or 4096 for the low resolution logging of the DS1922 and DS1923 loggers) samples. There are two alternatives to the way the micro-T logger will behave after it has taken 2048 readings. With roll over disabled, the device will fill the device memory with the first 2048 logged samples. Additional samples are not logged. With roll over enabled, however, the sample readings will wrap around, and overwrite previous data starting at first logged sample. So in essence, the device stores the last 2048 samples in this mode. Setting roll over as enabled or disabled depends on the duration of the deployment and the monitoring requirements. If the most recent temperature history is important, then roll over should be enabled. Otherwise, one should estimate the duration of the deployment in minutes and divide the number by 2048 to calculate the value of the sample rate (number of minutes between logged samples). If the estimated duration of a deployment is for example, 10 days, then the device would be sufficient to store a new value every 7 minutes. Simply use the below calculation to determine what your log interval should be: Example Calculation: 10 days * 24 hours * 60 minutes = 14400 minutes 14400 minutes / 2048 readings = 7 minute minimum sample interval If for example your deployment was going to last 30 days your sample interval should be a minimum of 21 minutes. If 2048 samples is not large enough to store all temperature readings for a deployment, you can use several devices and set the deployment start time to the time that make the second device start recording as soon as the memory of the first device is full, and so on. If using the previous example, make sure to disable roll over. It is recommended that you determine and regularly deploy your micro-T devices on a schedule based on when the devices will reach 2048 readings. micro-T Software Operations Manual 14 NexSens Technology, Inc. 2.6 Battery Life The following graph shows how the battery life of each micro temperature logger increases as the sample interval increases. It should be noted that the maximum life of any temperature logger is 10 to 11 years, no matter what the log interval. The graph also assumes an ambient temperature of 25°C which may not be realistic for your application. The temperature of the logger plays an important role in determining battery life, as extreme temperatures and frequent sample intervals degrade battery life. See the specific temperature logger manual for exact battery life spans due to temperature effects. Due to the limited battery life of certain devices such as the DS1922 series and DS1923 it is highly recommended that large sample intervals be used. The battery is not replaceable, and the device will no longer operate once its battery has been drained. This is important to note because, for example, the DS1923 could be sampled at 1 second intervals; which only gives the device a 20 day life! Note: This graph was generated based on the information provided by Dallas/Maxim Semiconductor and is not perfectly accurate as it is used for a general overview of the typical battery life. For exact battery life specifications see the micro temperature logger user manuals available here: www.nexsens.com/micro-t/support/manual.htm *Copyright Maxim Integrated Products (http://www.maxim-ic.com). Used by permission. micro-T Software Operations Manual 15 NexSens Technology, Inc. 3 Getting Started 3.1 System Requirements micro-T software requires the following minimum system configuration: Pentium class PC 128 MB RAM 100 MB hard drive 2MB video card CD-ROM drive for software installation Windows 98, ME, 2000 (SP1 or higher), XP The operating system support is based on the driver for the USB reader. If micro-T software is run using the micro-T serial reader, then Windows 95 and NT can also be used. For better performance, twice the minimum system configuration is recommended. 3.2 Software Installation micro-T software is distributed on CD-ROM. The setup program starts automatically when the CD is inserted. If not, you can manually start the setup process by following the steps below. We suggest that you accept the default options presented by the setup program. Note: It is very important that all USB adapters are unplugged while installing the software. Failure to do so may cause the software to perform inappropriately. During the installation, you will be asked to register micro-T software. You can either print the registration form and mail or fax it to NexSens or connect to the Internet and register online. By registering within 30 days of purchasing micro-T software, you are eligible for 2 years of free software updates. For your convenience a shortcut to micro-T software is also placed on your desktop. After either running the micro-T installation from a NexSens CD or from the NexSens website the micro-T Setup dialog box will appear. Please make sure that any micro-T USB adapters are removed from the computer. micro-T Software Operations Manual 16 NexSens Technology, Inc. Click Next to continue. The NexSens License Agreement will appear. This agreement is the same as the one that appears at the beginning of this manual. Next, micro-T Setup will ask you to choose which folder to install the micro-T program to. It is highly recommended that this folder be left as its default. micro-T will display the selected settings. Click Next to continue. micro-T Software Operations Manual 17 NexSens Technology, Inc. micro-T Setup will then begin installing the program. This may take a few moments depending on the speed of your computer. Finally, click Finish to complete the installation of micro-T. micro-T Software Operations Manual 18 NexSens Technology, Inc. 3.3 Registering microT Software After you have successfully installed micro-T software, by default the micro-T icon is located on your desktop. Double click on this icon to open micro-T Software. You will have 30 days to evaluate the software. Sometime during that time you will need to obtain a registration key from NexSens. After the 30 day trial period ends you will be required to register: During the 30 days, if you would like to just continue into the micro-T program, click Continue. Otherwise, click Register. The following screen will appear: Enter your name and organization in to the appropriate fields. You will then need to contact NexSens Technology, Inc. with your iChart Serial Number to obtain a Registration Key. Either email [email protected] with your contact information and micro-T Serial Number or call a NexSens Support Representative at 1-937-426-2703. Be sure to have the serial number ready when you make the call. Additionally you may register online at www.NexSens.com/register.php 3.4 Uninstalling Software To uninstall micro-T software, click Settings in the Start Menu. Select Control Panel and then Add / Remove Programs. Follow the instructions to remove micro-T software and all associated files. micro-T Software Operations Manual 19 NexSens Technology, Inc. 3.5 USB and Serial Adapter Connection Before a USB adapter can be used, the USB driver must be installed. See Appendix: Driver Installation for more information on installing the driver. To be able to communicate to the PC, the micro-T logger must be placed in an adapter that plugs directly into your PC. These adapters come in either Serial or USB. (Insert picture of these). Since USB is the default adapter shipped with the NexSens Starter Kit, it is recommended that you verify that your computer a working USB port. If the computer that will be running the micro-T software does not, please request the Serial adapter upon purchase. After installing the micro-T software, you will be able to connect with your micro-T loggers via the USB adapter or serial adapter. When plugging the USB adapter for the first time, Windows will automatically recognize it and start the Found New Hardware wizard. This wizard guides you through the USB driver installation. You will only need to go through the driver installation process the first time you use the USB adapter with your computer. If you need assistance with the dialog windows, follow the steps in Appendix A: USB Driver Installation. If after installing the driver you are unable to communicate with your micro-T device, follow the instructions in Appendix: Troubleshooting Connecting with Micro-T Devices. Note: The Serial adapter does not require a driver. If using the Serial adapter, simply connect to the serial port on your computer. micro-T Software Operations Manual 20 NexSens Technology, Inc. 3.6 Creating a Database After installing the software, a micro-T software icon will be located on your desktop. Double click on this icon to open the program. The following screen will appear: This is the micro-T Open Option menu. From this menu you can perform a variety of tasks as detailed in the following pages. Open Sample Project This option will open a sample micro-T database, allowing you to see the many capabilities of micro-T loggers and software. This sample database includes a basemap and several micro-T logging devices. You will not be able to interrogate these devices, but you will be able to work with a database and explore the software features. A micro-T Quick Tour pop-up guide will walk you through the main software features. Open Last Project This option will open to the last micro-T database used. This is the default option if micro-T Open Option is disabled. Create New Project This option will open directly to the micro-T Project File menu. Enter a filename for the database and click Save. This file contains the setup information for all micro-T loggers in the database. By default, the file is located in the folder: C:\Program Files\NexSens\micro-T\Users and has the extension .ICR. This window can also be opened selecting New Project from the File Menu, or by clicking the New Project icon from the Main Toolbar micro-T Software Operations Manual 21 NexSens Technology, Inc. Open Without Project This option will open micro-T software without a database open. You can then create a new database by selecting New Project from the File Menu, or by clicking the New Project icon from the Main Toolbar. This will open the Create New Project window. Do not show this dialog in the future To disable the Open Option dialog, check the box in the lower left corner. If checked, the Open Option window does not come up at the start of micro-T software, and the software will open by default to the last micro-T database that was used. You can re-enable the Open Option dialog window by going to Edit | Preferences and then placing a check next to the Enable iChart startup dialog box. You can also choose which item you would like to auto-load when starting from the Edit | Preferences menu. 3.7 Adding New Sensors After creating a new database, the micro-T software will display the Instrument Control screen. If no loggers were connected to a USB or COM port on your computer then the database will contain a single dummy device. Devices are automatically added to a database by clicking the Interrogate button as described in the next section. The software will search every USB and Serial port for a connected micro-T temperature device. If it successfully finds a device, the software will automatically scan to see if that device is already in the database. All data contained on the sensor is uploaded into your database, as well. If the device is not already in the database, then device will automatically be added, along with all of its data. micro-T Software Operations Manual 22 NexSens Technology, Inc. 3.8 Setting up a Deployment When your first receive your micro-T loggers you will need to “deploy” them before they will begin logging. Click on the Deploy button. A warning message will appear. If this is not the first time you are deploying this device and you would like to retain the previous samples taken, be sure to first click on the Interrogate button. If you have not done this, click No and do so. If you have already interrogated the device, or if this is the first time you are deploying the device, click Yes to continue. For a more detailed explanation of the Interrogation feature, see Section 4.3: Retrieve Data from Loggers. The micro-T Deploy dialog box will open. This dialog box allows you to set specific log information that will be used when taking samples. Sync micro-T time to PC time – If this option is checked then the micro-T logger time will update to the PC time. If you are deploying a device for the first time you should check this option. Log Interval – The time between log samples. Begin log on the next log interval – If this option is checked, the micro-T device will start logging at the next log interval. For example if the log interval is set to 60 minutes, it will begin logging at the start of the next hour. Begin log at – The device will start logging at the next log interval unless this box is checked. Specify the time, up to 45 days that you would like the micro-T logger to wait before taking readings. Enable log memory roll over – If this option is checked then the log readings will roll over after the maximum number of samples have been taken. The maximum number of samples is 2048 readings for the DS1921 series and the high resolution logging of the DS1923. The maximum number of samples is 4096 readings for the low resolution logging of DS1922 series and the low resolution logging of the DS1923. It should be noted that the first reading will be taken at the next sample interval after deployment. For example, if the sample interval is set to 5 minutes at 12:01PM the first sample will happen at 12:05PM. micro-T Software Operations Manual 23 NexSens Technology, Inc. 3.9 Retrieve Data From Loggers Data is retrieved by the process of “interrogating” each device in the micro-T logger database. To interrogate sensors, click the Interrogate button as shown below: The micro-T software will search every USB and Serial port for a connected micro-T logger. If it successfully finds a micro-T logger, the software will automatically scan to see if that device is already in the database. All data contained on the sensor is uploaded into your database. If the device is not already in the database, then device will automatically be added, along with all of its data. 3.10 Creating Reports Historical Data Reports can be created after a micro-T logger has been added to your database. To create a report, click the New Report icon from the main toolbar or select it from the Report Menu. The report interface is fully interactive and changes to reports are displayed instantly. micro-T Software Operations Manual 24 NexSens Technology, Inc. To include additional parameters in the report, double-click a folder icon. This action will expand the list of parameters for that particular sensor. Place a check in each box next to the desired parameters. Please note that once a new parameter is selected, the report will update instantly. Depending on the amount of data in the database, there may be a small pause. Wait for micro-T software to update the report before selecting another parameter. micro-T software includes standard templates for daily, monthly, and yearly reports. In addition, reports containing the entire database may be generated. Select these options in the “Time Limit” section of the Report Toolbar. micro-T software will display data in Statistic and Graph formats. Statistics include the average, minimum, maximum values, and standard deviation of each parameter. Check the “Data” box to display data in that format as well. micro-T software allows you to auto-align data based on time. This feature is very useful when generating reports using multiple sensors that do not necessarily have the same time interval between data points. By default, no data alignment is selected. If you would like to align data to minute intervals, simply select UserDefined and enter the number of minutes you would like to align the data to. Click the PDF icon on the Main Toolbar to output the current data report in Adobe Acrobat PDF format. micro-T software contains many more advanced features related to the Historical Data Report tool. More information on these features can be found in Section 5 – Working With Data. micro-T Software Operations Manual 25 NexSens Technology, Inc. 4 Working with micro-T Loggers A micro-T database contains more than just data retrieved from micro-T loggers. It contains configuration settings for loggers, data reports, basemaps, and more. A single micro-T database may be used to interact with a multitude of loggers, and acts as a “control center” for your entire environmental monitoring network. The following tutorials will explain the process of creating a new database and adding devices to it. No programming is required to add devices to the database – all setup is done through a series of easy-to-use dialog boxes. 4.1 Adding Loggers to the Database micro-T databases may contain hundreds of individual micro-T temperature loggers. Add additional micro-T loggers to the database by simply clicking the Interrogate button in the Main Instrument Control screen. The micro-T software will search every USB and Serial port for a connected micro-T logger. If it successfully finds a micro-T logger, the software will automatically scan to see if that device is already in the database. All data contained on the sensor is uploaded into your database, as well. If the device is not already in the database, then device will automatically be added, along with all of its data. 4.2 Disabling Loggers Devices in the Database Devices can be disabled within the micro-T database. This feature will prevent users from interrogating the device or retrieving any new data from it. Typically this option is used when a device is inactive due to discontinued use, or has been physically removed but will be re-deployed at a later date. To disable a device, first select the device from the Navigation Panel and then select the Disable Device command from the Instrument menu. The Disable option will only be displayed if the device selected is enabled. Devices are enabled by default. After you have selected Disable Device, you will be asked if you would like to add a field note stating that you have enabled this device with the time that you disabled it. A field note is a note that is located in the Summary section of Report. See section 7.6 for more information on field notes. Select Yes if you would like to open the Field Note message box. Select No to simply return to the Instrument Control screen. micro-T Software Operations Manual 26 NexSens Technology, Inc. 4.3 Enable Loggers in the Database Disabled devices can be re-enabled by first selecting the device from the Navigation Panel and then selecting the Enable Device command from the Instrument menu. The Enable option will only be displayed if the device selected is disabled. After you have selected Enable Device, you will be asked if you would like to add a field note stating that you have enabled this device with the time that you enabled it. A field note is a note that is located in the Summary section of Report. See section 7.6 for more information on field notes. Select Yes if you would like to open the Field Note message box. Select No to simply return to the Instrument Control screen. 4.4 Removing Loggers from the Database To remove a temperature logger from the database, simply select Instrument | Setup Site. Then select the site the device is located in (by default there will be one site, Default Site) and select the device you wish to remove. Once the device is highlighted, click the Remove button, placing it into the Available Devices column. This will remove the device from your database. If at any time you would like to restore this device, simply highlight it from the Available Devices list and Add it back to the Site. micro-T Software Operations Manual 27 NexSens Technology, Inc. 5 Working With Data 5.1 Display the Current Day’s Data The current day’s data can be displayed quickly while in Instrument Control main screen. Options are available to display in tabular, statistical, and graphical formats. To view the current day’s data, select a device from the Instrument Control menu in the Navigation Panel. Daily Data – Tabular Format Click the Data Tab to view the current day’s data in tabular format. If the table is empty, Interrogate the device to view its data. The Minimum and Maximum values are highlighted to make them easy to find in the data table. Maximum = Red Highlight Minimum = Blue Highlight Daily Data – Statistical Format Click the Statistic Tab to view a statistical summary of the current day’s data. Statistics are generated for all parameters and include the total number of samples, average value, minimum value with a time stamp, maximum value with a time stamp, and the standard deviation. Daily Data – Graphical Format Click the Graph Tab to view graphs of the current day’s data for each parameter micro-T Software Operations Manual 28 NexSens Technology, Inc. 5.2 Historical Data Report Creation and Sharing micro-T software is a data collection and analysis tool, designed to collect, store, and analyze environmental measurements from remote sensing devices. As such, historical report creation is one of the core components within micro-T software. Create a new historical data report by selecting the New Report command from the Report Menu or simply click the New Report icon from the Main Toolbar. Report creation tools in micro-T software are fully interactive, and changes to a report’s settings are displayed instantly. Report Mode is divided into two main sections. The data report is displayed on the left of the screen in HTML format. The Report Toolbar is located on the right of the screen. This toolbar contains all the functions used to create a historical report. micro-T Software Operations Manual 29 NexSens Technology, Inc. 5.3 Copying the Database to Another Computer In some instances it may become necessary to copy your micro-T database to a different computer. This process is extremely simple and is done by selecting the Backup command from the File Menu. Database Backup Process Select a destination folder for your backup database in the To field. This should be a floppy disk, network folder, USB drive, or other location. Select None to disable the automatic backup schedule and choose to backup All data in the database. Click the Backup Now button to backup your micro-T database to the specified location. Database Restoration Process Install micro-T software on your new PC. Once the installation is complete, start the program and select Restore from the File Menu. Enter the location of your backup IDB file in the From field. Click the Restore Now button to restore your database on the new PC. The files will be restored to micro-T “Users” folder located in (default): C:\Program Files\NexSens\micro-T\Users\*.Backup Where * is the name of the database. Your data will now be accessible on the new PC. Open the database by selecting the Open Project command from the File Menu. micro-T Software Operations Manual 30 NexSens Technology, Inc. micro-T Software Operations Manual 31 NexSens Technology, Inc. 6 Software Reference Guide 6.1 Main Project Window This section describes the components and functions contained within the Main Project Window. 6.1.1 Title Bar The Title Bar displays the filename of the open micro-T database. 6.1.2 Menu Bar Many of micro-T software’s core features and functions can be accessed through the Menu Bar. More information on specific program functions in the Menu Bar can be found in Section 6.5 – Menu Commands. micro-T Software Operations Manual 32 NexSens Technology, Inc. 6.1.3 Main Toolbar The Main Toolbar contains icons that provide single-click access to core program functions. New Project - Creates a new micro-T database. Open Project - Opens an existing micro-T database. micro-T software will display the Open Project dialog box, where you can locate and open the desired database. Save – In Report Mode, saves the current report in HTML format. In Basemap Mode, saves changes to the current basemap. Print – Prints the current report or basemap. Navigation Panel - Toggles the Navigation Panel on and off. Tools - Toggles the right tool bar on and off. New Basemap – Creates a New Basemap and opens Basemap Mode Instrument Mode - Opens the instruments tools. New Report - Creates a new report and opens the Report Tools Schedule Tasks - Schedule tasks that will occur automatically like remote interrogation and report posting. To PDF - In Report Mode, saves the current report in PDF format. To Excel - Exports the current report data to Microsoft Excel. Help – Click this icon to open this manual. The Weblink icon is a direct link to the NexSens webpage, http://www.nexsens.com/. micro-T Software Operations Manual 33 NexSens Technology, Inc. 6.1.4 Navigation Panel The Navigation Panel provides quick access to the three core modules within micro-T software – Basemap, Instrument Control and Report. The panel is divided into three sections, each representing one of these modes. Basemap – Lists all basemaps associated with the micro-T database. Click an item to open that basemap. Instrument Control – Lists all loggers associated with the database. device to display the current day’s data. Click a Report – Lists all open reports associated with the micro-T database. Click a file to display that report. 6.1.5 Instrument Control Screen The Instrument Control screen is one of the core components of micro-T software. Instrument Control provides a direct interface to all loggers associated with the database. Through Instrument Control you can set auto-interrogation schedules, interrogate devices, display the current days data, and more. Instrument Control is divided into four main screens – Device, Data, Statistic, and Graph. Device Click the Device tab to display information about the current device. This screen shows the most recent measurements retrieved from the instrument. Each parameter is listed and their values are displayed in the green indicator boxes. Setup – Opens the Device Property – Status dialog box. Deploy – Opens the Device Property – Deploy dialog box. . Interrogate – Interrogates the device and retrieves any new data recorded since the last interrogation, as well as adds the device to the database if it is not already there. Data – Click the Data tab to display the current day’s data in tabular format. Both the minimum and maximum values are highlighted for all parameters. Minimum = blue. Maximum = red. Statistic – Click the Statistic tab to display statistics for the current day’s data. This window will show the number of daily samples, average value, minimum value, maximum value, and standard deviation for each parameter. Graph – Click the Graph tab to display graphs generated from the current day’s data. micro-T Software Operations Manual 34 NexSens Technology, Inc. 6.1.6 Device Properties – Status Click Status from the Main Project Window to open the microT Status dialog box. This screen contains various device configuration options. All information is set while deploying a device. micro-T ID– Unique ID of the micro-T device connected to your PC. micro-T name– Serial number of the micro-T device. PC time – The time of your PC. micro-T time – The time stored on the micro-T logger. Log interval – Time in minutes between samples. Begin log time – Time that the device started/will start logging. Memory usage – Number of samples taken since device was last deployed. The maximum number of samples will either be 2048 or 4096, depending on the type of micro-T device and the level of data resolution. See Section 2 Principles of Operation for more information. Memory roll over – Displays whether or not roll over is enabled or disabled. If enabled, this line also display whether the memory actually roll over. See Section 2 Principles of Operation for more information. micro-T Software Operations Manual 35 NexSens Technology, Inc. 6.1.7 Device Properties – Deploy Click Deploy from the Main Project Window to open the microT Deploy dialog box. This screen contains various device configuration options. This dialog box starts a log deployment. Note: micro-T devices will not log data until they are deployed. Upon deployment, any existing data on the micro-T device will be erased. Make sure to upload all current data on the device (by clicking the Interrogate button) before deploying if you wish to save the data currently stored on the device. Sync micro-T time to PC time – If this option is checked then the micro-T logger time will update to the PC time. If you are deploying a device for the first time you should check this option. Log Interval – The time between log samples. Begin log on the next log interval – If this option is checked, the micro-T device will start logging at the next log interval. For example if the log interval is set to 60 minutes, it will begin logging at the start of the next hour. Begin log at – The device will start logging at the next log interval unless this box is checked. Specify the time, up to 45 days, that you would like the micro-T logger to wait before taking readings. Enable log memory roll over – If this option is checked then the log readings will roll over after the maximum number of readings have been taken. The maximum number of samples is 2048 readings for the DS1921 series and the high resolution logging of the DS1923. The maximum number of samples is 4096 readings for the low resolution logging of the DS1922 series and the low resolution logging of the DS1923. Reading through Section 2 – Principles of Operation before deploying a device should give you all the information you need to understand these temperature loggers. micro-T Software Operations Manual 36 NexSens Technology, Inc. 6.2 Instrument Control Tools Click the Tools icon from the Main Project Window to open the Instrument Control Tools. These tools are used to customize the display of data in the Instrument Control screen. The options change based on which mode you are in. You can change modes by simply clicking on the corresponding tab. 6.2.1 Instrument Control Tools – Device Mode Text Color – Sets the text color for the most recent data points displayed in the Instrument Control’s Device Mode. Back Color – Sets the background color for the recent data status boxes displayed in the Instrument Control’s Device Mode. Alarm Color – Sets the status box background color to be displayed when an alarm is triggered for that parameter. Parameter Per Column – In some cases a device or datalogger may be configured to monitor a large number of parameters. Use this field to display the most recent data points in multiple columns in Instrument Control’s Device Mode. micro-T Software Operations Manual 37 NexSens Technology, Inc. 6.2.2 Instrument Control Tools – Data Mode Time Limit All – Includes all data from the micro-T database in the data table. Daily – Includes all data from the selected day in the data table. Monthly – Includes all data from the selected month in the data table. Yearly – Includes all data from the selected year in the data table. From To – Includes all data between the selected dates in the data table. Color / Font Min Color – micro-T software will automatically highlight the minimum value of each parameter throughout the selected time range with this selected color. Max Color – micro-T software will automatically highlight the maximum value of each parameter through the selected time range with this selected color. Font – Sets the font for the data points displayed in the table. 6.2.3 Instrument Control Tools – Statistics Mode Time Limit Operates in same manner as when in Data Mode. Statistics Avg – Display the average of each parameter during the time range. Max – Display the maximum of each parameter during the time range. Min – Display the minimum of each parameter during the time range. Samples – Display the total number of samples obtained during the selected time range. Std – Display the standard deviation for each parameter during the selected time range. Sum – Display the sum of each parameter during the selected time range. micro-T Software Operations Manual 38 NexSens Technology, Inc. 6.2.4 Instrument Control Tools – Graph Mode Time Limit All – Includes all data from the micro-T database in the data graphs. Daily – Includes all data from the selected day in the data graphs. Monthly – Includes all data from the selected month in the data graphs. Yearly – Includes all data from the selected year in the data graphs. From To – Includes all data between the selected dates in the data graphs. Parameter – Graphs for each parameter are customized independently from one another. To make a change to a graph, first select the desired parameter from the list here. Graph Scale Autoscale – Check this option to enable auto-scaling of the selected parameter’s graph. Lower Limit – If auto-scaling is disabled, use this field to set a lower limit for the selected parameter’s graph. Upper Limit – If auto-scaling is disabled, use this field to set an upper limit for the selected parameter’s graph. Graph Appearance Back Color – Sets the background color for the selected parameter’s graph. Trace Color – Sets the trace color for the selected parameter’s graph. Grid Color – Sets the grid color for the selected parameter’s graph. Trace Width – Sets the trace width for the selected parameter’s graph. micro-T Software Operations Manual 39 NexSens Technology, Inc. 6.3 Report Tools NexSens micro-T software contains an advanced report generation component to help sort through the mountains of data collected from micro-T loggers. To create a new report, click the New Report icon from the Main Toolbar or select it from the Report Menu. Data may be presented in one of three ways within a report – Statistics, Graph, and Table. In addition, users may also include information specific to the report such as the physical location of a device or the name of the monitoring project. Users can choose which modes to include in a report – simply turn off the modes that you wish to hide. Reports are created as HTML documents and may be saved locally in this format. In addition, reports can be exported to Microsoft Excel or converted to PDF and saved in a local folder Graphs are generated using GD. The GD license can be viewed online at: http://www.boutell.com/gd/manual2.0.26.html#notice To configure a data report, use the integrated Report Tools. The Report Tools are spread across three tabs – General, Graph Properties, and Advanced. micro-T Software Operations Manual 40 NexSens Technology, Inc. 6.3.1 General Tab Time Limit All – Includes all data from database in the report. Daily – Includes all data from the selected day in the report. Monthly – Includes all data from the selected month in the report. Yearly – Includes all data from the selected year in the report. From To – Includes all data between the selected dates in the report. Include Reports may include a project summary, data statistics, graphs, and data tables. Place a check in the boxes to include these components in the report. Summary – Displays a Summary within the report. Statistics – Displays a Statistical Summary for each parameter in the report. Includes number of samples, average value, minimum value, maximum value, and the standard deviation for each parameter. Graph – Generates separate data graphs for each parameter and displays them within the report. Data – Display data for each parameter in table format. Settings –Advanced features in the Report Header menu. This menu can be accessed by clicking on the Settings… button. Image – Click on the Browse button to select a header image for reports. By default this image is the Nexsens Logo. The following information fills in the Summary field of each Report: Author – the Author field is filled in with the text entered. Site – the Site field is filled in with the text entered. Site Description – the respective field is filled in with the text entered. Report Notes – the respective field is filled in with the text entered. Show detail field note – If you do not wish to see field notes on reports, uncheck this check box. This option is checked by default. micro-T Software Operations Manual 41 NexSens Technology, Inc. Time Resolution micro-T software allows you to auto-align data based on time. This feature is very useful when generating reports using multiple sensors that do not necessarily have the same time interval between data points. By default, no data alignment is selected. If you would like to align data to minute intervals, simply select UserDefined and enter the number of minutes you would like to align the data to. Parameter Place a check mark next to each parameter you want to include in the report. Reports can contain data from all parameters. By default, no parameters will be selected. To display parameters, click the folder icon next to the device name and place a check next to the parameters you wish to view. Graph micro-T software incorporates an advanced feature allowing the user to place multiple traces on a single graph. This feature is very useful when comparing multiple parameters together to determine a correlation. Up to 12 traces per graph may be combined. micro-T software will automatically place the yaxis onto the graph for each additional trace as well as re-color any traces to avoid two traces having the same color. This feature is even further enhanced by the Combine same parameter Y-axis button. If there is a check next to this field then micro-T software will combine the y-axis of each trace in the graph and redraw the trace as needed to fit this new y-axis. micro-T Software Operations Manual 42 NexSens Technology, Inc. 6.3.2 Graph Property Tab Click the Graph Property tab to display options for customizing the look and feel of the graphs included in your data report. Parameter Select a parameter from the list to customize its corresponding data graph. Graphs are configured independently from one another, and changes made to one graph will not affect the appearance of any others. Only parameters that have been checked in the General tab parameters list will show up here. You can deselect a parameter by un-checking its corresponding check box. Note: If you would like to modify multiple parameters at a single time, you can select the folder they are in. Doing so will affect every device in that folder. You can also select the Site to modify every device in that site. Graph Scale Autoscale – Enable auto-scaling of the graph for the selected parameter. Lower Limit – Lower y-Axis limit for the graph of the selected parameter. Upper Limit – Upper y-Axis limit for the graph of the selected parameter. Graph Appearance Back Color – Background color for the graph of the selected parameter. Trace Color – Trace color displayed on the graph of the selected parameter. Note: If multiple parameters are on a single graph the software will make sure that two traces never have the same color. If you select a color for a trace that is already being used the color of the other trace will automatically change. Grid Color – Grid color displayed on the graph of the selected parameter. Trace Width – Trace width on the graph for the selected parameter. micro-T Software Operations Manual 43 NexSens Technology, Inc. 6.3.3 Advanced Tab Parameter Select a parameter from the list to configure its advanced options. Changes made to one parameter will not affect the settings of any others. You can change multiple parameters by selecting the folder those parameters are in. Changes will then affect every parameter in that folder. Precision Sets the number of decimal places for the data shown in statistics, graphs, and data table. Output Avg – Check this box to display average values in the report. The Time Resolution field in the General settings of the Report Tools determines the average values. Min – Check this box to display the minimum value that occurred during the time period defined in the Time Slice field in the General Settings of the Report Tools. Max – Check this box to display the maximum value that occurred during the time period defined in the Time Slice field in the General Settings of the Report Tools. Std – Check this box to display the standard deviation of the values recorded during the time period defined in the Time Slice field in the General Settings of the Report Tools. Sum – Check this box to display the sum of the values recorded during the time period defined in the Time Slice field in the General Settings of the Report Tools. Samples – Check this box to display the number of samples recorded during the time period defined in the Time Slice field in the General Settings of the Report Tools. micro-T Software Operations Manual 44 NexSens Technology, Inc. Include Data The Value Limit filters the data sets to be displayed in the report. A data set includes a date/time stamp, and the selected parameters from the General Settings tab of the Report Tools. All – Display all data with no filtering. X <= ? – Filter (Do Not Include) data sets above the indicated value. X >= ? – Filter (Do Not Include) data sets below the indicated value. ? <= X <= ? – Filter (Do Not Include) data sets outside the indicated values. Graph Markers micro-T software allows you to mark four time events on your graphical reports. Select the time and date from the Mark Time drop down menu and enter the text you would like displayed next to the mark in the Mark Text text box. This feature is extremely useful in marking times when the system was offline for a period of time. micro-T Software Operations Manual 45 NexSens Technology, Inc. 6.4 Basemap Toolbar The Basemap Toolbar is activated when the Tools icon is selected in Basemap Mode. These drawing tools will aid you in creating a custom basemap. The first set of tools are ready to be used as soon as they are placed. The next set are free hand drawing tools to allow you to customize any other option. The remainder of the tools aid in functionality and effect how the objects are oriented and how they look. There are four different kinds of basemap tools: Drawing Components, Display Components, Control Components, and Basemap and Component Properties. 6.4.1 Drawing Components Select Object – used to select items on the basemap and adjust their properties. Freehand – create freehand drawings on the basemap with customized colors. Line – create freehand lines to be placed on the basemap with customized colors. Polyline – create a freehand series of angled lines to be placed on the basemap with customized colors. Rectangle – create freehand-scaled rectangles to be placed on the basemap with customized colors. Rounded Rectangle – create freehand-scaled rectangles with rounded corners to be placed on a basemap with customized colors. Ellipse/Circle – create freehand-scaled circles to be placed on the basemap with customized colors. Polygon – create a freehand-scaled, closed series of lines to be placed on a basemap with customized colors. Text – enter text to a basemap. micro-T Software Operations Manual 46 NexSens Technology, Inc. Vertical Mirror – mirror an object vertically. Horizontal Mirror – mirror an object horizontally. Rotate Counter CW – rotate an object counter clockwise 90 degrees. Rotate CW – rotate an object clockwise 90 degree. Bring to Front – This button will make the selected object appear on top. Send to Back – This button will make the selected object appear on bottom. 6.4.2 Display Components Read Out – this device places a LED data screen on the basemap, which will display data. Chart – this device displays data in a chart form. Thermometer – places a thermometer on the basemap to analyze data in a more user-friendly way. Tank – places a tank on the basemap to analyze data in a more user-friendly way. This component displays data in a fuel tank fashion and is handy to use for water level, battery voltage, etc. Half Gauge – places a dial on the basemap to analyze data in a more user-friendly way. The dial can represent numerous factors: speed, heat, pressure, etc. Data is measured from zero degrees to one hundred and eighty degrees. Full Gauge – places a dial on the basemap to analyze data in a more user-friendly way. The dial can represent numerous factors: speed, heat, pressure, etc. Data is measured from zero degrees to three hundred and sixty degrees. Percent – places a percent bar on the basemap to analyze data in a more user-friendly way. The percent bat can represent numerous factors, speed, heat, pressure, etc. Data is measured from zero percent to one hundred percent. Wind meter – places the wind meter on the basemap to analyze data in a more user-friendly way. micro-T Software Operations Manual 47 NexSens Technology, Inc. 6.4.3 Control Components Background Image – an image can be selected to display as the basemap. Click on this icon and then select the file location of the image. Changes made to the original image will not be updated on the basemap until the image is reselected as the Background Image. Data Component – these are placed on basemap at certain locations, and when clicked on, you will move to a user-specified location in the data analysis. Image viewer – places a view box on the basemap that acts as a slideshow. 6.4.4 Basemap and Component Property Fill Color – users select the color for all solid objects including rectangles, rounded rectangles, circles, and polygons. Line Color – users select the color for all line objects including lines, pencil marks, and poly lines. Font Color – users select the color for the font. Background Color – users without basemap images can select the swatch color of the basemap. Line Thickness – users select the thickness of lines on objects. Line Style – users select the style of the lines on objects. Font – users select the adjustment of scale in text. Toggle Grid – displays a grid over the basemap. Grid Property – locks a grid to the basemap for manipulation of objects, Redraw – refreshes the basemap if a pause in data analysis has taken place. Magnify – magnifies a selected area of the basemap. micro-T Software Operations Manual 48 NexSens Technology, Inc. 6.5 Menu Commands 6.5.1 File Menu New Project – Creates a micro-T database. Open Project – Launches an existing database. micro-T software displays the Open dialog box in which you can locate and open the desired file. Close – Closes the open micro-T database, along with all associated reports and basemaps. Save – In Report Mode, select this command to save the current report in HTML format. In Basemap Mode, select this command to save the current basemap. Backup – Opens the Backup Data dialog box. See Section 7.6 for more information. Restore – Opens the Restore Data dialog box. See Section 7.6 for more information. Import – Imports data from a .CSV file into the open micro-T database. Caution: Once data has been imported into the micro-T database it is not possible to remove it. This action also will overwrite existing data points that have identical date/time stamps in the .CSV file. Export – Exports the open micro-T database to a .CSV file. Send To – In Report Mode, this command sends a report to an e-mail recipient, FTP server, folder, or Microsoft Excel. Print – In Report Mode, select this command to print the current HTML report. Print Preview – In Report Mode, select this command to preview the output of the Print command. Print Setup – Select this command to configure specific printer settings. Recent Databases – A listing of the four most recent micro-T databases is displayed near the bottom of the File Menu. Click a database listed here to open. Exit – Exit micro-T software. micro-T Software Operations Manual 49 NexSens Technology, Inc. 6.5.2 Edit Menu Cut – Select this command to cut an object and place it on the clipboard. Copy – Select this command to copy an object and place it on the clipboard. Paste – Select this command to paste an object from the clipboard into micro-T software. Preferences – Opens the System Setup dialog box. 6.5.3 View Menu Main Toolbar – Select this command to toggle the display of the Main Toolbar. Status Bar – Select this command to toggle the display of the Status Bar. Basemap Tools – Select this command to display the Basemap Tools. Report Tools – Select this command to display the Report Tools. Instrument Tools – Select this command to display the Instrument Control Tools. Navigation Panel – Select this command to toggle the display of the Navigation Panel. Diagnostic Window – Select this command to display micro-T software’s Diagnostic Window. The diagnostic window is an advanced tool used by NexSens technical support staff for troubleshooting purposes. Full Screen – Select this command to toggle Full Screen mode in micro-T software. Full Screen mode will maximize the micro-T software program window and hide all top line Menu Commands. micro-T Software Operations Manual 50 NexSens Technology, Inc. 6.5.4 Basemap Menu New Basemap – Select this command to create a new basemap for the open micro-T software database. Remove Basemap – Select this command to open the Remove Basemap dialog box. Select a basemap from the list and click the Remove button to delete the basemap from the database. 6.5.5 Instrument Menu Interrogate – Interrogates the device currently connected to the PC. Enable Device – Enables the currently selected device in the micro-T database. Disable Device – Disables the currently selected device in the micro-T database. This action will stop all data transfers to and from the device. Setup Site – Opens the Site Setup menu. See Section 7.6 for more information. Add Field Note – Adds a field note to reports made with this database. See section 7.6 for more information. Setup Parameter – Allows you to change the text of units of measurement and more. 6.5.6 Report Menu New Report – Creates a new Report from data stored in the open micro-T database. Open Report – Opens a previously created report associated with the current micro-T database. Create PDF Report – In Report Mode, select this command to export the current report in PDF format. This will generate a new PDF document that can be saved on your PC. Page Properties – Select this command to modify the settings of the PDF generator. See Section 7.6 for more information. Refresh Report – Refreshes the current report view. micro-T Software Operations Manual 51 NexSens Technology, Inc. 6.5.7 Advanced Menu Lock – Select this option to “lock” the micro-T database and prevent unauthorized users from making changes to settings and devices. Set Password – Select this command to enable and set an administrator password for the open micro-T database. Users will be required to enter this password before any changes may be made to the database’s settings and configuration. 6.5.8 Window Menu Cascade – Arranges all windows (ie. Instrument Control, Report, Basemap) in a cascading pattern. Tile Horizontal – Arranges all windows horizontally. Tile Vertical – Arranges all windows vertically Open Windows… - All open windows are listed in the Window menu. Select an open window to switch between reports, basemaps, and instruments. 6.5.9 Help Menu User’s Guide – Opens the User’s Manual in PDF format. About – Displays the About micro-T Soft dialog box. Check For Updates – Select this command to check for software updates available at NexSens’ website. Register Software – micro-T software can be used for 30 days on a free trial basis. During these 30 days all features are available. Once the 30-day trial period is completed, your copy of M micro-T software must be registered with NexSens. Contact NexSens to register software today. NexSens Website – Select this command to open your web browser to go directly to NexSens website: http://www.NexSens.com micro-T Software Operations Manual 52 NexSens Technology, Inc. 6.6 Advanced Dialog Boxes and Menus 6.6.1 Backup The Backup command is used to make backup copies of a micro-T database. Backups can be scheduled for regular intervals or created manually. Both the .ICR file and complete database are included in the backup. This command is only available when a micro-T database is open. Project – Displays the name of the open micro-T database. To – Enter the destination for your database backup files. Backup Schedule None – Select this option to disable automatic micro-T backups. Remind me to backup every – Selecting this option will cause a backup reminder to appear after a set number of days. Auto backup daily at – micro-T software will automatically backup your database every day at the time set in this field. Auto backup weekly on – micro-T software will automatically backup your database once a week on the day set in this field. How Much Data to Backup Current Month – Select this option to backup the current month’s data. Current Year – Select this option to backup the current year’s data. All – Select this option to backup all data stored in the micro-T database. Backup Now Click this button to backup the micro-T database. Note: micro-T software automatically saves your micro-T database configuration every time a database is opened to a folder: C:/Program Files/Nexsens/micro-T/Users/*.Backup. Where * is the name of your database. Note: This feature only saves your configuration however, not your data. You must use the Backup feature in order to save the database data. micro-T Software Operations Manual 53 NexSens Technology, Inc. 6.6.2 Restore The Restore command is used to restore a micro-T database that has become damaged or is otherwise inaccessible. This command is also used when transferring a micro-T database from one PC to another. From – Enter the location of your micro-T database backup files. micro-T software automatically saves your micro-T database in a folder located at: C:/Program Files/Nexsens/micro-T/Users/*.Backup Where * is the name of your database. In this folder will be folders that have the name of a date micro-T configuration was backed up. Simply, click on the date you wish to restore from and select the .icr file contained within the folder. Note: micro-T software only saves your database configuration in the .icr file. In order to back up your data you will need to manually back up your database with the Backup command. Restore Now – Click this button to restore your micro-T software database from the location specified in the From field. 6.6.3 Setup Site By default all devices are in one site, Default Site. It is helpful to be able to separate these devices into “sites”. This enables the user to have a better understanding of the database, and the devices being used. Available Devices – List of all available devices in this micro-T database. Devices are available until they are placed into a site. A device can only be in one site at a time. Add – Adds selected device to selected site. Sites are selected from the Site drop down menu. Remove – Adds selected device to selected site. Sites are selected from the Site drop down menu. Note leaving a device in the Available Devices list effectively removes it from the database. You can restore this device at any time by moving it back into a Site. New Site – Prompts you for a name, and then creates a site with that name Delete Site – Deletes selected site. Sites can be selected from the Site drop down menu. Deleting a site that has devices in it automatically adds those devices to the Available Parameters list. Rename Site – Renames selected site. Sites can be selected from the Site drop down menu. micro-T Software Operations Manual 54 NexSens Technology, Inc. 6.6.4 Page Property Page Property allows you to setup features such as the paper size and other paper options. These features do not become displayed in micro-T software and will only affect printing options. You will need to have a report open to change the page property. These changes only affect the report that is open. If you would like to modify more than one report, you will have to do this individually. Margin When in html view, micro-T software will set the margins to the inches specified. This is just like margins set in Microsoft Word, etc. Margins should be chosen based on what looks the best on your printer. Page Break When in html view, micro-T software will automatically insert page breaks after certain events as specified. This is just like the page break in Microsoft Word, etc. Using page breaks allows you to keep sections of the report on individual pages, and generally makes the report look better. All page break options are enabled by default. Page Size – Select the paper size you would like for PDF reports. This should be the actual size of paper you will be using to print the PDF report. micro-T Software Operations Manual 55 NexSens Technology, Inc. Width / Height – If Custom is selected from the Size drop down menu, you will be able to enter in the actual Width and Height of the paper you will be using to print your PDF report. Page Orientation – Select the orientation you would like the pages of your PDF report to be printed. Font Scale – Allows you to scale up or scale down the font size of your PDF report by the percentage entered. Y-Axis Scale Orientation Sets the orientation of the Y-Axis scale labels on graphs generated in your PDF report. 6.6.5 Field Note The field note field is located in every report generated by the current database, as long as you have checked Summary to be displayed. This feature cannot be used when a report is open. Time – The time to be displayed for the note. Type – The type of note to be displayed. There are many pre-made notes to insert. Or you can create your own by selecting Custom. Note – The text to be displayed for the note. micro-T Software Operations Manual 56 NexSens Technology, Inc. Appendix Specifications Standard temperature logger (DS1921G): ▫ ▫ ▫ ▫ ▫ Digital thermometer measures temperature in 0.5°C increments from -40°C to +85°C Factory calibrated to ±1°C from -30°C to +70°C. Automatically measures temperature in intervals from 1 to 255 minutes Logs up to 2,048 consecutive temperature readings Durable stainless-steel case withstands harsh environments. Resistance to dirt, moisture or shock. Water resistant. High resolution temperature logger (DS1921Z): ▫ ▫ ▫ ▫ ▫ Digital thermometer measures temperature in 0.125°C increments from -5°C to 26°C Factory calibrated to ±1°C. Automatically measures temperature in intervals from 1 to 255 minutes Logs up to 2,048 consecutive temperature readings Durable stainless-steel case withstands harsh environments. Resistance to dirt, moisture or shock. Water resistant. High resolution temperature logger (DS1921H): ▫ Digital thermometer measures temperature in 0.125°C increments from 15°C to 46°C ▫ ▫ ▫ ▫ Factory calibrated to ±1°C. Automatically measures temperature in intervals from 1 to 255 minutes Logs up to 2,048 consecutive temperature readings Durable stainless-steel case withstands harsh environments. Resistance to dirt, moisture or shock. Water resistant. micro-T Software Operations Manual 57 NexSens Technology, Inc. High resolution, high memory temperature logger (DS1922L): ▫ Digital thermometer measures temperature in 0.0625°C increments from -40°C to +85°C ▫ ▫ ▫ ▫ Factory calibrated to ±1°C from -30°C to +70°C. Automatically measures temperature in intervals from 1 to 255 minutes Logs up to 4,096 consecutive temperature readings Durable stainless-steel case withstands harsh environments. Resistance to dirt, moisture or shock. Water resistant. High resolution, high memory temperature logger (DS1922T): ▫ Digital thermometer measures temperature in 0.0625°C increments from 0°C to +125°C ▫ ▫ ▫ ▫ Factory calibrated to ±1°C from -30°C to +70°C. Automatically measures temperature in intervals from 1 to 255 minutes Logs up to 4,096 consecutive temperature readings Durable stainless-steel case withstands harsh environments. Resistance to dirt, moisture or shock. Water resistant. Temperature and Relative Humidity Logger (DS1923): (1) ▫ Digital thermometer measures temperature in 0.0625°C increments from -20°C to +85°C. ▫ Digital relative humidity sensor measures relative humidity in 0.04% increments from 0 to 100%. ▫ ▫ ▫ Factory calibrated to ±0.5°C from -10°C to +65°C. ▫ Durable stainless-steel case withstands harsh environments. Resistance to dirt, moisture or shock. Automatically measures temperature in intervals from 1 minute to 273 hours. Logs up to 2,048 consecutive temperature readings and 2,048 consecutive relative humidity readings. Copyright Maxim Integrated Products (http://www.maxim-ic.com). Used by permission. micro-T Software Operations Manual 58 NexSens Technology, Inc. Installation for Windows 2000 When you first plug in the USB adapter Windows will detect and start the Found New Hardware Wizard: Step 1: Click Next when the Found New Hardware Wizard dialog box appears. Step 2: Check the “Search for suitable driver for my device” option. Click Next to continue. Step 3a: If the micro-T installation CD is in your CD-ROM drive then place a check mark in the “CDRom drives” option and click Next. If you have the CD, this is the recommended method. Windows will scan the CD and automatically install the driver. micro-T Software Operations Manual 59 NexSens Technology, Inc. Step 3b: If you downloaded a copy of the software from the web, or no longer have the installation CD, you will need to specify the location of the driver. Check “Specify a location” and click Next. By default the driver is located in “C:\Program Files\NexSens\micro-T\Driver” Click Browse and go to that location. Click Open. Note: the DS29402k..inf file should be in that folder. Click OK to continue. Step 4: Once Windows has successfully found the driver, click Next. micro-T Software Operations Manual 60 NexSens Technology, Inc. Step 5: Click Finish in the following window. Make sure that the driver has been successfully installed. Once you have completed the above steps for the first time, you will not have to do so again. micro-T Software Operations Manual 61 NexSens Technology, Inc. Installation for Windows XP When you first plug in the USB adapter Windows will detect and start the Found New Hardware Wizard: Step 1a: If the micro-T installation CD is in your CD-ROM drive then place a check mark in the “Install the software automatically” option and click Next. If you have the CD, this is the recommended method. Windows will scan the CD and automatically install the driver. Step 1b: If you downloaded a copy of the software from the web, or no longer have the installation CD, you will need to specify the location of the driver. Check “Install from a list or generic location”. Click Next. micro-T Software Operations Manual 62 NexSens Technology, Inc. By default the driver is located in “C:\Program Files\NexSens\micro-T\Driver”. Click Browse and go to that location. Click OK to continue. Step 2: If the following dialog box appears, click Continue Anyway. Clicking STOP Installation will discontinue the driver installation and will not allow the USB adapter to work correctly. micro-T Software Operations Manual 63 NexSens Technology, Inc. Step 3: Windows will search for the driver. Make sure that the driver has been successfully installed. If it has been click Finish. Once you have completed the above steps for the first time, you will not have to do so again. See the following pages for information regarding what to do in the circumstance that the driver failed to install properly. micro-T Software Operations Manual 64 NexSens Technology, Inc. If for any reason you see the following window: You will need to reinstall the driver. Typically Windows will not redisplay the Found New Hardware wizard automatically again. Therefore you will need to go to the Windows Device Manager in order to remedy the problem. The Device Manager can be accessed by going to the Start menu and clicking on Control Panel. This will open a folder. Click on the file labeled System. micro-T Software Operations Manual 65 NexSens Technology, Inc. The System Properties dialog box will appear. Go to the Hardware tab and click Device Manager. You should see a device labeled USB Device that has a yellow icon by its name. micro-T Software Operations Manual 66 NexSens Technology, Inc. Right click on the device and select Update Driver. This will restart the Found New Hardware Wizard. Go back to step one and follow the steps that follow. If you need further assistance call a NexSens Support Representative at (937)-426-2703 or email us at [email protected]. micro-T Software Operations Manual 67 NexSens Technology, Inc. Troubleshooting Connecting with micro-T Devices If you are unable to communicate with the micro-T devices after installing the USB driver, then there is most likely either a connection error or a problem with the driver installation. Make sure the micro-T device is securely attached to the adapter and that the adapter is plugged into a working port on your computer. You may want to try plugging the adapter into a different computer port before trying these following steps. The following information is provided by Maxim Dallas Semiconductor and can be found at http://www.maxim-ic.com/appnotes.cfm/appnote_number/1740 App Note 1740 White Paper 6: 1-Wire Drivers Installation Guide for Windows: 1. Make sure an up-to-date version of the micro-t Drivers has been downloaded. This can be done by updating micro-T software to the latest version. To update to the latest version, click on Check for Updates located in the Help Menu of the micro-T software. 2. If running Windows 2000 or XP, first log into an account with administrator privileges. This is required for installing devices drivers. To determine the account privileges (XP or 2000) follow these steps: - Log on to Windows with the user account in question. - Click Start > Control Panel. - Double-click the User Accounts icon. If the account is a “Computer Administrator” under XP, icons for all of the accounts available on the computer are shown (including a “Guest” account that is disabled by default). Next to each icon is the user name, and the phrase “Computer Administrator” or “Limited account.” If a Limited user, only the icon for the account will be viewable. Next to this icon is the user name, and the phrase “Limited account.” 3. After installation, if difficulties persist, please look in the “Device Manager” to see if the 1-Wire USB adapter has been installed correctly (it will show up in a list of hardware devices attached to the computer). To do this, from the Control Panel, double-click “System”. Then choose the correct tab by clicking on it. In Windows 98, the correct tab is “Device Manager”. In Windows XP, the correct tab is “Hardware” (then click on the button labeled “Device Manager”). 4. With the USB adapter plugged in, the “Device Manager” should show the following entry, either “1Wire Devices” or “1-Wire Devices”. The following is a picture of a good install on Windows XP (with USB adapter plugged in): micro-T Software Operations Manual 68 NexSens Technology, Inc. 5. If the following error appears, indicated below by a yellow circle with an exclamation mark under the “1Wire Devices” entry, then try “Updating” the device driver by right-clicking the entry and then clicking on the “Update Drivers” menu option. (Keep the USB adapter plugged in). 6. Follow the instructions. When prompted for the new driver, browse to the <applications> folder. This is the folder specified when running the installation program above. The driver, DS2490.SYS, and it respective DS2490.INF file should be in the <applications> folder. By default, the <applications> folder is located here: “C:\Program Files\Dallas Semiconductor\1-Wire Drivers Version X.XX”. The X.XX is a version number (which can also include “beta” and an extra number). Then proceed to finish the “Update Driver” wizard. 7. The driver should now be correctly installed. See the picture in Step 7 above for a picture of the “Device Manager” with the 1-Wire USB adapter’s driver successfully installed. micro-T Software Operations Manual 69 NexSens Technology, Inc. Simulating a 'First-time' Install A ‘first-time’ install of the USB driver may be necessary for micro-T software to operate correctly depending on what has been installed on the computer previous to micro-T software. If other Maxim Dallas Semiconductor drivers have been installed on the system, first check to see if you can communicate to the micro-T devices. If not or there is a conflict between the drivers, follow the instructions given below. It should be noted that this will rarely, if ever, have to be done. In the uninstall instructions below, note that %WIN% stands for the “Windows” directory, which can vary by OS (i.e., C:\Windows, C:\WinNT, etc.). Similarly, %WIN\SYS% stands for the “System” directory, which can also vary (i.e., C:\Windows\System, C:\WinNT\System32, etc.). 1. Delete the *.inf file(s) associated with the DS2490.SYS (including any *.pnf files). It is important that these files get removed. If this does not happen, Windows tries to install the DS2490.SYS again when the USB adapter gets plugged back in to the PC. Microsoft Windows *.inf file locations differ between operating systems. See tables below for where to look for these files. 2. Delete the DS2490.SYS file from the %WIN\SYS%\drivers directory. 3. Using the Registry Editor (RegEdit.exe or RegEdt32.exe), purge the registry of the following driver information: For Windows 98, ME delete the following registry key: \LocalMachine\System\Enum\USB\Vid_04fa&Pid_2490 For Windows 2000, XP delete the following registry key: \LocalMachine\System\CurrentControlSet\Enum\USB\Vid_04fa&Pid_2490 On Windows 2000/XP, you must restart the system before reinstalling the driver. micro-T Software Operations Manual 70 NexSens Technology, Inc. micro-T Software Operations Manual 71