1
Encompass LE
User Manual
Online Control Center
Single Chain Site Login
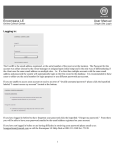
Logging In:
The UserID is the email address registered, or the serial number of the receiver at the location. The Password for the
account was either chosen by the client or assigned upon initial setup and is the only way of differentiating the account
if the client uses the same email address on multiple sites. For example, if a client has multiple accounts with the same
email address and password, the system will automatically log in to the first record in the database. It is recommended
in these cases to either use the serial number for login purposes or use different passwords per account.
If you are unable to access your account or receive an error of “invalid username/password”, please click the hyperlink
labeled “I cannot access my account.” located at the bottom.
If you have logged in before but have forgotten your password, click the hyperlink “I forgot my password.”. From
there you will be able to have your password sent to the email address registered on your account.
If you have not logged in before or are having difficulty in retrieving your password, please email us at:
[email protected] or call the Encompass LE Help Desk at 800-331-3340 ext. 75120.
Edit Site Info:
1
This screen allows you to update your information. Upon first signing into a new account you may notice x’s or invalid
information. This is used as a placeholder upon initial setup and we encourage you to update your site information so
we can better address any issues you have in the future.
Please note: Navigation links can be found throughout the system. These are helpful for jumping back to the previous
page or menus within the system. The Help link is located in the top right corner; this gives you access to a dynamic
help document that will assist you throughout the system.
Local Messaging:
This function allows the use of customized messages within chain sequence scheduling. The sequence is set by the
chain profile and may contain “Local Message 1”. This is useful for messages that are unique to a single site within a
chain, such as: store location and directions, hours of operation or specialized local offerings within the store itself.
This has to be controlled by the chain operator, and usage stated within the chain itself.
Please note: The sequence containing Local Messages must already be set and loaded to the receiver. These messages
are transmitted when uploaded by the individual site, NOT when refreshing a sequence. These are stored using Spot#
300001 – 300015 on the receiver; these slots are reserved solely for this purpose.
Upload Local Message:
Begin by giving the message you intend to upload a description. This field is limited to 40 characters and the standard
format is: Message Number (if attained from Muzak) and a brief description including the run dates. For example,
2
A456815 – Brand Water 01/15/08-03/20/08. If there is no intended stop date, a common abbreviation is “tfn” or till
further notice; this is also assumed if no dates are included in the description.
After creating your message description click “Submit” to proceed to the next page.
The following screen will allow for upload of a message. Click the “Browse…” button and select the message file you
wish to use, and then click “Upload File”. Uploading times depend on the size of the file and your network connection;
please allow adequate time for uploading to finish. Failure to do this may result in an incomplete or corrupted file.
Please note: All message files must follow the rules listed on the page. Do not use files that are not the correct format,
this may have adverse affects to your service.
If, during this process, you encountered an error and wish to check the status of this message, simply return to the Main
menu and use “Modify Message”.
Modify Message:
3
This screen will allow you to view existing messages and see their status. The Local Message Service is limited to 15
messages per site.
Please note: Different stores within a chain may use different descriptions; therefore, the descriptions are not displayed.
Delete Message:
This feature is handled similarly to Modify Message. Simply select the message you wish to delete, click “Submit” and
then verify on the proceeding pages.
Now Playing:
You will notice on the right side a “What’s Playing Now” link. Clicking on this link will direct you to the What’s
Playing Now page. From here you can select music programs and see the name and artist of what is currently playing.
This feature will also show the previous 10 songs that have played on that program. This feature is available for all
Muzak programs excluding Environmental. This feature will not work with custom music programming.
4
Click the “Main” link located at the top left of the screen to return to the Main Menu.
Click the “Continue to Receiver Settings page” on the Main Menu to begin the process of programming your
Encompass LE Receiver.
Modify Zones & Receivers
On this page you will see all of the zones at this location. A zone refers to areas of unique programming within the
same physical location. For every unique area of service within a site a different zone is needed.
Zones:
Zone names are limited to 16 characters and should describe the area the music is affecting (i.e.: Dining, Lobby, OnHold, etc.) as well as time zone or geographic information. These are available via a pull-down list and naming is
determined at the Chain Profile level. Zones are also utilized for message delivery. A zone’s name can be a simple
description of where the messages are playing (i.e.: On Hold, In Store, Pump Side) or can describe a zone in terms of
the messages programmed to run in that zone (i.e.: carwash stores, deli stores, and deli-floral stores.) Zones should
only be altered by an authorized person familiar with the breakdown of the messages.
5
If you have more than one zone and wish to change a particular zone, click “Edit” beside the zone you wish to modify.
Modifying an entire site, including all zones and all selected features, can be done by simply clicking the “Submit”
button located at the bottom of the page.
Changing a single option within a zone can be accomplished by clicking “Edit” beside the check box under the
appropriate column. For example, for simple program changes, click “Edit” beside the check box located in the
Program Selection column.
Please Note: A check mark signifies that a section is being actively used. Do NOT uncheck options prior to making a
selection. This action will delete the data within that option. For example, if the check mark is present on the Program
Selection column and is then removed, the receiver on that zone will revert back to an unauthorized status and display
AUTHORIZE VIA WEB OR NOC on the display as though it had not been installed. This can be facilitated easily by
re-adding programs to the site lineup. Simply follow the steps below under “Program Selection”.
6
Please note: The Chain Profile settings take precedence over settings for individual zones. These restrictions will be
shaded and editing will not be possible. Please check with appropriate corporate or franchise management to verify
what you are allowed to customize. It is recommended that chain profile users create zones for local exceptions, to
prevent these sites from having to update manually.
Zones that are restricted will appear as unavailable when you are logged in as a single chain site. You will not be able
to change these settings. Refreshing these sites can be accomplished by using the “Submit” button or the “Edit” link
beside the appropriate zone.
Program Selection
Program Selection refers to the music programs available by using the program select buttons on the front of the
receiver. This selection can be made in by either clicking the check boxes beside the individual programs or by using
the “Select All Programs” button to check all the program boxes on the page. It will also check at the “Authorized
for All” check box which will automatically authorize any new additional program that Muzak adds to the Encompass
LE experience.
7
Hovering the mouse over the programs will reveal a popup box displaying the program description, energy level, target
audience/lifestyle and some examples of the Muzak Audio Architects skill in advising if the program you are viewing
fits your business. The programs are grouped under 15 different Genres of music styles to help you in making your
programming decisions.
The “Holiday” Genre contains two music programs. When these are not in use they display the Muzak program
number and “OFFAIR” (see image below). If selected within the control system they will be available on the receiver;
however between Holiday music broadcasts no music is transmitted on these programs. Selecting these and keeping
them active on the zone saves time and prevents you from having to re-enter the control system during every holiday
season. It is recommended if you wish to have holiday music during the year to have these selected. Holiday programs
include: Mardi Gras, Valentines Day, St. Patrick’s Day, Cinco De Mayo, Summer Fun, Independence Day,
Oktoberfest, Halloween, Veterans Day, Thanksgiving, Traditional Christmas and Secular Holiday.
8
Custom Programs:
Custom programs will be listed at the bottom as shown below (if included in Muzak service).
Daypart Schedule:
Daypart Scheduling or “Dayparting” is the process of setting a schedule that can: change the program selection, mute,
unmute and authorization for a specified period of time. NOTE: All receivers should remain powered on at all times.
A receiver must be on to receive daypart commands and messaging.
Please note: if the receiver is muted for any reason, the front display will read “MUTED BY NOC” and the output will
be silenced. As mentioned earlier, chain profile settings take precedence over single chain site settings. If a refresh is
made to the chain profile, the site will revert to chain profile settings.
9
Selecting mute within the Program column will mute the zone at the time selected on the days selected. To unmute,
simply use the unmute command as another line and select the days and time you wish to unmute the zone.
The following would mute a zone during the week, Monday through Friday, between 9:00pm and 7:00am.
Please note: All times in the control system are in Eastern Standard Time (EST) – please account for any
difference in your time zones when working with dayparting and sequence scheduling.
WARNING: If MUTE is used, don’t forget to set an UNMUTE for the time you wish the music to return.
Please note: Dayparts are not required to be in order of occurrence; this allows the user to add to the bottom of the list
instead of re-ordering with every adjustment. However, it is HIGHLY recommended when possible to re-order your
dayparts to make them easier to follow. This will not only help you, but if contact with NOC is necessary, the control
operator will be able to more easily understand and can help prevent a lengthy call time.
“Authorize All ON/OFF” allows all available programs to be enabled on the receiver during the specified ON period.
This is useful if you only have the site set up for a few programs but have employees working after hours. This will
enable your work crew to listen to any available program when working late stocking or cleaning. Please note: You
must set a daypart to change the program back to your regular selection; otherwise the receiver will stay tuned to the
program listened to that evening.
In the example below, the site determined that they would give their night crew employees access to all programs
starting at 9:30pm. Then, at 6:00am, the programs would once again be restricted to the site’s standard programming
(City Lights).
10
Special Holiday Dayparting:
Special attention needs to be paid to dayparting Holiday music for an extended period of time. The first daypart is set
to change to the Holiday program of your choice. Make sure that you check the day of the week to match the Start and
End Date that you desire for your Holiday program. Since the command only needs to be sent once to take your
receiver to the Holiday program, you only need to send these commands one time. Once on the Holiday program, the
receiver will remain on this program until you send another daypart at the end of the Holiday music season to return to
your existing program. To accomplish this, create a dayparting command to return to your regular selections at the end
of the Holiday music season, again only sending the command one day using the same Start and End Dates.
The following is an example of a simplified Holiday setup. The regular program start and end date has been set to
December 31; this is the day we want to go back to normal programming. The Start and End Date are the same
because this only needs to send the command once, not every day.
To have your regular programming play until the start of the Holiday music season and then return to your regular
programming at the season’s end, you will need to add an end date on the last day you want your regular programming
to be scheduled. Create a daypart to start your Holiday program on the day and date you want to begin your Holiday
music. Then recreate the existing daypart with a Start Date to coincide with the day and date that you want to resume
your existing daypart after the Holiday music season.
11
When programming a receiver that has multiple programs selected on the Program Selection screen, it is often desirable
to schedule the Holiday daypart every day of the Holiday music season as seen in the example below. Since the site
can change the program on the receiver this allows the site to start the day on the selected Holiday program while still
giving the site the ability to select other programs if they choose.
A complete listing of the Holiday music programs and dates each program is available on our Web site at:
www.muzak.com. Please note: These dates are sometimes changed prior to air but are a good representation of when
special music programs become available.
Sequence Scheduling:
Sequence Scheduling will allow you to set specific start times and days when message sequences play.
The “All” button will select all days of the week. The time selected will be when the sequence will start playing – how
often each message within the sequence plays is determined by the interval selected when the sequence was created.
Boost can be set for OFF, LOW OR HIGH. When OFF is selected the messages are played the same volume level as
the music. LOW will increase the volume of messages above the music by 3db, while HIGH will increase the volume
of the messages above the music by 6db. These are very slight differences but sometimes allow messages to stand out
or “pop” and can impact customer attention.
12
The Start and End Dates are handled in the same manner as Dayparting. Simply set the date you wish the messages to
start playing. The End Date determines when they will cease.
To stop a sequence, use the “Stop Sequence” command found in the Sequence pull down column. See the example
below.
The Start and End Date are not required fields. As with Dayparting, the Start Date is saved as today and the End Date
is left open. This will continue to play messages until you go back in and change it. The same principle applies to the
Stop Sequence command.
When using a closed command as seen in the example above, be sure to set the Stop Sequence dates to be the same as
the sequence. Otherwise, it will continue to transmit and can have a negative impact on service. Please note: The Stop
Sequence command will stop all active sequences.
Adparting:
Adparting is a live, streaming, satellite-delivered service that broadcasts advertisements to single chain sites that have
met certain required criteria. To activate an ad, simply check the group of messages that apply to the zone and click
“Continue”.
If broadcast Adparting is not used by the client, a message will appear that states “Adparting is not available for Your
Company. Click Help to learn more.”
Simply continue to the next page.
Are You Sure?:
This page will present you with the information on each zone. Double-check that everything is correct, paying close
attention to the zone name. If multiple zones exist and the “Submit” button was used to edit, you will need to confirm
all zones.
Selecting the “Submit Changes” button will send the info to the receiver, sometimes referred to as a “refresh”. If the
changes are incorrect select the “Return to Main” button, keeping in mind that any changes will be lost.
13
Please note: for more assistance, the Encompass LE Help Desk is available at 800-331-3340 ext. 75120.
14