1
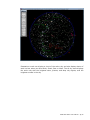
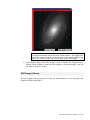
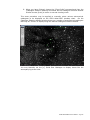
12. You can now see that the object NGC 104, a Globular Cluster, is much larger and many more stars are displayed. Exercise 4. Desktop - Right mouse button When working on the desktop, clicking the right mouse button will bring a number of options to the user. More of these options will be described later in this text but here are some examples to illustrate the use of this feature. Identifying objects. Chart Field of View. Identifying objects. 1. Open STAR Atlas:PRO™. 2. Identify an object of interest on the desktop, preferably a bright one such as a named star (choosing a bright or large object will make this example simpler). 3. Precisely centre the cursor over the object you have selected. 4. Now, click the right mouse button to display the popup menu. 5. This menu has a number of commands. [Identify Object]. Click the 3rd one from the top – 6. This will now bring up a new set of data relevant to the object of interest. Amongst the data provided will be the name of the object. There may be a number of items identified, but the brightest one is indicated by the magnitude – that is the object with the smallest magnitude number, is likely to be the one you want to learn more about. 7. Now, double click on this objects name and another data menu will popup with more data about your object of interest. Field of View. 8. Click the right mouse button again, but this time identify [Field of View]. 9. Click on this and a menu appears which you have seen earlier in this tutorial – it is the [Set Field of view] menu. 10. Try resetting the Field of View to a number of different settings and see the effect these changes have on the object you have selected. STAR Atlas:PRO™ User Manual – Pg 190