1
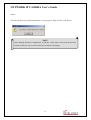
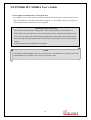
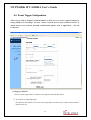
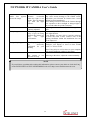
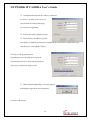
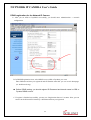
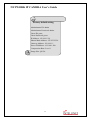
NETWORK IP CAMERA User’s Guide
NOTE
If you select “DHCP”, you may see the rebooting message “Now the Network Camera is
rebooting to apply the changes...” on Web Browser. After completing rebooting, Operating
Status LED blinks once per second. (The message may not be changed at all so you must check
whether the Operating Status LED blinks.)
To select DHCP, you must have DHCP server in the network. Otherwise, the IP address will be
rebooted automatically as the previous IP address. It may take 4 minutes for booting.
After rebooting, please reenter the previous IP address.
You may see the fail message from “Network Configuration” page.
② Send IP address to e-mail
To send camera system information (Camera Name, Camera Location, DHCP IP address), check in
a text box and enter you email address. (You should configure your SMTP server information first)
③ Web Server Port Number
To set the Port Number for the Web Server. (The default port number is ‘80’ and users can select from
80 to 1023)
④ Image Transfer Port Number
To set the port number for the image transfer. (The default port number is “8000” and users can select
from 8000 to 65535)
⑤ Upgrade port number
To set the Port Number for upgrading firmware. Default port number is “9000” and users can select
from 8000~65535.
⑥ PTZ port number
To set the port number for PTZ control. (Default is ‘10000’ and users can select from 8000 to 65535.
CAUTION
Be careful not to duplicate port number between Image Transfer Port Number and Upgrade port
number. If it is duplicated, the warning message may appear.
⑦
ETSP port number
To set the port number for ETSP (Event Trigger Setting Program). (Default is “11000” and users can select from
8000 to 65535.
(For the detail of ETSP, please refer to the ETSP manual.)
35