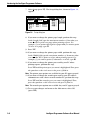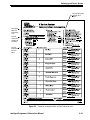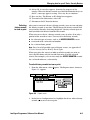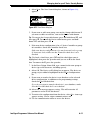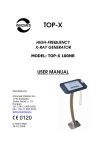
1
V Series
Intelligent Programmer Software
(DOS Version)
User Manual
Copyright ©1996, 1997, 1999, 2002 Best Lock Corporation dba Best Access Systems.
All rights reserved. Printed in the United States of America.
Information in this document is subject to change without notice and does not
represent a commitment on the part of Best Access Systems. The software described in
this document is furnished under a license agreement or nondisclosure agreement.
This publication is intended to be an accurate description and set of instructions
pertaining to its subject matter. However, as with any publication of this complexity,
errors or omissions are possible. Please call your BEST distributor or Best Access
Systems at (317) 849-2250 if you see any errors or have any questions. No part of this
manual and/or databases may be reproduced or transmitted in any form or by any
means, electronic or mechanical, including photocopying, recording, or information
storage and retrieval systems, for any purpose other than the purchaser’s personal use,
without the express written permission of Best Access Systems.
This document is distributed as is, without warranty of any kind, either express or
implied, respecting the contents of this book, including but not limited to implied
warranties for the publication’s quality, performance, merchantability, or fitness for
any particular purpose. Neither Best Access Systems, nor its dealers or distributors shall
be liable to the user or any other person or entity with respect to any liability, loss, or
damage caused or alleged to be caused directly or indirectly by this publication.
The Best logo is a registered trademark of Best Access Systems.
Hewlett-Packard is a registered trademark of Hewlett-Packard Co.
Microsoft, MS-DOS, and Windows are registered trademarks of Microsoft Corporation.
Written and designed by Best Access Systems and Avalon Group, Inc., Indianapolis,
Indiana.
T61930/Rev B
When ordering use part number 1761004
ER–7991–4 May 2002
CONTENTS
FIGURES
IX
INTRODUCING THE
INTELLIGENT PROGRAMMER SOFTWARE
IPS features
1–1
1–2
Overview of IPS activities
1–2
Conventions used in this manual
1–3
Support for IPS users 1–4
V Series document family 1–4
Support services 1–5
Telephone technical support 1–5
PC requirements for running the IPS
1–5
Setting up the IPS to work with your computer system
Defining the printer page size 1–6
Selecting the printer port 1–6
Selecting the transfer port 1–6
Using the IPS in handheld terminal mode
NAVIGATING THE IPS
1–6
1–9
2–1
Starting and logging into the IPS
2–1
Using the IPS menus 2–3
Main menu 2–3
File menu 2–4
Transfer menu 2–5
Devices Administration menu 2–5
Devices Functions menu 2–7
Reports menu 2–8
About menu 2–9
IPS User Manual
iii
Using dialog boxes 2–10
Moving to a field or list 2–11
Using lists 2–11
Using date fields 2–11
Using time fields 2–11
Typing information in fields 2–12
Using radio buttons 2–12
Using check boxes 2–12
Selecting buttons 2–13
Changing the IPS password
2–13
Logging out and exiting the IPS
2–14
DEFINING YOUR V SERIES SYSTEM
3–1
Components of the V Series System 3–1
Magnetic stripe electronic lock 3–1
Proximity reader electronic lock 3–1
Keypad electronic lock 3–2
Controller 3–2
Access cards, card encoder, and Card Encoding Software
Enrolling Station 3–3
Programming methods 3–3
Handheld terminal 3–3
Intelligent Programmer Software 3–4
Intelligent Programmer Software for Windows 3–4
System overview 3–5
Features of the V Series System
3–7
Filling out the user forms 3–7
Facility Information form 3–8
Token & Door Information form and
Token by Door Information form
3–11
Encoding access cards or generating access codes (optional)
Creating device configurations
4–1
Two approaches to creating a device configuration
4–3
Adding a device
4–4
Copying an existing device configuration
Defining a device configuration
3–14
3–14
CREATING A DEVICE CONFIGURATION
Adding a group
3–3
4–2
4–5
4–8
Task 1: Define the token format (optional) 4–8
iv
Defining the token length 4–9
Defining the facility code format 4–9
Defining the card number/ access code format 4–9
Defining the issue code format 4–10
Using the look ahead feature 4–10
Determining whether to validate the LRC 4–11
IPS User Manual
Task 2: Enter facility code information
What is a facility code? 4–14
4–14
Task 3: Select device system settings 4–16
Adding a communication token and password 4–16
Selecting a daylight savings time setting 4–16
Selecting a controller setting 4–17
Selecting the chassis type 4–17
Task 4: Defining V Series Controller features
(optional—controllers only) 4–19
Selecting the door contact type 4–19
Selecting the door forced alarm feature 4–19
Using the RQE unlock feature 4–19
Using the remote unlock feature 4–20
Defining the door open too long feature 4–20
Selecting the alarm output duration 4–20
Task 5: Set up holidays
4–23
Task 6: Set up time zones 4–24
What is a time zone? 4–24
What is a time interval? 4–24
Defining time zone numbers 4–25
How do I define time zones and their intervals?
4–25
Task 7: Define timed access features 4–28
Setting the unlock duration 4–28
Selecting a time zone for timed automatic lockdown 4–28
Selecting a time zone for facility code access 4–29
Selecting a time zone for timed automatic unlocking 4–29
Task 8: Delete the temporary operator token
4–31
Task 9: Define the user database 4–32
Adding a token 4–32
Enrolling Proximity Cards 4–35
Adding a range of access cards 4–38
Modifying a token 4–40
Deleting a token 4–42
Deleting a range of access cards 4–43
Defining additional device configurations
4–44
PROGRAMMING A V SERIES SECURITY DEVICE
Transferring device configurations
from a laptop or desktop PC to a palmtop PC
5–1
5–3
Task 1: Connect a PC to the device 5–5
Connecting a laptop PC to a device 5–5
Connecting a palmtop PC to a device 5–7
Task 2: Transfer a device configuration to the device
IPS User Manual
5–8
v
MANAGING DATA FOR YOUR V SERIES SECURITY DEVICES
6–1
Retrieving, viewing, printing, and deleting
history records 6–1
Retrieving history records from a device 6–2
Selecting history records to view or print 6–5
Deleting a device’s history records 6–8
Retrieving a device’s programming settings and
user database 6–8
Updating the records for a device 6–9
Creating a new device configuration 6–10
Viewing and printing a device configuration’s settings
6–12
Viewing and printing a device configuration’s user database
Printing all data for a device or group of devices
Backing up and restoring IPS data
Backing up data 6–16
Restoring data 6–20
Packing the IPS database
6–14
6–15
6–16
6–24
MAINTAINING DEVICE CONFIGURATIONS
Selecting a device configuration to edit
7–1
7–2
Adding a facility code, or changing the range of card numbers or
access codes for a facility code 7–3
Changing or adding a communication token and password
Changing or adding holidays
7–6
Changing or adding a time zone
Changing the user database
7–7
7–8
Deleting a device configuration
Renaming a group or device
7–4
7–8
7–9
USING THE HANDHELDTERMINAL MODE
Entering handheld terminal mode
A–1
A–2
Programming a V Series Security Device to override
time zone control A–3
Viewing a V Series Security Device’s system data
Resetting a V Series Security Device
A–7
A–8
Clearing a low battery message (electronic lock only)
Exiting the handheld terminal mode
A–11
A–12
V SERIES SECURITY DEVICE HISTORY EVENT TYPES
GLOSSARY
INDEX
vi
B–1
C–1
D–1
IPS User Manual
FIGURES
FIGURES
INTRODUCING THE
INTELLIGENT PROGRAMMER SOFTWARE
Main menu before logging in
File menu before logging in
Login dialog box
1–6
1–7
1–7
Main menu after logging in
File menu after logging in
Setup dialog box
1–7
1–7
1–8
NAVIGATING THE IPS
Main menu before logging in
File menu before logging in
Login dialog box
2–2
2–2
2–2
Main menu after logging in
2–2
Main menu after logging in
2–3
File menu after logging in
Transfer menu
2–4
2–5
Devices Administration menu
Devices Functions menu
Reports menu
Examples of dialog boxes
IPS User Manual
2–7
2–8
About information box
File menu
2–5
2–9
2–10
2–13
vii
Figures
Password dialog box
File menu
2–14
2–14
Main menu after logging out
2–15
File menu before logging in
Login dialog box
2–15
2–15
Main menu after logging in
2–15
DEFINING YOUR V SERIES SYSTEM
V Series System Components
3–6
Sample of a completed Facility Information form (front)
3–9
Sample of a completed Facility Information form (back)
3–10
Sample of a completed Token & Door Information form
3–12
Sample of a completed Token by Door Information form
3–13
CREATING A DEVICE CONFIGURATION
Devices Administration menu
4–3
Add Device Group dialog box
4–3
Devices Administration menu
4–4
Add Device dialog box
4–4
Devices Administration menu
4–5
Copy From . . . To . . . dialog box
Devices Administration menu
4–6
Copy From . . . To . . . dialog box
New Name dialog box
Access card
4–6
4–7
4–7
4–8
Personal identification number (PIN)
Devices Administration menu
Devices Functions menu
System dialog box
4–11
4–11
4–12
Variable Card Format dialog box
Facility dialog box
4–15
System dialog box
4–17
System dialog box
4–21
Door Status dialog box
Holidays dialog box
4–9
4–12
4–21
4–23
Defining time zones and their intervals—an example
Time Zones dialog box
Reader dialog box
4–27
4–30
User Database dialog box
IPS User Manual
4–26
4–31
viii
Figures
User Database dialog box
4–34
Add/Modify Card dialog box
User Database dialog box
4–34
4–36
Add/Modify Card dialog box
User Database dialog box
4–36
4–38
Add Card Range dialog box
4–39
User Database dialog box
4–40
Add/Modify Card dialog box
4–41
User Database dialog box
4–42
User Database dialog box
4–43
Delete Range dialog box
4–43
PROGRAMMING A V SERIES SECURITY DEVICE
Connecting a laptop or desktop PC to a palmtop PC
PC to PC dialog box
5–3
5–4
Sending information box at the end of the process
5–5
Connecting a laptop PC to an electronic lock or controller
Connecting a palmtop PC to an electronic lock or controller
PC to Lockset dialog box
Login dialog box
5–6
5–7
5–8
5–9
MANAGING DATA FOR YOUR V SERIES SECURITY DEVICES
History to PC dialog box
Login dialog box
6–2
6–3
History to PC dialog box
Add Device dialog box
Login dialog box
Reports menu
6–3
6–4
6–4
6–5
History Report dialog box
6–6
History Selection dialog box
6–6
Devices Administration menu
Device to PC dialog box
Login dialog box
New Name dialog box
Reports menu
6–9
6–10
Device to PC dialog box
Login dialog box
6–8
6–10
6–11
6–12
6–12
Functions Report information box
Reports menu
IPS User Manual
6–13
6–14
ix
Figures
User Db Report information box
Reports menu
6–15
Backup menu
6–16
Backup To dialog box
6–14
6–16
Backup To information box at the end of the process
Backup menu
6–17
6–18
Backup To dialog box
6–18
Serving Remote information box at the start of the process
Backup To information box at the end of the process
Backup menu
6–19
6–20
Restore From dialog box
6–20
Restore From information box at the end of the process
Backup menu
6–19
6–21
6–21
Restore From dialog box
6–22
Serving Remote information box at the start of the process
Restore From information box at the end of the process
Pack Database information box at the end of the process
6–23
6–23
6–24
MAINTAINING DEVICE CONFIGURATIONS
Devices Administration menu
Devices Functions menu
Facility dialog box
7–3
System dialog box
7–5
Holidays dialog box
7–2
7–2
7–6
Devices Administration menu
7–9
Devices Administration menu
7–9
Rename dialog box
7–10
USING THE HANDHELD TERMINAL MODE
File menu
x
A–2
IPS User Manual
1
INTRODUCING THE
INTELLIGENT PROGRAMMER
SOFTWARE
This manual describes how to use the
V Series Intelligent Programmer Software (IPS), a
DOS software program. The IPS, which runs on a
desktop PC, laptop PC, or palmtop PC, lets you
manage your V Series System.
The IPS lets you define the programming settings
and user database for a V Series Security Device in
the comfort of your office. Then, you can transfer
this information to the device by connecting a laptop
PC or palmtop PC to the device.
The IPS lets you use the same programming settings
and user database to program a group of devices that
you want to operate the same. Since each device’s
and each group’s programming settings and user
database are stored in the IPS, you can view and
print this information at any time.
You also can use the IPS to retrieve a device’s history
records. Then, you can view and print these records
at any time.
Intelligent Programmer Software User Manual
1–1
Introducing the Intelligent Programmer Software
IPS FEATURES
The IPS provides many features that make it a flexible tool for managing
your V Series System. For example, the IPS:
■ operates on a desktop PC, laptop PC, and palmtop PC with minimal
system requirements
■ provides easy-to-use menus and dialog boxes
■ is password protected
■ lets you create device configurations, which include programming
settings and a user database, in your office
■ stores as many device configurations as you have disk space for
■ lets you create new device configurations by copying and editing
existing configurations
■ lets many V Series Security Devices share the same configuration
■ can transfer data between a palmtop PC and a desktop PC or
laptop PC
■ programs and retrieves data from devices
■ can store device history records, which you can view and print at
any time
■ lets you view and print reports of IPS data at any time.
OVERVIEW OF IPS ACTIVITIES
You can use the IPS to perform the following activities, which are
described in this manual:
■ create or modify a device configuration for a V Series Security
Device or group of devices
■ transfer a configuration to a device
■ retrieve, view, and print device history records
■ retrieve a device’s programming settings and user database
■ view and print a device configuration’s programming settings
■ view and print a device configuration’s user database
■ print all data for a device or group of devices
■ backup and restore data.
1–2
Intelligent Programmer Software User Manual
Introducing the Intelligent Programmer Software
CONVENTIONS USED IN THIS MANUAL
Each activity described in this manual begins with a brief explanation of
its purpose. To help you select programming settings, read this
explanation before you perform the activity.
Step-by-step instructions also are provided for each activity. To help you
understand the steps provided for activities, review the table below,
which describes the conventions used in this manual.
Convention
Explanation
Information introduced by
Note:
Information that clarifies a discussion or additional
information that might be of interest.
Information introduced by
Tip:
Information that indicates a helpful hint for performing
a step or activity.
Caution
Icon indicating a warning about the possible
consequences of actions that might cause equipment to
be damaged or information to be lost.
Keyboard icons, such as
A, E , U, D
Icons representing a key on the PC’s keyboard. For
example, if instructions say “Press E” they mean
“Press the Enter key on the PC’s keyboard”.
BOLD
Information you type or would type if you were entering
the information provided in an example.
Underlined letter in a
word or phrase, such as
Functions or Time Zone
field
Hot key in a command, button, or field name. To select
items on menus, you can press the key with this letter
on the PC’s keyboard. To move to fields and to select
buttons in dialog boxes, you can press and hold down
A and then press the key with this letter.
Numbered steps
introduced by a phrase
such as,
Step-by-step procedure for performing an activity.
To add a token:
Instructions including the Short-hand way of indicating that you should carry out
word select. For example, the indicated command or ‘press’ the indicated button.
“Select OK.”
For more information, see page 2–13.
Instructions including the Short-hand way of indicating that you should move the
highlight bar to the indicated item. For more
word highlight. For
information, see page 2–11.
example, “Highlight the
time zone you want to set
up.”
Intelligent Programmer Software User Manual
1–3
Introducing the Intelligent Programmer Software
Convention
Explanation
The word device
Short-hand way of referring to either:
The word token
■
a V Series Magnetic Stripe Security Device (a
magnetic stripe electronic lock or controller)
■
a V Series Proximity Security Device (a proximity
electronic lock or controller)
■
a V Series Keypad Security Device (a keypad
electronic lock or controller).
Short-hand way of referring to either:
■
a card that a user uses to access a door with a V Series
Magnetic Stripe Security Device
■
a card that a user uses to access a door with a V Series
Proximity Security Device
■
a personal identification number (PIN) that a user
enters to access a door with a V Series Keypad
Security Device.
SUPPORT FOR IPS USERS
BEST provides a variety of support for IPS users, which is described
below.
V Series
document
family
In addition to this manual—the V Series Intelligent Programmer
Software User Manual—the following documents are available to help
you with the installation, start up, and maintenance of the V Series
System:
■ Getting Started with the V Series Intelligent Programmer Software
■ V Series Service Manual, which describes how to install, maintain,
and troubleshoot the V Series lock
■ Installation Instructions for V Series 83KV/93KV—
85KV/95KV Locksets
■ V Series Controller Installation Instructions
■ Installation Instructions for V Series 34HV–35HV Locksets
■ Installation Instructions for the BEST Encoder
■ V Series Handheld Terminal User Manual
■ V Series Keypad Security Device Programming Guide
■ V Series Keypad Security Device Quick Programming Guide.
To obtain these documents, contact your local BEST representative.
1–4
Intelligent Programmer Software User Manual
Introducing the Intelligent Programmer Software
Support
services
Telephone
technical
support
When you have a question or problem with the IPS or with another
component in the V Series System, your first resources for help are the
documents described above. If you can’t find a satisfactory answer,
contact your local BEST representative.
Before you call for technical support, please make sure you are at the
location where the problem exists, and that you are prepared to
provide the following information:
■ the exact wording of any error or warning messages
■ what you were doing when you encountered the problem and
exactly what happened
■ what you’ve done so far to correct the problem.
BEST representatives provide telephone technical support for all
V Series products. You can locate the representative nearest you by
calling (317) 849-2250, Monday through Friday, between 7:00 a.m. and
4:00 p.m. eastern standard time.
PC REQUIREMENTS FOR RUNNING THE IPS
To run the IPS on a desktop PC or a laptop PC, you need an IBMcompatible PC with:
■ 8088 or higher speed processor
■ 640 K of RAM (random access memory)
■ at least 10 MB of free hard disk space
■ DOS Version 3.2 or higher
■ VGA or higher resolution video graphics card.
To install and run the IPS on a palmtop PC, you need the following
components:
■ a Hewlett–Packard 100 LX or 200 LX Palmtop PC with 1 MB of RAM,
preferably 2 MB of RAM
■ a Hewlett–Packard (HP) palmtop cable (HP F1015A)
■ a PC that meets the specifications listed above to use for installing
the IPS on the palmtop.
Intelligent Programmer Software User Manual
1–5
Introducing the Intelligent Programmer Software
SETTING UP THE IPS TO WORK WITH YOUR COMPUTER SYSTEM
For instructions to install the IPS, see Getting Started with the V Series
Intelligent Programmer Software, provided with the IPS. After you
install the IPS and before you use it, you need to set up your computer
system to work with the IPS by:
■ defining the printer page size
■ selecting the printer port
■ selecting the transfer port.
Defining the
printer page
size
The printer page size is the size of the printable area on paper in your
printer. You can set the page length and the page width for the paper in
your printer.
The default page size for printing IPS reports is 55 lines in length and
80 characters in width. This page size is the size generally used for
8.5″ × 11″ paper (standard letter size).
Selecting the
printer port
The printer port is the PC port used for printing IPS reports from the
PC. Printer port options are:
■ LPT1 and LPT2, possible parallel ports on a desktop PC or laptop PC.
The HP Palmtop PC does not have a parallel port.
■ COM1 through COM4, possible communication (serial) ports on a
PC. The HP Palmtop PC has one communication port—COM1.
■ IR, the infrared port on some PCs, which is used to transmit infrared
signals to a printer with an infrared receiver. The HP Palmtop PC has
an IR port.
Selecting the
transfer port
The transfer port is the communication (serial) port used for
transferring data:
■
■
■
between the PC and a V Series Security Device
between the PC and another PC
from an enrolling station and the PC.
To set up the IPS to work with your computer system:
1. If you are using a desktop PC or a laptop PC, type INTPROG at the
program directory DOS prompt (C:\INTPROG>) and press E.
If you are using a palmtop PC, press the & . . . (More) key to access
the More Applications screen. Then, press T until a box appears
around the IPS icon and press E.
The Main menu appears as shown in Figure 1.1.
Figure 1.1
1–6
Main menu before logging in
Intelligent Programmer Software User Manual
Introducing the Intelligent Programmer Software
2. Select File (press f). The File menu appears as shown in Figure 1.2.
Figure 1.2
File menu before logging in
3. Select Login (press l). The Login dialog box, shown in Figure 1.3,
appears.
Figure 1.3
Login dialog box
4. In the Password field, type the IPS password.
Note: The default IPS password is 123456.
5. Select OK (press E). The Main menu appears as shown in
Figure 1.4.
Figure 1.4
Main menu after logging in
6. Select File (press f). The File menu appears as shown in Figure 1.5.
Figure 1.5
File menu after logging in
Intelligent Programmer Software User Manual
1–7
Introducing the Intelligent Programmer Software
7. Select Setup (press s). The Setup dialog box, shown in Figure 1.6,
appears.
Figure 1.6
Setup dialog box
8. If you want to change the printer page length, perform this step.
In the Length field, type the maximum number of lines that you
want the IPS to print on a page when printing reports. For
example, if your printer has legal-size paper and you want to print
72 lines on a page, type 72.
9. Press T.
10. If you want to change the printer page width, perform this step.
In the Width field, type the maximum number of characters that
you want the IPS to print on a line when printing reports. For
example, if you want to print 65 characters on a line, type 65.
11. If you want to change the printer port used by your PC when
printing reports, perform this step.
Press T until the printer port you want is highlighted. Then, press
the spacebar so the circle next to the port is filled in.
Note: The printer port options not available for your PC appear grayed.
12. If you want to change the transfer port used by your PC when it
communicates with a device or with another PC, perform this step.
Press T until the transfer port you want is highlighted. Then,
press the spacebar so the circle next to the port is filled in.
Note: The transfer port options not available for your PC appear grayed.
13. To save your changes and return to the Main menu, select OK
(press E).
1–8
Intelligent Programmer Software User Manual
Introducing the Intelligent Programmer Software
USING THE IPS IN HANDHELD TERMINAL MODE
V Series Security Devices can be programmed using either the V Series
Handheld Terminal, or a palmtop PC or laptop PC running the IPS. The
handheld is a passive programming device, which relies on the device’s
firmware to run. The handheld lets you perform activities for only one
device at a time and only when the handheld is connected to the
device. The handheld does not store any information.
Note: Some programming can be performed for V Series Keypad
Security Devices using the device’s keypad. For more information, see
the V Series Keypad Security Device Programming Guide.
The IPS provides far greater flexibility for programming devices than
the handheld does. The IPS lets you define the programming settings
and user database for a device in the comfort of your office. Then, you
can transfer this information to the device by connecting a laptop PC or
palmtop PC to the device.
Although you’ll generally want to use the standard IPS interface, the IPS
can emulate the handheld. In the special handheld terminal mode with
the PC connected to a device, the IPS can be used the same way you use
the handheld.
Using the IPS, the following activities can be performed only with the
IPS in the handheld terminal mode and with the PC connected to a
device:
■ programming the device to override time zone control.
See page A–3.
■ viewing the device’s system data. See page A–7.
■ resetting the device. See page A–8.
■ clearing low battery messages. See page A–11.
Intelligent Programmer Software User Manual
1–9
Introducing the Intelligent Programmer Software
1–10
Intelligent Programmer Software User Manual
2
NAVIGATING THE IPS
This chapter provides basic instructions for using the
Intelligent Programmer Software (IPS). Topics
covered include:
■ starting and logging into the IPS. See page 2–1.
■ using the IPS menus. See page 2–3.
■ using dialog boxes. See page 2–10.
■ changing the IPS password. See page 2–13.
■ logging out and exiting the IPS. See page 2–14.
STARTING AND LOGGING INTO THE IPS
To use the IPS, you need to start and log into the IPS.
When you’ve finished using the IPS, you can log out
or exit. For instructions for logging out or exiting the
IPS, see page 2–14.
Intelligent Programmer Software User Manual
2–1
Navigating the IPS
To start and log into the IPS:
1. If you are using a desktop PC or a laptop PC, type intprog at the
program directory DOS prompt (C:\INTPROG>) and press E.
If you are using a palmtop PC, press the & . . . (More) key to access
the More Applications screen. Then, press T until a box appears
around the IPS icon and press E.
The Main menu appears as shown in Figure 2.1.
Figure 2.1
Main menu before logging in
2. Select File (press f). The File menu appears as shown in Figure 2.2.
Figure 2.2
File menu before logging in
3. Select Login (press l). The Login dialog box, shown in Figure 2.3,
appears.
Figure 2.3
Login dialog box
4. In the Password field, type the IPS password.
Note: The default IPS password is 123456.
5. Select OK (press E). The Main menu appears as shown in
Figure 2.4.
Figure 2.4
2–2
Main menu after logging in
Intelligent Programmer Software User Manual
Navigating the IPS
USING THE IPS MENUS
This section describes the IPS menus and how to use them.
Main menu
The IPS Main menu, shown in Figure 2.5, lists the drop-down menus
you can select. When you select a drop-down menu from the Main
menu, the menu opens. Then, you can select an option from the dropdown menu to perform an activity.
Some options in the drop-down menus carry out a command. For
example, when you select Exit from the File menu, you immediately
exit the IPS.
Other options in the drop-down menus require additional information
to perform the activity. When you select one of these options, a dialog
box appears so you can provide the necessary information.
The following drop-down menus are listed on the Main menu:
■ File. See page 2–4.
■ Transfer. See page 2–5.
■ Devices. See page 2–5.
■ Reports. See page 2–8.
■ About. See page 2–9.
File
Transfer Devices
Figure 2.5
Reports
About
Main menu after logging in
To access a drop-down menu:
Press T until the menu is highlighted. Then, press E.
Or, press the menu’s hot key—the key on the PC’s keyboard with
the underlined letter in the menu’s name.
To select an option from a drop-down menu:
Press U or D until the option is highlighted. Then, press E.
Or, press the option’s hot key—the key on the PC’s keyboard with
the underlined letter in the option’s name.
Intelligent Programmer Software User Manual
2–3
Navigating the IPS
File menu
When you first access the IPS and select File from the Main menu, the
File menu contains only three commands—Login, Terminal and Exit.
After you log into the IPS, the File menu appears as shown in Figure 2.6.
The following commands appear on the menu:
■ Setup lets you select the page size for the printer used by your PC,
the PC’s printer port, and the port used to transfer data to or from
another PC or a V Series Security Device. For instructions, see
page 1–6.
■ Logout lets you leave the IPS running in a secure mode. For
instructions, see page 2–14.
■ Password lets you change the IPS password. For instructions, see
page 2–13.
■ Terminal lets you run the IPS in a mode that imitates the handheld
terminal. For instructions, see page A–1.
■ Backup lets you back up data or restore data. For instructions, see
page 6–16.
■ Pack DB lets you reduce the space being used by the IPS on your
PC’s hard disk. For instructions, see page 6–24.
■ Exit lets you exit the IPS. For instructions, see page 2–16.
Figure 2.6
2–4
File menu after logging in
Intelligent Programmer Software User Manual
Navigating the IPS
Transfer menu
When you select Transfer from the Main menu, the Transfer menu,
shown in Figure 2.7, appears. The following commands appear on the
Transfer menu:
■ PC to Device lets you transfer a device configuration from a
palmtop PC or laptop PC to a device. For instructions, see page 5–3.
■ Device to PC lets you transfer a device configuration from a device
to a palmtop PC or laptop PC. For instructions, see page 6–8.
■ History to PC lets you transfer history records from a device to a
palmtop PC or laptop PC. For instructions, see page 7–8.
■ PC to PC lets you transfer device configurations from a palmtop PC,
laptop PC, or desktop PC to another PC. For instructions, see
page 5–8.
Figure 2.7
Devices
Administration
menu
Transfer menu
When you select Devices from the Main menu, the Devices
Administration menu, shown in Figure 2.8, appears.
The Device Configurations list appears on the left side of the Devices
Administration menu. Before you select View Hist, Copy, Delete, or
Rename from the Devices Administration menu, you highlight a device
or group in this list. Then, when you select the command, the
command is performed for the highlighted device or group.
Figure 2.8
Devices Administration menu
Intelligent Programmer Software User Manual
2–5
Navigating the IPS
The following commands appear on the Devices Administration menu:
■ Add Group lets you add the name of a group of devices to your IPS
records so you can define a device configuration for the group. For
instructions, see page 4–3.
Note: Before you’ve added any groups or devices to your IPS records,
the Rename button, Functions . . button, Copy button, Delete button,
and Del History cannot be selected and appear grayed.
■ Add Device lets you add the name of a device to your IPS records so
you can define a device configuration for the device. Or, you can add
a device to a group. All devices in a group share the same device
configuration. For instructions, see page 4–4.
■ Rename lets you rename a device or group in your IPS records. For
instructions, see page 7–9.
■ Functions . . lets you access the Devices Functions menu, described
below, to define or change a device configuration.
Note: If you highlight a device belonging to a group in the Device
Configurations list, the Functions . . button cannot be selected and
appears grayed. A device configuration can be defined for an entire
group, but not for an individual device belonging to a group.
■ Copy lets you copy a group’s or device’s device configuration to
another group or device. For instructions, see To copy a device
configuration to an existing device or group: on page 4–5 or
see To copy a device configuration to a new device or group: on
page 4–6.
■ Delete lets you delete a device or group from your IPS records. For
instructions, see page 7–8.
■ Del History lets you delete the history records stored in the IPS for
a device. For instructions, see page 7–9.
Note: If you highlight a group in the Device Configurations list, the Del
History button cannot be selected and appears grayed. Device history
information cannot be stored for a group.
■ Close lets you exit the Devices Administration menu and return to
the Main menu.
2–6
Intelligent Programmer Software User Manual
Navigating the IPS
Devices
Functions menu
When you select Functions . . from the Devices Administration menu,
the Devices Functions menu, shown in Figure 2.9, appears. The Device
Configurations list appears on the left side of the Devices Functions
menu. Before you select any command, other than Admin . . . or Close,
from the Devices Functions menu, you highlight a device configuration
in this list. Then, when you select the command, a dialog box appears
so you can view or define the highlighted device configuration.
Figure 2.9
Devices Functions menu
The following commands appear on the Devices Functions menu:
■ Reader lets you view or define timed access features. For
instructions, see page 4–28.
■ System lets you view or select device system settings, and view or
define the token format. For instructions, see Task 3: Select device
system settings on page 4-16 and see Task 1: Define the token
format (optional) on page 4-8.
■ User Db lets you view or define the user database for the device
configuration. For instructions, see page 4–32.
■ Admin . . . lets you access the Devices Administration menu,
described above.
■ Facility lets you view or enter facility code information for the
device configuration. For instructions, see page 4–14.
■ Holidays lets you view or set up holidays for the device
configuration. For instructions, see page 4–23.
■ Time Zones lets you view or set up time zones used when defining
timed access features and the user database for the device
configuration. For instructions, see page 4–24.
■ Close lets you exit the Devices Administration menu and return to
the Main menu.
Intelligent Programmer Software User Manual
2–7
Navigating the IPS
Reports menu
When you select Reports from the Main menu, the Reports menu,
shown in Figure 2.10, appears. The Device Configurations list appears
on the left side of the Reports menu. Before you select any command,
other than Close, from the Reports menu, you highlight a device or
group of devices in this list. Then, when you select the command, the
command is carried out for the highlighted device configuration.
■ History lets you view the history records stored in the IPS for a
device. History records show information about events at a device.
For instructions, see page 6–5.
Note: If you highlight a group in the Device Configurations list, the
History button cannot be selected and appears grayed. History
information cannot be stored for a group.
■ User DB lets you view and print the user database for a selected
device configuration. For instructions, see page 6–14.
■ Functions lets you view and print the programming settings for a
selected device configuration. For instructions, see page 6–12.
Note: If you highlight a device assigned to a group in the Device
Configurations list, the Functions button and User DB button cannot be
selected and appear grayed. To view the programming settings or user
database for the device, highlight the group the device belongs to.
■ Print All lets you print all of the reports for a selected device or
group of devices. For instructions, see page 6–15.
■ Close lets you exit the Reports menu and return to the Main menu.
Figure 2.10 Reports menu
2–8
Intelligent Programmer Software User Manual
Navigating the IPS
About menu
When you select About from the Main menu, the information box
shown in Figure 2.11 appears. This information box shows the version
of the IPS that you are running and the date when this version was
released. When you’ve finished viewing this information, select OK
(press E). The Main menu reappears.
Figure 2.11 About information box
Intelligent Programmer Software User Manual
2–9
Navigating the IPS
USING DIALOG BOXES
Figure 2.12 shows three examples of dialog boxes. A dialog box
appears when you select a command from a menu and the IPS needs
more information to carry out the command. The following items might
appear in a dialog box:
■ lists. See page 2–11.
■ date fields. See page 2–11.
■ time fields. See page 2–11.
■ fields where you type information. See page 2–12.
■ radio button fields. See page 2–12.
■ check box fields. See page 2–12.
■ buttons. See page 2–13.
Note: Not every dialog box has all of these items.
Time field
List
Check
box
Field
where you
type
Radio
button
Button
Date field
Figure 2.12 Examples of dialog boxes
2–10
Intelligent Programmer Software User Manual
Navigating the IPS
Moving to a
field or list
Before you can provide information in a field, you need to move to the
field.
To move to a field or list:
Press T until the highlight appears on the field you want.
Or, press and hold down A, and then press the field’s hot key—
the key on the PC’s keyboard with the underlined letter in the field’s
name. The highlight jumps to the field.
Note: You also can press U or D until the highlight appears on the field
you want. However, you might change the setting in any radio button
fields in the dialog box.
Using lists
Some dialog boxes contain lists. When you highlight an entry in the list,
the information that appears in the fields applies to the highlighted
entry.
To highlight an entry in a list:
1. Move to the list, following the instructions above.
2. Press U or D until the highlight appears on the entry you want.
Using date
fields
Some IPS dialog boxes have date fields, which have a special format.
To enter a date:
Type the date you want, first typing two digits for the year, then two
digits for the month, then two digits for the day. Do not type
slashes. Slashes automatically appear in the field. For example, if the
date you want is January 1, 2002, type 020101.
Using time
fields
Some IPS dialog boxes have time fields, which have a special format.
To enter a time:
Type the time you want in 24-hour format, preceded by a zero if
necessary. Do not type a colon. A colon automatically appears in the
field. For example, if the time you want is 5:00 p.m., type 1700.
Note: 24:00 is not a valid entry in a time field. Instead, enter 23:59.
Intelligent Programmer Software User Manual
2–11
Navigating the IPS
Typing
information in
fields
In some fields you type numbers or letters, or a mix of numbers and
letters. When typing information in fields, keep in mind the following
guidelines:
■ If the text in the field is highlighted, the text you type replaces the
highlighted text.
■ To delete the character to the left of the cursor, press the backspace
key.
■ To delete the character the cursor is on, press M (Delete).
■ To move the cursor one character to the left, press L.
■ To move the cursor one character to the right, press R.
Using radio
buttons
Radio button fields have two or more options that appear on the screen.
The selected option is the one whose radio button is turned on—the
one with a filled circle next to it. Radio buttons work like the buttons
on a car radio—one button in a field always is turned on and only one
button can be on at a time.
To turn on a radio button:
Press and hold down A, and then press the radio button’s hot
key—the key on the PC’s keyboard with the underlined letter in the
radio button’s name. The circle next to the radio button appears
filled.
Or, move to the field, then press D or U until the radio button you
want turns on.
Using check
boxes
Check box fields are fields where an option can be enabled or disabled.
To enable the option, you check the field so an X appears in it. To
disable the option, you remove the X.
To put an X in a check box:
Press T until the check box name is highlighted, then press the
spacebar so an X appears in the box.
To remove the X from a check box:
Press T until the check box name is highlighted, then press the
spacebar so the X disappears from the box.
2–12
Intelligent Programmer Software User Manual
Navigating the IPS
Selecting
buttons
Buttons let you select a command from a dialog box or menu. In most
cases, the command is carried out as soon as you select the button. In
some cases, another dialog box appears.
To select a button other than OK or Cancel:
Press and hold down A, and then press the button’s hot key—the
key on the PC’s keyboard with the underlined letter in the button’s
name.
Or, press T until the button is highlighted, then press E.
To select an OK button:
With no button highlighted, press E.
Or, press T until the OK button is highlighted, then press E.
To select a Cancel button:
Press W (Escape).
Or, press T until the Cancel button is highlighted, then press E.
CHANGING THE IPS PASSWORD
A password is required to access most IPS features. You type this
password when you log into the IPS. If you know the current IPS
password, you can change the password. The password may be
between one and six digits.
To change the IPS password:
1. From the Main menu, select File. The File menu, shown in
Figure 2.13, appears.
Figure 2.13 File menu
Intelligent Programmer Software User Manual
2–13
Navigating the IPS
2. Select Password. The Password dialog box appears.
Figure 2.14 Password dialog box
3. In the Old Password field, type the current password.
4. In the first New Password field, type the password you want (from
one to six digits). For example, if you want the password to be
8734, type 8734.
5. In the second New Password field, type the password you want
exactly the way you typed it in the first New Password field.
6. Select OK. The Main menu reappears.
LOGGING OUT AND EXITING THE IPS
When you’ve finished using the IPS, you can log out or exit the IPS.
When you log out, the IPS remains running. However, anyone who
wants to use the IPS must first log back into the IPS. This feature helps
maintain the security of your IPS data. When you exit the IPS, the IPS
stops running. Then, you can use other software programs on your PC.
To log out of the IPS:
1. From the Main menu, select File. The File menu, shown in
Figure 2.15, appears.
Figure 2.15 File menu
2. Select Logout. A message appears asking, “Do you really want to
logout?”
2–14
Intelligent Programmer Software User Manual
Navigating the IPS
3. Select Yes. The Main menu appears as shown in Figure 2.16.
Figure 2.16 Main menu after logging out
To log back into the IPS:
1. From the Main menu, select File. The File menu appears as shown in
Figure 2.17.
Figure 2.17 File menu before logging in
2. Select Login. The Login dialog box, shown in Figure 2.18, appears.
Figure 2.18 Login dialog box
3. In the Password field, type the IPS password.
4. Select OK. The Main menu appears as shown in Figure 2.19.
Figure 2.19 Main menu after logging in
Intelligent Programmer Software User Manual
2–15
Navigating the IPS
To exit the IPS:
1. From the Main menu, select File. The File menu, shown in
Figure 2.20, appears.
Figure 2.20 File menu
2. Select Exit. The IPS stops running.
2–16
Intelligent Programmer Software User Manual
3
DEFINING YOUR
V SERIES SYSTEM
This chapter describes the entire V Series System,
which includes the Intelligent Programmer Software
(IPS). This chapter provides an overview of each of
the components of the V Series System. It also
describes the main features of the system.
This chapter also provides information about two
preliminary tasks you might perform when setting
up your V Series System:
■ filling out the user forms. See page 3–7.
■ encoding access cards or generating access
codes. See page 3–14.
COMPONENTS OF THE V SERIES SYSTEM
Magnetic stripe
electronic lock
One of the main components of the V Series System
is the magnetic stripe electronic lock. This lock can
be accessed by inserting and removing a valid
magnetic stripe card in the lock. The lock can be
programmed using a PC running the IPS or the IPS
for Windows, or a V Series Handheld Terminal.
Proximity
reader
electronic lock
Another main component of the V Series System is
the proximity electronic lock. This lock, which is
well–suited for outdoor locations, can be accessed
by holding a valid proximity card near the lock. It
supports HID and Motorola/Indala proximity cards,
and is compatible with Weigand, ABA, and custom–
formatted proximity cards. The lock can be
Intelligent Programmer Software User Manual
3–1
Defining your V Series System
programmed using a PC running the IPS or the IPS for Windows, or a
handheld.
Keypad
electronic lock
Another main component of the V Series System is the keypad
electronic lock. This lock can be accessed by entering a personal
identification number (PIN) on the lock’s keypad. This lock, which is
well-suited for outdoor locations, serves as an alternative to the
magnetic stripe electronic lock and the proximity electronic lock. The
user does not have to carry a card to access the keypad electronic lock.
The keypad electronic lock can be programmed using a PC running the
IPS or the IPS for Windows, or a handheld. Also, some programming
can be performed directly from the lock’s keypad.
Controller
The V Series Controller allows the V Series electronics to be separate
from the door’s locking mechanism and to be located up to 500 feet
away from the locking mechanism. The controller provides V Series
electronic features for use with electrically-controlled locking devices.
The controller is well-suited to provide access control for:
■ exit devices
■ glass doors
■ non-standard doors
■ turnstiles
■ doors controlled by electric strikes or magnetic locks
■ electrically-operated mortise or cylindrical locks.
The controller is suitable for use with interior and exterior doors. The
controller has an adaptable power supply input that accepts 12 or
24 volts AC or DC. A backup battery supports the controller’s
programming in the event of a power failure. All controller functions
are shut down under backup power.
The main role of the controller is to control the operation of the locking
device connected to the controller. A reader can be connected to the
controller to provide a means for users to access the door controlled by
the controller.
The controller can accept a request-to-exit signal from a lock, or a
separate request-to-exit device, such as a button, can be connected to
the controller. When someone turns a door knob with a request-to-exit
feature, or presses a request-to-exit button, the controller does not
trigger an alarm when the door is opened. If the controller is
programmed for the RQE unlock feature, the controller also unlocks the
door.
A remote unlock device, such as a button, can be connected to a
controller. This device can be located away from the door. When
someone, such as a receptionist, presses the remote unlock button, the
3–2
Intelligent Programmer Software User Manual
Defining your V Series System
controller unlocks the door if the controller is programmed for the
remote unlock feature.
The controller can monitor the door’s status. If the door is opened
without use of a valid access method, the controller can trigger a door
forced alarm. The controller can monitor whether the door has been
open too long. The controller also can supervise a tamper switch,
which can be used to protect the controller enclosure or another
device. The controller’s alarm output can trigger an external alerting
device, such as a siren or strobe light, or a security system.
Access cards,
card encoder,
and Card
Encoding
Software
The magnetic stripe electronic lock accepts magnetic stripe cards
produced by a variety of manufacturers, as well as magnetic stripe cards
manufactured by BEST. If your system uses magnetic stripe cards
manufactured by BEST, you can obtain encoded cards from your BEST
representative, or you can encode your system’s access cards yourself.
To encode access cards, you need:
■ an IBM–compatible PC with a 386 or higher speed processor, 4 MB
of RAM (random access memory), at least 10 MB of free hard disk
space, Microsoft Windows 3.1
■ a V Series Card Encoder, obtained from BEST
■ the V Series Card Encoding Software, obtained from BEST.
Enrolling
Station
Programming
methods
Handheld
terminal
The VPD–ES Enrolling Station can be connected to a PC running the IPS
and used to read proximity cards while adding token records to a
device configuration used by proximity security devices. The enrolling
station works with a variety of common proximity card formats. For a
list of compatible card formats, refer to the VPD–ES Enrolling Station
Setup and Operating Instructions.
Each V Series Security Device provides a variety of programmable
features that determine how the device operates and when users gain
access to the door. The device can be programmed using either a
handheld terminal, or a palmtop PC or laptop PC running the IPS.
Additionally, limited programming can be performed for a V Series
Keypad Security Device using its keypad.
The V Series Handheld Terminal is a passive programming device,
which relies on the V Series Security Device’s firmware to run. The
handheld lets you define or change a device’s programming settings and
user database only when the handheld is connected to the device.
When connected to the device, the handheld also lets you view a
history of up to 1000 events at the device. The handheld does not store
any information.
Intelligent Programmer Software User Manual
3–3
Defining your V Series System
Intelligent
Programmer
Software
The IPS (16–bit DOS–compatible version), which runs on a desktop PC,
laptop PC, or palmtop PC, lets you define the programming settings and
user database for a V Series Security Device in the comfort of your
office. Then, you can transfer this information to the device by
connecting a laptop PC or palmtop PC to the device.
The IPS lets you use the same programming settings and user database
to program a group of devices that you want to operate the same. Since
each device’s and each group’s programming settings and user database
are stored in the IPS, you can view and print this information at any
time.
Note: Only devices of the same type (for example, controllers, mortise
electronic locks, cylindrical electronic locks) can belong to the same
group.
You also can use the IPS to retrieve a device’s history records. Then,
you can view and print these records at any time.
Intelligent
Programmer
Software for
Windows
The IPS for Windows (32–bit Windows–compatible version), which
runs on a desktop PC or laptop PC, lets you define the programming
settings and user database for a V Series Security Device in the comfort
of your office. Then, you can transfer this information to the device by
connecting a laptop PC to the device.
The IPS for Windows lets you use the same programming settings and
user database to program a group of devices that you want to operate
the same. Since each device’s and each group’s programming settings
and user database are stored in the IPS for Windows, you can view and
print this information at any time.
Note: Only devices of the same type (for example, controllers, mortise
electronic locks, cylindrical electronic locks) can belong to the same
group.
You also can use the IPS for Windows to retrieve a device’s history
records. Then, you can view and print these records at any time.
3–4
Intelligent Programmer Software User Manual
Defining your V Series System
System
overview
Figure 3.1 shows the main components of a V Series System that uses
the IPS running on a palmtop PC to program and maintain devices. The
table below defines each of the possible components in the V Series
System. Keep in mind that your system might not include all of these
components.
Component
Definition
Card encoder
Device that reads, encodes, and erases information on a
magnetic stripe card.
Card Encoding
Software
Software that controls the Card Encoder.
Controller
Device that allows the V Series electronics to be separate
from the door’s locking mechanism and to be located up to
500 feet away from the locking mechanism. The controller
provides V Series electronic features for use with
electrically-controlled locking devices. A reader can be
connected to the controller to provide a means for users to
access the door.
Electronic lock
A battery-powered, self-contained, programmable lock that
controls access to a door.
Enrolling Station
Device that can be connected to a PC running IPS and used
to read proximity cards while adding token records to a
device configuration used by proximity security devices.
Handheld terminal
Device that lets you define programming settings and the
user database for a V Series Security Device—an electronic
lock or controller. It also lets you view access control information, such as the user database, configuration settings,
and event history. The handheld is the only equipment necessary to program and maintain the device.
Intelligent Programmer
Software (IPS) or
Intellient Programmer
Software (IPS) for
Windows
Software that lets you define programming settings and the
user database for groups of V Series Security Devices, as
well as individual devices. You also can use the IPS to
retrieve the history records from devices. The IPS lets you
view and print information about devices at any time.
Token
An access card or personal identification number (PIN)
containing identification information. A token is given to a
user and is similar to a key, letting the user gain access to a
controlled area.
Intelligent Programmer Software User Manual
3–5
Defining your V Series System
Card Encoder
Desktop PC
Enrolling Station
Access Card
Palmtop PC
Magnetic Stripe
Electronic Lock
Magnetic Stripe
Card Reader
Not shown:
Keypad Electronic Lock
Keypad Reader
Proximity Electronic Lock
Proximity Reader
Controller
Handheld Terminal
Figure 3.1
3–6
V Series System Components
Intelligent Programmer Software User Manual
Defining your V Series System
FEATURES OF THE V SERIES SYSTEM
The V Series System is an electronic access control system that can be
programmed to meet your facility’s access control needs. The system is
designed to secure your facility by granting specific access rights to
authorized people, based on a defined time schedule, for each V Series
Security Device in the system. By tracking events at the devices, the
system provides information to help you maintain the security of your
facility.
For each device in the system, you control access to the door controlled
by the device by defining:
■ which users can access the door, what access privileges each user
has, and when each user has access
■ time periods when the door automatically unlocks and then later
relocks
■ time periods when no one can access the door, except someone
with a communication token or key
■ time periods when any token with a valid facility code can access
the door.
Important features of the V Series System include:
■ electronic, battery-powered lock design with a modified BEST
chassis
■ real-time clock and calendar in the device
■ convenient retrofitting of locks
■ up to 1000 unique tokens per device
■ controlled access for each device or group of devices using up to
eight time zones
■ automatic unlock and relock features
■ storage of each device’s 1000 most recent events
■ up to 16 custom-defined holidays per device or group of devices
■ availability with magnetic stripe card reader, proximity card reader,
or keypad reader technologies
■ user-definable token format.
FILLING OUT THE USER FORMS
Use the Facility Information form, the Token & Door Information form,
and the Token by Door Information form to collect the information
needed to program the V Series Security Devices in your facility. You’ll
use the information to determine how each device operates and how
users gain access to each door.
Intelligent Programmer Software User Manual
3–7
Defining your V Series System
You’ll find it easier to fill out the user forms if you first read Chapter 4
Creating a device configuration. The section Task 6: Set up time
zones on page 4-24 is especially helpful.
Facility
Information
form
Use the Facility Information form to collect information about your
facility and its operation. Figure 3.2 and Figure 3.3 show a sample of a
completed form.
Follow the instructions on the form to provide the information
necessary for your facility. Leave blank any sections that don’t apply.
3–8
Intelligent Programmer Software User Manual
Defining your V Series System
Define up to
16 holidays
Define up to
8 time zones
Figure 3.2
Sample of a completed Facility Information form (front)
Intelligent Programmer Software User Manual
3–9
Defining your V Series System
Record
facility code
information
Record the
communication token
information
Check to
enable
daylight
savings time
Figure 3.3
3–10
Sample of a completed Facility Information form (back)
Intelligent Programmer Software User Manual
Defining your V Series System
Token & Door
Information
form and
Token by Door
Information
form
The Token & Door Information form and the Token by Door
Information form help you determine
■ the information necessary to configure the device for each door
■ the token data necessary to provide people access to each door.
Follow the instructions on the selected form to provide the information
necessary for each door in your facility. Leave blank any sections that
don’t apply.
Use either the Token & Door Information form or the Token by Door
Information form. You don’t need to complete both forms. The Token
& Door Information form is best suited to smaller facilities. The Token
by Door Information form is best suited to larger facilities.
Figure 3.4 shows a sample of the first page of a completed Token &
Door Information form. Figure 3.5 shows a sample of the first page of a
completed Token by Door Information form.
Intelligent Programmer Software User Manual
3–11
Defining your V Series System
Record
information
common to
all doors
Record
information
for each
token
Record information
common to all
tokens
Reference the
abbreviations
Figure 3.4
3–12
Sample of a completed Token & Door Information form
Intelligent Programmer Software User Manual
Defining your V Series System
Record information
common to all
tokens
Record the
doors this
information
is for
Record
information
common to
the doors
Record
information
for each
token
Figure 3.5
Sample of a completed Token by Door Information form
Intelligent Programmer Software User Manual
3–13
Defining your V Series System
ENCODING ACCESS CARDS OR GENERATING ACCESS CODES (OPTIONAL)
Next, you can encode the access cards or generate the access codes for
people who will have access to your facility. For instructions on using
the V Series Card Encoding Software, use the software’s on-line help
feature. If you don’t have a card encoder, your access cards are preprogrammed for you. If you want BEST to generate random access
codes for you, contact your BEST representative.
CREATING DEVICE CONFIGURATIONS
Next, you can create device configurations for your V Series Security
Devices, using the information you provided in the user forms. For
instructions, see Chapter 4 Creating a device configuration.
3–14
Intelligent Programmer Software User Manual
4
CREATING A DEVICE
CONFIGURATION
A device configuration includes the settings that
determine how a V Series Security Device operates.
It also includes the database that defines which
tokens can access the door controlled by the device
and under what circumstances.
You can create a device configuration for an
individual device. You can also create a device
configuration for a group of devices.
Note: Only devices of the same type (for example,
controllers, mortise electronic locks, cylindrical
electronic locks) can belong to the same group.
For example, all of the magnetic stripe controllers
for exterior doors to a particular building might
share the same device configuration. Each controller
operates exactly the same, and the same access cards
can access each door.
To program a device, you perform the following
tasks:
1. Identify the device to the Intelligent Programmer
Software (IPS) by adding the device to the
software’s records. If you want, you can add a
group and then add the device to the group.
2. Create a device configuration for one device or a
group of devices either by editing the default
configuration or by copying and editing a
configuration you’ve already defined.
Intelligent Programmer Software User Manual
4–1
Creating a device configuration
3. Connect a palmtop or laptop PC containing the device configuration
to the device and transfer the configuration to the device.
This chapter describes the first two tasks. For instructions for
transferring the device configuration to the device, see Chapter 5
Programming a V Series Security Device.
TWO APPROACHES TO CREATING A DEVICE CONFIGURATION
There are two basic approaches you can use to define a device
configuration for a V Series Security Device or group of devices:
1. Create a new device configuration from scratch.
2. Copy and edit an existing device configuration.
When you use the first approach, you provide all programming settings
and you add all of the tokens that need to access the doors controlled
by the devices to the configuration’s user database.
When you use the second approach, you copy an existing device
configuration whose settings and/or user database are similar to the
device configuration you need. Then, you can edit the settings and/or
user database to suit the needs of the devices that will use this
configuration. When you copy a device configuration to a new (or
existing) device configuration, you can indicate whether you want to
copy the user database in addition to the programming settings.
Tip: You can create one or more device configurations to serve as
models. Then, you can copy and edit one of these models to define a
new configuration for a device or group of devices.
Before you begin creating device configurations, make sure you
understand the terms and definitions described in the table below.
4–2
Component
Definition
Device
V Series Electronic Lock or V Series Controller. When you add a
device to your IPS records, you provide a 20-character name
(including spaces) for the device.
Device
configuration
Information that you define for a V Series Security Device or group
of devices. A device configuration includes the programming
settings that determine how the device(s) operate and the user
database for the device(s).
Group
Two or more devices that share the same device configuration.
When you add a group to your IPS records, you provide a 20character name (including spaces) for the group.
User database
List of all tokens for a device configuration. It includes settings
that define when each token can access the door(s).
Intelligent Programmer Software User Manual
Creating a device configuration
ADDING A GROUP
If you want to define a device configuration for a group of V Series
Security Devices, you need to add the group.
Note: For instructions to add a group when copying a device
configuration, see page 4–6.
To add a group:
1. From the Main menu, select Devices. The Devices Administration
menu, shown in Figure 4.1, appears.
Figure 4.1
Devices Administration menu
2. Select Add Group. The Add Device Group dialog box, shown in
Figure 4.2, appears.
Figure 4.2
Add Device Group dialog box
3. In the Enter Group Name field, type a name for the group (up to
20 characters, including spaces). For example, you might type
EXTERIOR - BLDG 1 to represent all of the mortise electronic locks on
exterior doors in Building 1.
4. Select OK. The Devices Administration menu reappears. The Device
Configurations list includes the group you just added. G> appears
next to the group name to indicate a group.
Intelligent Programmer Software User Manual
4–3
Creating a device configuration
ADDING A DEVICE
If you want to define a device configuration for an individual V Series
Security Device, you need to add the device to the IPS’s records. If you
want a device to use a configuration defined for a group, you need to
add the device to the group.
To add a device:
1. From the Main menu, select Device. The Devices Administration
menu, shown in Figure 4.3, appears.
Figure 4.3
Devices Administration menu
2. Select Add Device. The Add Device dialog box, shown in Figure 4.4,
appears.
Figure 4.4
Add Device dialog box
3. If you want to add the device to a group, in the Groups list, highlight
the group you want. Then, check the Add to Group check box.
If you do not want to add the device to a group, make sure the Add
to Group check box is not checked.
Tip: To check a check box, press T until the check box name is
highlighted, then press the spacebar until you see an X in the check
box. To remove the X, press the spacebar.
4–4
Intelligent Programmer Software User Manual
Creating a device configuration
4. In the Enter Device Name field, type a name for the device (up to
20 characters, including spaces). For example, you might type
EAST DOOR.
5. Select OK. The Devices Administration menu reappears. The Device
Configurations list includes the device you just added.
If you added the device to a group, the device is listed under the
group and is indented. If you didn’t add the device to a group, the
device isn’t indented, and D> appears next to the device name to
indicate a device.
COPYING AN EXISTING DEVICE CONFIGURATION
If you want to define a device configuration for a V Series Security
Device or group by copying an existing device configuration, you can:
■ Add the device or group, following the instructions in the section To
add a device: on page 4–4 or in the section To add a group: on
page 4–3. Then, copy an existing device configuration to the new
device or group.
■ Or, copy a device configuration and create the new device or group
at the same time.
To copy a device configuration to an existing device or group:
1. From the Main menu, select Device. The Devices Administration
menu, shown in Figure 4.5, appears.
Figure 4.5
Devices Administration menu
2. In the Device Configurations list, highlight the device configuration
(for a group or device) you want to copy.
Intelligent Programmer Software User Manual
4–5
Creating a device configuration
3. Select Copy. The Copy From . . . To . . . dialog box, shown in
Figure 4.6, appears. Notice that the name of the selected device
configuration appears in the dialog box title.
Figure 4.6
Copy From . . . To . . . dialog box
4. If you want to copy the selected device configuration’s user
database, check the User Db check box.
If you do not want to copy the selected device configuration’s user
database, make sure the User Db check box is not checked.
5. In the Device Configurations list, highlight the group or device
where you want to copy the selected device configuration.
6. Select Copy. A message box appears asking, “Copy . . . to . . .?”
7. To copy the device configuration, select Yes. The device
configuration is copied to the selected group or device. The Copy
From . . . To . . . dialog box reappears.
8. Select Close. The Devices Administration menu reappears.
To copy a device configuration to a new device or group:
1. From the Main menu, select Device. The Devices Administration
menu, shown in Figure 4.7, appears.
Figure 4.7
Devices Administration menu
2. In the Device Configurations list, highlight the device configuration
(for a group or device) you want to copy.
4–6
Intelligent Programmer Software User Manual
Creating a device configuration
3. Select Copy. The Copy From . . . To . . . dialog box, shown in
Figure 4.8, appears. Notice that the name of the selected device
configuration appears in the dialog box title.
Figure 4.8
Copy From . . . To . . . dialog box
4. If you want to copy the selected device configuration’s user
database, check the User Db check box.
If you do not want to copy the selected device configuration’s user
database, make sure the User Db check box is not checked.
5. Select New. The New Name dialog box, shown in Figure 4.9,
appears.
Figure 4.9
New Name dialog box
6. If you want to add a new group and copy the selected device
configuration to the group, turn on the Group radio button.
If you want to add a new device and copy the selected device
configuration to the device, turn on the Device radio button.
Tip: To turn on the Group radio button, press and hold down A, and
then press g. To turn on the Device radio button, press and hold
down A, and then press l.
7. In the Enter Unique Name field, type a name for the new group or
device (up to 20 characters, including spaces).
8. Select OK. The new device or group is created and the selected
device configuration is copied to the new group or device.
The Copy From . . . To . . . dialog box reappears. The Device
Configurations list includes the group or device you just added.
9. Select Close.
Intelligent Programmer Software User Manual
4–7
Creating a device configuration
DEFINING A DEVICE CONFIGURATION
When you define a device configuration, you provide information that
determines how the V Series Security Device(s) will work and how
people will access the door(s) controlled by the device(s). Use the
checklist below to make sure you perform each task.
❏
❏
❏
❏
Task 1:
Define the token format (optional). See page 4-8.
Task 2:
Enter facility code information. See page 4-14.
Task 3:
Select device system settings. See page 4-16.
Task 4:
Defining V Series Controller features (optional—controllers only).
See page 4-19.
❏
❏
❏
❏
❏
Task 5:
Set up holidays. See page 4-23.
Task 6:
Set up time zones. See page 4-24.
Task 7:
Define timed access features. See page 4-28.
Task 8:
Delete the temporary operator token. See page 4-31.
Task 9:
Define the user database. See page 4-32.
TASK 1: DEFINE THE TOKEN FORMAT (OPTIONAL)
Each V Series Magnetic Stripe Security Device and Proximity Security
Device is programmed at the factory to read access cards that use the
following token format:
■ Token length: 15 digits
■ Facility code length: 5 digits
■ Facility code start location: position 2
■ Card number/access code length: 6 digits
■ Card number/access code start location: position 7
■ Issue code length: 1 digit
■ Issue code start location: position 13
■ Issue code start number: 0
■ Issue code end number: 0
■ Look ahead setting: 0 (disabled)
■ Validate LRC setting: X (enabled).
Figure 4.10 shows an example of the information generally encoded on
access cards.
Facility
code
Card
Issue
number code
Access card
Figure 4.10 Access card
4–8
Intelligent Programmer Software User Manual
Creating a device configuration
V Series Keypad Security Devices are programmed with the same
default settings as magnetic stripe security devices. Usually only the
following settings are relevant for keypad security devices:
■
■
■
■
■
■
Token length
Facility code length
Facility code start location
Card number/access code length
Card number/access code start location
Validate LRC setting.
Figure 4.11 shows an example of the information generally included in
personal identification numbers (PINs).
Facility
code
Access
code
Personal identification number (PIN)
Figure 4.11 Personal identification number (PIN)
If you want to use tokens with a different token format for devices
using this configuration, you can program the devices to use tokens
with that format.
Defining the
token length
The token length is the total amount of information encoded on each
access card or the total number of digits in each PIN.
Note: Each PIN usually consists of a facility code and an access code that
uniquely identifies the user.
Defining the
facility code
format
Defining the
card number/
access code
format
A facility code generally is a unique sequence of digits that is
programmed into every device and encoded on every access card, or
included in every PIN, that belongs to the facility. When you define the
facility code format, you indicate:
■ the maximum number of digits in the facility code
■ the starting location of the facility code on the access cards or in the
PINs.
A card number or access code is a unique sequence of digits that
identifies a user. When you define the card number or access code
format, you indicate:
■ the maximum number of digits in the card number or access code
■ the starting location of the card number on the access cards or the
access code in the PINs.
Intelligent Programmer Software User Manual
4–9
Creating a device configuration
Defining the
issue code
format
An issue code generally indicates how many times an access card with a
particular card number has been issued. For example, when an access
card is first issued to someone, it normally is encoded with Issue 1. If
the access card is damaged, lost, or stolen, and a replacement card is
issued to the card holder, the card normally would be encoded with
Issue 2.
When you define the issue code format, you indicate:
■ the maximum number of digits in the issue code
■ the starting location of the issue code on the access cards
■ the range of issue codes that the device should accept.
Note: Issue codes and the look ahead feature generally are not used for
V Series Keypad Security Devices.
Using the look
ahead feature
The look ahead feature lets you program a V Series Magnetic Stripe
Security Device to accept an access card whose encoded issue code is
higher than the current issue code recorded for the card in the device’s
database. The setting for the look ahead feature determines how many
numbers higher the access card’s encoded issue code can be than the
issue code on record for the card.
For example, if you enter 2 as the look ahead setting in a device’s
configuration, the device will accept an access card whose encoded
issue code is one or two numbers higher than the issue code on record
for the card (as long as the issue code is within the acceptable issue
code range). The device would accept an access card whose encoded
issue code is 3, even if the current issue code on record for the card
is 1.
When the device accepts an access card with an encoded issue code
different from the current issue code on record for the card, the device
automatically updates its records to reflect the encoded issue code.
A special situation can occur where the device accepts an access card
with an encoded issue code lower than the current issue code on
record for the card. In this situation, the device ‘wraps around’ when
using the look ahead setting to determine whether the access card’s
encoded issue code is valid for the device.
For example, suppose:
■ The valid issue code range is from 1 to 9.
■ The look ahead setting is 1.
■ The current issue code on record for card 125 is 9.
■ Card 125’s encoded issue code is 1.
When card 125 attempts to access the door during the time zone
assigned for the access card, the device will grant access to the card.
The device also will update its records to indicate that the current issue
code for card 125 is 1.
4–10
Intelligent Programmer Software User Manual
Creating a device configuration
Determining
whether
to validate
the LRC
Caution
You can determine whether the devices using this device configuration
validate the longitudinal redundancy check (LRC). However, always
validate the longitudinal redundancy check unless a BEST
representative informs you otherwise. The LRC feature is included in
most token formats and helps verify that the devices read the card data
or PIN correctly.
Changing the device configuration’s token format will delete the
token data already defined for the device configuration. If you need
to change the token format, be sure you change the token format
before you enter facility codes and define the user database.
To change the token format:
1. From the Main menu, select Devices. The Devices Administration
menu, shown in Figure 4.12, appears.
Figure 4.12 Devices Administration menu
2. In the Device Configurations list, highlight the device or group
whose device configuration you want to define.
3. Select Functions. The Devices Functions menu, shown in
Figure 4.13, appears.
Figure 4.13 Devices Functions menu
Intelligent Programmer Software User Manual
4–11
Creating a device configuration
4. Select System. The System dialog box, shown in Figure 4.14,
appears.
Figure 4.14 System dialog box
5. Select Variable Format. The Variable Card Format dialog box, shown
in Figure 4.15, appears.
Figure 4.15 Variable Card Format dialog box
6. In the Card Length field, type the total number of digits of data
(from 1 to 99) on the access cards or in the personal identification
numbers (PINs), preceded by a zero if necessary. For example, if
there are 20 digits of data on the access cards or in the PINs, type 20.
7. In the Facility Code Length field, type the maximum number of
digits (from 0 to 9) in the facility codes for this token format. For
example, if the maximum facility code length is four digits, type 4.
If you type 0, the devices using this configuration will not check the
facility code when determining whether to grant access to a token.
8. In the Facility Code Location field, type the starting location
(from 1 to 99) of the facility code, preceded by a zero if necessary.
For example, if the facility code starts at position 3, type 03.
If you typed 0 in Step 7, type 99 here.
9. In the Card Number Length field, type the number of digits
(from 1 to 9) in the card number or the access code for this token
format.
4–12
Intelligent Programmer Software User Manual
Creating a device configuration
10. In the Card Number Location field, type the starting location
(from 1 to 99) of the card number or access code, preceded by a
zero if necessary.
11. In the Issue Code Length field, type the number of digits
(from 0 to 4) in the issue code for this token format. If you type 0,
the devices will not check the issue code when determining
whether to grant access to a token.
Note: Issue codes and the look ahead feature generally are not used for
V Series Keypad Security Devices. If you are changing the token format
for a keypad security device, you generally can skip Step 12, and Step
14 through Step 16.
12. In the Issue Code Location field, type the starting location
(from 1 to 99) of the issue code, preceded by a zero if necessary.
If you typed 0 in Step 11, type 99 here and skip Step 14, Step 15,
and Step 16.
13. If the devices should validate the longitudinal redundancy check
(LRC), check the Validate LRC check box.
If the devices should not validate the LRC, make sure this check box
is not checked.
Note: Always check this box for V Series Keypad Security Devices.
Tip: To check a check box, press T until the check box name is
highlighted, then press the spacebar until you see an X in the check
box. To remove the X, press the spacebar.
14. In the Issue Code Range Start field, type the lowest-numbered issue
code that the devices should accept, preceded by enough zeros to
replace the digits you see (the total number of digits in the issue
code for the selected token format). The devices will reject any
tokens with issue codes lower than this number.
For example, if the devices should reject any token with an issue
number lower than 4 and the issue code for the selected token
format has one digit, type 4.
15. In the Issue Code Range End field, type the highest-numbered issue
code that the devices should accept, preceded by enough zeros to
replace the digits you see (the total number of digits in the issue
code for the selected token format). The devices will reject any
tokens with issue codes higher than this number.
For example, if the devices should reject any token with an issue
number higher than 8 and the issue code for the selected token
format has one digit, type 8.
Intelligent Programmer Software User Manual
4–13
Creating a device configuration
16. In the Look Ahead field, type the setting that determines if a valid
token with an issue code different from the issue code currently on
record for that token can access the doors. Type enough zeros
before the setting to replace the digits you see (the total number of
digits in the issue code for the selected token format). For more
information, see page 4–10.
For example, if the devices should accept a token with an issue
code up to three numbers higher than the current issue code on
record for that token, type 3.
17. Select OK. A message appears asking, “The cards, facility codes and
device history databases will be deleted. Are you sure?”
18. To accept your changes, select Yes. The System dialog box
reappears.
19. Select OK. The Devices Functions menu reappears.
TASK 2: ENTER FACILITY CODE INFORMATION
So that the V Series Security Devices can verify the facility code on
access cards or included in personal identification numbers (PINs), you
need to add the facility codes you want the devices to accept. You also
need to define the range of card numbers or access codes that is
acceptable for each facility code. The devices will reject tokens with
card numbers or access codes outside this range. Use the information
you provided on the Facility Information form (see page 3–8).
What is a
facility code?
A facility code generally is a unique sequence of digits that is
programmed into every device and encoded on every access card, or
included in every PIN, that belongs to the facility. The facility code
helps ensure the security of a facility’s devices since an access card or
PIN without the facility code can’t open a door even if the card has a
valid card number or the PIN has a valid access code.
You can program a device with up to eight facility codes, although in
most cases only one facility code is needed. However, if you add
multiple facility codes, the range of valid card numbers or access codes
for one facility code normally shouldn’t overlap with the range of valid
card numbers or access codes for another facility code. If a device’s
user database includes access cards with the same card number or PINs
with the same access code, you can’t be certain which user is
associated with events recorded in the device’s history for this card
number or access code.
4–14
Intelligent Programmer Software User Manual
Creating a device configuration
For example, you could define the following facility codes and card
number or access code ranges:
Starting Card No.
or Access Code
Ending Card No.
or Access Code
12345
1
199
54321
200
299
13579
300
399
Facility Code
To enter facility code information:
1. Make sure you’re viewing the Devices Functions menu and the
device configuration you’re defining is highlighted.
2. Select Facility. The Facility dialog box, shown in Figure 4.16,
appears.
Figure 4.16 Facility dialog box
3. In the Facility list, highlight the facility number that you want to
enter information for.
4. In the FC-Code field, type the facility code, preceded by enough
zeros to replace the digits you see (the total number of digits in the
facility code for the selected token format). For example, if the
facility code is 12345 and the facility code for the selected token
format has five digits, type 12345.
5. In the Starting Card field, type the lowest card number or access
code (for the facility code entered in Step 4) that the devices should
accept. Type enough zeros before the card number or access code
to replace the digits you see (the total number of digits in the card
number or access code for the selected token format). The devices
will reject any tokens with card numbers or access codes lower than
this number.
For example, if the lowest card number or access code for this
facility code is 1 and the card number or access code for the
selected token format has six digits, type 000001.
Intelligent Programmer Software User Manual
4–15
Creating a device configuration
6. In the Ending Card field, type the highest card number or access
code (for the facility code entered in Step 4) that the devices should
accept. Type enough zeros before the card number or access code
to replace the digits you see (the total number of digits in the card
number or access code for the selected token format). The devices
will reject any tokens with card numbers or access codes higher
than this number.
For example, if the highest card number or access code for this
facility code is 199 and the card number or access code for the
selected token format has six digits, type 000199.
7. For each additional facility code you want to define, repeat Step 3
through Step 6.
8. When you’ve finished entering facility code information, select OK.
The Devices Functions menu reappears.
TASK 3: SELECT DEVICE SYSTEM SETTINGS
When you define system settings for the device configuration, you:
■ add a communication token and password
■ select the daylight savings time setting
■ indicate whether the device configuration is for a V Series Controller
or group of controllers (or for a V Series Electronic Lock or group of
electronic locks)
■ select the chassis type if the device configuration is for an electronic
lock or group of electronic locks.
When defining system settings, use the information you provided on
the Facility Information form (see page 3–8).
Adding a
communication
token and
password
You need to add a permanent communication token to replace the
temporary communication token used to access V Series Security
Devices for initial programming. The permanent communication token
lets you access the devices at any time to program them. The same
permanent communication token generally is used for all the devices in
your system.
You must add at least one communication token and you can have a
maximum of two. You pick the password you want to use for each
communication token. The password can be between one and six
digits.
Selecting a
daylight
savings time
setting
4–16
Each device has an internal clock/calendar that keeps track of the
current date and time. The device needs to know the date and time to
operate correctly and to keep an accurate record of all events at the
device.
Intelligent Programmer Software User Manual
Creating a device configuration
You need to indicate whether the devices using the device
configuration are located in an area that changes to daylight savings
time for part of the year. If you program the devices for daylight savings
time, the devices automatically adjust their clocks ahead one hour in
the spring and back one hour in the fall on the appropriate dates.
Note: In the U.S., daylight savings time begins on the first Sunday in
April at 2:00 a.m. and ends on the last Sunday in October at 2:00 a.m.
Selecting a
controller
setting
You need to indicate whether controllers or electronic locks are using
the device configuration. Door status features are available for
controllers. For information about these features, see page 4–19.
Selecting the
chassis type
If electronic locks (not controllers) are using the device configuration,
you need to identify the lock chassis type (cylindrical or mortise). This
setting is used to program electronic locks using this device
configuration to operate their motors for the appropriate duration
when operating the lock. The cylindrical motor is required to run
slightly longer than the mortise motor.
Note: Cylindrical chassis types have a figure-eight core in the knob or
lever. Mortise chassis types have a figure-eight core in the escutcheon
or none at all.
To select device system settings:
1. Make sure you’re viewing the Devices Functions menu and the
device configuration you’re defining is highlighted.
2. Select System. The System dialog box, shown in Figure 4.17,
appears.
Figure 4.17 System dialog box
3. In the Comm Card #1 field, type the card number or access code for
the communication token, preceded by enough zeros to replace the
digits you see (the total number of digits in the card number or
access code for the selected token format). For example, if the
communication token number or PIN is 817 and the card number or
access code for the selected token format has six digits, type 000817.
Intelligent Programmer Software User Manual
4–17
Creating a device configuration
Note: Remember, you must define at least one communication token for
the device configuration.
4. In the Password field next to the Comm Card #1 field, type the
password (from 1 to 6 digits) for the communication token,
preceded by enough zeros to total six digits. After you use the
communication token at a device, you enter this password to access
programming and history features.
For example, if you want the password for the main
communication token to be 122988, type 122988.
5. In the Comm Card #2 field, type the card number or access code for
an additional communication token, preceded by enough zeros to
replace the digits you see (the total number of digits in the card
number or access code for the selected token format). You don’t
have to define two communication tokens for the device
configuration.
6. In the Password field next to the Comm Card #2 field, type the
password for the additional communication token, preceded by
enough zeros to total six digits.
7. If the devices using this device configuration are located in an area
that changes to daylight savings time, check the Daylight Savings
Time check box.
If the devices are located in an area that does not change to
daylight savings time, make sure this check box is not checked.
Tip: To check a check box, press T until the check box name is
highlighted, then press the spacebar until you see an X in the check
box. To remove the X, press the spacebar.
8. If controllers are using this device configuration, check the
Controller check box.
If electronic locks are using this device configuration, make sure
this checkbox is not checked.
9. If electronic locks are using this device configuration and they have
a cylindrical chassis, turn on the Cylindrical radio button.
If the locks have a mortise chassis, turn on the Mortise radio
button.
Tip: To turn on the Cylindrical radio button, press and hold down A,
and then press y. To turn on the Mortise radio button, press and hold
down A, and then press m.
10. Select OK. The Devices Functions menu reappears.
4–18
Intelligent Programmer Software User Manual
Creating a device configuration
TASK 4: DEFINING V SERIES CONTROLLER FEATURES (OPTIONAL—
CONTROLLERS ONLY)
If V Series Controllers are using this device configuration, you need to
define special features available only for controllers. To define these
features, you:
■ select the door contact type
■ select the door forced alarm setting
■ select a RQE unlock setting
■ select a remote unlock device setting
■ define the door open too long feature
■ select the alarm output duration.
When defining controller features, use the information you provided on
the Token & Door Information form or the Token by Door Information
form (see page 3–11).
Selecting the
door contact
type
You need to indicate whether the door contact for controllers using this
device configuration is normally closed or normally open. By default,
the door contact setting is normally open.
Selecting the
door forced
alarm feature
You need to indicate whether the controllers using this device
configuration should trigger an alarm when the door controlled by the
controller is opened without use of a valid access method. When the
controller triggers a door forced alarm, the controller’s alarm output is
activated for the number of seconds selected for the alarm output
duration. By default, the door forced alarm feature is turned off.
Note: An alerting device, such as a siren or strobe light, or a security
system generally is connected to the controller’s alarm output.
Using the RQE
unlock feature
A controller can accept a request-to-exit signal from a lock or a separate
request-to-exit device, such as a button, can be connected to a
controller. When someone turns a door knob with a request-to-exit
feature, or presses a request-to-exit button, the controller does not
trigger an alarm when the door is opened. If the controller is
programmed for the RQE unlock feature, the controller also unlocks the
door. The request-to-exit feature usually is used to let people out of an
area secured by a lock that remains locked all the time, such as a
magnetic lock. By default, the request-to-exit feature is turned off.
Intelligent Programmer Software User Manual
4–19
Creating a device configuration
Using the
remote unlock
feature
Defining the
door open too
long feature
A remote unlock device, such as a button, can be connected to a
controller. This device can be located away from the door. When
someone, such as a receptionist, presses the remote unlock button, the
controller unlocks the door if the controller is programmed for the
remote unlock feature. By default, the remote unlock feature is turned
off.
You can program the controllers using this device configuration to
monitor whether the door has not latched because it did not close
correctly or because it has been propped open. This feature helps
maintain the security of the area that the door provides access to. For
example, if the default settings are used, the following events take
place.
Suppose the controller has granted access to someone who enters the
secured area and the door has been propped open. For 30 seconds after
the end of the unlock duration nothing happens. This period is called
the delay duration. It provides time for the person granted access to
enter the secured area and close the door.
If the door remains open at the end of the delay duration, the reader
connected to the controller triggers a local alarm (if equipped to do so,
the reader sounds the alarm and flashes its red LED), warning people
nearby that the door is open. If the door remains open, the local alarm
continues for 60 seconds. This time period is called the warning
duration.
If the door remains open at the end of the warning duration, the
controller activates its alarm output. If the door remains open, the
controller continues to activate its alarm output for 60 seconds.
When you select the door open too long feature for the controllers
using this device configuration, you can change:
■ the delay duration
■ the warning duration
■ the alarm duration.
You also can eliminate one or two of these durations. For example, if
you want a local warning alarm to begin to sound as soon as the unlock
duration ends, you can change the delay duration to 0.
Selecting the
alarm output
duration
4–20
The default alarm output duration is 120 seconds. When the controller
triggers a door forced alarm or a tamper alarm, it activates its alarm
output for 120 seconds. You can change this duration.
Intelligent Programmer Software User Manual
Creating a device configuration
To define controller features:
1. Make sure you’re viewing the Devices Functions menu and the
device configuration you’re defining is highlighted.
2. Select System. The System dialog box, shown in Figure 4.18,
appears.
Figure 4.18 System dialog box
3. If the Controller check box is not checked, check this check box.
Tip: To check a check box, press T until the check box name is
highlighted, then press the spacebar until you see an X in the check
box. To remove the X, press the spacebar.
4. Select Door Status. The Door Status dialog box, shown in
Figure 4.19, appears.
Figure 4.19 Door Status dialog box
5. If the door contact connected to the controllers using this device
configuration is normally closed, turn on the NC radio button.
If the door contact is normally open, turn on the NO radio button.
Tip: To turn on the NC radio button, press and hold down A, and then
press c. To turn on the NO radio button, press and hold down A,
and then press n.
Intelligent Programmer Software User Manual
4–21
Creating a device configuration
6. If the controllers should trigger door forced alarms, check the Door
Forced check box.
If the controllers should not trigger door forced alarms, make sure
this check box is not checked.
7. If the controllers use the RQE unlock feature, check the RQE Unlock
check box.
If the controllers do not use the RQE unlock feature, make sure this
check box is not checked.
8. If the controllers use the remote unlock feature, check the Remote
Unlock check box.
If the controllers do not use the remote unlock feature, make sure
this check box is not checked.
9. If the controllers use the door open too long feature, check the
DOTL check box.
If the controllers do not use the door open too long feature, make
sure this check box is not checked.
10. In the DOTL Delay Duration field, type the number of seconds (from
1 to 999) the controllers should wait after the unlock duration ends
before triggering a local alarm, preceded by zeros if necessary. For
example, if the controllers should wait 60 seconds, type 060.
To indicate no delay, type 000.
11. In the DOTL Warning Duration field, type the number of seconds
(from 1 to 998) a local warning alarm should sound, preceded by
zeros if necessary. For example, if the local alarm should sound for
two minutes, type 120.
To indicate that no local warning alarm should sound (at the end
of the delay duration a remote alarm is triggered), type 000.
To indicate that the local warning alarm should sound until the
door is closed (no remote alarm is triggered), type 999.
12. In the DOTL Alarm duration field, type the number of seconds (from
1 to 998) the controller should activate its alarm output for a door
open too long alarm, preceded by zeros if necessary. For example, if
the controller should activate its alarm output for 90 seconds,
type 090.
To indicate that the remote alarm should continue until the door
is closed, type 999.
4–22
Intelligent Programmer Software User Manual
Creating a device configuration
13. In the Alarm Output Dur field, type the number of seconds (from 1
to 998) the controller should activate its alarm output for a door
forced alarm or a tamper alarm, preceded by zeros if necessary. For
example, if the controller should activate its alarm output for
60 seconds, type 060.
To indicate that the controller should activate its alarm output for
.5 seconds, type 000.
To indicate that the alarm output should remain activated until
the alarm condition no longer exists, type 999.
14. Select OK. The System dialog box reappears.
15. Select OK. The Devices Functions menu reappears.
TASK 5: SET UP HOLIDAYS
To configure the V Series Security Devices using this device
configuration for operation on holidays, you need to define each
holiday you listed on the Facility Information form (see page 3–8). A
holiday is a time period usually associated with a calendar holiday. You
can program up to 16 holidays.
Each holiday can span any time period you designate. For example, one
holiday might be defined as half a day. Another holiday might span an
entire week. For each holiday, you provide the date and time when the
holiday starts, as well as the date and time when the holiday ends.
Note: Do not enter 24:00 to indicate the end of a holiday. Instead, enter
23:59.
To set up holidays:
1. Make sure you’re viewing the Devices Functions menu and the
device configuration you’re defining is highlighted.
2. Select Holidays. The Holidays dialog box, shown in Figure 4.20,
appears.
Figure 4.20 Holidays dialog box
3. On the Holiday list, highlight the holiday you want to define.
Intelligent Programmer Software User Manual
4–23
Creating a device configuration
4. In the Start Date field, type the date when the holiday will start, first
typing the year, then the month, then the day. For example, if the
holiday will start on December 31, 2000, type 001231.
5. In the Start Time field, type the time, in 24-hour format, when the
holiday will start. For example, if the holiday will start at 1:00 p.m.,
type 1300.
6. In the End Date field, type the date when the holiday will end. For
example, if the holiday will end on January 2, 2001, type 010102.
7. In the End Time field, type the time when the holiday will end. For
example, if the holiday will end at 7:00 a.m., type 0700.
8. For each additional holiday you want to define, repeat Step 3
through Step 7.
9. When you’ve defined all the holidays you want, select OK. The
Devices Functions menu reappears.
TASK 6: SET UP TIME ZONES
Before you can select the settings that determine when each valid token
can access doors controlled by V Series Security Devices using this
device configuration, and the settings that determine when special
access features are in effect, you need to define the time zones for the
devices. Use the information you provided on the Facility Information
form (see page 3–8).
In this task, you define when each time zone occurs. You’ll use these
time zones when you perform Task 7 to define timed access features
and Task 8 to define the user database.
What is a time
zone?
Time zones are blocks of time that occur each week and/or on holidays.
You define time zones to set up days and times when:
■
■
■
■
What is a time
interval?
4–24
valid tokens can access the doors controlled by devices using this
device configuration
the doors automatically unlock (or unlock when a valid token
accesses the door) and then later relock
all tokens in the facility can access the doors
the doors automatically lock down, denying all tokens access, and
then later resume normal operation.
Each time zone can have up to three intervals. Intervals are time periods
when selected tokens can access the doors or a special access feature is
in effect. For each interval, you define the start time and end time. You
also indicate which days each interval is in effect.
Intelligent Programmer Software User Manual
Creating a device configuration
Each time zone can have up to three intervals. If the time zone spans
midnight, you must define two intervals—one before midnight and one
after midnight.
Note: Do not enter 24:00 to indicate the start time of a time interval.
Instead, enter 00:00.
Defining time
zone numbers
You can define the time zones numbered one through eight. However,
Time Zone 0 and Time Zone 9 are already defined for you.
■ Time Zone 0 = Never
■ Time Zone 9 = Always (24 hours per day, 7 days per week,
plus holidays)
How do I define
time zones and
their intervals?
The best way to understand how to define time zones and intervals is to
consider an example. Suppose you’re defining a device configuration
for a device on a door that provides access to the offices for an entire
department. Also, suppose the door needs to be accessed by the
following groups of employees:
■ Managers. Managers are allowed to access the door any time except
on Sunday mornings from 6:00 a.m. until noon and on holidays.
■ Full-time employees. Full-time employees are allowed to access
the door from 7:00 a.m. until 6:00 p.m. on Mondays through Fridays.
■ Several part-time employees. Part-time employees are allowed to
access the door from 7:00 a.m. until 1:00 p.m. on Mondays,
Wednesdays, and Fridays. They’re also allowed to access the door on
Saturdays from 11:30 a.m. until 5:30 p.m.
■ Housekeeping staff. Housekeeping personnel are allowed to
access the door from 5:00 p.m. until midnight on Sundays through
Thursdays.
■ Security staff. Security personnel are allowed to access the door at
any time, including on Holidays.
Suppose you also want to enable the following features for the door:
■ The door should automatically unlock on Thursdays at 9:30 a.m. and
then relock at 11:30 a.m. Each week during this time, participants in
a local professional association hold a meeting at the department’s
offices. Participants include employees from other companies, who
don’t have tokens for the facility.
■ The device should let all tokens in the facility access the door on
Mondays from 9:00 a.m. until 10:00 a.m. Each week during this time,
an interdepartmental meeting is held at the department’s offices.
■ The door should never automatically lock down and deny all tokens
entry.
Intelligent Programmer Software User Manual
4–25
Creating a device configuration
Figure 4.21 shows how you would complete the time zones section of
the Facility Information form to meet the needs described in the
previous example. Notice, that you don’t need to define a time zone for
the security staff. You can assign Time Zone 9, one of the predefined
time zones, to these employees’ tokens to indicate that they should
always be allowed to access the door.
Similarly, you don’t need to define a time zone for the feature that
automatically locks down the door. You can assign Time Zone 0, the
other predefined time zone, for this feature to indicate that the feature
should never be enabled.
Figure 4.21
4–26
Defining time zones and their intervals—an example
Intelligent Programmer Software User Manual
Creating a device configuration
To set up time zones:
1. Make sure you’re viewing the Devices Functions menu and the
device configuration you’re defining is highlighted.
2. Select Time Zones. The Time Zones dialog box, shown in
Figure 4.22, appears.
Figure 4.22 Time Zones dialog box
3. On the Time Zone list, highlight the time zone you want to set up.
The Time Zone dialog box shows the settings for Interval 1 of the
selected time zone.
4. In the Interval field, turn on the radio button for the time interval
(1, 2, or 3) you want to set up. The Time Zone dialog box shows the
settings for the selected interval in the selected time zone.
5. In the Start Time field, type the time, in 24-hour format, when the
interval will start. For example, if the interval will start at 1:00 p.m.,
type 1300.
6. In the End Time field, type the time when the interval will end. For
example, if the interval will end at 6:00 p.m., type 1800.
7. For each day you want the interval to be active, check the
appropriate Days of the Week checkbox. For example, if you want
the interval to be active on Sundays, Saturdays, and Holidays, check
the D check box, the S check box, and the H checkbox.
8. For each interval you want to set up for the selected time zone,
repeat Step 4 through Step 7.
9. For each time zone you want to set up, repeat Step 3 through
Step 8.
10. When you’ve set up all the time zones you want, select OK. The
Devices Functions menu reappears.
Intelligent Programmer Software User Manual
4–27
Creating a device configuration
TASK 7: DEFINE TIMED ACCESS FEATURES
You need to program the unlock duration—the number of seconds
that the doors remain unlocked when accessed by a token—for the
V Series Security Devices using this device configuration. You can also
select time zones for three timed access features:
■ Door lock time zone. This feature lets you select a time zone when
the doors automatically lock down, denying all valid tokens access,
and then later resume normal operation.
■ Facility code only time zone. This feature lets you select a time
zone when all tokens with a valid facility code can access the doors.
■ Door unlock time zone. This feature lets you select a time zone
when the doors automatically unlock (or unlock when a valid token
accesses the door) and then later relocks.
You determine when each timed access feature is in effect by assigning
one of the time zones you defined in Task 6, or one of the predefined
time zones, to the feature. If you want a timed access feature never to
be in effect, assign Time Zone 0. If you want a timed access feature
always to be in effect, assign Time Zone 9.
If any time zones you assign for timed access features overlap, the most
secure feature is in effect, according to the priority listed below. For
example, if the time zone selected for the door unlock feature overlaps
the time zone selected for the door lock feature, the door lock feature is
in effect when the time zones overlap.
1. Door lock time zone
2. Facility code only time zone
3. Door unlock time zone
When programming timed access features, use the information you
provided on the Token & Door Information form or the Token by Door
Information form (see page 3–11).
Setting the
unlock duration
Unlock duration is the programming function that determines how long
doors controlled by devices using this device configuration remain
unlocked when accessed by a token. By default, the unlock duration is
3 seconds.
Selecting a
time zone for
timed
automatic
lockdown
Use the door lock feature to program regular time periods when you
don’t want anybody to be able to access the doors. The only way to
access a door when the door lock feature is in effect is with the
communication token (or by key). By default, the door lock time zone is
0 (never).
4–28
Intelligent Programmer Software User Manual
Creating a device configuration
Selecting a
time zone for
facility code
access
Use the facility code only feature to program regular time periods when
you want anyone with a token that has a valid facility code to be able to
access the doors. This feature generally is used for devices that protect
common entry points to buildings or areas where many people need
access. Since you can program no more than 1000 tokens to access a
door, you can also use this feature when more than 1000 tokens need to
access a door.
For example, you could let all users with tokens that have a valid facility
code access the doors at the main entrances to a building during normal
business hours, such as on Mondays through Saturdays, from 8:00 a.m.
to 10:00 p.m.
By default, the facility code only time zone is 0 (never).
Caution
Selecting a
time zone for
timed
automatic
unlocking
If someone loses an access card, the card can be used to access the
door during the facility code only time zone. To prevent the card
from being used to access the door, you can disable the facility code
only time zone, or you can change the facility code for the door and
all of the cards that access it.
Use the door unlock feature to program regular time periods when you
want the doors to unlock and then later relock. You can determine
whether the doors automatically unlock at the start of a door unlock
time interval or whether the doors unlock only when accessed by a
valid user token.
For example, you can use the door unlock feature for devices that
protect conference room doors that you want to remain closed, but
unlocked, for selected time periods. If you don’t enable the first card
unlock feature, the doors automatically unlock at the start of a door
unlock time interval. The doors remain unlocked until the end of the
door unlock time interval.
You might use the door unlock feature and the first card unlock feature
for the doors at the front of a building. For example, suppose you’d like
the doors to unlock at 8:00 a.m. on Mondays through Fridays, but only
if someone has arrived. You would also like the doors to relock at
5:00 p.m. each day. For the door unlock time zone, you can assign a
time zone defined to start at 8:00 a.m. and end at 5:00 p.m. on Mondays
through Fridays. You can also enable the first card unlock feature.
If the first valid token to access the door doesn’t do so until 8:15 a.m.,
the door remains locked until 8:15 a.m. and then unlocks when
accessed by the valid token. If no valid token accesses the door on a
particular day, the door remains locked all day.
By default, the door unlock time zone is 0 (never). By default, the first
card unlock feature is disabled.
Intelligent Programmer Software User Manual
4–29
Creating a device configuration
To define timed access features:
1. Make sure you’re viewing the Devices Functions menu and the
device configuration you’re defining is highlighted.
2. Select Reader. The Reader dialog box, shown in Figure 4.23,
appears.
Figure 4.23 Reader dialog box
3. In the Unlock Duration field, type the number of seconds
(from 3 to 99) the doors controlled by devices using this device
configuration should remain unlocked when accessed by a token,
preceded by a zero if necessary. For example, if the doors should
remain open for 5 seconds, type 05.
To indicate .5 seconds, type 00.
For more information, see page 4–28.
Note: If the Controller check box on the System dialog box is checked,
the range for the unlock duration is 0 to 99. If the Controller check box
is not checked, the range is 3 to 99.
4. In the Door Lock TZ field, type the time zone number (from 0 to 9)
indicating when you don’t want any tokens other than a valid
communication token to be able to unlock the doors.
To indicate one of the time zones you defined in Task 6, type the
time zone number (from 1 to 8). To indicate never, type 0.
For more information, see Selecting a time zone for timed
automatic lockdown on page 4-28.
5. In the FC-Code TZ field, type the time zone number indicating when
you want all tokens with a valid facility code to be able to unlock the
doors. To indicate one of the time zones you defined in Task 6, type
the time zone number (from 1 to 8).
To indicate never, type 0. To indicate always, type 9.
For more information, see Selecting a time zone for facility code
access on page 4-29.
4–30
Intelligent Programmer Software User Manual
Creating a device configuration
6. In the Door Unlock TZ field, type the time zone (from 1 to 8)
indicating when you want the doors to remain unlocked.
To indicate one of the time zones you defined in Task 6, type the
time zone number (from 1 to 8). To indicate never, type 0.
For more information, see Selecting a time zone for timed
automatic unlocking on page 4-29.
7. If you want the doors to unlock for the door unlock time zone
(defined in Step 6) when a valid token accesses the door, check the
First Card Unlock check box.
If you want the doors to unlock automatically at the beginning of
the door unlock time zone, make sure the First Card Unlock check
box is not checked.
For more information, see Selecting a time zone for timed
automatic unlocking on page 4-29.
8. Select OK. The Devices Functions menu reappears.
TASK 8: DELETE THE TEMPORARY OPERATOR TOKEN
When you changed the device configuration’s facility code from the
factory default setting in Task 2, you disabled the temporary operator
token. To keep the user database accurate and up-to-date, you need to
delete the temporary operator token number from the user database.
To delete the temporary operator token:
1. Make sure you’re viewing the Devices Functions menu and the
device configuration you’re defining is highlighted.
2. Select User Db. The User Database dialog box, shown in Figure 4.24,
appears.
Figure 4.24 User Database dialog box
3. In the Card# list, highlight Card # 999998.
4. Select Delete. A message box appears asking, “Do you really want to
delete this?’
Intelligent Programmer Software User Manual
4–31
Creating a device configuration
5. To delete the token, select OK. The User Database dialog box
reappears. The token you deleted no longer appears on the Card#
list.
6. Select Close. The Devices Functions menu reappears.
TASK 9: DEFINE THE USER DATABASE
The user database describes all of the tokens that can access the doors
controlled by the V Series Security Devices using this device
configuration. When defining the user database for the device
configuration, you can:
■ add tokens
■ enroll proximity cards
■ add a range of access cards
■ modify tokens
■ delete a token
■ delete a range of access cards.
Note: Features involving a range of tokens generally are not used for
V Series Keypad Security Devices since the use of consecutive access
codes can compromise the security of your access control system.
Tip: When you’ve finished defining the user database, remember to
review it to make sure it’s complete and accurate.
Adding a token
You can add tokens that need access to the doors controlled by devices
using this device configuration. For each token, you enter:
■ the card number or access code
■ the time zone representing the time periods when you want the
token to be able to access the door
■ the expiration date
■ the issue code
■ the deadbolt override setting
■ the passage mode setting.
When adding tokens, use the information you provided on the Token &
Door Information form or the Token by Door Information form (see
page 3–11).
Note: Issue codes generally are not used for V Series Keypad Security
Devices.
4–32
Intelligent Programmer Software User Manual
Creating a device configuration
Assigning the time zone
For each token you add for the devices using this device configuration,
you assign a time zone representing the time periods when you want
the token to be able to access the doors. You can select one of the time
zones you defined in Task 6, or one of the predefined time zones. If you
want a token never to be able to access the doors, assign Time Zone 0.
If you want a token always to be able to access the doors, assign Time
Zone 9.
For information about defining time zones, see page 4–24.
Setting deadbolt override
If you grant the deadbolt override privilege to a token, the token can
access a door controlled by an electronic lock using this device
configuration even when the door’s deadbolt is thrown.
Note: The deadbolt override feature applies only to electronic locks
with a mortise deadbolt function chassis.
Setting passage mode
When a user with the passage mode privilege for a device uses his or
her token, hears the door unlock, and uses his or her token again within
the unlock duration, the door will remain unlocked. This feature can be
used only during the time zone assigned to the token.
When a door is unlocked using the passage mode feature, the door
remains unlocked until someone with the passage mode privilege locks
the door. The door also will relock if a door lock time interval or a
facility code only time interval begins. If you give tokens the passage
mode privilege, you might want to define a brief door lock time interval
at the end of each work day to make sure each door is relocked. For
more information, see Selecting a time zone for timed automatic
lockdown on page 4-28.
Similarly, if the user uses his or her token when the door is in passage
mode, the user can relock the door by using the token again within the
unlock duration. This feature can be used at any time although it does
not relock a door during a door unlock time zone.
For information about setting the unlock duration, see page 4–28.
Tip: Instead of entering his or her personal identification number (PIN)
twice to use the passage mode feature, a user can enter his or her PIN
and press *, then press #.
Note: To add a range of consecutively numbered access cards, see
page 4–38.
Intelligent Programmer Software User Manual
4–33
Creating a device configuration
To add a token:
1. Make sure you’re viewing the Devices Functions menu and the
device configuration you’re defining is highlighted.
2. Select User Db. The User Database dialog box, shown in Figure 4.25,
appears.
Figure 4.25 User Database dialog box
3. Select Add/Modify. The Add/Modify Card dialog box, shown in
Figure 4.26, appears.
Figure 4.26 Add/Modify Card dialog box
4. In the Card # field, type the token’s card number or access code,
preceded by enough zeros to replace the zeros you see (the total
number of digits in the card number or access code for the selected
token format). For example, if the card number is 123 and the card
number for the selected token format has six digits, type 000123.
Note: If you’re adding a token for keypad security devices, you can
select PinGen if you want the IPS to generate the access code. Then the
IPS completes the Card Number field with a randomly generated access
code that has the number of digits in the access code for the selected
token format.
5. In the Time Zone field, type the number of the time zone
representing the time periods when you want the token to be able
to access the doors controlled by devices using this device
configuration. Type the number of one of the time zones you
defined in Task 6 (from 1 to 8), or type 0 for never, or type 9 for
always.
For information about defining time zones, see page 4–24.
4–34
Intelligent Programmer Software User Manual
Creating a device configuration
6. In the Expiration field, type the date when you want the token to
expire and no longer be able to access the doors. Type the year,
then the month, then the day.
For example, if you want the token to expire on December 31,
2001, type 011231.
7. If the number of digits in the issue code for the selected token
format is greater than 0, perform this step.
In the Issue Code field, type the token’s issue code, preceded by
enough zeros to replace the zeros you see (the total number of
digits in the issue code for the selected token format). For example,
if the issue code is 2 and the issue code for the selected token
format has one digit, type 2.
Note: Issue codes generally are not used for V Series Keypad Security
Devices.
8. To give the token the deadbolt override privilege, check the Dead
Bolt check box. If you do not want to give the token the deadbolt
override privilege, make sure the Dead Bolt check box is not
checked.
For more information about this feature, see page 4–33.
Note: The deadbolt override feature applies only to electronic locks
with a mortise deadbolt function chassis.
9. To give the token the passage mode privilege, check the Pass Mode
check box. If you do not want to give the token the passage mode
privilege, make sure the Pass Mode check box is not checked.
For more information about this feature, see page 4–33.
10. Select Apply. The User Database dialog box reappears. The list
includes the token you just added.
11. For each additional token you want to add, repeat Step 3 through
Step 10.
12. When you’ve added all the tokens you want, select Close. The
Devices Functions menu reappears.
Enrolling
Proximity Cards
Best Access Systems’ VPD–ES Enrolling Station lets you read various
types of proximity cards to add token records to the user database for a
device configuration. For a list of the proximity card formats supported
by the enrolling station, refer to the VPS–ES Enrolling Station Setup
and Operating Instructions.
Intelligent Programmer Software User Manual
4–35
Creating a device configuration
Before you can use the IPS to enroll proximity cards into a device
configuration’s user database, you must perform the following tasks to
set up the enrolling station:
1. Confirm switch settings. See the VPS–ES Enrolling Station Setup
and Operating Instructions.
2. Make connections. See the VPS–ES Enrolling Station Setup and
Operating Instructions.
3. Confirm the transfer port setting. See the VPS–ES Enrolling Station
Setup and Operating Instructions.
After you’ve set up the enrolling station for use with your computer,
you’re ready to enroll proximity cards.
To add a proximity card:
1. Make sure you’re viewing the Devices Functions menu and the
device configuration you’re defining is highlighted.
2. Select User Db. The User Database dialog box, shown in Figure 4.27,
appears.
Figure 4.27 User Database dialog box
3. Select Add/Modify. The Add/Modify Card dialog box, shown in
Figure 4.28, appears.
The enrolling station sounds two or three tones and flashes its LED.
Notice that "[Connected]" appears at the top of the Add/Modify
dialog box, indicating that the enrolling station is communicating
properly with the PC.
Figure 4.28 Add/Modify Card dialog box
4–36
Intelligent Programmer Software User Manual
Creating a device configuration
4. Place a proximity card over the enrolling station reader.
The enrolling station sounds one tone and flashes its LED. the
proximity card number appears in the Card Number field.
5. In the Time Zone field, type the number of the time zone
representing the time periods when you want the card to be able to
access the doors controlled by devices using this device
configuration. Type the number of one of the time zones you
defined in Task 6 (from 1 to 8), or type 0 for never, or type 9 for
always.
For information about defining time zones, see page 4–24.
6. In the Expiration field, type the date when you want the card to
expire and no longer be able to access the doors. Type the year,
then the month, then the day.
For example, if you want the card to expire on December 31, 2001,
type 011231.
7. If the number of digits in the issue code for the selected cable
format is greater than 0, perform this step.
In the Issue Code field, type the card’s issue code, preceded by
enough zeros to replace the zeros you see (the total number of
digits in the issue code for the selected token format). For example,
if the issue code is 2 and the issue code for the selected card format
has one digit, type 2.
8. To give the card the deadbolt override privilege, check the Dead
Bolt check box. If you do not want to give the card the deadbolt
override privilege, make sure the Dead Bolt check box is not
checked.
For more information about this feature, see page 4–33.
Note: The deadbolt override feature applies only to electronic locks
with a mortise deadbolt function chassis.
9. To give the card the passage mode privilege, check the Pass Mode
check box. If you do not want to give the card the passage mode
privilege, make sure the Pass Mode check box is not checked.
For more information about this feature, see page 4–33.
10. Select Apply. The User Database dialog box reappears. The list
includes the card you just added.
11. For each additional card you want to enroll, repeat Step 3 through
Step 11.
Intelligent Programmer Software User Manual
4–37
Creating a device configuration
12. When you’ve added all the cards you want, select Close. The
Devices Functions menu reappears.
For information about responding to a problem that you
experience when enrolling proximity cards, see the VPS–ES
Enrolling Station Setup and Operating Instructions.
Adding a range
of access cards
You can add a range of access cards with consecutive card numbers
that need access to the doors. All access cards in the range will have
the same:
■ time zone setting
■ expiration date
■ issue code
■ deadbolt override setting
■ passage mode setting.
When adding a range of access cards, use the information you provided
on the Token & Door Information form or the Token by Door
Information form (see page 3–11).
Note: This feature generally is not used for V Series Keypad Security
Devices since the use of consecutive access codes can compromise the
security of your access control system.
To add a range of access cards:
1. Make sure you’re viewing the Devices Functions menu and the
device configuration you’re defining is highlighted.
2. Select User Db. The User Database dialog box, shown in Figure 4.29,
appears.
Figure 4.29 User Database dialog box
4–38
Intelligent Programmer Software User Manual
Creating a device configuration
3. Select Add Range. The Add Card Range dialog box, shown in
Figure 4.30, appears.
Figure 4.30 Add Card Range dialog box
4. In the Card # Start field, type the lowest card number in the range,
preceded by enough digits to replace the zeros you see (the total
number of digits in the card number for the selected token format).
For example, if the lowest card number is 101 and the card number
for the selected token format has six digits, type 000101.
5. In the Card # End field, type the highest card number in the range,
preceded by enough digits to replace the zeros you see (the total
number of digits in the card number for the selected token format).
For example, if the highest card number is 199 and the card number
for the selected token format has six digits, type 000199.
6. In the Time Zone field, type the number of the time zone
representing the time periods when you want the access cards in
the range to be able to access the doors controlled by devices using
this device configuration. Type the number of one of the time zones
you defined in Task 6 (from 1 to 8), or type 0 for never, or type 9 for
always.
For information about defining time zones, see page 4–24.
7. In the Expiration field, type the date when you want the access
cards in the range to expire and no longer be able to access the
doors. Type the year, then the month, then the day.
For example, if you want the access cards to expire on April 15,
2001, type 010415.
8. If the number of digits in the issue code for the selected token
format is greater than 0, perform this step.
In the Issue Code field, type the issue code for the access cards in
the range, preceded by enough zeros to replace the zeros you see
(the total number of digits in the issue code for the selected token
format). For example, if the issue code is 2 and the issue code for
the selected token format has one digit, type 2.
9. To give the access cards in the range the deadbolt override
privilege, check the Dead Bolt check box. If you do not want to give
Intelligent Programmer Software User Manual
4–39
Creating a device configuration
the access cards the deadbolt override privilege, make sure the Dead
Bolt check box is not checked.
For more information about this feature, see page 4–33.
Note: The deadbolt override feature applies only to electronic locks
with a mortise deadbolt function chassis.
10. To give the access cards in the range the passage mode privilege,
check the Pass Mode check box. If you do not want to give the
cards the passage mode privilege, make sure the Pass Mode check
box is not checked.
For more information about this feature, see page 4–33.
11. Select OK. The User Database dialog box reappears. The list
includes the cards you just added.
12. For each additional card range you want to add, repeat Step 3
through Step 11.
13. When you’ve added all the card ranges you want, select Close. The
Devices Functions menu reappears.
Modifying a
token
If you copied the user database from another device configuration to
create this device configuration, you might want to modify one or more
of the following settings for a token:
■ time zone setting
■ expiration date
■ issue code
■ deadbolt override setting
■ passage mode setting.
To modify a token:
1. Make sure you’re viewing the Devices Functions menu and the
device configuration you’re defining is highlighted.
2. Select User Db. The User Database dialog box, shown in Figure 4.31,
appears.
Figure 4.31 User Database dialog box
4–40
Intelligent Programmer Software User Manual
Creating a device configuration
3. In the Card# list, highlight the token you want to modify.
4. Select Add/Modify. The Add/Modify Card dialog box, shown in
Figure 4.26, appears.
Figure 4.32 Add/Modify Card dialog box
5. If you want to change the token’s time zone, perform this step.
In the Time Zone field, type the number of the time zone
representing the time periods when you want the token to be able
to access the doors controlled by devices using this device
configuration. Type the number of one of the time zones you
defined in Task 6 (from 1 to 8), or type 0 for never, or type 9 for
always.
For information about defining time zones, see page 4–24.
6. If you want to change the token’s expiration date, perform this step.
In the Expiration field, type the date when you want the token to
expire and no longer be able to access the doors. Type the year,
then the month, then the day.
For example, if you want the token to expire on December 31,
2001, type 011231.
7. If the number of digits in the issue code for the selected token
format is greater than 0 and you want to change the token’s issue
code, perform this step.
In the Issue Code field, type the token’s issue code, preceded by
enough zeros to replace the zeros you see (the total number of
digits in the issue code for the selected token format). For example,
if the issue code is 2 and the issue code for the selected token
format has one digit, type 2.
Note: Issue codes generally are not used for V Series Keypad Security
Devices.
8. If you want to change the token’s deadbolt override setting, perform
this step.
To give the token the deadbolt override privilege, check the Dead
Bolt check box. If you do not want to give the token the deadbolt
Intelligent Programmer Software User Manual
4–41
Creating a device configuration
override privilege, make sure the Dead Bolt check box is not
checked.
For more information about this feature, see page 4–33.
9. If you want to change the token’s passage mode setting, perform
this step.
To give the token the passage mode privilege, check the Pass Mode
check box. If you do not want to give the token the passage mode
privilege, make sure the Pass Mode check box is not checked.
For more information about this feature, see page 4–33.
10. Select OK. The User Database dialog box reappears. The list
includes the token you just modified.
11. For each additional token you want to modify, repeat Step 3 through
Step 10.
12. When you’ve modified all the tokens you want, select Close. The
Devices Functions menu reappears.
Deleting a
token
If you copied the user database from another device configuration to
create this device configuration, you can delete any tokens that don’t
need to access the doors controlled by devices using this device
configuration.
To maintain the security of your facility, you should delete all
inactive tokens.
Caution
To delete a token:
1. Make sure you’re viewing the Devices Functions menu and the
device configuration you’re defining is highlighted.
2. Select User Db. The User Database dialog box, shown in Figure 4.33,
appears.
Figure 4.33 User Database dialog box
3. In the Card# list, highlight the token you want to delete.
4. Select Delete. A message box appears asking, “Do you really want to
delete this?”
4–42
Intelligent Programmer Software User Manual
Creating a device configuration
5. To delete the highlighted token, select OK. The User Database
dialog box reappears. The token you deleted no longer appears on
the Card# list.
6. For each additional token you want to delete, repeat Step 3 through
Step 5.
7. When you’ve deleted all the tokens you want, select Close. The
Devices Functions menu reappears.
Deleting a
range of access
cards
If you copied the user database from another device configuration to
create this device configuration, you can delete a range of access cards
that don’t need to access the doors controlled by devices using this
configuration.
Note: This feature generally is not used for V Series Keypad Security
Devices since the use of consecutive access codes can compromise the
security of your access control system.
To delete a range of access cards:
1. Make sure you’re viewing the Devices Functions menu and the
device configuration you’re defining is highlighted.
2. Select User Db. The User Database dialog box, shown in Figure 4.34,
appears.
Figure 4.34 User Database dialog box
3. Select Delete Range. The Delete Range dialog box, shown in
Figure 4.35, appears.
Figure 4.35 Delete Range dialog box
4. In the Card # Start field, type the lowest card number in the range,
preceded by enough zeros to replace the digits you see (the total
Intelligent Programmer Software User Manual
4–43
Creating a device configuration
number of digits in the card number for the selected token format).
For example, if the lowest card number in the range is 101 and the
card number for the selected token format has six digits, type
000101.
5. In the Card # End field, type the highest card number in the range,
preceded by enough zeros to replace the digits you see (the total
number of digits in the card number for the selected token format).
For example, if the highest card number in the range is 199 and the
card number for the selected token format has six digits, type
000199.
6. To delete the range of cards, select OK. The User Database dialog
box reappears. The range of cards you deleted no longer appears on
the Card# list.
7. Select Close. The Devices Functions menu reappears.
DEFINING ADDITIONAL DEVICE CONFIGURATIONS
For each additional device configuration you want to define, repeat
Task 1 through Task 9.
4–44
Intelligent Programmer Software User Manual
5
PROGRAMMING A
V SERIES SECURITY DEVICE
When you program a V Series Security Device, you
use the Intelligent Programmer Software (IPS) to
transfer a device configuration to the device. The
device configuration might have been defined for
that device only or for a group of devices.
If you created the device configuration on a desktop
or laptop PC and you want to use a palmtop PC to
program the device, you need to transfer the IPS data
from the laptop or desktop PC to the palmtop PC.
For instructions, see page 5–3.
To transfer a device configuration to a device, you
perform the following tasks:
❏ Task 1: Connect a PC to the device. See page 5-5.
❏ Task 2: Transfer a device configuration to the device.
See page 5-8. Then, disconnect the PC from the
device.
Before you program a device, make sure you
understand the terms and definitions described in
the table on the next page.
Intelligent Programmer Software User Manual
5–1
Programming a V Series Security Device
Term
Definition
Palmtop cable
Cable that connects a palmtop PC to a desktop or laptop PC.
This cable lets you transfer data from the desktop or laptop PC
to the palmtop PC, or from the palmtop PC to the desktop or
laptop PC. This cable also lets you install the IPS on a palmtop
PC.
In addition, this cable connects a palmtop PC to a PC-to-lock
adapter cable. With the PC-to-lock adapter cable connected to a
V Series Electronic Lock, you can transfer data from the
palmtop PC to the lock, or from the lock to the palmtop PC.
This cable also connects a palmtop PC directly to a V Series
Controller or to a controller’s remote RS–232 connector. Then,
you can transfer data from the palmtop PC to the controller, or
from the controller to the palmtop PC.
Obtain this cable from the computer vendor where you
purchased your palmtop PC.
PC-to-lock adapter
cable
Cable that connects a palmtop cable or laptop cable to an
electronic lock. With the palmtop cable connected to a
palmtop PC or the laptop cable connected to a laptop PC, you
can transfer data from the PC to the electronic lock, or from the
lock to the PC. Obtain this cable from Best Lock.
Laptop cable
Cable that connects a laptop PC to a PC-to-lock adapter cable.
With the PC-to-lock adapter cable connected to an electronic
lock, you can transfer data from the laptop PC to the lock, or
from the lock to the laptop PC.
This cable also connects a laptop PC directly to a controller or
to a controller’s remote RS–232 connector. Then, you can
transfer data from the laptop PC to the controller, or from the
controller to the laptop PC. Obtain this cable from Best Lock.
5–2
Communication
token
Token that you use to access a V Series Security Device’s
programming features. The communication token’s card
number or access code is programmed in the device.
Temporary communication token
Token for temporary use that lets you communicate with a
V Series Security Device programmed with factory default
settings.
Password
Series of digits (from 1 to 6) that you enter after you use a
communication token to access a device’s programming
features or history. This password is programmed in the device.
Intelligent Programmer Software User Manual
Programming a V Series Security Device
TRANSFERRING DEVICE CONFIGURATIONS
FROM A LAPTOP OR DESKTOP PC TO A PALMTOP PC
If you maintain your device configurations on a laptop or desktop PC
and you want to use a palmtop PC to program V Series Security Devices,
you need to transfer the device configurations from the laptop or
desktop PC to the palmtop PC.
Caution
If both the laptop or desktop PC and the palmtop PC have a device
configuration with the same name, when you transfer the device
configuration to the palmtop PC, you overwrite the device
configuration on the palmtop PC. You cannot retrieve the device
configuration after it has been overwritten.
To connect a laptop or desktop PC to a palmtop PC:
1. Refer to Figure 5.1 and plug the palmtop cable into the side of the
palmtop PC.
2. Plug the palmtop cable into the appropriate COM port on the laptop
or desktop PC.
Note: The palmtop cable must be connected to the COM port selected
in the Transfer Port field in the Setup dialog box (see page 1–6).
Palmtop cable
Figure 5.1
Connecting a laptop or desktop PC to a palmtop PC
Intelligent Programmer Software User Manual
5–3
Programming a V Series Security Device
To transfer device configurations from a laptop or desktop PC to a
palmtop PC:
1. Make sure the laptop or desktop PC is properly connected to the
palmtop PC. For instructions, see page 5–3.
2. Start and log into the IPS on the laptop or desktop PC. The Main
menu appears. For instructions, see page 2–1.
3. At the laptop or desktop PC, select Transfer. The Transfer menu
appears.
4. At the laptop or desktop PC, select PC to PC. The PC to PC dialog
box, shown in Figure 5.2, appears.
Figure 5.2
PC to PC dialog box
5. Mark each device configuration you want to transfer.
To mark a device configuration, highlight the device configuration
in the Device Configurations list. Then, press the spacebar. An
asterisk appears next to the device configuration you marked.
A, and
then press s.
6. Start and log into the IPS on the palmtop PC. The Main menu
appears.
7. At the palmtop PC, select Transfer. The Transfer menu appears.
8. At the palmtop PC, select PC to PC. The PC to PC dialog box, shown
in Figure 5.2, appears.
9. At the palmtop PC, select Receive. The Receiving Information dialog
box appears on the palmtop PC, indicating that the palmtop PC is
attempting to connect with the laptop or desktop PC.
10. At the laptop or desktop PC, select Send. The Sending information
box appears on the laptop or desktop PC, indicating that the laptop
or desktop PC is beginning to transfer information to the palmtop
PC.
11. Wait while the transfer takes place. The information box on both
PCs indicates the progress of the transfer. Figure 5.3 shows how the
Tip: To turn on the Server radio button, press and hold down
5–4
Intelligent Programmer Software User Manual
Programming a V Series Security Device
Sending information box appears on the laptop or desktop PC at the
end of the process.
Figure 5.3
Sending information box at the end of the process
12. On the palmtop PC, press E. The Main menu appears.
13. On the laptop or desktop PC, press E. The Main menu appears.
14. Disconnect the laptop or desktop PC from the palmtop PC. For
instructions, see the section below.
To disconnect a laptop or desktop PC from a palmtop PC:
1. Unplug the palmtop cable from the COM port on the laptop or
desktop PC.
2. Unplug the palmtop cable from the side of the palmtop PC.
TASK 1: CONNECT A PC TO THE DEVICE
Before you can transfer a device configuration from a PC to a V Series
Security Device, you need to connect the PC to the device.
Connecting a
laptop PC to a
device
To connect a laptop PC to a V Series Electronic Lock, you need a laptop
cable and a PC-to-lock adapter cable. To connect a laptop PC to a
V Series Controller, you need only a laptop cable.
To connect a laptop PC to an electronic lock:
1. Refer to Figure 5.4 and plug the PC-to-lock adapter cable into the
base of the lock.
2. Connect the PC-to-lock adapter cable to the laptop cable.
3. Connect the laptop cable to the appropriate COM port on the
laptop PC.
Note: The laptop cable must be connected to the COM port selected in
the Transfer Port field in the Setup dialog box (see page 1–6).
Intelligent Programmer Software User Manual
5–5
Programming a V Series Security Device
To connect a laptop PC to a controller:
1. Refer to Figure 5.4 and connect the laptop cable to the controller’s
remote RS–232 connector.
Note: If the controller does not have a remote RS–232 connector, you
can connect the laptop cable directly to the RS–232 connector on the
controller board. For more information, see the V Series Controller
Installation Instructions.
2. Connect the laptop cable to the appropriate COM port on the
laptop PC.
Note: The laptop cable must be connected to the COM port selected in
the Transfer Port field in the Setup dialog box (see page 1–6).
Laptop cable
Laptop cable
PC-to-lock adapter cable
Figure 5.4
5–6
Connecting a laptop PC to an electronic lock or controller
Intelligent Programmer Software User Manual
Programming a V Series Security Device
Connecting a
palmtop PC to a
device
To connect a palmtop PC to an electronic lock, you need a palmtop
cable and a PC-to-lock adapter cable. To connect a palmtop PC to a
controller, you need only a palmtop cable.
To connect a palmtop PC to an electronic lock:
1. Refer to Figure 5.5 and plug the PC-to-lock adapter cable into the
base of the lock.
2. Connect the PC-to-lock adapter cable to the palmtop cable.
3. Plug the palmtop cable into the side of the palmtop PC.
To connect a palmtop PC to a controller:
1. Refer to Figure 5.5 and connect the palmtop cable to the
controller’s remote RS–232 connector.
Note: If the controller does not have a remote RS–232 connector, you
can connect the palmtop cable directly to the RS–232 connector on the
controller board. For more information, see the V Series Controller
Installation Instructions.
2. Plug the palmtop cable into the side of the palmtop PC.
Palmtop cable
Palmtop cable
PC-to-lock adapter cable
Figure 5.5
Connecting a palmtop PC to an electronic lock or controller
Intelligent Programmer Software User Manual
5–7
Programming a V Series Security Device
TASK 2: TRANSFER A DEVICE CONFIGURATION TO THE DEVICE
After you’ve connected the PC to the V Series Security Device, you’re
ready to transfer a device configuration to the device. When you
transfer a device configuration to a device, in addition to transferring
programming settings, you can decide whether to transfer:
■ the PC’s date and time
■ the device configuration’s user database.
To transfer a device configuration to the device:
1. If you want to update the device’s date and time when you transfer
the device configuration, make sure the PC’s date and time are
correct.
Note: To check or set a laptop PC’s date and time, you can use the DOS
Date and Time commands. Refer to your DOS manual. To check or set a
palmtop PC’s date and time, refer to the manual provided with the PC.
2. Make sure the laptop or palmtop PC is properly connected to the
device. For instructions, see Connecting a laptop PC to a device on
page 5–5 or see Connecting a palmtop PC to a device on page 5–7.
3. From the Main menu, select Transfer. The Transfer menu appears.
4. Select PC to Device. The PC to Device dialog box, shown in
Figure 5.6, appears.
Figure 5.6
PC to Lockset dialog box
5. In the Device Configurations list, highlight the device configuration
you want to transfer to the device.
6. If you want to transfer the selected device configuration’s user
database, in addition to the programming settings, check the
User DB check box.
If you do not want to transfer the selected device configuration’s
user database, make sure the User DB check box is not checked.
Tip: To check a check box, press T until the check box name is
highlighted, then press the spacebar until you see an X in the check
box. To remove the X, press the spacebar.
5–8
Intelligent Programmer Software User Manual
Programming a V Series Security Device
7. If you want to update the device’s date and time when you transfer
the device configuration, check the Date/Time check box. You
should update the device’s date and time if you are programming
the device for the first time.
If you do not want to update the device’s date and time, make sure
the Date/Time check box is not checked.
8. Select OK. A message appears stating, “This will overwrite all
parameters in the lock.”
9. To transfer the device configuration to the device, select Yes. A
message appears stating, “Please swipe communications card.”
10. Use the communication token to access the device.
Note: If you are programming the device for the first time, use the
temporary communication token.
11. Select Yes. The Login dialog box, shown in Figure 5.7, appears.
Figure 5.7
Login dialog box
12. In the Password field, type the communication token’s password.
Note: The default password for the temporary communication token is
123456.
13. Select OK. A status bar appears, showing the progress of the
transfer. When the device configuration has been transferred from
the PC to the device, a message appears stating, “Press any key to
continue.”
14. Press any key. The PC to Device dialog box reappears.
15. To return to the Main menu, select OK.
16. Disconnect the PC from the device.
Intelligent Programmer Software User Manual
5–9
Programming a V Series Security Device
5–10
Intelligent Programmer Software User Manual
6
MANAGING DATA FOR YOUR
V SERIES SECURITY DEVICES
This chapter describes how to manage your
Intelligent Programmer Software (IPS) data.
Instructions are provided for the following activities
that you might perform:
■ retrieving, viewing, printing, and deleting device
history records. See page 6–1.
■ retrieving a V Series Security Device’s
programming settings and user database. See
page 6–8.
■ viewing and printing a device configuration’s
programming settings. See page 6–12.
■ viewing and printing a device configuration’s
user database. See page 6–14.
■ printing all data for a device or group of devices.
See page 6–15.
■ backing up and restoring IPS data. See page 6–16.
■ packing the database to reduce the computer
memory being used by the IPS. See page 6–24.
RETRIEVING, VIEWING, PRINTING, AND DELETING
HISTORY RECORDS
Each V Series Security Device maintains a history of
up to the last 1000 events, including the date and
time of each event. Each event is an action taken at
the door controlled by the device or at the device
itself. For example, the device records each
programming change made for the device.
Intelligent Programmer Software User Manual
6–1
Managing data for your V Series Security Devices
The device also records each time it grants access to a token or denies
access to a token. For access events, the device records the card
number or access code associated with the event.
You might want to view a device’s history records to determine why a
device is operating differently than you expect. You also might want to
view a device’s history if you’ve had a security problem and want to
find out who accessed the door controlled by the device during a
certain time period.
To use the IPS to view a device’s history records, you first need to
retrieve the history records from the device. Then, you can view and
print the history records. When you’ve finished viewing and printing
history records, you can delete them to save space on the PC.
Retrieving
history records
from a device
The process of retrieving a device’s history is slightly different if the
device is not yet listed in the IPS records than if it is listed. If the device
is already listed, see the section below. If the device is not already
listed, page 6–3.
Note: You cannot retrieve history records to a group.
To retrieve history records from a device already listed in the IPS
records:
1. Connect the PC to the device. For instructions, see Connecting a
laptop PC to a device on page 5–5 or see Connecting a palmtop PC
to a device on page 5–7.
2. From the Main menu, select Transfer. The Transfer menu appears.
3. Select History to PC. The History to PC dialog box, shown in
Figure 6.1, appears.
Figure 6.1
History to PC dialog box
4. In the Device Configurations list, highlight the device whose history
you want to retrieve.
5. Select OK. A message appears stating, “This will overwrite all
history records on the PC for this device.”
6. To retrieve the history records from the device, select Yes. A
message appears stating, “Please swipe communications card.”
6–2
Intelligent Programmer Software User Manual
Managing data for your V Series Security Devices
7. Use the communications token to access the device.
8. Select Yes. The Login dialog box, shown in Figure 6.2, appears.
Figure 6.2
Login dialog box
9. In the Password field, type the communication token’s password.
10. Select OK. A status bar appears, showing the progress of the
transfer. When the history records are transferred from the device to
the PC, a message appears stating, “Press any key to continue.”
11. Press any key. The History to PC dialog box reappears.
12. To return to the Main menu, select OK.
13. Disconnect the PC from the device.
To retrieve history records from a device not yet listed in the IPS
records:
1. Connect the PC to the device. For instructions, see Connecting a
laptop PC to a device on page 5–5 or see Connecting a palmtop PC
to a device on page 5–7.
2. From the Main menu, select Transfer. The Transfer menu appears.
3. Select History to PC. The History to PC dialog box, shown in
Figure 6.3, appears.
Figure 6.3
History to PC dialog box
Intelligent Programmer Software User Manual
6–3
Managing data for your V Series Security Devices
4. Select New. The Add Device dialog box, shown in Figure 6.4,
appears.
Figure 6.4
Add Device dialog box
5. If you want to add the device to a group, in the Groups list, highlight
the group you want. Then, check the Add to Group check box.
If you do not want to add the device to a group, make sure the Add
to Group check box is not checked.
Tip: To check a check box, press T until the check box name is
highlighted, then press the spacebar until you see an X in the check
box. To remove the X, press the spacebar.
6. In the Enter Device Name field, type a name for the device (up to
20 characters, including spaces). For example, you might type
SOUTH DOOR.
7. Select OK. The History to PC dialog box reappears.
8. In the Device Configurations list, highlight the device you just
added.
9. Select OK. A message appears stating, “This will overwrite all
history records on the PC for this device.”
10. To retrieve the history records from the device, select Yes. A
message appears stating, “Please swipe communications card.”
11. Use the communication token to access the reader.
12. Select Yes. The Login dialog box, shown in Figure 6.5, appears.
Figure 6.5
Login dialog box
13. In the Password field, type the communication token’s password.
6–4
Intelligent Programmer Software User Manual
Managing data for your V Series Security Devices
14. Select OK. A status bar appears, showing the progress of the
transfer. When the history records are transferred from the device to
the PC, a message appears stating, “Press any key to continue.”
15. Press any key. The History to PC dialog box reappears.
16. To return to the Main menu, select OK.
17. Disconnect the PC from the device.
Selecting
history records
to view or print
After you’ve retrieved a device’s history records, you can view and print
the history records at any time. The IPS keeps the history records until
you overwrite them by retrieving the device’s history records again or
until you delete the device from the IPS records.
When you view a device’s history records, you can select all or only a
portion of the records to view. You can view the history records:
■ for selected types of events, such as all ACCESS GRANTED events
■ associated with a selected card number
■ for a selected time period.
Note: For a list of all possible types of history events, see Appendix B
V Series Security Device History Event Types.
When you select the criteria to indicate which records you want to
view, the IPS shows only the records that meet all of the selected
criteria. For example, you can view only the ACCESS GRANTED records
for a selected token on a selected day.
To select history records to view or print:
1. From the Main menu, select Reports. The Reports menu, shown in
Figure 6.6, appears.
Figure 6.6
Reports menu
2. In the Device Configurations list, highlight the device whose history
records you want to view or print.
Intelligent Programmer Software User Manual
6–5
Managing data for your V Series Security Devices
3. Select History. The History Report dialog box, shown in Figure 6.7,
appears.
Figure 6.7
History Report dialog box
Tip: If you want to find the next event listed in the History Report dialog
box for a particular token, select Find. The Find Card Number dialog
box appears. In the Card Number field, type the card number or access
code for which you want to find a record. Then, select Find. The
History Report dialog box reappears and the highlight bar moves to the
next event in the list for the selected card number or access code.
4. To limit the records that appear in the History Report dialog box,
select Filter. The History Selection dialog box, shown in Figure 6.8,
appears.
Figure 6.8
History Selection dialog box
5. If you want to limit the type of events for which records appear in
the History Report dialog box, perform this step.
In the Select Event(s) list, mark each type of event that you want to
view or print history records for. For example, if you want to view
only records indicating that the device granted access to a token,
mark ACCESS GRANTED.
Note: To mark a type of event that you want to view history records for,
highlight the event and press the spacebar. A diamond (♦) appears next
to the type of event. To unmark a type of event, highlight the event and
press the spacebar. The diamond next to the type of event disappears.
6. If you want the records for only one card number or access code to
appear in the History Report dialog box, perform this step.
6–6
Intelligent Programmer Software User Manual
Managing data for your V Series Security Devices
In the Card# field, type the card number or access code that you
want to view or print records for, preceded by enough zeros to
replace the digits you see (the total number of digits in the card
number or access code for the selected token format). For example,
if you want to view the events associated with token 817 and the
card number or access code for the selected token format has six
digits, type 000817.
7. If you want the records for a selected time period to appear in the
History Report dialog box, perform this step through Step 10.
In the Start Date field, type the date when you want the time period
to start, first typing the year, then the month, then the day. For
example, if you want to view the records for a time period starting
on December 15, 2000, type 001215.
Note: If you want to view the records that meet the criteria defined in
the Select Event(s) list and the Card# field no matter when the records
were recorded, type all zeros in the Start Date field, Start Time field,
End Date field, and End Time field.
8. In the Start Time field, type the time, in 24-hour format, when you
want the time period to start. For example if you want to view the
records for a time period starting at 8:00 a.m. on the selected start
date, type 0800.
9. In the End Date field, type the date when you want the time period
to end, first typing the year, then the month, then the day. For
example, if you want to view the records for a time period ending
on January 1, 2001, type 010101.
10. In the End Time field, type the time, in 24-hour format, when you
want the time period to end.
11. Select OK. The History Report dialog box reappears, showing only
the records that meet the criteria you defined in the History
Selection dialog box. Notice that the Filter On check box is
checked, indicating that only the records that meet the criteria
defined in the History Selection dialog box are shown.
Tip: To scroll one line at a time through the records that appear in the
History Report dialog box, press D or U. To scroll one screen at a time,
press N (Page Down) or O (Page Up).
To show all of the records, not just the records that meet the criteria
defined in the History Selection dialog box, remove the check from the
Filter On check box. All of the records appear.
Intelligent Programmer Software User Manual
6–7
Managing data for your V Series Security Devices
12. To print a report showing the records you’re viewing, select Print. A
message appears stating, “Printing . . .” When the report has finished
printing, a message appears stating, “Print completed. (Press any
key to continue.)”
13. Press any key. The History Report dialog box reappears.
14. When you’ve finished viewing the device history records, select
Close. The Reports menu reappears.
15. To return to the Main menu, select Close.
Deleting a
device’s history
records
After you’ve viewed and printed a device’s history records, you should
delete the history records to conserve space on the PC.
To delete a device’s history records:
1. From the Main menu, select Devices. The Devices Administration
menu, shown in Figure 6.9, appears.
Figure 6.9
Devices Administration menu
2. In the Device Configurations list, highlight the device whose history
records you want to delete.
3. Select Del History. A message appears asking, “Are you sure you
want to delete all of the device’s history?”
4. To delete the device’s history records, select Yes. The Reports menu
reappears.
5. To return to the Main menu, select Close.
RETRIEVING A DEVICE’S PROGRAMMING SETTINGS AND
USER DATABASE
You can retrieve the programming settings and user database from a
V Series Security Device. You can retrieve just the programming
settings, or you can retrieve the user database, as well as the
programming settings.
6–8
Intelligent Programmer Software User Manual
Managing data for your V Series Security Devices
Updating the
records for a
device
If changes were made to the device’s programming settings or user
database using a handheld terminal or the keypad on a V Series Keypad
Security Device, you might want to retrieve the settings and user
database to update the IPS records.
To retrieve a device’s programming settings and user database to
update the records for a device:
1. Connect the PC to the device. For instructions, see Connecting a
laptop PC to a device on page 5–5 or see Connecting a palmtop PC
to a device on page 5–7.
2. From the Main menu, select Transfer. The Transfer menu appears.
3. Select Device to PC. The Device to PC dialog box, shown in
Figure 6.10, appears.
Figure 6.10 Device to PC dialog box
4. In the Device Configurations list, highlight the device configuration
you want to overwrite with the configuration in the device.
5. If you want to transfer the device’s user database to the selected
device configuration, in addition to the programming settings,
check the User DB check box.
If you do not want to transfer the device’s user database, make
sure the User DB check box is not checked.
Tip: To check a check box, press T until the check box name is
highlighted, then press the spacebar until you see an X in the check
box. To remove the X, press the spacebar.
6. Select OK. A message appears stating, “This will overwrite all
parameters on the PC for this device.”
7. To retrieve the configuration from the device, select Yes. A message
appears stating, “Please swipe communications card.”
8. Use the communication token to access the device.
Intelligent Programmer Software User Manual
6–9
Managing data for your V Series Security Devices
9. Select Yes. The Login dialog box, shown in Figure 6.11, appears.
Figure 6.11 Login dialog box
10. In the Password field, type the communication token’s password.
11. Select OK. A status bar appears, showing the progress of the
transfer. When the device configuration is transferred from the
device to the PC, a message appears stating, “Press any key to
continue.”
12. Press any key. The Device to PC dialog box reappears.
13. To return to the Main menu, select OK.
14. Disconnect the PC from the device.
Creating a new
device
configuration
If you want to create a device configuration based on the settings and
user database in use at a device and you don’t have this information in
the IPS records, you can retrieve the device’s settings and user database
and create a new device configuration at the same time.
To retrieve a device’s configuration settings and user database to
create a new device configuration:
1. Connect the PC to the device. For instructions, see Connecting a
laptop PC to a device on page 5–5 or see Connecting a palmtop PC
to a device on page 5–7.
2. From the Main menu, select Transfer. The Transfer menu appears.
3. Select Device to PC. The Device to PC dialog box, shown in
Figure 6.12, appears.
Figure 6.12 Device to PC dialog box
6–10
Intelligent Programmer Software User Manual
Managing data for your V Series Security Devices
4. Select New. The New Name dialog box, shown in Figure 6.13,
appears.
Figure 6.13 New Name dialog box
5. If you want to add a new group, turn on the Group radio button. If
you want to add a new device, turn on the Device radio button.
Tip: To turn on the Group radio button, press and hold down A, and
then press g. To turn on the Device radio button, press and hold
down A, and then press l.
6. If the new device configuration is for a V Series Controller or group
of controllers, check the Controller check box.
If the new device configuration is for an electronic lock or group
of electronic locks, make sure the Controller check box is not
checked.
Tip: To check a check box, press T until the check box name is
highlighted, then press the spacebar until you see an X in the check
box. To remove the X, press the spacebar.
7. In the Enter Unique Name field, type a name for the new group or
device (up to 20 characters, including spaces).
8. Select OK. The Device to PC dialog box reappears. The device or
group you just added is highlighted in the Device Configurations
list.
9. If you want to transfer the device’s user database to the selected
device configuration, in addition to the programming settings,
check the User DB check box.
If you do not want to transfer the device’s user database, make
sure the User DB check box is not checked.
10. Select OK. A message appears stating, “This will overwrite all
parameters on the PC for this device.”
11. To retrieve the configuration from the device, select Yes. A message
appears stating, “Please swipe communications card.”
12. Use the communication token to access the device.
Intelligent Programmer Software User Manual
6–11
Managing data for your V Series Security Devices
13. Select Yes. The Login dialog box, shown in Figure 6.14, appears.
Login
OK
Password:
Cancel
Figure 6.14 Login dialog box
14. In the Password field, type the communication token’s password.
15. Select OK. A status bar appears, showing the progress of the
transfer. When the device configuration is transferred from the
device to the PC, a message appears stating, “Press any key to
continue.”
16. Press any key. The Device to PC dialog box reappears.
17. To return to the Main menu, select OK.
18. Disconnect the PC from the device.
VIEWING AND PRINTING A DEVICE CONFIGURATION’S SETTINGS
You can view and print a device configuration’s programming settings
at any time.
To view or print a device configuration’s settings:
1. From the Main menu, select Reports. The Reports menu, shown in
Figure 6.15, appears.
Figure 6.15 Reports menu
2. In the Device Configurations list, highlight the device configuration
whose settings you want to view or print.
6–12
Intelligent Programmer Software User Manual
Managing data for your V Series Security Devices
3. Select Functions. The Functions Report information box, shown in
Figure 6.16, appears. It shows all of the settings in the selected
device configuration.
Figure 6.16 Functions Report information box
Tip: To scroll one line at a time through the information that appears in
the Functions Report information box, press D or U. To scroll one
screen at a time, press N (Page Down) or O (Page Up).
4. To print the device configuration’s settings, select Print. A message
appears stating, “Printing . . .” When the report has finished
printing, a message appears stating, “Print completed. (Press any
key to continue.)”
5. Press any key. The Functions Report information box reappears.
6. When you’ve finished viewing the device configuration’s settings,
select Close. The Reports menu reappears.
7. To return to the Main menu, select Close.
Intelligent Programmer Software User Manual
6–13
Managing data for your V Series Security Devices
VIEWING AND PRINTING A DEVICE CONFIGURATION’S USER DATABASE
You can view and print a device configuration’s user database at any
time.
To view or print a device configuration’s user database:
1. From the Main menu, select Reports. The Reports menu, shown in
Figure 6.17, appears.
Figure 6.17 Reports menu
2. In the Device Configurations list, highlight the device configuration
whose user database you want to view or print.
3. Select User DB. The User Db Report information box, shown in
Figure 6.18, appears. It shows all of the access cards in the selected
device configuration.
Figure 6.18 User Db Report information box
Tip: To scroll one line at a time through the information that appears in
the User Db Report information box, press D or U. To scroll one
screen at a time, press N (Page Down) or O (Page Up).
4. To print the device configuration’s settings, select Print. A message
appears stating, “Printing . . .” When the report has finished
printing, a message appears stating, “Print completed. (Press any
key to continue.)”
5. Press any key. The User Db Report information box reappears.
6–14
Intelligent Programmer Software User Manual
Managing data for your V Series Security Devices
6. When you’ve finished viewing the device configuration’s settings,
select Close. The Reports dialog box reappears.
7. To return to the Main menu, select Close.
PRINTING ALL DATA FOR A DEVICE OR GROUP OF DEVICES
You can print all the data for a V Series Security Device or group of
devices at the same time. If you print all of the data for a device
configuration for a group of devices, you print the following reports:
■ Functions Report
■ User Db Report.
If you print all the data for a device configuration for an individual
device, you print the following reports:
■ History Report
■ Functions Report
■ User Db Report.
If you print all the data for a device assigned to a group device
configuration, you print only the History Report.
To print all data for a device or group:
1. From the Main menu, select Reports. The Reports menu, shown in
Figure 6.19, appears.
Figure 6.19 Reports menu
2. In the Device Configurations list, highlight the device or group
whose data you want to view or print.
3. Select Print All. A message appears stating, “Printing . . .” When the
reports have finished printing, a message appears stating, “Print
completed. (Press any key to continue.)”
4. Press any key. The Reports menu reappears.
5. To return to the Main menu, select Close.
Intelligent Programmer Software User Manual
6–15
Managing data for your V Series Security Devices
BACKING UP AND RESTORING IPS DATA
The IPS provides features that let you back up and restore IPS data. For
example, you can back up data from a palmtop PC directly to another
PC’s hard disk or floppy disk drive. You also can restore data from a
PC’s hard disk or floppy disk drive to a palmtop PC.
Similarly, you can back up data from a laptop or desktop PC to its own
floppy disk drive or to another PC’s hard disk or floppy disk drive. You
also can restore data to a laptop or desktop PC from the PC’s own
floppy disk drive or from another PC’s hard disk or floppy disk drive.
Backing up
data
When you back up IPS data, you transfer all of the data. You cannot
perform a partial backup.
You can use the backup feature when you want to create a duplicate
copy of the IPS data for safekeeping or when you want to update the
data on another PC.
To back up data to the PC’s own hard disk or floppy disk drive:
1. From the Main menu, select File. The File menu appears.
2. Select Backup. The Backup menu, shown in Figure 6.20, appears.
Figure 6.20 Backup menu
3. Select Backup. The Backup To dialog box, shown in Figure 6.21,
appears.
Figure 6.21 Backup To dialog box
6–16
Intelligent Programmer Software User Manual
Managing data for your V Series Security Devices
4. Remove the X from the Backup to Remote Machine check box.
Tip: To remove the X from a check box, press T until the check box
name is highlighted, then press the spacebar until you do not see an X
in the check box.
5. In the Backup File field, type the complete path for the backup.
Include the location of the drive and directory where you want to
back up the data, and a filename for the backup. For example, if you
want to back up the data to a file named data.bak and a directory
named IPS_data on a diskette in the PC’s floppy disk drive, type
A:\IPS_DATA\DATA.BAK.
6. If you are backing up the data to a floppy diskette, insert a floppy
diskette with sufficient space to store the data in the appropriate
disk drive.
7. Select OK. The Backup To information box appears, indicating that
the PC is beginning to back up the data.
Note: If a file with the same name already exists at the location where
you are backing up data, a message appears asking, “The file already
exists. Do you want to overwrite it?” To overwrite the existing data,
select Yes.
8. Wait while the backup takes place. The Backup To information box
indicates the progress of the backup. Figure 6.22 shows how the
Backup To information box appears at the end of the process.
Figure 6.22 Backup To information box at the end of the process
9. Select OK. The Main menu appears.
To back up data to another PC’s hard disk or floppy disk drive:
1. Connect the source PC (the PC you want to back up data from) to
the target PC (the PC you want to back up data to). For instructions,
see page 5–3.
2. Start and log into the IPS on the source PC. The Main menu appears.
For instructions, see page 2–1.
3. At the source PC, select File. The File menu appears.
Intelligent Programmer Software User Manual
6–17
Managing data for your V Series Security Devices
4. At the source PC, select Backup. The Backup menu, shown in
Figure 6.23, appears.
Figure 6.23 Backup menu
5. At the source PC, select Backup. The Backup To dialog box, shown
in Figure 6.24, appears.
Figure 6.24 Backup To dialog box
6. At the source PC, make sure the Backup to Remote Machine check
box is checked.
Tip: To check a check box, press T until the check box name is
highlighted, then press the spacebar until you see an X in the check
box.
7. At the source PC, in the Backup File field, type the complete path
for the backup. Include the location of the drive and directory
where you want to back up the data, and a filename for the backup.
For example, if you want to back up the data to a file named
data.bak in a directory named IPS_data on a diskette in the target
PC’s floppy disk drive, type A:\IPS_DATA\DATA.BAK.
Note: Do not select OK yet.
8. Start and log into the IPS on the target PC. The Main menu appears.
9. If you are backing up the data to a floppy diskette, insert a floppy
diskette with sufficient space to store the data in the appropriate
disk drive.
10. At the target PC, select File. The File menu appears.
11. At the target PC, select Backup. The Backup menu, shown in
Figure 6.23, appears.
6–18
Intelligent Programmer Software User Manual
Managing data for your V Series Security Devices
12. At the target PC, select Server. The Serving Remote information box,
shown in Figure 6.25, appears.
Figure 6.25 Serving Remote information box at the start of the process
13. At the source PC, select OK. The Backup To information box
appears, indicating that the PC is beginning to back up the data.
Note: If a file with the same name already exists at the location where
you are backing up data, a message appears asking, “The file already
exists. Do you want to overwrite it?” To overwrite the existing data,
select Yes.
14. Wait while the backup takes place. The information box on both
PCs indicates the progress of the backup. Figure 6.26 shows how
the Backup To information box appears on the source PC at the end
of the process.
Figure 6.26 Backup To information box at the end of the process
15. On the source PC, select OK. The Main menu appears.
16. On the target PC, select OK. The Main menu appears.
17. Disconnect the source PC from the target PC.
Intelligent Programmer Software User Manual
6–19
Managing data for your V Series Security Devices
Restoring data
Caution
When you restore IPS data, you transfer all of the data. You cannot
perform a partial restoral. You can use the restore feature when you
have made a mistake and want to go back to a previous version of the
data. You can also use the restore feature when you want to update the
data on one PC with data from another PC.
When you restore IPS data to a location that already has IPS data,
you overwrite all of that IPS data. You cannot retrieve the data after
it has been overwritten.
To restore data from the PC’s own hard disk or floppy disk drive:
1. From the Main menu, select File. The File menu appears.
2. Select Backup. The Backup menu, shown in Figure 6.27, appears.
Figure 6.27 Backup menu
3. Select Restore. The Restore From dialog box, shown in Figure 6.28,
appears.
Figure 6.28 Restore From dialog box
4. Remove the X from the Restore From Remote Machine check box.
Tip: To remove the X from a check box, press T until the check box
name is highlighted, then press the spacebar until you do not see an X
in the check box.
5. In the Restore File field, type the complete path for the backup you
want to restore. Include the location of the drive and directory
where you want to restore the data from, and the filename of the
backup you want to restore. For example, if you want to restore the
6–20
Intelligent Programmer Software User Manual
Managing data for your V Series Security Devices
data from a file named data.bak in a directory named IPS_data on a
diskette in the PC’s floppy disk drive, type A:\IPS_DATA\DATA.BAK.
6. If you are restoring the data from a floppy diskette, insert the floppy
diskette in the appropriate disk drive.
7. Select OK. The Restore From information box appears, indicating
that the PC is beginning to restore the data.
8. Wait while the restore takes place. The Restore From information
box indicates the progress of the restore. Figure 6.29 shows how
the Restore From information box appears at the end of the process.
Figure 6.29 Restore From information box at the end of the process
9. Select OK. The Main menu appears.
To restore data from another PC’s hard disk or floppy disk drive:
1. Connect the target PC (the PC you want to restore data to) to the
source PC (the PC you want to restore data from). For instructions,
see page 5–3.
2. Start and log into the IPS on the target PC. The Main menu appears.
For instructions, see page 2–1.
3. At the target PC, select File. The File menu appears.
4. At the target PC, select Backup. The Backup menu, shown in
Figure 6.30, appears.
Figure 6.30 Backup menu
Intelligent Programmer Software User Manual
6–21
Managing data for your V Series Security Devices
5. At the target PC, select Restore. The Restore From dialog box,
shown in Figure 6.31, appears.
Figure 6.31 Restore From dialog box
6. At the target PC, make sure the Restore From Remote Machine
check box is checked.
Tip: To check a check box, press T until the check box name is
highlighted, then press the spacebar until you see an X in the check
box.
7. At the target PC, in the Restore File field, type the complete path for
the backup you want to restore. Included the location of the drive
and directory where you want to restore the data from, and the
filename of the backup you want to restore. For example, if you
want to restore the data from a file named data.bak in a directory
named IPS_data on a diskette in the source PC’s floppy disk drive,
type A:\IPS_DATA\DATA.BAK.
Note: Do not select OK yet.
8. Start and log into the IPS on the source PC. The Main menu appears.
9. If you are restoring the data from a floppy diskette, insert the floppy
diskette in the appropriate disk drive.
10. At the source PC, select File. The File menu appears.
11. At the source PC, select Backup. The Backup menu, shown in
Figure 6.30, appears.
6–22
Intelligent Programmer Software User Manual
Managing data for your V Series Security Devices
12. At the source PC, select Server. The Serving Remote information
box, shown in Figure 6.32, appears.
Figure 6.32 Serving Remote information box at the start of the process
13. At the target PC, select OK. The Restore From information box
appears, indicating that the PC is beginning to restore the data.
14. Wait while the restore takes place. The information box on both
PCs indicates the progress of the restore. Figure 6.33 shows how
the Restore From information box appears on the target PC at the
end of the process.
Figure 6.33 Restore From information box at the end of the process
15. On the target PC, select OK. The Main menu appears.
16. On the source PC, select OK. The Main menu appears.
17. Disconnect the target PC from the source PC.
Intelligent Programmer Software User Manual
6–23
Managing data for your V Series Security Devices
PACKING THE IPS DATABASE
The IPS provides a feature that lets you “pack” its database. The process
of packing the database involves reorganizing the IPS data so it takes up
less space on the PC’s hard disk.
You can pack the database periodically to conserve space on your PC’s
hard disk. If you see a message indicating your PC is running out of disk
space, you can pack the database to free disk space.
Note: When you pack the database, your device configurations’
programming settings and user databases, and your device history
records are not affected.
Do not interrupt the process of packing the database. An interruption
might cause you to lose or destroy data.
Caution
To pack the database:
1. From the Main menu, select File. The File menu appears.
2. Select Pack DB. A message appears asking, “Do not reboot or
otherwise interrupt once pack has started or all your data could be
lost. This may take several minutes. Do you wish to continue?”
3. To pack the database, select Yes. The Pack Database information
box appears, indicating that the PC is beginning to pack the
database.
4. Wait while the pack takes place. The Pack Database information box
indicates the progress of the pack. Figure 6.34 shows how the Pack
Database information box appears on the target PC at the end of the
process.
Figure 6.34 Pack Database information box at the end of the process
5. Select OK. The Main menu appears.
6–24
Intelligent Programmer Software User Manual
7
MAINTAINING DEVICE
CONFIGURATIONS
To maintain the Intelligent Programmer Software
(IPS), you need to keep each V Series Security
Device’s programming up to date. You might need
to modify a device’s programming to change how it
operates. You also might need to add, modify, or
delete information in a device’s user database.
To update a device or group of devices, you perform
the following tasks:
1. Update the device configuration for the device or
group of devices by editing the configuration.
2. For each device to be updated with the device
configuration, connect a palmtop or laptop PC
containing the updated configuration to the
device and transfer the updated configuration to
the device.
This chapter describes how to make the following
common changes to a device configuration’s
programming settings and user database:
■ adding a facility code or changing the range of
card numbers or access codes for a facility code.
See page 7–3.
■ changing or adding a communication token and
password. See page 7–4.
■ changing or adding holidays. See page 7–6.
■ changing or adding a time zone. See page 7–7.
■ changing the user database. See page 7–8.
Intelligent Programmer Software User Manual
7–1
Maintaining device configurations
In addition, this chapter describes how to:
■ delete a device configuration that you no longer need.
See page 7–8.
■ rename a device configuration. See page 7–9.
For instructions for transferring the device configuration to the device,
see Chapter 5 Programming a device.
SELECTING A DEVICE CONFIGURATION TO EDIT
Anytime you want to edit a device configuration, you need to perform
the steps below to select the device configuration.
To select a device configuration to edit:
1. From the Main menu, select Devices. The Devices Administration
menu, shown in Figure 7.1, appears.
Figure 7.1
Devices Administration menu
2. In the Device Configurations list, highlight the device or group
whose device configuration you want to edit.
3. Select Functions. The Devices Functions menu, shown in Figure 7.2,
appears.
Figure 7.2
7–2
Devices Functions menu
Intelligent Programmer Software User Manual
Maintaining device configurations
ADDING A FACILITY CODE, OR CHANGING THE RANGE OF CARD NUMBERS OR
ACCESS CODES FOR A FACILITY CODE
If you need to add additional tokens to a device configuration’s user
database and the tokens use a facility code not yet defined for the
device configuration, you can add the facility code to the device
configuration. You also can change the range of card numbers or access
codes that is acceptable for a facility code. V Series Security Devices
using the device configuration will reject tokens with card numbers or
access codes outside this range. For more information about facility
codes, see page 4–14.
To add a facility code or change the range of card numbers or access
codes for a facility code:
1. Make sure you’re viewing the Devices Functions menu and the
device configuration you’re editing is highlighted. For instructions,
see Selecting a device configuration to edit on page 7 -2.
2. Select Facility. The Facility dialog box, shown in Figure 7.3, appears.
Figure 7.3
Facility dialog box
3. In the Facility list, highlight the facility that you want to add or
change.
4. If you’re adding a facility code, perform this step.
In the FC-Code field, type the facility code, preceded by enough
zeros to replace the digits you see (the total number of digits in the
facility code for the selected token format). For example, if the
facility code is 86421 and the facility code for the selected token
format has five digits, type 86421.
Intelligent Programmer Software User Manual
7–3
Maintaining device configurations
5. If you’re adding a facility code or you want to change the starting
card number or access code, perform this step.
In the Starting Card field, type the lowest card number or access
code (with the selected facility code) that the devices should accept.
Type enough zeros before the card number or access code to
replace the digits you see (the total number of digits in the card
number or access code for the selected token format). The devices
will reject any tokens with card numbers or access codes lower
than this number.
For example, if the lowest card number or access code for this
facility code is 1 and the card number or access code for the
selected token format has six digits, type 000001.
6. If you’re adding a facility code or you want to change the ending
card number, perform this step.
In the Ending Card field, type the highest card number or access
code (with the selected facility code) that the devices should accept.
Type enough zeros before the card number or access code to
replace the digits you see (the total number of digits in the card
number or access code for the selected token format). The devices
will reject any tokens with card numbers or access codes higher
than this number.
For example, if the highest card number or access code for this
facility code is 999 and the card number or access code for the
selected token format has six digits, type 000999.
7. For each additional facility code you want to add or change the
range of card numbers or access codes for, repeat Step 3 through
Step 6.
8. When you’ve finished adding or changing facility code information,
select OK. The Devices Functions menu reappears.
9. To return to the Main menu, select Close.
CHANGING OR ADDING A COMMUNICATION TOKEN AND PASSWORD
You can change the card number or access code and/or password for a
communication token already defined for a device configuration. You
also can add a second token to a device configuration’s user database if
only one communication token is defined.
Each device configuration must have at least one communication token
and can have a maximum of two. You pick the password you want to
use for each communication token. The password can be between one
and six digits.
7–4
Intelligent Programmer Software User Manual
Maintaining device configurations
To change or add a communication token number, or access code, and
password:
1. Make sure you’re viewing the Devices Functions menu and the
device configuration you’re editing is highlighted. For instructions,
see Selecting a device configuration to edit on page 7 -2.
2. Select System. The System dialog box, shown in Figure 7.4, appears.
Figure 7.4
System dialog box
3. If you want to change or add a card number or access code for a
communication token, perform this step.
In the Comm Card #1 or #2 field, type the card number or access
code for a communication token, preceded by enough zeros to
replace the digits you see (the total number of digits in the card
number or access code for the selected token format). For example,
if the communication token number is 411 and the card number
or access code for the selected token format has six digits, type
000411.
Note: Remember, you must define at least one communication token for
the device configuration.
4. If you want to change or add the password for a communication
token, perform this step.
In the Password field next to the Comm Card #1 or #2 field, type
the password (from 1 to 6 digits) for the communication token,
preceded by enough zeros to total six digits. After you use the token
to access a door controlled by a device, you enter this password to
access programming and history features.
For example, if you want the password for the communication
token to be 8591, type 008591.
5. Select OK. The Devices Functions menu reappears.
6. To return to the Main menu, select Close.
Intelligent Programmer Software User Manual
7–5
Maintaining device configurations
CHANGING OR ADDING HOLIDAYS
Since you program the time and date when each holiday starts and
ends, you must update the holidays programmed for V Series Security
Devices on a regular basis to indicate the new dates for holidays. It’s
easier to define a new holiday schedule in a device configuration if you
first complete a Facility Information form (see page 3–8).
You can also change or add a holiday at any time. You can program up
to 16 holidays for a device.
Each holiday can span any time period you designate. For example, one
holiday might be defined as half a day. Another holiday might span an
entire week. For each holiday, you provide the date and time when the
holiday starts, as well as the date and time when the holiday ends.
Note: Do not enter 24:00 to indicate the end of a holiday. Instead, enter
23:59.
To change or add a holiday:
1. Make sure you’re viewing the Devices Functions menu and the
device configuration you’re editing is highlighted. For information,
see Selecting a device configuration to edit on page 7 -2.
2. Select Holidays. The Holidays dialog box, shown in Figure 7.5,
appears.
Figure 7.5
Holidays dialog box
3. On the Holiday list, highlight the holiday you want to change or add.
4. If you’re adding a holiday or you want to change the date when the
holiday will start, perform this step.
In the Start Date field, type the date when the holiday will start,
first typing the year, then the month, then the day. For example, if
the holiday will start on December 31, 2000, type 001231.
5. If you’re adding a holiday or you want to change the time when the
holiday will start, perform this step.
7–6
Intelligent Programmer Software User Manual
Maintaining device configurations
In the Start Time field, type the time, in 24-hour format, when the
holiday will start. For example, if the holiday will start at 1:00 p.m.,
type 1300.
6. If you’re adding a holiday or you want to change the date when the
holiday will end, perform this step.
In the End Date field, type the date when the holiday will end. For
example, if the holiday will end on January 3, 2001, type 010103.
7. If you’re adding a holiday or you want to change the time when the
holiday will end, perform this step.
In the End Time field, type the time when the holiday will end. For
example, if the holiday will end at 6:30 a.m., type 0630.
8. For each additional holiday you want to change or add, repeat
Step 3 through Step 7.
9. When you’ve changed or added all the holidays you want, select
OK. The Devices Functions menu reappears.
10. To return to the Main menu, select Close.
CHANGING OR ADDING A TIME ZONE
You might want to change or add a time zone in a device configuration
to define when:
■ a group of access tokens can access doors controlled by V Series
Security Devices using the device configuration
■ the doors automatically unlock (or unlock when a valid token
accesses the doors) and then later relock
■ all tokens in the facility can access the door
■ the doors automatically lock down, denying all tokens access, and
then later resume normal operation.
For example, suppose your company adds a new group of employees
who need to access a group of doors. In the device configuration for
the group of devices controlling the doors, you might need to define a
time zone indicating when the new employees can access the doors.
When you add the new employees’ tokens to the device configuration’s
user database, you can assign the newly-defined time zone for the
employees. For more information about time zones, see page 4–24.
Changes to time zones affect the tokens and features using that time
zone. For example, changing Time Zone 1 affects all tokens that have
access to the door during Time Zone 1.
It’s easier to define time zones if you first complete a Facility
Information form (see page 3–8). For instructions to change or add a
Time Zone, see page 4–24.
Intelligent Programmer Software User Manual
7–7
Maintaining device configurations
CHANGING THE USER DATABASE
The user database for a device configuration describes all of the tokens
that can access the V Series Security Devices using this device
configuration. When maintaining the user database for the device
configuration, you can:
■ add tokens. See page 4–32.
■ enroll a proximity card. See page 4–35.
■ add a range of access cards. See page 4–38.
■ modify tokens. See page 4–40.
■ delete a token. See page 4–42.
■ delete a range of access cards. See page 4–43.
It’s easier to change the user database if you first complete a Token &
Door Information form or the Token by Door Information form (see
page 3–11).
Note: Features involving a range of tokens generally are not used for
V Series Keypad Security Devices since the use of consecutive access
codes can compromise the security of your access control system.
Tip: When you’ve finished changing the user database, remember to
review it to make sure it’s complete and accurate.
DELETING A DEVICE CONFIGURATION
You can delete a device configuration you no longer need. Before you
delete a device configuration, make sure that no V Series Security
Devices are currently using the configuration.
Note: If you accidentally delete a device configuration you need, you
can retrieve the configuration from a device that is using exactly the
same configuration. For instructions, see Retrieving a device’s
programming settings and user database on page 6 -8.
7–8
Intelligent Programmer Software User Manual
Maintaining device configurations
To delete a device configuration:
1. From the Main menu, select Devices. The Devices Administration
menu, shown in Figure 7.1, appears.
Figure 7.6
Devices Administration menu
2. In the Device Configurations list, highlight the device configuration
you want to delete.
3. Select Delete. A message appears asking, “Delete . . . ?”
4. To delete the device configuration, select Yes. The Devices
Administration menu reappears. The device configuration no longer
appears on the Device Configurations list.
5. To return to the Main menu, select Close.
RENAMING A GROUP OR DEVICE
You can rename a group or device to make it easier for you to identify.
To rename a group or device:
1. From the Main menu, select Devices. The Devices Administration
menu, shown in Figure 7.7, appears.
Figure 7.7
Devices Administration menu
Intelligent Programmer Software User Manual
7–9
Maintaining device configurations
2. In the Devices Configurations list, highlight the group or device
whose name you want to change.
3. Select Rename. The Rename dialog box, shown in Figure 7.8,
appears.
Figure 7.8
Rename dialog box
4. In the Enter New Name field, type the new name (up to
20 characters, including spaces). For example, you might type WEST
WAREHOUSE DOOR.
5. Select OK. The Devices Administration menu reappears.
6. To return to the Main menu, select Close.
7–10
Intelligent Programmer Software User Manual
A
USING THE HANDHELD
TERMINAL MODE
This appendix provides instructions for using the
handheld terminal mode to perform the following
activities:
■
■
■
■
programming a V Series Security Device to
override time zone control. See page A–3.
viewing a device’s system data.
See page A–7.
resetting a device. See page A–8.
clearing an electronic lock’s low battery message.
See page A–11.
Unlike the regular IPS interface, which you can use
when the PC is not connected to a device, the
handheld terminal mode requires the PC to be
connected to a device. This appendix describes how
to:
■ enter the handheld terminal mode.
See page A–2.
■ exit the handheld terminal mode.
See page A–12.
If you want to perform other activities using the
handheld terminal mode, refer to the V Series
Handheld Terminal User Manual. When following
the instructions in that manual, keep in mind the
following guidelines:
■ When the instructions say to press
* on the
handheld terminal keyboard, press E.
■ When the instructions say to press # on the
handheld terminal keyboard, press W (Escape).
Intelligent Programmer Software User Manual
A–1
Using the handheld terminal mode
ENTERING HANDHELD TERMINAL MODE
Anytime you want to use the handheld terminal mode, you need to
perform the steps below to connect the PC to the V Series Security
Device and enter the mode.
To enter the handheld terminal mode:
1. Connect the PC to the device. For instructions, see Connecting a
laptop PC to a device on page 5–5 or see Connecting a palmtop PC
to a device on page 5–7.
2. From the Main menu, select File. The File menu, shown in
Figure 1.2, appears.
Figure 1.2 File menu
3. Select Terminal. You see:
4. Use the communication token to access the device. You see:
5. Type the communication token’s password.
6. Press E. You see:
A–2
Intelligent Programmer Software User Manual
Using the handheld terminal mode
PROGRAMMING A V SERIES SECURITY DEVICE TO OVERRIDE
TIME ZONE CONTROL
There are four door mode features that let you override time zone
control for a door. These features are similar to the timed access
features. However, when you select a door mode to override time zone
control, the selected door mode remains in effect until you restore time
zone control for the V Series Security Device.
The following door mode features are available:
■ Door lock. This feature locks down the door, denying all tokens
access.
■ Card only. This feature sets the device to allow access to any token
in the device’s user database.
■ Facility code only. This feature sets the device to allow access to
any token with a valid facility code.
Caution
If someone loses an access card, the card can be used to access the
door during the facility code only time zone. To prevent the access
card from being used to access the door, you can disable the facility
code only time zone, or you can change the facility code for the door
and all of the cards that access it.
■
Door unlock. This feature sets the door to unlock and remain
unlocked.
When you are ready to restore the door to time zone control, you set
the device to time zone control again. For example, during an
emergency you might use the door lock feature to lock out all
employees. When the emergency is over, you restore the device to time
zone control.
To lock down a door continuously:
1. Press U or D until you see:
2. Press E. For example, you see:
Intelligent Programmer Software User Manual
A–3
Using the handheld terminal mode
3. Press U or D until you see:
4. Press E. You see:
To disable time zone control while allowing individual tokens access:
1. Press U or D until you see:
2. Press E. For example, you see:
3. Press U or D until you see:
4. Press E. You see:
A–4
Intelligent Programmer Software User Manual
Using the handheld terminal mode
To allow access for tokens with a valid facility code:
1. Press U or D until you see:
2. Press E. For example, you see:
3. Press U or D until you see:
4. Press E. You see:
To unlock the door continuously:
1. Press U or D until you see:
Intelligent Programmer Software User Manual
A–5
Using the handheld terminal mode
2. Press E. For example, you see:
3. Press U or D until you see:
4. Press E. You see:
To restore time zone control:
1. Press U or D until you see:
2. Press E. For example, you see:
3. Press U or D until you see:
A–6
Intelligent Programmer Software User Manual
Using the handheld terminal mode
4. Press E. You see:
VIEWING A V SERIES SECURITY DEVICE’S SYSTEM DATA
You can view a V Series Security Device’s ROM version number and real
time clock number. You might need this information to upgrade a
device.
To view a device’s system data:
1. Press U or D until you see:
2. Press E. You see:
3. Press U or D until you see:
4. Press E. For example, you see:
Intelligent Programmer Software User Manual
A–7
Using the handheld terminal mode
5. When you’ve finished viewing the system data, press W (Escape)
twice. You see:
RESETTING A V SERIES SECURITY DEVICE
You can reset a V Series Security Device if you want to restore the
factory default settings for the device and reprogram the device. You
also can clear the user database without affecting programming
settings.
Caution
Resetting a device will erase all of the device’s programming settings,
all of the device’s history events, and all of the tokens in the device’s
user database. Resetting the user database will erase all tokens in the
device’s user database, but preserve the programming settings and
history.
To reset a device’s programming settings, history, and user database:
1. Press U or D until you see:
2. Press E. You see:
3. Press U or D until you see:
A–8
Intelligent Programmer Software User Manual
Using the handheld terminal mode
4. Press E. You see:
5. To reset the device, type 1. If you decide you do not want to reset
the device, type 0.
6. Press E. If you typed 1 in Step 5, the device’s programming
settings, history, and user database are reset to factory default
settings. You see:
7. Press W (Escape). You see:
Caution
You should add a facility code and a permanent communication
token before you close communication with the device. However, if
you close communication without adding a new communication
token and facility code, the temporary communication token and
temporary operator token will work for the device.
To add a facility code and a permanent communication token in the
handheld terminal mode, refer to the V Series Handheld Terminal User
Manual.
Intelligent Programmer Software User Manual
A–9
Using the handheld terminal mode
To reset a device’s user database only:
1. Press U or D until you see:
2. Press E. You see:
3. Press E. You see:
4. To reset the user database, type 1.
If you decide you do not want to reset the user database, type 0.
5. Press E. If you typed 1 in Step 4, the device’s user database is reset
to factory default settings. You see:
6. Press W (Escape). You see:
A–10
Intelligent Programmer Software User Manual
Using the handheld terminal mode
CLEARING A LOW BATTERY MESSAGE (ELECTRONIC LOCK ONLY)
If a V Series Electronic Lock has low batteries, the lock rejects all
tokens, and the lock’s red and green LEDs flash when a user tries to
access the lock. The lock also generates a low battery message. Even
after the batteries are changed, the lock continues to reject tokens until
you clear the lock’s low battery message.
To clear an electronic lock’s low battery message:
1. When you enter the handheld terminal mode you see:
2. To clear the low battery message, type 1.
3. Press E. You see:
Intelligent Programmer Software User Manual
A–11
Using the handheld terminal mode
EXITING THE HANDHELD TERMINAL MODE
When you have finished performing activities in the handheld terminal
mode, you can exit the mode and disconnect the PC from the V Series
Security Device.
To exit the handheld terminal mode:
1. Press W (Escape) until you see:
2. Press E. You see:
3.
4.
5.
6.
A–12
Press q. A message appears asking, “Quit?”
To exit, select Yes.
The Main menu appears.
Disconnect the PC from the device.
Intelligent Programmer Software User Manual
B
V SERIES SECURITY DEVICE
HISTORY EVENT TYPES
The table on the following pages describes in
alphabetical order each history event that can be
recorded at a V Series Security Device. For
information about retrieving, viewing, printing, and
deleting device history records, see page 6–1.
Intelligent Programmer Software User Manual
B–1
V Series Security Device history event types
B–2
Event type
Description
ACCESS GRANTED
ADD CARD
The device granted access to the indicated token.
ADD CARD RANGE
Using the handheld terminal, the indicated range of
tokens was added to the device’s user database.
CARD EXPIRED
The device denied access to the indicated token
because the token’s programmed expiration date was
earlier than the current date.
CONTROLLER ERR
The microcontroller board was unable to communicate
with the controller board.
CONTROLLER OK
The controller’s microcontroller board was able to
communicate with the controller board after having
failed to do so.
CYCLE ISSUE
The device updated the issue code recorded for the
indicated token in the device’s user database.
DEADBOLT LOCKED
The V Series Electronic Lock denied access to the
indicated token because the lock’s deadbolt was locked
and the token did not have the deadbolt override
privilege.
DEL CARD RANGE
Using the handheld terminal, the indicated range of
tokens was deleted from the device’s user database.
DELETE CARD
Using the handheld terminal, the indicated token was
deleted from the device’s user database.
DEVICE PC CONFIG
Using the IPS, the device’s programming settings were
retrieved from the device to the PC.
DEVICE PC HIST
Using the IPS, the device’s history records were
retrieved from the device to the PC.
DEVICE PC USERDB
Using the IPS, the device’s user database was retrieved
from the device to the PC.
DOOR FORCED
The door, which is controlled by a V Series Controller,
was opened without use of a valid access method.
DOOR LOCKED
The device denied access to the indicated token
because the device was in the door lock mode.
DOOR SECURED
DOOR TAMPER
The door automatically locked.
DOOR UNLOCKED
DOTL ALARM
The door automatically unlocked.
FIRST UNLOCK
The first card unlock feature was used to unlock the
door.
INVALID CARD #
The device denied access to the indicated token
because the token was not recorded in the device’s
user database.
Using the handheld terminal, the indicated token was
added to the device’s user database.
The device protected by the controller’s tamper
feature, such as the controller enclosure, was opened.
The door controlled by the controller generated a door
open too long alarm.
Intelligent Programmer Software User Manual
V Series Security Device history event types
Event type
Description
INVALID F-CODE
The device denied access to the indicated token
because the token’s facility code was not valid.
INVALID ISSUE
The device denied access to the indicated token
because the token’s issue number was not valid.
INVALID T-ZONE
The device denied access to the indicated token
because the token’s time zone was not in effect.
MOD DOOR STATUS
Using the handheld terminal, the controller’s
programmed door status settings were changed.
MODIFY CARD
Using the handheld terminal, the information in the
device’s user database for the indicated token was
modified.
MODIFY CHASSIS
Using the handheld terminal, the electronic lock’s
programmed chassis type was changed.
MODIFY DATE/TIME
Using the handheld terminal, the device’s date and/or
time were changed.
MODIFY DOOR MODE
Using the handheld terminal, the device’s door mode
was changed.
MODIFY F-CODE
Using the handheld terminal, the device’s valid facility
codes were changed.
MODIFY HOLIDAY
Using the handheld terminal, the holidays defined for
the device were changed.
MODIFY READER
Using the handheld terminal, the device’s timed access
features were changed.
MODIFY SYSTEM
Using the handheld terminal, the electronic lock’s
system settings were changed.
MODIFY TIME ZONE
Using the handheld terminal, the device’s time zones
were changed.
MODIFY VAR FORM
Using the handheld terminal, the device’s card format
was changed.
PASSAGE CLOSE
PASSAGE OPEN
PC DEVICE CONFIG
The passage mode feature was used to lock the door.
PC DEVICE USERDB
Using the IPS, a user database was transferred from the
PC to the device.
Intelligent Programmer Software User Manual
The passage mode feature was used to unlock the door.
Using the IPS, programming settings were transferred
from the PC to the device.
B–3
V Series Security Device history event types
B–4
Event type
Description
POWER LOSS: 0X0_
The device lost power and may have performed an
internal reset. Use the following table to understand the
code.
Code
Meaning
Internal reset
0x00
Reset code was cleared.
N/A
0x01
Memory was corrupted.
Yes
0x02
Real time clock was
corrupted.
Yes
0x04
Power was lost.
No
0x08
Database version is
incorrect, ROM change.
Yes
REMOTE UNLOCK
The door, which is controlled by a controller, was
unlocked using the remote unlock feature.
RESET DATABASE
Using the handheld terminal, the device’s user database
was erased.
RESET HISTORY
Using the handheld terminal, the device’s history was
erased.
RESET SYSTEM
Using the handheld terminal, the device’s programming
was restored to factory default settings, and the device’s
history and user database were erased.
SHUTDOWN
STARTUP
The controller lost power and shut down.
TAMPER CLEARED
The device protected by the controller’s tamper feature
was secured after having been opened.
The controller restarted after it lost power and shut
down.
Intelligent Programmer Software User Manual
C
GLOSSARY
Access card
Credit card-size device encoded with magnetic
information and used to access a door controlled by a
V Series Magnetic Security Device or Proximity Security
Device.
Access code
Sequence of digits that is included in a personal
identification number (PIN) and identifies the user.
Card Encoder
Device that reads, encodes, and erases information on a
V Series access card.
Card Encoding
Software
Software that controls the V Series Card Encoder.
Card number
Sequence of digits that is encoded on an access card and
identifies the user.
Card only door
mode
Door mode that allows access to any token in a device’s
user database.
Chassis type
Type of mechanical locking mechanism—cylindrical or
mortise—used in an electronic lock.
Communication
token
Token generally used for all V Series Security Devices in a
facility to access devices at any time for programming.
Controller
Device that allows the V Series electronics to be separate
from the door’s locking mechanism and to be located up
to 500 feet away from the locking mechanism. The
controller provides V Series electronic features for use
with electrically-controlled locking devices.
Cylindrical
chassis type
Lock chassis that installs into a circular bore in the door.
Intelligent Programmer Software User Manual
C–1
Glossary
Daylight savings
time setting
Deadbolt
override
privilege
Device
C–2
Programming setting that determines whether a V Series Security Device
automatically adjusts its clock for daylight savings time.
Privilege that can be granted to a token so the token can access a door with a
mortise electronic lock even when the door’s deadbolt is thrown.
V Series Security Device. Both V Series Electronic Locks and V Series
Controllers are V Series Security Devices.
Device
configuration
Information that you define for a V Series Security Device or group of devices
using the Intelligent Programmer Software. A device configuration includes
the programming settings that determine how the device(s) operate and the
user database for the device(s).
Door forced
alarm
Remote alarm triggered by a V Series Controller when the door controlled by
the controller is opened without use of a valid access method.
Door lock door
mode
Door mode that locks down a door, denying all tokens access.
Door lock time
zone
Time zone when a door automatically locks down, denying all tokens access,
and then later resumes normal operation.
Door mode
One of five types of operation for a V Series Security Device that determines
what access is currently provided at a door.
Door open too
long (DOTL)
feature
V Series Controller feature that monitors whether the door controlled by the
controller has been open too long.
Door unlock door
mode
Door mode that sets the door to unlock and remain unlocked.
Door unlock time
zone
Time zone when a door automatically unlocks (or unlocks when accessed by a
valid token) and then later relocks.
Electronic lock
Battery-powered, self-contained, programmable lock, which controls access to
a door. V Series Electronic Locks include magnetic stripe electronic locks,
proximity electronic locks, and keypad electronic locks.
Enrolling station
Device that can be connected to a PC running the IPS and used to read
proximity cards while adding token records to a device configuration used by
proximity security devices.
Facility code
Sequence of digits that generally is unique and programmed into every device
and encoded on every access card, or included in every personal identification
number (PIN), belonging to a facility to help ensure the security of a facility’s
doors.
Facility code
only
door mode
Door mode that sets a device to allow access to any token with a valid facility
code.
Facility code
only
time zone
Time zone when all tokens with a valid facility code can access a door.
Intelligent Programmer Software User Manual
Glossary
Group
Handheld
terminal
Two or more V Series Security Devices that share the same device
configuration.
Equipment that lets you program a V Series Security Device with parameters
and view access control information, such as the user database, programming
settings, and device event history.
History
Chronological record of up to the last 1000 events at a V Series Security
Device, including the date and time of each event.
Holiday
Time period of any length defined for a V Series Security Device, and usually
associated with a calendar holiday.
Intelligent
Programmer
Software (IPS)
Software that lets you define programming settings and the user database for
groups of V Series Security Devices, as well as individual devices. The IPS also
lets you retrieve the history records from devices, as well as view and print
device information.
Intelligent
Programmer
Software (IPS)
for Windows
Windows–compatible software that lets you define programming settings and
the user database for groups of V Series Security Devices, as well as individual
devices. The IPS for Windows also lets you retrieve the history records from
devices, as well as view and print device information.
Issue code
Laptop cable
Look ahead
setting
Mortise chassis
type
Number indicating how many times a particular card number or access code
has been issued.
Cable that connects a laptop PC to a PC-to-lock adapter cable, which in turn
connects to a V Series Electronic Lock. This cable also connects a laptop PC to
a V Series Controller’s RS–232 connector.
Feature that lets you program a V Series Security Device to accept a token
whose encoded issue code is higher than the current issue code recorded in
the device’s database.
Lock chassis that installs into a mortised cavity in the edge of a door.
Palmtop cable
Cable that connects a palmtop PC to a desktop or laptop PC. This cable also
connects a palmtop PC to a PC-to-lock adapter cable, which in turn connects
to a V Series Electronic Lock. This cable also connects a palmtop PC to a
V Series Controller’s RS–232 connector.
Passage mode
privilege
Privilege that can be granted to a token for a door. When the token is used a
twice (within the unlock duration) during the time zone assigned to the token,
the door remains unlocked. When the door is unlocked by passage mode, and
the token is used twice (within the unlock duration), the door relocks.
Password
One to six digits used with a communication token to access a device for
programming. Or, one to six digits used to access the Intelligent Programmer
Software.
PC -to-lock
adapter cable
Cable that connects a palmtop cable or laptop cable to a V Series Electronic
Lock.
Personal
identification
number (PIN)
Sequence of digits, which generally includes a facility code and an access
code. A user enters a PIN to access a door controlled by a V Series Keypad
Security Device.
Intelligent Programmer Software User Manual
C–3
Glossary
Reader
Device that can be connected to a V Series Controller. Users use their tokens
at the reader to access the door protected by the controller.
Remote unlock
device
Device, such as a button, that can be connected to a V Series Controller and
located away from the door. When someone, such as a receptionist, presses
the remote unlock button, the controller unlocks the door if the controller is
programmed for the remote unlock feature.
Request-to-exit
device
Device, such as a button, that can be connected to a V Series Controller. When
someone activates the request-to-exit device, the controller does not trigger an
alarm. If the controller is programmed for the RQE unlock feature, the
controller also unlocks the door.
Temporary
communication
token
Token for temporary use that lets you communicate with a V Series Security
Device programmed with factory default settings.
Temporary
operator token
Time interval
Block of time during a time zone.
Time zone
Blocks of time (up to three time intervals) that occur weekly and/or on
holidays, and determine when selected tokens can access a door or when a
special access feature is in effect.
Time zone
control
door mode
Door mode that lets timed access features determine the operation of a
V Series Security Device.
Token
Unlock duration
User database
C–4
Token that gives people temporary access to doors before the devices in a
V Series System are permanently programmed.
Access card or V Series personal identification number (PIN) used to access a
door.
Number of seconds that a door remains unlocked when accessed by a valid
access method.
All user tokens—up to 1000—defined for a device configuration.
Validate LRC
setting
Feature that determines whether a V Series Security Device validates the
longitudinal redundancy check (LRC) for a token. The LRC, included in most
token formats, helps verify that the token data is interpreted correctly.
Variable card
format
Feature that lets you program a V Series Security Device to accept tokens with
a particular format.
Intelligent Programmer Software User Manual
D
INDEX
A
C
About menu 2–9
access cards
adding a range of cards to a device configuration 4–38
definition of C–1
deleting a range of cards from a device
configuration 4–43
encoding 3–14
enrolling 4–35
features of 3–3
information encoded on 4–8
access codes
changing the starting and ending access
codes for a facility code 7–3
defining the format of 4–9
defining the starting and ending access
codes for a facility 4–14
definition of C–1
generating 3–14
selecting history records associated with
an access code 6–5
adding
devices to your records 4–4
groups to your records 4–3
alarm output duration, selecting in a device
configuration 4–20
Cancel buttons 2–13
card encoder
definition of 3–5, C–1
features of 3–3
Card Encoding Software
definition of 3–5, C–1
features of 3–3
card numbers
changing the starting and ending card
numbers for a facility code 7–3
defining the format of 4–9
defining the starting and ending card
numbers for a facility code
4–14
definition of C–1
selecting history records associated with
a card number 6–5
card only door mode
definition of A–3, C–1
overriding time zone control with A–4
chassis type
definition of 4–17, C–1
selecting in a device configuration 4–17
check boxes 2–12
clearing A–11
clearing a low battery message for an electronic lock A–11
communication tokens
adding to a device configuration 4–16
changing or adding to a device configuration 7–4
definition of 5–2, C–1
B
backing up data 6–16
buttons 2–13
Intelligent Programmer Software User Manual
D-1
Index
connecting
laptop or desktop PC to a palmtop PC 5–3
laptop PC to a device 5–5
palmtop PC to a device 5–7
controller
definition of 3–5, C–1
features of 3–2
controller features
alarm output duration 4–20
defining in a device configuration 4–19
door contact type 4–19
door forced alarm feature 4–19
door open too long feature
4–20
remote unlock feature 4–20
RQE unlock feature 4–19
controller setting, selecting in a device configuration 4–17
conventions used in this manual
1–3
copying
device configuration to a new
device or group 4–6
device configuration to an existing device or group
4–5
creating device configurations 4–2,
6–10
cylindrical chassis type
definition of 4–17, C–1
selecting in a device configuration 4–17
D
date and time
checking or setting on a PC 5–8
transferring from a PC to a device 5–8
date fields 2–11
daylight savings time
definition of 4–16, C–2
selecting a setting for 4–16
deadbolt override privilege
definition of 4–33, C–2
setting for a token 4–33
defining a device configuration 4–8
definition of 3–5, C–2
D-2
deleting
device configurations 7–8
device history records 6–8
range of access cards from a
user database 4–43
tokens from a user database
4–42
desktop PC
backing up data to another PC
6–17
backing up data to the PC’s
hard disk or floppy
disk drive 6–16
connecting to a palmtop PC
5–3
disconnecting from a palmtop
PC 5–5
requirements for running the
IPS on 1–5
restoring data from another PC
6–21
restoring data from the PC’s
hard disk or floppy
disk drive 6–20
transferring data to a palmtop
PC from 5–3
device configurations
adding devices 4–4
adding groups 4–3
controller features 4–19
copying to a new device or
group 4–6
copying to an existing device or
group 4–5
creating 4–2, 6–10
defining 4–8
definition of 4–2, C–2
deleting 7–8
deleting the temporary operator token from 4–31
editing 7–2
facility code information 4–14
facility information 7–3
holidays 4–23, 7–6
models for 4–2
overview of 4–1
printing all data for 6–15
renaming a group or device
7–9
resetting a device’s programming settings and user
database A–8
resetting a device’s user database only A–10
retrieving from devices 6–8
system settings 4–16, 7–4
time zones 4–24, 7–7
timed access features 4–28
token format 4–8
transferring from a laptop or
desktop PC to a palmtop PC 5–3
transferring to devices 5–8
user database 4–32, 7–8
viewing and printing 6–12
devices
adding to your records 4–4
clearing a low battery message
for an electronic lock
A–11
copying a device configuration
to a new device 4–6
copying a device configuration
to an existing device
4–5
definition of 4–2, C–2
deleting from your records 7–8
printing all data for 6–15
programming to override time
zone control A–3
renaming in your records 7–9
resetting a device’s programming settings, history,
and user database A–8
resetting a device’s user database only A–10
restoring time zone control for
A–6
retrieving history records from
6–2
retrieving the device configuration from 6–8
retrieving the user database
from 6–8
transferring a device configuration to 5–8
transferring a user database to
5–8
transferring the PC’s date and
time to 5–8
updating the records for 6–9
viewing system data for A–7
Devices Administration menu 2–5
Devices Functions menu 2–7
Intelligent Programmer Software User Manual
Index
dialog boxes
moving to a field or list in 2–11
overview of 2–10
selecting a Cancel button in
2–13
selecting an OK button in 2–13
typing information in fields
2–12
using buttons in 2–13
using check boxes in 2–12
using date fields in 2–11
using lists in 2–11
using radio buttons in 2–12
using time fields in 2–11
disconnecting a laptop or desktop
PC from a palmtop PC 5–5
door contact type, selecting in a device configuration 4–19
door forced alarm feature
definition of C–2
door forced alarm feature, selecting
in a device configuration
4–19
door lock door mode
definition of A–3
overriding time zone control
with A–3
door lock mode, definition of C–2
door lock time zone
definition of 4–28, C–2
selecting in a device configuration 4–28
door mode
card only door mode A–3 to
A–4
definition of C–2
door lock door mode A–3
door unlock door mode A–3,
A–5
facility code only door mode
A–3, A–5
programming a device to override time zone control
A–3
restoring time zone control at a
device A–6
time zone control door mode
A–3
door open too long feature
defining in a device configuration 4–20
definition of C–2
door unlock door mode
definition of A–3, C–2
overriding time zone control
with A–5
door unlock time zone
definition of 4–28, C–2
selecting in a device configuration 4–29
E
editing device configurations 7–2
electronic lock 3–5, C–2
clearing a low battery message
for A–11
encoding access cards 3–14
enrolling station C–2
definition of 3–5
features of 3–3
entering handheld terminal mode
A–2
exiting handheld terminal mode
A–12
exiting the IPS 2–16
F
facility code only door mode
definition of A–3, C–2
overriding time zone control
with A–5
facility code only time zone
definition of 4–28, C–2
selecting in a device configuration 4–29
facility codes
adding to a device configuration 7–3
changing the starting and ending access cards or access codes for 7–3
defining the format of 4–9
defining the starting and ending
card numbers/access
codes for 4–14
definition of C–2
entering information for 4–14
overview of 4–14
Facility Information form 3–8
fields
check boxes 2–12
date fields 2–11
moving to 2–11
radio buttons 2–12
time fields 2–11
typing information in 2–12
Intelligent Programmer Software User Manual
File menu 2–4
Functions report 6–12
G
generating access codes 3–14
groups
adding to your records 4–3
copying a device configuration
to a new group 4–6
copying a device configuration
to an existing group
4–5
definition of 4–2, C–3
deleting from your records 7–8
printing all data for 6–15
renaming in your records 7–9
H
handheld terminal
definition of 3–5, C–3
features of 3–3
handheld terminal mode
entering A–2
exiting A–12
overview of 1–9, A–1
programming a device to override time zone control
A–3
resetting a device A–8
restoring time zone control
A–6
viewing a device’s system data
A–7
history
definition of C–3
deleting records 6–8, A–8
list of history event types B–1
overview of 6–1
retrieving from a device 6–2
selecting records to view or
print 6–5
viewing and printing the History report 6–5
history event types
list of B–1
selecting to view or print 6–5
History report 6–5
holidays
changing or adding to a device
configuration 7–6
definition of 4–23, C–3
setting up in a device configuration 4–23
D-3
Index
I
Intelligent Programmer Software
About menu 2–9
accessing a drop-down menu in
2–3
backing up data for 6–16
changing the password for
2–13
default password for 2–2
definition of 3–5, C–3
Devices Administration menu
2–5
Devices Functions menu 2–7
exiting 2–16
features of 1–2, 3–4
File menu 2–4
handheld terminal mode 1–9,
A–1
logging back into 2–15
logging out of 2–14
Main menu 2–3
overview of activities using 1–2
packing the database 6–24
Reports menu 2–8
requirements for running 1–5
restoring data for 6–20
selecting an option from a dropdown menu in 2–3
setting up to work with your
computer system 1–6
starting and logging into 2–1
support for users 1–4
Transfer menu 2–5
using dialog boxes in 2–10
issue codes
defining the format of 4–10
definition of C–3
K
keypad electronic lock
features of 3–2
L
laptop cable
definition of 5–2, C–3
using to connect a laptop PC to
a device 5–5
laptop PC
backing up data to another PC
6–17
backing up data to the PC’s
hard disk or floppy
disk drive 6–16
connecting to a device 5–5
D-4
connecting to a palmtop PC
5–3
disconnecting from a palmtop
PC 5–5
requirements for running the
IPS on 1–5
restoring data from another PC
6–21
restoring data from the PC’s
hard disk or floppy
disk drive 6–20
retrieving history records from
a device to 6–2
retrieving the device configuration from a device to
6–8
retrieving the user database
from a device to 6–8
transferring data to a palmtop
PC from 5–3
lists in dialog boxes 2–11
logging back into the IPS 2–15
logging into the IPS 2–1
logging out of the IPS 2–14
look ahead feature
definition of C–3
overview of 4–10
low battery message A–11
M
magnetic stripe electronic lock
features of 3–1
Main menu 2–3
manual conventions 1–3
menus
About menu 2–9
accessing a drop-down menu
2–3
Devices Administration menu
2–5
Devices Functions menu 2–7
File menu 2–4
Main menu 2–3
Reports menu 2–8
selecting an option from a dropdown menu 2–3
Transfer menu 2–5
mortise chassis type
definition of 4–17, C–3
selecting in a device configuration 4–17
P
packing the database 6–24
palmtop cable
definition of 5–2, C–3
using to connect a laptop or
desktop PC to a palmtop PC 5–3
using to connect a palmtop PC
to a device 5–7
palmtop PC
connecting a laptop or desktop
PC to 5–3
connecting to a device 5–7
disconnecting a laptop or desktop PC from 5–5
requirements for running the
IPS on 1–5
restoring data from another PC
6–21
retrieving history records from
a device to 6–2
retrieving the device configuration from a device to
6–8
retrieving the user database
from a device to 6–8
transferring data from a laptop
or desktop PC to 5–3
passage mode privilege
definition of 4–33, C–3
setting for a token 4–33
password, communication token
changing 7–4
defining 4–16
definition of 5–2, C–3
password, IPS
changing 2–13
default 2–2
definition of C–3
PC. See desktop PC, laptop PC,
palmtop PC
PC-to-lock adapter cable
definition of 5–2, C–3
using to connect a laptop PC to
an electronic lock 5–5
using to connect a palmtop PC
to an electronic lock
5–7
personal identification numbers
definition of C–3
information included in 4–9
printer port, selecting 1–6
O
OK buttons 2–13
Intelligent Programmer Software User Manual
Index
printing
all data for a device or group of
devices 6–15
defining the printer page size
1–6
device configuration settings
6–12
Functions report 6–12
History report 6–5
selecting the printer port 1–6
User Db report 6–14
programming a device to override
time zone control A–3
programming methods 3–3
proximity reader electronic lock
features of 3–1
R
radio buttons 2–12
reader, definition of C–4
real time clock number, viewing for
a device A–7
remote unlock device, definition of
C–4
remote unlock feature, using in a device configuration 4–20
renaming a group or device 7–9
reports
Functions report 6–12
History report 6–5
User Db report 6–14
Reports menu 2–8
request-to-exit device, definition of
C–4
requirements for running the IPS
1–5
resetting a device A–8
restoring data 6–20
restoring time zone control at a device A–6
ROM version number, viewing for a
device A–7
RQE unlock feature, using in a device configuration 4–19
S
selecting an option from a dropdown menu 2–3
setting up the IPS to work with your
computer system 1–6
starting and logging into the IPS
2–1
support for IPS users 1–4
system settings
changing 7–4
defining 4–16
T
technical support services 1–5
temporary communication token,
definition of 5–2, C–4
temporary operator token
definition of C–4
deleting from a device configuration 4–31
time fields 2–11
time intervals
definition of 4–24, C–4
examples of 4–25
setting up in a device configuration 4–24
time zone control door mode
definition of A–3, C–4
restoring at a device A–6
time zones
assigning for a token 4–33
changing or adding to a device
configuration 7–7
defining numbers for 4–25
definition of 4–24, C–4
door lock time zone 4–28
door unlock time zone 4–29
examples of 4–25
facility code only time zone
4–29
programming a device to override time zone control
A–3
restoring time zone control at a
device A–6
setting up in a device configuration 4–24
timed access features
defining in a device configuration 4–28
door lock time zone 4–28
door unlock time zone 4–28
facility code only time zone
4–28
unlock duration 4–28
Token & Door Information form
3–11
Token by Door Information form
3–11
Intelligent Programmer Software User Manual
token format
card number/access code format 4–9
default settings for 4–8
defining 4–8
facility code format 4–9
issue code format 4–10
look ahead setting 4–10
token length 4–9
validate LRC feature 4–11
token length, defining 4–9
tokens
adding a range of access cards
to a device configuration 4–38
adding to a device configuration 4–32
assigning a time zone for 4–33
definition of 3–5
deleting a range of access cards
from a device configuration 4–43
deleting from a device configuration 4–42
modifying in a device configuration 4–40
selecting a deadbolt override
setting for 4–33
selecting a passage mode setting for 4–33
using the enrolling station to
add access cards to a
device configuration
4–35
Transfer menu 2–5
transfer port, selecting 1–6
transferring data
backing up data 6–16
from a laptop or desktop PC to
a palmtop PC 5–3
restoring data 6–20
retrieving history records from
a device already listed
in the IPS records 6–2
retrieving history records from
a device not yet listed
in the IPS records 6–3
selecting the transfer port 1–6
transferring a device configuration to a device 5–8
transferring a user database to a
device 5–8
transferring the PC’s date and
time to a device 5–8
D-5
Index
U
V
unlock duration
defining in a device configuration 4–28
definition of 4–28, C–4
user database
adding a range of access cards
to 4–38
adding communication tokens
to 4–16
adding tokens to 4–32
assigning a time zone for a token 4–33
changing in a device configuration 7–8
clearing by resetting a device
A–10
defining in a device configuration 4–32
definition of 4–2, C–4
deleting a range of access cards
from 4–43
deleting the temporary operator token from 4–31
deleting tokens from 4–42
modifying tokens in 4–40
retrieving from a device 6–8
selecting a deadbolt override
setting for a token
4–33
selecting a passage mode setting for a token 4–33
transferring to devices 5–8
using the enrolling station to
add access cards to
4–35
viewing and printing 6–14
User Db report 6–14
user forms
Facility Information form 3–8
overview of 3–7
Token & Door Information
form 3–11
Token by Door Information
form 3–11
V Series System
access cards 3–3
card encoder 3–3
Card Encoding Software 3–3
components of 3–1
controller 3–2
enrolling station 3–3
features of 3–7
handheld terminal 3–3
illustration of 3–6
Intelligent Programmer Software 3–4
keypad electronic lock 3–2
magnetic stripe electronic lock
3–1
overview of 3–5
programming methods for 3–3
proximity reader electronic
lock 3–1
validate LRC setting
definition of C–4
selecting 4–11
variable card format
definition of C–4
viewing
device configuration settings
6–12
device’s system data A–7
Functions report 6–12
History report 6–5
User Db report 6–14
D-6
Intelligent Programmer Software User Manual